
Sewing machine restoration is a time consuming process. The details matter to get the best presentation from a sewing machines finish that is 50 to a 100 years old.
These are the machines that have lacquered finishes and decals. These are the machines that have accumulated layers of dirt, dust, and grime over the decades. These are the machines with the shiny steel, nickle and chrome plated pieces that have become dull from the buildup of varnish (that coffee colored coating you notice on the needle and presser foot bar) caused by oil aging over the years.
You have to be concerned about what the best outcome can be for the parts you are working on, and then choose the cleaning processes that best achieve that goal. People tend to concentrate on the painted finish and decals, and there is a lot of information about how to clean these surfaces. But what about the shiny bits? The presser foot, the needle plate, the covers, the small shiny screws and fittings, the presser foot bar and needle bar. Then there is the bobbin case, the tension assemblies, and the rocking and rotating parts. All of these must be cleaned. All of these require different cleaning methods than the paint and decals.
Fine #0000 Steel wool and wire brushes may seem to be appropriate in some places, for example where there is corrosion or pitting. These should be the last resort methods where nothing else will work. Realize that these abrasive methods will result in creating fine scratches that will ultimately dull an otherwise shiny surface that must be polished later to restore their shine.
Removing grease and varnish on the shiny bits can be accomplished with alcohol and acetone using cotton swabs and cotton balls. This method represents the majority of work in a restoration, but must be done cautiously. A drip of alcohol or acetone on a painted surface will damage the finish. So, cleaning the shiny bits is a tedious and time consuming process. It would not be unusual to use a hundred or more cotton swabs to accomplish the task.
Enter the ultrasonic cleaner… this wonderful appliance has saved me countless hours of hand cleaning small (and larger parts). It is now my go to method for any unpainted part that can be removed from the machine.
The theory behind ultrasonic cleaning has been used for a long time in industry. Its simple… a dirty part is submerged in water. The cleaner creates a high frequency wave in the water. Small microscopic bubbles form on the parts surface. The bubbles implode and create a high pressure (though microscopic) vaccum called “cavitation”. The dirt is sucked off of the surface without damaging the part.
My cleaner is large enough to accommodate the face plate, the inspection covers, neele plate, bobbin cover plate, feed dogs, tension parts, and all of the small miscellaneous shiny bits such as screws, and levers, Rotating parts and rocker arms are also effectively in the ultrasonic cleaner.
Mine heats the water to about 150 degrees, and with a small amount of degreaser and a 15 or 20 minute cleaning cycle, they come out looking almost like new. The following example is the best I can offer…
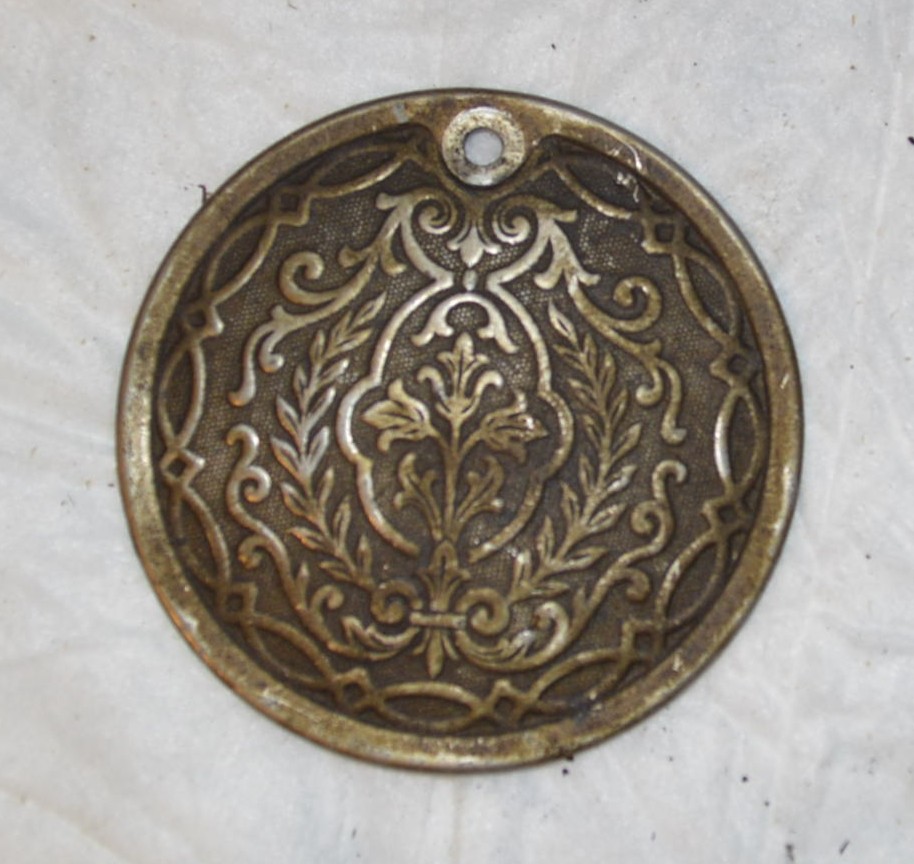
Part from a Vintage Singer Model 15-90 Manufactured in 1938

Following a rinse and a bath in WD-40 to displace any water left behind, it is a simple matter of wiping the cleaned part with a clean shop towel. Tension parts get a final soak in alcohol to remove any trace of the WD-40, we don’t want any lubrication here.
If you are interested in getting a great result on these shiny parts, and want to save yourself a LOT of time, ultrasonic cleaning is the way to go. By the way, in the absence of oil buildup, water is all you really need to use to get great results. Soap or degreasers are not necessary. It is great for many other applications such as cleaning jewelry, sunglasses, dental implants, carburetors, etc… So you can get one and justify the very reasonable price!
Tell me what do you think?

Great post. I recently found your blog and am thoroughly enjoying learning from your detailed tutorials and tips! I like the idea of an ultrasonic cleaner and am beginning to research options. What size (fluid volume) do you find sufficient to clean the largest parts you need to clean? Thanks!
LikeLike
Thanks Scott,
The ultrasonic cleaner I bought is a Costway VGT-6250 and it is a 2.5L capacity. It is a great cleaner and I like the heat option. It has been used a lot and I am very happy with it. I would buy a larger unit next time because it is about 2″ short for the longest part (the rockers). It really poses little problem though. I just flip them around to get both ends clean. There are lots of options out there, and price is generally about the same models.
It was recommended to me and a lot of folks on the Forums find it favorable.
I’m glad you like my blogs, each machine is a little different, so while the content always covers certain things, the differences are worth talking about.
I hope this helps!
Lee
LikeLike