
Introduction
To start off, I have been putting off the restoration of this Singer model 101 off for a while. To long actually, because it is a restoration I really wanted to do but just couldn’t get to. My hesitancy is mostly due to the complexity of the machine and the fact that I have not tested the machine and don’t have a clue about what might be wrong with it. Still, I have a particular interest in the model 101 and consider it to be a somewhat “rare” machine in comparison to Singer’s other model machines. So much so, that I am going to spend some time explaining what makes the model 101 so special.
ALERT! This introduction is a little long, but there are many folks that have never heard of the model 101 and if not, I would like to give a good introduction of the machine and how it fits in the Singer model lineup. Feel free to skip ahead if I get to long winded.
First manufactured in 1920, the model 101 was produced until 1937. In comparison to other Singer sewing machine models, the 101 was produced in very low numbers. In fact, over it’s 17 year production run, my research finds that only 230,475 were manufactured. This number is miniscule compared to practically every other model Singer ever produced. It was a very unusual and innovative machine for it’s time but the model ended up being a market failure. That’s not to say that it isn’t a fine machine, because it is… but let me explain why I believe this is the case.
The model 101 never really caught on with the market. The model 101 failed to gain wide spread popularity and this was largely due to it’s innovations and Singer’s failure to recognize what the average customer was looking for when purchasing a sewing machine. Keep in mind, in 1930 the sewing machines were in high demand and considered a major purchase. Considering it’s price point, the expensive model 101 was introduced into a fiercely competitive market . Regardless of it’s innovations, the failure of the model 101 to sell in larger numbers or gain wider acceptance is in no way attributed to the quality, capability, or any other fault of the 101… in fact, it is an excellent machine. I will tell you where I think Singer missed the mark, and then I will tell you what makes this machine so ahead of it’s time.
Between 1920 and 1937 the consumer cost of the model 101 was between $140.00 to $170.00. Compared with the average income in the US being about $3,300 in 1920 this was a great deal of money. At it’s price point, it was more than twice the cost of other Singer models offered at the time. Add to this Singer’s competitors offered high quality machines at less cost and it is easy to see that the 101 would be a luxury purchase in a time luxury was generally not afforded.
Another disadvantage of the 101 was the lack of electricity in the average American household. In the 1920’s and 30’s, electricity in homes was pretty much confined to large cities. Smaller cities and towns had limited access to electricity and rural areas even less. This was a problem for the 101 because it was the first Singer machine that depended on the use of an electric motor. While other machines could operate with a treadle belt or hand crank, and could be retrofitted with an electric motor later, the model 101 could not. It could only run with it’s electric motor. This further limited the number of people who could use the machine even if they opted to afford it.
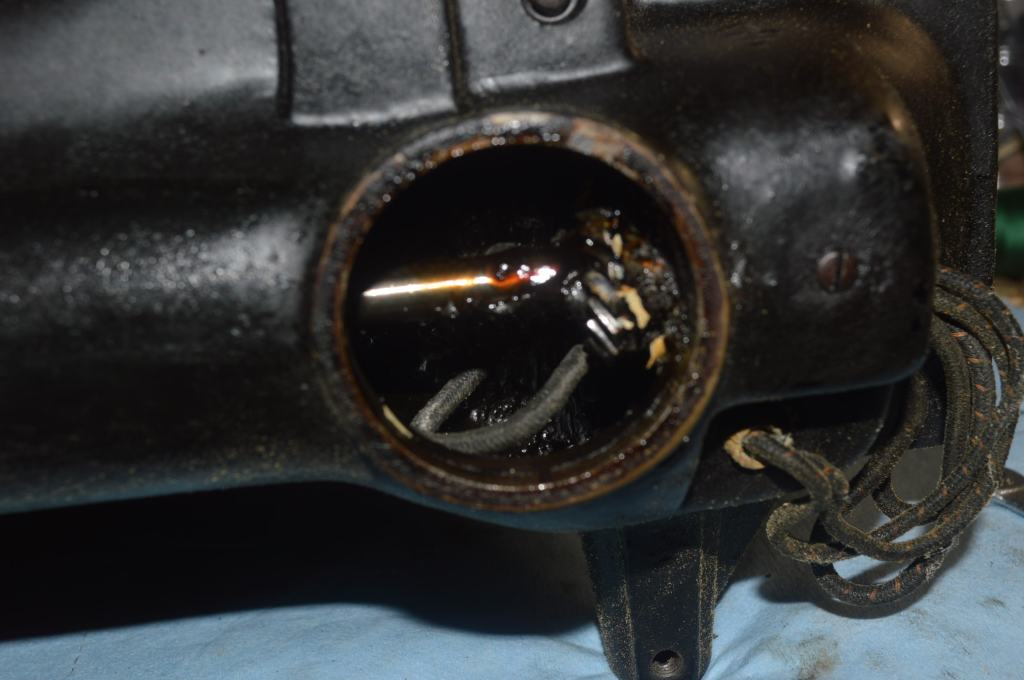
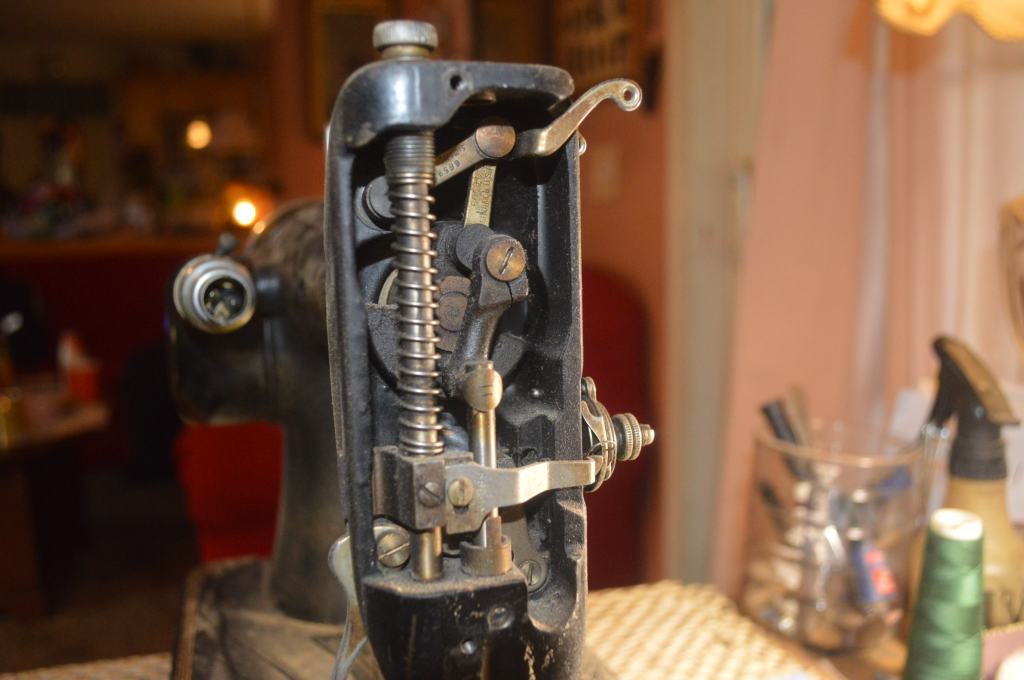
I mentioned innovation and it is an advantage for a sewing machine when it offers ease of use or maintenance. Well, in the case of the 101 some of it’s innovation didn’t turn turn out quite as well as Singer expected. Aside from it’s reliance on electricity, one notable innovation of the 101 was a wick style lubrication system to keep the sewing mechanisms under the sewing bed lubricated. With one point of oiling instead of many was a great idea borrowed from industrial sewing machines and was intended to simplify maintenance. The wick system sat in a pan that was soaked with oil through a single hole in the removeable sewing machine bed cover. The end of each wick contacted a part in the machine that needed oil lubrication. The problem was that it did not relieve oil maintenance for sewing mechanisms in other areas of the machine such as the needle bar area or the top shaft, and the machine used grease to lubricate the gears and the motor wicks.
This is what the model 101 wick system looks like…
While good in theory, it didn’t work so well in practice… the model 101 is a full size machine intended for use in a cabinet. Like most full size sewing machines, when not in use the machine folded down in the cabinet. However, in doing so all of the oil drained out of the oil pan… oops. To be fair, singer recognized this somewhere along the line and fitted the pan with a rim to hold the oil in the pan when the machine was stored, but not all machines (including this one) were fitted with it.
So what’s the good news? It seems like I have spent so much time telling you the faults of the machine, let me tell you what makes the 101 stand out and makes it a great vintage/antique sewing machine.
There is another side of the story. The 101 introduced other innovations that really worked well! The model 101 was the first Singer sewing machine to utilize a “potted” motor and fully gear driven sewing mechanism. It also introduced the first horizontal full rotary hook mechanism. These are features that are touted in the iconic Singer model 201-2 but they first appeared here. For this reason, the 101 is often compared to the 201 when in fact I think it should be the other way around. The body of the 101 was constructed of cast iron, but the machine was also manufactured with an aluminum body to reduce weight and offered in a bentwood case for portability.
These innovations resulted in machine that runs quietly, smoothly, and makes an excellent straight stitch. The 101 uses standard class 66 bobbins and standard 15X1 sewing needles. The stitch length is controlled by a dial located on the bed adjacent to the sewing machine’s pillar. It does not offer reverse sewing or drop feed dogs, but then again, neither did nearly any other sewing machine of the period. So looking at the machine through today’s lens, it’s faults are much less noticeable… electricity is pretty much taken for granted, and the machine is easily oiled by removing the bed plate (Singer actually called it the cloth plate and from this point on, so will I).
So that’s my rendition of the model 101 introduction and lets get on to the restoration.
Restoration Plan
The machines serial number is AD166119 and dates the machine to 1930. The goal of this restoration is to disassemble the machine to the greatest extent possible. like the 201, it is a gear driven machine and the gears are balanced and tooth matched in sets. The Adjuster’s manual warns against removing the gears and I will heed their warning. Also (as I found out) many of the other sewing assemblies are inexorably attached to the gear shafts. Removal of these parts normally done in a sewing machine restoration are near impossible to accomplish without damaging the machine or losing critical adjustments. These parts will be cleaned in place, but everything else is fair game. The restoration will include the maximum mechanical restoration I can do as well a a complete cosmetic restoration. Because I want this machine to look like new as well as run like new, I am going to repaint and re-decal the machine.
Anywhere I deviate from this plan, I will note as the restoration progresses… So, here it goes.
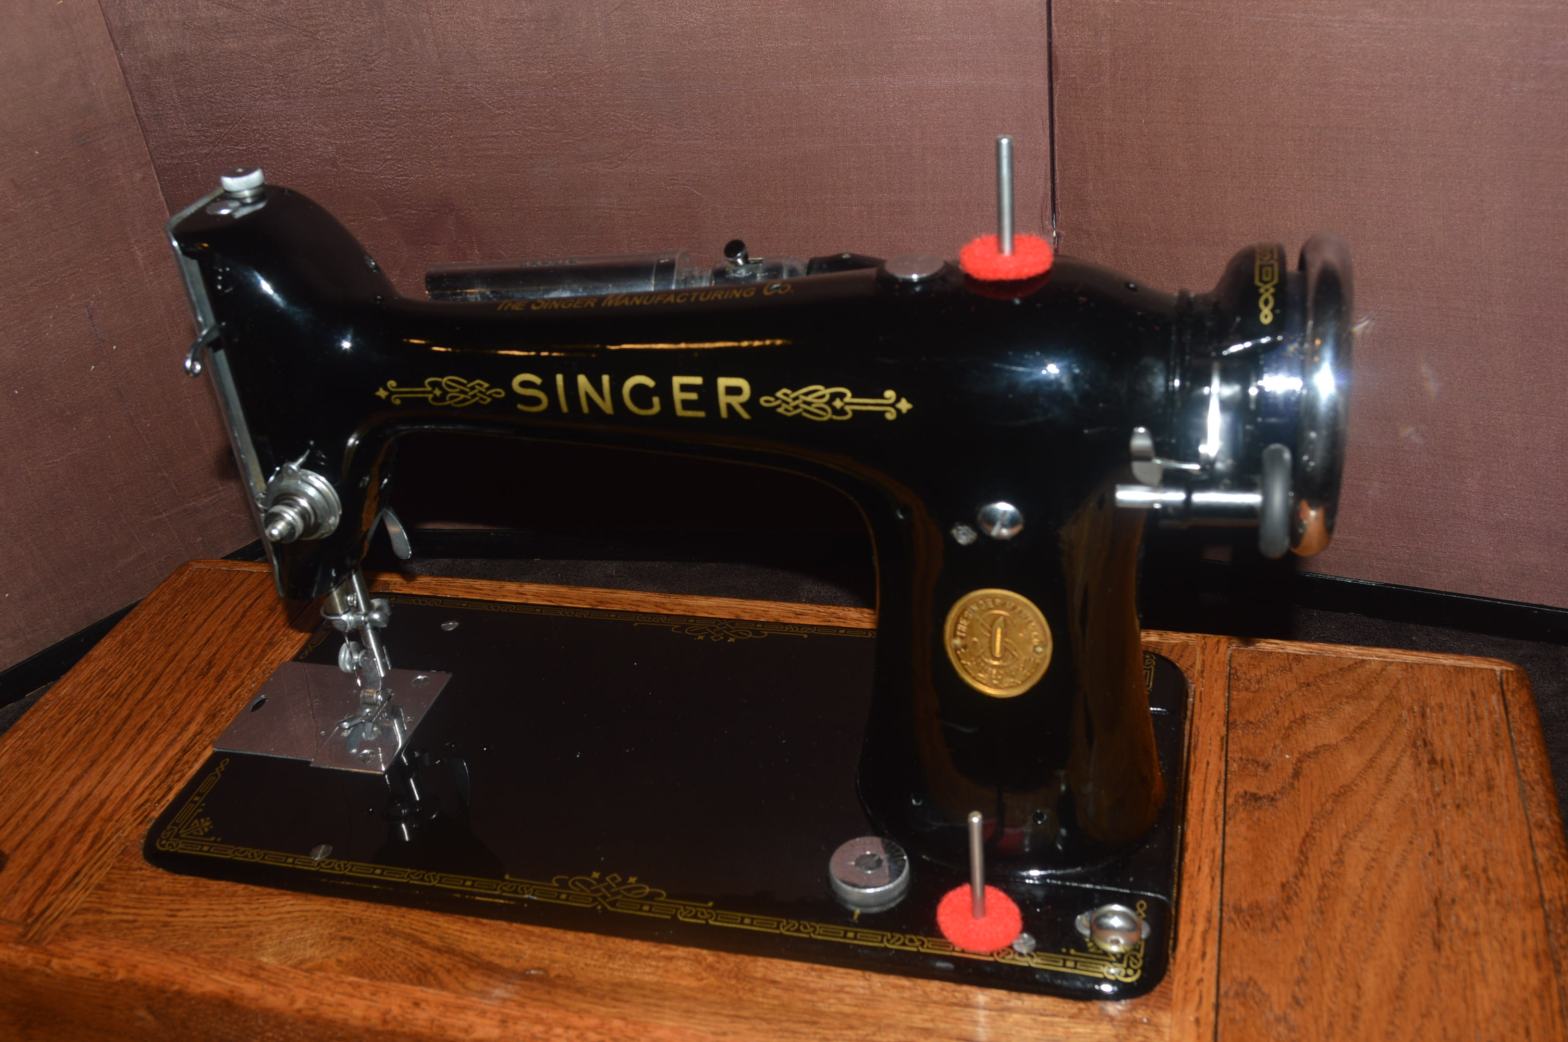
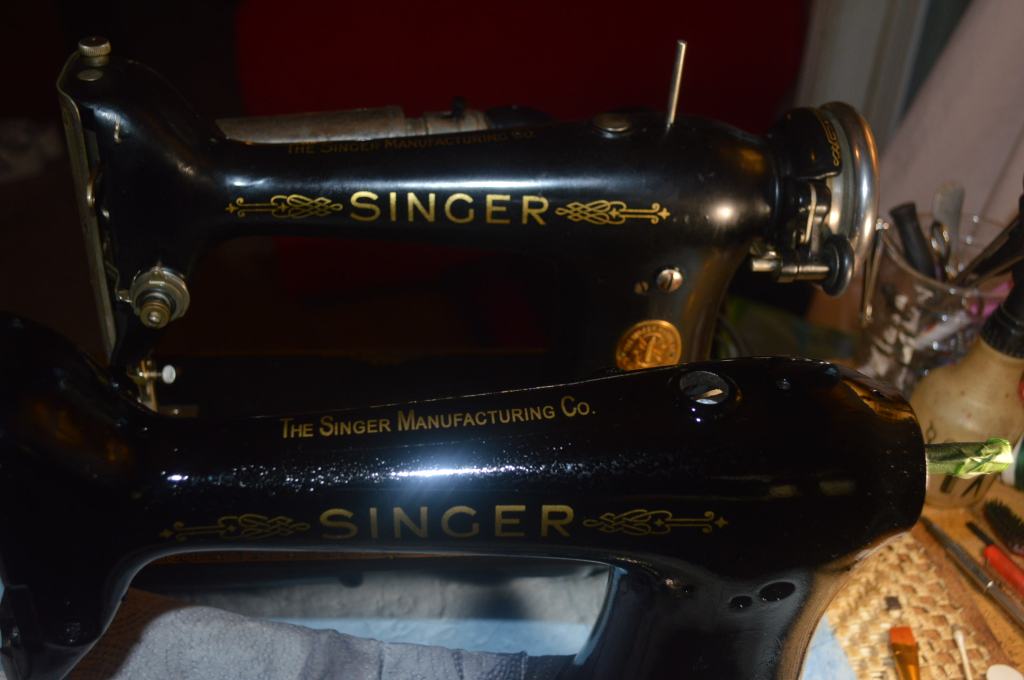
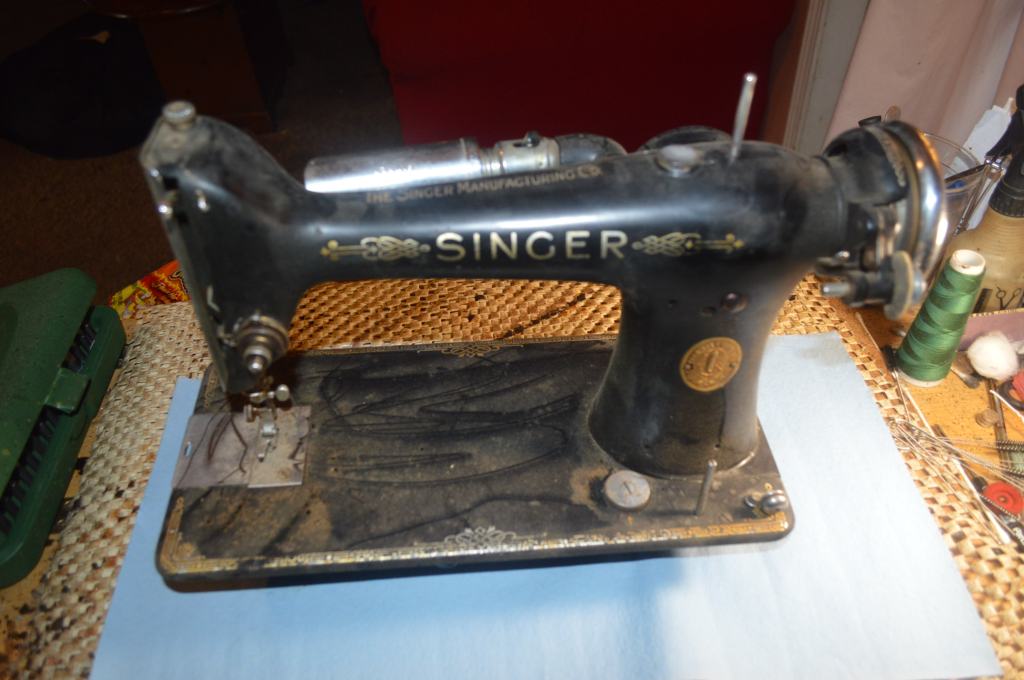
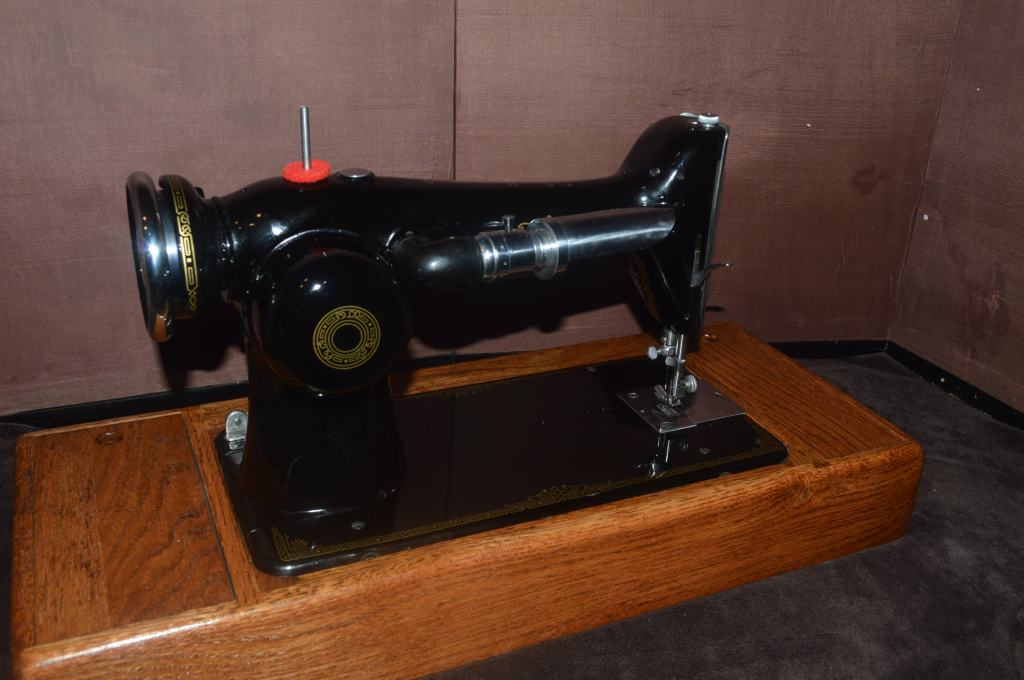
A sewing machine restoration is a before and after comparison so before I get started, here is the machine before restoration.

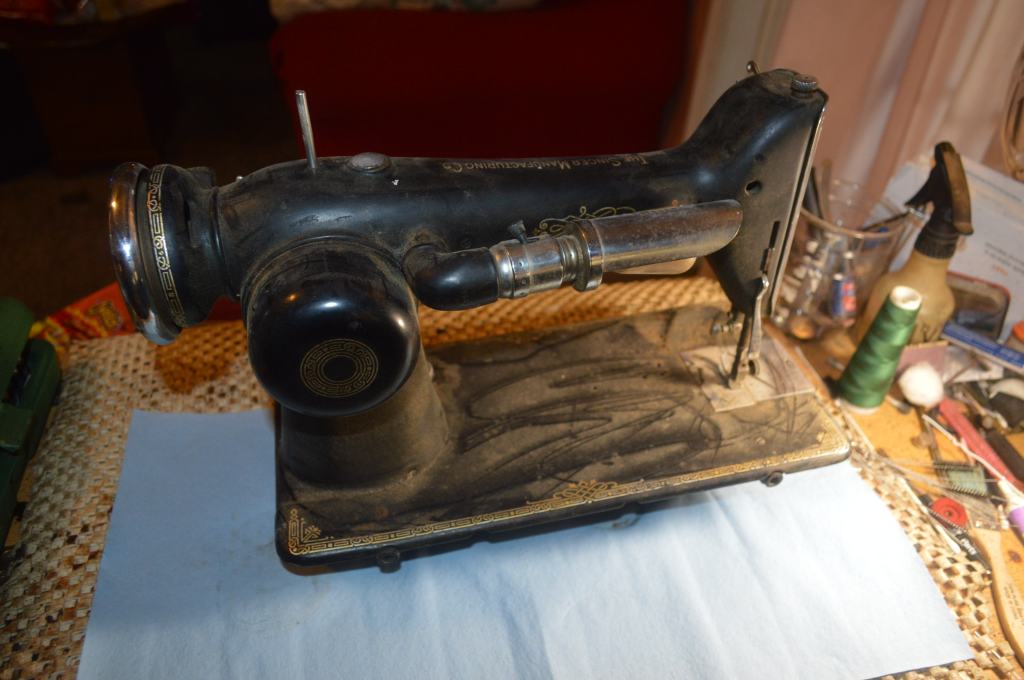
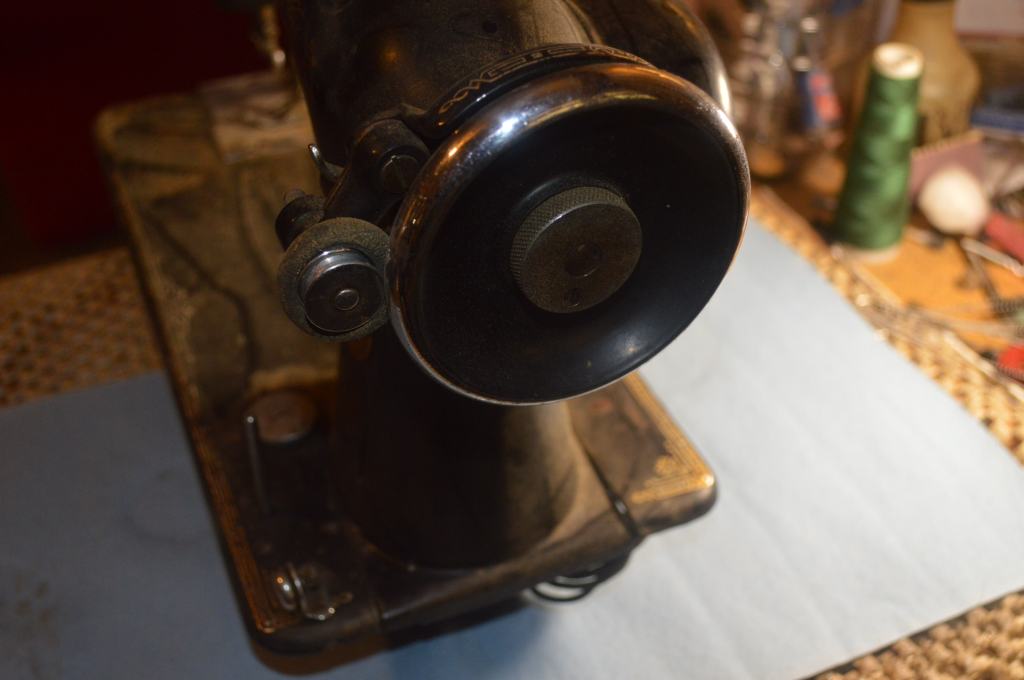

It is dirty, stiff, and full of old grease. There is a lot of oil varnish on the sewing mechanisms and a slight bit of rust in places. The wires for the light and motor are cut and were found stuffed into the body of the machine. The machine is in desperate need of restoration and as long as there is a problem I don’t know about, I think the outcome will be a great success. As always, when a machine is planned for repainting, the restoration begins with the mechanical restoration.
Mechanical Restoration
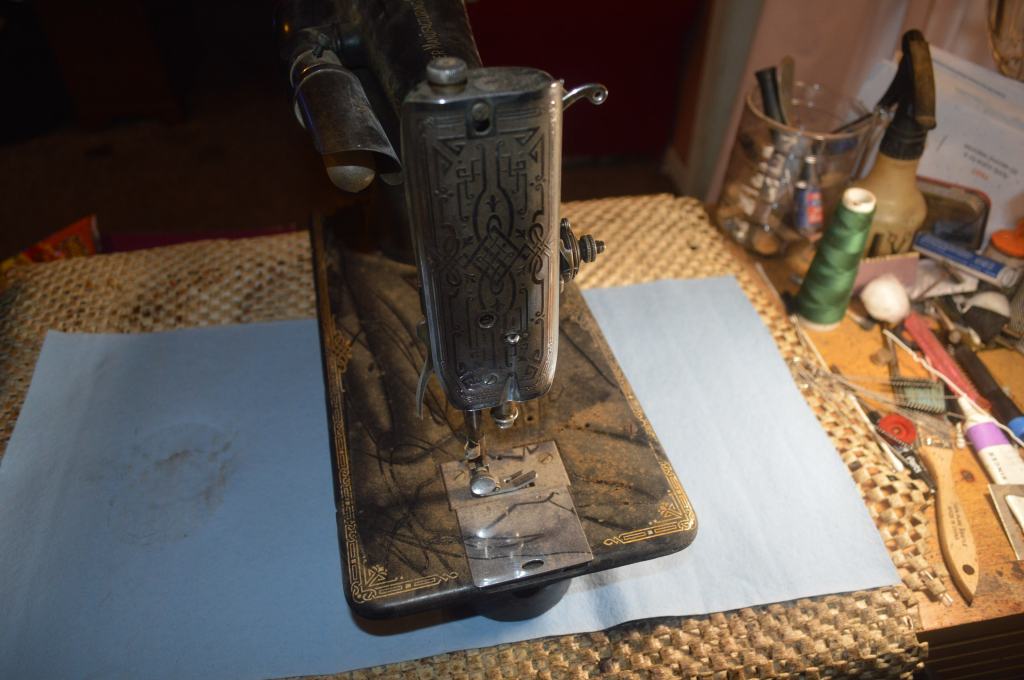
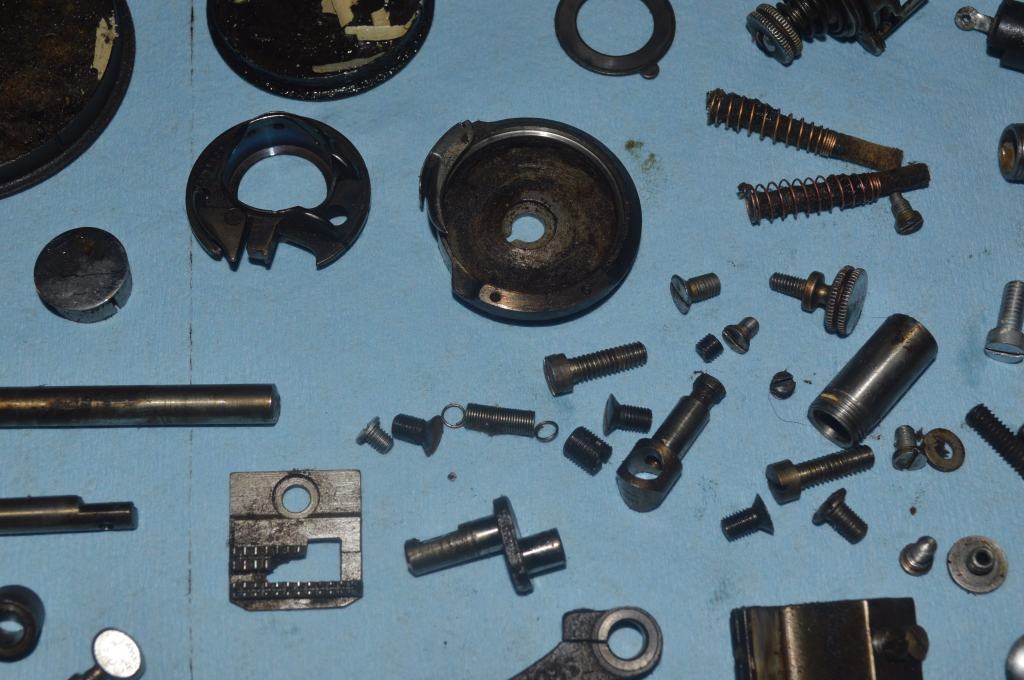
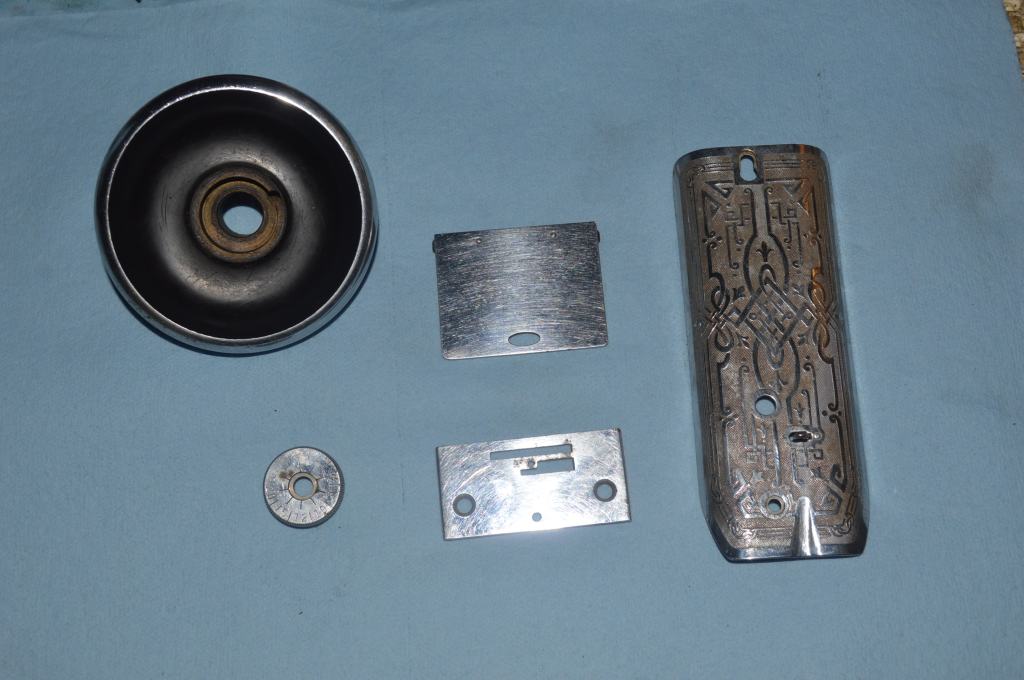
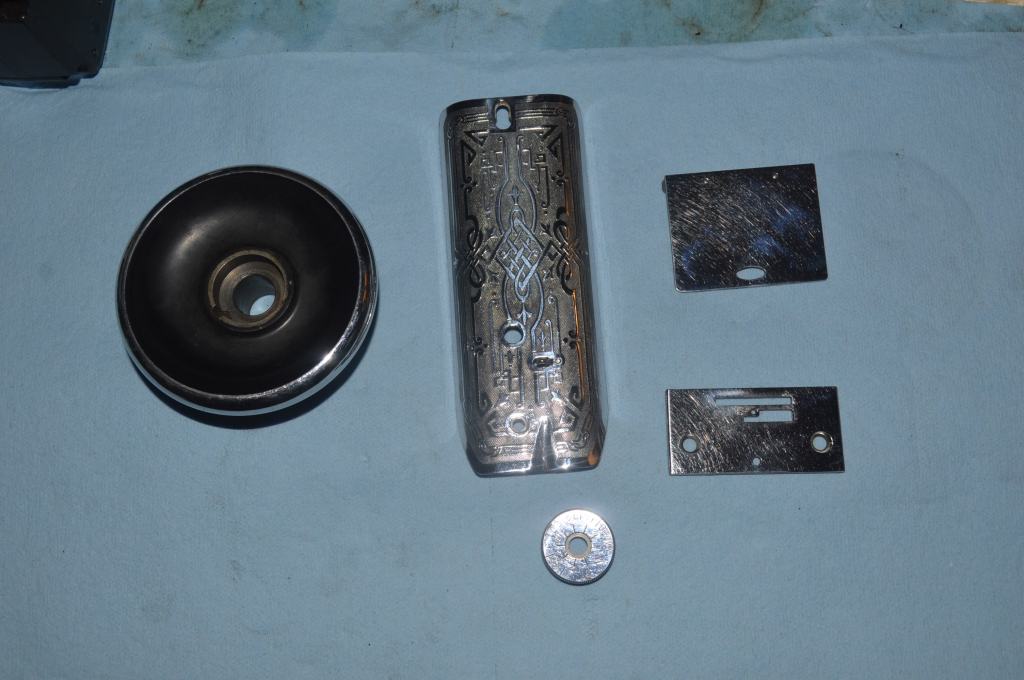
The mechanical restoration begins by removing as many of the mechanical parts as possible. This includes all of the plates, the tension assembly, needle bar, presser foot bar, and all of the linkages in the needle bar area of the sewing head.
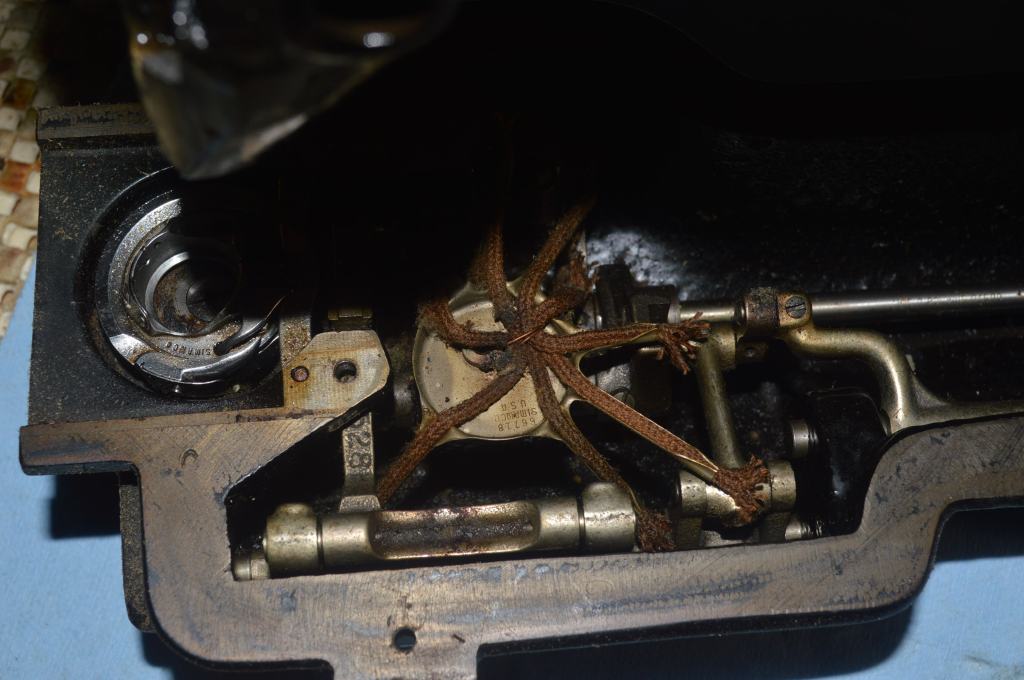
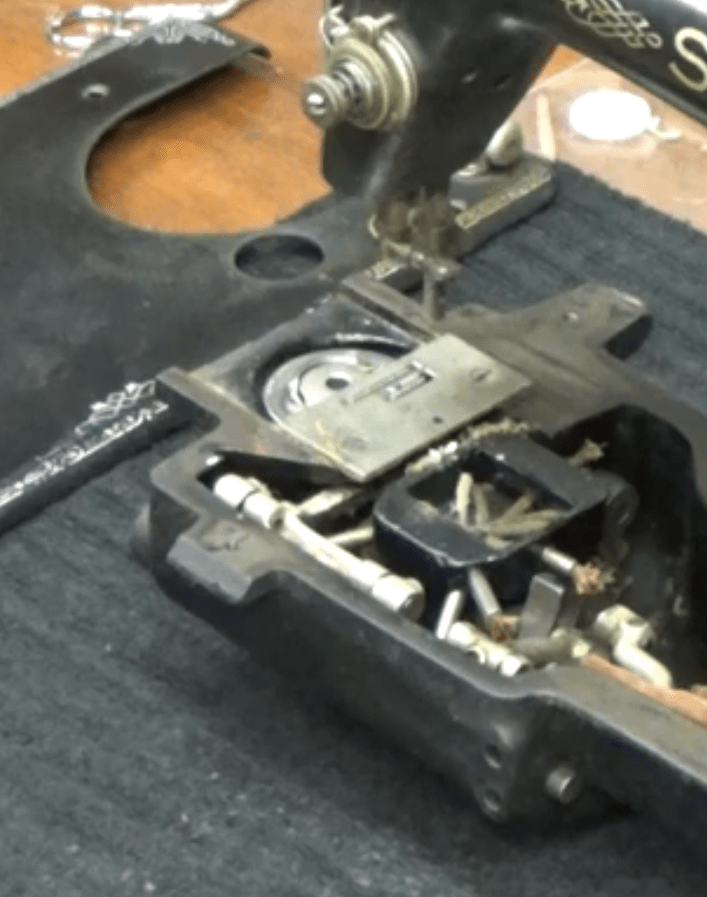
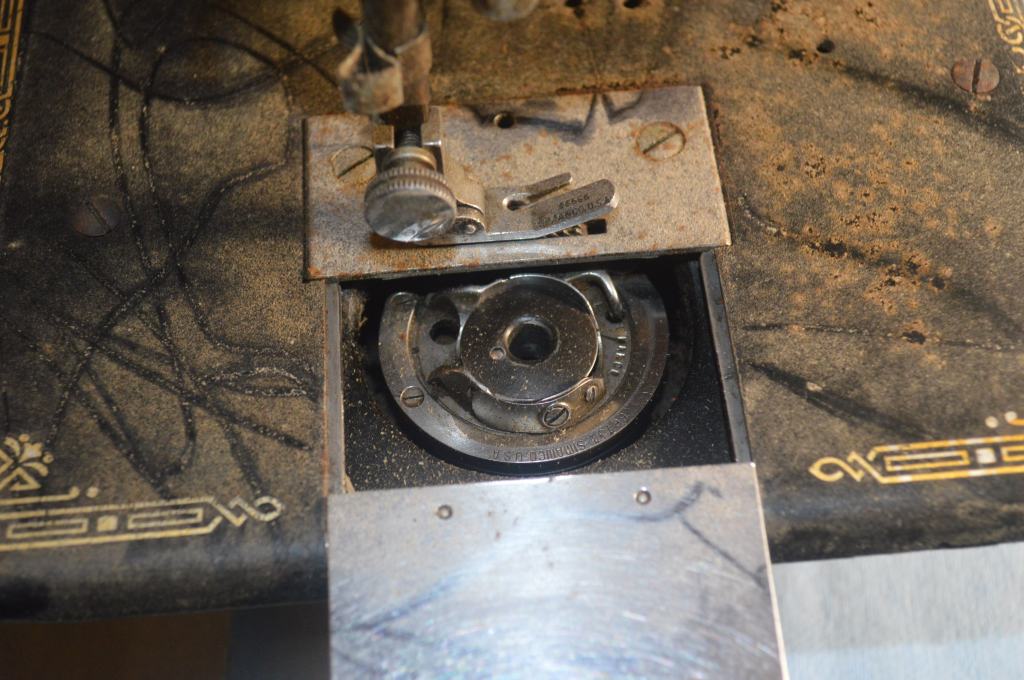
The cloth cover is removed and the feed dogs, bobbin case, and bobbin hook is removed.
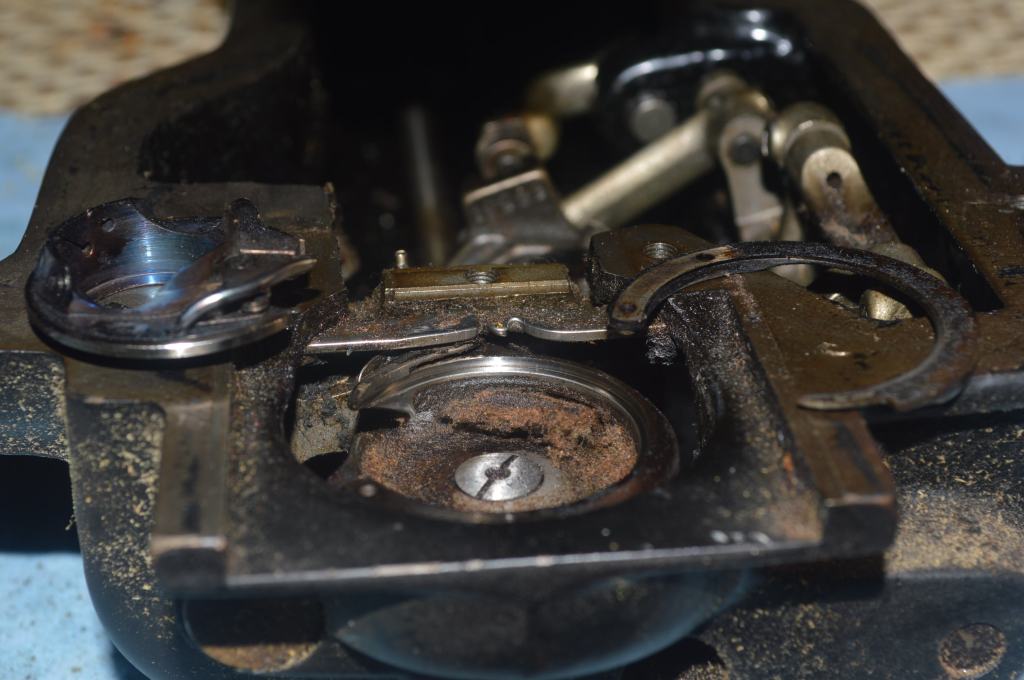
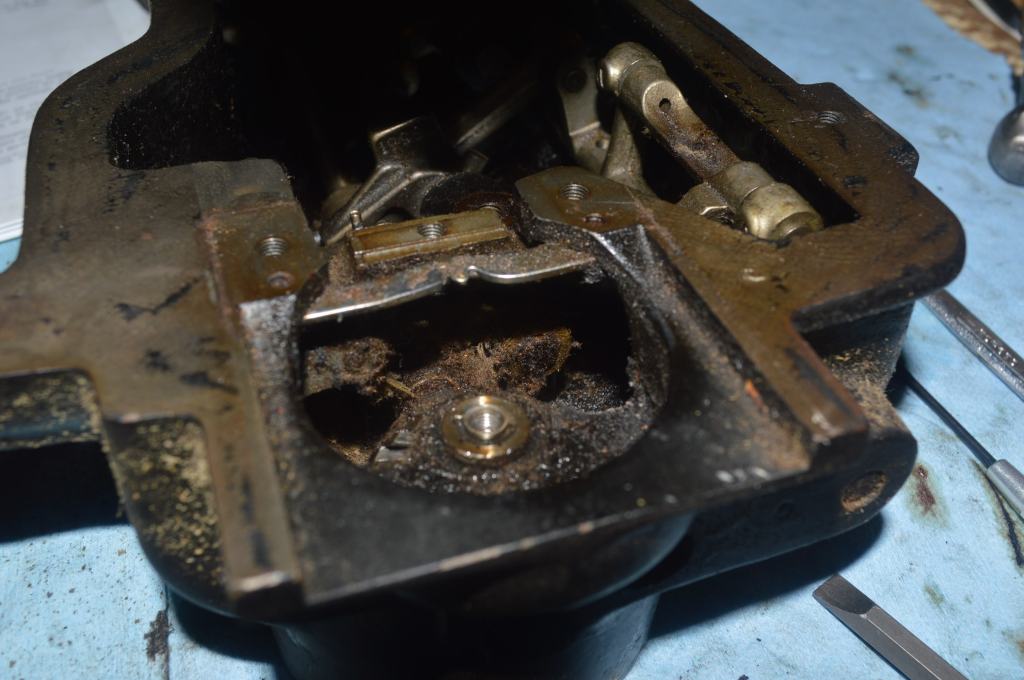
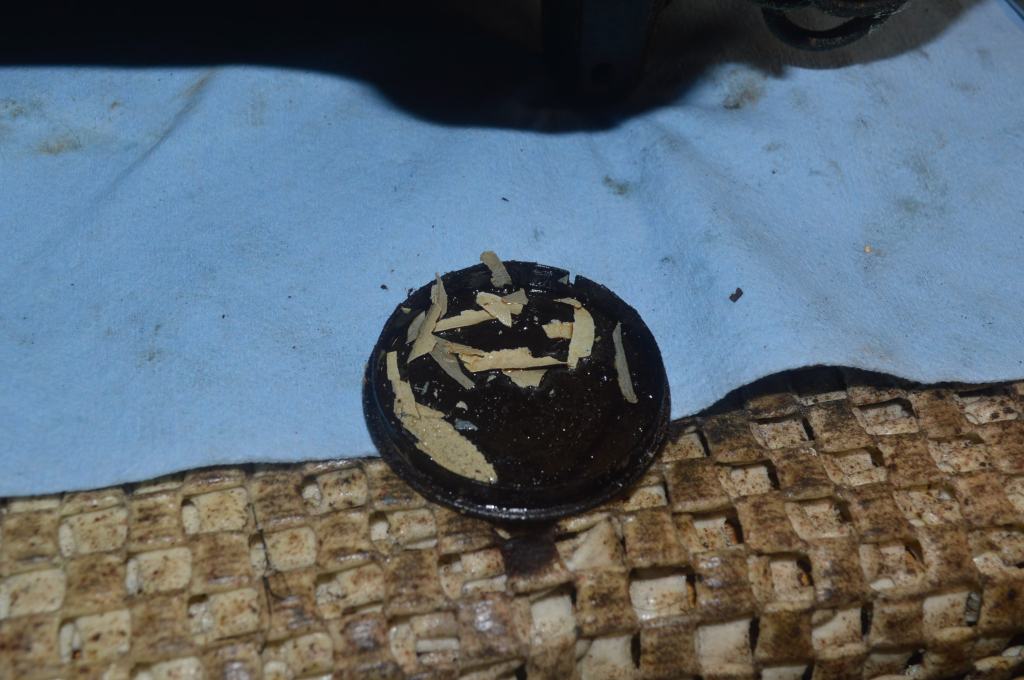
There is a lot of old compressed lint below the hook and throughout the machine… this is as bad as I have ever seen in a machine and there is more to be found.
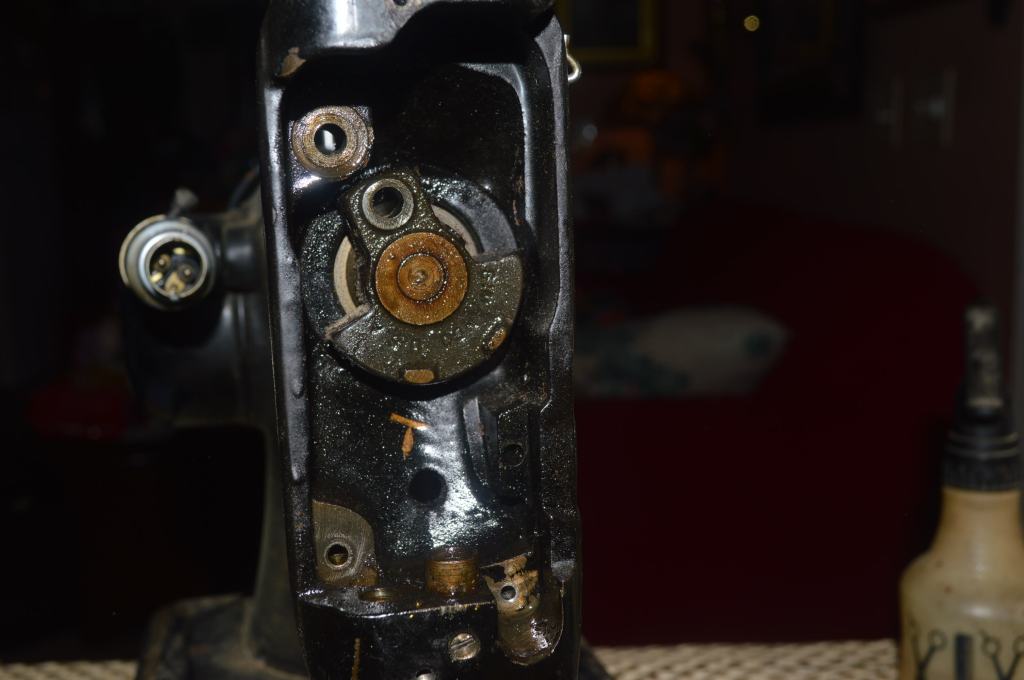
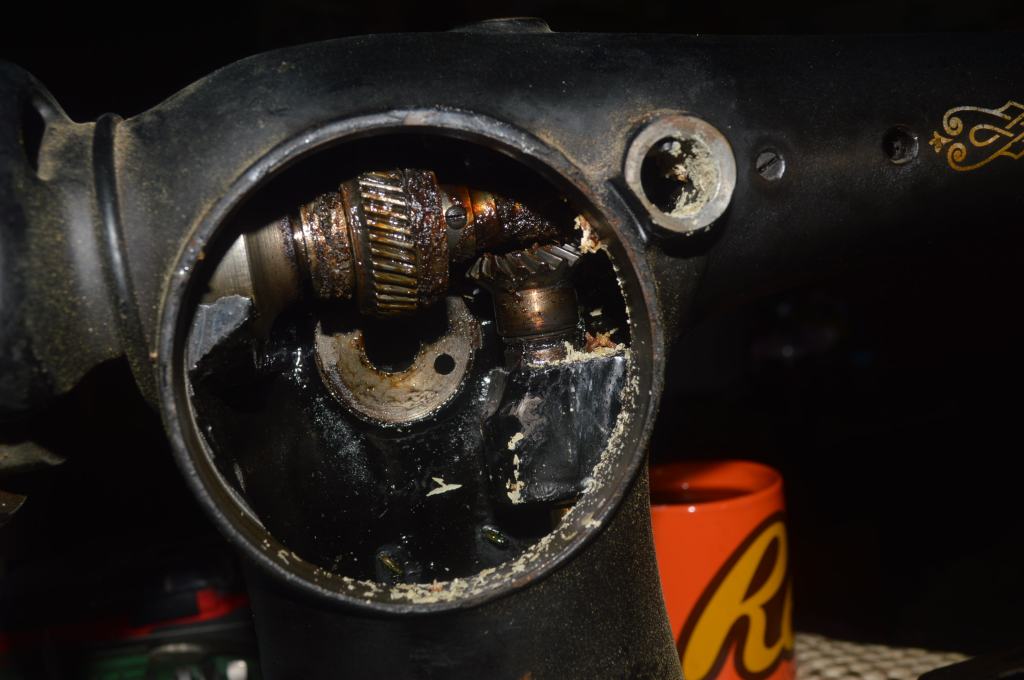
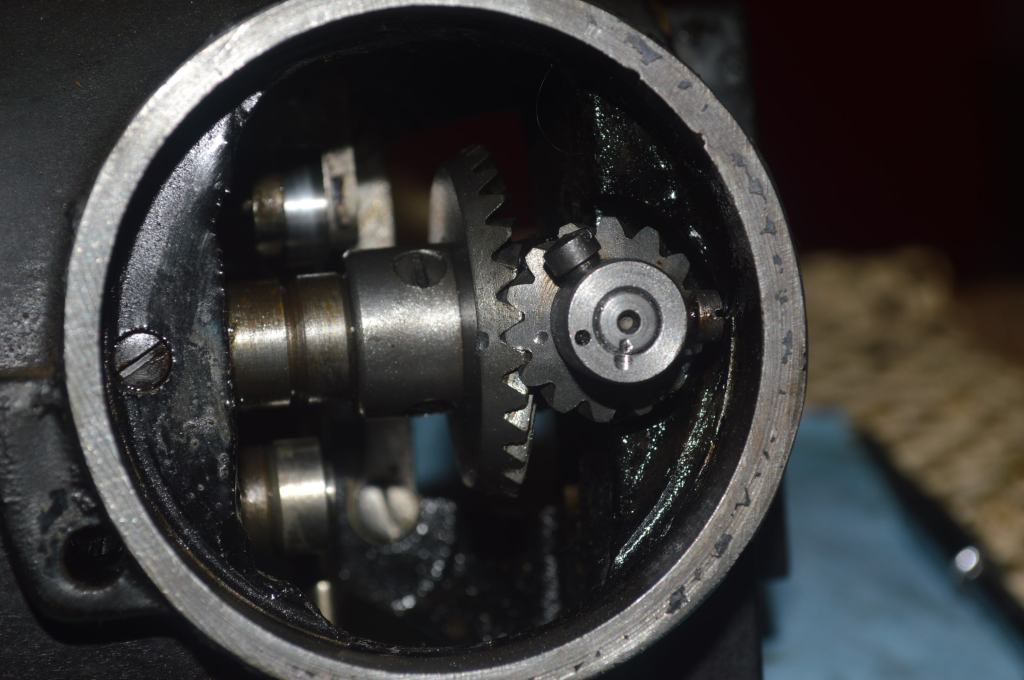
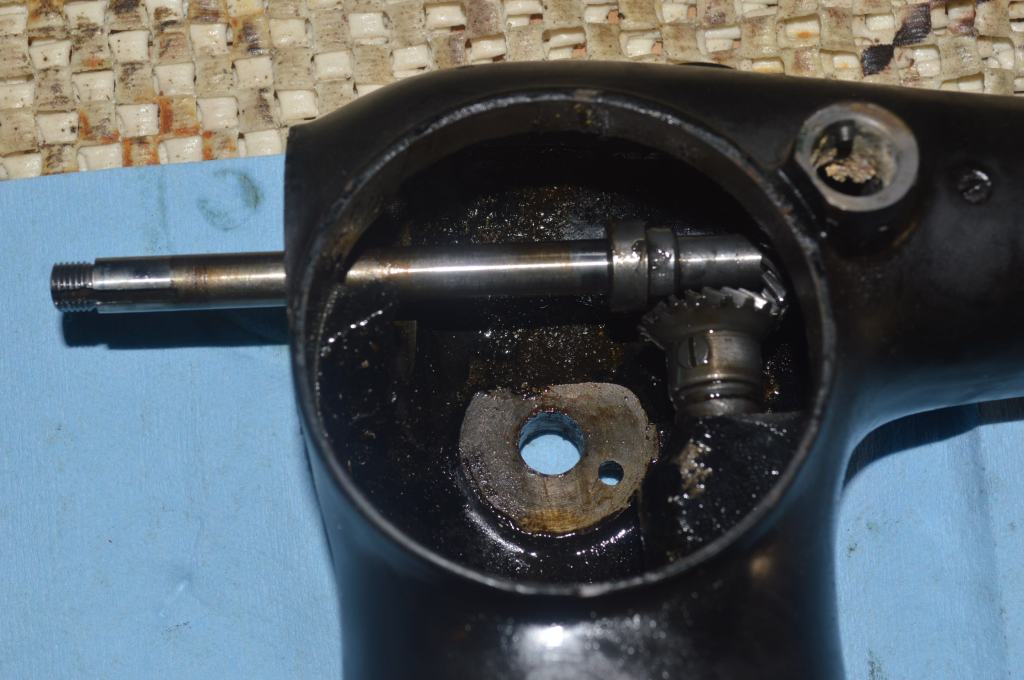
The motor covers are removed to expose the gears.
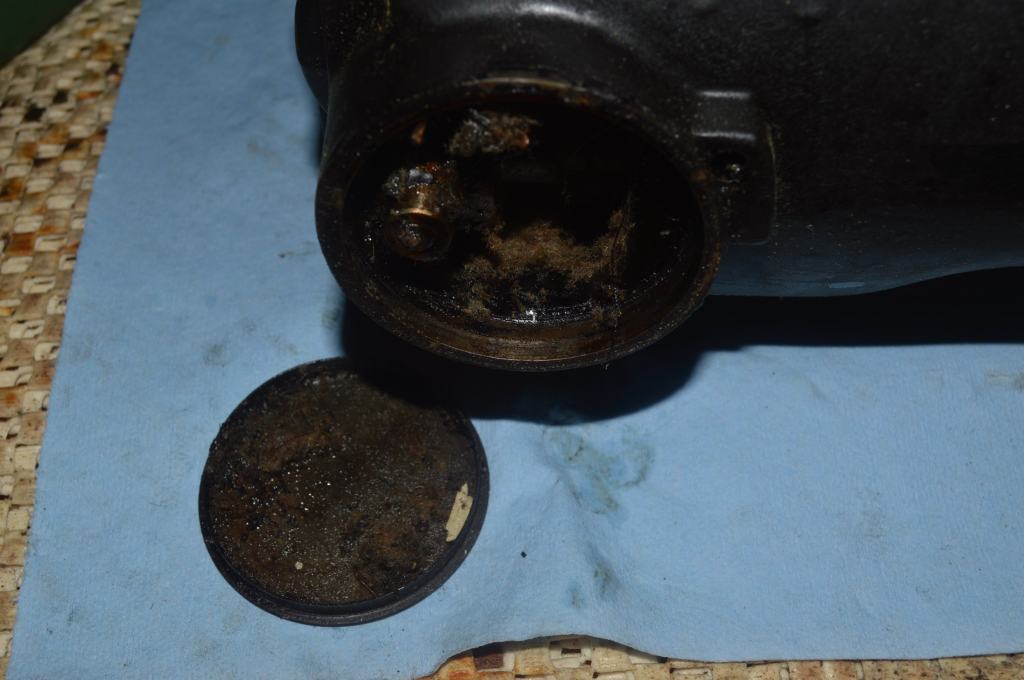
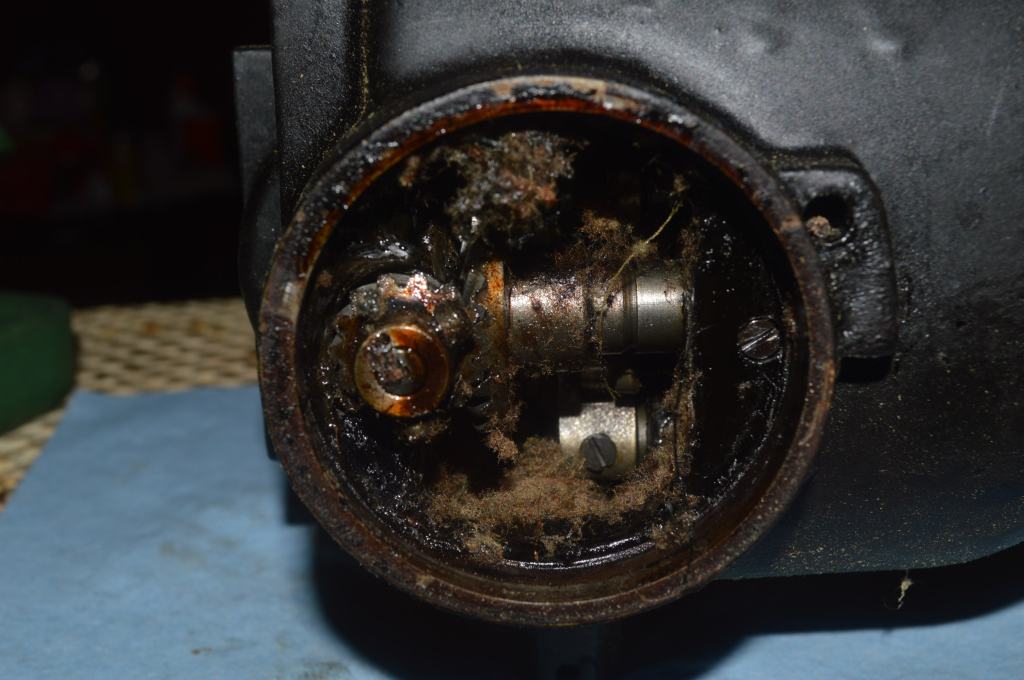
It looks pretty bad, but what’s a little grease and oil? That’s what restoration is all about… cleaning everything to the greatest extent possible.
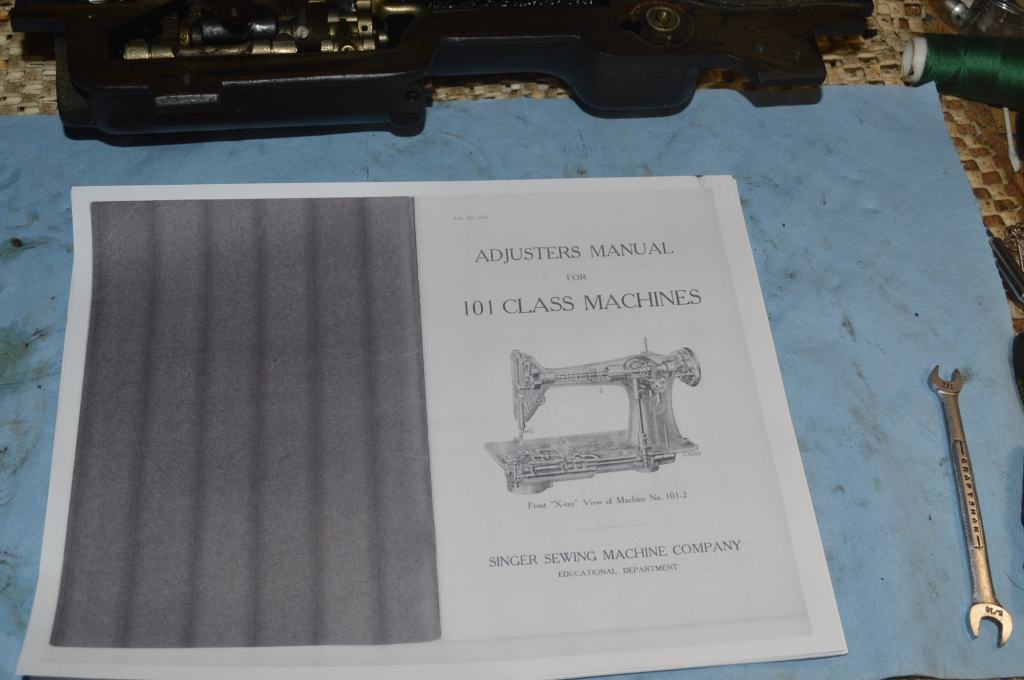
As I said before, the model 101 is a bit more complicated than other Singer models and the disassembly of some assemblies are not self explanatory. Attempting to disassemble this machine by “feel” is a recipe for failure or worse… damage to the machine. For a successful restoration the model 101 adjuster’s manual is a necessity. It is available online and the download was free.
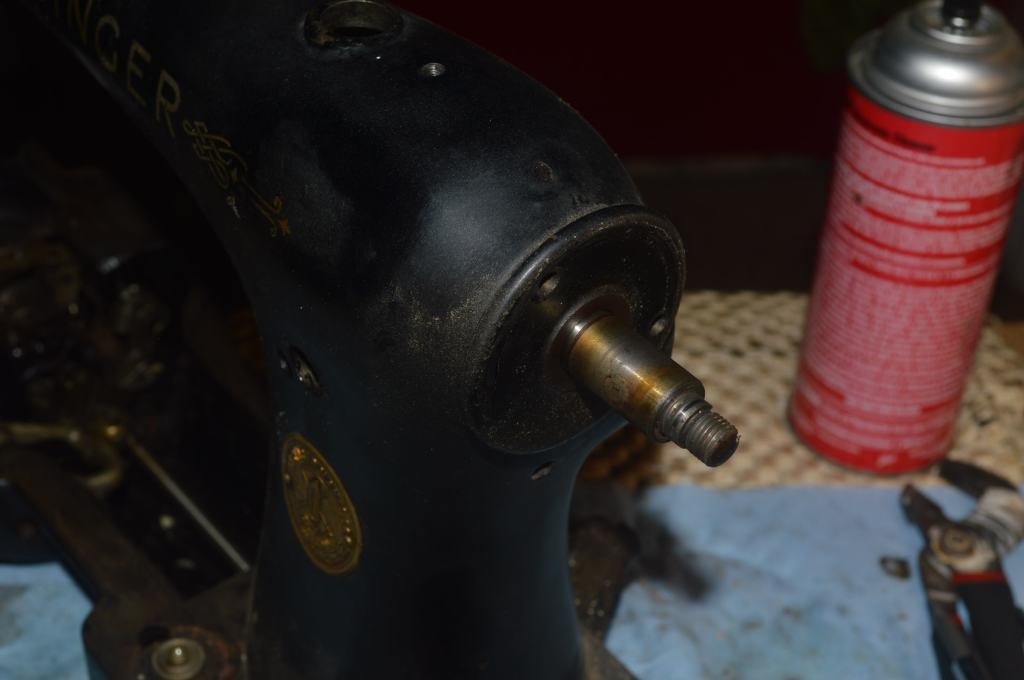
After reading thru the manual, the motor and motor wiring s removed…

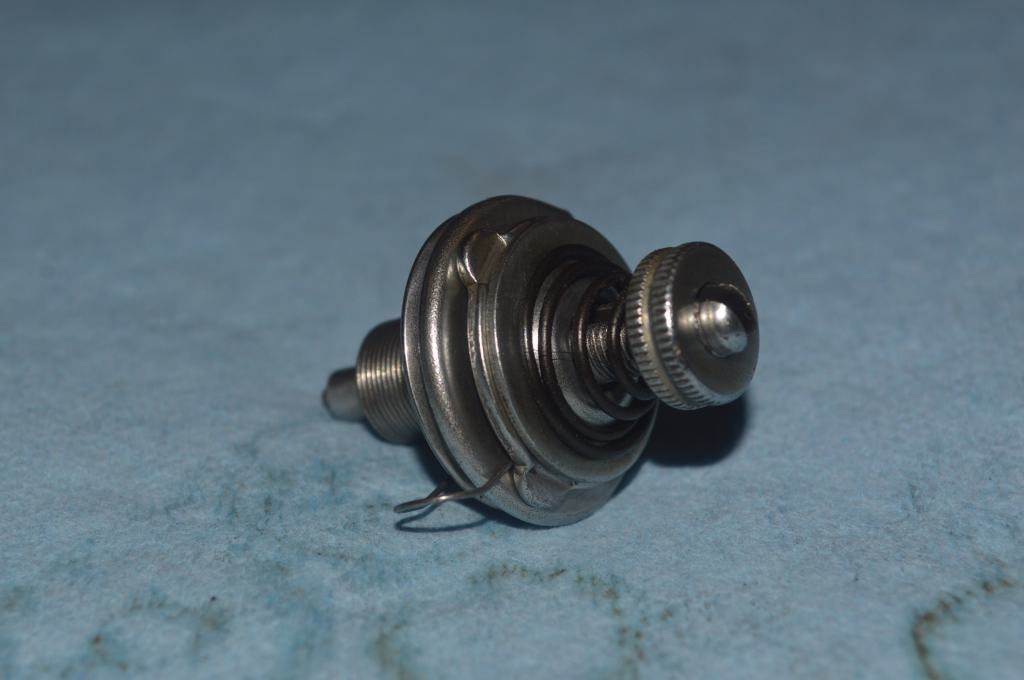
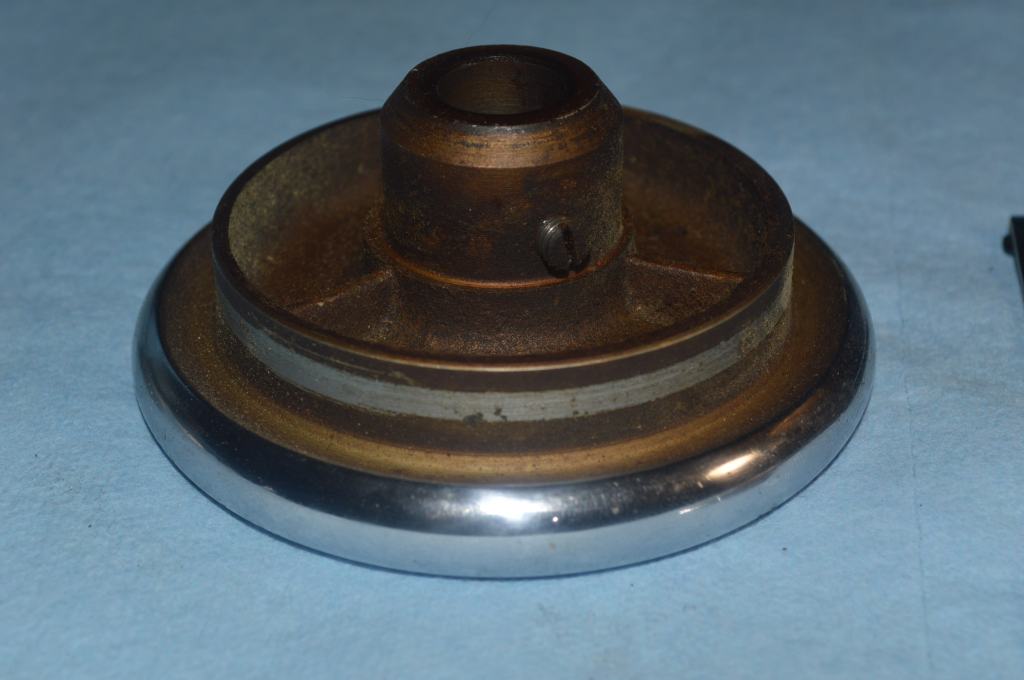
Then the balance wheel and bobbin winder assembly is removed…
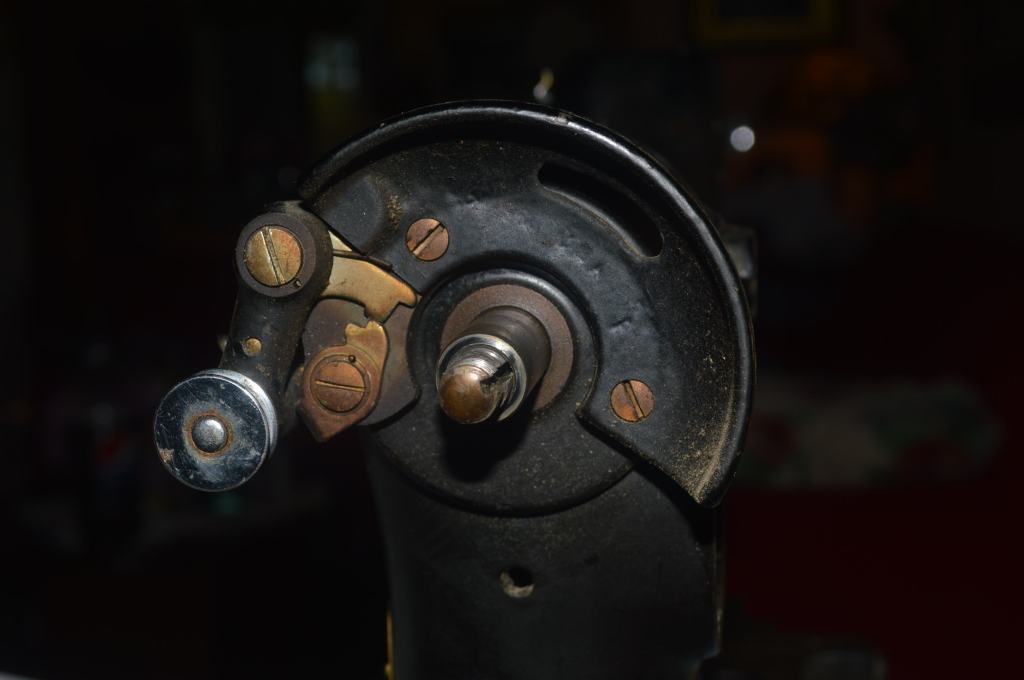
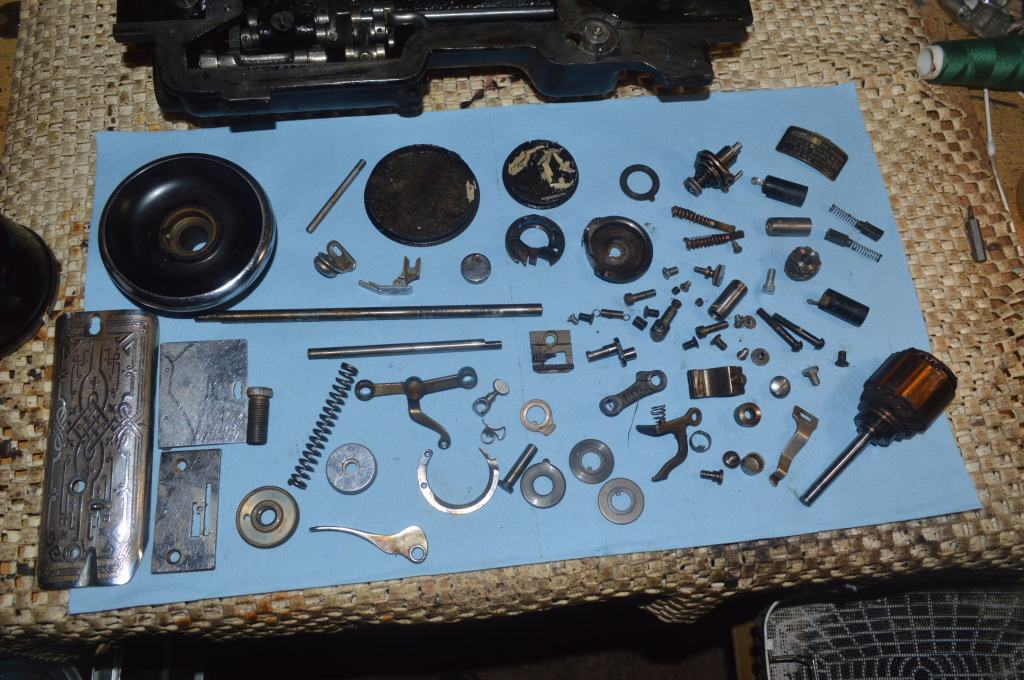
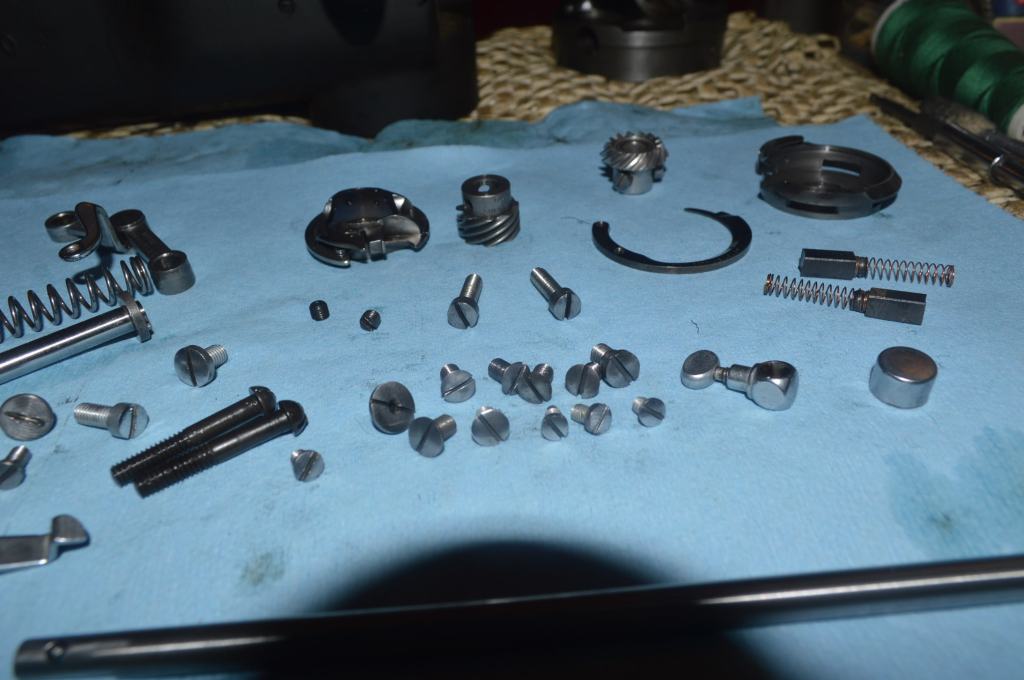
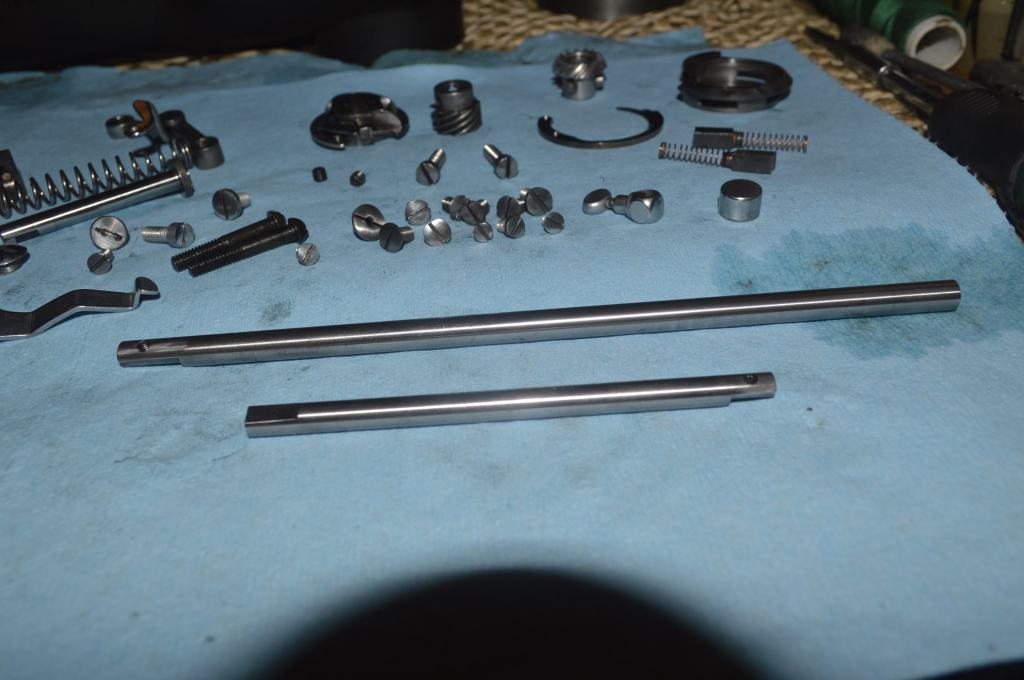
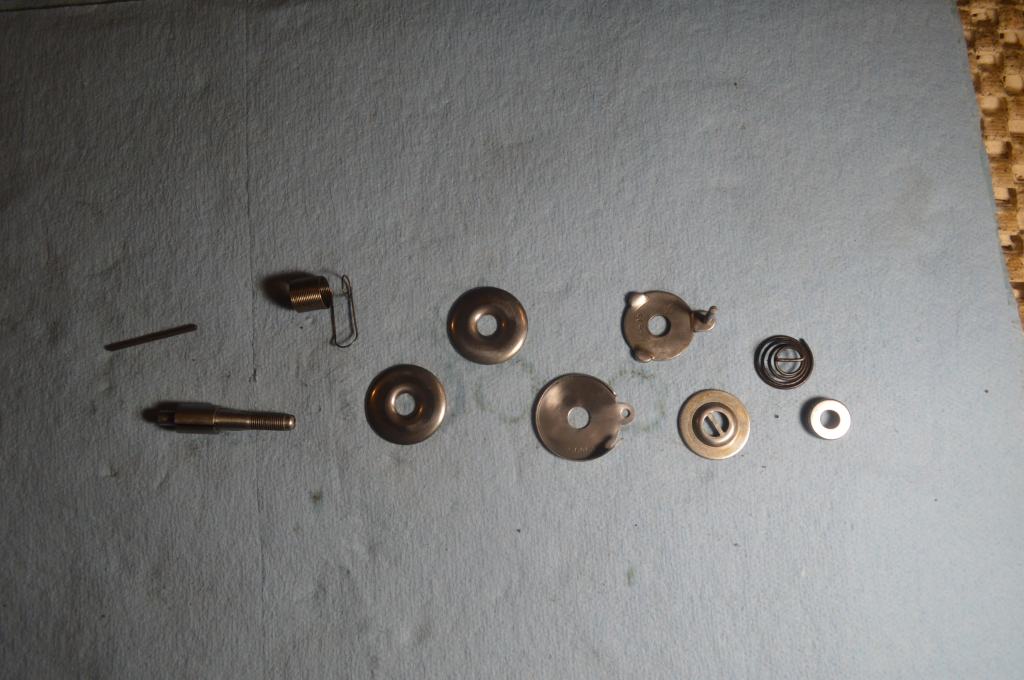
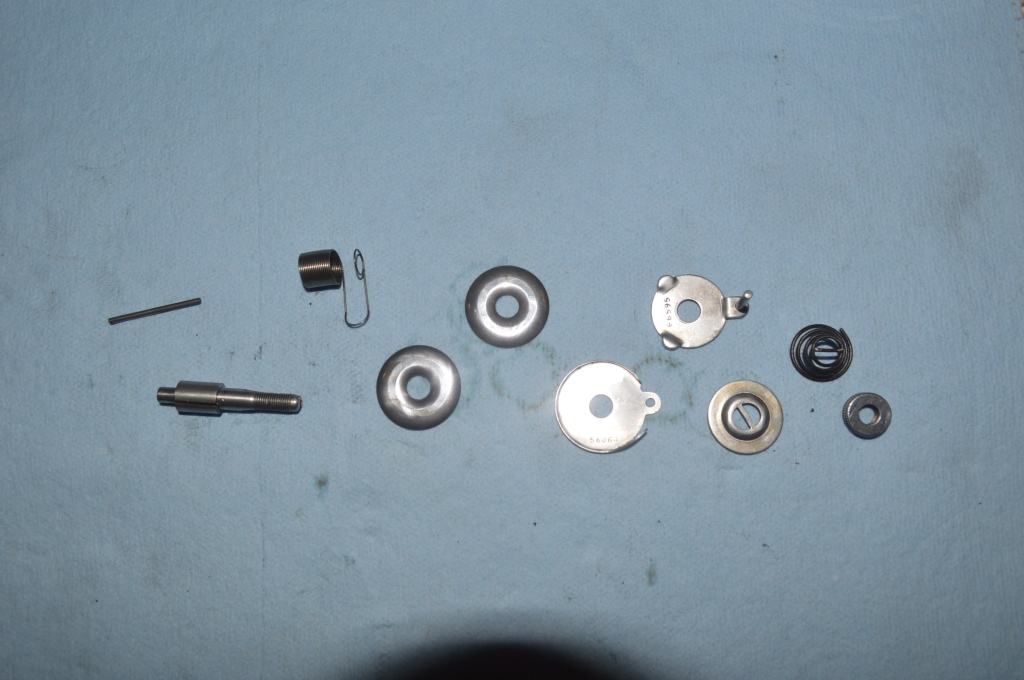
All of the parts are laid out for cleaning. There is a considerable amount of old oil varnish and grease to be removed to restore these parts to “like new”.

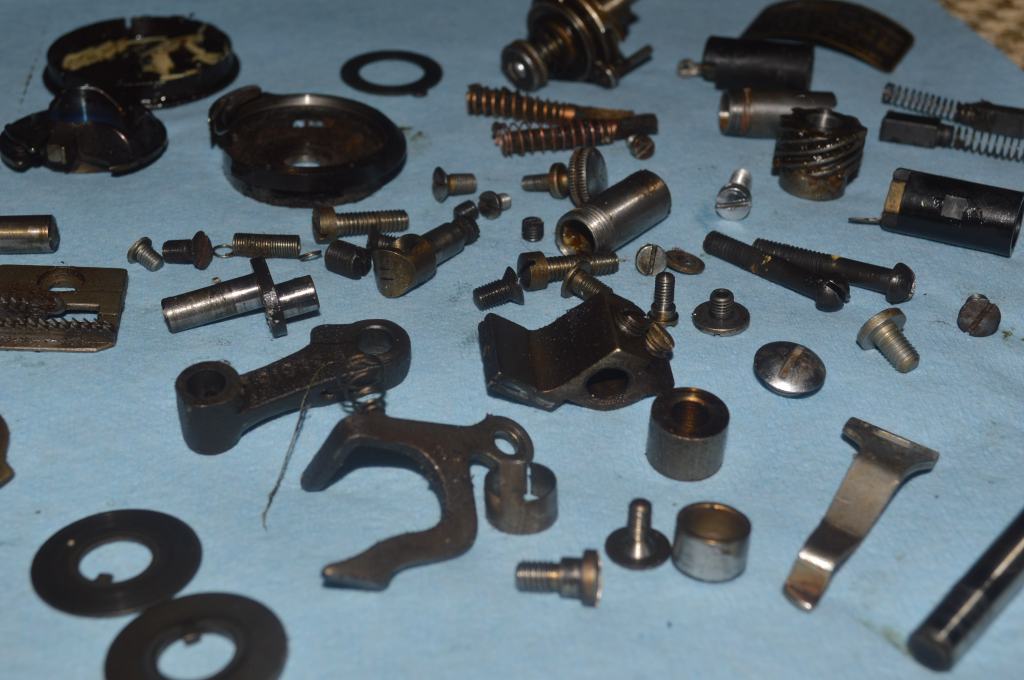
After the parts are ultrasonically cleaned, they are heated in oil at 350 degrees for one hour. Any moisture remaining is boiled off and the parts are laid out for further cleaning… ultrasonic cleaning removes the old oil varnish and old grease, but all of the parts are then wire brushed to bright steel. The needle bar and presser foot bar is polished to a glass like finish.


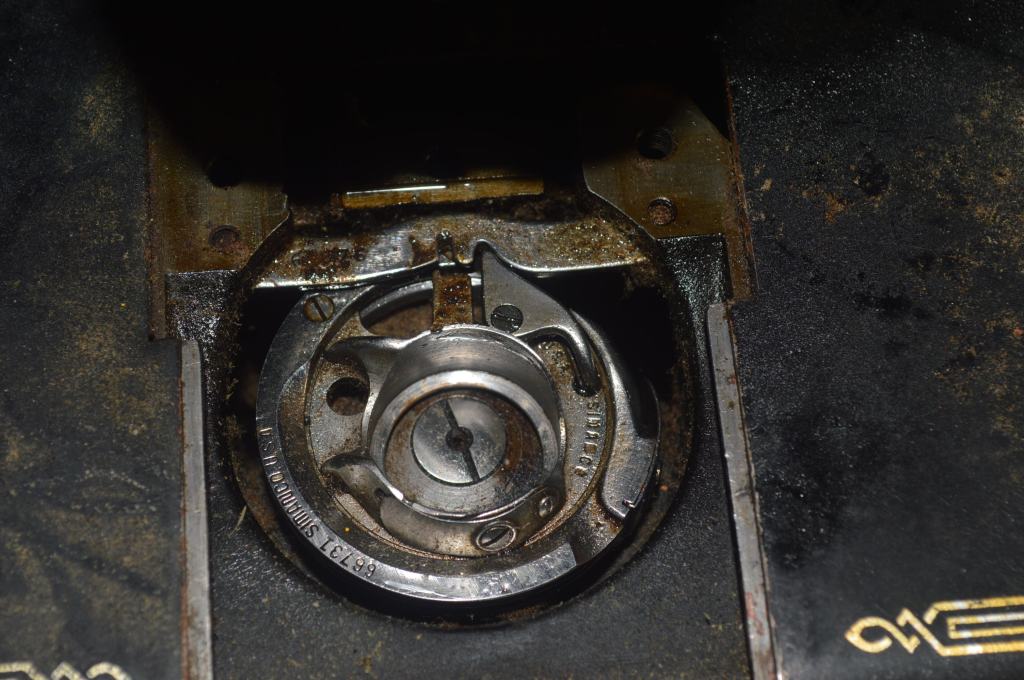
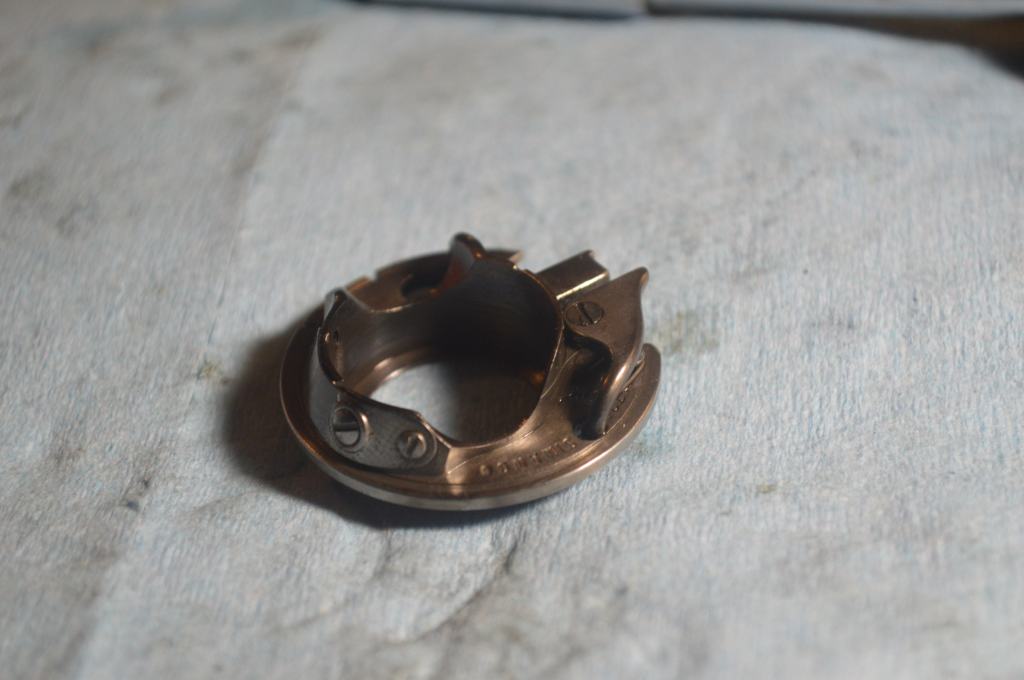
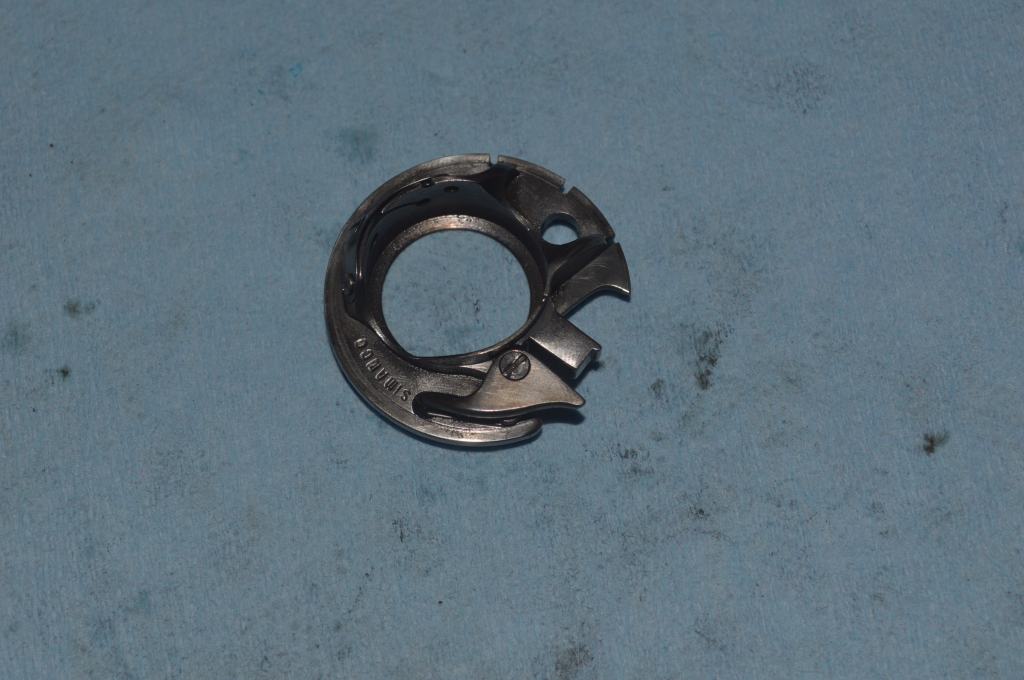
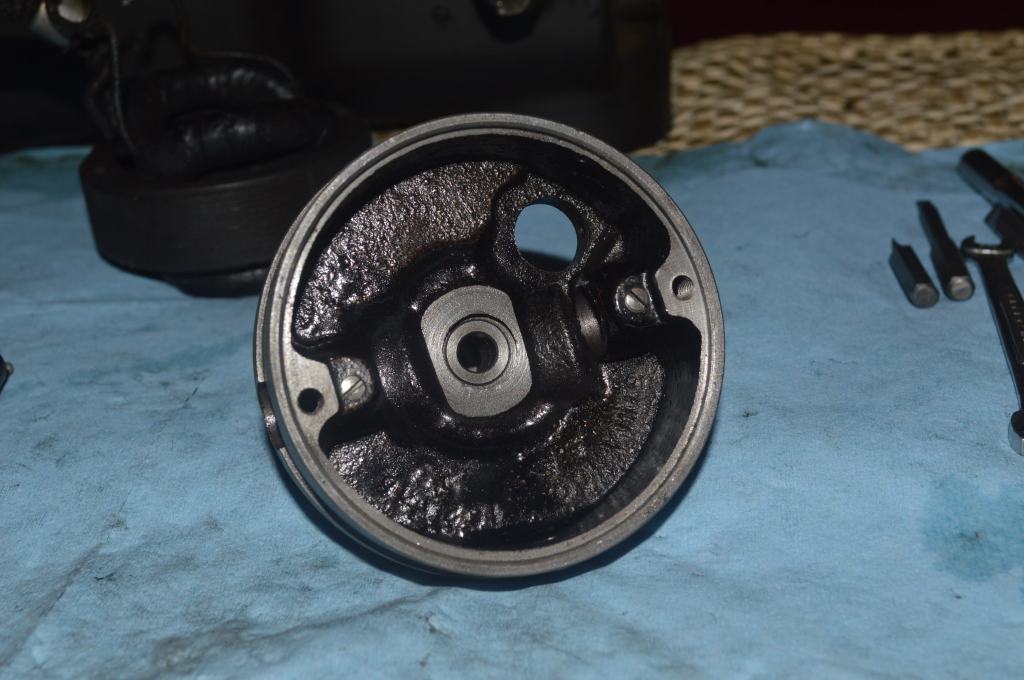
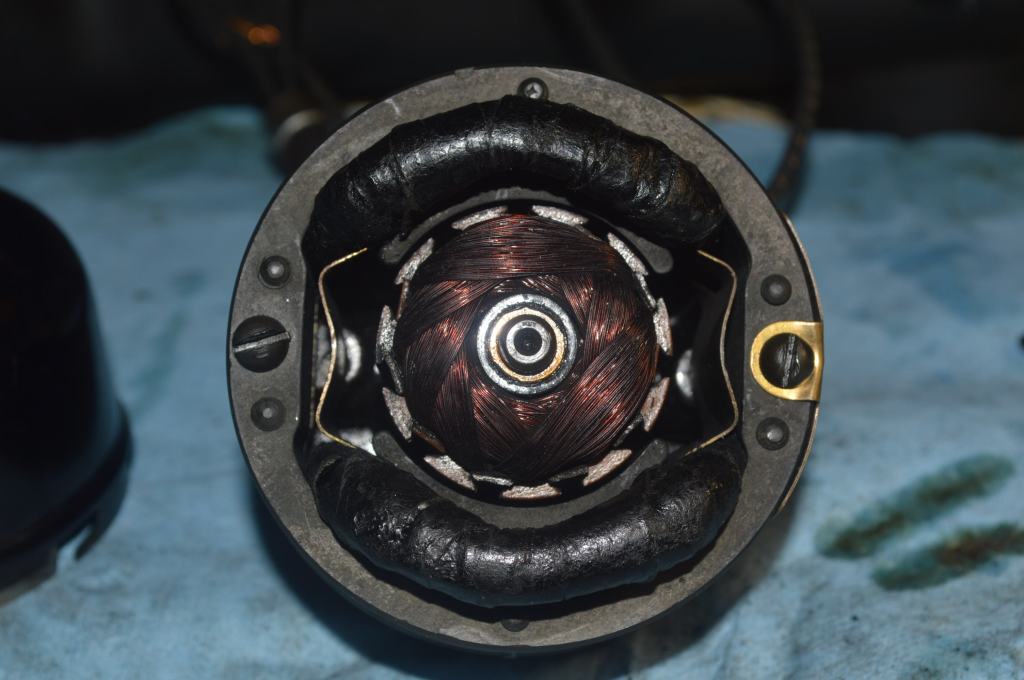
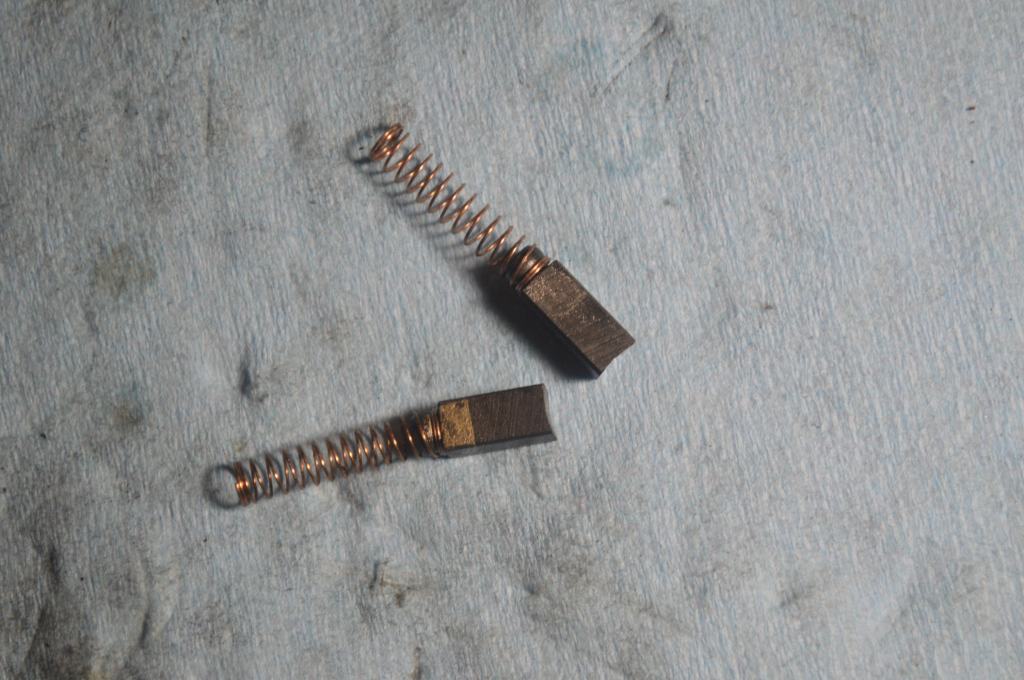
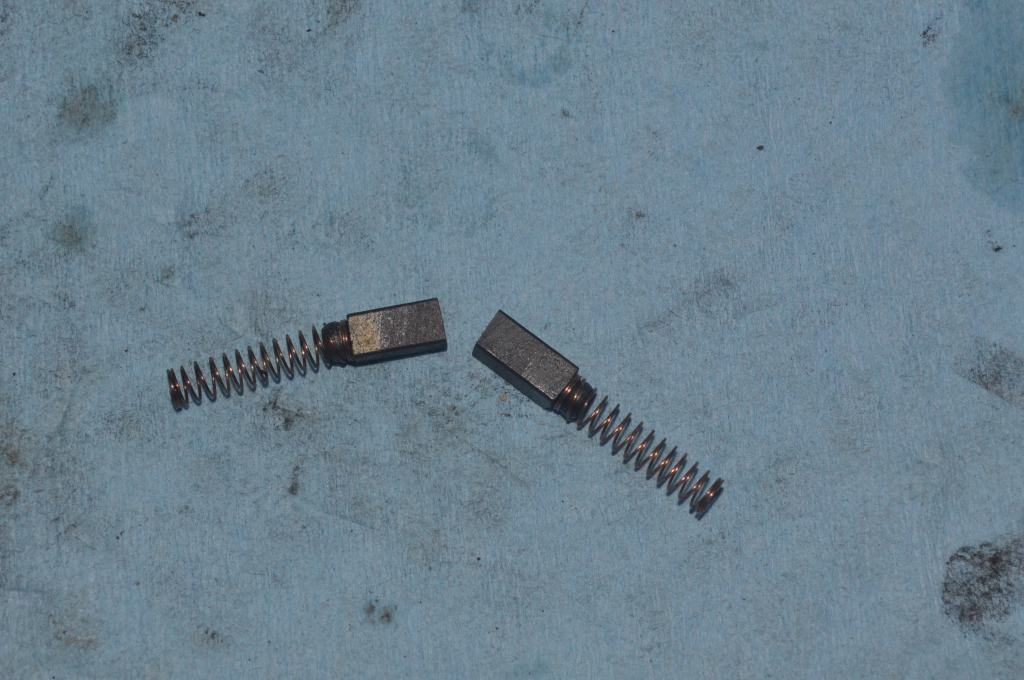
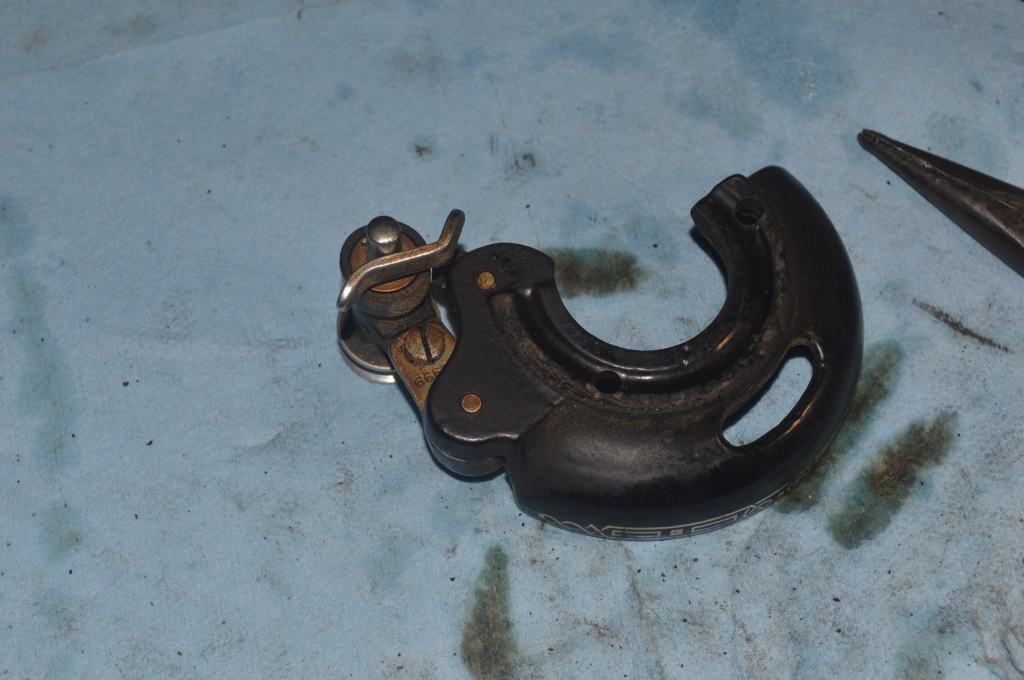
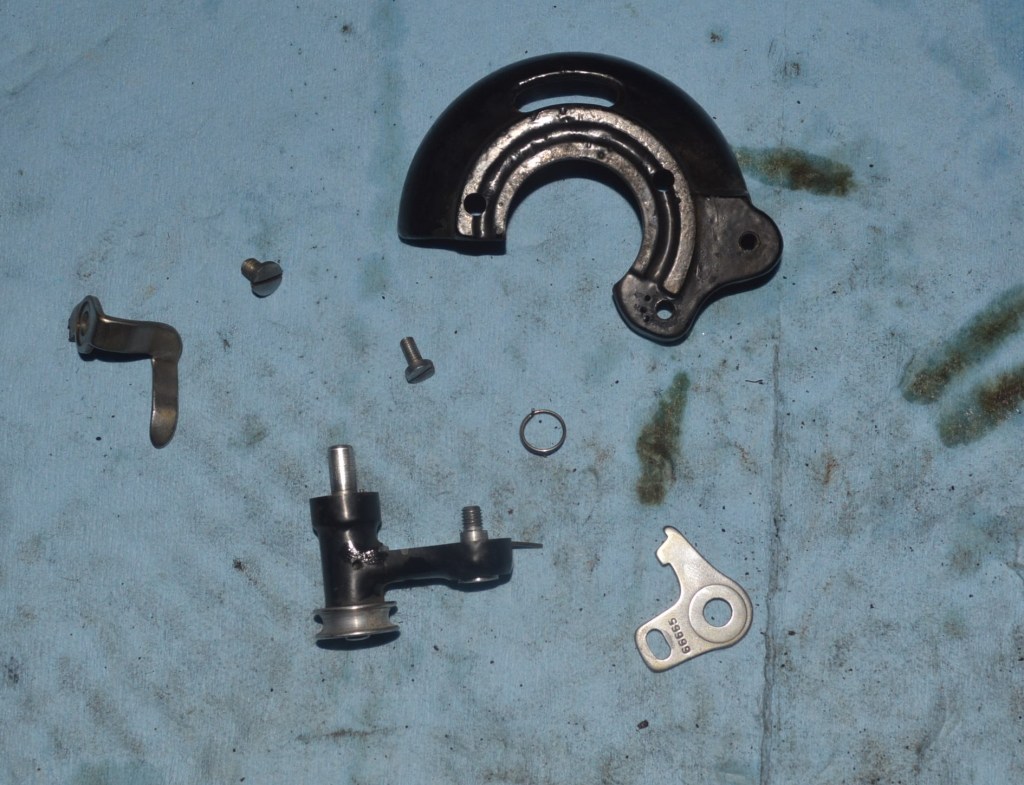
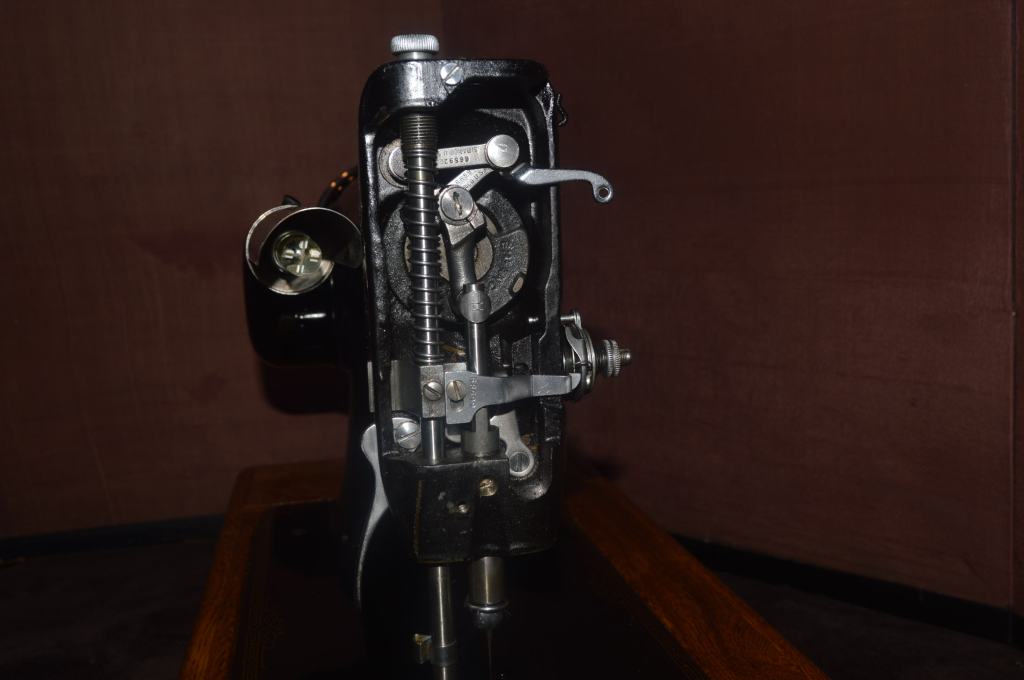
The rotary hook bobbin case on this machine needs additional attention. If you look at it closely, you will notice that it has some screws that hold smaller parts on the case. I know for certain that there is gunk and old oil varnish beneath these parts. Clean the outside as much as you want, crud that needs to be removed is hidden from sight. The hook is what makes the stitch and anything associated with it needs to be removed and cleaned.
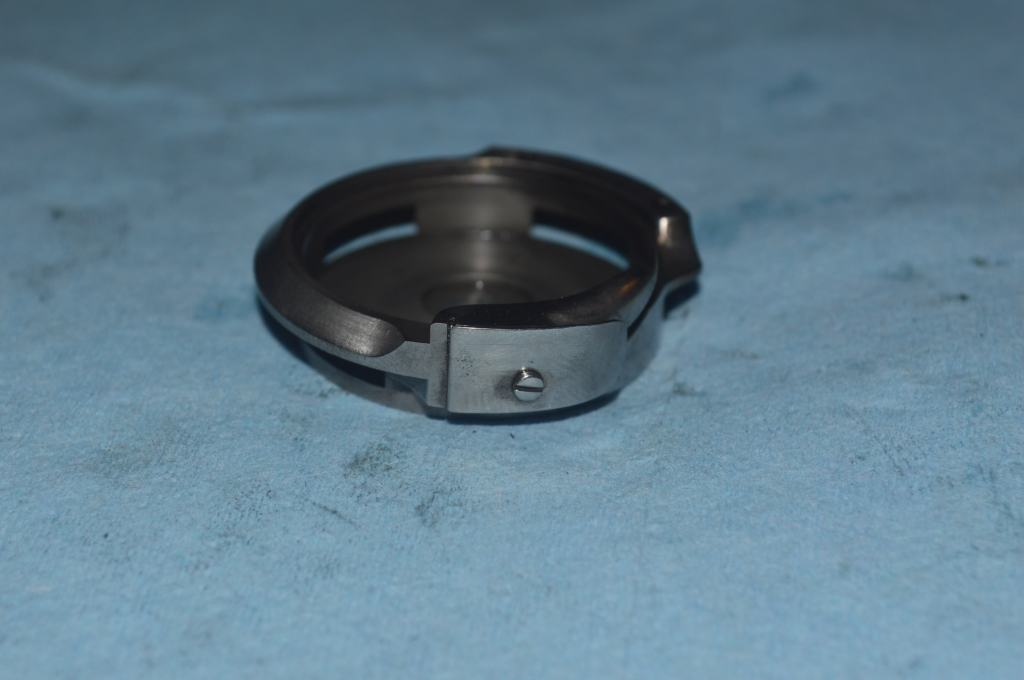

The same thing applies even more so to the bobbin case. The bobbin case is responsible for controlling the bobbin thread tension and being in the thread path, gunk here can seriously affect even bobbin thread tension and stitch quality.
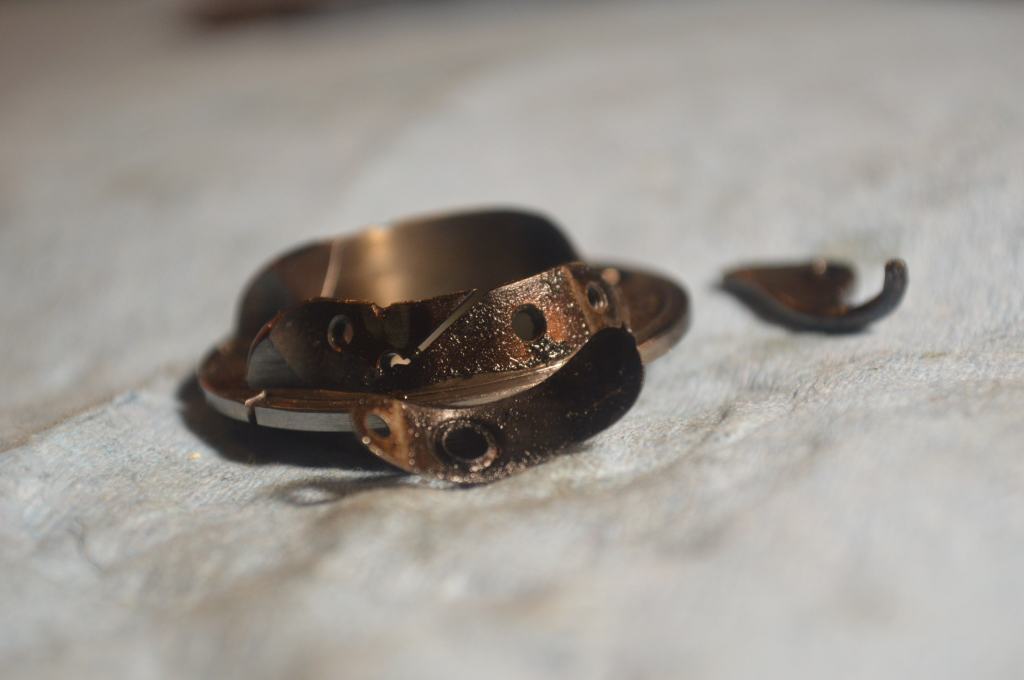
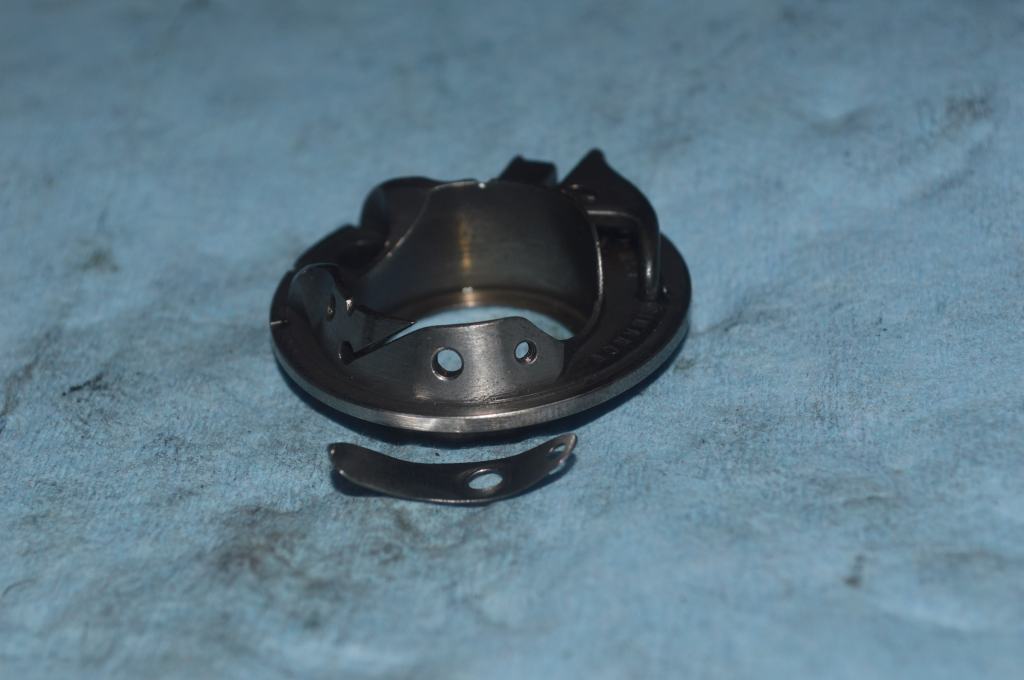
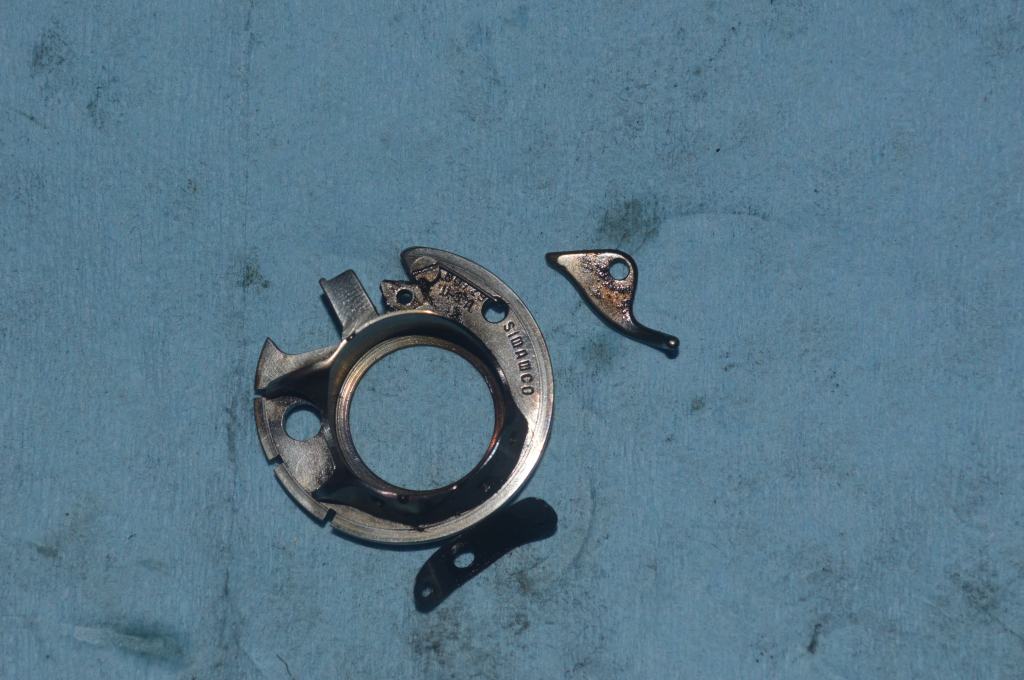
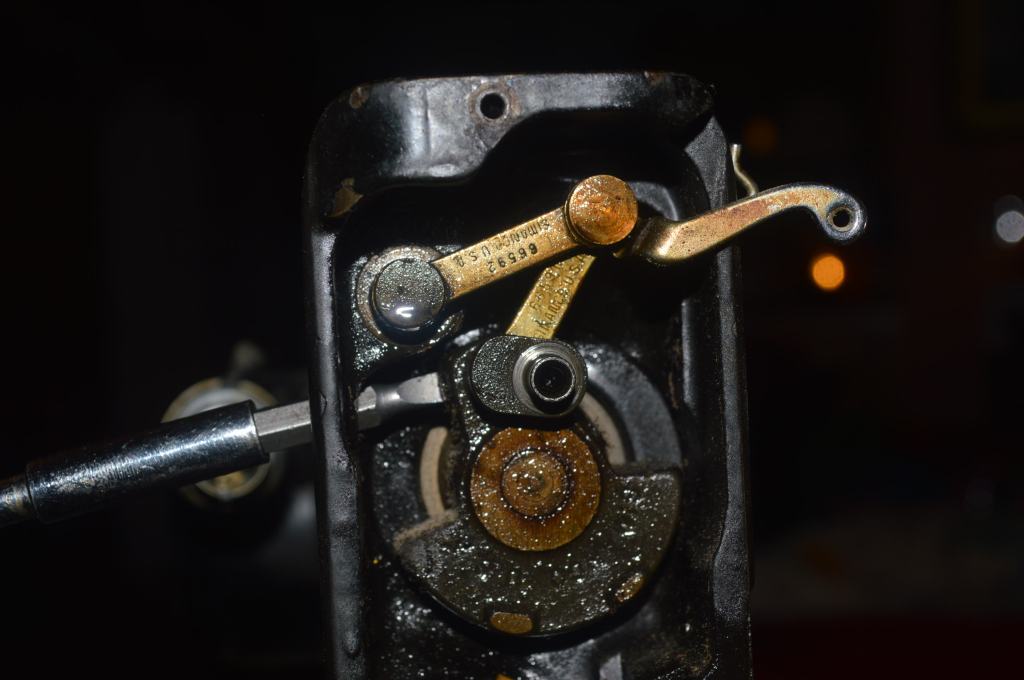
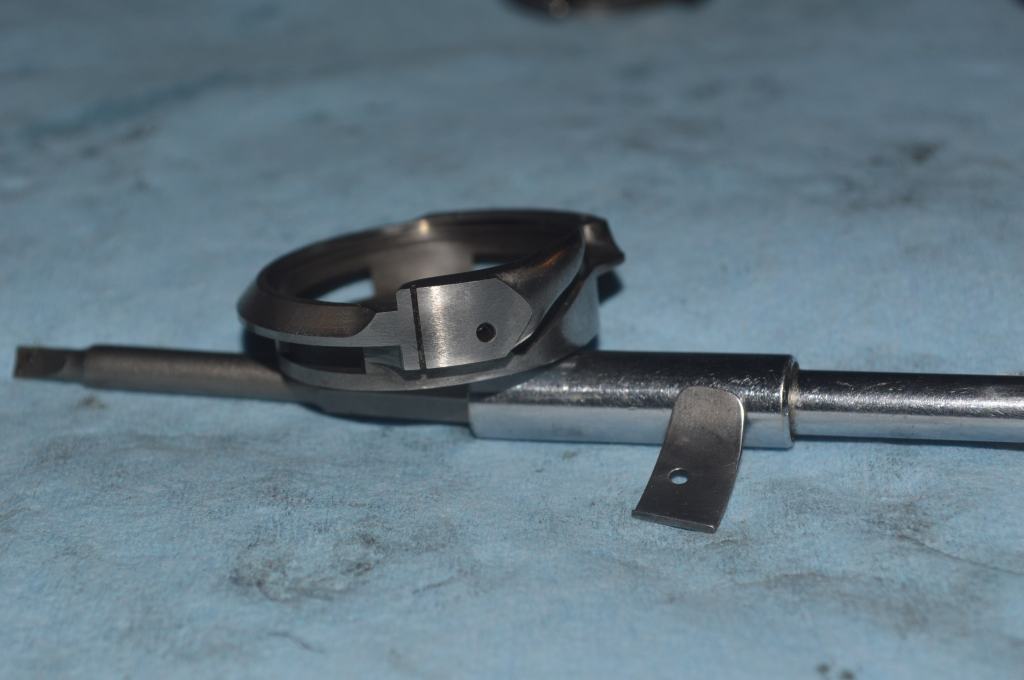
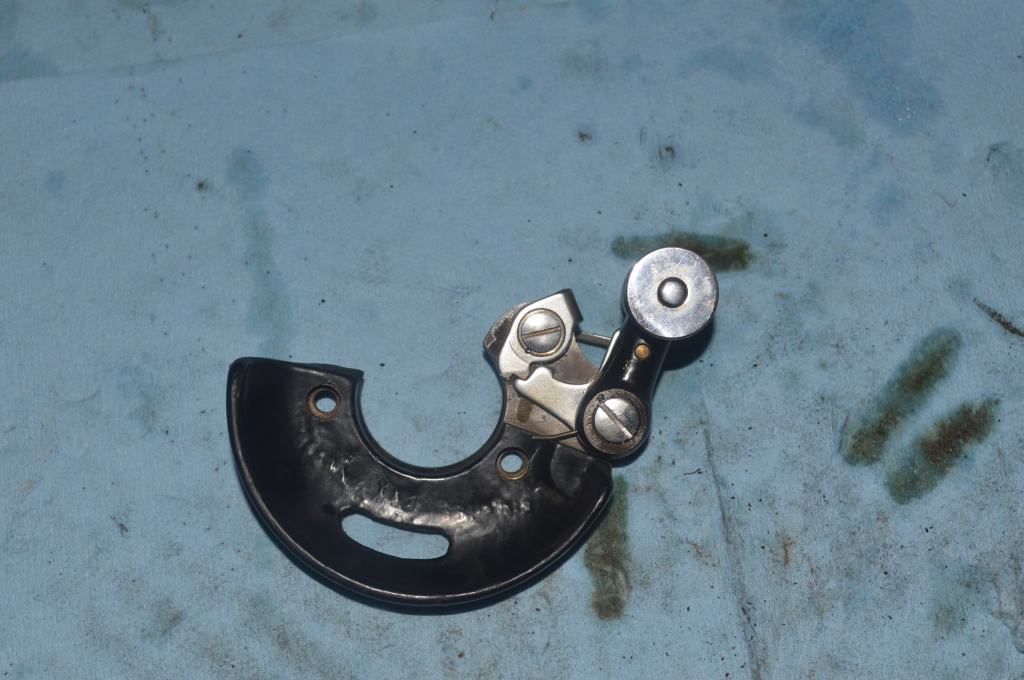
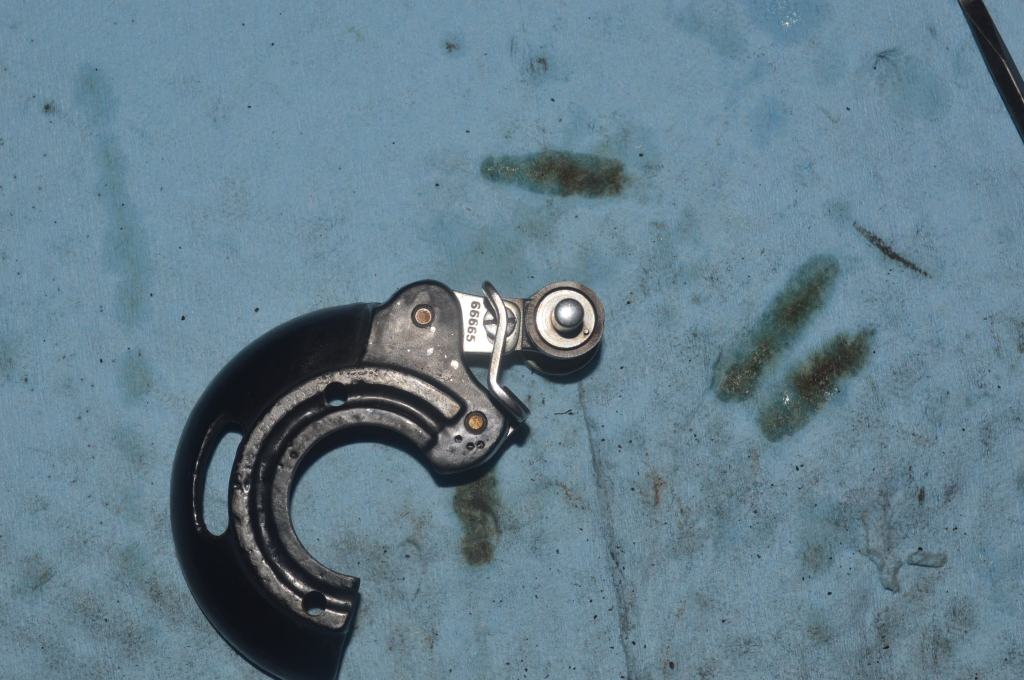
Lets take a closer look at the part below… Removing the finger to clean it revealed something about the part that would be overlooked without disassembly.

This part adjusts for thread clearance and is supposed to move by rocking slightly back and forth. The finger certainly didn’t move before disassembly and was frozen in place.
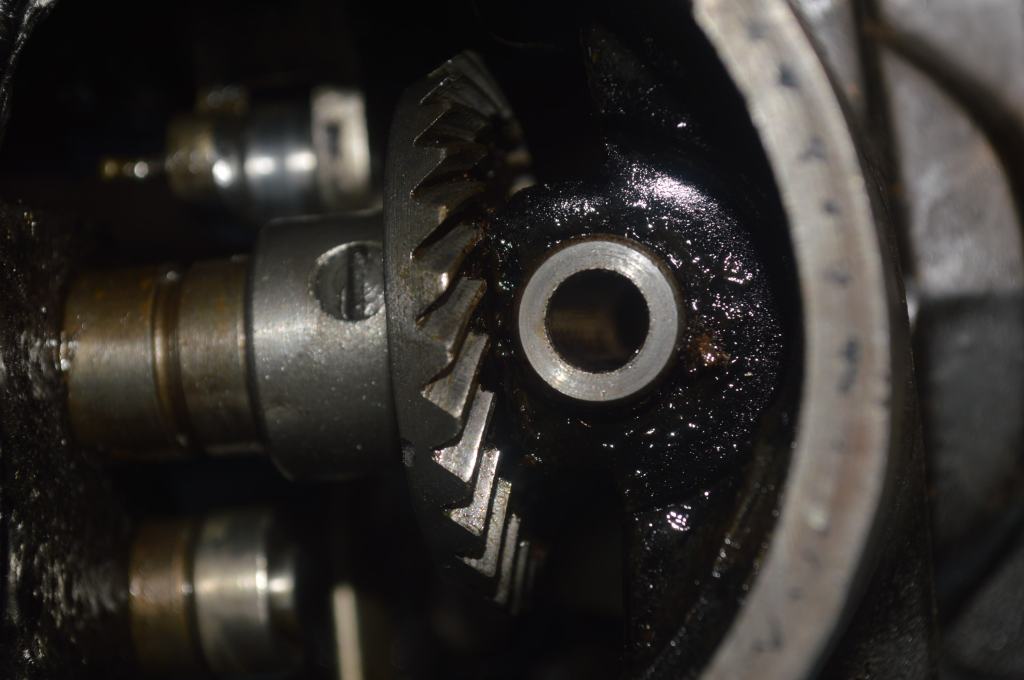
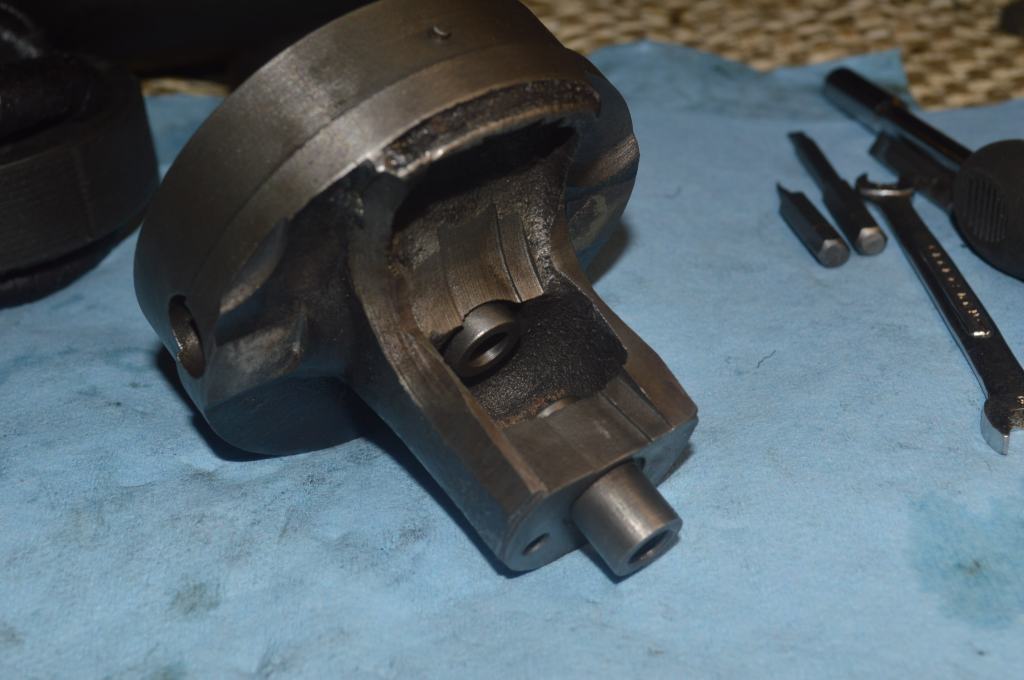
Because the 101 is a gear driven machine, the disassembly is limited because the gears should not be removed. Not only that, many of the other assemblies are tied to the hook gear shaft. Because of interference with the body of the machine, they can’t be removed either. Disassembly is by far the best and easiest way to remove old oil varnish in places where parts contact each other, but it is not the only way… unfortunately for me, I must use an alternate method.
The objective is to remove old oil varnish from in between parts that contact and move or rotate against one another. Without disassembling the parts, a solvent must be used to dissolve the oil varnish in place and then it must be flushed out with a solvent penetrant (I use WD40). Finally, the WD40 must be flushed out with sewing machine oil. Compressed air is essential in these steps and the machine must be turned by hand while doing it… so that’s what I did. It takes a long time to do it this way but it’s what the sewing machine needs. The gears and all of the linkages are cleaned in the process. Actually, it’s not all that different from what Singer recommended to free up a stuck or sluggish machine. They advise using a few drops of kerosene at each oiling point followed by running the machine for a minute or so to dissolve the old oil and then use sewing machine oil to re-establish proper lubrication.

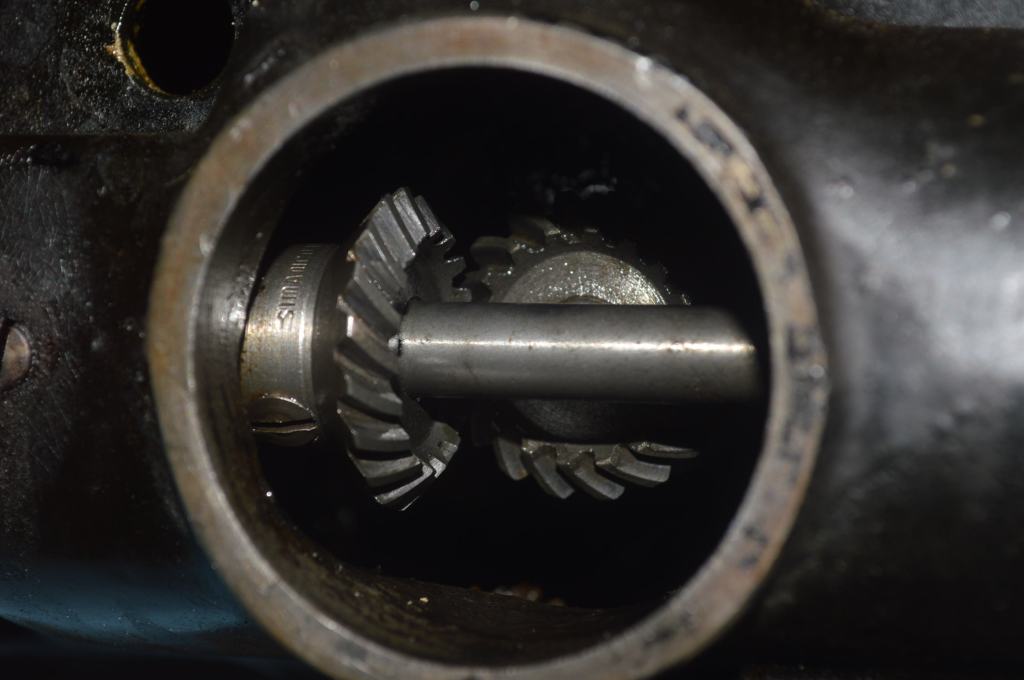
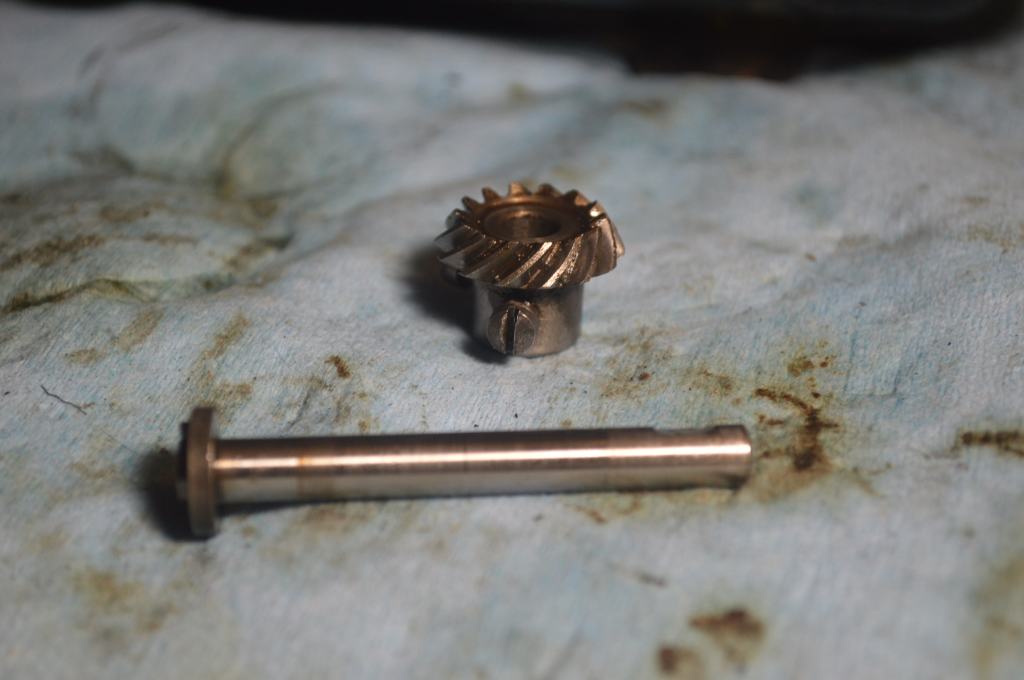
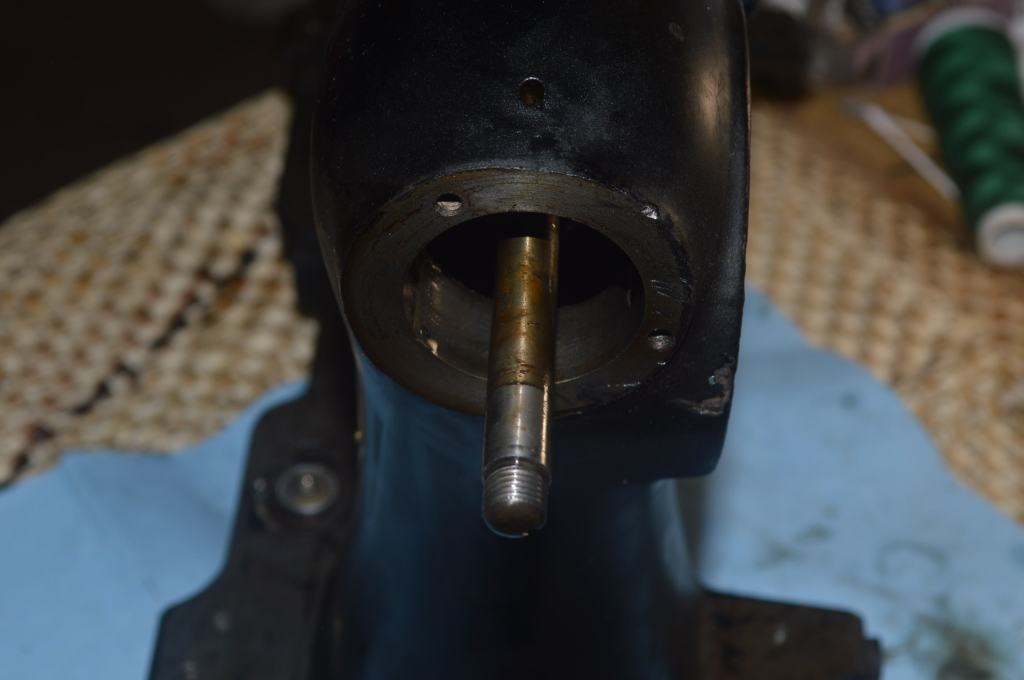
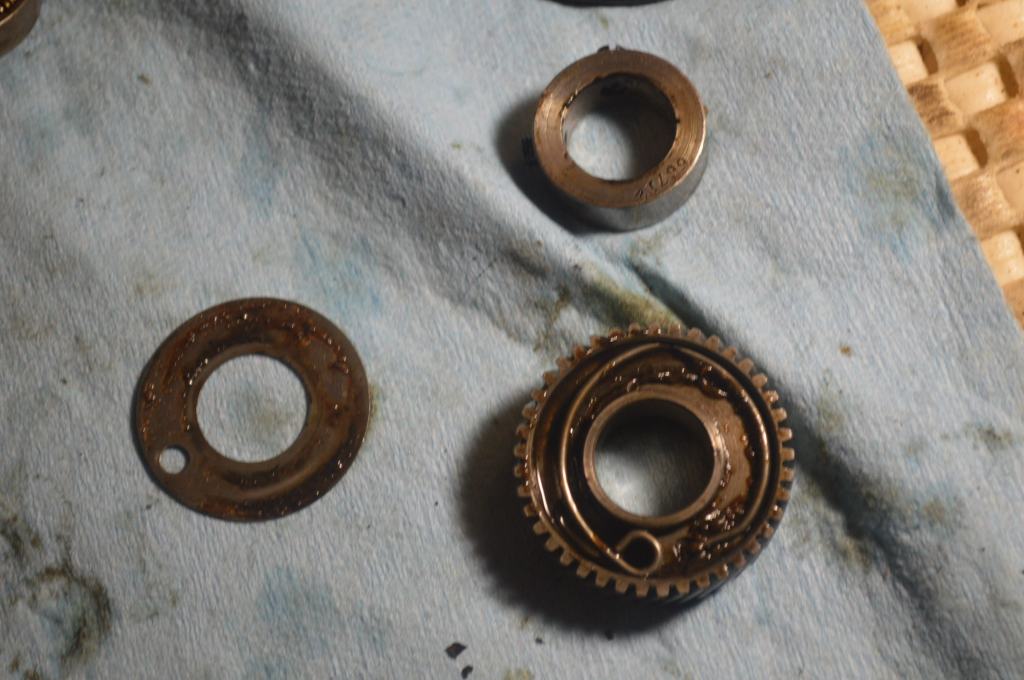
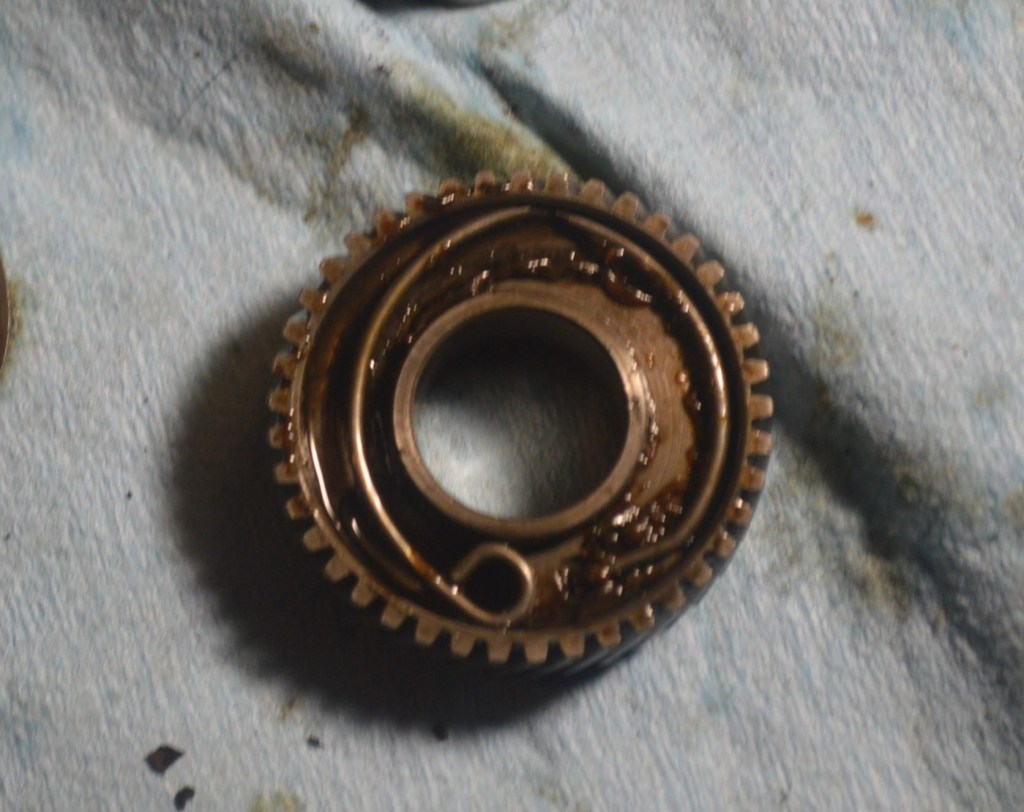
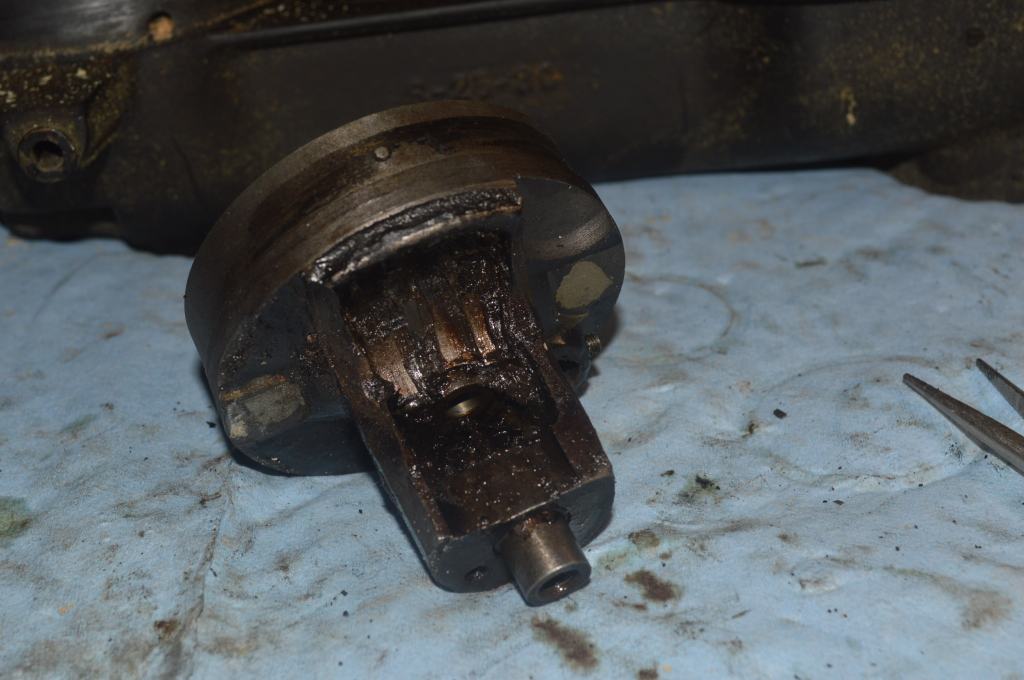
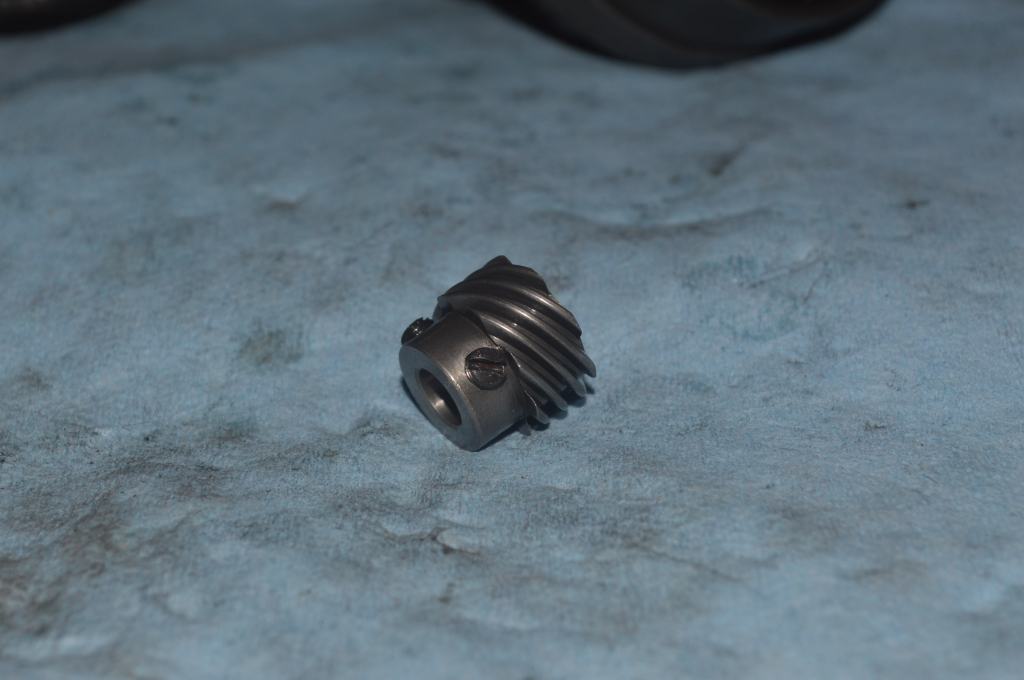
There is one gear that I will remove from the machine for a good reason. The bobbin hook shaft needs to be removed and polished. It has a long shaft that runs in a long bore and oil varnish inevitably builds up on the shaft. There is a lot of surface area for oil varnish to affect smoothness. Before removing the bobbin hook shaft, a reference mark is scribed on both gears so they can be installed to the proper tooth, and the hook shaft is scribed to index the shaft to the bobbin hook gear.
The gear is removed along with the hook shaft so the shaft can be polished.
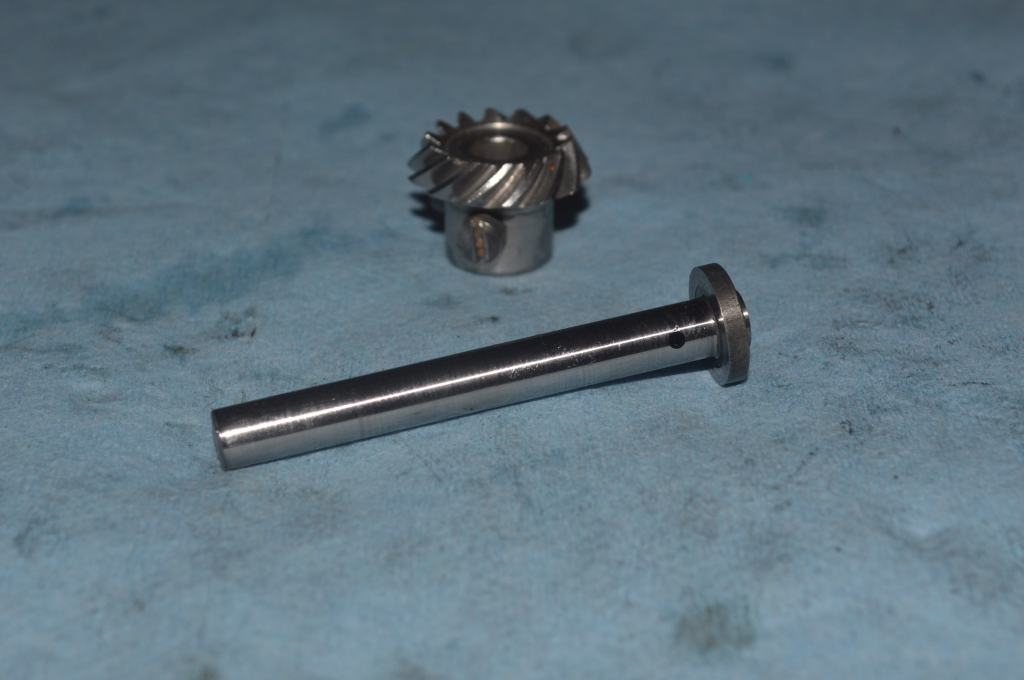
Actually, cleaning the assemblies in place removed much of the varnish, but now it is as smooth as it was when new.
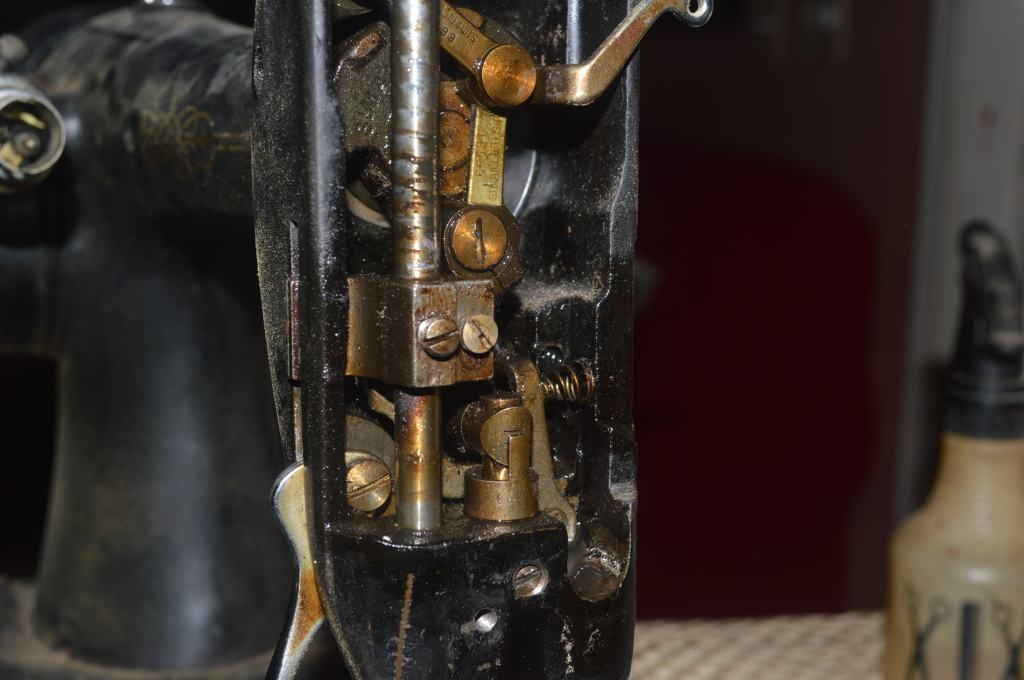
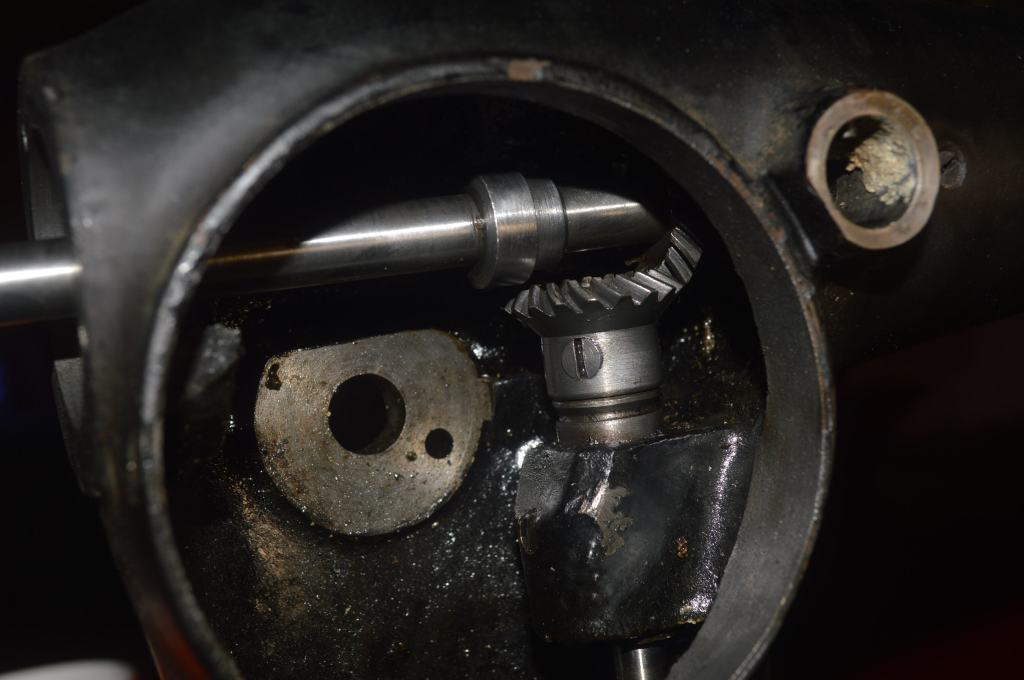
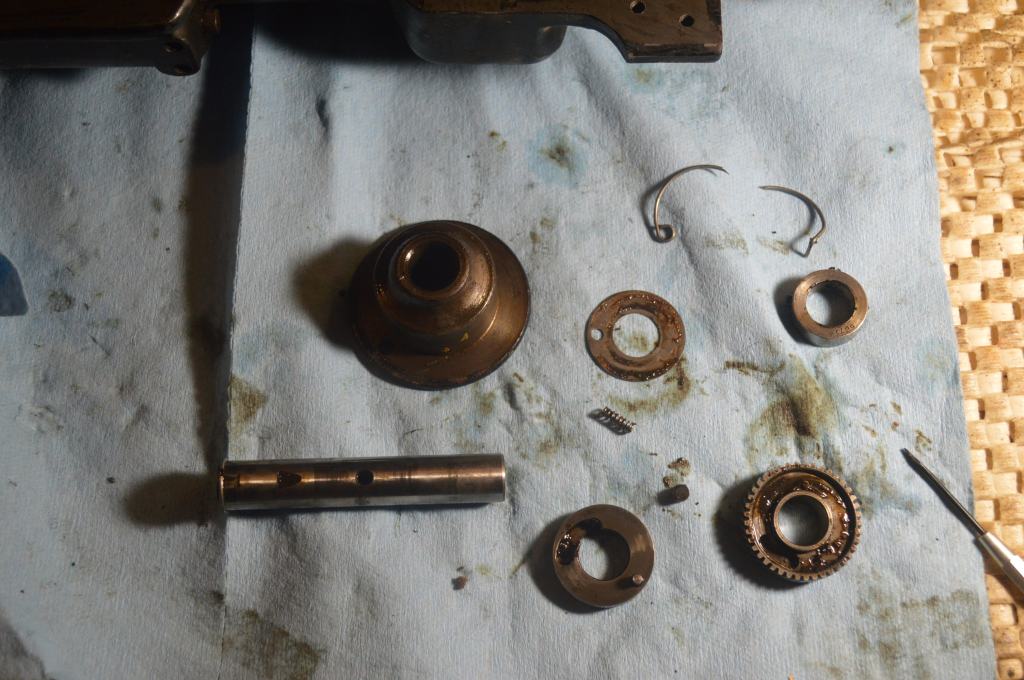
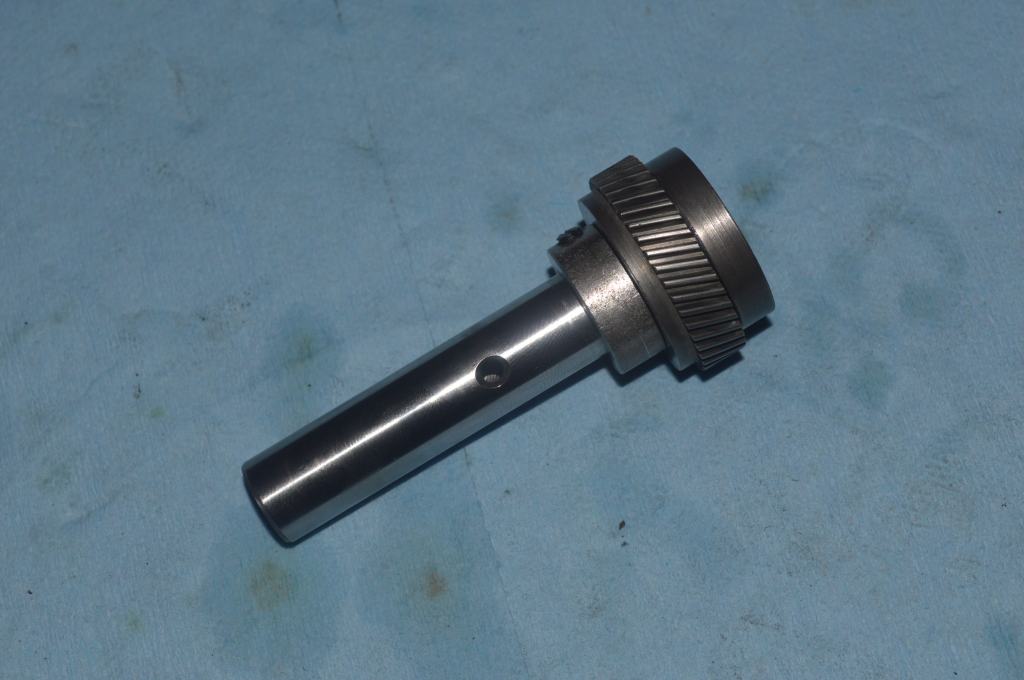
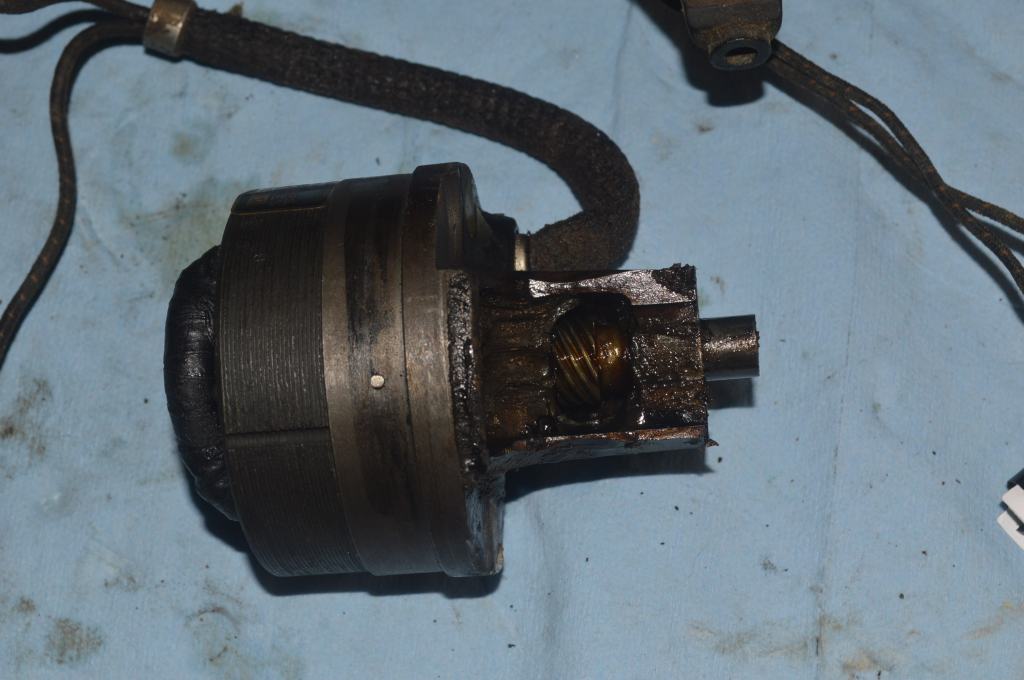
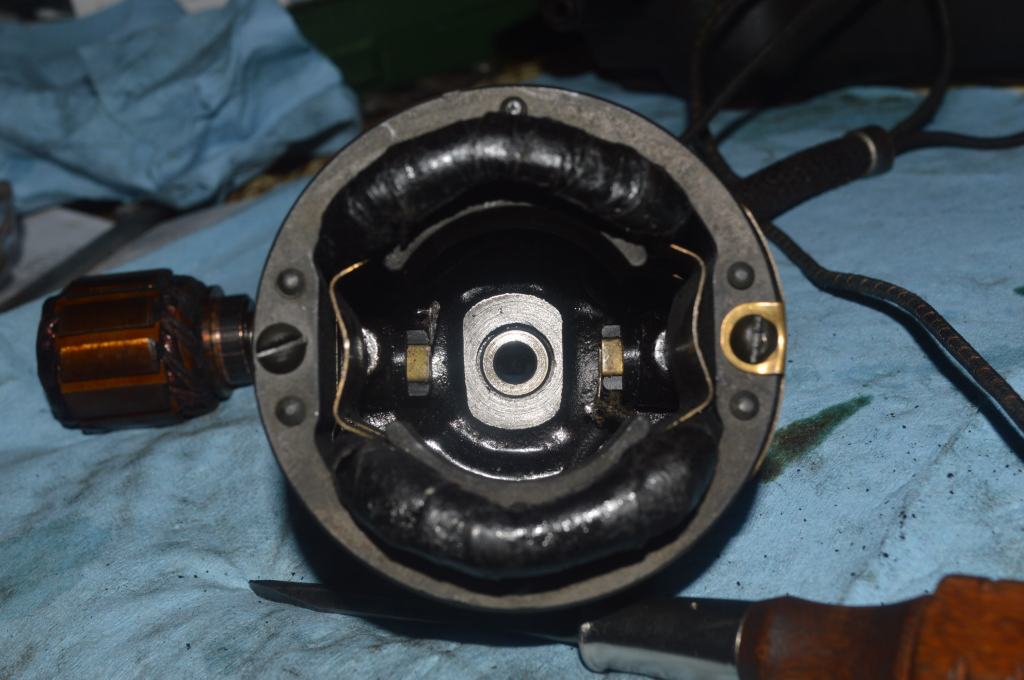
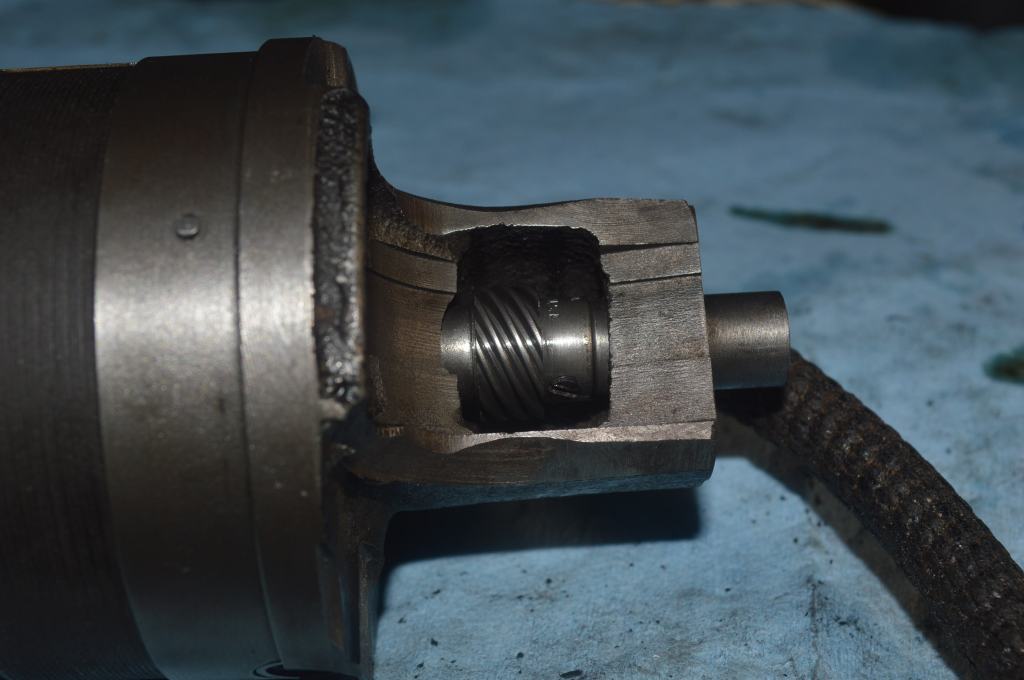
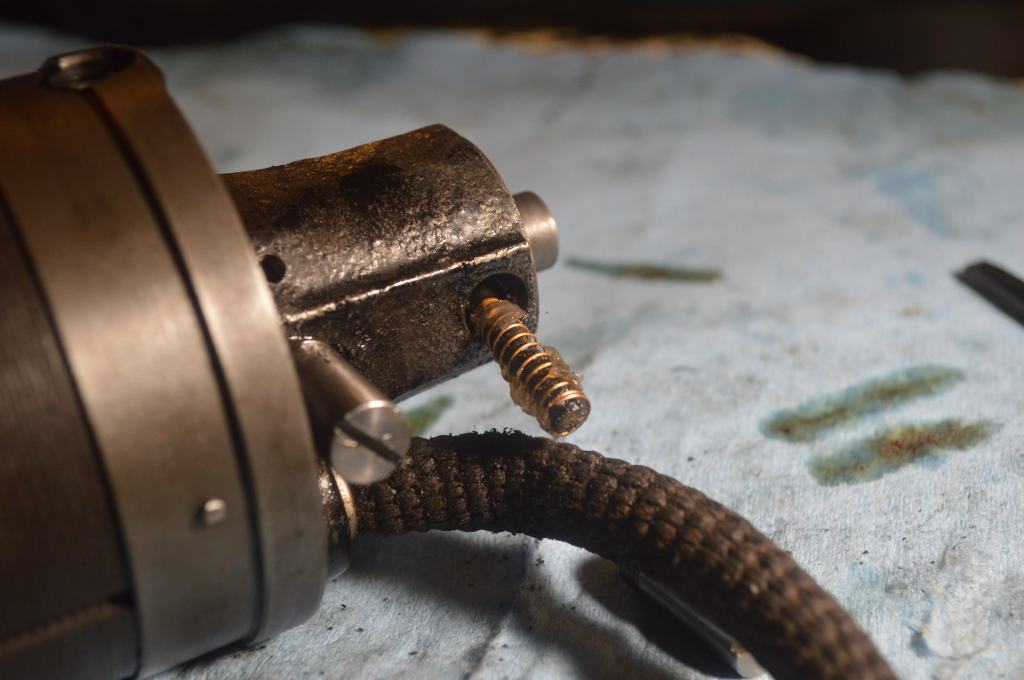
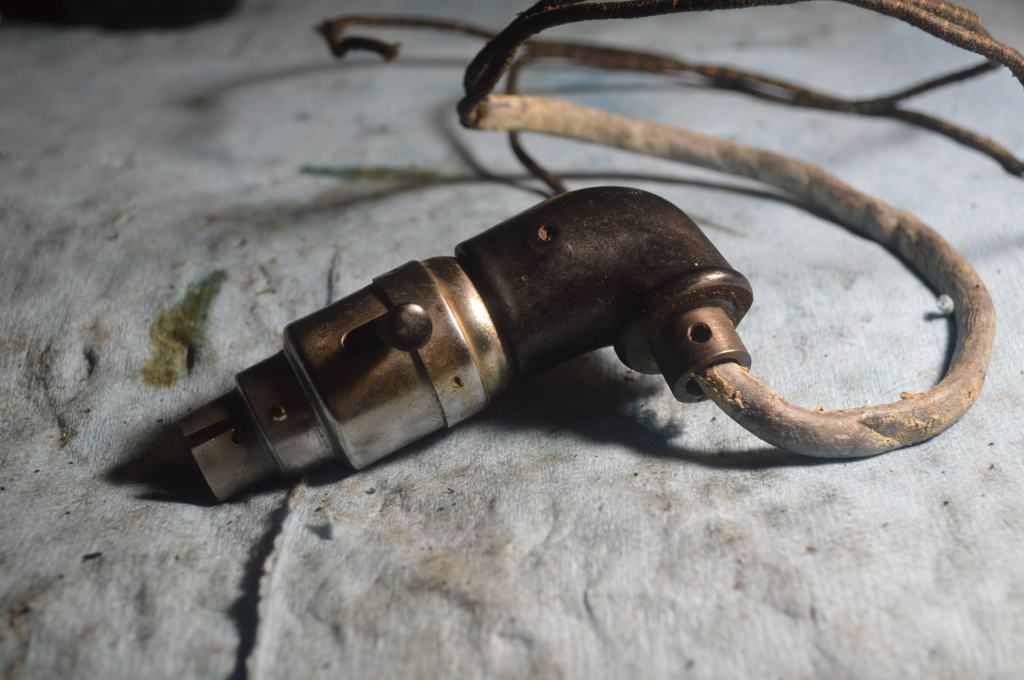
The model 101 was introduced as an electric machine. The potted motor turned a spiral gear on a shaft that engaged the drive mechanism through a clutch. This assembly is not found on any other machine. For this reason, I isolated this assembly and disassembled it separately from the other parts in the machine.

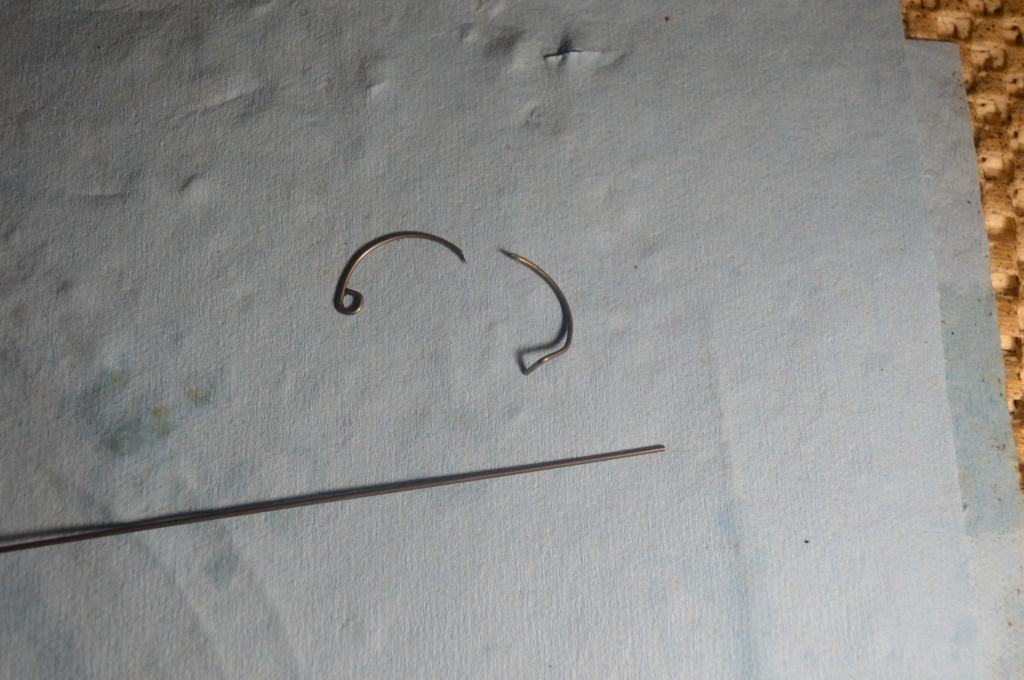
After disassembly, I found a broken spring in the clutch mechanism. This is a common problem with the 101 and I read about it when researching the machine. Obviously, the machine will not run properly without it.
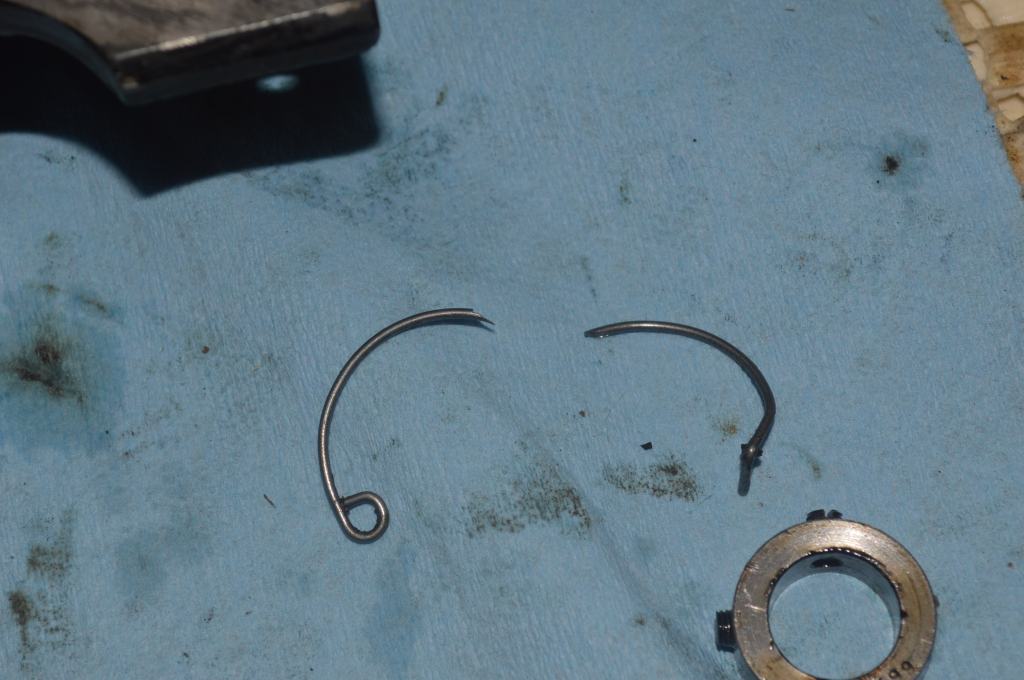
The problem with machines like the 101 is that replacement parts are scarce. The age of the machine and it’s low production numbers make replacement parts hard to find. There is no chance of finding a new replacement and the fact that this spring is buried in an obscure clutch assembly means that either this restoration ends here, or a replacement spring must be fabricated.
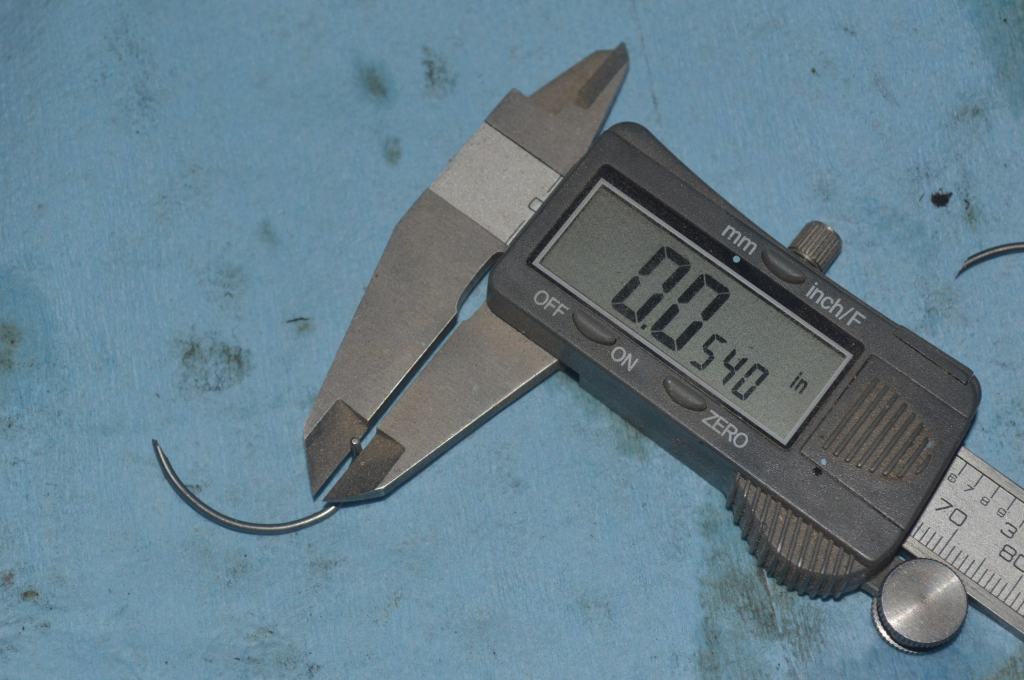
I’m not stopping the restoration and making this spring should not pose a problem. The wire diameter falls into the category of small spring grade steel wire. The diameter of the broken spring is 0.054 inches and I ordered a compatible spring grade wire of 0.055 inches to make the replacement spring.
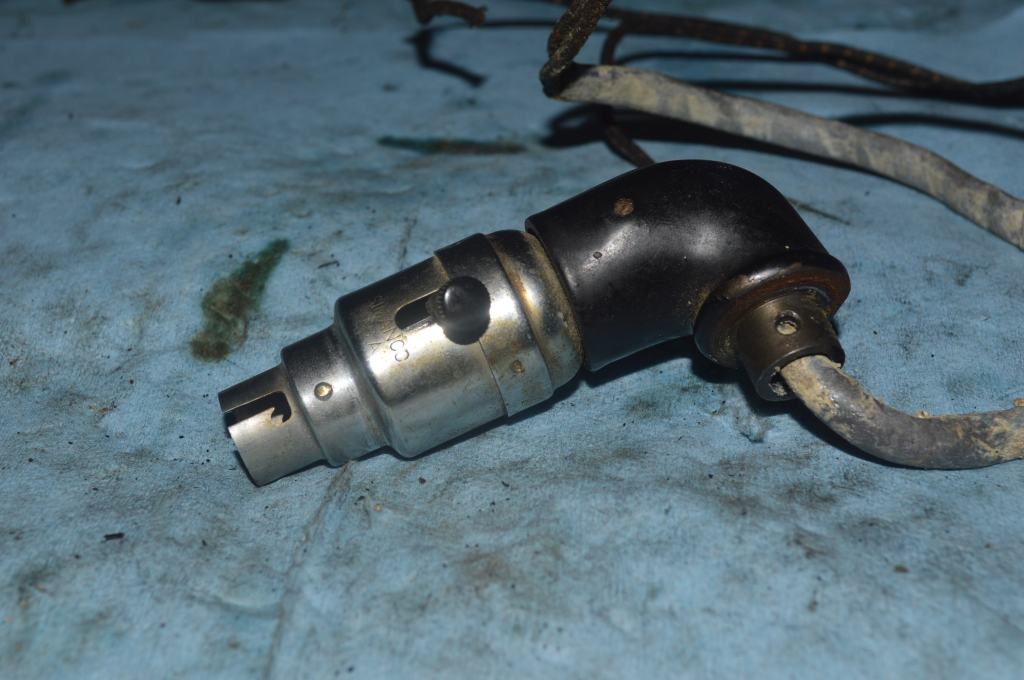
While waiting for the wire to come in, the restoration continues and the other clutch drive parts are cleaned and polished. Because they are intended to operate as a clutch, they need to be as smooth as possible. The easiest way to polish these parts is by using a vibratory tumbler with a walnut shell polishing media. This polishes small and tight places I couldn’t otherwise get to.
Before 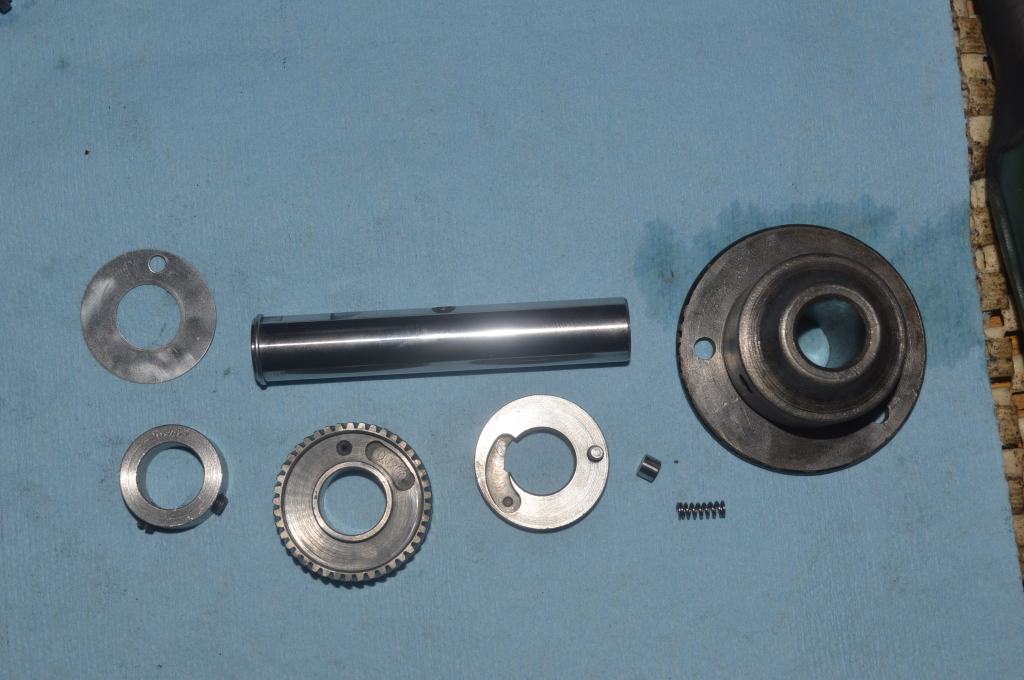
After 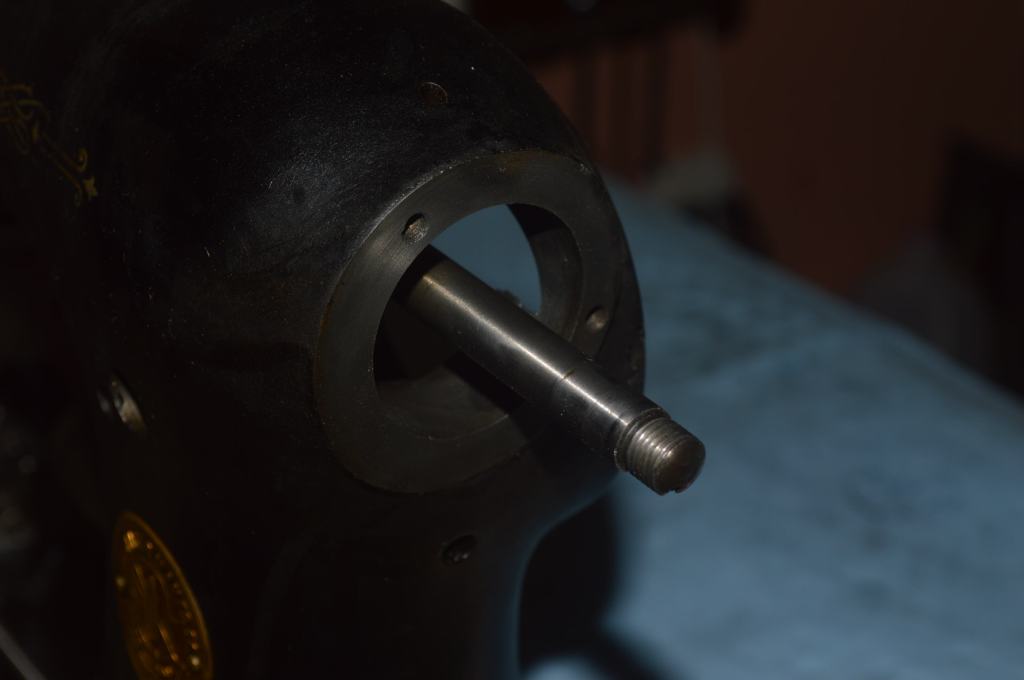
Well, a week later the spring wire arrived and a replacement spring was made using the old broken spring as a template.

New spring 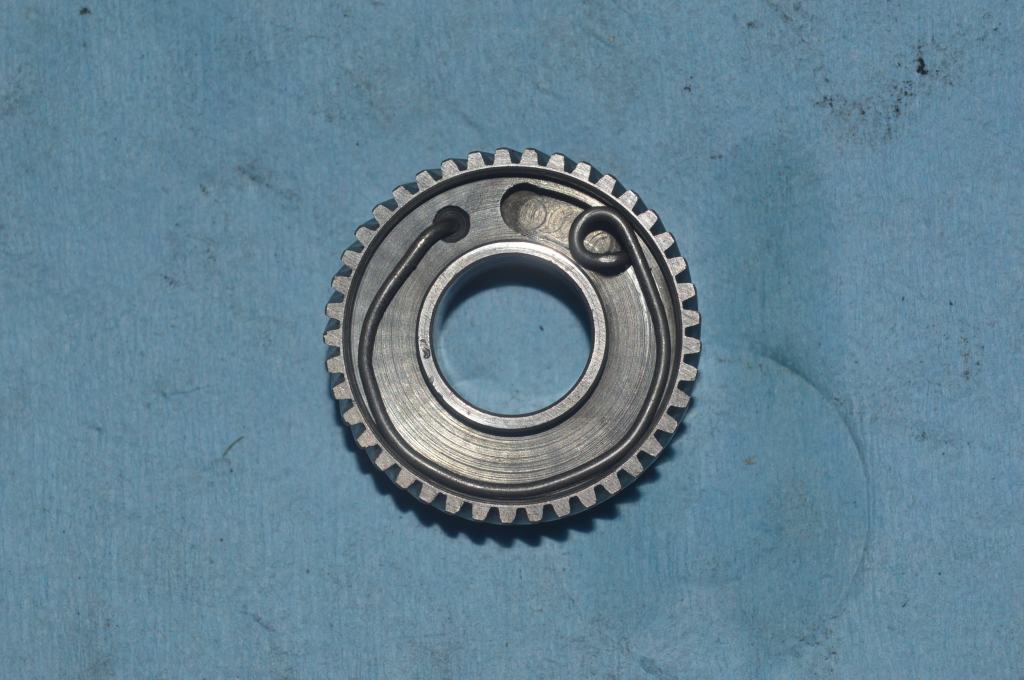
The assembly is reassembled with Singer lubricant and tested to make sure it works as it should.
There are still a few things to disassemble and restore and the next part of the process will be the motor restoration.
The model 101 potted motor is amenable to restoration but it needs to be completely disassembled to get the motor case clean. There are grease ports that are commonly found plugged with old grease so I soak the motor case in kerosene and use compressed air to remove any old vestiges of old grease. To isolate the motor case, the field coil is removed. The brush tube wires are de-soldered to remove the field coil and the brush tubes are removed from the motor case. Now the motor disassembly is complete, the component parts are restored. The armature and armature shafts are polished, the shaft bores are cleaned with a round brass bristle brush, and the brushes are reconditioned. Oftentimes, the wires are cracked and need to be replaced. In the case of this motor, the wires are supple and in very good condition. This grade of wire is cloth wrapped for abrasion resistance and can’t be replaced with the same grade of wire available today so I have elected to reuse these wires.
This is the motor disassembled before it is cleaned and restored.
Spiral gear and armature removed 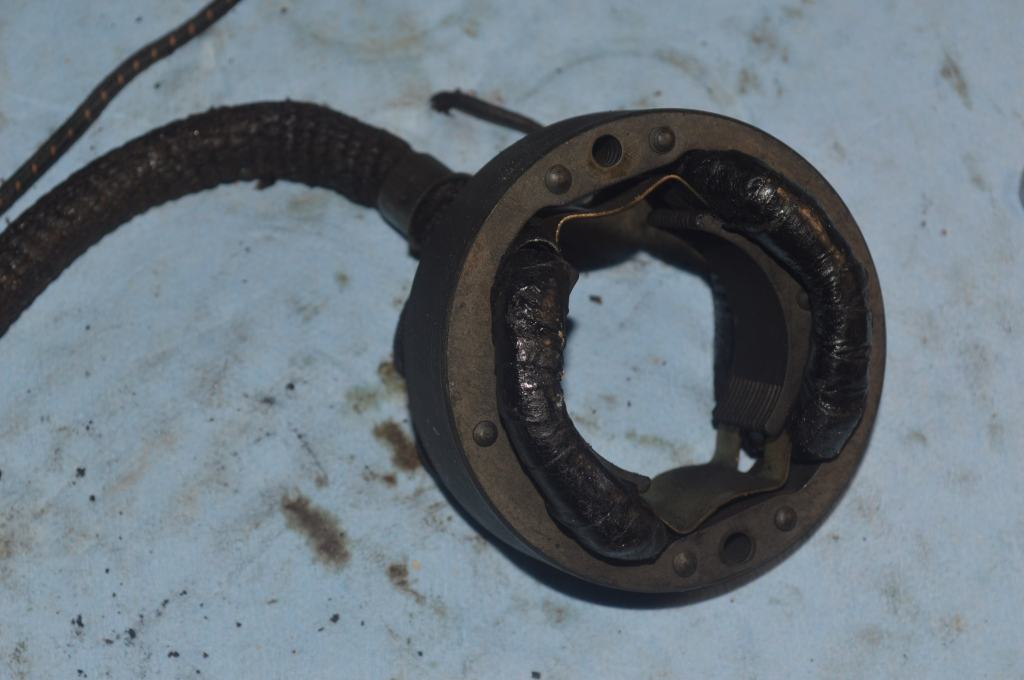
Field coil removed 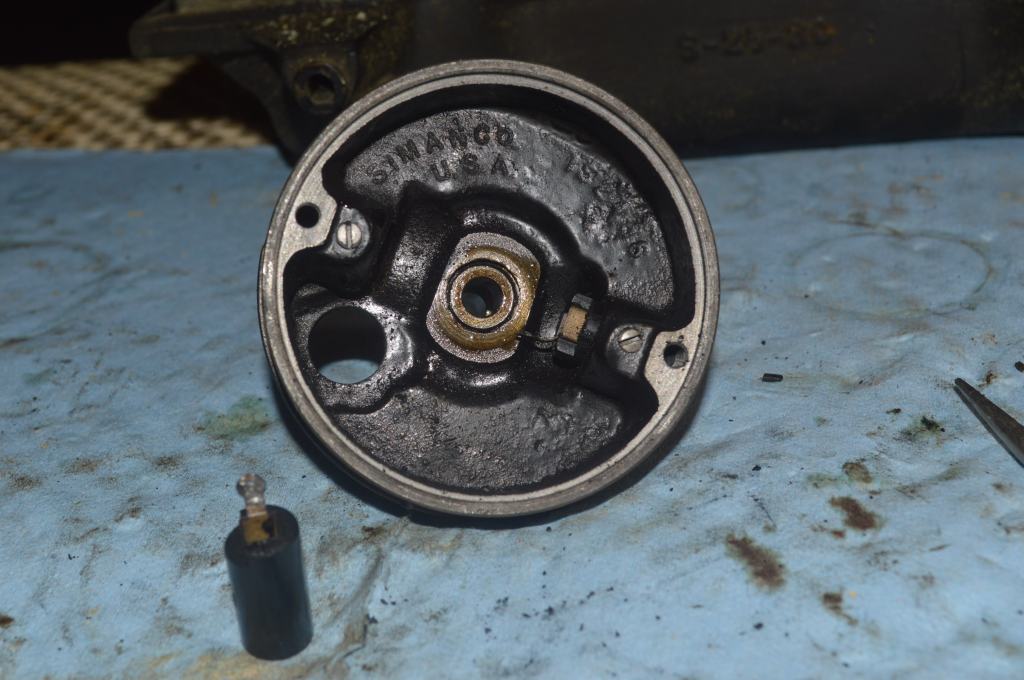
Brush tubes removed 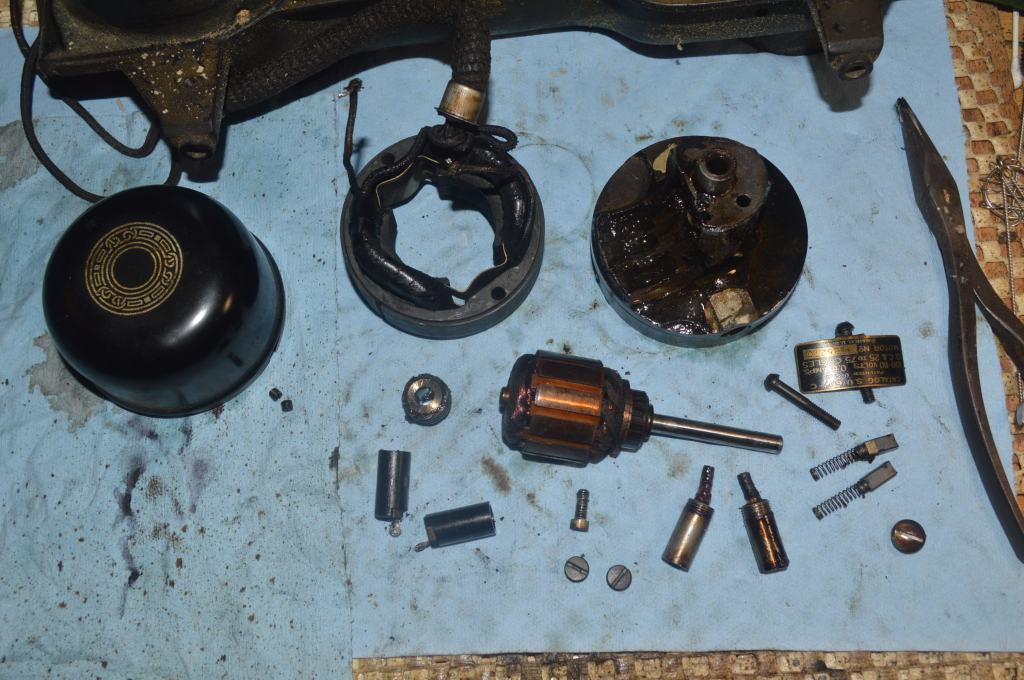
Parts before cleaning 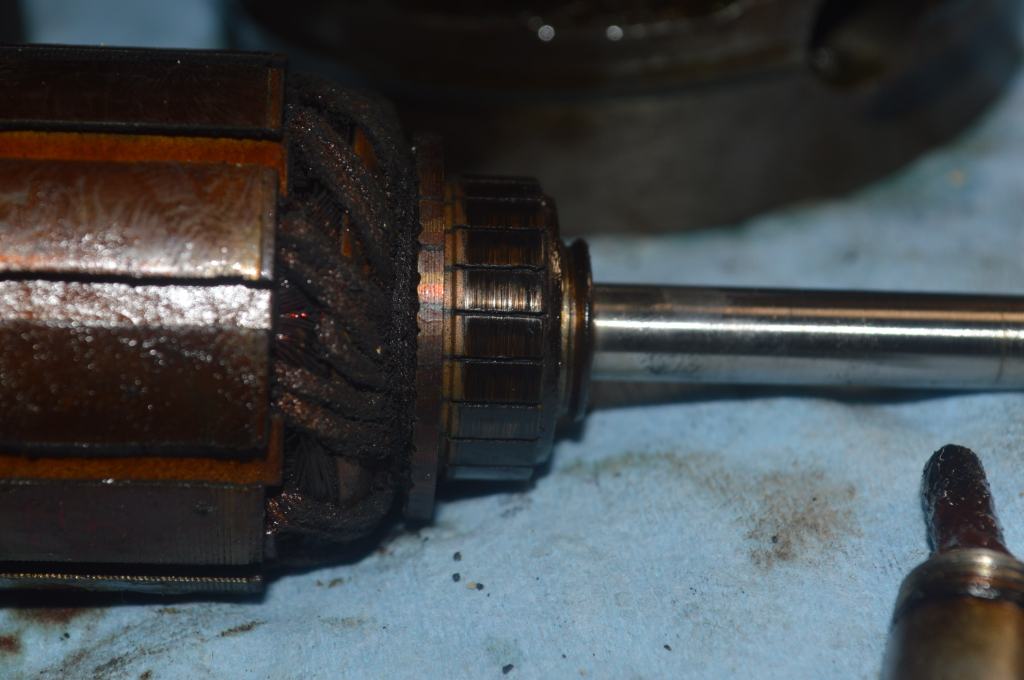
Armature before polishing 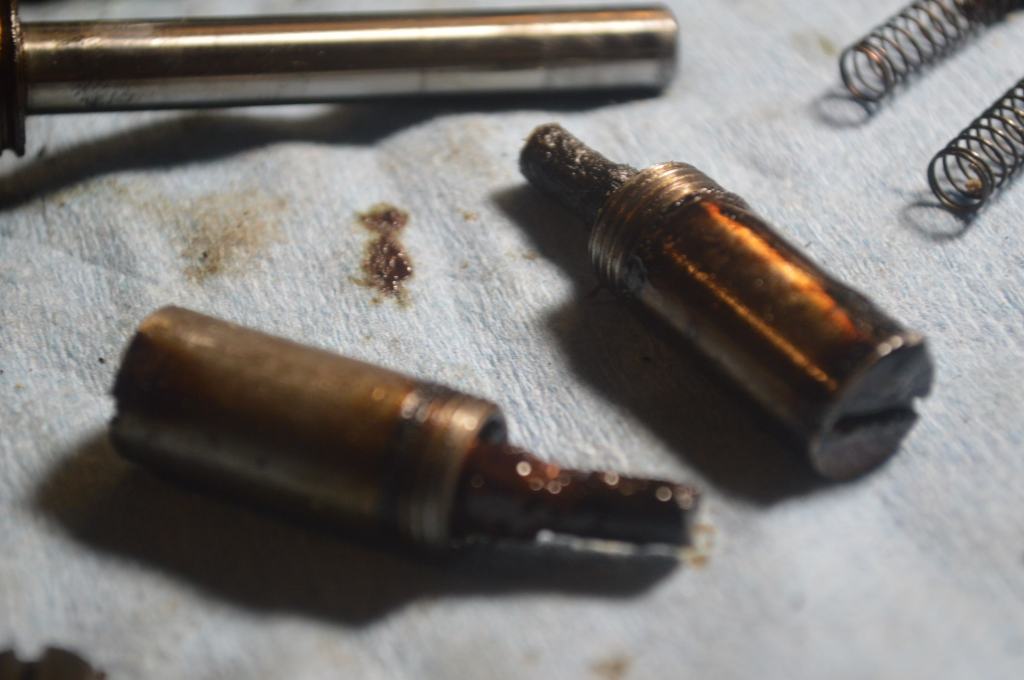
Wick tubes before cleaning 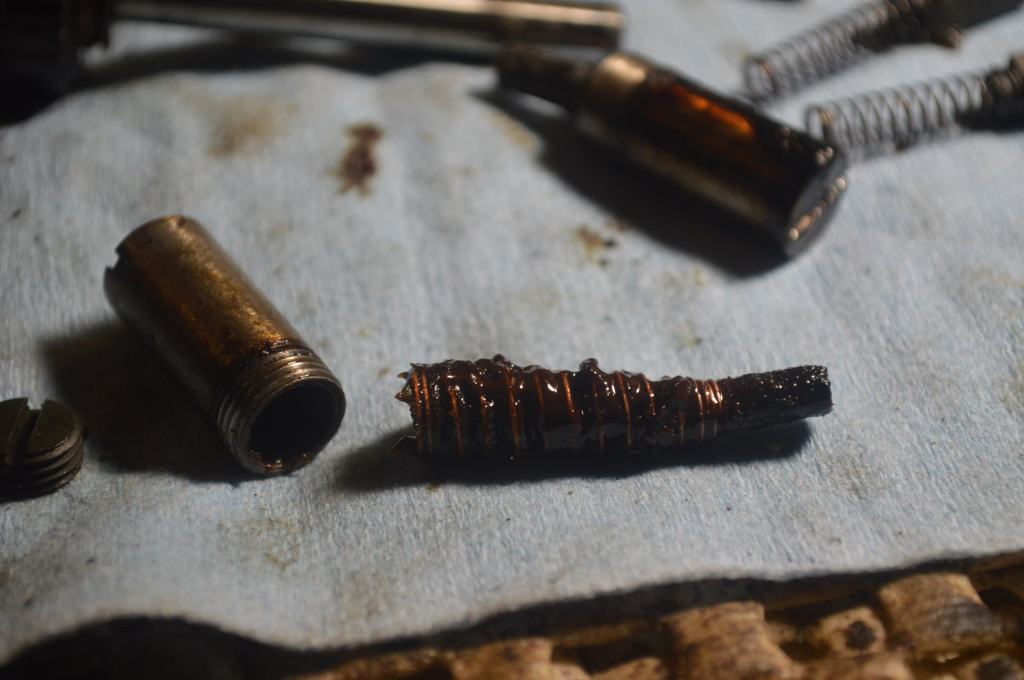
Grease wicks before cleaning
The motor case and spiral gear is cleaned.
The commutator and armature shaft is polished.
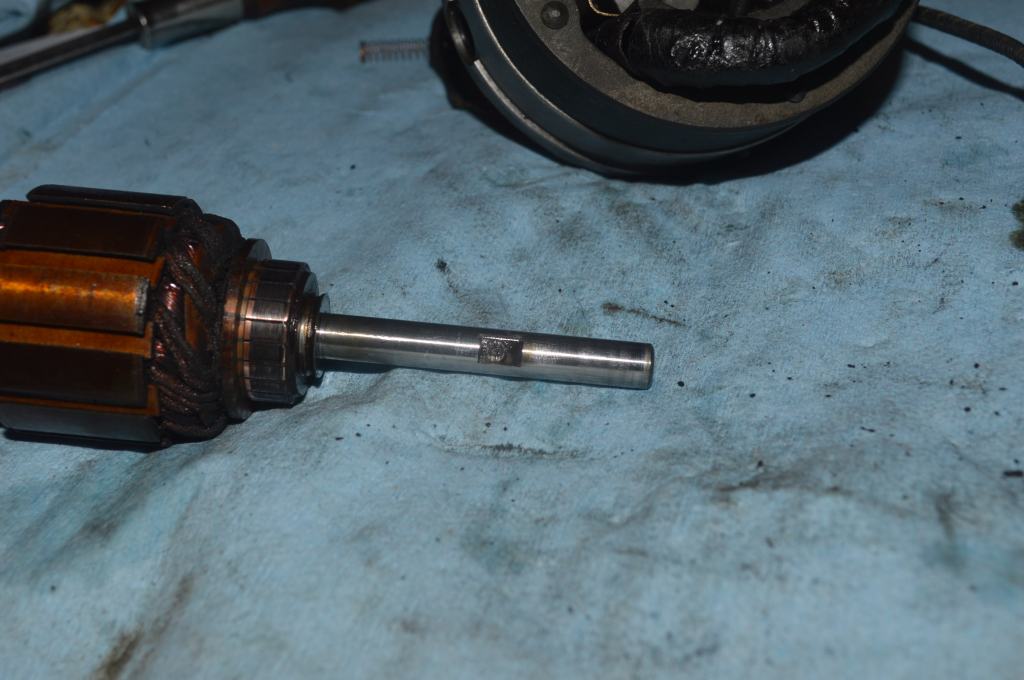
Before 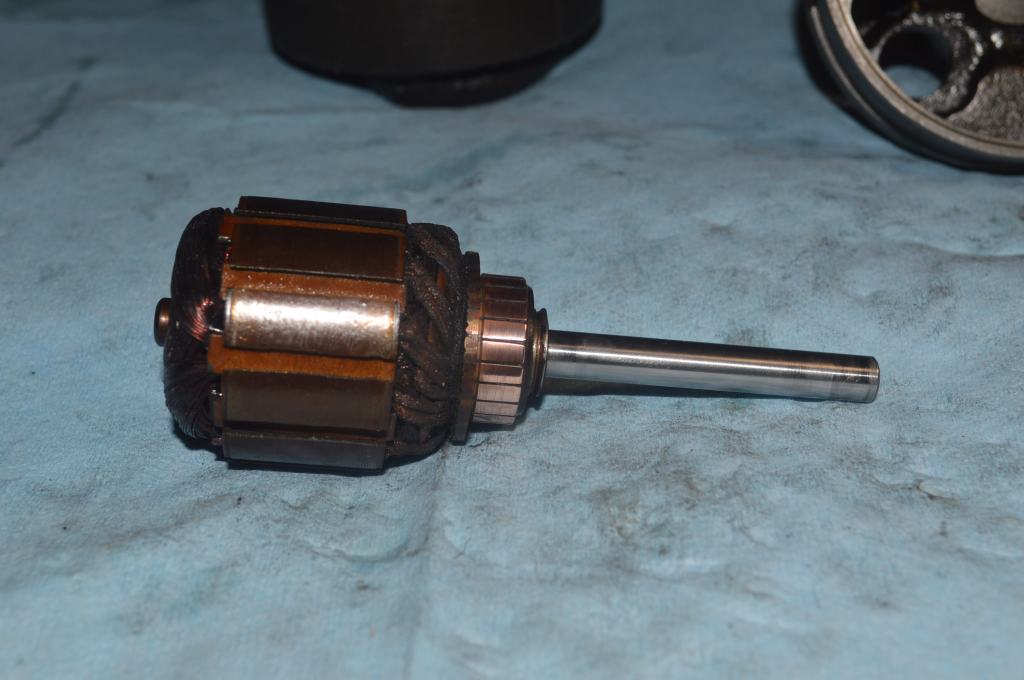
After
The brush tubes are reinstalled and the brush wires are re-soldered to the brush tubes. The field coil is reinstalled and the armature and spiral gear are reinstalled in the motor case.
The brushes are reconditioned before reinstalling in the motor case.
The grease wicks and grease tubes are cleaned. The wicks are recharged with grease, and the tubes are refilled with grease.

The cap is cleaned and put back on the motor case.

The motor is run at full speed for a few minutes (until warm) to seat the reassembled parts. The motor runs quiet and delivers good power. With this step, the motor restoration is finished.
There are just a few smaller assemblies to be done. Next, the bobbin winder assembly is disassembled.
The parts are laid out and cleaned.

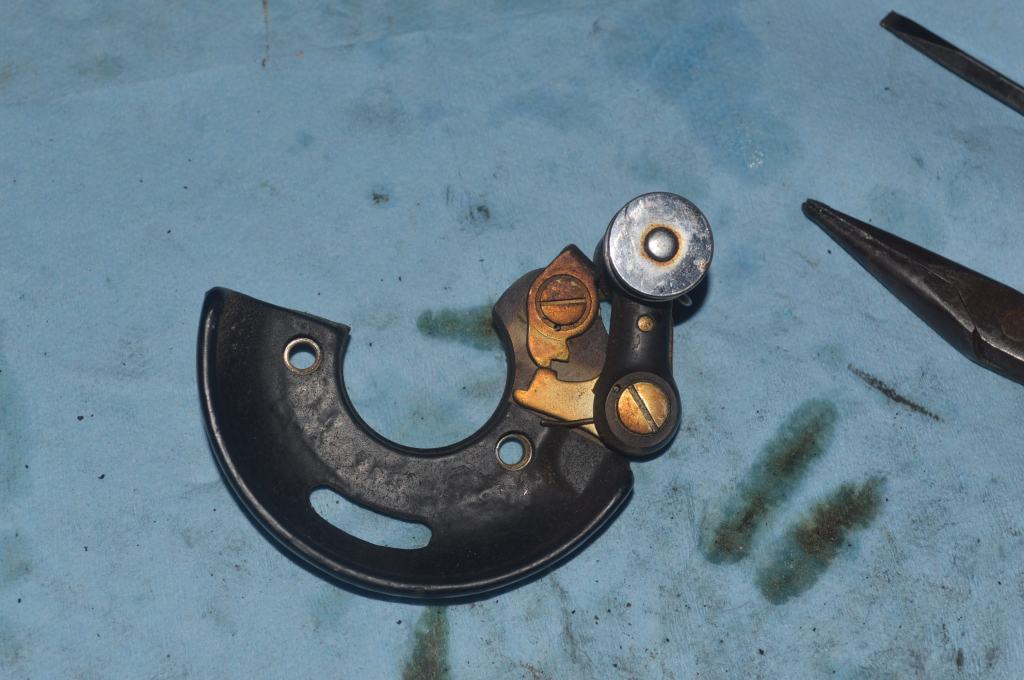
Now, the tension assembly is disassembled and cleaned.

I think that’s it… did I miss anything? So, with all of the gears, assemblies, and parts cleaned, the machine is ready for reassembly… But not before the cosmetic restoration is done.
Cosmetic Restoration
Overall, the paint is dull but intact. The decals are not bad, but there is some silvering. This machine would be a decent candidate for an original finish restoration (paint chip repair, cleaning, and top coating with new shellac), but I have decided to repaint and re-decal it. I want this machine to look like new. The restoration decals available for the 101 look great and the new finish will result in a beautiful machine.
I don’t intend to strip the body or cloth plate to bare metal. I will sand the decals and the old shellac off but retain as much of the original paint as possible. Because the original paint is sanded smooth but not removed, it provides a perfect base coat for the new paint. The original paint is a compatible surface for the new custom mixed black shellac based paint used for the re-paint and it will result in a beautiful deep black finish.
All of this is to prepare the machine for new waterslide decals, but there is a complication. Because the new paint finish is shellac based, it is susceptible to water staining. the same goes for the finish on any black vintage Singer sewing machine. In case you didn’t know, you must avoid exposing a vintage black Singer sewing machine to water at all costs lest the finish turn from shiny black to a cloudy white. This is where the restoration deviates from an original finish restoration.
To apply the new decals, the new paint finish needs to be impervious to water. The best choice is to spray a coat of oil based polyurethane on the machine as a substrate for the decals
I intentionally wait until this step is done before ordering the new decals… the finish will cure for a few days before the decals arrive. Still, there is much to do and in the meantime all of the plated parts are cleaned and then polished.

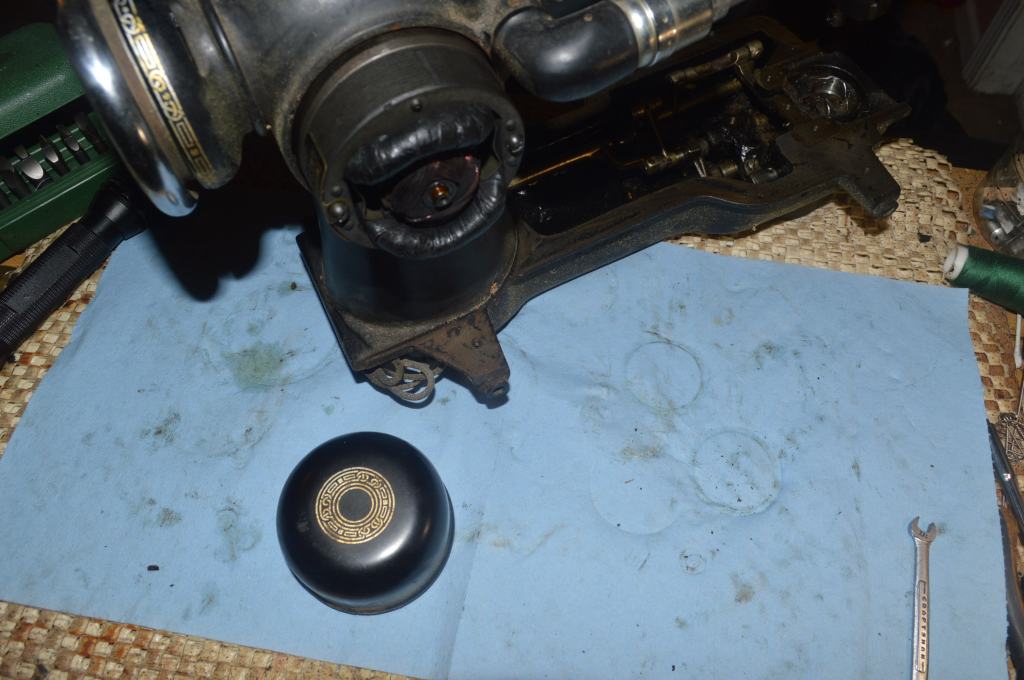
The light is cleaned and polished.


By the time the decals arrived the machine had cured for four days… plenty enough time for the polyurethane to cure. The next step is applying the decals. The decals come with a sheet that shows the placement on the machine, but it helps to have another 101 to see exactly how the decals are placed… I happen to have one!
Again, the machine is left to sit for a few days before the final coats of poly are applied. Once done, the machine is allowed to dry for four days to ensure the poly has hardened and ready to handle for reassembly.
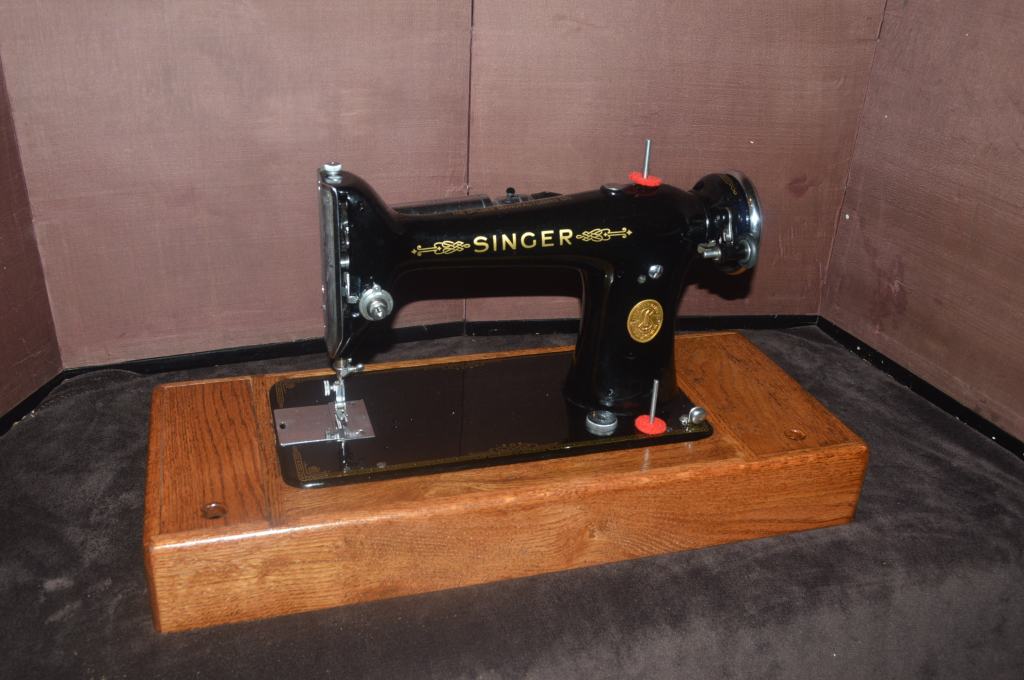
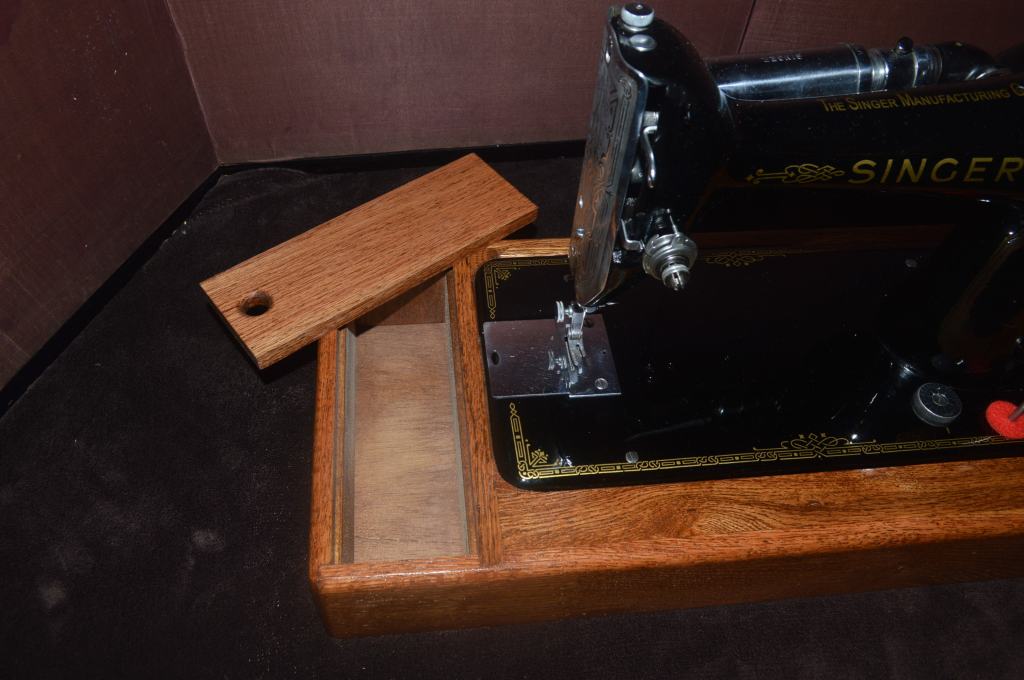
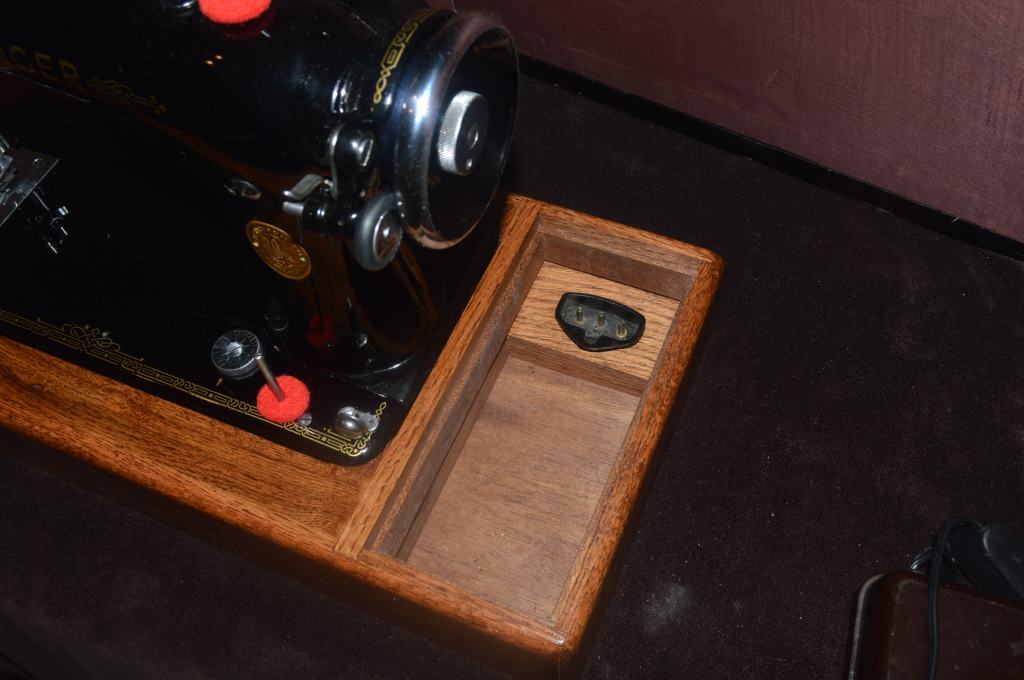
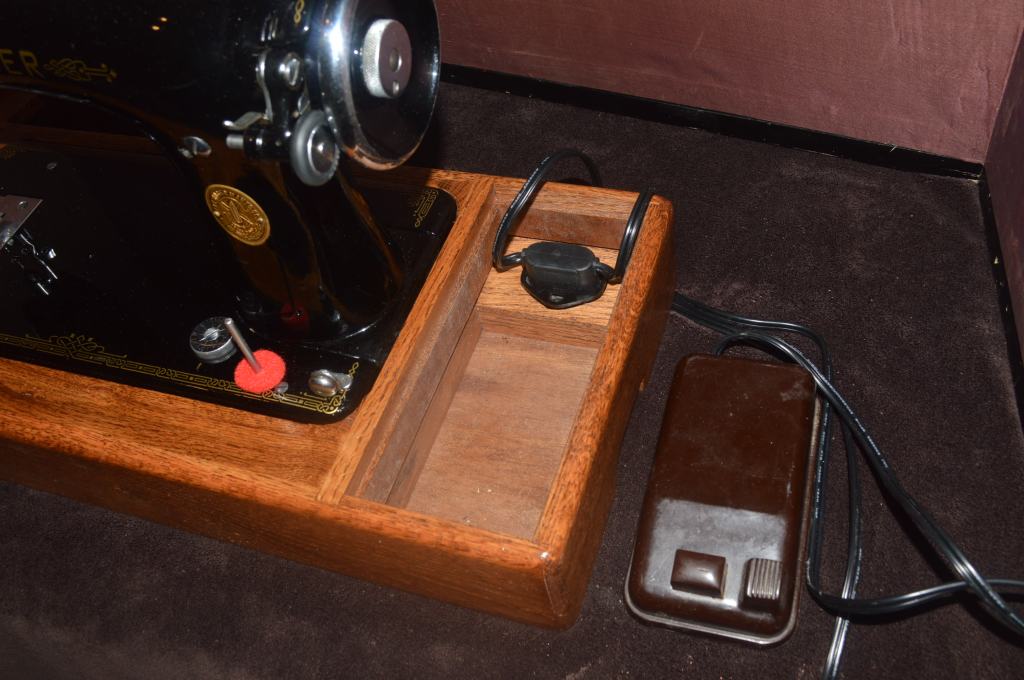
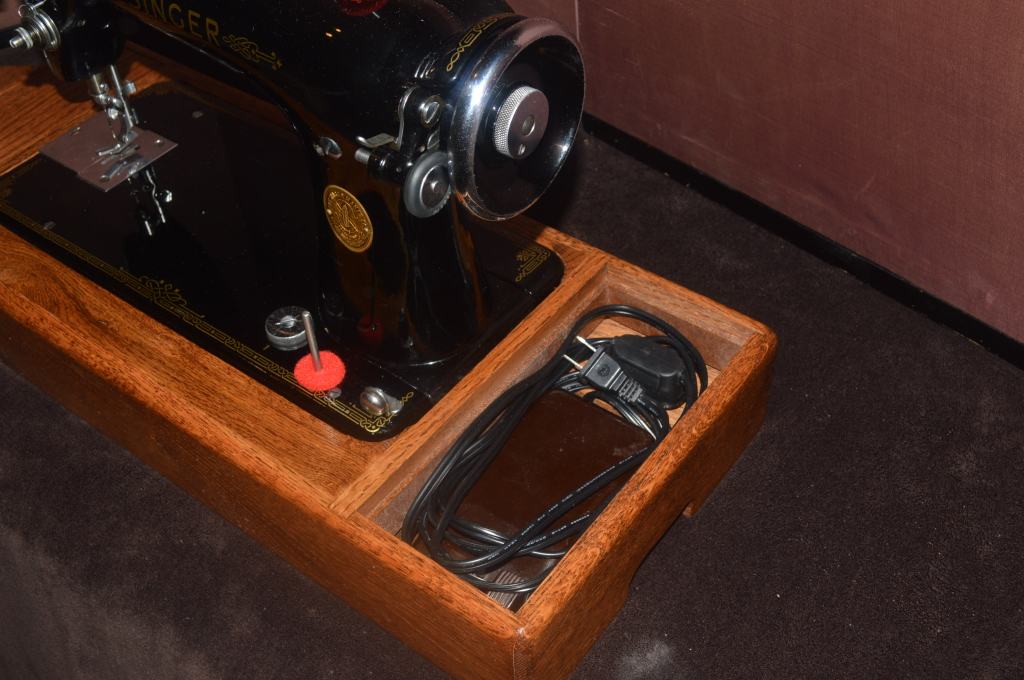
This 101 was a cabinet model. The machine did not have a foot controller nor was it wired for one. To address this, part of my restoration plan included making a base custom fit for the machine. To make the machine portable and easy to use, I incorporated a vintage Singer plug terminal into the base and sized the compartment to store the controller. The base for this machine has sufficient space to store the wires and the pedal. For convenience, the base includes additional length for a compartment in front of the machine as an extension for added fabric support. While the machine has hinge supports, tilting the machine will drain the oil from the wick pan so the base will not include hinges. Given the fact that very little maintenance is performed under the machine, this is not really a problem and it allows placement of the hinge plate at the front of the machine.
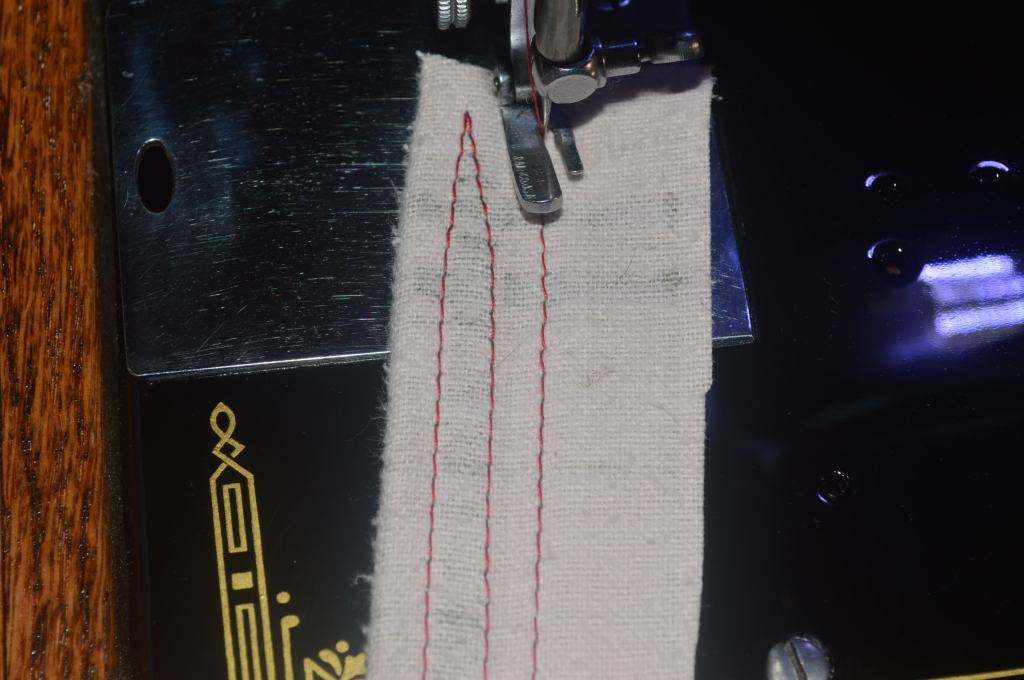
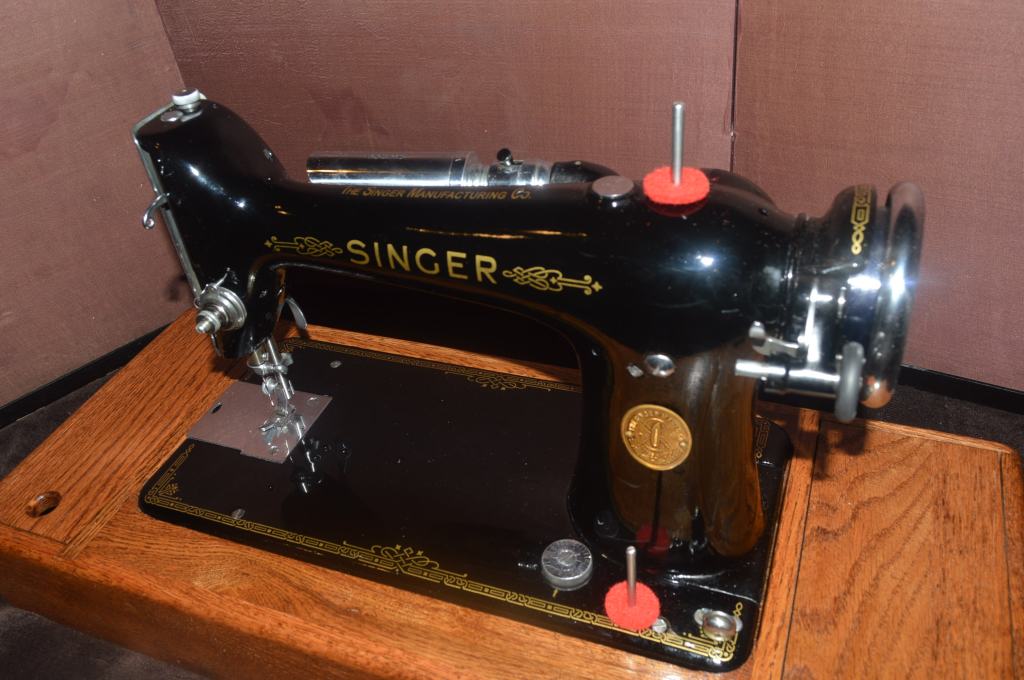
After reassembly, fitting the machine in the base, and wiring to the plug, the machine is run and adjusted. The tensions, presser foot height, needle bar height, and hook timing is set. Considering the fact that the machine was not run before the restoration began, and a spring was broken in the clutch mechanism, I can’t offer a before or after performance comparison. I can say that after the restoration, it runs smoothly, quietly, and it makes a great straight stitch. This is what I was expecting and looking forward to.
Overall, the restoration met all of my expectations. It has a great cosmetic condition and runs smooth as silk. I’m glad that I finally got around to this restoration. Despite the complexity and extra effort involved, it was well worth the time!
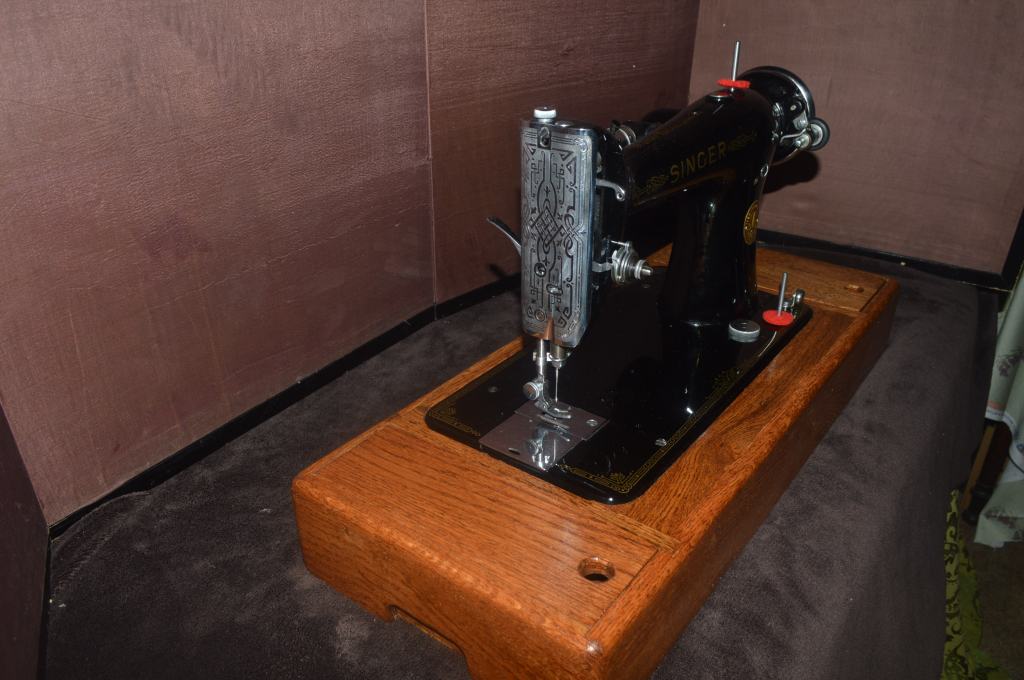
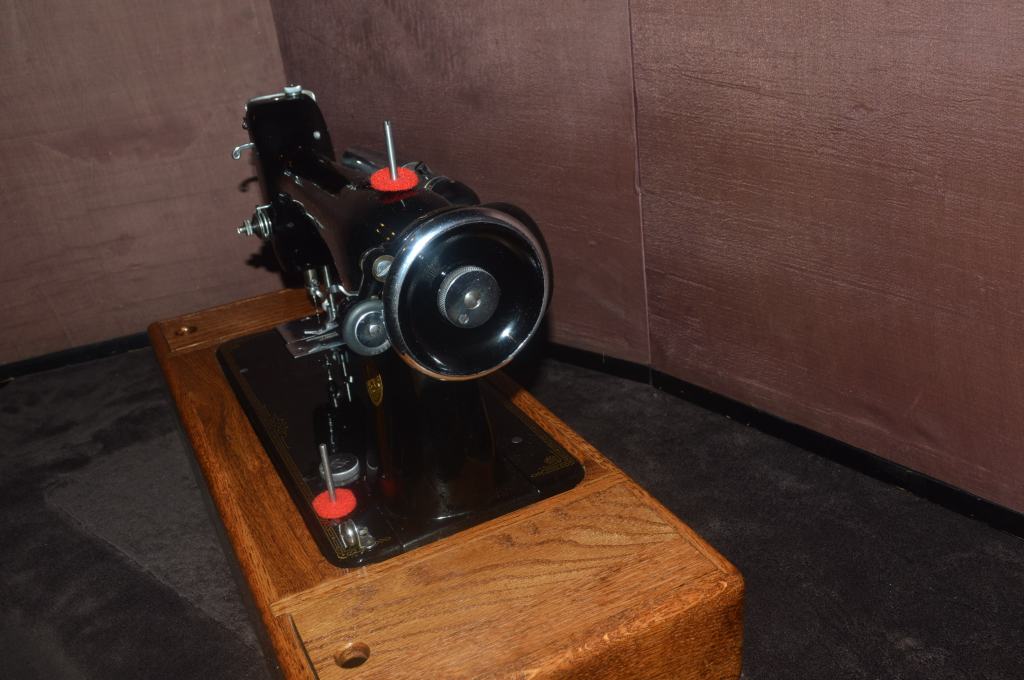
In keeping with my custom, here is the before and after comparison…
Before…


After…

Well, I hope you enjoyed the seeing the restoration process as much as I did doing it… It is satisfying to know that a durable high quality machine made 91 years ago is now running as smoothly and reliably as it did when it was new. Not only that, I have every reason to expect that with proper oiling and maintenance this machine will run reliably for many more years to come.
Looking for a similarly restored quality vintage all metal sewing machine for your sewing room? Let us know! We specialize in custom orders and are happy to locate and restore the “perfect” machine for you!
As always, If you have any questions, or if I can be of any assistance, please contact me through Etsy or send me an email to Pungoliving@gmail.com.
Thanks for reading!
Lee

Wow, another beautiful restoration as usual. The 101 came out gorges, Lee, congratulations! If I ever come across one that is complete to restore I may just do it.
LikeLike
Your work and your willingness to share your expertise with these posts is inspirational. It really is Lee.
Your “can do” attitude and the information I’ve gleaned from your posts have inspired me to take on the restoration of five different machines. My latest is a Singer 319 which hadn’t been used in at least two decades, and likely more. It was in sore need of adjustment, cleaning and a reconditioning of the motor. It now purrs like a contented cat and sews beautifully.
I credit your posts as my inspiration.
LikeLike
Hello Jeffery,
I missed your comment! I’m glad you find some useful information and I enjoy writing the blogs. It’s a lot of work but it helps me keep focused on what I’m doing.
The 319 is an interesting machine and I like the style. I’ve been thinking about one for a long time, but I have not gotten one just yet… I really enjoy working on the older vintage machines and just can’t seem to run out of them.
I’m glad to hear you are on number 5 in restorations. You really get to know how these things work when you disassemble and reassemble them again… it takes the mystery out of so many problems!
Let me know if I can help or assist you in any way possible and have a blessed evening,
Lee
LikeLike
Lee, My name is Kelly Weber and I enjoyed this enormously. I have a 101-12, the portable machine with the bentwood case. I started to restore it myself but ran into trouble and may have screwed up the motor but not really sure. It appears to be seized.
What I was wondering is what you would charge for doing a restoration or if you even could do a restoration. I would really love to get this machine running. I have kind of fallen in love with it. Please let me know. Thx, Kelly
LikeLike
Hello Kelly,
I’m glad you enjoyed reading my 101 restoration blog. Your 101 is a very special machine and there were far less aluminum bodied 101’s made than cast iron 101’s.
The 101 sewing mechanism does not work like any other Singer and it may not be the motor is seized up… I think it is less likely it is.
I do custom restorations and I normally keep them for local machines. It depends on many factors and shipping and risk of damage in transit is a real concern.
If you would like to know more about a restoration, please email me at pungoliving@gmail ,com and I can get (and give) more information for your machine.
Have a great night!
Lee
LikeLike