
Introduction
This tutorial follows several requests for a tutorial from folks who want to restore the motor on their vintage (possibly antique) Singer model 101 sewing machine. I am restoring a 101 and I thought that this would be a great opportunity to capture these steps since I am doing it as part of the restoration blog anyway. While the steps shown in the restoration are shown, this tutorial will go much more in depth for clarification that I don’t make in the restoration blog (I tend to get long winded). I would recommend that you read thru it to see what’s involved before you start your motor restoration. Make sure you have everything you need to complete the restoration and it will save time in the end.
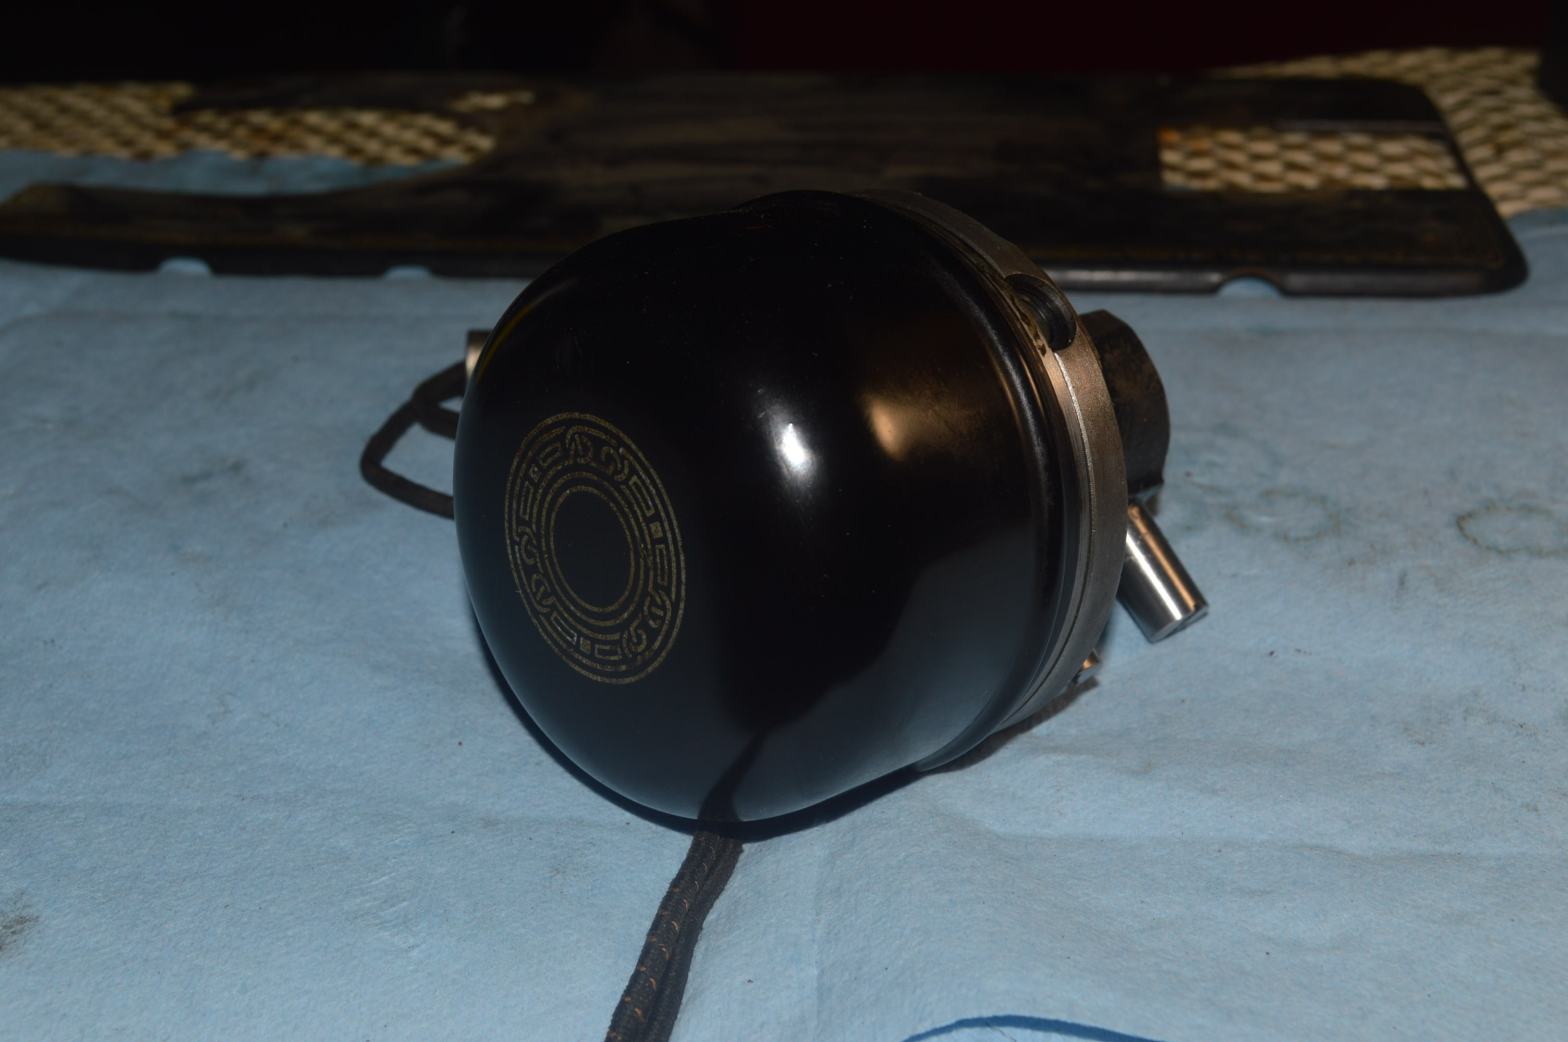
For those who don’t know why it is called a potted motor, I’ll pass on what I have learned. The term “potted” is not something unique or special to the motor, it is merely a colloquialism acquired because the motor looked something like a pot sitting on the side of the machine. Other Singer sewing machines use a “potted” motor and they are also found on the Singer model 201-2 and the model 15-91. While the 101 motor looks different from the others, the one thing that all three of these machines share is the motor is a direct gear drive to the machines sewing mechanism.
The potted motor on the 101 was the first Singer machine to use a direct gear drive motor and it is very similar to the design of the motor used on the 201-2 and the 15-91. Although the design of the motor is similar, the design of the machines is not. The 101 uses a completely different drive mechanism than either the 20-2 or the 15-91 so the process of removing it from the machine is different.
I hope that this tutorial answers all of the questions regarding how to both remove and restore the 101’s motor and I will try to be a thorough as possible without getting long winded… so here it goes.
How to Remove the Motor
First, the motor on the 101 can be removed independent from the balance wheel. In fact, if you don’t have reason to, or thought otherwise, it is better that you don’t. Fortunately, it’s really easy to do. There are only two screws on the front of the pillar opposite from the motor that need to be removed.
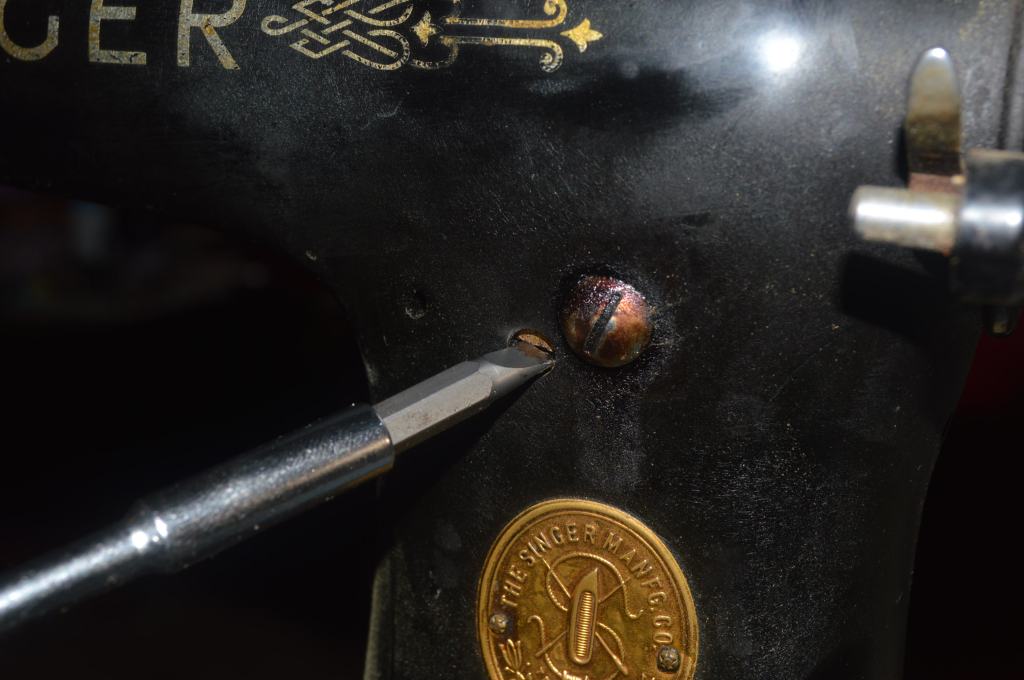
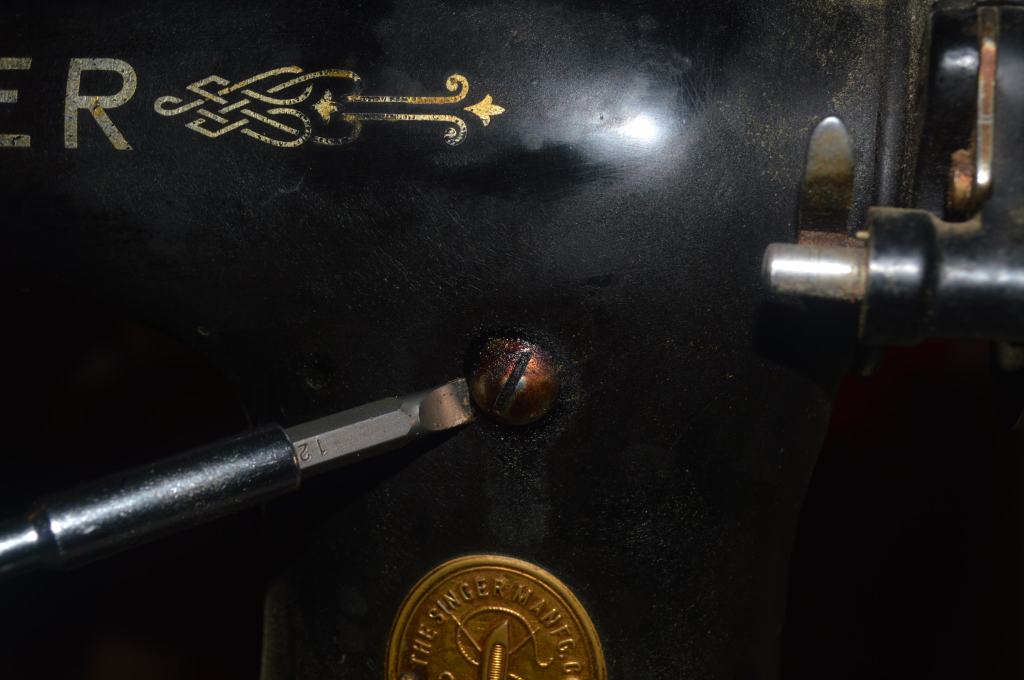
These two screws hold the motor to the machine.
After removing these screws, hold the motor cap and wiggle the motor loose and pull it away from the machine… How easy was that!
Motor Restoration
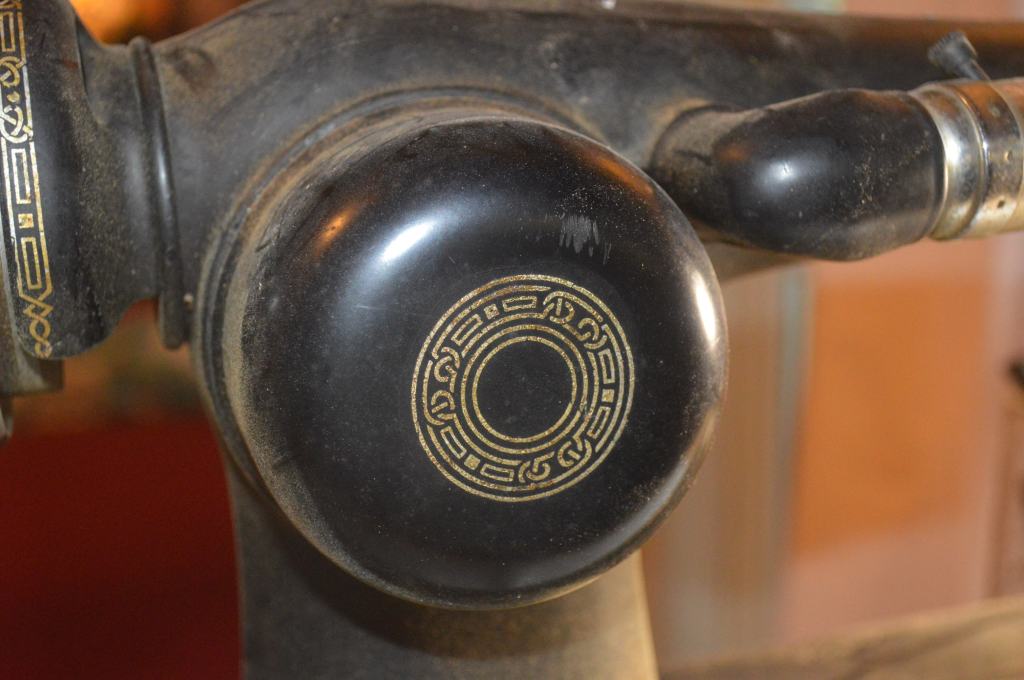
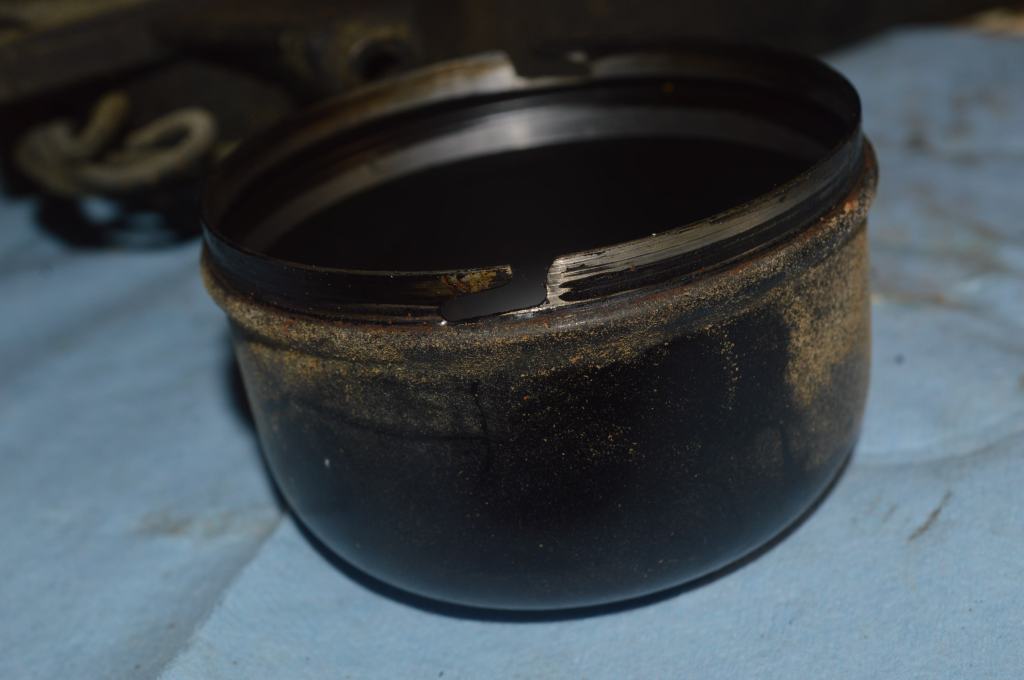
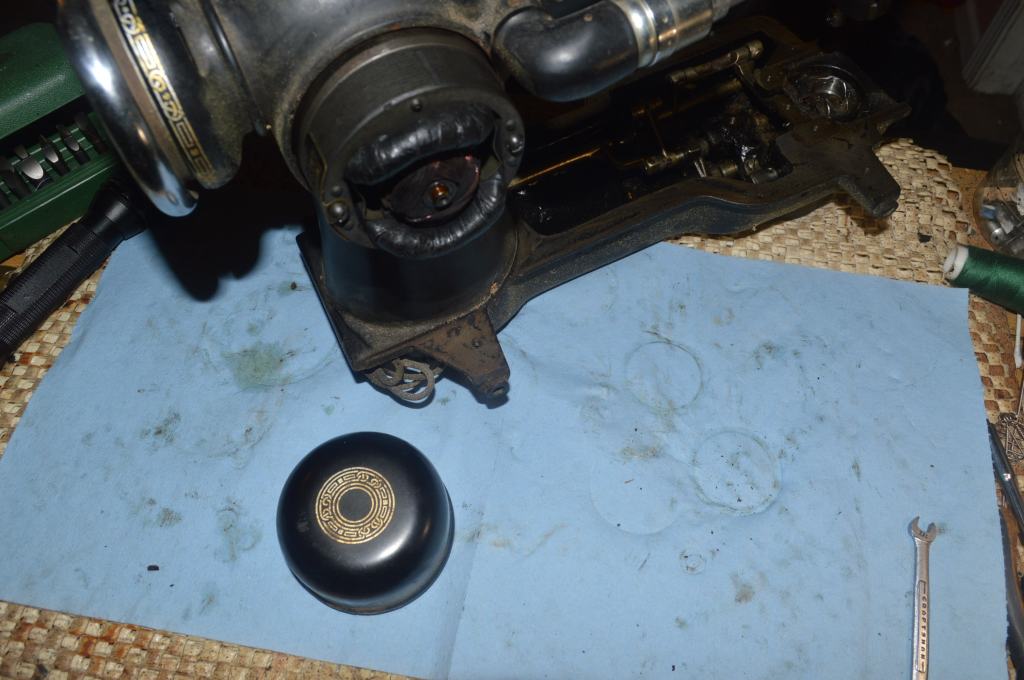
To get started on the disassembly, first remove the cap. The cap can is removed by rotating the cap and disengaging the pins on the motor that secure the cap via slots in the cap.
Before removing the motor from the machine completely, the motor wires need to be disconnected. The motor on the 101 has the main power wires going (hopefully) to a motor terminal block on the back of the machine under the bed near the pillar. If yours doesn’t, just look for where the wires exit the machine. Regardless of how your machine is wired, the wires must be free to pull up through the motor access hole in the machine… mine were just cut off and stuffed into the body of the machine.
Remove the motor from the body of the machine and set it on a few paper towels… there will be a lot of old grease to deal with from this point on.
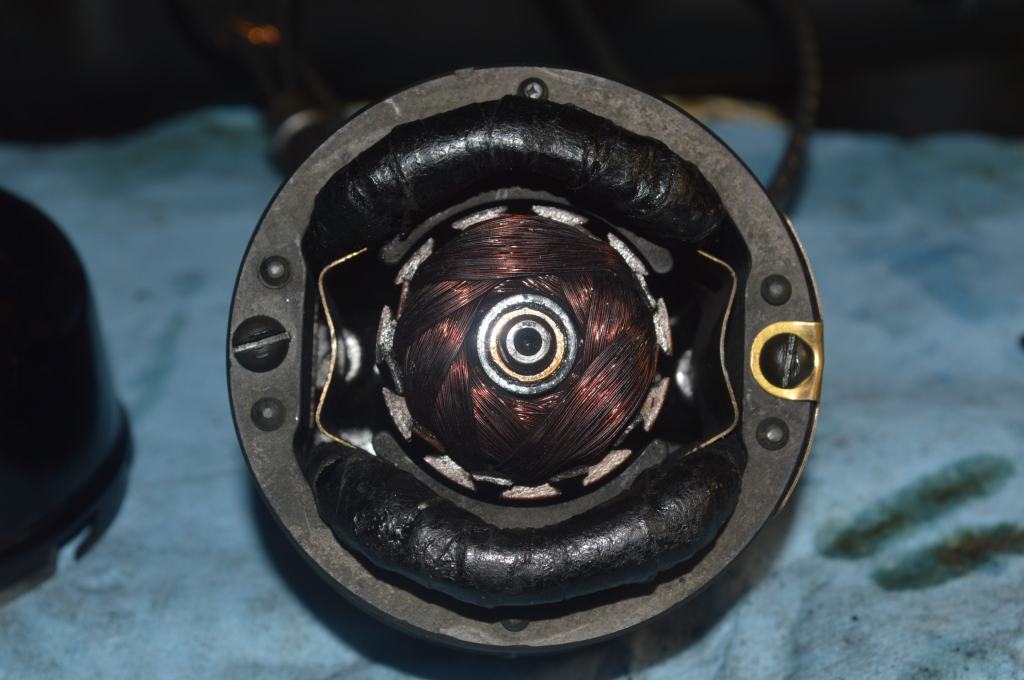
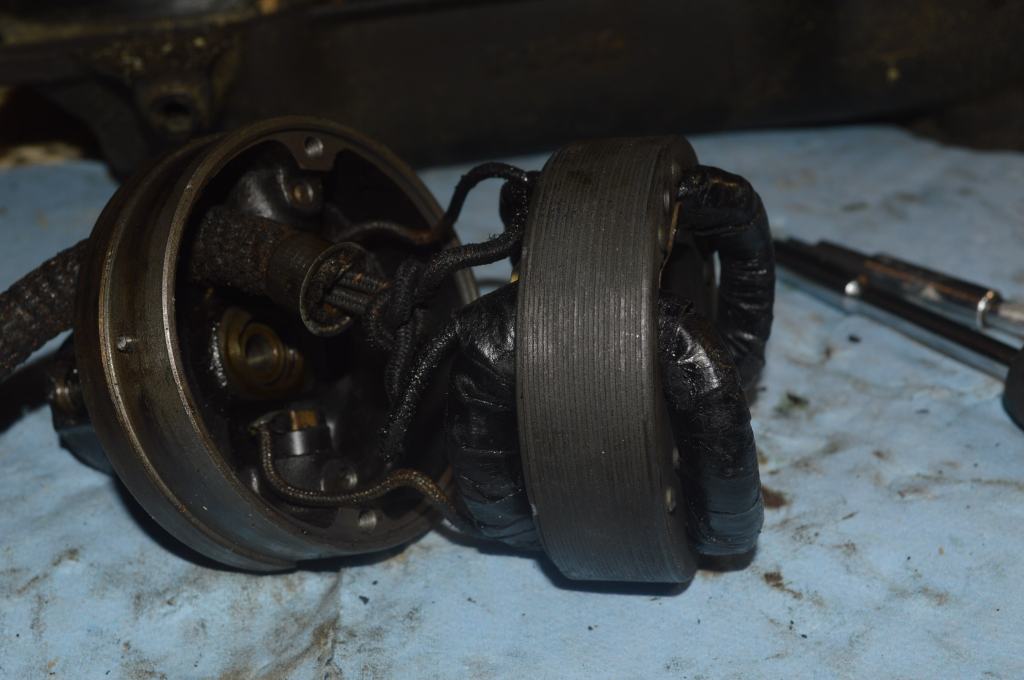
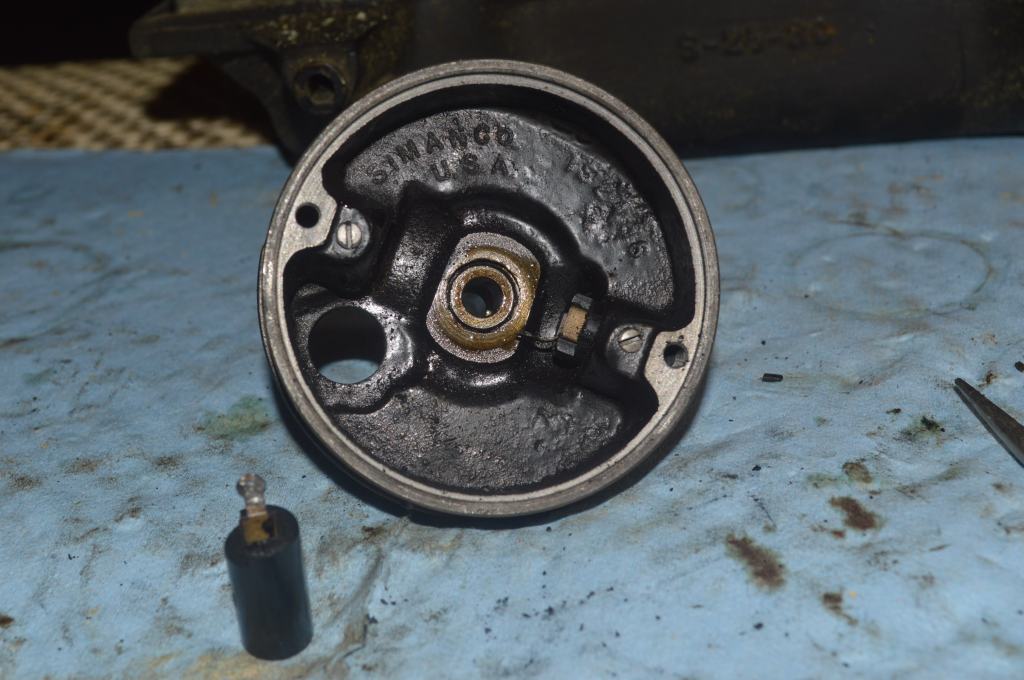
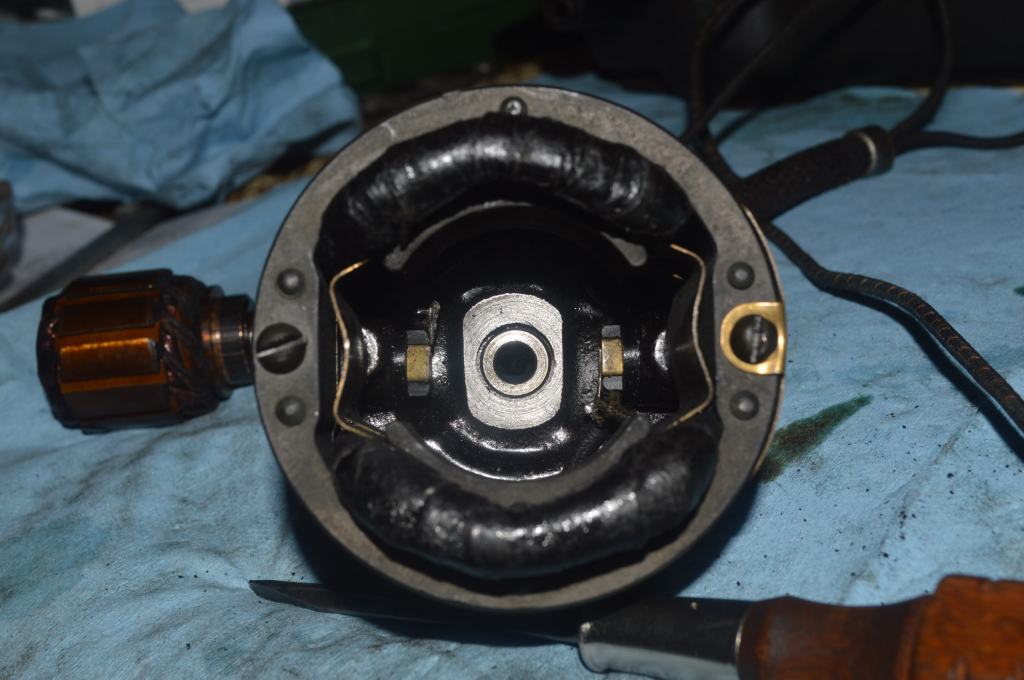
Looking at the end of the motor you will see the end of the armature and the field coil. The field coils is held on the motor case by two screws.
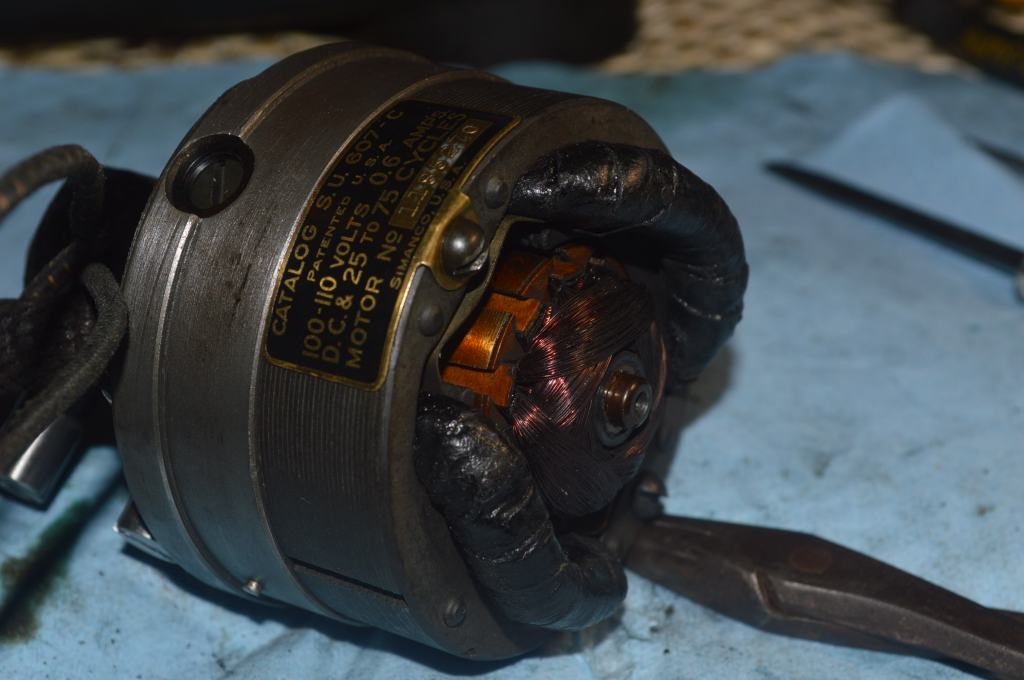
While it is tempting to remove these screws to get into the motor, don’t just yet…the armature must be removed first.
Now, before the armature is removed, the motor brushes must be removed. Spoiler alert: They are spring loaded and retained under threaded caps, so be careful when removing the caps so neither the cap or the brush goes flying across the room beginning an hour long search for it wherever it landed and hid itself.
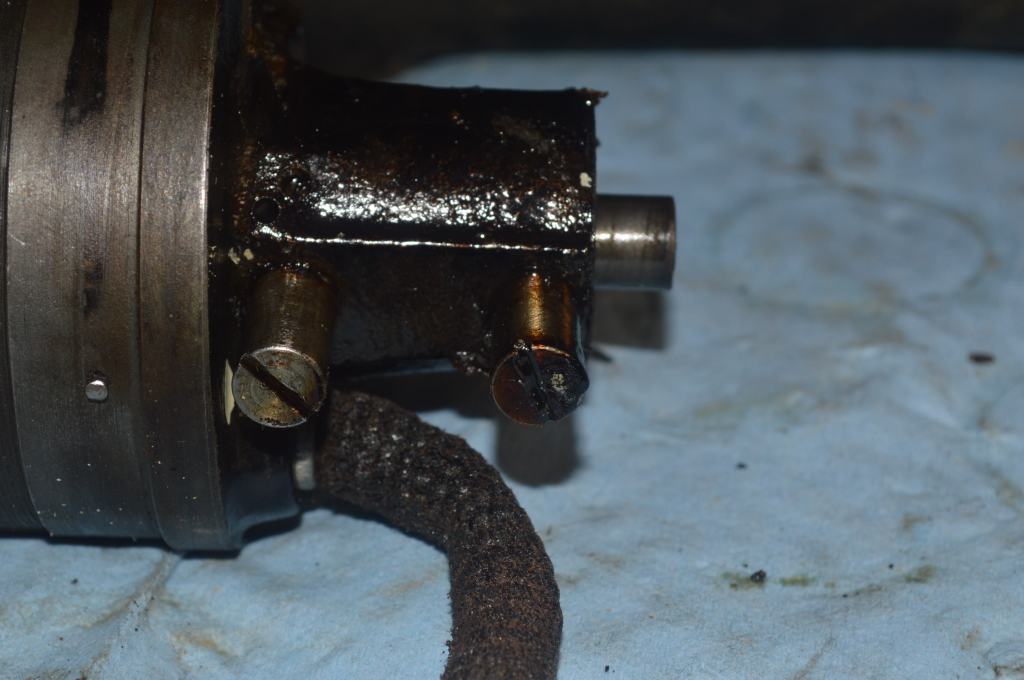
On each side of the motor you will see a slotted cap.
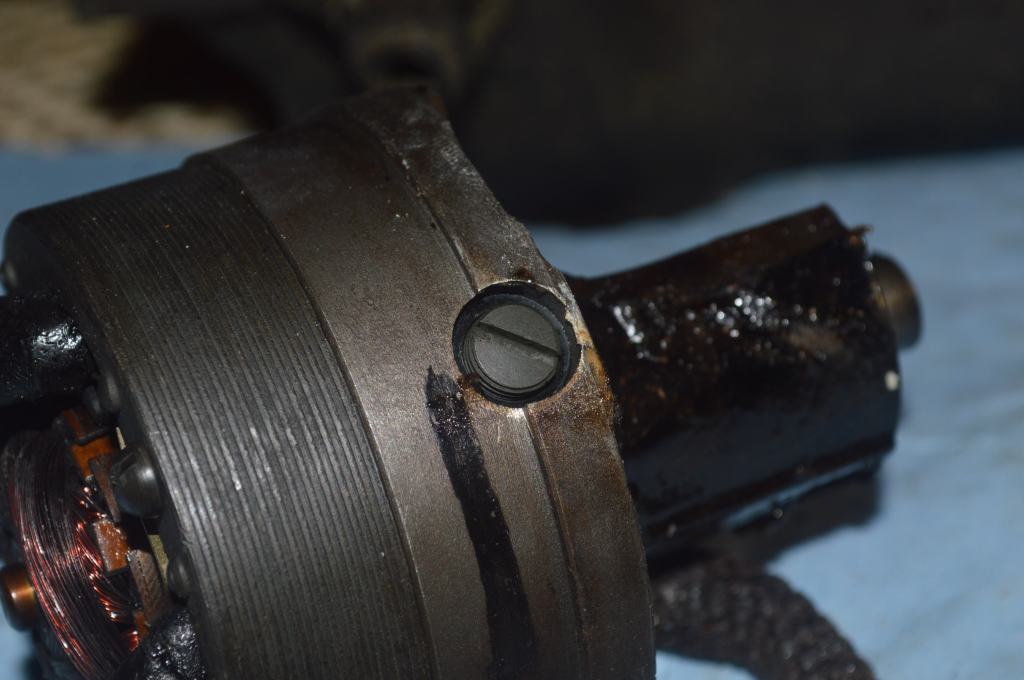
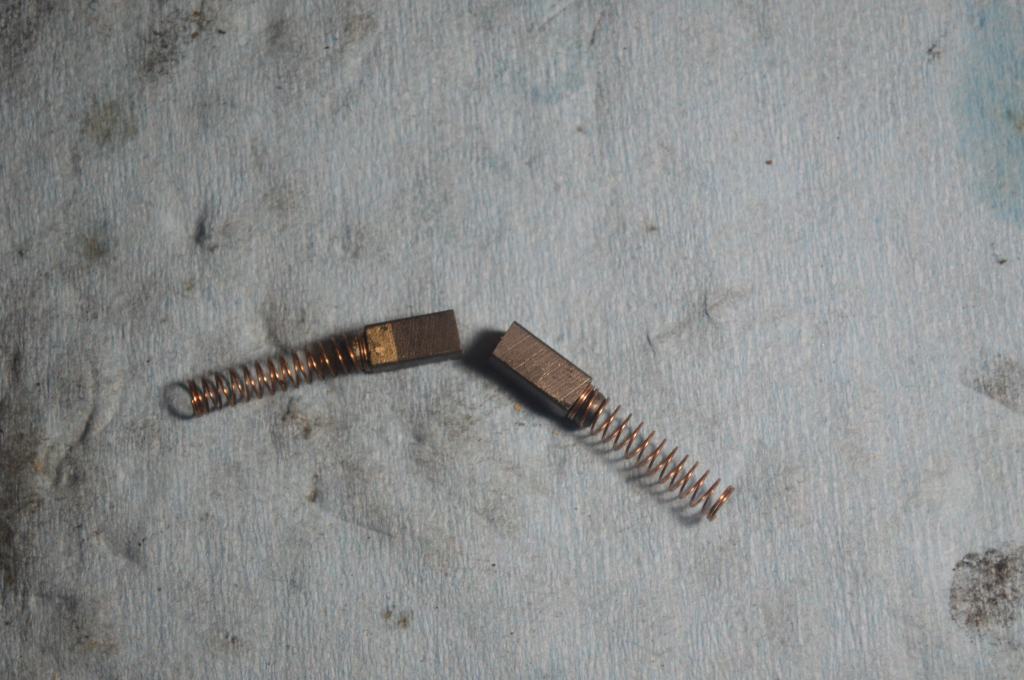
Remove both caps, keeping your thumb on the cap so it doesn’t fly off… it’s not much spring pressure but enough to get it lost. With the caps removed, gently pull on the spring to remove the motor brushes.

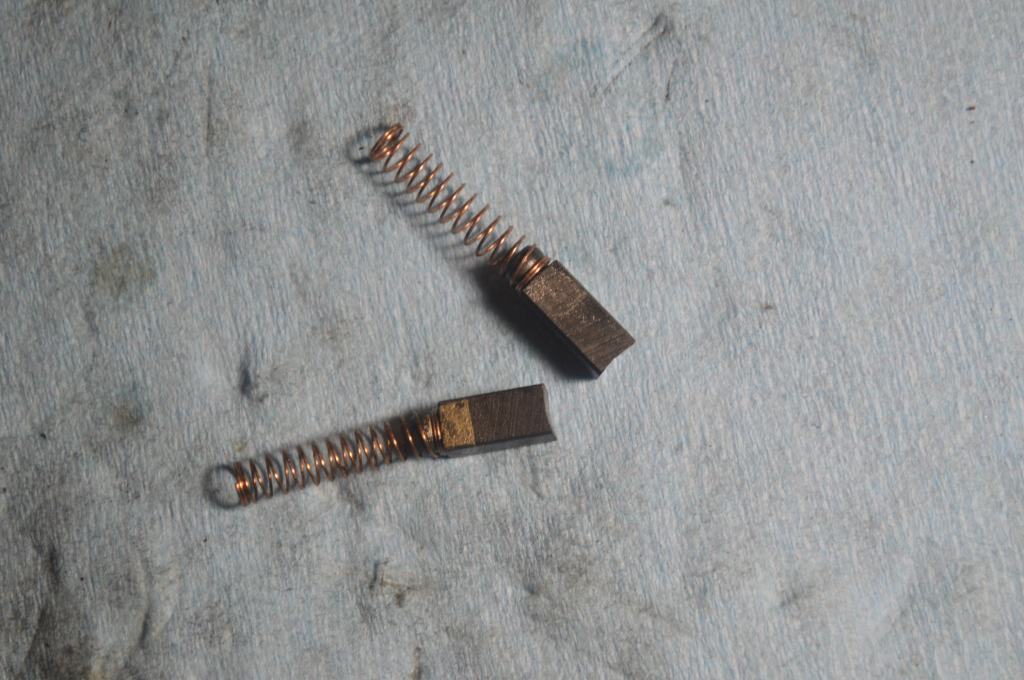
On the 101 potted motor the brushes are color coded. This is for reassembling the brush in the proper orientation on the proper side. Look at the picture above and you will see a gold dot on the motor case and a gold band on the brush. The other side is a silver dot on the case and a silver band on the brush. This is the orientation they will be reassembled in. Now the armature can be removed.
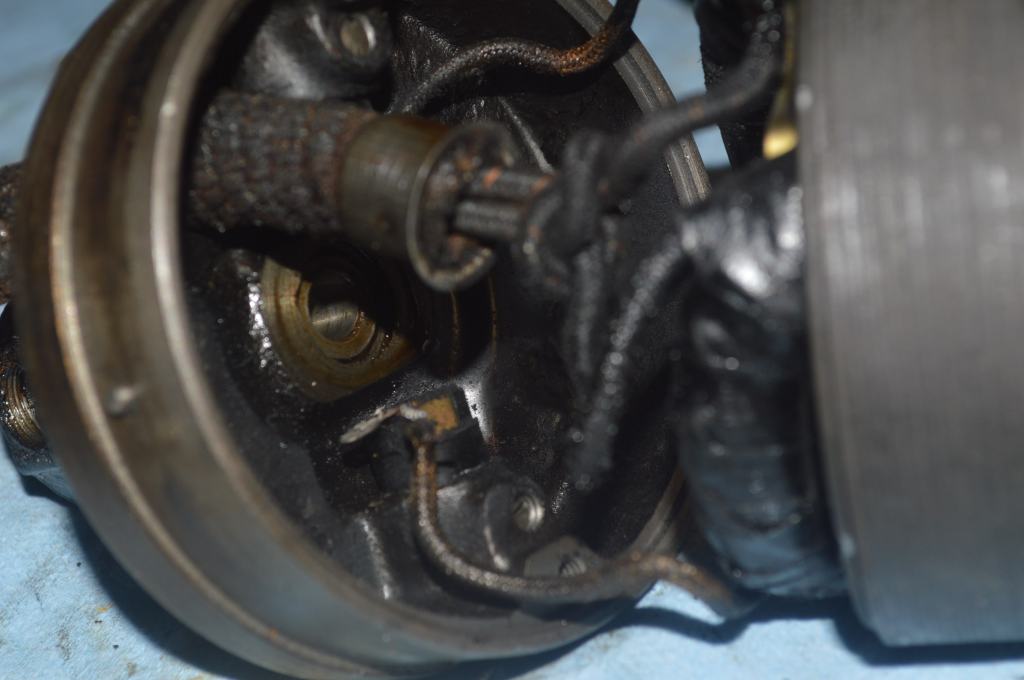
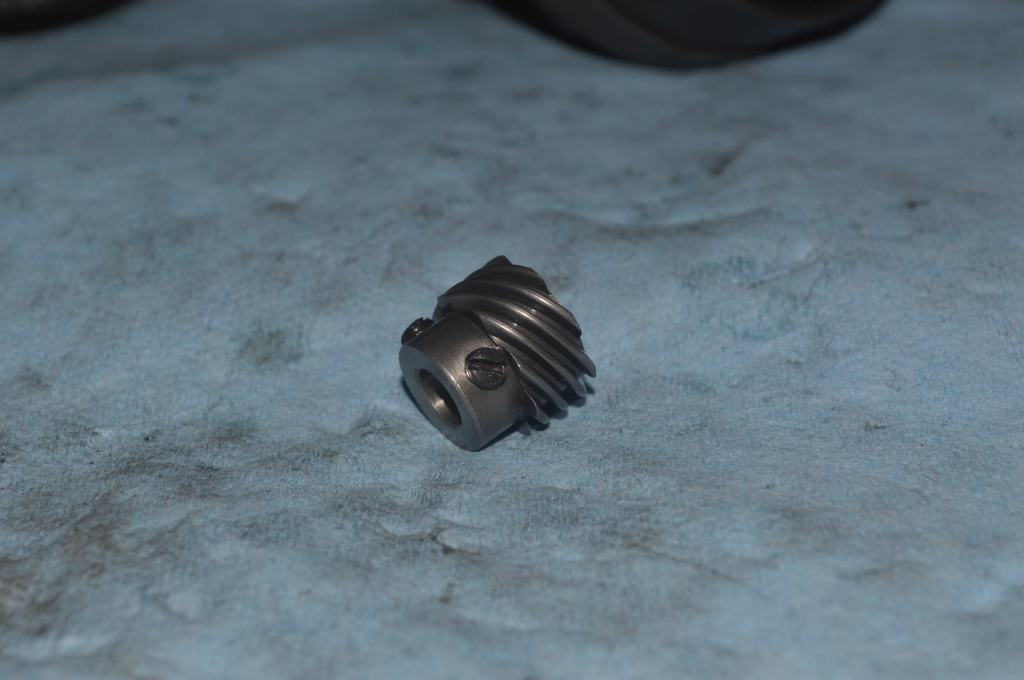
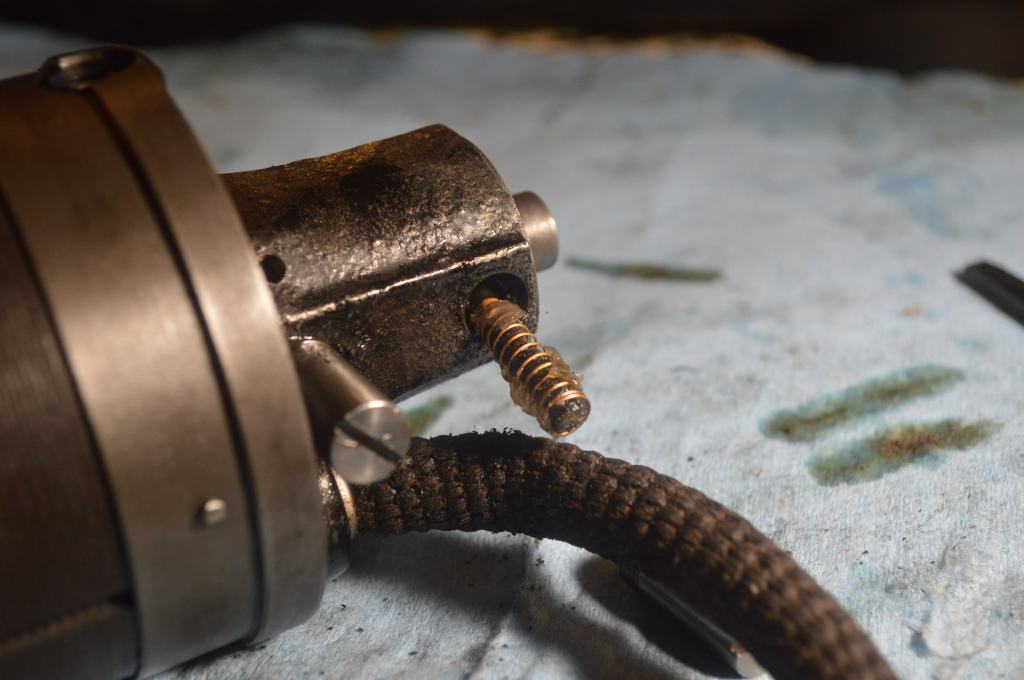
The armature is secured by two set screws in the spiral gear found at the back of the motor.
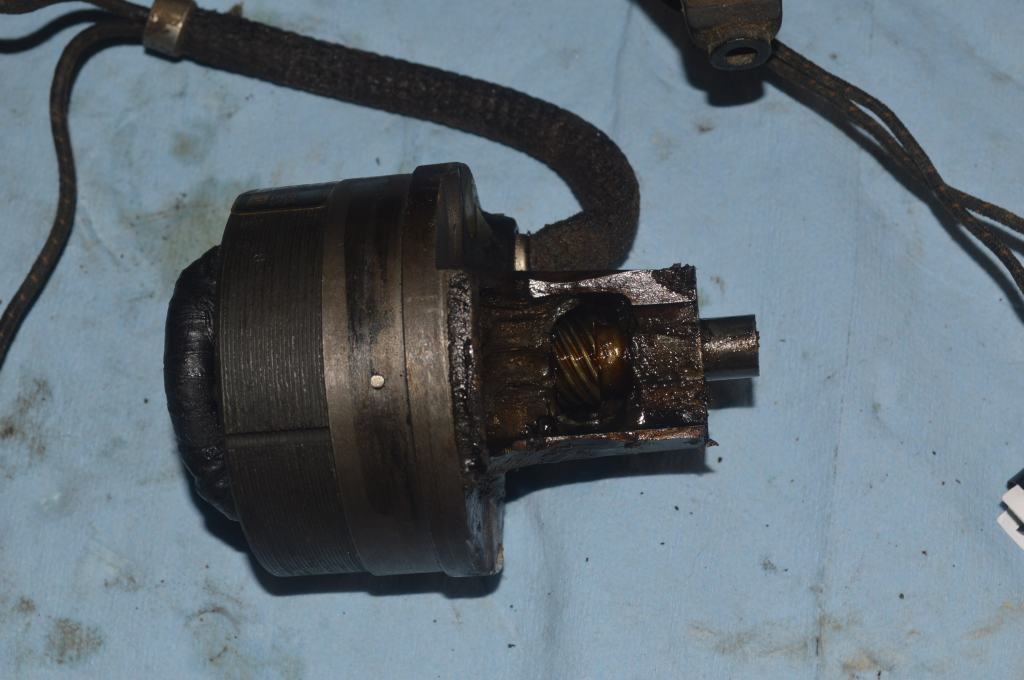
It is probably caked with grease, so turn the armature until these set screws present themselves. after loosening the set screws, the armature can be removed from the motor case. The gear will be free to remove too so set it and the armature aside for cleaning.
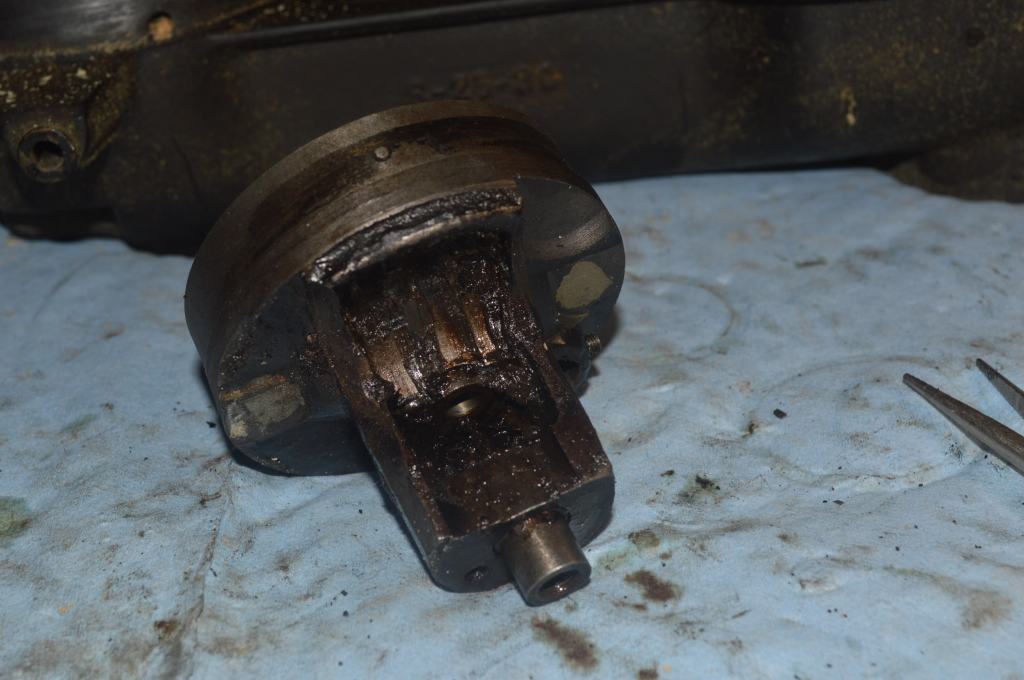
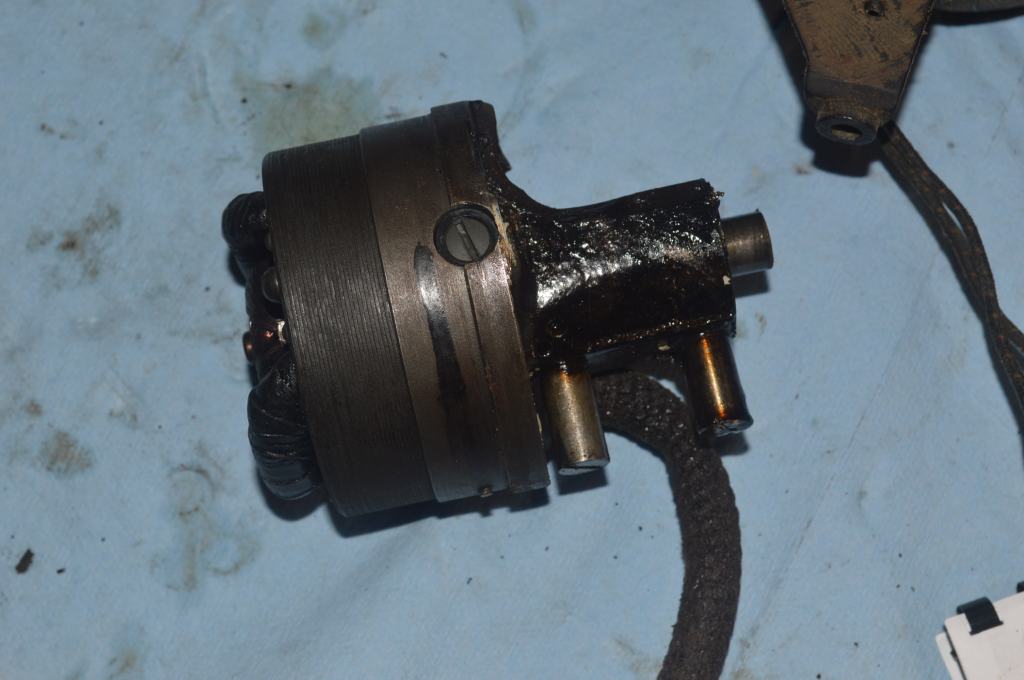
Now remove the grease tubes and grease wicks. The are simply removed by unscrewing the barrels of the grease tubes. The wicks will probably come out with the barrel, but if not, pull them out from the motor case.


Now the field coil can be removed by removing the two screws mentioned earlier. The field coil will be fitted tightly in the motor case so rapping it on the side lightly with the handle of a screwdriver and then prying gently where the coil meets the case will assist in freeing it from the case.
The field coil has two wires that are soldered to the brush tubes, so it will only come but so far away from the motor case. To remove the coil completely, the wires must be de-soldered from the brush tubes one on each side. With the wires de-soldered, remove the field coil.
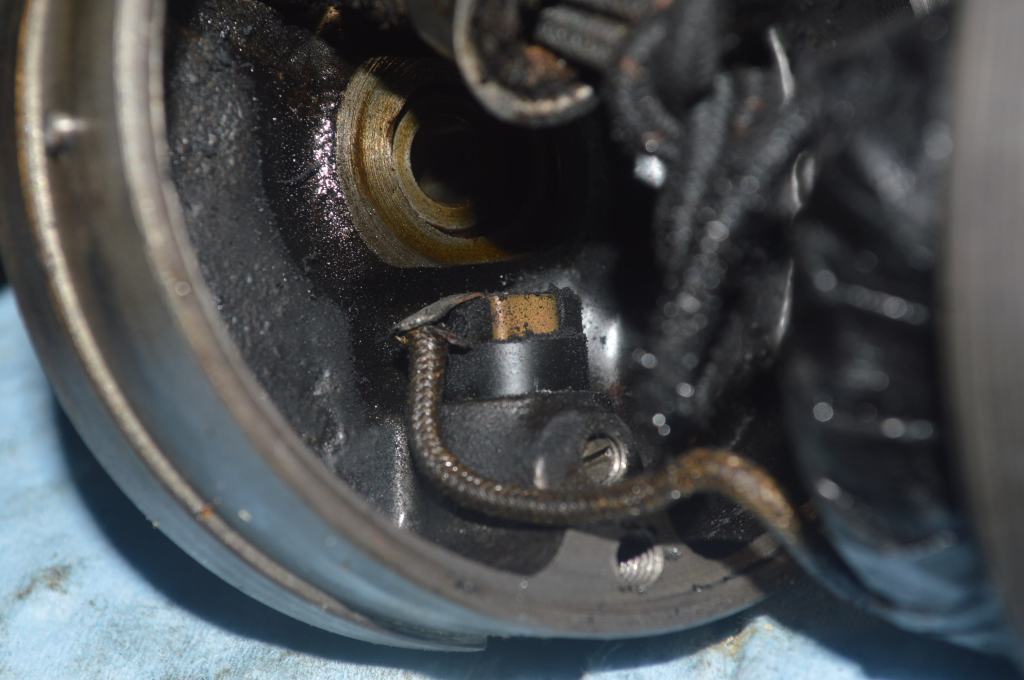

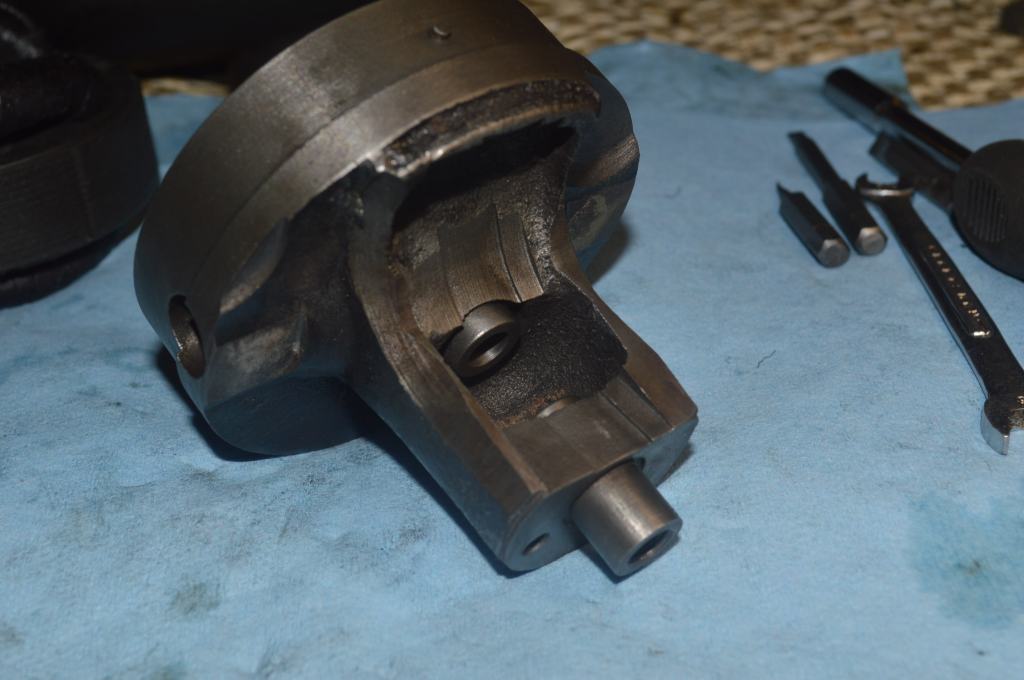
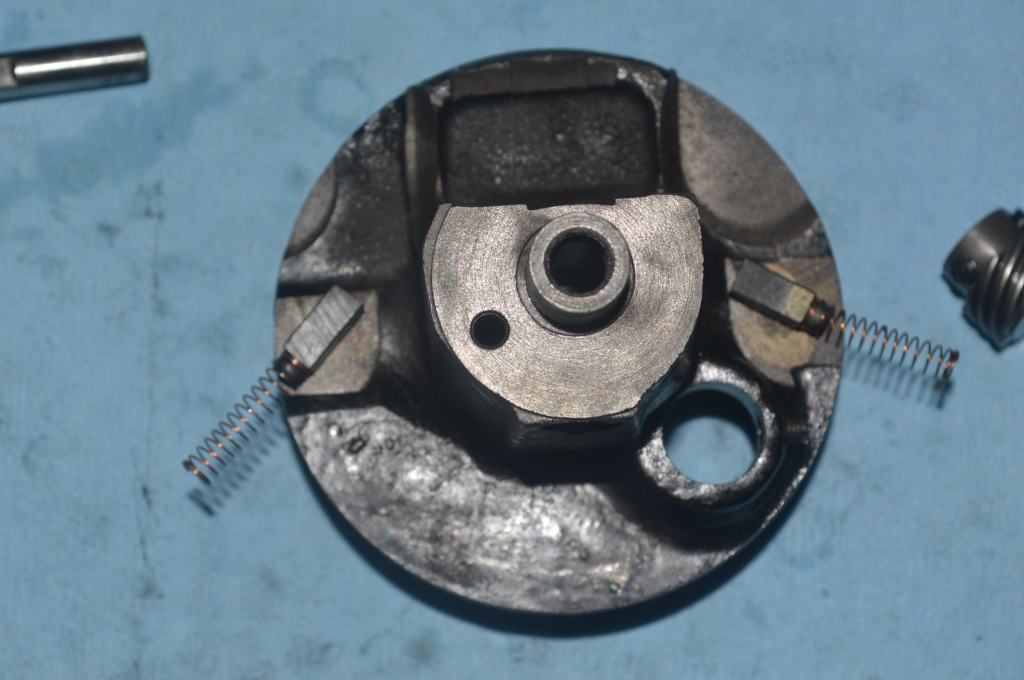
Now the brush tubes can be removed. Bend the solder terminal 90 degrees so it is in line with the tube. Looking at the picture below you see two set screws. These set screws tighten against the brush tube. Loosen the set screws and remove the brush tubes by pressing them out from the inside.
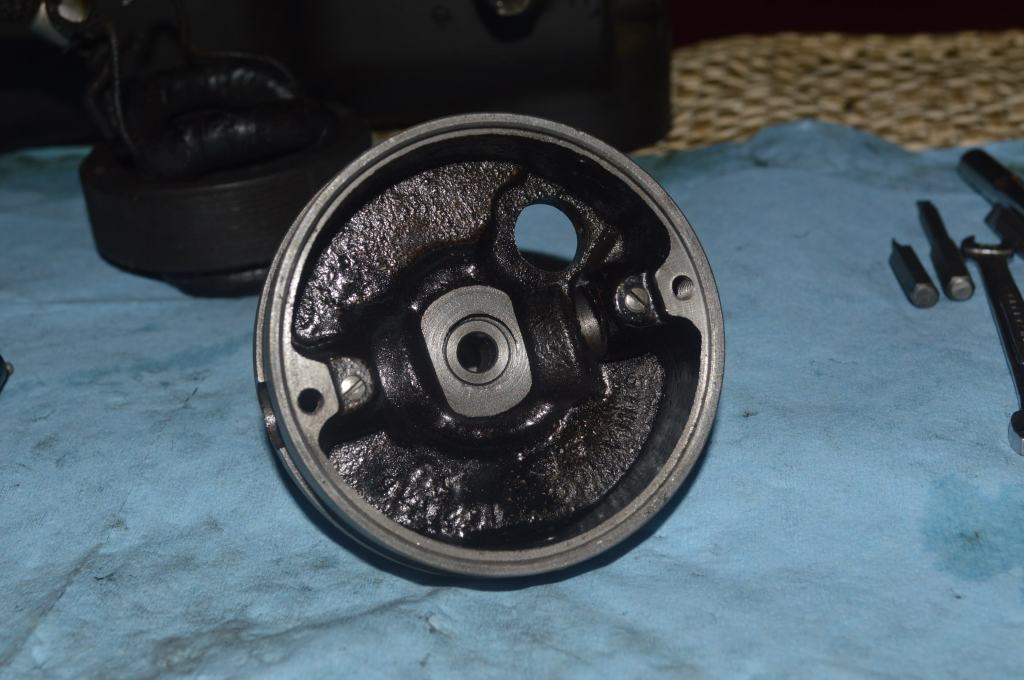
STOP! Before continuing, look at the motor bushing inside the motor case and the shaft end of the armature for a round washer… There is a washer in the motor to prevent grease from migrating into the motor windings and it is either left on the shaft or the bushing. Find it and make sure it does not get lost.
Now lay all of the parts out for cleaning.
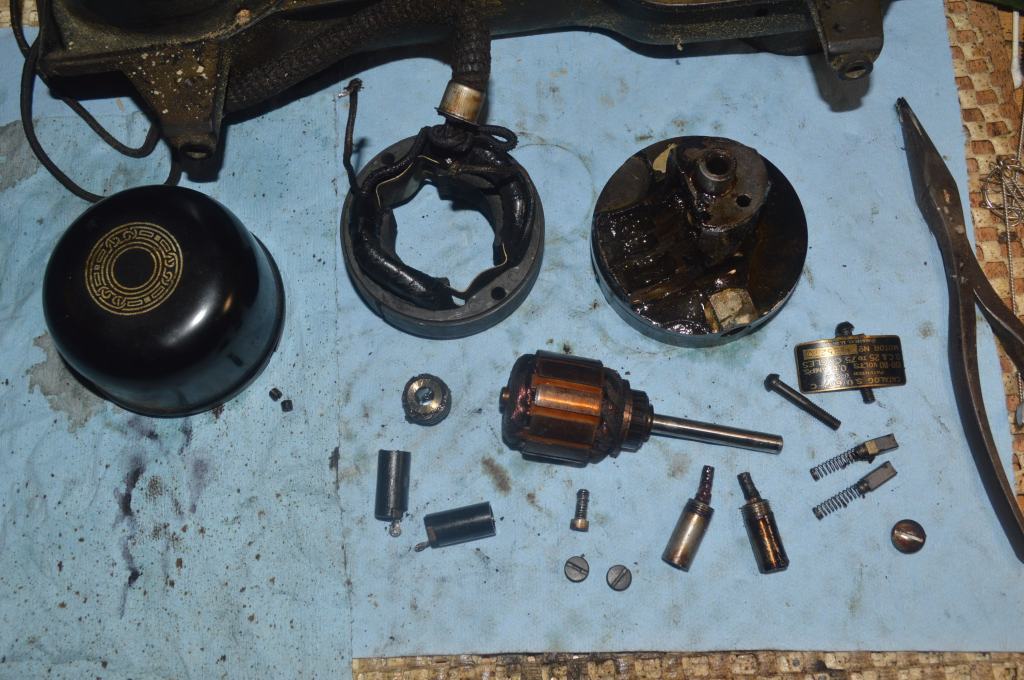
It’s important that the motor case be cleaned as much as possible, The same goes for the armature and the grease cups and wicks. To clean the motor casing, I submerge it in kerosene for 24 hours to loosen the old grease. I then use compressed air to blow it all away. If you don’t have access to an air compressor, canned air will work fine. If you don’t want to use an air compressor or canned air, you can use a small bristle brush and kerosene followed by cotton swabs and paper towels to good effect. The point is to get it clean. The same goes for the bevel gear.
The grease tubes can be cleaned with kerosene but not the wicks. The wicks are designed for grease and kerosene will soak into the wick and displace the grease. To clean the wick springs, do not attempt to remove the wick from the spring. Clean the spring with compressed air or use a paper towel, tooth picks, and cotton swabs to remove the old grease.
Next is polishing the commutator and armature shaft. For this I use a drill, a dremel tool with a polishing buffer wheel, jewelers rouge for the commutator, and oiled 2000 grit sandpaper for polishing the shaft. Do not attempt to clean the wire windings on the armature or in the field coil. They can be damaged easily.
If you don’t have a dremel tool, you can polish the commutator with a drill and 2500 grit dry sandpaper… Chuck the armature shaft in the drill and lightly wrap a strip of sandpaper until it forms a 180 degree arc around the armature and turn the drill until it is polished. If you use this method, keep the sandpaper lightly against the commutator… you are polishing it, not grinding it. When the copper is bright, it’s done. Don’t have a dremel or a drill? you can use a red pencil eraser… it works.
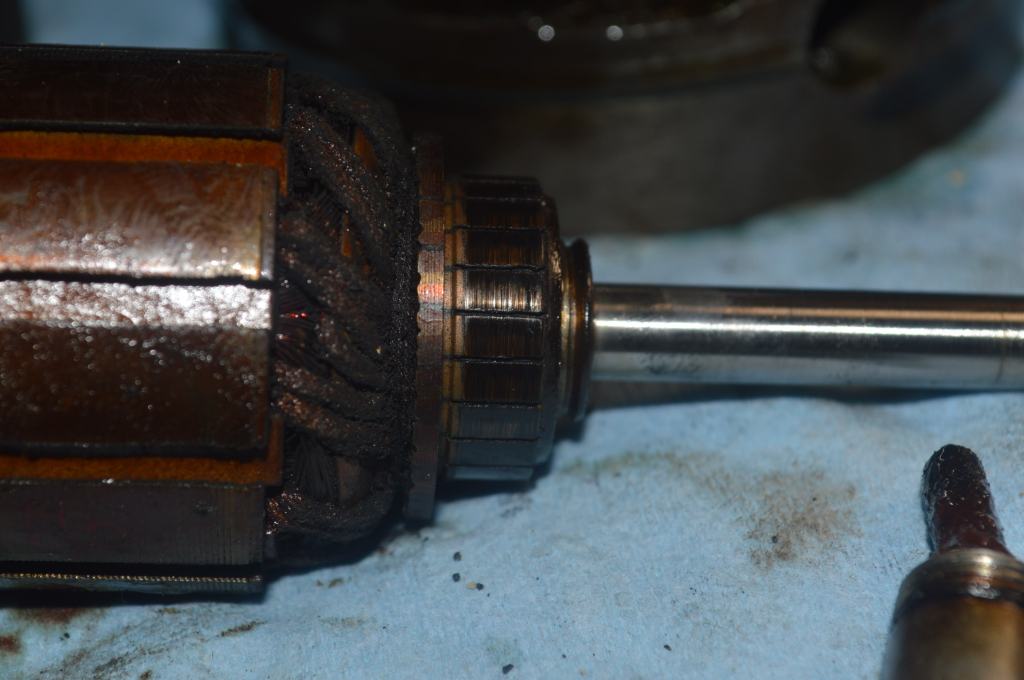
Before 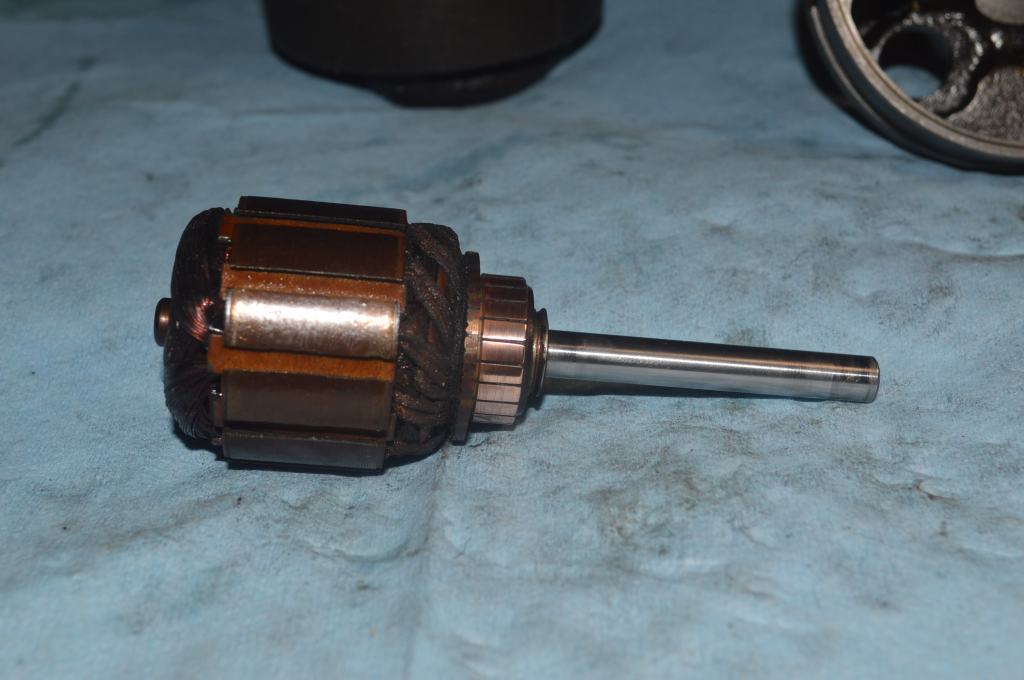
After
The armature shaft is polished by chucking the shaft up to the flatted slot in an electric drill and wrapping the oiled sandpaper in a 180 arc around the shaft. As you turn the shaft rapidly with the drill, slowly move the sandpaper up and down the shaft until it is bright. Then wipe the oil from the shaft. The bit of shaft that was chucked in the drill is polished with the oiled sandpaper by hand.
Now it’s time to recondition the brushes. New brushes have a flat face. Over use, the brushes will wear and form a slight arc that conforms to the shape of the commutator. To restore the flat surface, the brush face is flattened by gently rubbing the brush perpendicular to a piece of fine grade sandpaper laid on a flat surface until the arc is gone. The brush is made of graphite and is very easy to sand. Use a light circular motion until the arc is gone and the brush is flat. Keep the brush perpendicular to avoid an angled rather than a flat brush face.
Now, on to the main power wires. Often times, the main wires are cracked and need to be replaced. As it turned out on my motor, the wires are in very good condition and I am going to reuse them. If you need to replace the wires, you will need 16 gage wire, a soldering iron, and heat shrink tubing. Because I am not replacing the wires I can’t show it done here. I do have a tutorial on restoring a model 201-2/15-91 potted motor that covers this step in detail… please follow the instructions there and I apologize for the inconvenience.
Now that everything is clean and polished, it time to reassemble the motor. Reassembly is simply the reverse of disassembly, but there are a few tips so I will follow thru to the end.
Starting with the brush tubes, insert the brush tubes into the motor case. Look at the pictures so you can see the direction of the tabs so they will bend in the right direction. Tighten the set screws to lock the brush tubes in place.
Reinstall the field coil by putting the wires through the hole in the motor case and then re-solder the brush tube wires to the brush tubes. Then bend the tabs 90 degrees to the tubes. It is important to install the field coil so that none of the wires encroach in the center area of the field coil. The wires will tuck tightly between the bottom of the field coil and the brush tubes. Take your time and tuck the wires using the flat side of a screwdriver head to make sure they are tucked out of the way after the field coil is tightened down with the two screws that hold it. Don’t forget the motor label plate. Here is what it should look like when it is reassembled. Why is this important? Well, the armature will use all of this space and if it rubs against a wire it will wear thru it and create a short… This would be bad (think replacement motor).
Now the armature can be installed. The spiral gear is placed in the back of the motor. It is helpful to use a screwdriver small enough to fit thru the gear and use it as a pilot to guide the armature shaft through the gear. You will notice that the armature has a slot milled in it. This is for one of the gear set screws to tighten against. Make sure the small round washer is on the shaft. Apply a drop of sewing machine oil at the end of the shaft and just behind the slot for initial lubrication. Start the armature in the motor case with the slot at the 12 O’clock position and make sure one of the set screws is also at the 12 O’clock position. Guide the armature shaft through the gear until it stops and tighten the set screw against the slot. Turn the armature and tighten the other set screw. Spin the motor by hand to make sure it isn’t rubbing any wires.
Reinstalling the grease wicks is simple but requires a bit of preparation. The wicks should be saturated with grease before they are installed (in this case the grease to use is 100% petroleum jelly with no additives). This is simply done by putting a blob of petroleum jelly in a spoon, add the wicks, and heat the spoon with a BIC lighter. When the grease melts, remove the flame. You will see the grease soaking into the wick and small bubbles will affirm that the wick is being saturated. The wicks will not absorb all of the grease so when the bubble stop, remove them and set them aside to cool. When the wicks have cooled, insert the wick into the bottom of the motor case. Fill the grease tubes about half full of grease. Place the spring end of the wick into the grease tube and screw them into until snug.
Now, install the brushes. As I mentioned before, the brush has a color band that matches a mark on the motor casing. Install the proper brush in on the proper side with the colored band on the brush pointing up to match the color dot on the motor case.
Replace the brush caps, slightly compressing the brush spring. The cap does not need to be tight, The brush tubes are brittle so just snug is good enough.
Now put the motor cover on and fish the motor wires through the pillar of the machine.
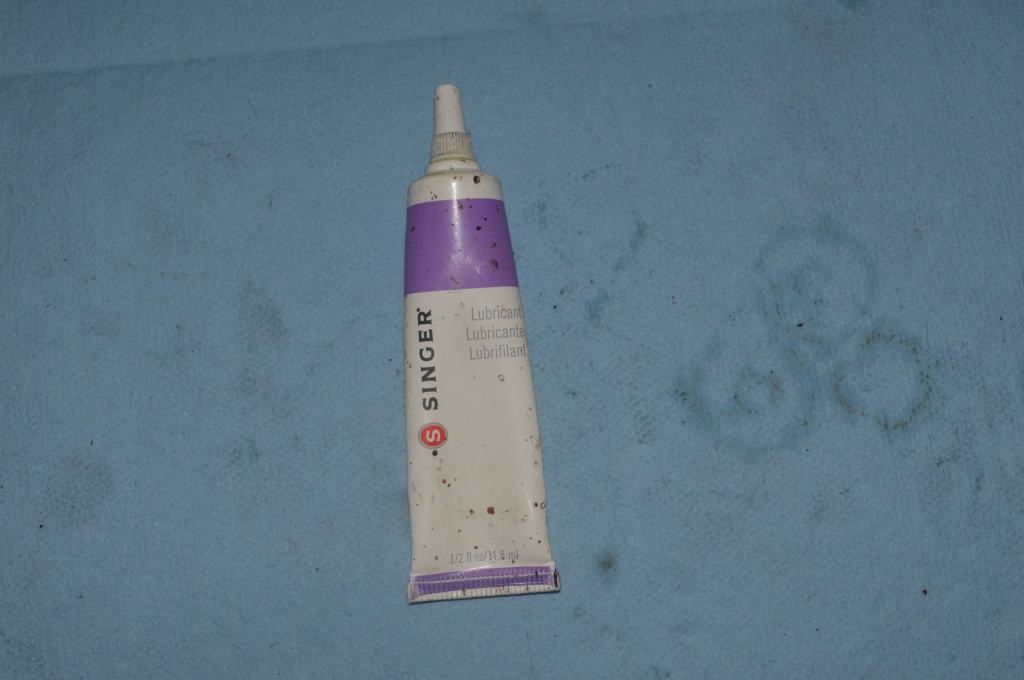
You are almost done. The gears need to be greased so apply Singer lubricant to the spiral gear in the motor, and to the gears in the machine before you reinstall the motor, Before you ask, I’ll answer your question. This formulation of Singer lubricant is great for gears, but it is not the same formulation Singer made for their motor lubricant 70 years ago (and not made since). It should not be used for the grease wicks or motor lubrication maintenance… use the petroleum jelly.
That’s it! I would recommend that you run the motor with the sewing assembly disengaged (Like when you wind a bobbin) for a few minutes to seat everything back in. You will probably notice the motor picking up speed as it is run. When it levels out and the speed stays consistent, you are ready to sew!
Hopefully you will see a dramatic difference in the speed and power of your machine, and motor will run reliably for years to come.
As always, our tutorials are provided as a free resource to help you learn and maintain your vintage sewing machine. As our site has grown, so has the cost to keep and maintain it. Despite these costs, I will strive to continue posting tutorials and other relevant content for the benefit of the sewing community. If you found the content of this tutorial useful, please consider making a small donation to help me grow the site and help defray my costs… every little bit helps.
Help Support our Site…
Make a one-time donation
Make a monthly donation
Make a yearly donation
Choose an amount
Or enter a custom amount
Your contribution is appreciated.
Your contribution is appreciated.
Your contribution is appreciated.
Please let me know if I can answer any questions or if I can be of any assistance by emailing me at pungoliving@gmail.com.
Thanks for reading,
Lee
