

Introduction
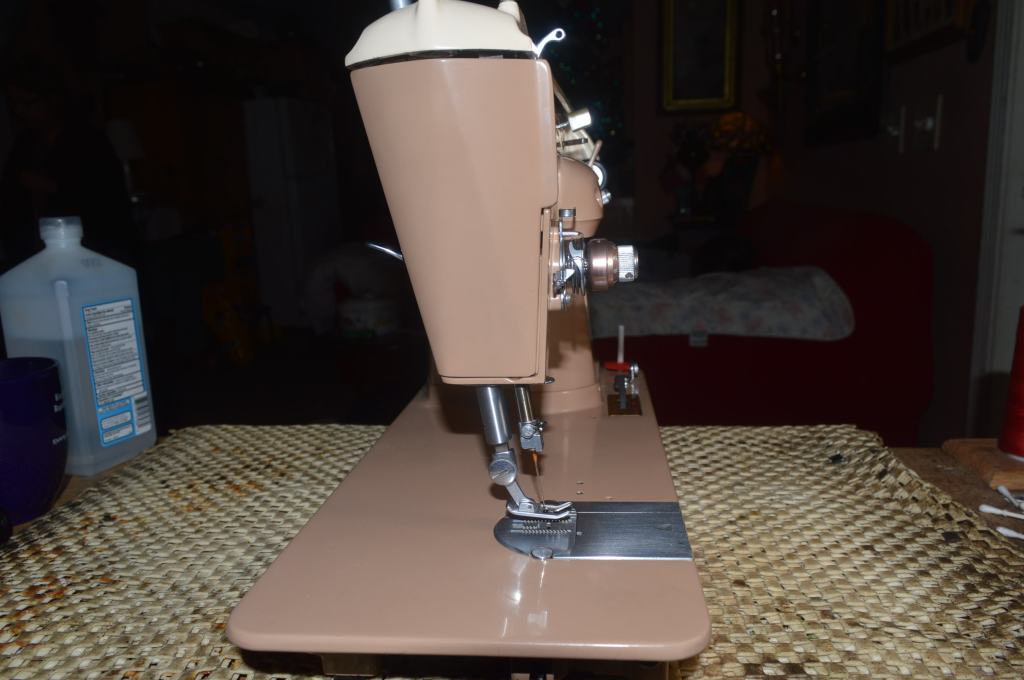
This restoration is for a Singer model 403A sewing machine. The customer purchased the machine as “refurbished” but had difficulty with the machine breaking the top thread when sewing thru multiple layers of fabric. She took the machine into a service repair shop where they oiled the machine and replaced the original foot controller with an electronic controller. The reasoning was that the original foot controller was a “fire hazard”. When the machine was returned, the problem persisted and when she questioned why, she was told that “you can’t go through more than 2 layers with older machines”. She had previous experience with the model 403A and knew this was simply not true. She contacted me to find and correct the problem, and also knowing that is not the case, I assured her that her 403A was a durable, and high-quality machine capable of any sewing project she could imagine. Getting it to sew wonderfully was assured.
History
In a major departure from Singer’s straight needle design the Singer 403A has a slant needle design, in 1951 Singer hung its hat and its future on the redesign of its domestic sewing machines from a vertical needle design to a slant needle design where the needle bar was slanted at an angle of 9 degrees. In 1951 Singer built a new manufacturing plant in Anderson South Carolina dedicated to the production of its new slant needle machines. This plant produced the model 301A, 401A, and 403A sewing machines. Later, using a new body style and the same sewing mechanism, they produced the model 500 and 503A sewing machines affectionately known today as “Rocketeers”. Production of machines in Andersonville lasted thru 1962. These slant needle machines included a plethora of enhancements in addition to the unique slant needle design. They also incorporated an all gear driven rotary hook, class 66 drop in bobbins, and they use standard 15×1 sewing needles that thread front to back. They also feature an internal motor, a high shank presser foot, a quick-change needle plate, left-center-right needle position, and except for the 301A (which is a straight stitch machine), they have an internal cam mechanism that produce different stitch patterns by inserting a varied selection of plastic pattern discs.
The machines manufactured in Singer’s Andersonville plant are very well built and considered by some to be the end of the line for Singer’s heirloom quality machines. Why? these machines are high quality all metal machines made with precision mechanisms and tight tolerances. To one extent or another, later Singer model sewing machines were made with economy of manufacture using cheaper materials rather than more expensive manufacturing processes and costlier materials… they simply cost more to build and competition from well-made sewing machines manufactured in Japan forced Singer to cut costs.
Restoration Plan
This machine was refurbished before it was sold to my customer. From all outward appearances, they did a great job! Cosmetically, with the exception of a series of numbers scratched into the paint on the rear of the pillar, the mechanical and cosmetic appearance of the machine is in exceptional. The paint and finish are in excellent condition. The mechanical assemblies are exceptionally clean. Except for a few places, the machine was properly lubricated. It was obvious that the machine had seen some disassembly and cleaning and even on close inspection, the machine appears to be in almost new condition. I was quite surprised to see the condition of the machine and it made me re-evaluate my approach to the restoration… or in fact if I could claim any work I did to this machine would reach the level of restoration I normally do. Obviously, the problem was the result of an adjustment and I figured that in the reassembly of parts disassembled in the refurbishment it already underwent, something was missed. The question was where. She also asked me to inspect the original foot controller and re-use it if it did not pose a risk.
When I first operated the machine, I did note that the motor was not as strong as I expected, and the remedy would be finding and adjusting anything that would compromise stitch quality or cause thread breakage. This restoration is going to be a process of elimination… not so much of disassembly and cleaning. That is where I started, and the process it took follows.
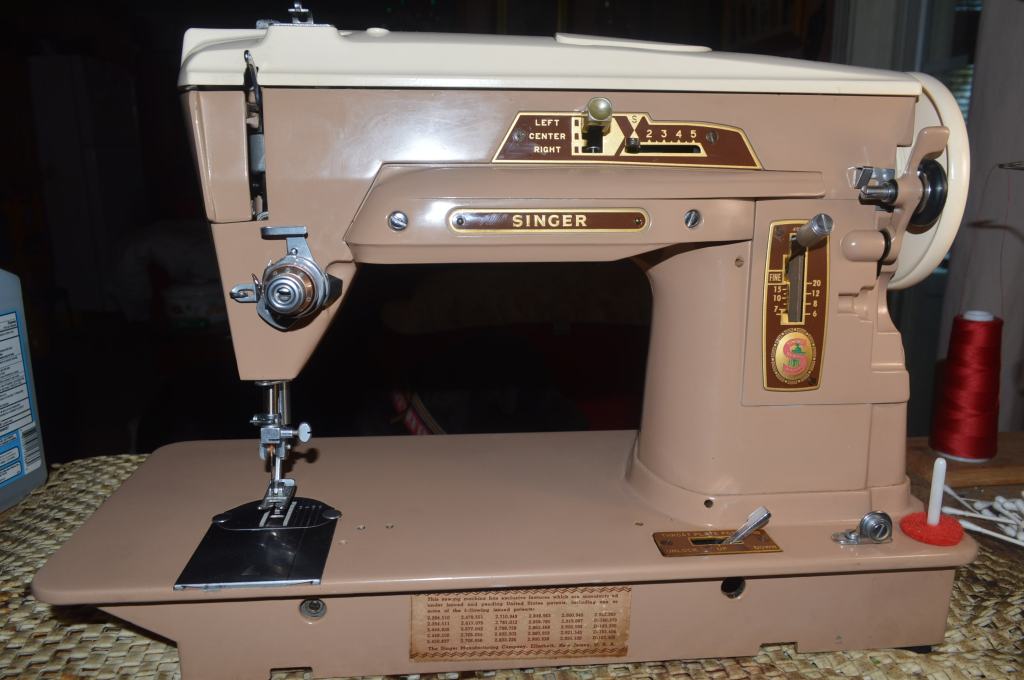
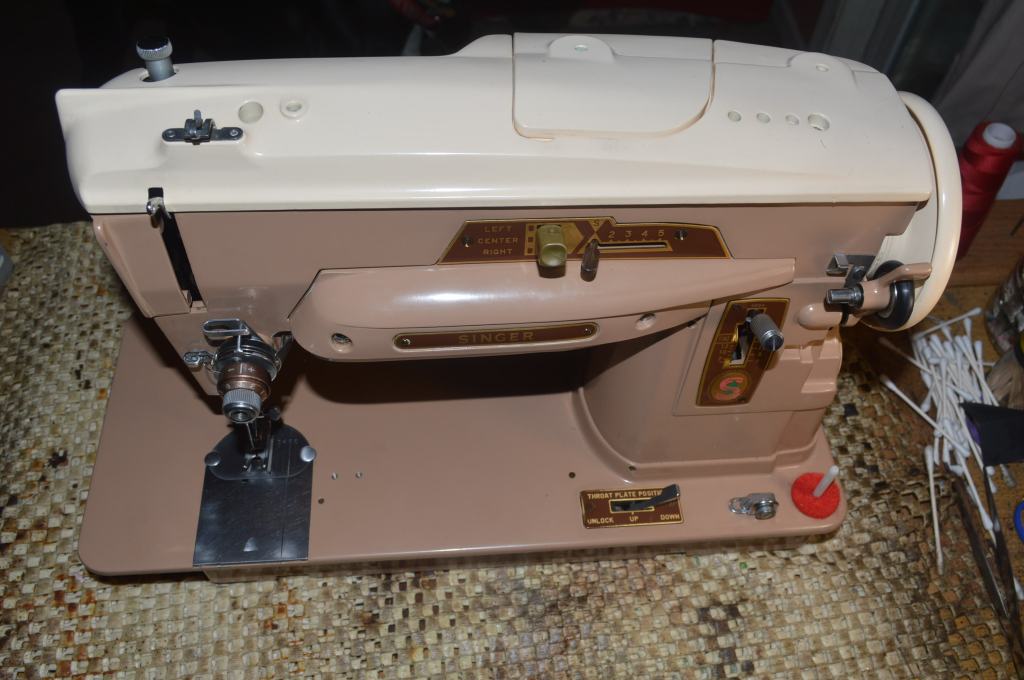
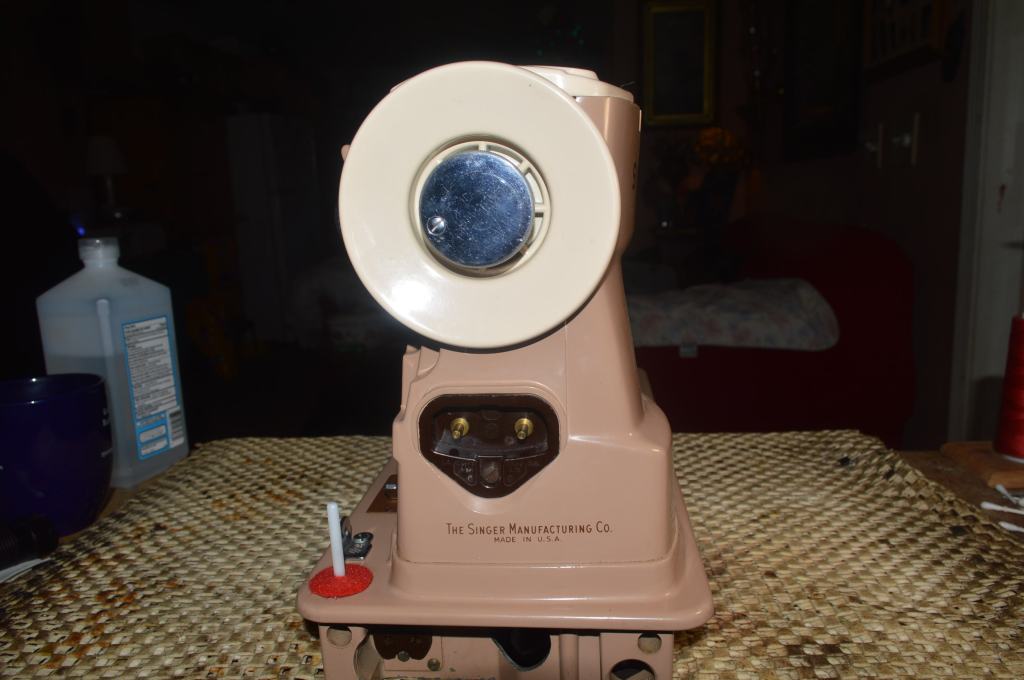
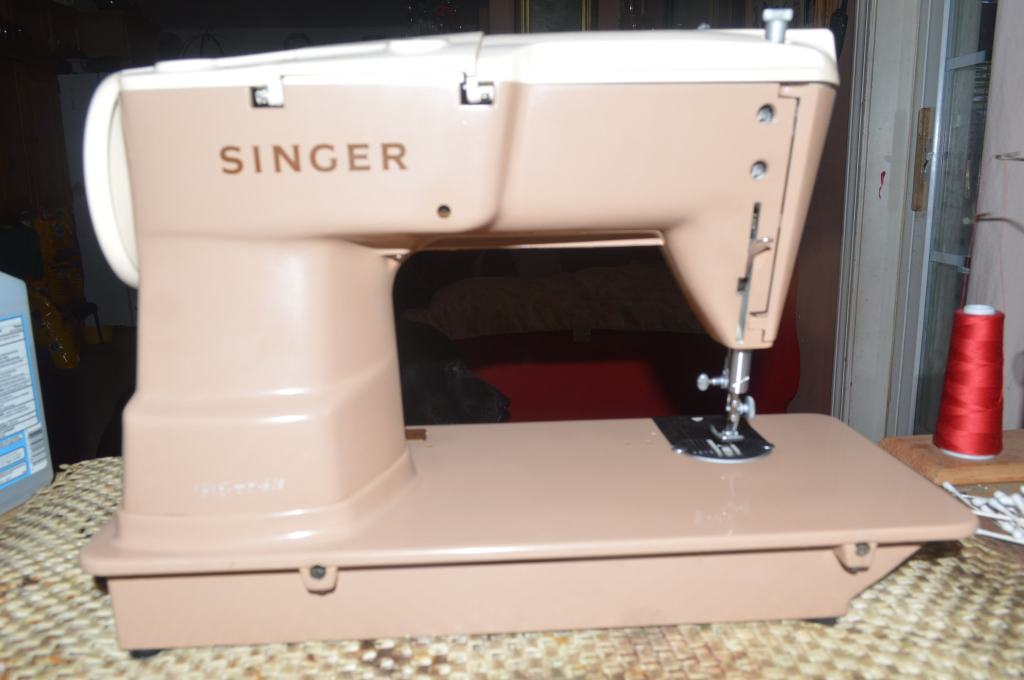
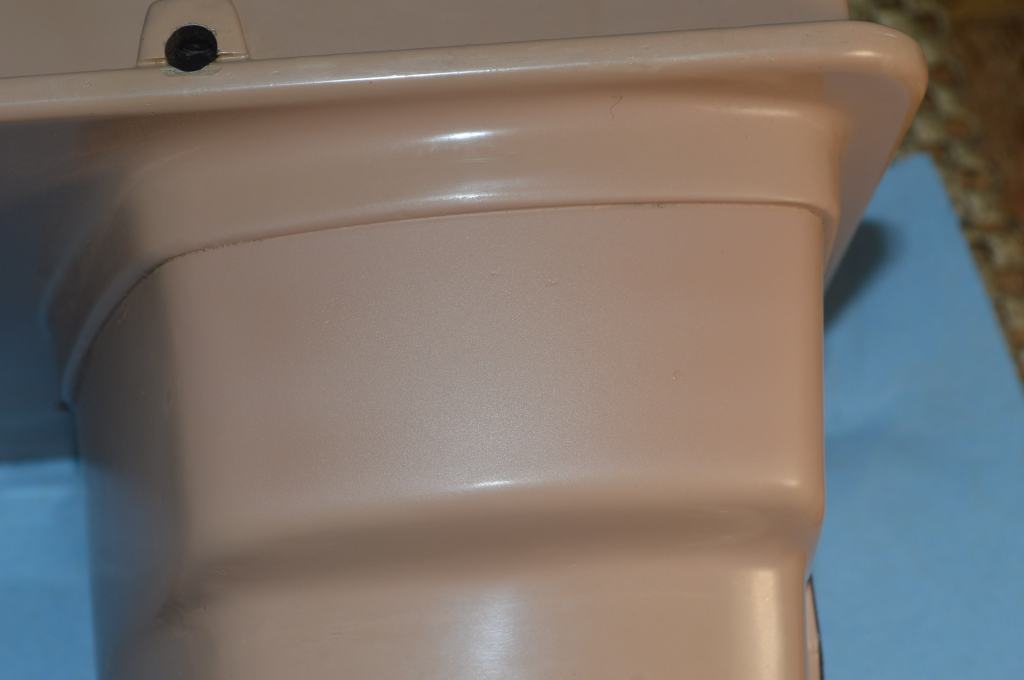
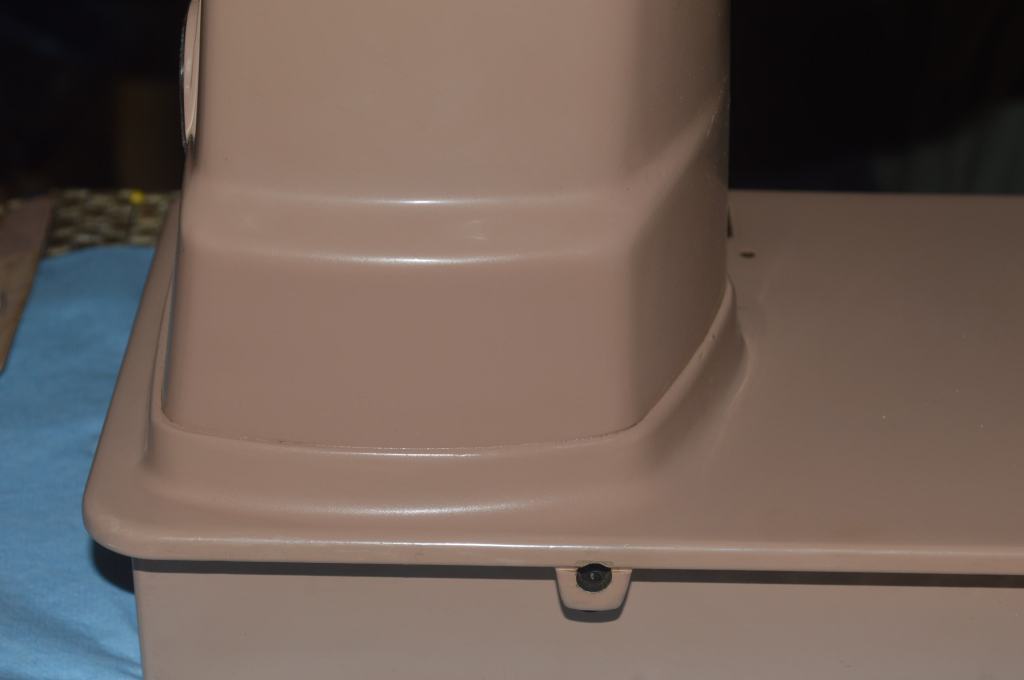
Here are pictures of the machine before I began my restoration efforts.
Want to see more clean?

So, where to start? First, I inspected the foot controller and found it to be in great condition. As requested by the customer, I removed the electronic controller and replaced it with her vintage Singer controller.
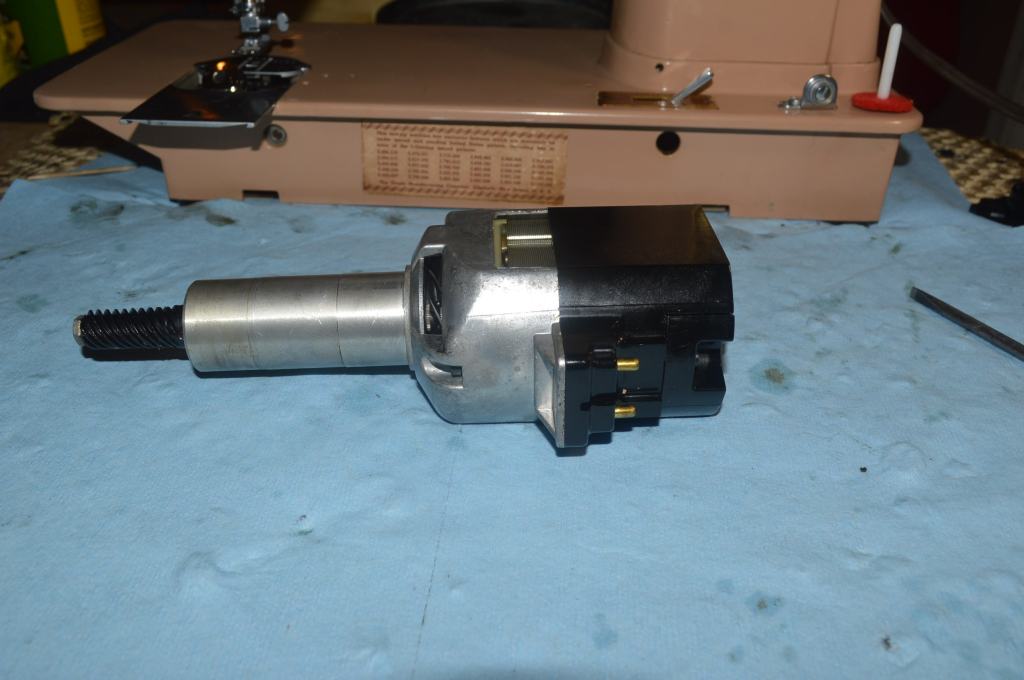
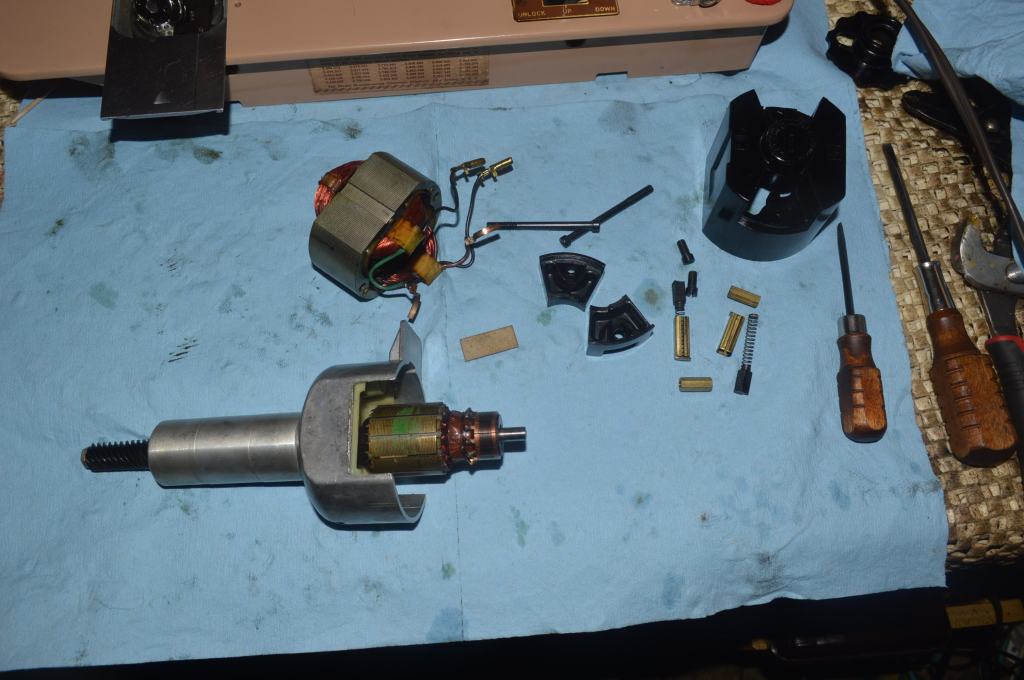
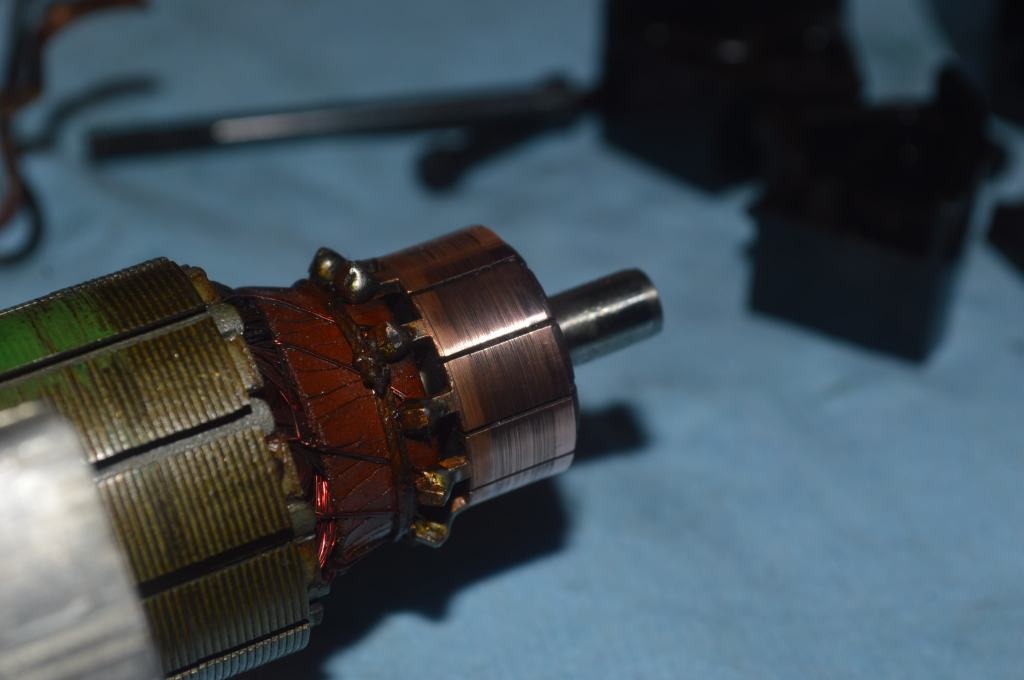
I knew the motor was lacking power, so I began with the disassembly and restoration of the motor. It was removed, disassembled, the armature and motor shafts were polished, and the brushes were reconditioned.
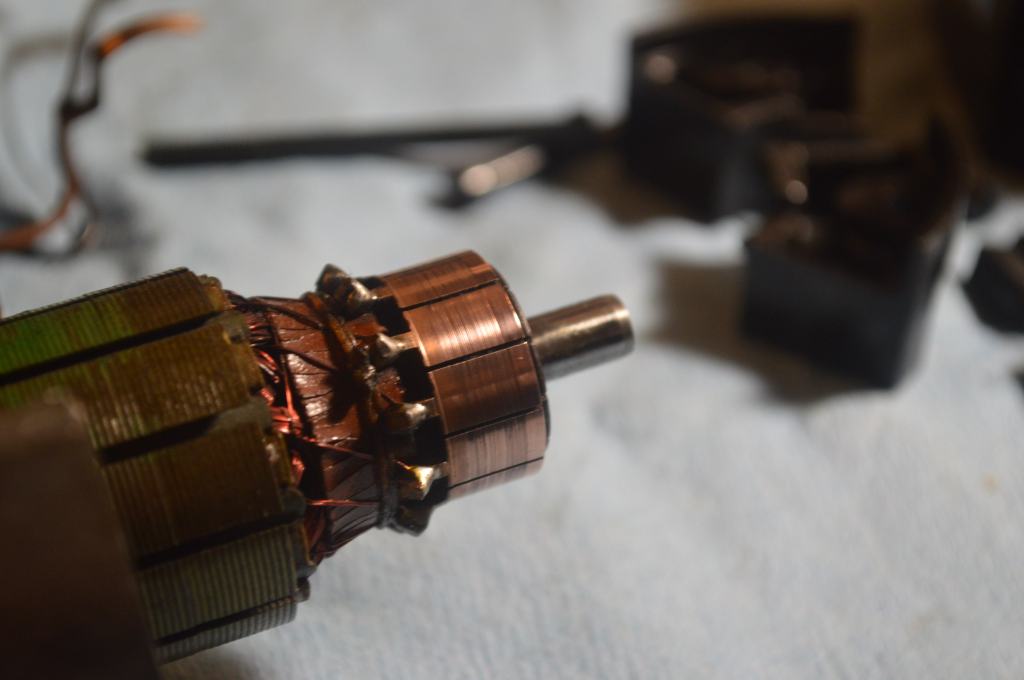
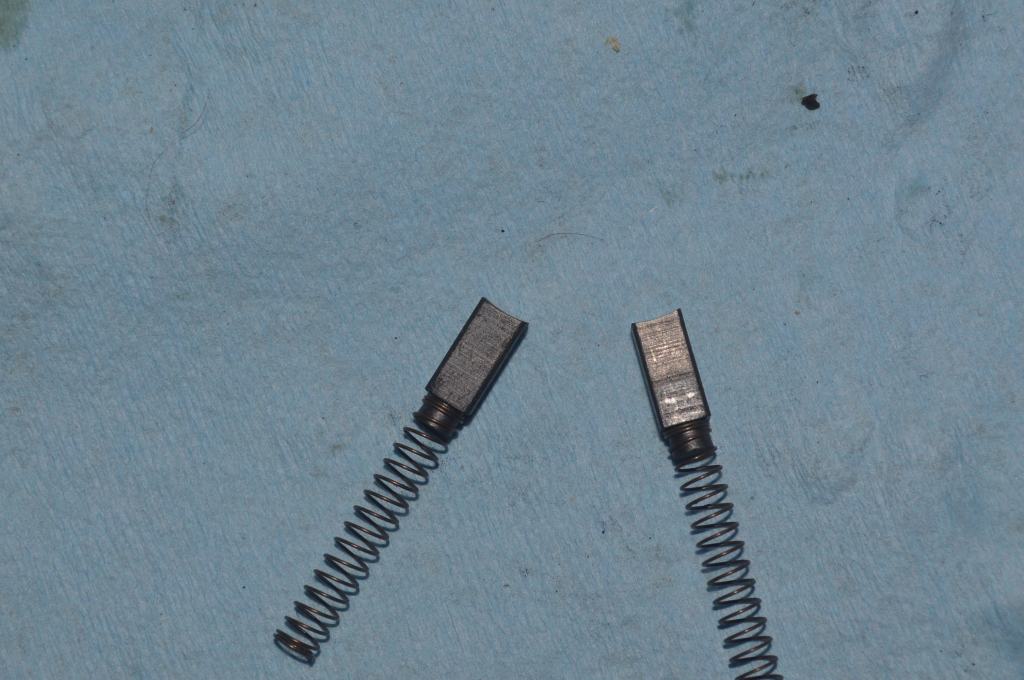
Following this restoration, the power of the motor was much improved and piercing power was no longer a problem.
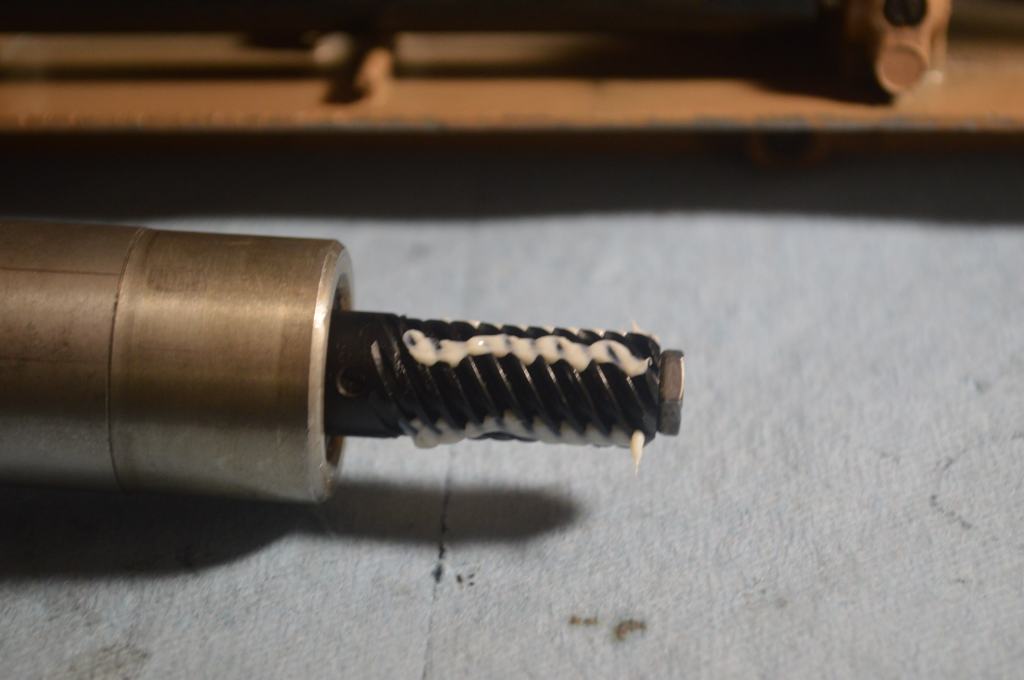
Often ignored, the balance wheel was disassembled, and the internal shock mechanism was cleaned and regreased.
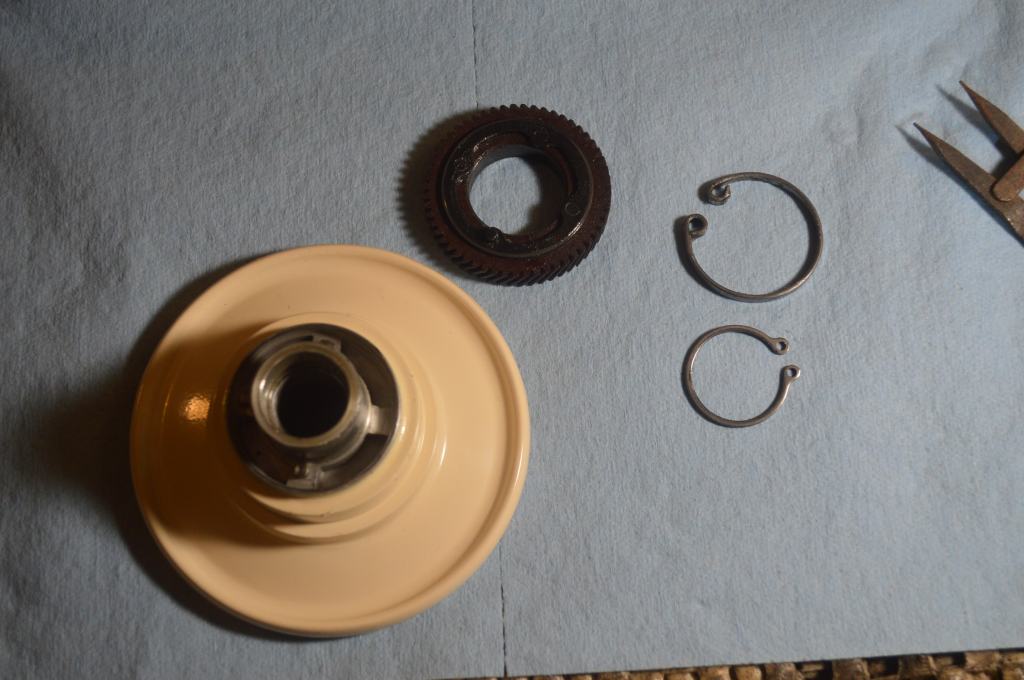
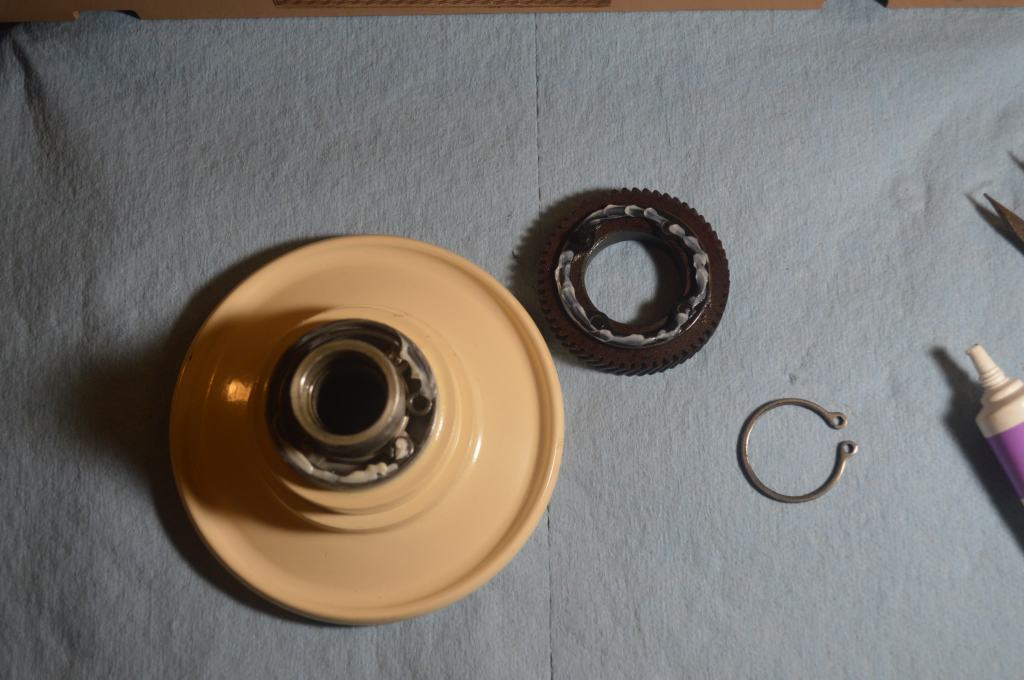
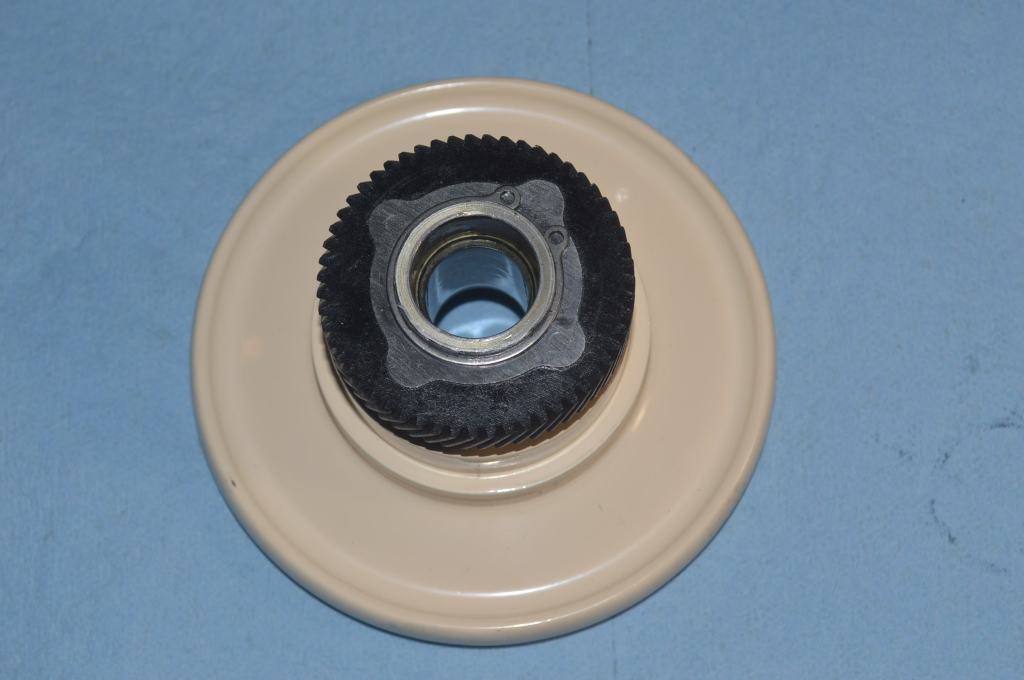
While the work performed in this step has nothing to do with thread breakage, it ensures proper operation of the balance wheel and is an important step for this machine.
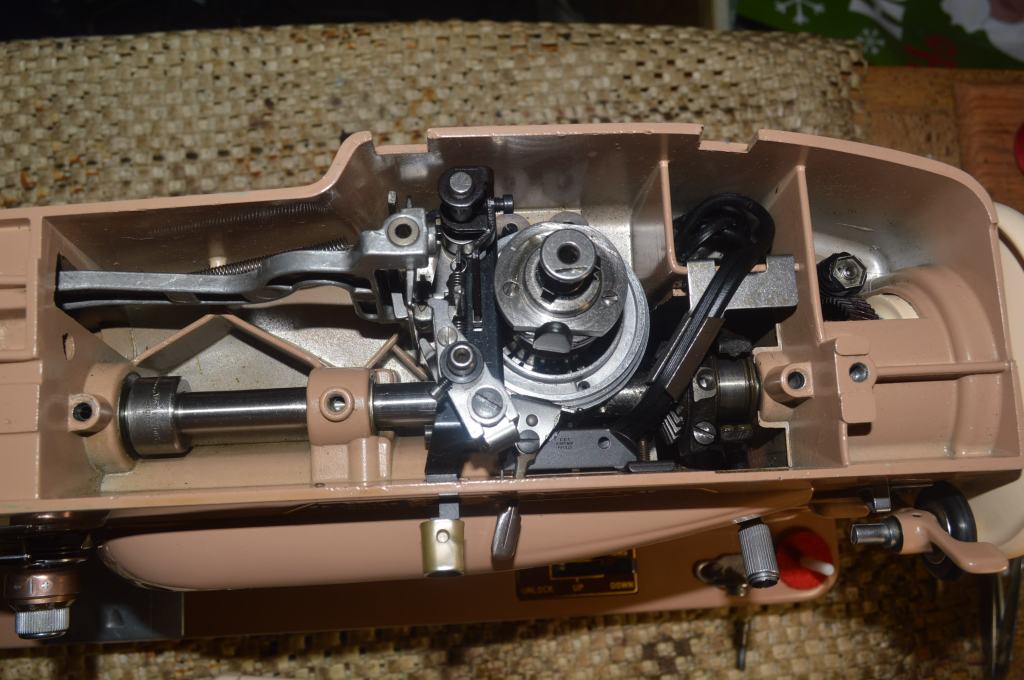
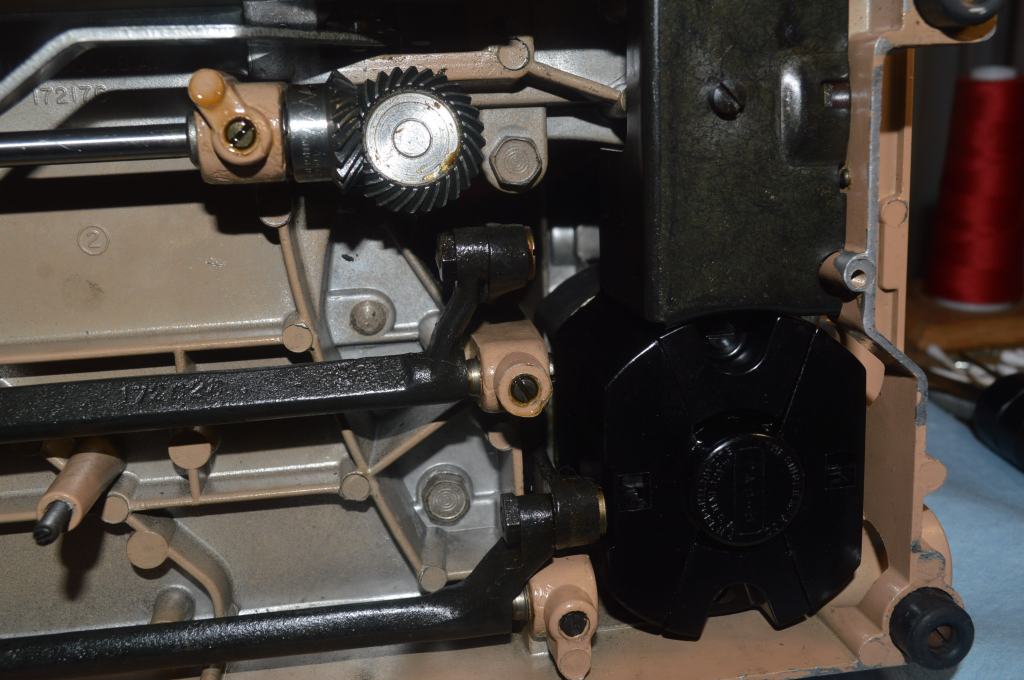
My attention then turned to the feed dog height and position adjustments. I noticed that there was oil varnish present in the joints responsible for these adjustments, so they were disassembled, cleaned, and readjusted.
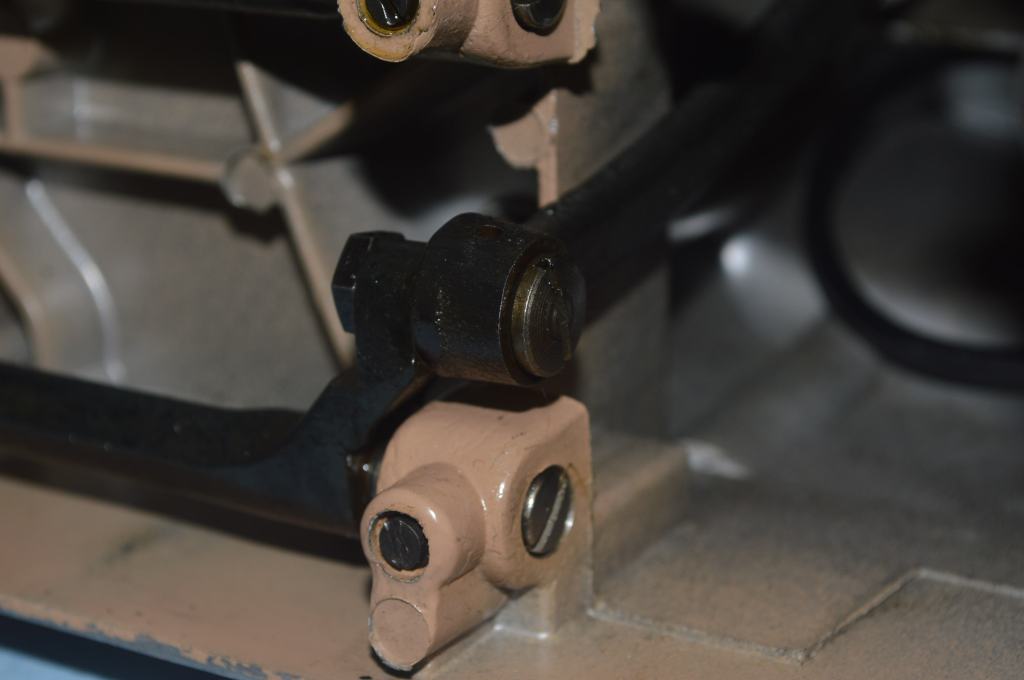
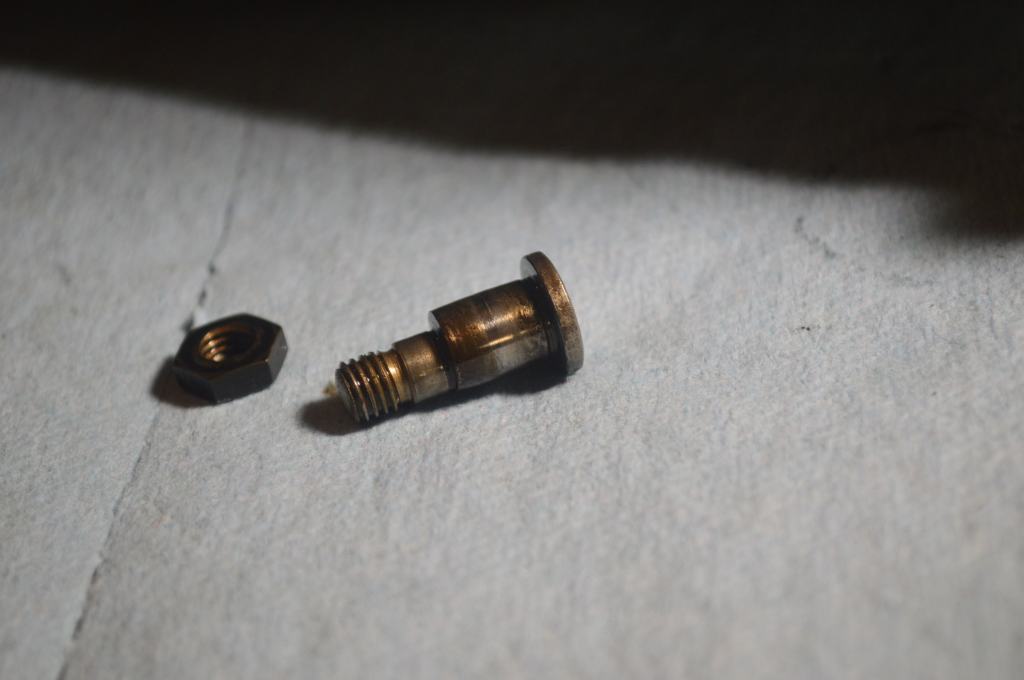
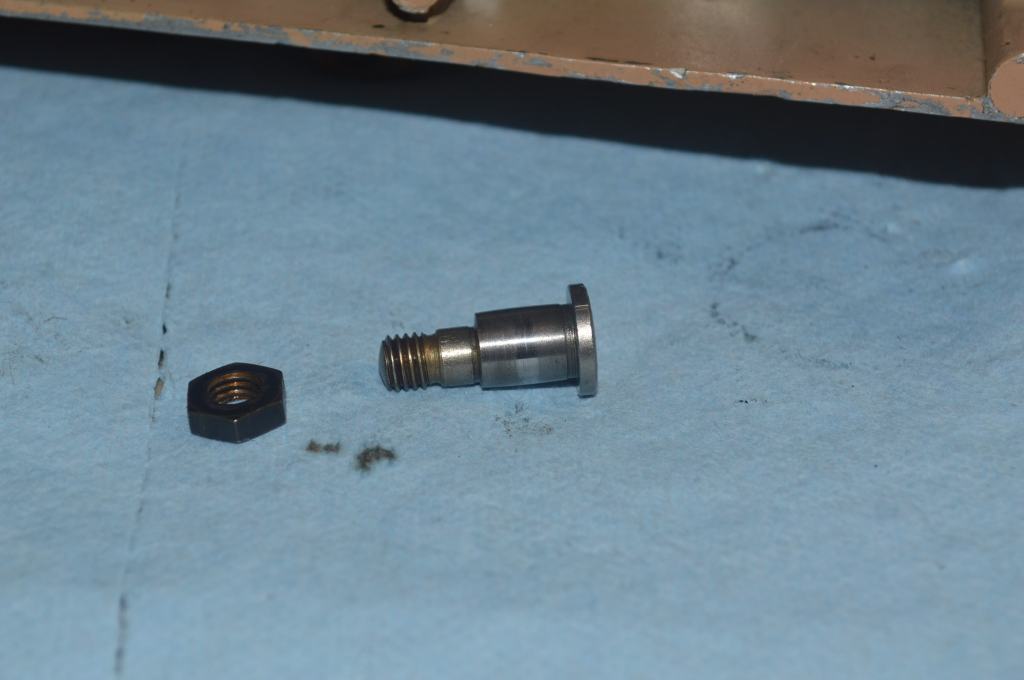
Feed dog height adjustment
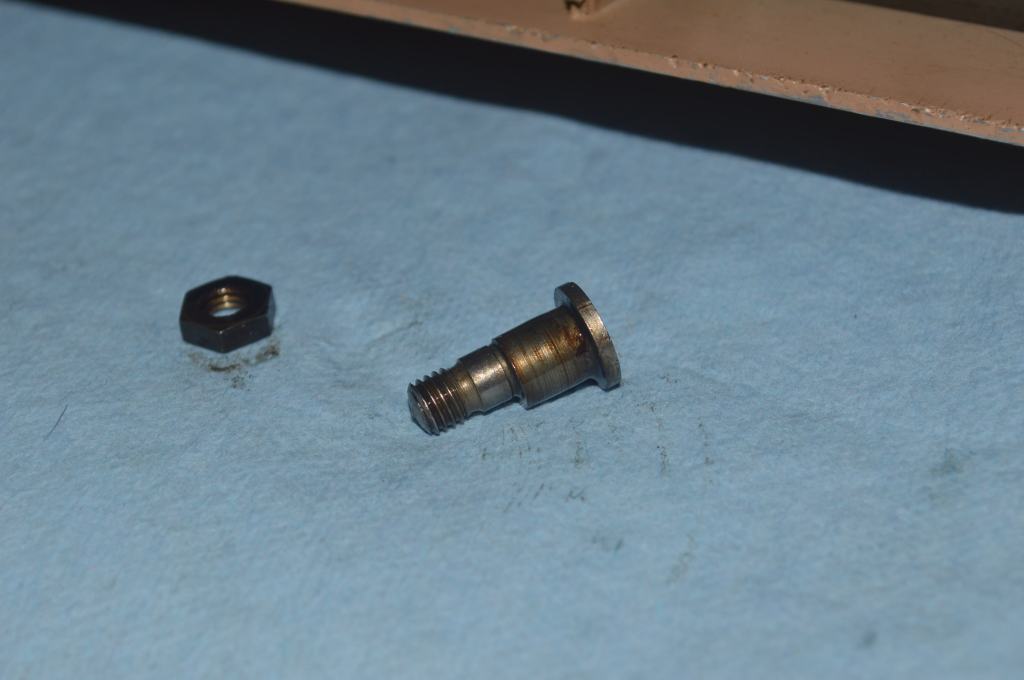
Could these adjustments affect thread breakage? I’m not convinced they did, but proper feeding of the fabric can affect the stitch quality and it is possible that the fabric was not moving in a straight line and pulling the thread against the throat plate. Regardless, they need to be properly adjusted for good fabric feeding.
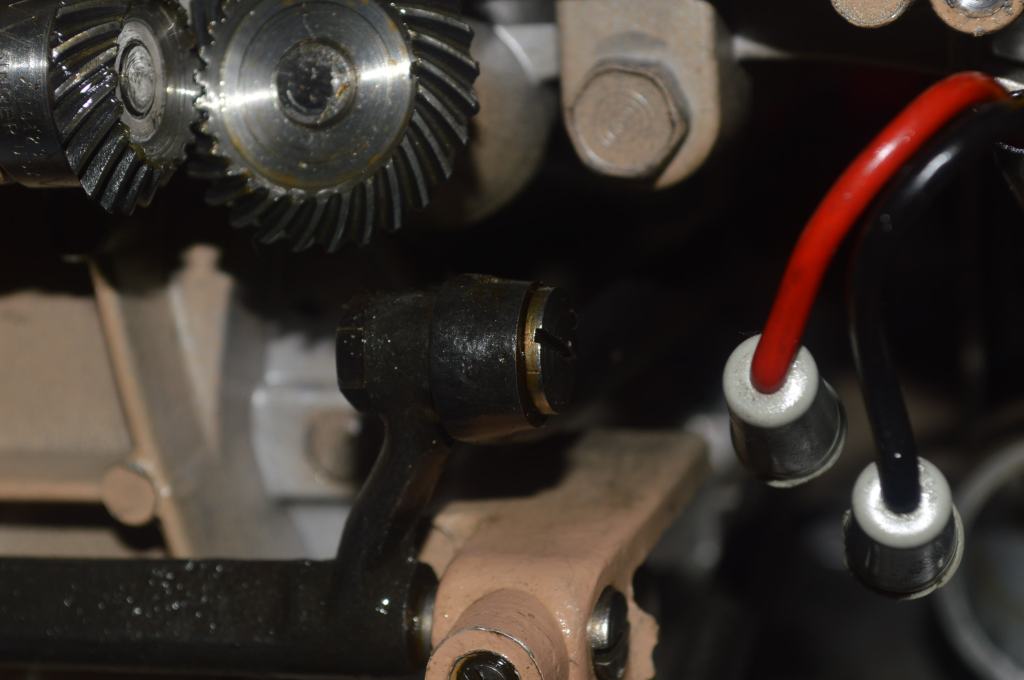
Next, the hook timing was checked. It turns out that the hook timing was spot on, but the needle depth was about 1/32″ too low… hmmm. now there is a suspect. The needle depth needs to be precisely set so the loop in the thread caught by the hook is just adequate enough for hook to catch reliably but not to big. This is a critical adjustment and very important to a proper stitch. A needle set too low will form a larger loop and it is possible that the excess thread loop formed could be breaking from the inertia of the hook snapping the thread as it grabbed it.
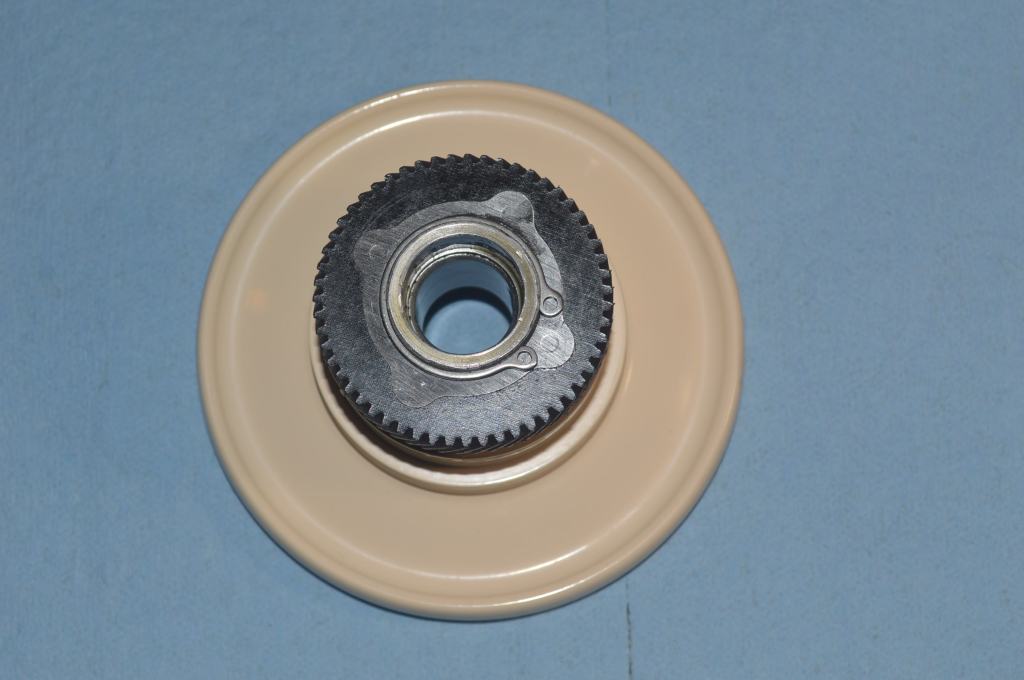
The needle swing was checked for adjustment to ensure that there was no slight wobble in the needle affecting the straightness of the stitch and it was spot on. The presser foot tension assembly was checked and found to be working properly. Next, the assemblies under the top cover were checked. The gears, the cam mechanism, the cam stitch selection follower, and all of the associated pieces were clean and in good adjustment. There was no lubricant on the balance wheel gear, the drive gears, or the cam stack mechanism gear, so these were lubricated.
With all of these items checked and the proper adjustments made, the machine was threaded and checked to see if the problem was resolved. Beginning with two layers of cotton fabric, the machine sewed with no issues. doubling to four layers, the machine had no problems with stitch breakage or piercing power. Doubling the fabric again to eight layers (about as much as I could put under the presser foot), the machine pierced the fabric easily and had no issues with thread breakage.
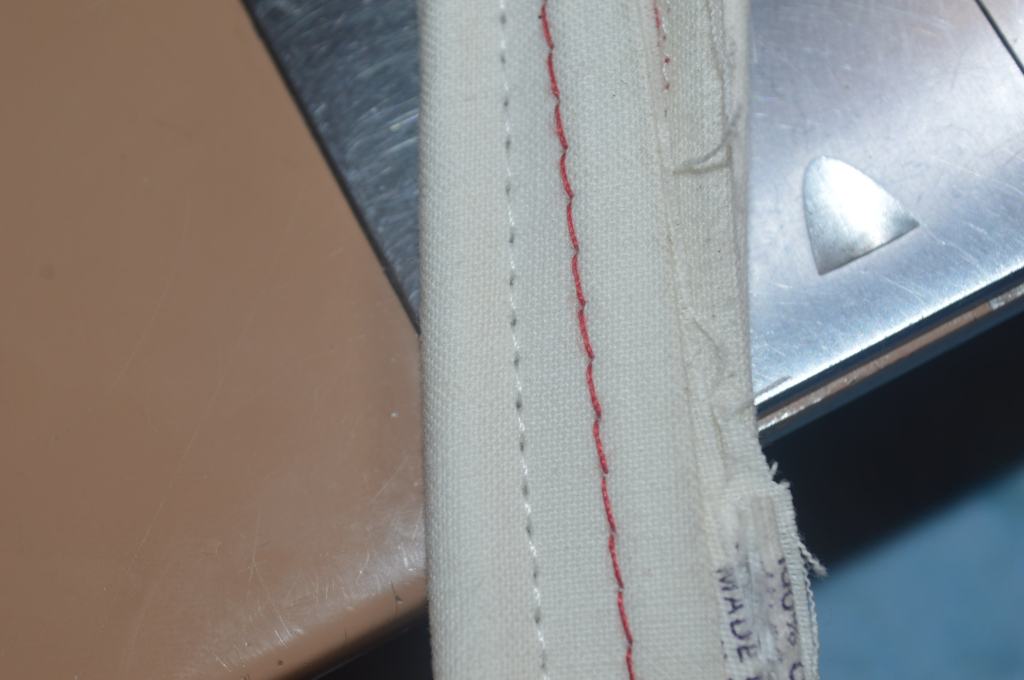

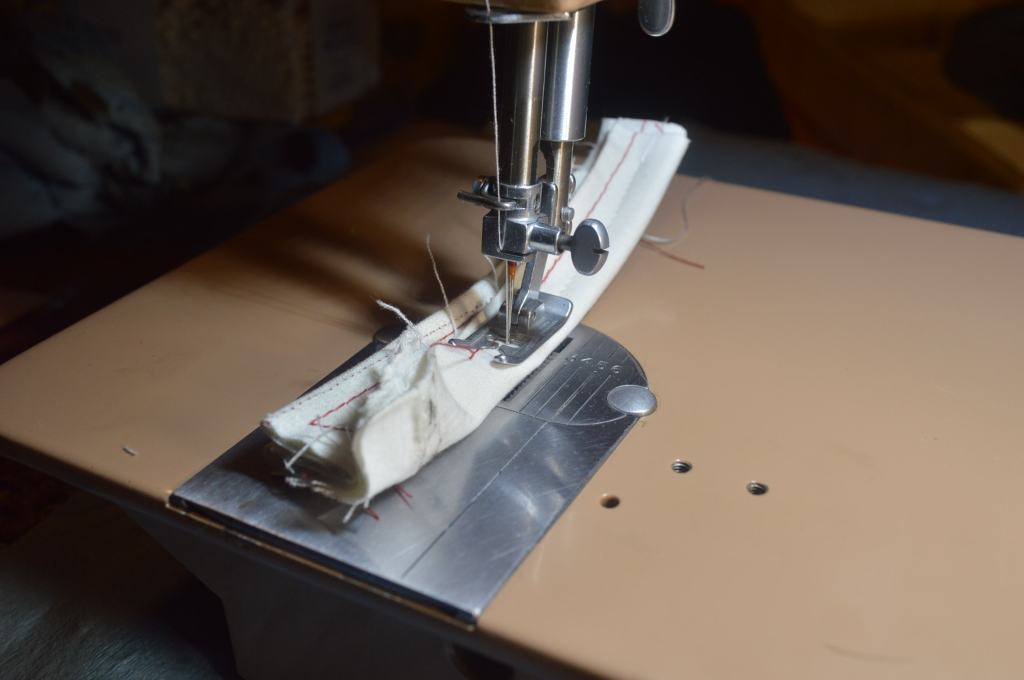
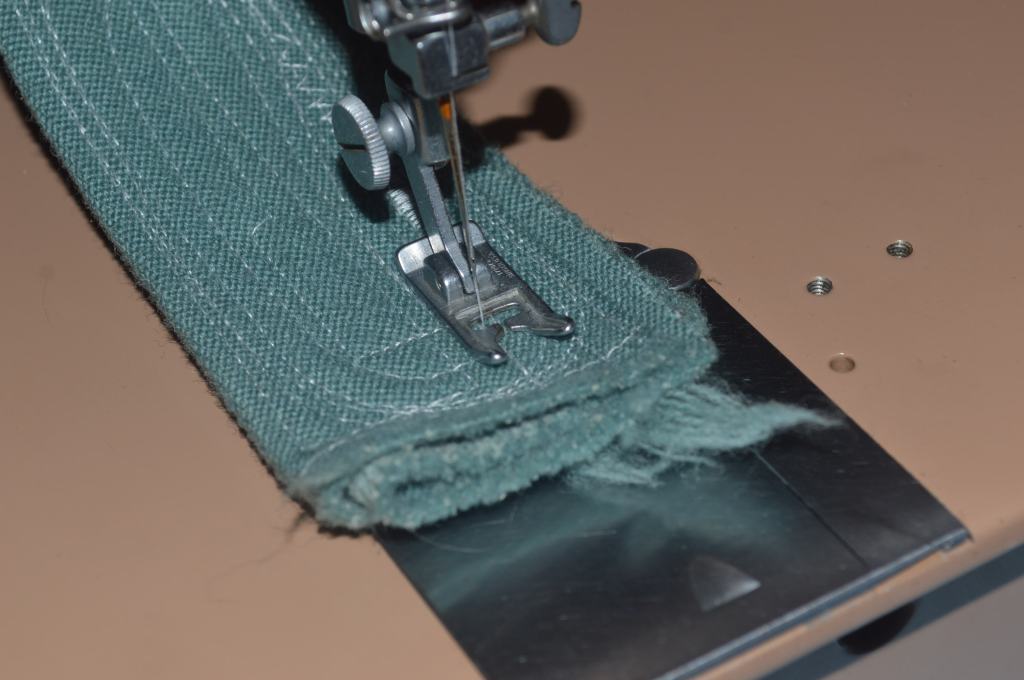
The fabric was changed to an upholstery fabric and again, no issues with the piercing power or thread breakage. In fact, the stitch quality was quite good.
It looks like the problem was found! After making minor and incremental changes to the bobbin and top tension adjustments, the machine performed flawlessly, and the stitch is absolutely beautiful!
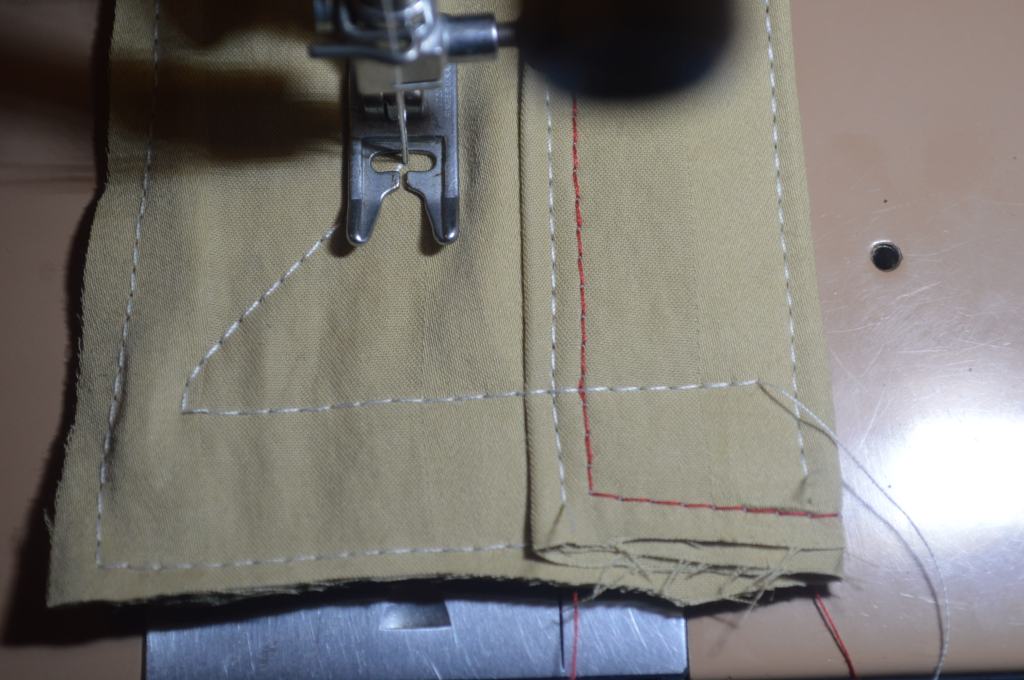
The straight stitch is fantastic, but a zig-zag machine also needs to be regulated properly to get the best zig-zag stitch. The best way to determine this is with a tight satin stitch. A tight uniform satin stitch is an indication that the machines to precisely feeding the fabric and the width indicates the precision of the needle bar swing.
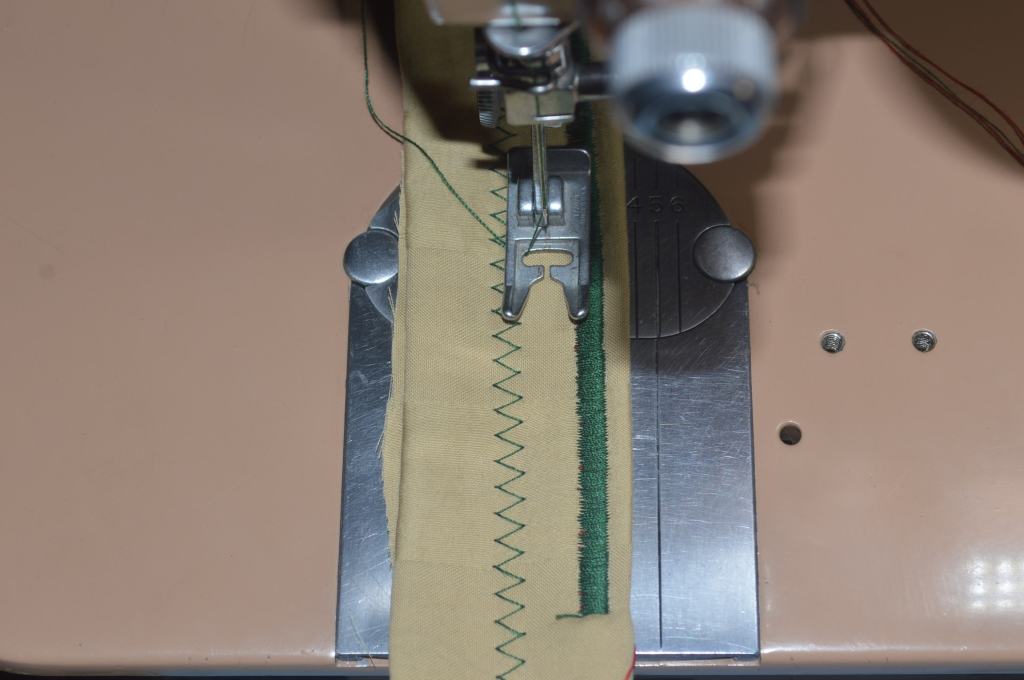
If the thread was going to break, it would break here. As you can see, the machine produces a great zig-zag and satin stitch.
I suspect that the needle bar depth was the culprit but ensuring that all of the mechanisms are in proper adjustments are all important for optimal performance. The quality of this machine told me what I already knew… this 403A is powerful, quiet running, smooth, and capable of sewing any fabric with ease while producing a beautiful laser straight stitch and a great zig-zag stitch.
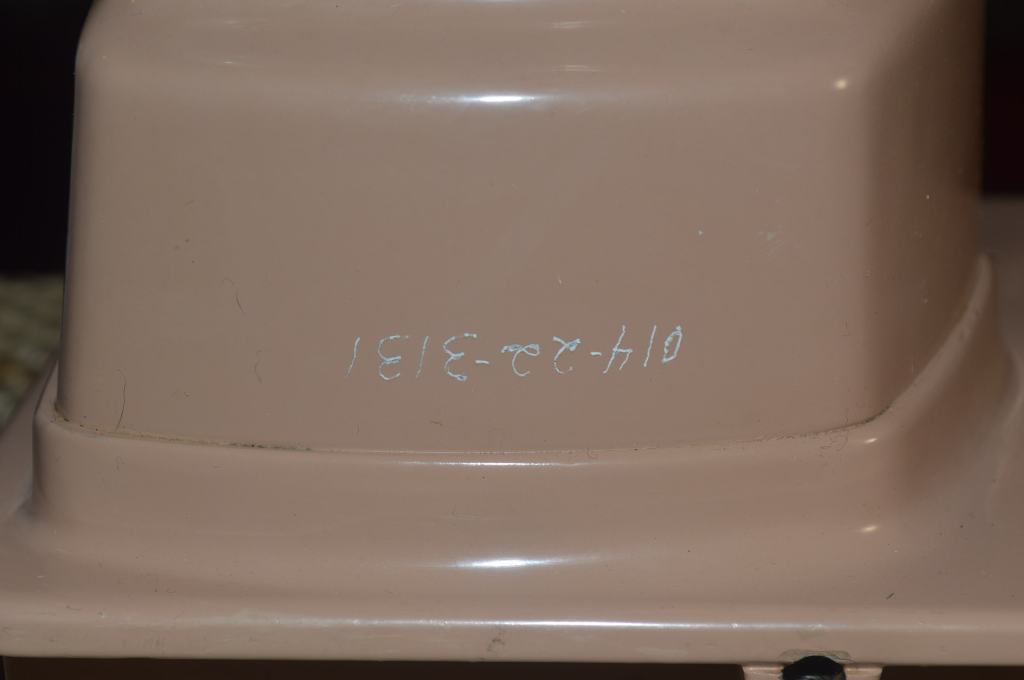
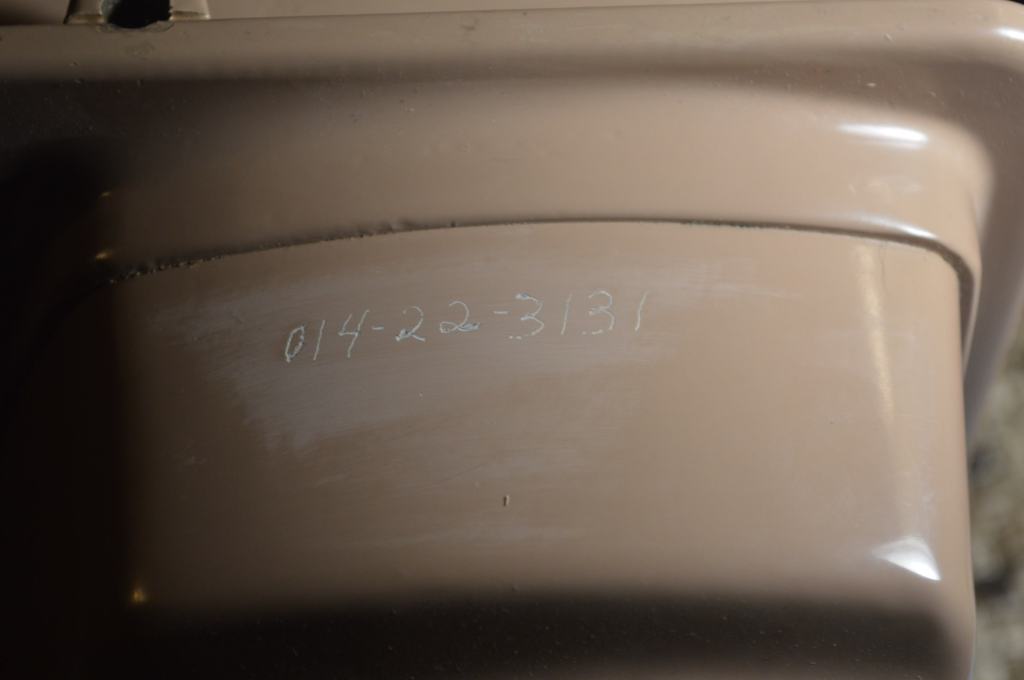
The only work remaining is to correct a cosmetic blemish on the back of the sewing machine pillar. Someone scratched a serial number (not the machines serial number) thru the paint. She asked me to remove the scratched in numbers and for this I used color matched paint.
The repair starts with smoothing the paint over the numbers with 1000 grit sandpaper.
Next, the numbers are filled with a body glazing putty.
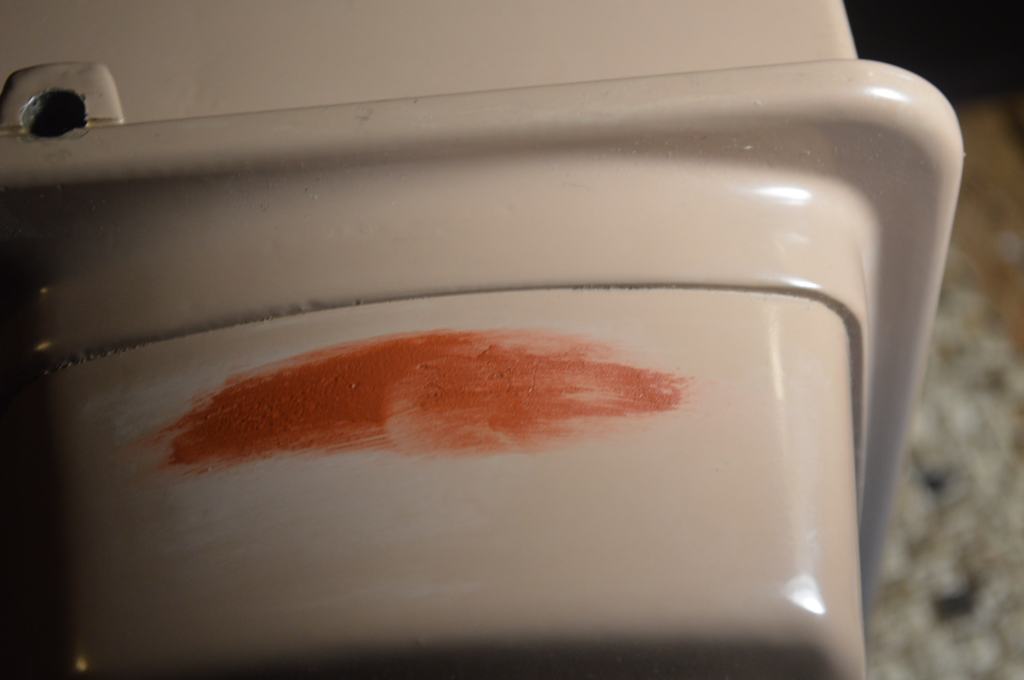
The glazing putty was removed with 1000 grit sandpaper leaving only the numbers filled with the glazing putty. Then the area was sprayed with color matched paint using an air brush.
To finish the repair, a high gloss polyacrylic coating was air brushed over the repair to seal and protect the paint.
With this done, the restoration is complete! The machine looks great and sews exceptionally well. I expect that she will look forward to using her machine for any sewing project she desires or can imagine!
Well, I hope you like what you see and enjoyed the restoration process as much as I did… Like I always say, some sewing machines need more, some need less, but they all get what they need and now I can look forward to the next restoration!
Looking for a similarly restored quality vintage all metal sewing machine for your sewing room? Let us know! We specialize in custom orders and are happy to locate and restore the “perfect” machine for you!
As always, if you have any questions, or if I can be of any assistance, please contact me through Etsy or send me an email to Pungoliving@gmail.com.
Thanks for reading!
Lee

Lee,
I just finished reading this and the 1946 201-2 restorations. Both beautifully done as usual. I never did get to cleaning the presser bar and needle bar assemblies and the other parts in the head of my 201-2, the same with my 403A and the 401A. They all run so nice as they are. Maybe this spring when my garage is warmer to work in and who knows maybe I’ll get the 1904 -66 painted, decaled and back together.
I have been looking at your restoration tab to see the latest for a while now and this time was the charm.
Looking forward to the next one.
Take good care, Bill
LikeLike
Hello Bill,
I am working on a restoration now… and it is quite different from the others. Hopefully the weather here will let me get on with painting. I am adding temperature control in my paint box so that will help with the colder weather.
Stay tuned!
Lee
LikeLike