
Someone asked me today on how to do this so this tutorial covers the motor belt replacement on the majority of Kenmore 158 series sewing machines. It does not apply to the 158.1030 or 158.1040 sewing machines because the motor attaches differently. Depending on the model of your machine, you may or may not need to remove the balance wheel or a bottom cover, but the steps to loosen and replace the belt are essentially the same across the board.
The machine here is a 158.1430, but as I said, the process is straight forward and applicable to most Kenmore machines so I will explain it in steps. If your Kenmore has a bottom cover (convertible or free arm machine) you will need to remove it first before proceeding thru these steps.
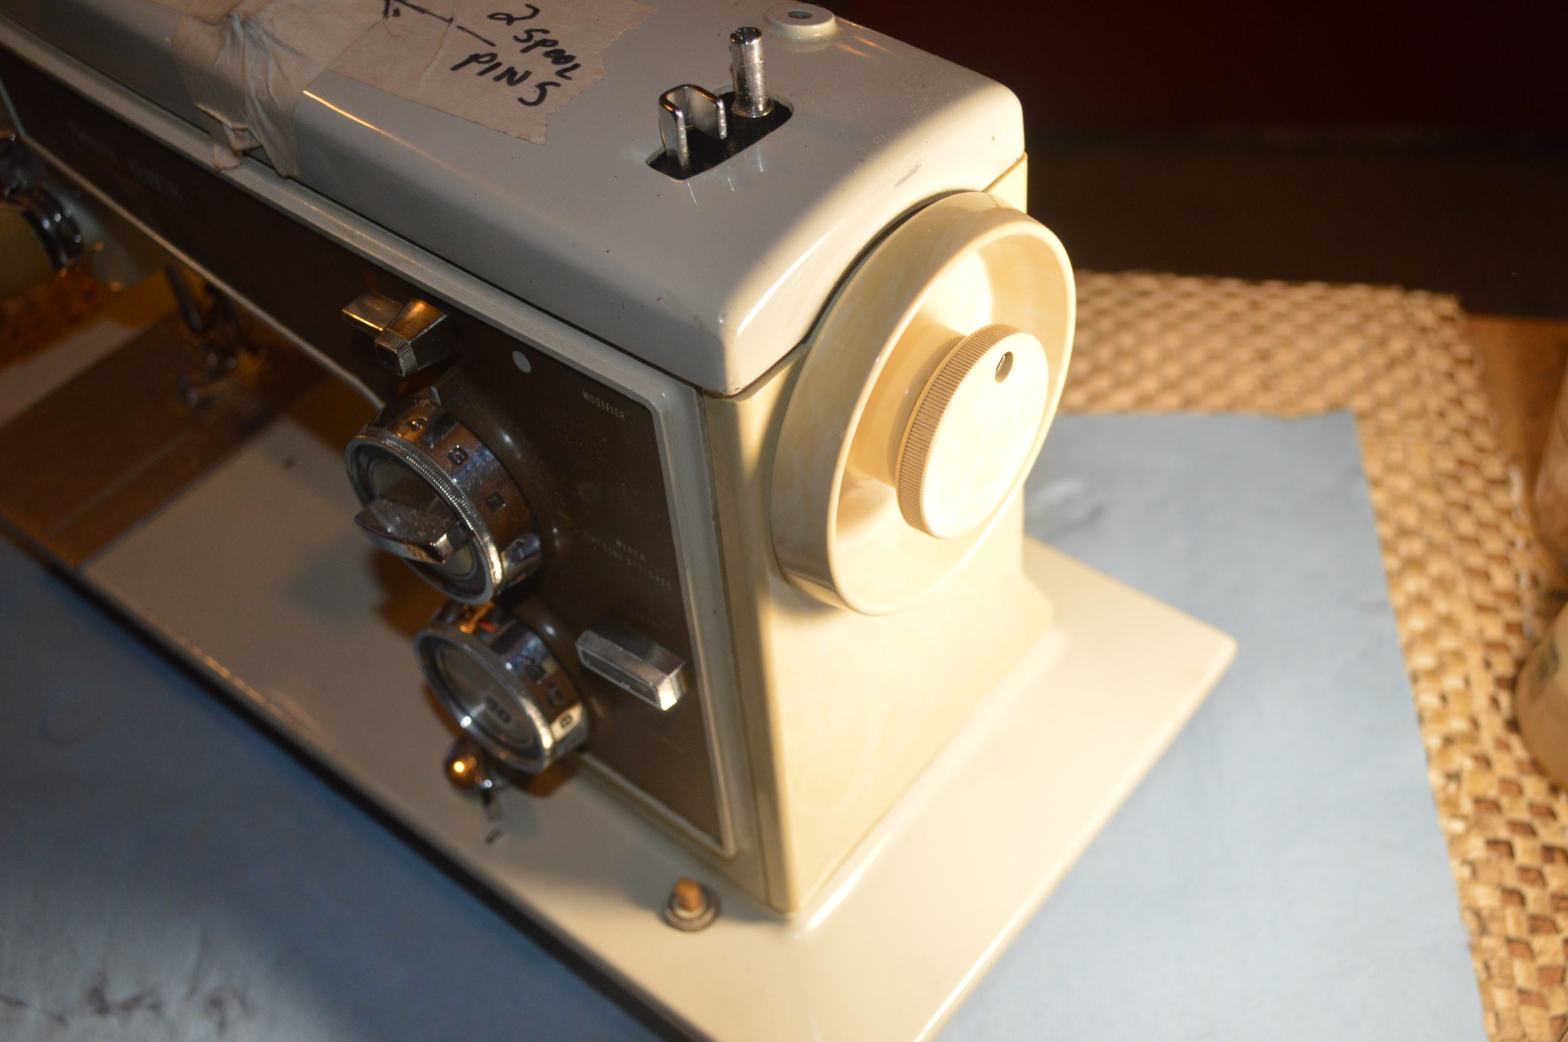
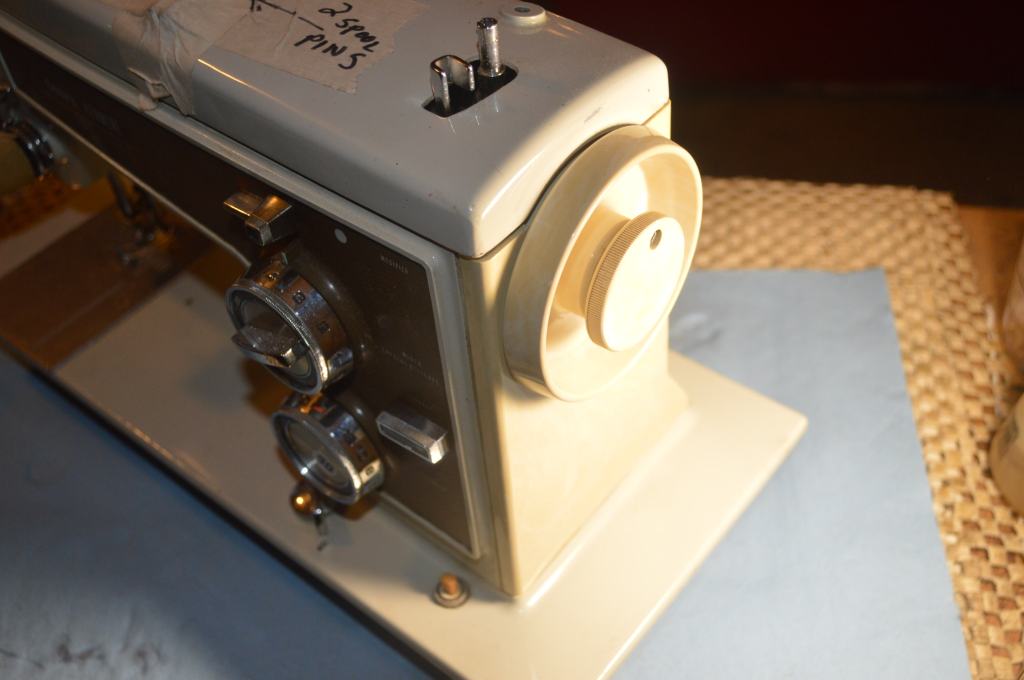
Step 1. Remove the top cover of the machine. There are no screws holding the lid on and it is held with spring clips… simply pop the cover off.
Maybe you noticed, but please Ignore the fact that the belt is already off the pulley on this machine…
Step 2. Remove the two screws attaching the rear cover to the machine.
Step 3. Tip the machine up on its nose.
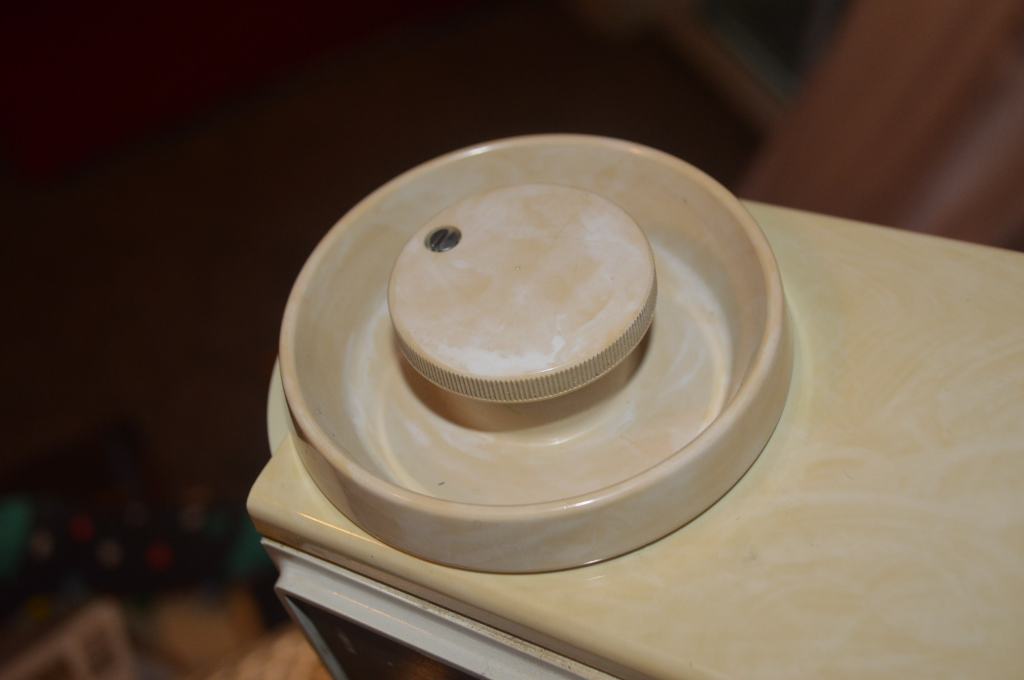
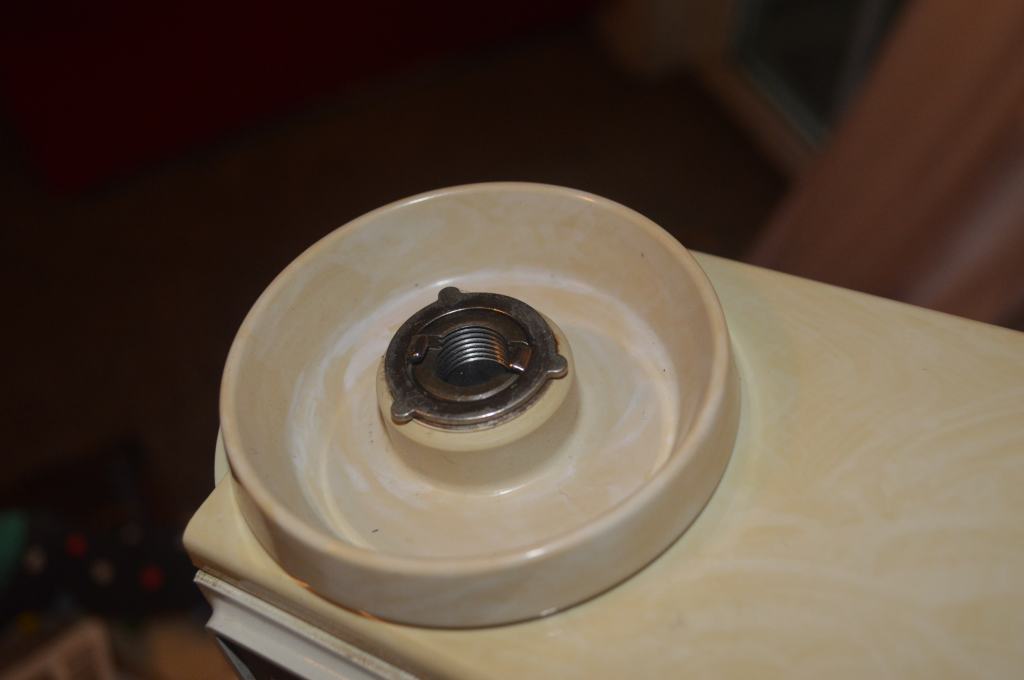
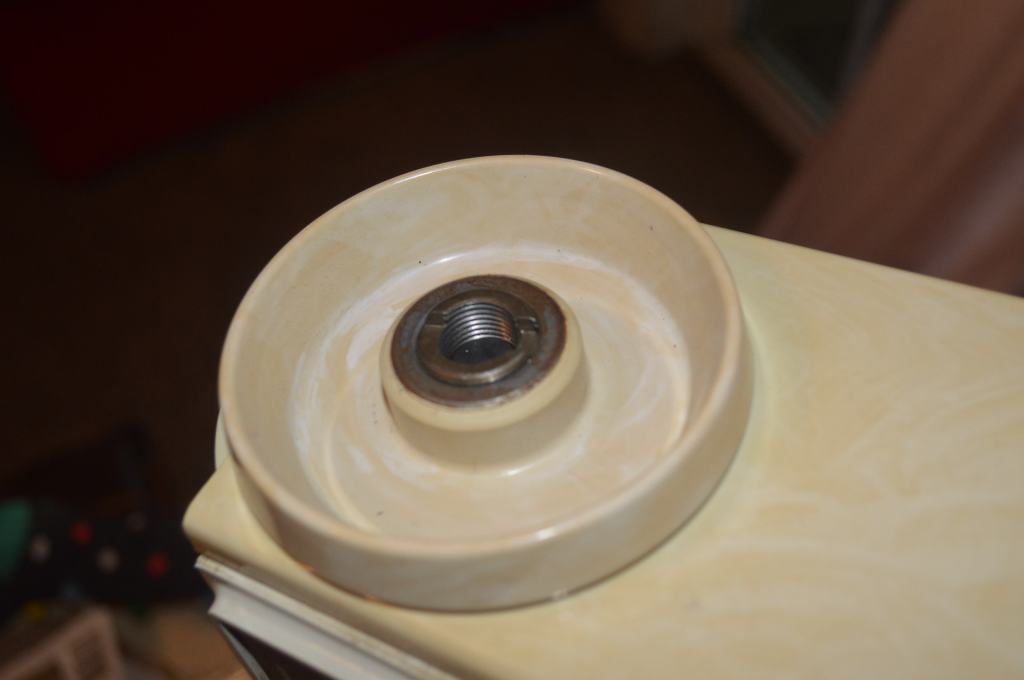
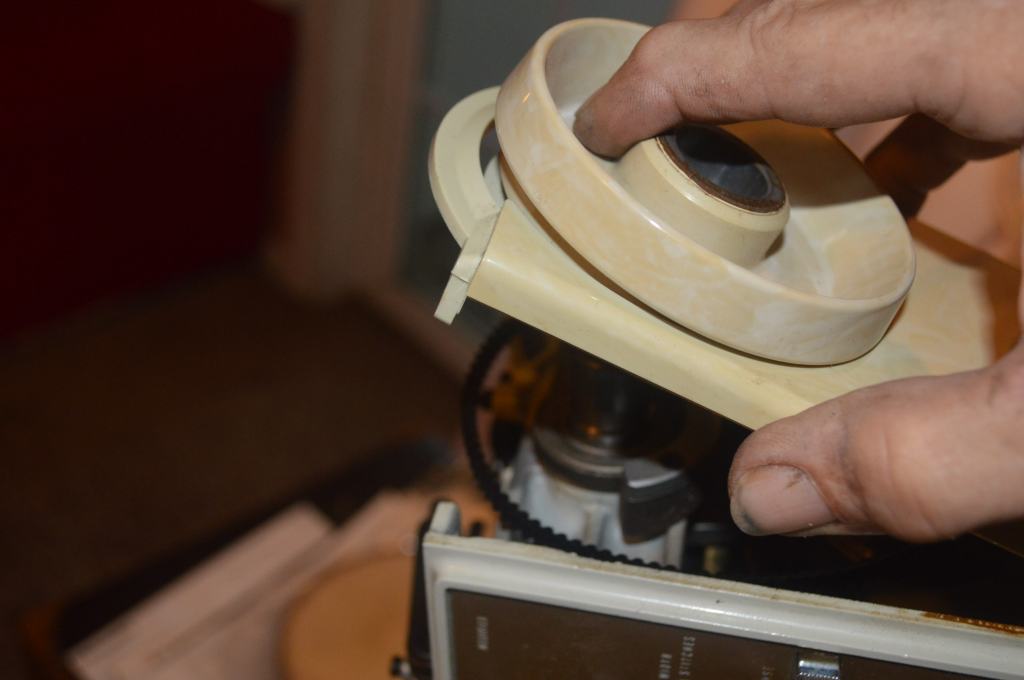
Step 4. Loosen the screw in the balance wheel stop motion knob (but don’t remove it). Unscrew the stop motion knob and remove the large washer from underneath it.
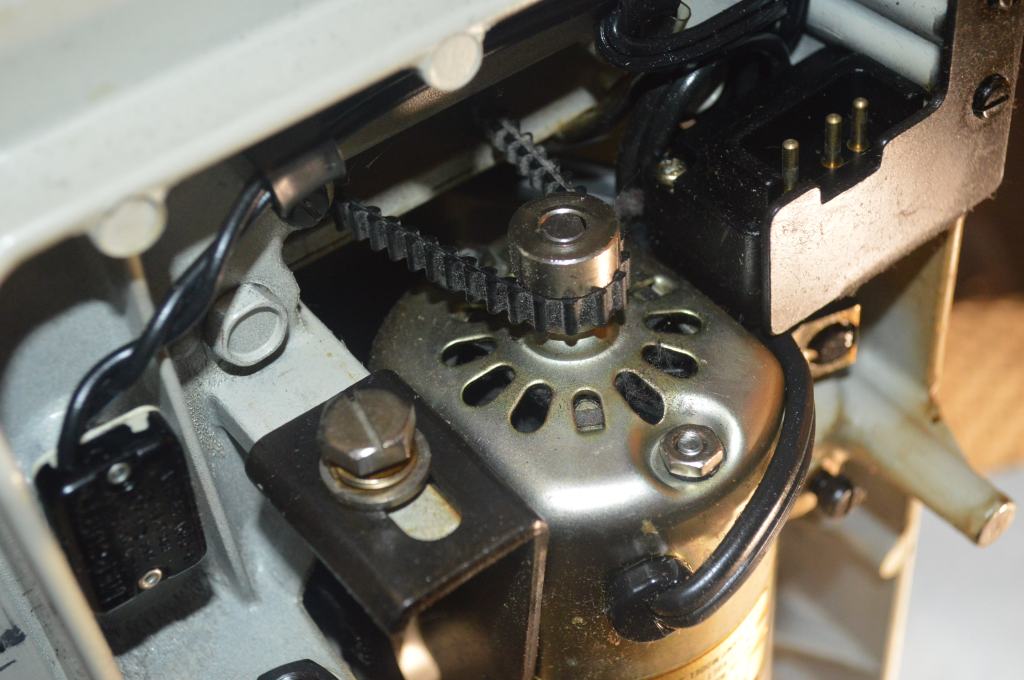
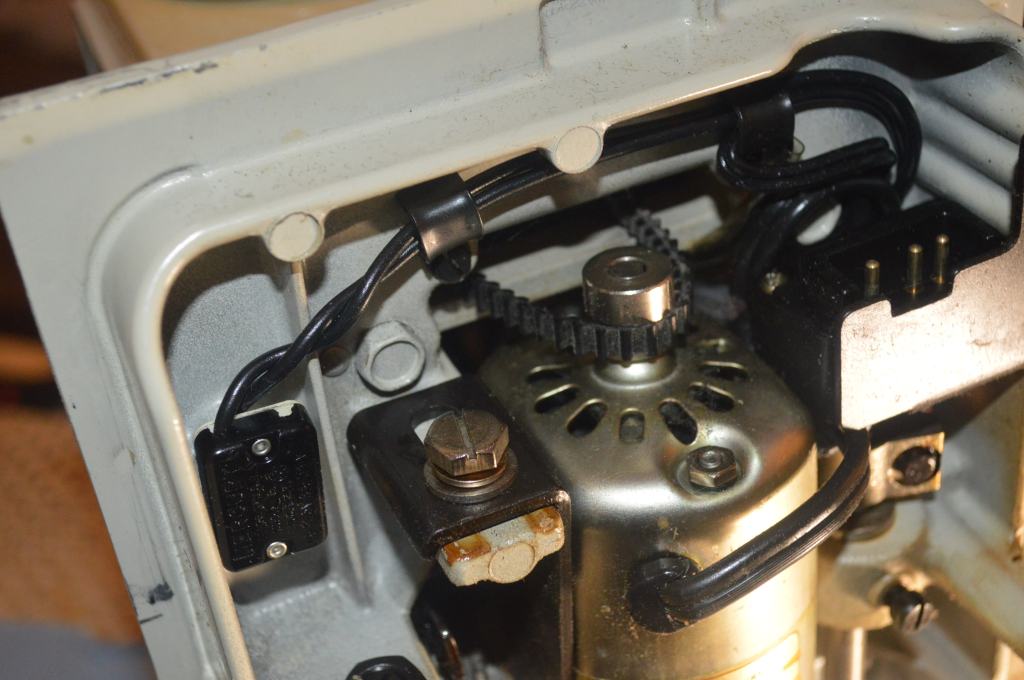
Step 5. Looking at the bottom of the machine, loosen the bolt on the motor bracket with a large screwdriver, 12mm wrench, or a crescent wrench. This bolt may be very tight. Shift the motor bracket up as far as it will go to loosen the belt and remove the belt from the motor pulley.
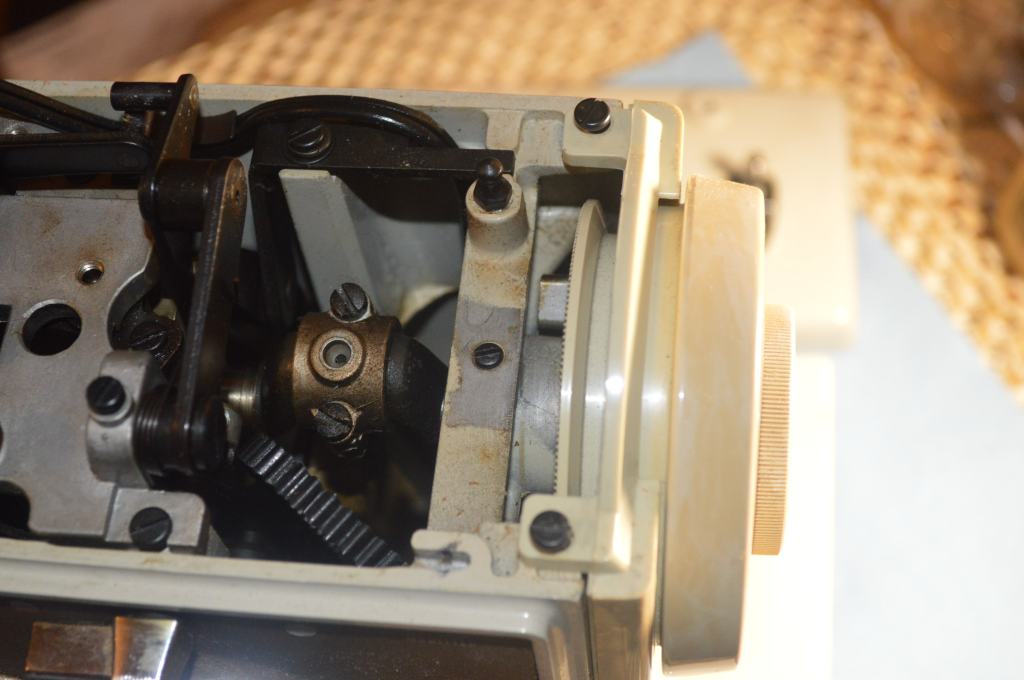
Step 6. With the belt removed from the pulley, gently pull the balance wheel and the rear cover away from the top of the machine and away from the upper arm shaft bushing. The rear cover has clips on the bottom that disengage when the cover is pulled away from the top of the cover. The motor belt is captured between the balance wheel and the cover. As soon as the balance wheel is free from the sewing arm shaft bushing, remove the belt from between the balance wheel and the cover.
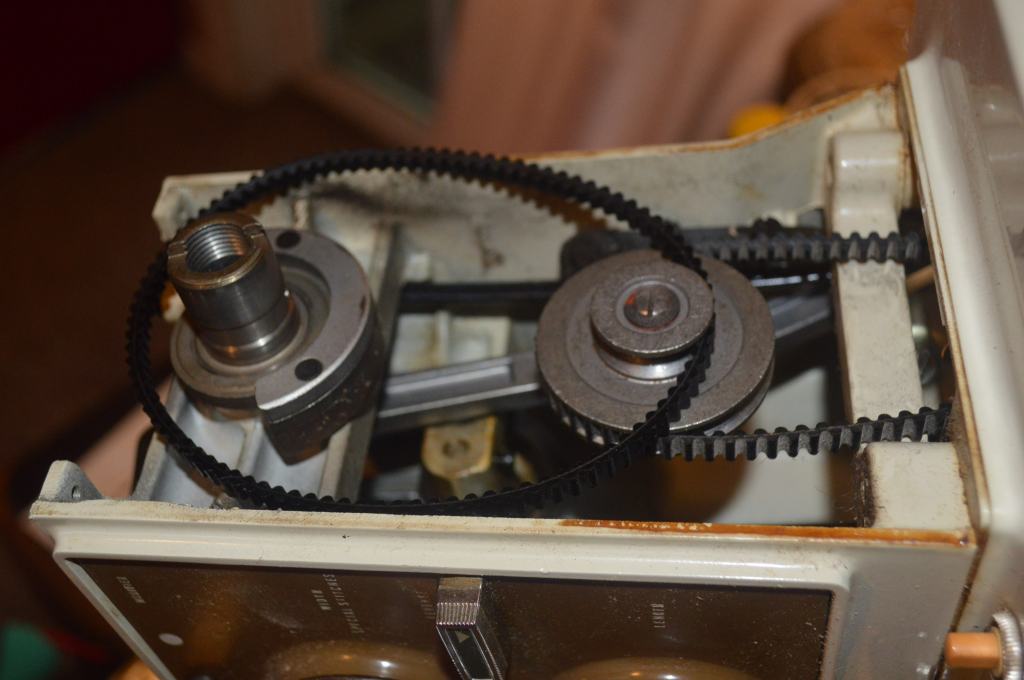
Step 7. Remove both belts from the large double pulley found behind the rear cover. This pulley is actually a reduction pulley and it magnifies the motor’s power to the sewing mechanisms… a nice feature!

Step 8. Grab your new belts. You will notice that they come in a set and there are two sizes.
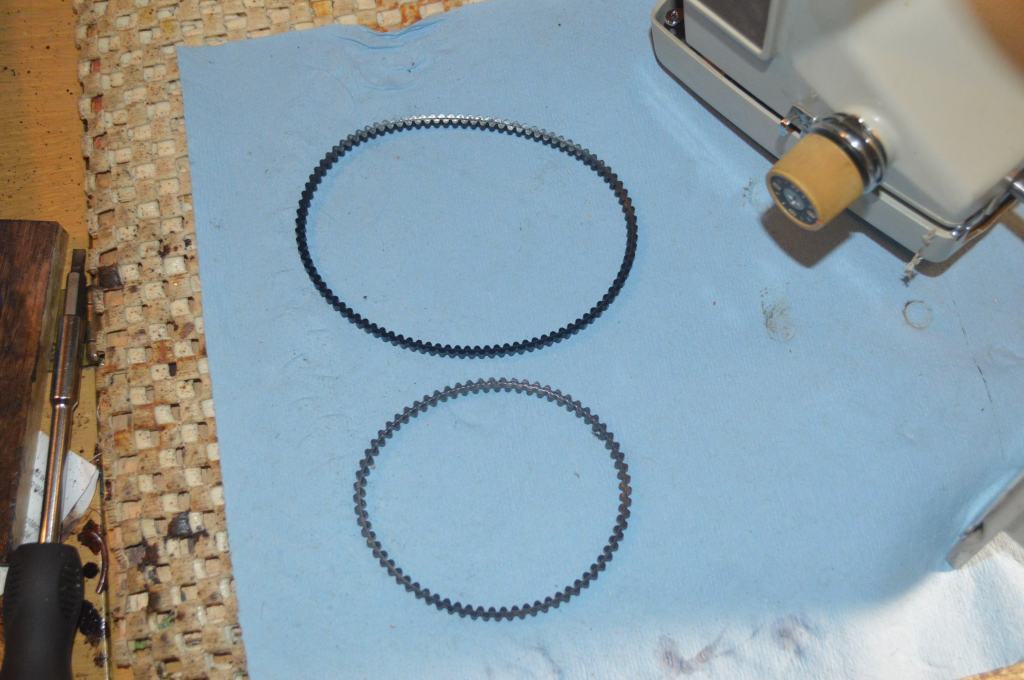
The smaller belt goes on first. Install the small belt on the large pulley groove and the motor pulley. Next, put the longer belt on the smaller pulley and lay it over the upper arm shaft bushing. Replacement motor belts are readily available and can be found at any online sewing machine parts store. They are usually sold in sets and you should replace both.
Step 9. With the balance wheel inserted thru the hole in the rear cover, engage the rear cover bottom clips and guiding the balance wheel towards the upper arm shaft bushing, guide the belt back on the groove in the balance wheel. Keeping some tension on the belt, put the balance wheel on the bushing.

Step 10. Adjust the tension on the motor belt by pulling the motor bracket down so the belt is snug. It does not need to be tight but it should not be loose… Just snug. Keeping the motor bracket snug against the belt, retighten the motor bracket bolt.
Step 11. Replace the large washer and the balance wheel stop motion knob on the machine with the wings pointing out and engaged in the slots on the sewing arm bushing. Screw on the stop motion knob and tighten the small screw.
Tip of the day… Because the large washer has two “wings”, it can be put on in the wrong direction. If after tightening the small screw the stop motion knob does not loosen enough or at all (as in what you would do to wind a bobbin), loosen the small screw, remove the stop motion knob, rotate the large washer 180 degrees and put it back together. You would think there is a 50/50 change of getting it right the first time, but somehow I usually get it wrong 80% of the time (go figure…).
Step 12. Set the machine upright and reinstall the two small screw that hold the rear cover on. Don’t make them too tight or they can crack the plastic cover.
Step 13. Replace the top cover and snap it into place.
Step 14. Test the machine out to make sure the belt does not slip… snug it a little tighter if it does.
That’s it! Step 14 is really self explanatory, but stopping at 13 steps in a tutorial is bad luck… I just threw step 14 in there to avoid any calamity this may cause (just kidding…) Anyway, that’s all there is to it!
As always, our tutorials are provided as a free resource to help you learn and maintain your vintage sewing machine. As our site has grown, so has the cost to keep and maintain it. Despite these costs, I will strive to continue posting tutorials and other relevant content for the benefit of the sewing community. If you found the content of this tutorial useful, please consider making a small donation to help me grow the site and help defray my costs… every little bit helps.
Help Support our Site…
Make a one-time donation
Make a monthly donation
Make a yearly donation
Choose an amount
Or enter a custom amount
Your contribution is appreciated.
Your contribution is appreciated.
Your contribution is appreciated.
Please let me know if I can answer any questions or if I can be of any assistance by emailing me at pungoliving@gmail.com.
Thanks for reading and I hope this helped!
Lee

I own a 158.1701 Kenmore. Can you refer me to where I can purchase the two belts that need replacing – the parts section of my instruction book says that they are part#28908 and part30083. Thanks so much, Val
LikeLike
The belts are sold as a set on Amazon. type in the following and you will find them… It does not list your machine, but the same belts fit the model 1400, 1410, 1430, and other Kenmore models
Kenmore Motor Belt #30083
You can do a similar search on Ebay and find the belts you need.
I hope this helps!
Lee
LikeLike
How do I remove the belts on a 1941? The back cover comes off without removing the handwheel, and I don’t see any obvious way to remove the handwheel. Do I remove the pulley? I just got this machine a few weeks ago with all of the original feet, and it’s just about perfect, but the belts are making a strange rubbing/rumbling sound when I turn the handwheel, like the lugs are rubbing against the sides or something. I’ve been trying to figure out if the belts were replaced and are a little too wide.
LikeLike
Hello Sheri,
It isn’t difficult to remove the belts, but you must loosen the motor bracket to get enough slack to remove the belts. To get to the motor bracket, you must remove the bottom cover. Simply remove the bottom cover by removing the bolts on the bottom of the machine and the single screw holding the nose cap on. The motor bolt is fairly large and can be tight. A wrench works best, but a large screwdriver will do. Remove the back cover, loosen the motor bolt and slide the motor bracket up. It is easier to remove the belt from the motor first. The reduction pulley is spring loaded and will allow the top belt to be removed. Assembly is the reverse, but don’t overtighten the motor belt. A belt that is too tight is no better than a belt that is too loose and it will rob power from the motor and cause premature wear.
Now, that said, the belts on your 1941 are cog tooth belts and they do make a rumbling sound and feel coarse when turned by hand. Unlike a smooth belt, this is inherent to the machine. I would first inspect the belts to see if there are any frayed cords or cracks. If not, run the machine to see if it runs smoothly… you may not need to do anything!
By the way, chances are the machine has been unused for a while. I would advise adding about 6 drops of sewing machine oil at each oil port on the ends of the motor casing (the motor will advise 3 drops, but I know the felts have dried up of oil). This will oil the motor felts and lubricate the motor.
I hope this helps!
Lee
LikeLike
Thank you so much! Sorry for the late reply, but I didn’t see an email notification that you had replied.
It’s strange, but this machine seems to have a fixed pulley. I had a 1430 that had a spring loaded one, like you mentioned, but this one doesn’t, so I haven’t been able to figure out how to get the belts off without removing the handwheel, which doesn’t have a visible screw like other models.
In any case, it sounds like the rumbling and coarse feeling are normal for this machine, so I’m not going to worry about changing the belts. Very helpful information!
LikeLike
Hello Sheri,
You are correct. The pulley is fixed, but it has slots for loosening and tightening. You don’t need to remove the balance wheel to remove the belt, and by loosening the motor bracket and the pulley mount, the belt will slip off of the balance wheel.
The bolt that holds the balance wheel is beneath a decal plate on the back end of the balance wheel. It is glued on and because it is very thin, it is apt to bend when removing it. Alcohol will dissolve the glue, and if you gently pry up on the small slot on the plate, you can get something thin (like a credit card) behind it and gently remove it. Use more alcohol if it sticks… I wouldn’t remove it unless you had to.
Otherwise, it sounds like your machine is happy to run just fine like it is!
I hope this helps!
Lee
LikeLike