

Introduction
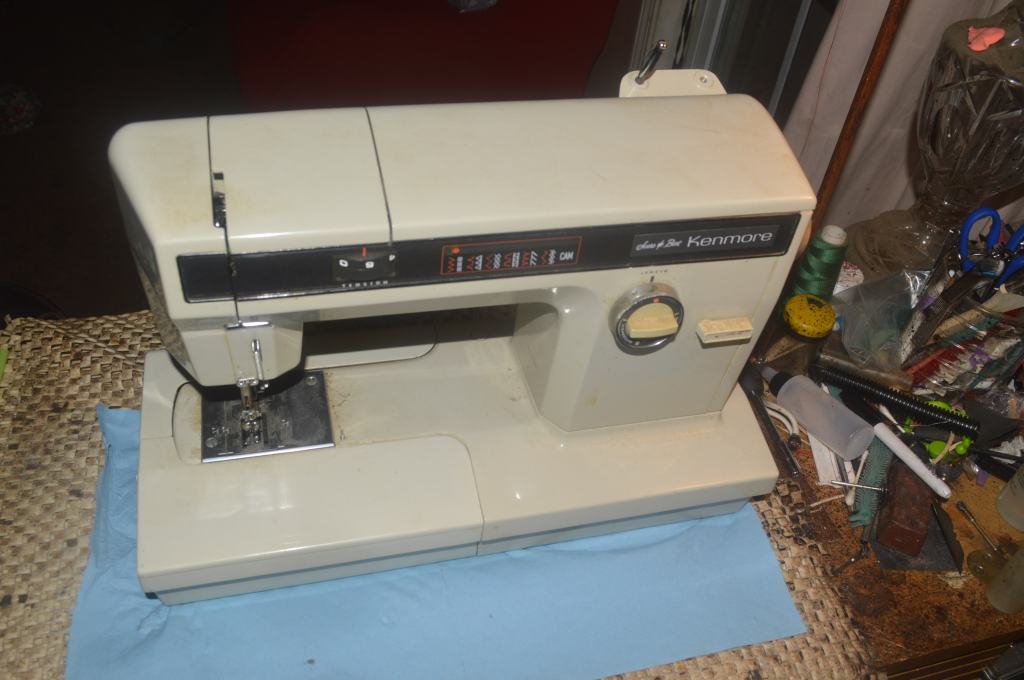
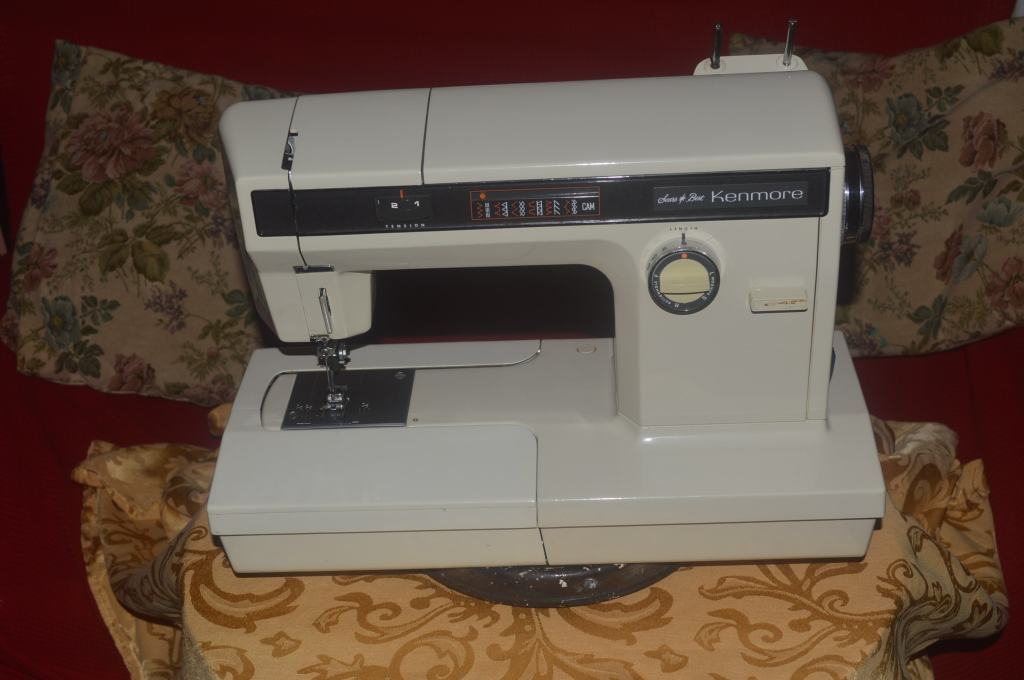
This is a private restoration of a Kenmore model 1914-2 sewing machine. The serial number 0035262 identifies its year of manufacture from 1976 to 1977. Manufactured by Maruzen Sewing Machine Company, it was made in Japan, and it is a high quality all metal sewing machine, Because of its quality and capabilities, it is a very desirable model with a very good following.
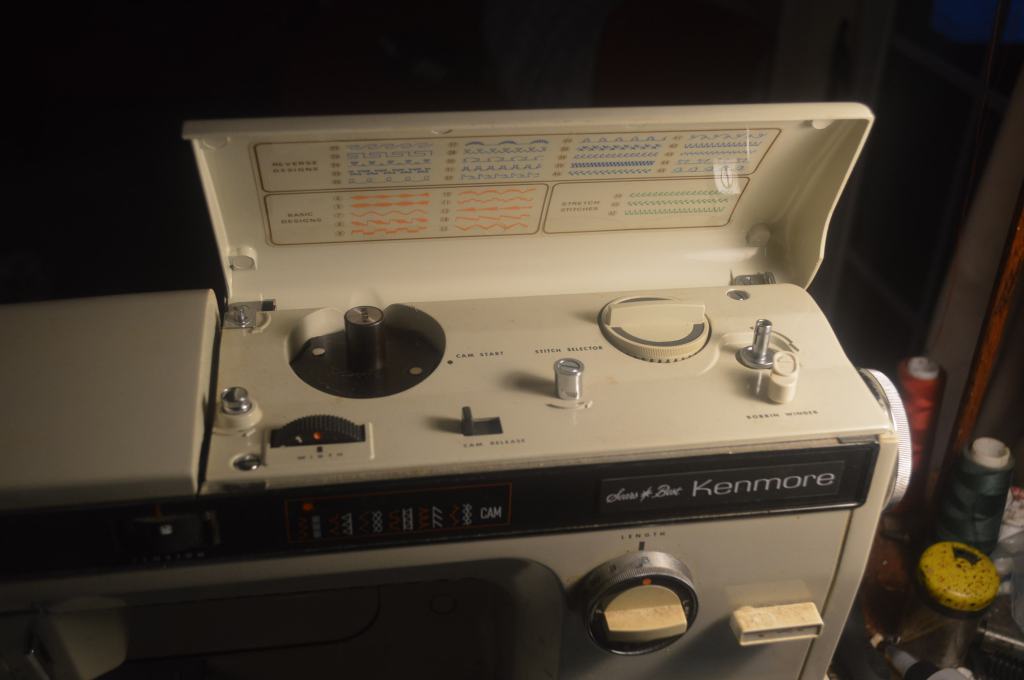
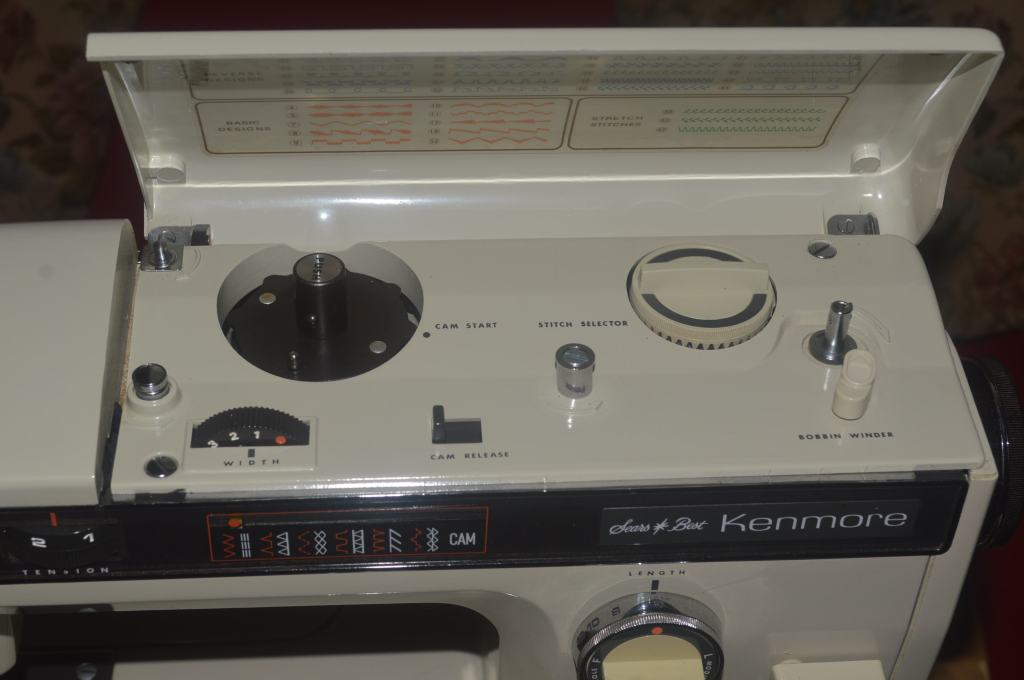
I said all metal…. well, the top motor belt pulley is made of plastic, but it has proven to be durable and seldom a problem in machines despite its age. Otherwise, every other component in the machine is made of steel or aluminum alloy. The model 1914 is a convertible machine. The front end of the bed can be detached to reveal a free arm for sewing cuffs and such. The model 1914 is quite a departure from most of the other machines in the 158 sewing machine series. For example, the top tension control is not a knob dial located on the front of the sewing machine but instead is controlled by a horizontal dial built into the front face of the sewing arm. Stitch selection and stitch width are tucked under the top cover. The 1914 uses Kenmore’s proprietary high shank feet and is a left homing needle machine. The machine includes 11 built in stitches, some of which are stretch stitches which make it perfect for garment construction. It is also a cam compatible machine , has a stitch modifier control, and a seperate setting for making manual buttonholes.
This particular model 1914 is a beautiful example of a vintage Kenmore. Aside from surface dirt and stains, the body of the machine and the mechanical parts are in very good shape. The needle bar adjustment has been changed and as a result the machine will not sew now, but that isn’t a problem in the end. That said, lets get to the restoration!
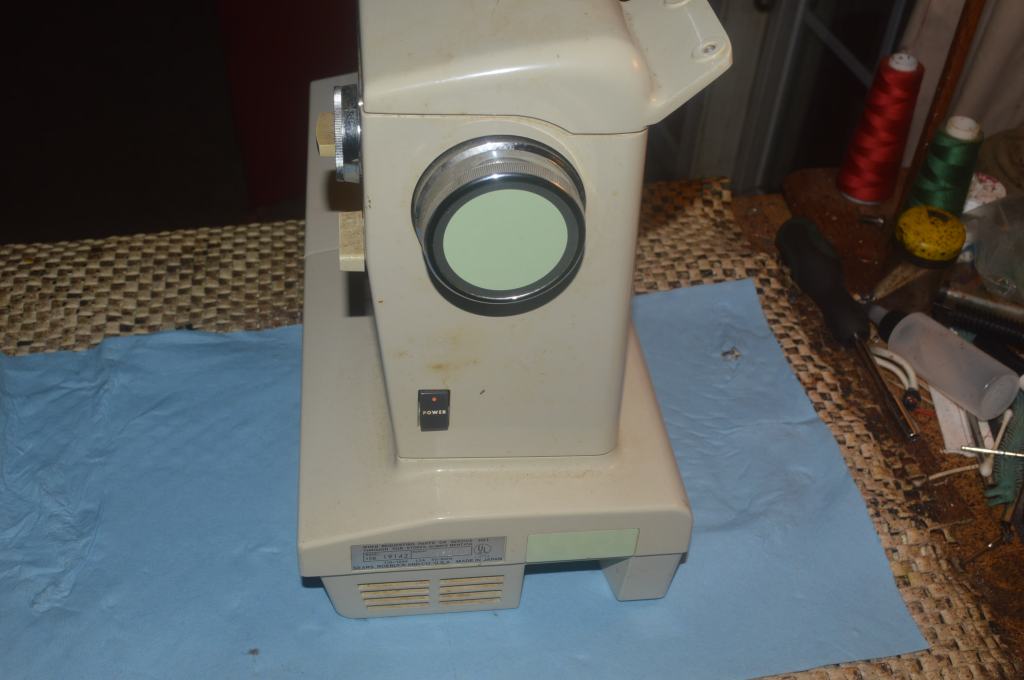
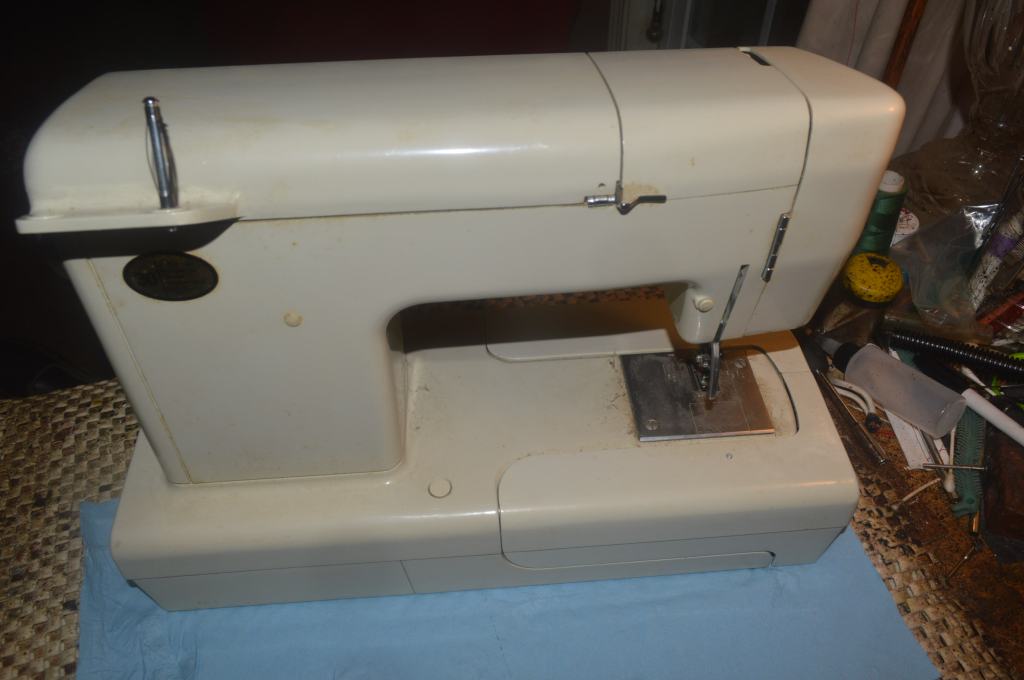
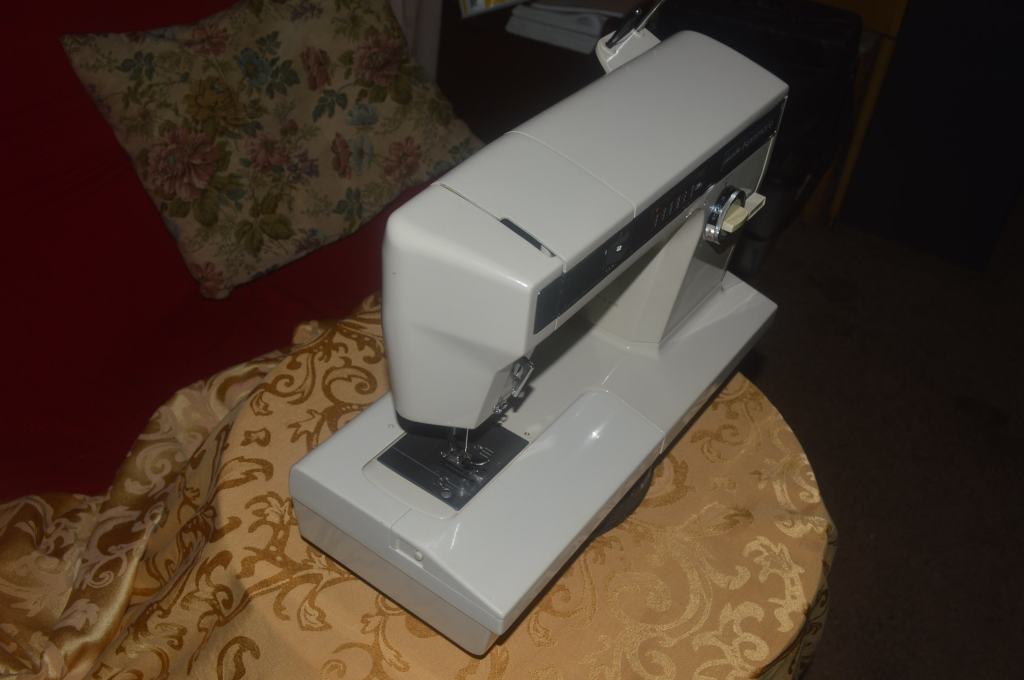
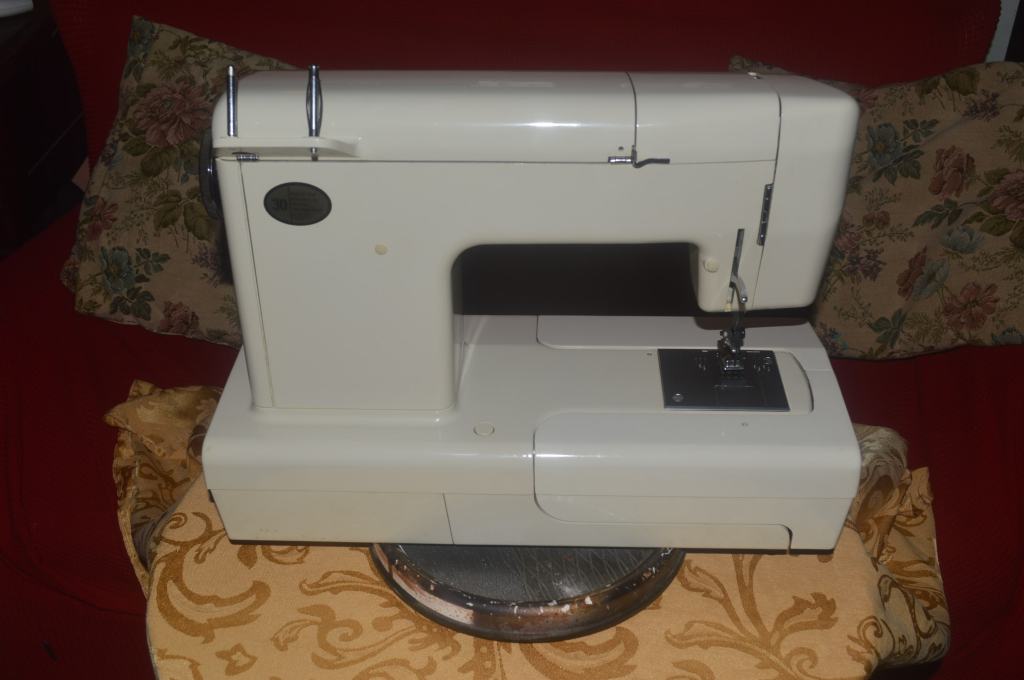
Here is the machine before the restoration…
Mechanical Restoration
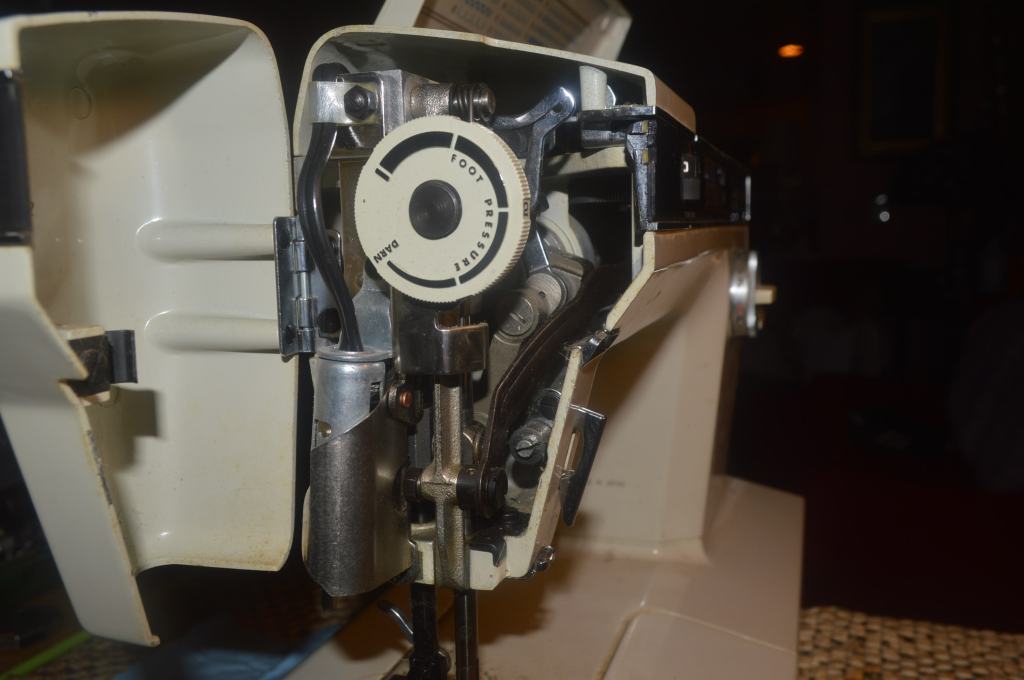
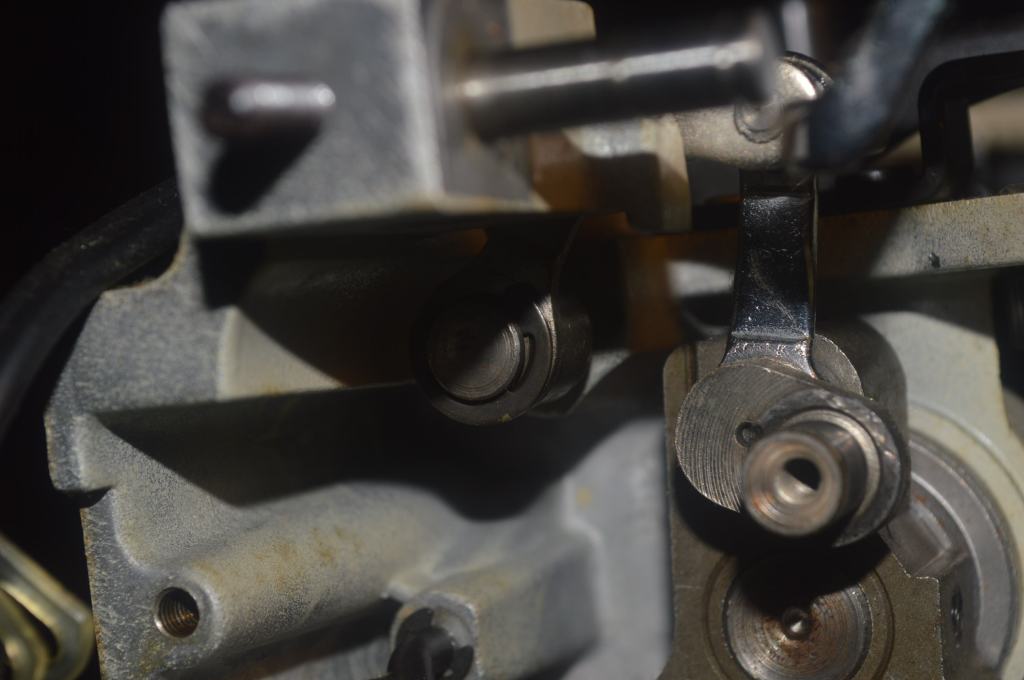
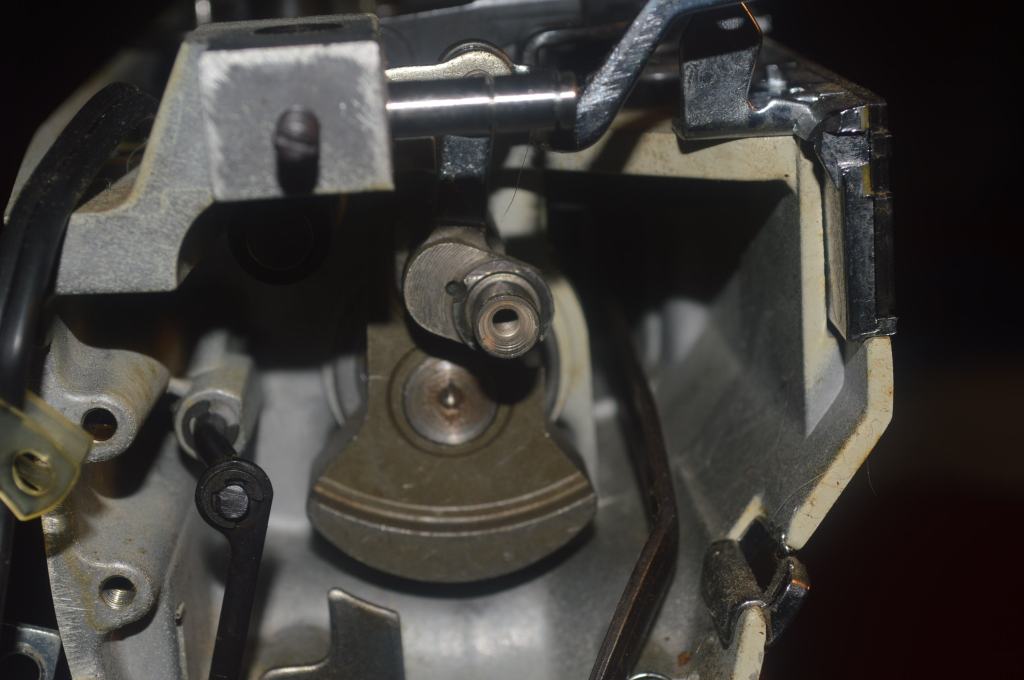
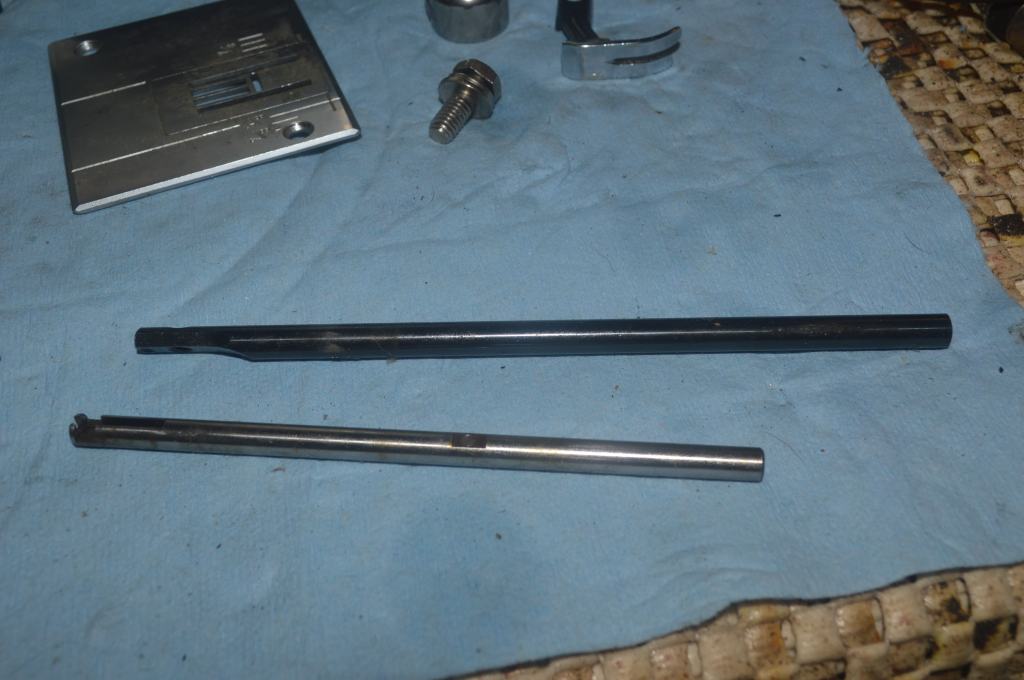
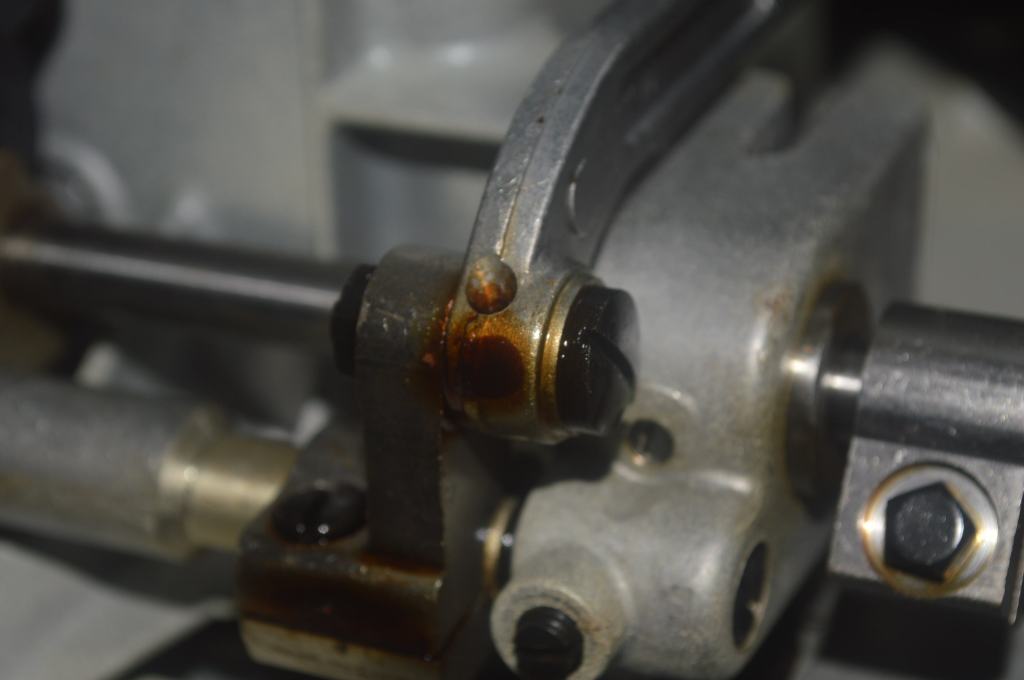
The restoration begins with disassembly of the parts in the needle bar head. There are pieces that cannot be removed because pinchwashers are used. Once removed, they cannot be reused. Fortunately, there is nothing left that can’t be cleaned in place.

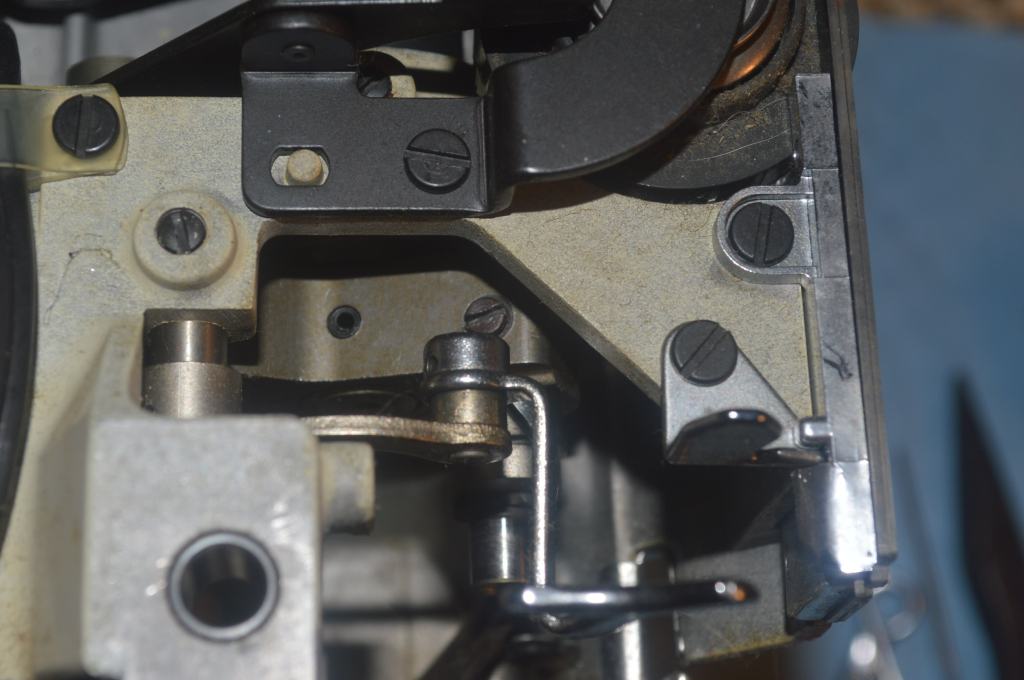
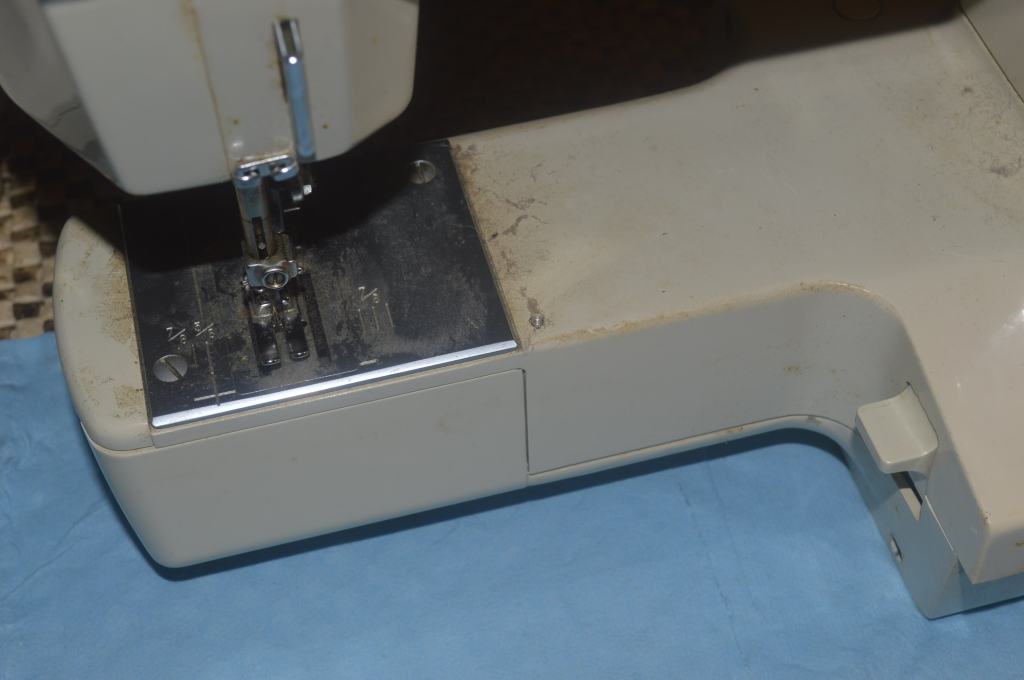
Next the bobbin, bobbin case, bobbin race cover and feed dogs are removed. Then, the bottom cover is removed to reveal the motor and the sewing mechanism.
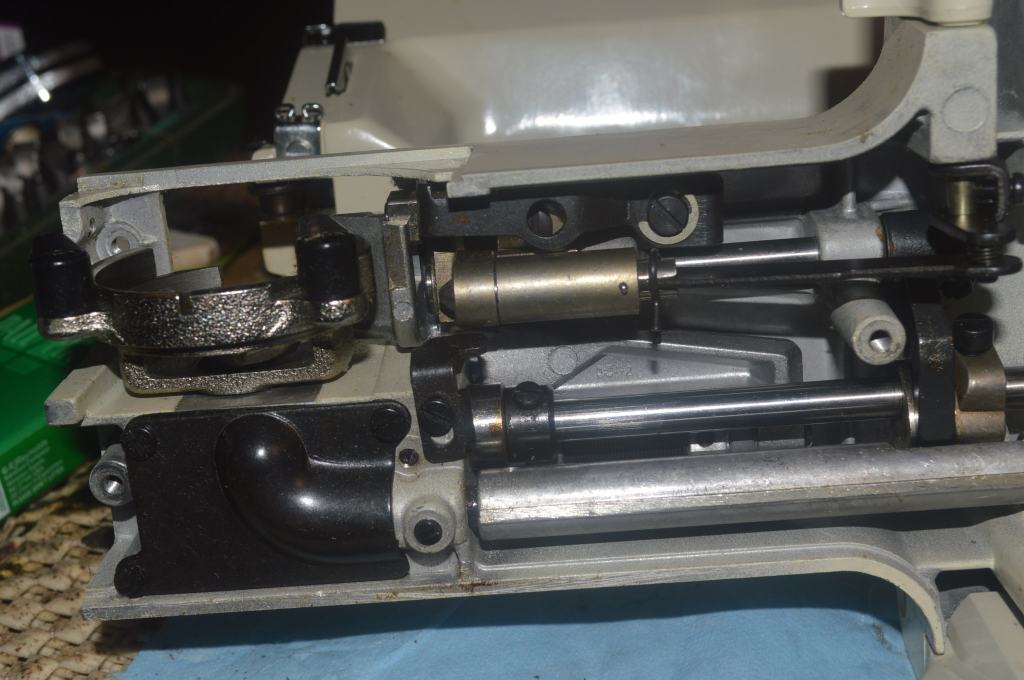
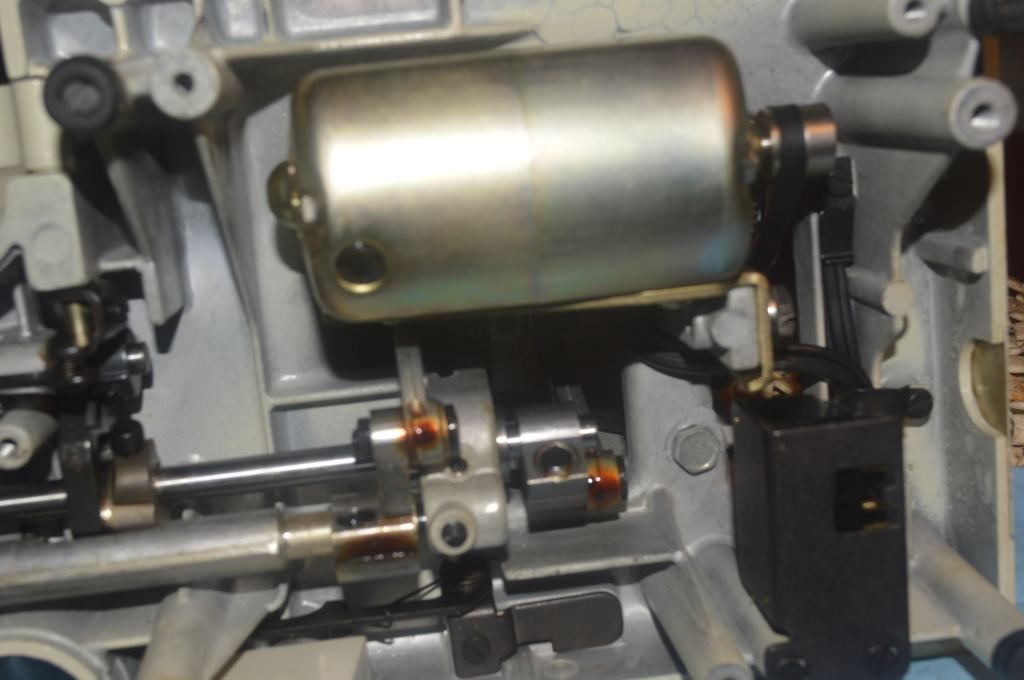
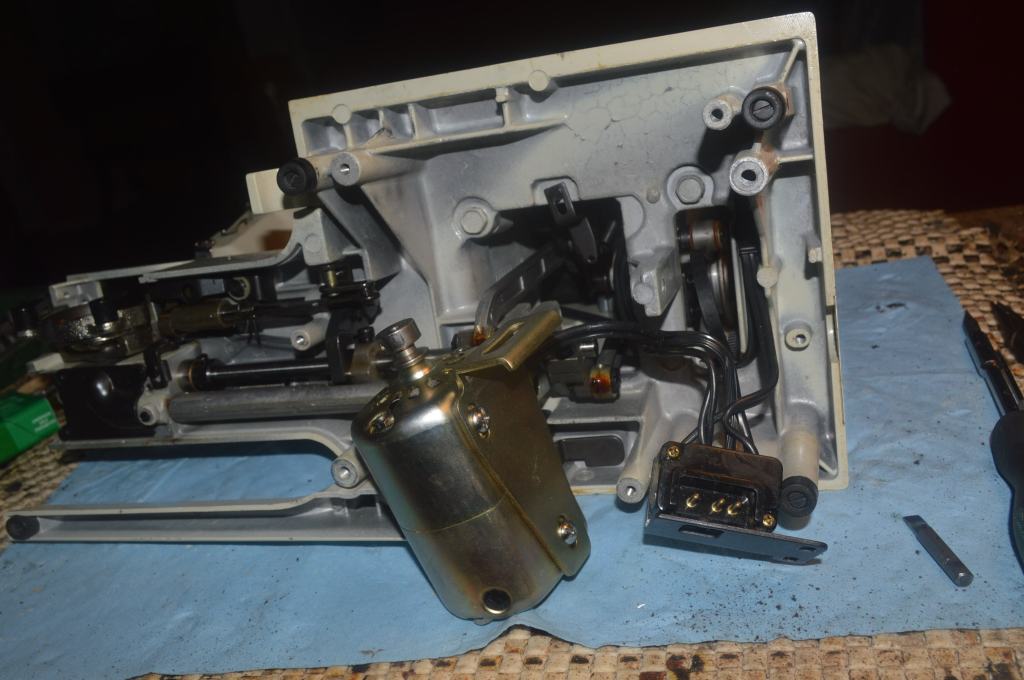
Next, the rear cover, the motor, and the motor pulley mechanism is removed and all of the parts are laid out for cleaning.
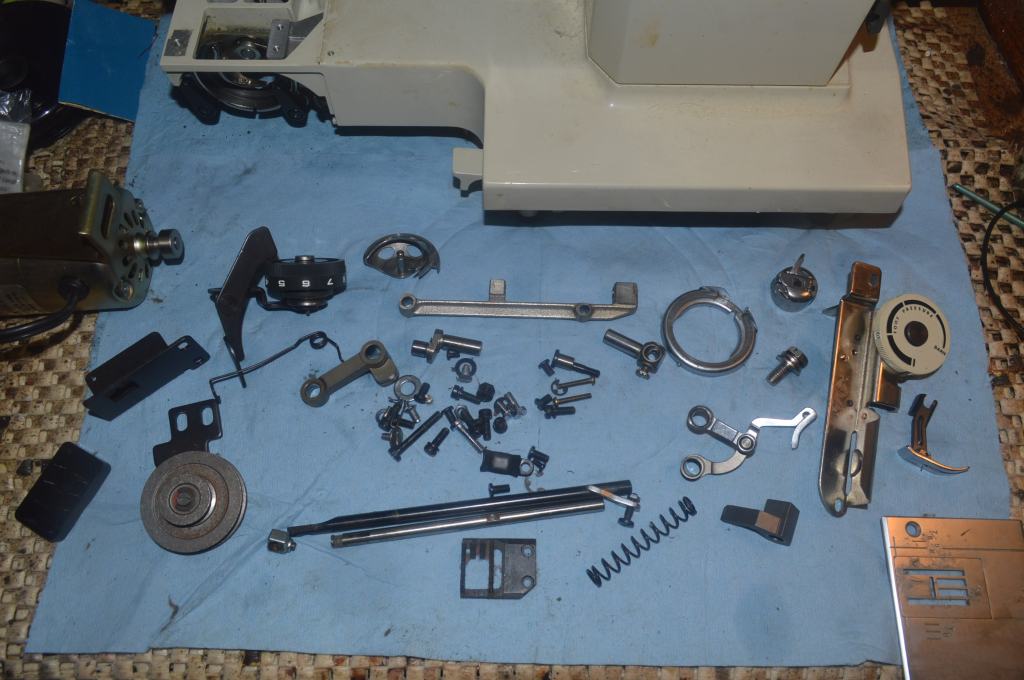
I decided to clean each part by hand for this restoration by using a dremel tool and wire wheel. However, the cleaning of the needle bar and the presser foot bar is followed by polishing to a glass smooth finish,
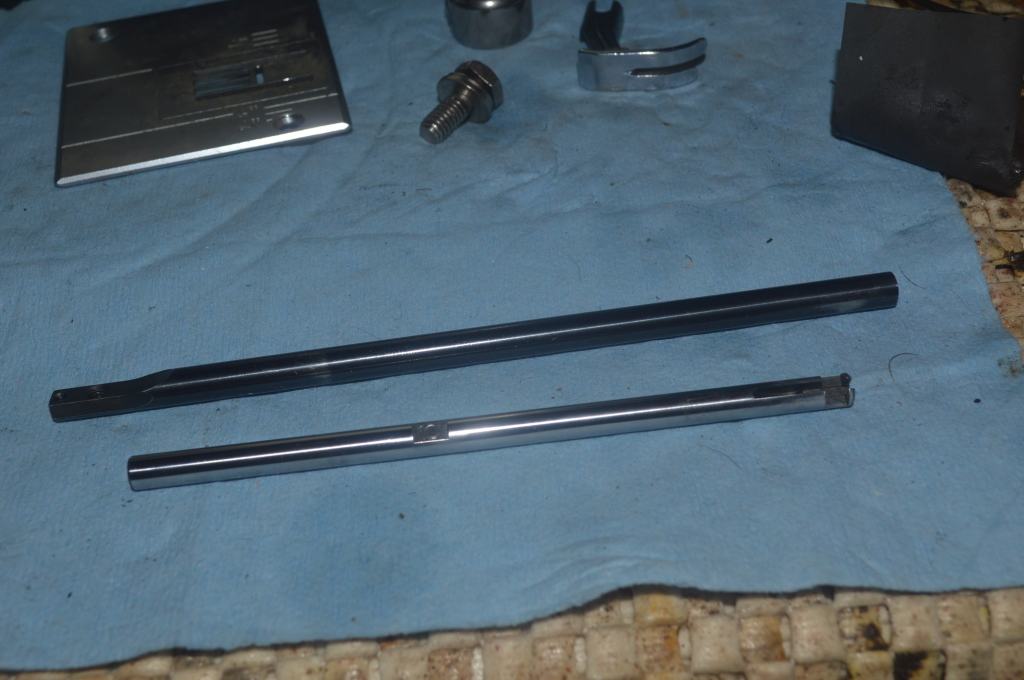
These parts are set aside until reassembly.
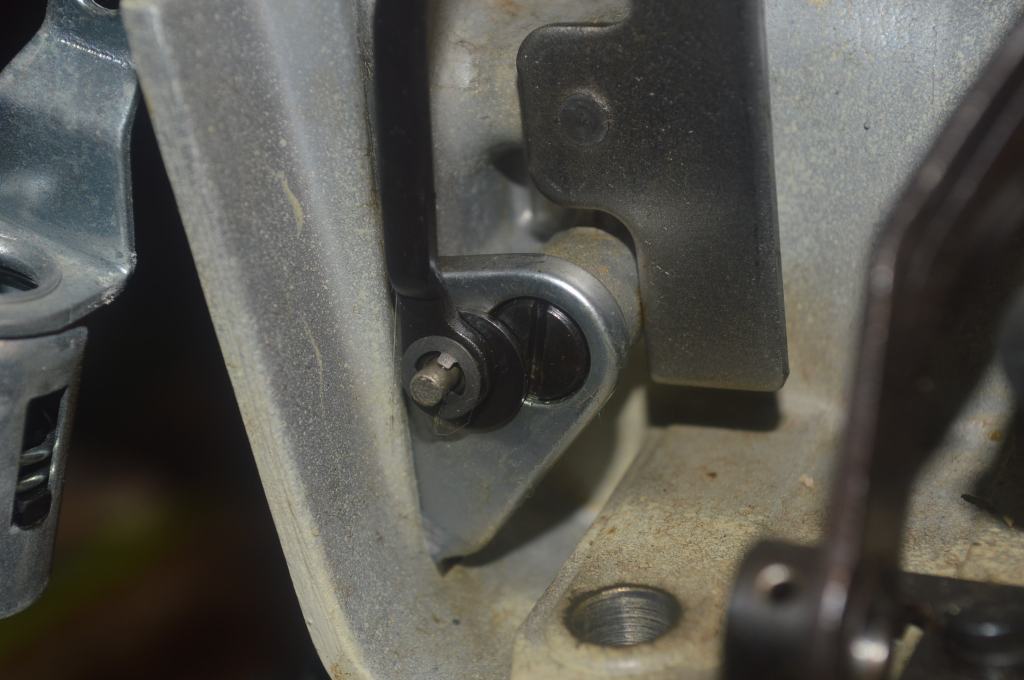
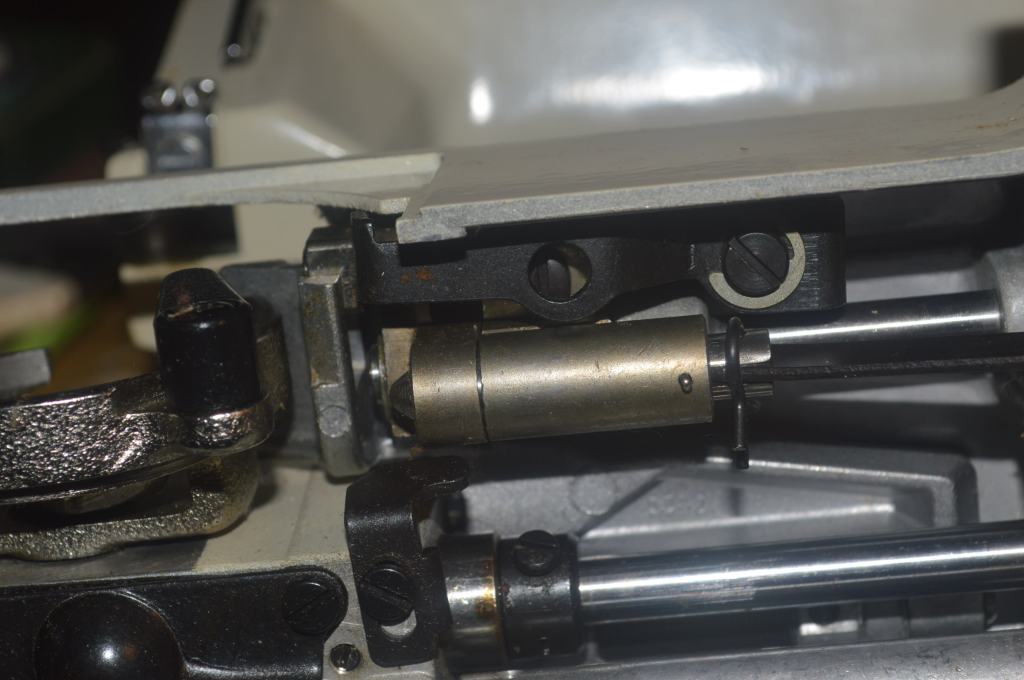
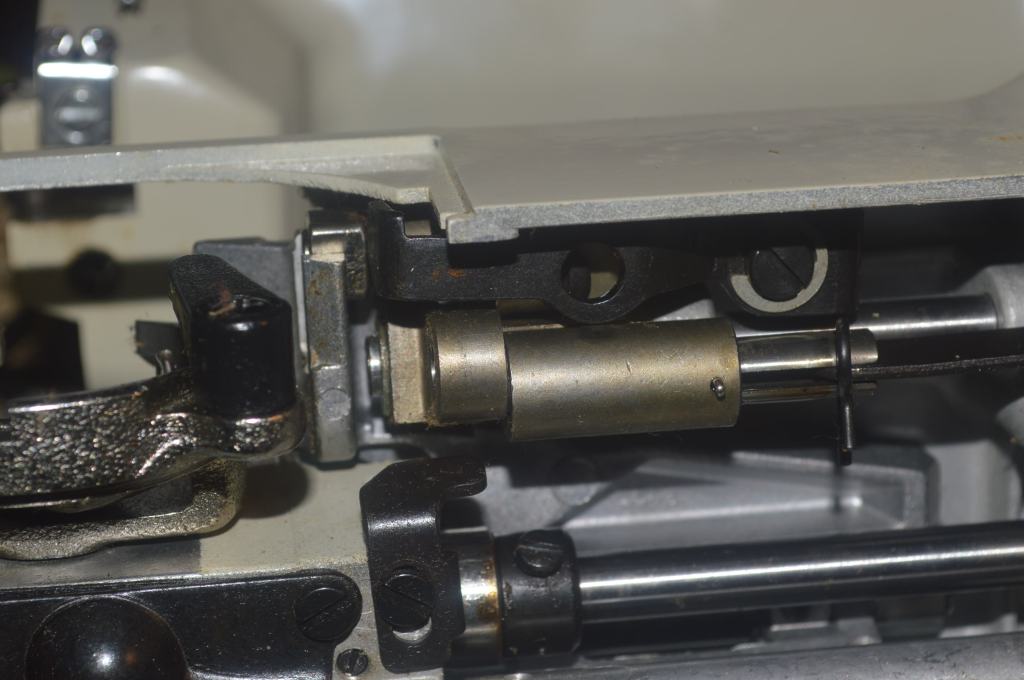
Now on to the feed dog drop. On a majority of Kenmores of this vintage, the feed dogs are stuck in place and won’t drop. I suspect the reason for this is because the feed dogs are seldom (if ever) dropped. Because many Kenmores are stored unused for long periods of time (often years), there is ample time for the old oil to dry out and leave oil varnish behind. The feed dog mechanisn is fairly complex, closely fit, buried deep in the machine and very difficult to get to. While it is a common problem, the mechanism is not amenable to complete (or any) disassembly. This makes it very hard to free them up. The best solution? Use heat. I use a butane torcn with a small flame applied to the feed dog assembly. The heat melts the old oil varnish and frees the mechanism quickly. Don’t worry about the machine though, because the oil varnish melts at a low temperature and the heat is localized. To keep the oil varnish from reforming, WD40 is used at the joints to dissolve and replace the old oil varnish. This is followed by sewing machine oil to keep it lubricated. The mechinaism is repeatedly exercised by hand until it drops under gravity (helped by a small spring in the mechanism). This will be repeated at various points in the restoration just to ensure they operate properly.
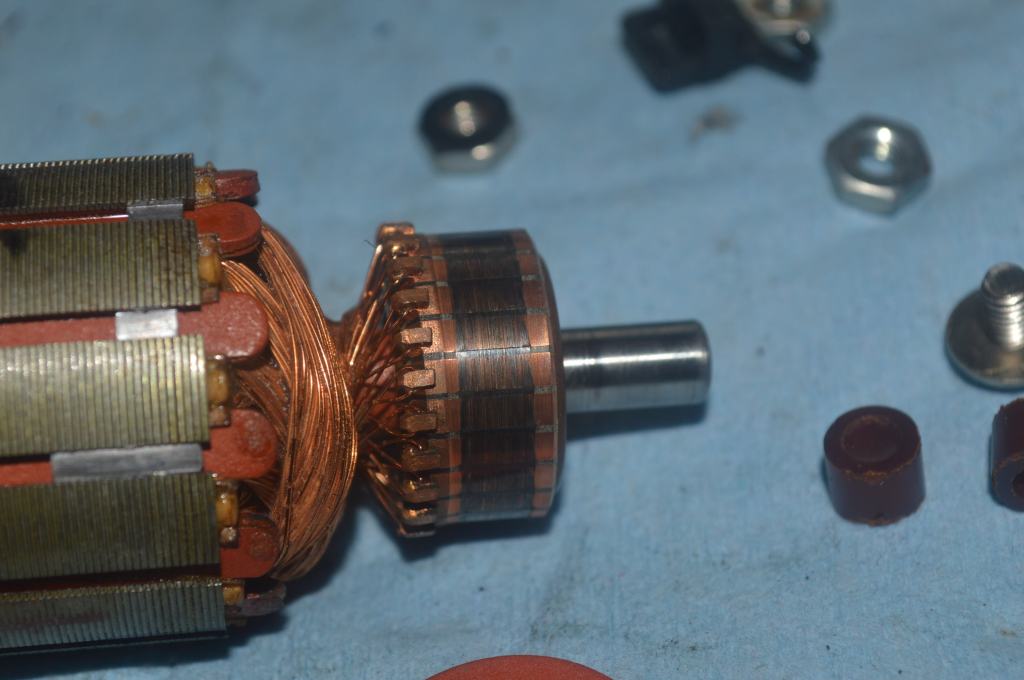
So far so good. Next the motor is disassembled. The commutator and the armature shafts are polished, the brushes are reconditioned, and the felt wicks are charged with oil.
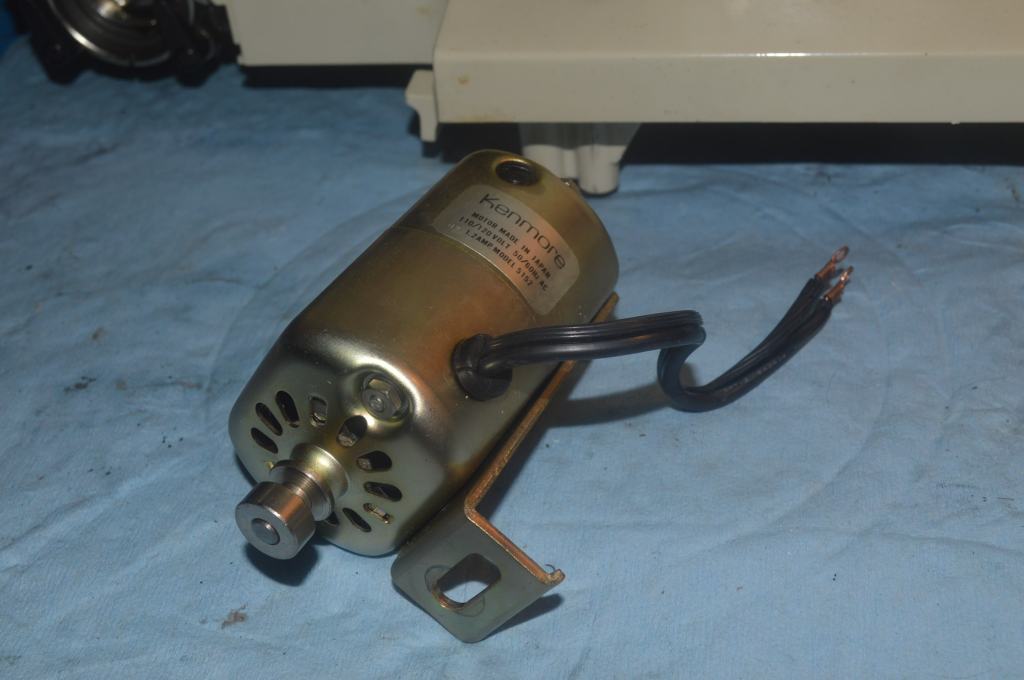
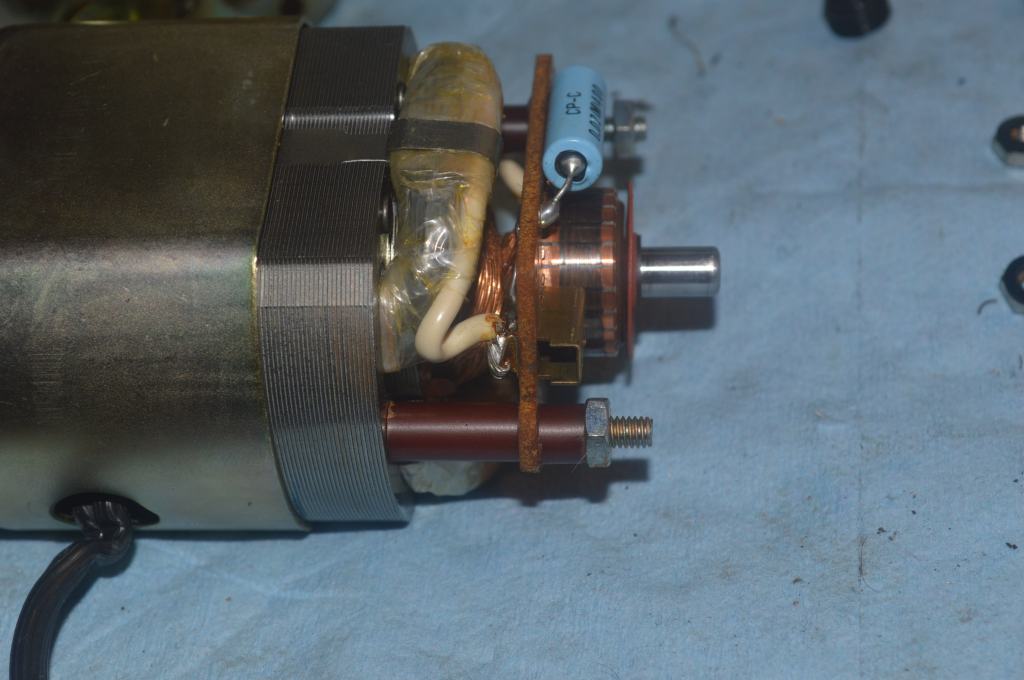
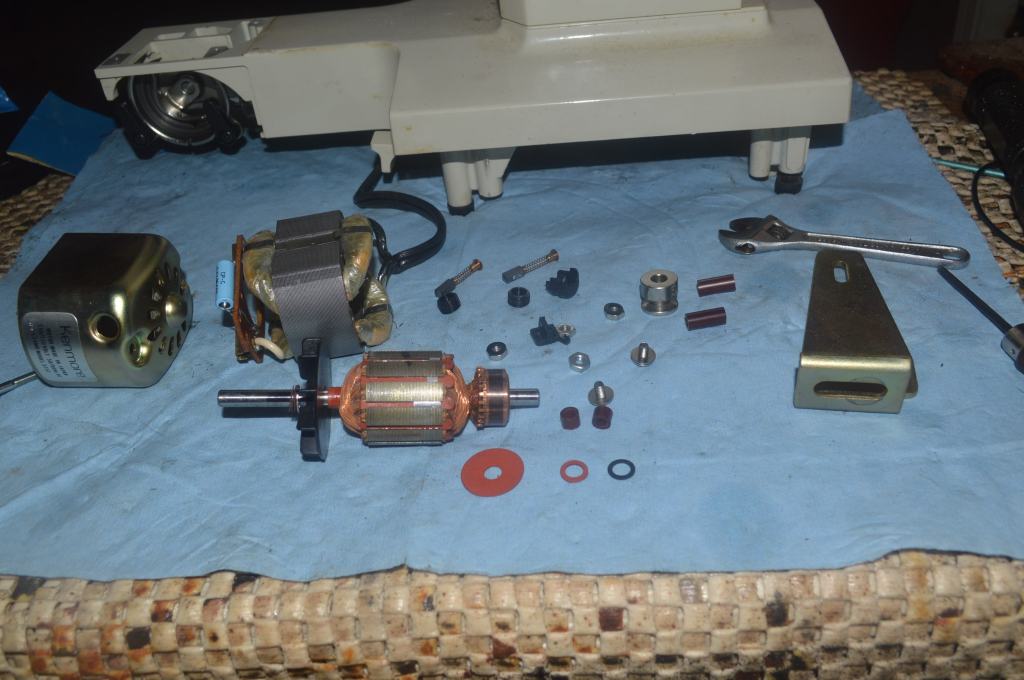
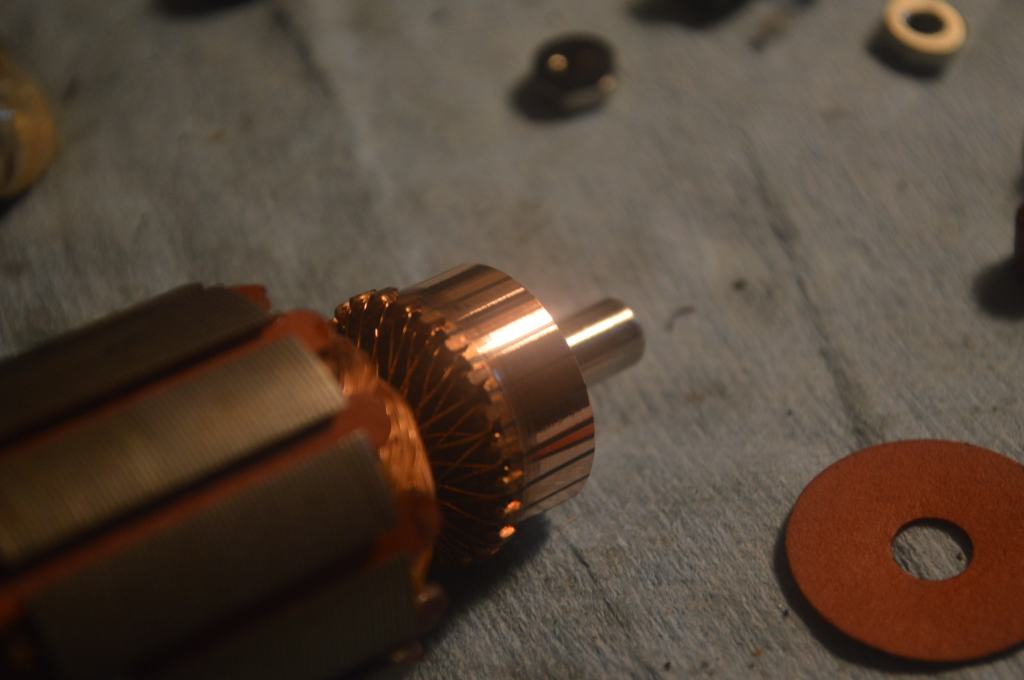
Kenmore motors are not only powerful (this one is 1.2 amps) but they restore with great results. Kenmore motors seldom fail and when they do they are easy to replace. After restoration they run great and develop good power and speed. This motor is no exception.
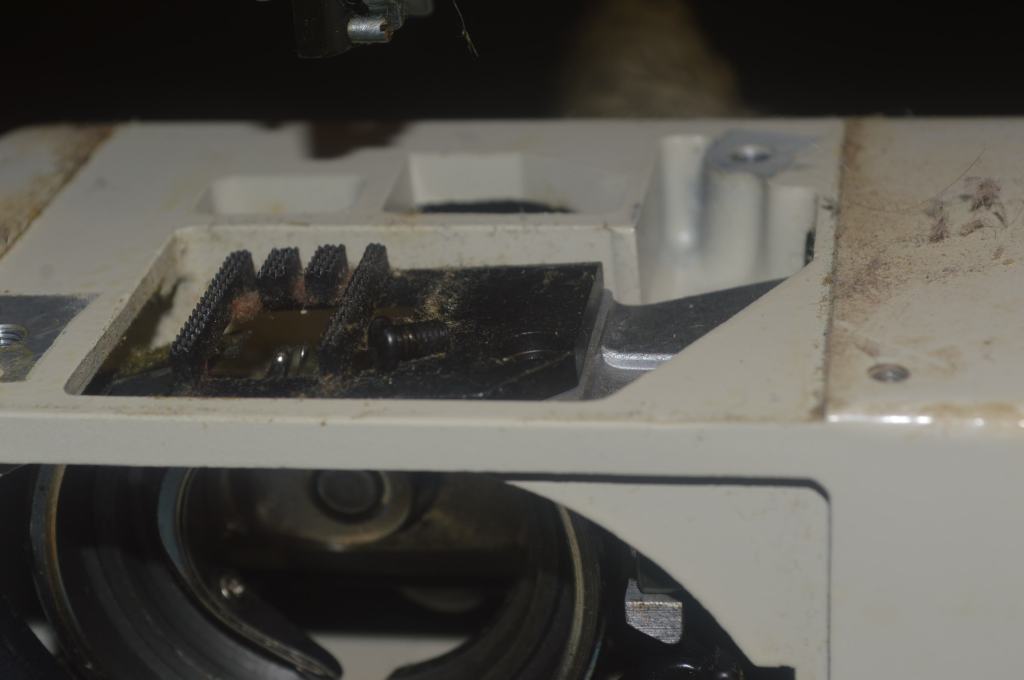
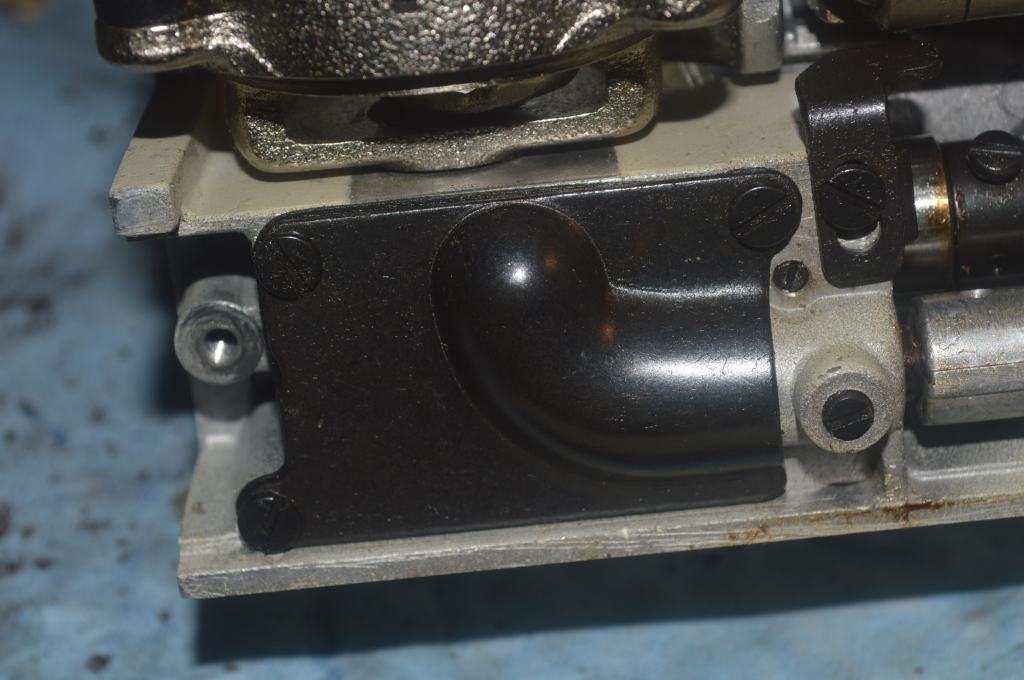
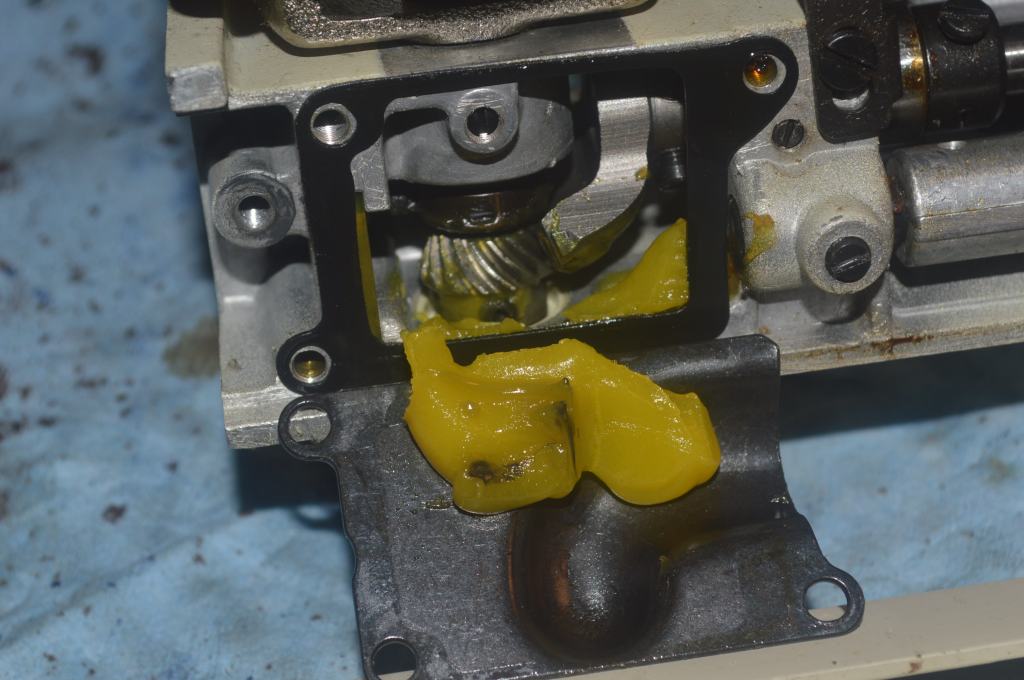
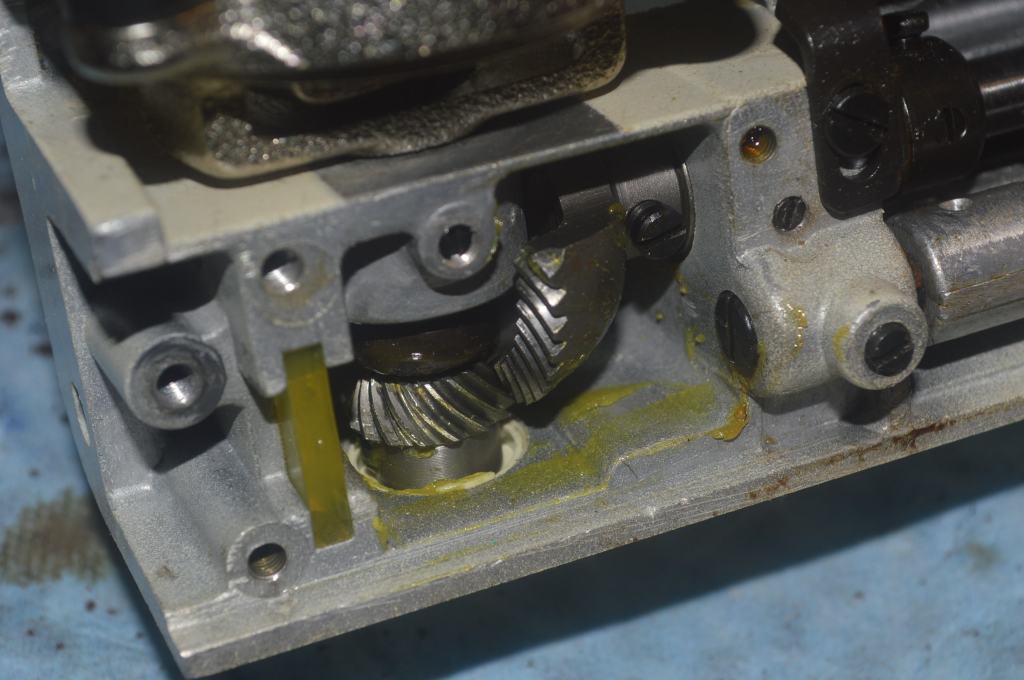
Another common problem found in older vintage Kenmores is in the gear case. The gear case is packed with grease that over time dies out and falls away from the oscillating gears. Not so much of a problem with the gears though. They are heat treated steel and in a sewing machine are not subjected to demanding loads. However, the lack of grease makes them noisy and it is certainly better if they are properly lubricated! The gear case is opened, the old grease is removed, the gears are cleaned, and the gear case is packed with fresh grease.

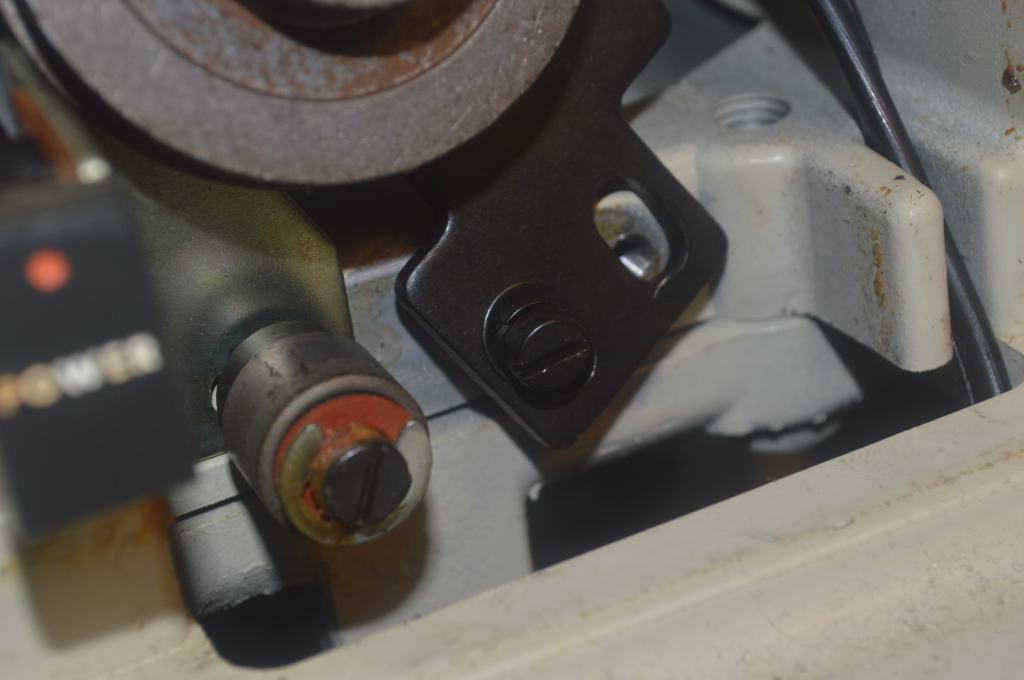
There are assemblies that are normally disassembled and cleaned. However, on this machine, I was unable to loosen the nuts securing them. Rather than break them, the parts are cleaned in place.
Nothing is removed in the top sewing arm assembly. Except for cleaning the worm gear, there is really nothing that needs to be disassembled unless somthing is sticking. On this machine, everything moves smoothly. Oil is applied to all joints and all of the linkages are checked to ensure they are moving freely.
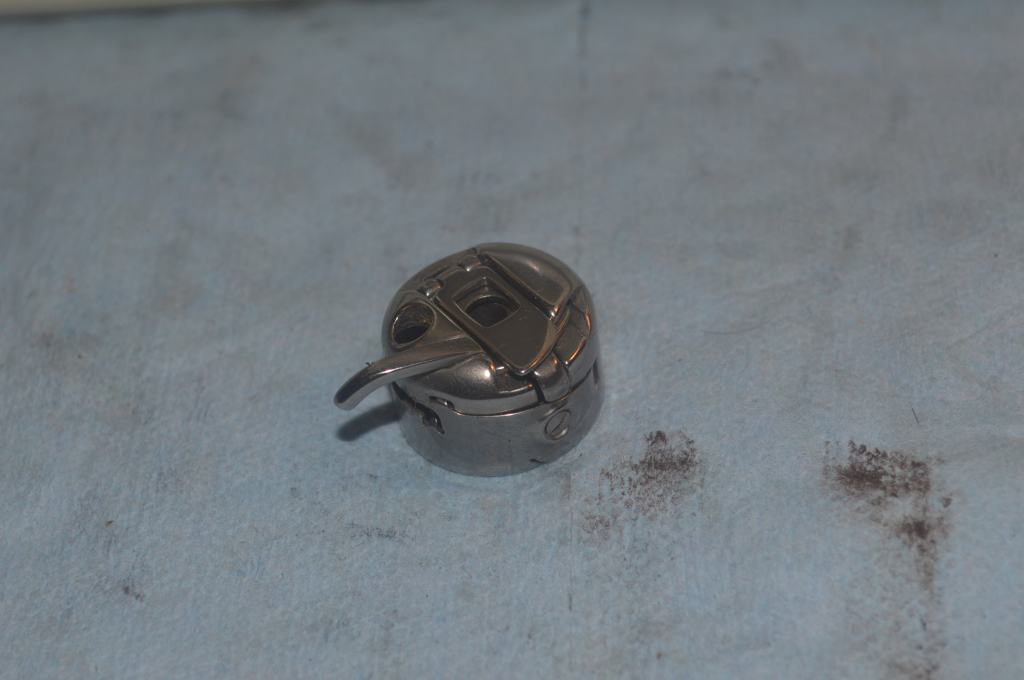
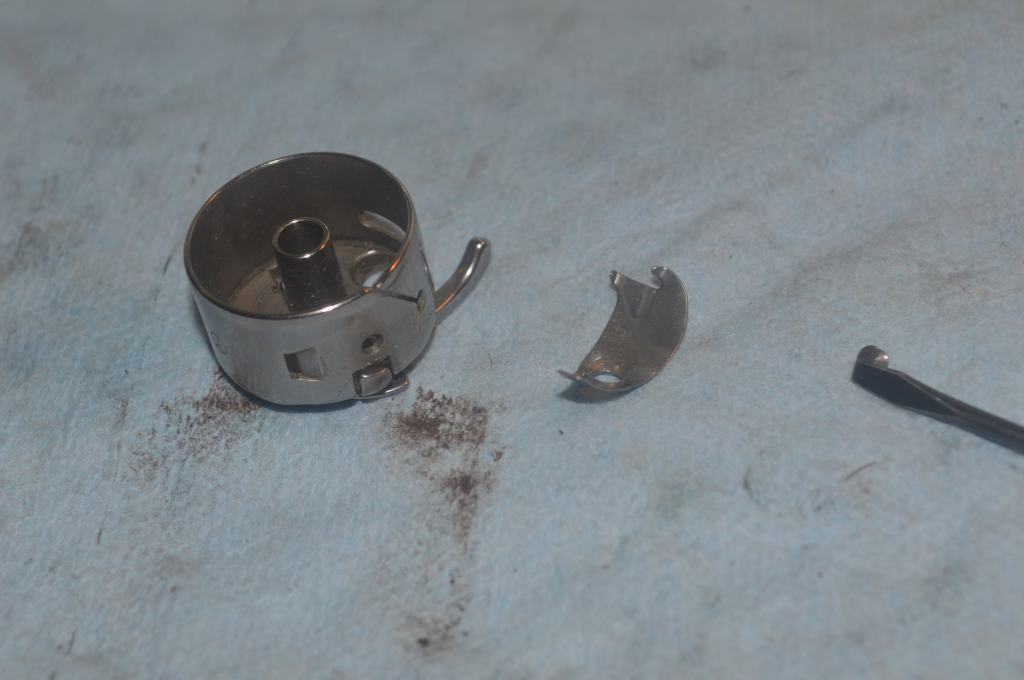
Next, the top tension assembly is cleaned and the bobbin case is disassembled and cleaned. It is surprisingly clean. These steps alone will assure even thread tension so important to an even balanced stitch.
With all of the mechanical parts cleaned and ready for reassembly, it is time to clean the machine.
Cosmetic Restoration
The cosmetic restoration consists merely of deep cleaning. I use GoJo and a small flux brush to clean the entire surface of the machine. This machine cleaned up surprisingly well. There are only a few very small nicks that I’ll bet you won’t even notice in the pictures. After cleaning, the machine looks great… it’s in excellent condition!
Finally, it is time for reassembly and adjusting. The feed dog height, the needle depth, the presser foot height, and the needle swing is adjusted to specification. All of the other points of adjustment are fine. The only way to know for certain the machine is properly adjusted is to use it, so it is run thru all of the built in stitch selections and two pattern cams… one single stack and one double stack to make sure the machine operates properly and the stitches are well formed and balanced.
When running the machine, I was a bit surprised at how fast it would sew. The machine has plenty of power and easily pierces as much fabric layers as I could put under the presser foot without using the hyper extension. Here are the sample stitches…
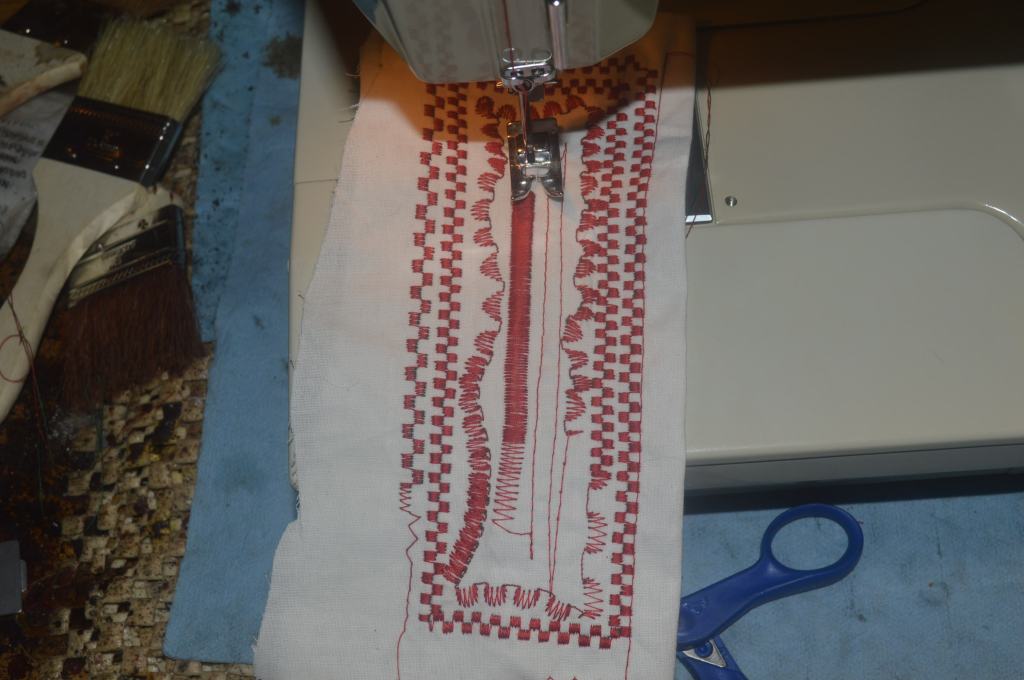
One thing I look for to demonstrate the feed accuracy of a sewing machine is the quality of the satin stitch it makes. The machine makes a beautiful satin stitch and I know that it is sewing as it should.
Finally, the machine restoration is finished and it is ready to return to the customer. I know she will be very pleased with the outcome… I am pretty critical of my work and I am very pleased!
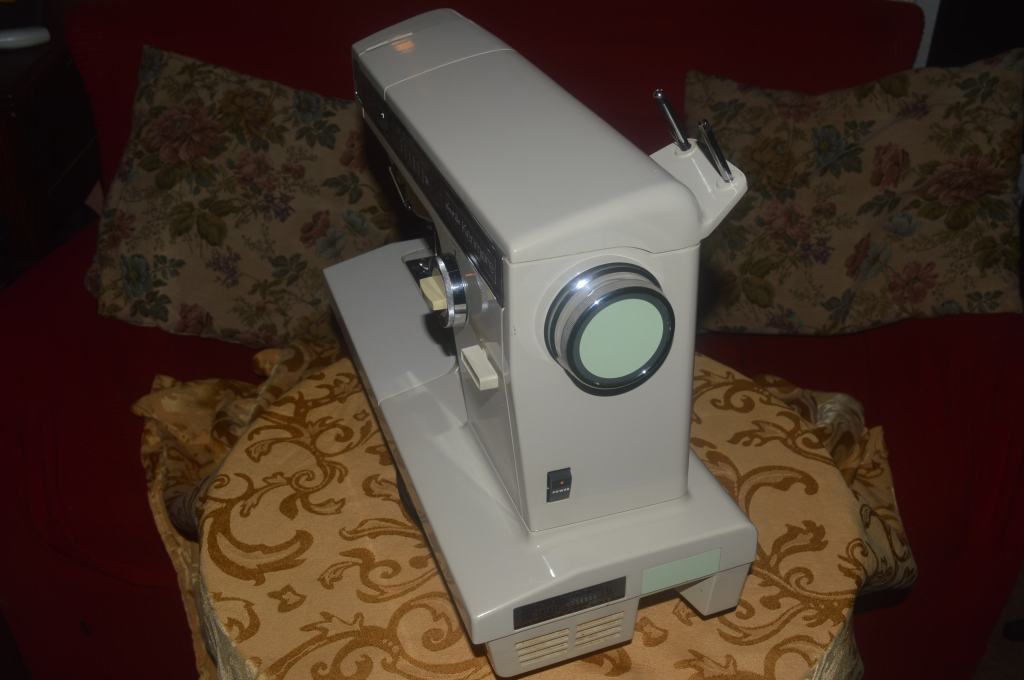
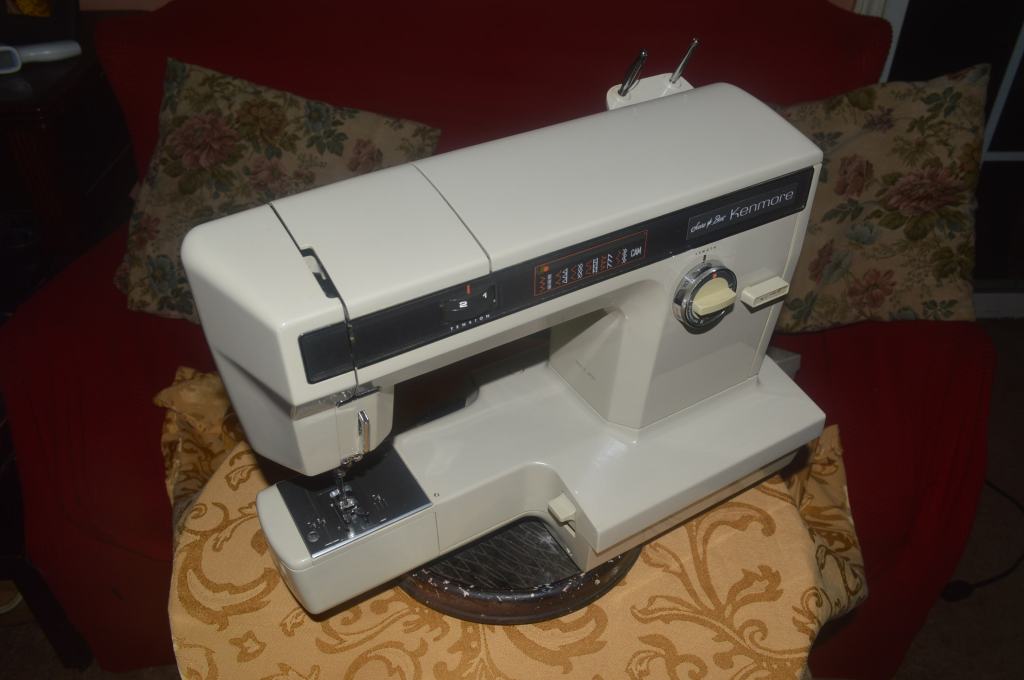
Here are pictures of the machine after the restoration…

Well, I hope you like what you see and enjoyed the restoration process as much as I did… This is a beautiful model 1914 and it runs beautifully as well. Like I always say, some sewing machines need more, some need less, but they all get what they need, and now I can look forward to the next restoration!
Looking for a similarly restored quality vintage all metal sewing machine for your sewing room? Let us know! We specialize in private restorations as well as custom orders and are happy to locate and restore the “perfect” machine for you!
As always, if you have any questions, or if I can be of any assistance, please contact me through Etsy or send me an email to Pungoliving@gmail.com.
Lee

Another beautiful restoration Lee. I’ve come to the conclusion that these all metal 158 Maruzen/Jaguar Kenmores are truly fabulous machines. The last of the great all metal machines before plastic took over all our lives.
LikeLike
I have 2 questions. The 1st is what your recommendation is for grease or the type of grease.
Next, any idea where I might be able to find a replacement front base cover? I have the buttonhole cover but it has that little spinny wheel on it and I don’t think that well work out well. Unless of course I am doing button holes.
LikeLike
Hello Deb,
Sorry for the late reply but I have been unavailble to answer questions for the past few weeks and I am trying to catch up.
First, the grease I use is a marine duty lithium base grease. It is very stable and excellent quality. You can find it at most big retail stores like Walmart or any auto supply store.
Second, you can probably find the needle plate for your machine on Ebay. It is the best place I have found to find original vintage parts. Sometimes it takes a while to find a specific part.
I hope this helps!
Lee
LikeLike