

Introduction
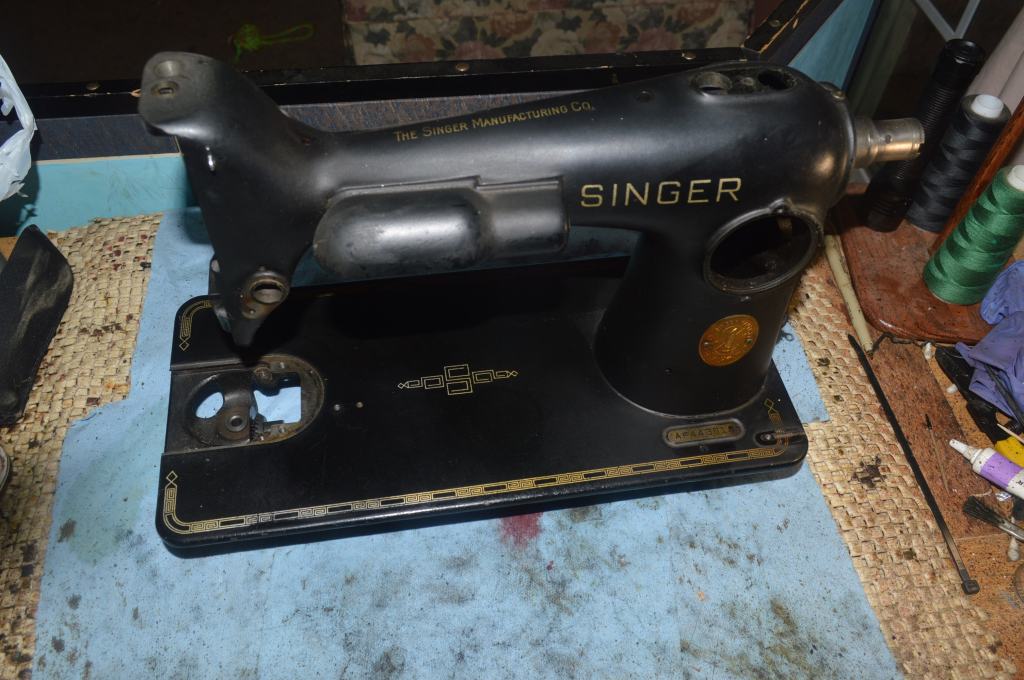
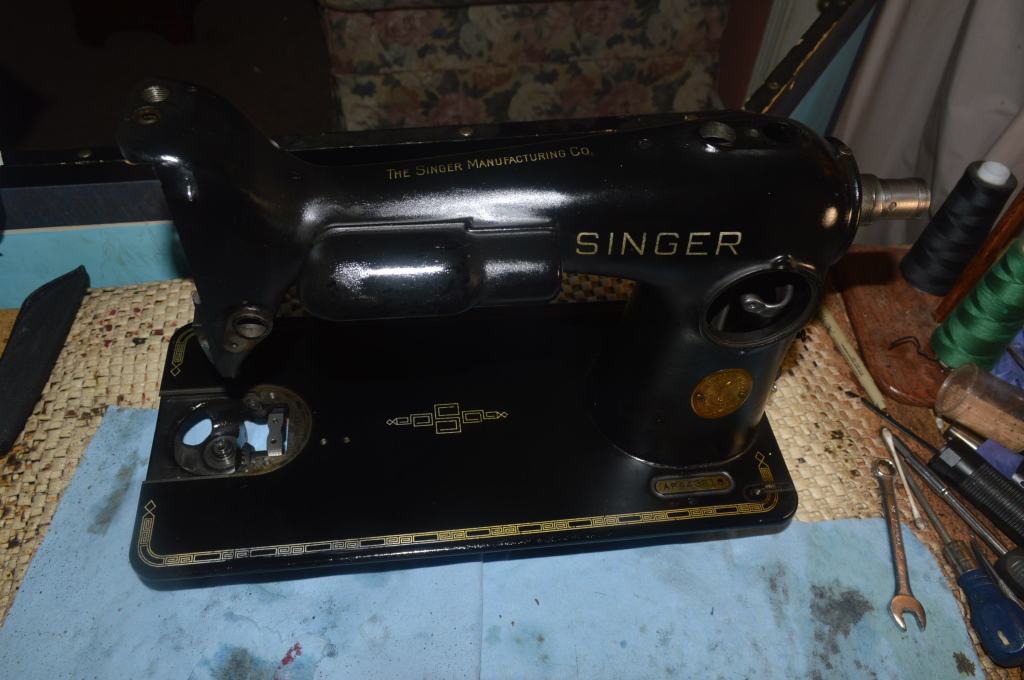
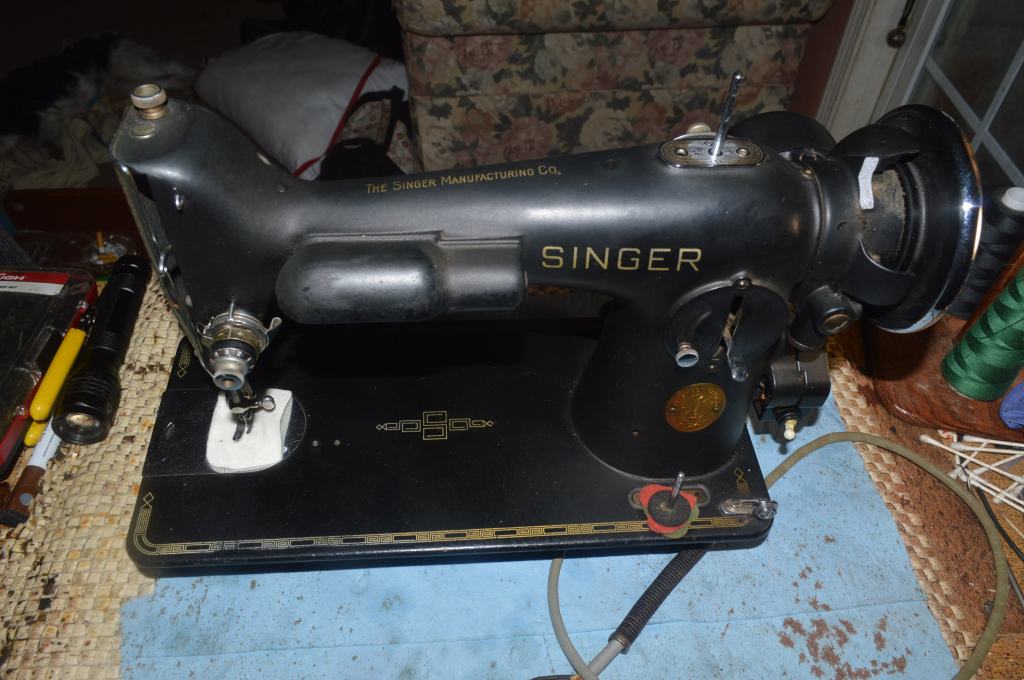
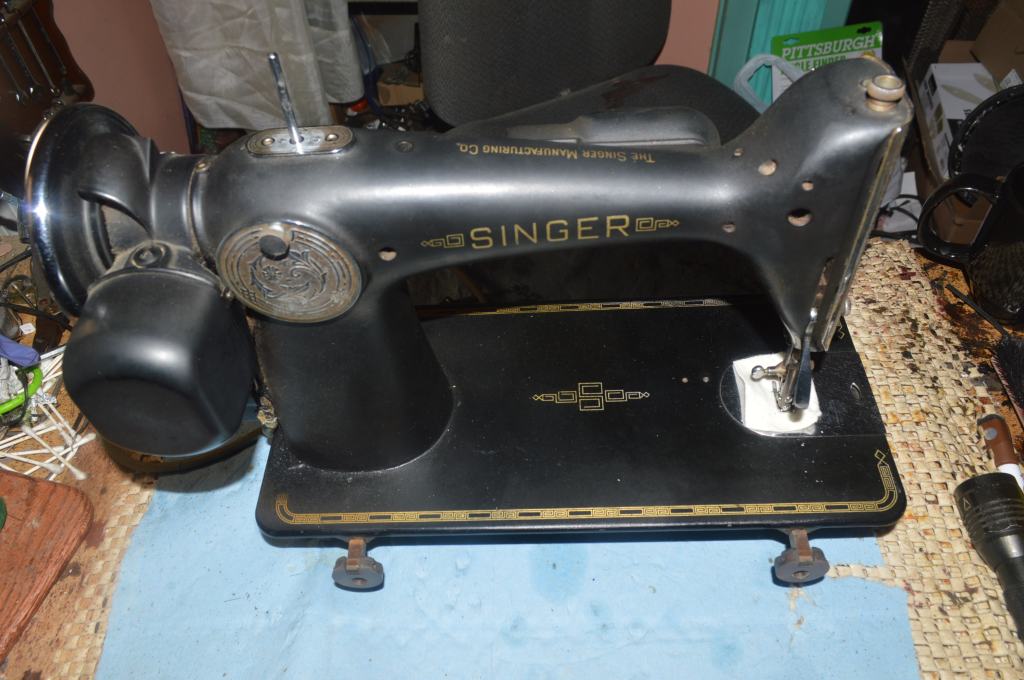
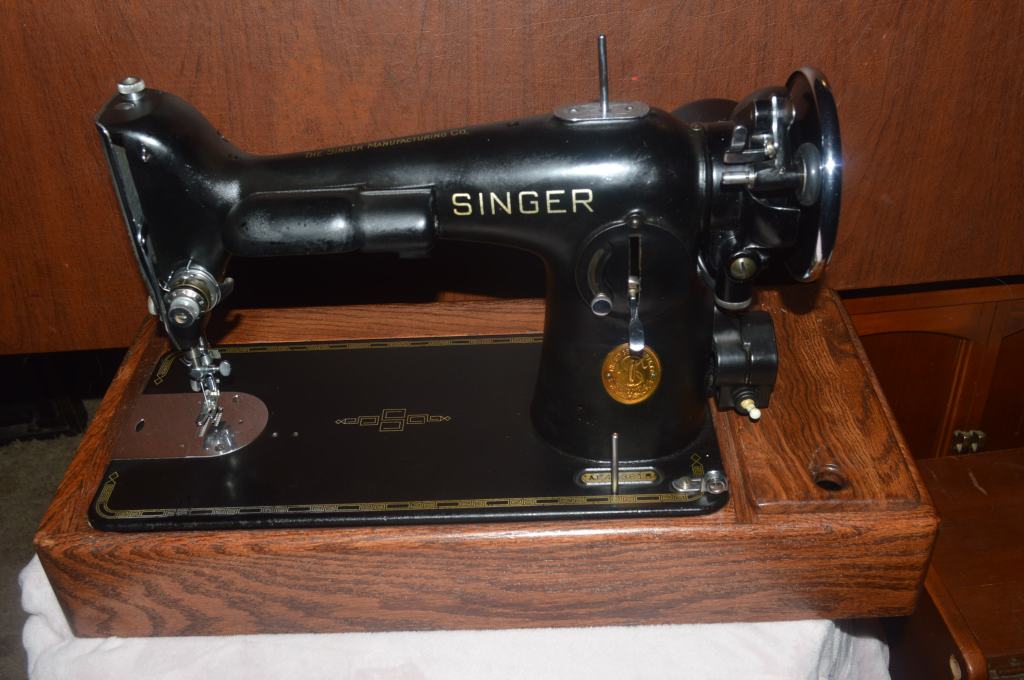
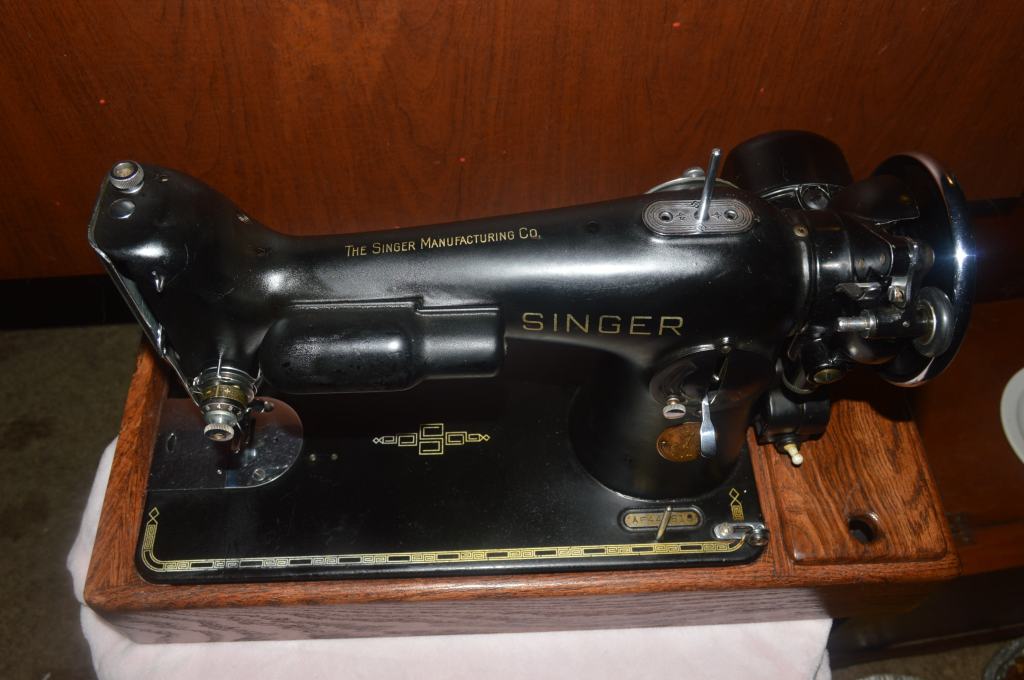
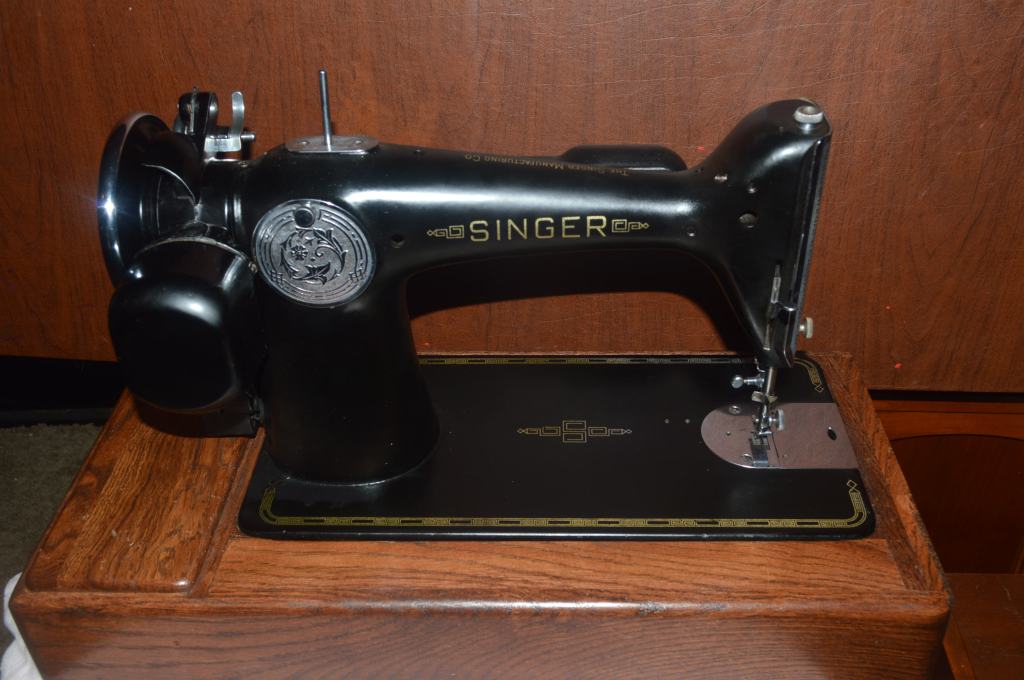
Another Singer model 201-2 restoration challenge! This is a private restoration and it like, so many vintage sewing machines, has a special story. This Singer model 201 is a family heirloom. It belonged to the customer’s mother and was undoubtedly used for many years before it was passed down to her.
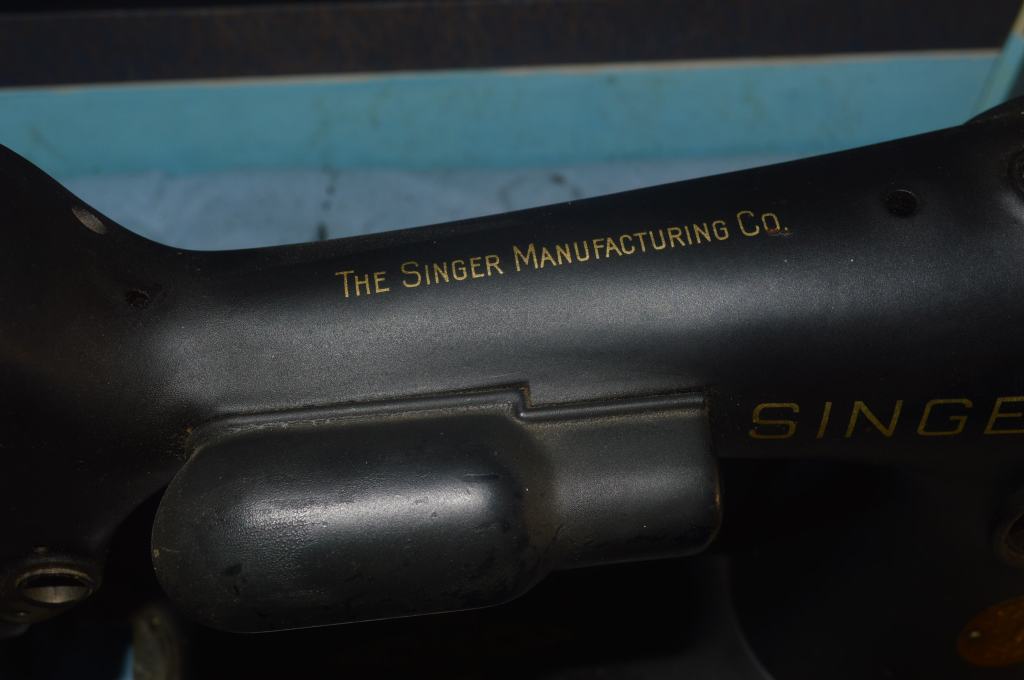
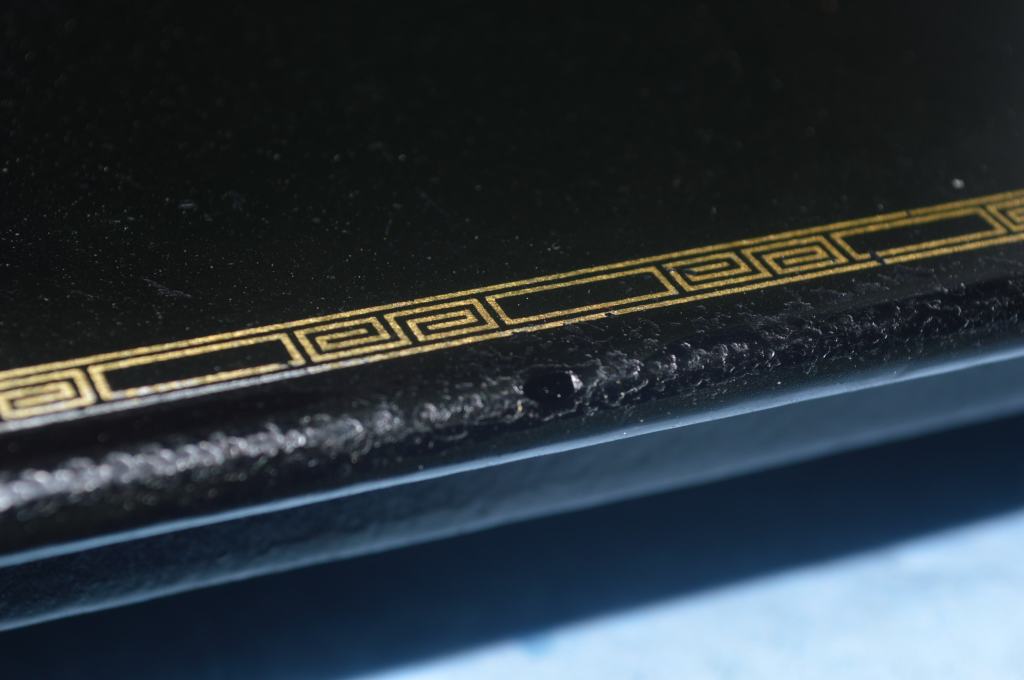
This machine was one of 10,000 commissioned for manufacture on February 27, 1940. It is what I call a “shiny bits” machine. 201’s made prior to 1942 had more nickel-plated parts and ornamentation than later machines. For example, the rim of the balance wheel is nickel plated and there are other small bits and pieces that were nickel-plated as well. There is no difference in the manufacturing quality between any 201 made before or after… they are all high-quality precision machines; it’s just that these earlier 201’s have a little more “bling”.
Restoration Plan
This machine is scheduled for a mechanical restoration. The machine is relatively stiff to turn by hand and there is little evidence of oil in any of the mechanisms. There is a reasonable amount of lint in the bobbin compartment but otherwise, the machine is relatively clean. I have not attempted to run the machine because the wires leading to the motor are severely deteriorated. There is a significant amount of oil varnish on all of the sewing assemblies and there is no doubt that this is contributing to the stiffness. The mechanical restoration will include disassembling all of the sewing mechanisms up to the gears. With the exception of the gear that runs the bobbin hook race, all of the gears will be cleaned in place., The motor, balance wheel, bobbin case, and top tension assembly will be disassembled and completely restored. All of the nickel-plated pieces, along with the needle bar, presser foot bar, and connecting rod journal will be polished. The body of the machine will be deep cleaned, and minor paint chips will be fixed using a custom mixed color matched paint. All of the disassembled parts will be ultrasonically cleaned and then tumble polished and wire brushed. Before reassembly, all of the parts will be restored to like new condition. The sewing assemblies not disassembled, including the gears, will be cleaned in place. After reassembly, the machine will be lubricated, adjusted, and run to ensure that it makes a good balanced stitch.
Mechanical Restoration
The mechanical restoration begins with the disassembly of all of the parts in the sewing assembly. Starting in the needle bar head, everything is removed.

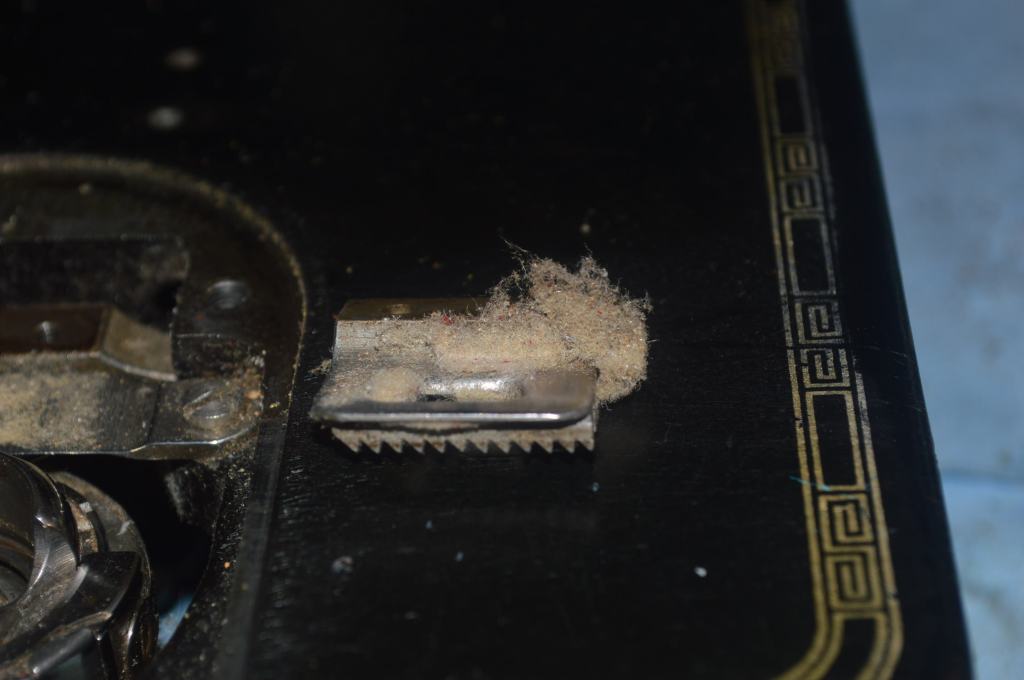
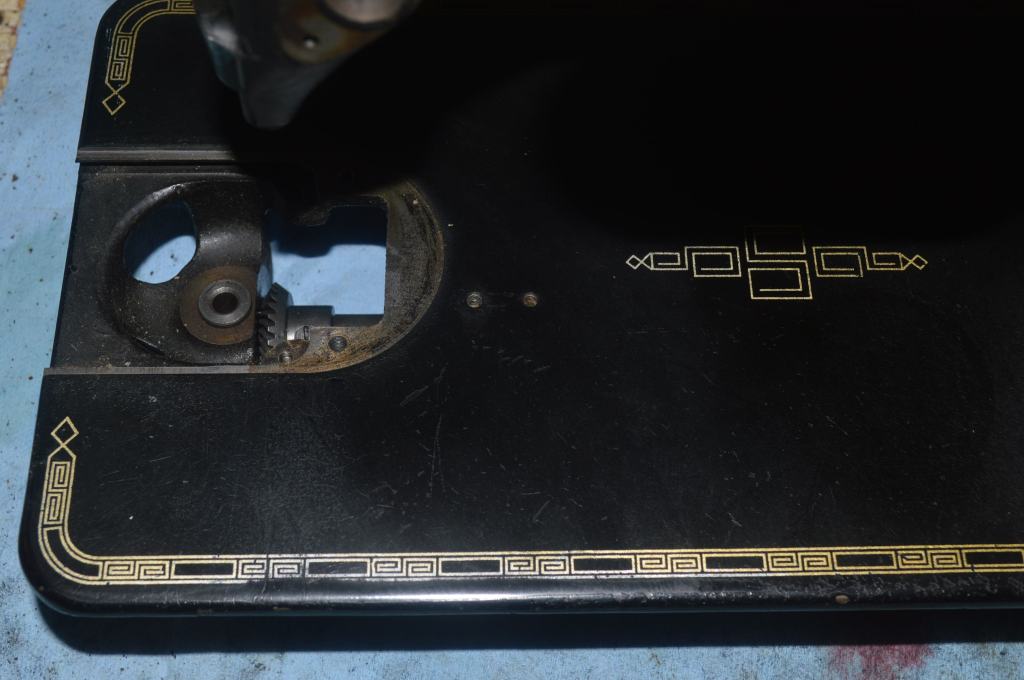
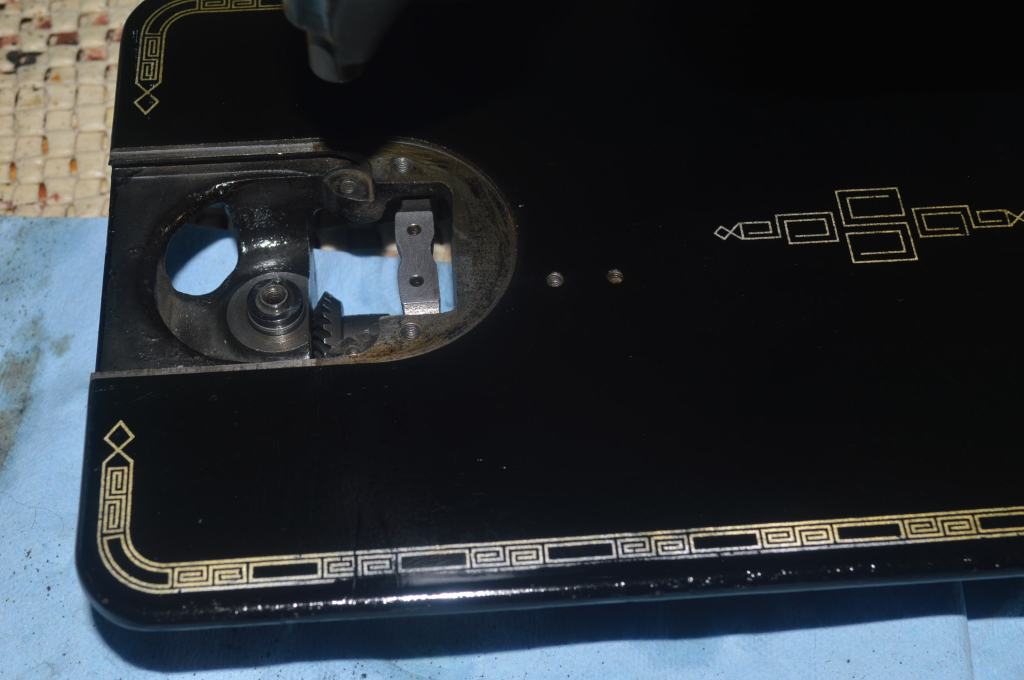
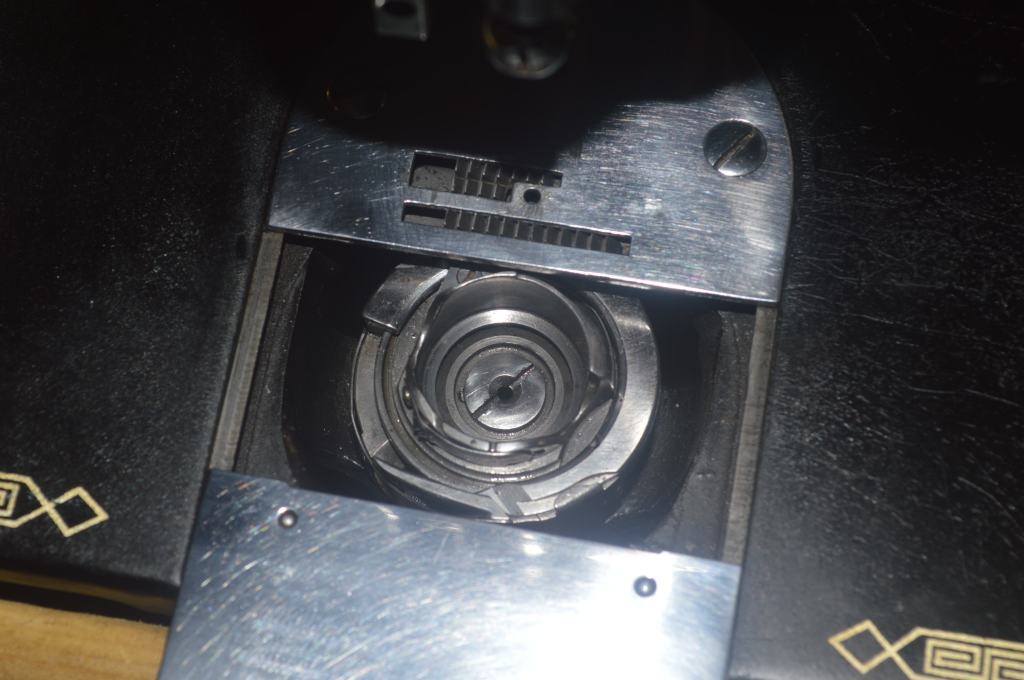
Next the feed dogs, bobbin case, bobbin race, and other parts in the bobbin area are removed.

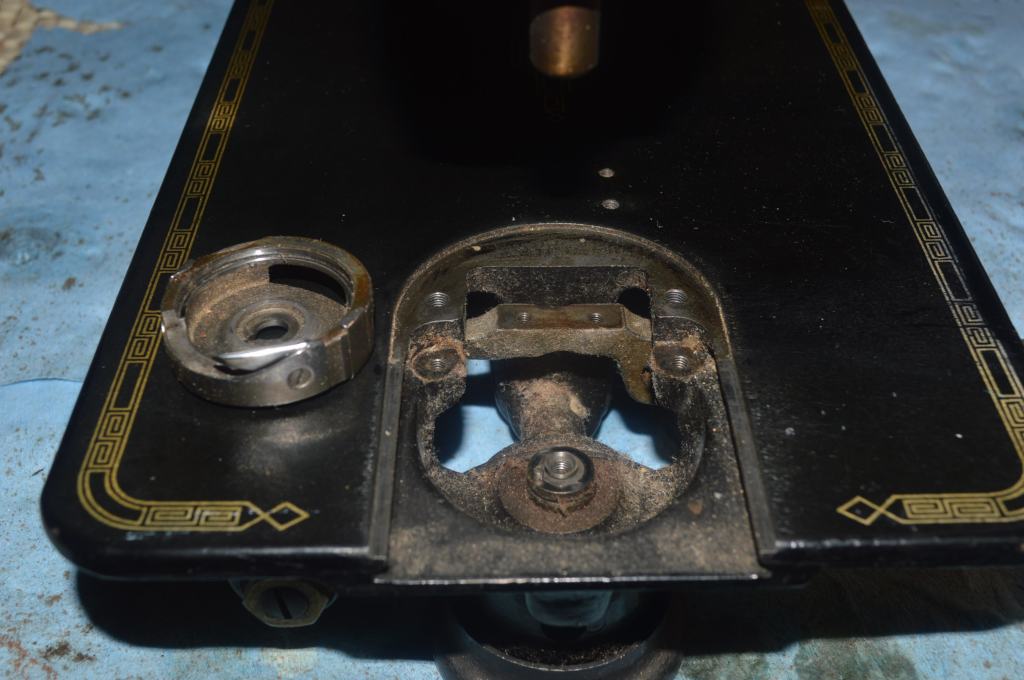
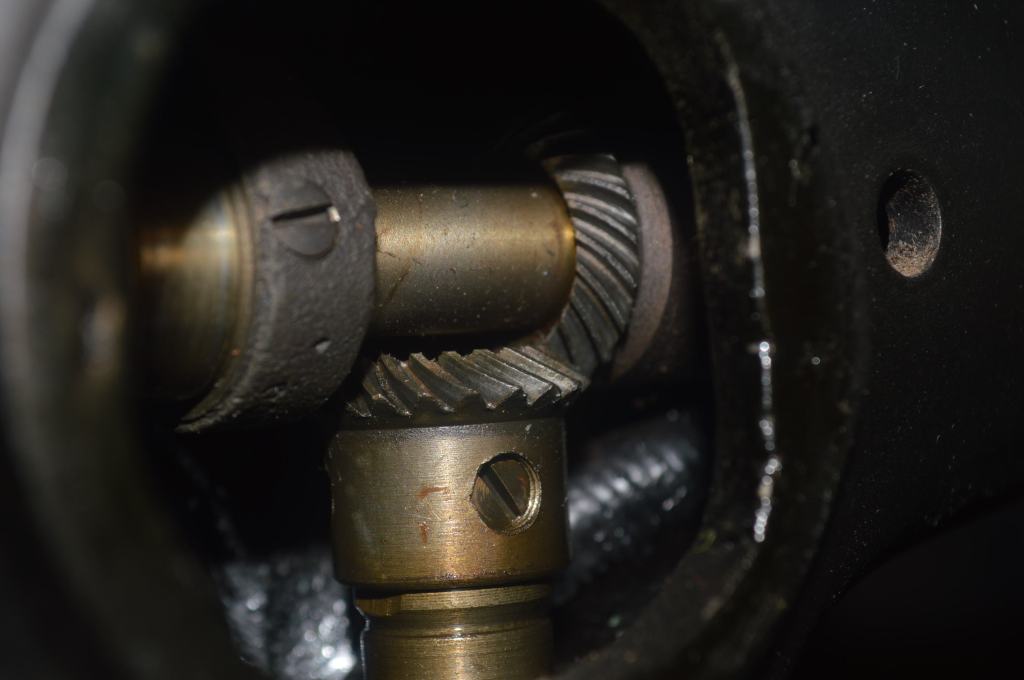
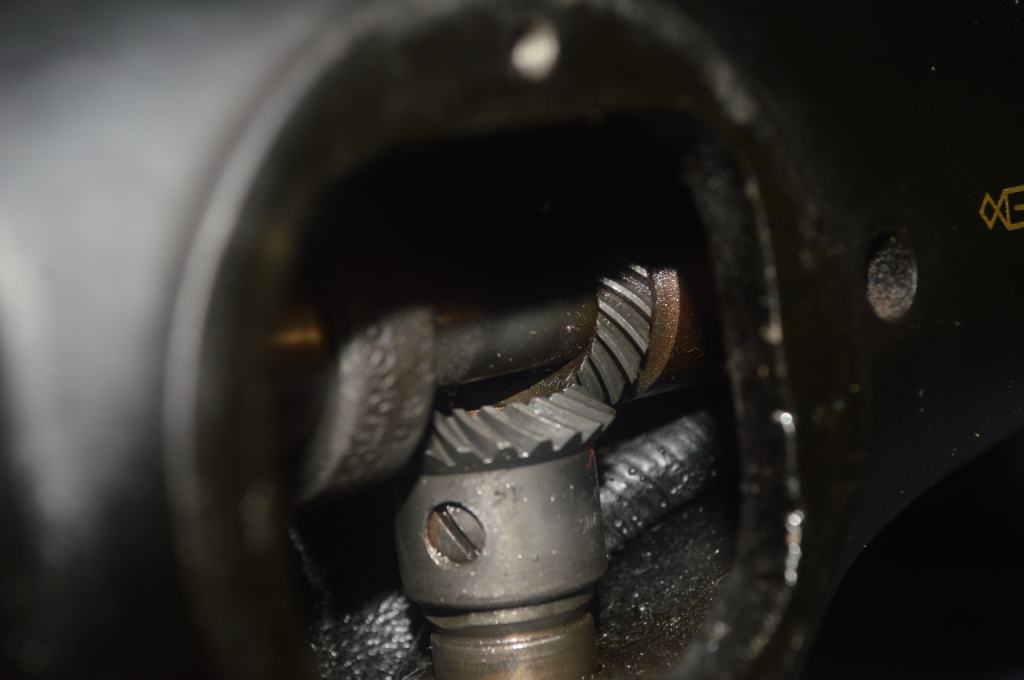
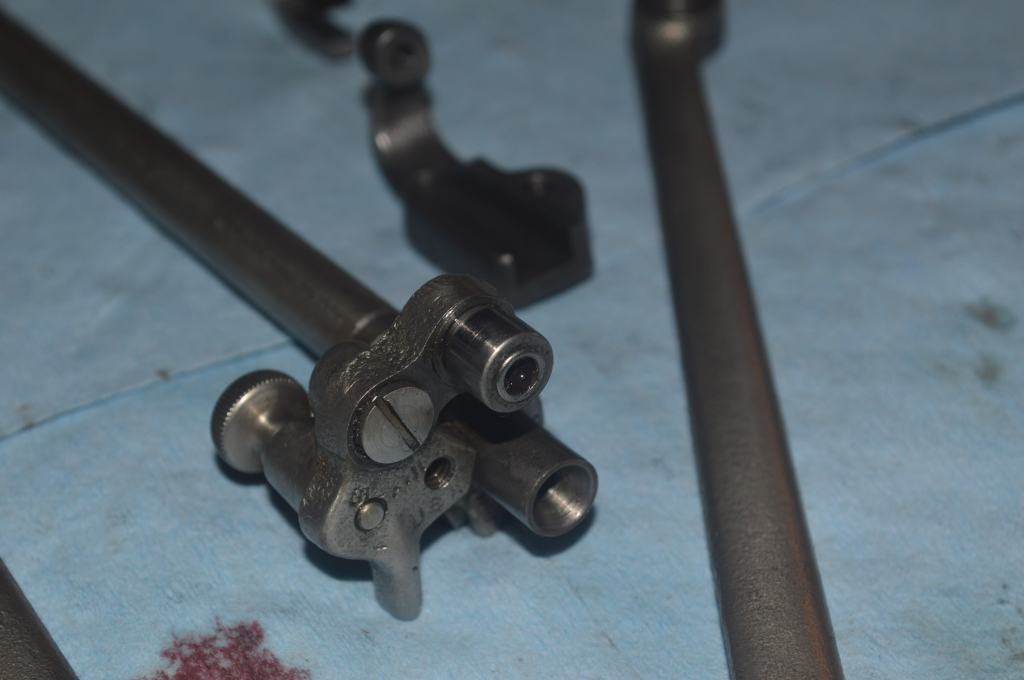
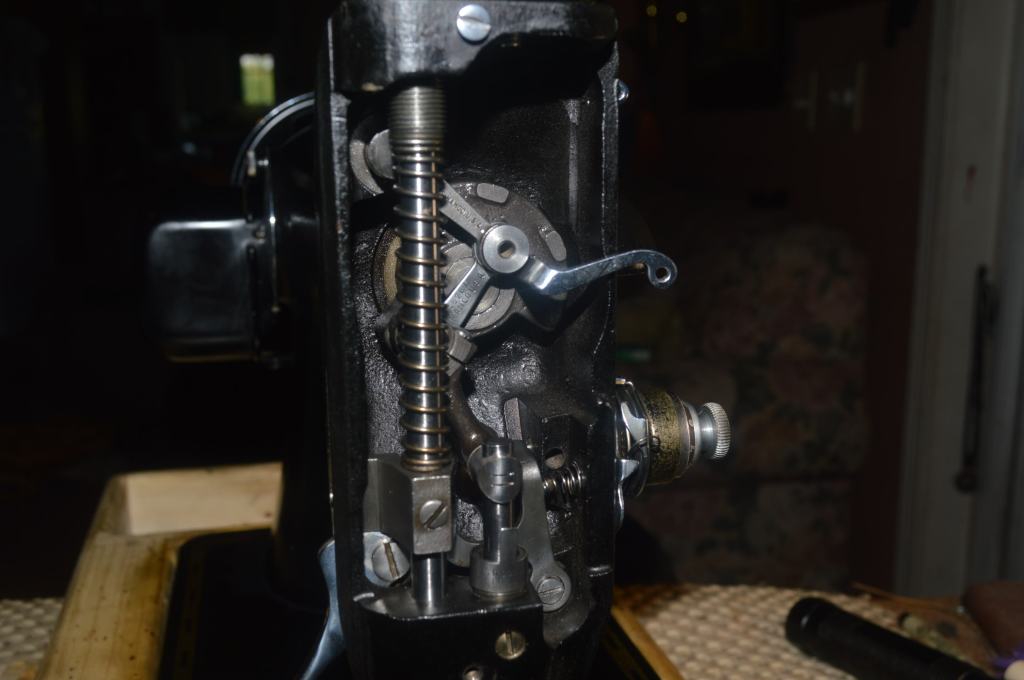
Working under the bed of the machine the rocker arms, the bobbin hook shaft gear. connecting rod, and the stitch length fork is removed. The gears and gear shaft are cleaned and oiled.
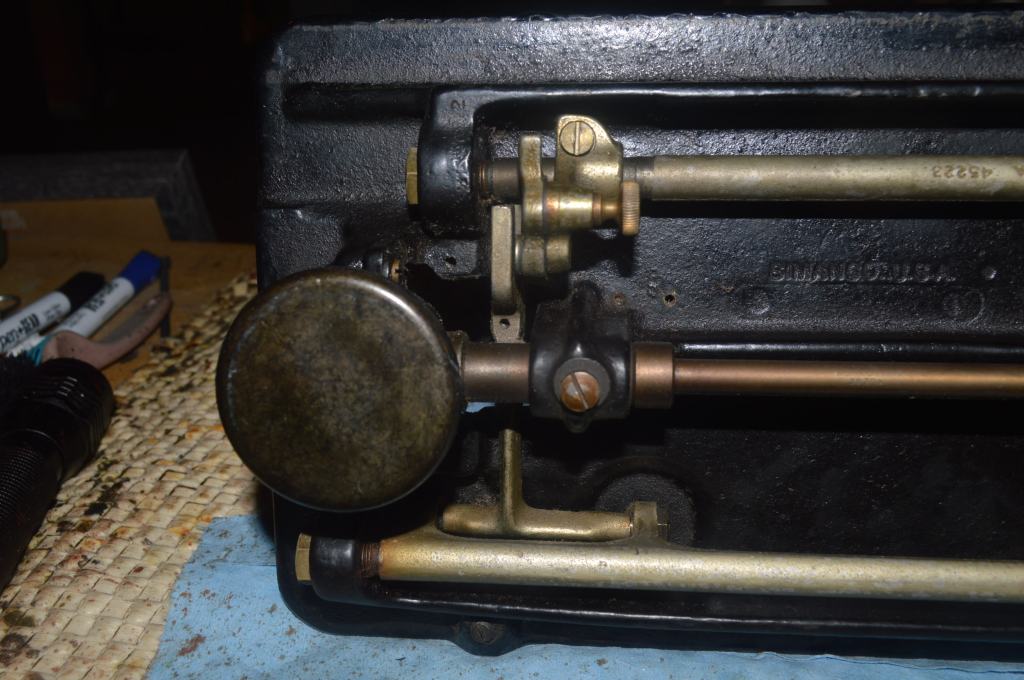
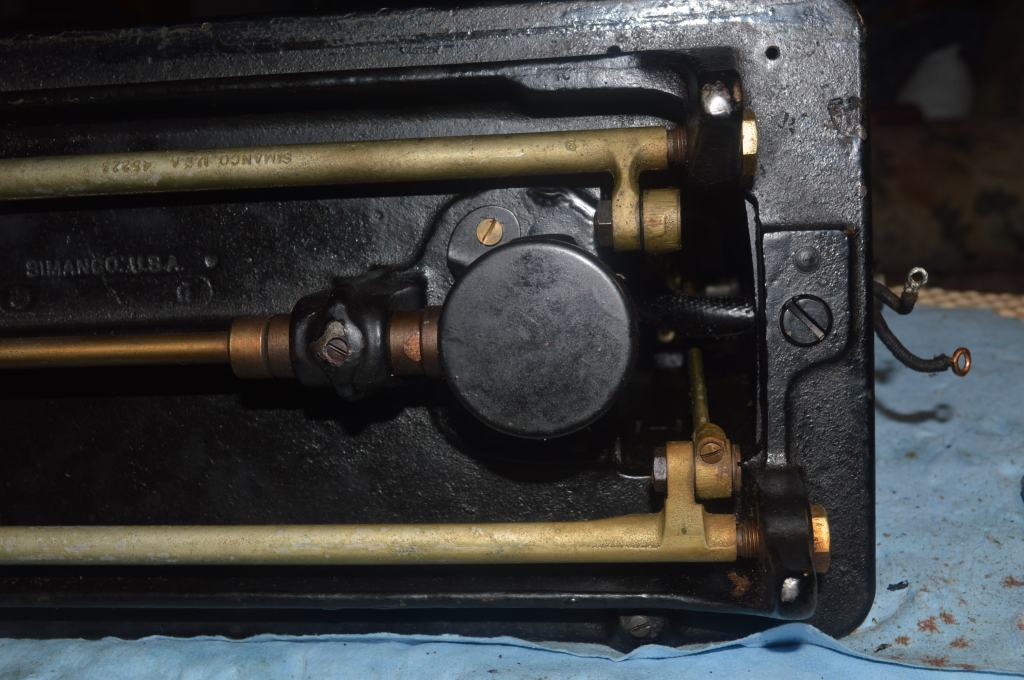

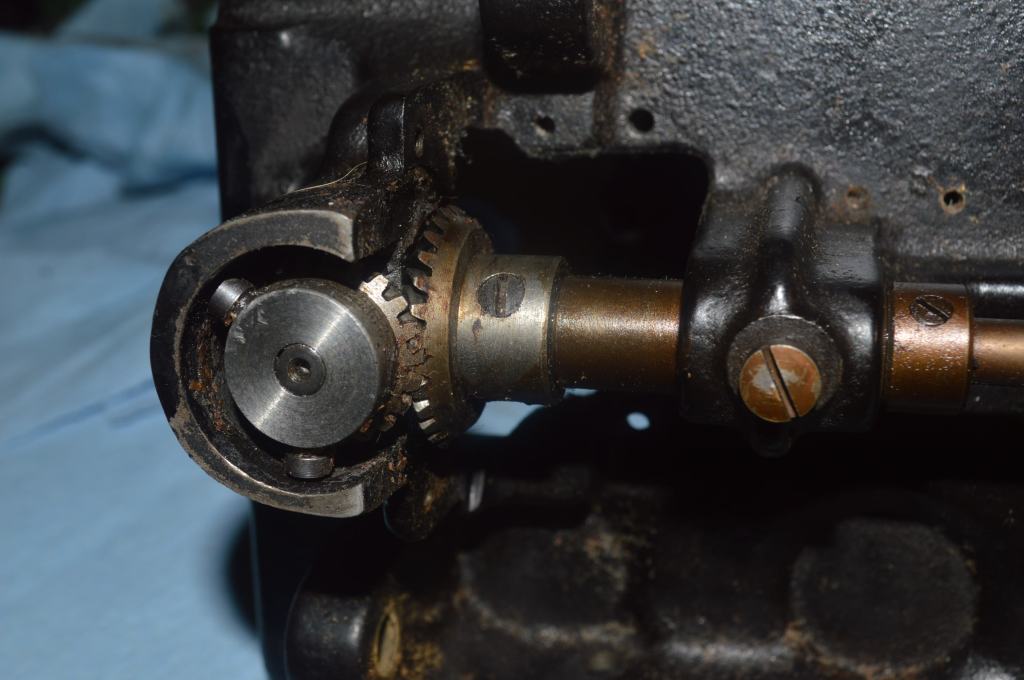

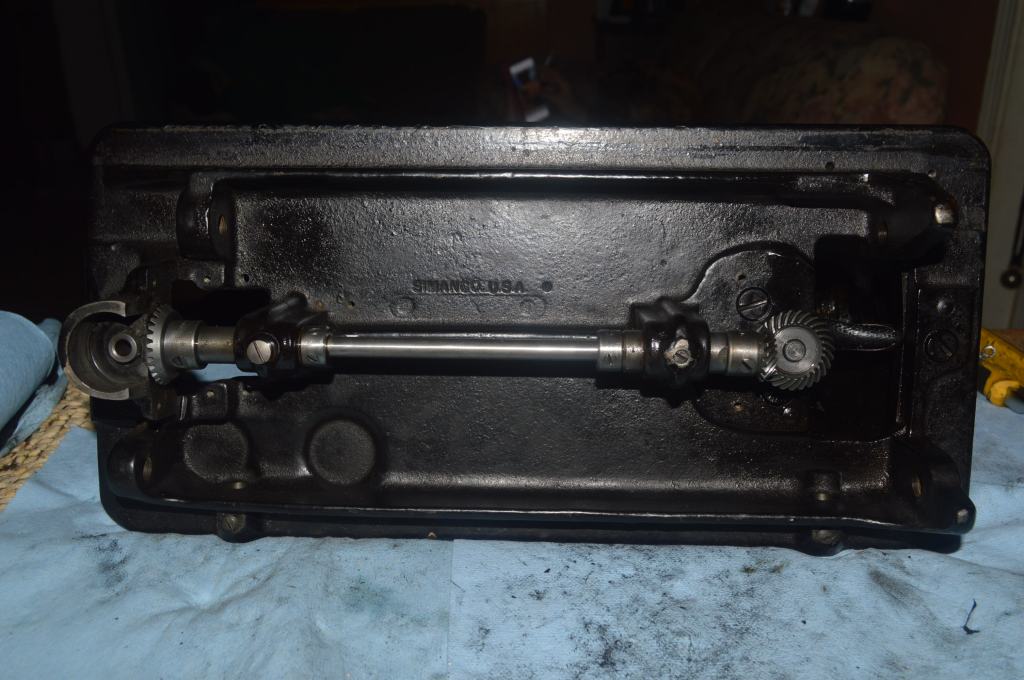
The gears in the arm shaft, along with the bearing lobes for the connecting rod and stitch length fork are cleaned in place.
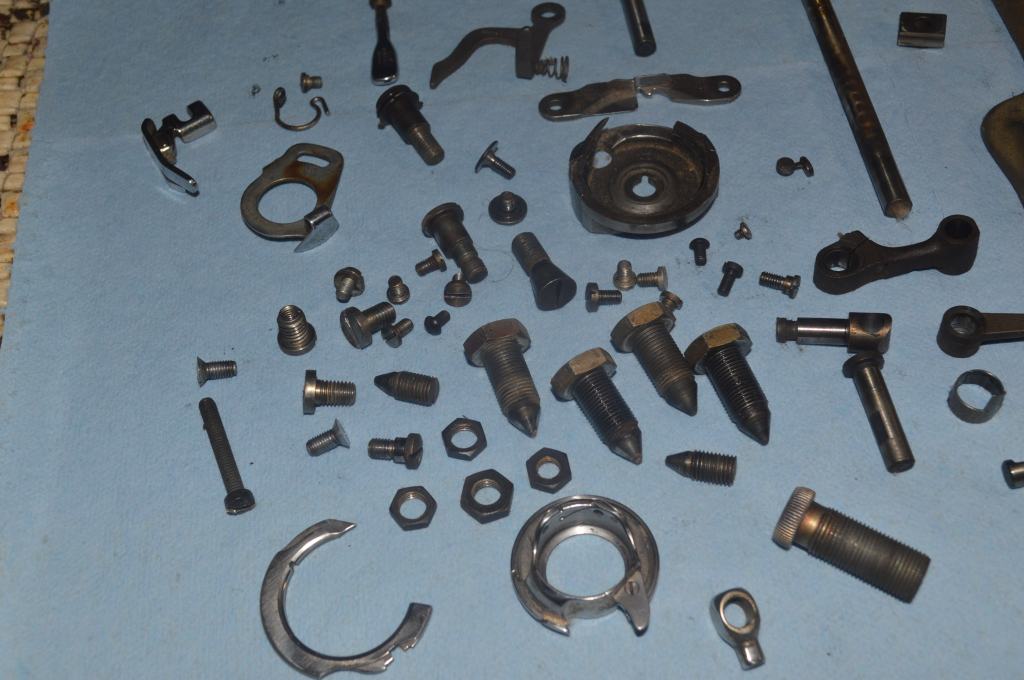
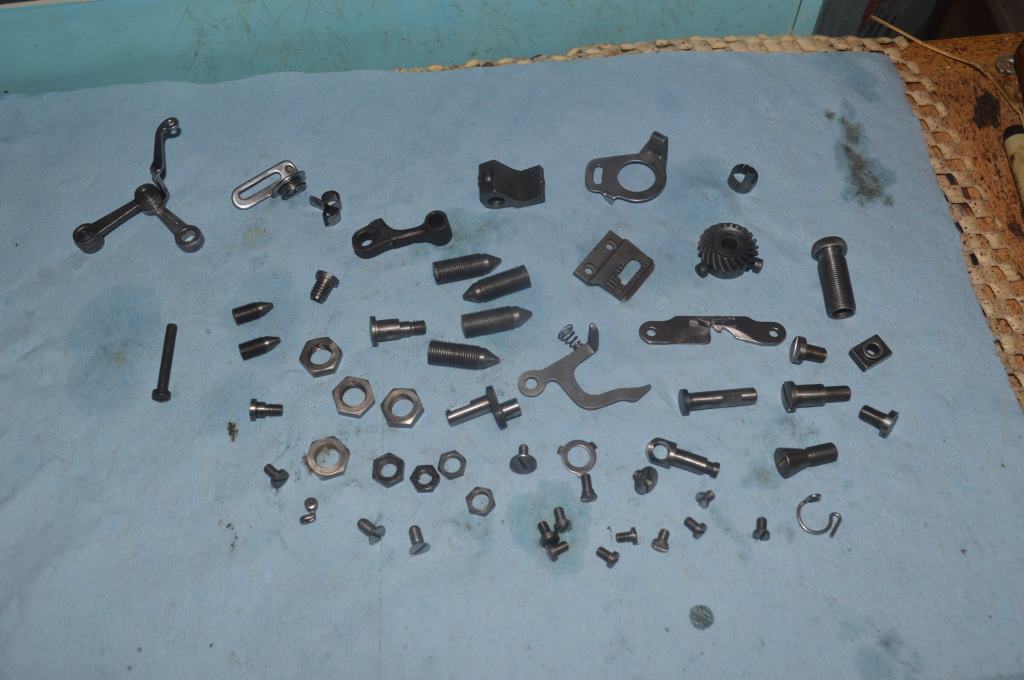
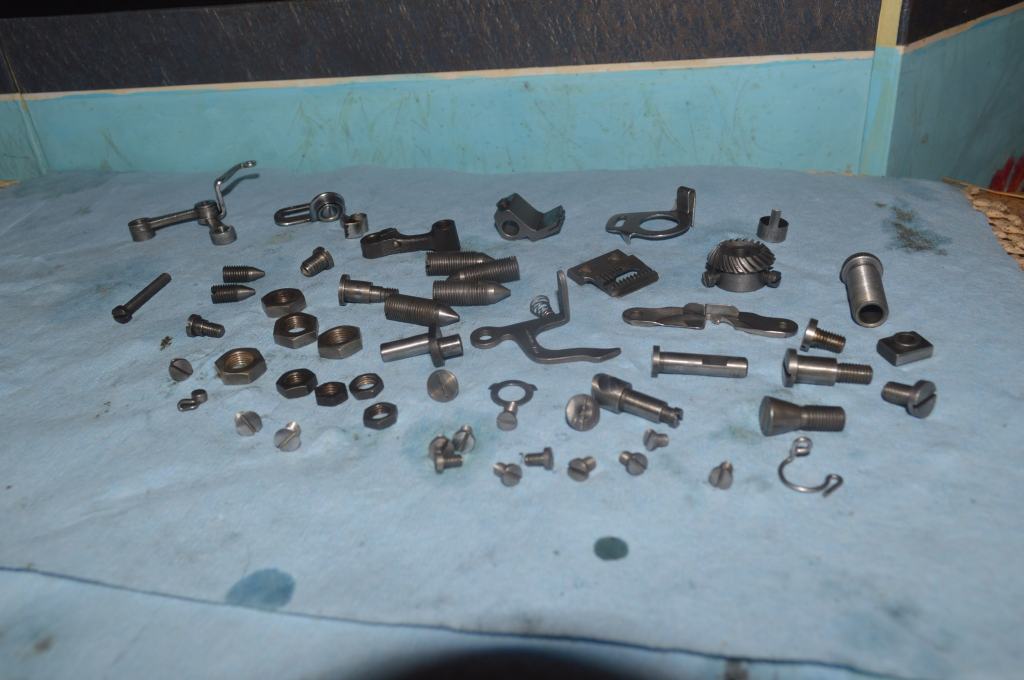
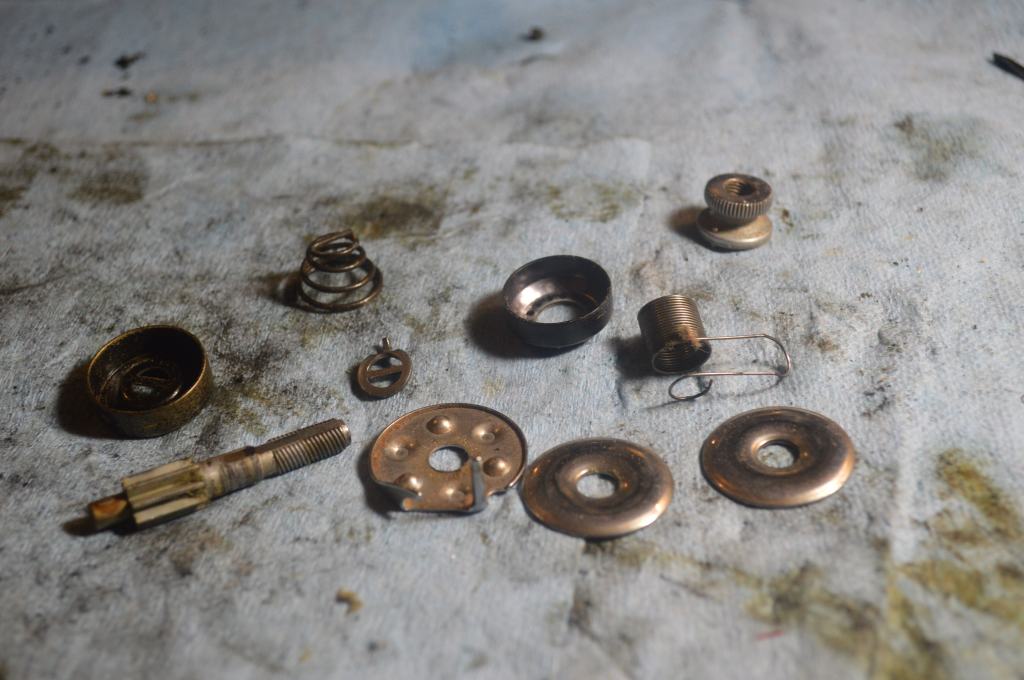
All of the parts removed are laid out for cleaning.
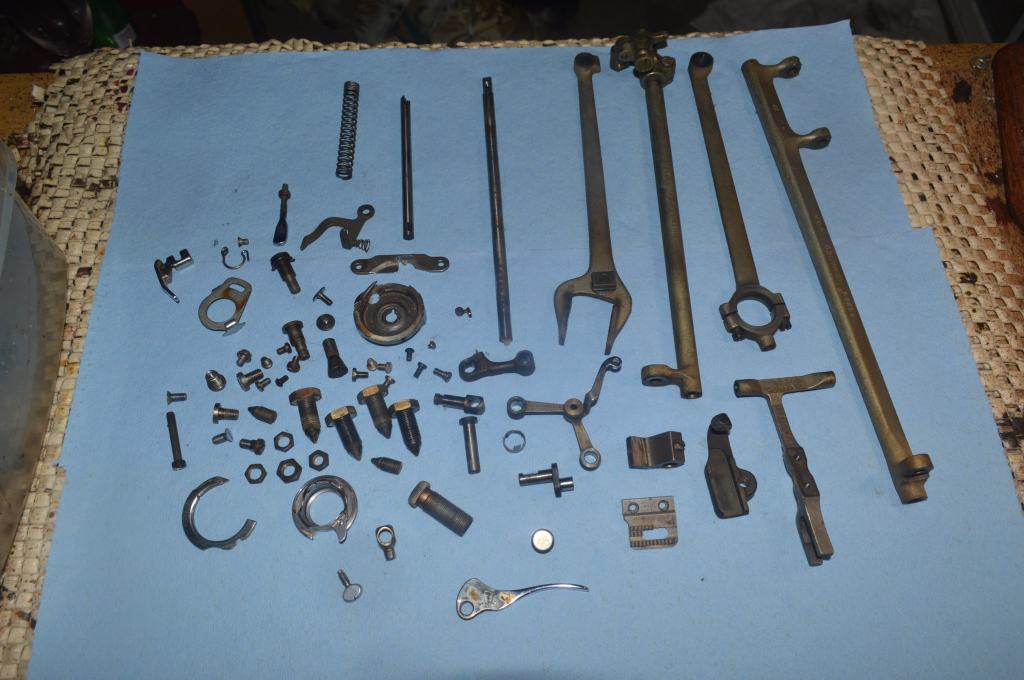
There is a considerable amount of old oil varnish and no sign of any oil. This explains why the machine was so stiff to turn. Similarly, oiling the gear shafts and the top sewing arm shaft made a huge difference… it turns very smoothly. I have no doubt that after assembly, everything will feel smooth as silk.
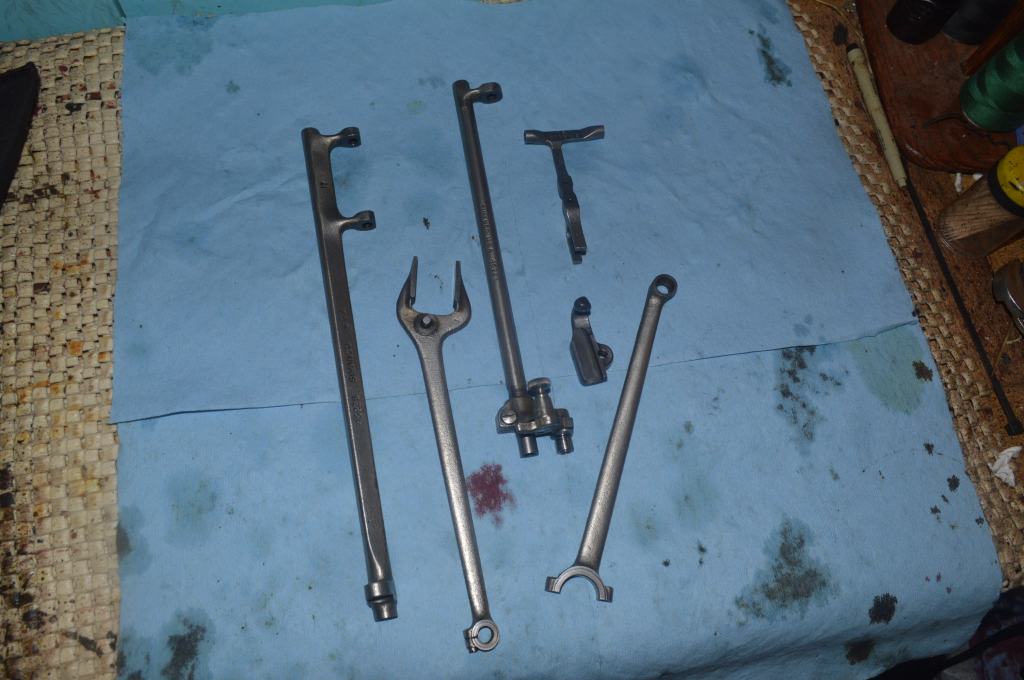
These parts are ultrasonically cleaned and then they are tumble polished. Following the polishing, each part is wire brushed to ensure they are clean and bright steel.
This rocker arm has a roller. Oftentimes, it is frozen and won’t turn. It is freed up and oiled to spin smoothly.
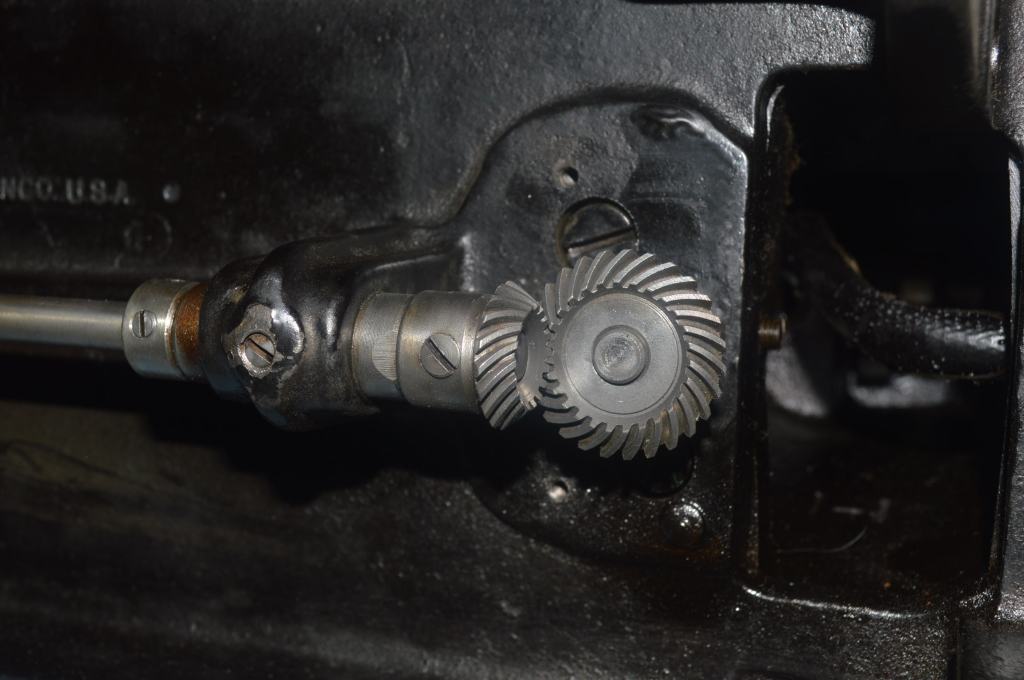
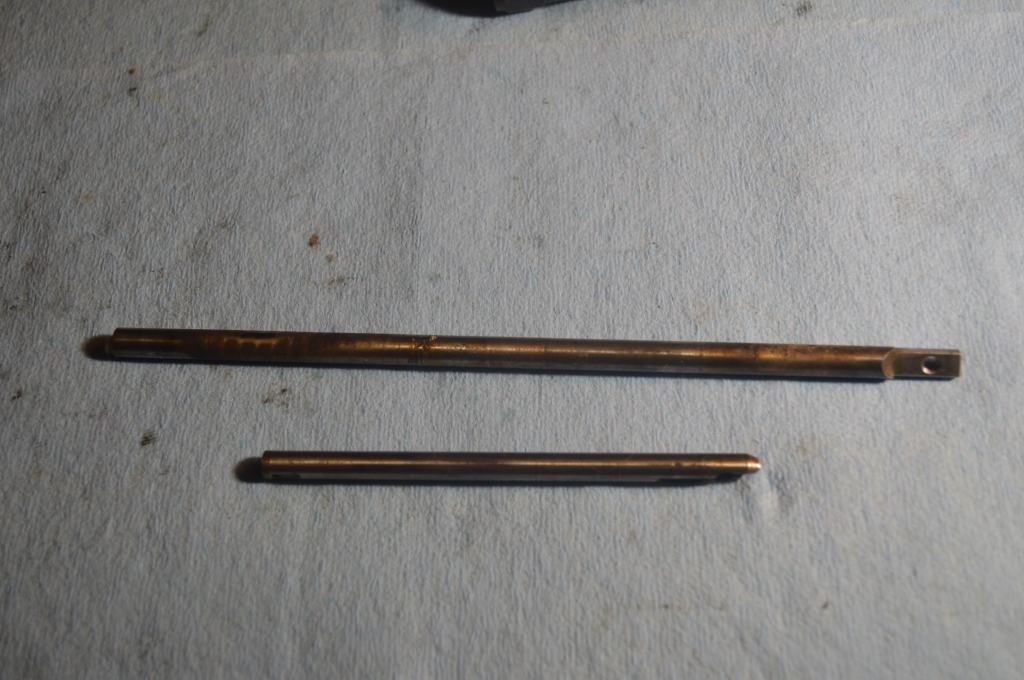
The bobbin shaft runs at high speed and is typically coated with oil varnish. This one looks pretty good. Still, it is polished and the gear is cleaned.
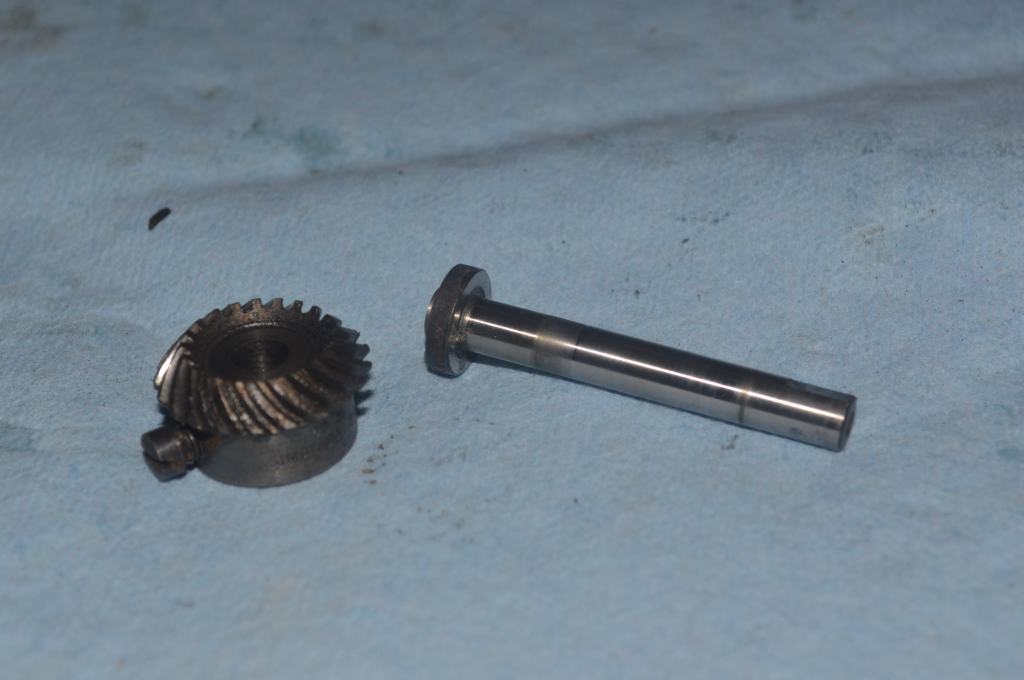
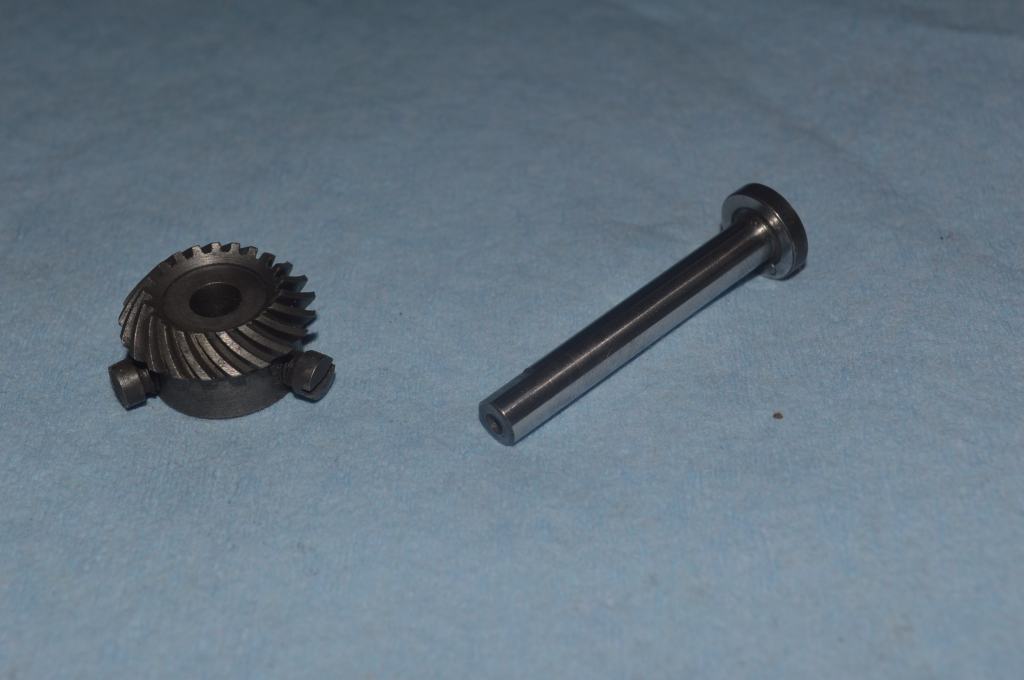
The bobbin shaft bore is cleaned with a brass bore brush.
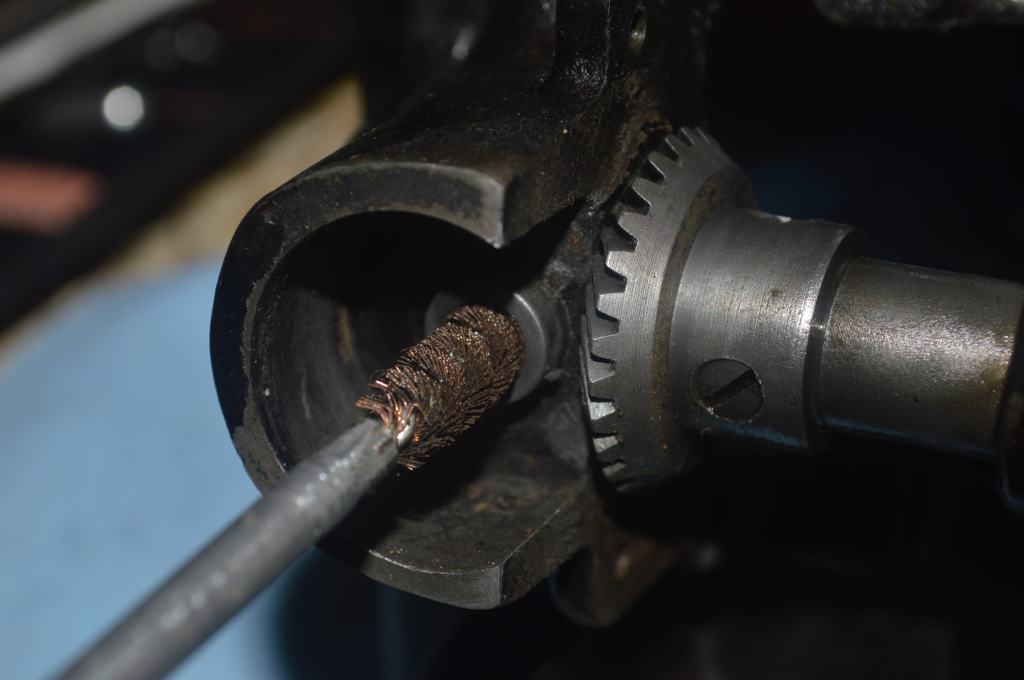
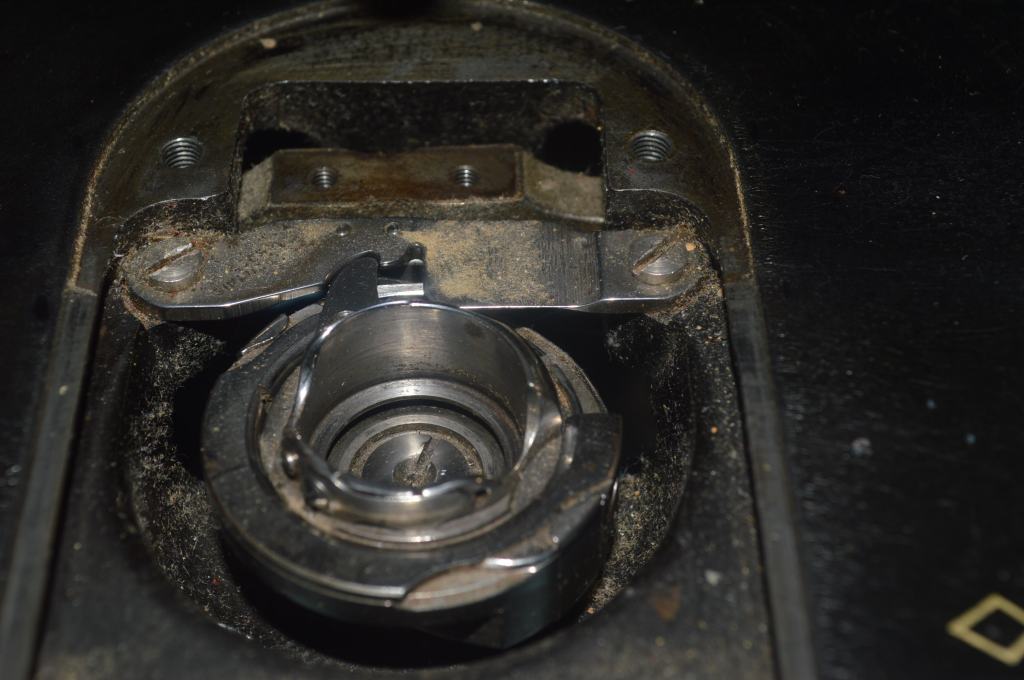
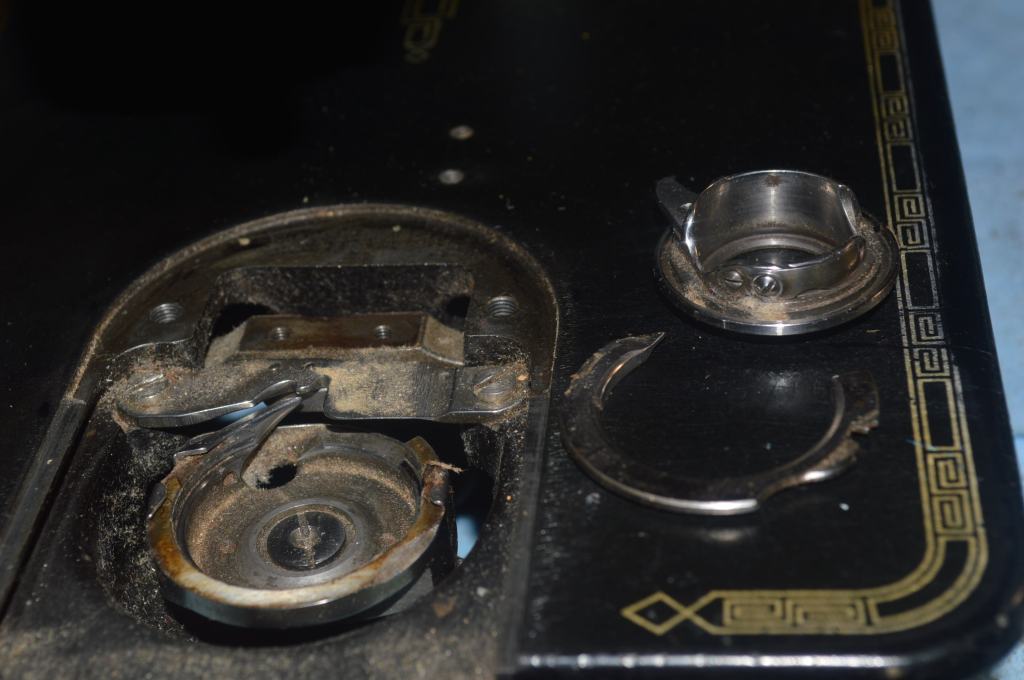
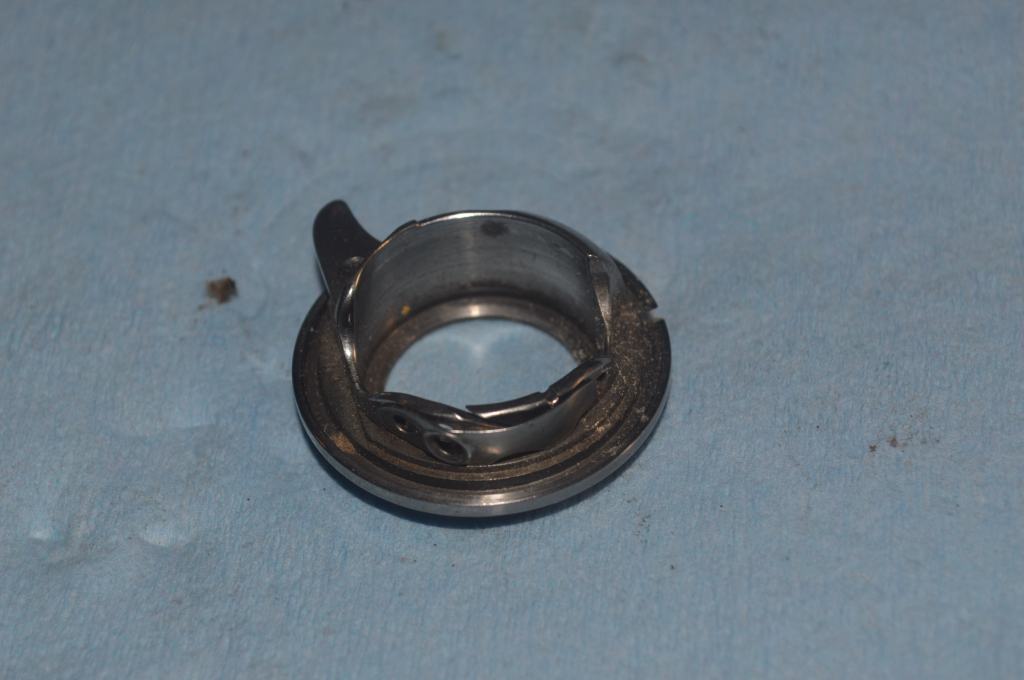
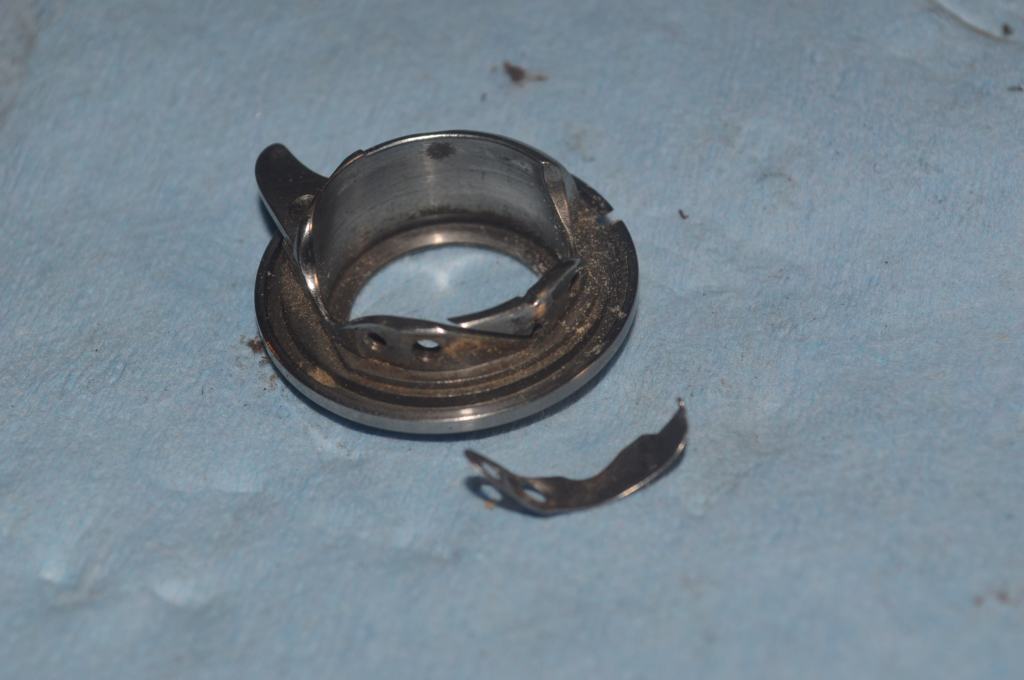
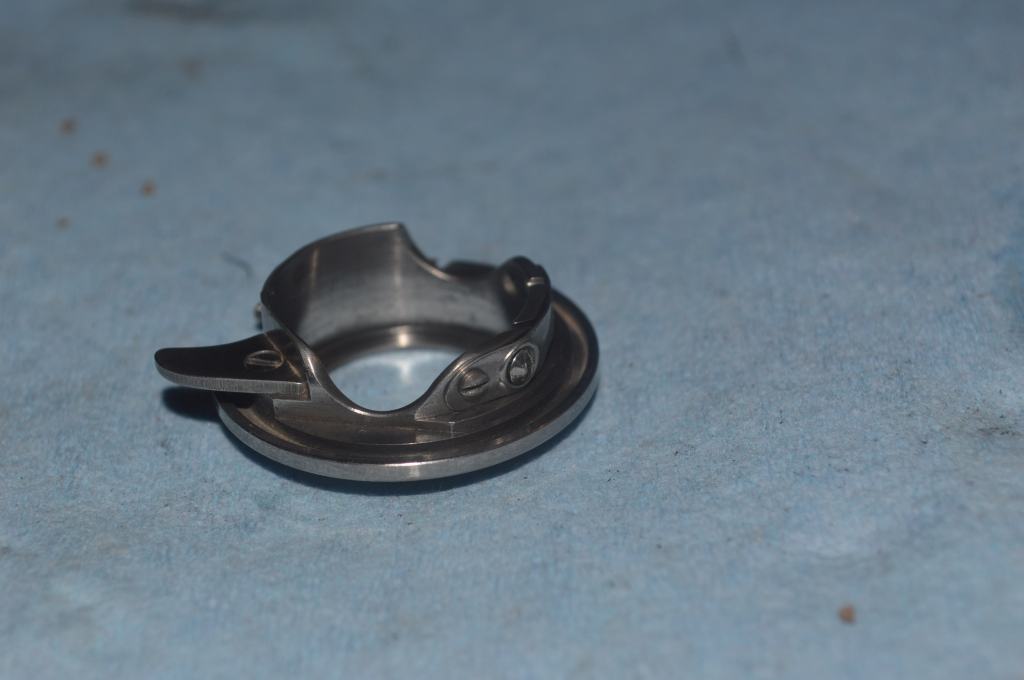
The bobbin hook race is an assembly and cleaning requires disassembly. There is always dirt to find behind anything that has plates or covers.
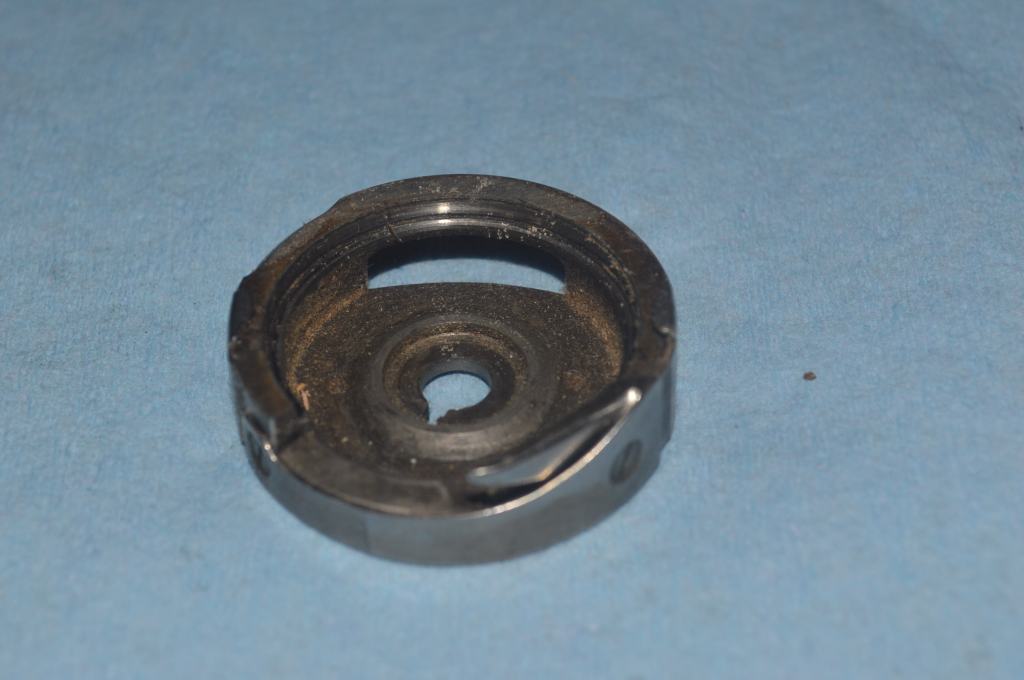
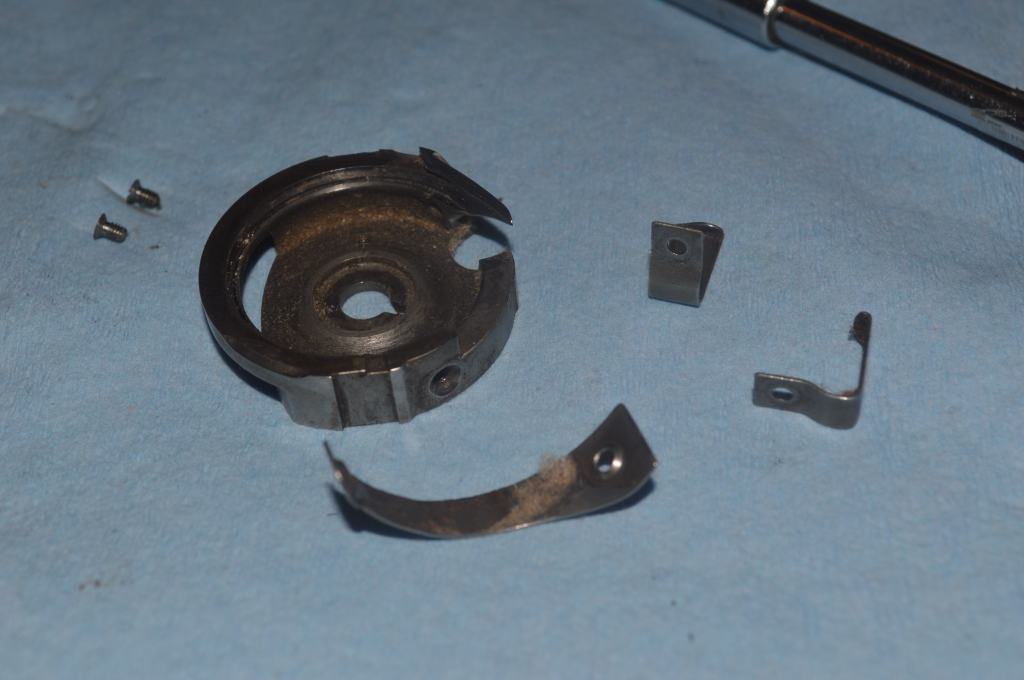
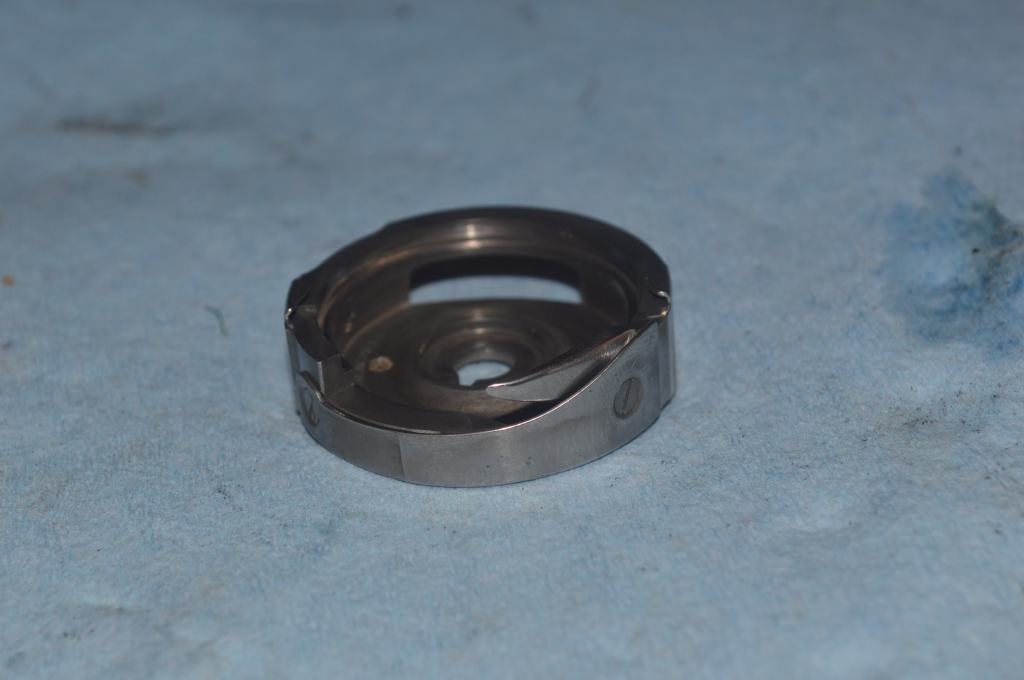
All of these surfaces are cleaned and polished. Similarly, the bobbin case has a flat spring that is responsible for bobbin thread tension. It too is disassembled, cleaned and polished.
The needle bar and the presser foot bar is cleaned and polished.

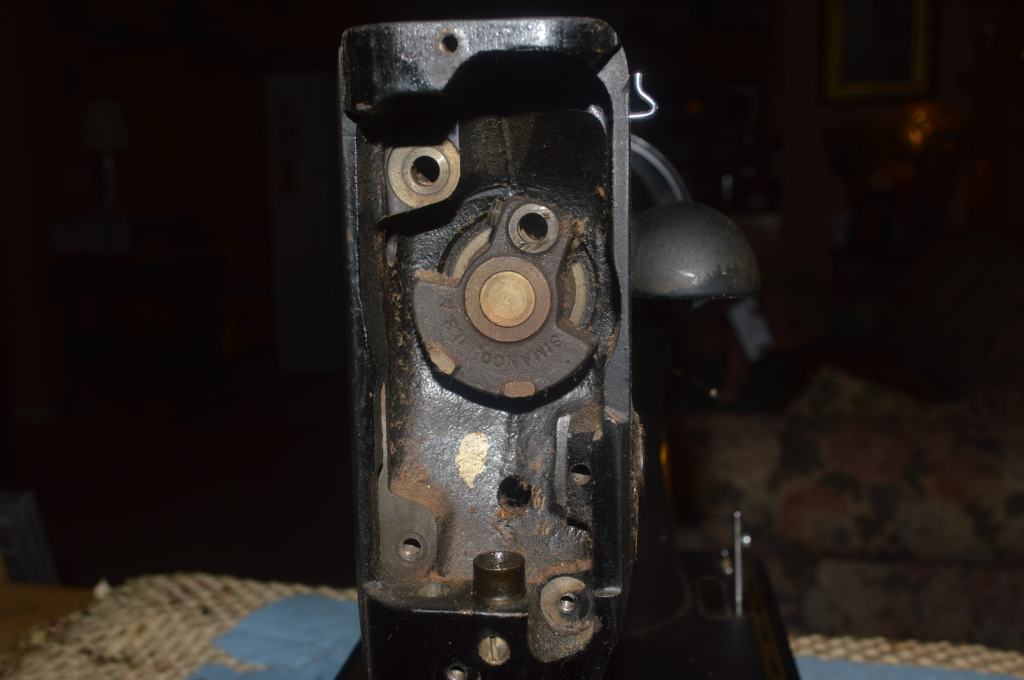
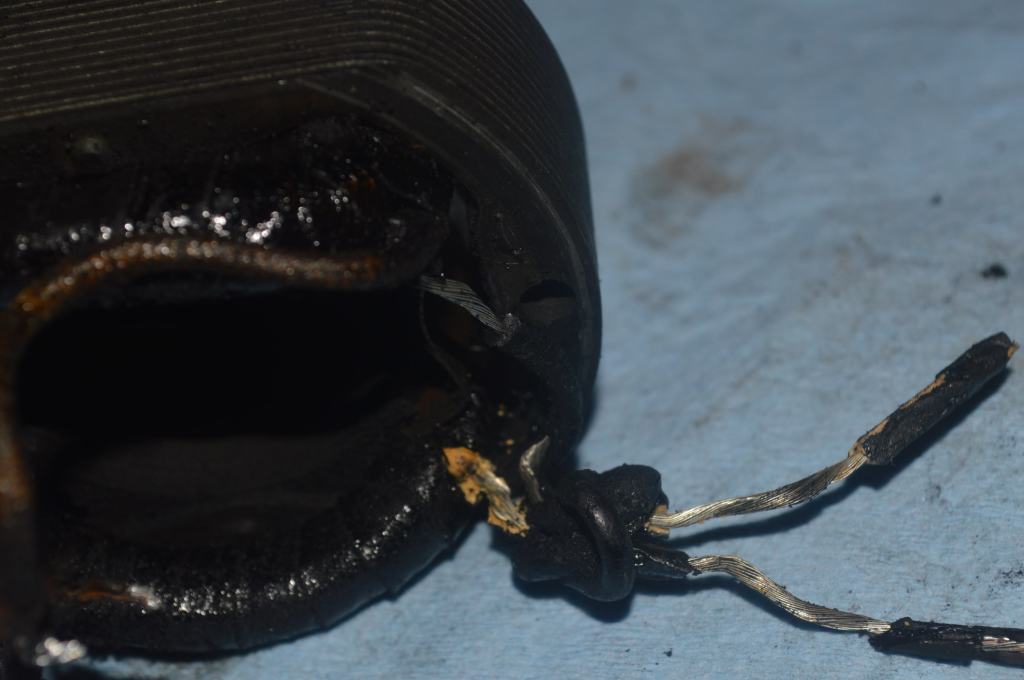
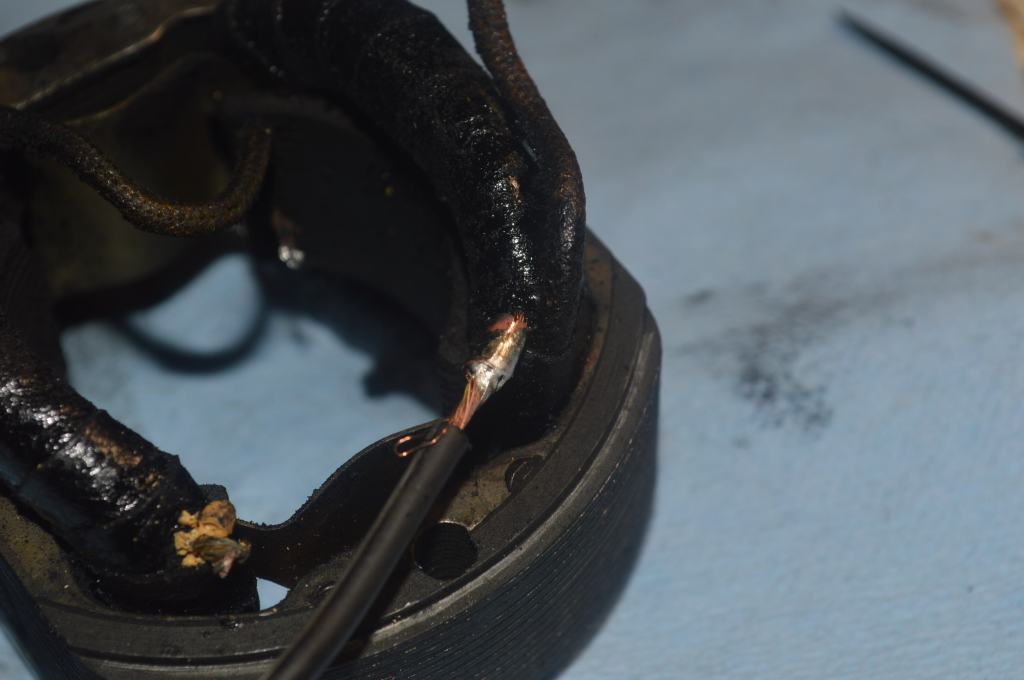
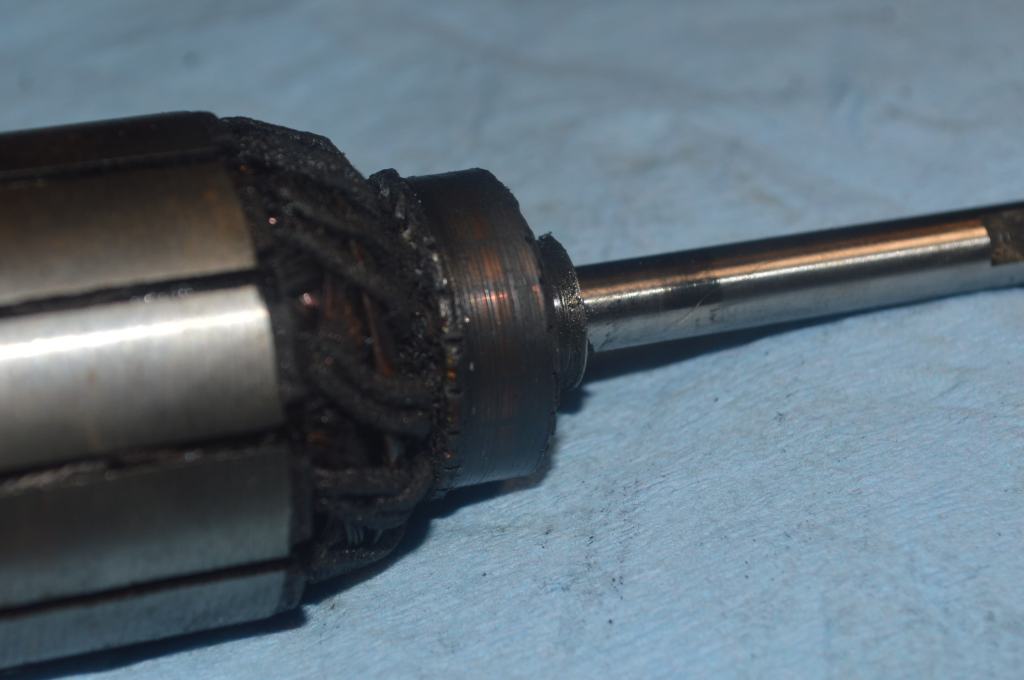
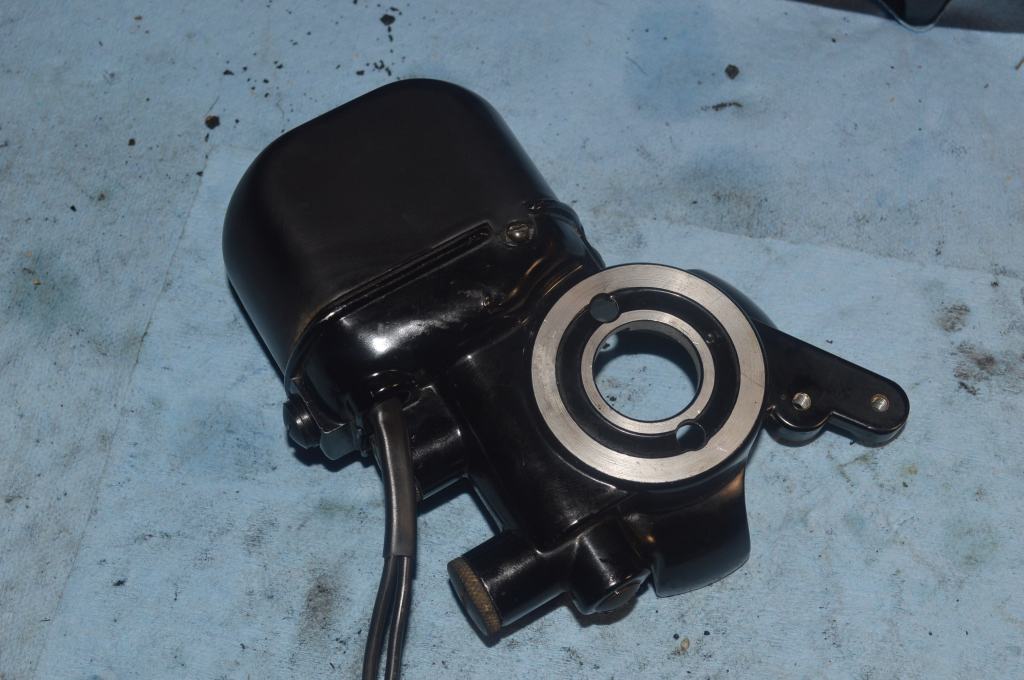
The most challenging part of a 201 mechanical restoration is the motor. The “potted” motors on these machines are gear drive motors and they have proven themselves to be very durable. The Achilles heel of these motors is the main power wires. The insulation gets hard and cracks, flaking away and exposing the wires. This motor is no exception. The wires are deteriorated all of the way to the field coil. This is a particular concern, and I will need to take extra precautions in replacing the wires.
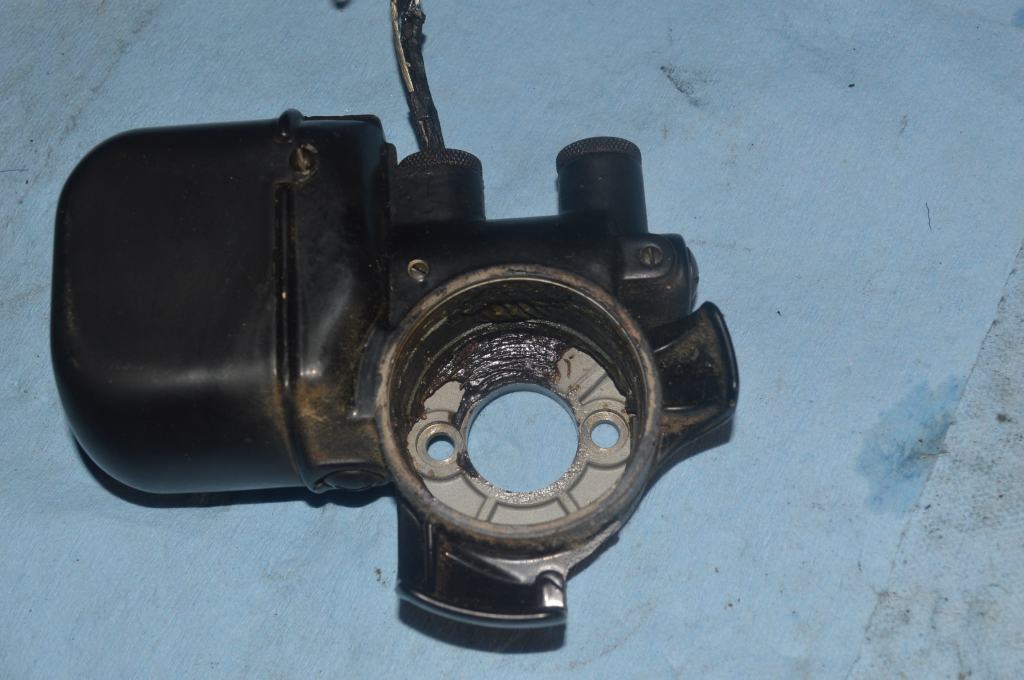
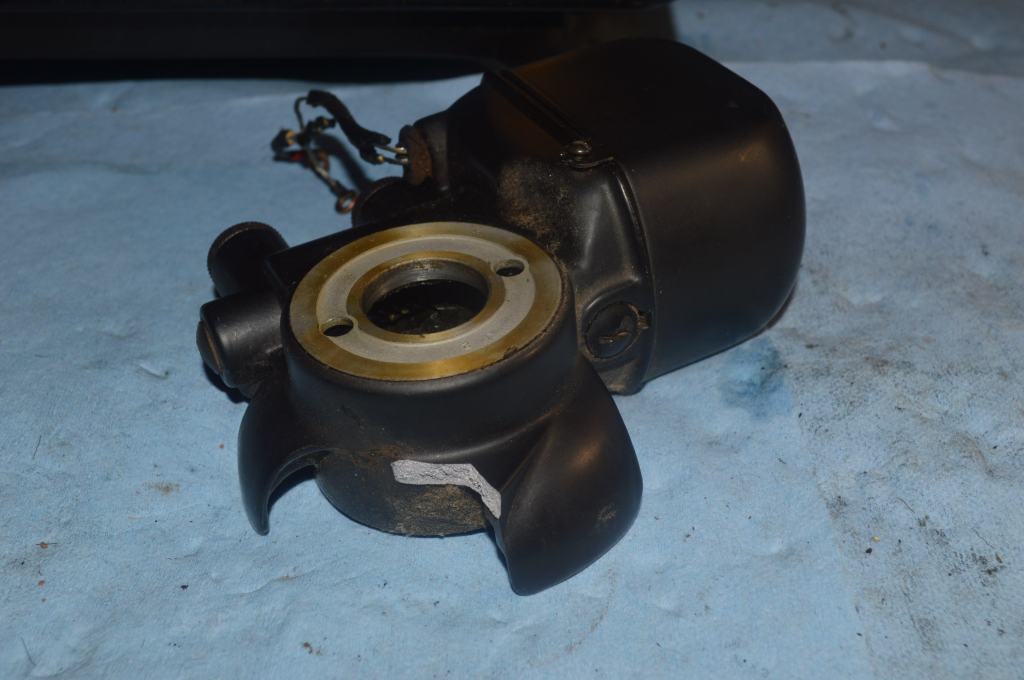
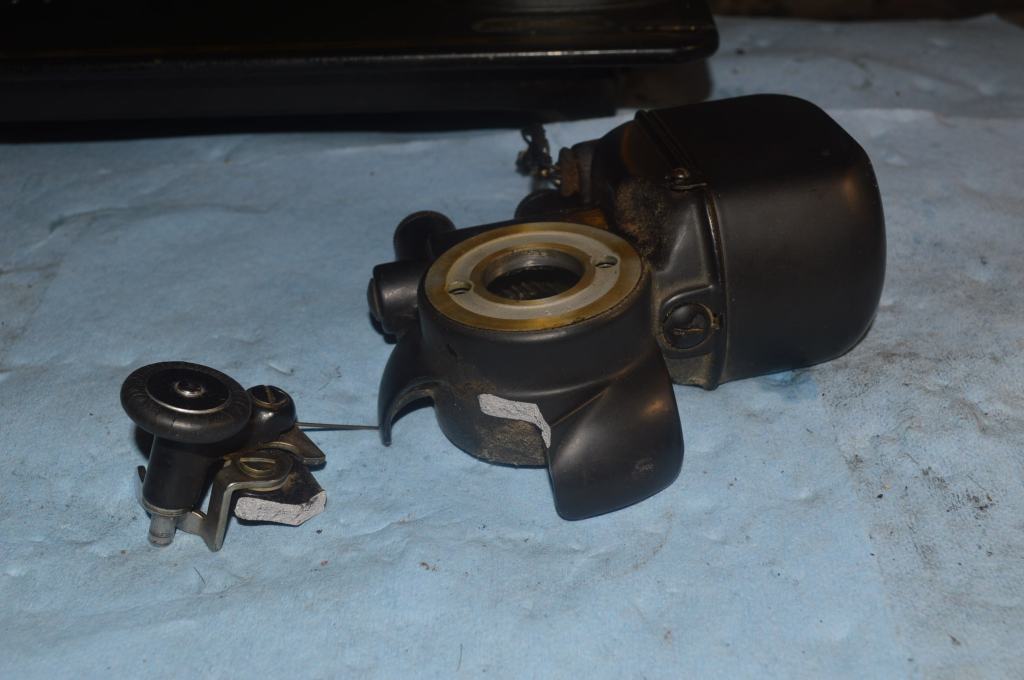
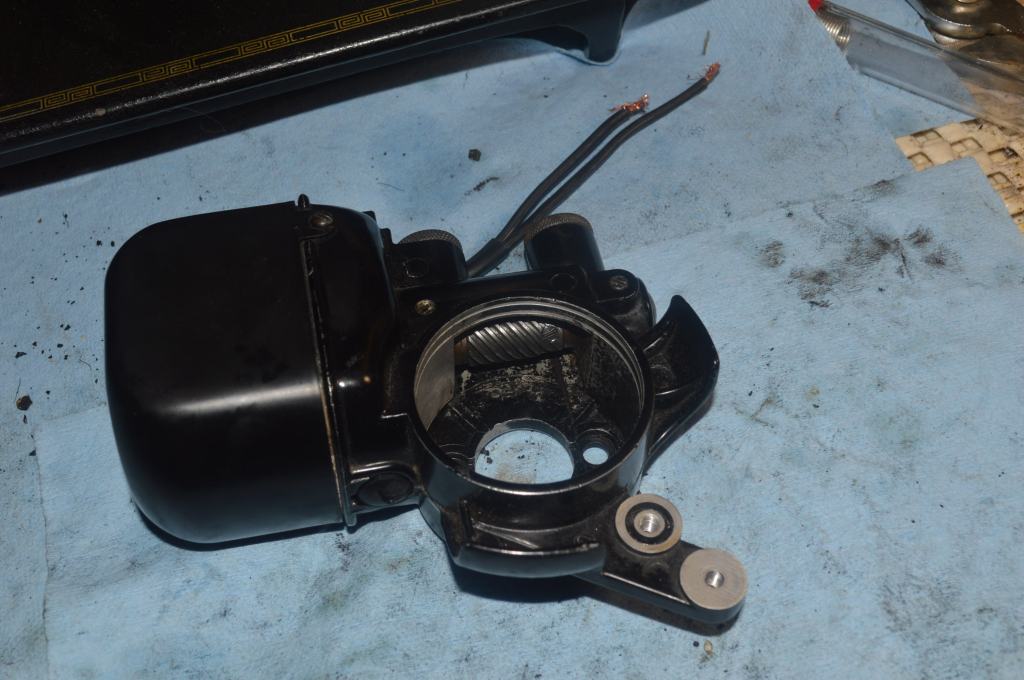
Unfortunately, the bobbin wonder broke off of the motor housing in shipping. I was fortunate to find a new motor housing on Ebay. The motor is disassembled, the armature is removed, the field coil is de-soldered from the brushes, the brush tubes are removed.
The power wires are replaced. because the wires are cracked all of the way to the field coil, solder couplings are used.

Heat shrink tubing is used over the solder joints.
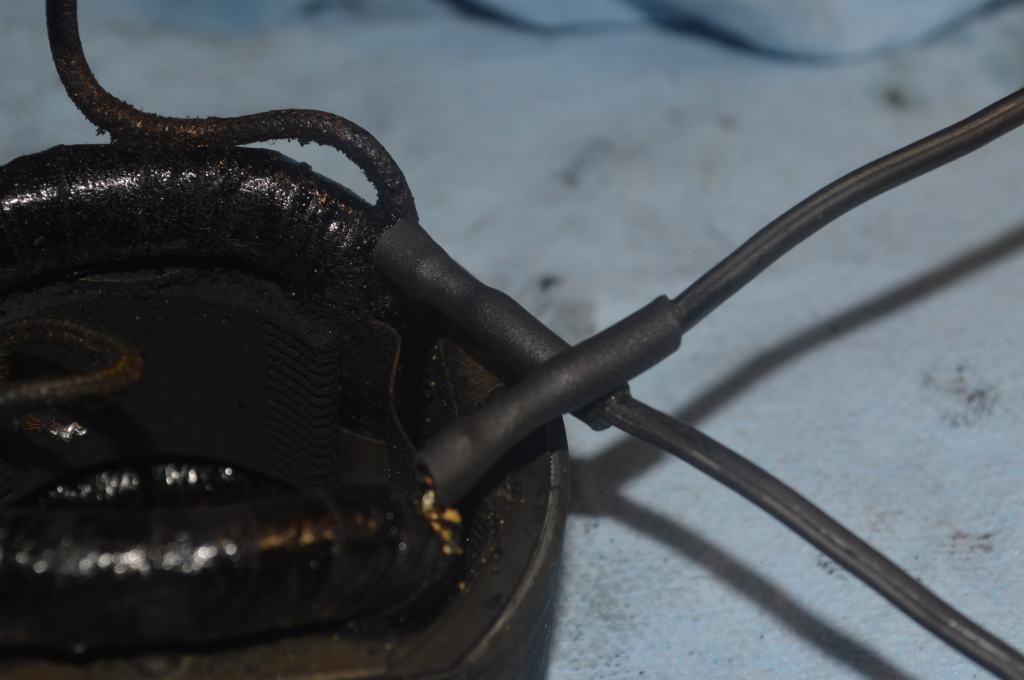
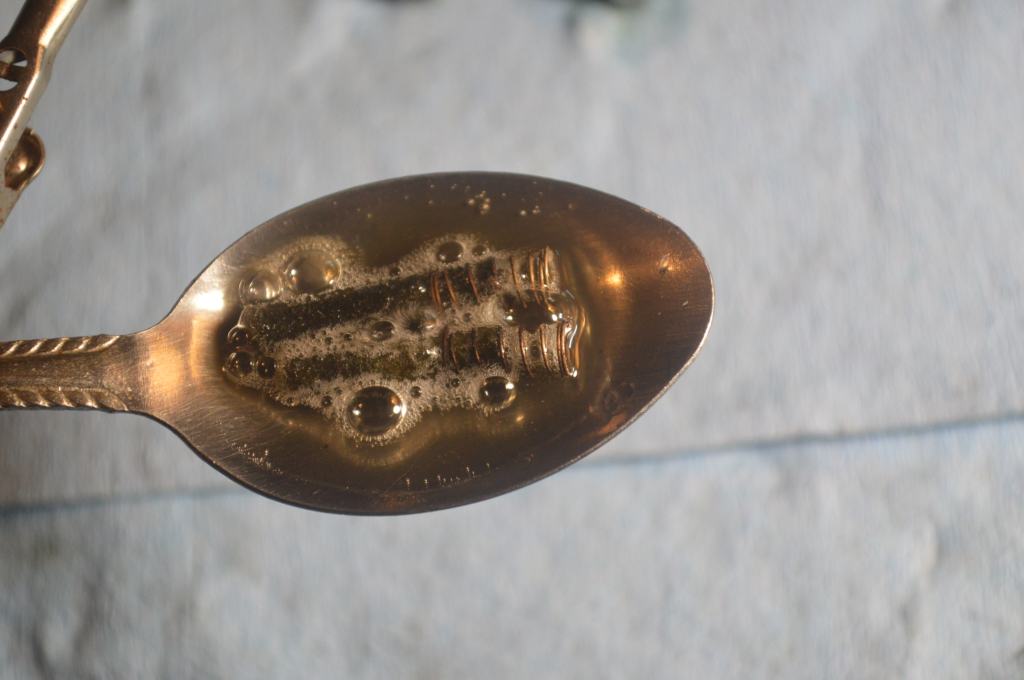
because the wires are bare where they enter the field coil, several coats of liquid wire insulation is used to coat the bare wire and to reinforce the wires.
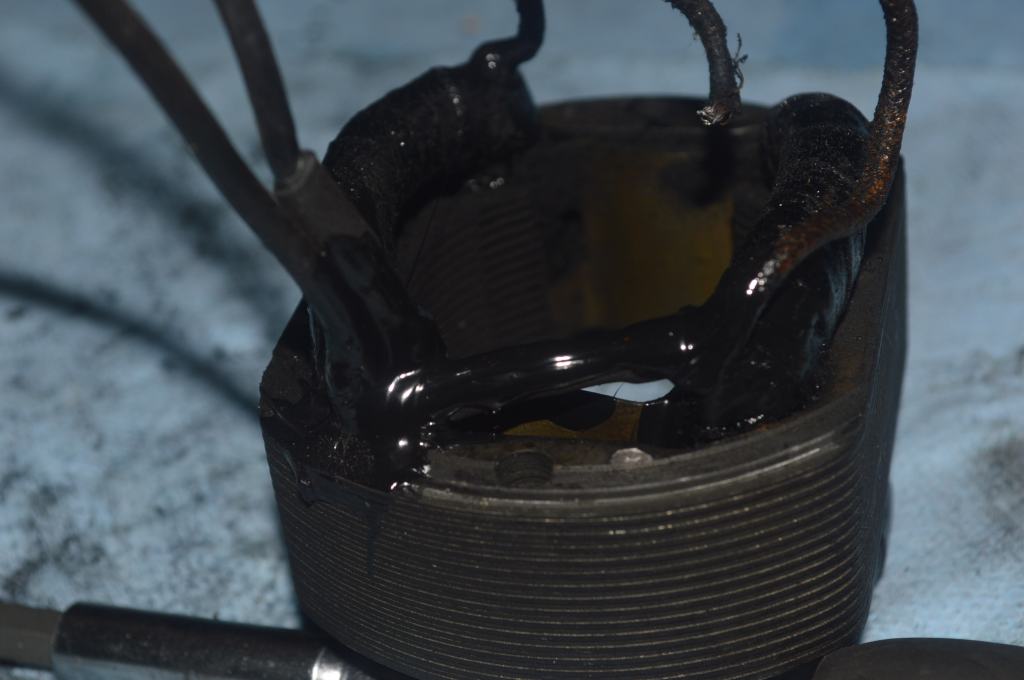
At this stage, I don’t know if there is a short in the field coil that cannot be repaired, and I won’t know until the motor is completely restored and tested… so it is on to the rest.
The armature is cleaned, and the motor shafts are polished.
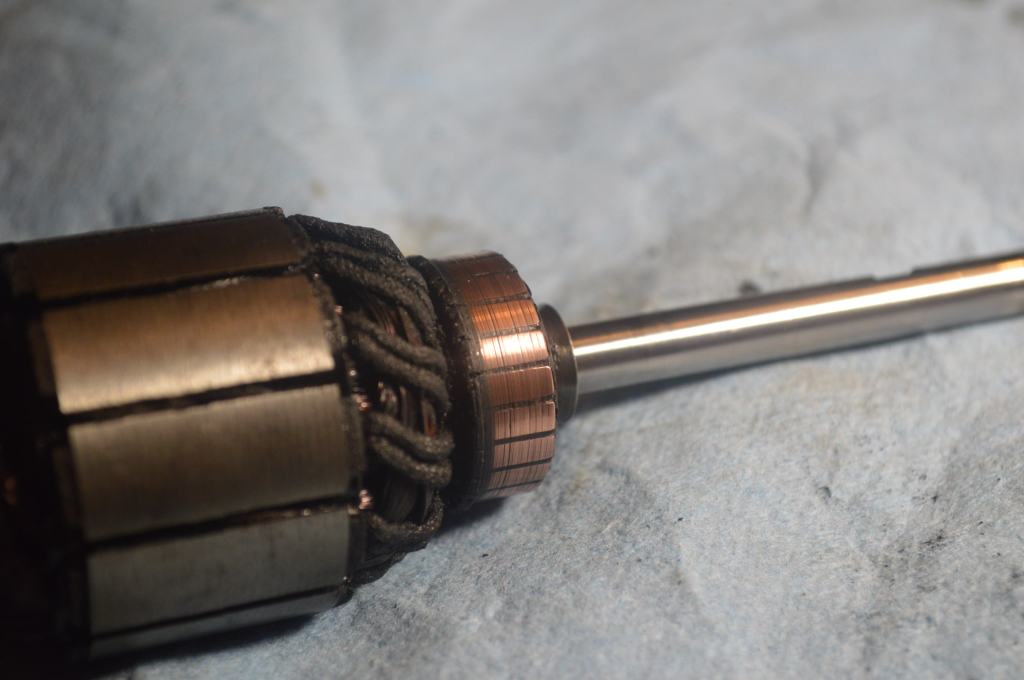
The brush tubes, wicks, motor housing, spiral gear along with the caps and screws are cleaned.

The brushes are worn to the point of replacement. New brushes are installed.
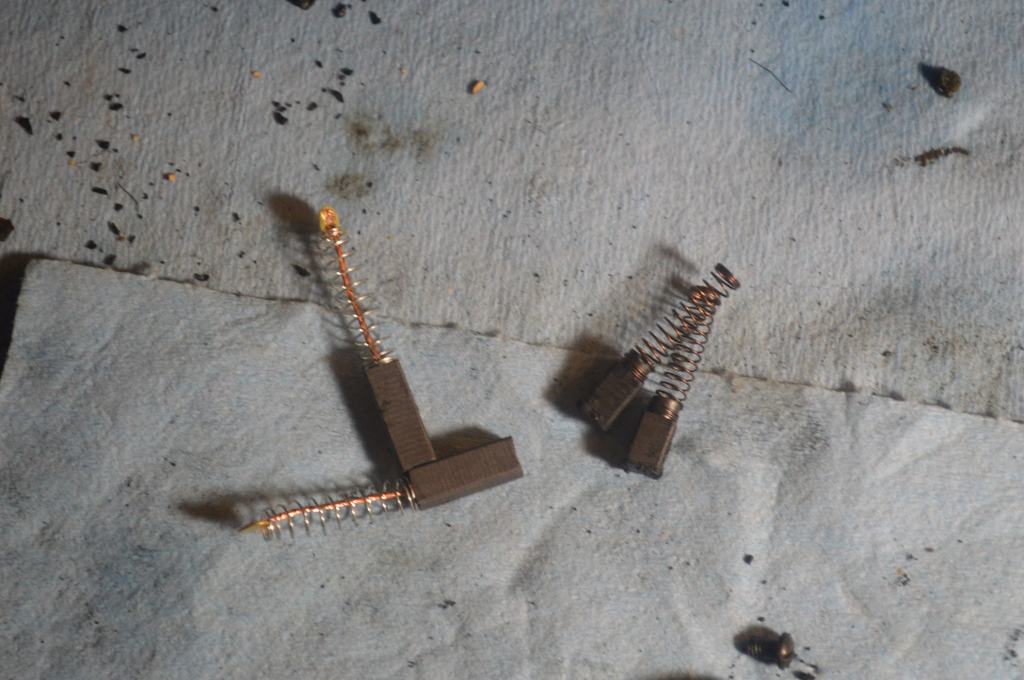
The wicks are cleaned and recharged with lubricant.
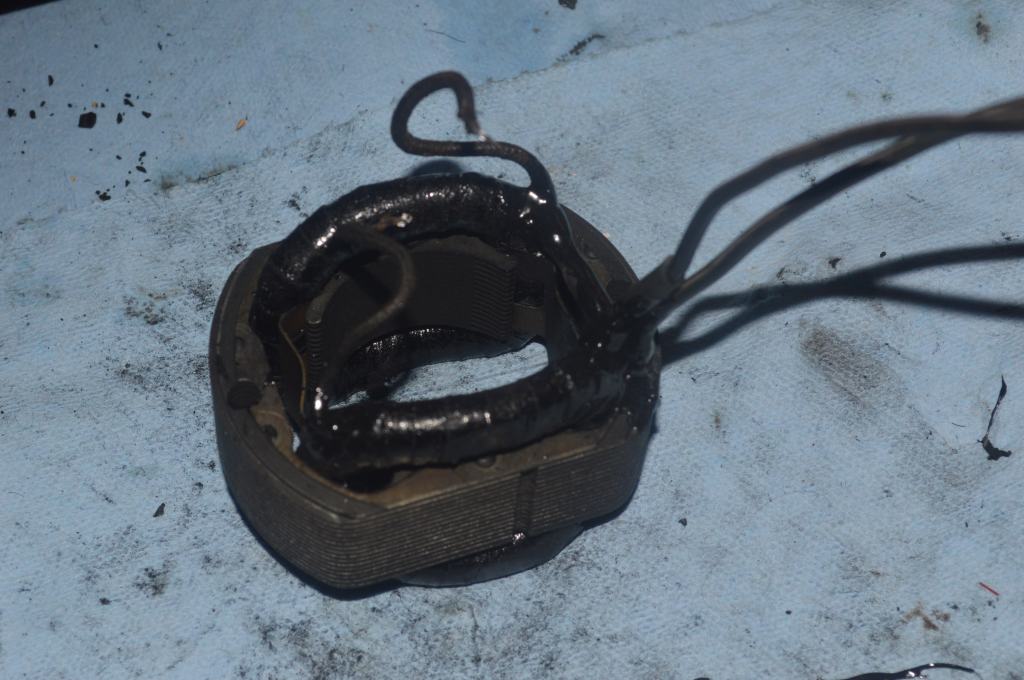
The field coil wires are resoldered to the brush tubes and the motor is reassembled.
Now, I can find out if the motor will run! Actually, the motor runs great, and to make sure all is well, it is run-in for about 10 minutes.
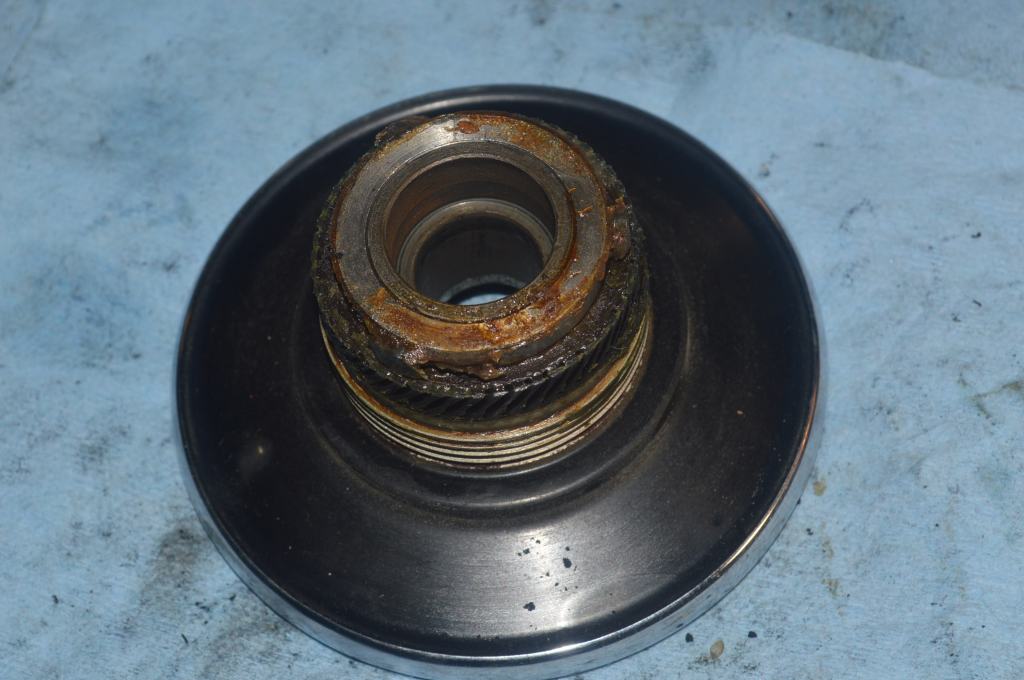
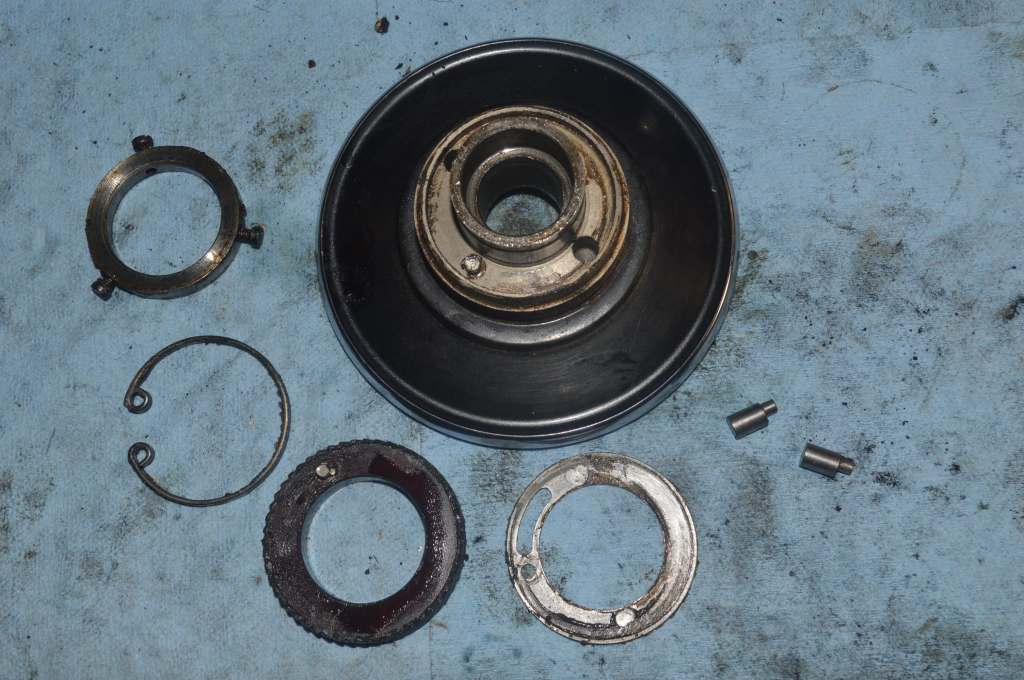
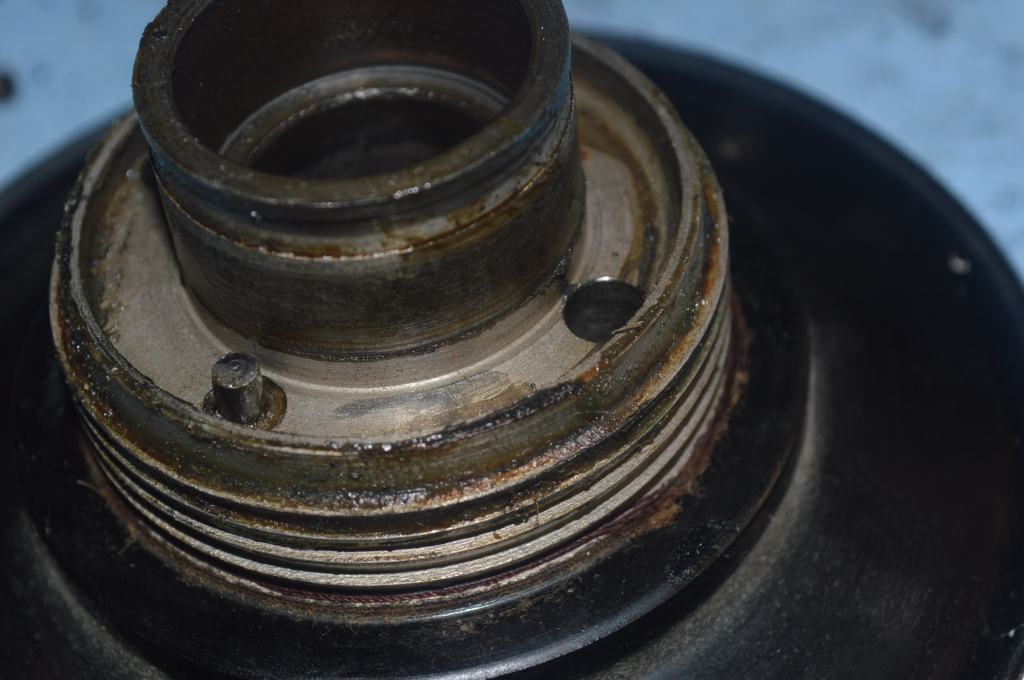
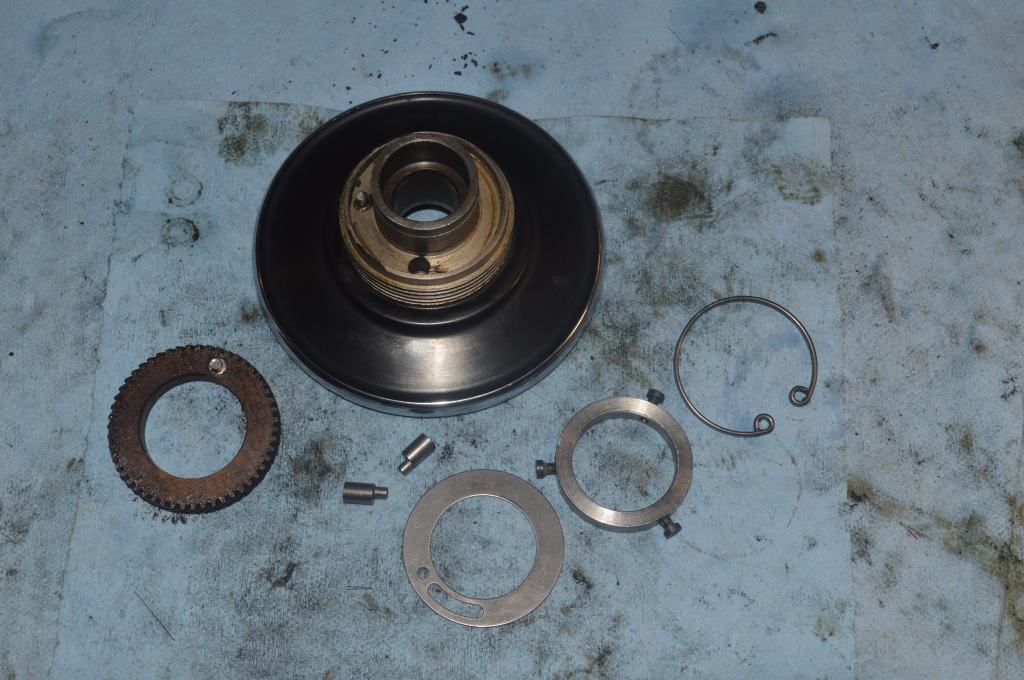
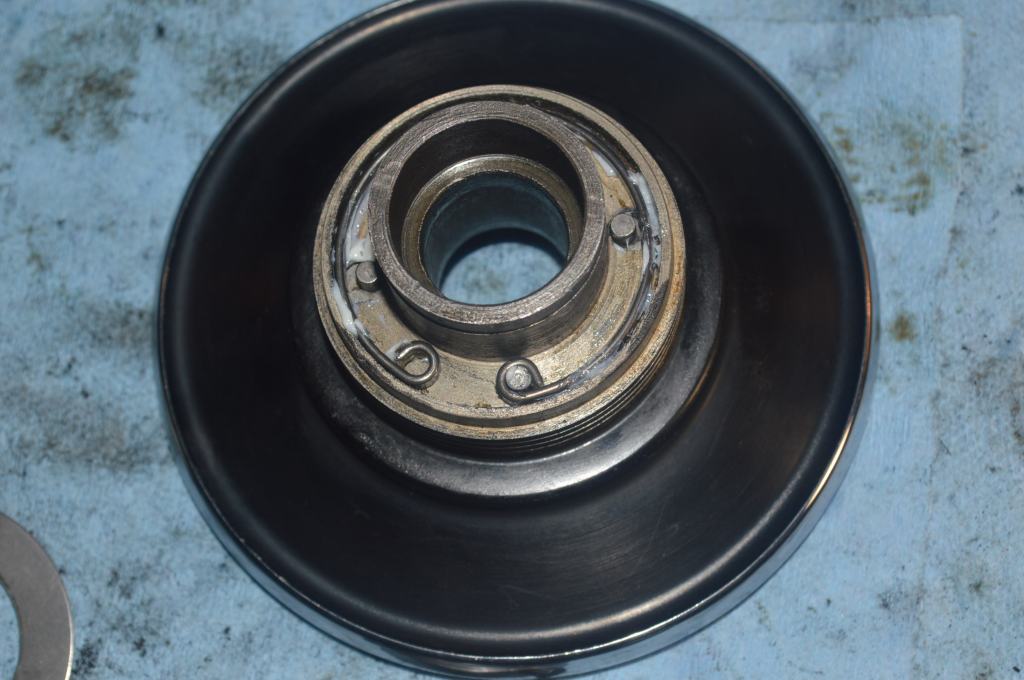
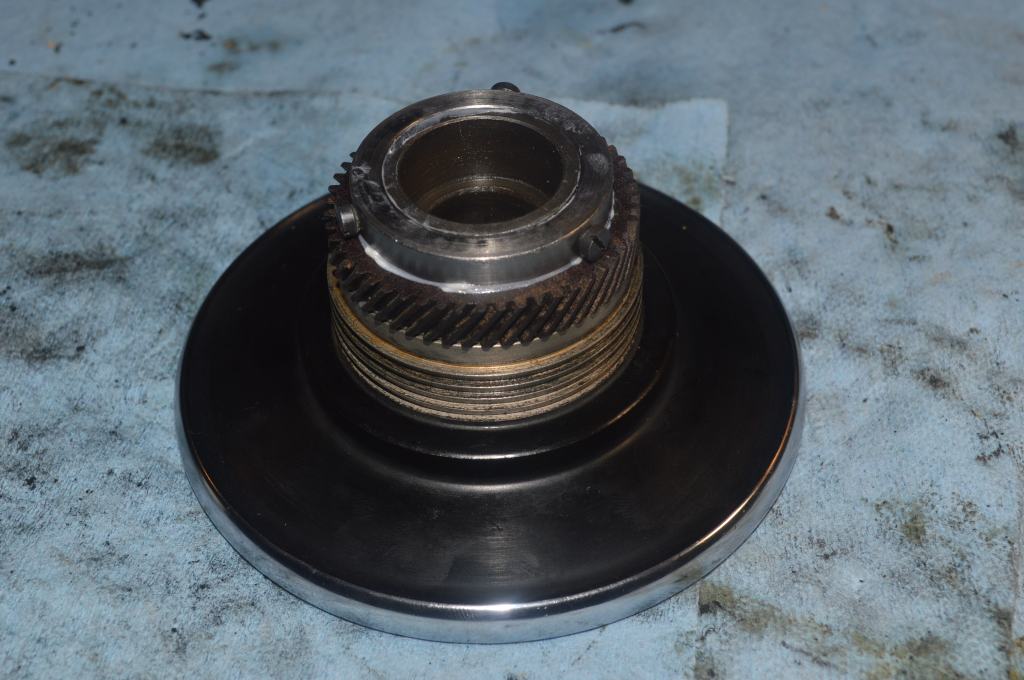
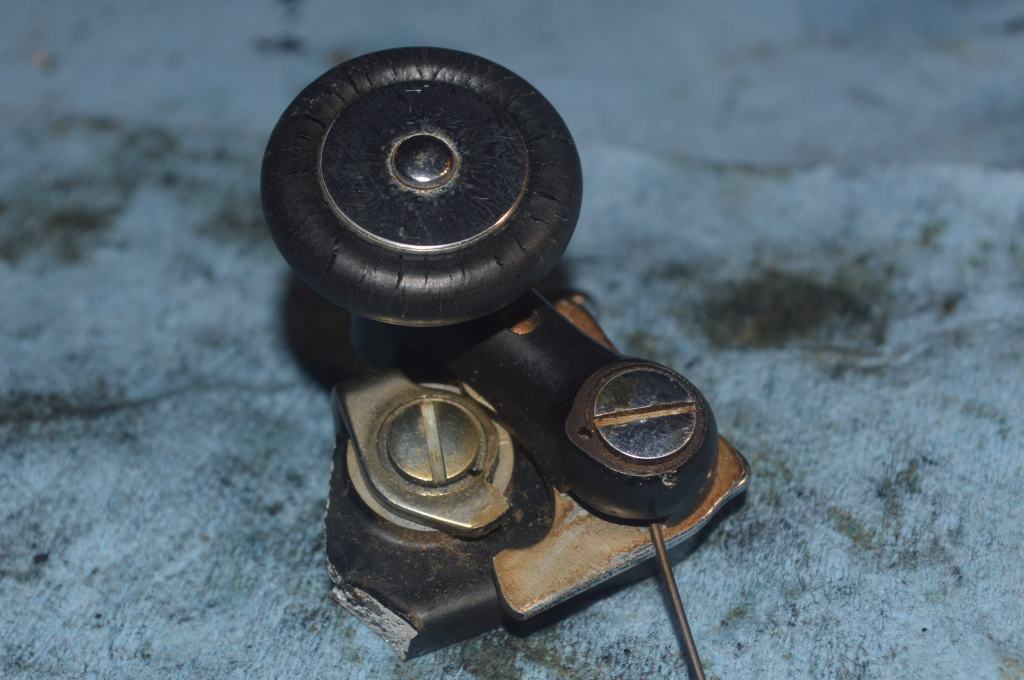
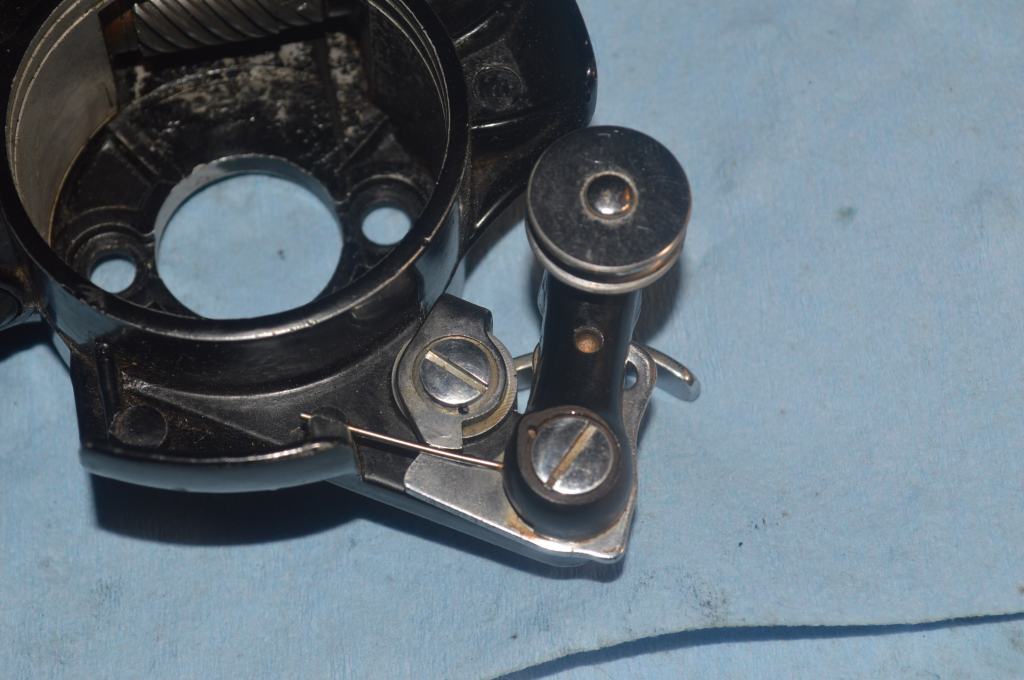
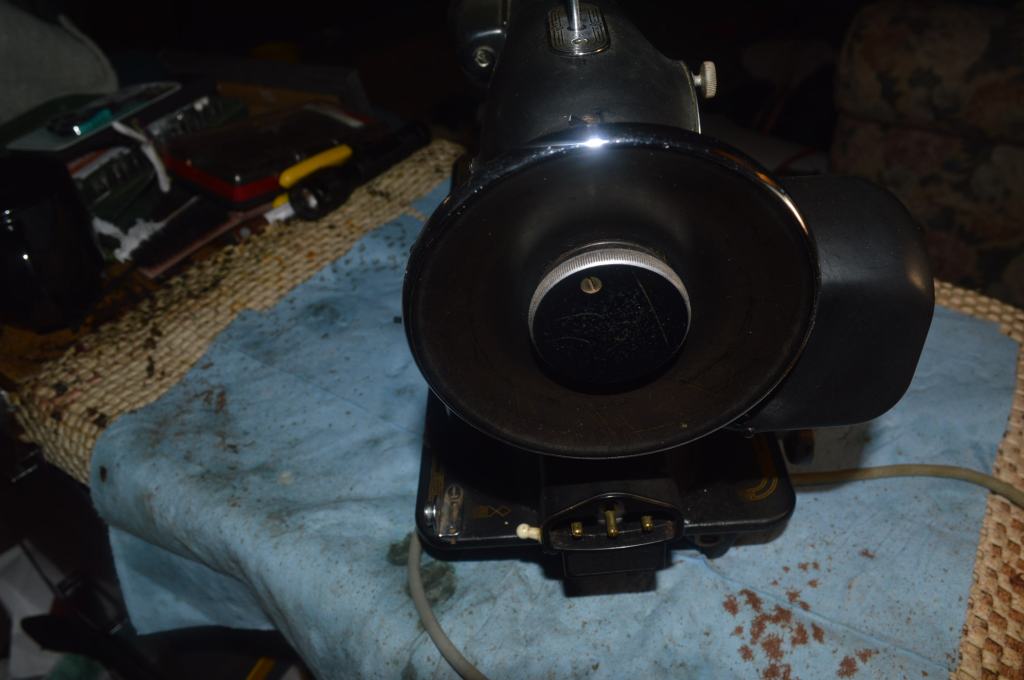
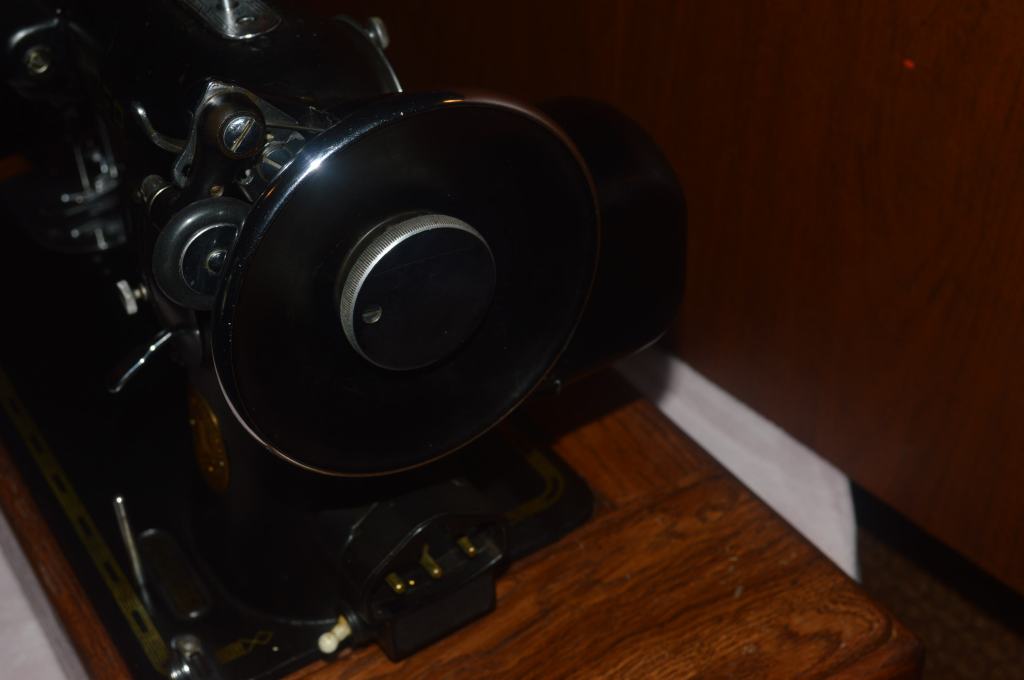
The next step is to restore the balance wheel. The balance wheel is designed with a shock absorbing assembly built in and it is an easy, but often forgotten
. The balance wheel is disassembled, the parts are cleaned, regreased, and reassembled.
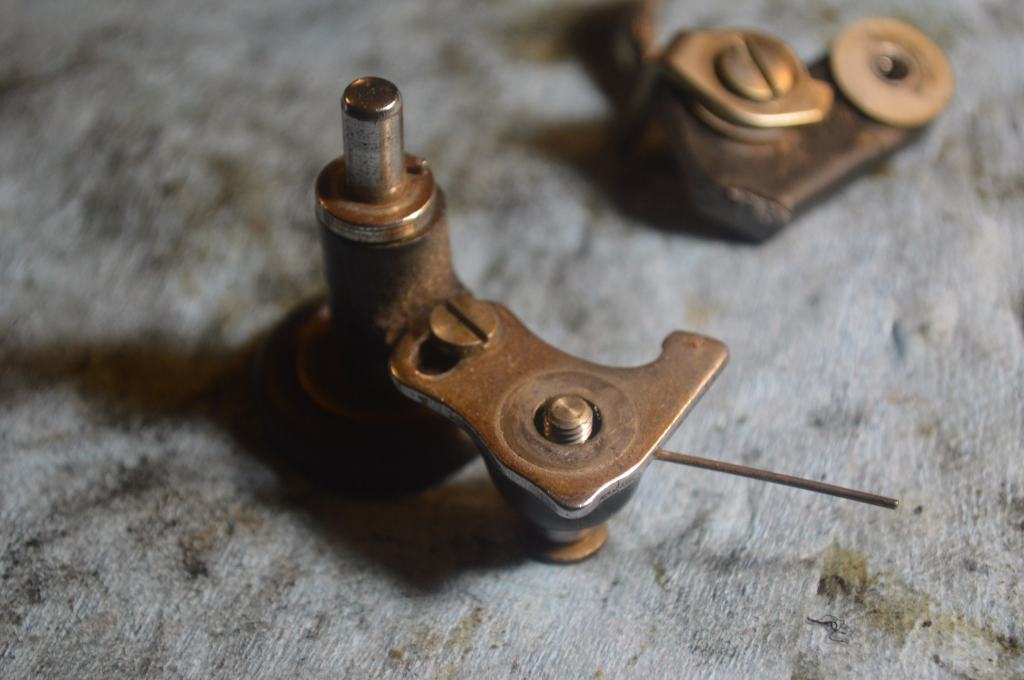
Next, the top tension assembly is disassembled, cleaned, and reassembled. Because it is directly in the thread path, it is subject to collecting dirt and debris. This one is no exception, so the tension shaft is cleaned and then polished for smoothness.

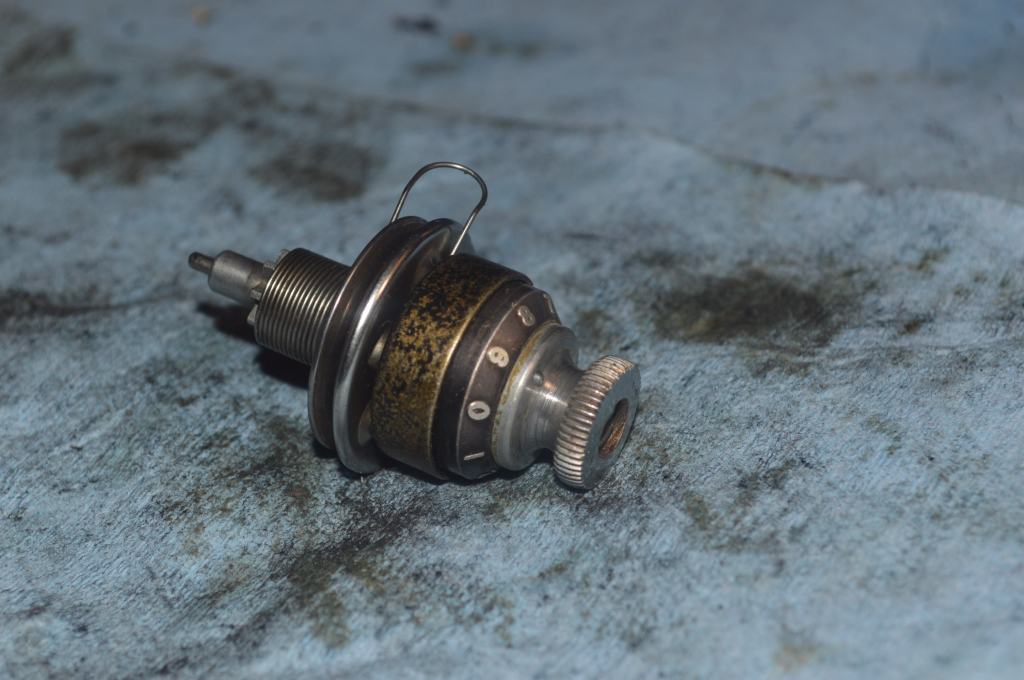
The last part to be disassembled and cleaned is the bobbin winder assembly.
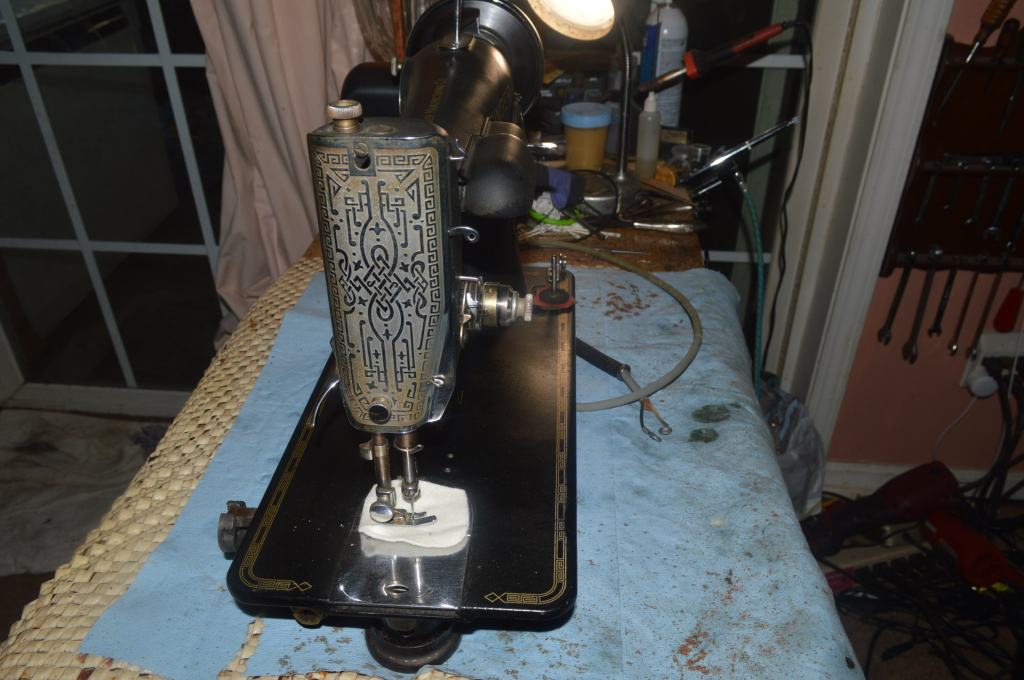
All of the mechanical parts are ready for reassembly. Next the machine is deep cleaned to get the best cosmetic condition possible. The machine is then glaze polished to brings out the best appearance the paint has to offer. From here on, a light coat of sewing machine oil is all that is needed to keep the finish nourished and looking its best.
Often, machines of this vintage have an abundance of paint chips on the bed. This machine has suprisingly few. Each is repaired with color matched paint.
Now that the cosmetic work is done, the only remaining task is to reassemble and adjust the machine. The hook timing, needle depth, feed dog clearance, and the presser foot bar height is set. The bobbin winder is adjusted to wind a tight bobbin, and the bobbin and top tension controls are adjusted for a straight tight lockstitch. Finally, after all of the adjustments are made and the machine is sewing as it should, the restoration is complete!

The real question should always be “how does it sew” well, it sews exactly like a 201 should sew!
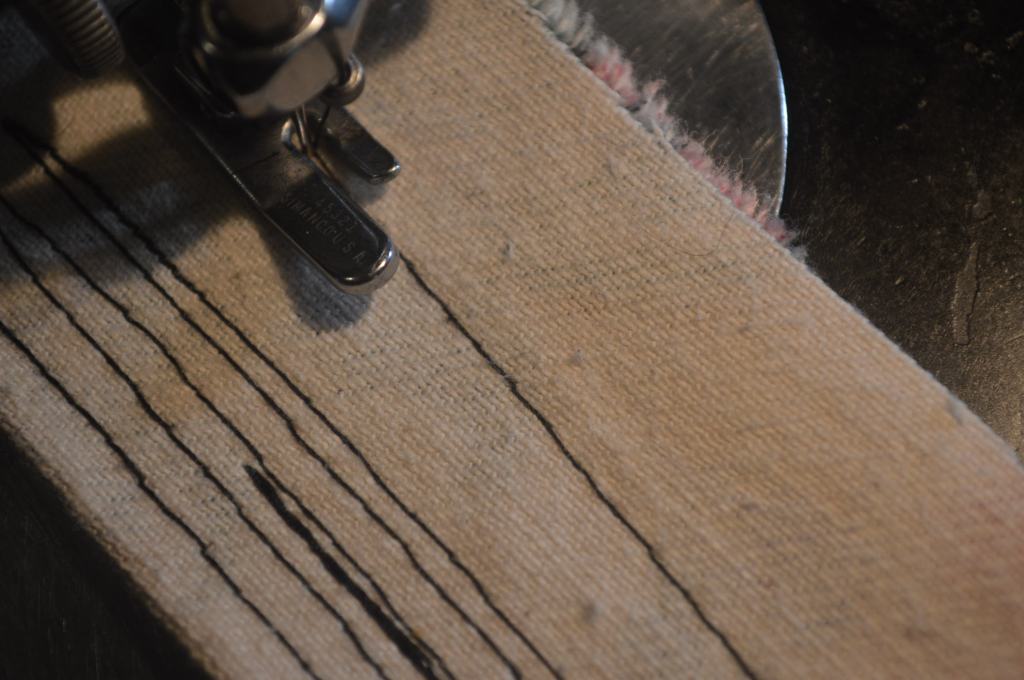
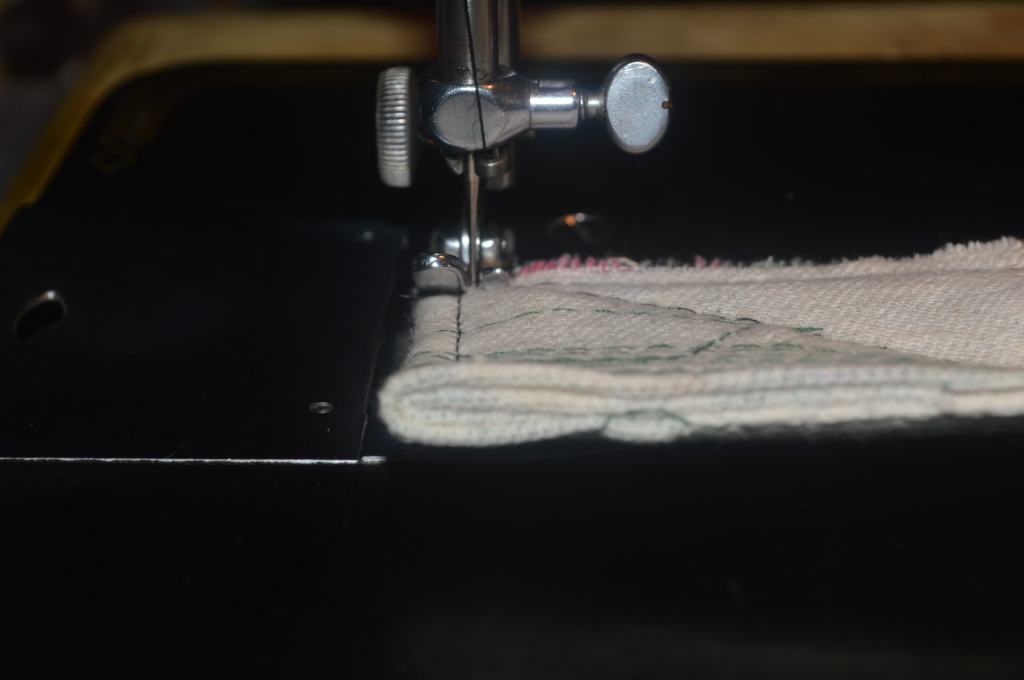
This is heavy denim fabric and the machine is using a size 14 needle. For those wondering how thick the fabric can be under the presser foot bar… well, its at least 8 layers!
So, the restoration is complete and for this machine it was a transformation. The machine gooks great and sews great! As usual, it is best shown in the before and after pictures… but only the customer and I will know the difference in smoothness.
Before…

After…


I hope you like what you see and enjoyed the restoration process as much as I did… this 201-2 looks and sews great!
As always, if you have any questions, or if I can be of any assistance, please contact me through Etsy or send me an email to Pungoliving@gmail.com.
Thanks for reading!
Lee

thanks for showing all those details! And it’s beautiful! one question, when you said you greased the wheel, what kind of grease? This may be a stupid question, but oil wouldn’t work the same? I realize grease is thicker and the wheel turns fast, so is that why?
Thanks in advance Lee, I have thick Singer lubricant, would that work?
LikeLike
Good morning Charlotte,
I use a small amount of Singer grease. Just enough to lubricate the gear teeth, the Singer lubricant is not recommended for the motor, but it is very slippery and works great for the textolite gear.
Don’t use grease on the gears. The gears are lubricated with oil.
Have a great day!
Lee
LikeLike
Nice job.
LikeLike
Thank you!
LikeLike