
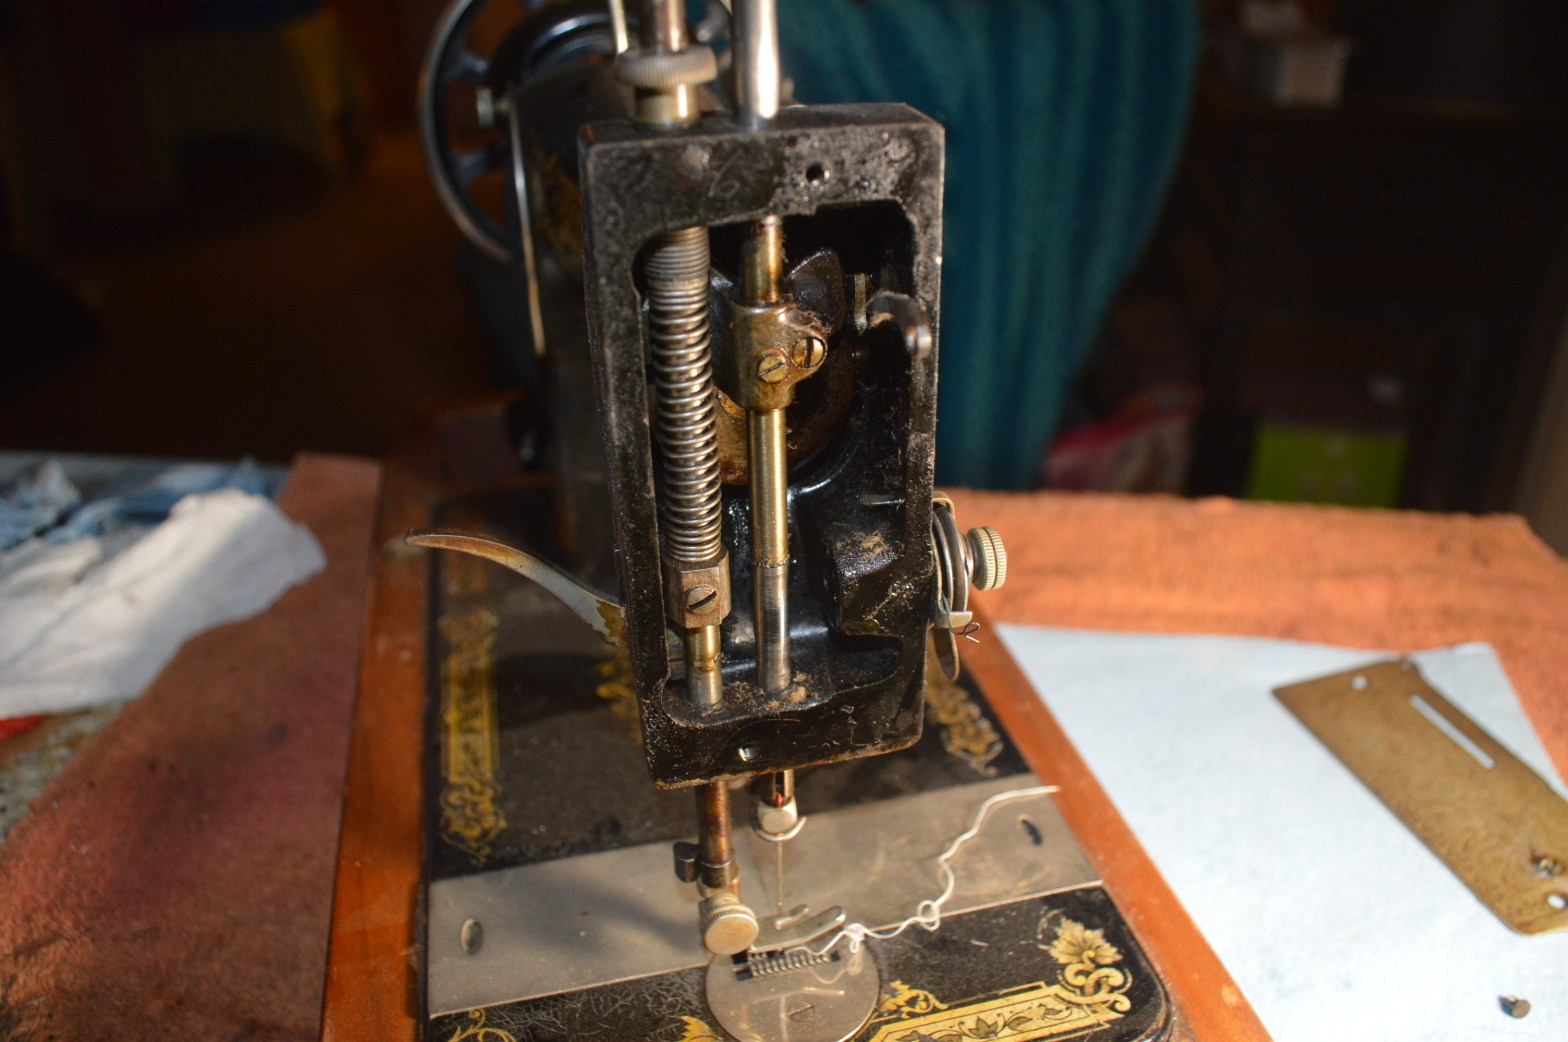
This tutorial is in response to a Customer who has a Singer model 27 with the presser foot so low that she can’t use the machine. This tutorial is geared towards Singer and other machines where the presser foot bar is held in adjustment by a single set screw. The machine is a 27, but it works for any model including a 66, 99, 28, 15, 201, and pretty much any machine you choose. While the pictures are different from machine to machine, the procedure is the same. So here goes…

The presser foot bar assembly consists of the presser foot bar, a presser foot lifter, a spring, and a presser foot. Adjustment is simple and there are only a few steps… it is important to follow the steps in order. With a minimum of discussion, I will walk you through it.
- Remove the face plate.
- Remove the presser foot and the needle.
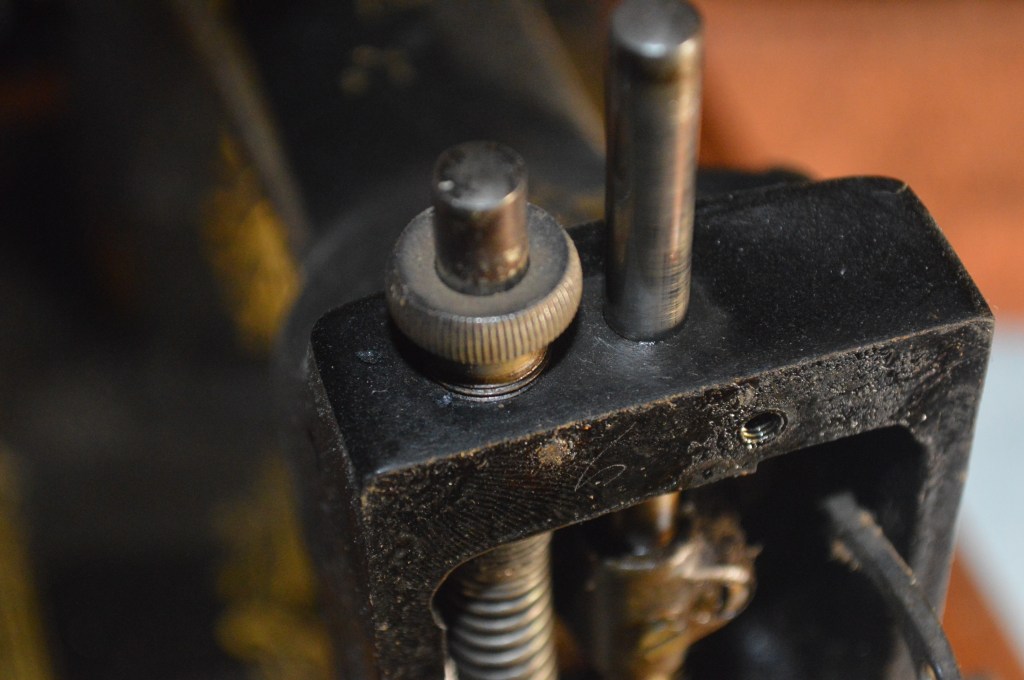
- Loosen the presser foot pressure adjustment screw on top of the machine until there is no pressure on the spring.
4. Loosen the screw in the presser foot lifter and put a drop of oil on the top of the lifter.
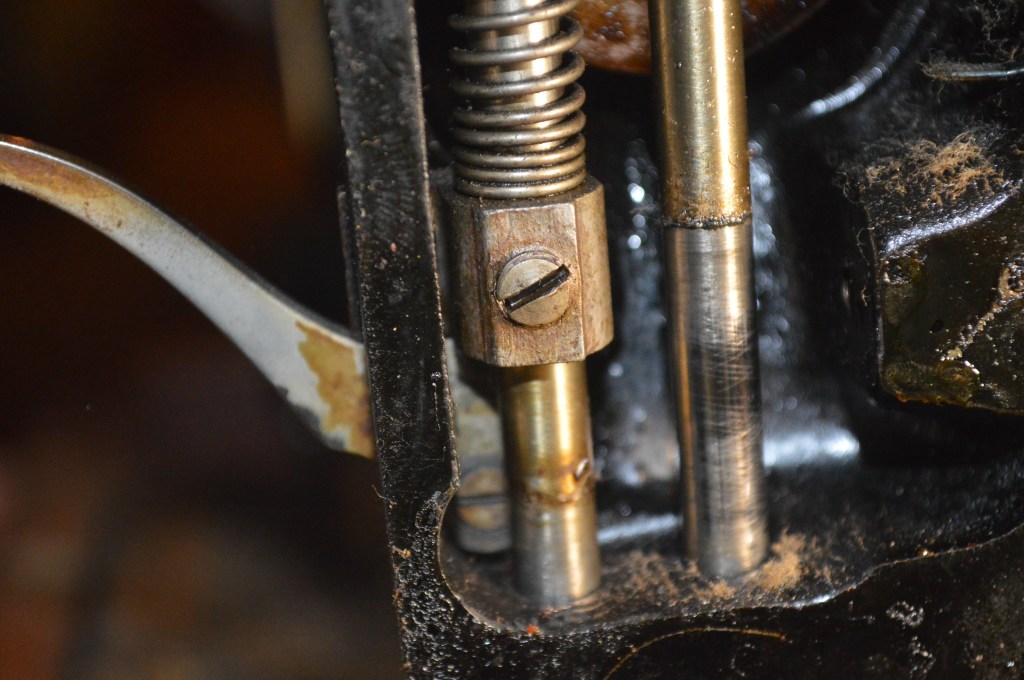
5. Using a pair of pliers, grip the presser foot on the flat where the presser foot attaches. Don’t worry, the presser foot is tempered steel and you wont be gripping it to hard so it will not scratch the presser foot bar.

6. Begin to wiggle the presser foot bar back and forth to loosen it in the lifter. Little bits back and forth at a time, not much force is required. Once the bar begins to turn, continue wiggling until the presser foot rotates freely.
7. Put the presser foot back on the presser foot and raise the presser foot lift lever up.
8. Lower the needle bar to the lowest position.
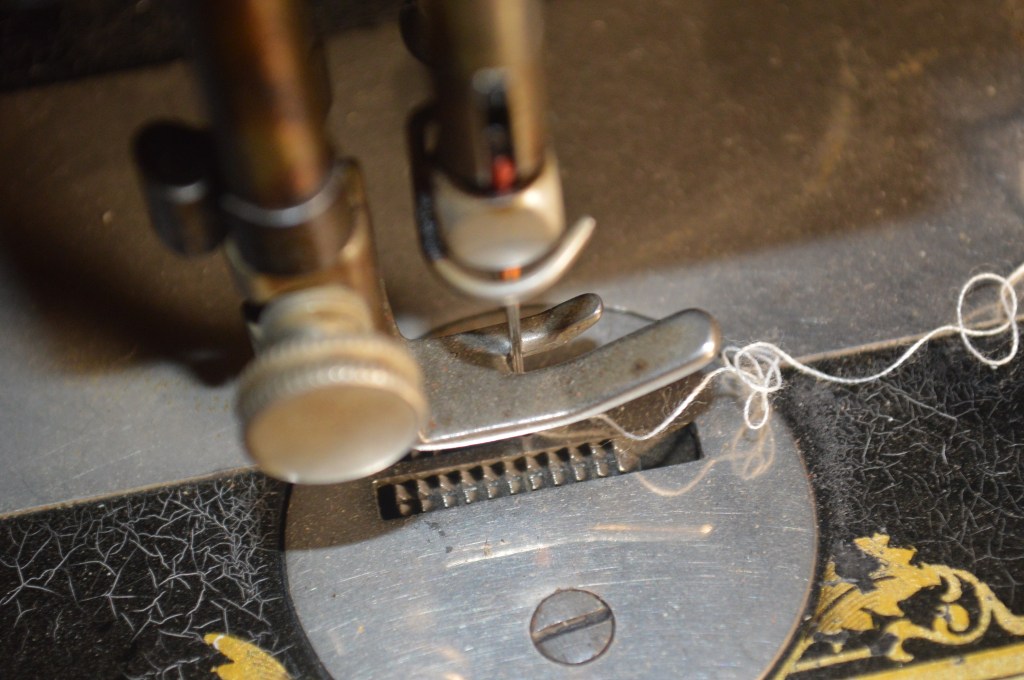
9. Wiggling the presser foot back and forth, move the presser foot bar up (or down) to a point that it is close to, but not touching the needle bar clamp… this is pretty close to tolerance. The proper distance is 5/16″ from the bottom of the foot to the needle bar plate.
10. Tighten the set screw very lightly… enough where it holds the presser foot in position, but will allow it to rotate.
11. Insert the needle and lower the presser foot until it touches the needle plate. Align the foot so it is parallel to the feed dogs and the needle enters the presser foot in the center of the foot.
12. Tighten the set screw firmly.
13. Turn the presser foot bar pressure screw all the way in putting pressure on the spring.
14. Lift the presser foot bar and rotate the machine a full revolution to ensure the needle clamp does not hit the presser foot.
15. Replace the face plate.
That’s it… I hope it helps solve your problem if your presser foot bar needs adjustment.
As always, our tutorials are provided as a free resource to help you learn and maintain your vintage sewing machine. As our site has grown, so has the cost to keep and maintain it. Despite these costs, I will strive to continue posting tutorials and other relevant content for the benefit of the sewing community. If you found the content of this tutorial useful, please consider making a small donation to help me grow the site and help defray my costs… every little bit helps.
Help Support our Site…
Make a one-time donation
Make a monthly donation
Make a yearly donation
Choose an amount
Or enter a custom amount
Your contribution is appreciated.
Your contribution is appreciated.
Your contribution is appreciated.
Please let me know if I can answer any questions or if I can be of any assistance by emailing me at pungoliving@gmail.com.
Thanks for reading,
Lee

My 62 year old Singer has a similar design as that and that’s what I did to adjust as had been taught by my late father 50 years ago. I just stumbled in your site and thanks to review it again.
LikeLike