

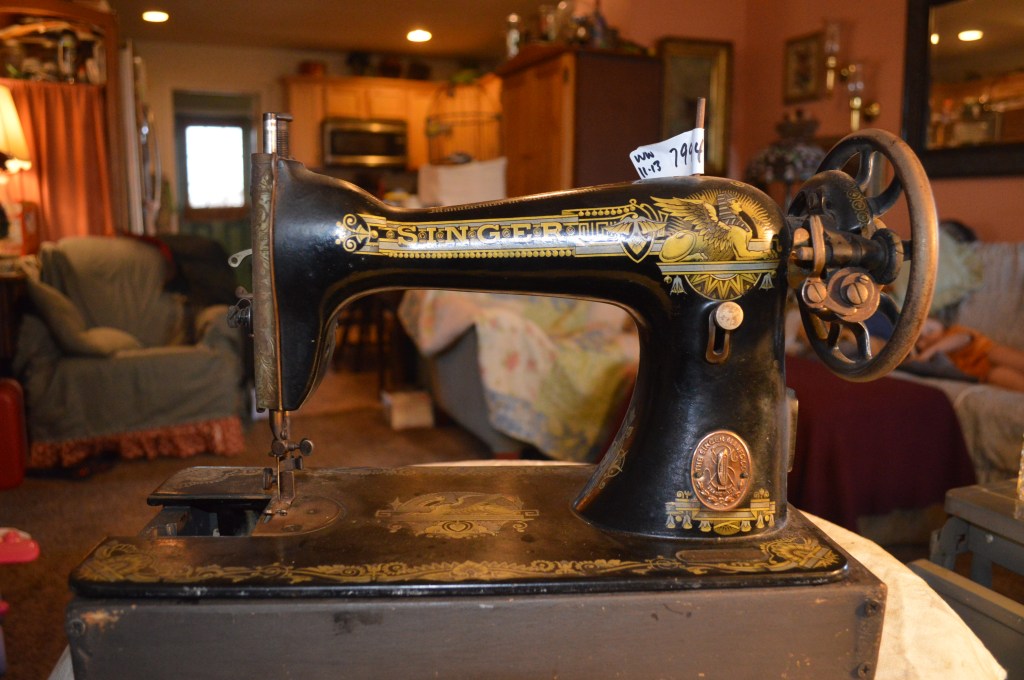
This is going to be an interesting restoration. It’s an antique Singer model 15K made in January or June of 1918. Think about that for a moment. What was the world like in 1918? History records that World War I was almost over and the Spanish flu pandemic had recently emerged. Considering this machine was manufactured in Clydebank Scotland, it assuredly saw a world much different than our own. Looking back from where I sit today it is hard to imagine the world in 1918 even existed in color… but it did. People were the same then as they are now, the only real difference were the things happening around them that transformed their lives. For us it is the cell phone, the internet, computers, Netflix, and Amazon. For them, if you happened to live in a city (less than half of the population did), it was the telephone, automobile, electricity, refrigeration, indoor plumbing, cameras. If you lived in the rural areas of the United States, even these things were scarce. One thing that did transform peoples lives, regardless of where you lived was of course the sewing machine.
In 1918, this sewing machine would have certainly been a prized possession in someone’s home. A very expensive item for the home, it could only be afforded by relatively few people. While the first truly reliable domestic sewing machines were introduced by Singer in the 1850’s, and the model 15 was introduced in the 1870’s, even by 1918 a sewing machine was not a typical household item. They were simply out of reach of many peoples budget. Believe it or not, this is the reason why these early sewing machines were so ornately decorated. Sewing machine ownership was a mark of status in the home, and the machines were appropriately adorned to be used and proudly displayed in the home.
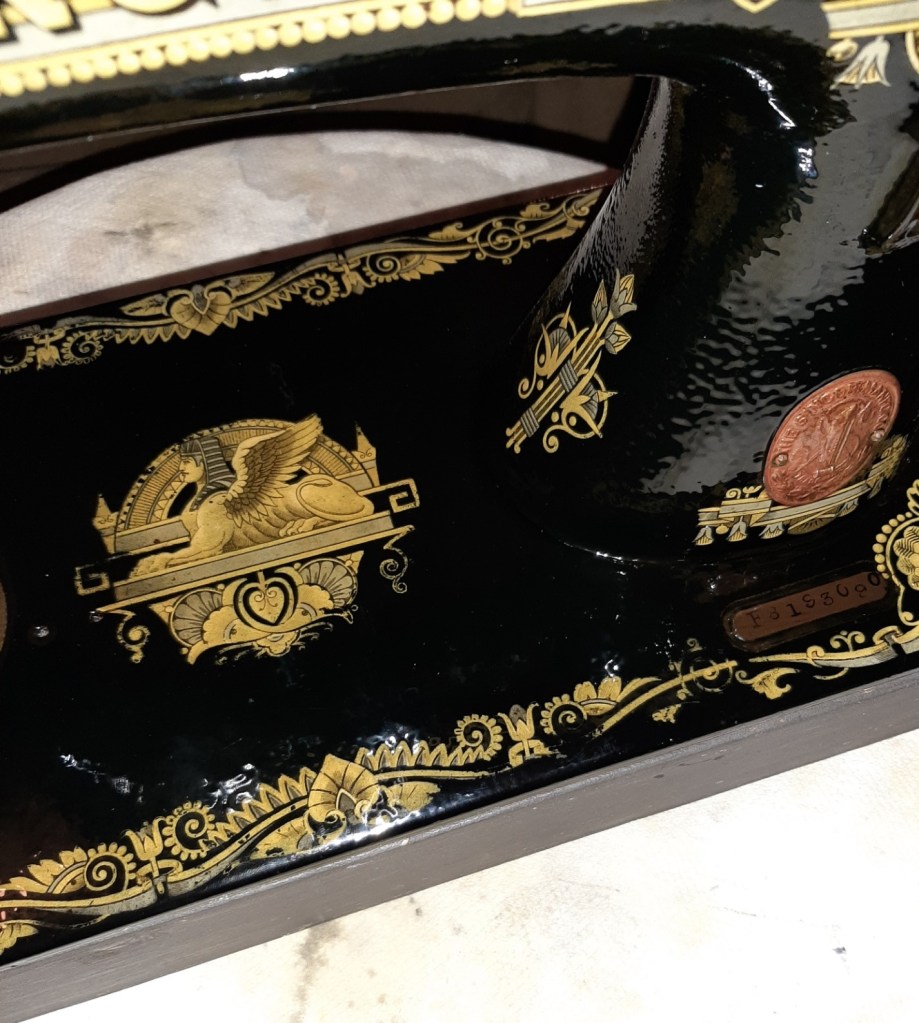
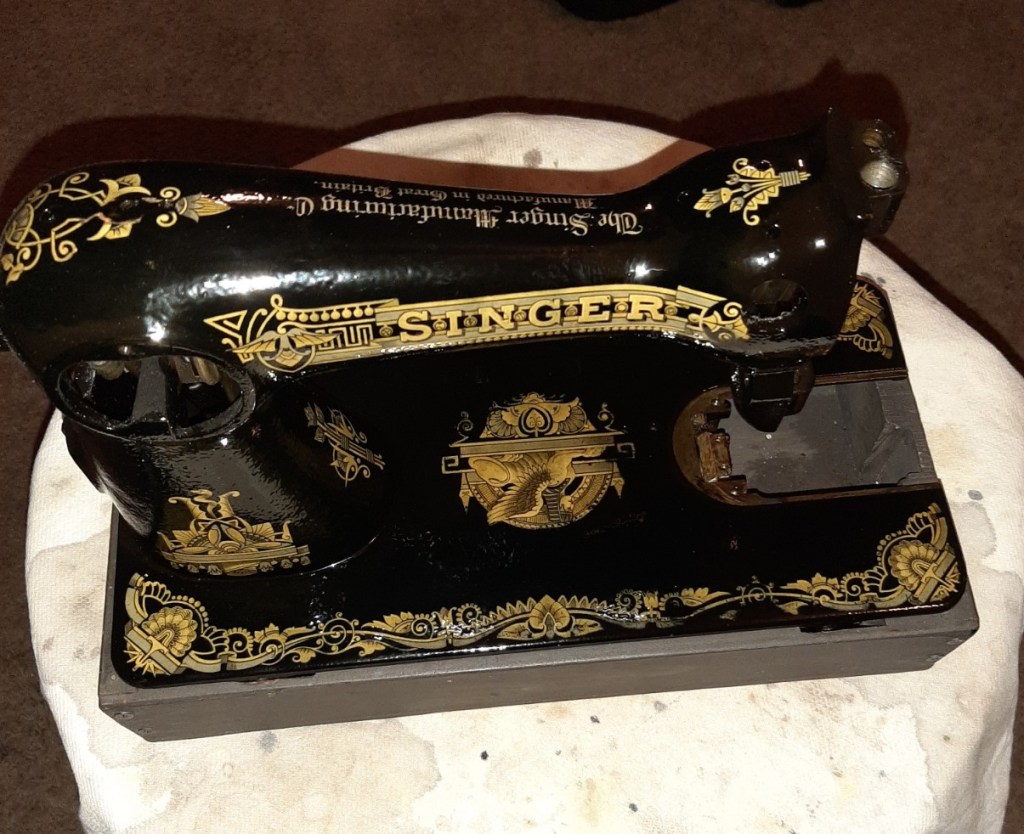
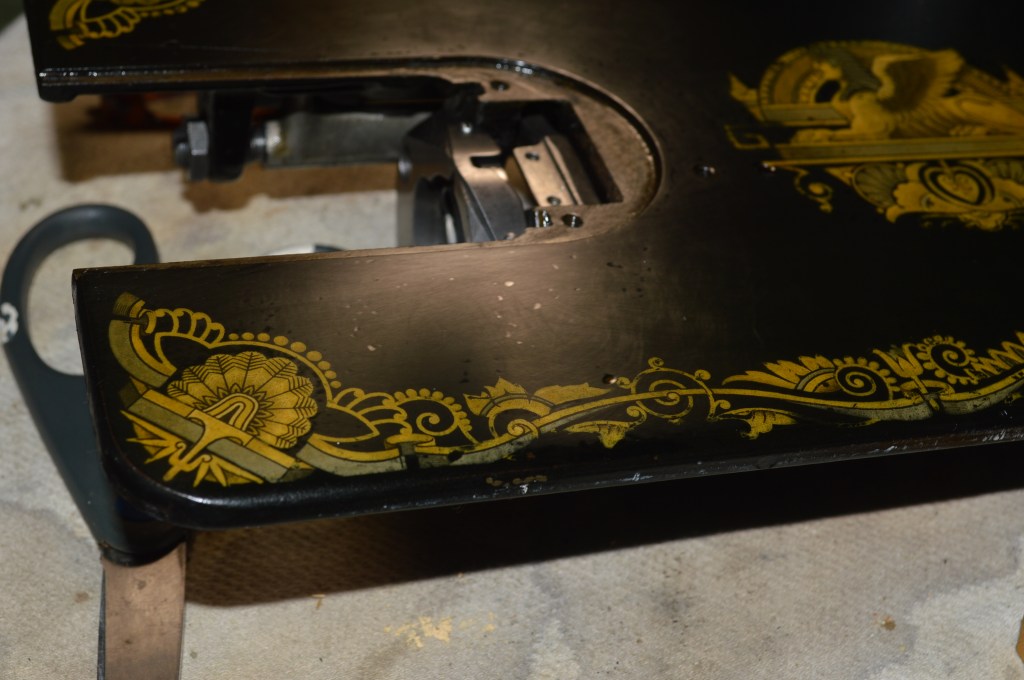
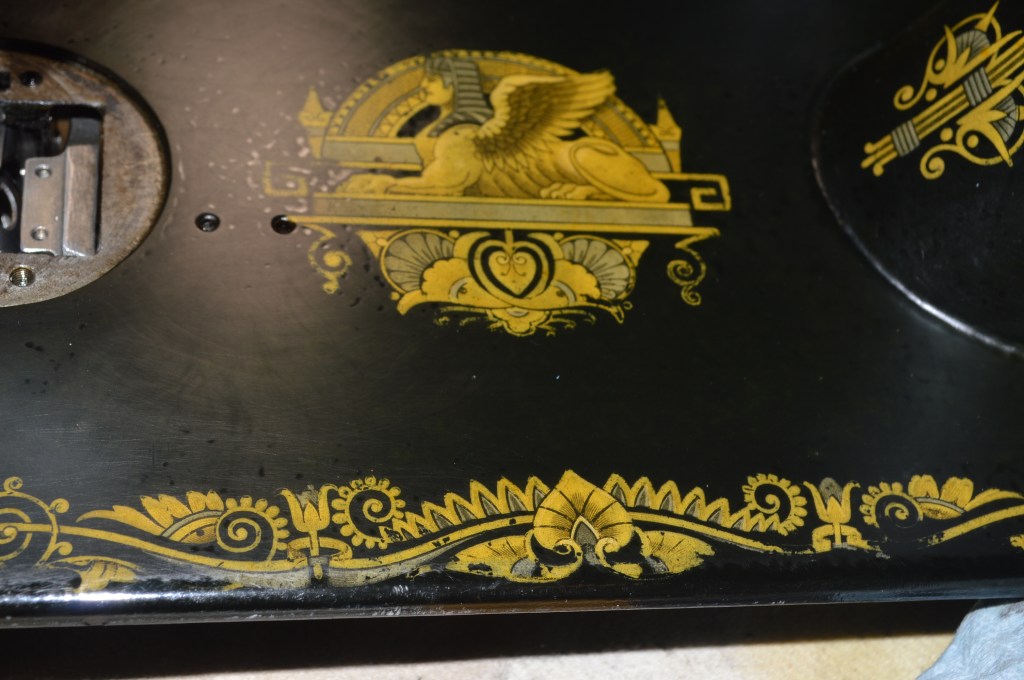
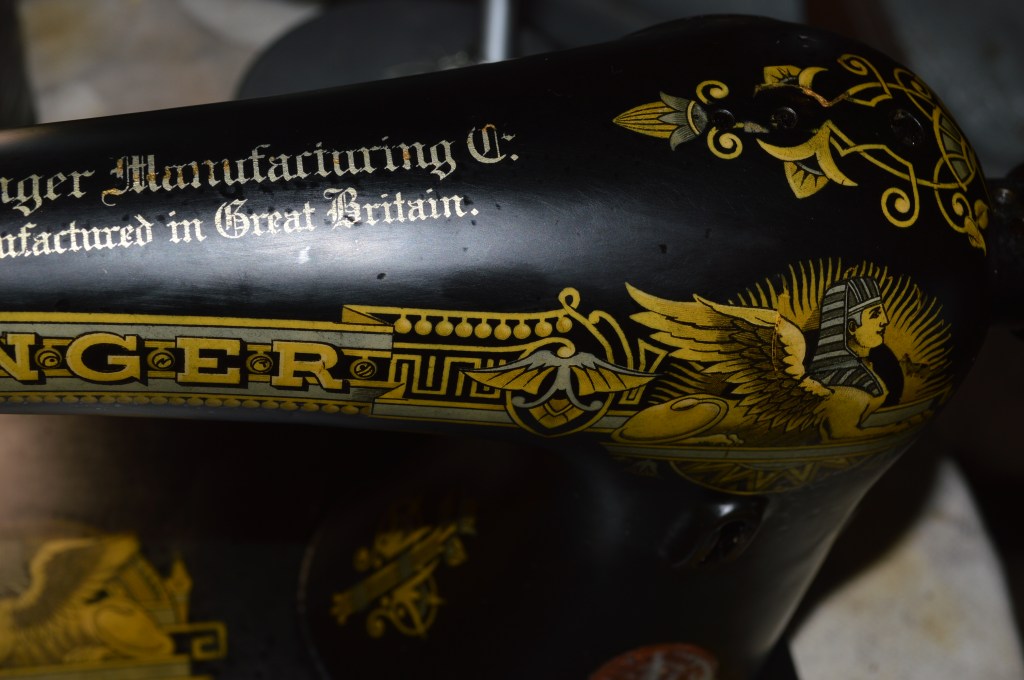
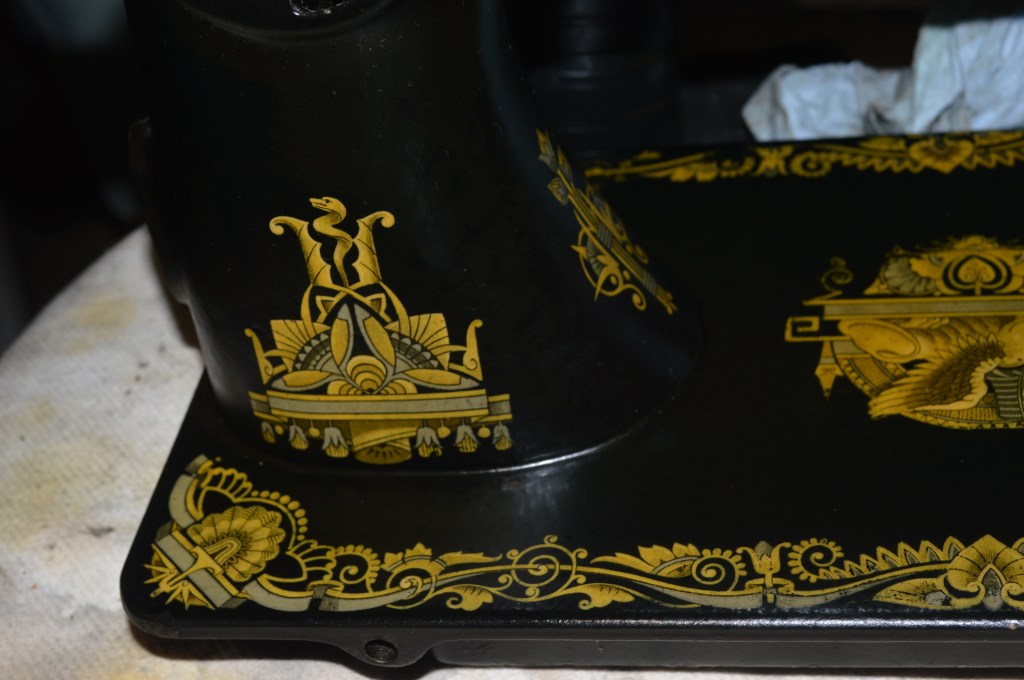
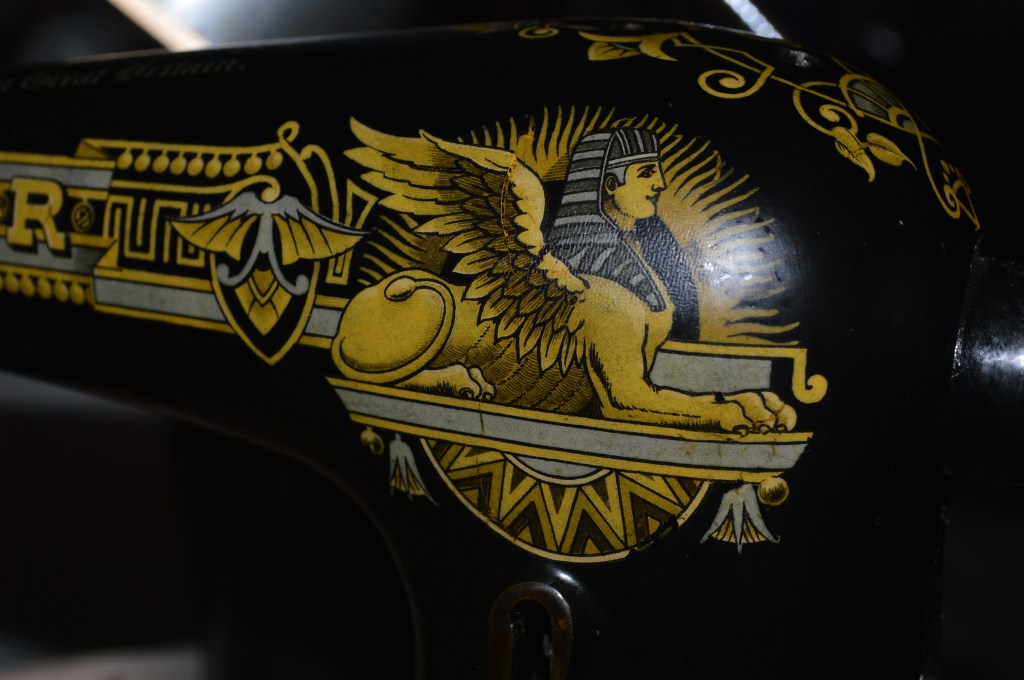
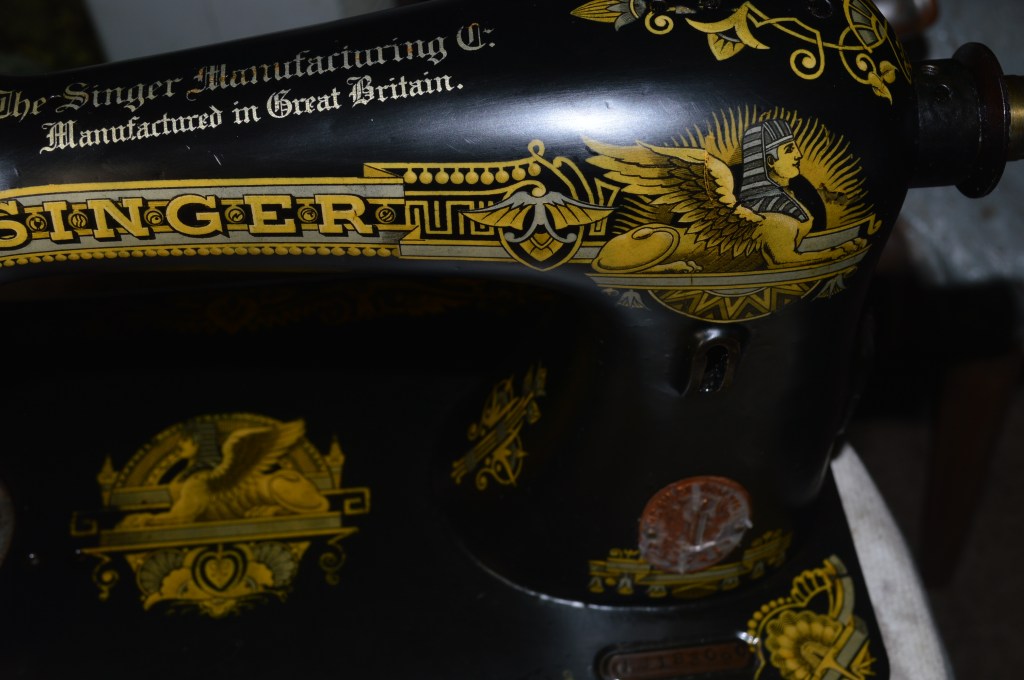
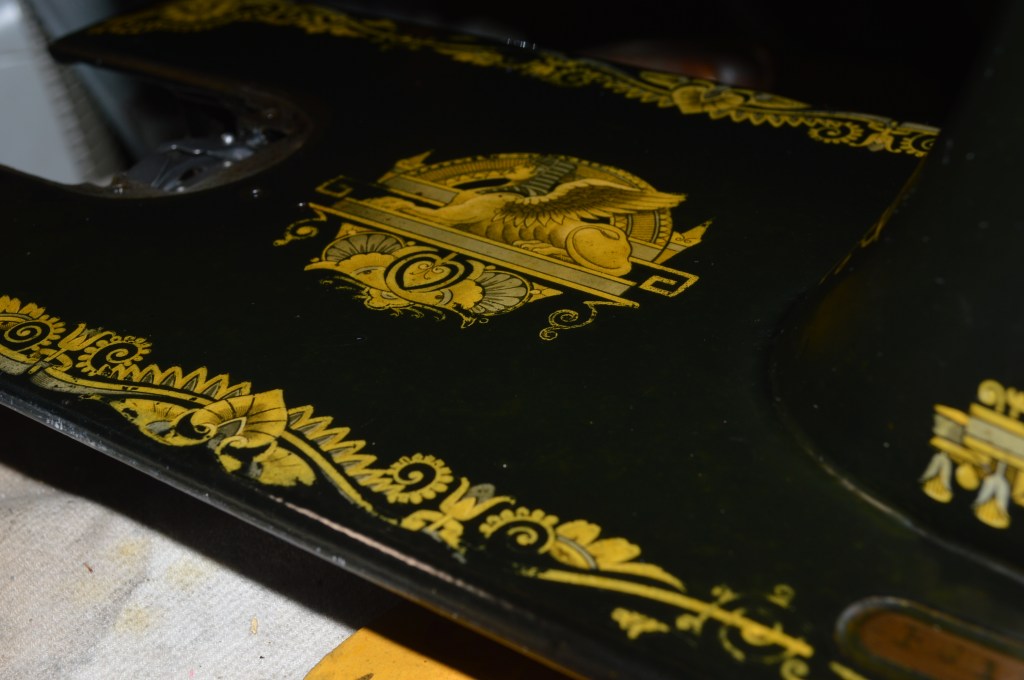
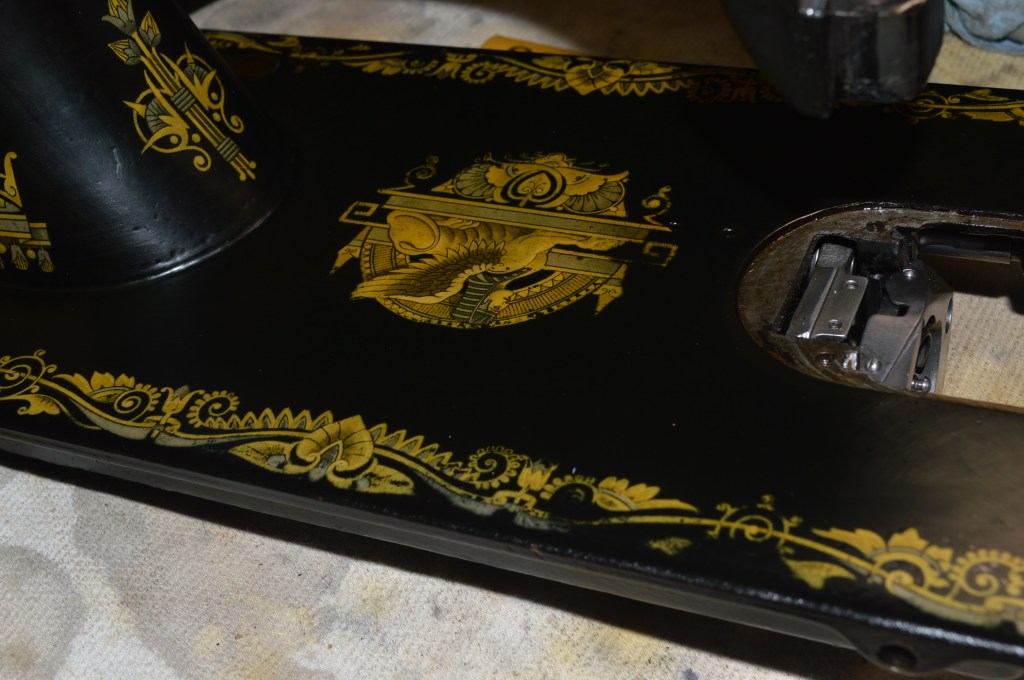
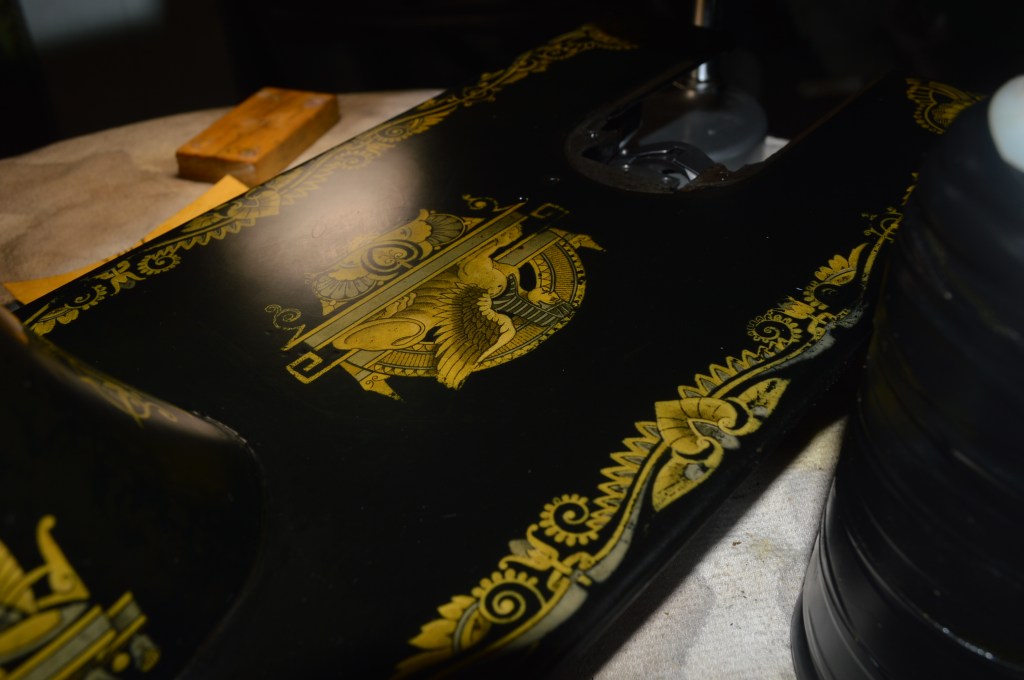
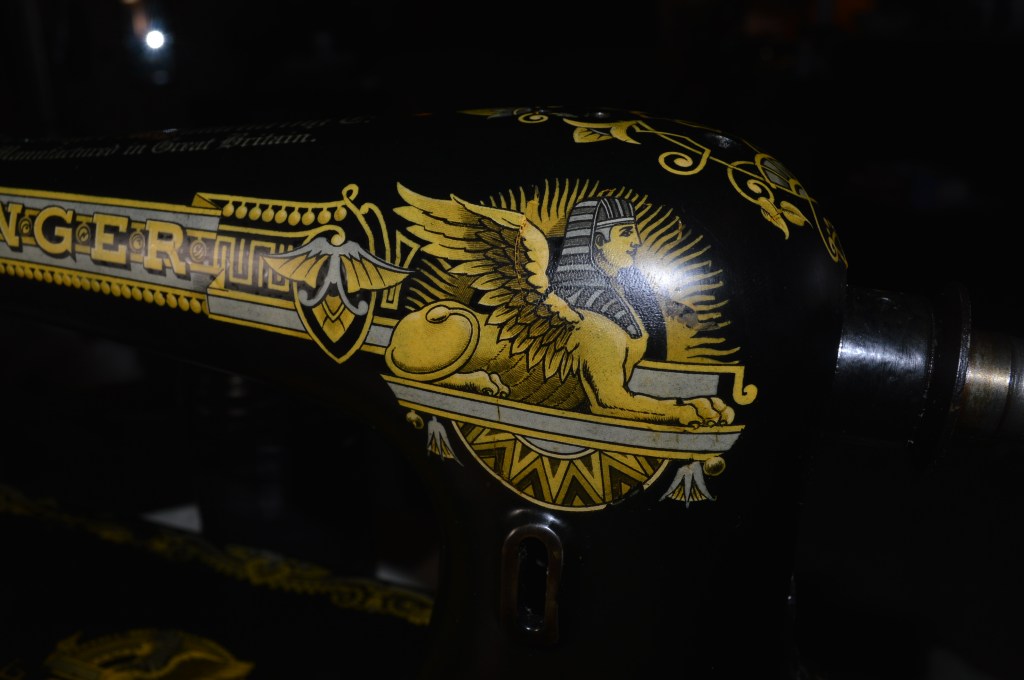
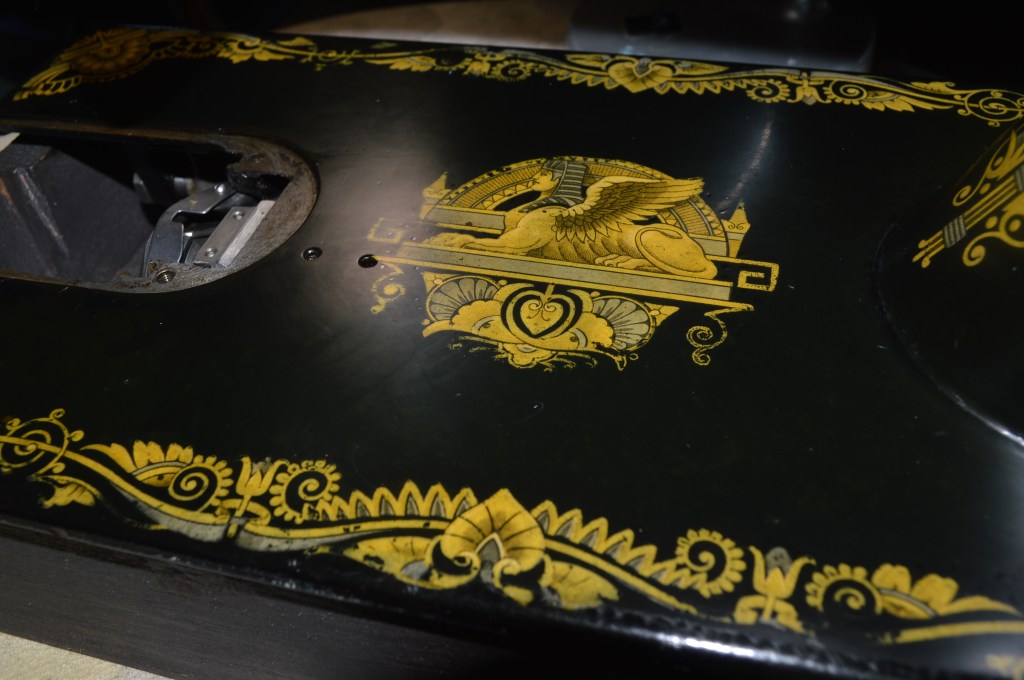
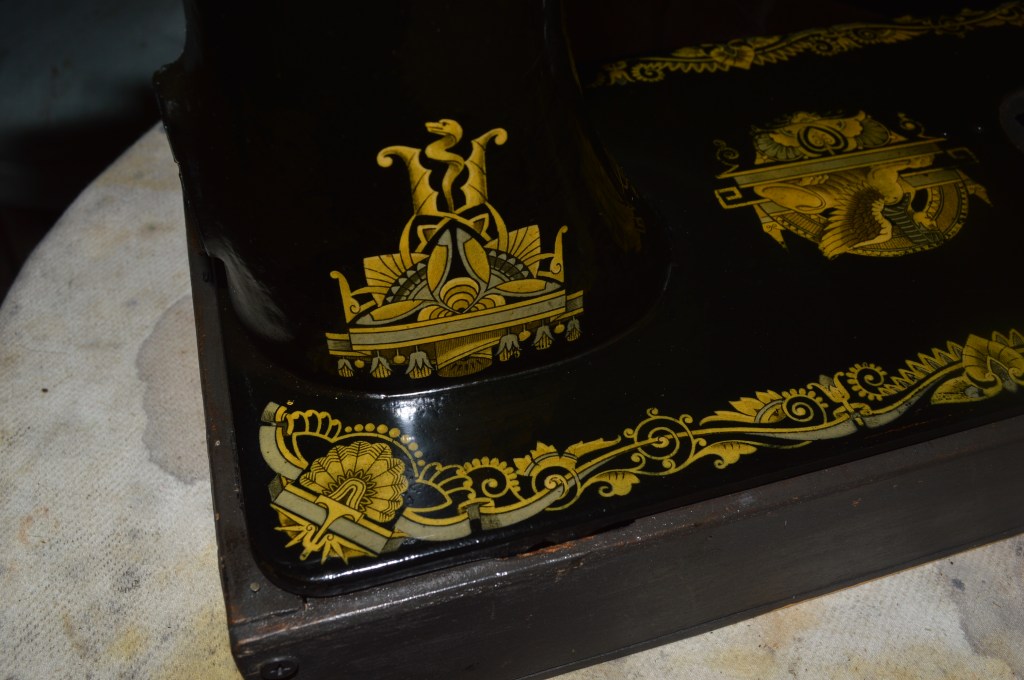
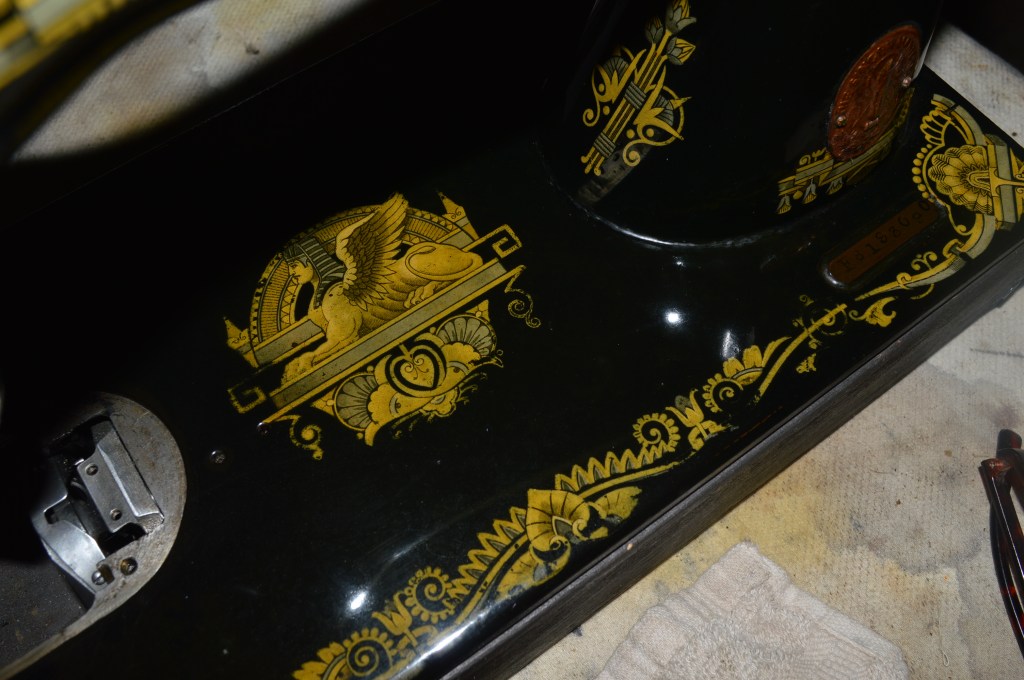
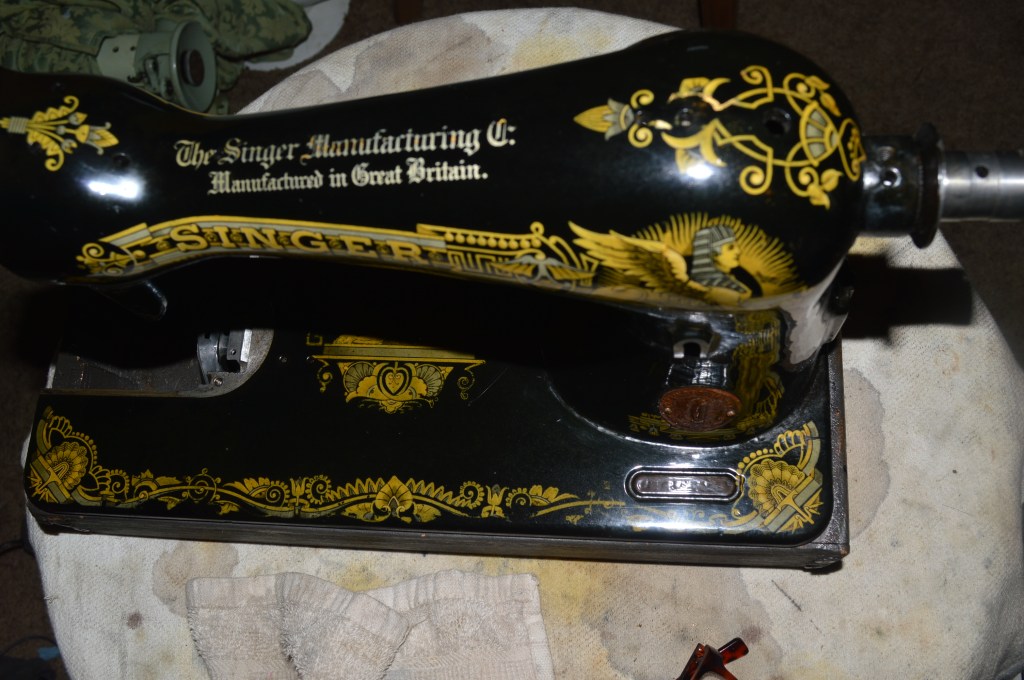
,The sphinx decals on this model 15 are typical of that fashion. They are full, intricate, colorful, and occupy much of the body of the machine. When you look at this machine, they are what you see first and they are what make this model 15 somewhat unusual. After 102 years, the decals are in excellent condition for their age! Of course, there is some wear, but the wear is very light and only noticed by close observation. That is what makes this machine such a special restoration. That’s what makes protecting these decals so important.
I have always said that before beginning the restoration of a sewing machine, the first and most important step is to set your expectations. Well, for this machine, I expect that it will look and run like it did 100 years ago. In evaluating a sewing machine for restoration I look at two things… the condition of the paint, and more importantly, the condition of the decals. Mechanically, these machines are so well built that the mechanical restoration is always successful. Paint and decals are a different story. The paint on all Singer sewing machines from the beginning until well past World War II is the same. It is a carbon black japanned lacquer finish applied by dipping the machine in a vat of black lacquer paint. A top coat of shellac was then applied over the paint and the decals giving the machine it’s iconic beautiful deep black finish.
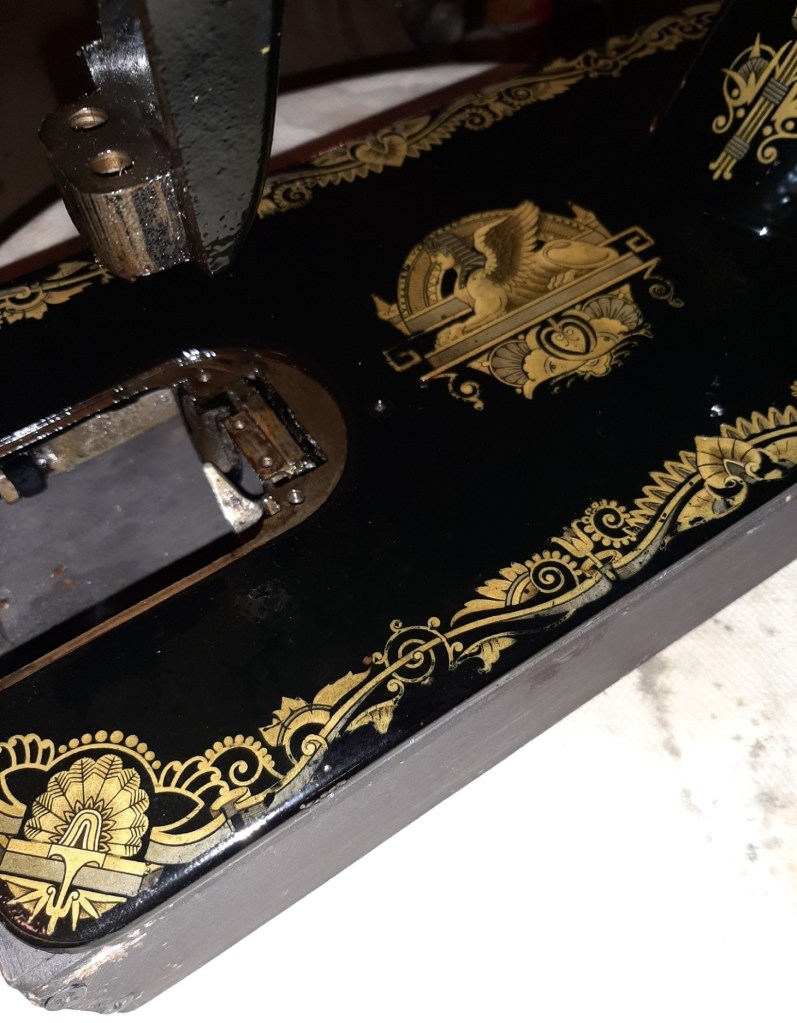
Often on machines of this vintage, the shellac coating has oxidized and caused the japanned paint to lose it’s deep black shine. So much so, it is typical to find the surface with a rough feel, crazing, scratches, and paint chips. But, the original paint is very durable and can often be rejuvenated to the point that it looks almost as good as new! Decals on the other hand are not as durable. Their only protection is the coat of shellac applied as a top coat for the japanned finish. As the shellac oxidizes and flakes away, the decals are exposed to wear and they are easily worn away. While some judicious repairs can be made on a small chip or scratch in a gold decal, it is impractical to restore an original decal if a larger portion has worn away. Indeed, for decals that are not gold, such as on this sphinx decal set (blends of yellows), it is too difficult to consider. That is why finding a machine with decals in this condition makes me smile, and I look forward to a fantastic outcome.
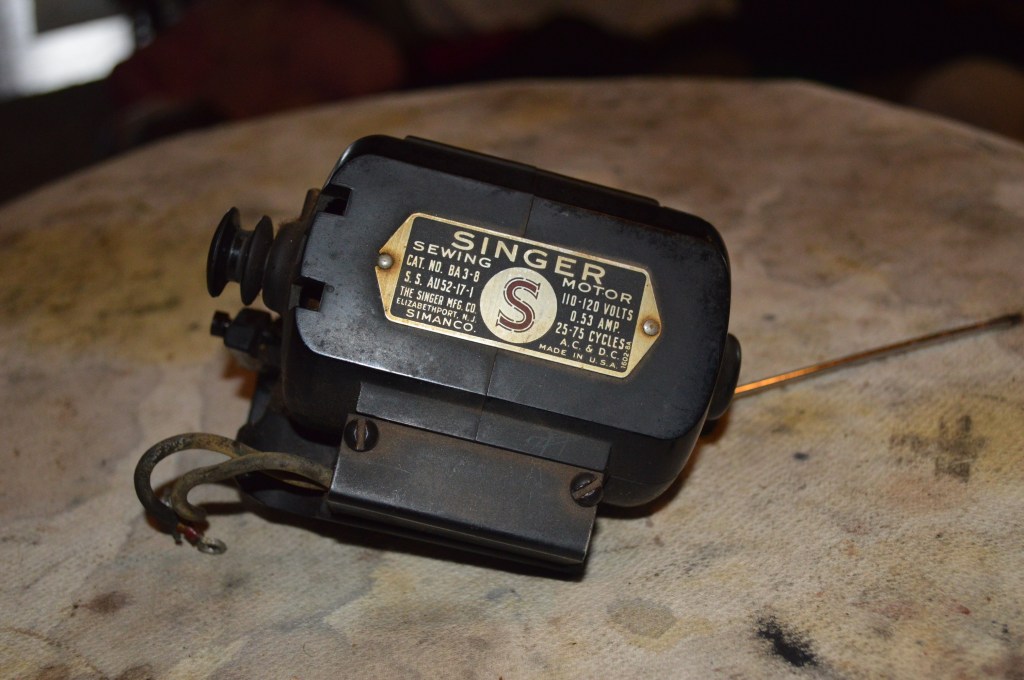
Originally a treadle machine, it has neither light nor motor. In 1919 the Singer Engineers apparently never imagined this machine with an electric lamp and there is no attachment point for a light provided. The only light option is to use an aftermarket light. In today’s world, a motors utility outweighs it’s absence, so I have chosen a 0.53 amp Singer BA3-8 motor to power the machine. This motor provides plenty of power and speed, and it suits the Singer model 15 class machines perfectly.
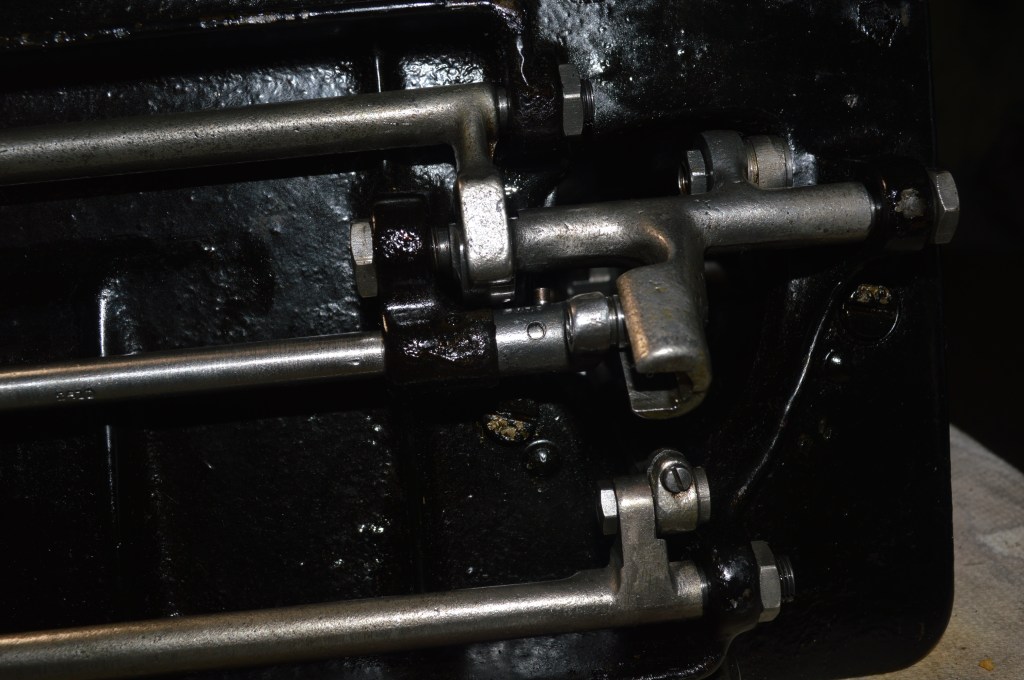
The mechanical restoration of this machine will be very detailed and comprehensive, However, I also want to emphasize the cosmetic restoration. My goal is to keep the original japanned finish and decals intact and restore them to the highest degree I can. This will include applying and finishing a new coating of shellac. If you are wondering why I am using shellac instead of some other more modern coating, it’s because I have decided that this restoration is really a conservation. I want to restore and protect the original finish and keep it’s vintage provenance. Shellac is compatible with the original lacquer paint on the machine. It is what Singer used, and because I want to keep the finish “correct”, it is what I am using. Disassembly will be done to the greatest extent possible. I say this because on a model 15 restoration, I normally remove the top sewing arm shaft. However, my second rule in a sewing machine restoration is “do no harm”. On this machine, a decal is covering a set screw that needs to be loosened to remove the arm shaft. I am not going to poke a hole in the decal to get at this screw for a task that is not necessary. Fortunately, the shaft spins smoothly and the shaft looks bright in the bushing. That said, the shaft will be cleaned in place so the connecting rod and stitch length fork are turning on a cleaned and oiled surface.
I have previously covered the cleaning of this machine in an earlier blog, and this restoration will continue where it ended… It has already been meticulously cleaned and prepped for the new shellac and that’s where we begin. If you would like to see the cleaning process described in detail, please feel free to click on this link: https://pungoliving.home.blog/2019/12/08/a-tutorial-cleaning-an-vintage-singer-model-15-sewing-machine/, and then come back here for the rest of the story. Otherwise, I will show the machine before and after cleaning so you can see the comparison.
Before 
After 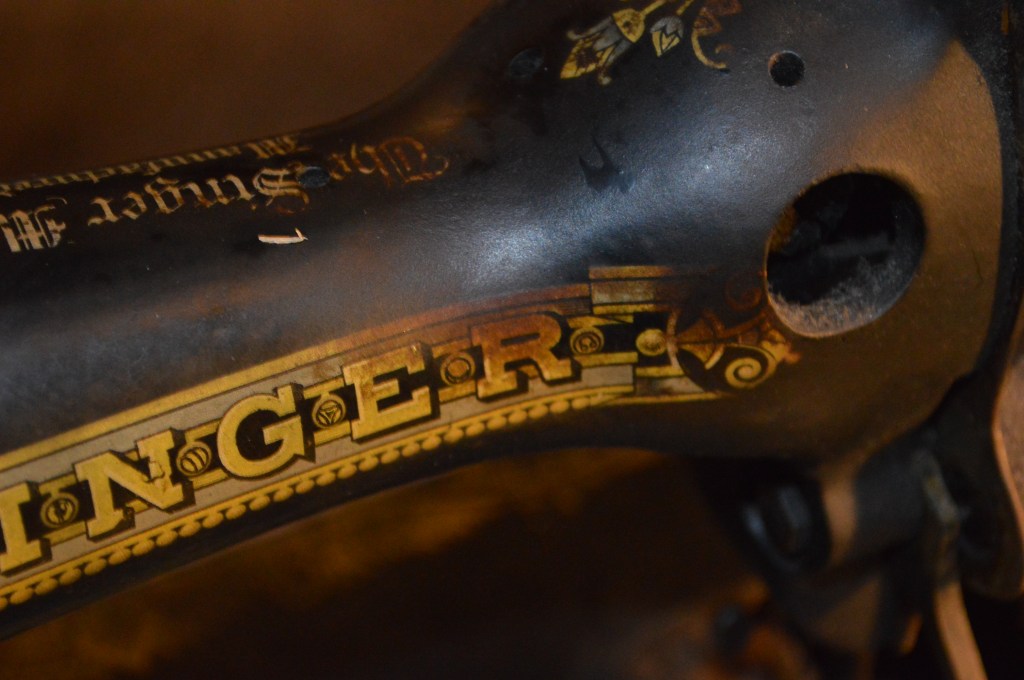
Before 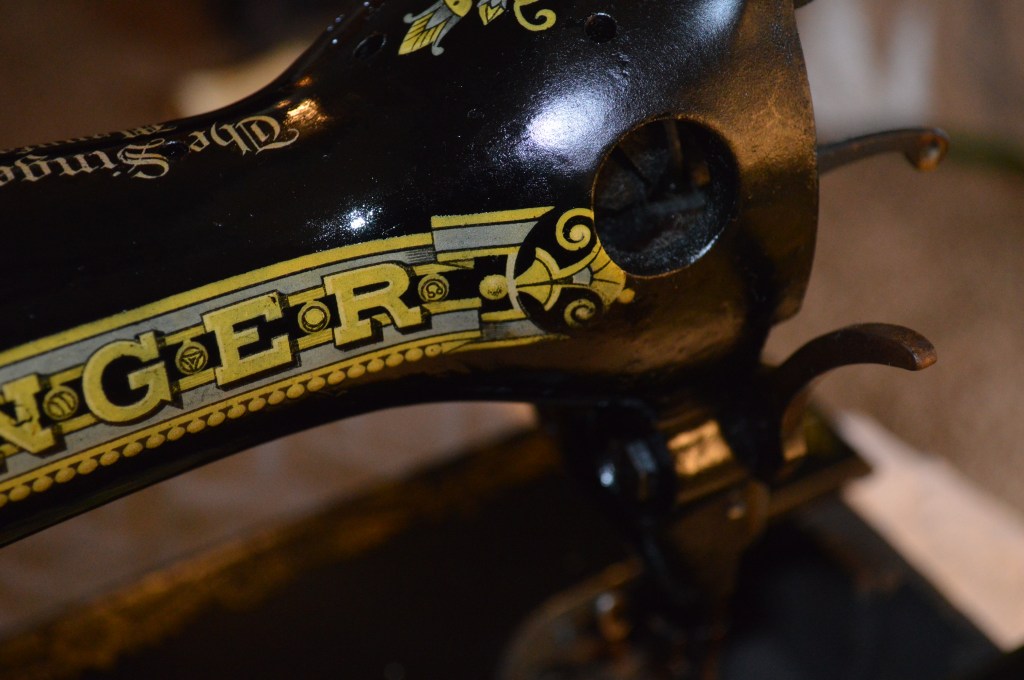
After 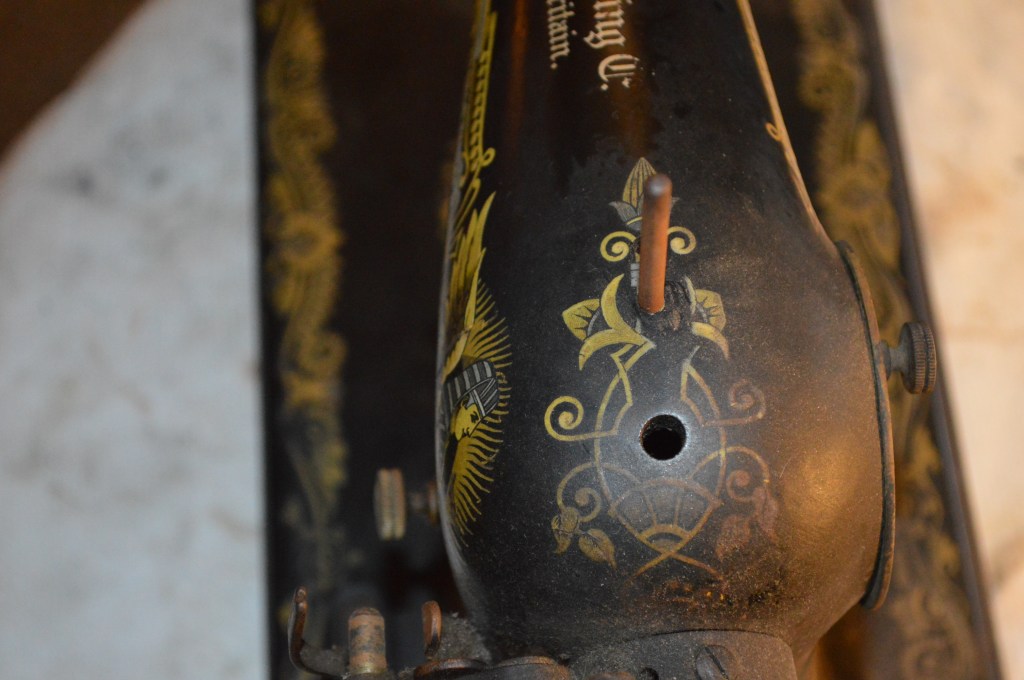
Before 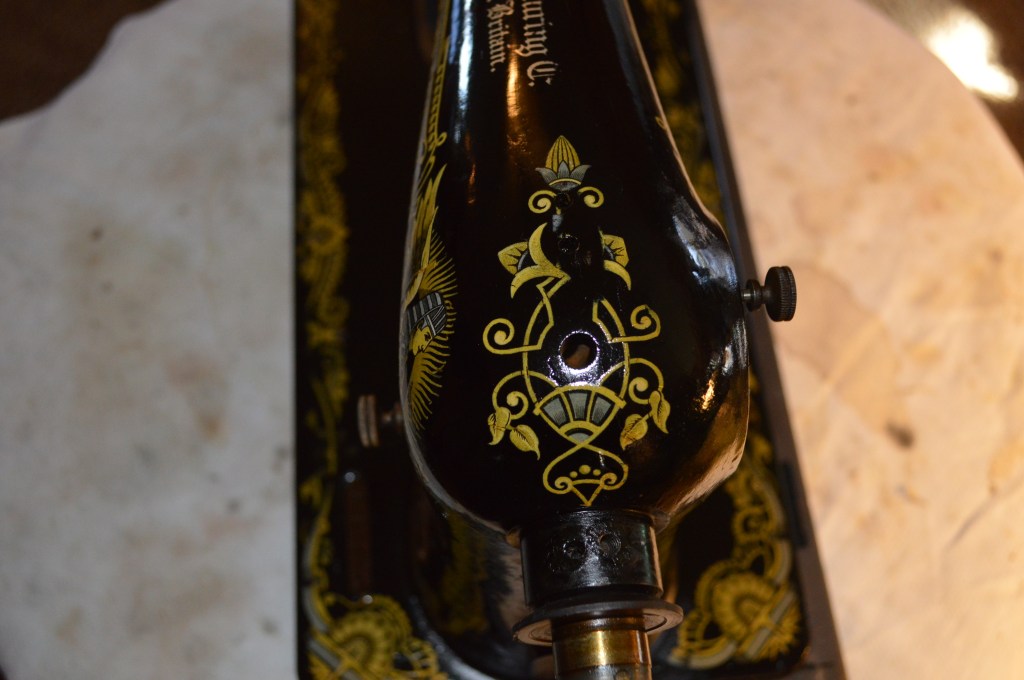
After 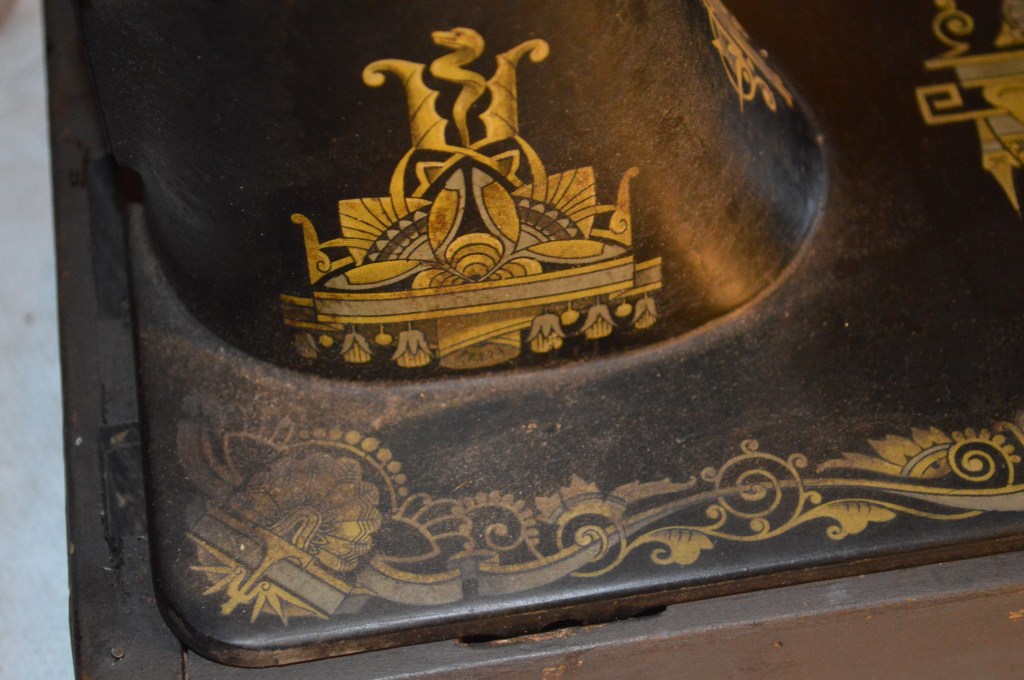
Before 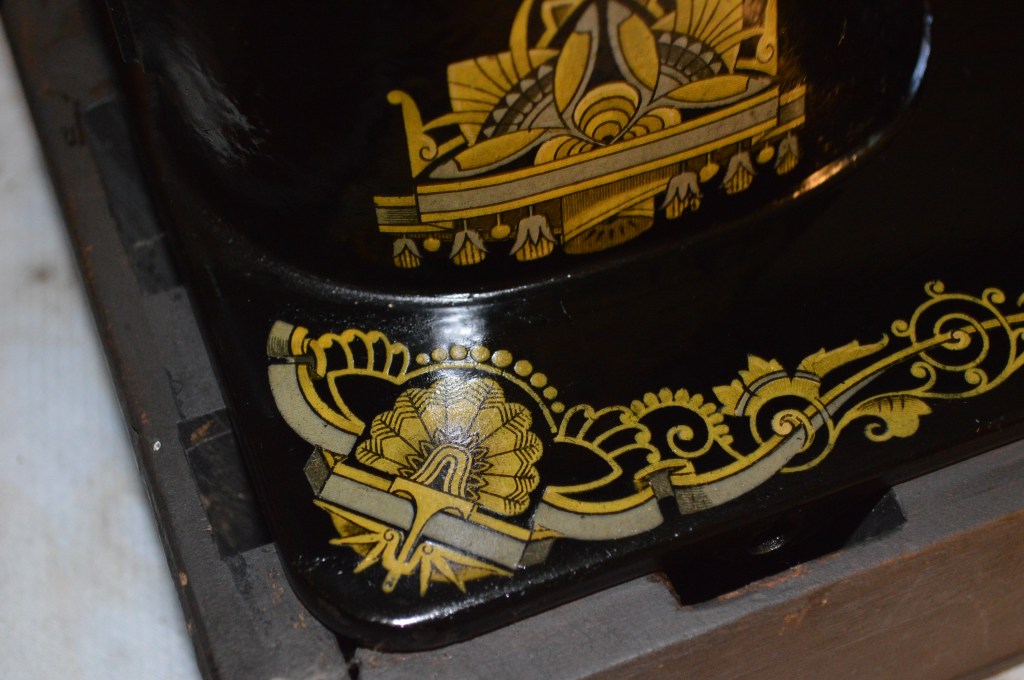
After 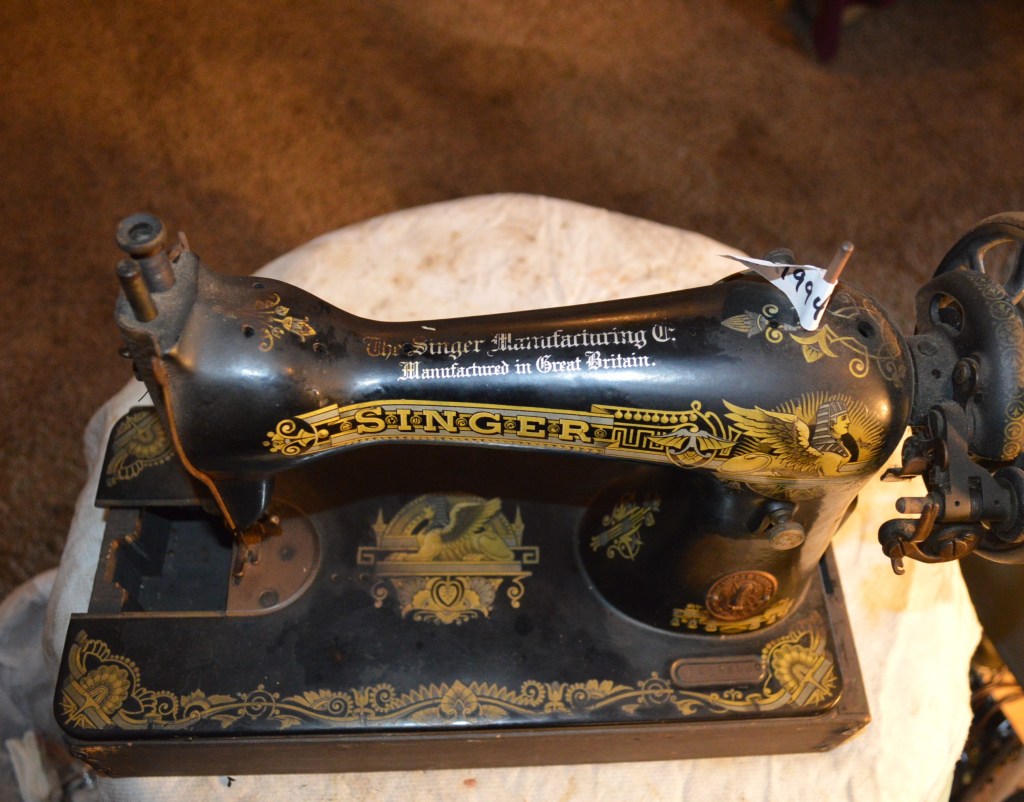
Before 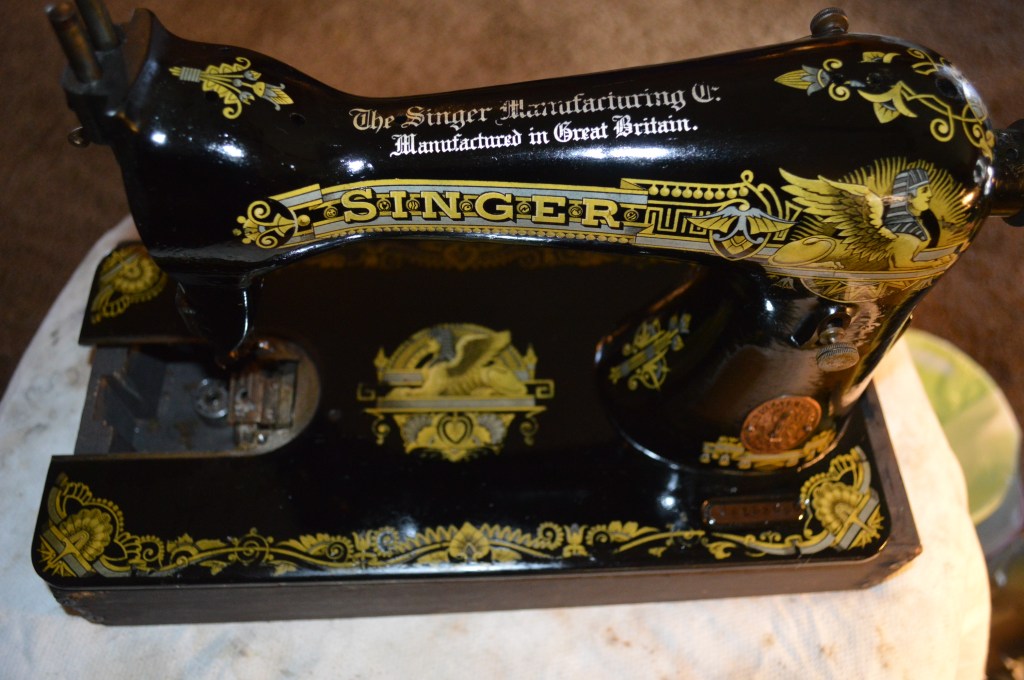
After
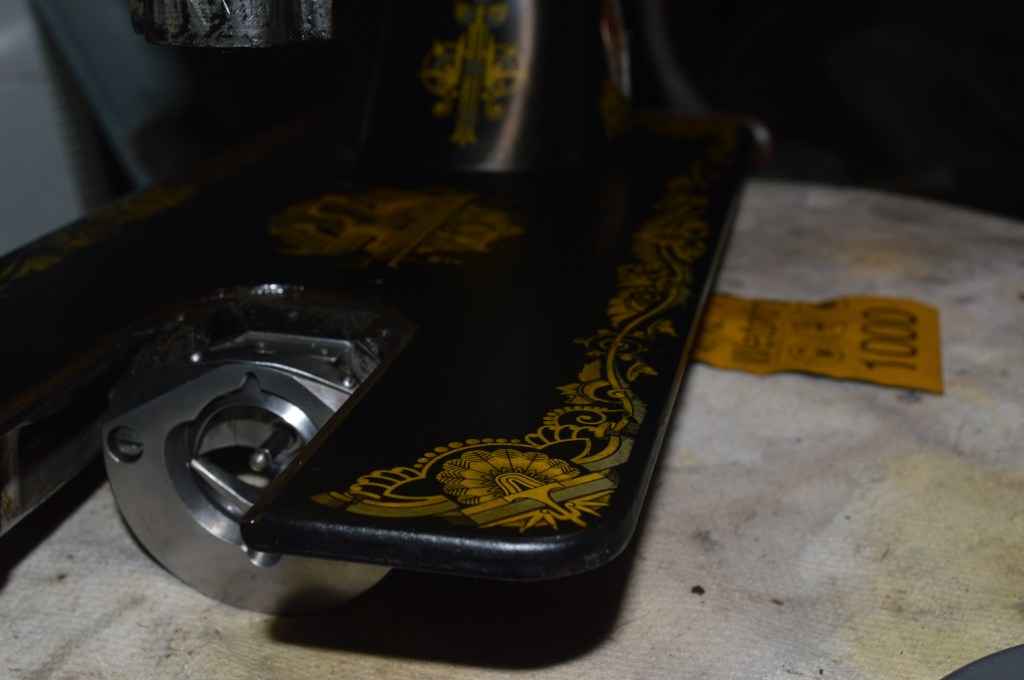
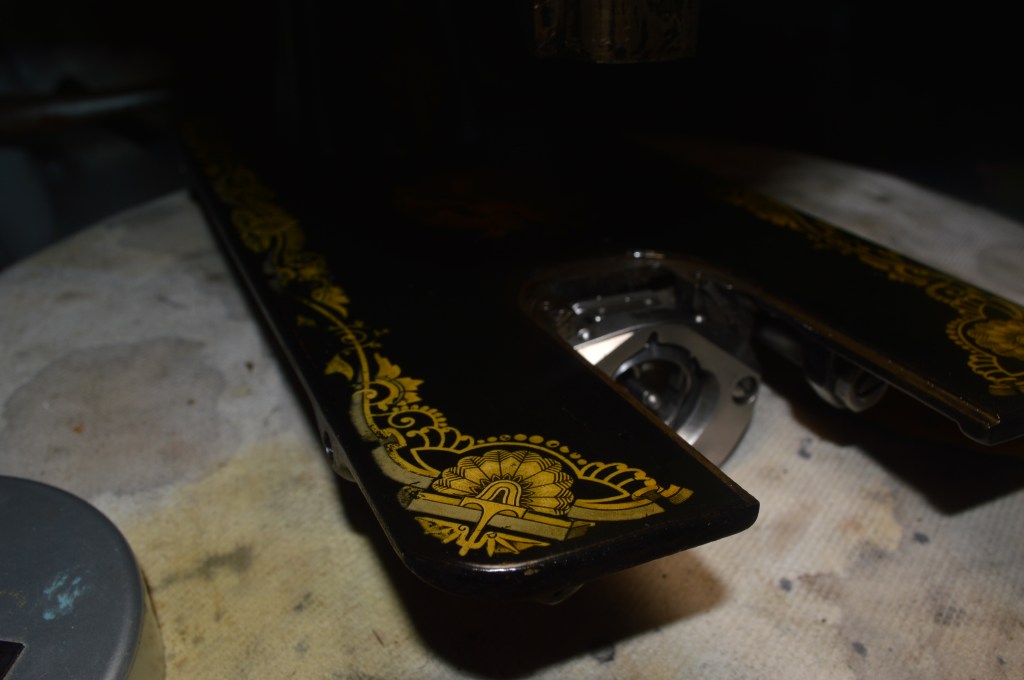
As the pictures show, the machine looks great from cleaning alone. But, if you look closely at the leading edge of the bed, there is some decal loss. In fact, the cleaning had me holding my breath the whole time from fear of losing more. What you can’t see in the picture is that the shellac is worn over most of the bed and the decals are exposed to an extent that I am not going to attempt any further handling or disassembly until I have stabilized the decals with a protective coat of shellac. Here is the machine sprayed with six new coats of shellac.
What you will notice here is that finish has a textured appearance. This is of no concern now because it will be sanded smooth before I am done. What you don’t notice is that the underlying japanned finish is now almost free of any pre-existing blemishes. That’s the beauty of this. The new shellac has dissolved the old shellac underneath and essentially erased all previous signs of wear in the paint.
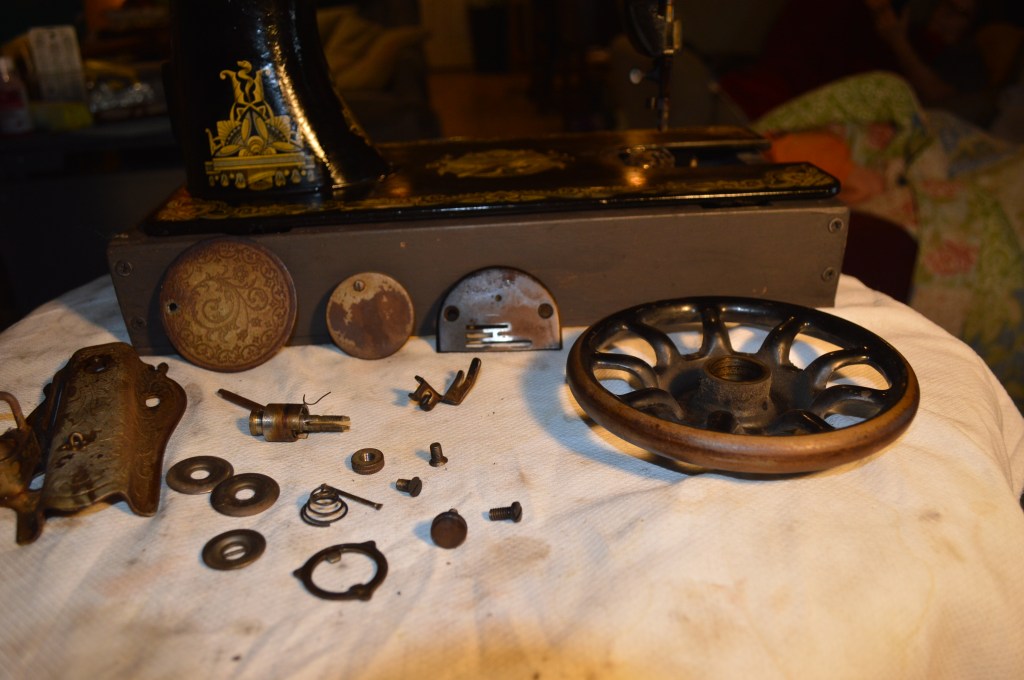
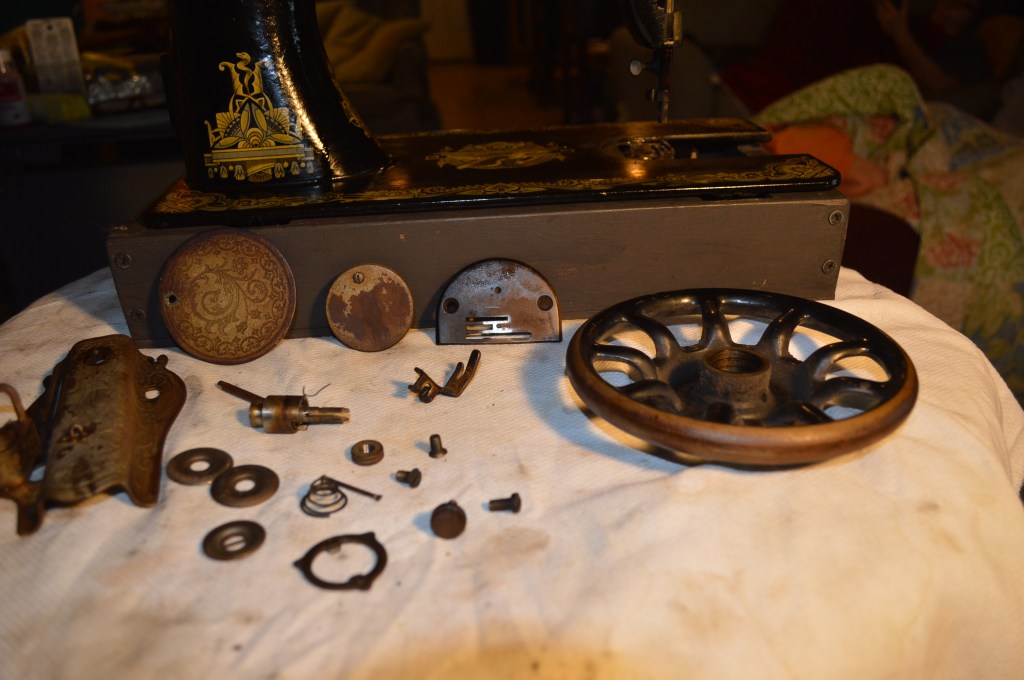
Part of the cosmetic restoration deals with the plated covers, the balance wheel, and bits and pieces like the feed dogs and bobbin winder. On this machine, these parts show more of the typical condition you commonly see on machines of this age. Much of the plating is gone and there is some small pitting present.
Some of this is oil varnish and it will be removed by ultrasonic cleaning. But, loss of plating is something that will need another approach. Often, the steel can polished to a nice shine, but pitting cannot be removed. I will have to see how these parts look after cleaning and polishing. But remember what I said about setting your expectations… These parts may not turn out to be as smooth or shiny as new, but they will be greatly improved, and I’ll be happy with that.
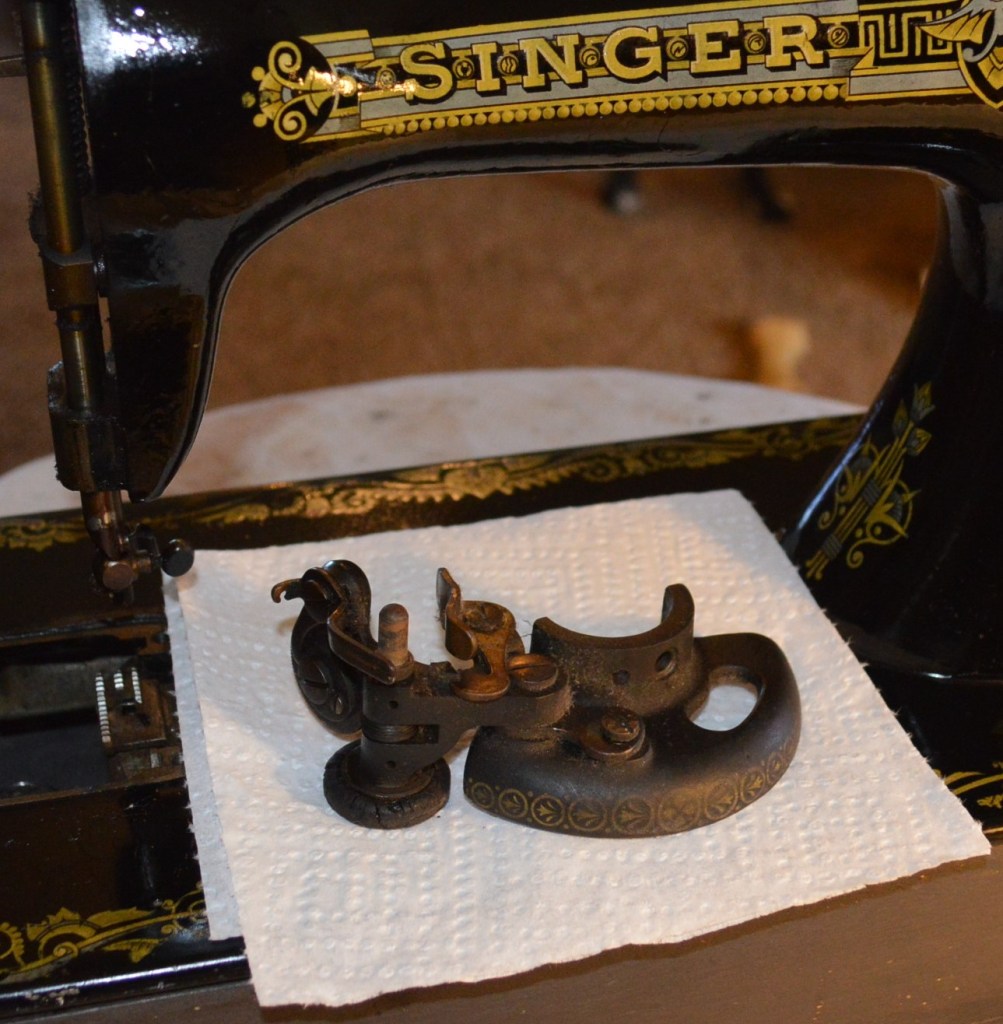
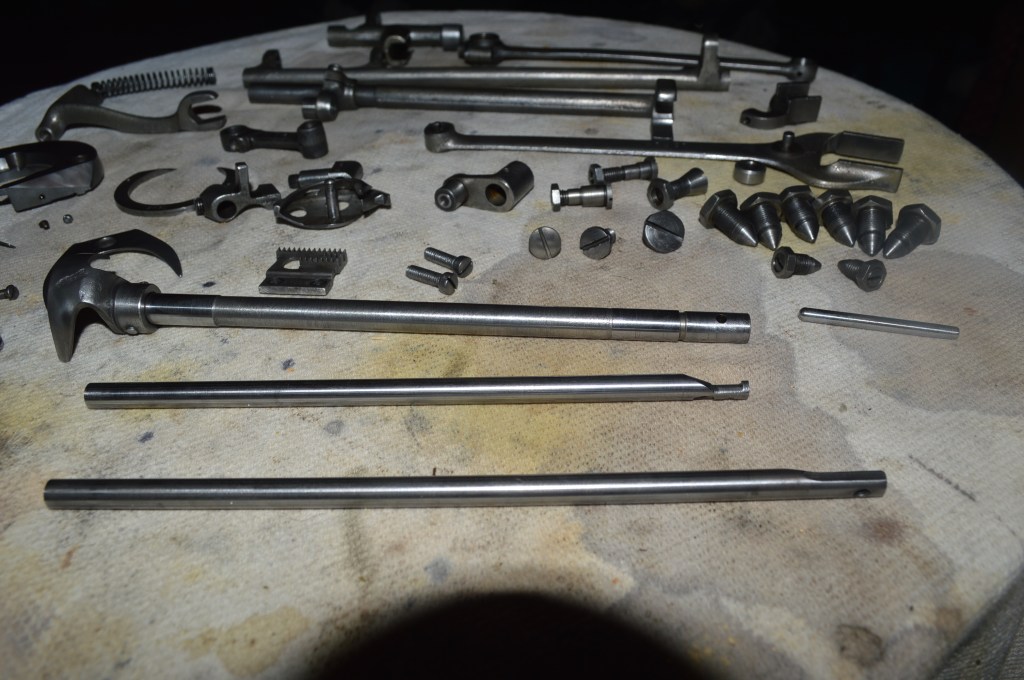
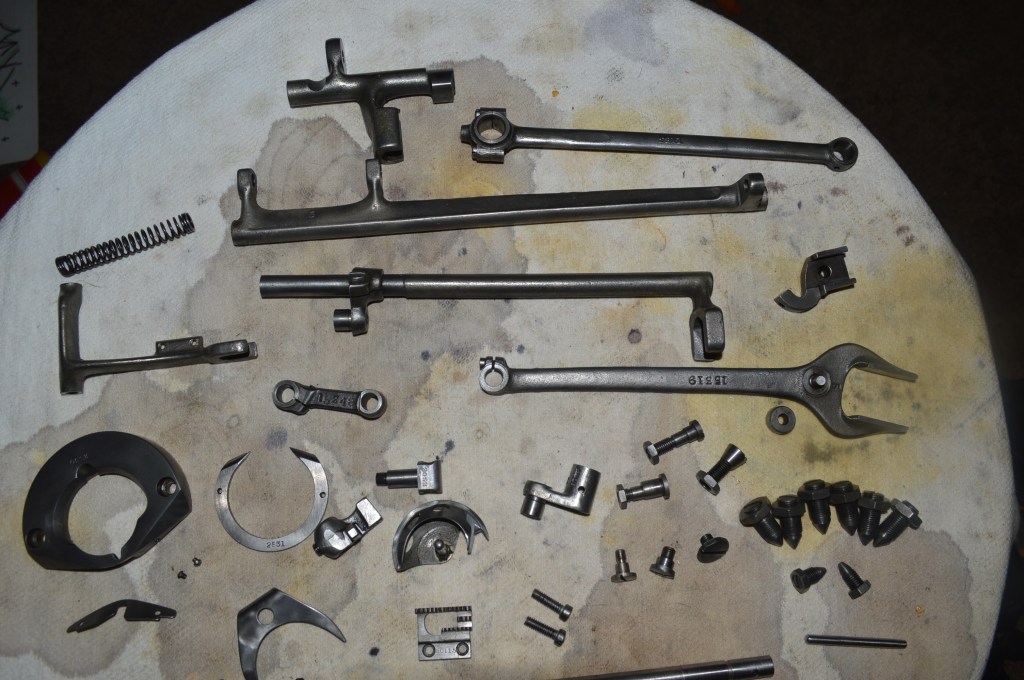
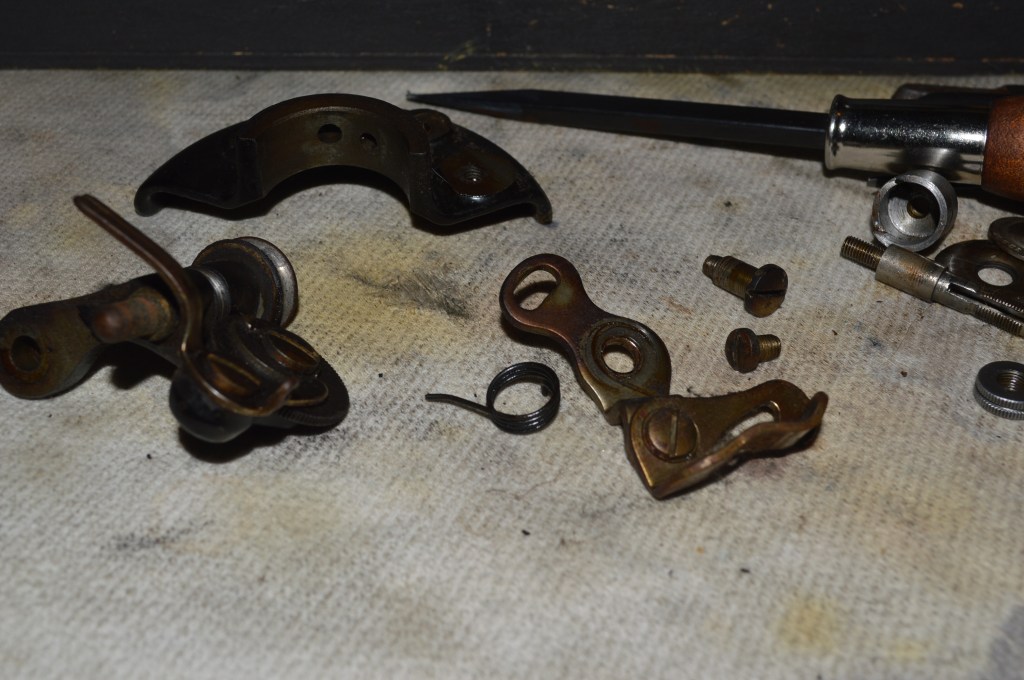
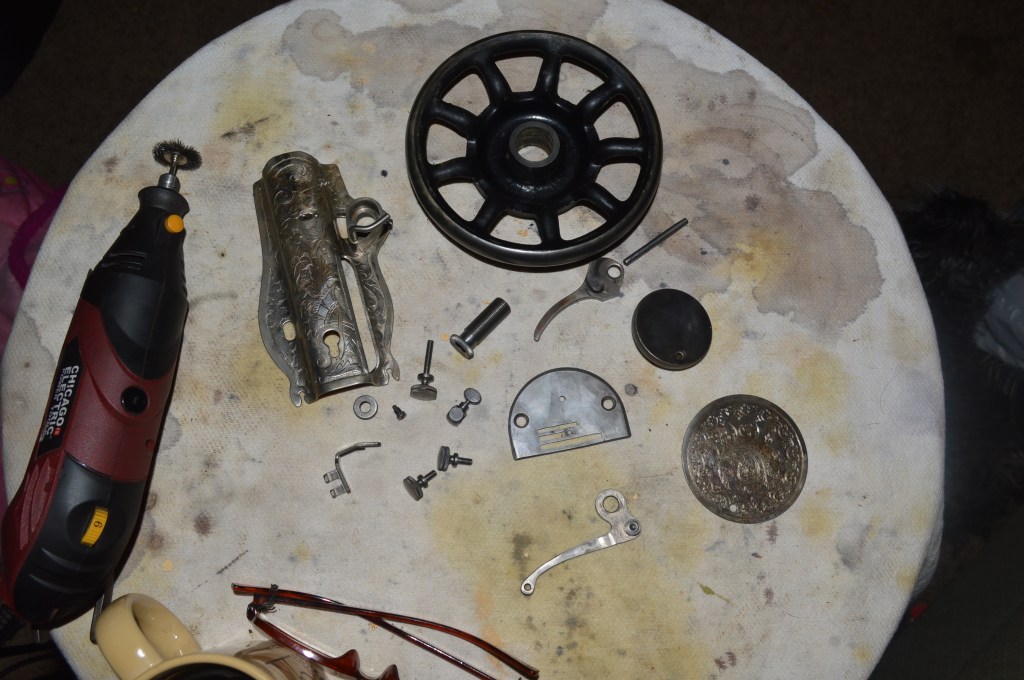
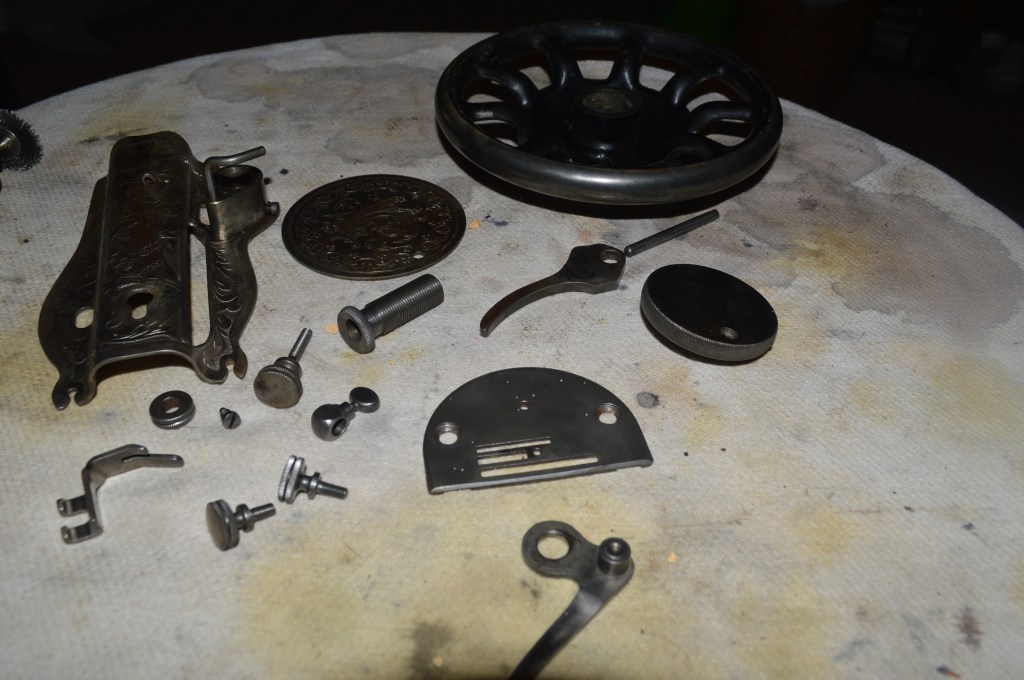
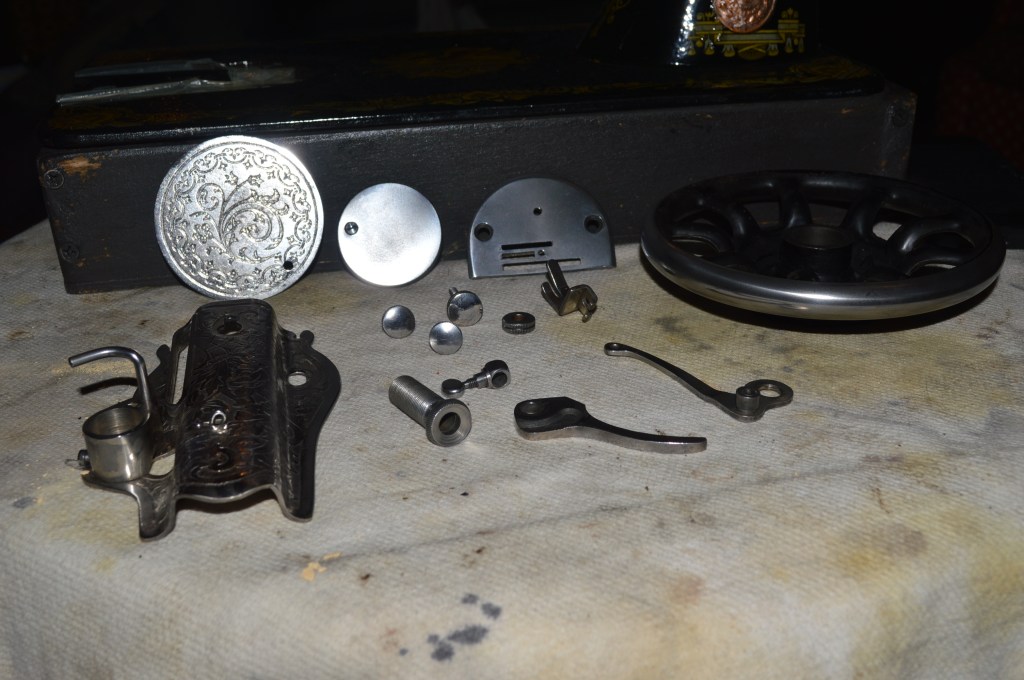
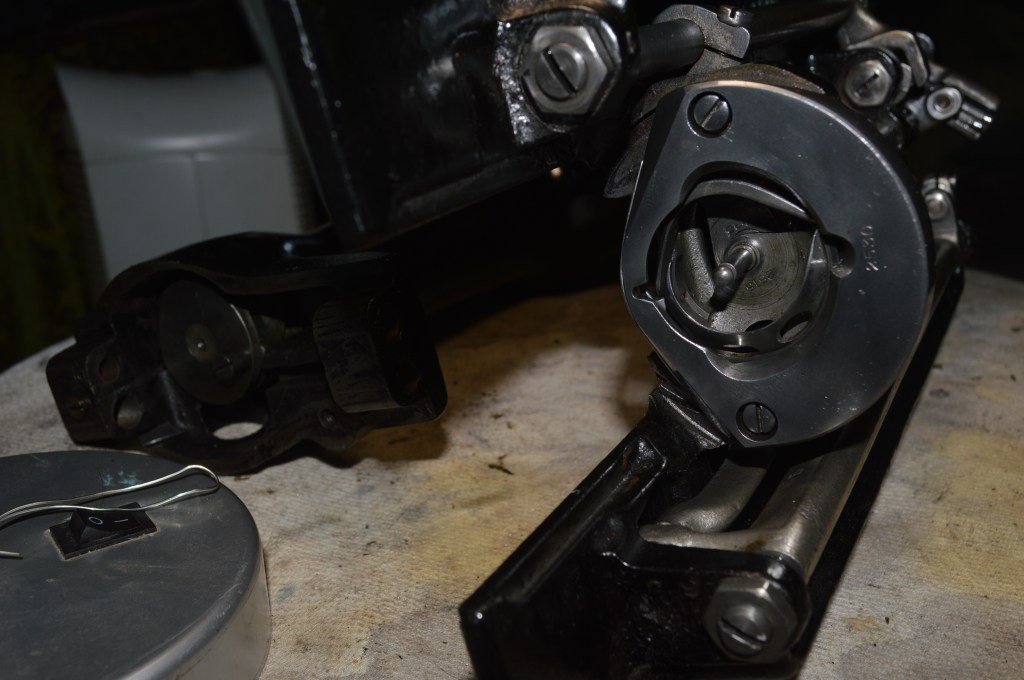
The disassembly continues and all of the mechanisms I can remove are laid out for cleaning…
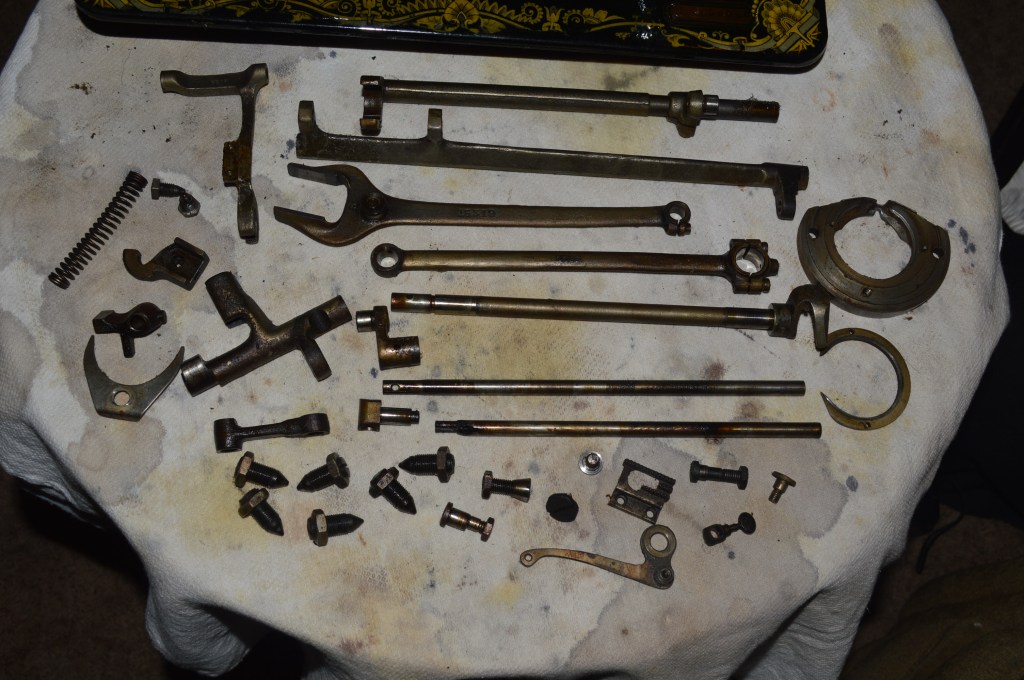
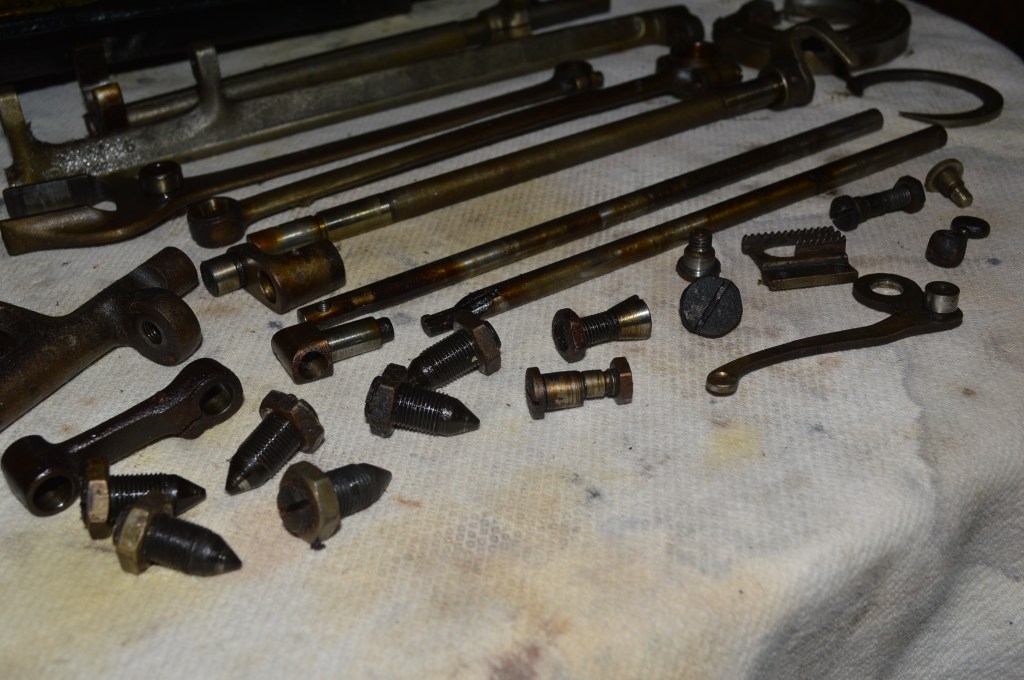
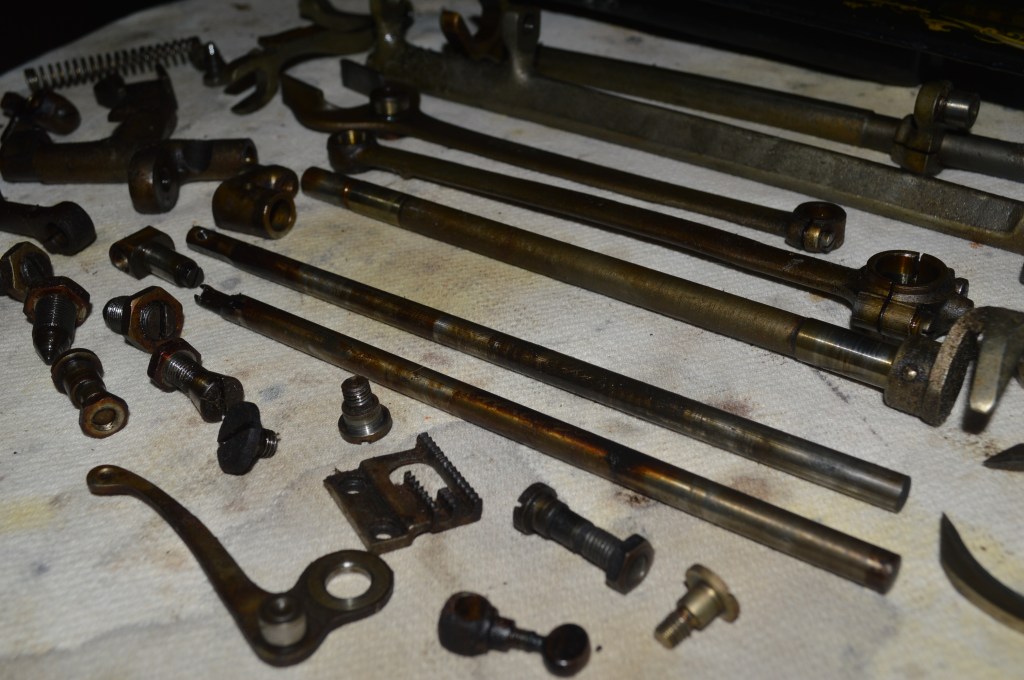
After 102 years the parts have acquired a coat of oil varnish. This coffee colored film coats the outside of the parts and more importantly, the areas where these parts contact each other. All of this film is removed by ultrasonic and mechanical cleaning. To return these parts to a like new condition each is wire brushed after ultrasonic cleaning to clean bright steel. The needle bar and presser foot bar is polished to a glass smooth finish. Look at the comparison now these parts have been restored…
Look at the connecting rod for example… before cleaning 
Connecting rod after cleaning 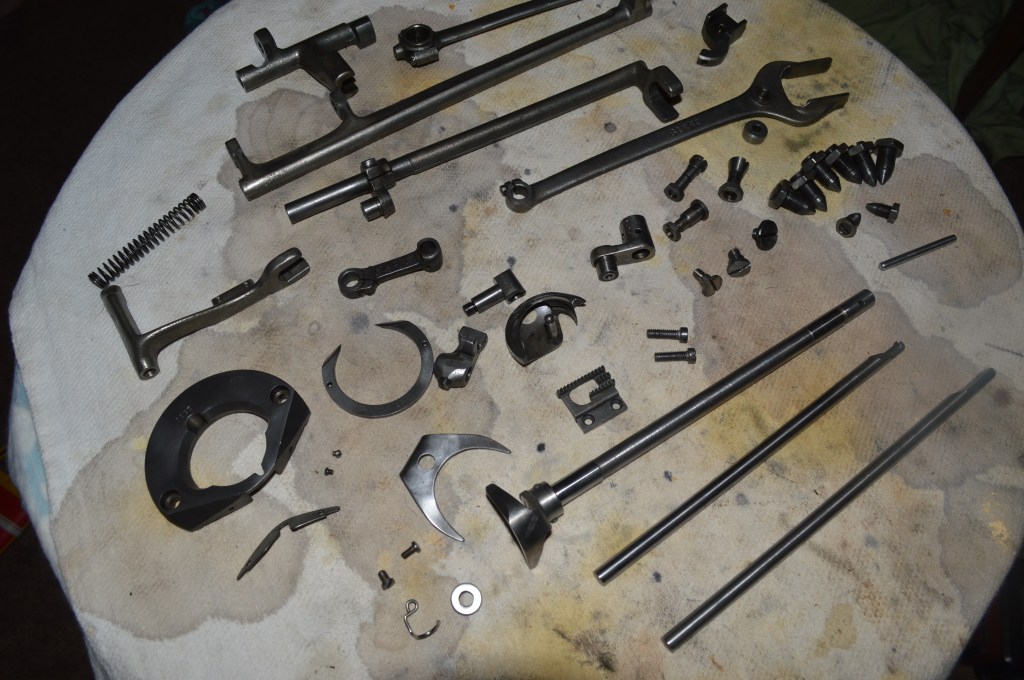
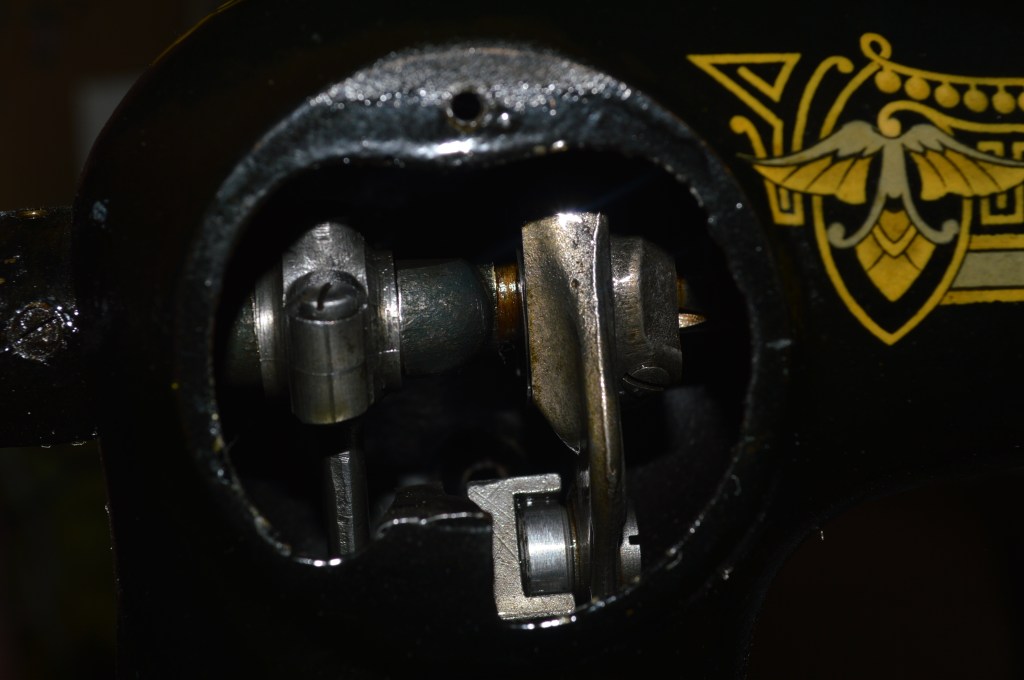
The sewing machine arm shaft and eccentric cam is cleaned in place…
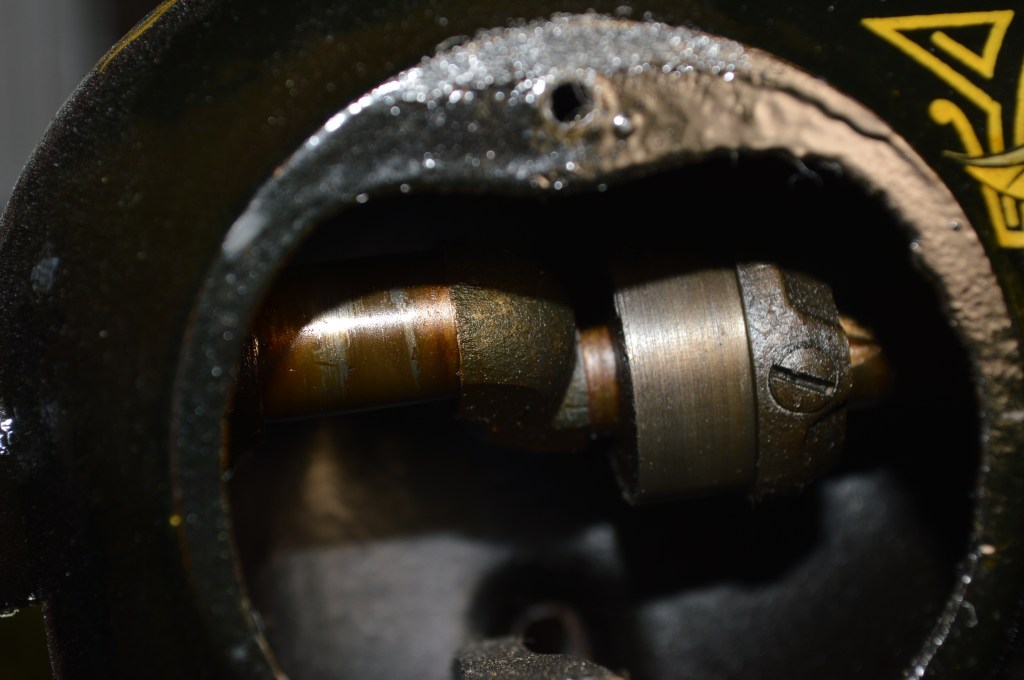
Arm shaft before cleaning 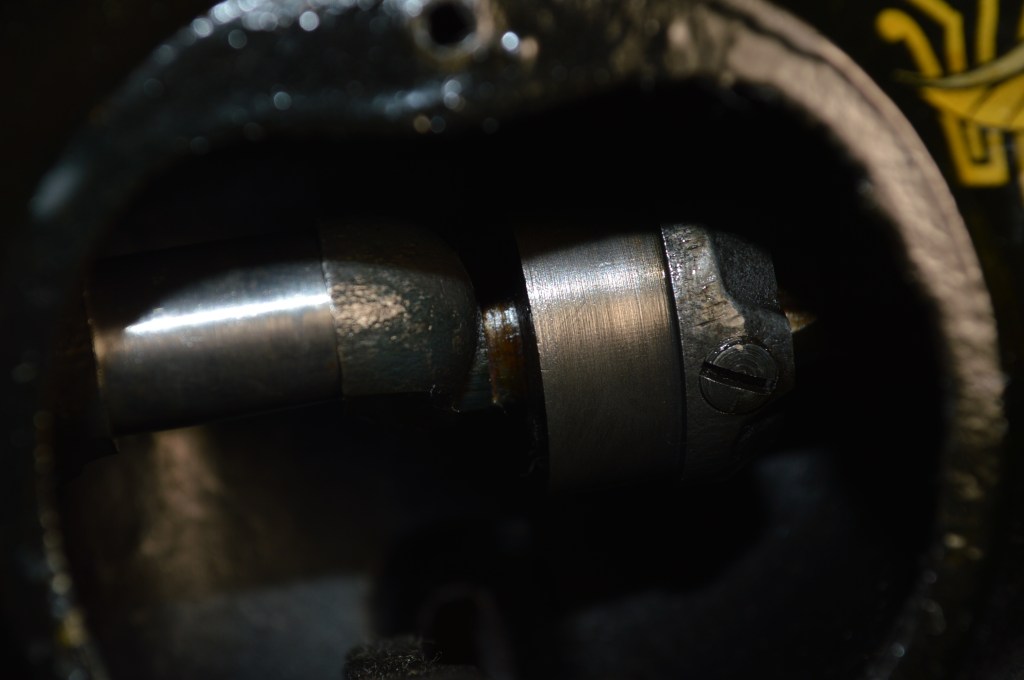
Arm shaft after cleaning 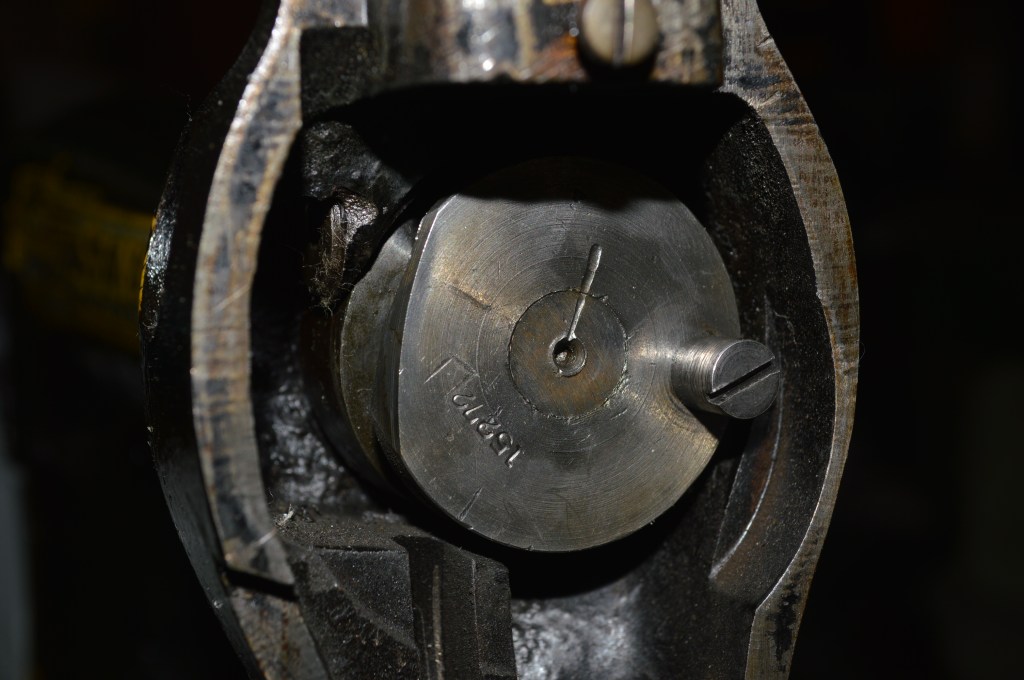
Eccentric cam is cleaned
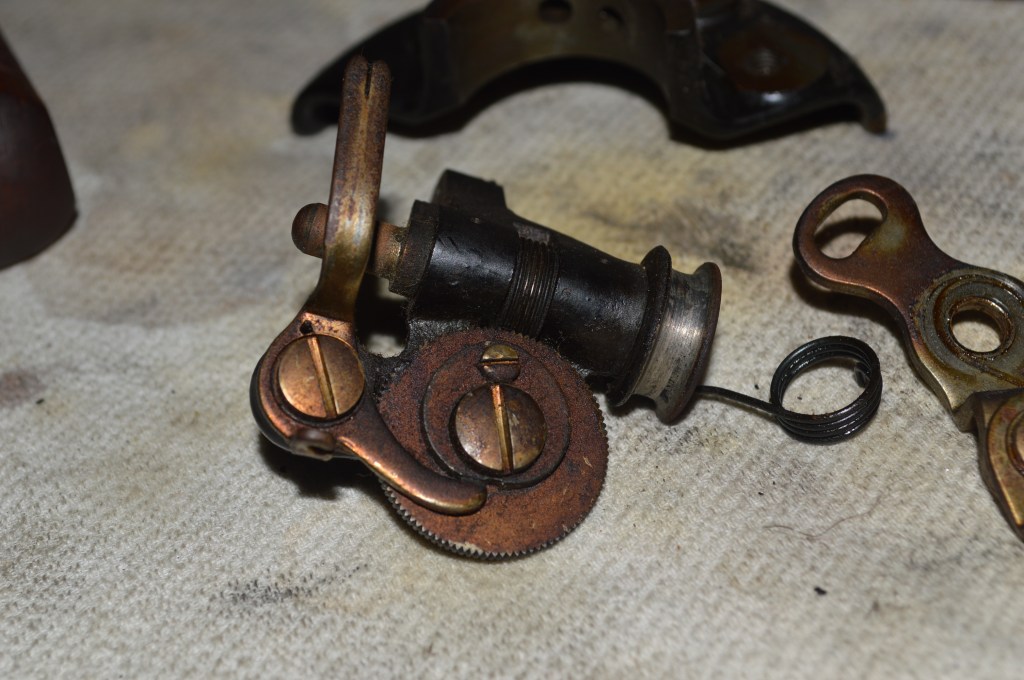
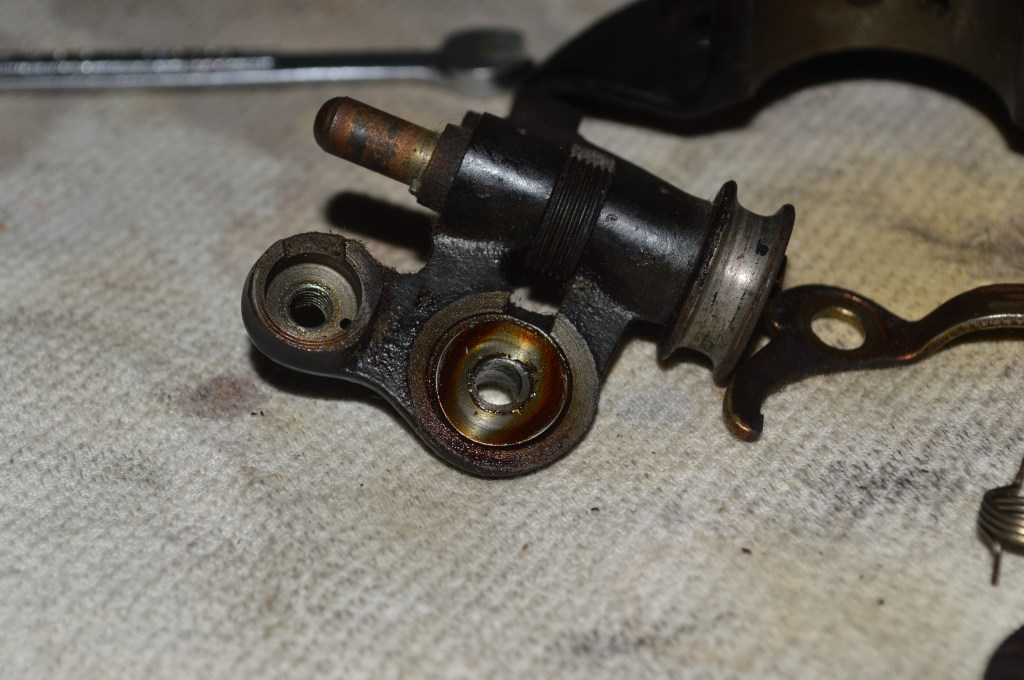
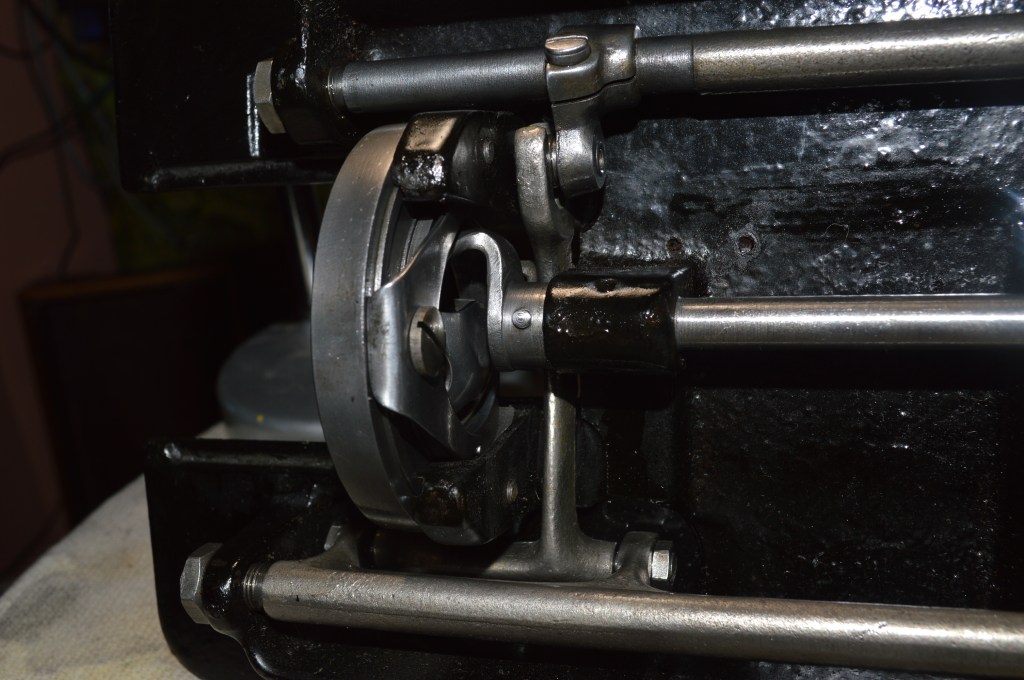
Next things to restore are the tension assembly and the bobbin winder. The tension assembly is very simple to clean, but the bobbin winder is quite a bit more complicated. Care needs to be taken in disassembly, cleaning, and reassembly because the very fine tooth worm gear mechanism can be easily damaged if not properly reassembled and adjusted… even so, I love watching these things winding a bobbin!

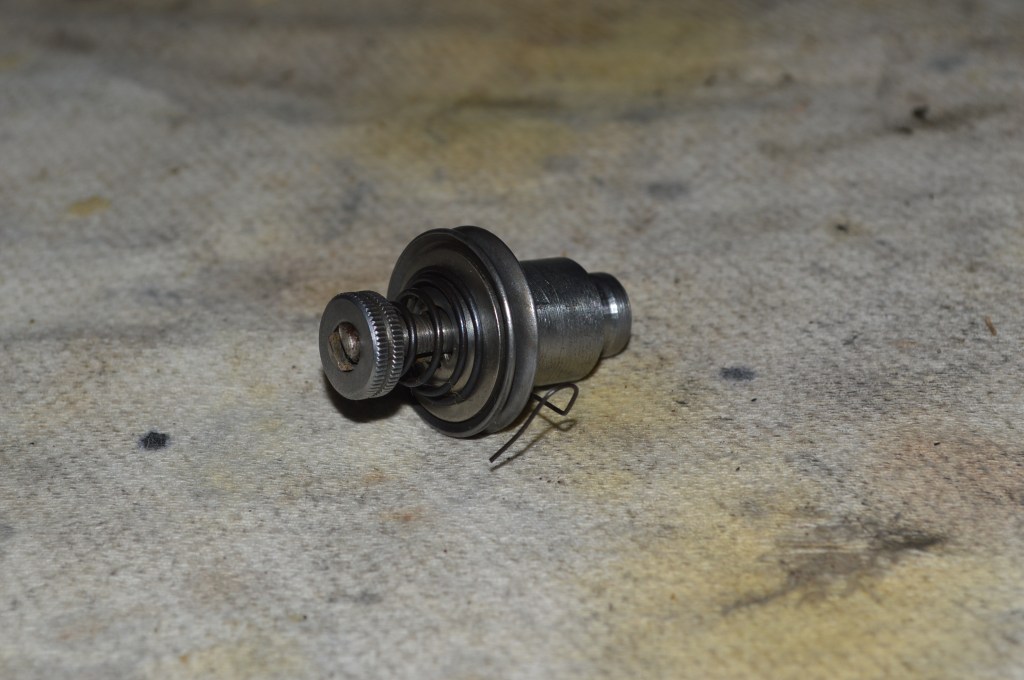
Cleaned tension assembly 
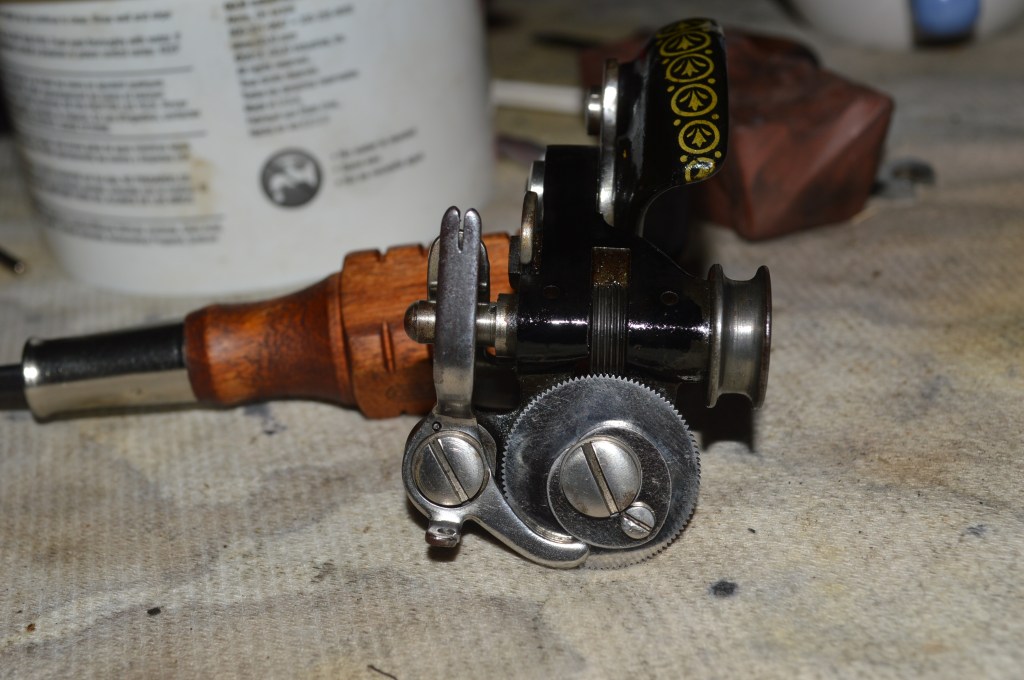
Cleaned bobbin assembly
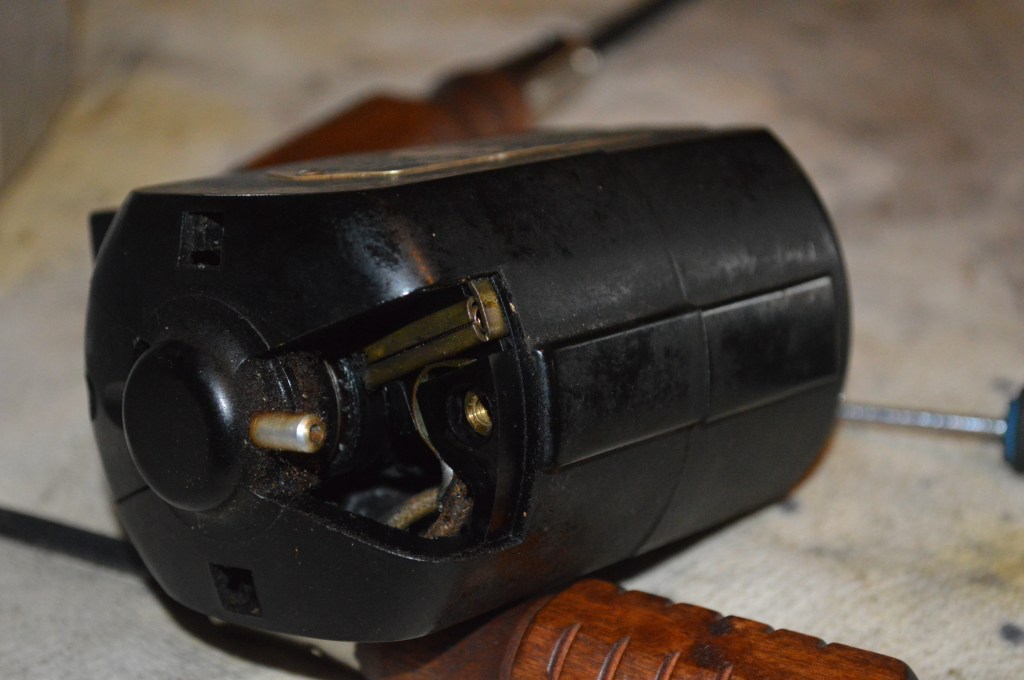
Now the motor is restored. It is completely disassembled and cleaned. the oil wicks are cleaned and recharged with oil, The armature shafts and commutator are polished, and the power wires are replaced.
Brushes are removed 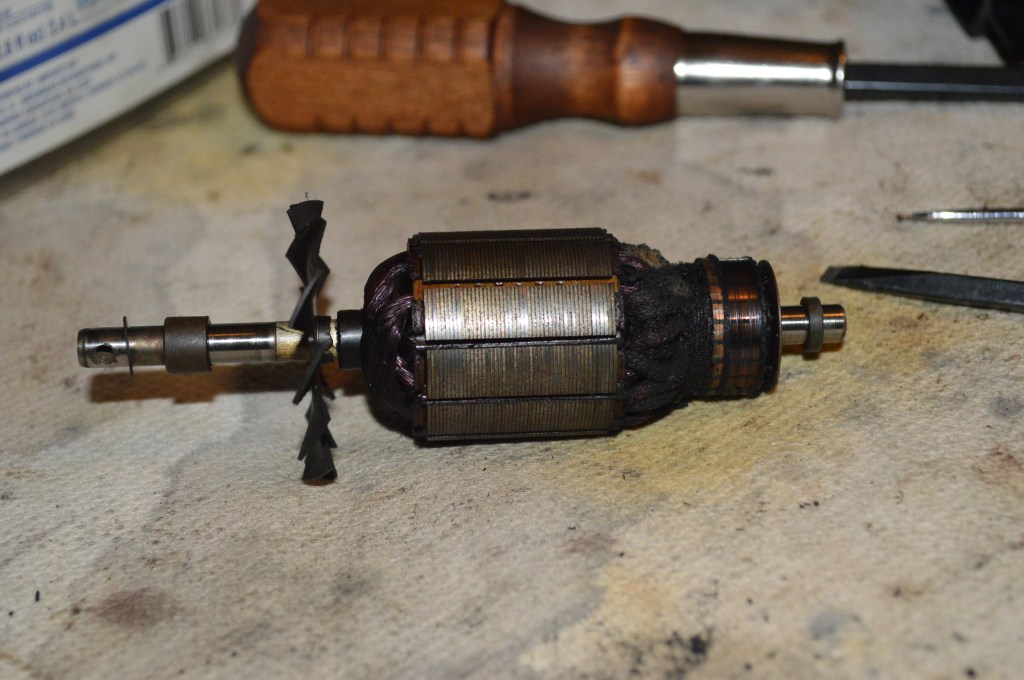
Armature is removed 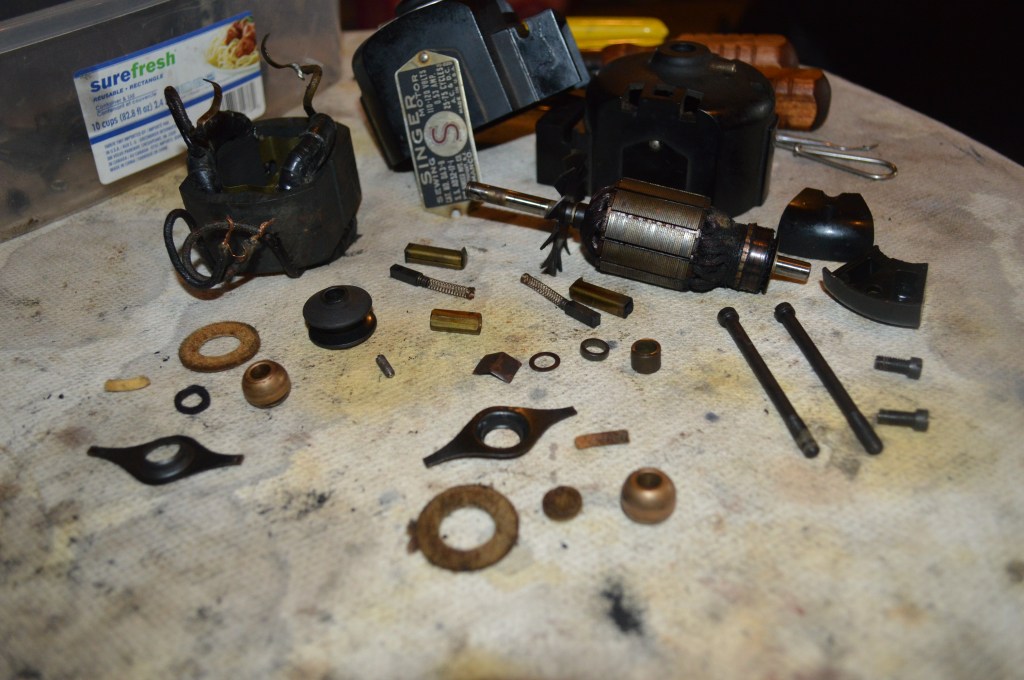
Parts laid out for cleaning 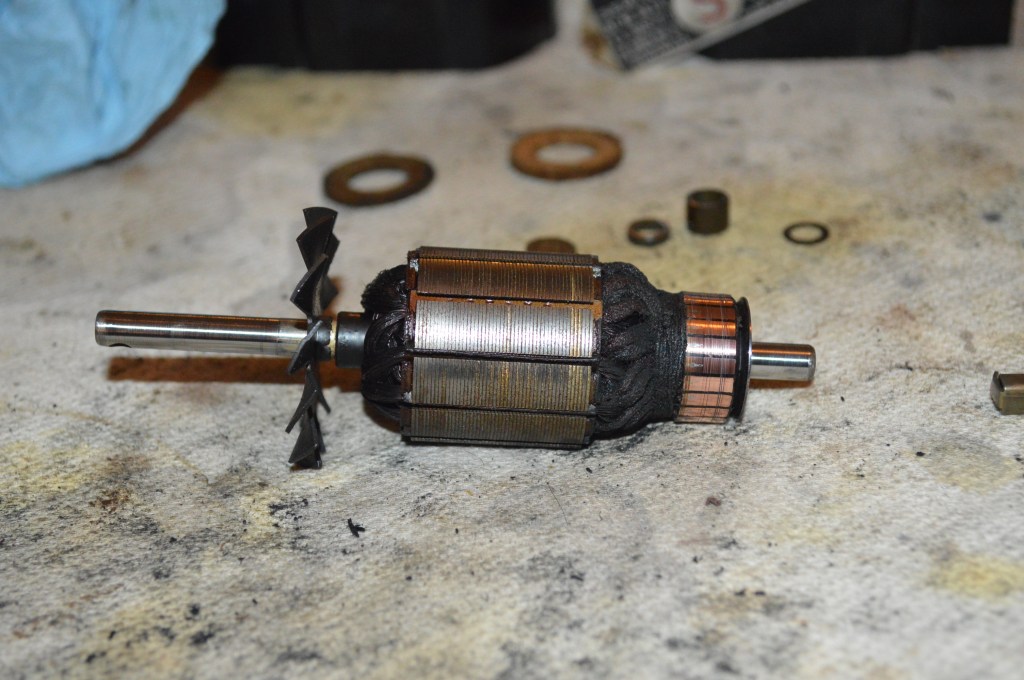
Armature polished 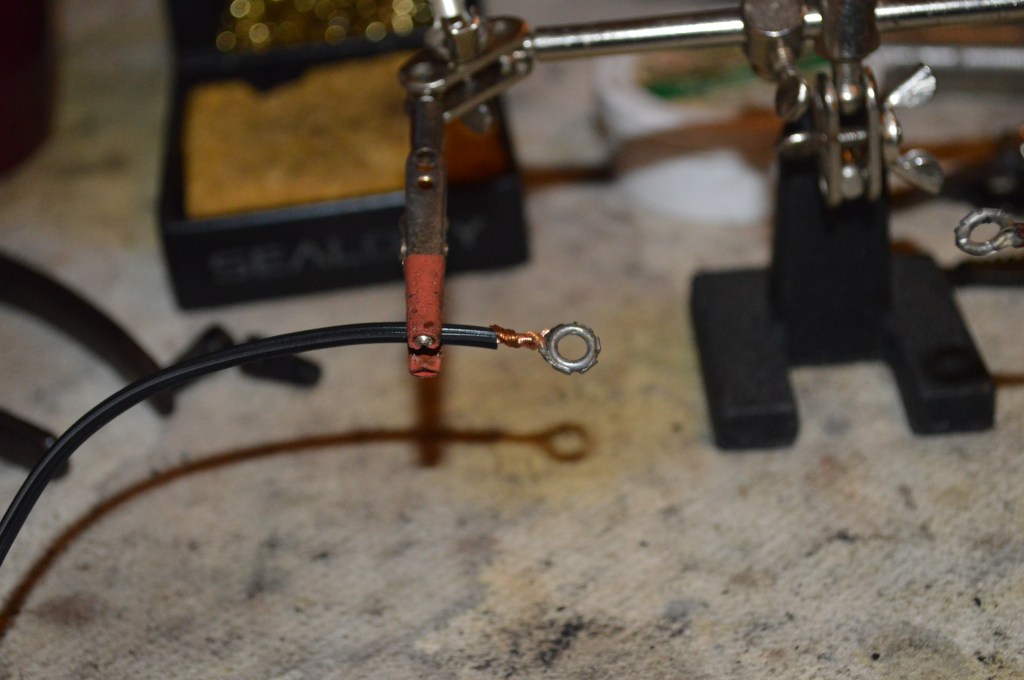
Terminals from old wires are reused 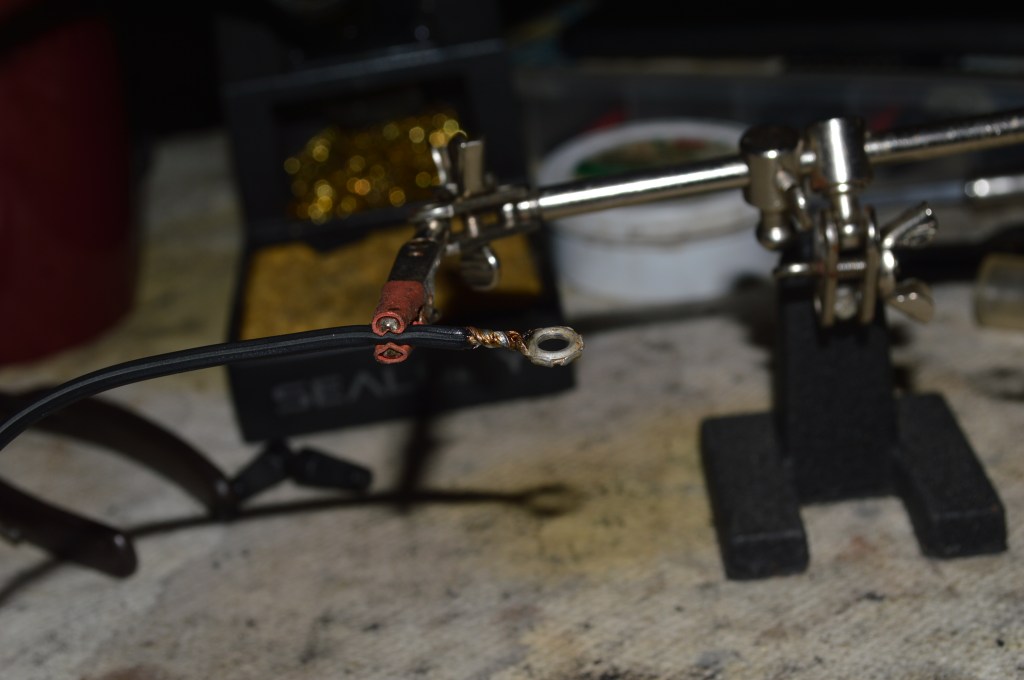
Terminals are soldered 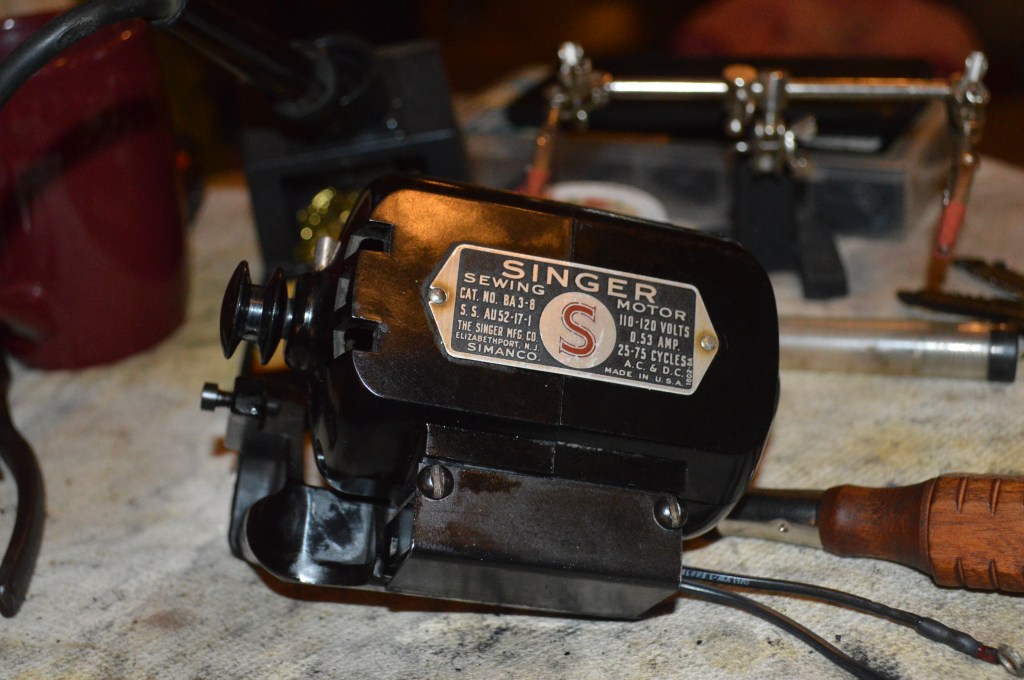
Shrink tubing used to insulate solder joint and motor reassembled 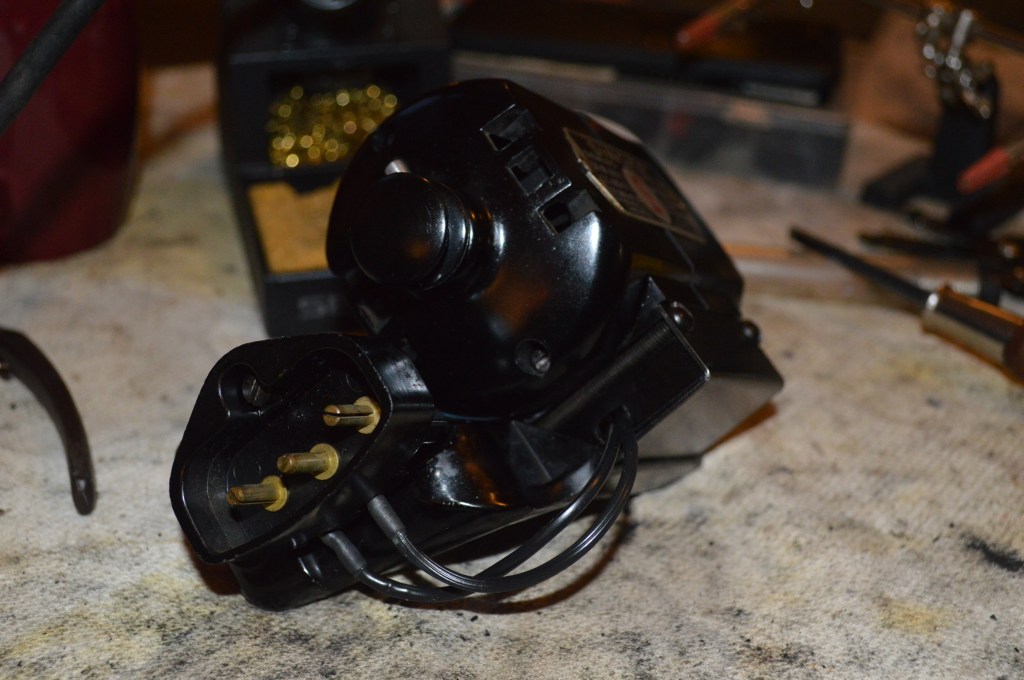
Terminal block wired and installed 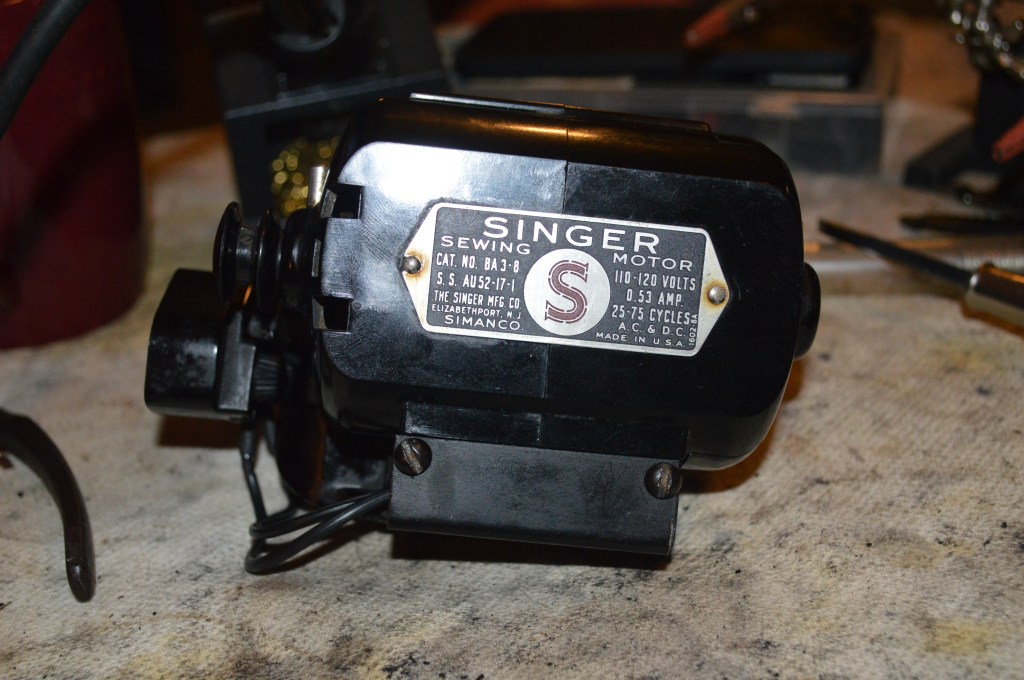
Motor is restored
The motor and all remaining parts are ready for reassembly. Meanwhile the machine is still sitting close by with the new coat of shellac waiting to be finished.
There is plenty left to do, and there is no need to worry about assembly just yet, so it’s on to the restoration of the balance wheel, covers, and plates. Their condition looks pretty bad but they will finish nicely.

The first step is ultrasonic cleaning, followed by a nice long soak in Evaporust. This will remove the light surface rust rust and I can focus on preparation for polishing. Polishing is a process that uses very fine abrasive grits. To get the best result, the surfaces must be smoothed as much as possible before polishing. Here the parts have been smoothed with a soft wire wheel and a roto tool prior to polishing. They look much better but after polishing they will look almost like new.
After wire brushing
Much improved, but the best outcome is achieved with polishing.
After… 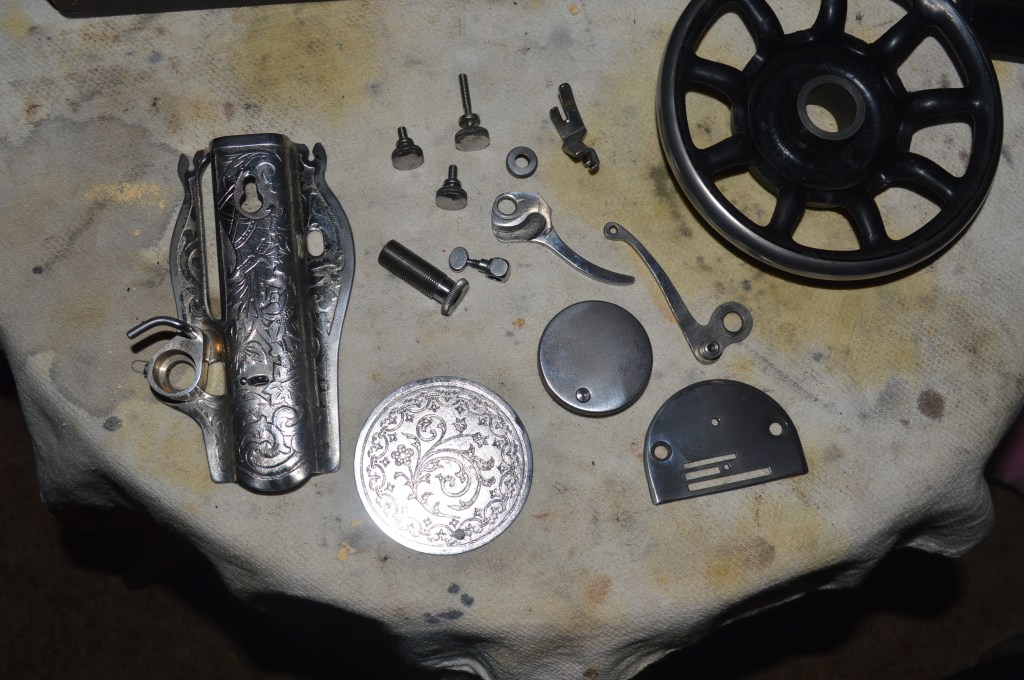
After… 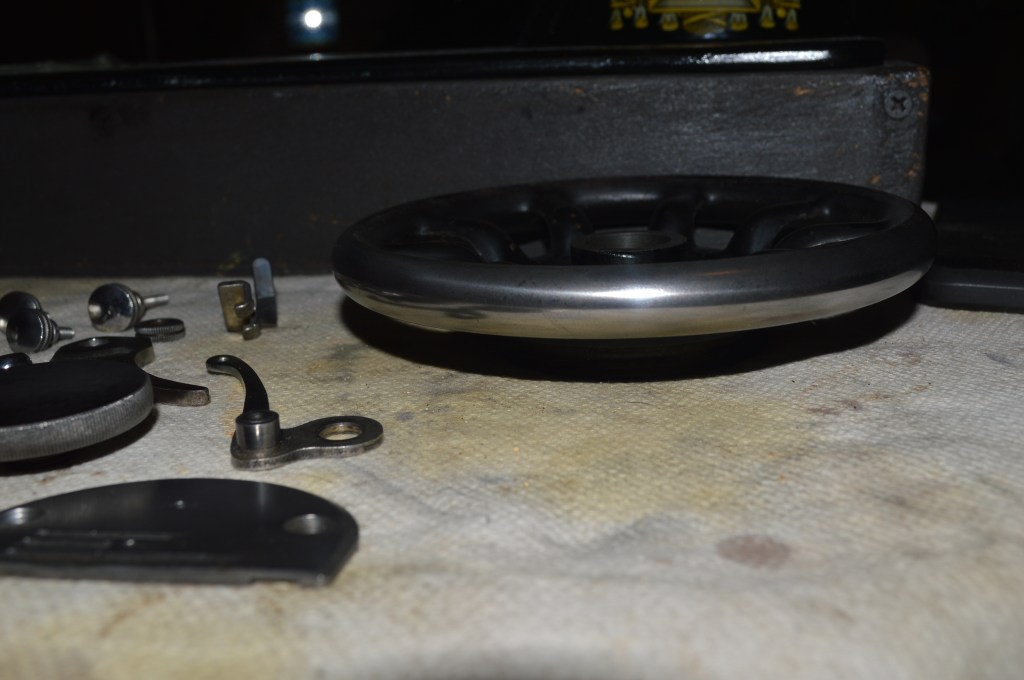
To achieve this result, each piece goes through multiple stages of polishing. Like wet sanding, polishing is a multi step process. To get the best outcome, each piece needs to go thru a series of different grit polishes. Polish has different grits denoted by color. For these pieces, I used white polish for the initial polish, green polish for the intermediate polish and finished with red polish (jewelers rouge).
The machine’s new shellac has cured sufficiently for finishing and now the sewing mechanisms under the bed and in the arm are reassembled. I do this before I sand and polish the finish to reduce handling after the final finish is achieved.

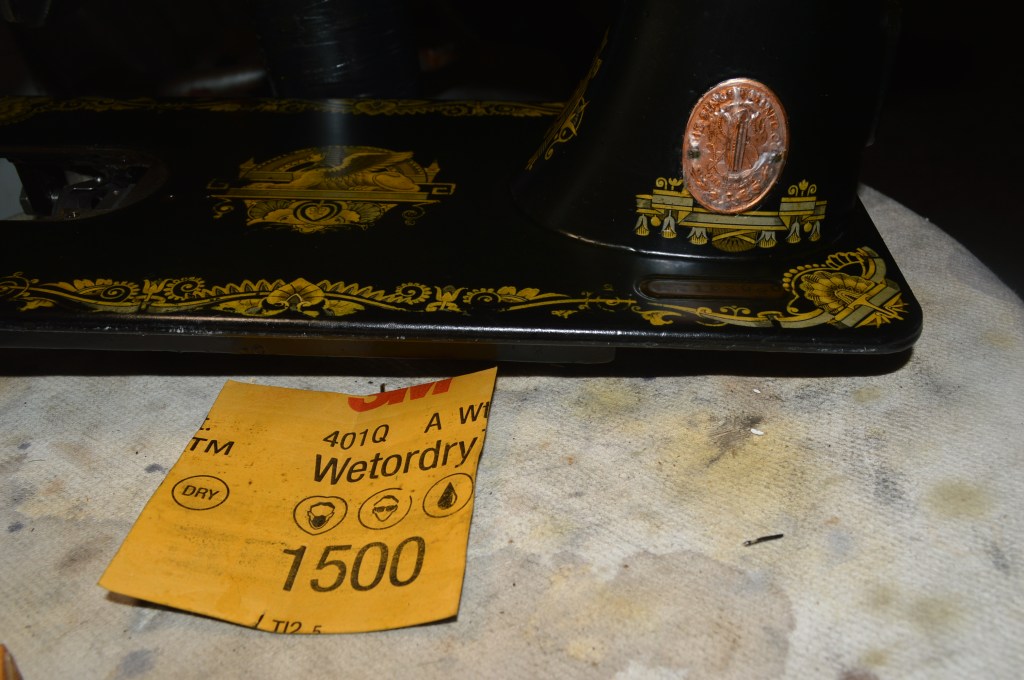
The next step in the cosmetic restoration is sanding and polishing the new shellac finish. To achieve the smoothest finish possible, I will go thru five stages of sanding and three stages of polishing. Starting out with 800 grit sandpaper and linseed oil as the wet medium for each stage of sanding, the machine is sanded smooth. But before I get into this, I want to share my experience with you. First, 800 grit sandpaper is a very fine grit. Even so, care must be taken to ensure that sanding is even across the body of the machine and not so much that it cuts through the new shellac coating. For sanding the bed a sanding block must be used, otherwise you will not get a flat smooth surface. The first three grits usesd, 800, 1000, and 1500, are all “cutting” grits. That means they remove material, and shellac is removed with each stage of sanding. 2000 and 2500 grit papers are “polishing” grits. These finer grits are for smoothing out the surface more than cutting the surface. I will show the different stages of sanding so you can see the finish emerge to its final finish. This is the result of 800 grit sanding…
The next round of sanding with 1000 grit paper removes the 800 grit scratches and further smooths the finish…
1500 grit paper removes 1000 grit scratches in the finish and the cutting is done…

2000 grit removes 1500 grit scratches and begins to polish the finish…
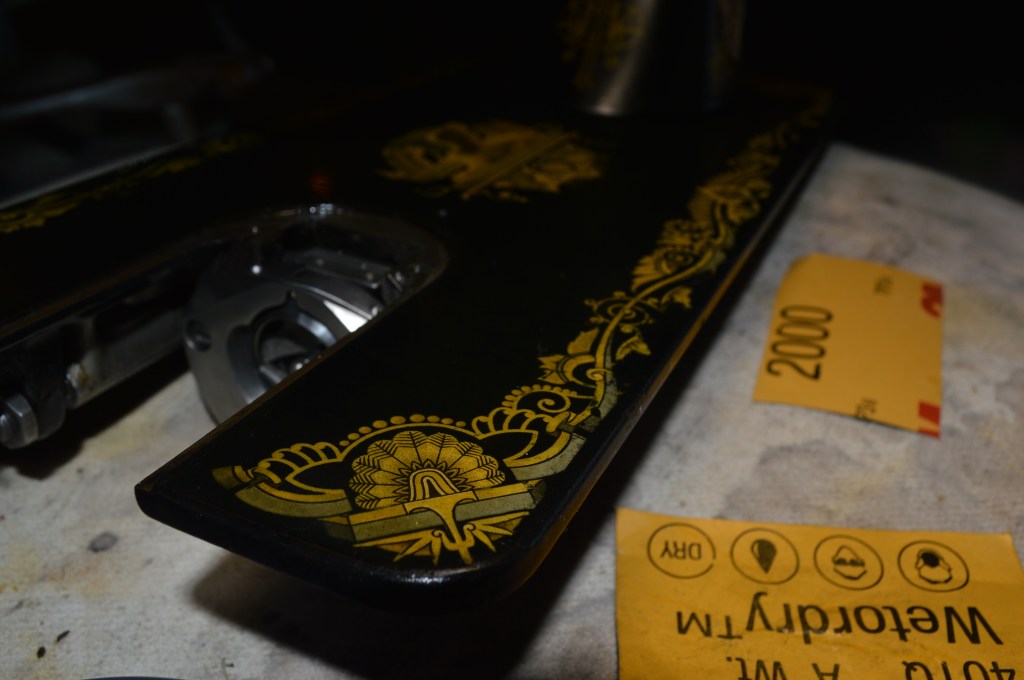
And to finish the sanding phase, 2500 grit removes the 2000 grit scratches. By the time you get to 2500 grit, the surface is extremely smooth. I think you could polish an apple with 2500 grit paper…


To get the final finish, I am going to use two different glaze polishes. These polishes are extremely fine grit and they will remove the 2500 grit scratches leaving a mirror shine. The first two polishing sessions are with a product called TR3. I do this twice because even at a finish of 2500 grit, the polish has some work to do. TR3 is a great product and gives a very nice deep shine finish. However, I complete the final polishing with a product called Meguiar’s Mirror Glaze. This polish seems to have a finer cut than TR3 and when applied over it, provides a beautifully smooth finish.
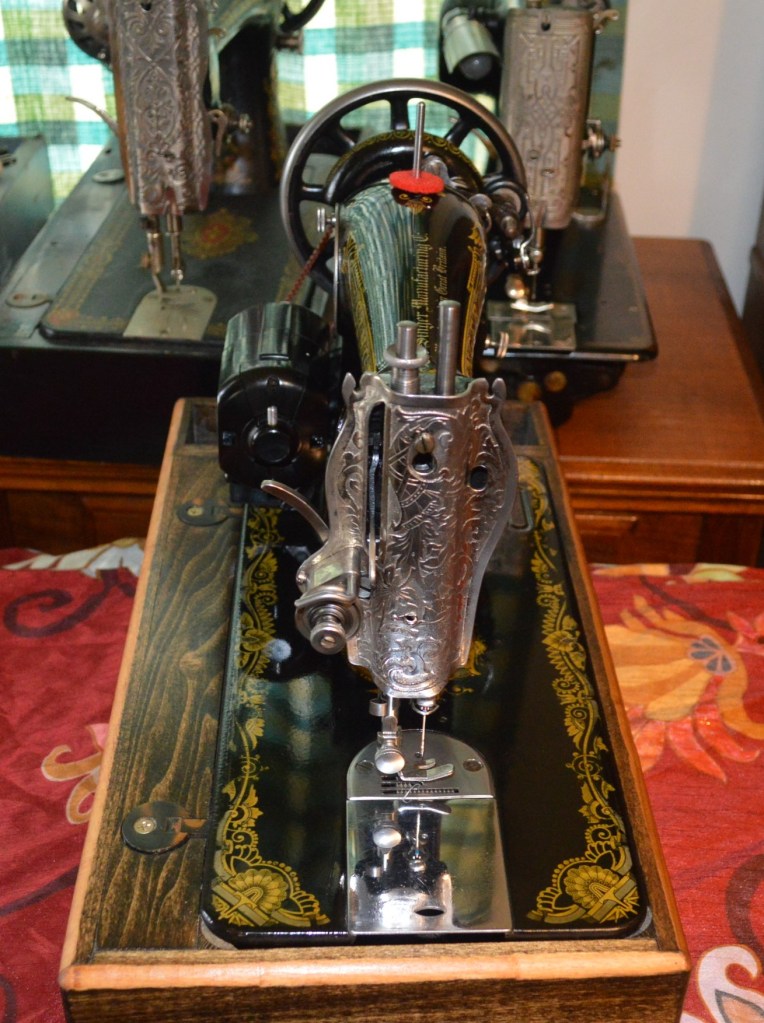
Moving on the final reassembly, the needle bar, presser foot bar, and the other bits and pieces in the sewing machine head are installed.

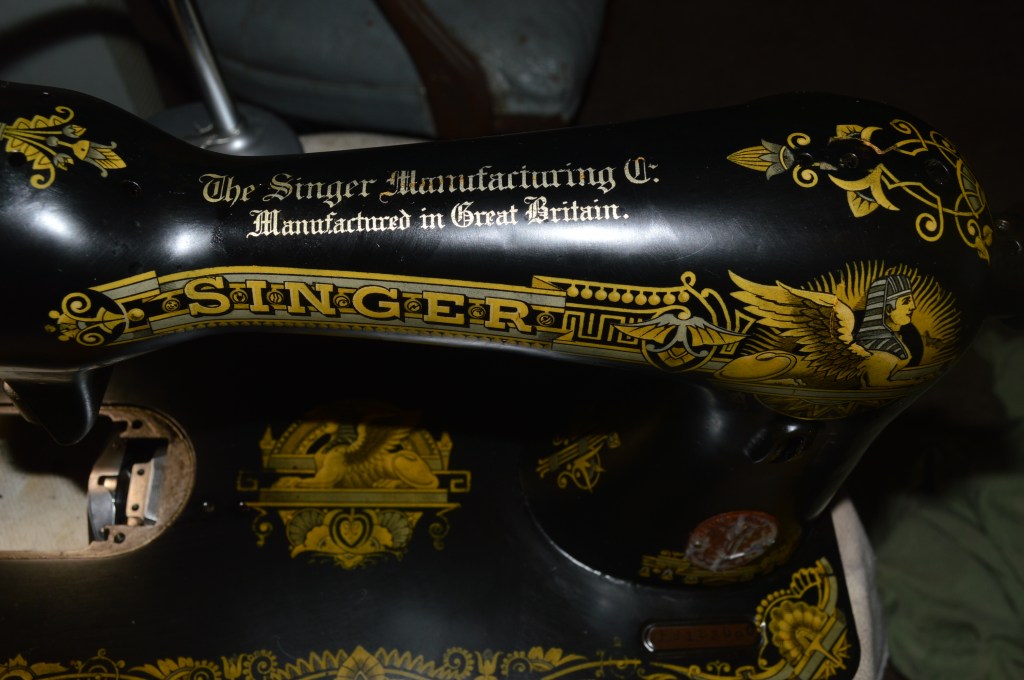
After attaching the motor and reassembling all of the bits and pieces back on the machine, the restoration is complete. The machine looks almost as it would have 102 years ago… and probably better than it did 101 years ago! Have a look…

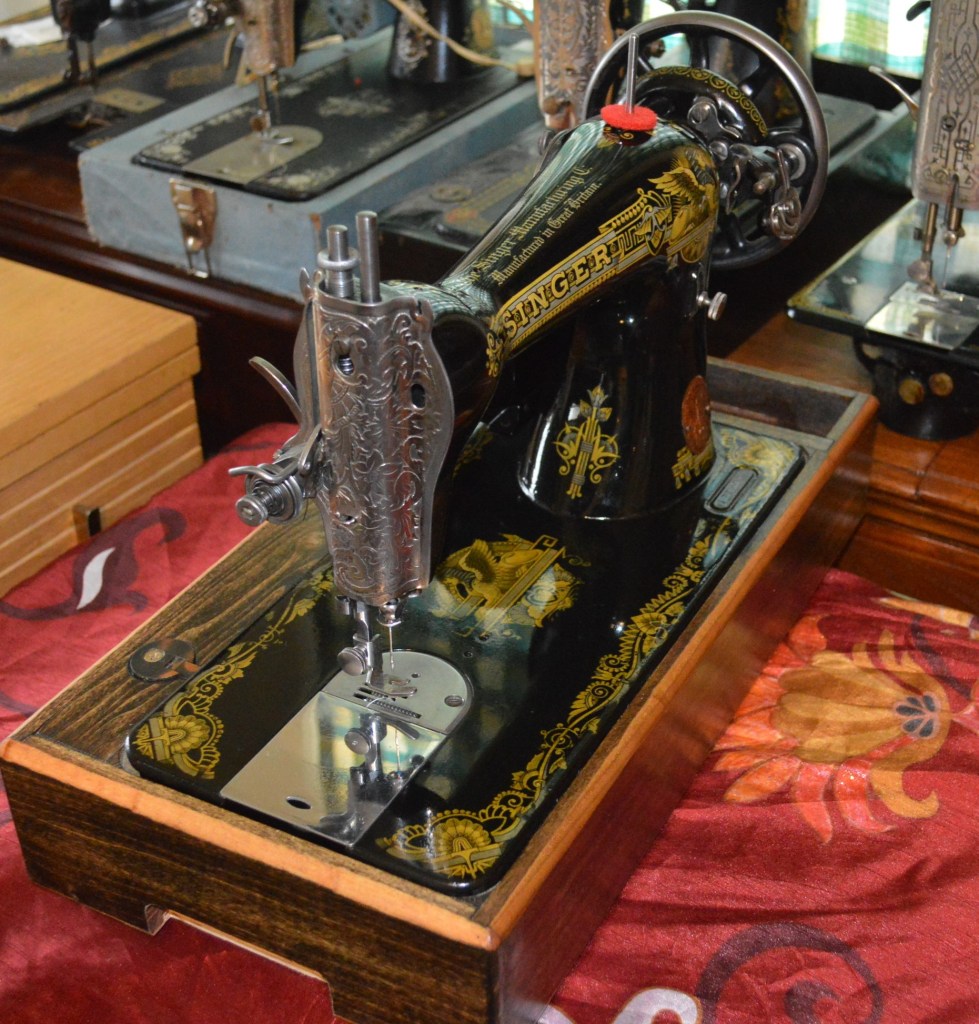
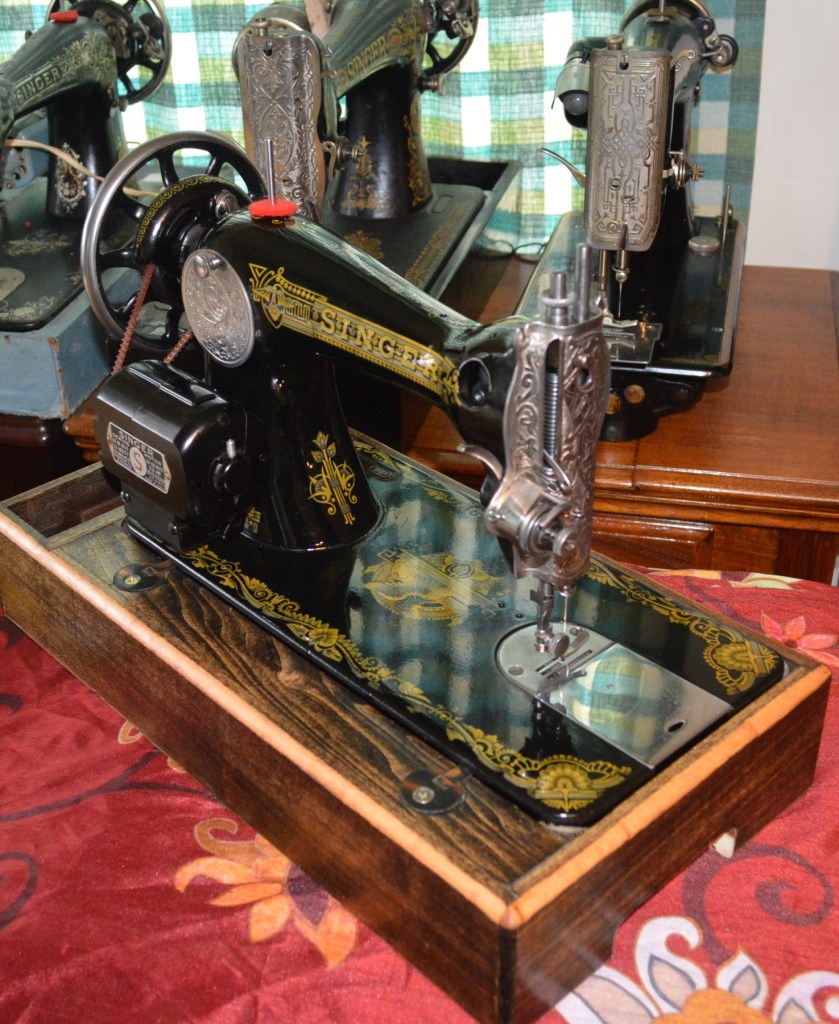
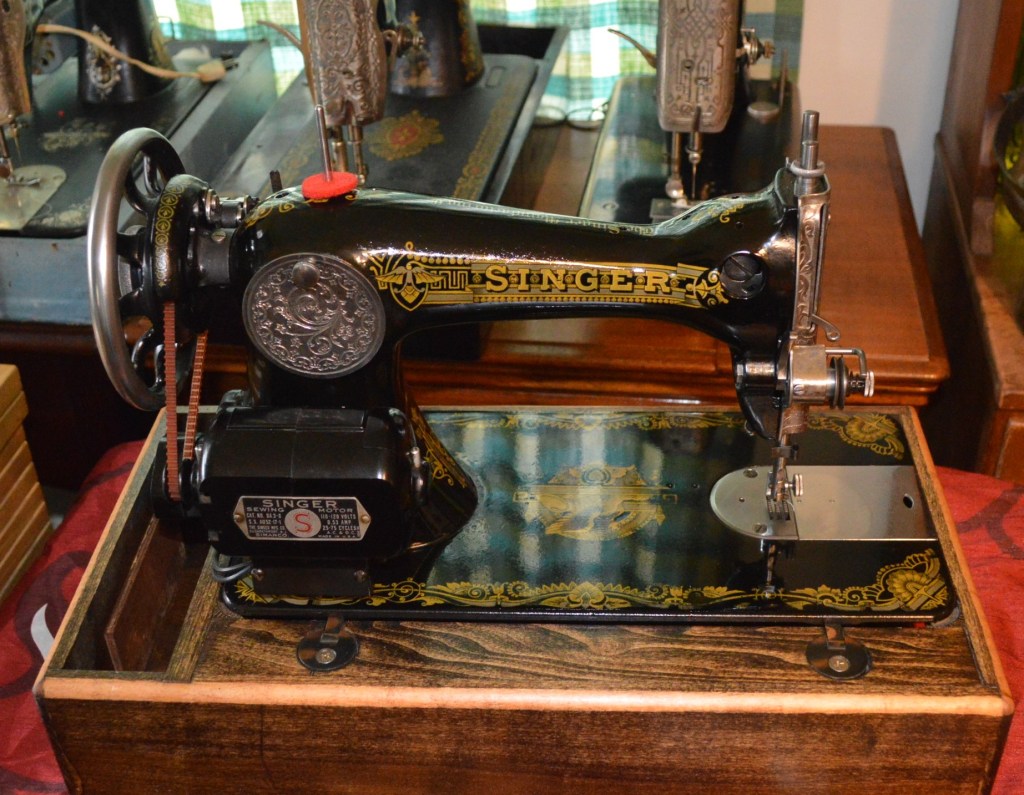
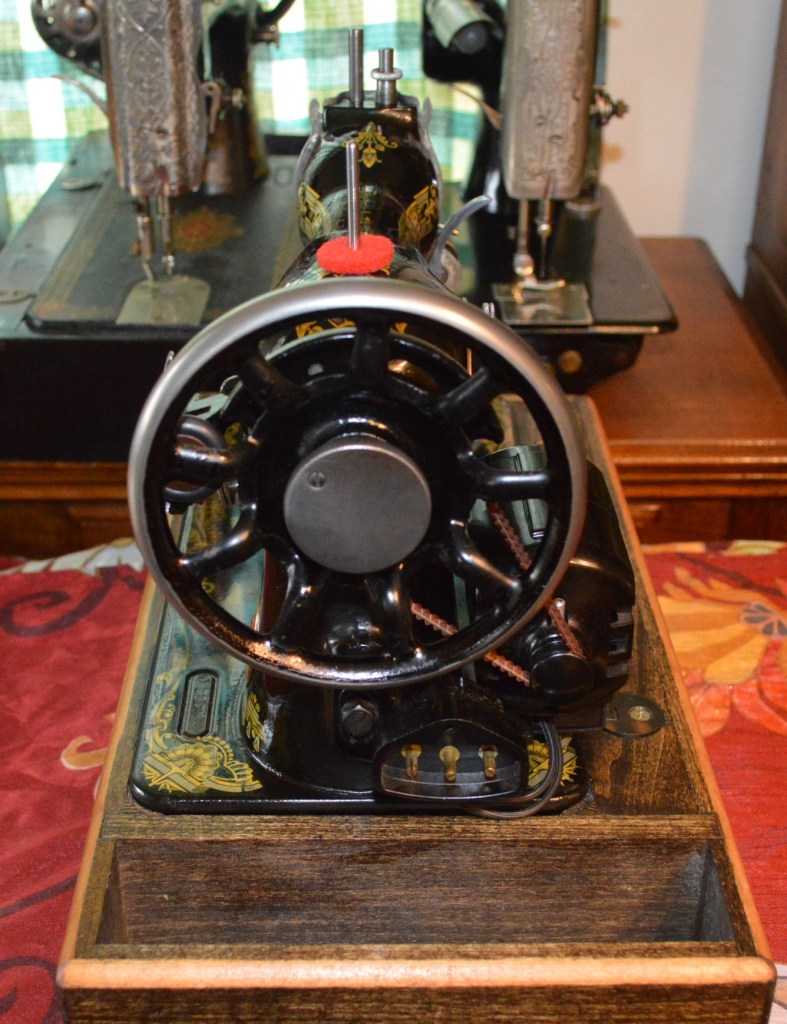
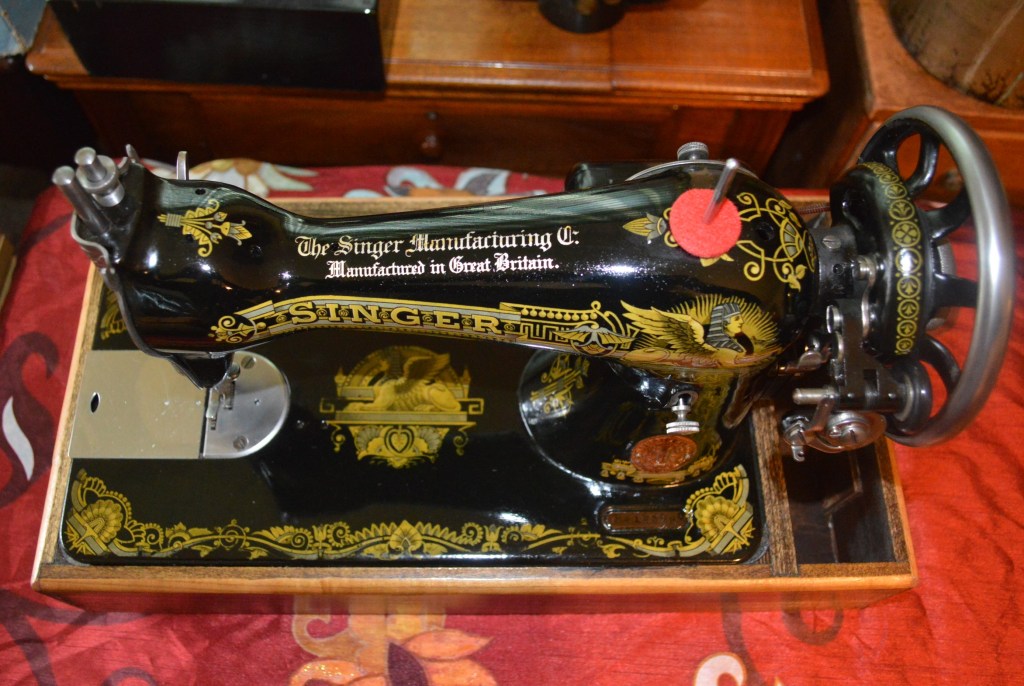
With this restoration done, all of my expectations have been met, and in some respects exceeded! The machine is powerful and sews a beautiful straight stitch. The original sphinx decals and the original japanned paint is protected under a beautifully smooth layer of shellac. I hope you would agree that this antique model 15K is a beautiful example of a machine of its vintage.
If you like what you see please visit our Etsy store at https://www.etsy.com/shop/pungoliving, and see this beautiful model Singer Model 15K and all of our other restored fine quality vintage sewing machines. If you have any questions, please contact Lee at Pungoliving@gmail.com.
Tell me what you think!

Congratulations for your nourishing blog. I’ve had a problem with my Singer machine, an old 15K model with sphinx decals, just the same that we can see in your post except for the electrical device. The machine sewed perfectly, but the mechanism to make the bobbin was not working properly due to the stuck wheel. I was able to take off the wheel with a few gum hammer blows (A big mistake, I knew it too late) and after that… the machine was not sewing well… only a few stitches and the timing was lost. I wonder what can I do to fix it. If you have any idea, it would be great. As far as a I know, pins in that model can not be remove. Thank you so much in advance and congratulations again.
LikeLike
Hello Oscar,
If you sent me some pictures of the affected part I could help answer your question.
Thanks,
Lee
LikeLike