

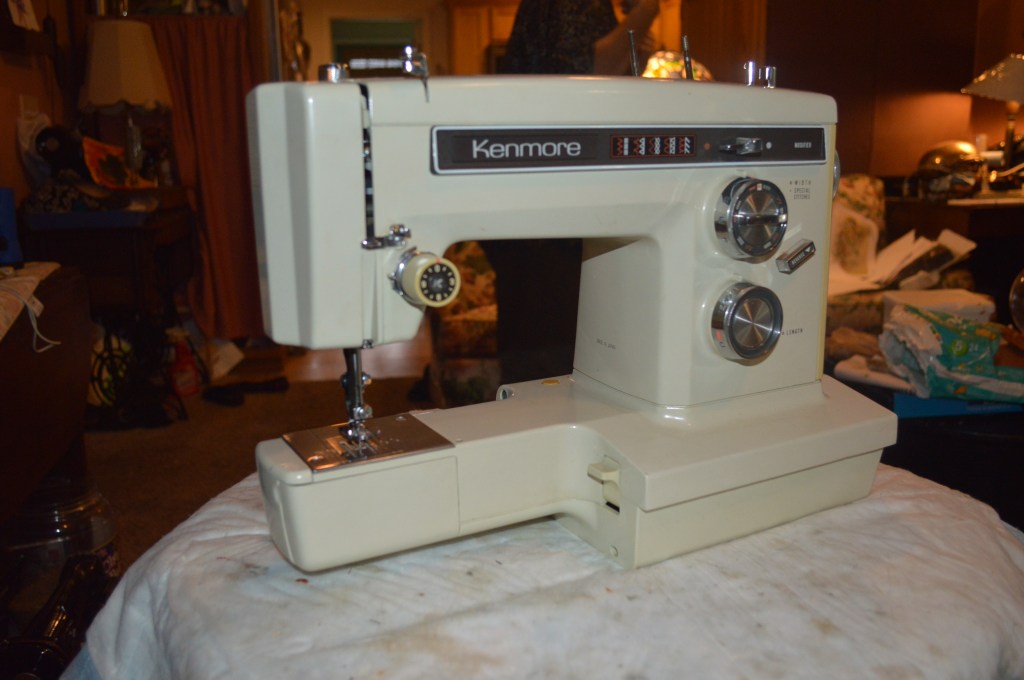
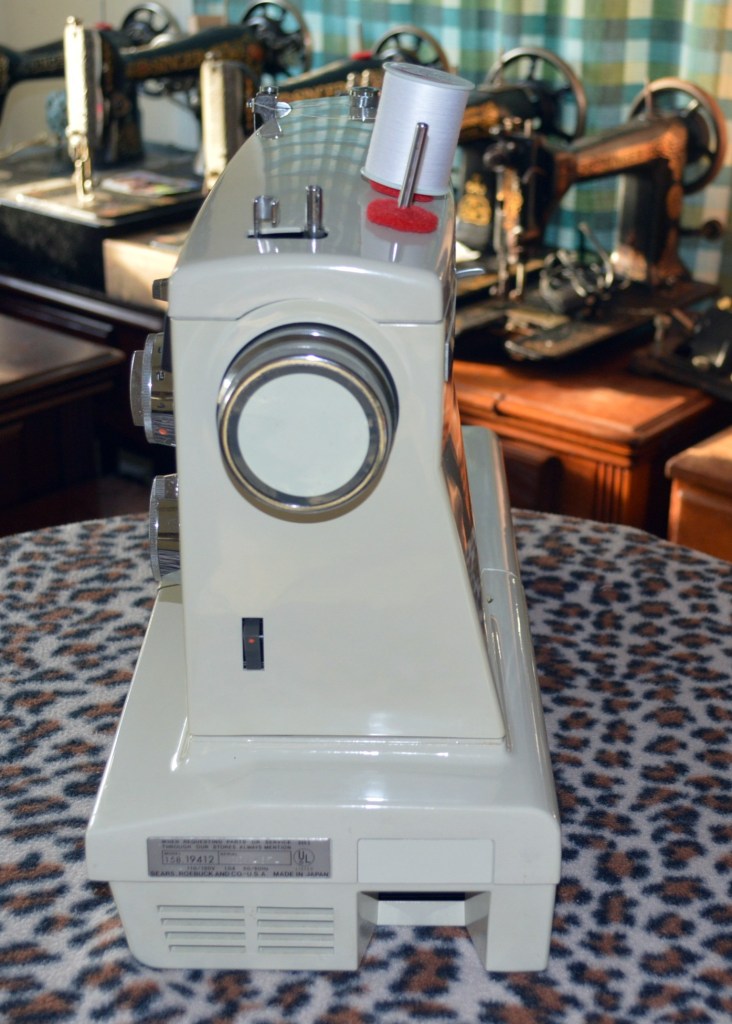
This is the second Kenmore 158.1941 I have had in the shop for restoration. The Kenmore model 158.1941 series of sewing machines is at the top of my list of “convertible” sewing machines for several reasons, not the least of which is it’s all metal construction. Also worthy of mention is the 1.0 amp motor coupled with a dual belt reduction system and the simple operation afforded by the well placed and logical function of the control knobs. The 1941 model is among the last of the all metal Kenmore’s, and certainly the best of their free arm (marketed by Kenmore as “convertible”) machines. This machine was manufactured in Japan by the Maruzen Sewing Machine Company in 1977, it is well regarded for both it’s versatility and durability. Unfortunately, the Kenmore Model 158.19412 is the last of a dying breed. By this I am referring to the end of an era of the production of all metal sewing machines… heirloom quality sewing machines that incorporated solid metals like bronze, cast iron, aluminum, or steel in all of the stitch forming and sewing mechanisms. By 1975, almost all domestic home sewing machines had begun to incorporate synthetic plastic parts into the drive mechanism stream. This included gears, bushings, levers, and other parts that are driven by the machine to form a stitch. Kenmore was the last holdout in the all metal sewing machine arena. Fortunately, this machine, despite it’s late date of manufacture dodged the tsunami of plastic cost saving measures incorporated by all sewing machine manufacturers at this time… The only plastic part found in this machine is the balance wheel belt pulley. Here at least it is not a part that is prone to breaking or wearing out.
The move to plastic was heralded by the sewing machine manufacturers as being an improvement benefiting the end user. They claimed less maintenance, quieter operation, and smoother operation, it was in fact an excuse to save money. Replacing plastic for steel or bronze in the drive train was cheaper to manufacture, and if the end user could be convinced that it was better for them, so much the better for sales. I am not going to argue the benefit of plastic versus steel in any high torque application, such as a sewing machine plunging a needle thru upholstery fabric at 900 or more stitches per minute, it is clear as day. To put it simply… for longevity and reliability, steel is good, plastic is bad.
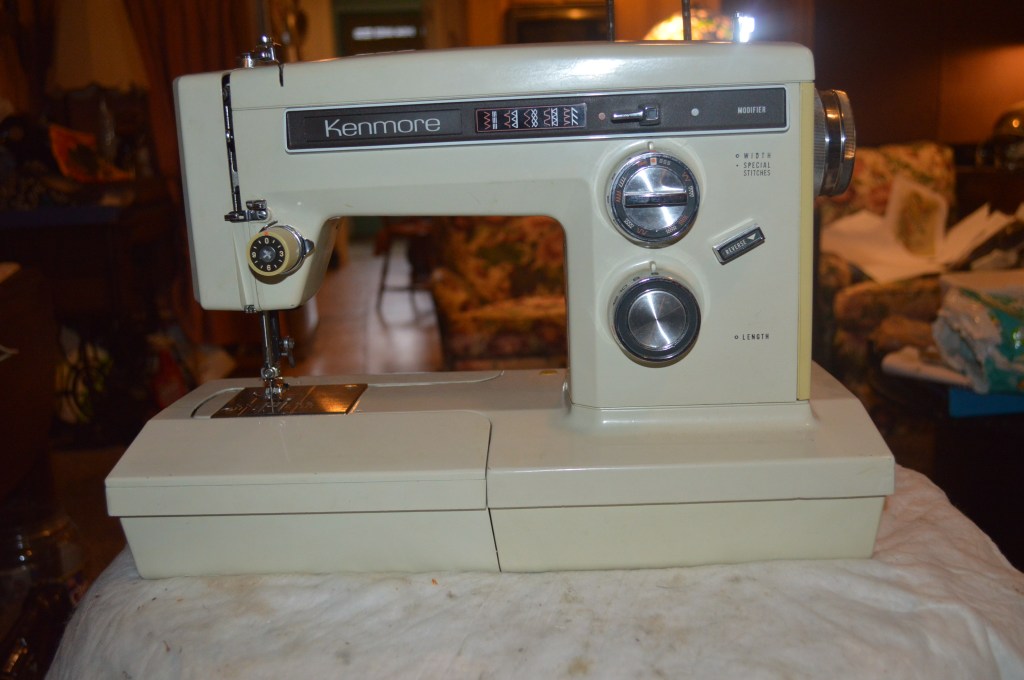
The model 1941 features ten different pattern stitches plus a great straight stitch. The ability to convert to a free arm and a center homing needle make it a great sewing machine for garment construction, Kenmore included a good selection of stretch stitches among the stitch patterns. The machine features a 1.0 amp motor with a double belt reduction drive mechanism to multiply the torque delivered to the needle. Smooth running and quiet, the model 1941 is perfect for both light weight and heavy weight fabrics. Similar to the 1600 and 1800 series, the model 1941 is a super high shank machine and has a generous hyper extension of the presser foot bar. Typical to free arm machines, the removable bed and accessory tray of the model allows for sewing hems, sleeves, and other portions of garment construction where it is convenient to have a small sewing area under the needle. The removable bed and accessory tray of the model 1941 is made out of metal.., and that’s a big plus. The bed snaps into place and attaches to the machine with a secure and satisfying “click” when the bed latch engages. The machine features feed dog drop for free motion quilting and embroidery, and it is twin needle capable.
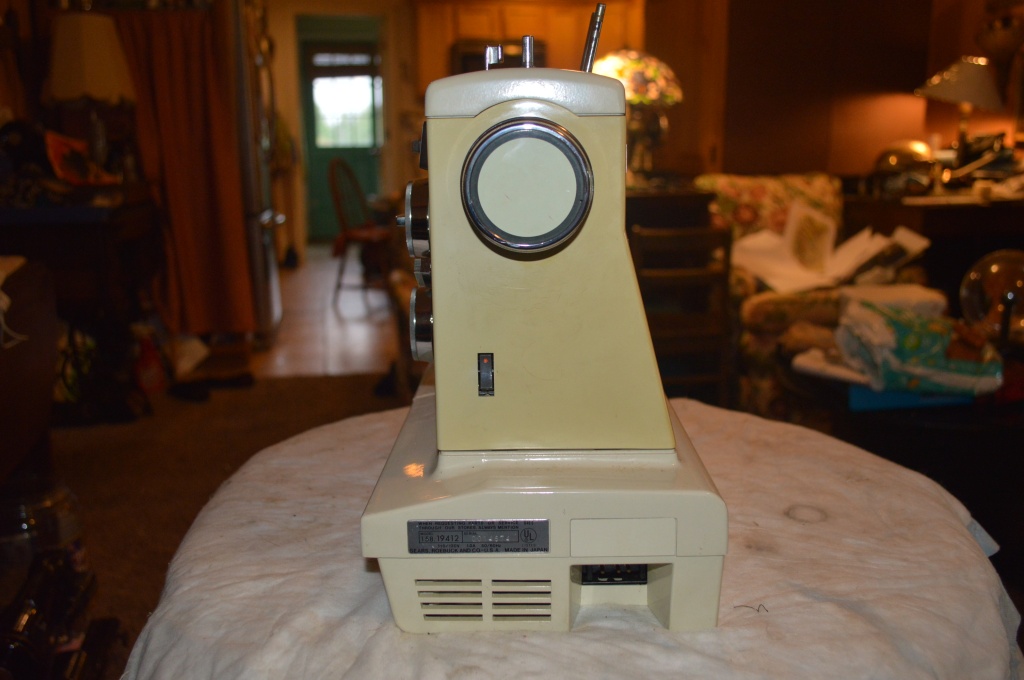
This sewing machine is in very good cosmetic condition. The paint is in very good condition and the mechanical mechanisms are relatively clean of any old oil varnish. To restore this machine mechanically to “near new” performance, the motor and tension assemblies will be disassembled and restored. The gear case will be cleaned and the gear grease will be replaced, all moving parets will be cleaned, and the machines body will be deep cleaned. Along the way, any items that need to be addressed will be taken care of. Cosmetically, the yellowing of the back plastic cover, and the bed detach buttons… a common cosmetic condition to Kenmore’s of this vintage, will be restored to its original color.
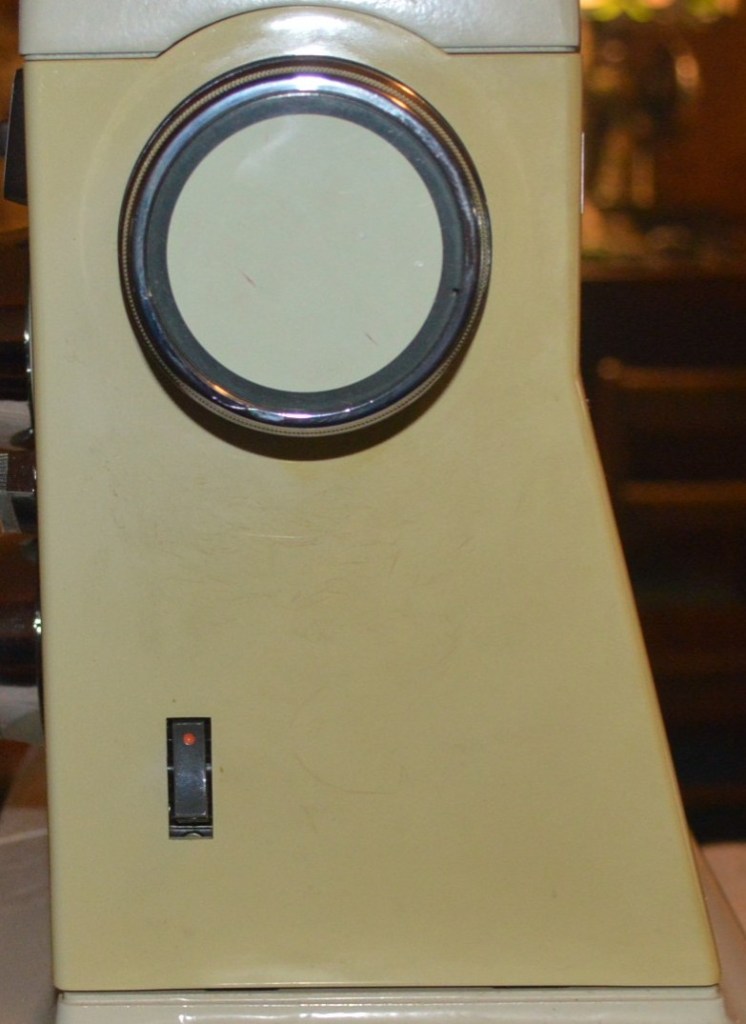
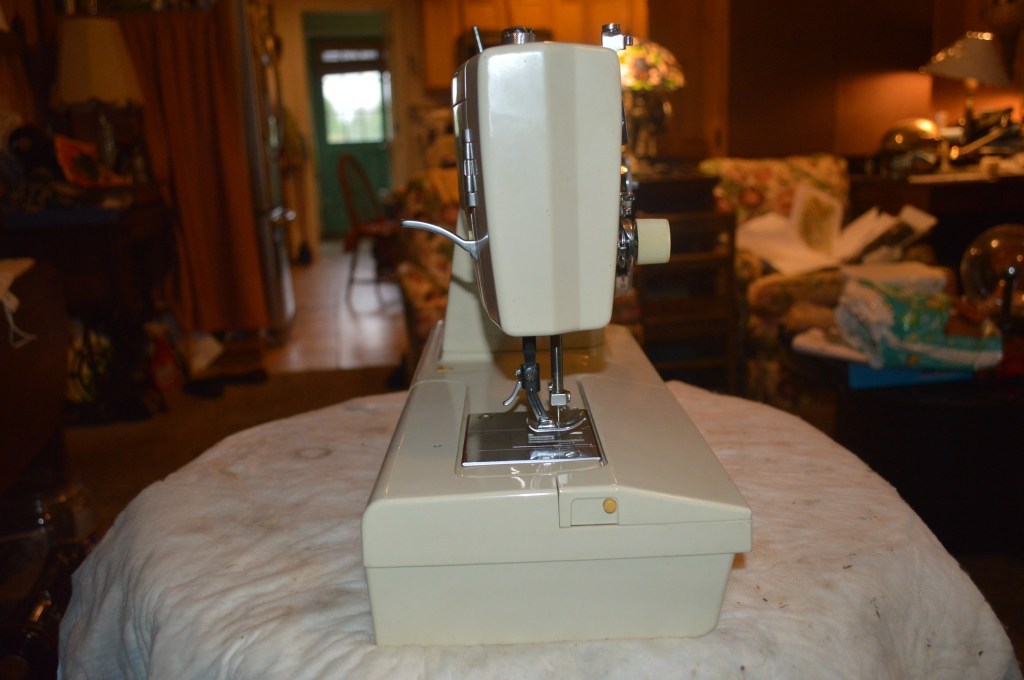
Moving ahead, here are pictures of the machine before restoration…


The first step is to remove all of the covers and bits that make it easier to clean the machine and access the mechanisms I am going after.

Top cover removed 
Presser foot pressure control assembly and spring removed for access… tension knob is also removed 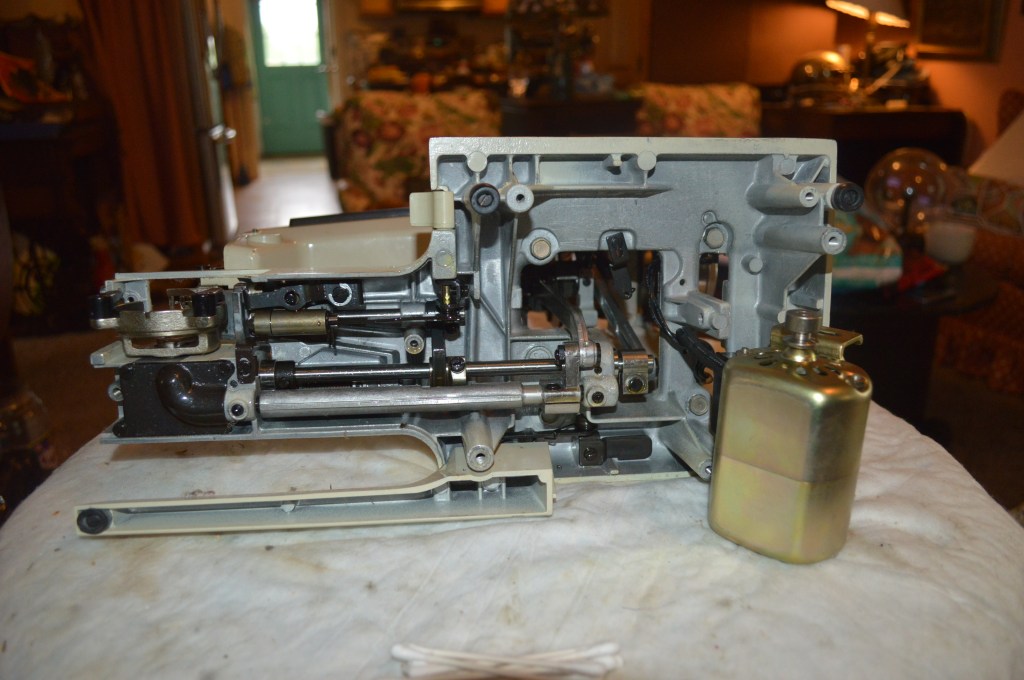
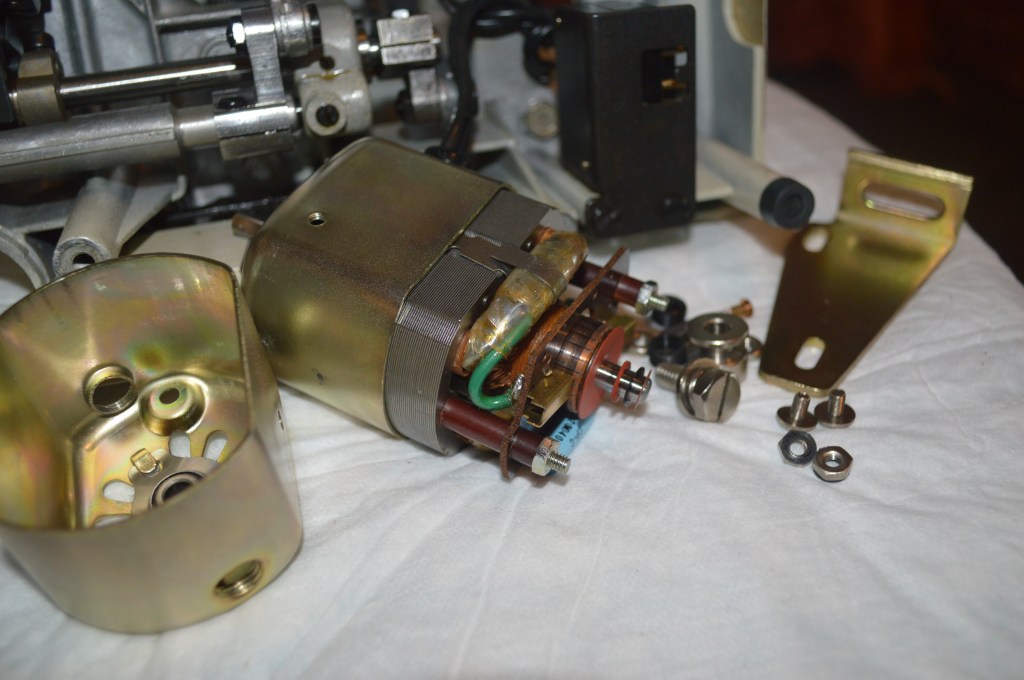
Motor, belts, and reduction pulley removed.
The bobbin case, case cover, and bobbin case hook are removed. These are cleaned with a wire brush. The hook shaft case is wire brushed in place and the next step is to replace the grease in the hook gear case. This is an essential step because I am certain that the grease has broken down over 40 years and is no longer lubricating the bevel gears as it should.

The gear case is accessed by removing this plate 
Yep… the gear grease has congealed and separated from the gears 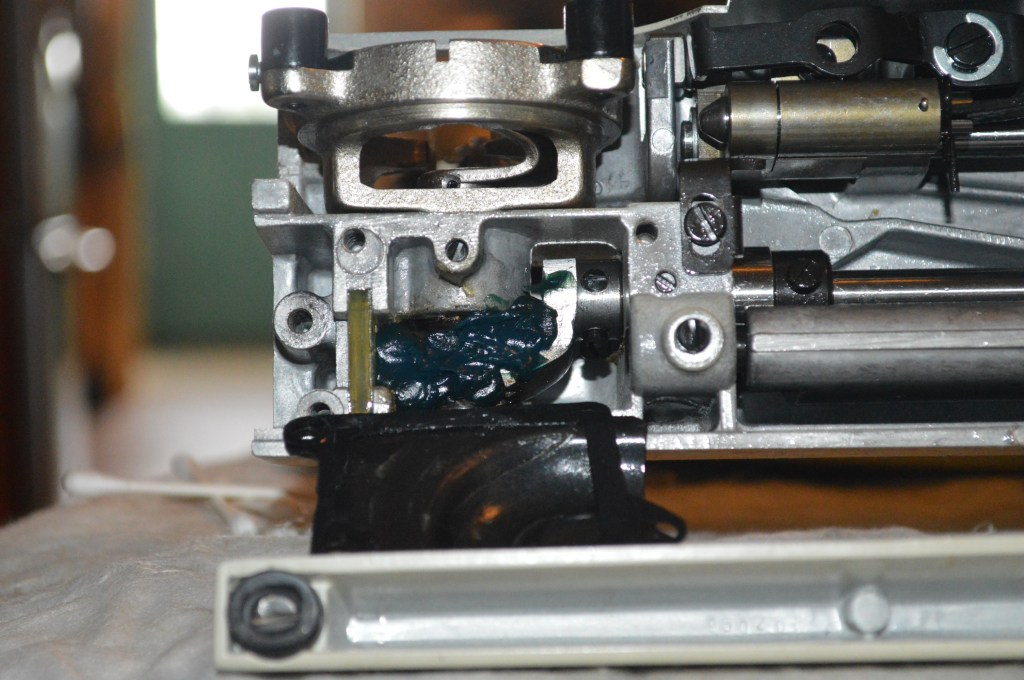
All old grease is removed and new synthetic gear grease added
The machine will run quieter and smoother as a result. Next the motor is restored by disassembling, polishing the armature and motor shafts with jeweler’s rouge, inspecting the brushes, and oiling the shaft bushing felts.
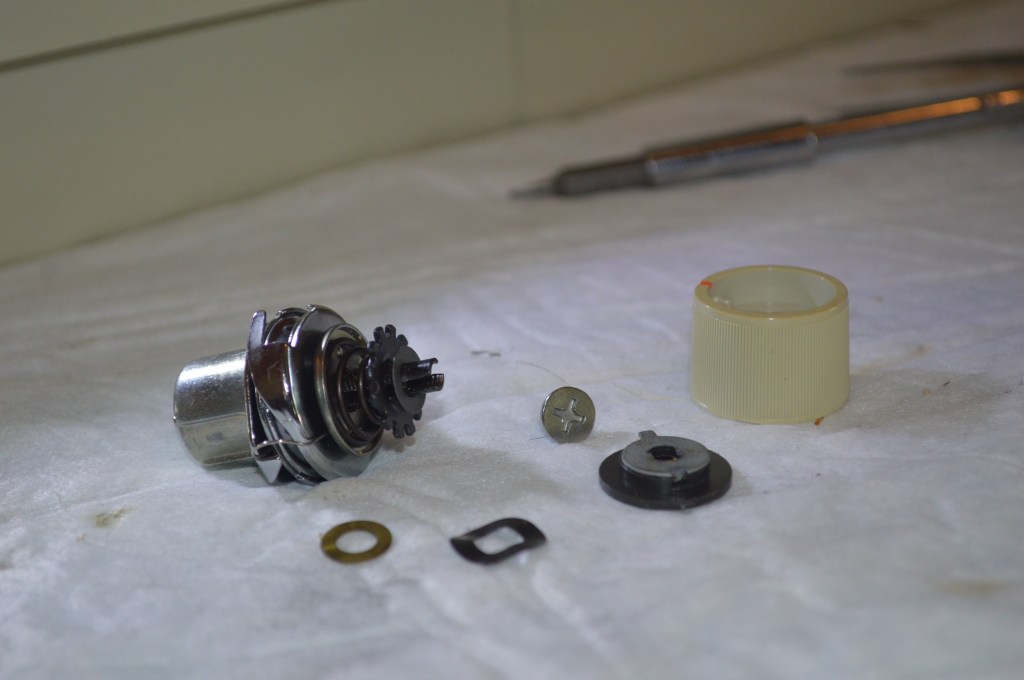
Brush end of the motor disassembled… if you decide to do this, make sure all of the washers on the shacft are accounted for and reinstalled in the same orientation 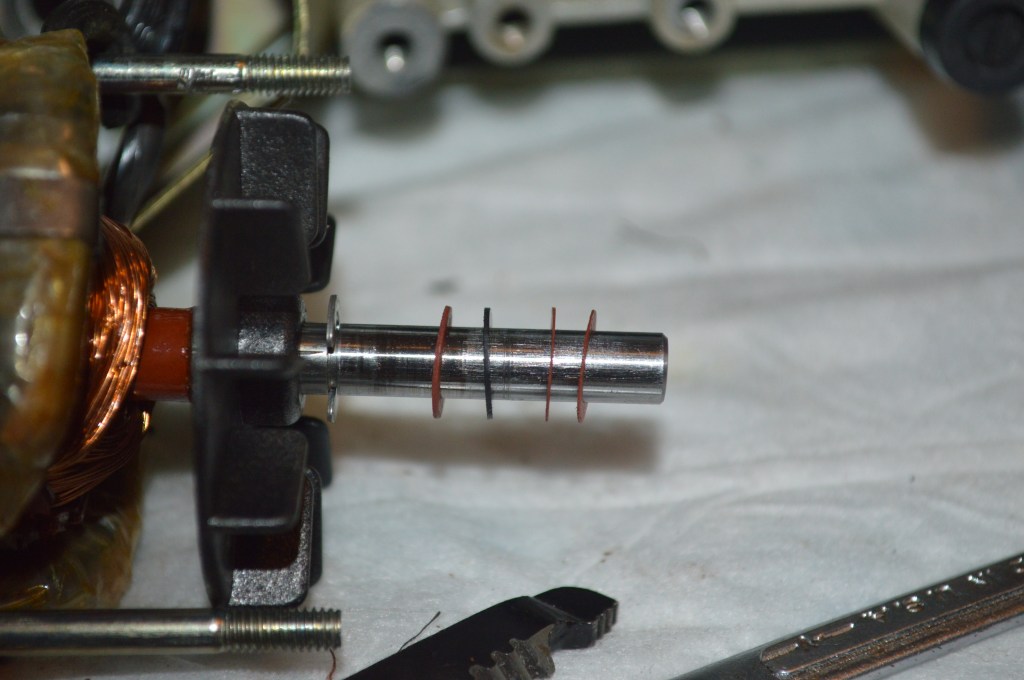
The pulley end of the motor shaft has washers to account for as well 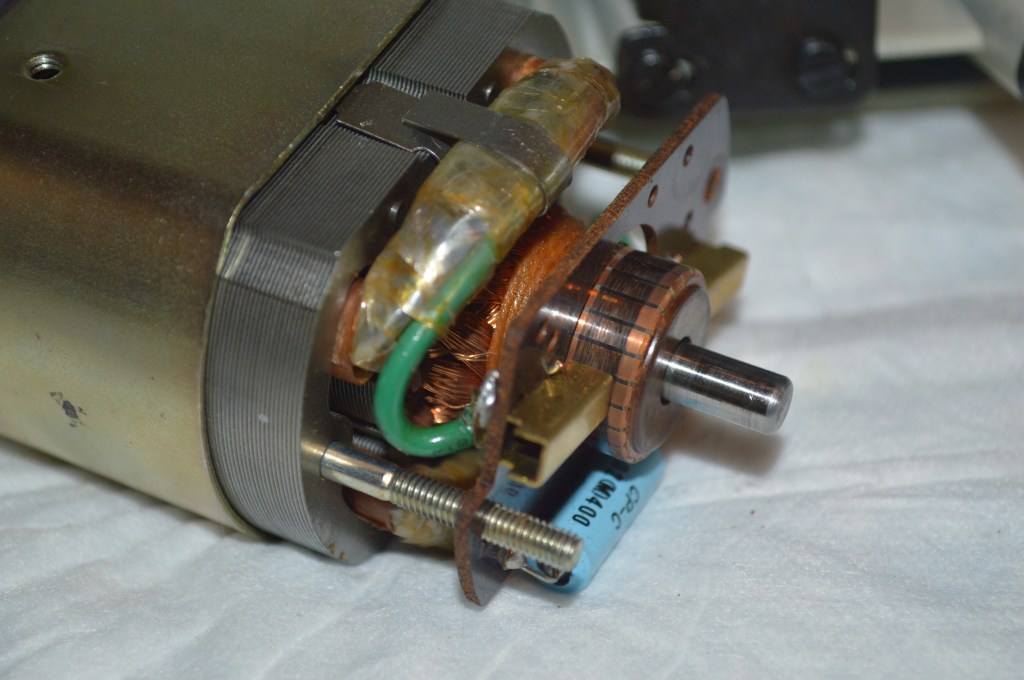
Note the carbon build up on the armature commutator 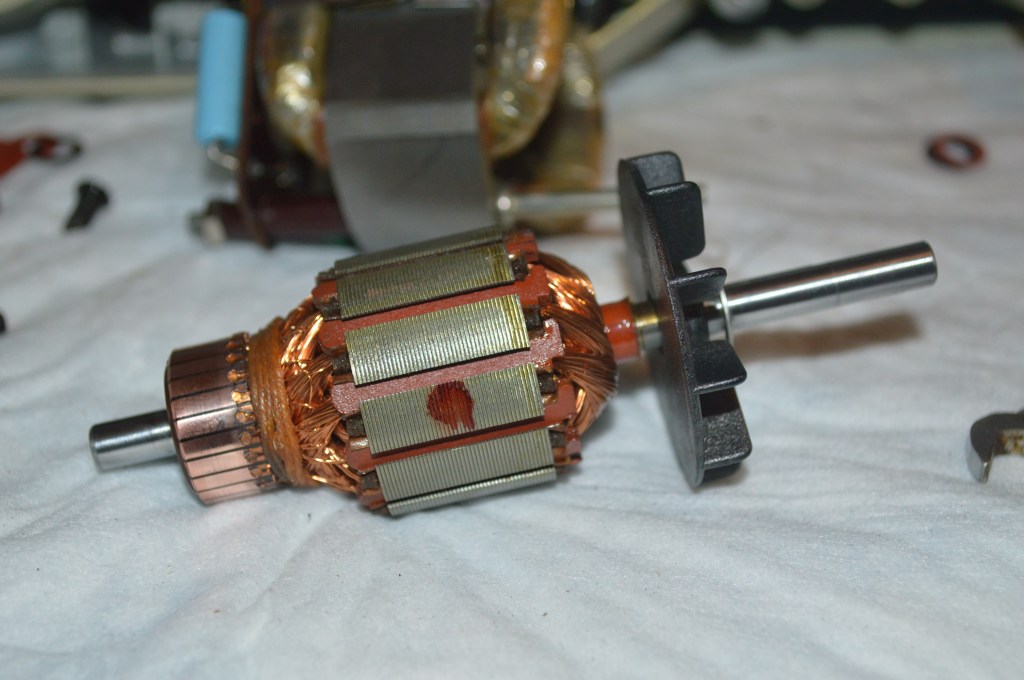
The armature and shafts after polishing, ready to be reassembled
Following the reassembly, the motor is bench tested for proper running… Next is the disassembly of the tension mechanism.

Following cleaning, it is reassembled and set aside for reassembly. The next step is the cosmetic restoration, Three things here… the two bed detach buttons, and the rear cover.
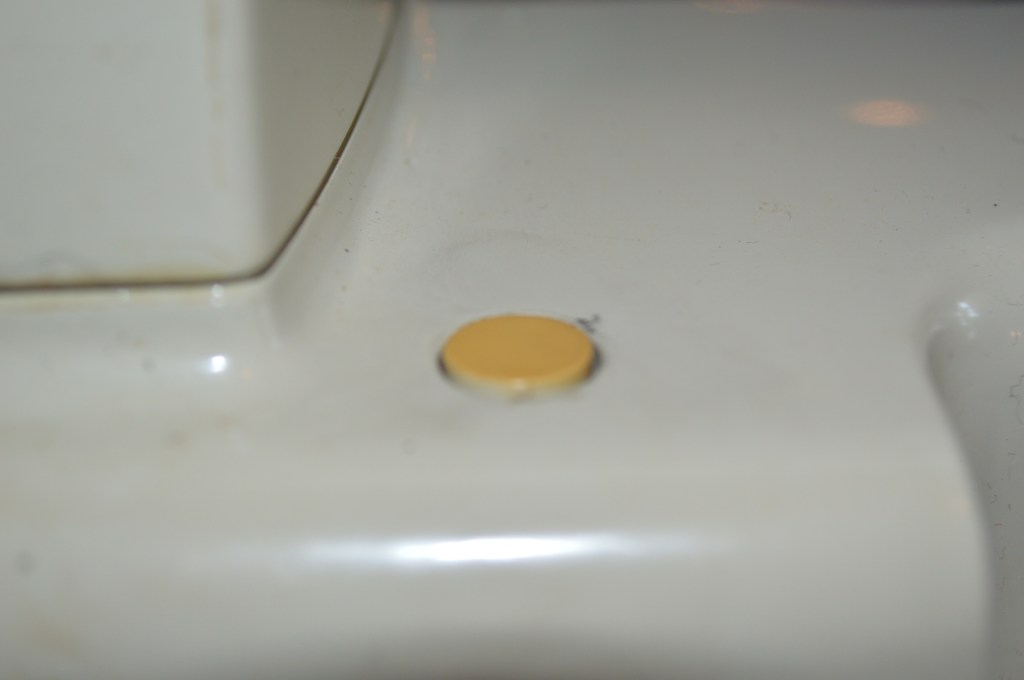
Before…

After…


Removing the yellowing and restoring the original color is accomplished in different ways. The buttons need to be cleaned in place because they have retaining rings that prevent them from being removed without ruining the button. These are gently cleaned in place with a cotton swab and acetone. The rear cover is much larger and to assure an even color, they are sun bleached using 40 volume creme developer… this is the same stuff used in hair salons for bleaching hair. Coating the part with the developer, sealing it in a plastic bag, and placing it in the sun for 2 hours does the trick.
Next, the body of the machine is cleaned inside and out, detailing all of the nooks and crannies where dirt accumulates. Now is the time to remove the bobbin winder assembly for cleaning as well.
Now, all of the bits, parts, and pieces are reinstalled, the top mechanisms in the sewing machine head and needle bar head are cleaned, and all moving parts are lubricated.
The sewing machine is threaded, the bobbin winder is tested for proper operation by filling a bobbin, and the machine is adjusted for proper feed and tension. As expected, the machine sews quietly and makes a great stitch at all stitch lengths and pattern stitch selections.
So, the restoration is complete and the dial has been turned back 40 years! The high quality of manufacture and time tested durability of these Kenmores will assure that it will sew for many more years. To sum it up, here is the machine before the restoration…


And the after the restoration…


If you are looking for a vintage sewing machine that has had a detailed restoration, and you would like to see this and other high quality restored vintage machines, please visit our Etsy store at:
https://www.etsy.com/shop/pungoliving?ref=seller-platform-mcnav
If you have any comments or questions regarding any of the machines we list, please contact us!
Thanks for visiting and tell me what you think!

Thank you for sharing your expertise and love of these beautiful machines. I just acquired a 19411 and am on the lookout for a 158.1931. I am curious, have you ever had the opportunity to compare this model or the 1931 to the 158.1913? I would love to one of those to pair with my 158.1815!
LikeLike
Good morning Gregory,
I’m glad you enjoyed our posts. I have not had an opportunity to experience a 1931… that’s the thing about Kenmores, they have so many different models and so many are similar! I would like to see one in person but it looks like the 1931 is a super high shank machine.
I have a comparison chart I found on the vintage Kenmore sewing forum that has a good comparison of features in the Kenmore line. If you give me your email address I will be happy to send it to you in excel format.
Thanks and have a great weekend,
Lee
LikeLike
My mother has a Kenmore 158.19142 and she wants it fully restored, because it’s showing age as far mechanical wise. She’s had it for 40+ years and she uses it all the time. I seen the pictures of the Kenmore 158.19412 and your work looks very good. How much will it be to restore it to near factory? Also would you know of somebody that will have another Kenmore 158.19142 for sell?
LikeLike
Very nice work on turning the sewing machine back to beautiful working condition. My mother has a Kenmore 159.19142 and would like it restored. Can you please email me what it will take for you to restore it please.
LikeLike
Hello Genaro,
I’m sorry I did not get back to you sooner, but I have been away for a few days.
I normally limit restorations to my Virginia Beach, Virginia area where it is possible to pick up the machine. The cost of packing and shipping 2 ways is very expensive and there is a great deal of liability involved if the machine arrives damaged in either direction. Add to this an estimated cost of $350 for restoration (assuming no parts need to be replaced) and a majority of folks deem the total cost to be more than the value of the machine. Usually, restorations are done on machines with very high sentimental value. This may or may not apply to your Mother’s machine and it is a decision that is different for different people.
The Kenmore 1941 is a very high quality machine and it is pretty easy to keep it sewing well. Otherwise, aside from replacing the oscillating gear grease, cleaning and oiling is generally all that needs to be done to keep it sewing well.
Is there any particular problem she is having with the machine? Perhaps I can help you in getting it sewing tip top again and keep her sewing happily for years to come!
Please let me know if I can be of assistance or answer any questions you may have.
Have a blessed evening!
Lee
LikeLike
Hello! I am trying to get one of these back up to fully running condition for my preteen daughter. For some reason, the stitches are bunching underneath the fabric. I’ve tried everything I can think of. Any ideas?
LikeLike
Can you send me a picture of the stitches? It will help me see what’s going on.
Thanks,
Lee
LikeLike
Thank you for this informative post about my Kenmore 158.1941 machine. I have promised 1 of my 2 machines to my daughter and would like your assessment of which is the more valuable machine to keep. The other is a Bernina 1001 and I have used it more in recent years because it is lighter and easier to move from closet to the table where I sew. However, that is just convenience and I can handle the Kenmore. I do not use the extra stiches the Bernina has, and do appreciate the ability to sew with ease through thicker, heavier layers that the Kenmore affords. A Bernina tech has told me the interior machine is all metal except for 1 part in the foot that has never been a problem (for which plastic is an advantage). I would appreciate your assessment, if you feel you can givefrom your experience!
Thank you,
Ginny
LikeLike
Well… that’s a question that has no clear answer. In the comparing any two machines, there are always going to be both sides of the story. Bernina is a Swiss made machine known for fine quality machines and innovations. Bernina is a family owned company since 1893. Your Kenmore was produced in Japan by Maruzen (now Jaguar). Maruzen was founded in 1949 and produced good quality machines in many, many models. Both are known for reliability over time.
That said… I cannot tell you from hands on experience which is a better choice to keep. I can ask what you what features suit your sewing preferences and there are considerations to keep in mind. From forum topics on the Bernina 1001, it seems that the things folks talk about most is the limited height of the presser foot, the use of propriety and expensive parts such as feet, bobbins, and bobbin cases. The 1941 has a high presser foot lift, uses class 15 bobbins, and parts like presser feet and bobbin cases are easy to find and relatively inexpensive.
I do not sew… but from a perspective of which machine I think would be more flexible to use, I would go with the Kenmore. The Bernina has a free arm that looks limiting for certain types of sewing projects. The Kenmore has a removable deck to expose a free arm. I assume that the Bernina has a similar deck feature, but I have not seen any pictures of the machine with it.
I’m not sure that plastic is ever “an advantage” in any sewing machine application, but there are places where plastic is well within it’s capability for limited use… One thing for certain, plastic can crack and I prefer metal over plastic in every application. Both of these machines have all metal gears and sewing mechanisms. Both are capable sewing machines, both can be expected to sew well for a long time, and either would be appreciated as a gift.
I hope I didn’t leave you with more questions than answers, but please let me know if I can be of any assistance. Hopefully someone will tag onto your comment and broaden the debate.
Have a blessed weekend!
Lee
LikeLike
Thank you, Lee, for your detailed response. It is very helpful to have your perspective. I hope your weekend is blessed also!.
LikeLike
re: My Kenmore 158.1914’s free arm cover. The machine sews much more quietly with the cover removed, there’s less clattering. Of course the machine is more convenient to use with the full platform in place. Is there something I can do to quiet down the clattering? Thank you very much for whatever suggestions you might have.
LikeLike
Hello Betsy,
I am not familiar with the 158.1914… I can say that a noisy Kenmore of that vintage can run smoother and quieter if you change the grease in the gear case. I have a tutorial on how to do this in the blog section. I am certain that the grease has hardened and is no longer lubricating the gears and I have seen this on every Kenmore I have restored.
Aside from that, I can’t say for sure where the clattering is coming from. Perhaps you can look at the cover to see if there is any place the paint has worn. This would indicate where the bed was vibrating against the machine and where you might look for a way to stop it.
I wish I could be of more help!
Lee
LikeLike
What grease do you use for lubricating the gears on the Kenmore 158 machines? Thank you in advance!
LikeLike
Thank you for your quick reply. I had looked through your article on renovating the 158.19412 and noted the directions on removing the cover where the blob of gear grease is. So I did that and the grease was very soft, about the consistency of vaseline, or even softer than that. So I didn’t replace it. I have a tube of Singer lubricant but it didn’t seem necessary to replace what was there. My sister had bought the 158.1914 at least a year ago, maybe it was 2019 (2020 seems like a blur, I don’t believe she got it for me in 2020) from a man who said he had completely renovated it to get it ready to sell, of course it would have been possible that he had missed the grease area. Anyway, after I oiled the appropriate spots on the underside, took off the top lid and oiled the spots, and oiled the parts behind the door on the left side of the machine, after I got it put back together, and sewed with it, it did seem quieter. I also cleaned around the bobbin area, was a bit linty in there. Perhaps the answer is to get in the habit of oiling on a regular basis. I didn’t remember whether it was noisy initially a year ago, actually it seems that it had gradually gotten noisier noisier.
LikeLike
I am so glad I found your blog! I have read through, watched, and listened to quite a few sewing machine maintenance/repair sites and I find your approach to be the best. I have a 158.17300, a 158.19411, and a 158.14100 all of which need repair. I am inclined to tackle the 19411 and the 17300; I think the 14100 will require too much work (missing reverse lever and bottom was exposed to sitting in water). I have a few other machines ~ fascinated by the 158.1040. Overall, in my opinion, vintage is the best.
LikeLike
Hello Brenda,
I’m glad that you found the information in my blogs useful. Information is not always easy to find, or necessarily correct when you find it. Kenmore machines are really very good machines and they have earned a reputation for reliability.
I think you can tell from my blogs that I am a vintage sewing machine guy. Machines made prior to 1975 (generally speaking) are all metal and of good Japanese quality. You just can’t find that today unless you are willing to spend thousands of dollars in a new machine.
I think the 1941 is a great convertible machine, but for variety of stitches the 1730 is a great machine. The 1410 is a perfect garment machine and has all of the stitches you need to make any project you choose. I too am interested in the 1040 because it is a 3/4 size machine, but I have read many people comment on some quirks common to the machine.
For the money, it is hard to match a Kenmore for versatility or reliability.
Thanks for reaching out to me and please let me know if I can be of any assistance to you!
Have a blessed evening,
Lee
LikeLike
I am sitting here with my 158.19411, and we are both fans of this beautiful restoration! Would you happen to know what bobbins these machines use?
LikeLike
Hello Kris,
I’m glad you enjoyed our blog!
Your 1941 uses class 15 bobbins. I prefer metal for vintage machines, but plastic bobbins should work fine.
Let me know if you have any more questions and have a great evening!
Lee
LikeLike
My mother had a model 1941 and it had not been used for years i took it to be serviced and they said the cam stack seemed to be seized and frozen. They were unable to repair. Is there anything else that i can do?
LikeLike
Hello Marie,
Your 1941 is an all metal machine… I hear similar stories from folks that tell me that their service repair shop can’t fix a typical vintage machine like your. The truth is that it can be repaired and it simply takes a lot of time and coaxing to get everything moving as it should. Your machine relies on oil. Unless it is rusted together, it can be freed up with time, patience, paper towels, and penetrating oil. You said the cam stack is frozen… does this mean that the stitch selector knob won’t turn, or the knob turns but the machine won’t change stitches? There are different areas of the machine besides the cam stack that may be the problem. Before I gave up on the machine, I would put a drop of oil everywhere specified in the users manual. and a drop on all of the linkage points under the top cover of the machine, paying particular attention to the linkages and levers associated with the cam stack.
If you are inclined and somewhat handy I can help walk you through the steps you need to take. Contact me at pungoliving@gmail.com, send a few pictures of the top of the machine with the top cover removed, and I think there is a good chance you can fix it.
Let me know if I can be of any assistance and have a great day!
Lee
LikeLike
Hi Lee! Hope you, your wife and the rest of your family are healthy and happy.
I enjoy your posts and this one, along with the comments, is highly interesting. Marie mentioned that she was told her 1941 was unrepairable, (they might have wanted to sell her a new plastic machine) we both know that’s highly unlikely, and your reply brought to mind one of my little 1040’s. The camstack dial will turn only so far and it will make only straight stitches. I spent quite some time trying to work this out with oil, then heat, then WD 40 and oil, then finally gave up for the time being as I had another 1040 which works perfectly and I’ve not experienced any “quirks”, not yet anyway. She just purrs right along, a sweet little machine that makes lovely stitches and is exceptionally great with twin needles. .Anyway, as far as the machine with the frozen camstack is concerned, have you ever used a product call “FreeAll”. I bought a can but haven’t tried it yet, I just know it’s stinky and will need to be used outside or in an open garage. Have you used it? What’s your take on it? Any advice to offer? I’ll be very grateful.
As always, best to you and yours.
LikeLike
Hello Suzanne,
It’s good to hear from you. The 1040 is a lot in a little package. The symptoms you are describing are very familiar. I think I can help you getting the cam stack working properly without using any more chemicals. You have already used WD40 and that works over time and I’d like to start from there.
I think I have some pictures that will help you but it would help me if you sent me a few pictures taken from the top of your machine showing the cam stack top, front, and rear… It will help me see the condition of your machine. Send them to pungoliving@gmail.com.
If no adjustments have been disturbed, and no springs have broken, I think we might get it sorted out without too much difficulty… I hope! So don’t give up and lets give it a shot.
Have a wonderful evening!
Lee
LikeLike
Thank you so much Lee! Don’t be surprised if it takes me a little while to get this to you; we have quite a few irons in the fire currently, but I will.
LikeLike
Hello can you please tell me the part that detaches from the free arm on a Kenmore 158.1913. I am looking for a replacement and it appears to be called a few different names and I have even downloaded the manual and cannot determine the actual part.
LikeLike
Hello Shawna,
I believe the part you are looking for is called the unit base…
I hope you have good luck finding a replacement! They pop up on Ebay from time to time.
Have a great day!
Lee
LikeLike
Good morning, have a Kenmore 158.19412 that i cannot fix the feed dogs. They act & appear they move back & forth improperly. Looks like a hiccup when trying to pull fabric through. Have oiled, taken gear covering to clean & grease . When removing bottom plate found a small black plastic looked like top of oil can. After oiling let it run 10 min but nothing i do helps feed dogs! Can you help…is a good machine otherwise.
LikeLike
Hello Joan,
The 1941 is a fine machine and the problem can be resolved.
There are several things that can affect the feed dogs. In my experience, the feed dogs on Kenmores just don’t get out of adjustment. This makes me think that they are either in the “dropped” position, or somewhere in between.
This is only a guess because there certainly other adjustments that may be in play, and it is possible they have changed.
Let me ask a few questions to narrow down my suspicions…
Is this a problem that just started?
Is this a problem that presented when you used the machine after a long time of no use?
In your best knowledge has anyone noodled with the machine in the past?
The feed dog drop getting stuck is a very common problem with machines that have sat unused for a long time, or even if they are used because most people never drop them. The tolerences are very tight and the mechanism is buried in a faily inacessible space and old oil will dry up and “glue” them together. I call this oil varnish and it is easily recognized as an amber to brown color on the parts and linkages.
Get back to me and let me know a little more about your machine and I will try to walk you through getting it fixed.
It would be easier if you emailed me directly at pungoliving@gmail.com and I may ask you to send me some pictures of various parts.
Have a great evening!
Lee
LikeLike
I am over the moon that I found your page! I will bookmark for sure. My son just brought home a Kenmore 158.19142 from an estate sale that was going to go to the dump. He called me and said it was an all metal Kenmore with 3 boxes of accessories. Buttonholer, monogrammer, and pattern cams. I said bring it home!!! Machine is in original case and it is beautiful on the outside. I haven’t done anything because I know I need to clean and oil and grease so thank you for your restoration info. I certainly am not mechanical enough to mess with the engine, above my pay grade.
I would like to know how I find instructions for the accessories. I downloaded the operating manual but there are no instructions in the cam/buttonholer or monogrammer boxes. Thanks in advance if you have any clue.
I gave away my metal Kenmore my mom handed down to me – biggest mistake of my life!! So I am very excited to have this vintage Kenmore.
My son also rescued a Necchi in a cabinet from going to the dump about 3 months ago. So I now have 6 vintage machines. Necchi, Singer, (3), White and now Kenmore !!
LikeLike
Hello Kate,
The following link is to a Kenmore forum that has a lot of information, They have a section on Kenmore Attachments and you may find some useful information. You will need to join the forum, but the folks are very friendly and helpful.
https://groups.io/g/VintageKenmoreSew
I’m glad you found a machine in excellent condition, and you should be very happy with how well it sews!
Have a great day,
Lee
LikeLike