
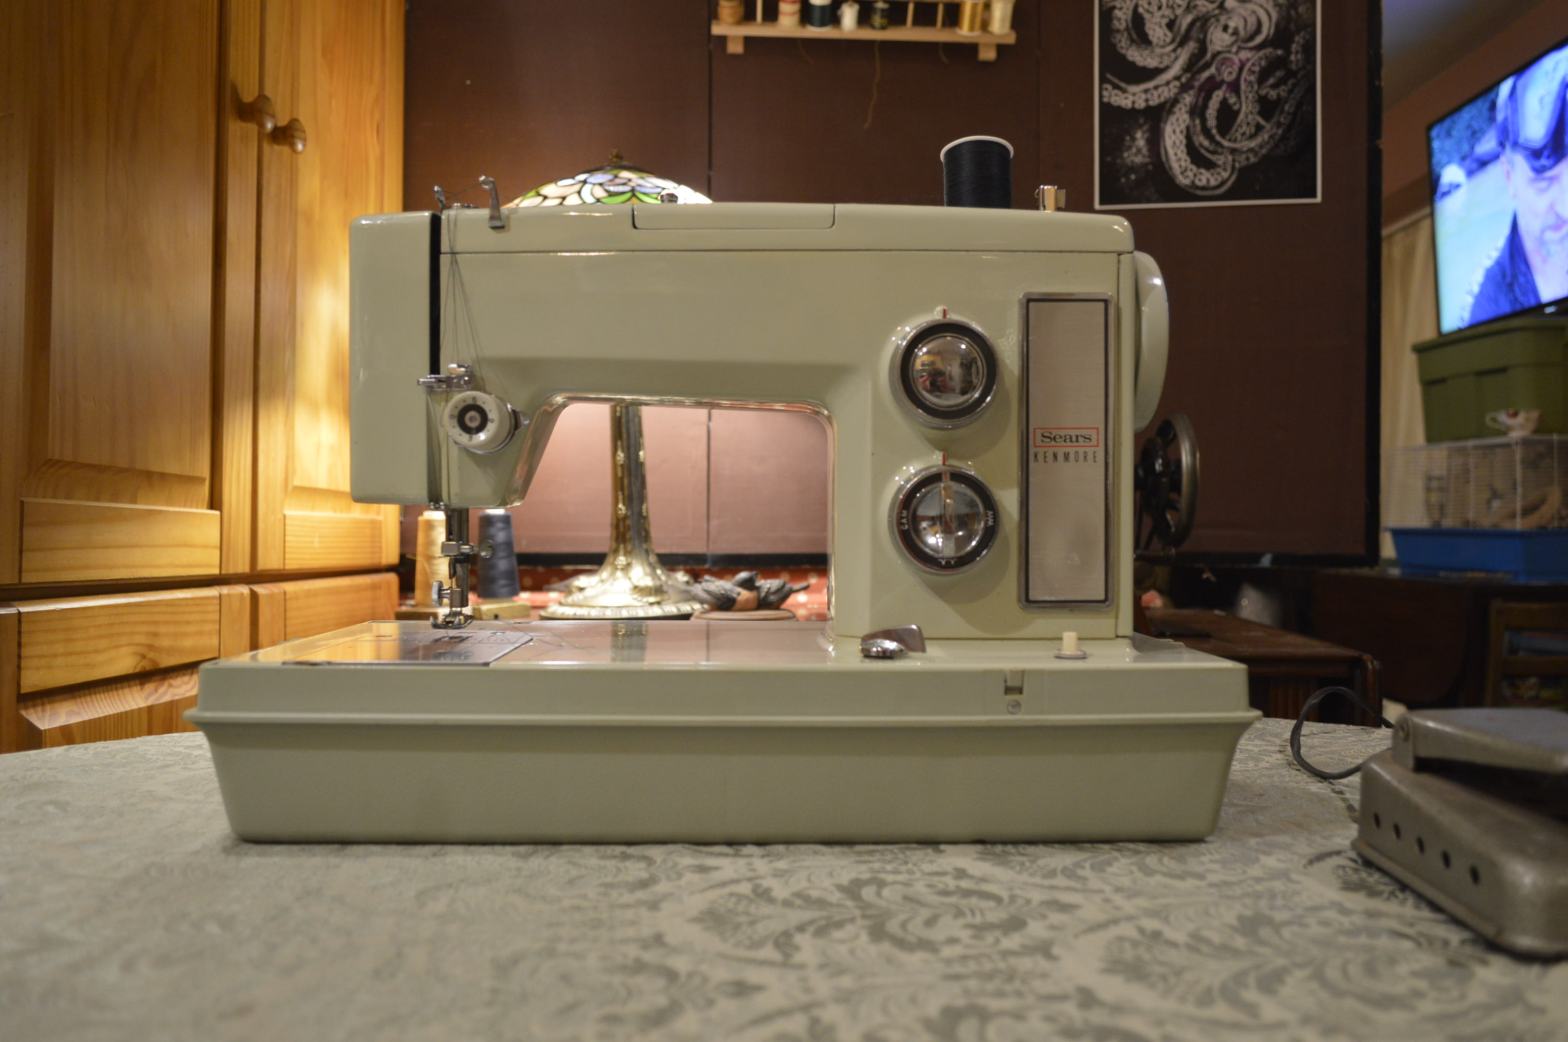

This project is fairly straight forward… Cleaning and servicing a Kenmore model 158.1755. The 158.1755 was manufactured in Japan by the Maruzen Sewing Machine Factory. The production run for the 1755 was between 1970 and 1971. The 1755 machine is a versatile and very forgiving all metal sewing machine. Easy to thread, easy to adjust, and easy to sew. It features two built in stretch stitches, along with the standard ziz-zag and straight stitch. The number of decorative and pattern stitches expands to 14 by inserting plastic cam discs into the cam mechanism accessed by a cover plate on the top of the machine. The machine produces a very good and consistent straight stitch and a very nice satin stitch. Pattern cam stitches are very good as well.
Under the hood is an all metal gear driven sewing mechanism. The oscillating shuttle hook is also driven by a set of steel gears. All of this is driven by a powerful yet quiet 1.2 amp motor. Power is delivered to the balance wheel via a double belt reduction drive. The sewing machine’s body is cast aluminum, as is the balance wheel. The top and front cover is made out of metal. The paint is enamel. The needle plate, needle plate insert, and the bobbin cover plate are stainless steel and sized for larger hands and easy access to the bobbin area to insert the bobbin case. All in all, the 1755 is a very robust, tough, strong, powerful, and sturdy sewing machine. But none of this is “special” or “unique” to the Kenmore 158 series line-up. In fact, it is fairly common for a Kenmore and it is one of the reasons that these all metal vintage Kenmore’s are such a good value.
One of the nicest features, besides it’s ability to sew well, is Kenmores are easy to clean and maintain. This particular machine has an unknown history. It showed up with some marks from use, consisting of a few small scratches and a few paint chips on the sewing machine bed. The drive mechanism showed the typical discoloration from oil varnish buildup. The sewing mechanism turned smoothly and all of the stitch functions operated smoothly as well. But… this is not unusual for a Kenmore of this vintage.
After my initial evaluation, I decided that all this machine needed was a full cleaning and servicing. Well… if was just a matter of cosmetic cleaning and oiling, I could stop here. This machine is in store for a little more. Of course, the body of the machine will be cleaned, but he sewing mechanisms will be deep cleaned to remove all traces of old oil and grease. All of the plates, fittings, bobbin assembly, and removable little bits will be ultrasonically cleaned. The motor will be partially disassembled to polish the armature and clean the brushes. The tension assemblies, both the top assembly and the bobbin case, will be disassembled and ultrasonically cleaned. So… here is the process in pictures…
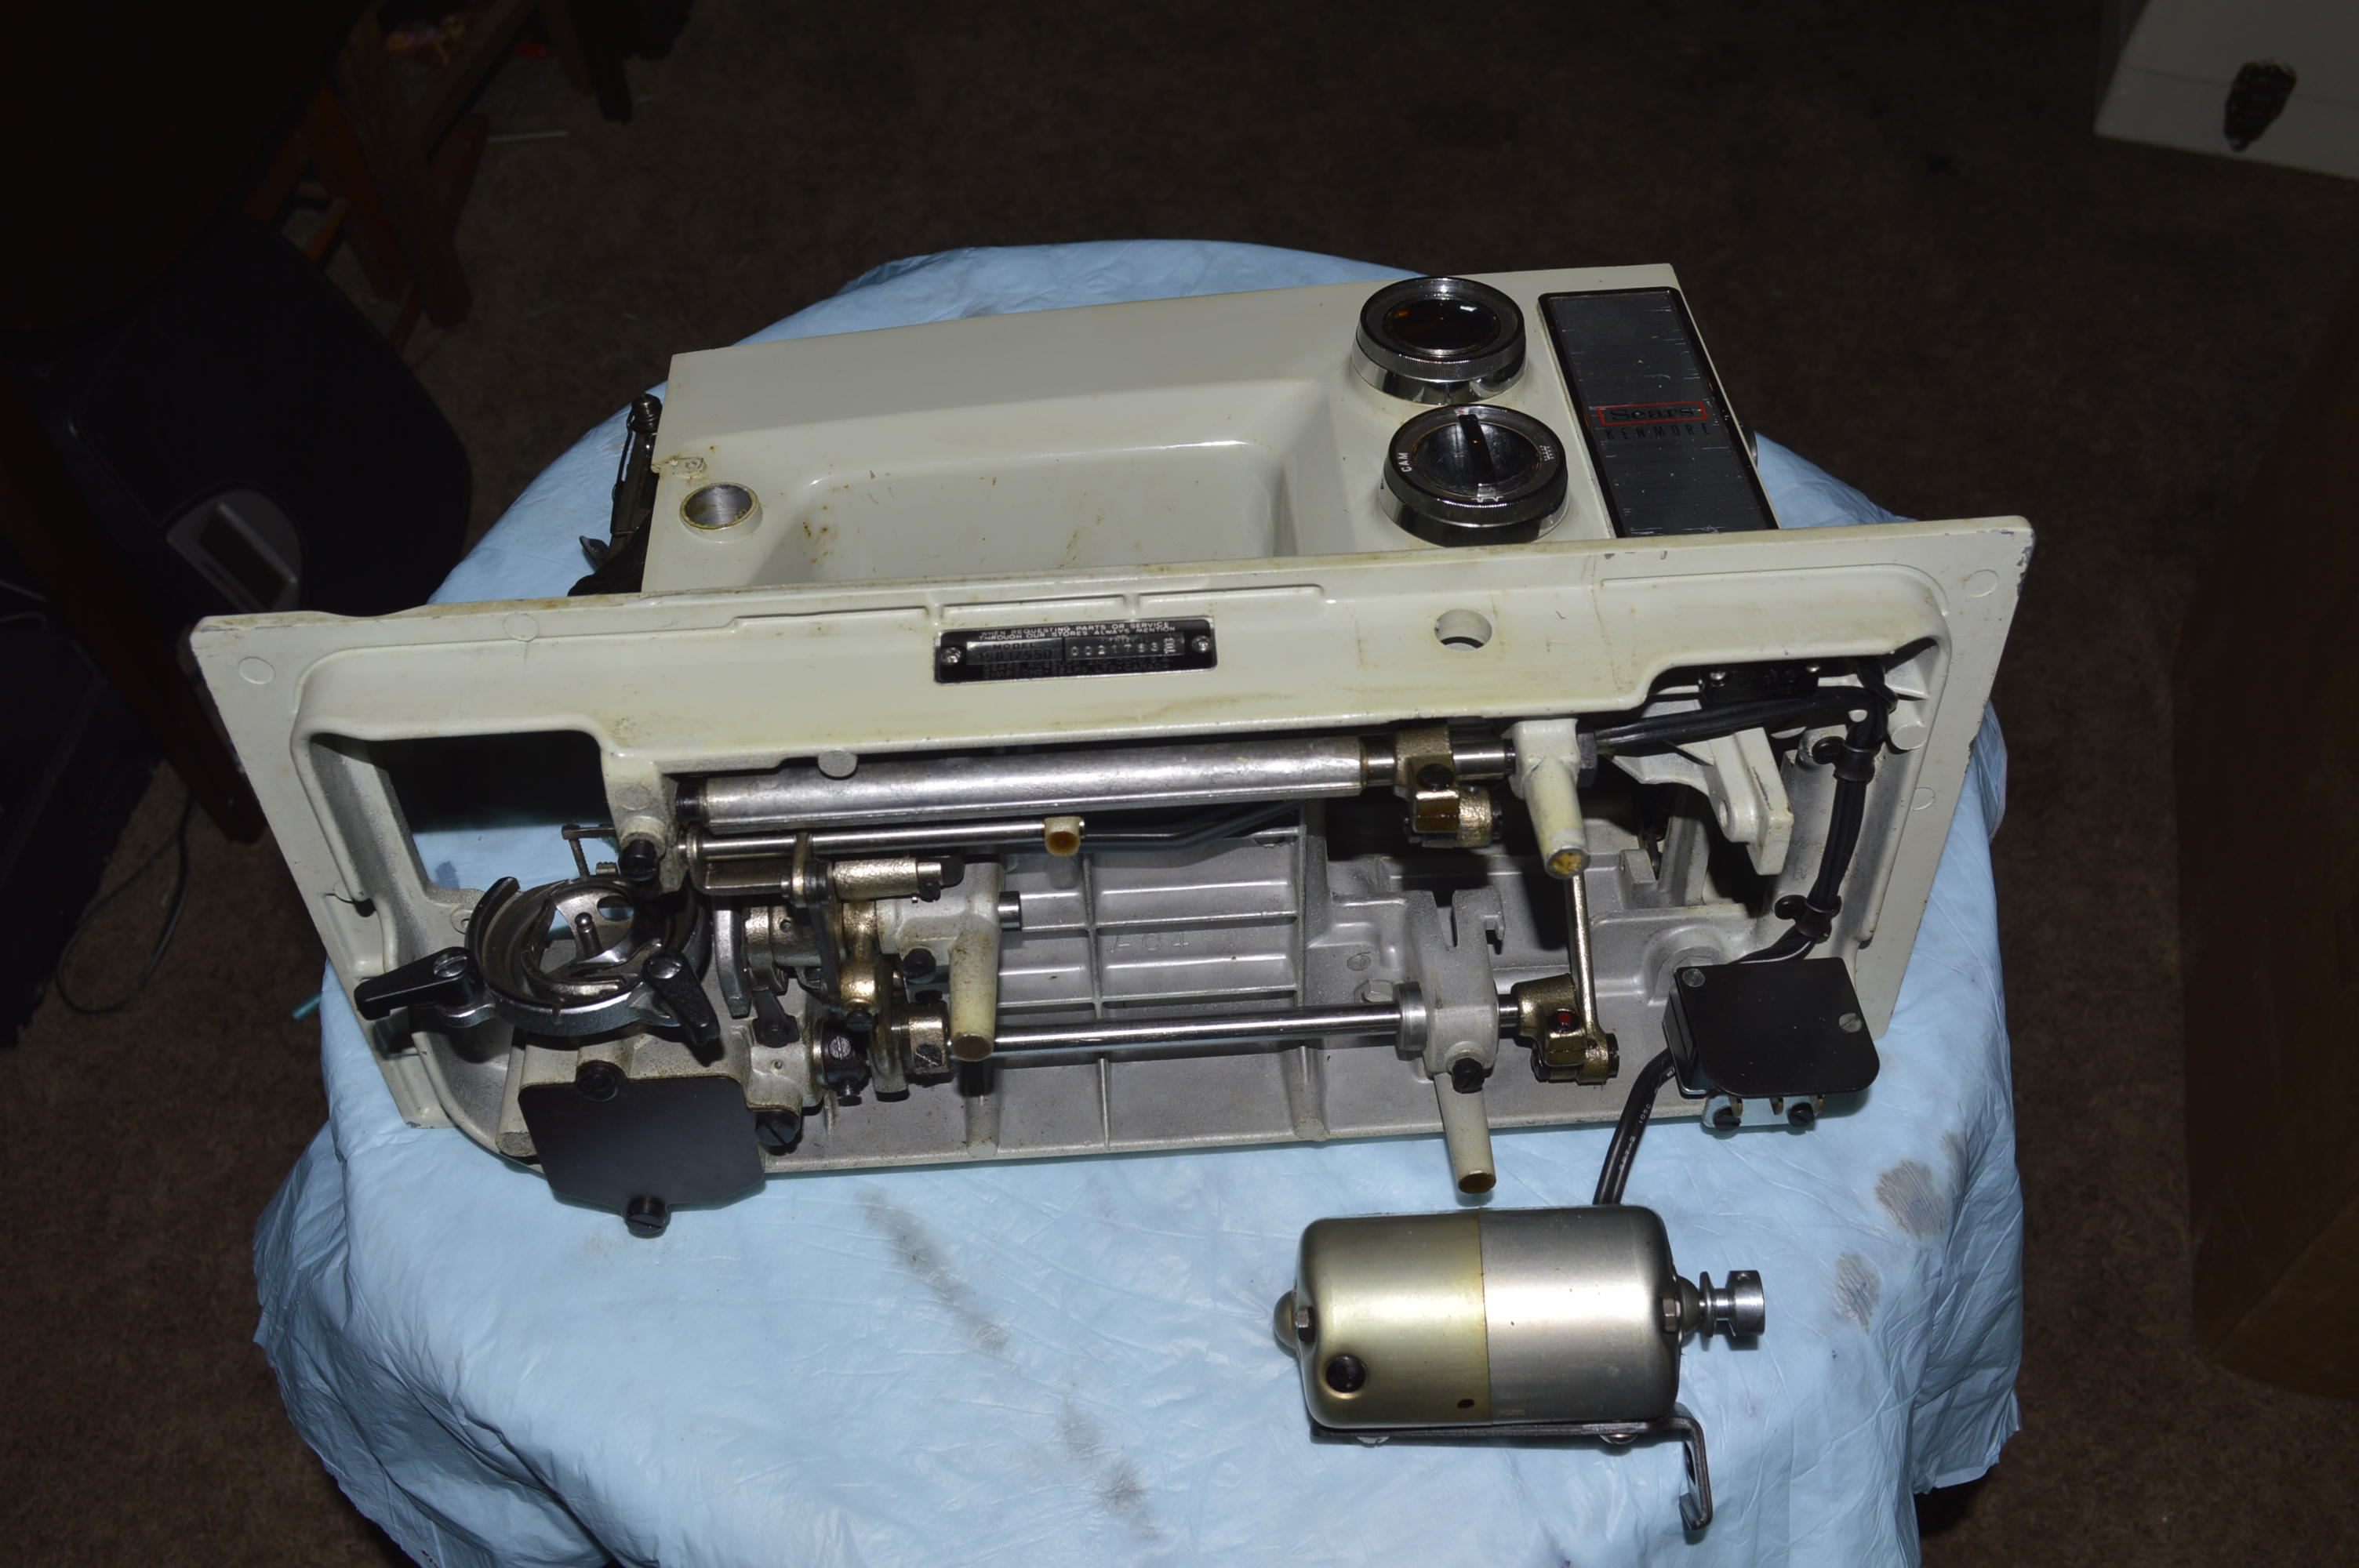
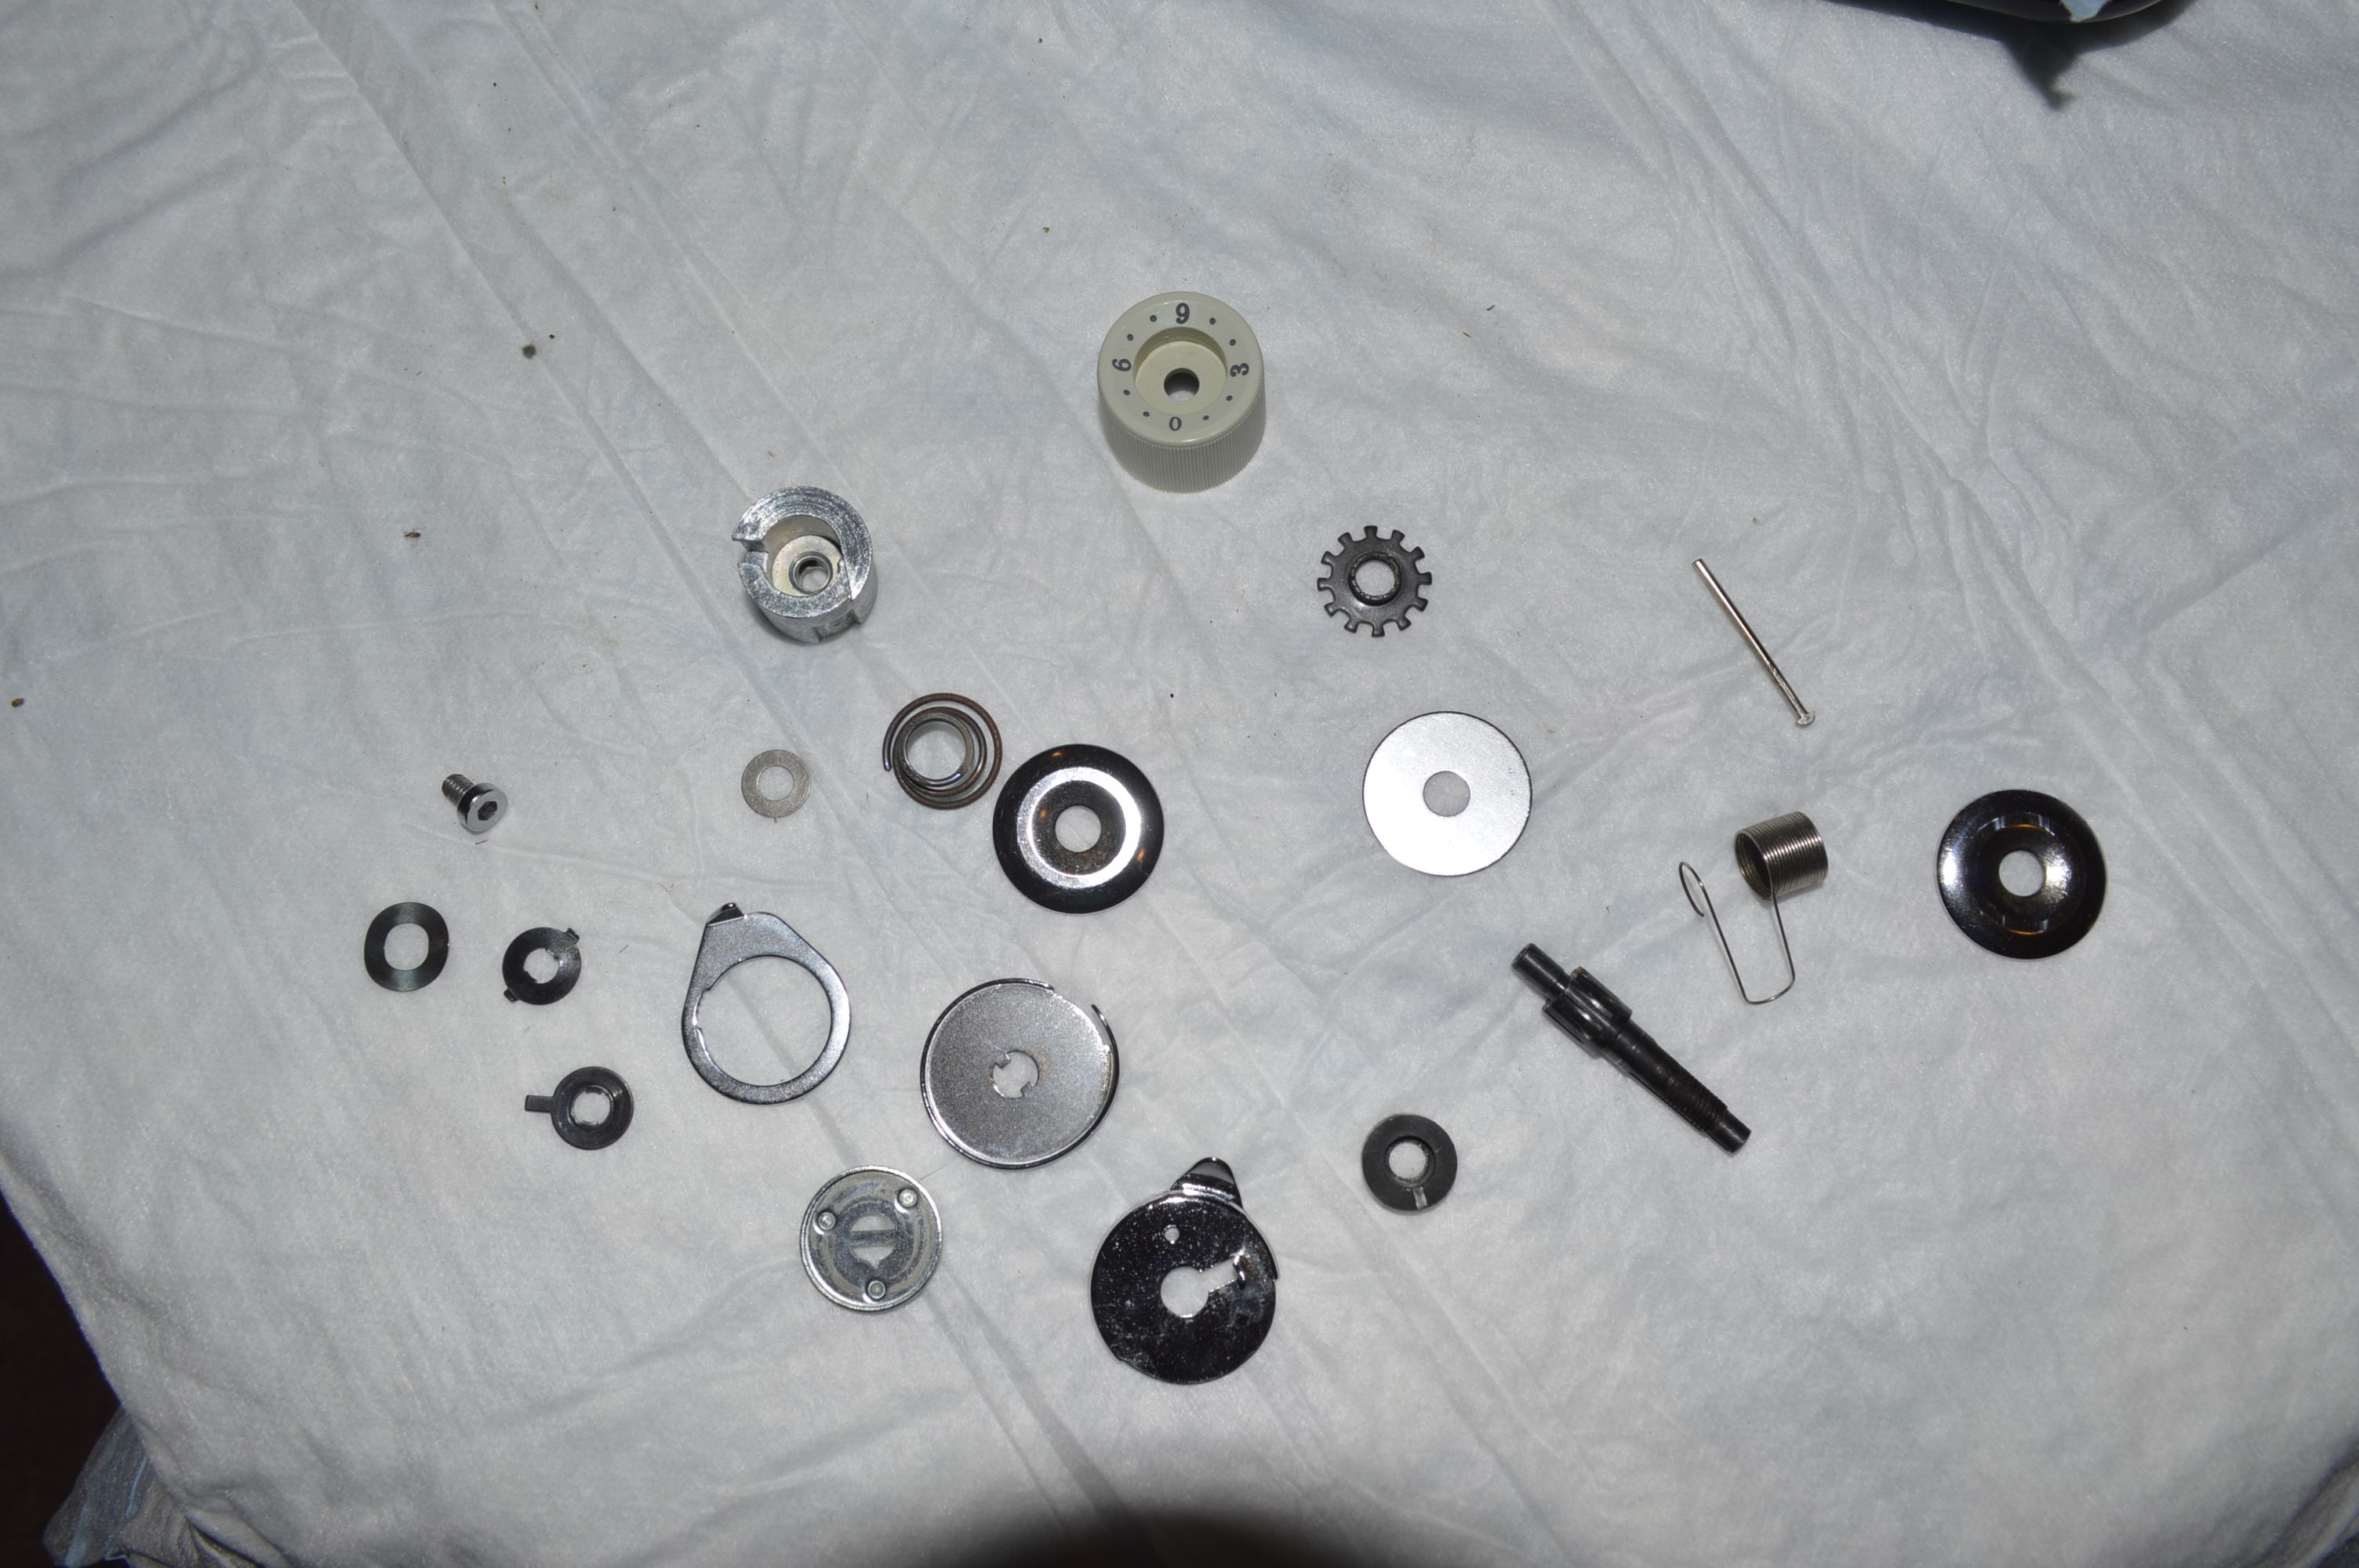
First, all of the covers, the balance wheel, the belts, and the motor is removed from the machine… This allows easier access to clean the internal mechanisms.
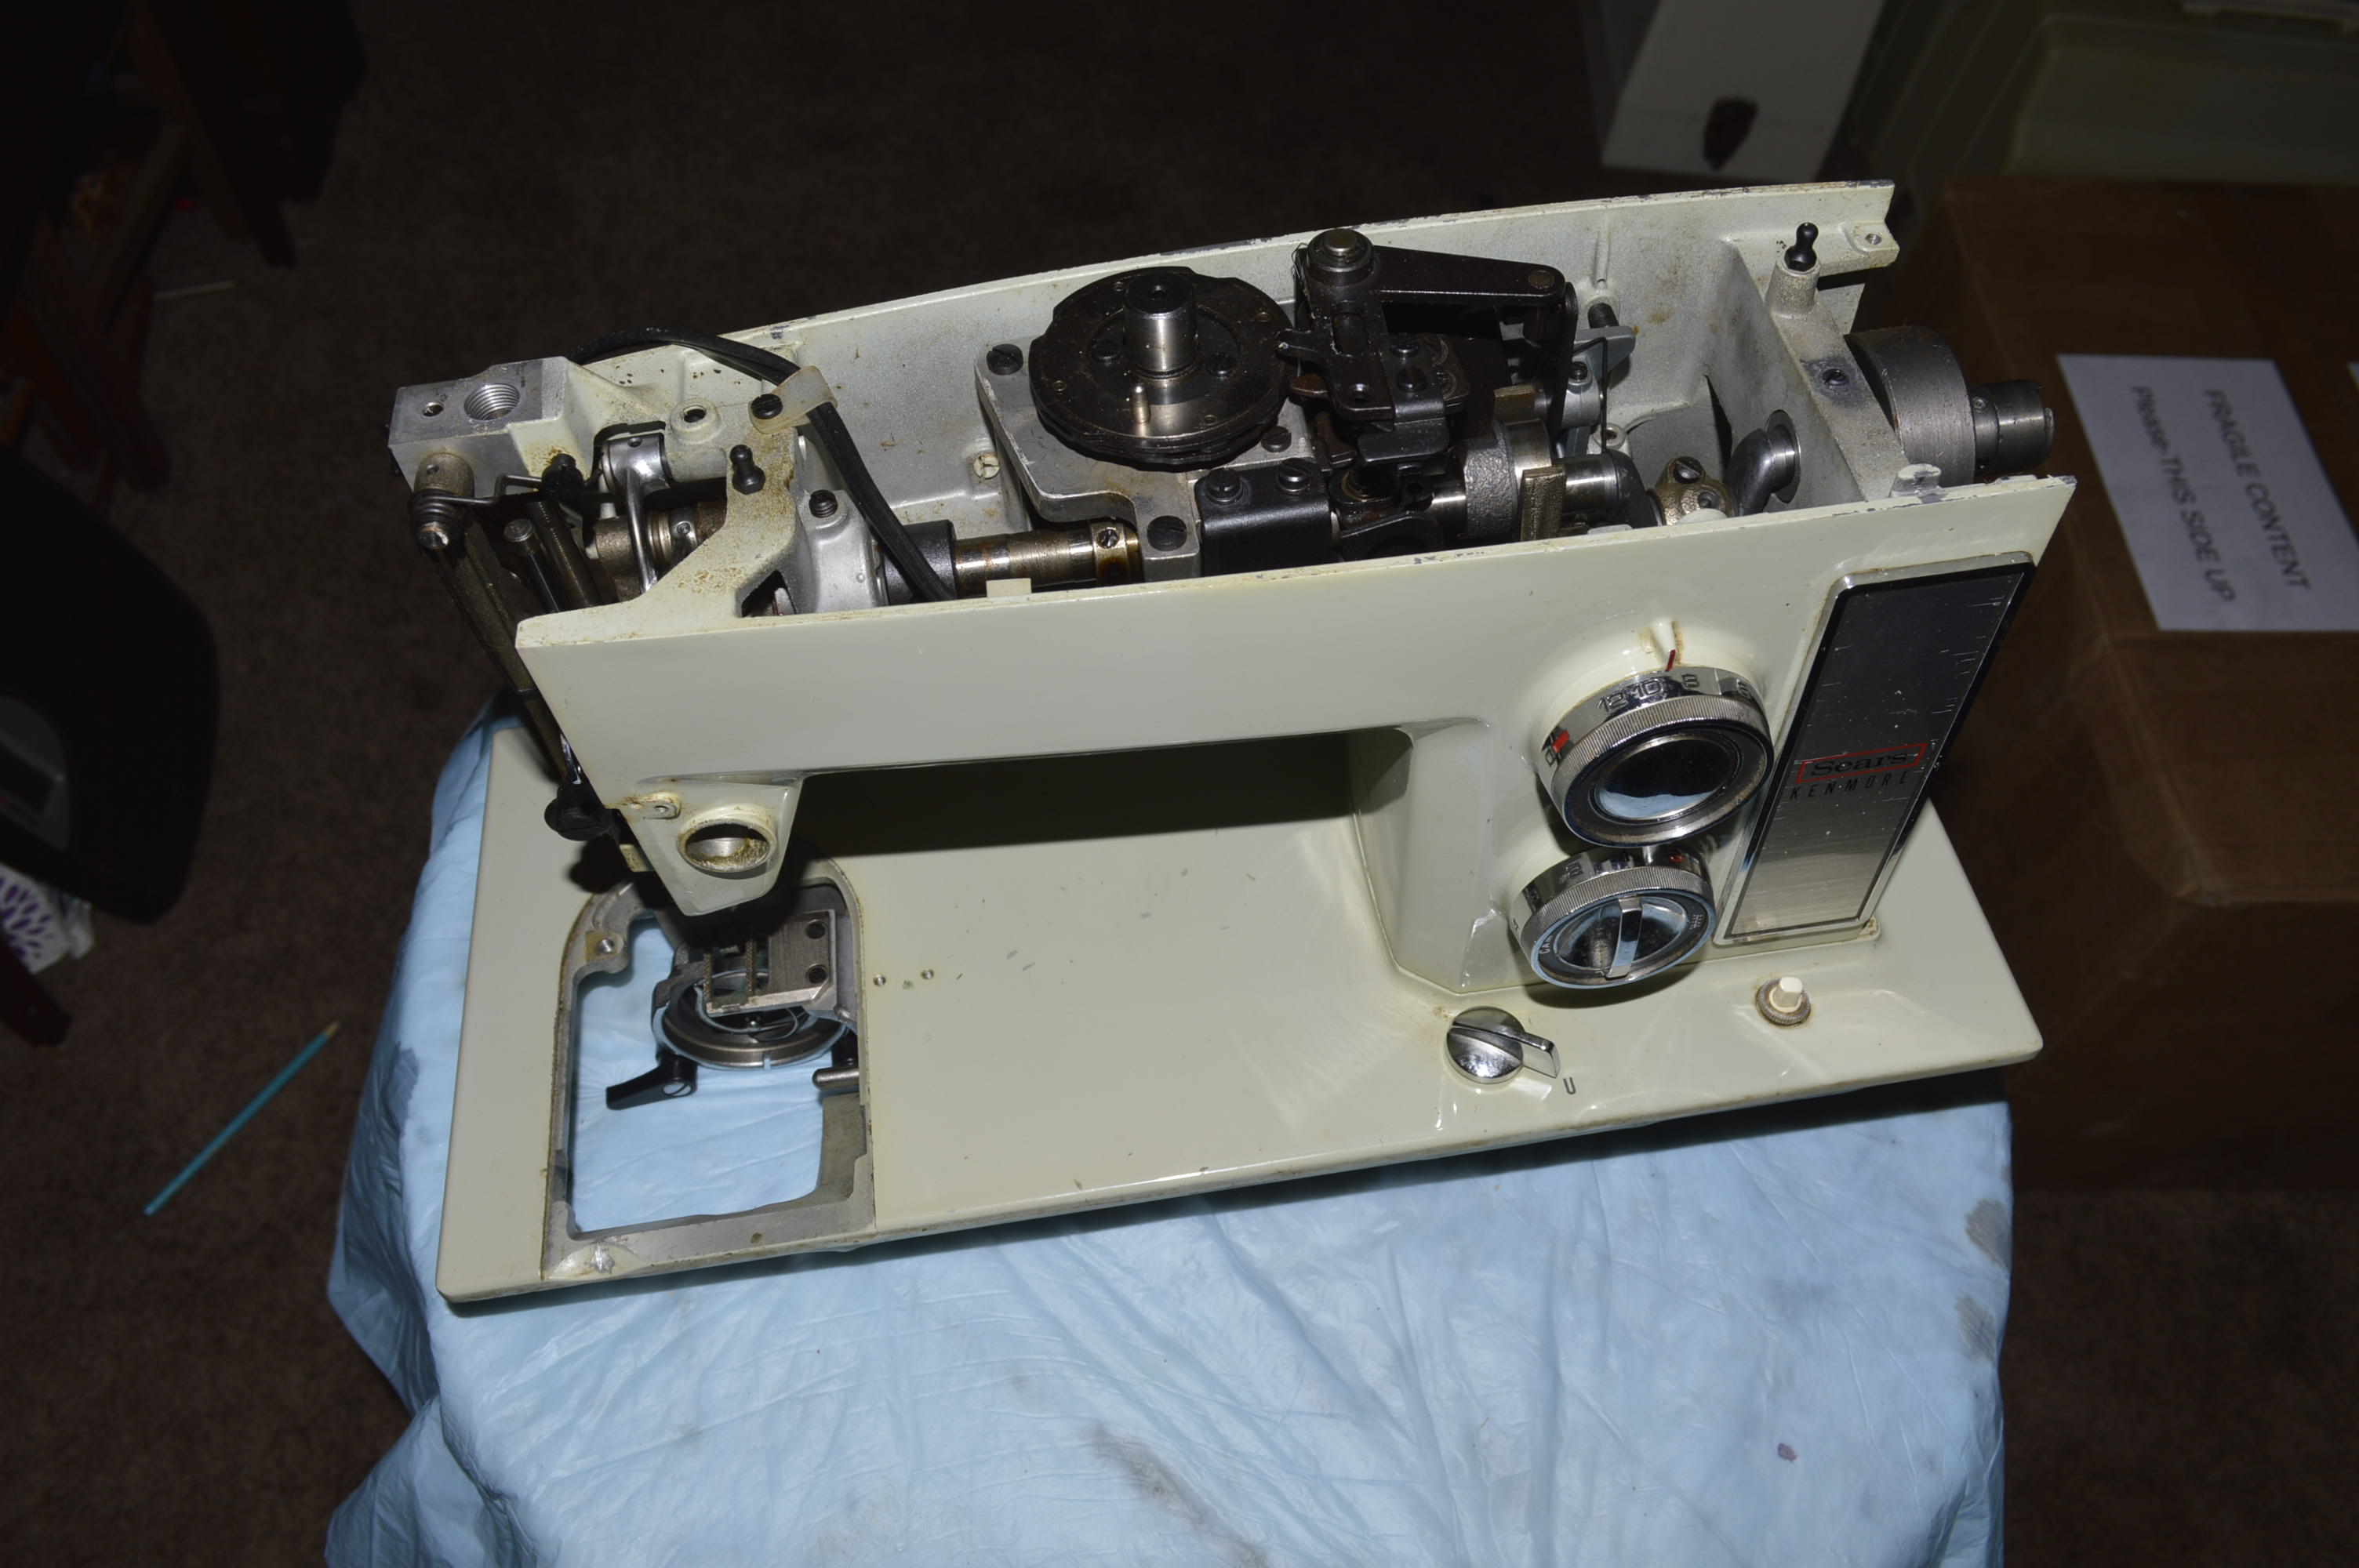


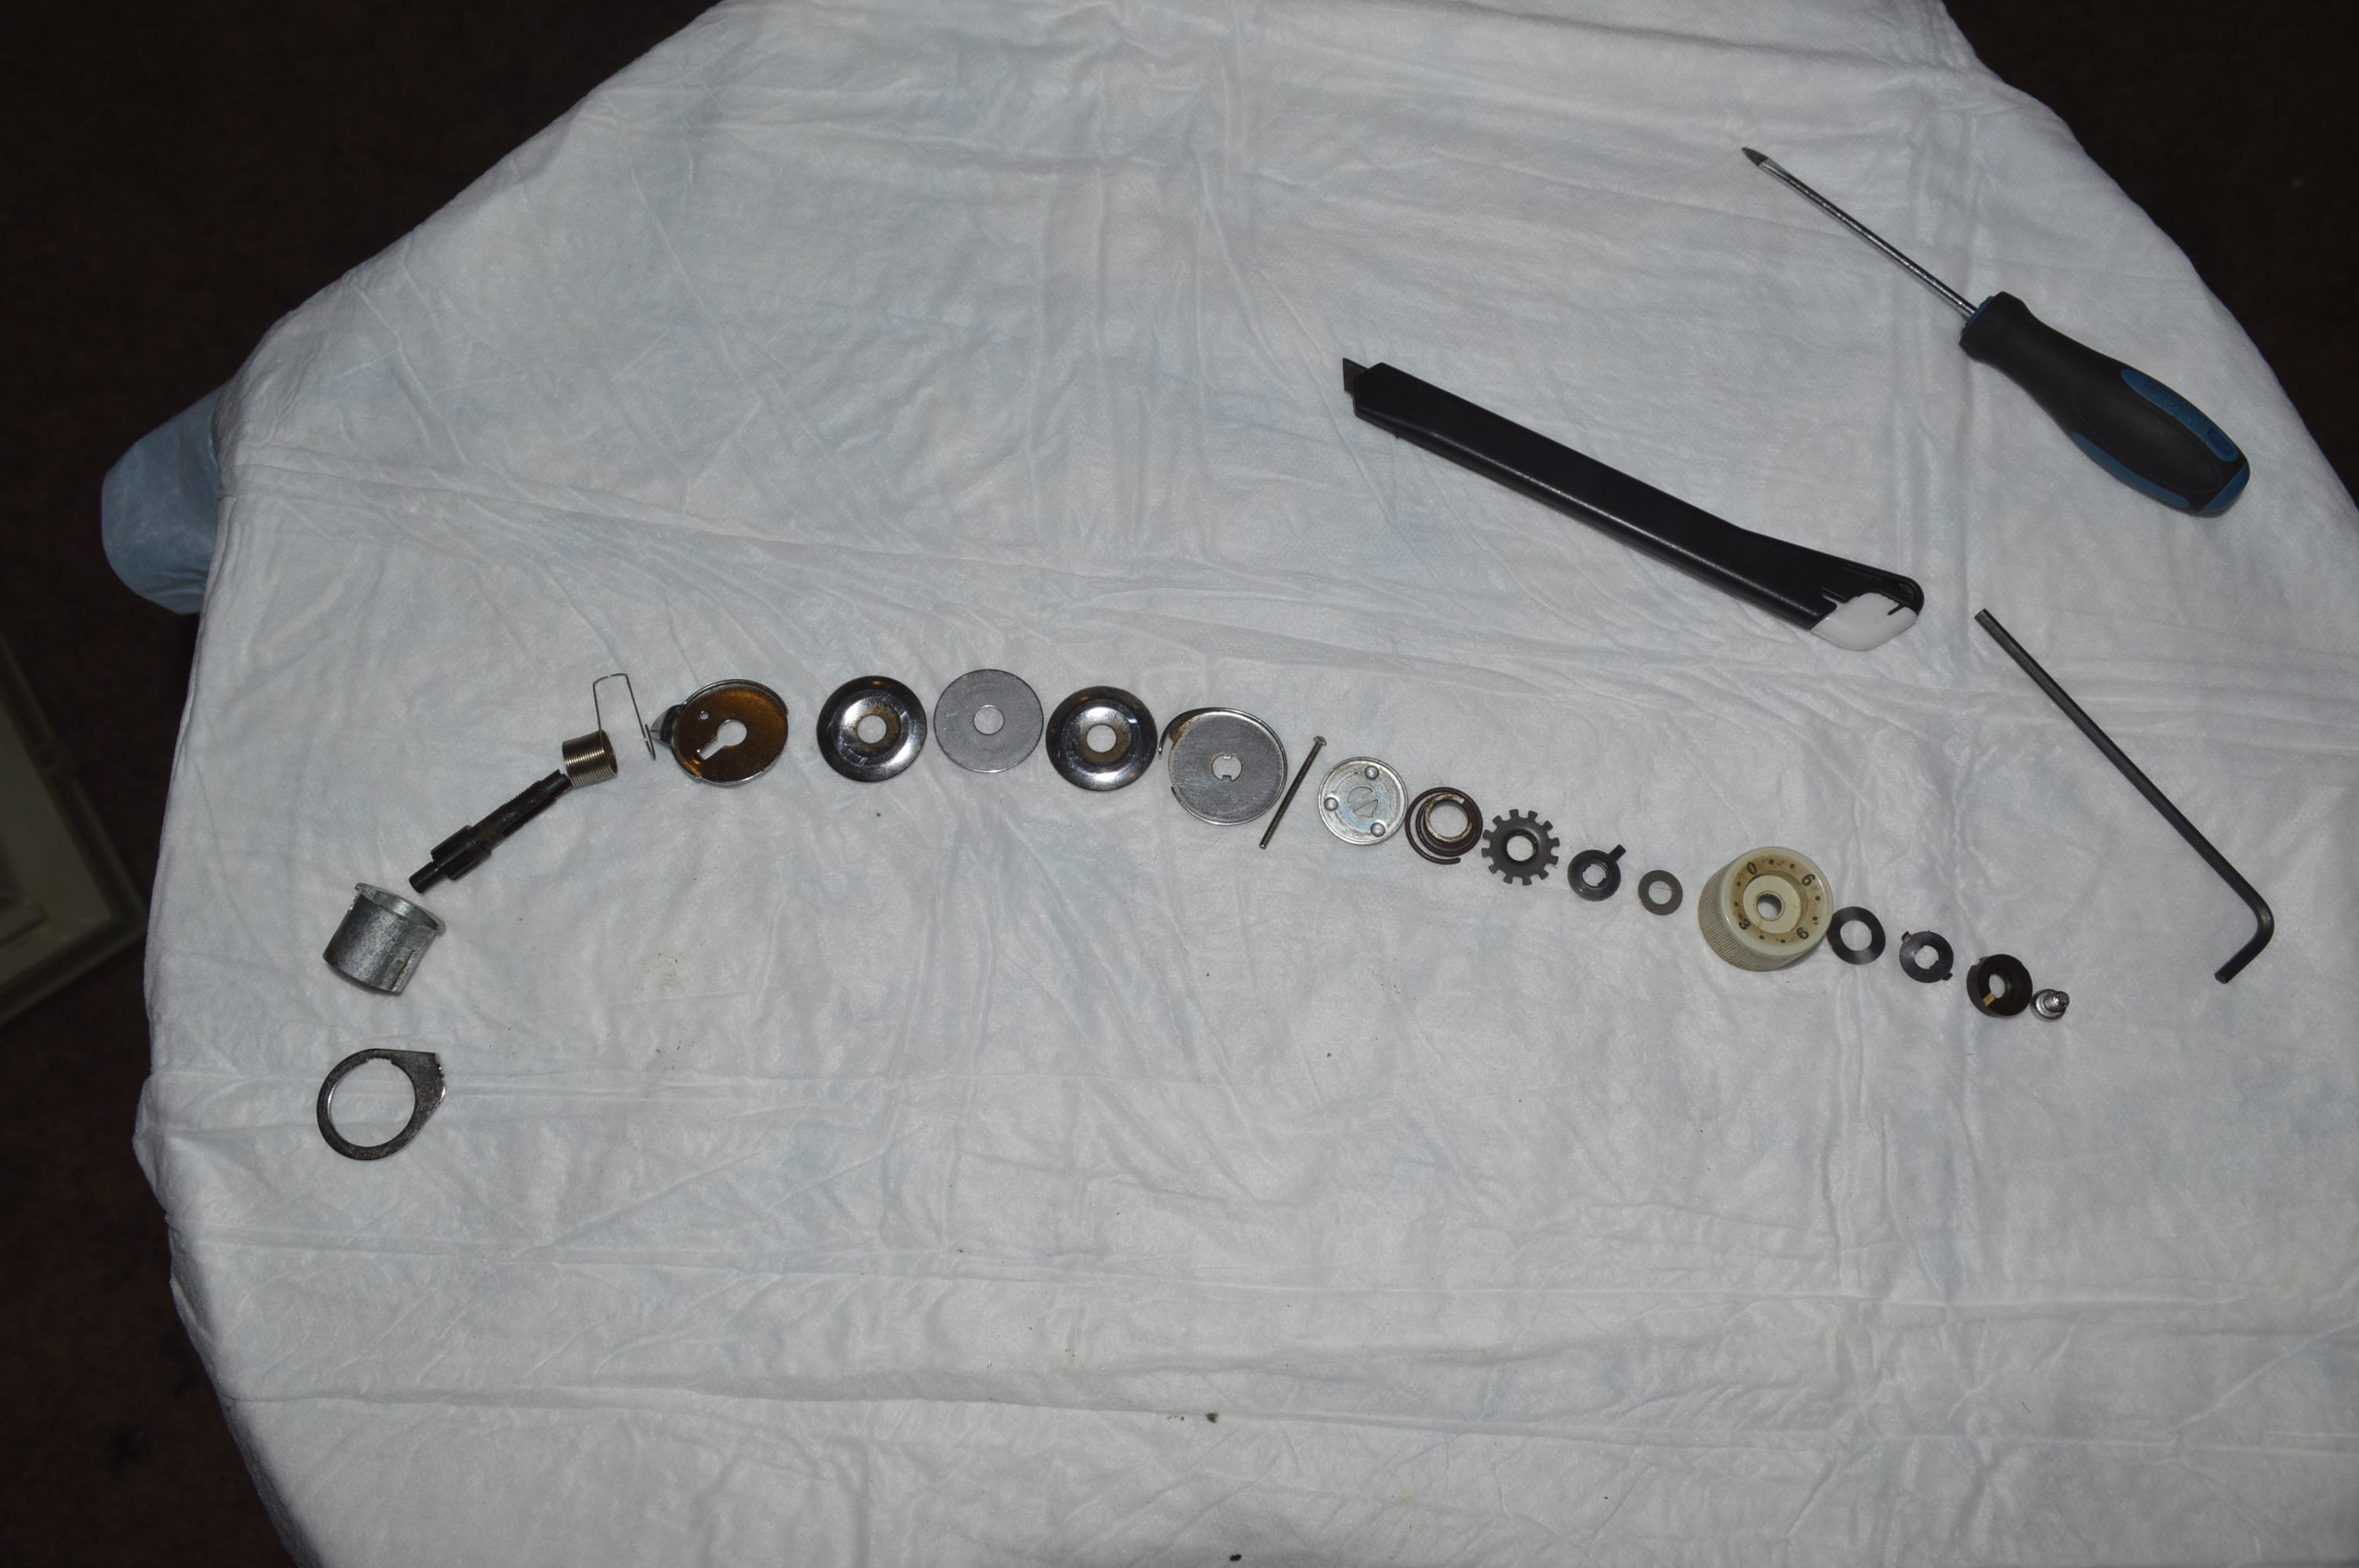
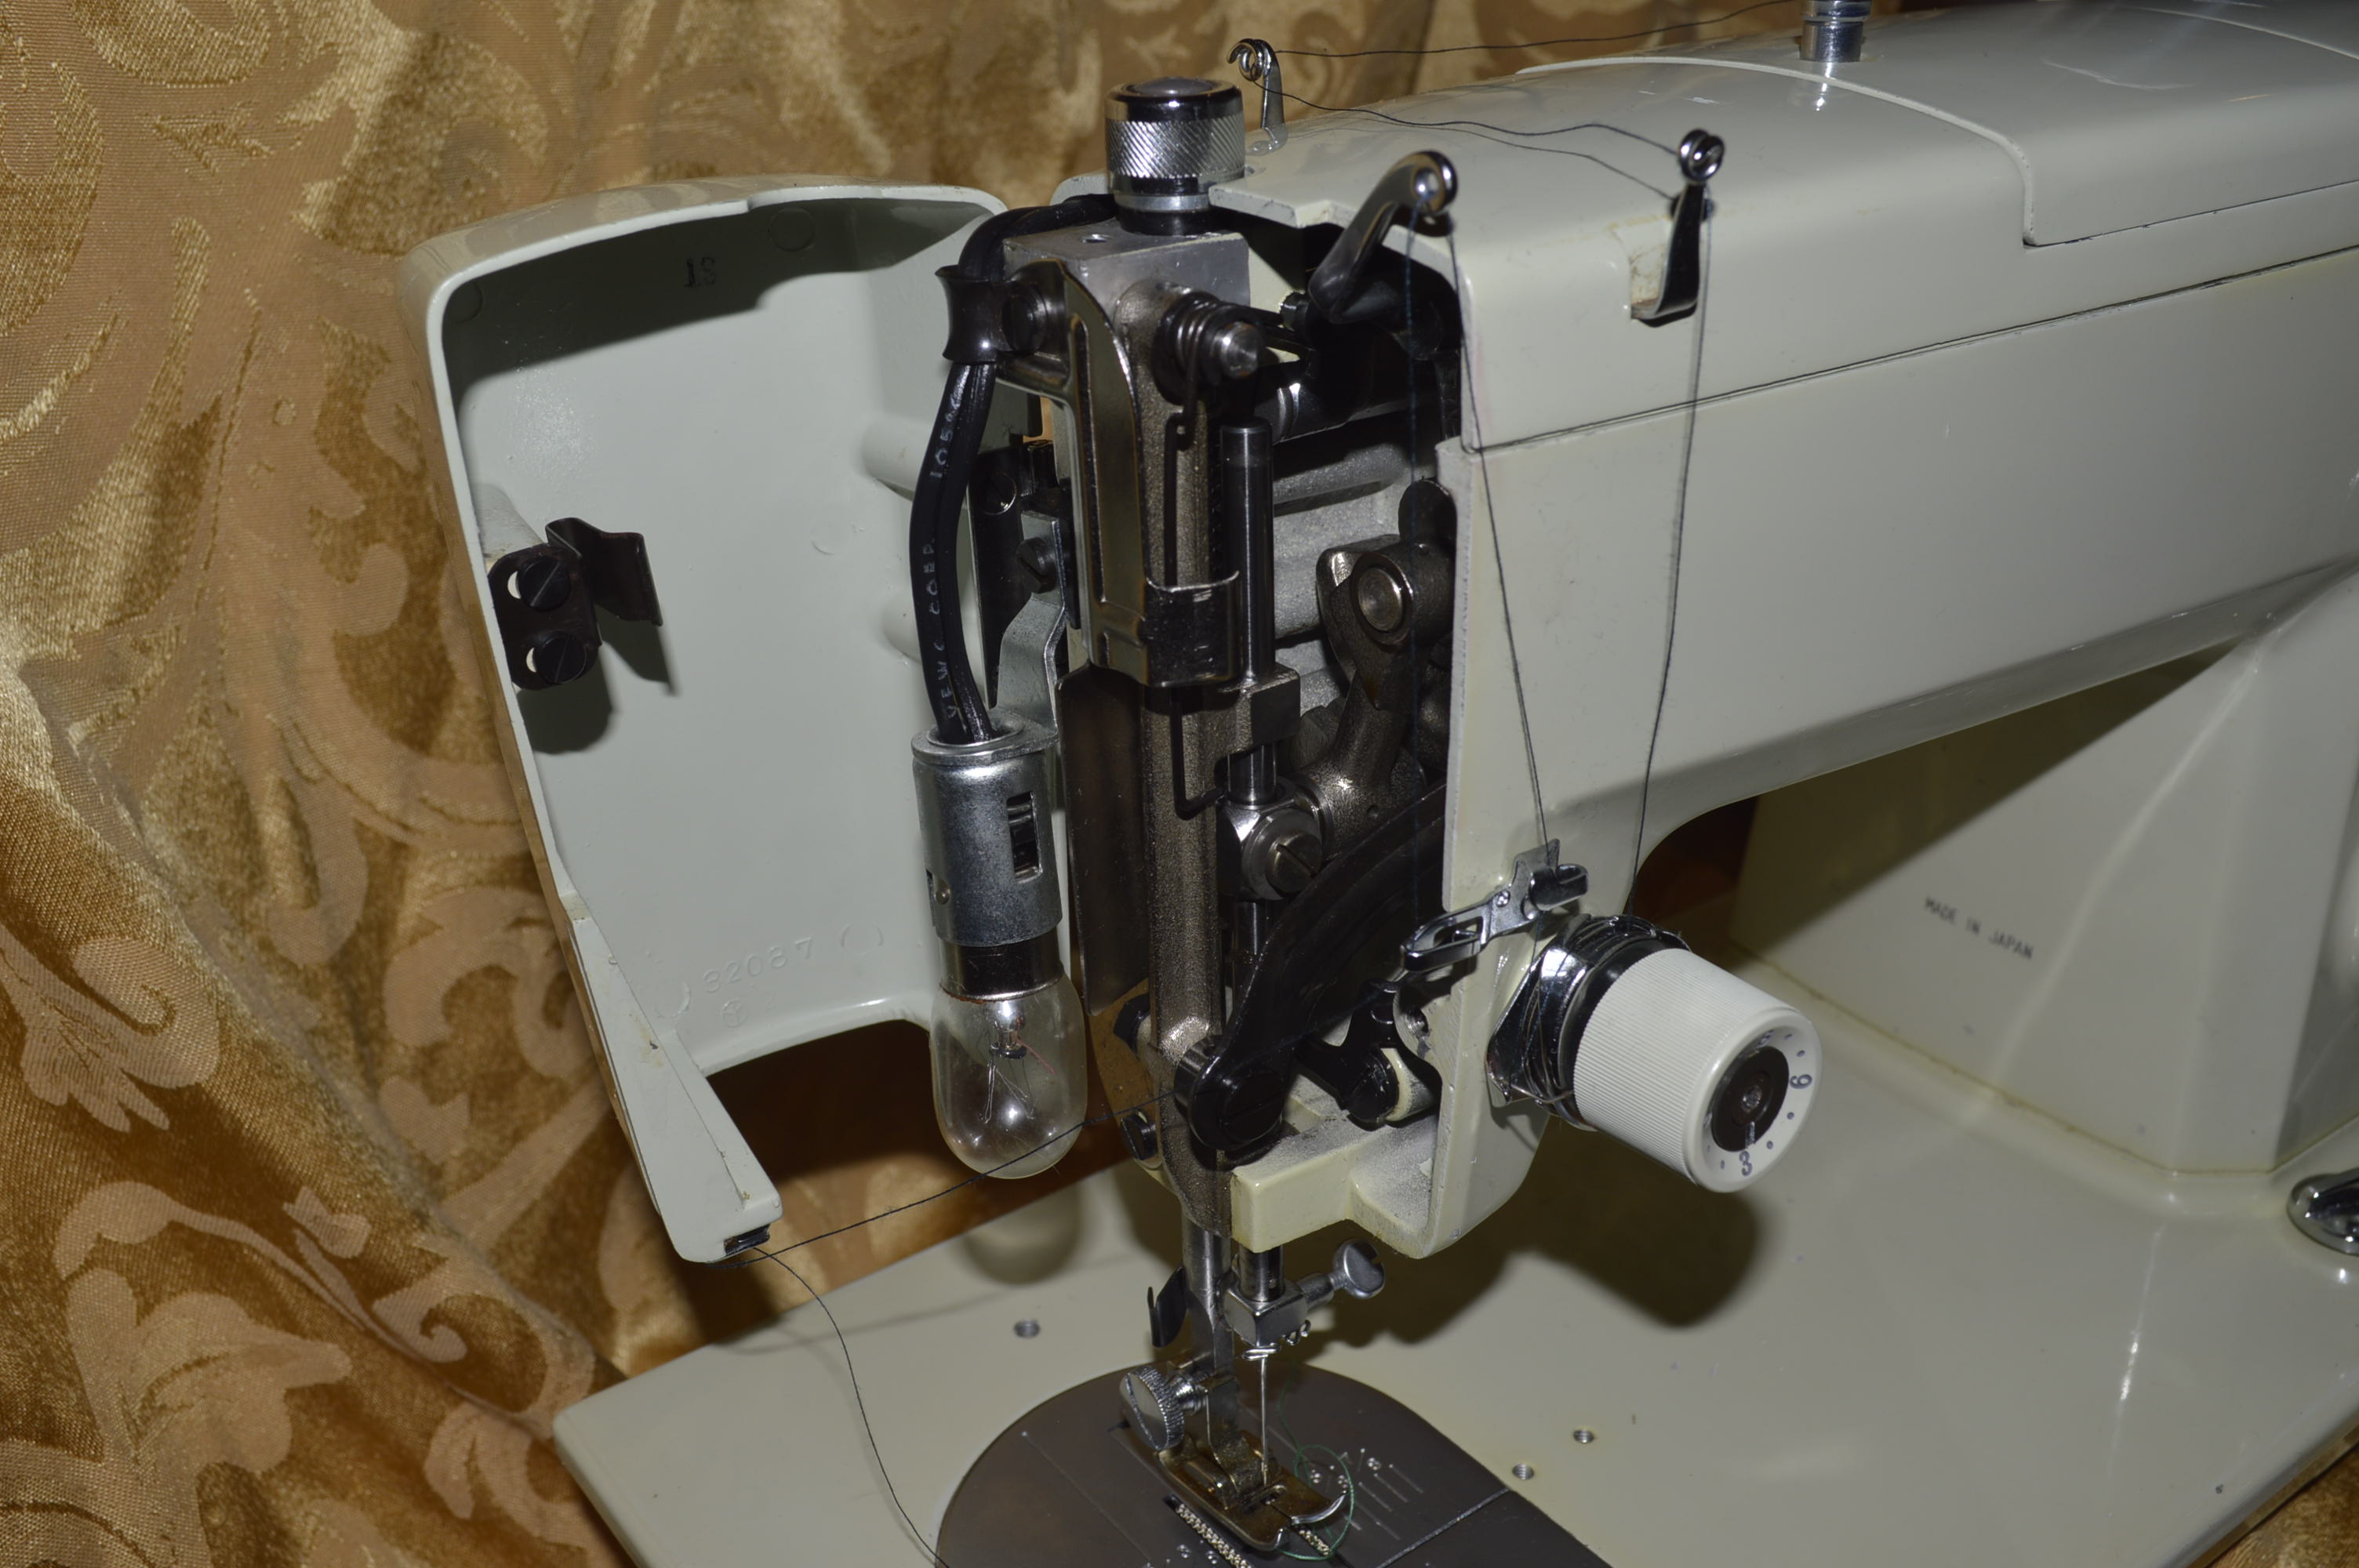
Disassembly of the mechanisms is really not necessary so they are cleaned in place. The only assemblies removed are the bobbin winding assembly, the top presser foot adjusting assembly, and the presser bar spring. This makes it easier get into tight places, and it is a laborious process to get all of the parts cleaned and de-greased. For me, the easiest way clean these assemblies is by using a small utility brush and a 20% solution of “Krud Kutter”. Unlike products like 409, Fantastic, Purple Power, or other similar detergents, Krud Kutter is non-toxic and environmentally safe… that means it won’t damage the finish on the sewing machine. Still, out of an abundance of caution I don’t allow any detergent to sit on the enameled surface too long, so wiping any drips or runs is important. It is also important to keep detergent from getting into the oil holes in the parts provided for routine oiling. This is easy to do by covering the oil hole with a cotton swab as the parts are being cleaned. After cleaning the assemblies in the needle bar area, the cam and drive mechanisms in the sewing machine arm, and the assemblies under the bed, these areas are sprayed with a light coat of WD-40. This displaces any lingering water and detergent, and leaves a protective film.
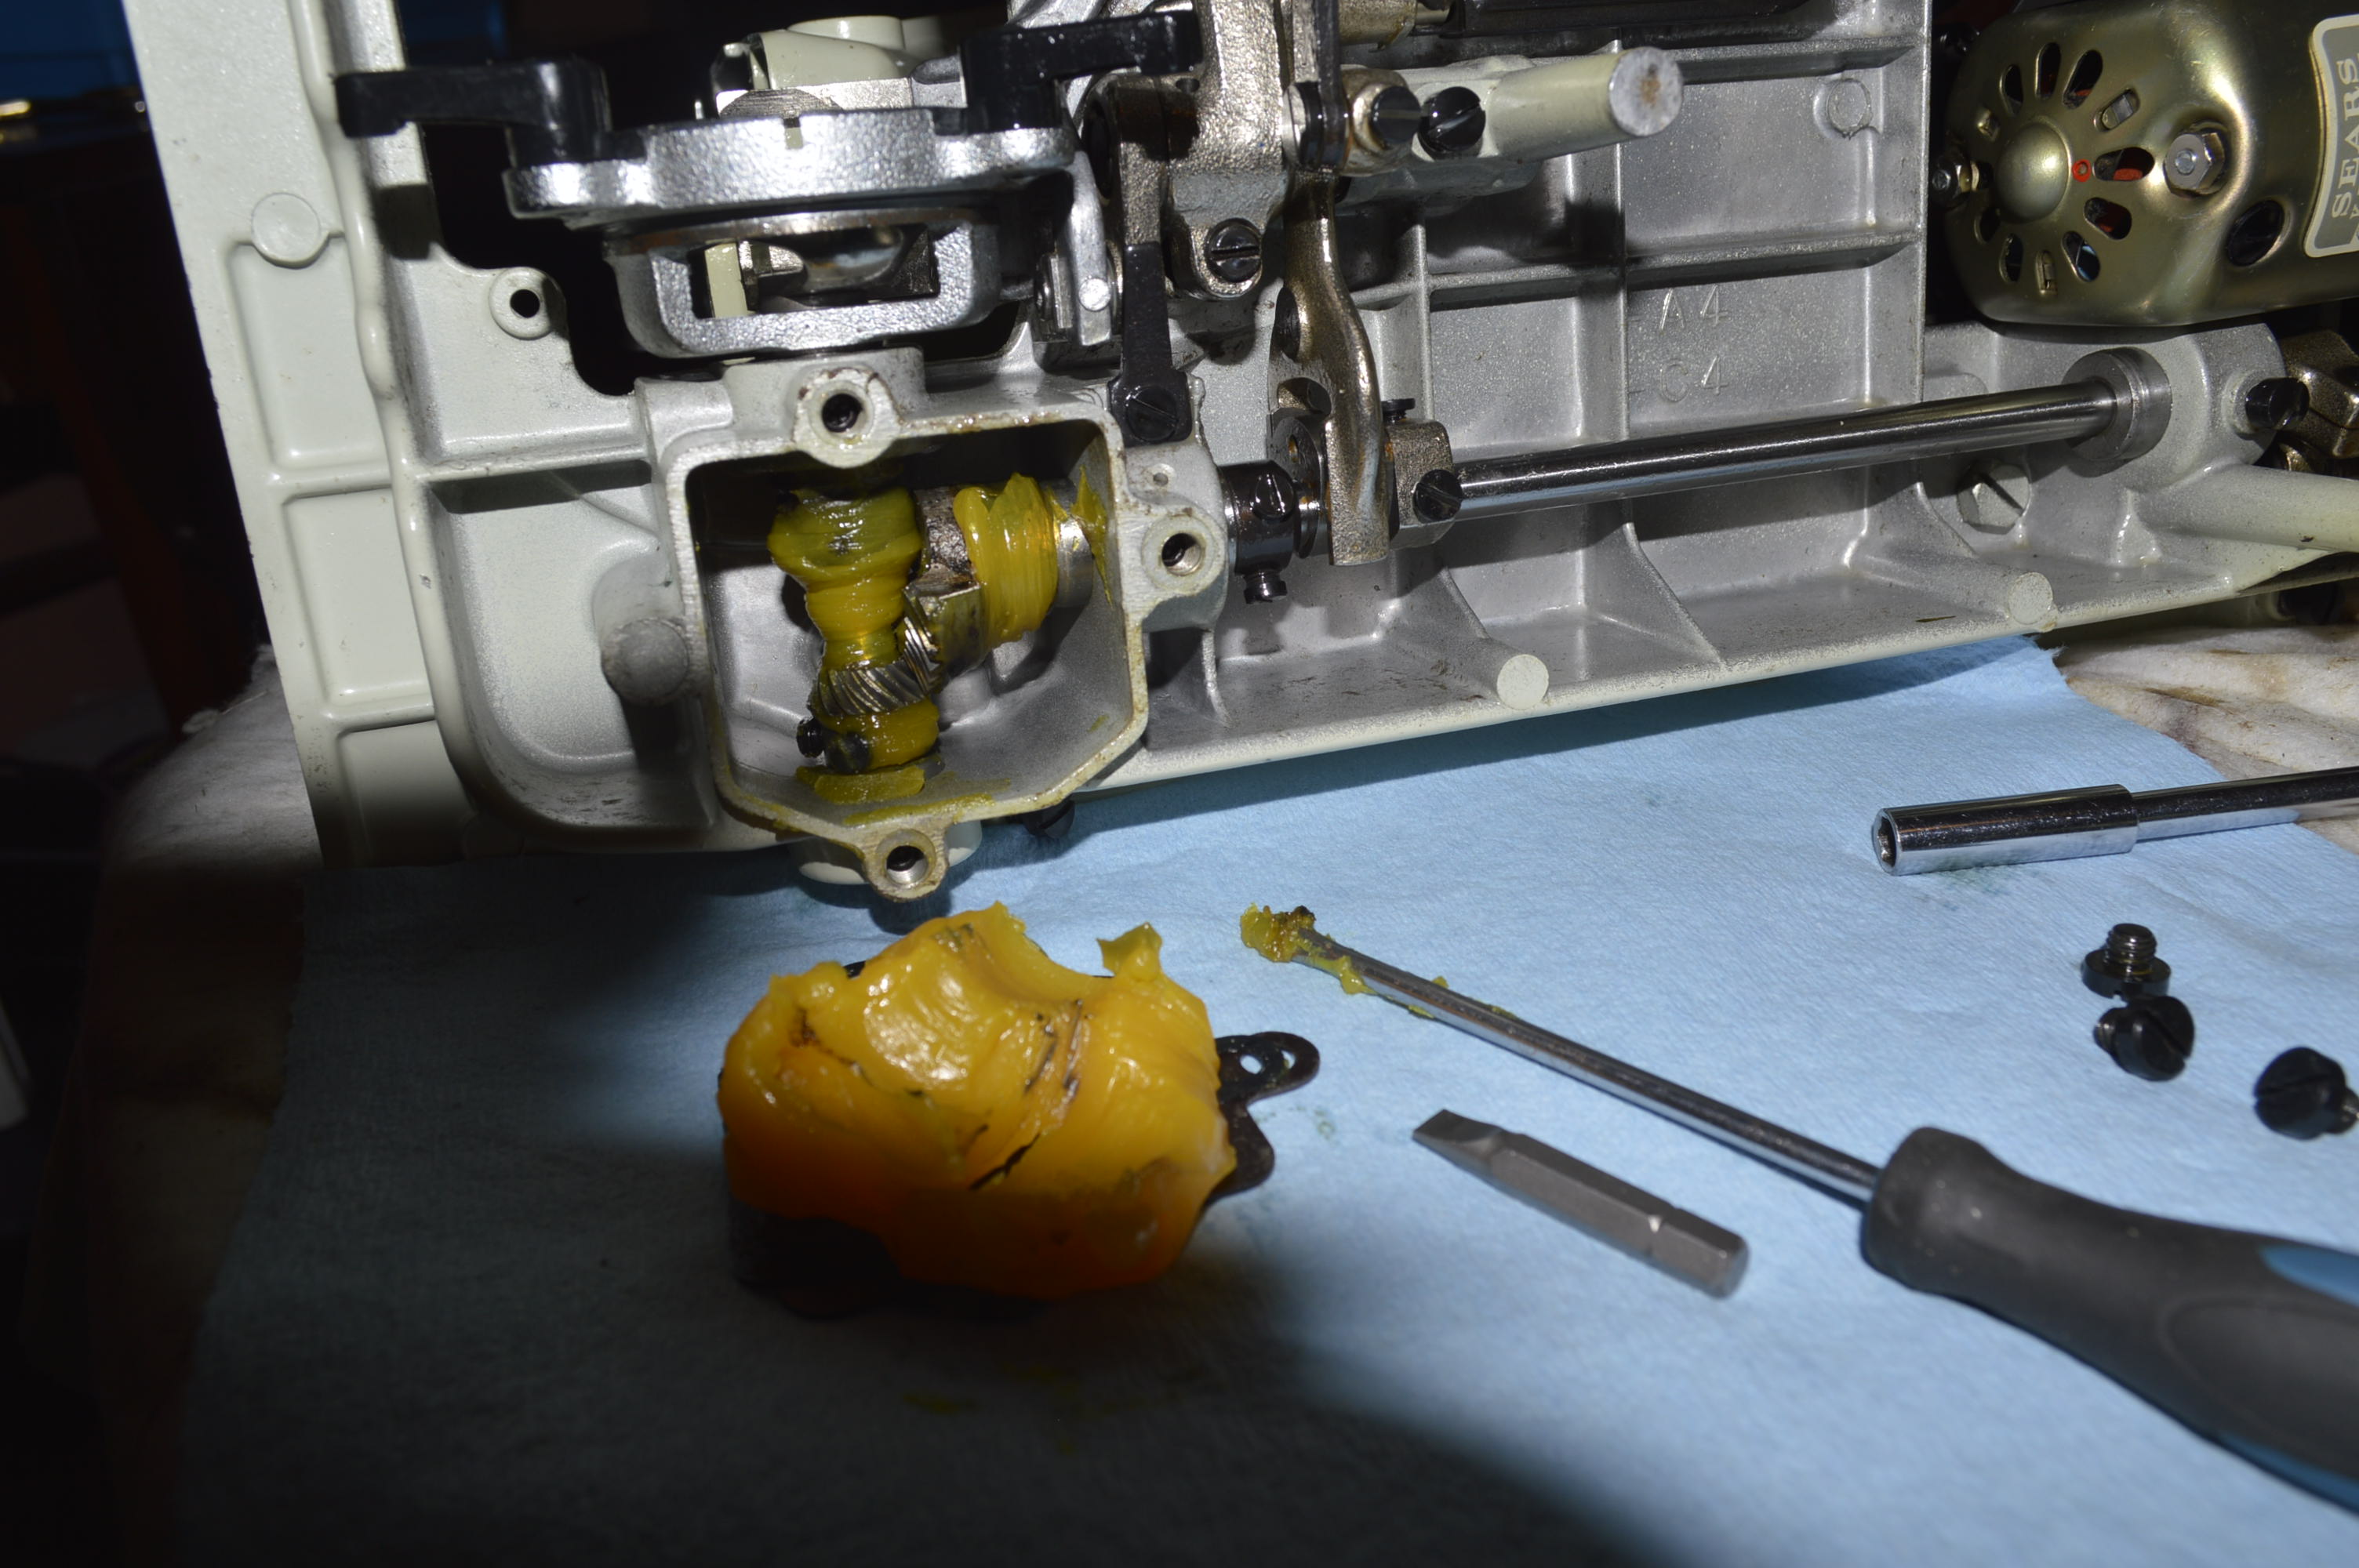
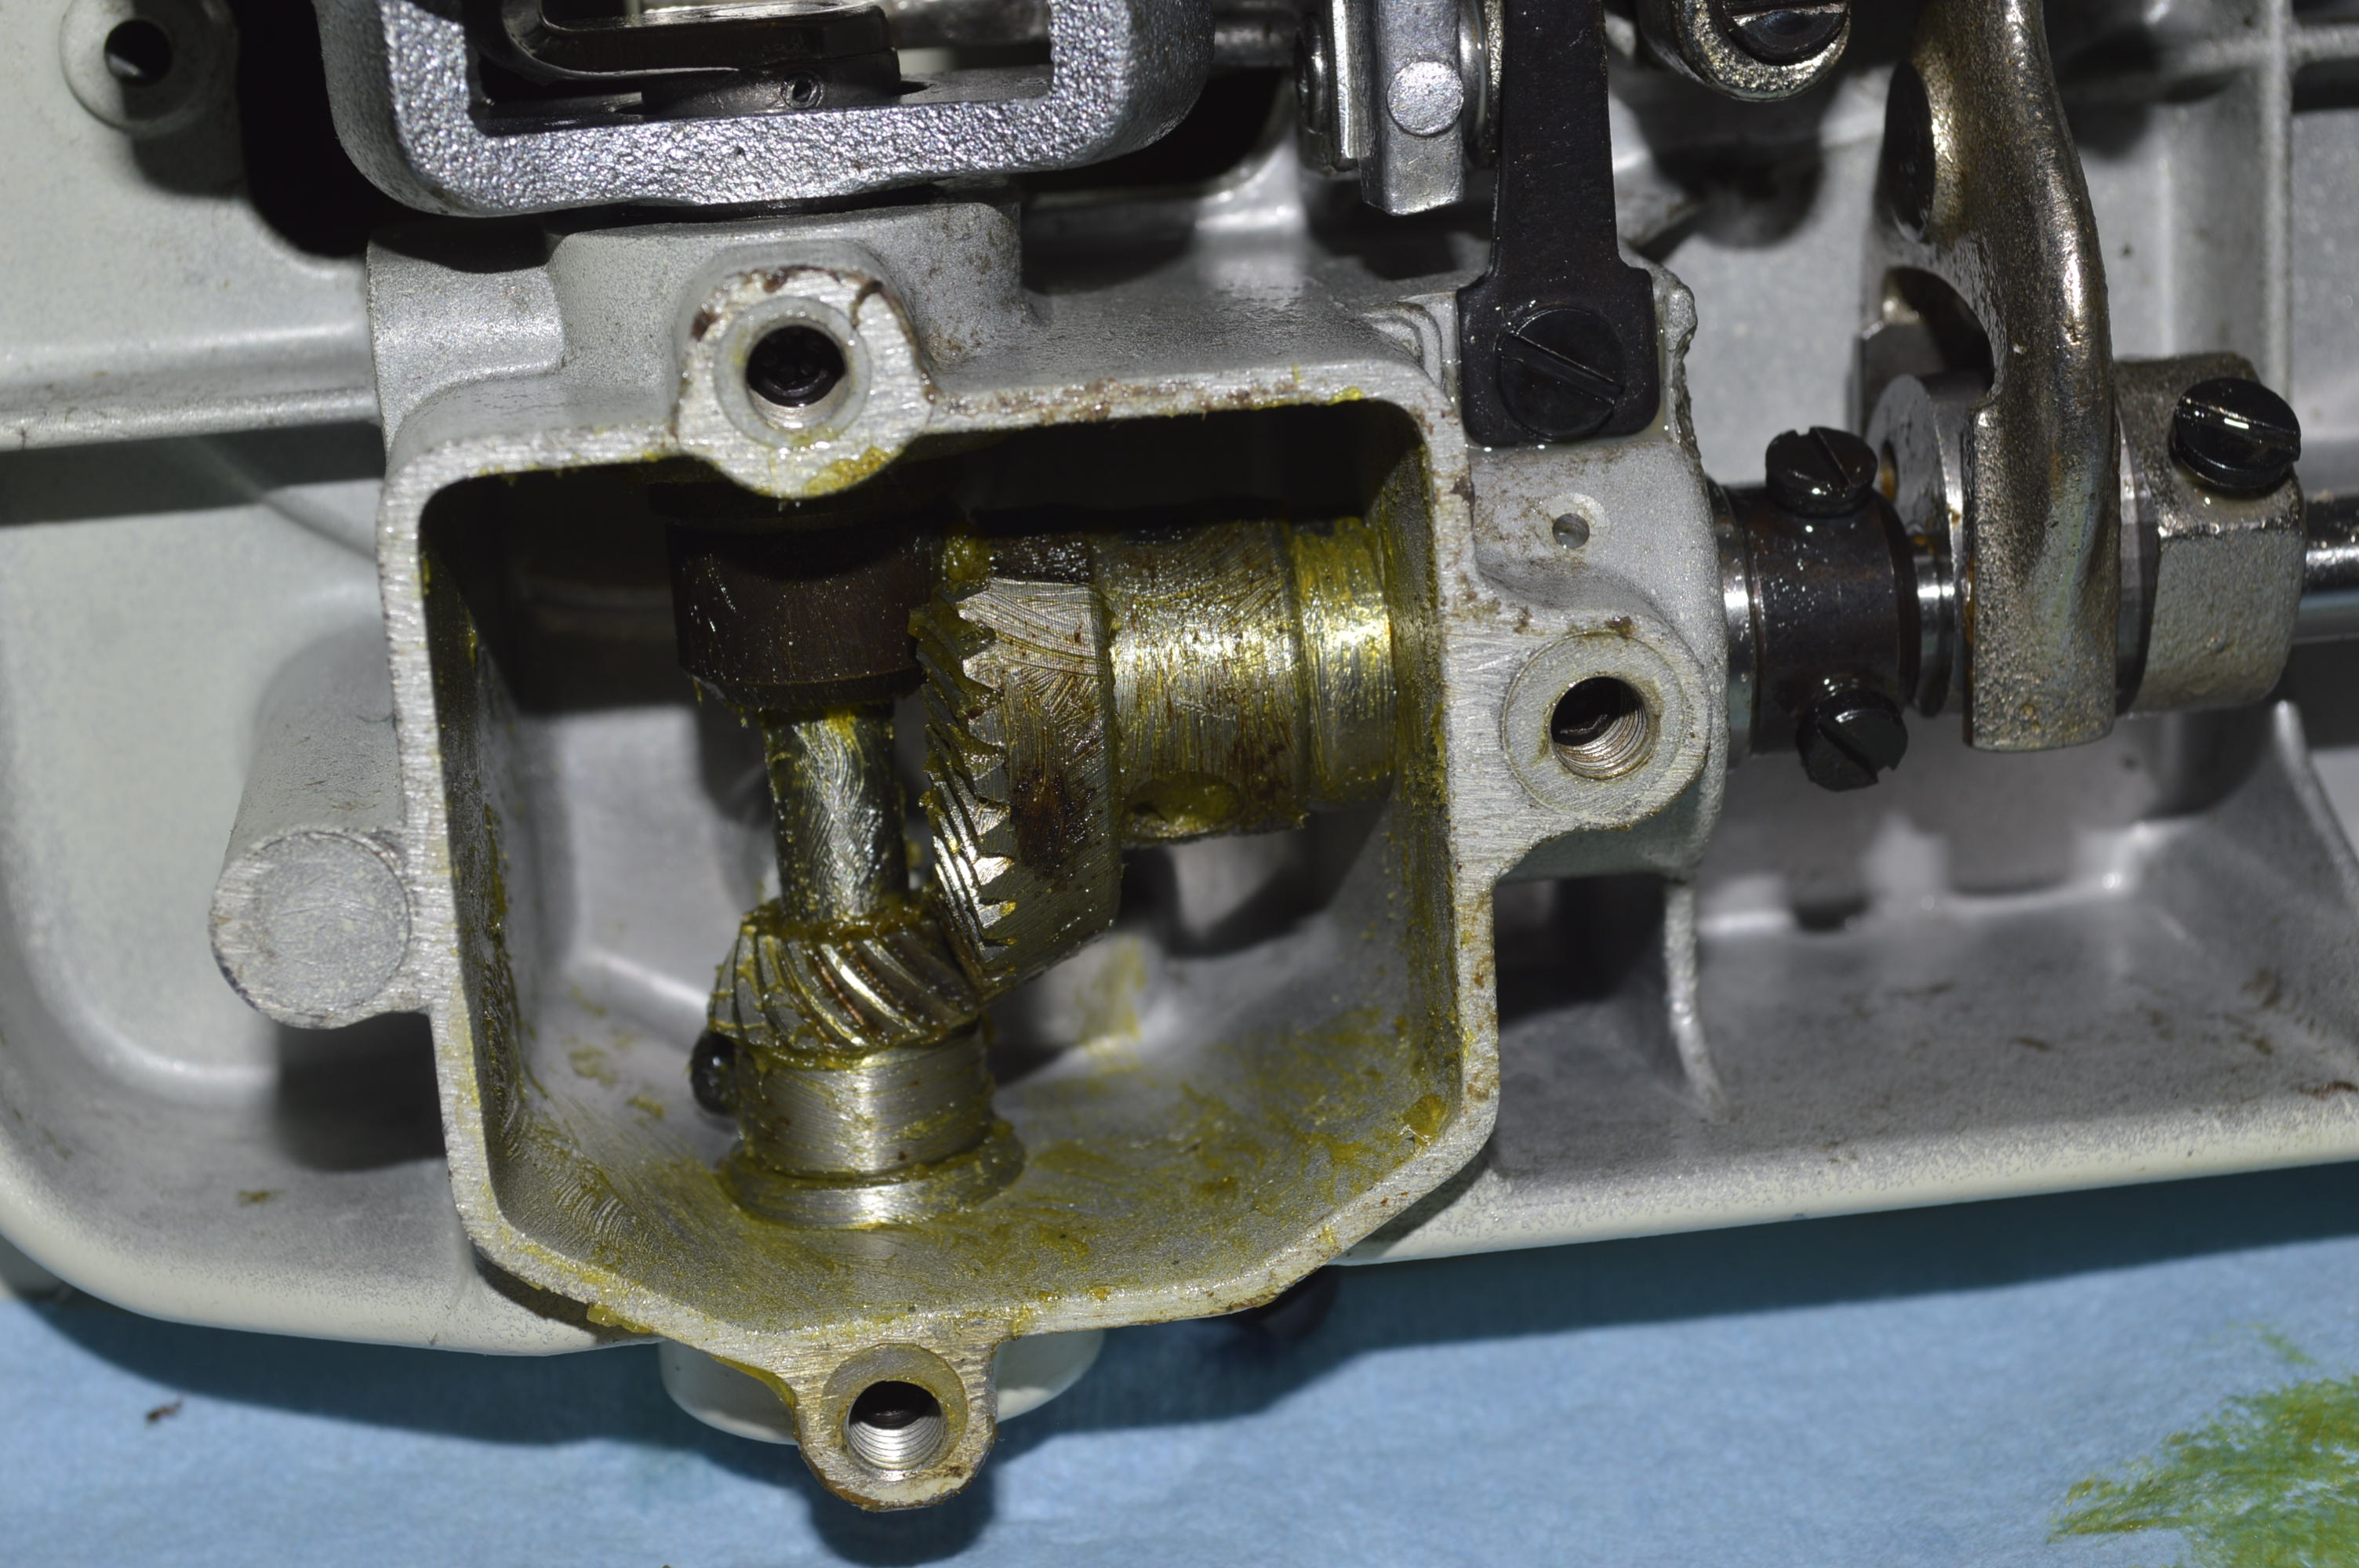
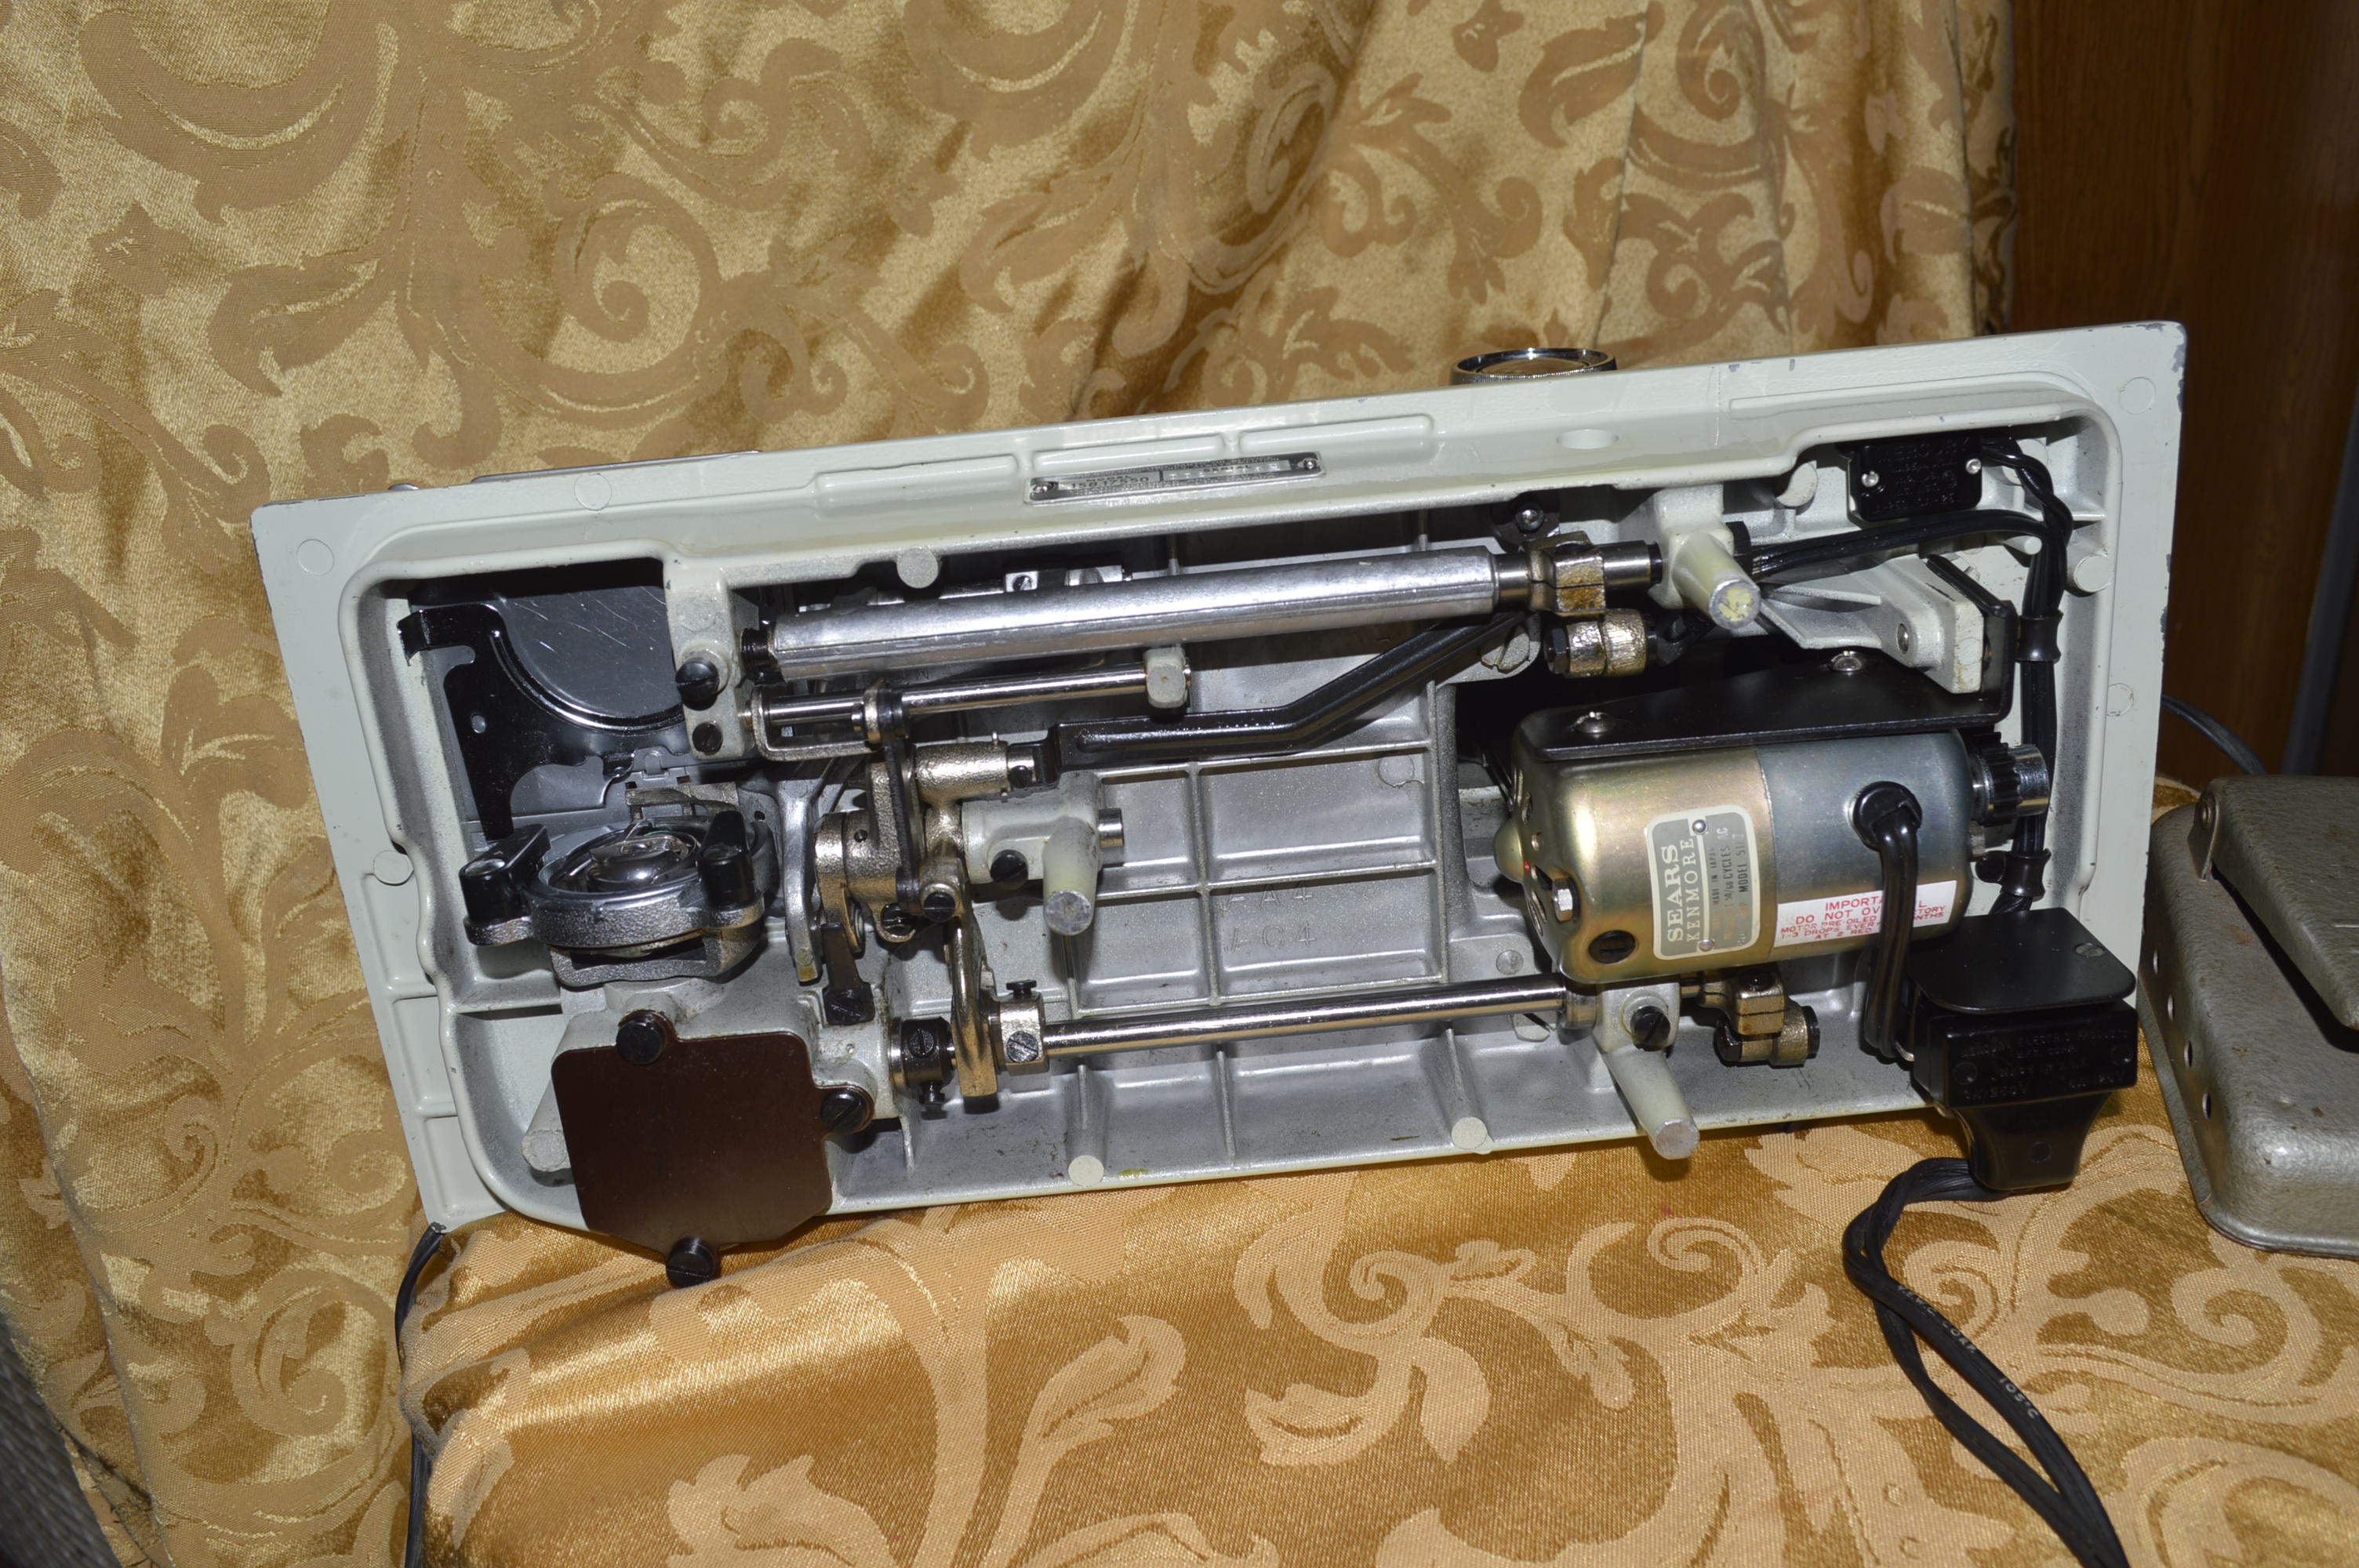
The next step is to clean the shuttle hook gear box and re-grease the gears… The yellow stuff is old grease and it is removed with dental picks and a small blade screw driver. After cleaning off the residue with a stiff utility brush, the gears are re-greased with Tri-Flow grease.
-
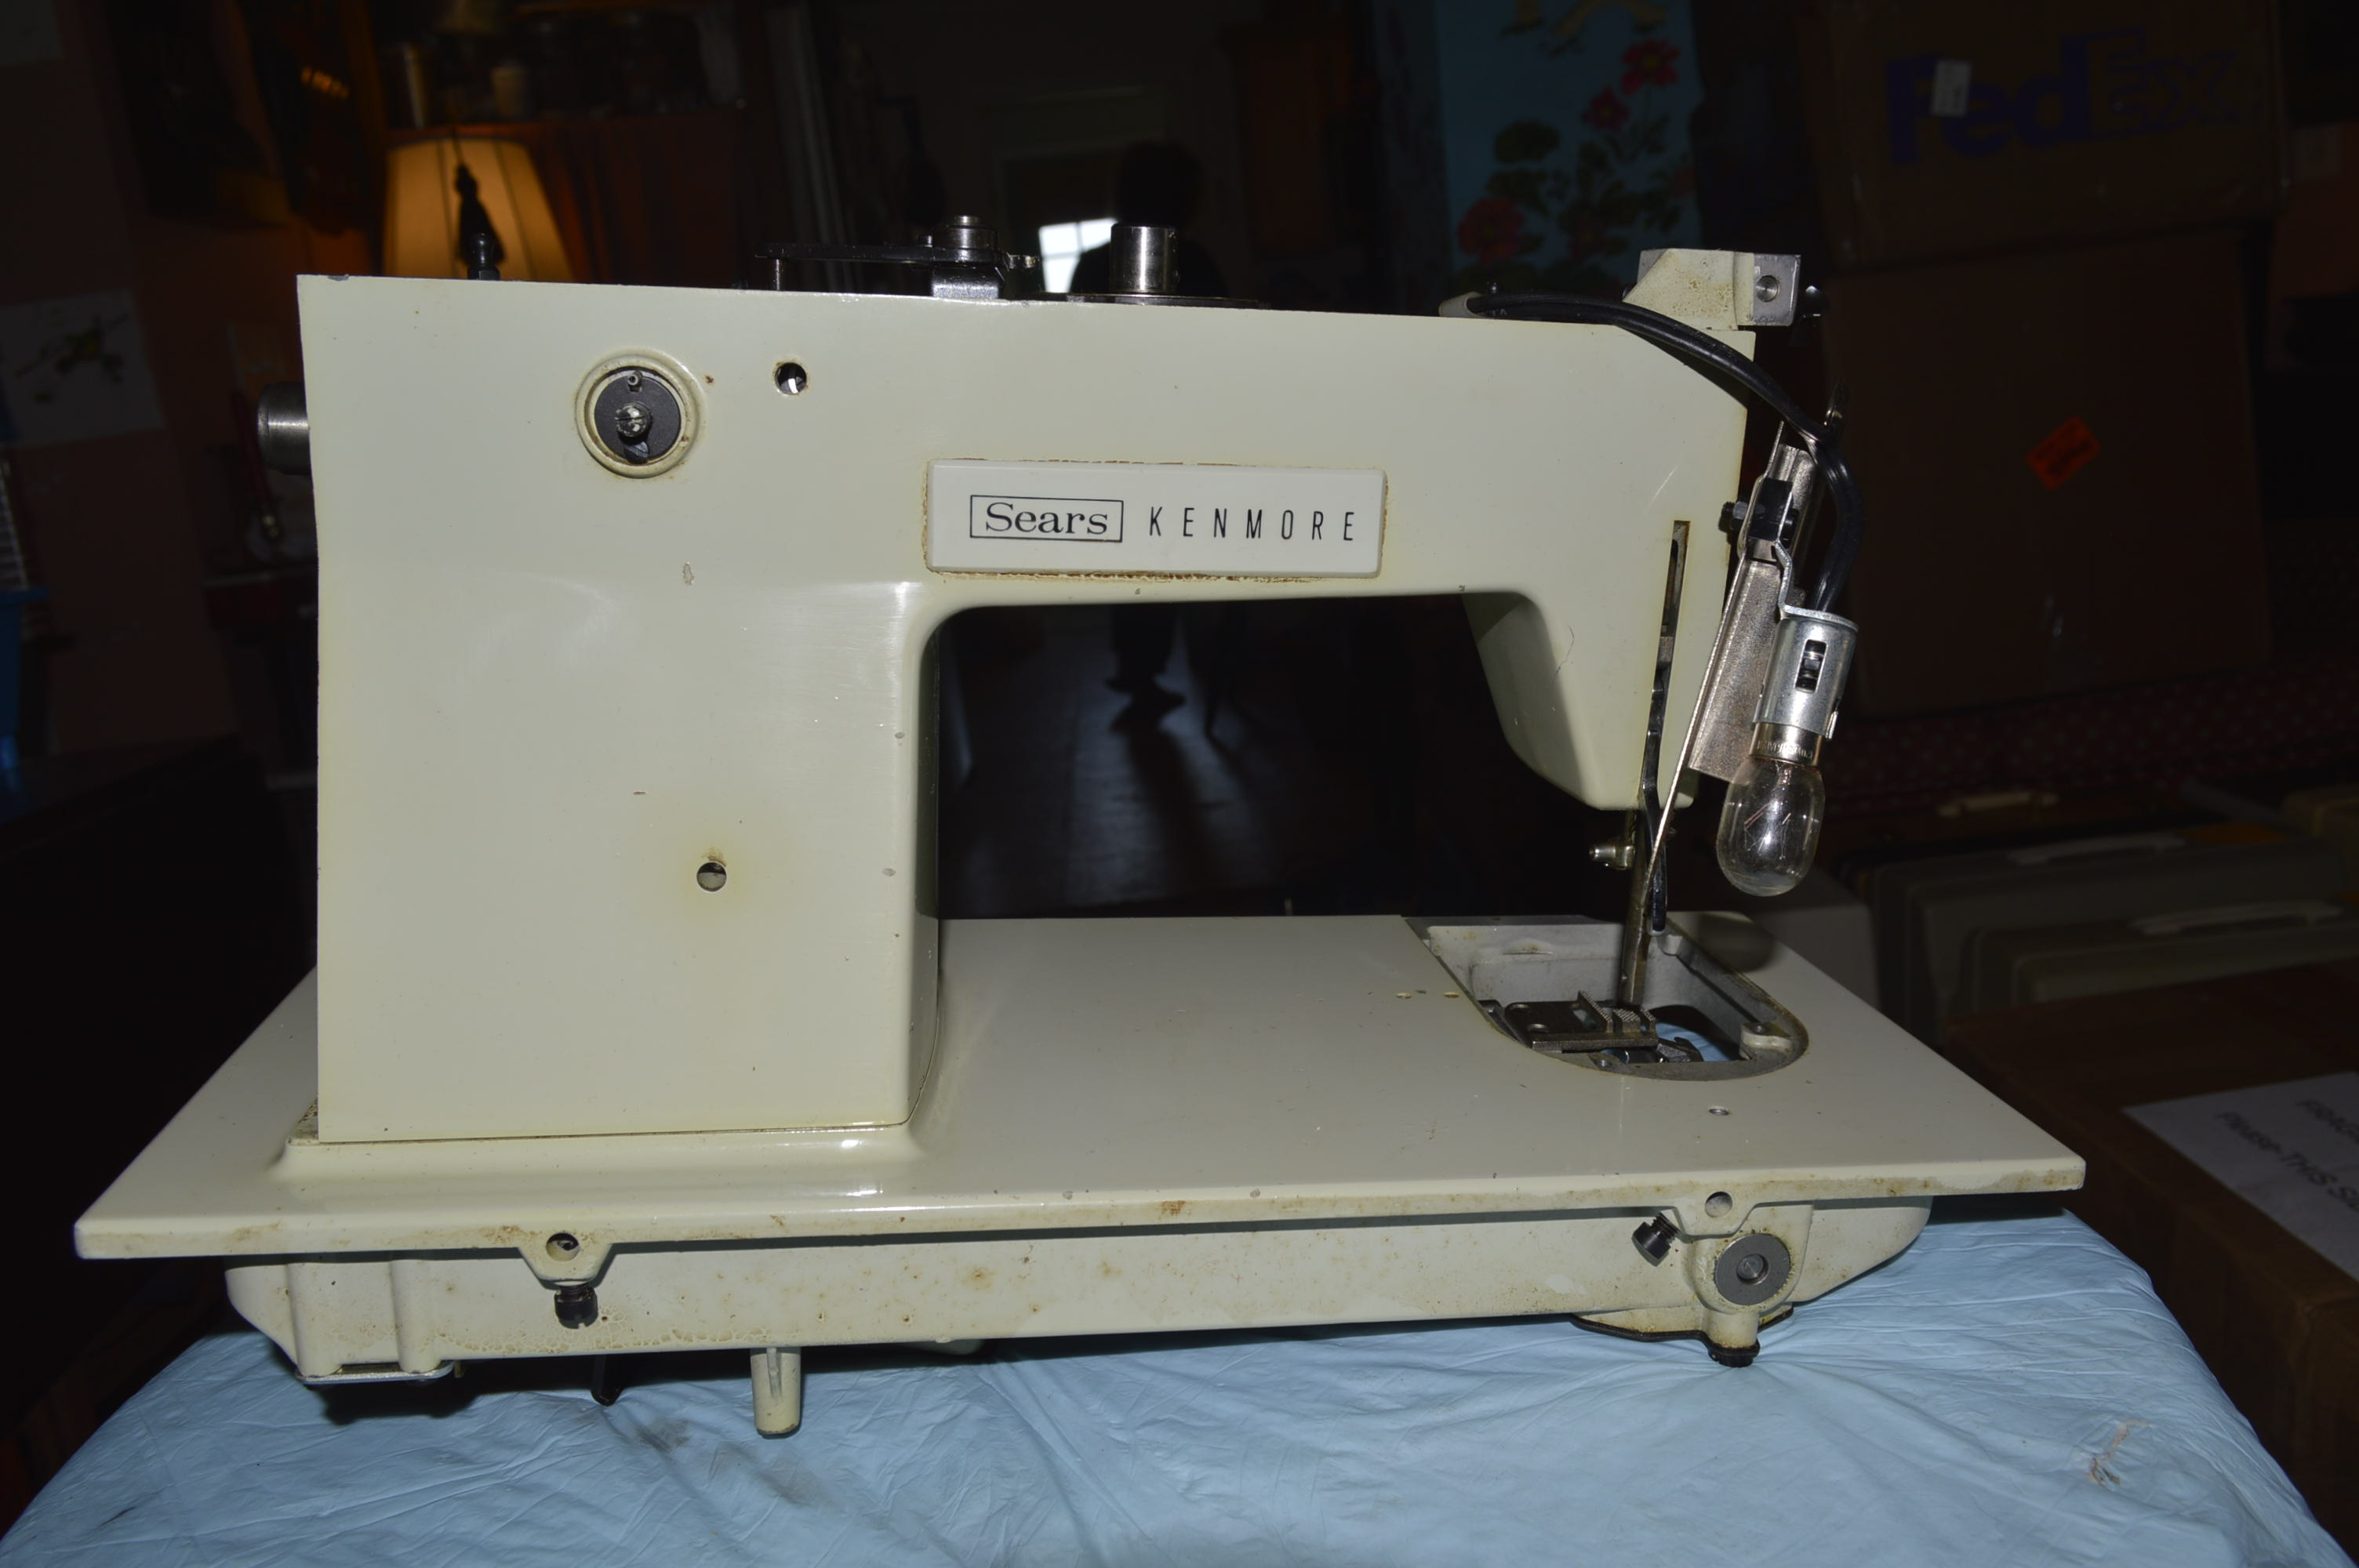
before…
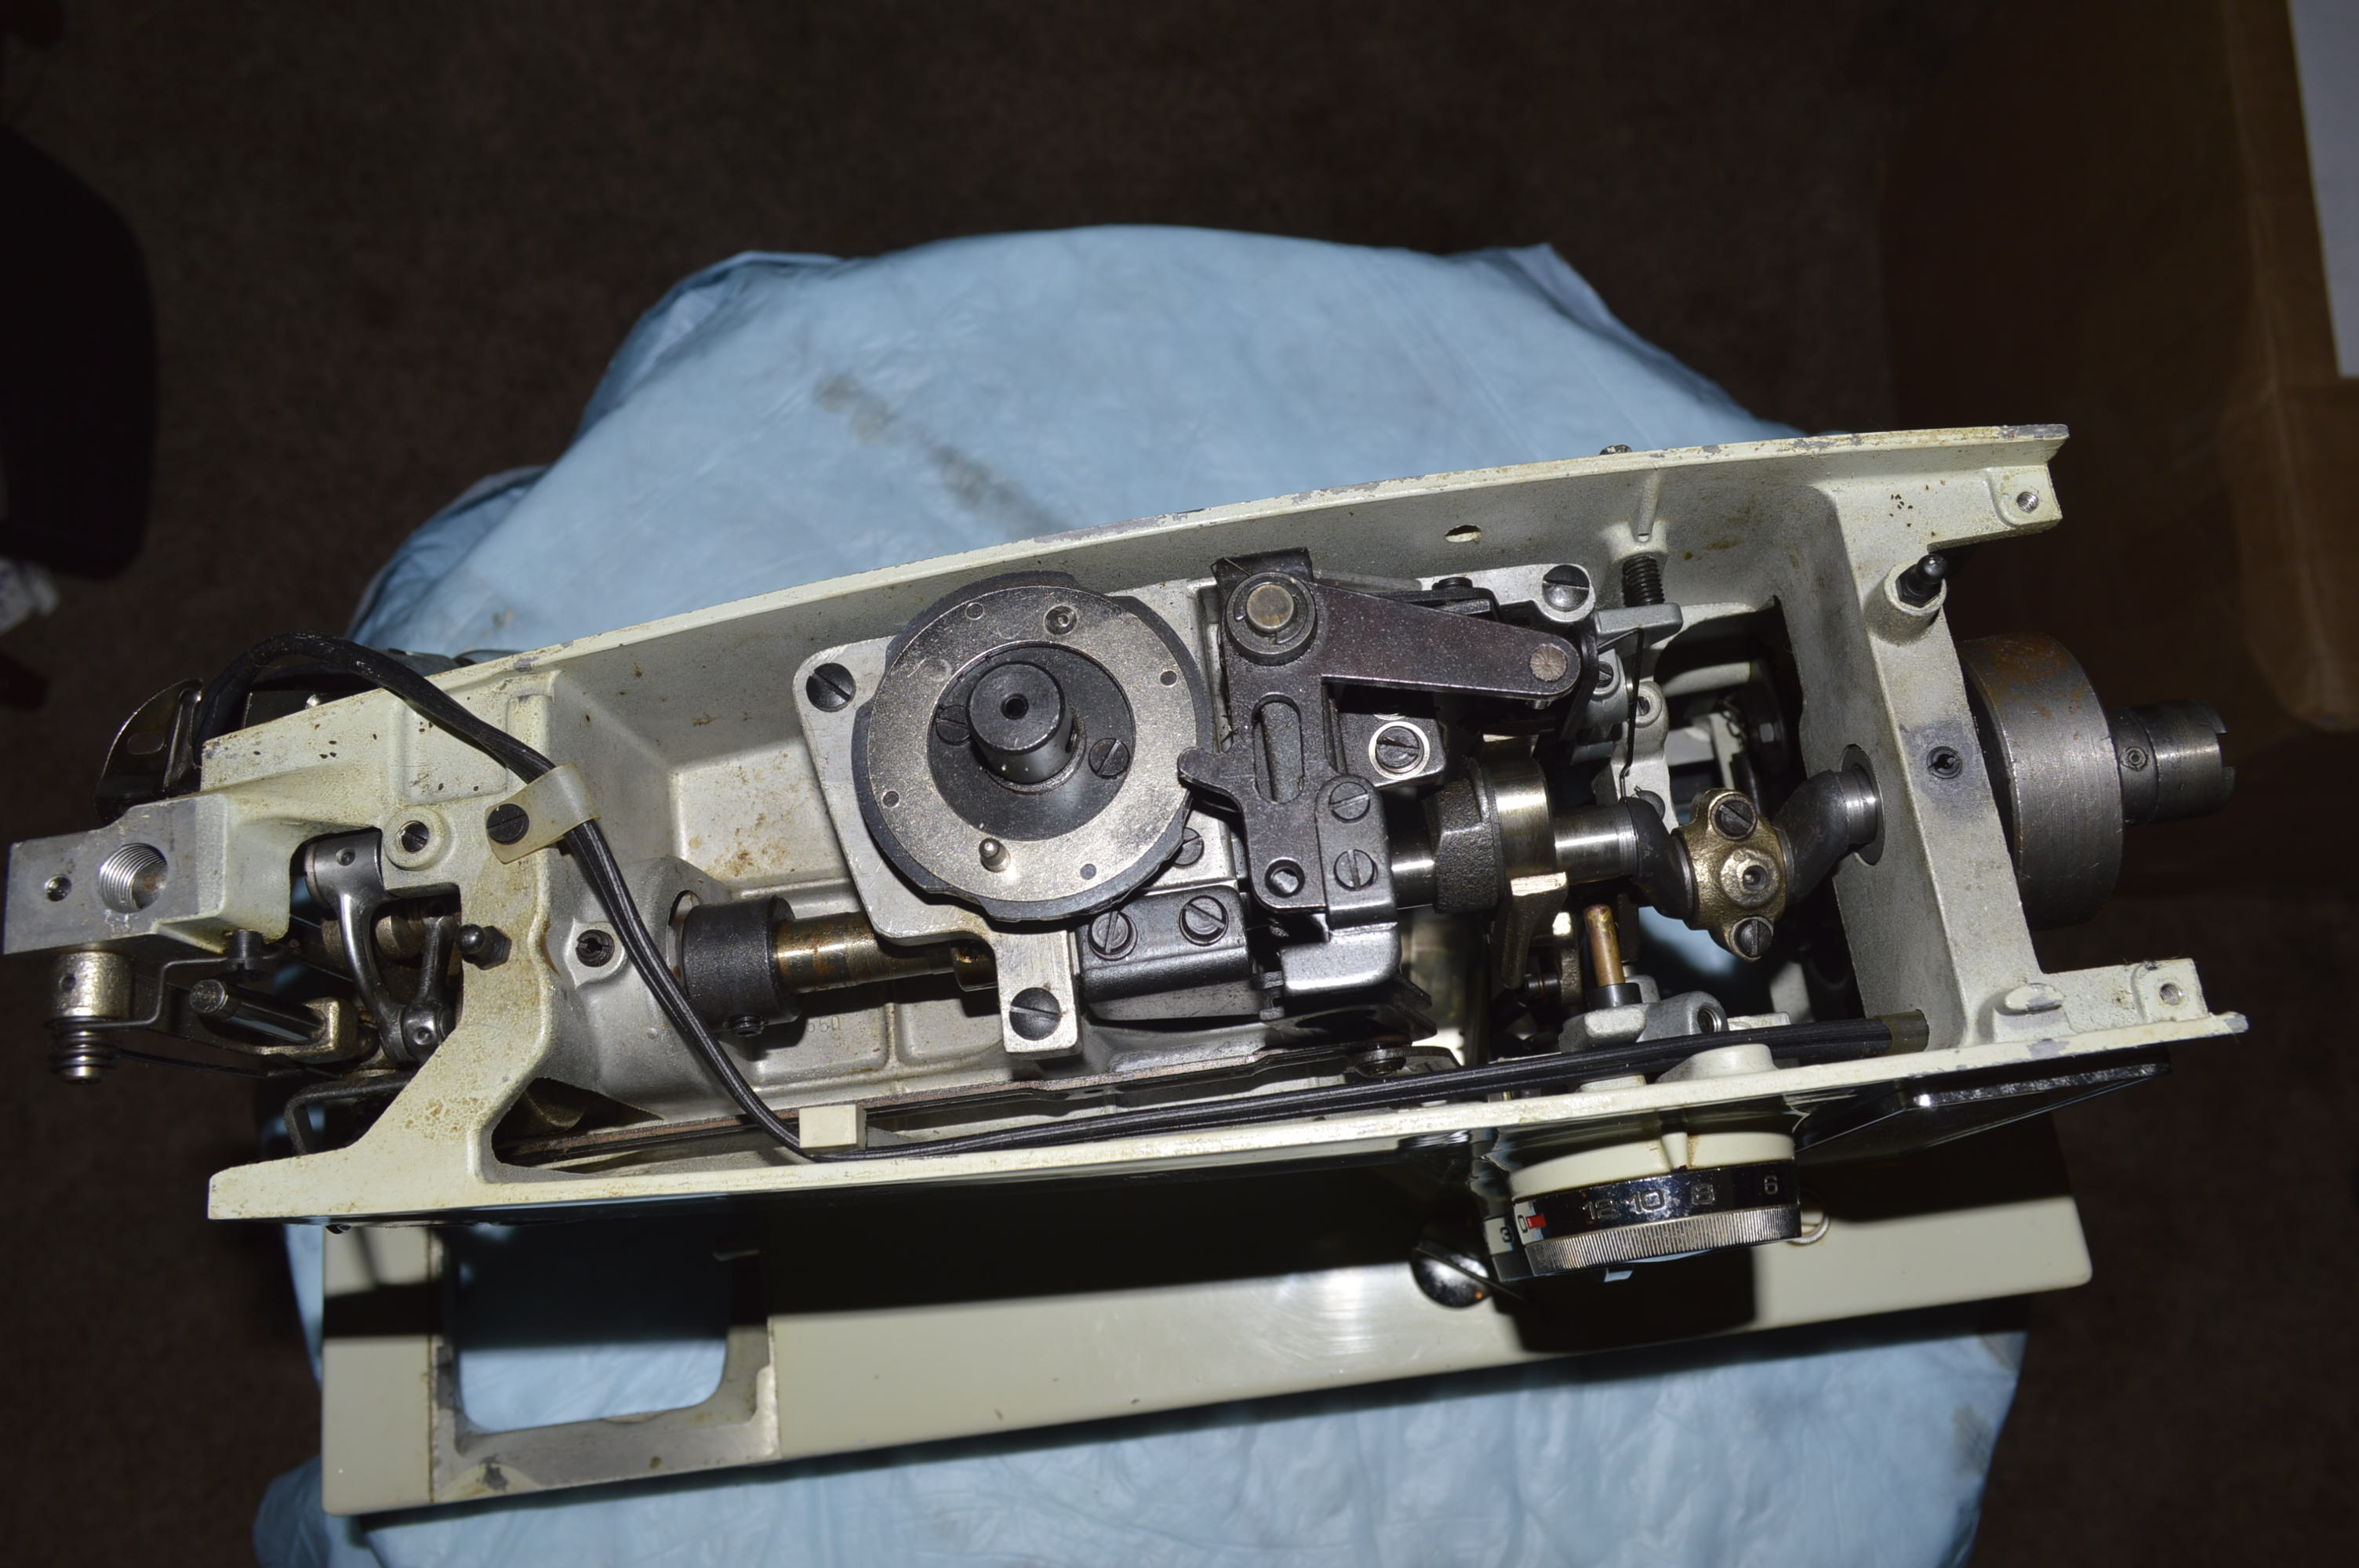
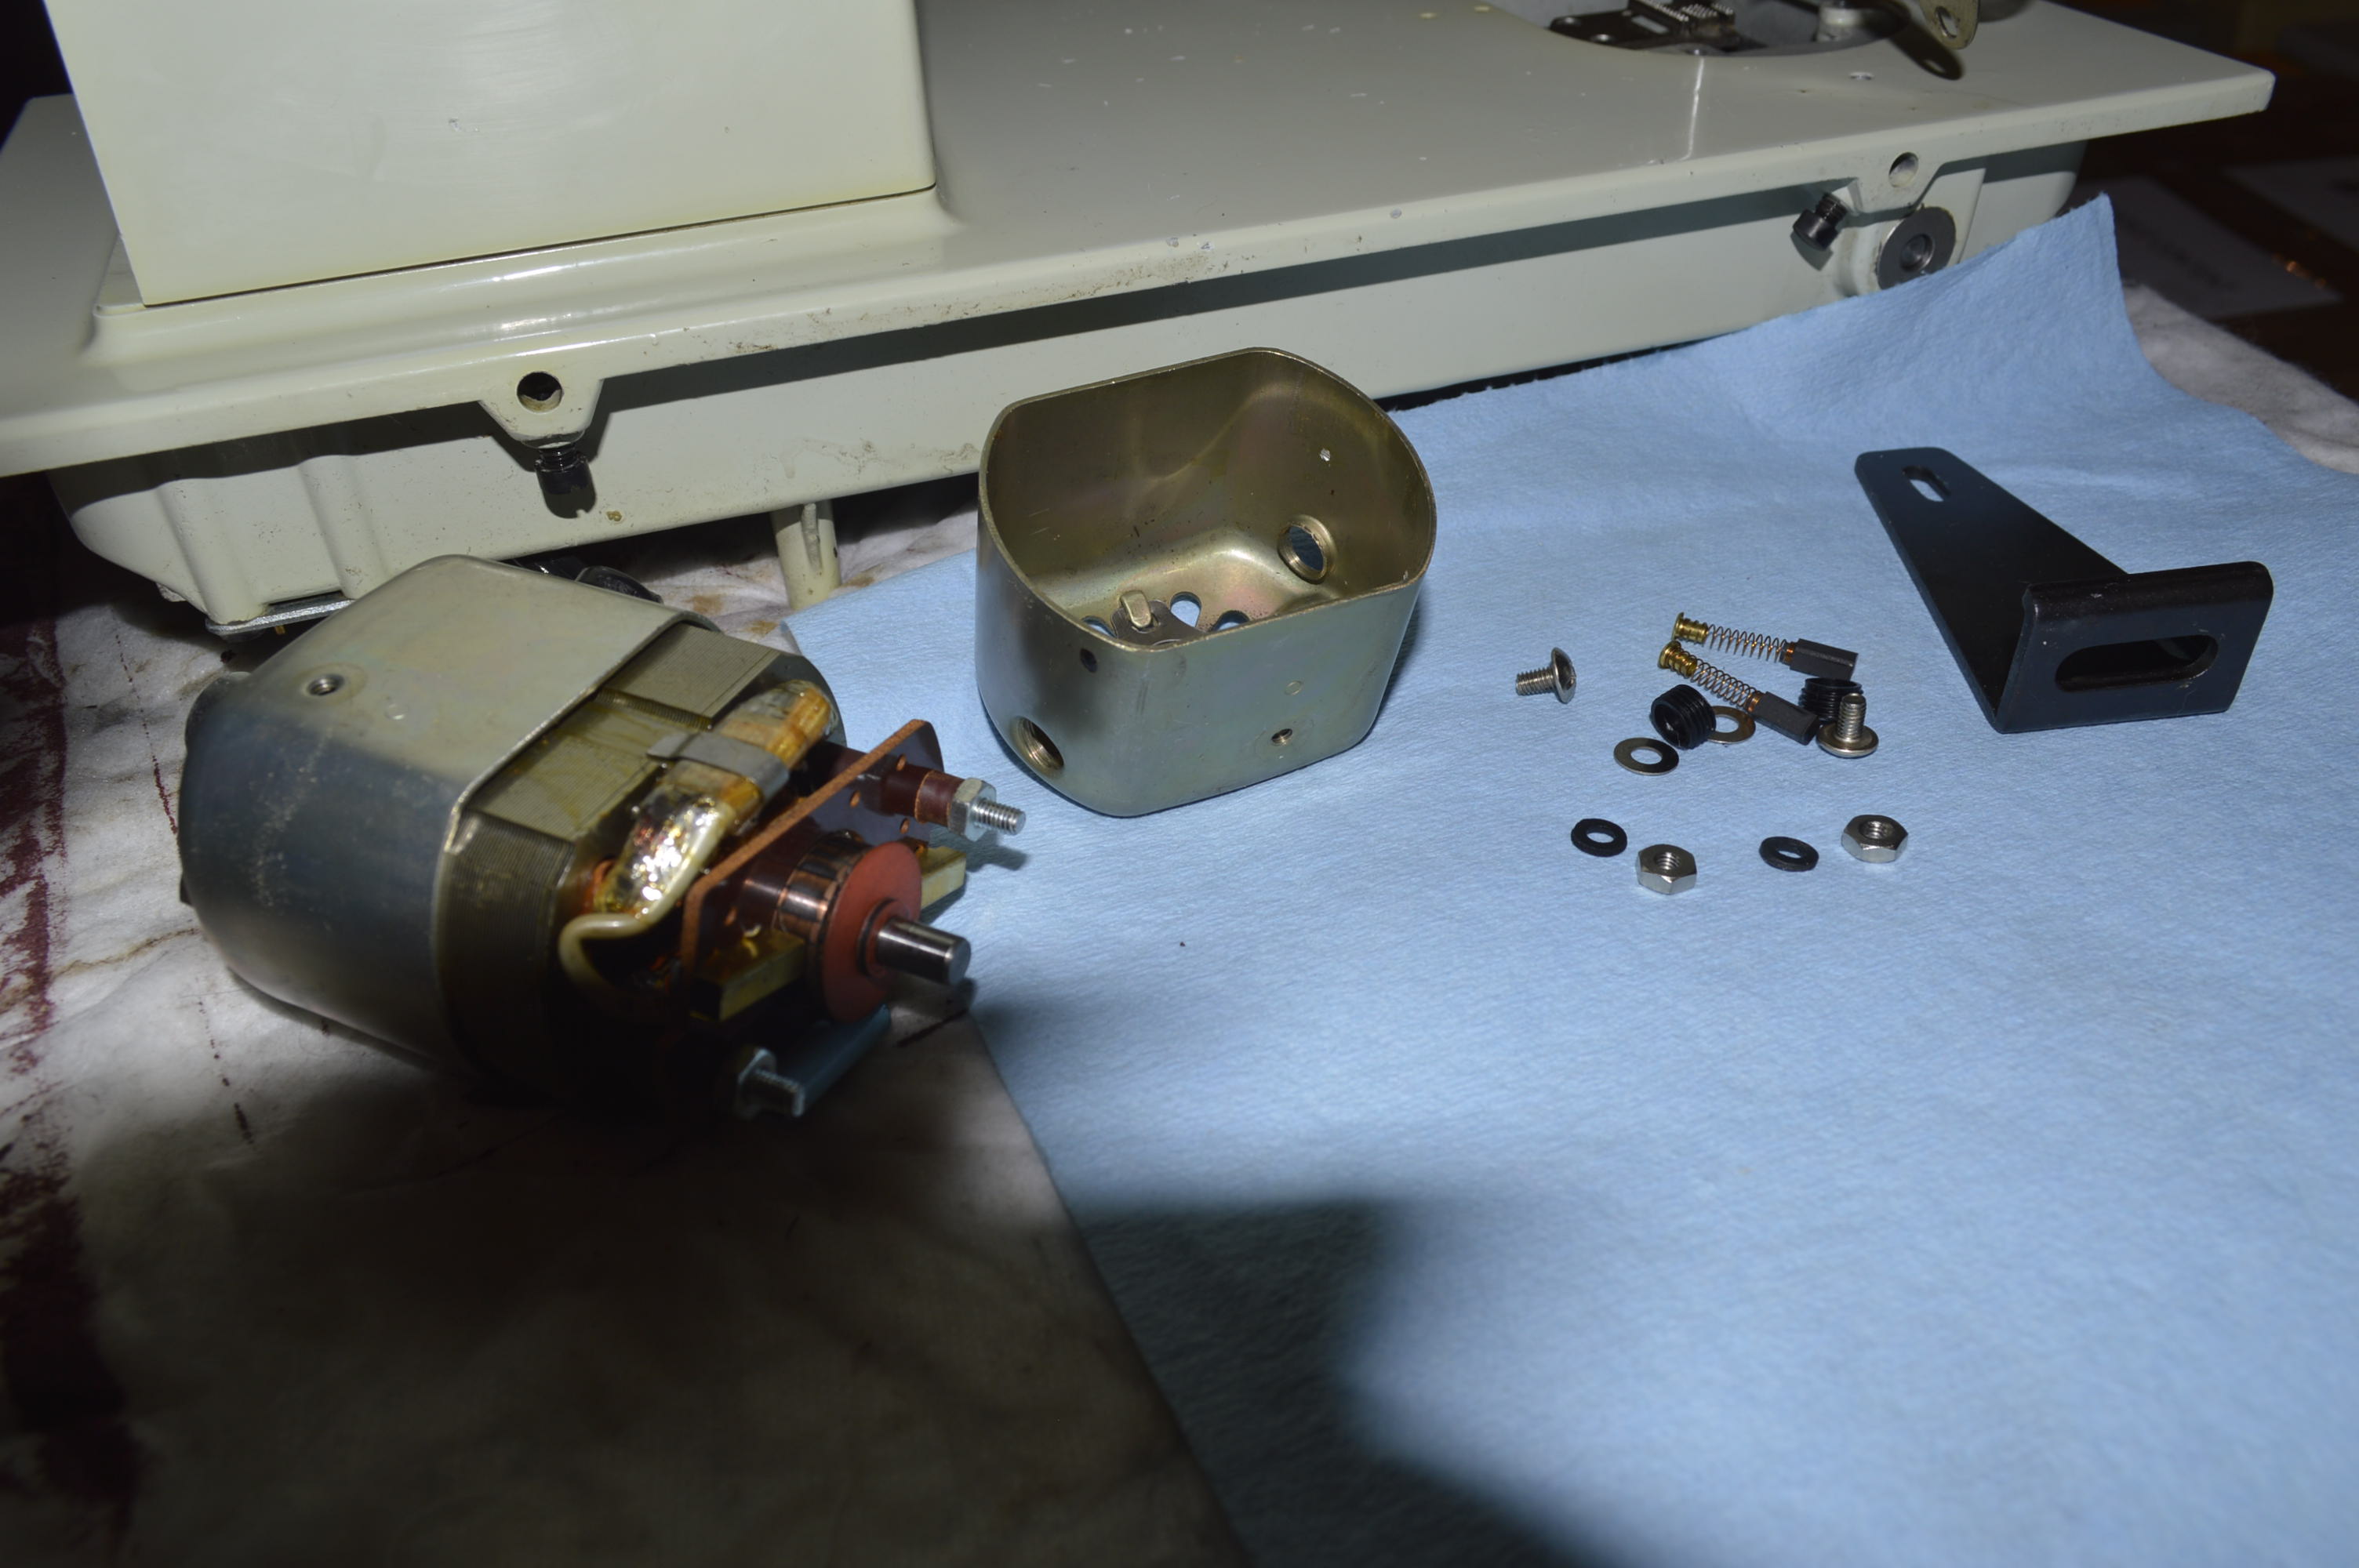
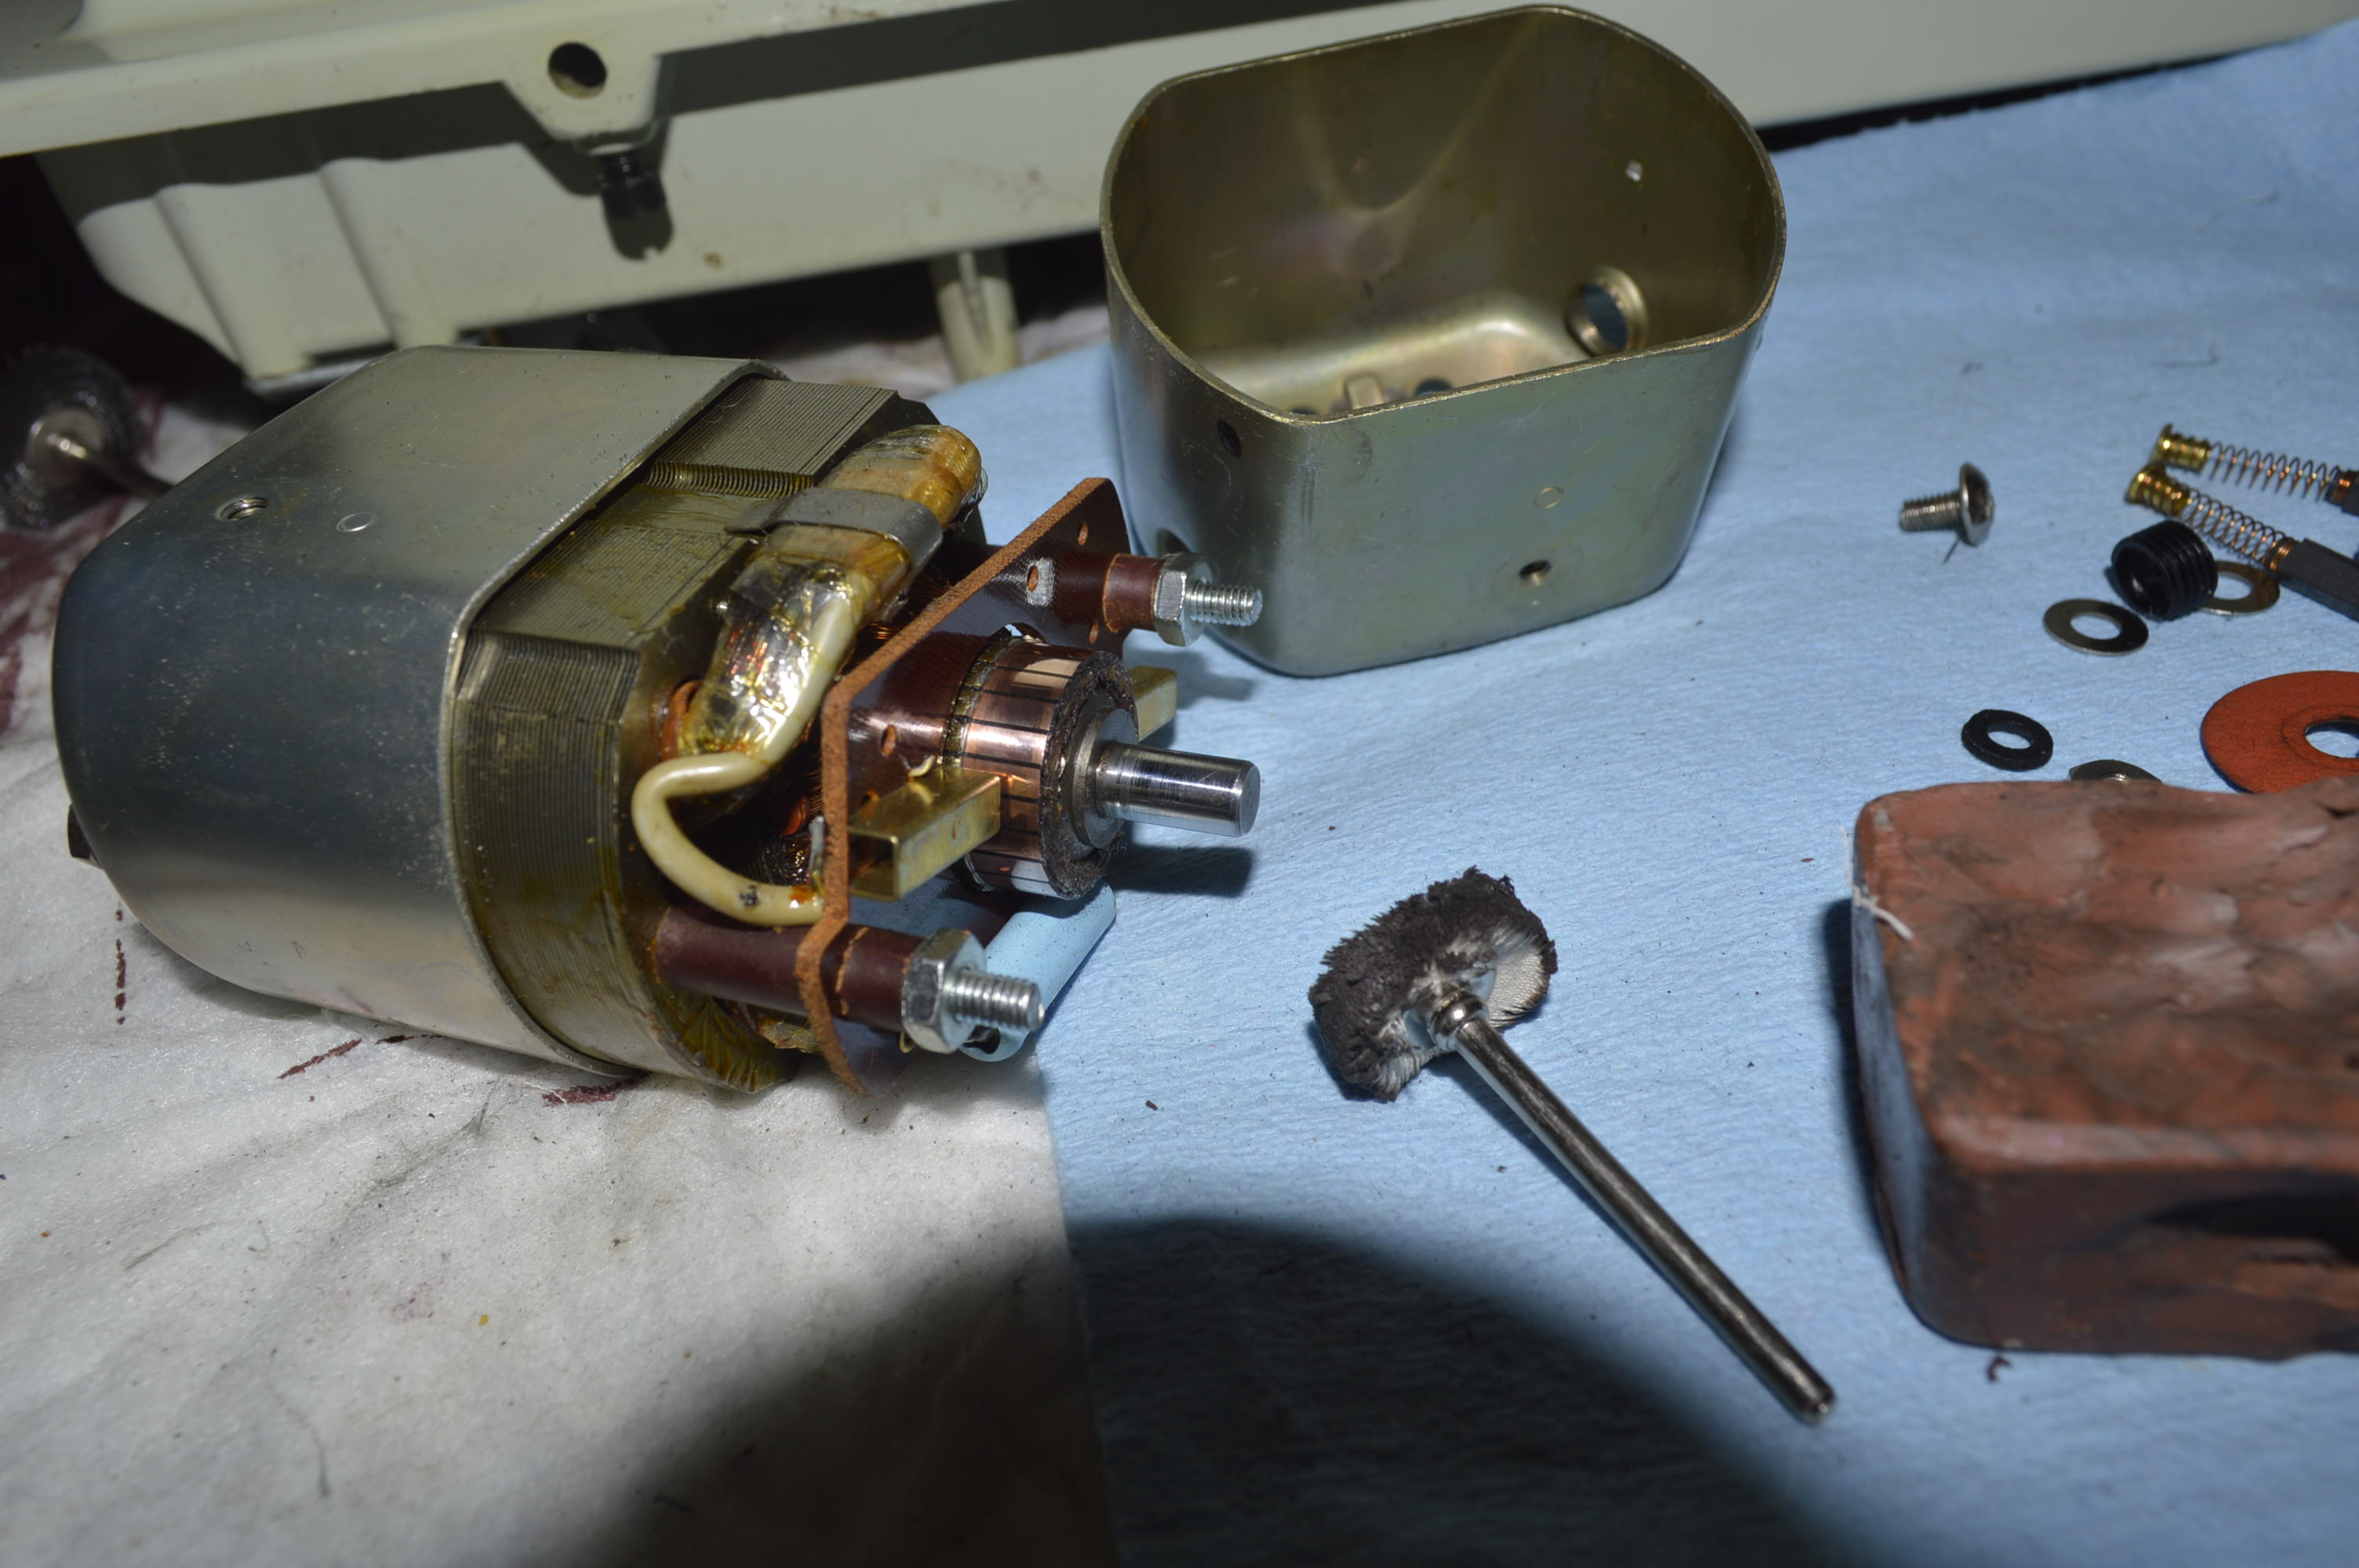
Did you notice how clean the bed mechanisms are? The next step is to service the motor… This only requires the motor brush and rear motor cover removal.
After reassembly and oiling, comes the disassembly and cleaning of the tension assemblies.


After cleaning…

The next picture is important to show… it shows what can hide in the bobbin case and wreaks havoc with getting a good tension balance and/or intermittent tension problems. If you find yourself having to adjust the top tension repeatedly while sewing a project, this may be the culprit… If you think this may be your problem, and don’t want to mess with a very small screw and adjustments, just replace it… they are pretty cheap.
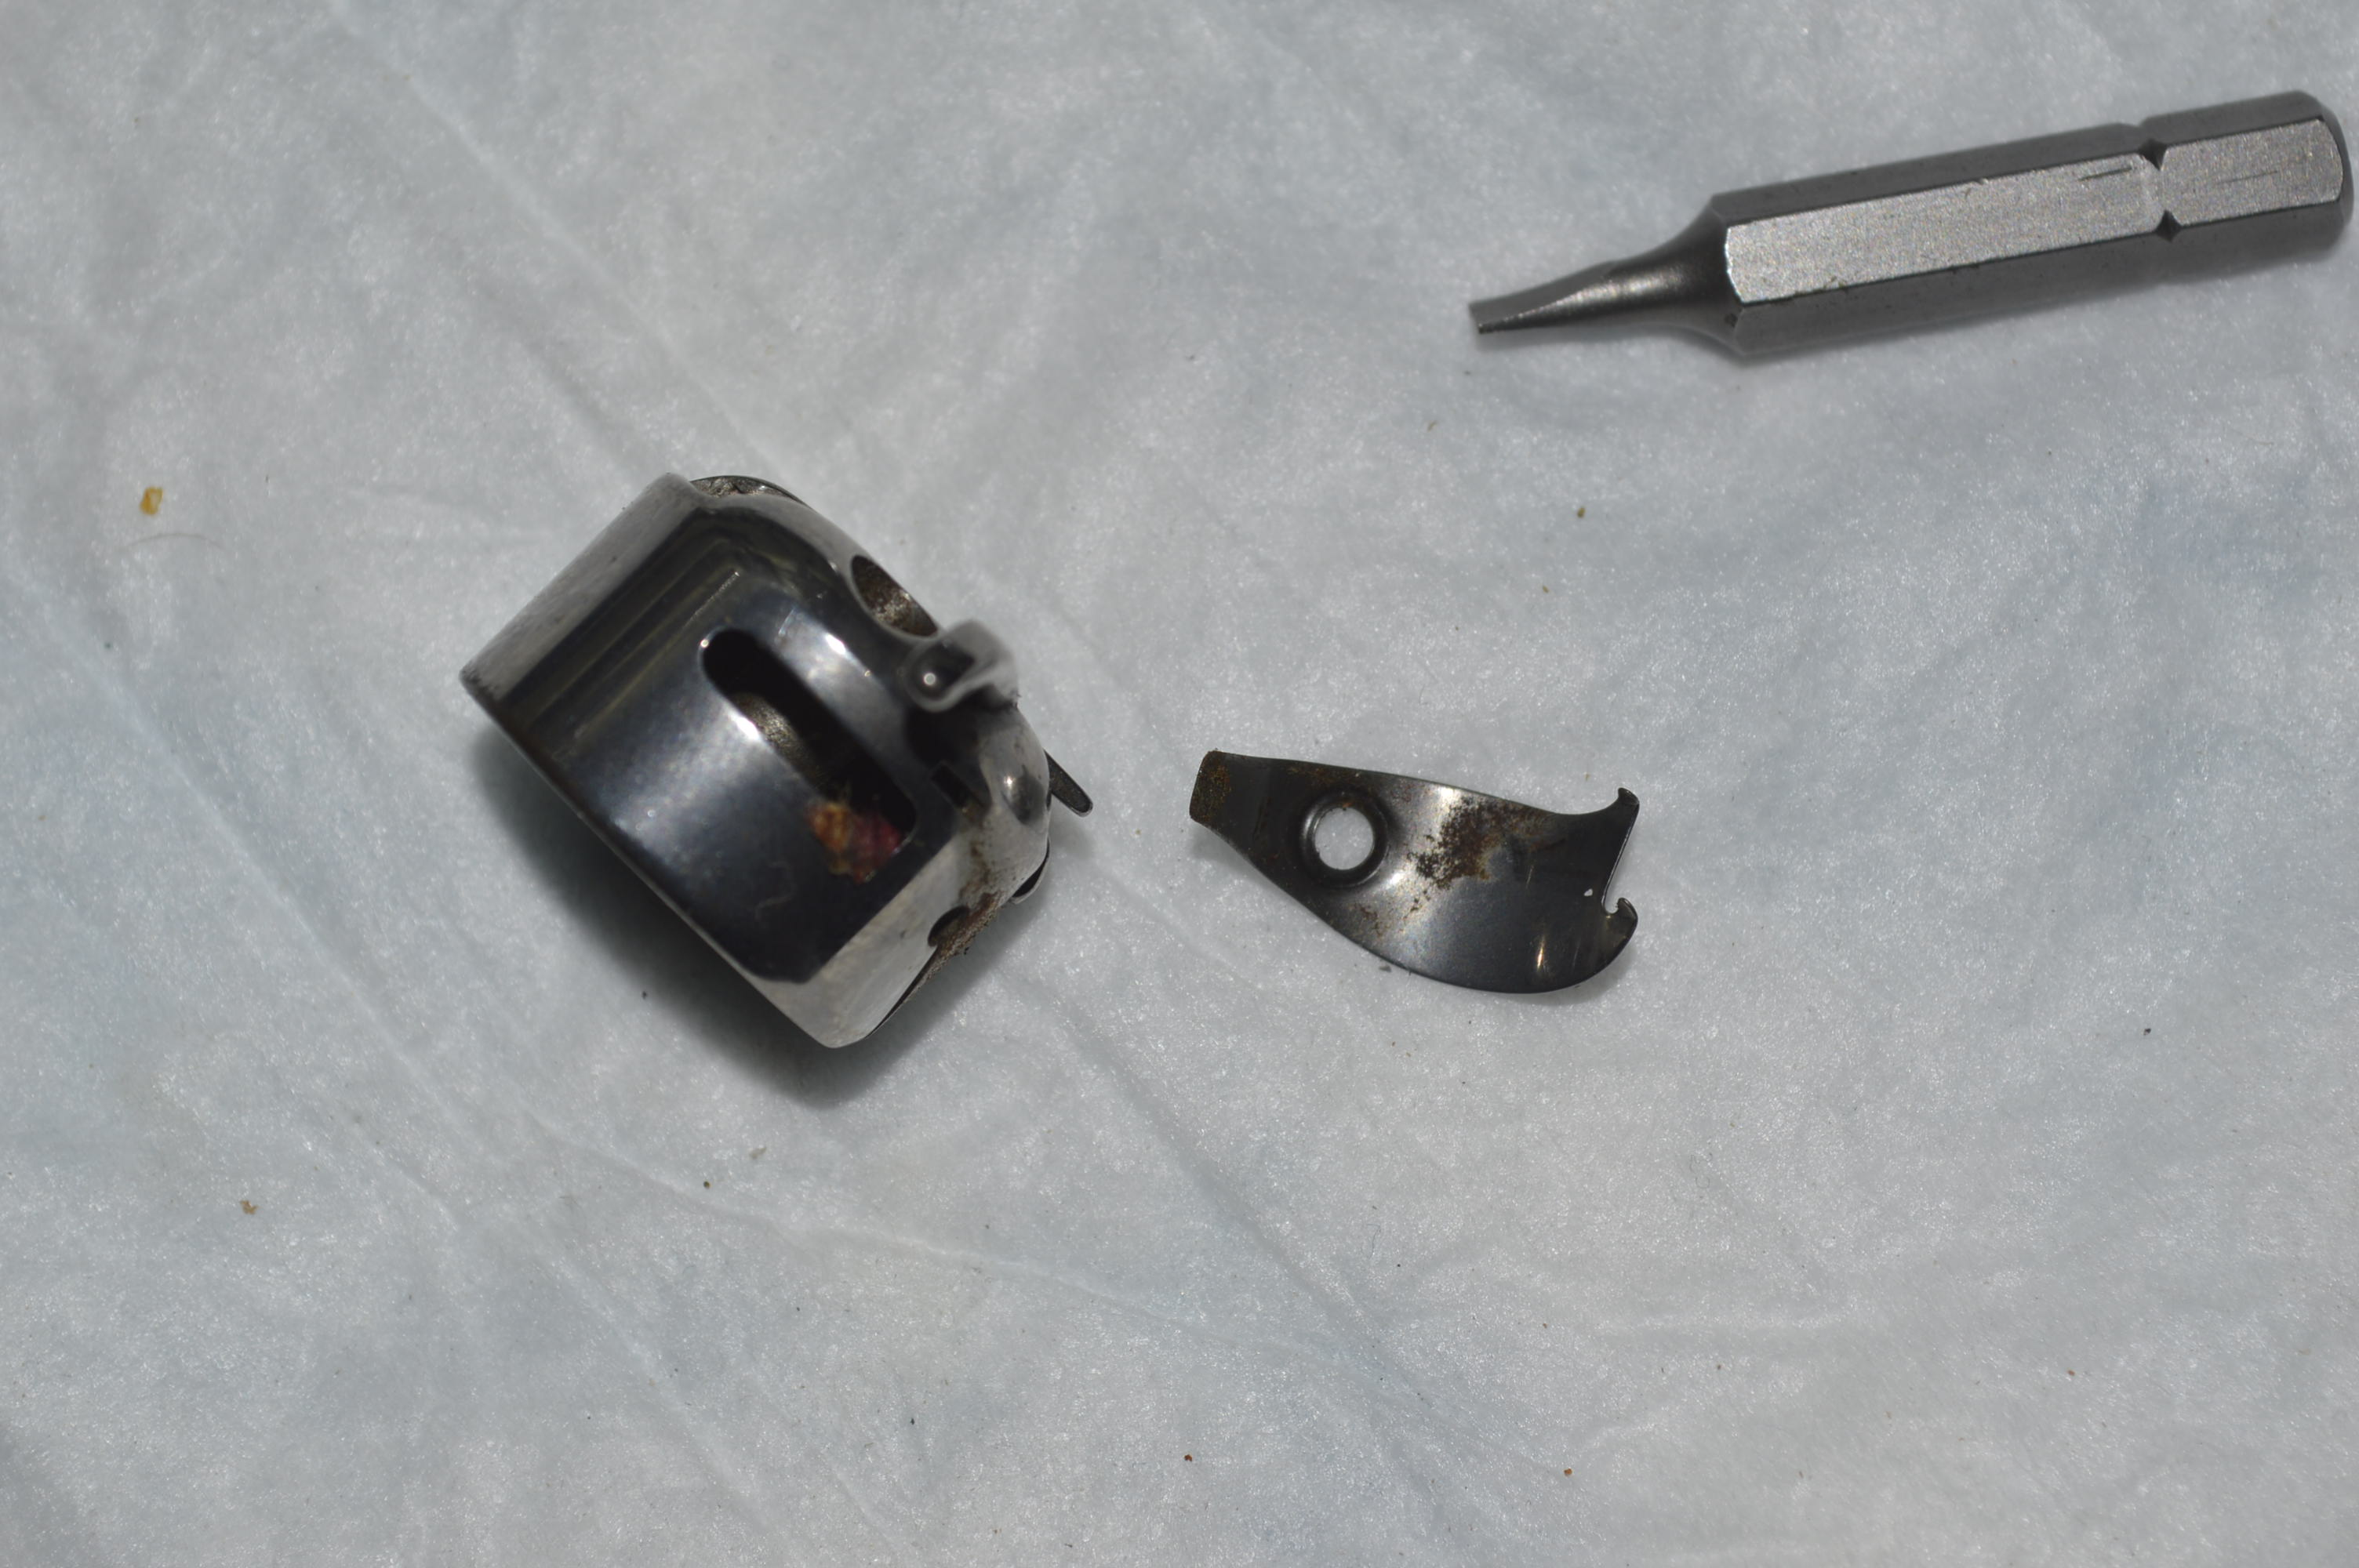
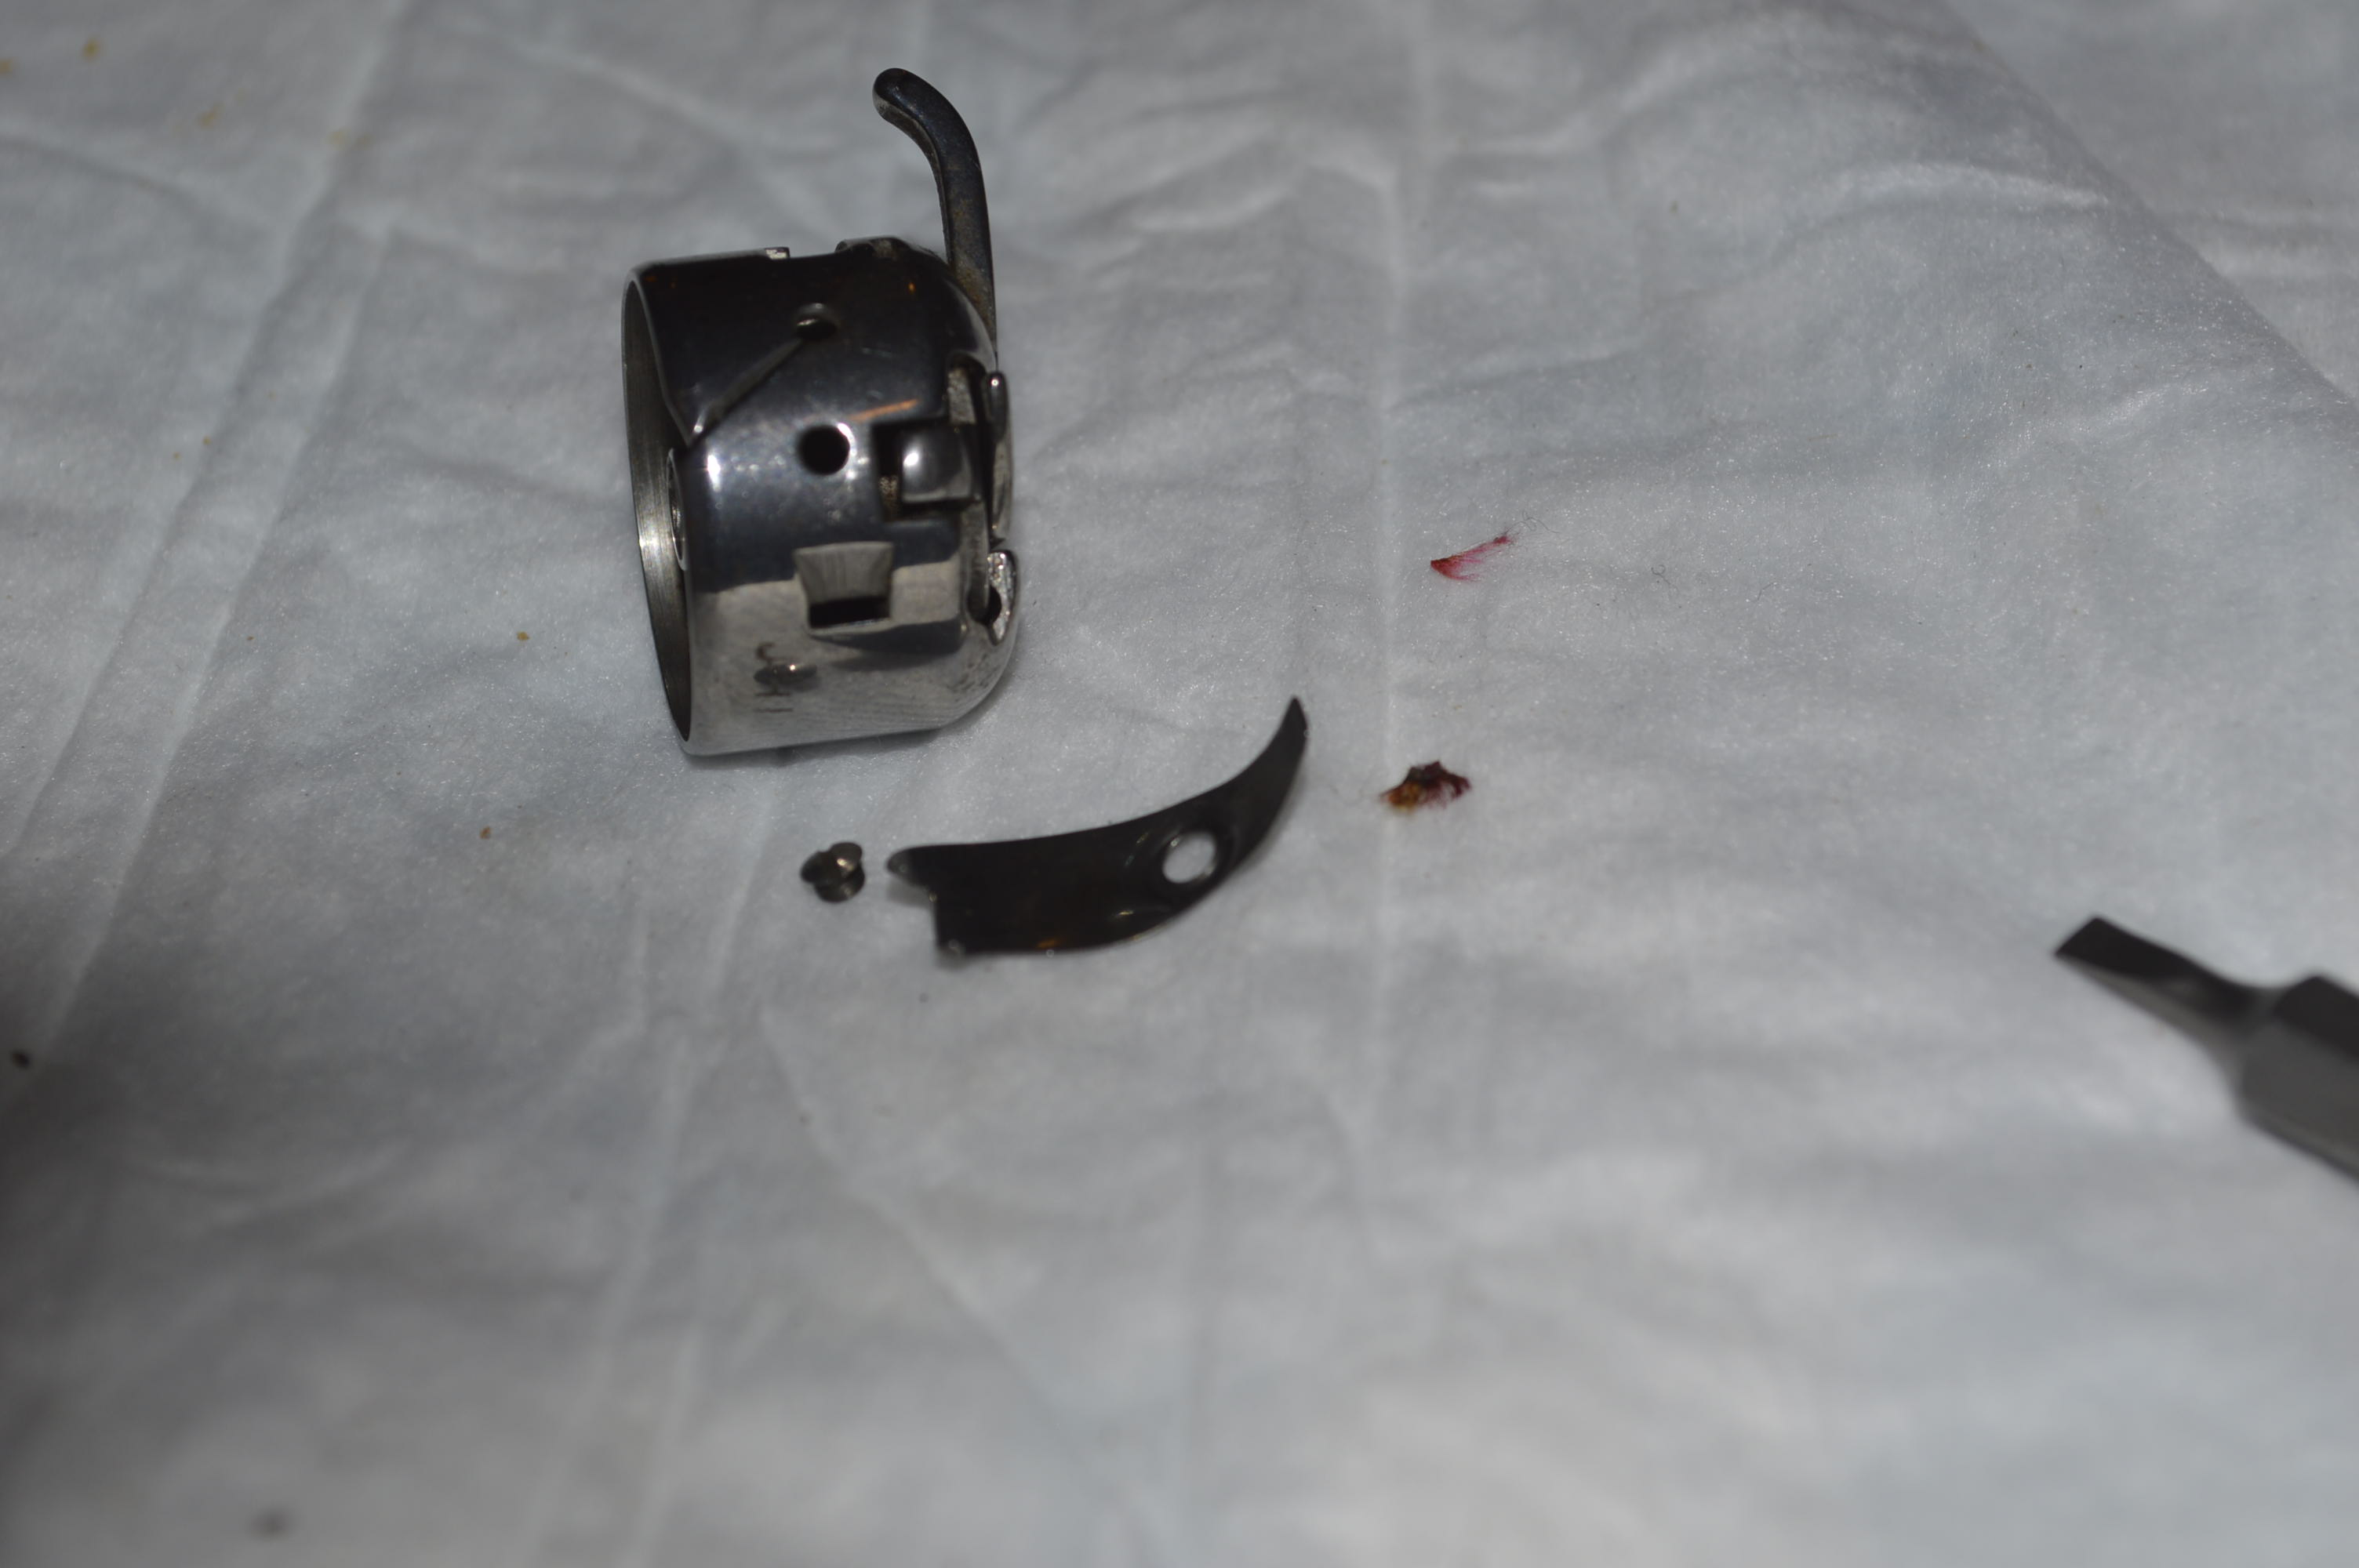
The small leaf spring performs the same task as the tension discs in the top tension mechanism. It is adjusted with a small screw to regulate the clamping force, or “drag” on the bobbin thread. If you look closely, you will see corrosion on the bobbin case, and crud on the leaf spring… all of it is directly in the thread path. Often overlooked, this is a very important part of servicing a sewing machine. After a soft bristle steel wire wheel, it is good as new.
The top tension parts after cleaning…
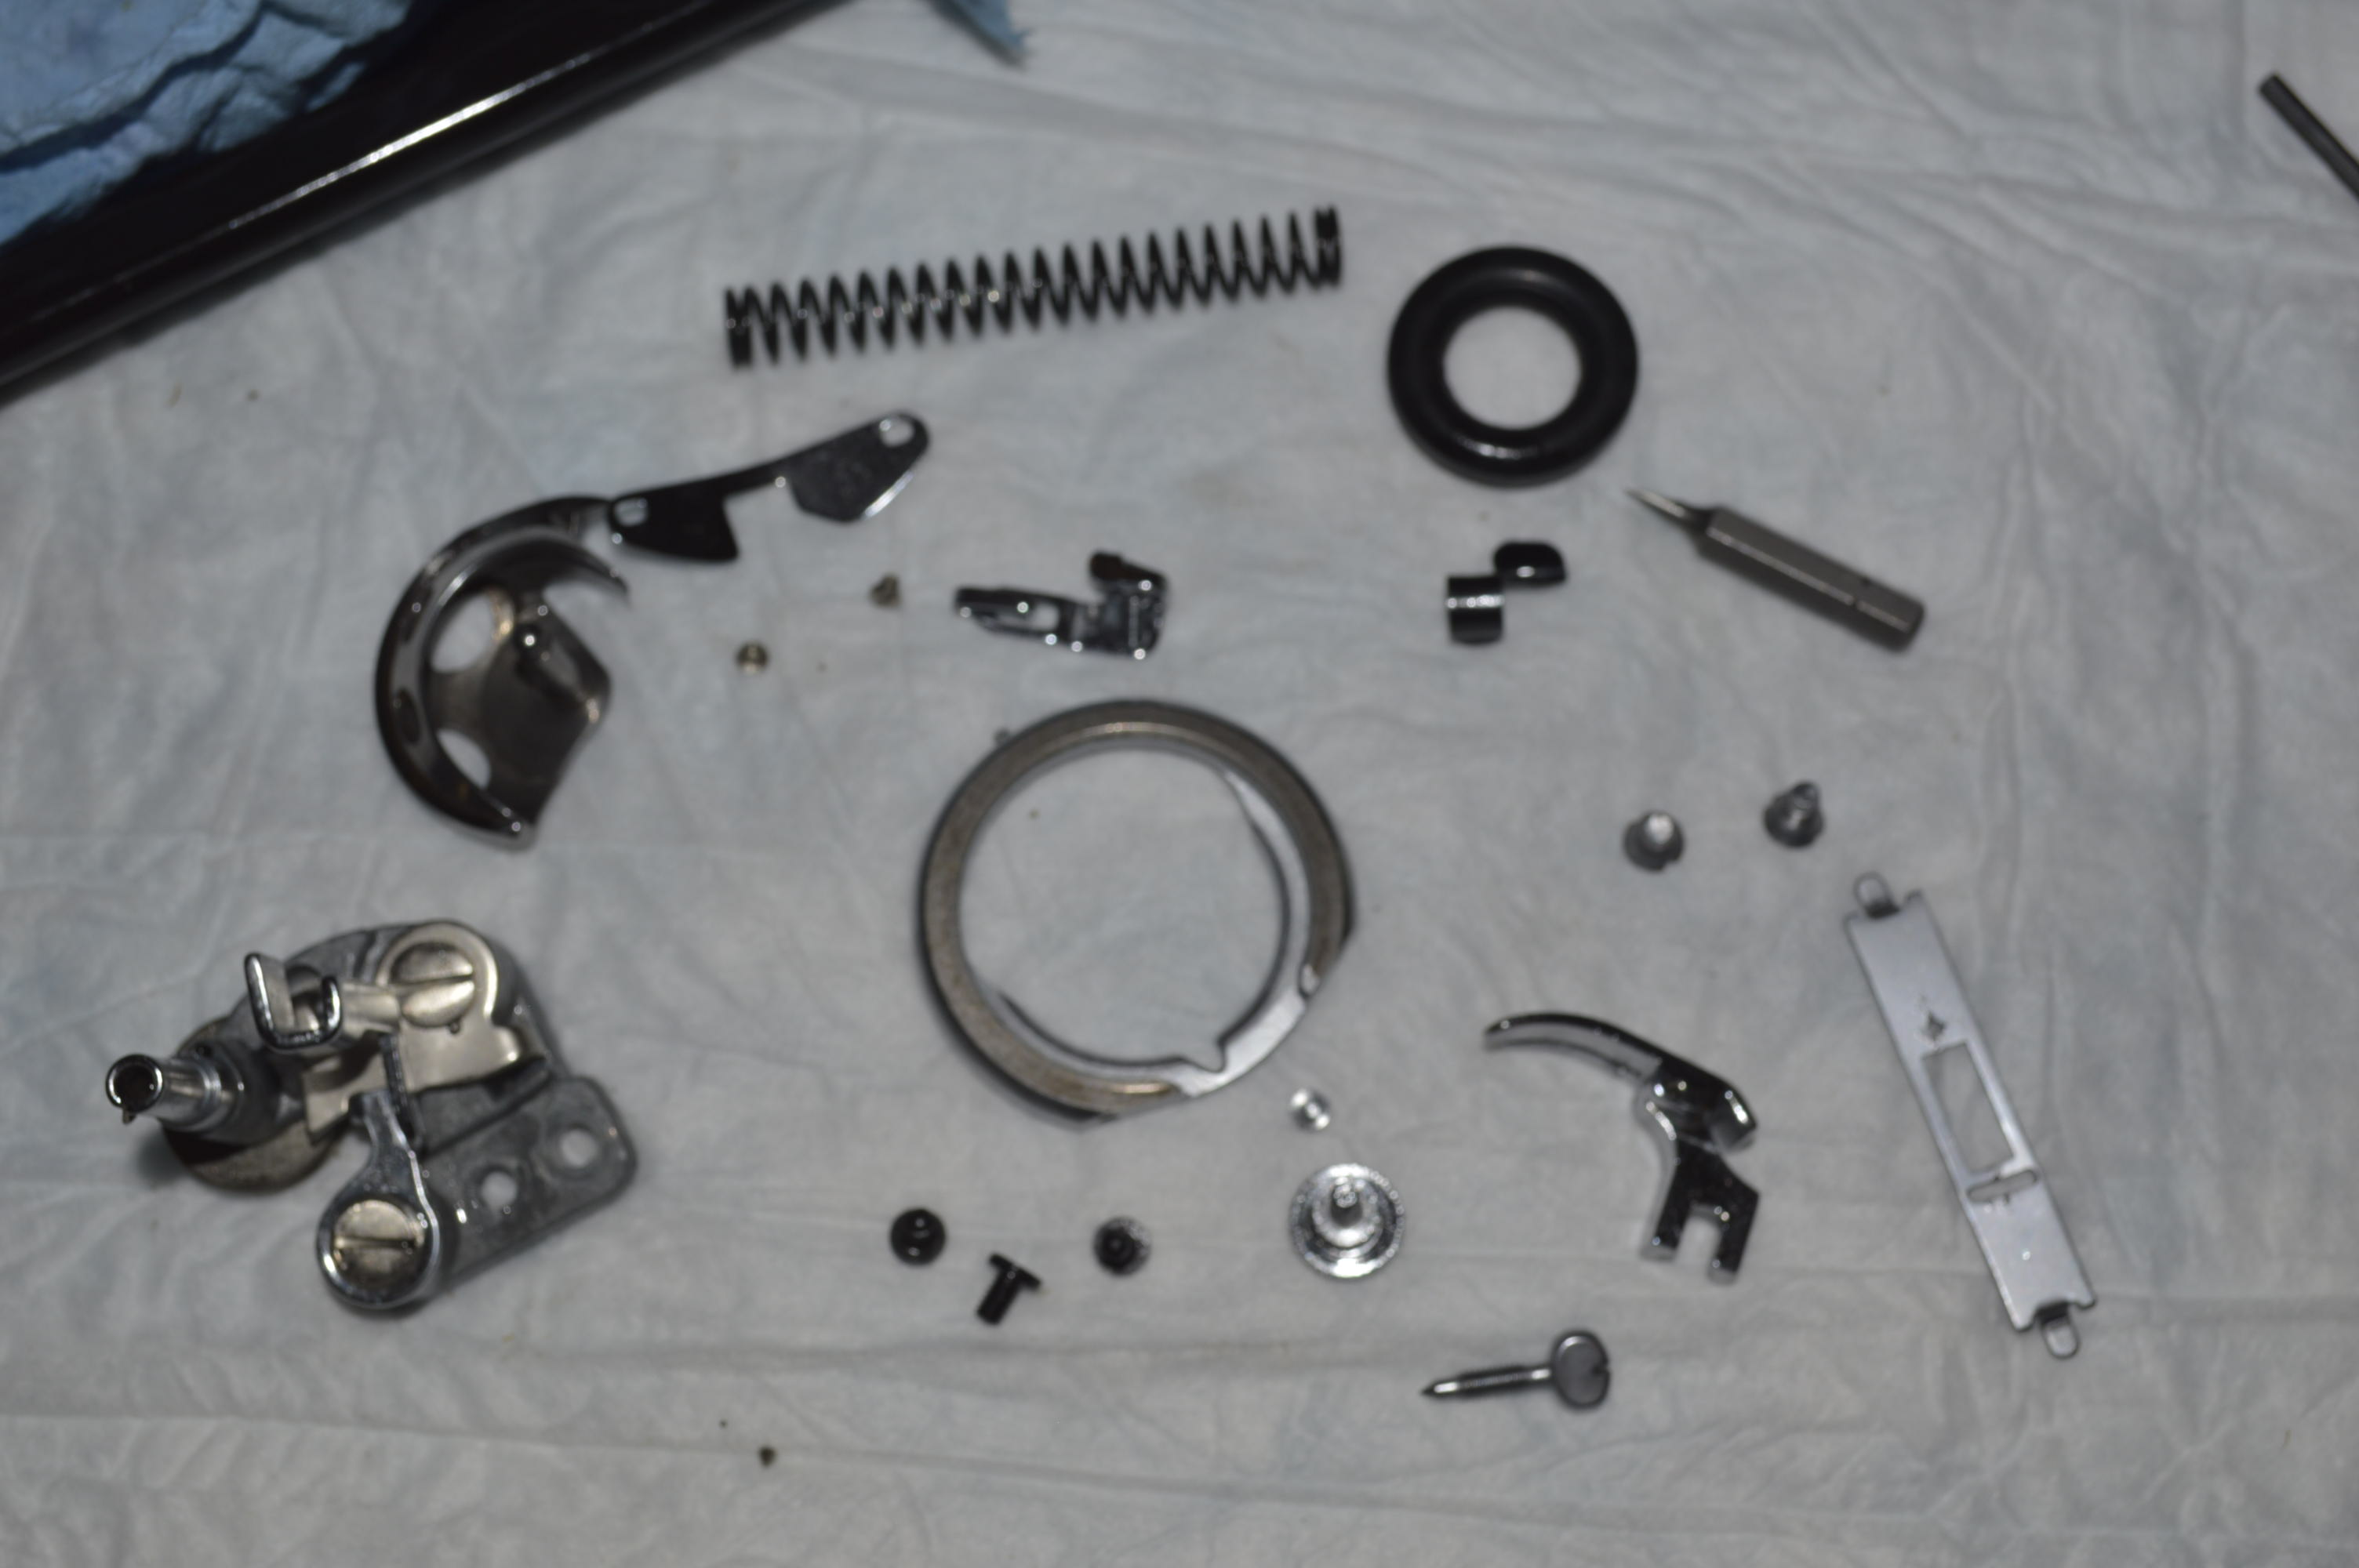
Meanwhile… all of the parts removed earlier have been ultrasonically cleaned… Then soaked in WD-40 (except the bobbin tire). A further step is taken with the bobbin winding assembly. It is soaked in 99% alcohol to remove any trace of the WD-40.
All of the part are reassembled on the machine, and attention is turned to cleaning the exterior of the machine… Not much to say here except the machine case, covers, and balance wheel are cleaned of any dirt and old oil. Kenmore enamel paint is tough and looks great when clean.
After the machine is assembled, it is lubricated with tri-flow oil, adjusted for thread balance and feed dog operation, adjusted, tested, and…. That’s it!
The result is a quiet, powerful, smooth running sewing machine that makes a stitch as good as new… and it will for another very long time.


Well, I hope you gleaned some good information and tips regarding the steps you may take to clean your Kenmore.
Let me know what you think!

I appreciate the clear information you have provided on the 1755. Any ideas on what is wrong if belts turn, motor runs, but the needle does not move? Does this machine need a pattern disc if i want to use the basic straight stitch? Thankyou.
LikeLike
Hello Nola,
Sorry it took me a day to respond. If the belt turns but the needle does not move up and down, it is likely that the knob on the back of the hand wheel needs to be tightened. If this knob is loosened, the needle will be disengaged to wind a bobbin.
Try tightening this knob and turn the wheel by hand. The needle should move up and down. If it only goes down until the needle just enters the needle plate. Check to make sure your bobbin case is inserted properly. Remove and reinsert it. The finger on the bobbin case should fit into a slot in the machine and snap into place. This can also be caused by a thread jam in the bobbin case… so with the case removed, look to make sure no thread has wrapped around the “hook” in the bobbin area of the machine.
Please let me know if this helps!
Lee
LikeLike
Second part of my response… If you turn the hand wheel by hand, and the needle moves up and down. and you have tightened the knob on the back of the hand wheel and it still does not sew, it is likely you have some oil on the belts. Please let me know if this is the case and I will try to help you fix the problem.
Your machine does not need a cam for straight stitch. simply make sure the stitch selector is on the red dot, and the stitch width is set to “S” or zero.
I hope this fixes your problem!
Lee
LikeLike
Thank you, I also have a Kenmore that is probably about 2 years newer than this one, so I did know about the “Bobbin Winder” and the wheel on the end of the machine to loosen/tighten to have the bobbin winder work. I will check for oil on the belts, but they don’t appear to be slipping. when we turn the wheel that normally runs the needle up and down, it is really stiff. Thank you for the assistance.
LikeLike
You are most welcome… I don’t want to bother you with responses, but my experience with Kenmore’s is that they are very tough. If you have ruled out the bobbin or a thread jam, then the next step is to rule out the motor. If the malance wheel knob is loosened, does the wheel spin freely? if it is difficult to turn, the problem is confined to a belt or the motor. if it does, the motor is not the problem,
May I ask if you have removed the top cover and oiled the mechanisms? The cover simply pops off on your machine. If you remove the top cover and turn the machine, try lubricating every part you see moving that moves or rotates against another part… do the same under the machine… and the same in the needle bar/light cover. Use sewing machine oil only… other types of oil can gum up a machine and over time it can cause problems like yours.
Your 1755 is an all metal machine and about the only 2 things it needs is oil and an occasional lint cleaning. They are great machines and my Wife chose a 1755 for her favorite machine. If you have the manual, the maintenance section shows where the machine needs oil. If you don’t have a manual that shows the oiling points, I will be happy to provide the pages showing these points.
I hope this helps!
Lee
LikeLike
Thank you Lee, for the good pointers. I will try these solutions this weekend, and will let you know!
LikeLike
Nola,
You are welcome! I hope it get’s your Kenmore acting great again! I look forward to knowing your problem is solved.
Have a great evening!
Lee
LikeLike
I have the 1755 model Kenmore Sewing machine. It’s a great machine, or has been. I haven’t used it for a long time and I find that now it won’t sew. The thread gets hung up and will not come through the tension even though it’s sent properly I don’t understand how to adjust that. The wheel on the side is very hard to turn but if I turn it, the needle does go up and down is there anything you can do to help me?
LikeLike
Hello Rita,
Your 1755 is an all metal machine and it requires regular oiling to run smoothly. Unfortunately, except for sewing machine oil, household oils often used will dry over time and leave behind an oil “varnish”. This can really gum things up.
If you oil it at each point with sewing machine oil and run it for a while it should loosen up. A particular place to look is to make sure the machine will sew a zig zag stitch.
Generally, Kenmore tension assemblies are very tolerant. You can clean the tension discs in place by using a strip of cloth wetted with alcohol. Run it through the tension discs up and down and see if it improves the top tension.
Try cleaning any lint you see in the feed dog and bobbin area, oil the machine, add 6 drops of oil for the motor at each end (you will see oiling holes, and run it for a few minutes.
My guess is that it will loosen up and run smoother. Clean the tension assembly as described and see if the tension corrects itself.
If you are still having problems, let me know and we can try a few other things.
Have a wonderful evening!
Lee
LikeLike
So glad I found you!!! I just purchased this machine today and will be servicing it(oil grease…spa day!!!) All your info and pictures where so helpful. I dont have an ultrasonic cleaner yet so will clean everything the best I can. I have never taken apart the bobbin assembly before or the motor so Im assuming it is something I should be able to do as long as I take pictures of the process??
I know these are super tough machines but having never taken apart those items Im worried I will mess them up. Any helpful tips would be appreciated….ay present it sews really well but I dont know how long it has sat in the garage I bought it from or when it was last oiled.
I loved reading about your life and how your wife and your interest have always been in sync!!! My husband and I share this also…we bounce things off each other all the time and usually one of us can come up with a solution to whatever our dilemma is!
The kenmore is a new addition to my life and Im looking forward to sewing on it for years to come !
LikeLike
Donna,
Thank you for your kind words! I enjoy what I do… blogs take time but it’s satisfying to me. I think you will be able to bring your 1755 to fine running condition with far less work than I did. I take these steps because I do a detailed restoration on all of the machines we acquire and then list them for sale in our Etsy store “pungoliving”. My opinion is that if someone is looking to purchase a restored vintage sewing machine, they should see the restoration process the machine had to justify their hard earned money.
That said, Kenmores are very durable machines. If it is sewing really well, I would reccommend limiting your attention to the mechanisms that affect the stitch and ensure reliability. If you are technically inclined, taking the motor apart is doable but probably not necessary. Many of the motors I find on these machines run great! Because it has been sitting for a long time I would reccommend putting 4-5 drops of sewing machine oil at the oil ports on the motor. Lubricate it every 6 monts or so with 3 drops of oil and it should last a long time. Dissassembly is not hard, but reassembly requires setting clearances. Because your machine is sewing well, clean everything with cotton swabs and acetone. Again, lubrication is the best medicine for these all metal machines. I would strongly reccommend using Tri-Flow oil on everything but the motor. It will lubricate and help dissolve old oil and restore smoothness you didn’t know the machine had. It is great stuff and I use it exclusively. It is available online and though a bit pricier than normal sewing machine oil, it is still only a few bucks and you get enough oil to last you for a few years of regular maintenance.
There are things that you should do to get the best from your machine. You should disassemble and clean the bobbin case… it’s easy. You should also replace the gear grease in the gear case. Almost every Kenmore I restore needs this desperately. Clean all of the dust and dirt you find under the machine and in the bobbin assembly. This is easy to disassemble. Removing the needle plate will give you plenty of access to the feed dogs.
Remove the top cover on the machine and oil all of the linkages and oiling points, Apply oil to the gear as well. Run the machine unthreaded, the needle removed. with the presser foot up, and no bobbin in the bobbin case. With the machine running, change the stitch selection knob to see that the linkages are working properly. If not, a few drops of Tri-Flow will most certainly free them up.
Dissassembling the top tension mechanism is not a bad idea, but if you have good tension control, you can leave it alone. Otherwise, I have a blog on how to disassemble and clean it if you choose to.
You don’t need an ultrasonic cleaner to clean the parts. I use one because I clean a LOT of parts and it save me time… even though I still clean by hand and wire the parts after ultrasonic cleaning, it makes it easier… remember, I am trying to make it like new to sell and this is the only way I know how to do it and list it as “restored”.
The steps I described is what you would expect from a thorough sewing machine servicing and it will save you $100-$150. Well worth the effort and few hours “spa day” for your machine!
If you find, or think that your machine is in need of more, let me know and I’ll be happy to help you “dig deeper” if you want to. I am always looking for topics to blog as tutorials.
The 1755 is a great machine… my Wife has one and uses it HARD. She may sew for 4-5 hours a day and it takes everything she throws under the needle with no complaint. For an exampe, I posted a blog on her free motion embroidery… The machine is her1755. If you read this blog you will see what I mean about being tough.
Enjoy you machine and let me know if I can be of any assistance!
Have a blessed night,
Lee
LikeLike
Thank you so much for the reply! I did clean the machine…oiled it, replaced the grease and even got it running better!! Amazing what a little oil will do. I will put some oil in the motor…what do you reccomend? I saw you said not to use triflow
Not sure this is in your expertise but my 1755 came in a cabinet and the left side is needing a new hinge to hold the machine at a flat level with the cabinet. Have you ever replaced on of these? Is it hard?
I looked at your wife’s embroidery and its amazing!
LikeLike
I use sewing machine oil in the motor. Recommend oil schedule is 3 drops every 6months. If a machine has been sitting unused for a long time, 5-6 drops to recharge the felts and then regular 6 month maintenance..
Hinges are easy. Under the machine where the hinge pin goes into the machine you will see a set screw. Loosen it ant the machine will lift off the hinge.
If the hinge is broken, you need a Kenmore hinge. The diameter of the hinge pin is not the same as a Singer. You can find replacements online.
Glad your machine is running better! Let me know if I can be of any more assistance.
Have a blessed day,
Lee
LikeLike
Your blog post is enlightening. Thank you for sharing it.
I love sewing and these old Kenmores. I have two of them and they’re both great. One is a “Ketherweight” 158-1040 and the other is a 158-14000, the same model as one I was given back in the ’60’s when I graduated high school. I sold the original many years ago and regretted it so when I found a refurbished 14000 online, I snapped it up. I set it in an original Kenmore table and have great fun using it. It actually does a few things better than my massive Brother VQ3000 electronic beast which I also love and use regularly. The little Ketherweight is a joy which I use for sewing leather and sometimes piecing. I have a small lightweight Brother machine that is used mostly for travel to my quilting group meetings. But occasionally it acts up so the 1040 is the perfect backup. It’s a few pounds heavier but I don’t mind as it sews like a dream.
I regularly clean all my machines and oil the Kenmores (the Brother machines must be oiled by a tech only) but I’m a tad leery of doing much disassembly as I’m afraid I won’t get it back together correctly. I can fix light switches, install faucets, replace water valves and the “guts” of a toilet (really!) Simple stuff like removing and cleaning the bobbin race, re-lubing the gears or replacing a bobbin winding assembly don’t faze me; they’re easy to do. But all the little pieces inside a machine intimidate me. I think I need to begin reading your blog posts to learn more.
LikeLike
Thank you for letting me know my blog was helpful! It’s funny that you should mention the 1040 and the 1400. My wife refers to her 1040 as her “mini-Kenny” and she loves her 1400. I think the 1410 and 1430 are great machines too, but she claims that the 1400 is great for free motion embroidery as it will accept heavy thread in the bobbin (she sews reverse so the bobbin thread is on top) without complaint better than her other machines. Kenmore’s are surprisingly durable machines…properly oiled and cleaned it is not likely that yours will ever need disassembly. The only place I always find a problem on a Kenmore is in the gear case. The grease used there is always the consistency of wax and no longer lubricating the gears. It is easy to service and well within your ability to do. You will find your machine will run quieter and smoother. Other than that, I have done many restorations and as a rule, Kenmore’s show far less detrimental “oil varnish” inside of moving parts than most other machines I restore, including Brother, Singer, and others. Please feel free to re-visit our site and look at some of the other blogs I posted on Kenmore’s and others. If you get any useful information than I consider my efforts in creating them more than worth the effort!
LikeLike
That is very reassuring, thank you! When oiling my machines, I have noticed there is no yellowing or gunk on the moving parts, so it looks like I’m good in that respect. Opening the gearbox, removing old lube and adding new is something I can do easily. I’ve done it on my 1040 (which IS surprisingly quiet) and need to check the 14000.
I like your wife’s term “mini-Kenny” better than “Keatherweight” – it’s cute, just like the machine itself.
I’ve always wanted to try free motion embroidery so I’m going to get some embroidery thread and see what I can do. You can be sure I’ll visit your blog! Thanks again.
LikeLike
Hello. I just purchased a kenmore 158.1755. I cleaned & oiled it right away, and it seemed to have been very well maintained! However, the reverse knob is frozen. It will not move & im not sure how to fix it. I’d really appreciate some advise! Thank you
LikeLike
Good morning Kim,
I’m away for the weekend. I don’t have a 1755 in front of me today, but I will look at ours on Tuesday and get back to you.
Thanks!
Lee
LikeLike
Hello Kim,
I didn’t forget about you. The 1755 has a center dial button that you push in to reverse stitch. The first thing I would like you to try is to remove the top cover of the machine. Set the stitch length dial to “0” then press in the reverse button. The button should move in and out without resistance and nothing in the top of the machine should move. If not, please let me know. Now, change the stitch length knob from “0” to “6”. Again, press the reverse button. The “fork” looking part inside the machine near the balance wheel should move up and down freely. If not, please let me know.
This information will help me narrow down the area where the problem is… unless something is broken, we should be able to figure out how to get it moving smoothly again.
Please email me at pungoliving@gmail.com.
Thanks,
Lee
LikeLike
I need your help to reassemble upper thread tension control on Kenmore sewing machine model 1755 made in 1970 -1971 .
LikeLike
Good evening Amatul,
I have a blog post that should help you. Please follow the link https://pungoliving.home.blog/2019/07/16/kenmore-upper-tension-assembly-how-to-disassemble-and-reassemble-it-the-right-way/.
I hope this helps and let me know if I can be of any other assistance.
Have a blessed evening,
Lee
LikeLike
Hi. My wife bought a Kenmore C877.782 that is in very nice condition. However the straight stitch won’t work. It doesn’t matter what position the zigzag knob control is in, it always does a zigzag. At zero, it moves about 1/2 the width and at 5 it moves fully from side to side. The button hole lever is in the off position. With the top off, everything seems to move properly when I turn the various knobs but when I turn the machine over, there doesn’t seem to be a position where the zigzag stays stationary, but the cam setup continues to move it. I hope that I’m making sense. Any suggestions would be appreciated. Thanks.
LikeLike
Good afternoon Ralph,
The zig-zag mechanism is adjustable. The problem is, different machines have different types of zig-zag mechanisms.
If you would send me a picture of your machine, and a picture under the top cover, I might be able to identify and explain how to make the zig-zag adjustment.
Please email me at pungoliving@gmail.com.
Thanks!
Lee.
LikeLike
I just got a new 158.1755, my old one got tired and I wanted the same machine. I have cleaned, oiled and fixed a couple problems but I’m having trouble with one last thing. When doing a simple straight stitch it seems to go forward then slightly back unless I hold and coax the fabric. I do have it set on the red S not one of the stretch stitches.
LikeLike
Hello Linda,
The 1755 is a great machine and one of my Wife’s favorite for free motion embroidery. I would like to help you solve the problem you are having and I think it is associated with the cam stack and stretch stitch modifier assembly.
To narrow down the symptom, make sure the machine does not have a cam installed and try sewing a straight stitch.
If the problem goes away, it would give me an idea of where to look for additional oiling and cleaning. Many problems with Kenmore’s making a solid straight stitch is associated with the cam linkage. If the problem persists, let me know and I’ll in a better position to help further narrow the problem down.
Have a blessed day!
Lee
LikeLike
I have recently bought this model to replace my old tired one. I have cleaned and solved most of its issues except one I cannot figure out. It seems to want to move fabric forward and a bit back unless I hold and guide it. I do not have it set on any stretch stitch mode. I am wondering if maybe the feed dogs are set too high and if so how to adjust that. If it is not that what else may be causing this problem? I am unsure whether the stitch length adjustments are accurate.
LikeLike
Hello Linda,
If your 1755 is pulling fabric backwards… even a little, it is not likely related to the feed dog height. It is possible to adjust the height, but it is not simple to do and it is not likely to go out of adjustment.
That said, there are mechanisms that do affect the direction of the fabric. The stretch stitch regulator is one of them but it should not affect a straight stitch. Most likely the issue is in the cam assembly. You did not mention if the problem was the same regardless of the stitch pattern selected, or if you have a cam in the machine. If you have a cam in the machine, try taking it out and see if the problem goes away. If not, it is probably related to the cam follower assembly (the two “fingers” that ride on the edge of the cam). It is not unusual for old oil to accumulate and prevent the fingers from fully retracting.
Try removing the cam and let me know if the problem persists. If it does, I’ll take a deeper look into my 1755 and try to tell you where the adjustments are.
I hope this helps!
Lee
LikeLike
I just bought this machine at a thrift store last week and I absolutely love it. I even like it more than my 1931!
The only issue is that the slowest speed is quite fast and the I can’t replace the foot pedal like I did for the 1931.
LikeLike
Hello MRB,
The problem is in the pedal… it can be replaced easily with a replacement pedal. There are probably a few just like your on eBay right now!
Please let me know if I can be of any assistance!
Have a great day.
Lee
LikeLike
Thanks, Lee! I thought it was permanently attached like the cord/pedal on my Singer 237 (that I got rid of). I see now that I can easily remove the cord on the 1755. Not sure how to find a replacement. For the 1931 I just looked for “3 uneven prong.” It was very easy to find and electronic one. This one will be harder to describe. lol
Have a great evening!
LikeLike
I think I found it! It looks like the one here: https://www.sewingpartsonline.com/foot-control-kenmore-fc-6605.aspx
Thanks again for your help!
LikeLike