
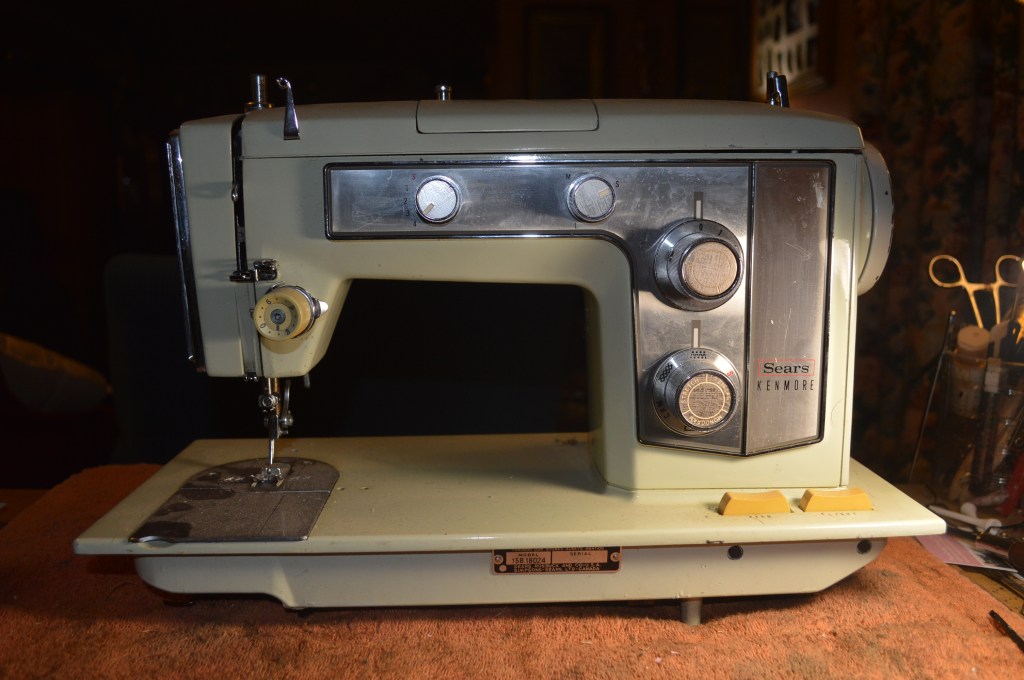
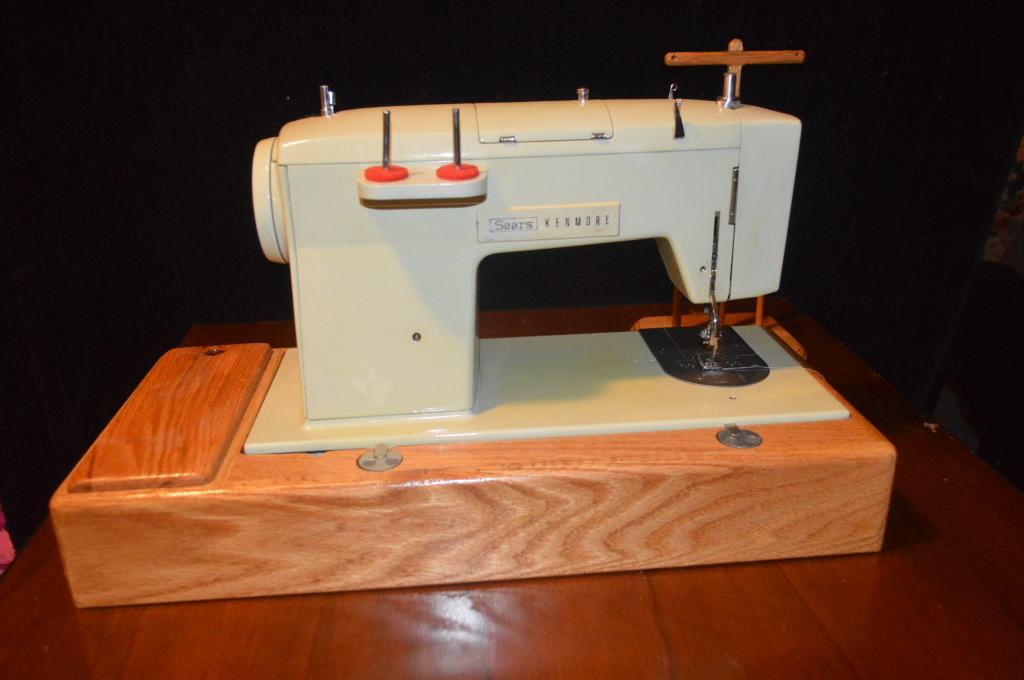
The Kenmore model 158.1802 is the flagship of the Kenmore model 158 sewing machine line. When the 1802 was introduced in 1968, Kenmore claimed it was their best sewing machine. They went so far as to emblazon this claim on their badge for all to see, so who am I to argue? I will go as far as saying that I suspect it was true when the machine was first introduced in 1968 and no less true in 1972 when production of the 1802 came to an end. Some may disagree, but It was Kenmore’s flagship sewing machine then, it has a fantastic reputation now, and It is certainly a great sewing machine in any vintage!

Why is this important? Well, it’s important to me because I got some exciting news… my niece Amelia is learning to sew! When I talked to my brother a month or so ago he mentioned that she had bought a new Janome sewing machine and is using it to fashion her own clothes. Janome makes some good machines so kudos to her for her doing her homework! Looking at some of her projects, it is clear she is quite talented in her work and she has been learning good sewing techniques. Well, I was excited and happy to hear that she had taken up the craft and because I believe that vintage all metal sewing machines are the highest quality, most durable, and best domestic sewing machines you can own, I decided that she should have a sewing machine suited for any project she might dream up. Thinking about Kenmore’s claim and discussions with my Wife about which machine would be perfect for her, we decided that it would be a Kenmore, and then after much thought, we decided the 1802 would be the best machine to restore for her. I know this introduction is a little long, but aside from the detailed restoration, I want her to know a little bit about her “new” vintage machine… Please bear with me.
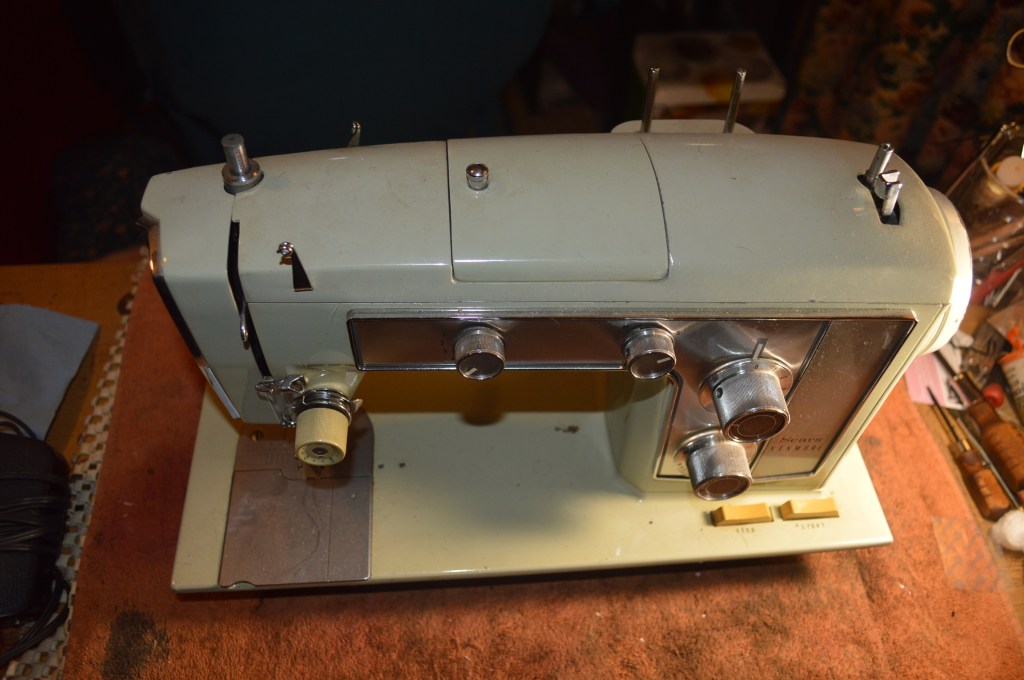
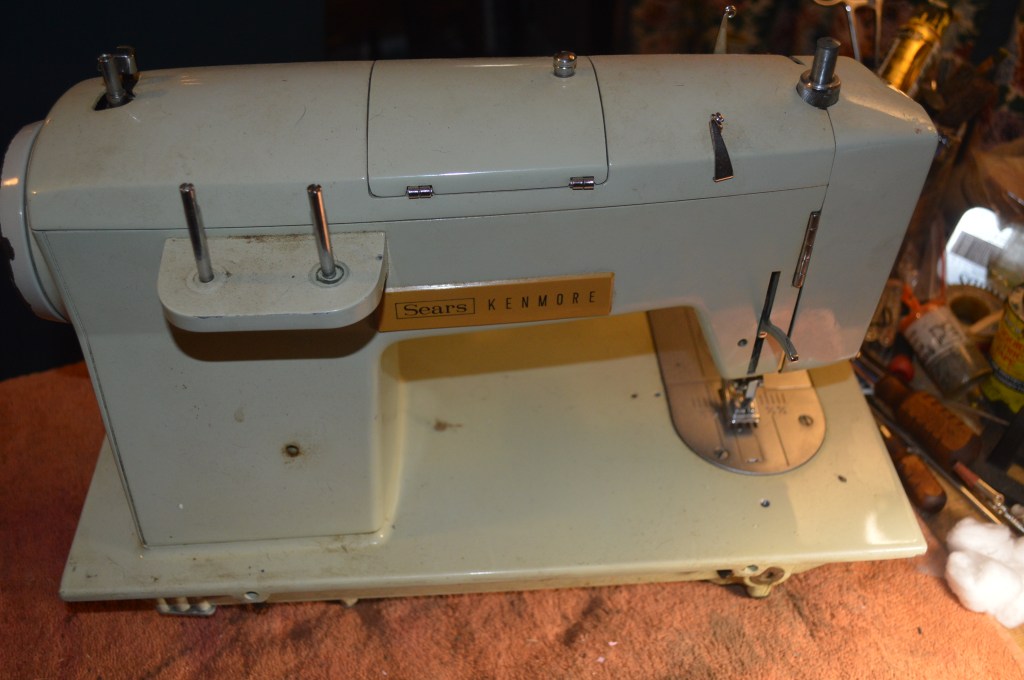
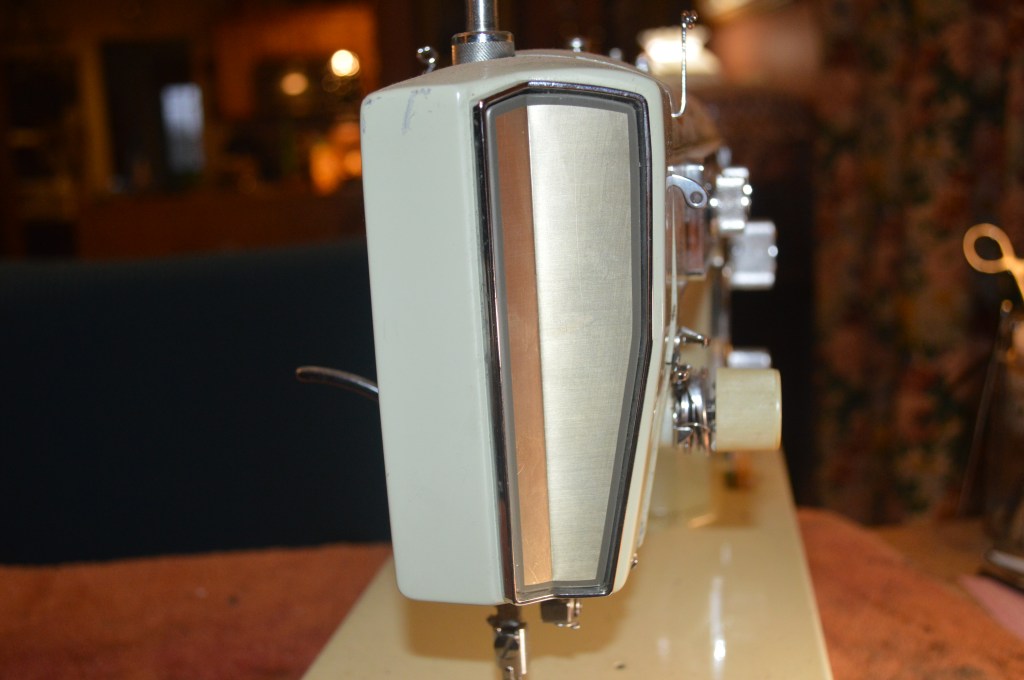
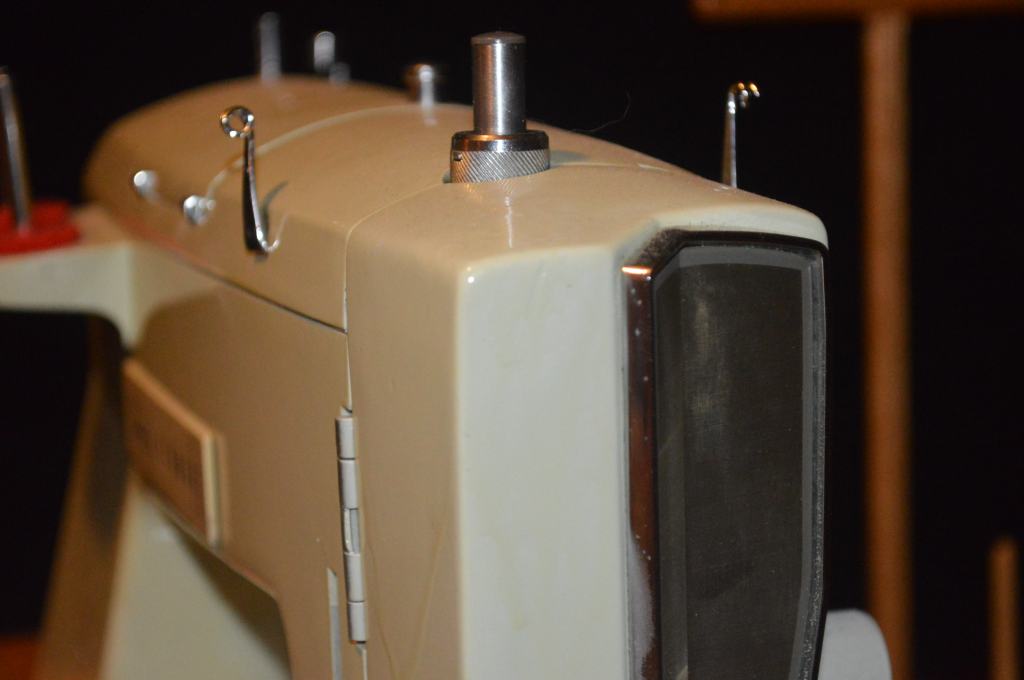
There are a lot of good things to say about the 1802. It is a full size machine, but because It has an aluminum alloy body to reduce weight, there is still a good heft to it. The machine is comfortable to use in a sewing cabinet or in a portable sewing case. it is quiet and smooth as silk sewing. Everything in and on the machine, including the sewing mechanisms, the plates, the covers, and the control knobs are made of metal. Aside from the badges, the tension dial, and the switches, there is no plastic to be found anywhere in the sewing machine. The 1802 is also a full featured machine. It is capable of using a plethora of gear driven attachments such as the best buttonhole attachment you can find on any vintage sewing machine, an assortment of Kenmore’s “super high shank” presser feet, and a large selection of stitch pattern cams to cover pretty much every conceivable sewing project she can imagine.
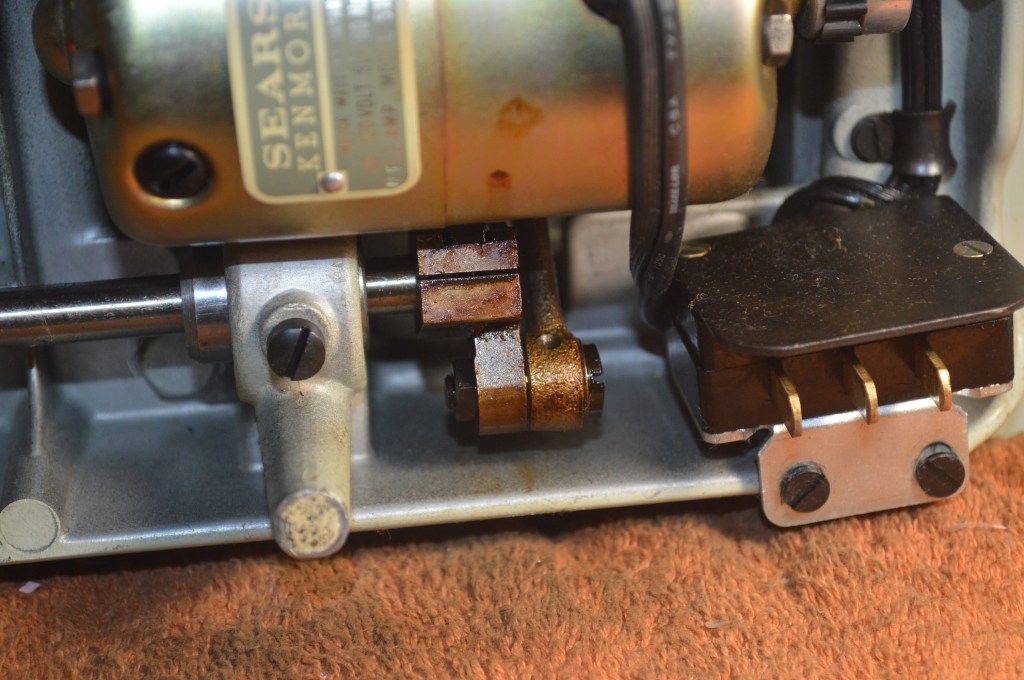
Like many Kenmore’s, the 1802 has an impressive presser foot lift height, a quick release presser foot clamp, and great control over the length and width of stretch stitches. It uses easy to find class 15 bobbins and standard 15X1 needles. As you might expect, the machine displays an impressive amount of power. The power of the internally mounted 1.2 amp motor is amplified through the sewing mechanism via a 2-belt reduction pulley system. This arrangement increases the power from the motor to the balance wheel. Consequently, the machine has plenty of piercing power and the ability to handle heavy sewing applications. The power is readily apparent when using the machine and it sews smoothly and quietly through any fabric with ease. Kenmore’s of this class have a distinctive sound and “feel” that give you confidence that the machine’s ability is limited only by your own.
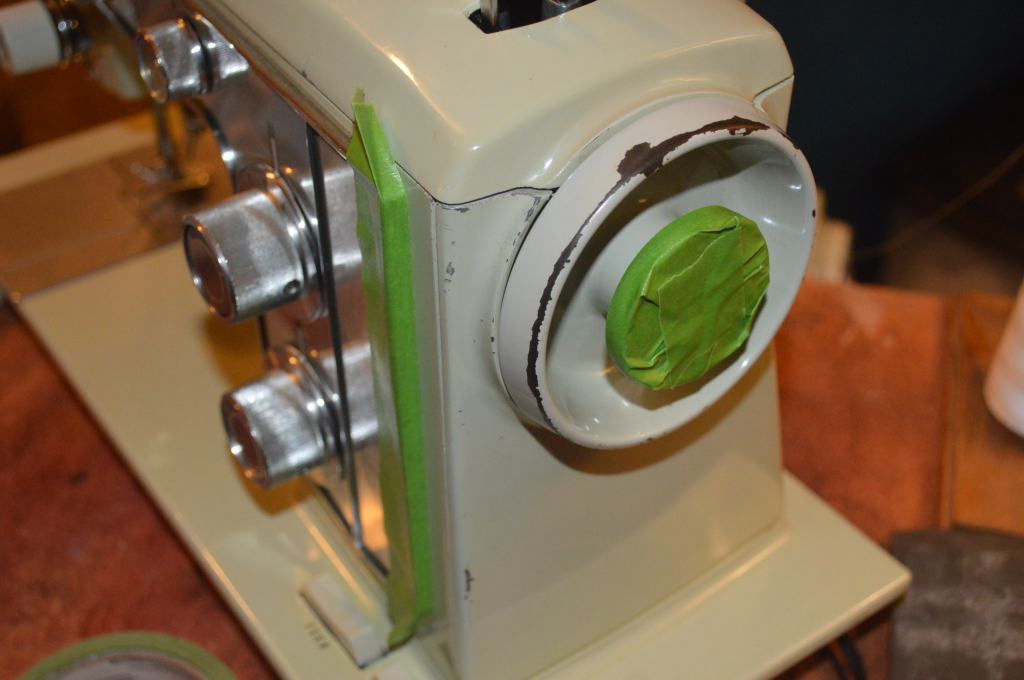
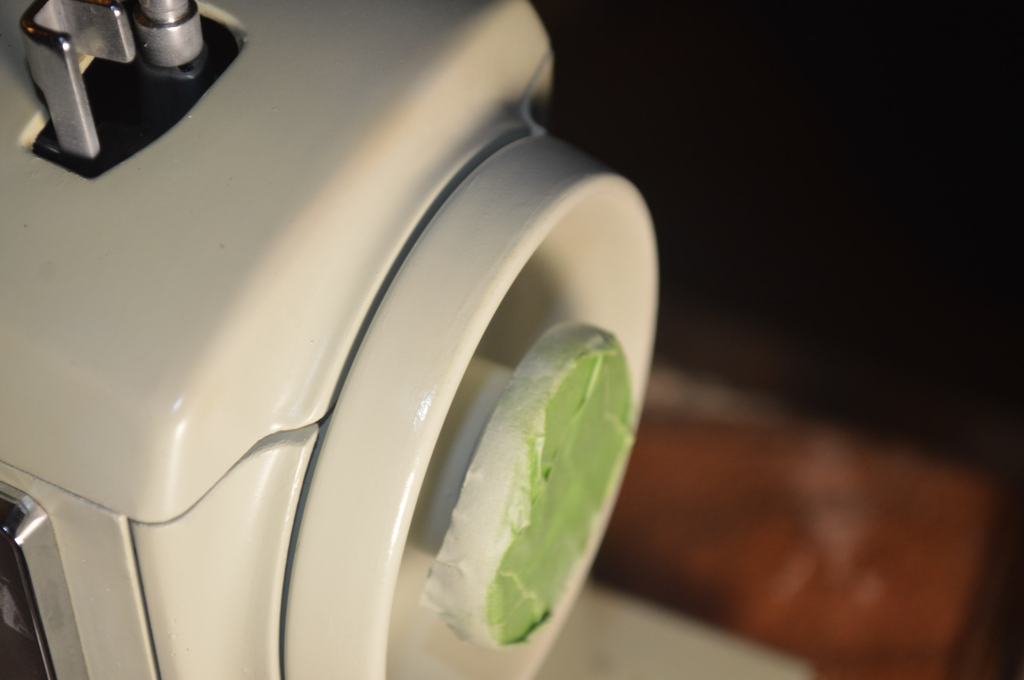
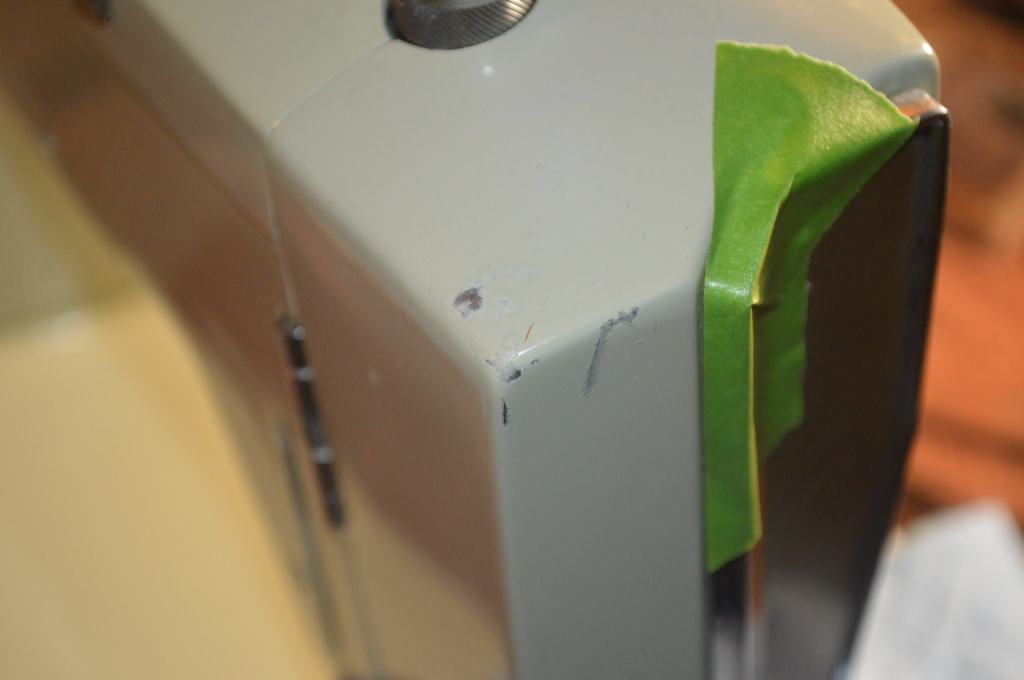
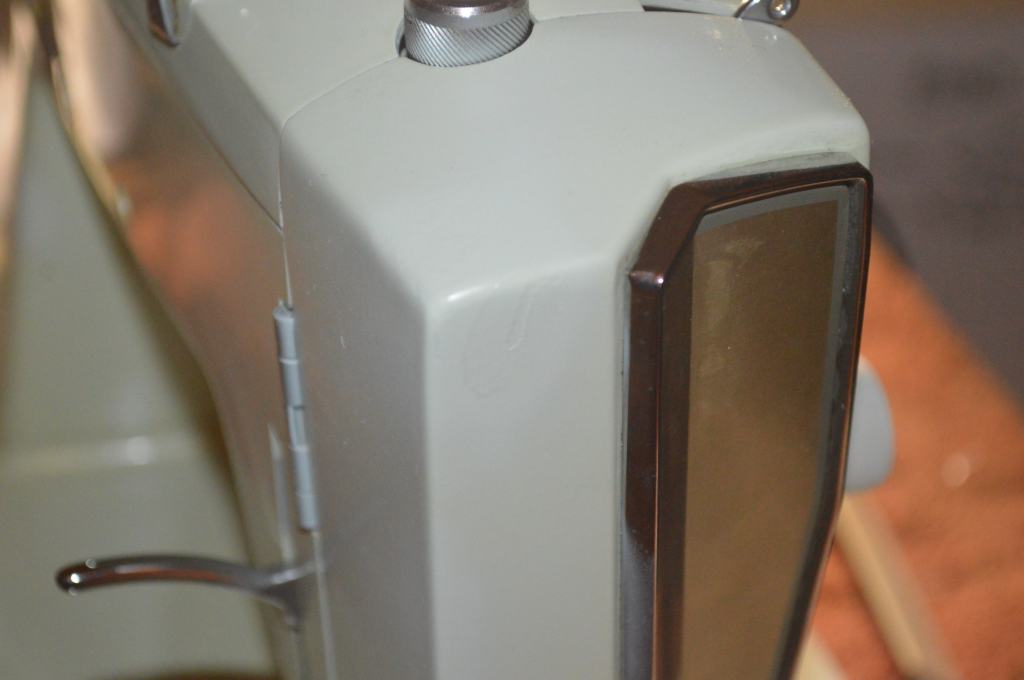
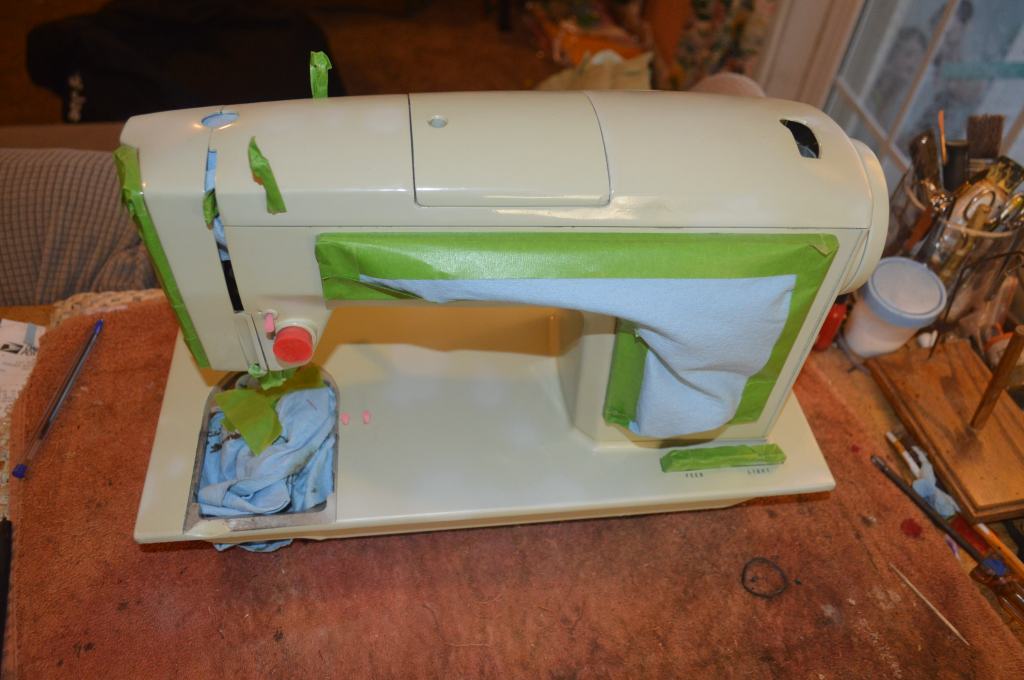
All that said, let’s look at her machine and get into the restoration. All in all, the machine looks like a great candidate for restoration. There are some minor paint chips in the body of the machine and some paint loss on the balance wheel. Typical of most Kenmore’s of this vintage, the plastic badge, tension dial, and switches have yellowed over time. This yellowing will be reversed in the restoration.
Let’s get started. This is the machine before restoration…

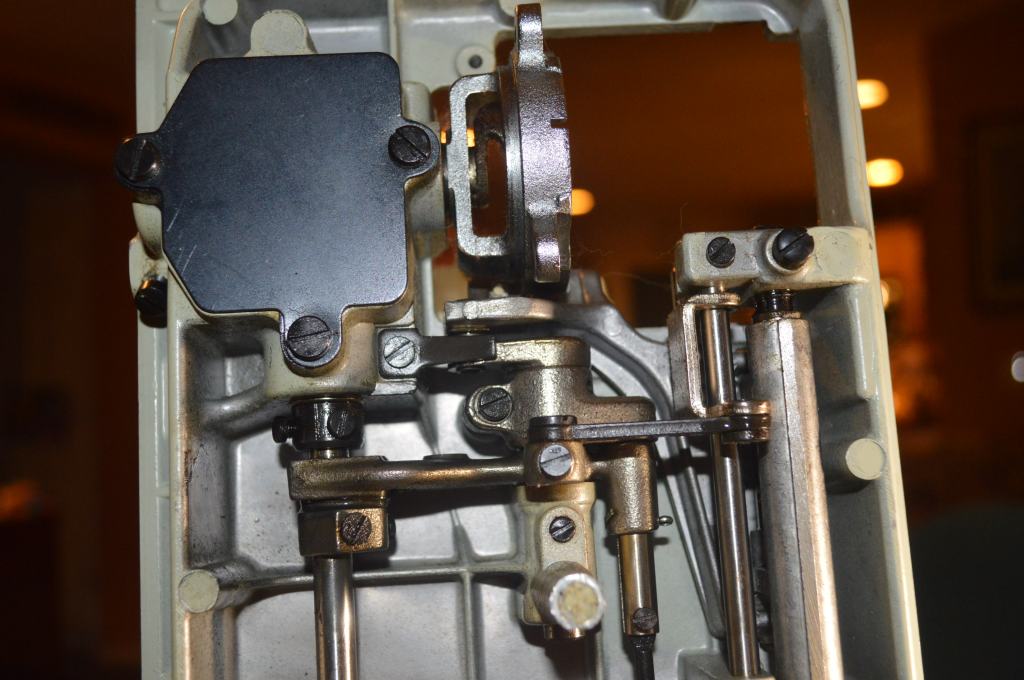
Mechanically, the machine looks good. The way I think of it, the machine has “good bones”. There is a minimum amount of old oil varnish on the sewing mechanisms that will be removed and cleaned in disassembly, but overall, the majority of the mechanisms look pretty clean.

The goal of this restoration is to address all of these issues, and more! So lets get started.
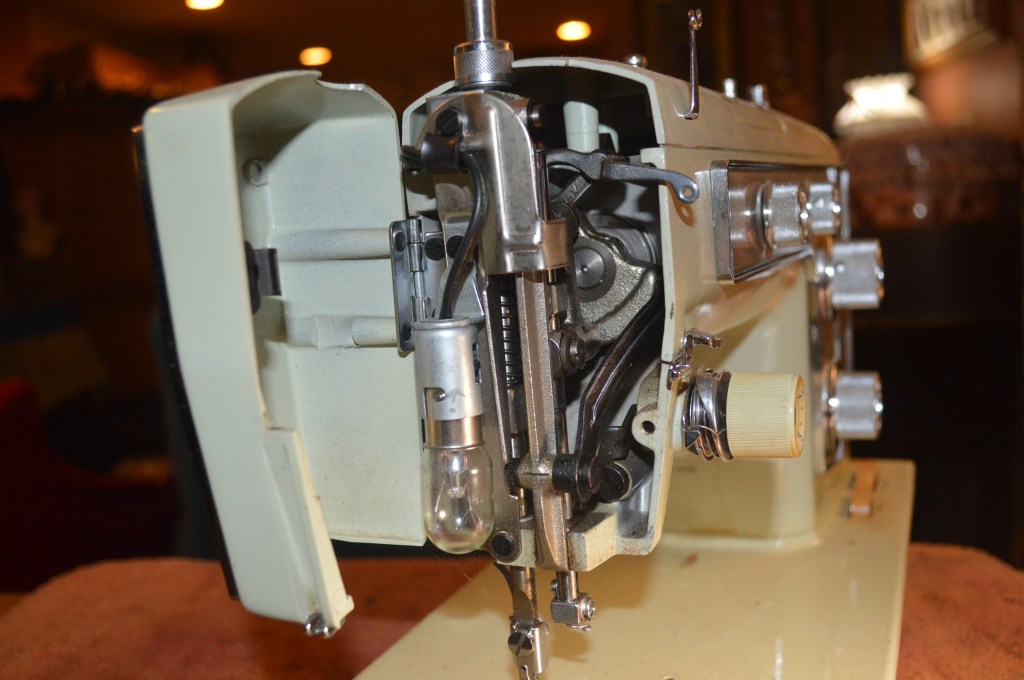
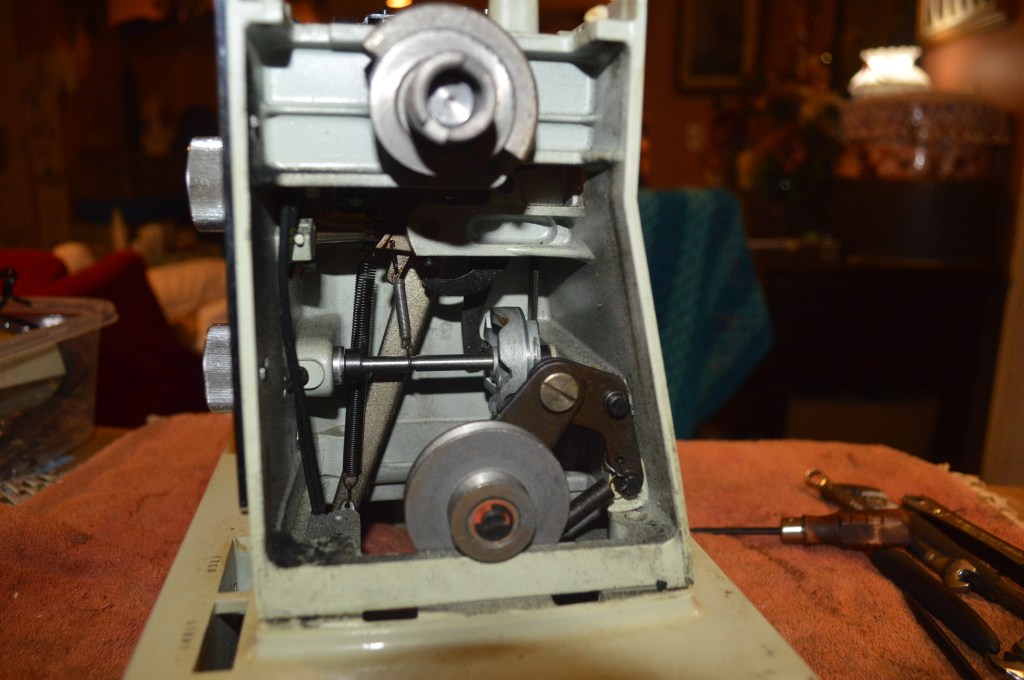
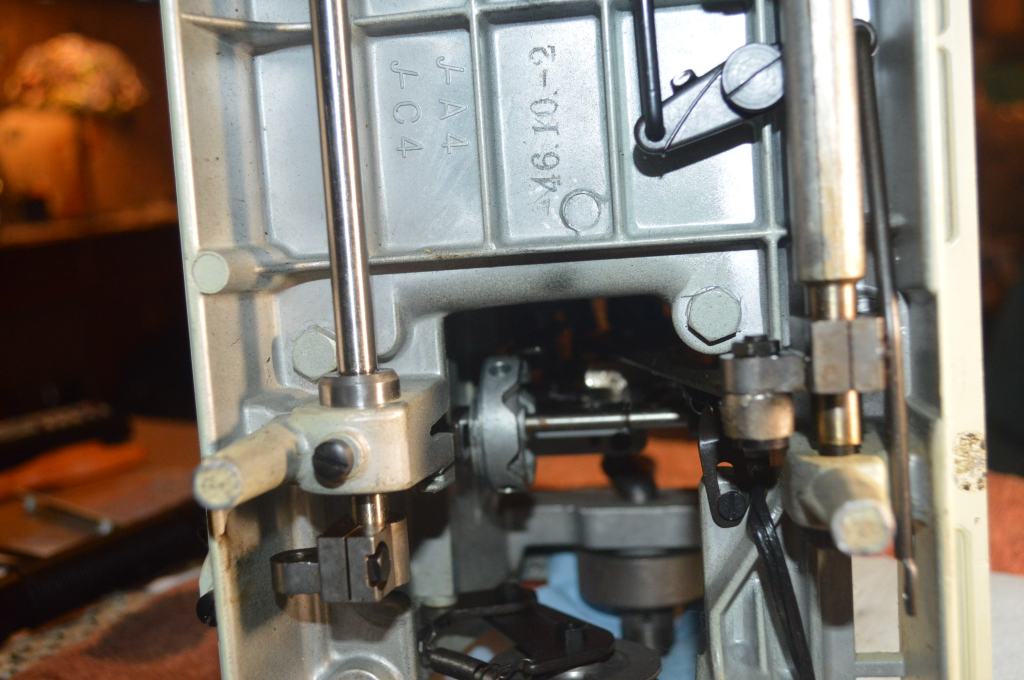
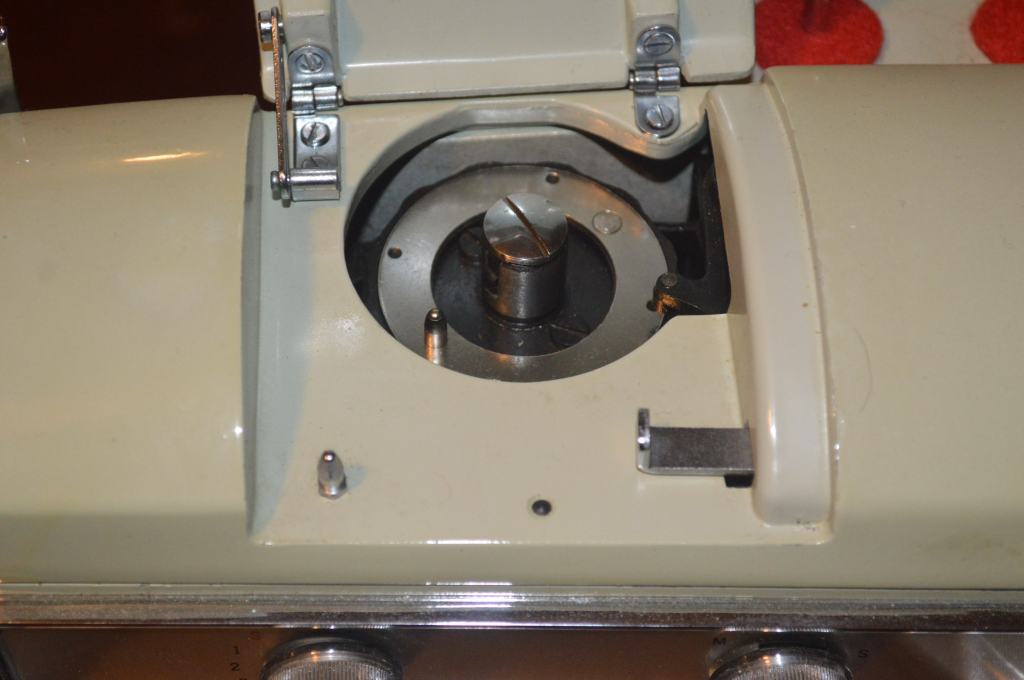
The sewing mechanism is disassembled in the needle bar head and the connecting rod, motor, switches, and power block are removed from under the machine. All of the cover plates, as well as the balance wheel, the tension assembly, and bobbin winder mechanism are also removed.
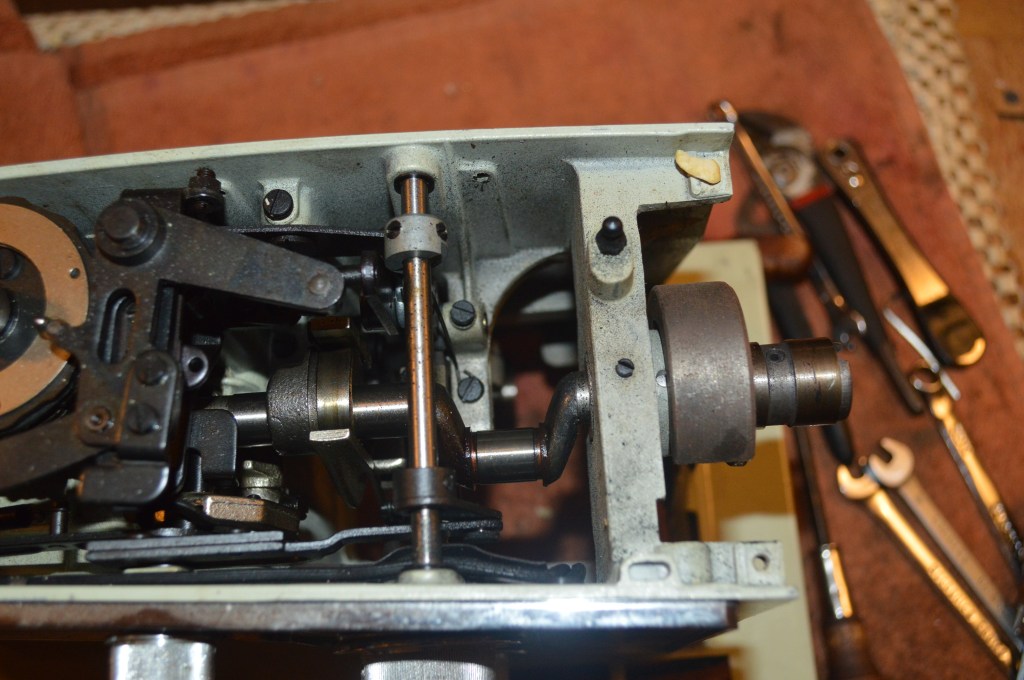
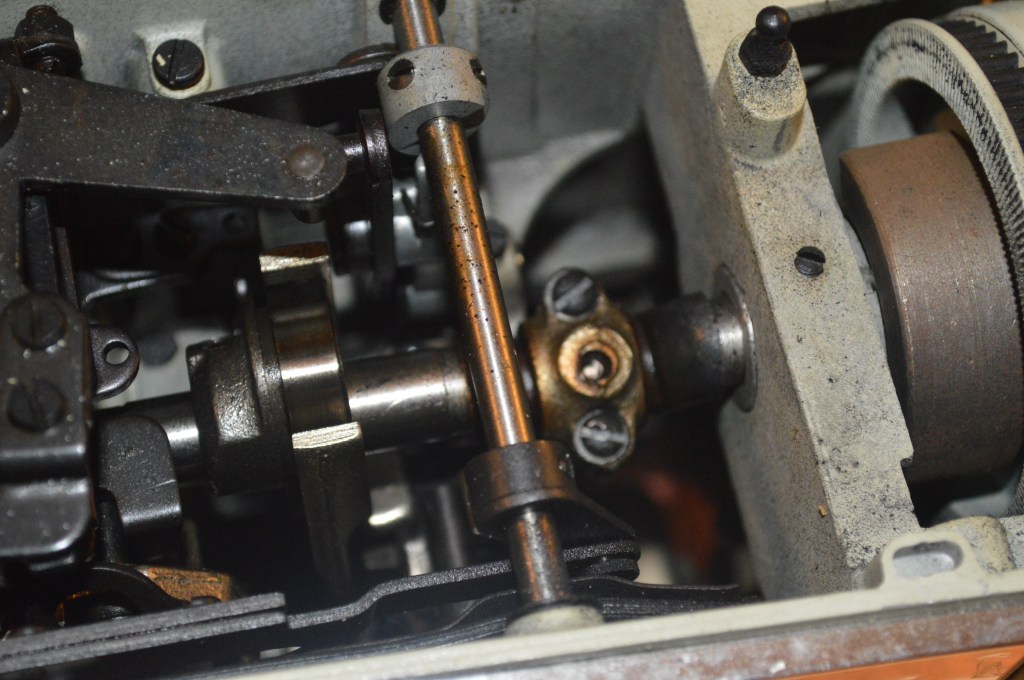
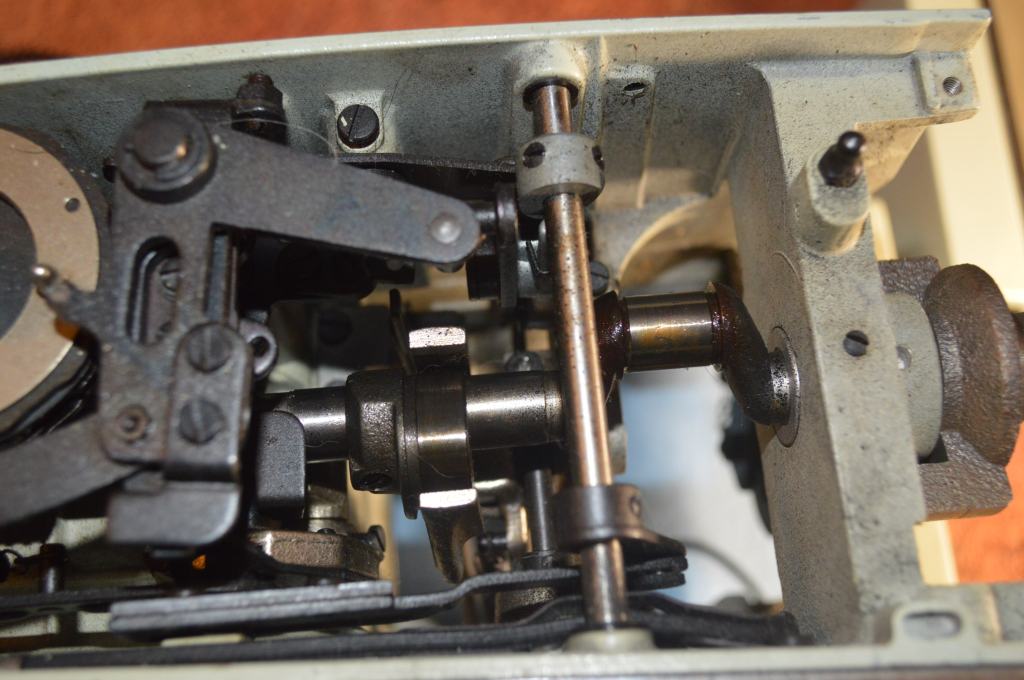
The sewing mechanism in the upper arm shaft is cleaned in place. Disassembly here requires the removal of complicated assemblies that would be very difficult to reassemble and readjust. Fortunately for this machine, they don’t show much build up of oil varnish and I can clean them in place. The rocker pins and linkages under the machine bed will be removed, cleaned, and reinstalled one at a time. This method keeps the original clearances close and only minor adjustments will be needed after cleaning and reassembly. The extra time spent doing it this way will save time in making adjustments later.
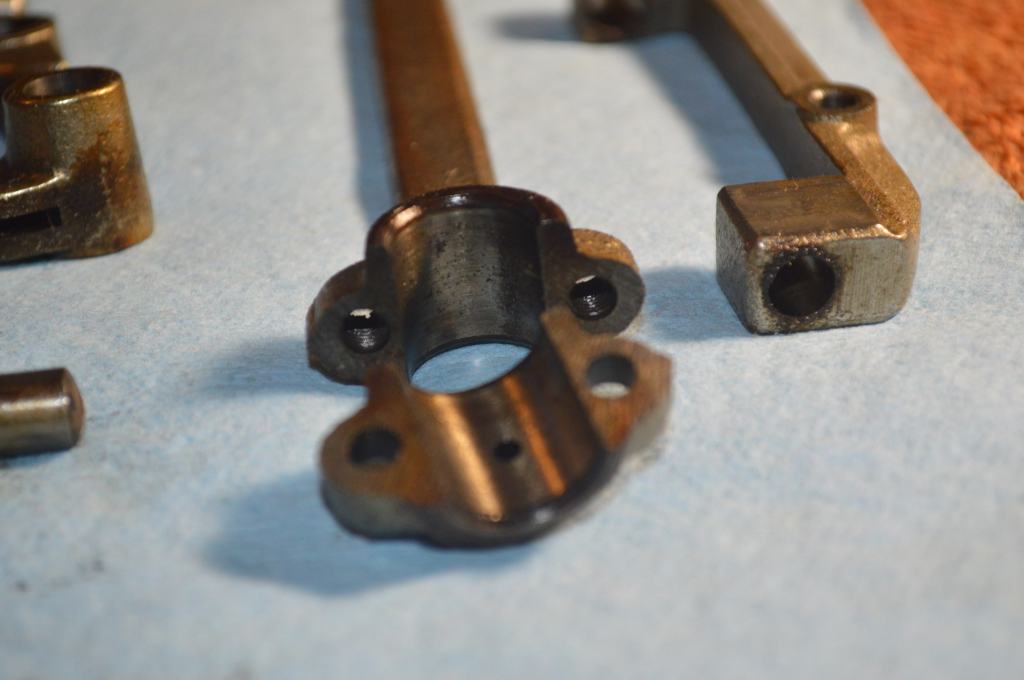
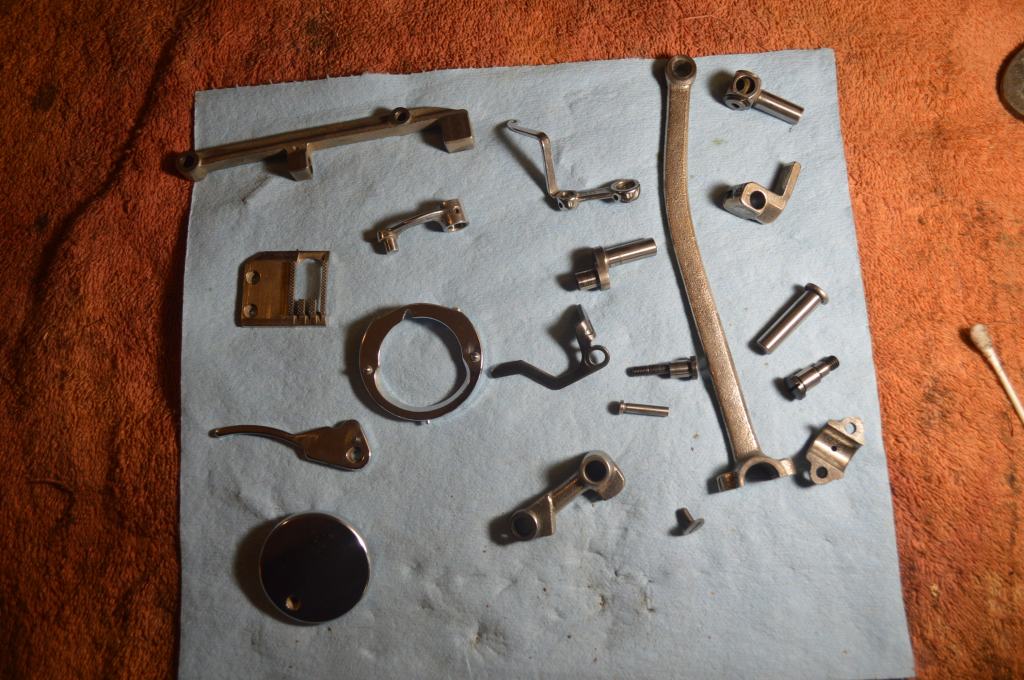
All of the parts that rotate or mate with another part are laid out for ultrasonic cleaning. As the pictures show, there is a lot of previously hidden oil varnish to be removed.
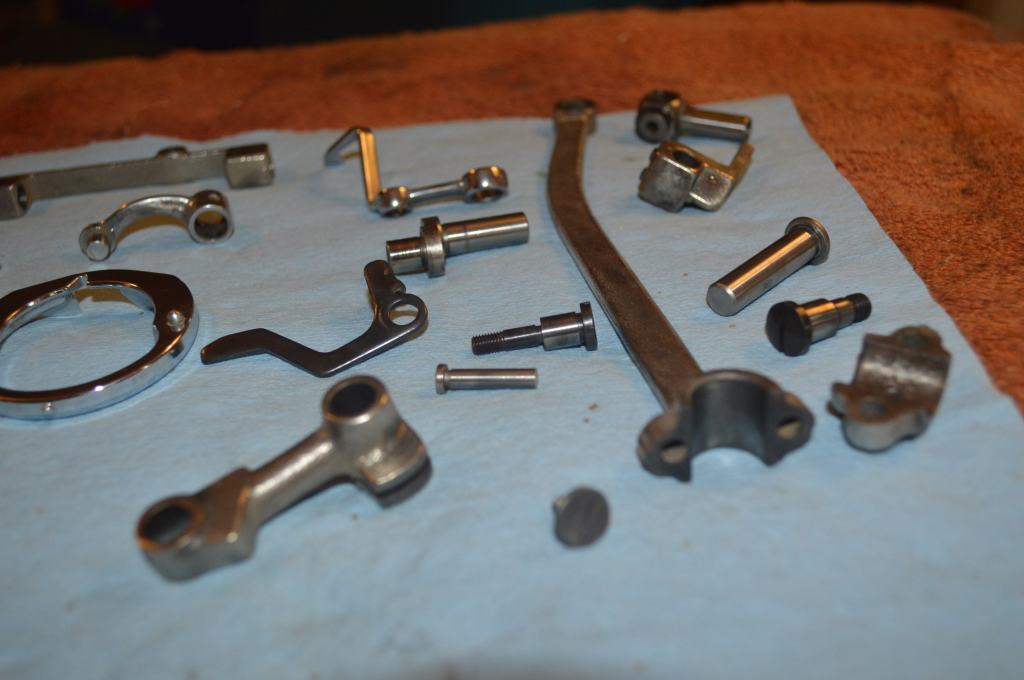
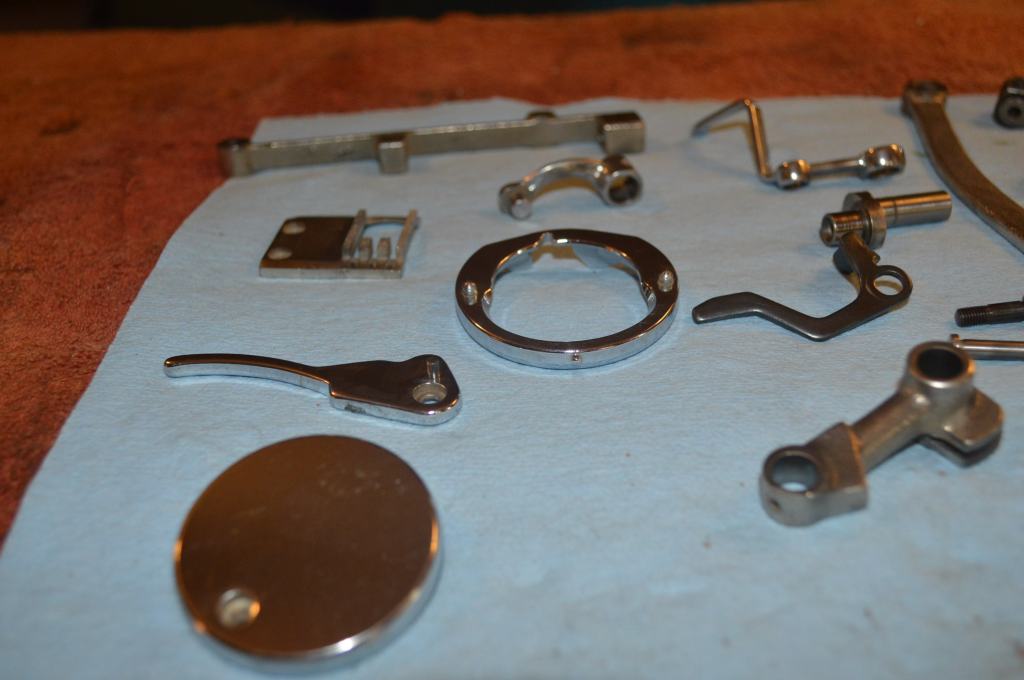
After cleaning, all of the parts are wire brushed to bright steel. When lubricated and reassembled together, they will be as smooth running as possible.
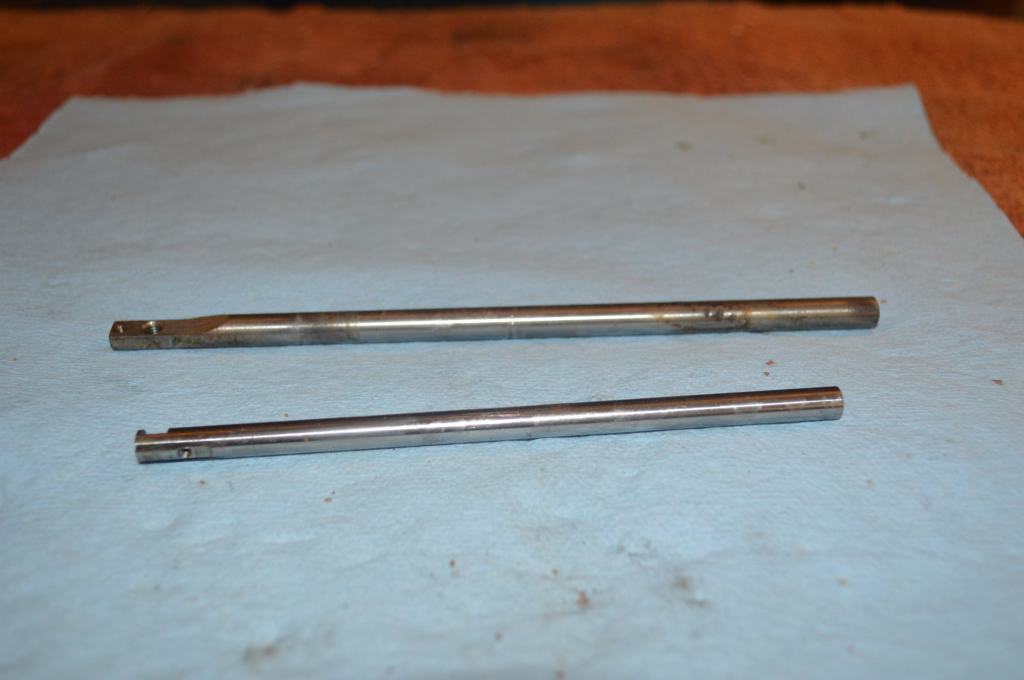
The needle bar and presser foot bar is polished glass smooth.
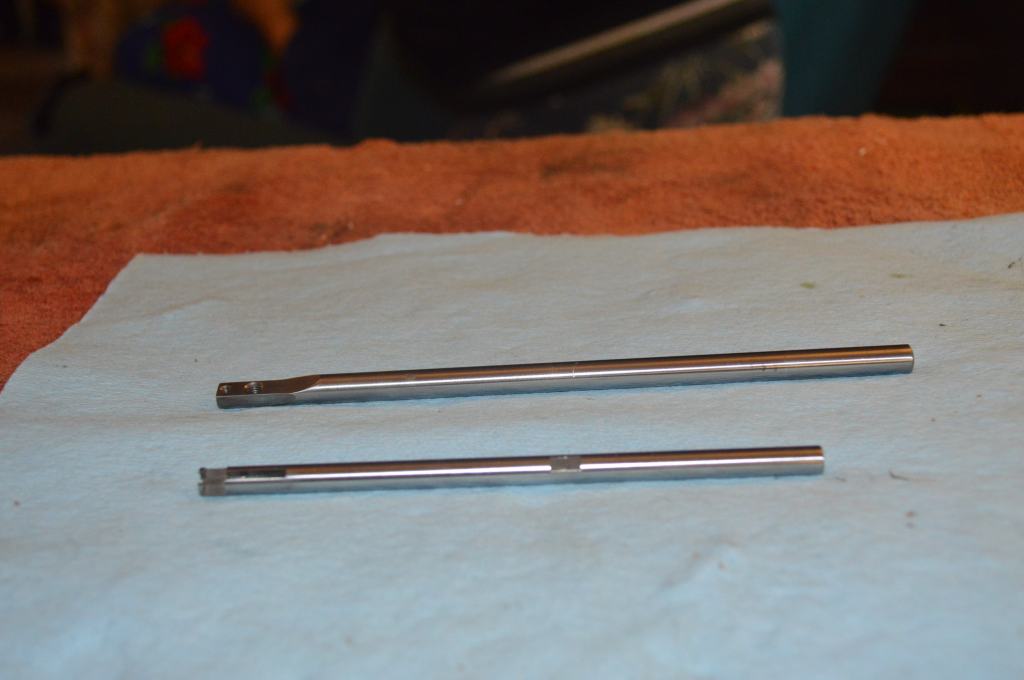
Because many parts rotate or move up and down in a bore, all bores are cleaned with a brass wire brush.
Some of the parts are removed and cleaned in place. This is done for assemblies that are too complicated to be disassembled and installed with the proper clearances or adjustment.

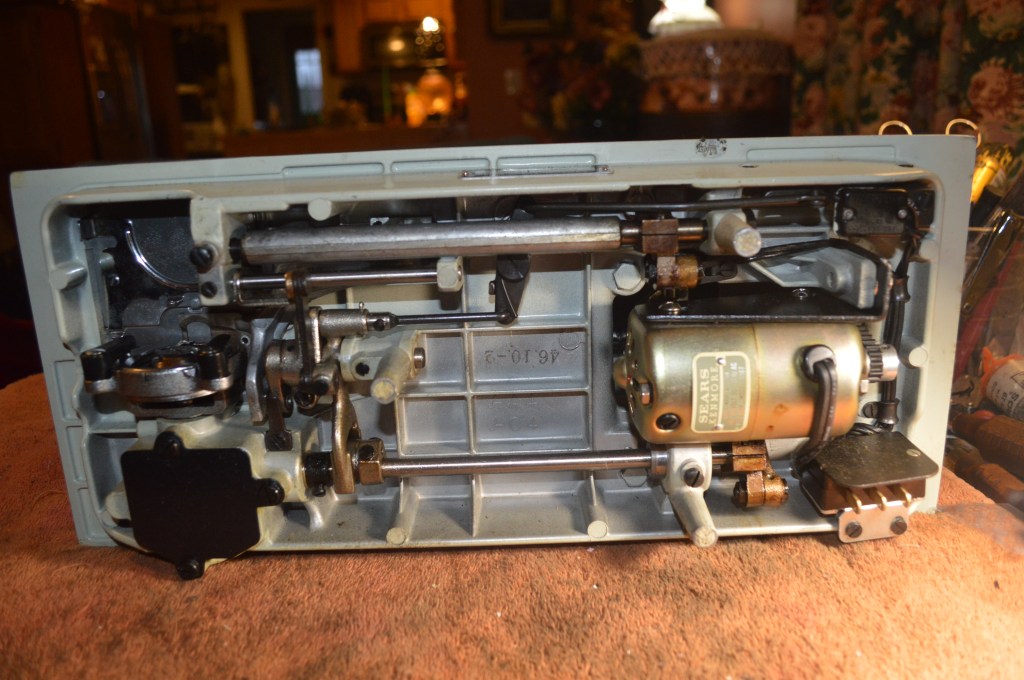
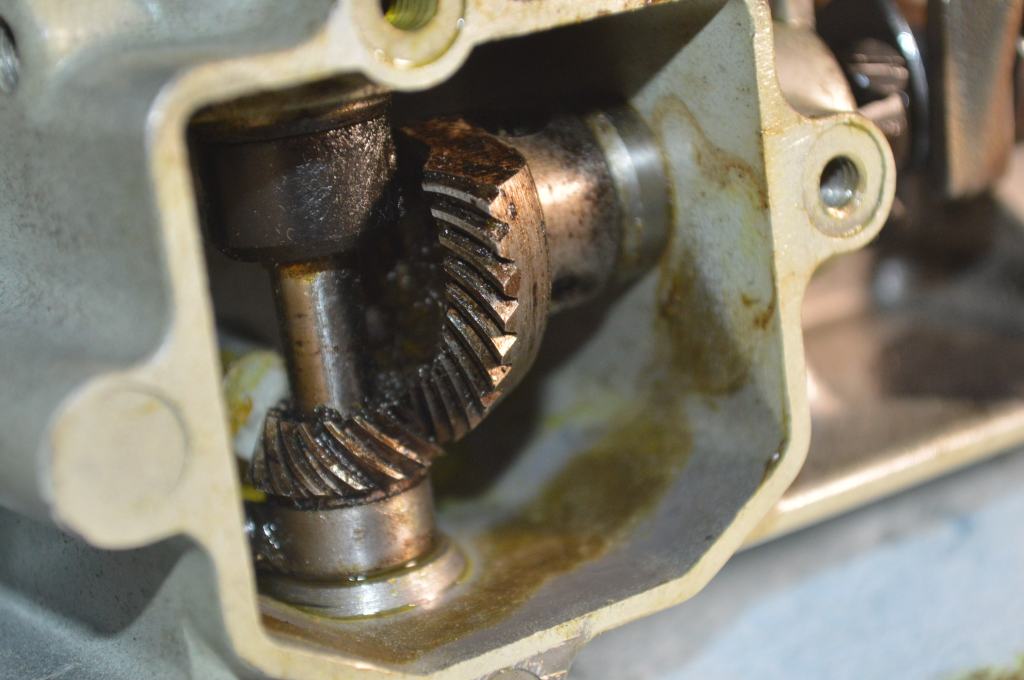
The connecting rod, cam lobes, forks, and gears are cleaned to bright steel.
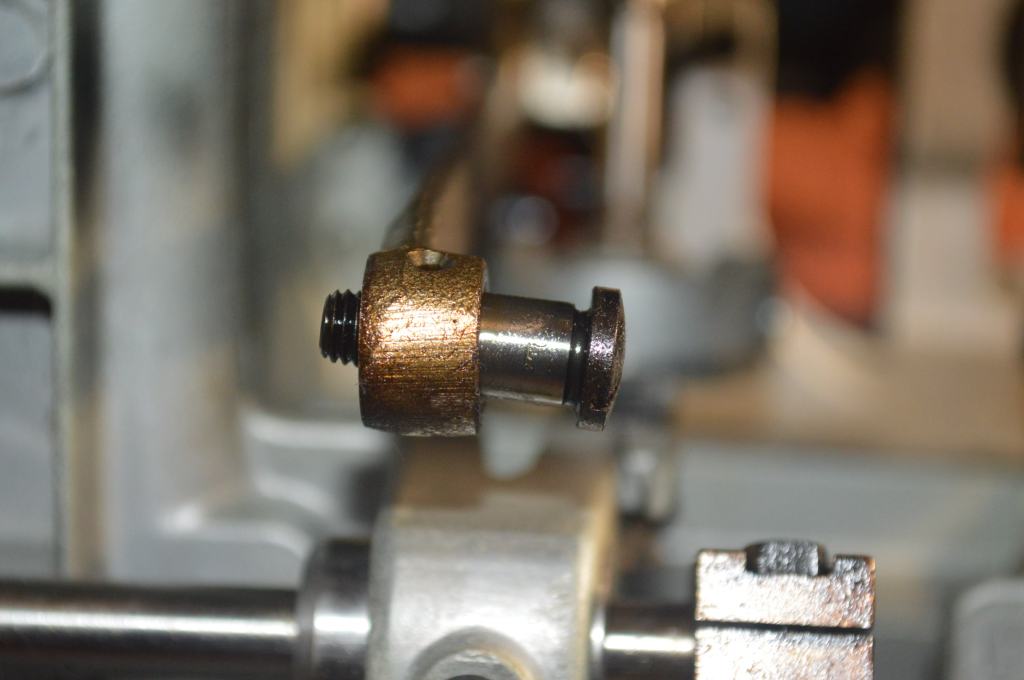
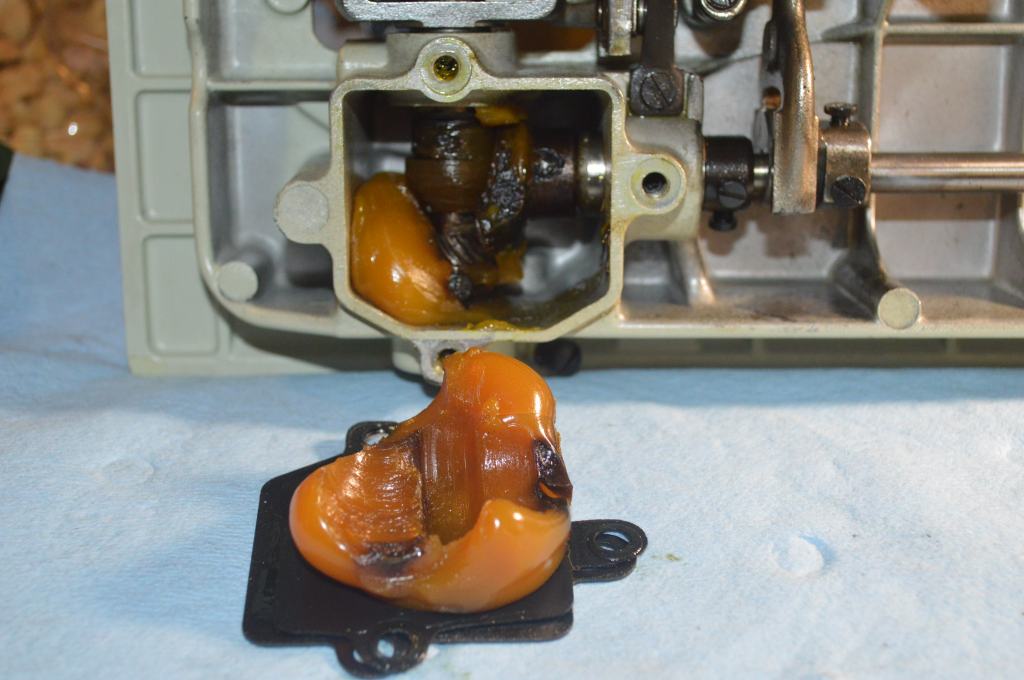
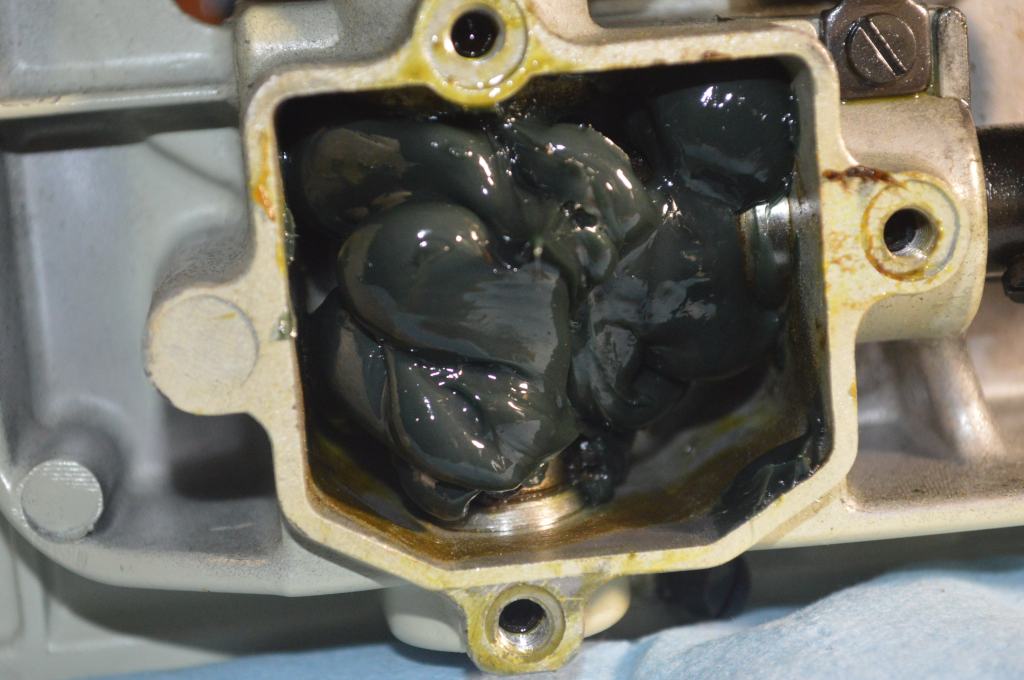
The oscillating gears are housed in a gear case and are lubricated with grease. Over decades, this grease hardens to the consistency of beeswax and is no longer capable of lubricating the gears. The old grease is removed and repacked with a high quality synthetic grease.
Next, the motor is disassembled and restored…
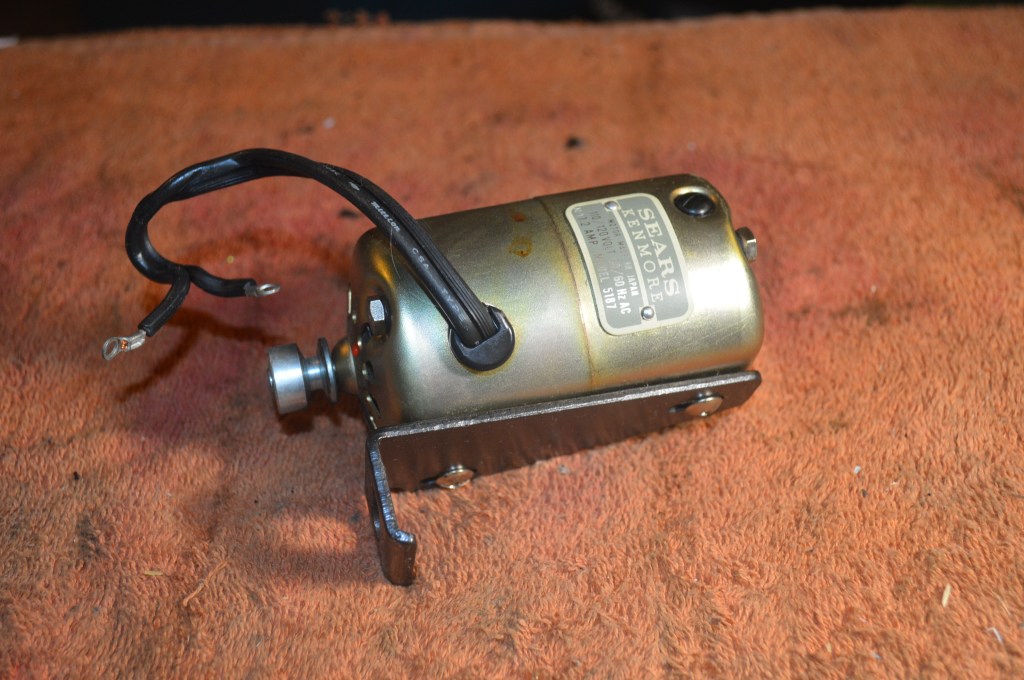
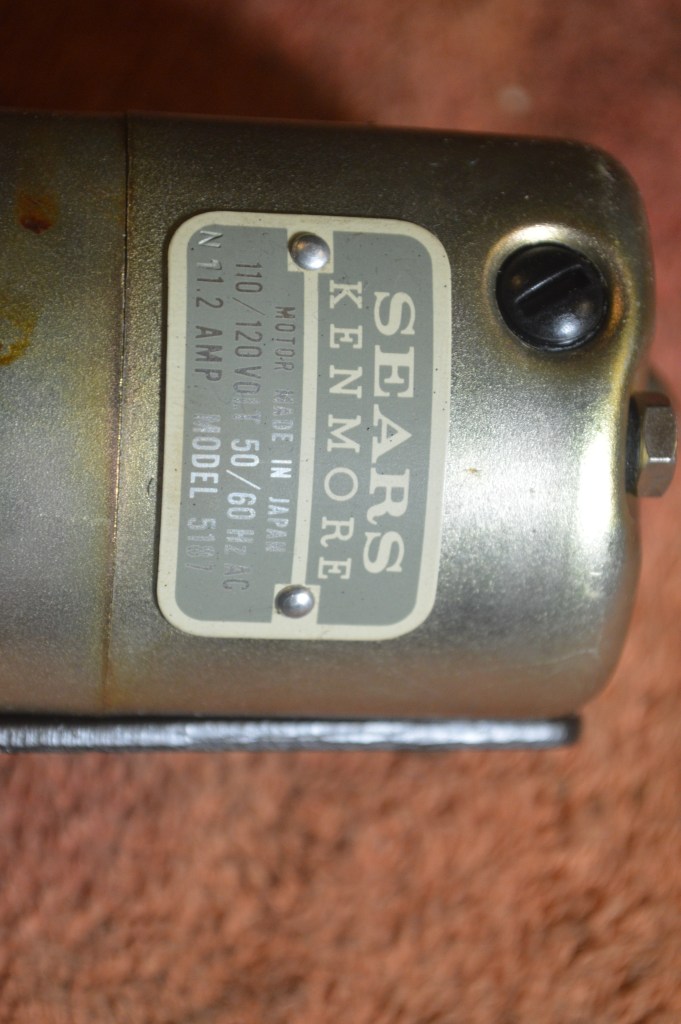
1.2 amp motor 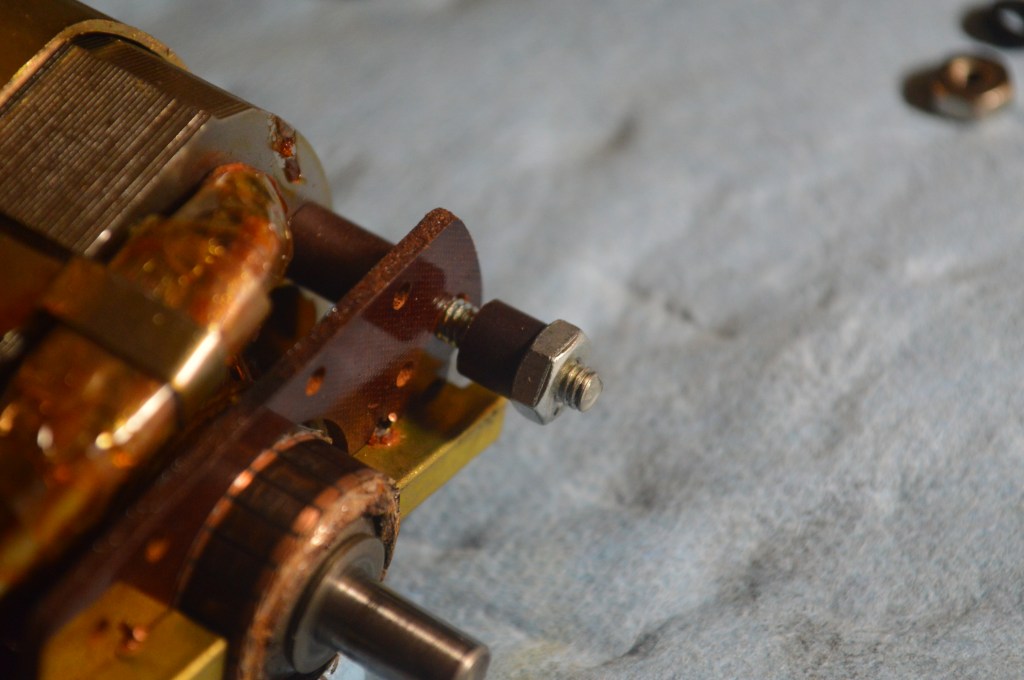
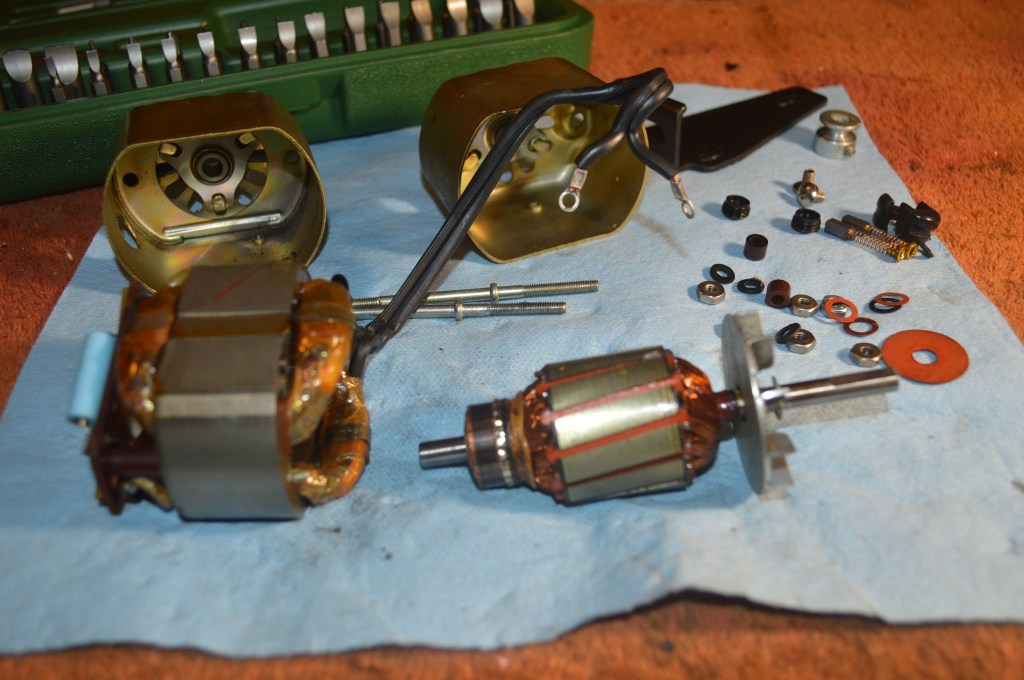
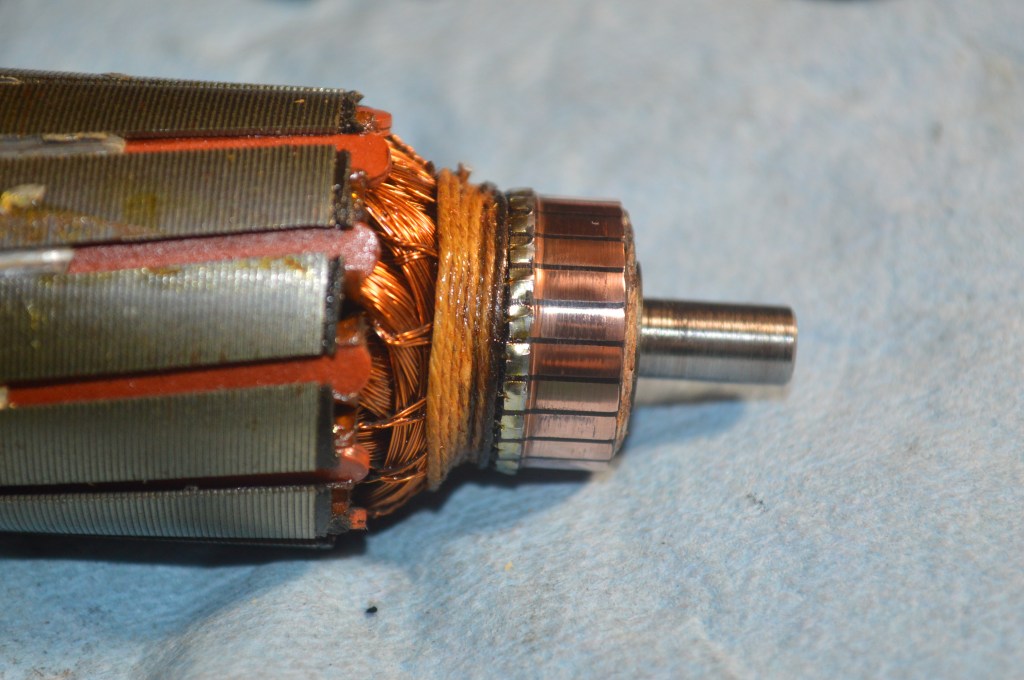
Commutator polished 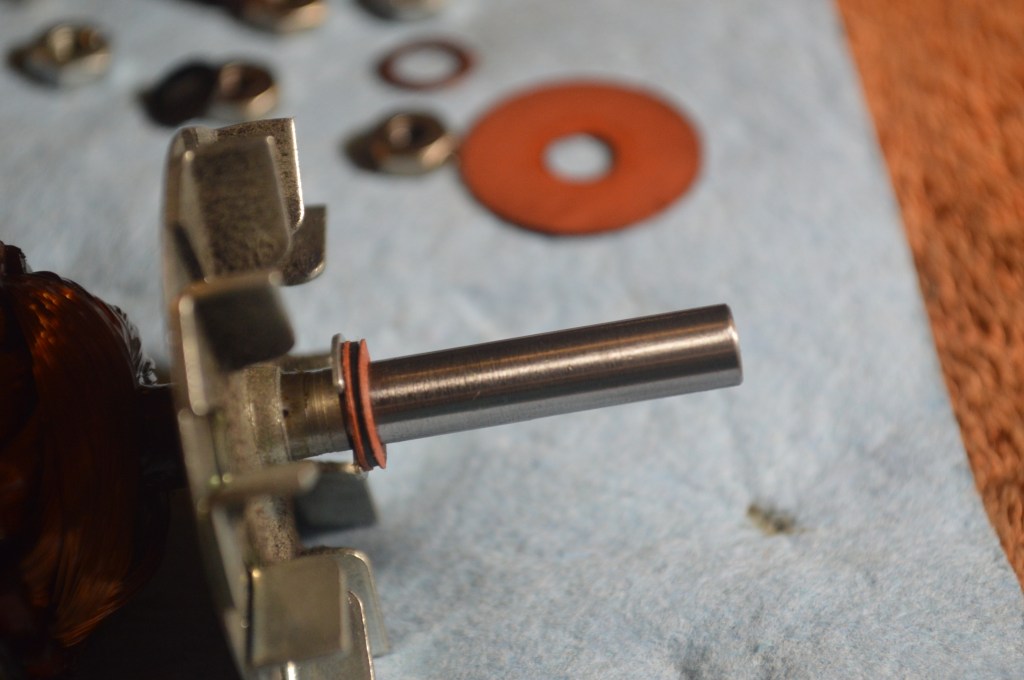
Shafts polished
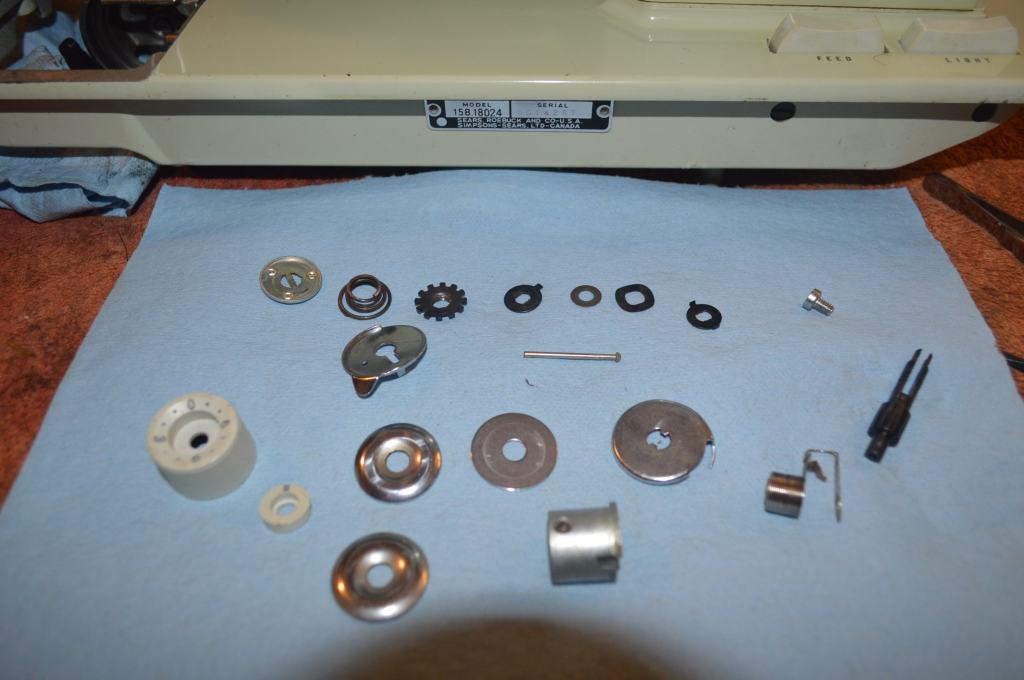
The tension assembly is disassembled and cleaned…
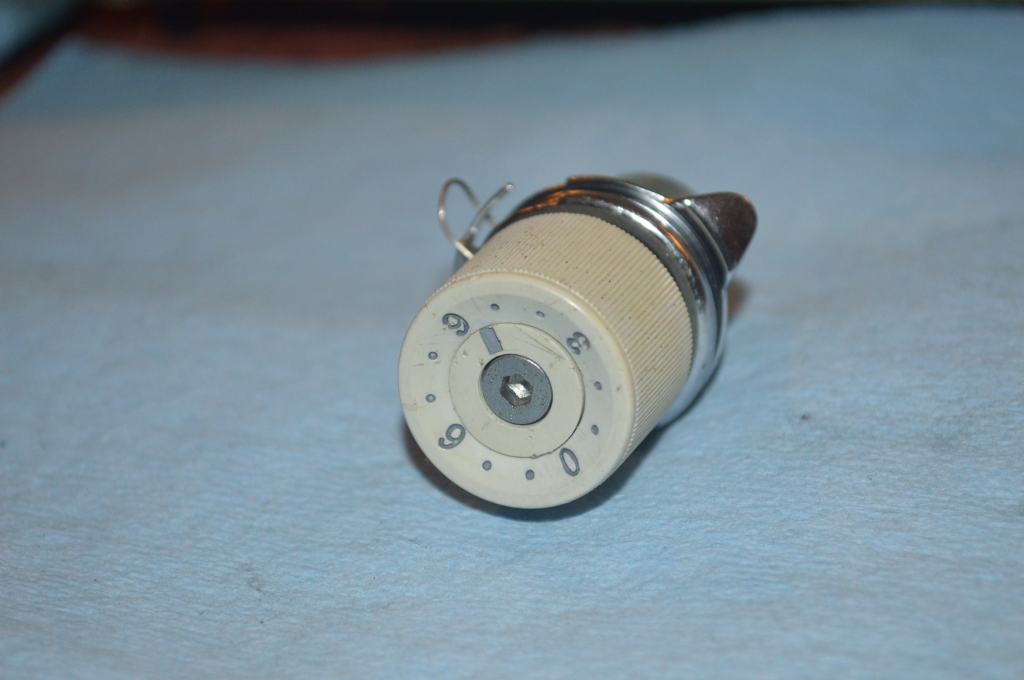
No longer yellow!
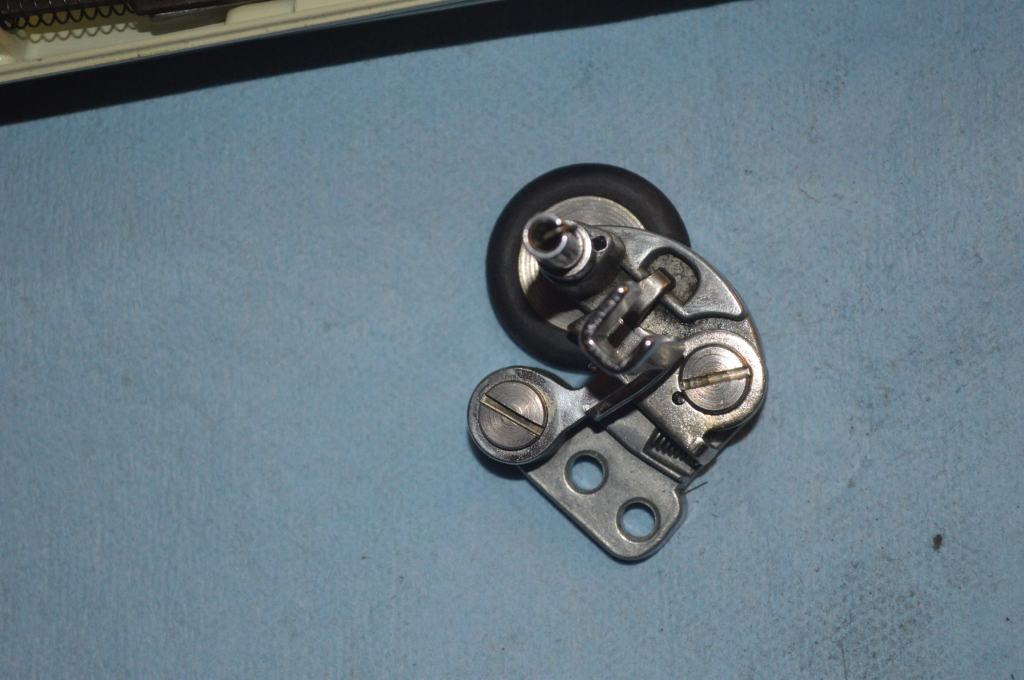
The bobbin winder is cleaned…

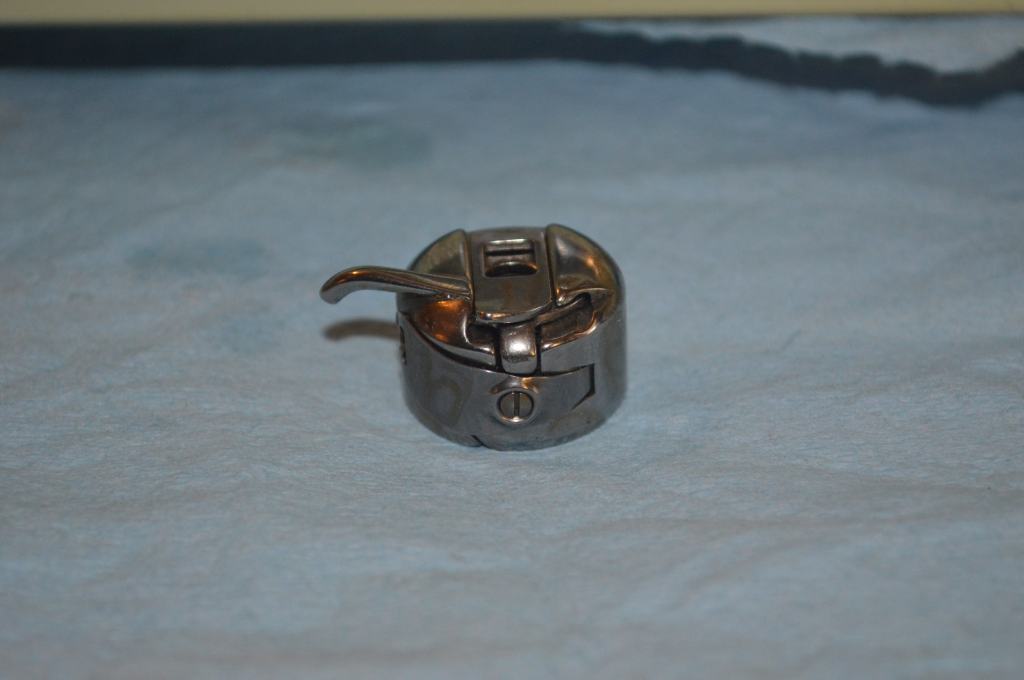
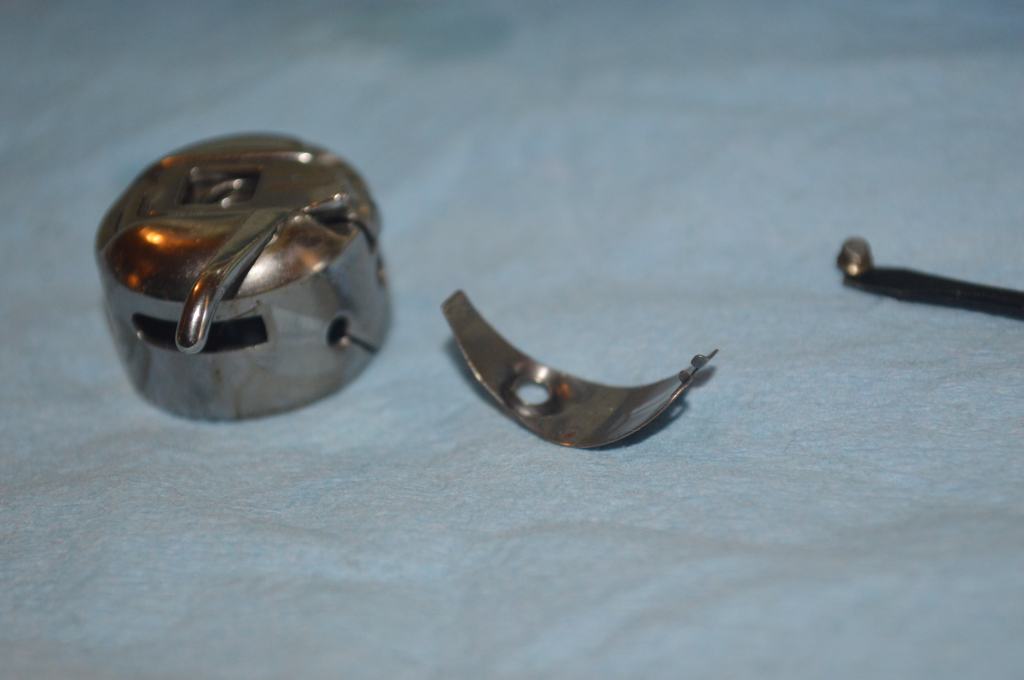
And finally, the bobbin case is disassembled and cleaned…
That completes the mechanical restoration and now the cosmetic restoration begins. First, the body of the machine is cleaned. Having everything already removed makes it easier.
The pieces that have yellowed are restored to their original color. This is a topic in itself and one I have covered in a tutorial that can be found at the following link: https://pungoliving.home.blog/2021/03/06/a-tutorial-reversing-the-plastic-yellowing-on-a-kenmore-sewing-machine/


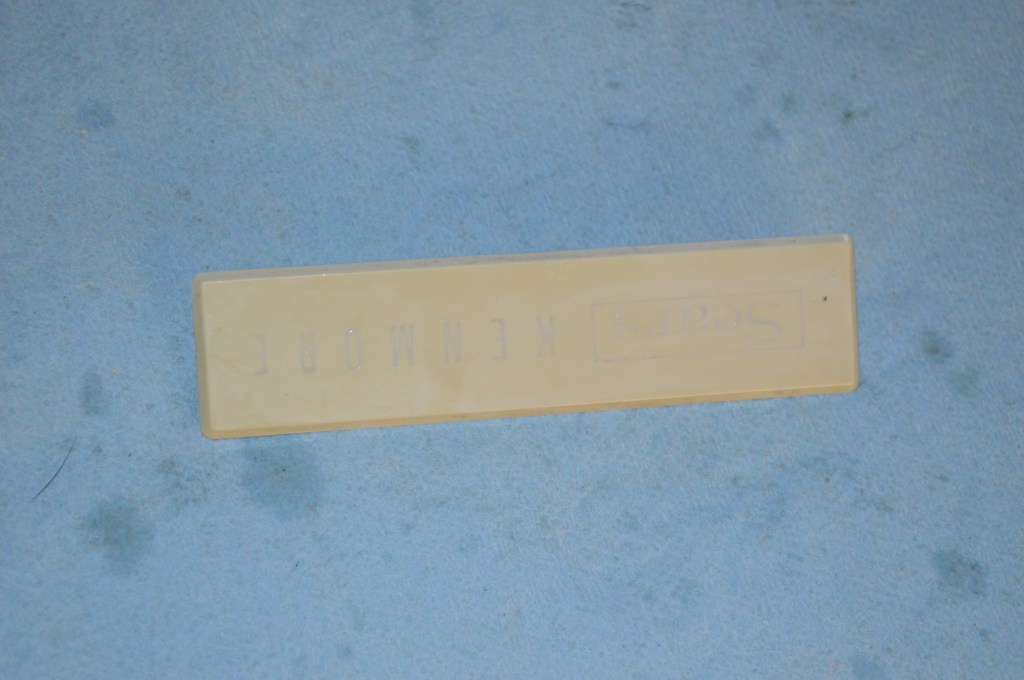

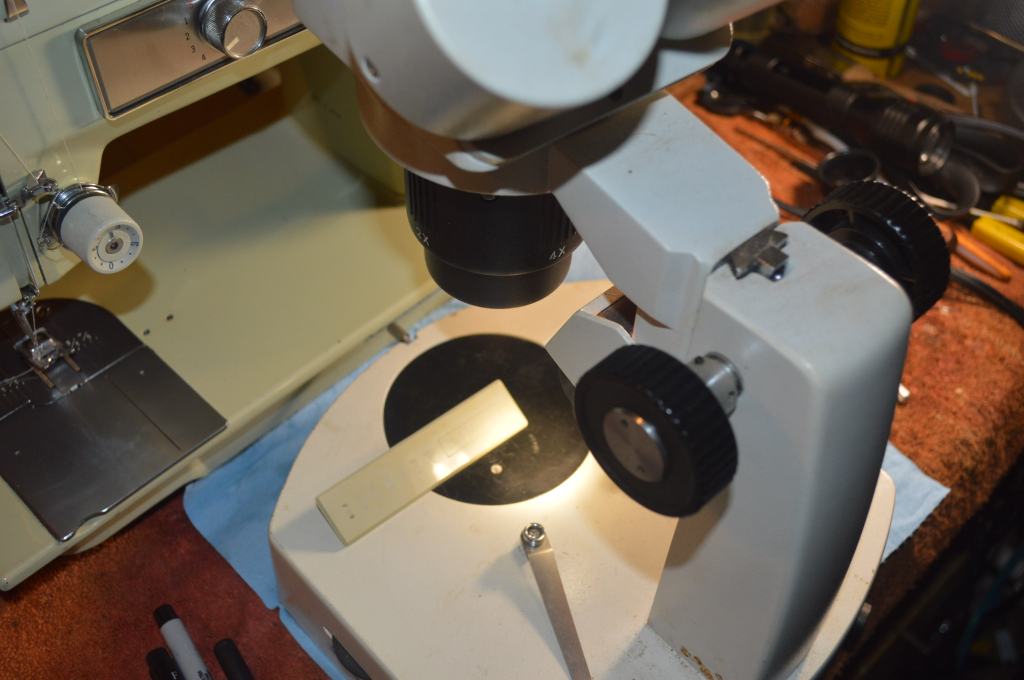
As you can see, the inked badge has been bleached out. If you noticed, the badge logo has changed and this is because this machine is technically a 158.18024. The “4” identifies the machine is the fourth iteration in the 1802 series model line and identifies it’s manufacture in either 1971 or 1972. My attempt to correct the lettering on this badge will invariably be marginal due to the width of the text and the font. My hands are not steady enough to produce the fine line thickness under magnification, and a brush thin enough is hard to find. I could replace the badge, but I want the machine to be original. My only consolation is in my attempt to do restore the lettering is that it will forever be a reminder to Amelia that no detail is too small for her machine. For this, the badge is placed under 40X magnification and the lines are inked with a very fine tip artist brush.
Before 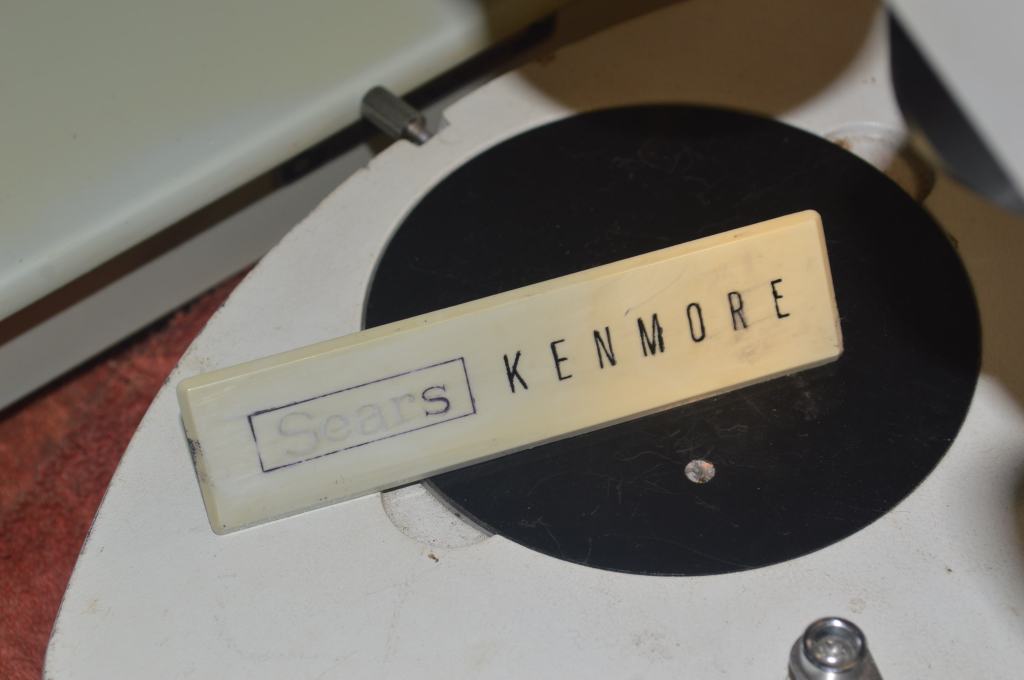
partially done 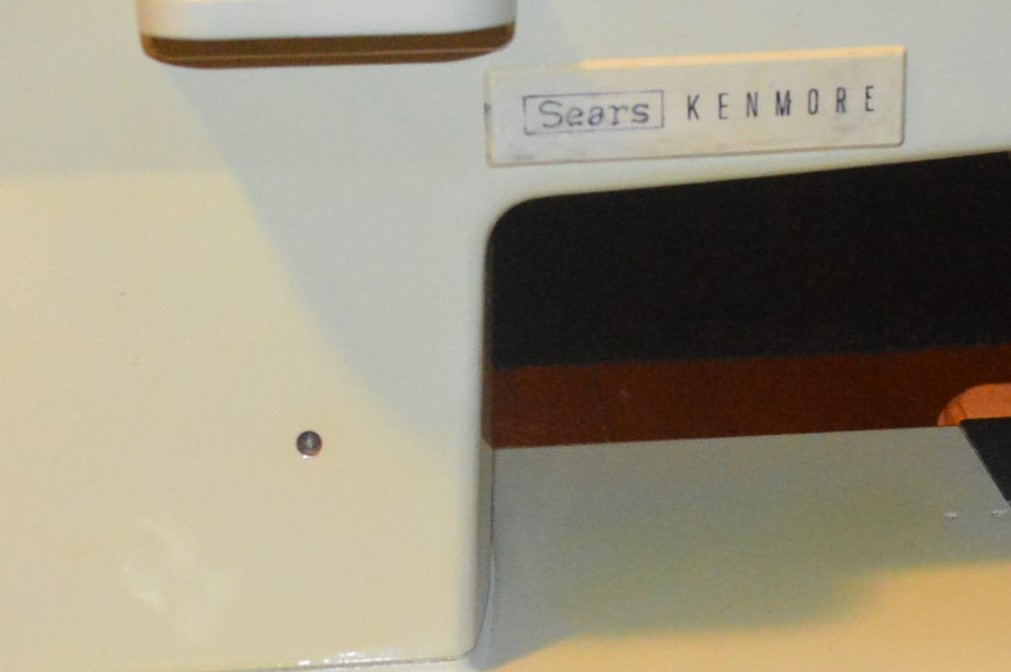
The outcome… not what I had hoped for but the best I could get…
Having done the best I can with the badge, the machine is reassembled and the paint matching begins.
The machine does not need a lot of paint repair. A few nicks here and there and the balance wheel is missing some paint. Using a paint matched color applied with an airbrush corrects these defects…

The paint used for paint matching is not a high gloss paint, but a flat paint. This is intentional because the machine will be top coated with a clear high gloss polyacrylic finish and the flat color will blend into the finish.
The machine is masked for spraying with a poly acrylic top coat.
After applying the topcoat, the machine is set aside for a few days to cure and then the machine is glaze polished.
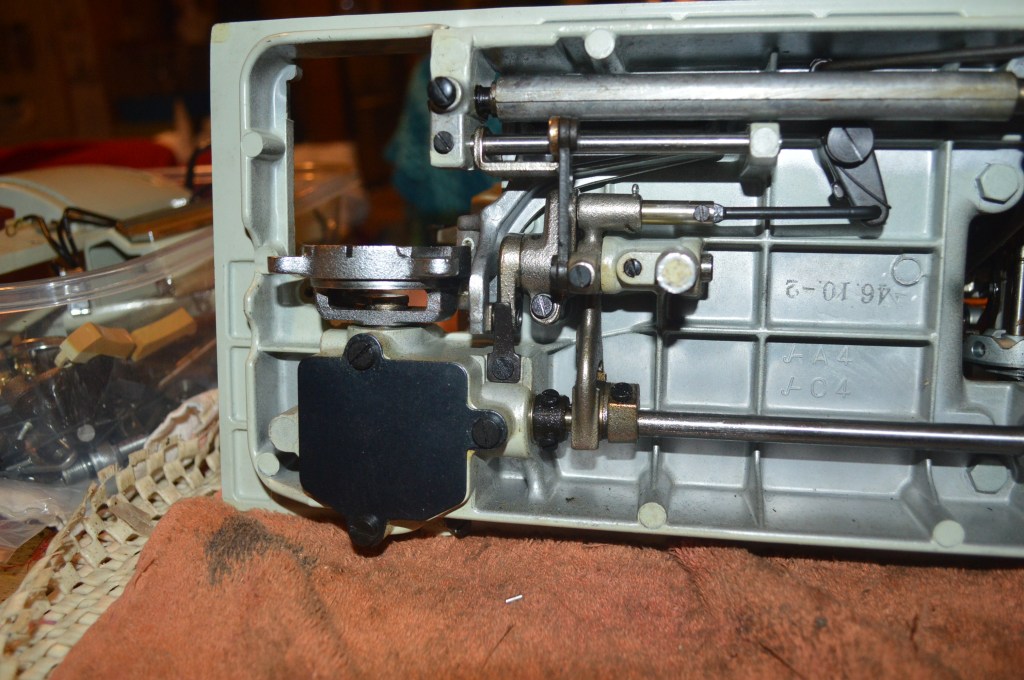
With everything reassembled and the cosmetic repairs completed, the machine is adjusted and tuned to ensure the stitch is the best it can be. The machines restoration is now complete!
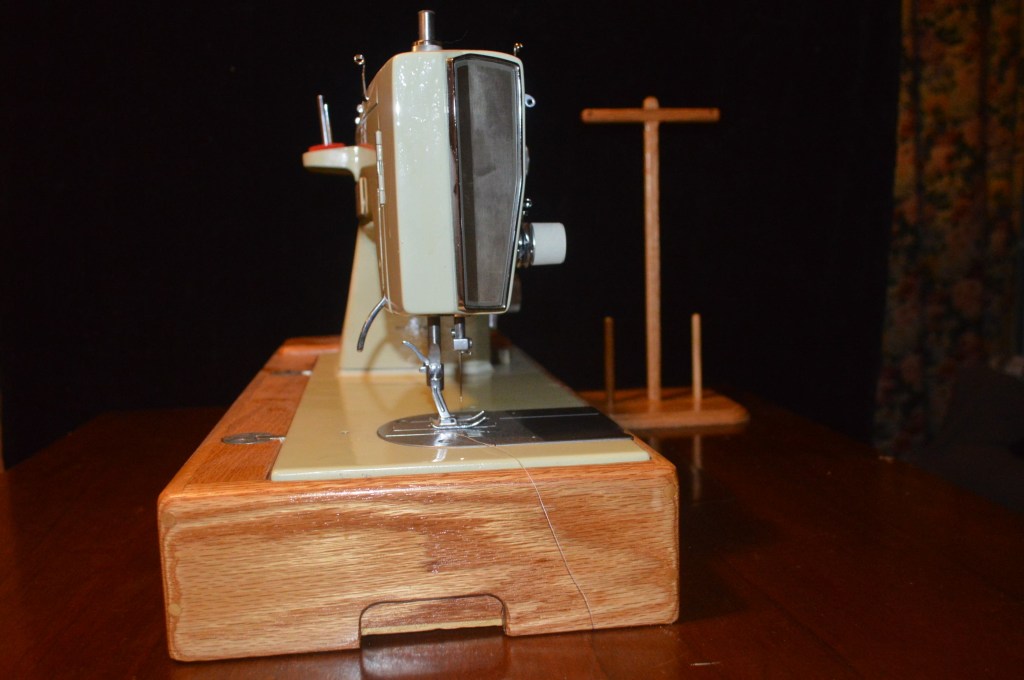
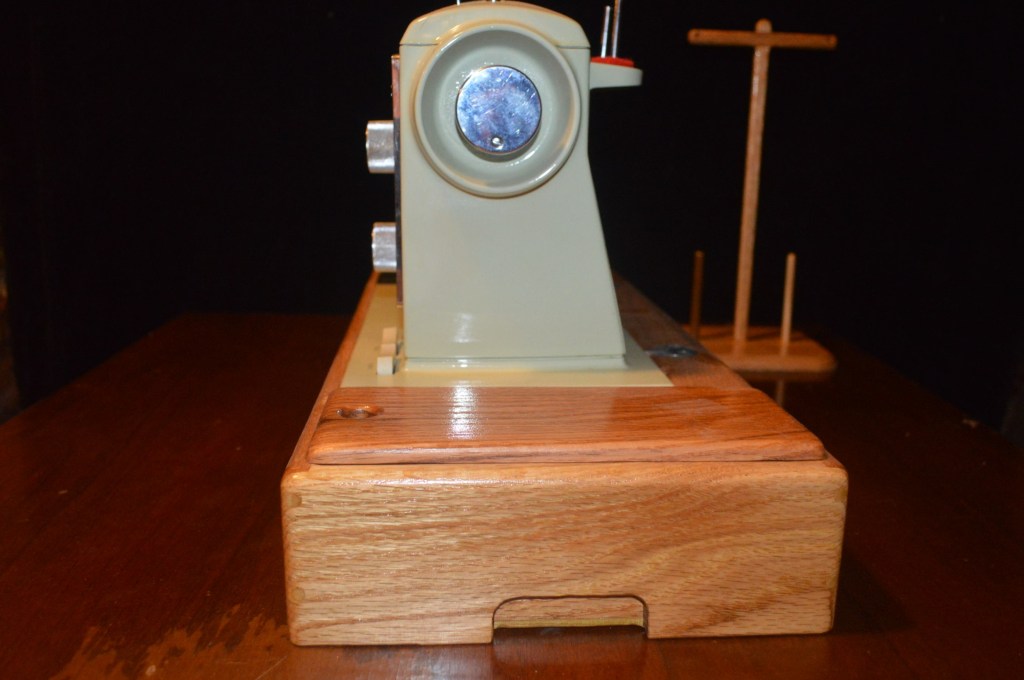
The only things remaining to be done is to make a custom red oak base and gather all of the attachments such as feet, cams, button hole attachment, monogrammer, etc.
The base is important to a machine like this. Kenmore plastic cases are great and in comparison to many other brands of sewing machine cases of this vintage, they have stood the test of time. Even after 50 years, many Kenmore cases still retain their strength and integrity. The case this machine came in was in good condition with the exception of a broken handle. This necessitated using a different case. Kenmore cases offer everything needed to use the machine except style. They do have a surprise inside many folks don’t know about, and you can see what this surprise is at the link to my blog explaining it at A Tutorial – Kenmore Sewing Machine Cases… There is a Surprise Inside! – Restored Vintage Fine Quality Sewing Machines (home.blog)
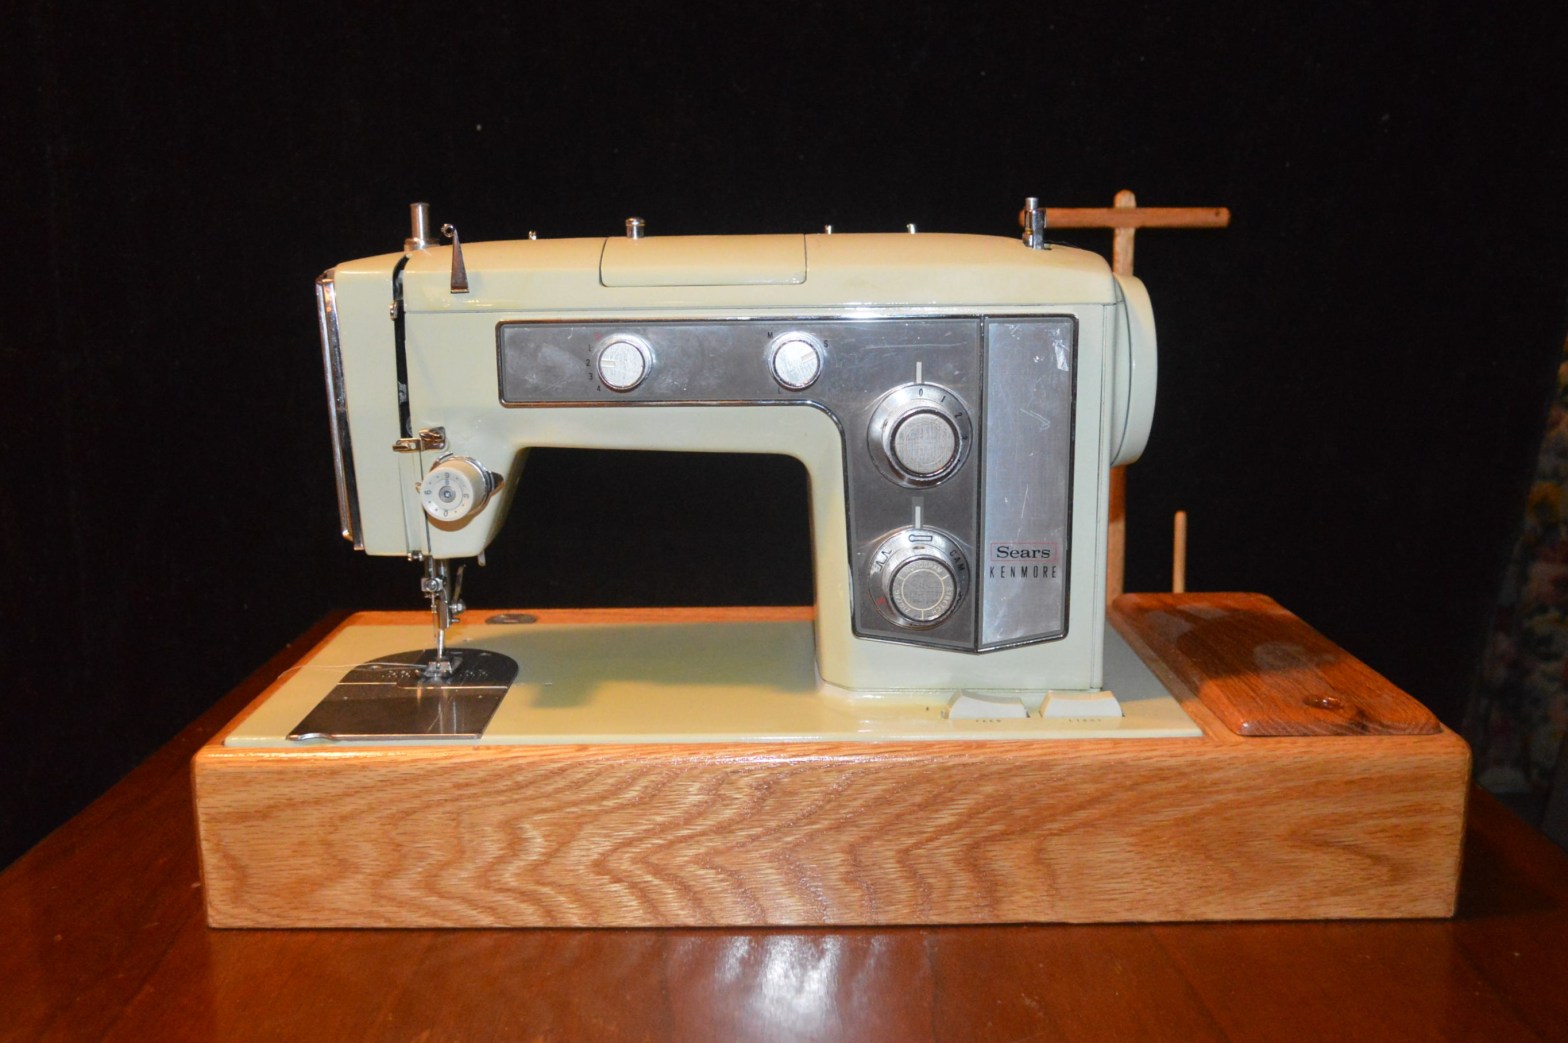
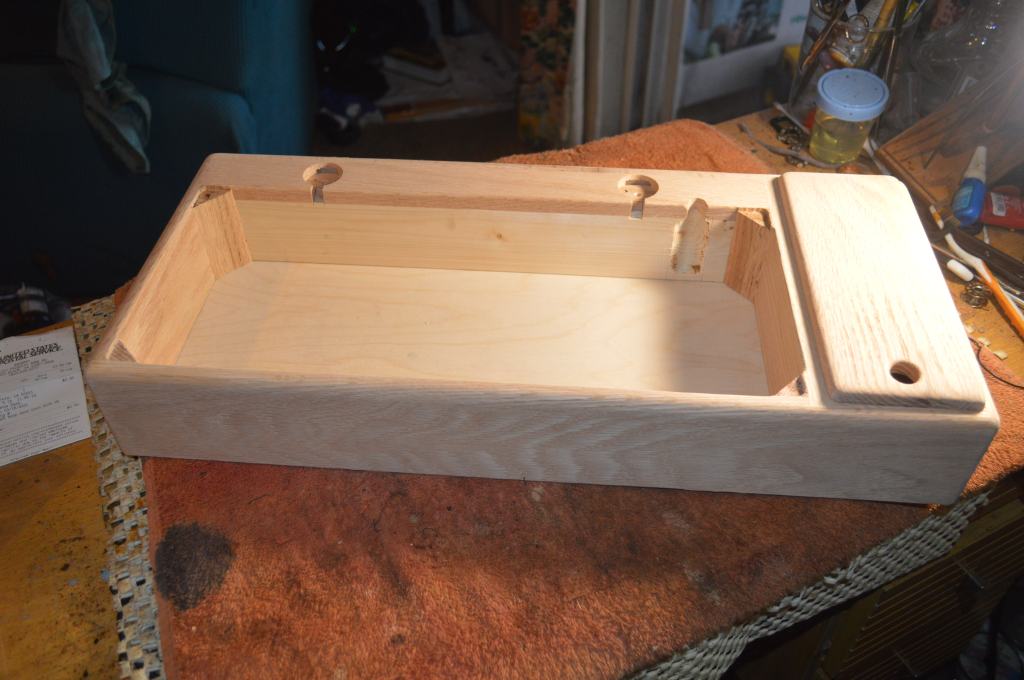
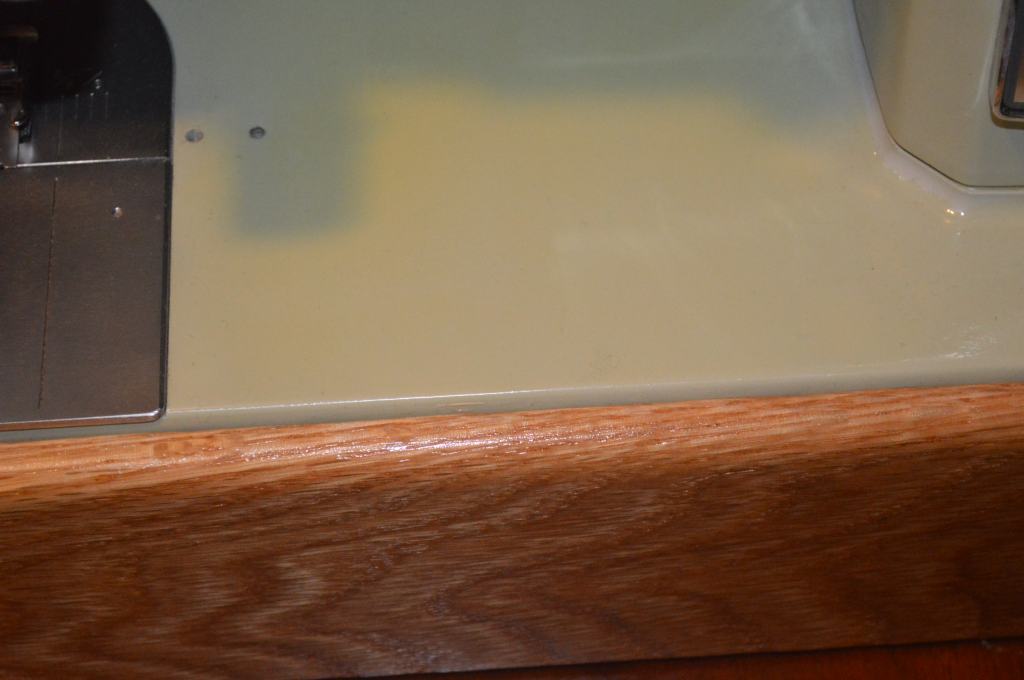
The 1802 is a powerful full size sewing machine. Even though it is smooth running, it is best used in a sewing machine cabinet. A sewing cabinet achieves two things… First, it provides a very stable platform for the machine and second, it is a functional piece of furniture designed to compliment the machine. I can’t offer her a sewing cabinet as a piece of furniture, but I can provide her with a beautiful base that is constructed like a piece of furniture. My chosen wood for bases is red oak. It is a very stable hard wood species, it stains well, and it is readily available. For my bases, I buy bundles of 3/4″ red oak tongue and groove solid wood flooring and process it to the proper dimensions for width and thickness. After removing the tongue and groove and planing it to a final thickness of 1/2″, I typically find the wood to have a wonderful grain pattern that I just can’t get in pre-processed oak boards. If you would like to see the build process for this base you can find it at this link: Building a Craftsman Quality Oak Sewing Machine Base for a Full Size Singer Sewing Machine – Restored Vintage Fine Quality Sewing Machines (home.blog). Because this base is built to fit a Kenmore, the dimensions and corner support radius’s are adjusted to fit the machine.
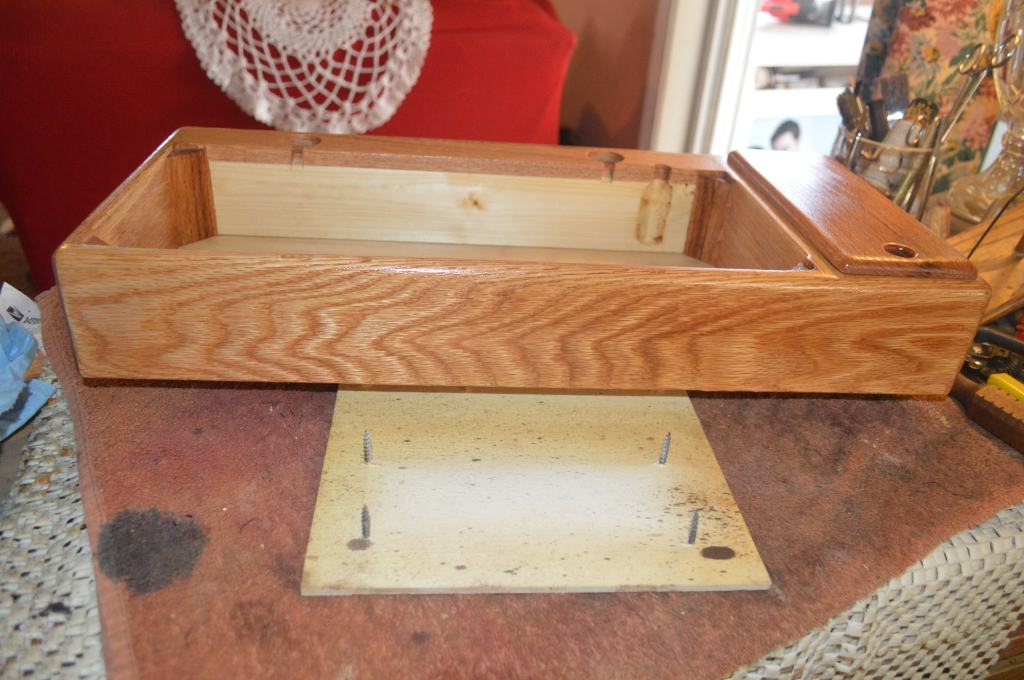
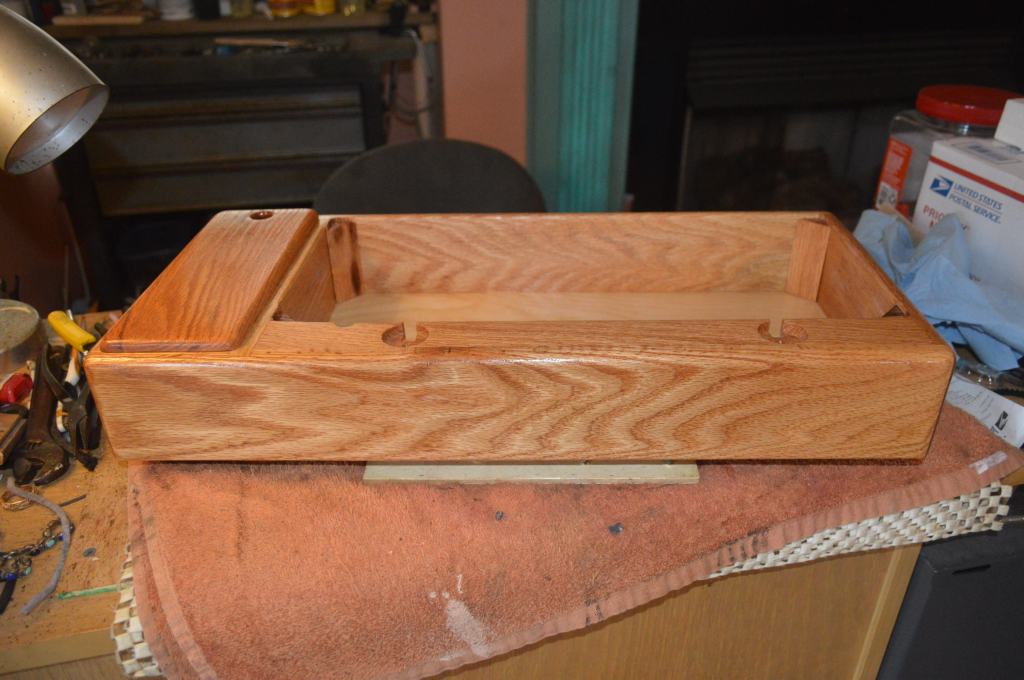
After building the base, the next step is to decide what finish would suit her preference without spoiling the surprise. You see, Amelia is a creative and artistic person so color and texture is important to her. Not knowing what she likes, I asked her Dad to find out. At this point I can only imagine the conversation… “So Amelia… what’s your favorite color? Her response was dusky rose… Not any closer to finding out what stain color to use, he undoubtedly had to narrow the conversation, probably something like this… Okay, that’s great, so… what’s your favorite wood?” After responding that her favorite wood is maple, she was probably wondering why he was asking! Anyway, the feint was accomplished and I have a direction in mind for the finish color. With a pronounced grain, red oak has a much bolder grain pattern compared to maple. In it’s natural color, red oak has a beautiful gold tone and the color is acceptably close to maple. Because she is also a textural person, I think she will like the grain pattern of the wood. Note the grain in the wood for her base? Picking through a bundle of wood, I chose these boards for her base because of it’s distinctive grain pattern. The build complete, here is the base before finishing… it looks pretty bland now, but after applying two coats of transparent natural stain and four coats of shellac it will look great!
See what I mean?
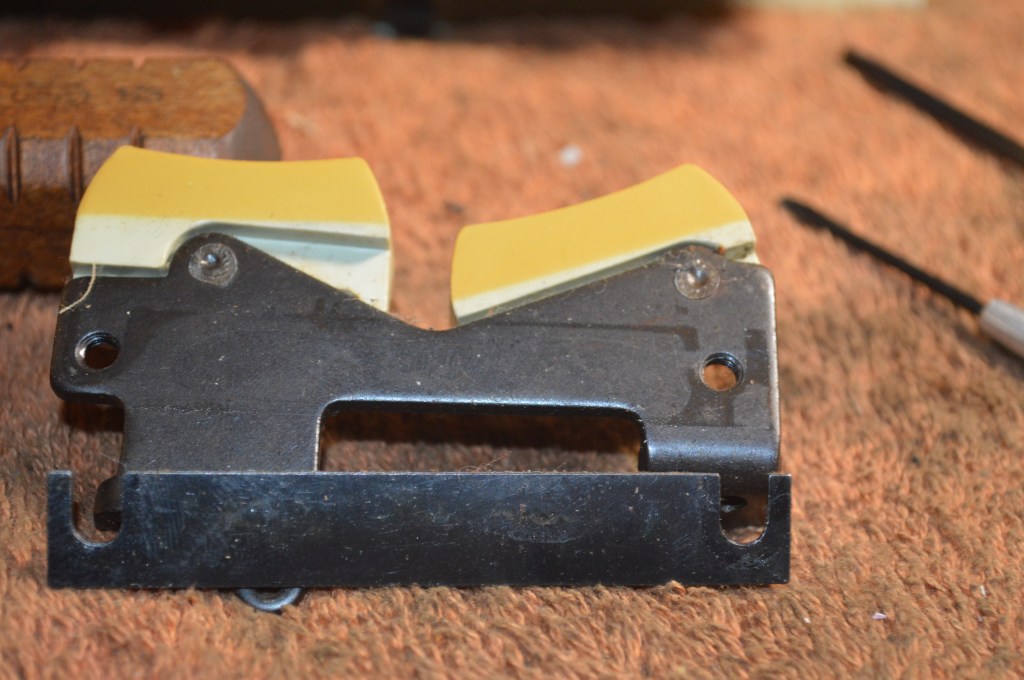
The next step is to assemble the accessories. I was fortunate to come across the “Kenmore Tower”, a stack of Kenmore accessories for this machine that includes pattern cams, a good assortment of high shank feet, and a monogrammer attachment. The only attachment the machine needs besides these is a button hole attachment. I consulted my good friend Ebay and within minutes had one whizzing my way! Here’s a little note on the button hole attachment. Sears designed many of their machines with a gear drive lever under the bobbin plate to drive their attachments…
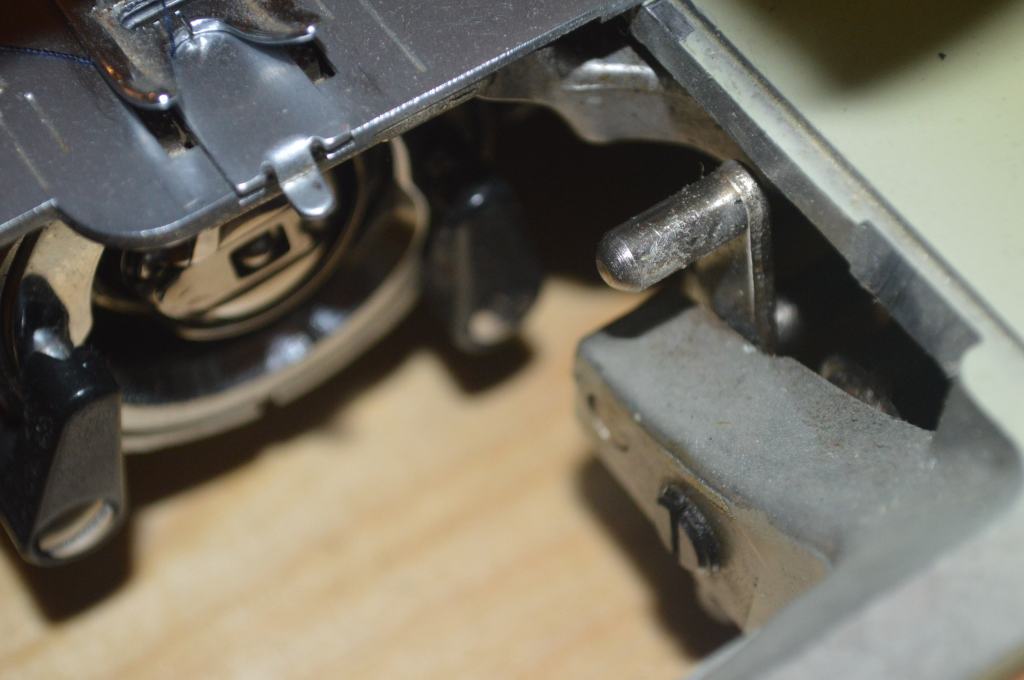
All Kenmore attachments are gear driven. Each attachment has a gear drive plate that is substituted in place of the machines bobbin cover plate. The benefit of this is that the fabric is held firmly in the attachment and the drive lever moves the attachment along with the fabric. Many machines move the attachment over the fabric and relies on the feed mechanism and movement of the attachment to work. In comparison to a Kenmore attachment, this is far less effective in proper formation and stitch uniformity.
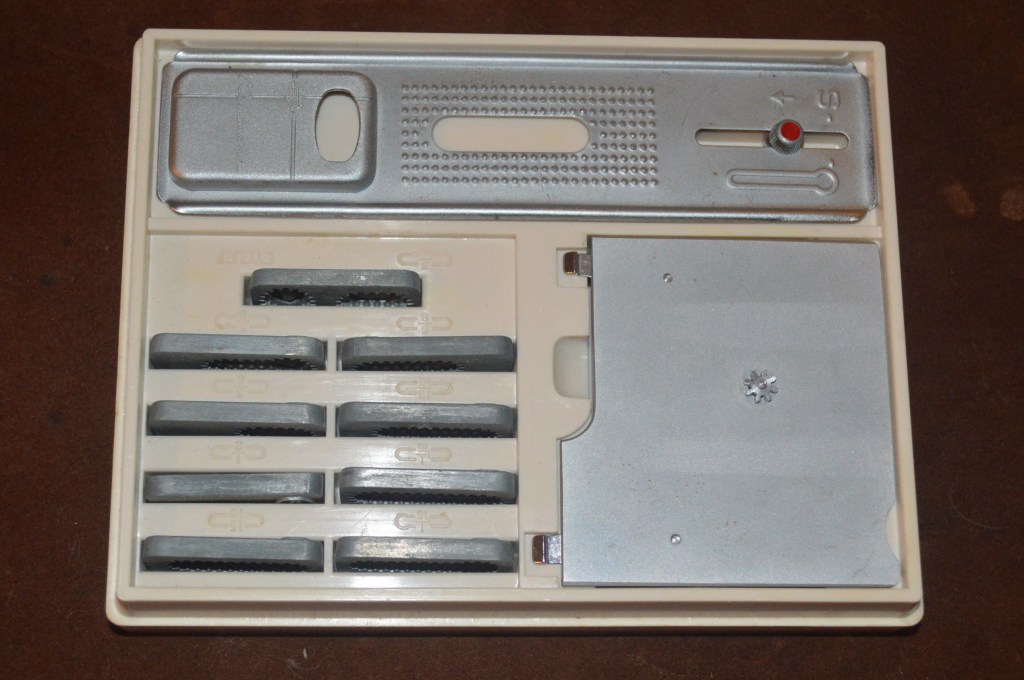
Gear drive 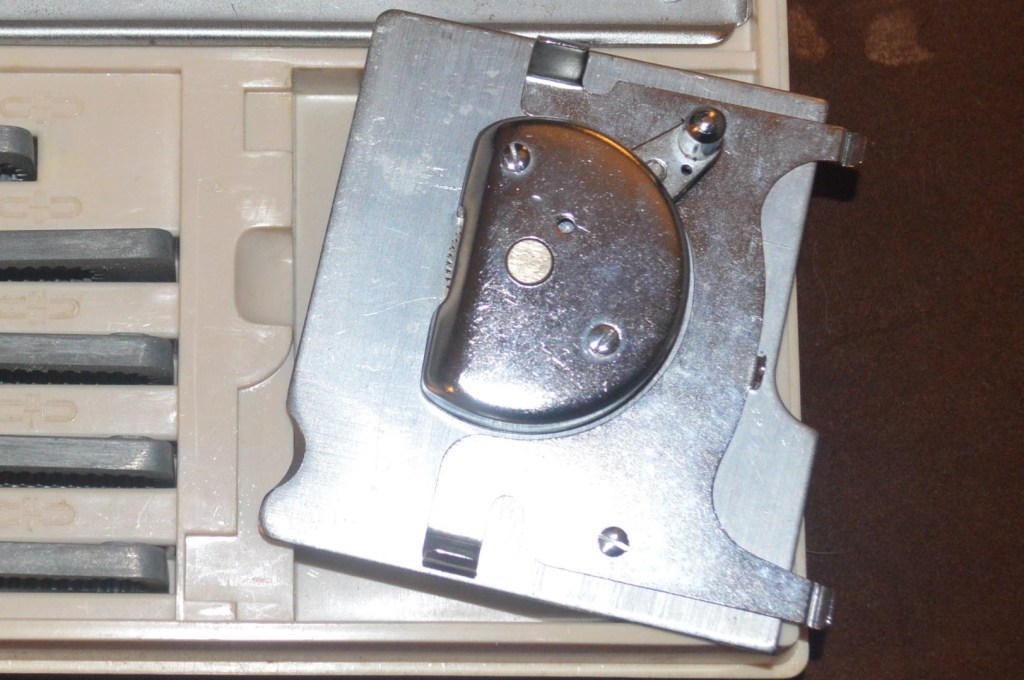
Gear engagement lever
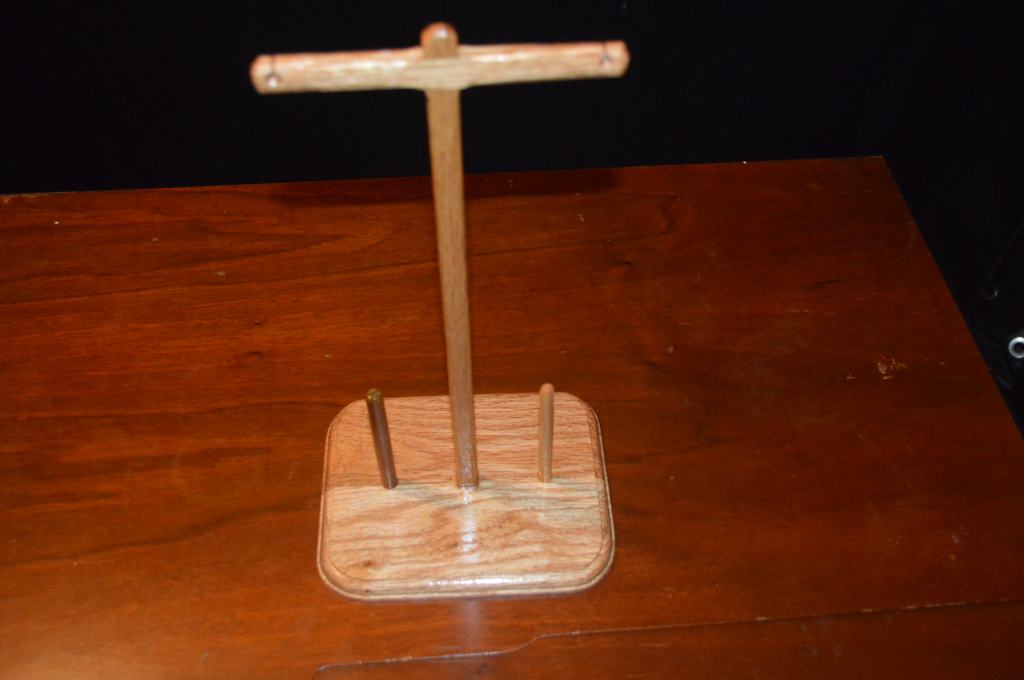
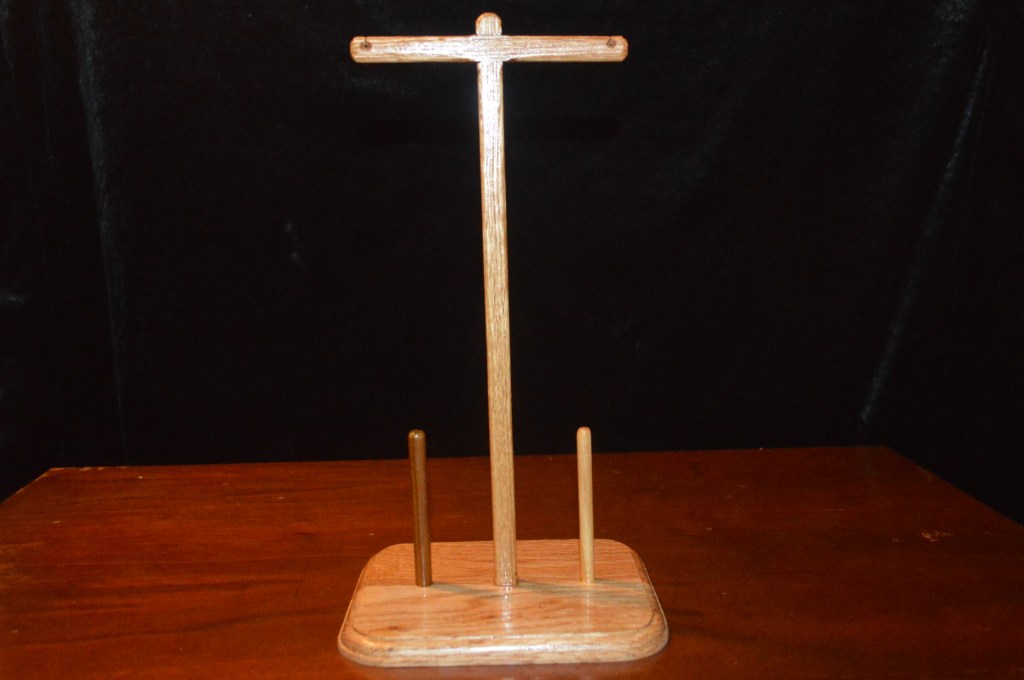
Almost done! Throw in the original users manual and I think she will have enough to make her successful in any sewing project she could ever dream of… except when looking at the whole package, I noticed something was missing. Looking around the shop I found some short pieces of red oak leftover from the base so I thought a cone spool holder would be useful. Using cone thread is very economical and they hold a LOT of thread. Anyway, I made a spool pin holder to match her base and now I think the package is complete. This cone spool holder has two different size dowels to accommodate any spool thread cone she chooses and is tall enough to clear the top of the machine. Intended to be a matching accessory, it is finished to match the base.
Finally finished, here is the machine after it’s restoration… it is a beautiful and a functional sewing machine that should run reliably for many years.


Surprise Amelia! We love you and hope you get many years of use from your “new” vintage all metal sewing machine!

Fabulous! Congrats, Amelia and happy sewing!
LikeLike
What a beautiful Kenmore! Your niece is a very lucky girl and you’re a real keeper as an uncle. That’s a tremendously thoughtful gift that we both know will last her a lifetime and beyond if she takes good care of it.
You may or may not recall, but last December we communicated on your blog about First Sewing Machines. Mine was a Kenmore 158-14001 which I was given in 1969. I had learned on my mother’s White Rotary 77 but loved my 14001, which if I remember correctly, is a favorite of your wife’s as well. I had bought a 2nd model 77 to use for parts should I need them when fixing up Mom’s machine and you VERY generously offered to help if needed. I know nothing about engineering, but I’m a great tinkerer and have managed to satisfactorily recondition several machines so they run smoothly and efficiently. I haven’t done the model 77 yet because I’ve been having too much fun building that collection of vintage Kenmores I mentioned. One of them is the unusual 120-491 straight stitch from 1954 (almost as old as I am, a-g-g-h!). Have you ever come across one of these? Its design is VERY different from any other Kenmore I’ve ever seen. Pretty it’s not, with a smooth, dull, greyish brown shell over an aluminum “skeleton”. It’s a clamshell sort of arrangement which detaches completely from the internal workings. So I opened it up to find it’s extremely simple. It was filthy, so I cleaned it thoroughly inside and out, oiled it appropriately and cleaned the 1.5 amp motor which was made by an old division of Chrysler no less! It’s neither friction nor belt driven; it’s chain driven (well ok, it is a belt of sorts, rather like a mini bicycle chain). Surprisingly, it has a few nylon parts and the original maintenance manual extolls the value of this “modern” innovation as being stronger than steel (not), but it’s lasted this long so it must have something going for it. So I finished working, tested it and discovered that with a size 16 needle, it slides through 8 layers of denim like it was butter. I’m hoping make some canvas slipcovers soon and know this beautifully ugly old beast will do the job.
As I’m still relatively new to your blog, I’m going back to read previous entries; the ones I’ve read so far are fascinating and informative. Thanks for posting all that you do – you’ve given me quite a bit of confidence. I can’t truly restore machines but usually I can get them running nicely.
LikeLike
Hello Suzanne,
I do remember our conversations and I appreciate your kind words! I hope she continues to enjoy sewing and continue to explore the possibilities. She has worked hard and having the time and ability to do the work that I do for these wonderful machines I felt it would be a perfect opportunity to expose her to a true quality sewing machine. I have seen the series 120 sewing machines but I have not worked on one. I like the idea of a chain drive and hope that yours continues to sew well. You certainly have the ability to keep it running and are very fortunate to dig deeper than most folks.
Please don’t hesitate to let me know if I can be of any assistance to you. I am only a small part of a very large community and any information I can share makes it worth my time.
Have a great afternoon!
Lee
LikeLike
UPDATE: I have yet to start making canvas slipcovers with the 120-491 because it needed a base. So I contacted the husband (and sadly widower) of my best friend for 35 years. We lost her to cancer complications in August 2019. She was my “sister-from-another-mother” and I still miss her badly. Sorry, I digress.
Anyway, he’s also a good friend and he loves working with wood; his work is beautiful. I gave him the machine and asked if he’d make a very simple base with something modest like pine. What I got back is an incredible piece that fits like the proverbial glove. It’s exactly what I wanted; very simple and nicely stained walnut with a silky smooth, glossy poly finish. It’s just perfect. Now, I have no excuse not to begin making the slipcovers….well…..except for the quilts I have to finish, the repairs & alterations my husband and daughter have asked me to do, some clothes for myself, working on my newly acquired 158-1941 (yes!), 1061, and 1803. Lastly, and most importantly, getting to know our first grand-niece and our 2nd great-granddaughter. 😁 Oh well! I enjoy it all and hope the Good Lord allows me to continue for whatever years I have.
Hope you and yours are Covid-free and doing well.
LikeLike
Hello Suzanne,
It’s so good to hear from you! I’m glad that you are finally set up to continue your projects… having a nice fitting base helps a great deal.
Congratulations on your growing family! What in this world is more precious than an new baby.
I, like you, cherish every day given to me and I do my best to make the most out of each one… Lord willing, I will see my first great grand child..
Blessings to you and your family, and thank for reaching out to me.
Have a blessed evening,
Lee
LikeLike
What an extraordinary gift for your niece, and for all of us to have learned about it. This story brightened my day and will now be part of your niece’s story that she can pass down the generations. You’ve made the world a measurably brighter place.
LikeLike
Hello Jeffrey,
Thank you for your kind words! I welcome her to the sewing community and hope that her story continues for her generations to follow… after all, that’s what it’s all about.
Have a blessed evening!
Lee
LikeLike
Lee, Amelia’s machine is beautiful, as is the fine base you made to set it in. She is very lucky. A few years ago, the daughter of the owner of my local quilt shop was sewing on a 40 year old Kenmore. I don’t know the model, but as she was sewing, I said to her mom that that is a NICE-sounding machine!
Lee, my new shuttle for the Singer 27, from the U.K., Is on its way. I’ll let you know if it fixes my problem. I also ordered an Amish-made rubber treadle belt with a barb connector, to hopefully since the belt slipping problem.
I’m glad to see the restoration on this newer vintage Kenmore, and I might need to pick your brain for the 1977 Singer Futura II 920 that I just acquired last week. I have the instruction manual, and have a downloaded version of the service manual, but just this morning found and ordered the hard copy version in the binder. Much easier to navigate. I’ve tried out the machine, even though I usually don’t do much until I’ve cleaned my machines. The interchangeable discs are not consistently working (or I’m not doing something correctly). The cast iron vintage ones don’t scare me much, but this one is a little intimidating.
Anyway, thanks for your very helpful advice on my machines. I love seeing your restoration projects.
Renita George
LikeLike
Hi Renita,
Thanks! I like the 158 series Kenmore’s, especially the machines made before 1975 since they were made before plastic started creeping into the machines sewing assemblies. I can live with plastic for covers and low stress parts, but gears? They just won’t last 50 years.
I hope the shuttle fixes your 27, It could be since the shuttle is the hook for the machine. Any problem with the shuttle will show up on the stitch so I am looking forward to hearing from you. I don’t have much experience with treadles. My Wife has one and we replaced the belt and it seems to work okay. I think a rubber belt will definitely prevent slipping.
I’m not familiar with the Singer Futura II 920, I’ll have to google it to see what it looks like.
I hope to hear about your success with your machines!
Have a great evening,
Lee
LikeLike
I learned to sew on this model machine. My parents gave it to me about 10 years ago and I am just now getting the time to work with it again. I cleaned it up today and the cabinet in which is is stored. Fingers crossed it will work well! I hope I can remember how to run the thread through. 🙂
LikeLike
Hello Terri,
It’s like riding a bicycle! It will all come back to you. Let me know if you run into any problems and I’ll help if I can.
Have a great afternoon!
Lee
LikeLike
I was recently gifted a 158.18023.
Does the needle have to ‘home’ to the left?
Also, cams 1,2,3 and a few others seem to be missing, but there aren’t enough slots for them.
Thank you.
LikeLike
Good morning Lynda,
Your 1802 is a left homing needle and there is no way to change the needle position.
Kenmore used different cams for different machines and there are (if I remember correctly) about 48 cams in total… cam sets come in 15, 25, and 30 cam sets. Some cams are intended to work with certain attachments so really don’t need the complete set to have a wide variety of patterns. You may find the single cams you want separately.
I hope I have answered your questions, but please feel free to let me know if I can be of any further assistance.
Have a great day!
Lee
LikeLike
Also, on my 158.18023, the reverse button doesn’t push in.thank you,
Lynda Williams
LikeLike
You will probably get good results if you soray the mechanisms inside and under the bed with Wd40 and let it sit overnight in paper towels (it will drip and can make a mess). Then exercise them until they free up. You might find this true with the feed dog drop mechanism too… follow up with sewing machine oil.
These machines need regular oiling to keep everything moving smooth.
I hope this helos!
Lee
LikeLike
It has been said already but is worth repeating- what a thoughtful and amazing gift for your niece! And also how great that you found a hobby to share with your wife. I just purchased the same machine to learn how to sew and it is a great machine so far. Although I’m not an engineer I find the mechanical aspect of older machines to be fascinating.
Your very detailed descriptions and photos will help me restore my machine as needed so thank you for sharing!
diane
LikeLike
Hello Diane,
Thank you for your thoughtful comment! I do enjoy the restoration process for these wonderful vintage machines and thanks to folks like you who know the potential and prefer to use them has kept my passion alive.
Your Kenmore is amazingly durable and kept clean and oiled it will continue to sew wonderfully… Please let me know if I can be of any assistance!
Lee
LikeLike
I happened to find your site while trying to set up my old Kenmore because my Montgomery Ward machine just died while in the middle of a quilt! I absolutely love the base you made for your niece!
I have a Sears Model 92-can’t seem to determine the year, but am assuming early to mid sixties. I acquired it about 35 years ago along with its blonde wood table. The machine aims a powerhouse. It has been quite some time since I’ve used it though and the original sewing table that it sits in is barely supporting it. I’m hoping to give it a good cleaning and some lubrication, but really need to figure out a way to fix the supporting deteriorating cracked wood barely holding it in the table.
Any information you can provide either on the history of my machine or how to reinforce the deteriorating supports would be greatly appreciated!
LikeLike
Hello Kara,
If you can give me the complete model number (from the small plate under the bed) I can help you identify the date of manufacture.
Send me a few pictures to pungoliving@gmail.com showing the condition of your cabinet, and I might be able to help you there too.
Have a wonderful day!
Lee
LikeLike
Hi Lee! You did an amazing job on Amelia’s sewing machine. I have one identical to it in a cabinet,and I hope Amelia loves hers as much as I love mine! Do you have any information on how to use the Monogram attachment? I fiddled with mine yesterday, and got nowhere fast! Any help will be greatly appreciated! Thank you.
Rebecca Wroblewski
LikeLike
Hello Rebecca,
Sorry for the late reply…. I’m just getting over 3-weeks of covid! Just getting back to my routine.
I’m not too familiar with the monogram attachment, but there is a forum that I would recommend that probably can be of help.
It is called the vintagekenmore group and you can find it at the link: “VintageKenmoresSew@groups.io”
You need to create a member account but it is easy and the members are very helpful… there is a lot of information on many Kenmore models and they have a section on Kenmore attachments.
I hope this helps and have a wonderful day!
Lee
LikeLike
If the link I provided does not get you there, follow this link: “https://groups.io/g/VintageKenmoresSew”
LikeLike
Lee, thank you for your reply. I hope you will be feeling well soon. Take care of yourself. Thank you for all you do for the sewing community!
LikeLike
I just found your article and Rebecca’s comment. My identical Kenmore is also in the cabinet. I bought it when my daughter was a baby, born Aug 1972. I have done SCADS of sewing on it and although have used many of the design cams, never tried monograming, precisely for the same reason. I’m retired now and have started sewing more again so will check out the website you posted about the monogramming. I’ve got 10 grandkids and one great grandchild I could sew for now!
LikeLike
Hello Beverlee,
That a wonderful story! These old vintage machines have a habit of building memories.
I hope you enjoy sewing for all of your grandkids and great grandkids!
Have a wonderful evening!
Lee
LikeLike