
Introduction
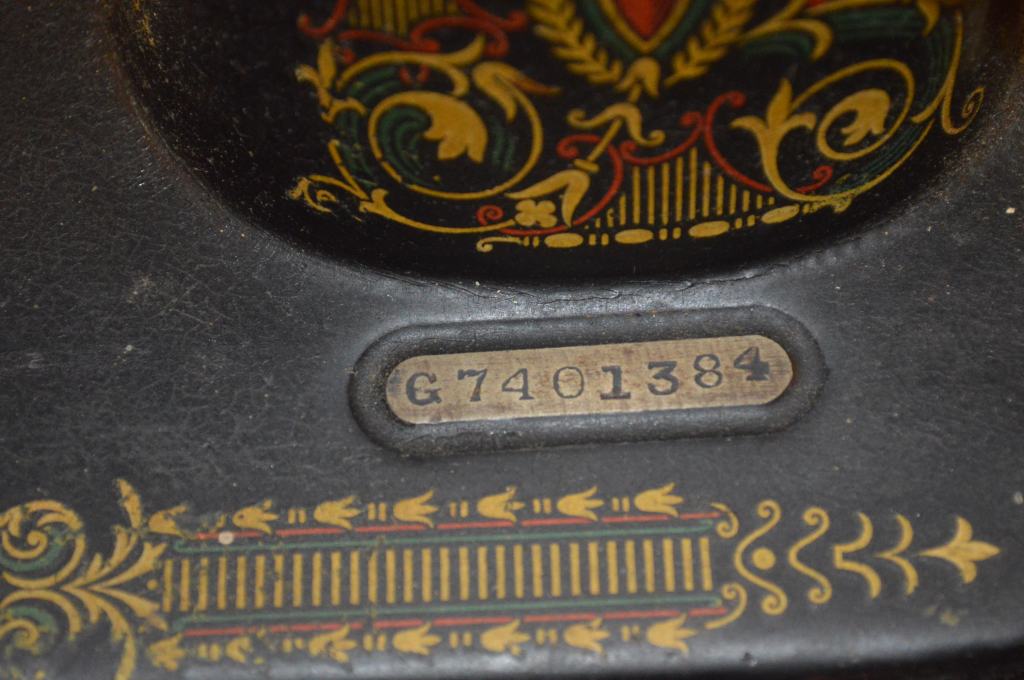
The Singer model 66 is truly one of Singer’s fine iconic sewing machines. First introduced in America in October of 1902 and produced there until 1956 and was also produced in Scotland as the 66K until 1960.
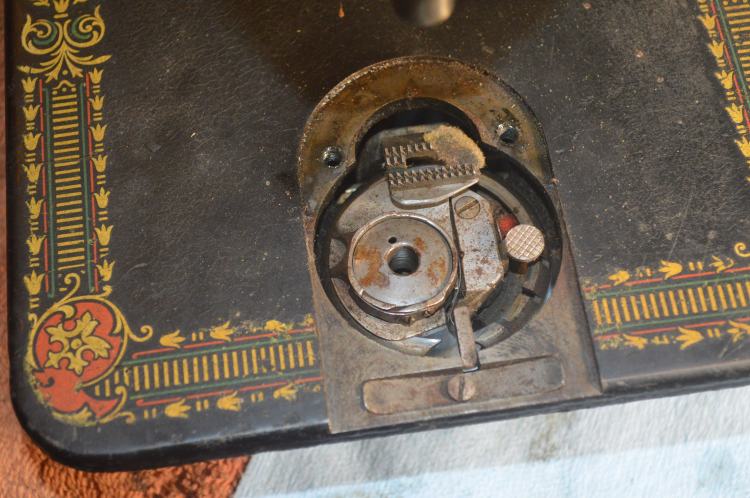
Singer claimed (and many believe) that the Singer model 66 was the first mass produced sewing machine that produced a near perfect stitch. Built incredibly tough, a model 66 that is well adjusted and in tune can out sew almost any new or modern sewing machine today… and it can do it through a variety of fabrics from linen and lace to horse blankets. The 66 introduced a smooth oscillating hook and the class 66 bobbin. Ever wonder why they call it a class 66 bobbin? Now you know!
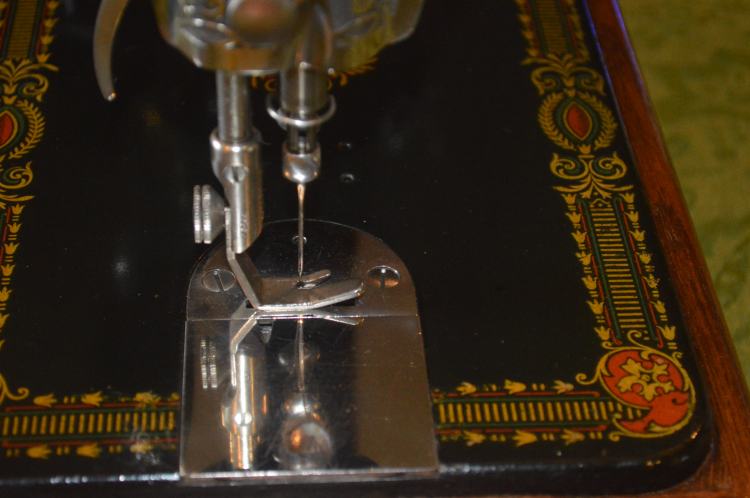
Different from the vertical hook design found in most machines of this vintage (excluding vibrating shuttles), the hook was mounted horizontally allowing the bobbin to be simply dropped into the machine. This added simplicity to threading of the machine and the perfection of the stitch it formed. This made the 66 an instant best seller.
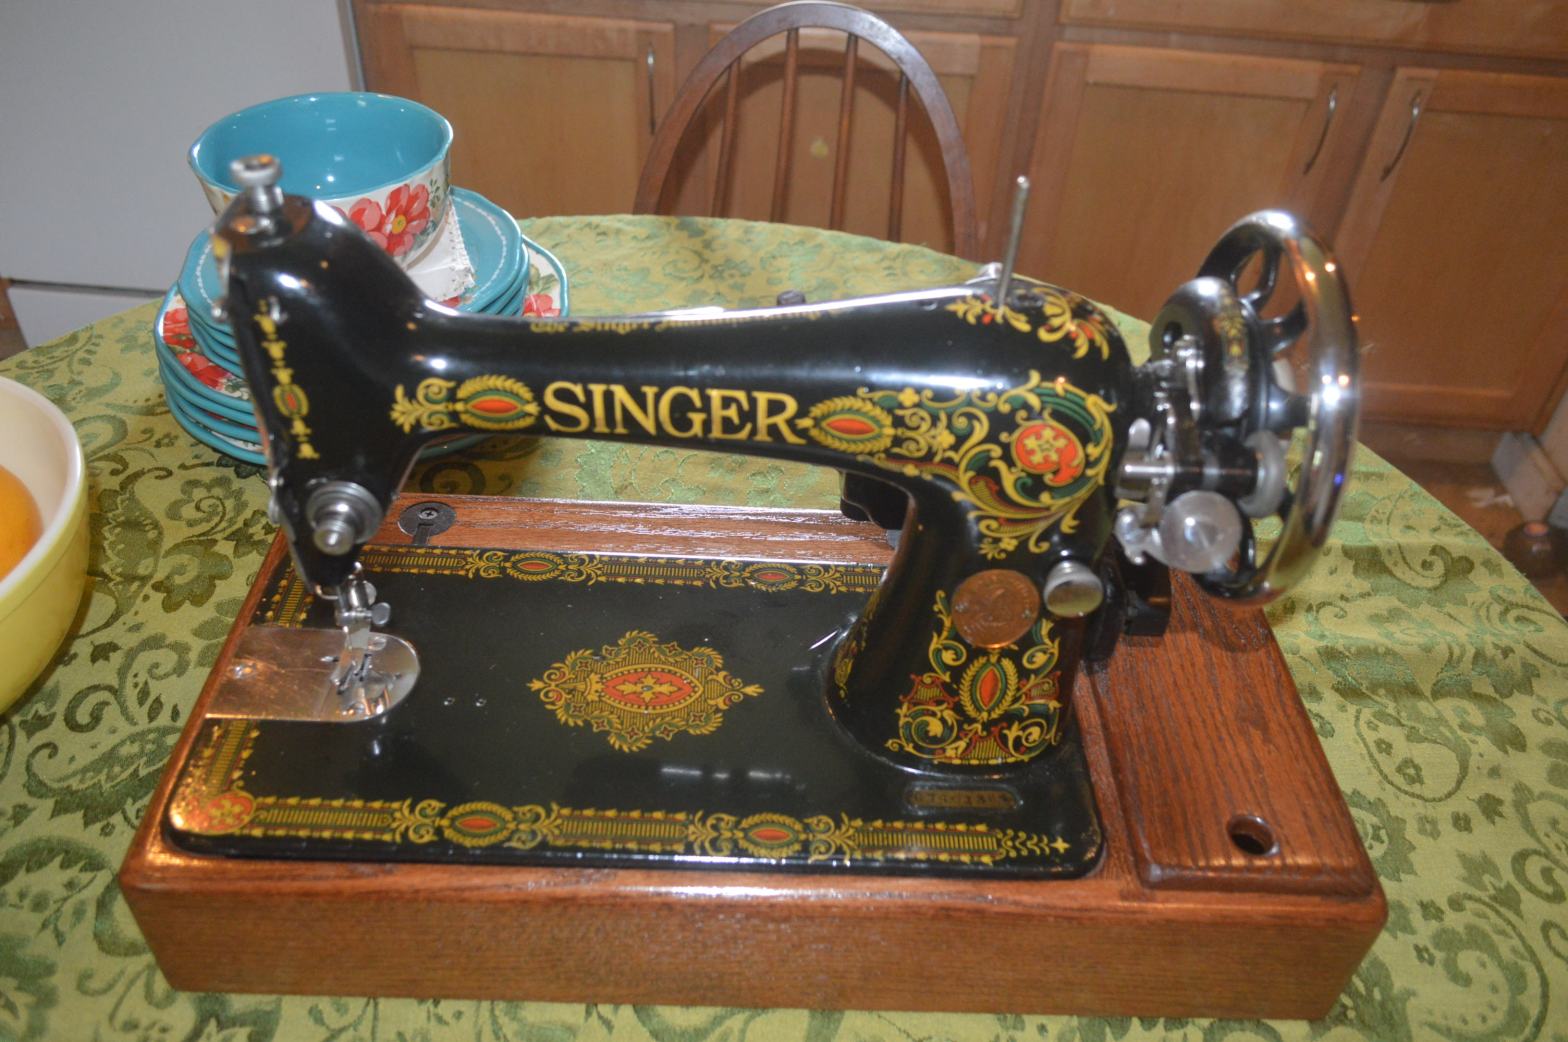
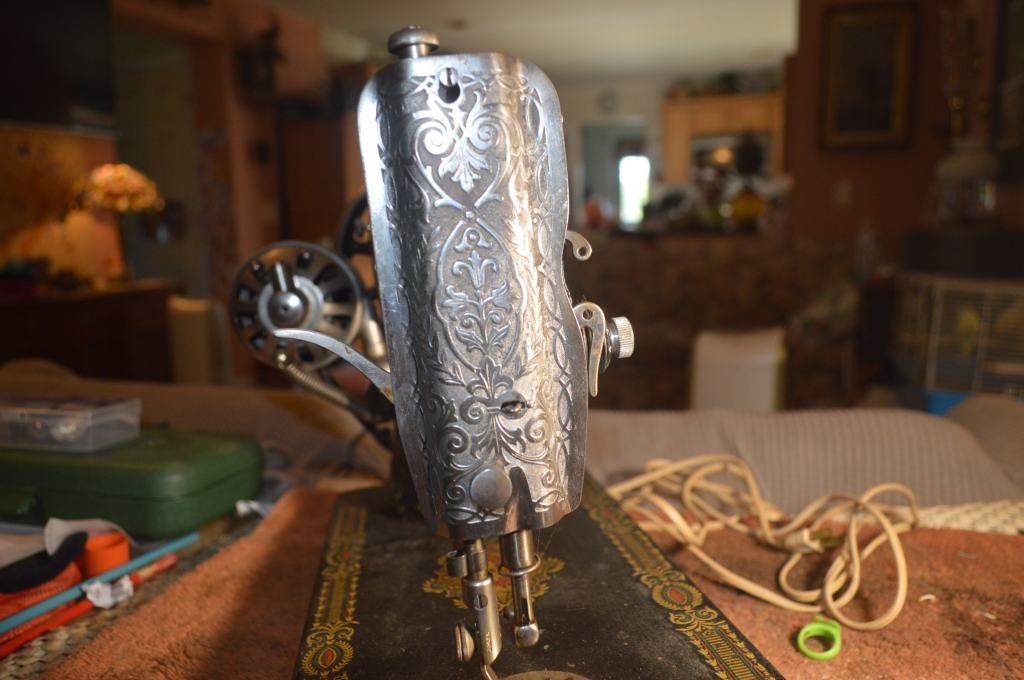
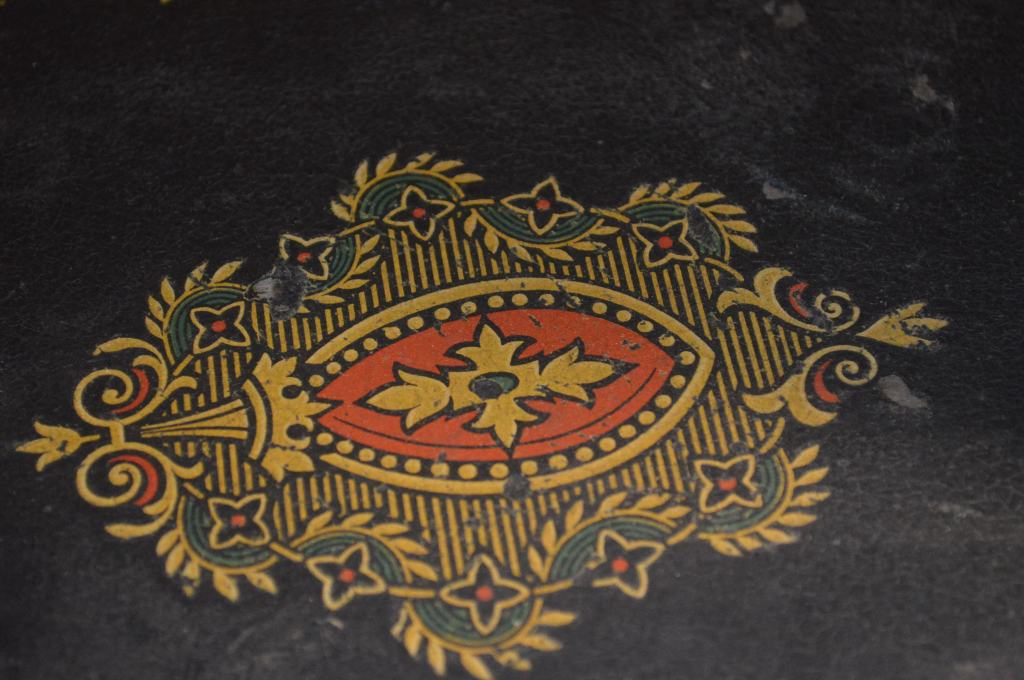
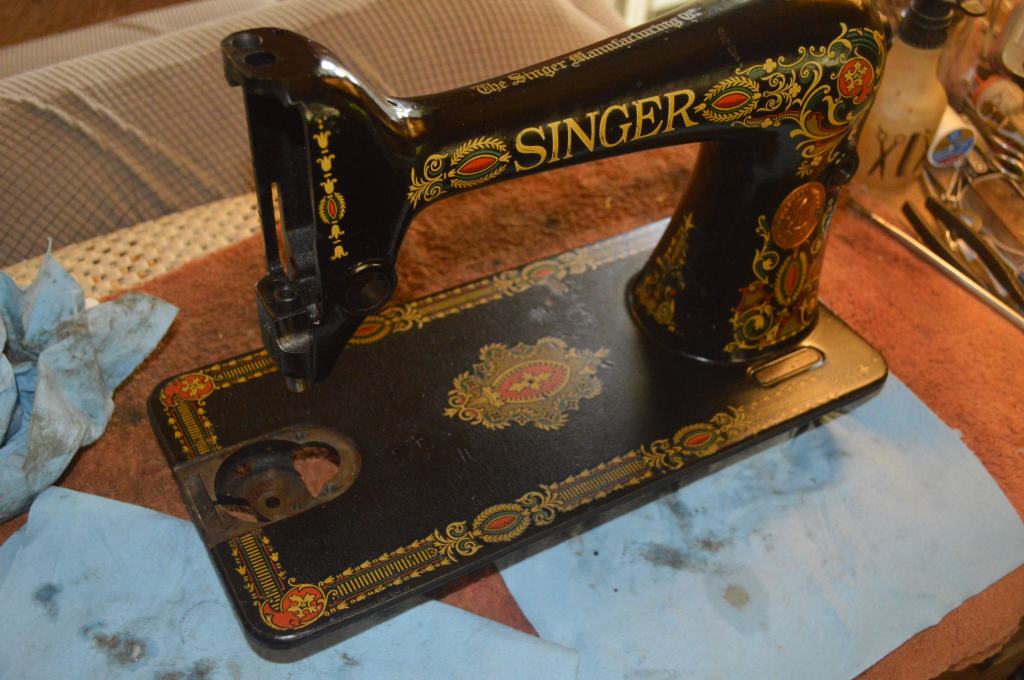
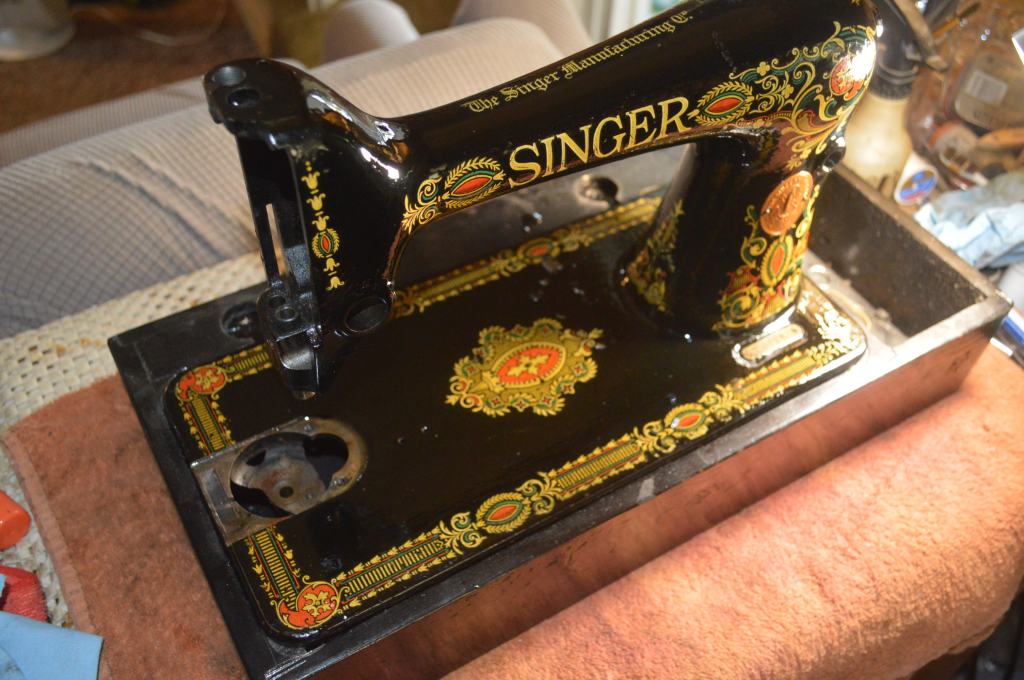
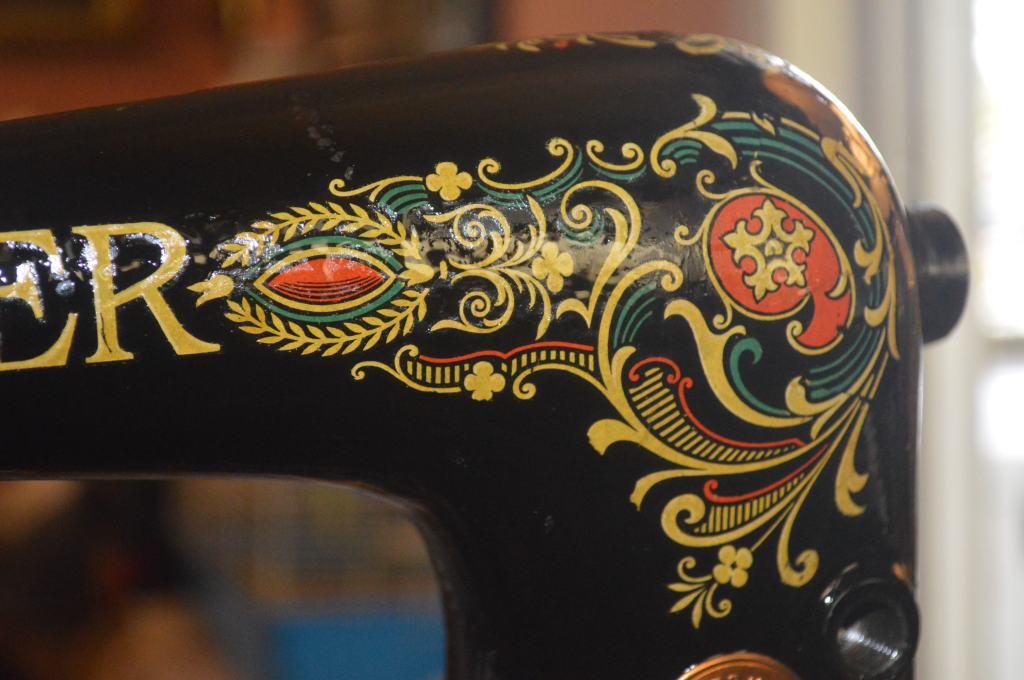
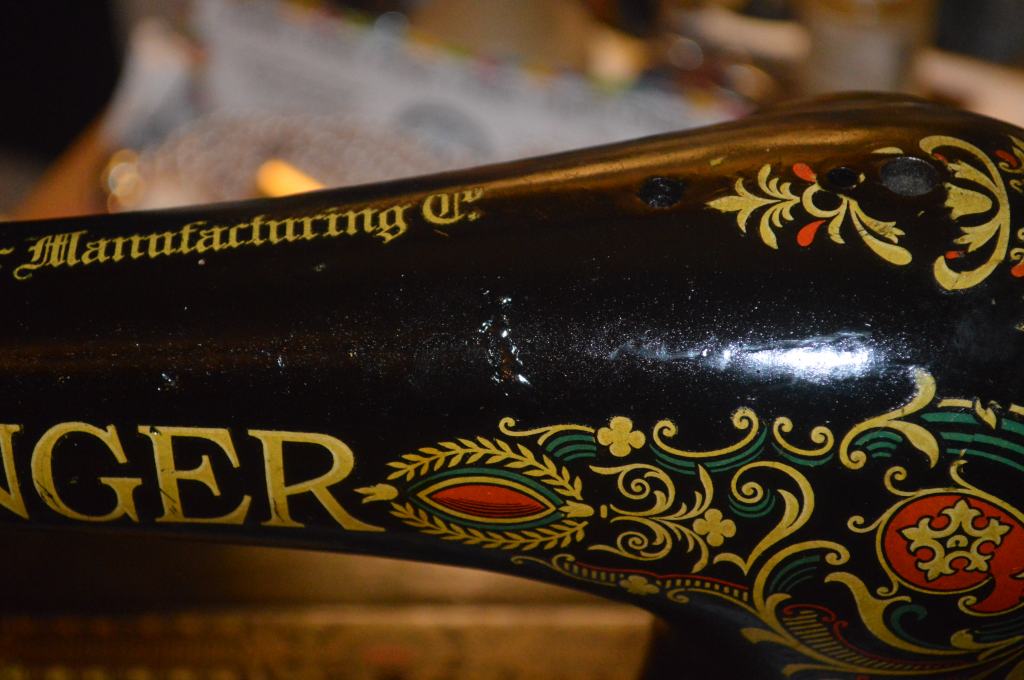
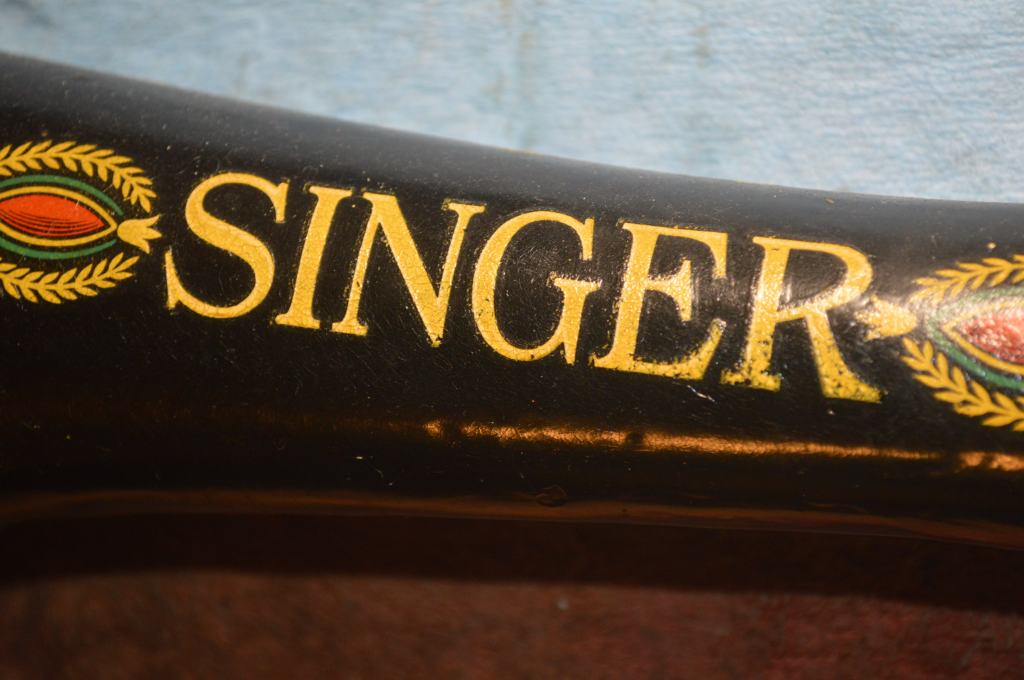
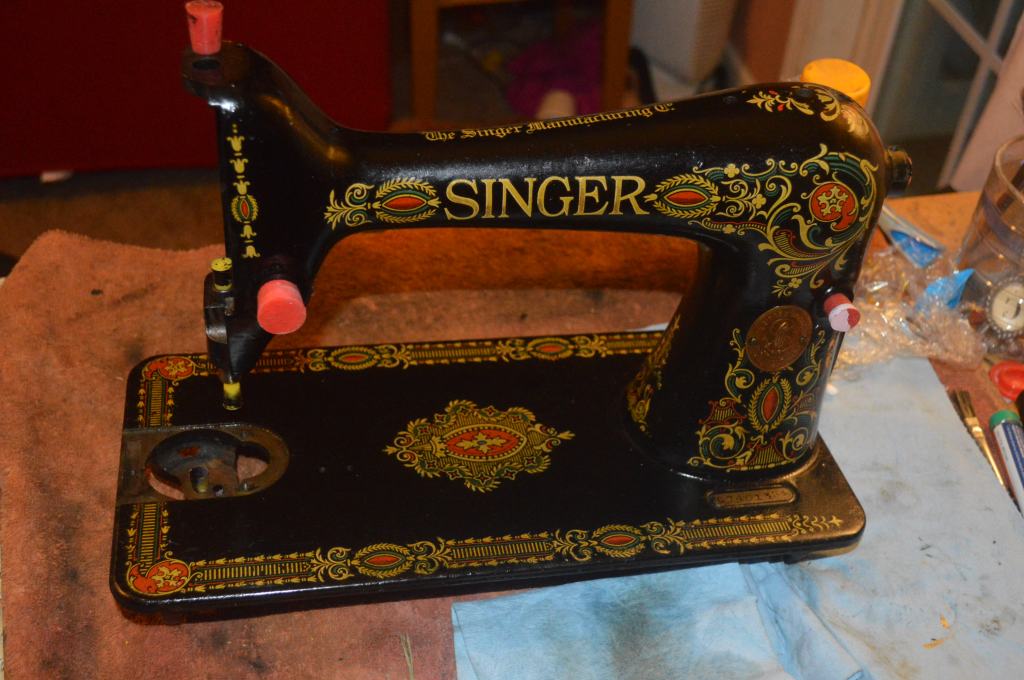
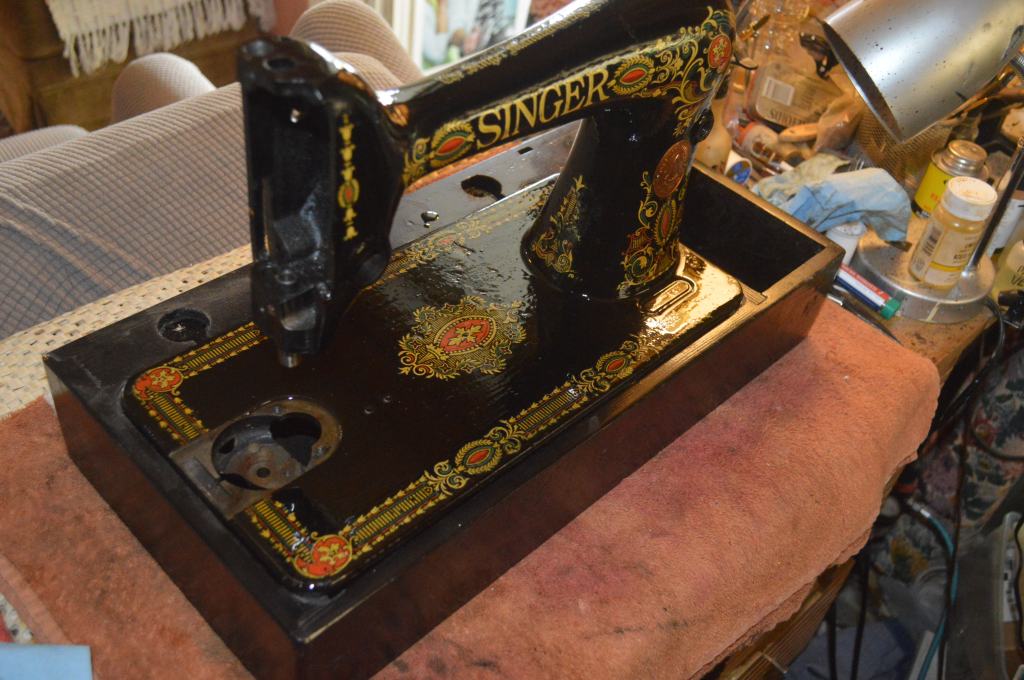
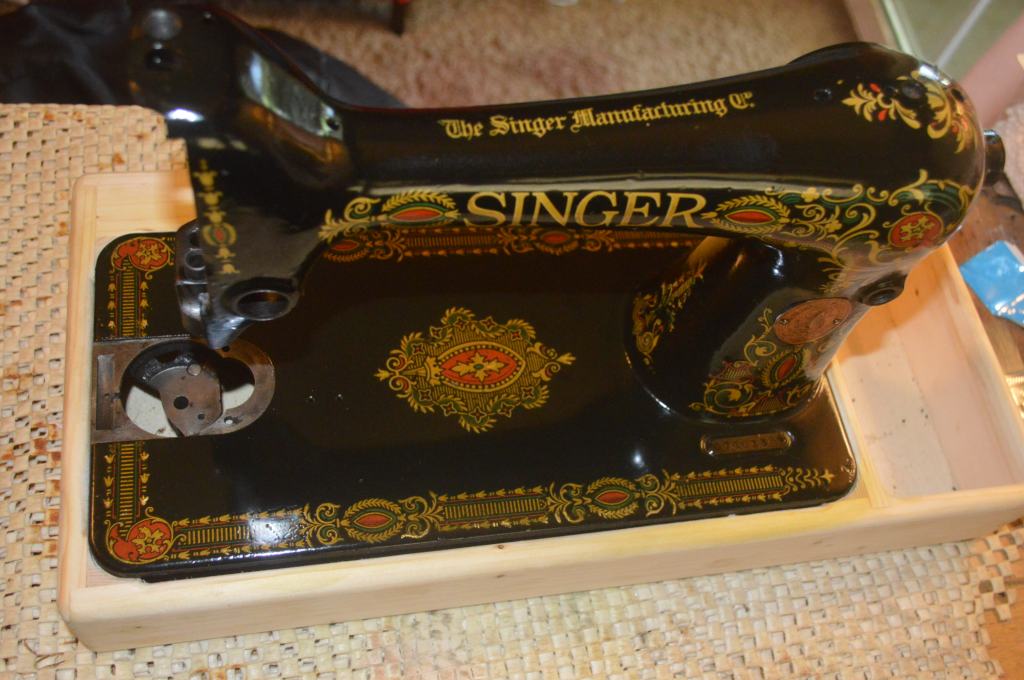
I chose this particular model mainly 66 for it’s cosmetic condition. Despite the fact that the machine runs smooth and sews well, the machine will undergo a complete disassembly and detailed mechanical restoration. This . The “Red Eye” decals are in very good condition for their age and I plan to do a detailed original finish cosmetic restoration to accentuate the decals and restore a smooth finish over the original black japanned paint. I also like the “Egyptian scroll” design on the nickel plated parts. When both of these tasks are completed, the end result will be a beautiful sewing machine that runs and sews like new.
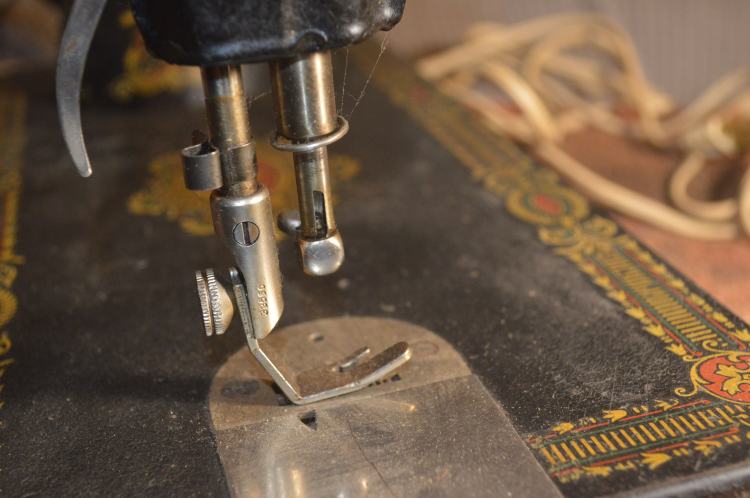
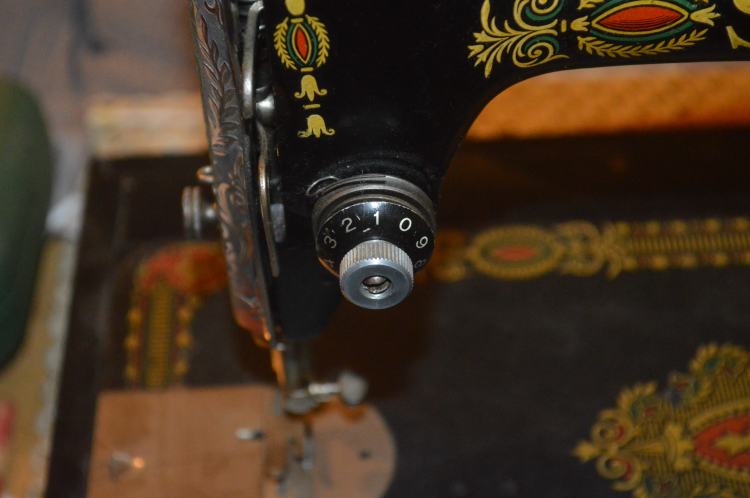
The earlier vintage model 66’s (prior to 1923) have a rear clamp presser foot. A side clamp presser foot was introduced on the 66 in 1923. The machine does not provide for a back tack or reverse,the feed dogs do not drop (the 66 never included this feature), and the stitch length is adjusted with a stitch length regulator knob instead of a lever.
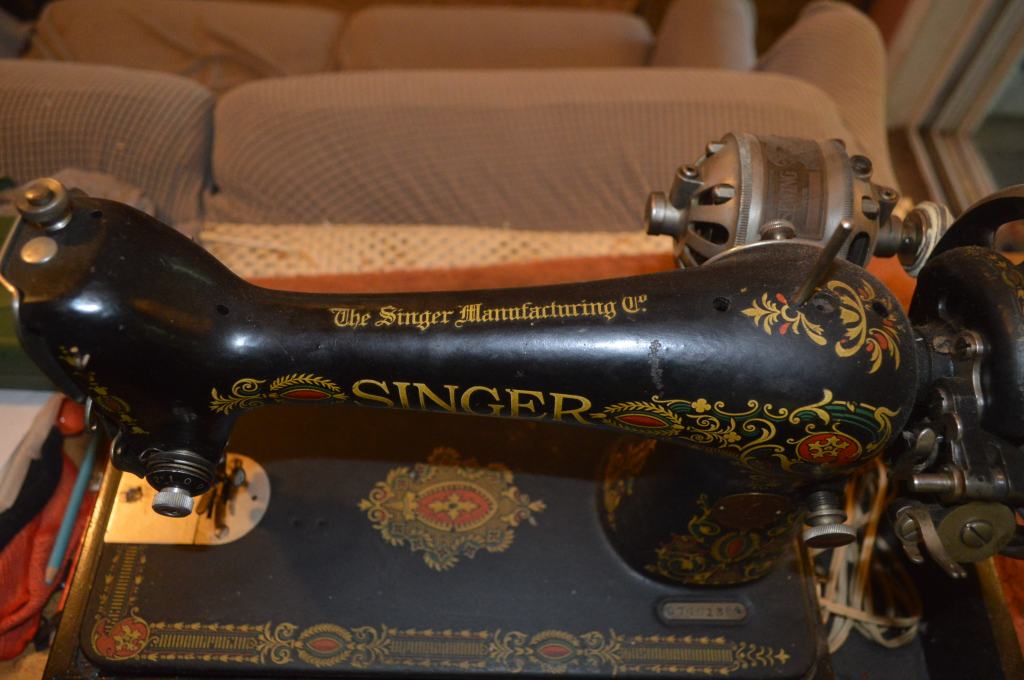
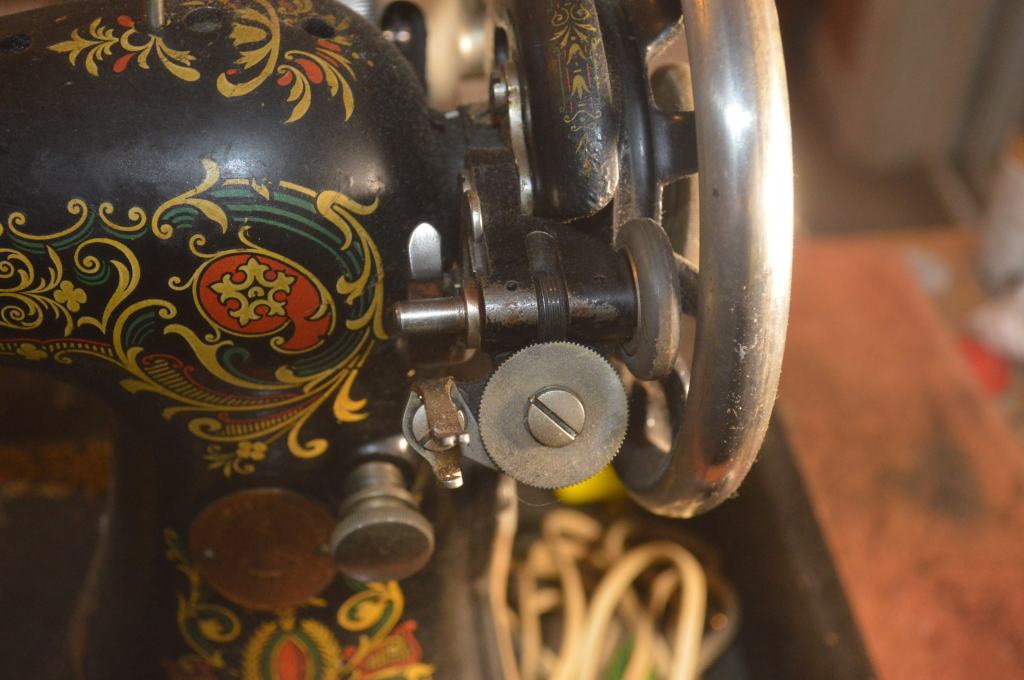
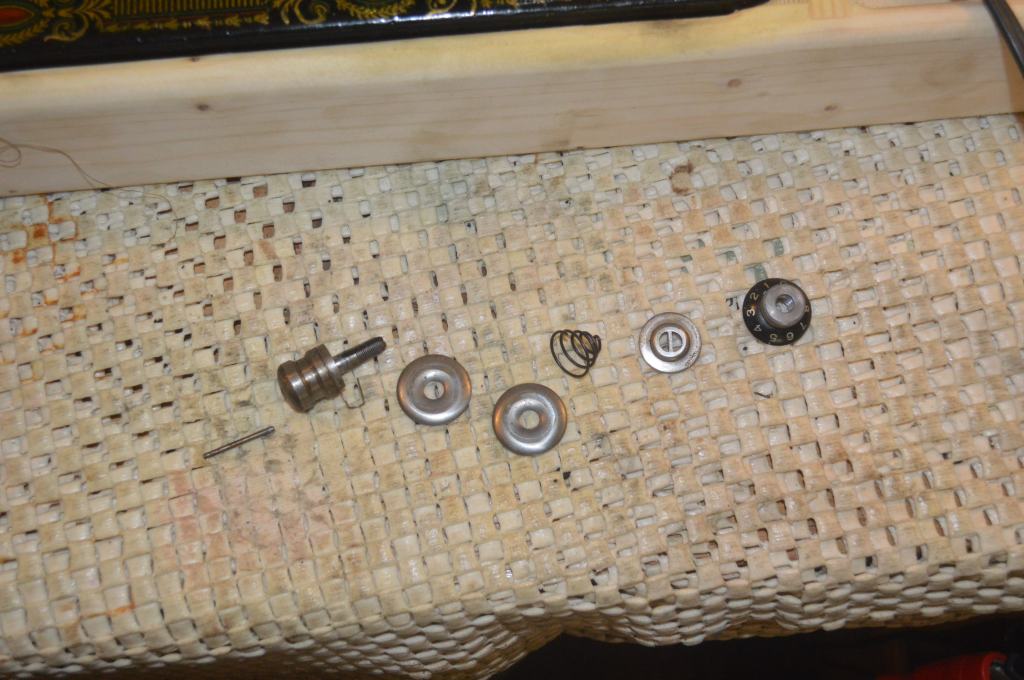
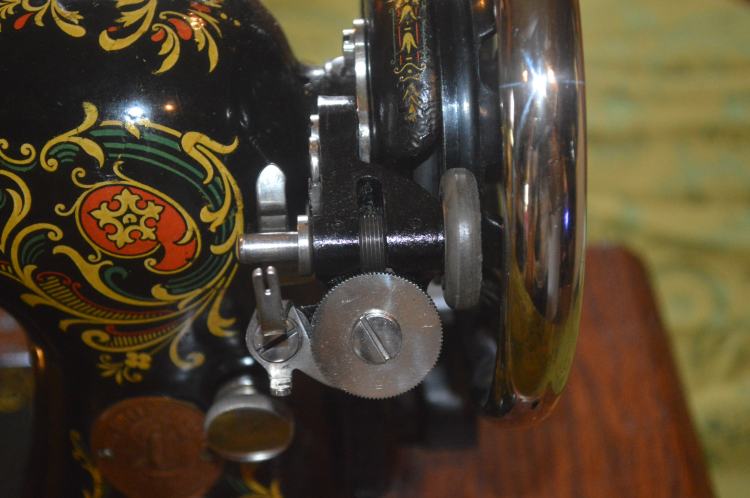
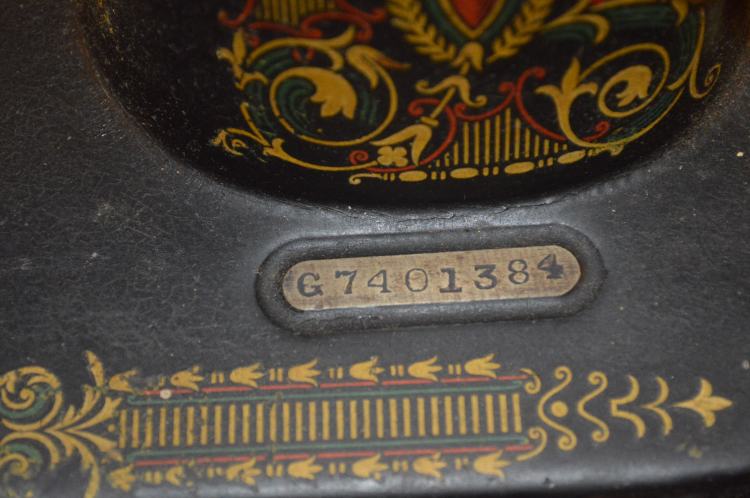
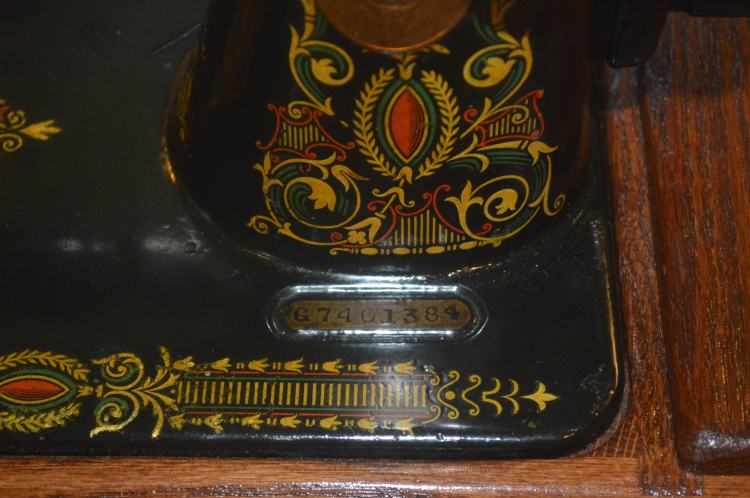
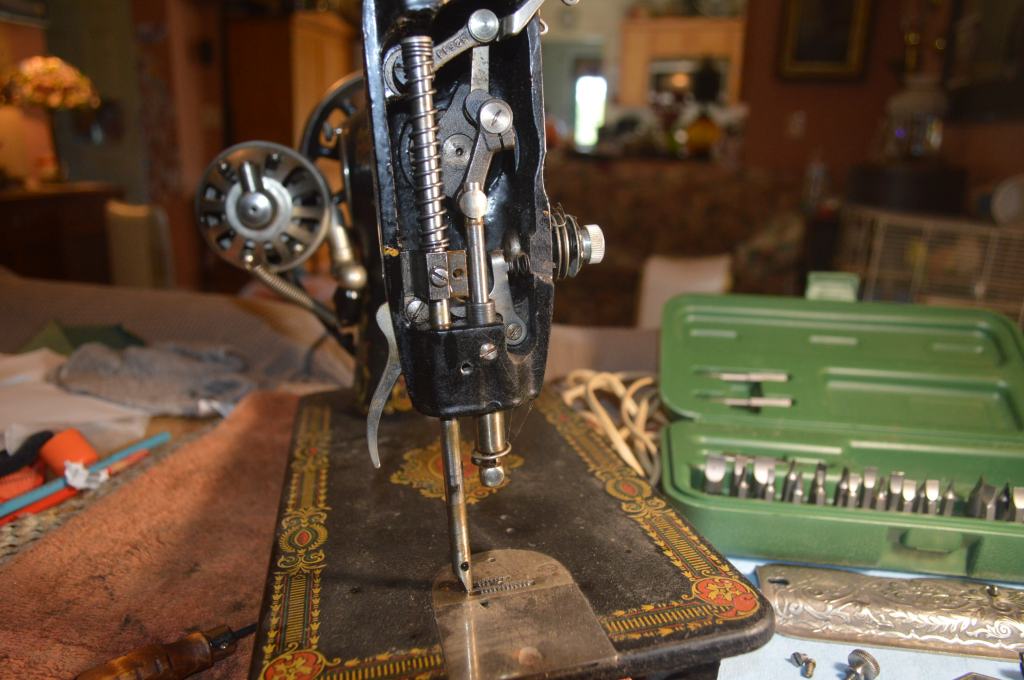
The addition of an aftermarket numbered tension dial on this machine was added to the tension assembly at some point in it’s life, and I intend to replace it with the simple knurled nut as originally used on the machine. Manufactured in 1919, it has attained antique status and possesses heirloom quality beyond any doubt. Worthy of a complete restoration, I will take every step possible to return the machine to “as like new” condition as my skills allow and in any sewing machine restoration, it’s the small details that matter.
The Restoration Plan
102 years ago when this machine was new it was pristine both mechanically and cosmetically. I have always wondered what was it like to sew on this model 66 when it was new. I know that the model 66 was touted by Singer as an innovative and smooth running sewing machine that made a near perfect straight stitch, but I’m not sure there is a comparison between how a model 66 sewing machine runs today and how the same machine ran when it was new. As I said, this machine runs smoothly and sews well, but it has 102 years of use and oil varnish build up in the sewing mechanism. To my mind, the only way I can get a sense of how this machine sewed when it was new is to completely disassemble and clean all of the parts in the machine, reassemble them, and adjust them to their original specifications. Mechanically. the goal of this restoration is to return this sewing machine to as “new” as possible. Because of the quality of material and precision used in it’s manufacture, I think my goal is attainable.
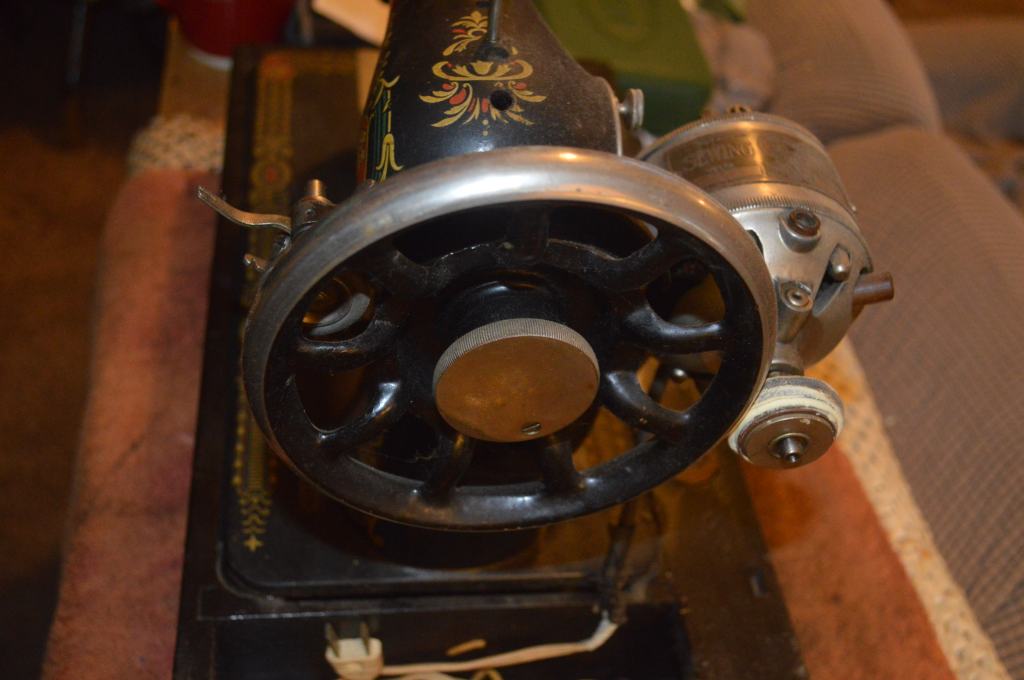
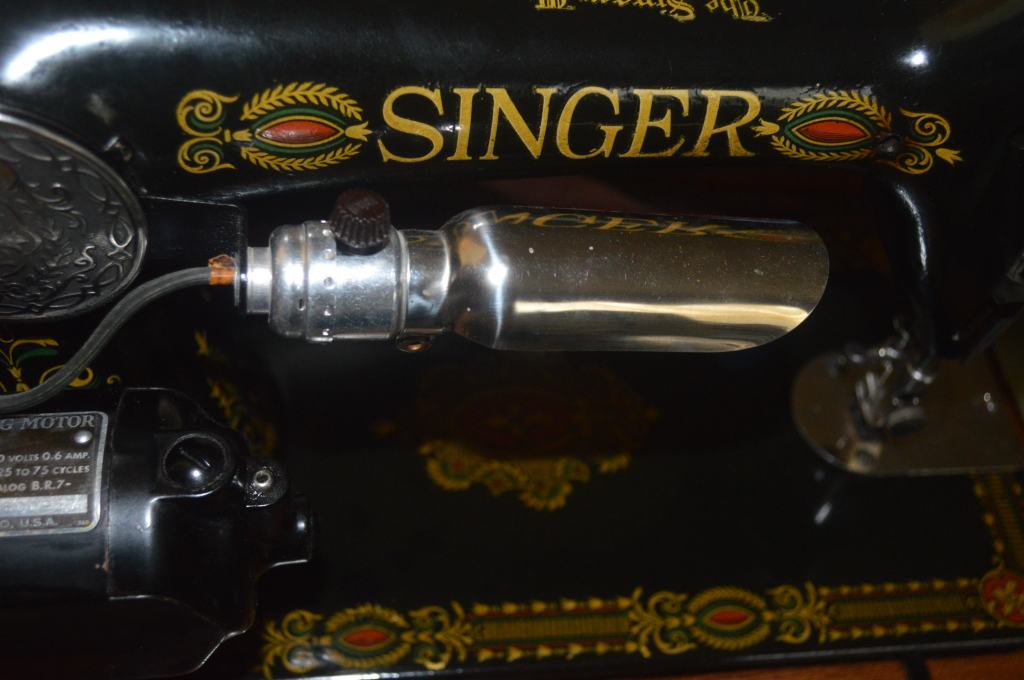
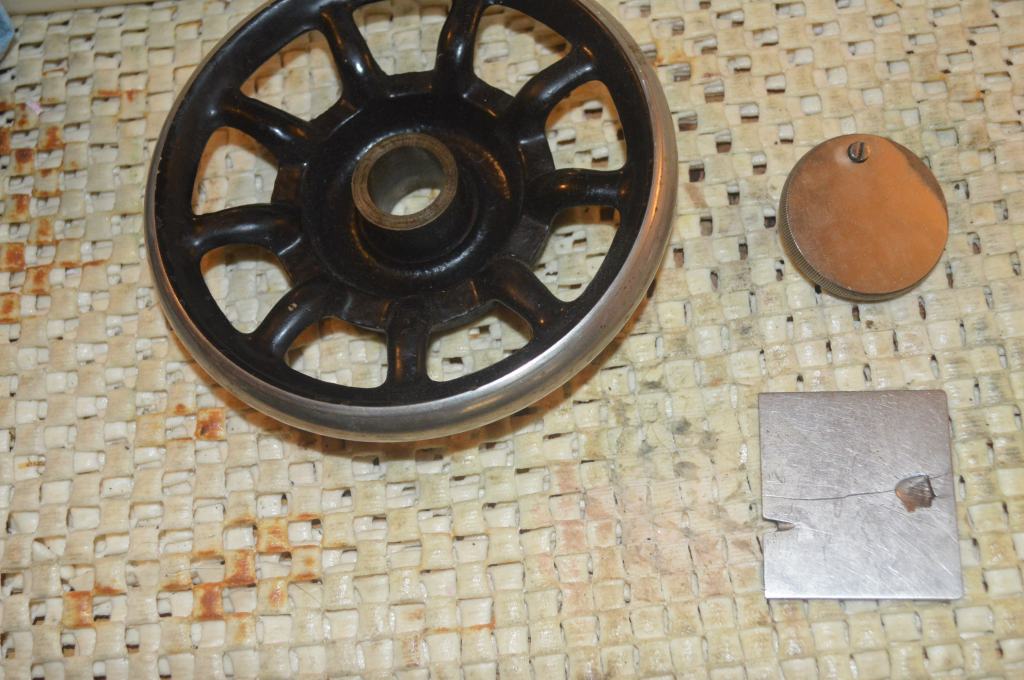
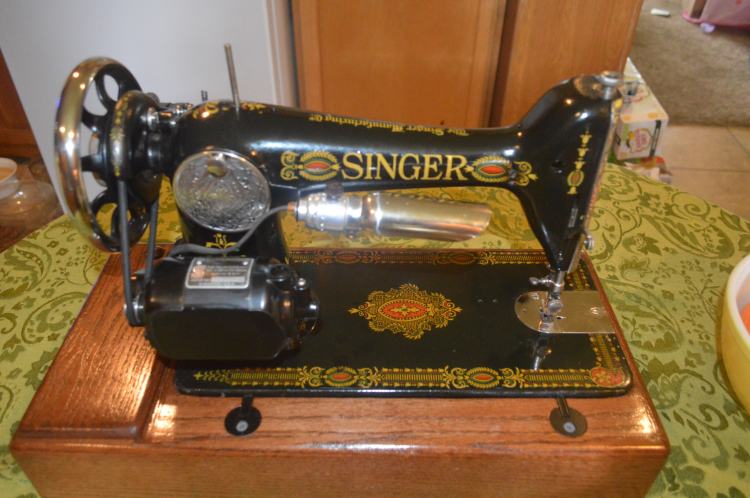
My plan is pretty simple. The mechanical restoration of this machine will include the disassembly of all of the parts and pieces. Everything in and on the body of the machine (except for the Singer badge) will be removed. Each part will be cleaned and wire brushed to bright steel. Parts that slide or rotate against another will be polished. All of the parts on the machine will be kept original except for the motor and the addition of a Singer style light correct for early vintage model 66’s. The 1914 vintage “turtle” sewing machine motor mounted to the machine shown in the pictures is a direct drive motor that uses a rubber friction wheel against the balance wheel to power the machine. I would love to re-use it, but unfortunately, while the motor runs, the motor windings have a break somewhere and the motor does not develop the power it should. The motor will be replaced with an appropriate vintage Singer motor. The replacement motor will be restored. Originally a treadle machine, this 66 did not have a light, so a vintage Singer style light will be added for practical reasons.
The cosmetic restoration will include detailed cleaning, paint chip repair, judicious decal repair, and the application of a new shellac topcoat. The paint repairs will be made with custom mixed shellac based paint to match the original jet black japanned paint. Where the decals can be repaired, custom color mixed paints will be used. The final polished finish will be obtained by wet sanding with successive grits of sandpaper using linseed oil as the wetting media. The final finish will be obtained by two rounds of glaze polishing for a beautiful smooth finish. While time consuming, I have found these methods to yield beautiful results and as I said earlier, the details matter.
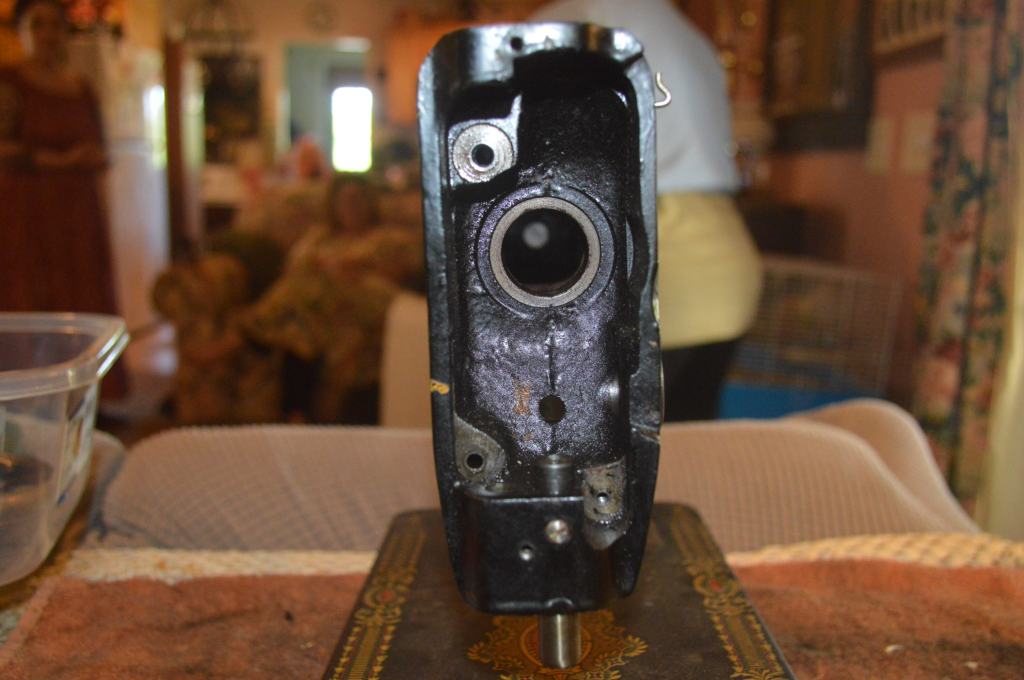
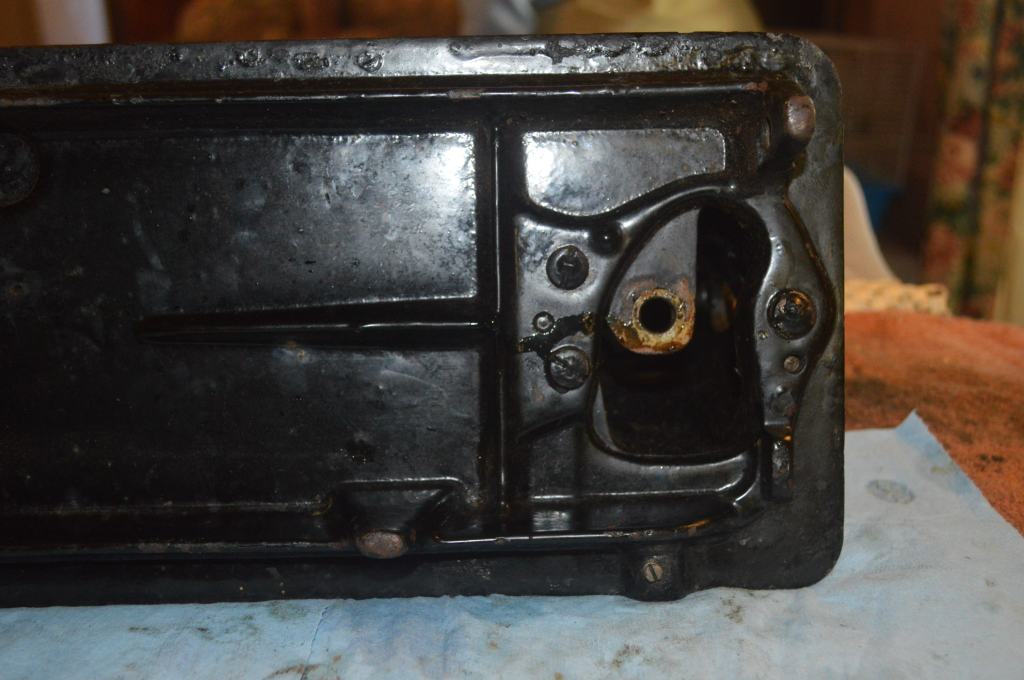
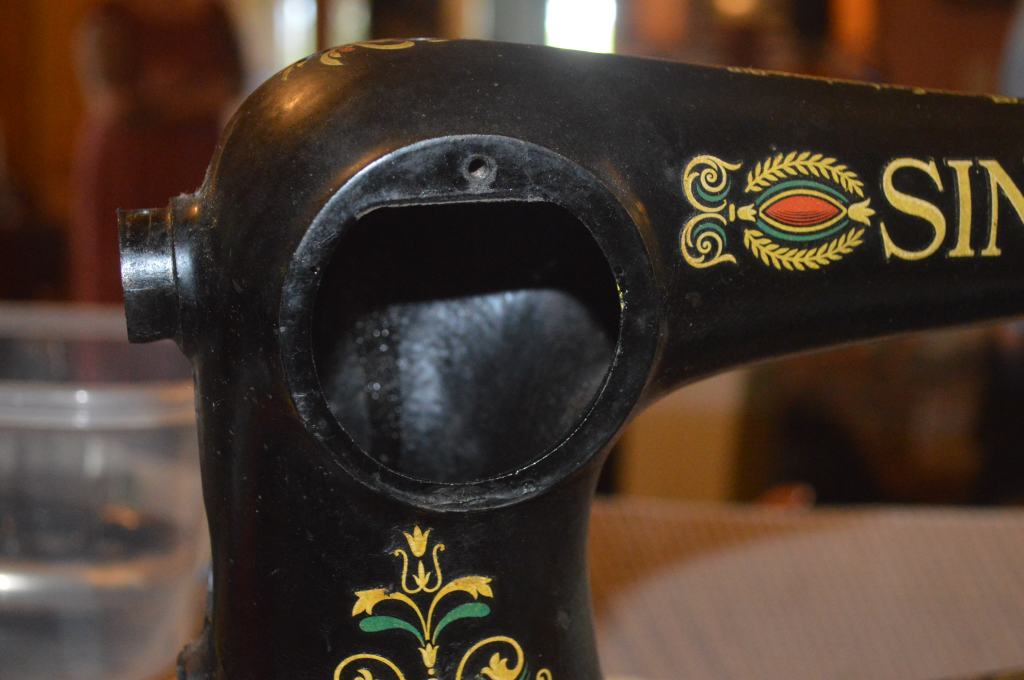
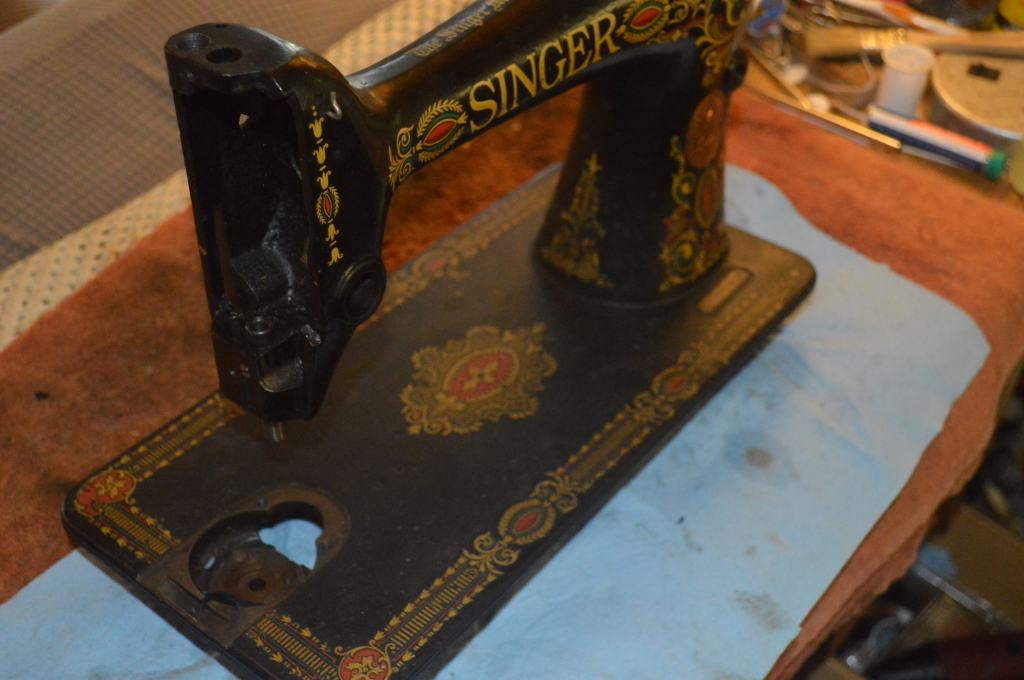
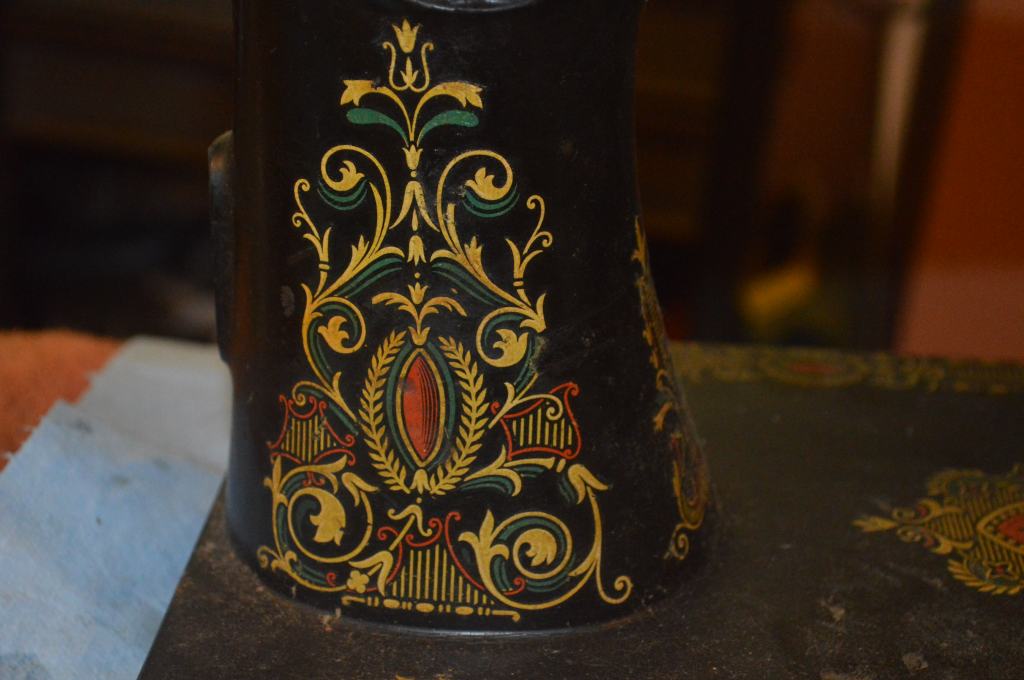
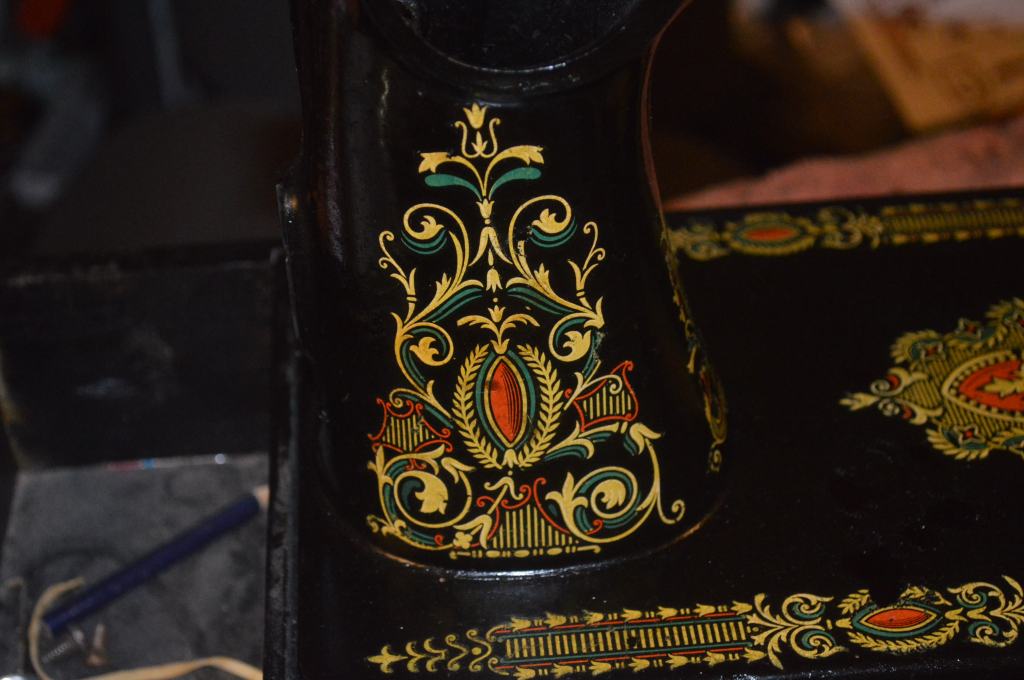
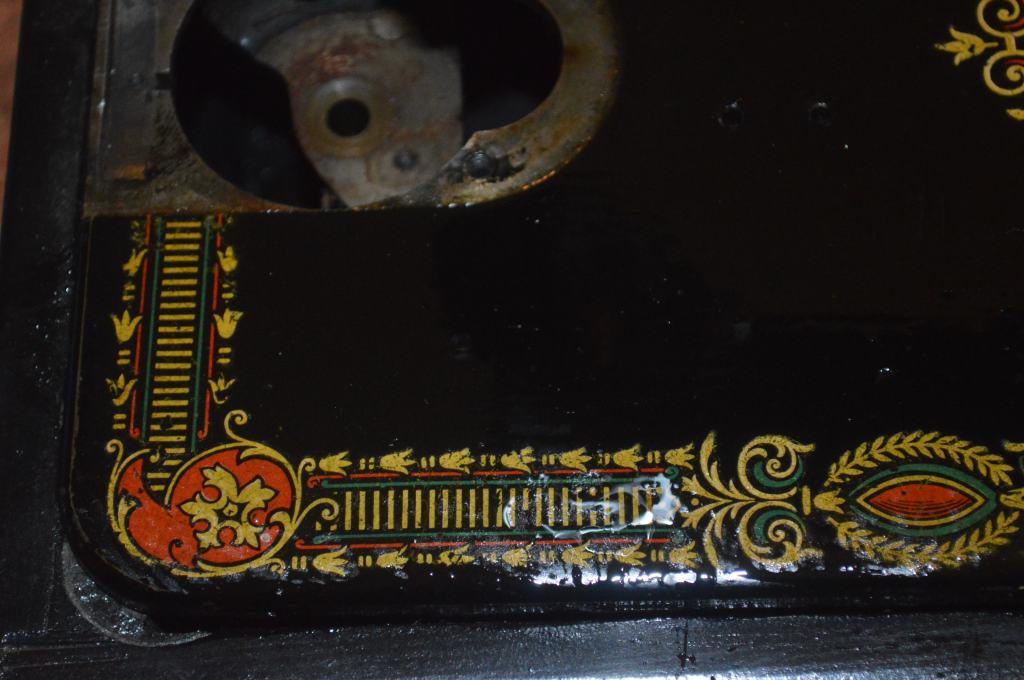
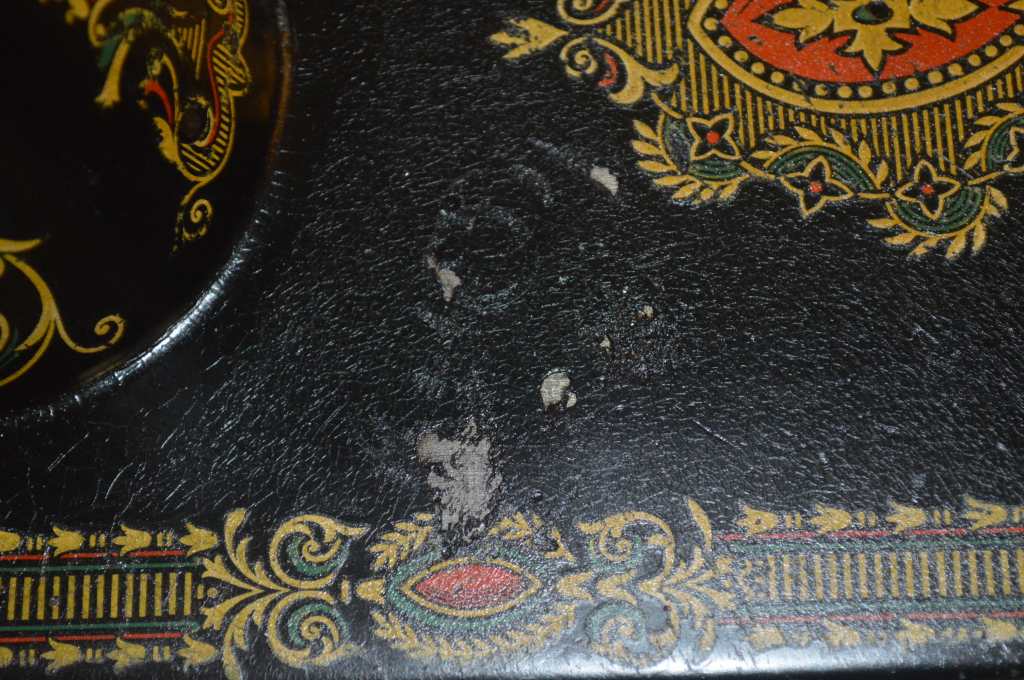
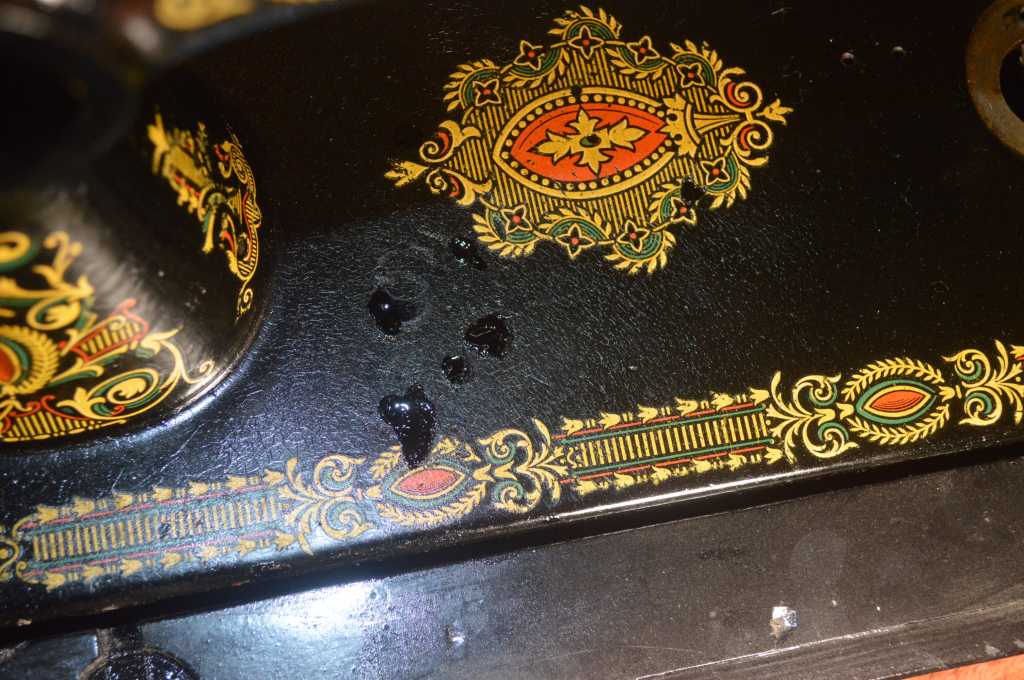
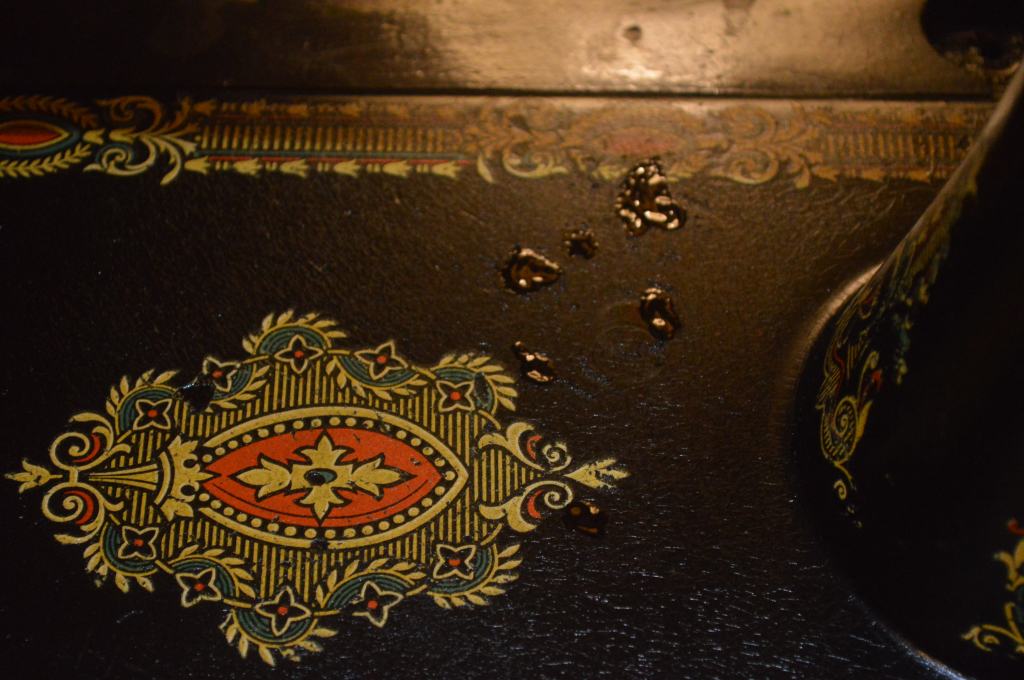
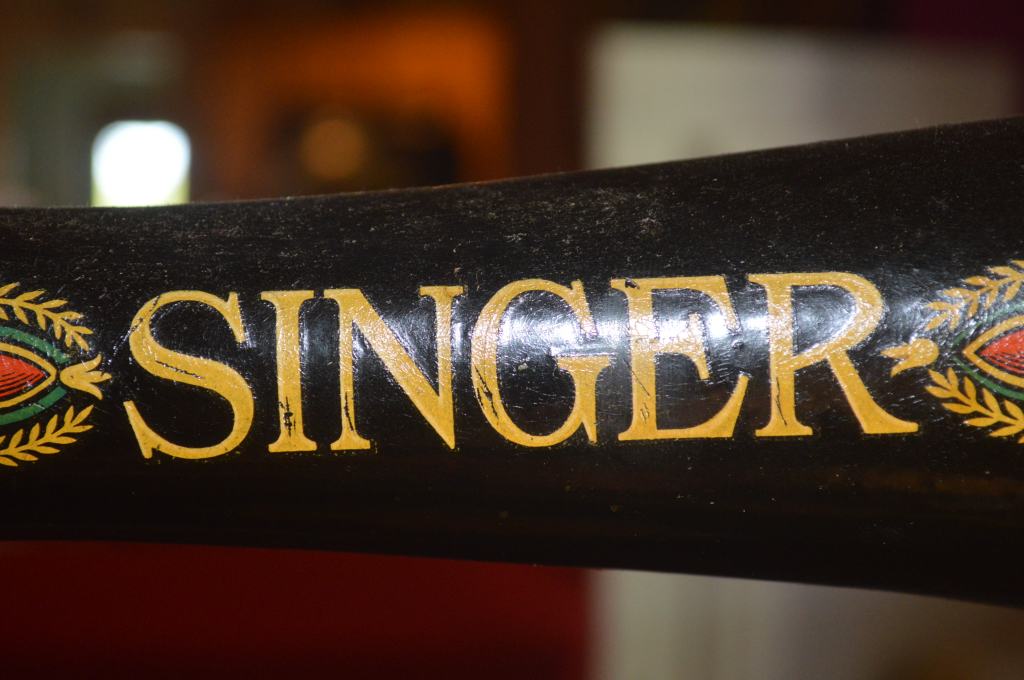
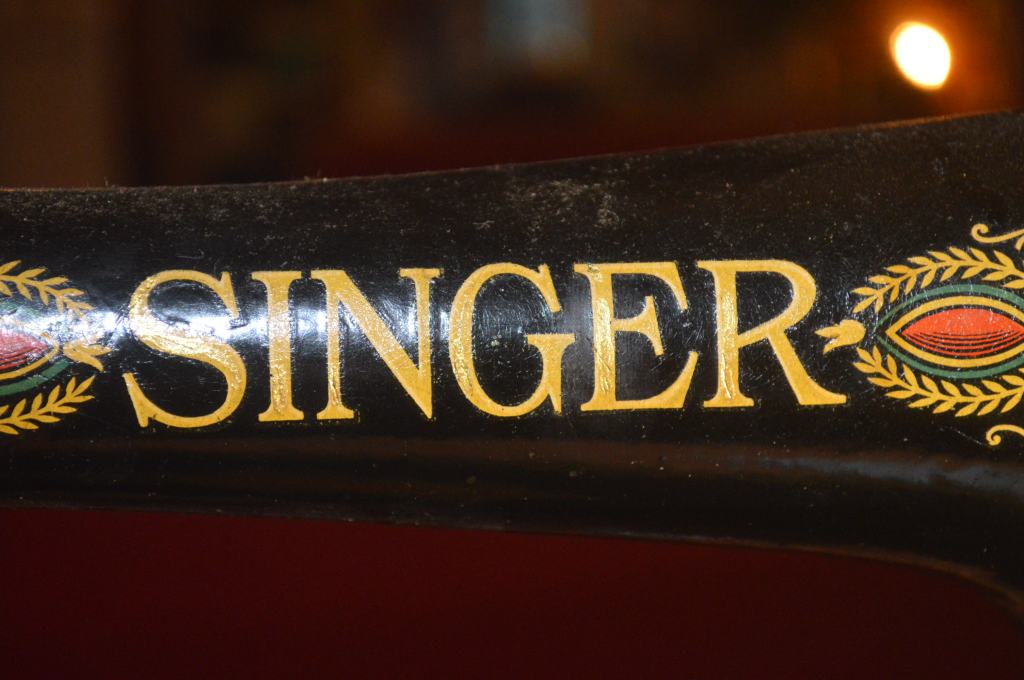
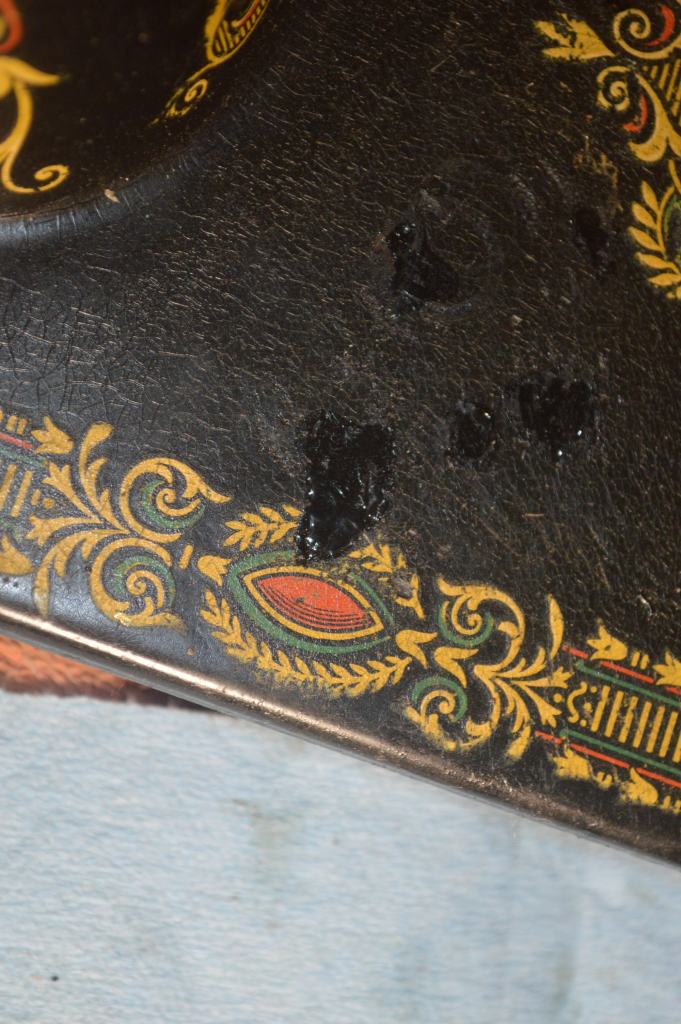
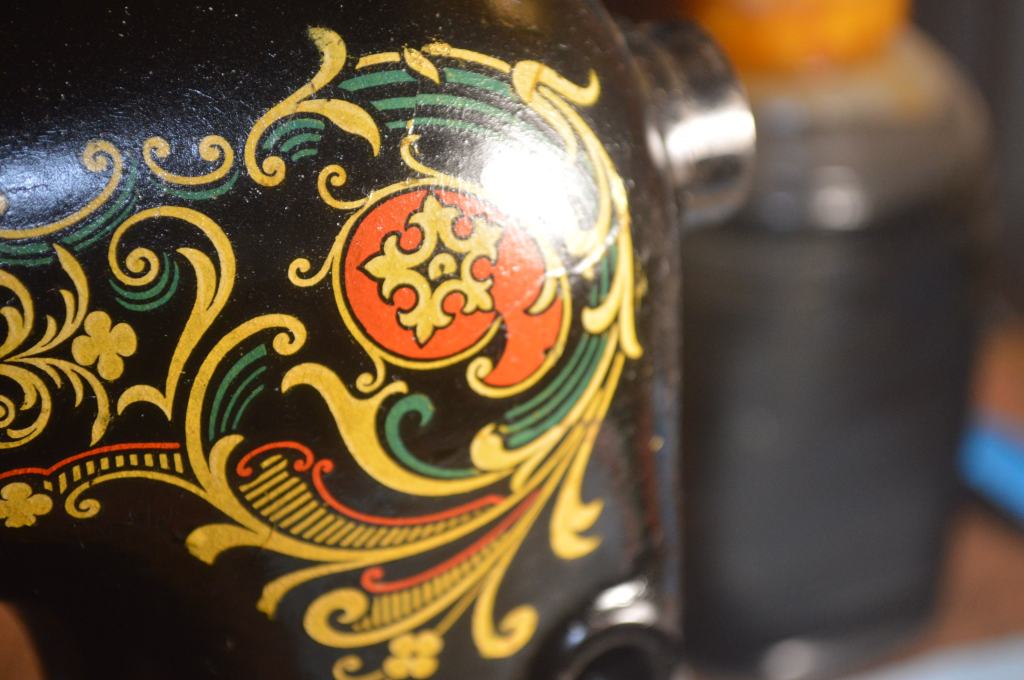
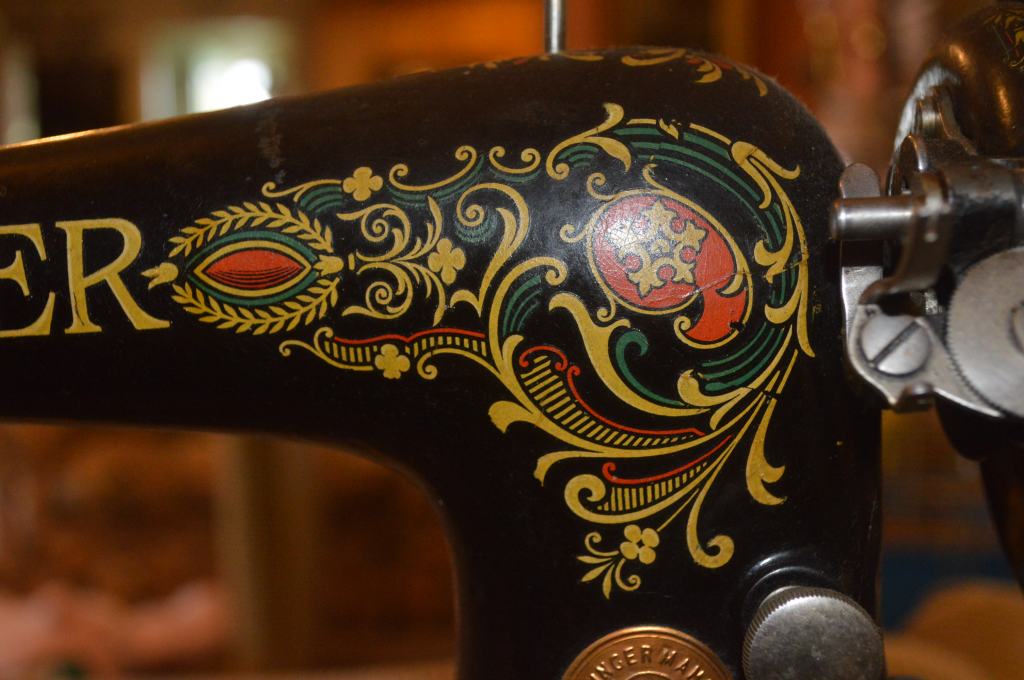
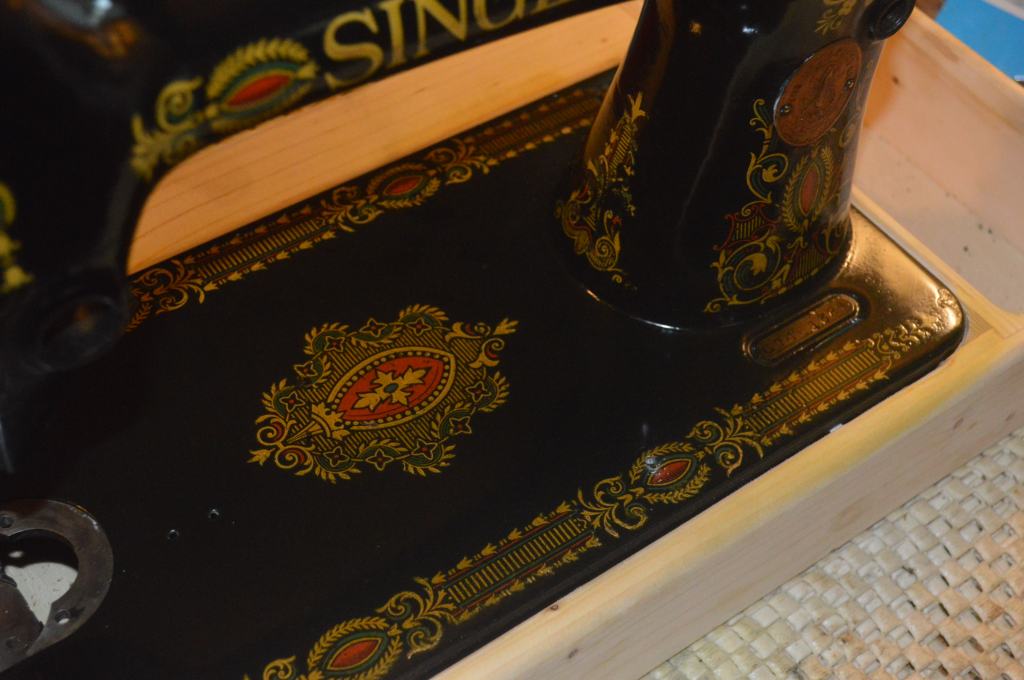
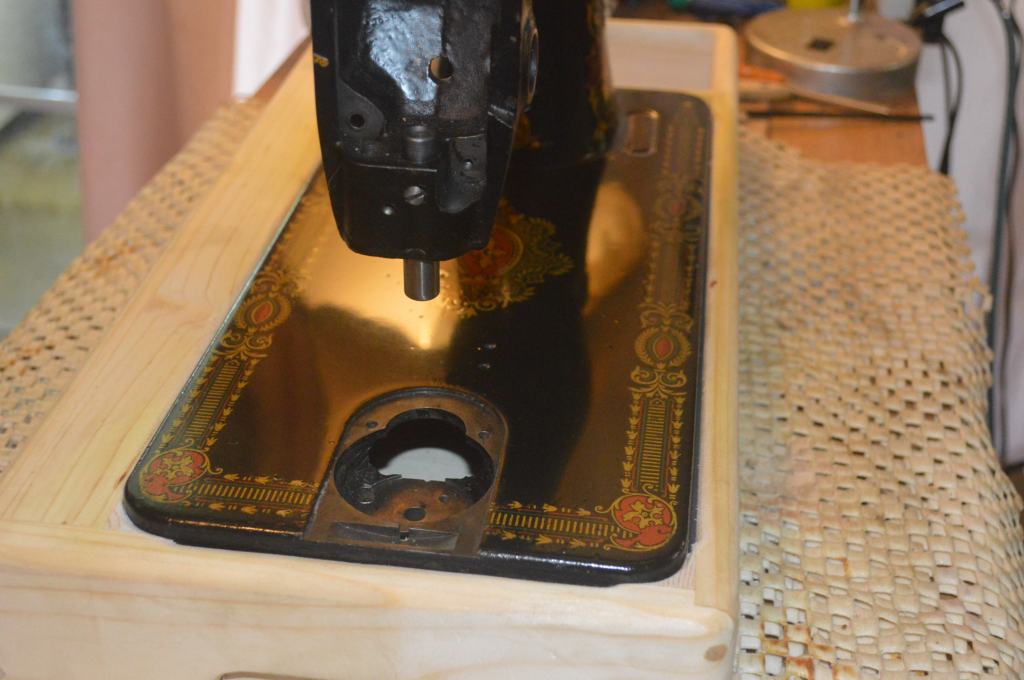
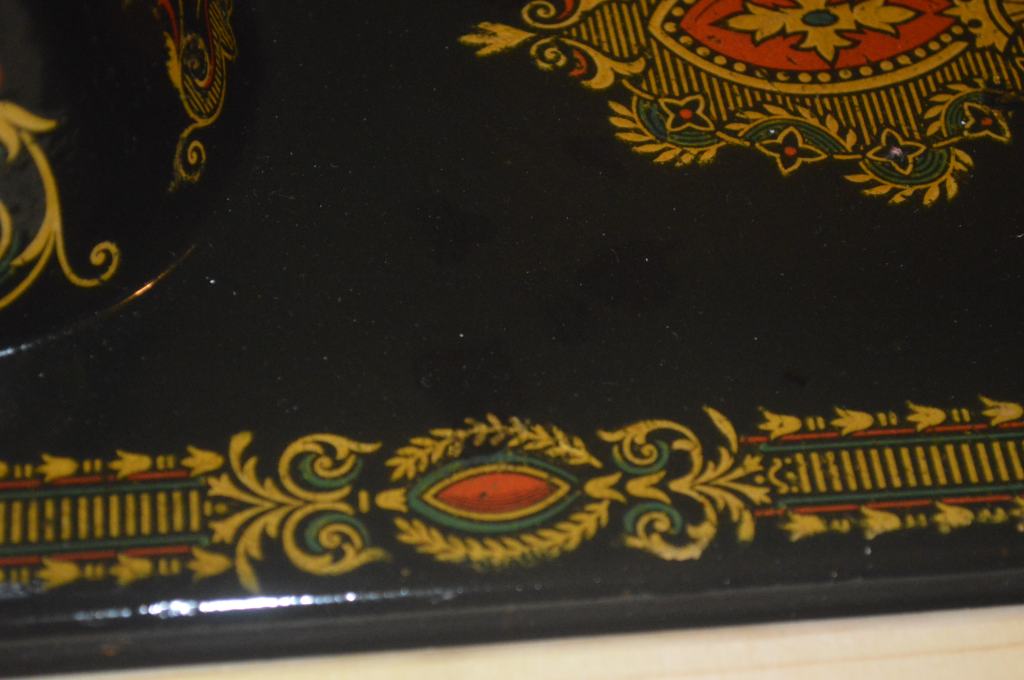
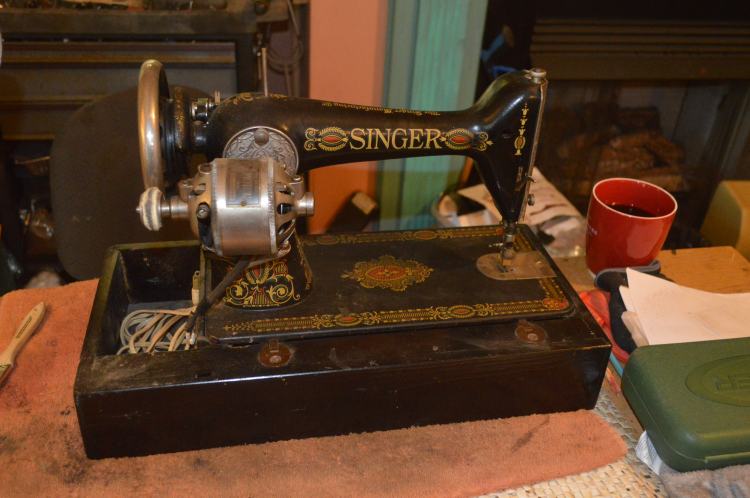
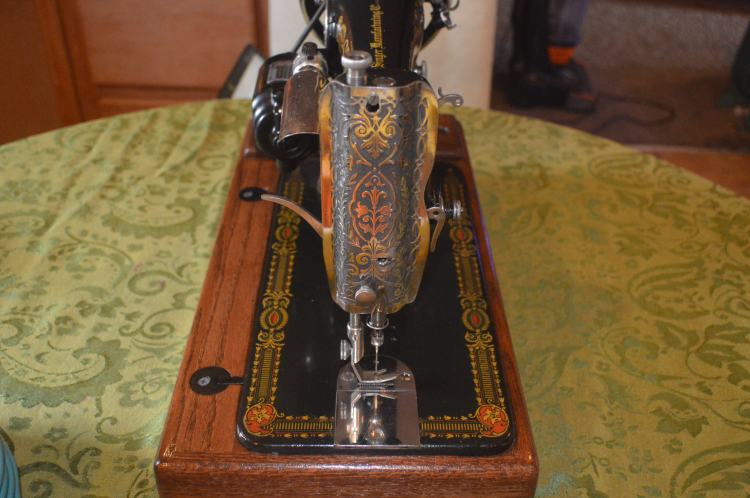
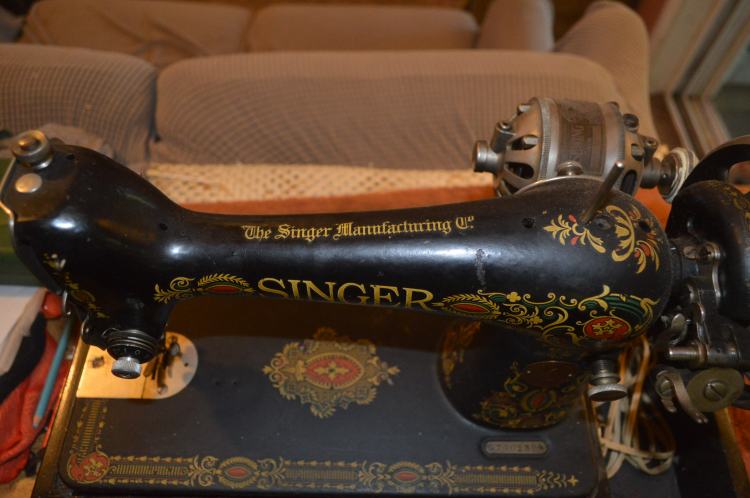
The following pictures show the machine in it’s as found condition. The paint on the bed has crazed due to the oils in the paint drying out with age. There is a heavy build up of dirt and oil on the surface of the machine and in the sewing mechanisms. There are a few rather large paint chips that go completely through the paint and the original shellac finish has worn away exposing both the paint and decals (making them susceptible to further damage). The decals are in great shape for their age, but there are some places where there are cracks in the lettering or in the multi color decals. Over all, the nickel plated pieces are in good condition, with a hint of nickel loss in very small areas.


The Mechanical Restoration
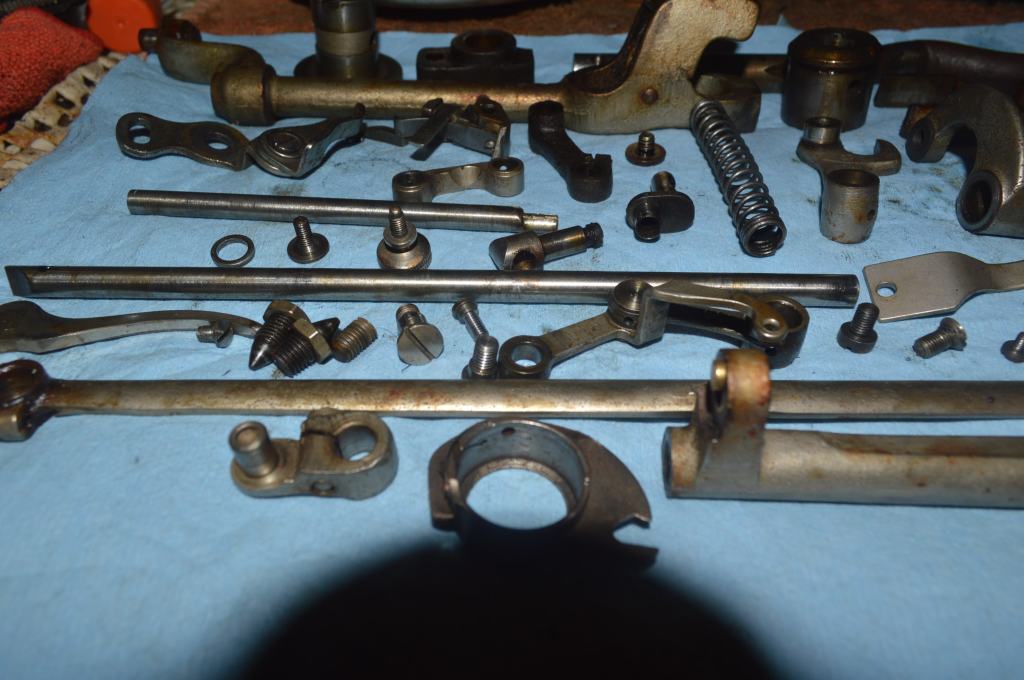
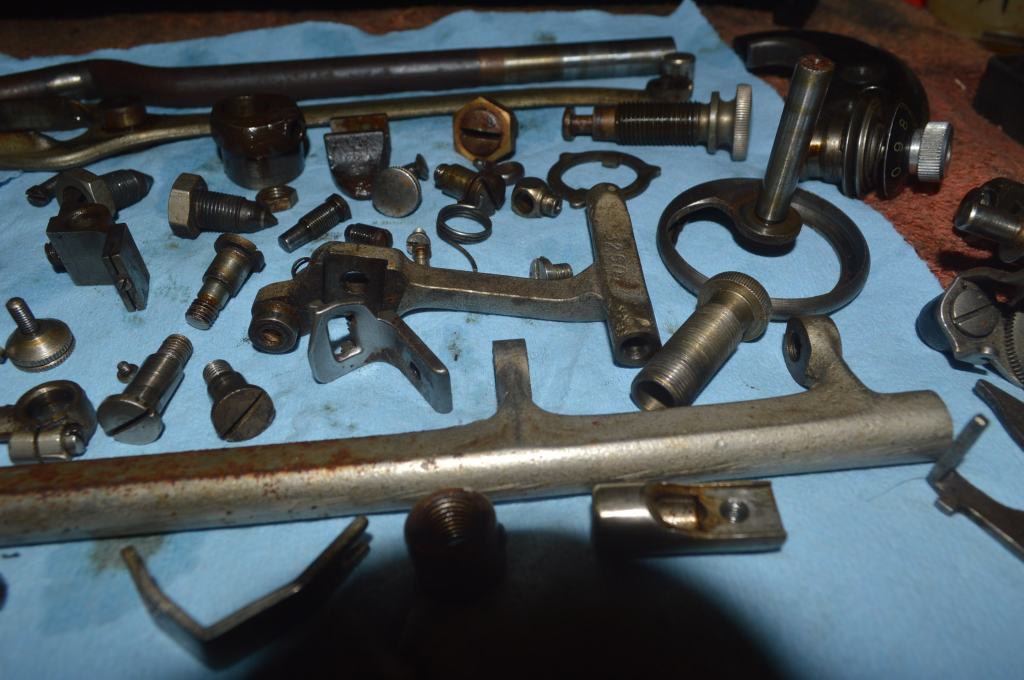
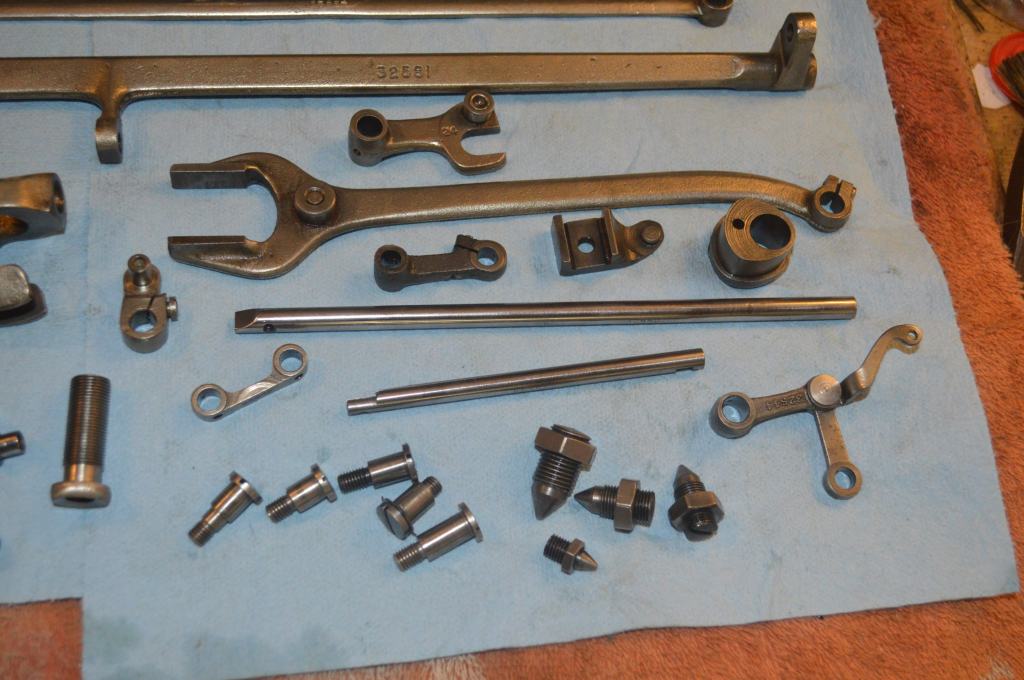
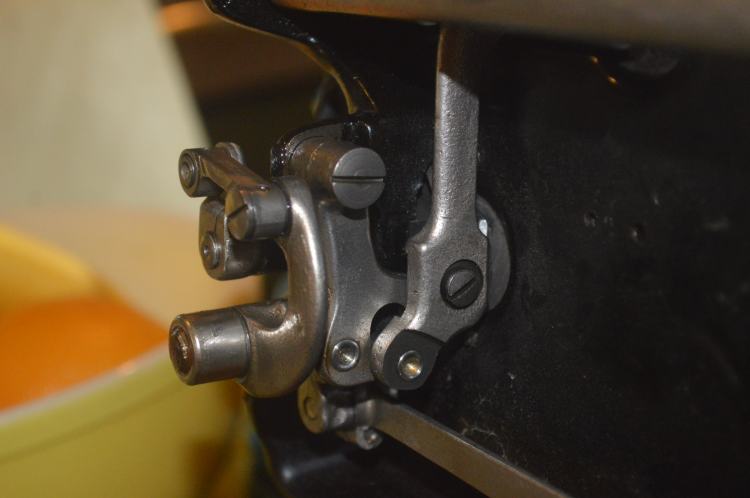
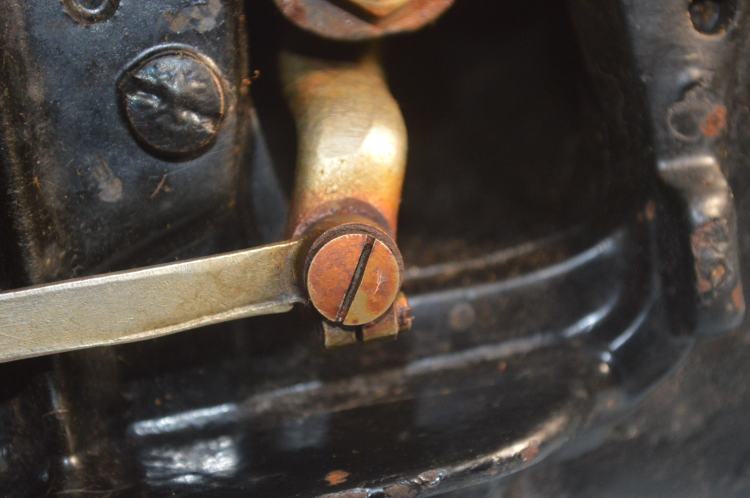
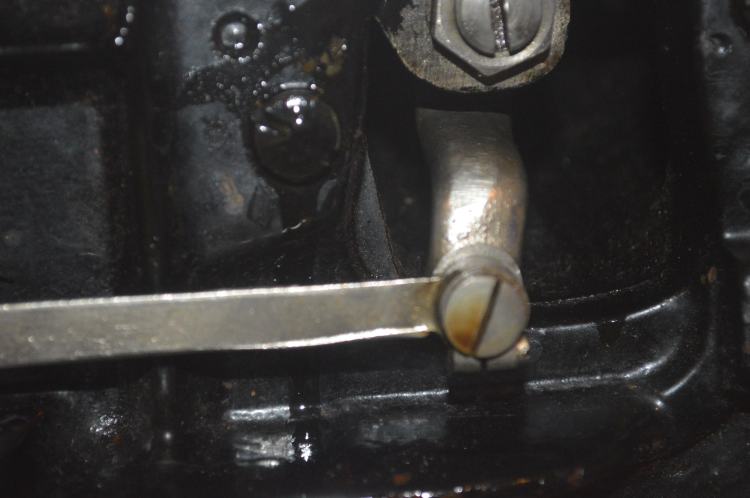
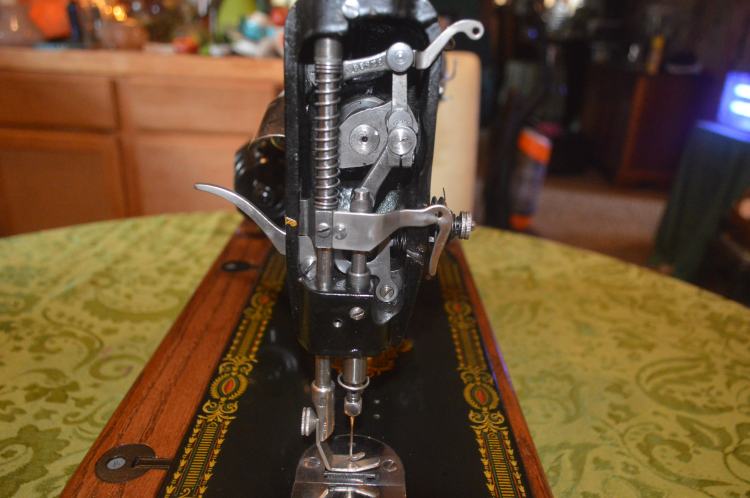
The mechanical restoration begins with disassembling and removing all parts in the sewing machine. These include the needle bar head, under the machine, inside the pillar, and in the sewing arm. Typical of machines of this vintage, the parts are coated with a heavy film of old oil varnish that can only inhibit the performance of the machine. After disassembly, the parts are laid out for ultrasonic cleaning.

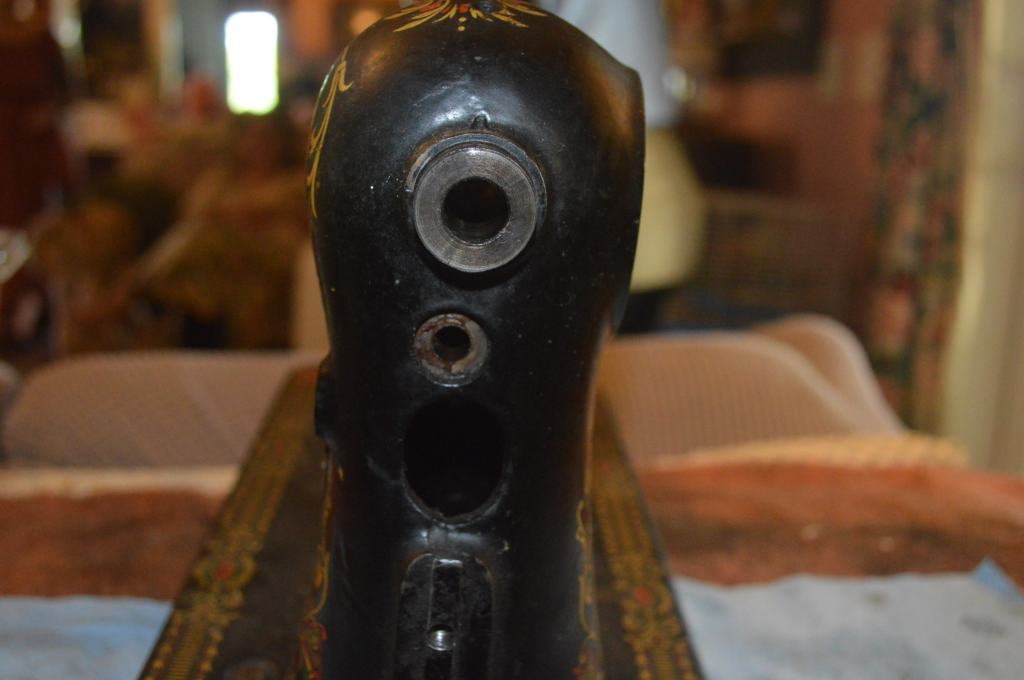
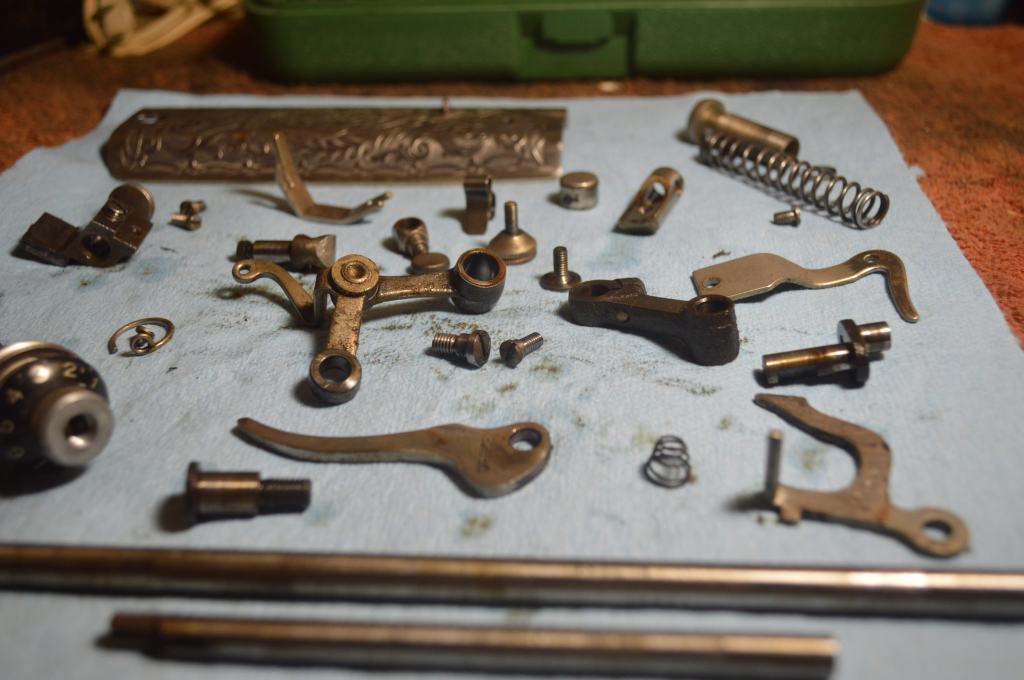
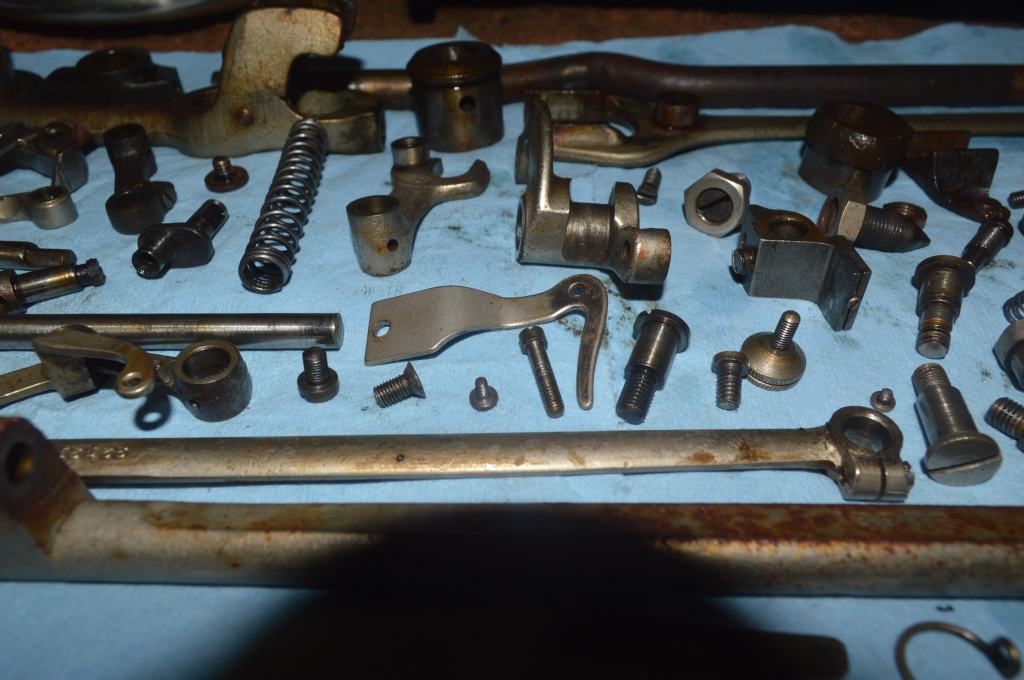
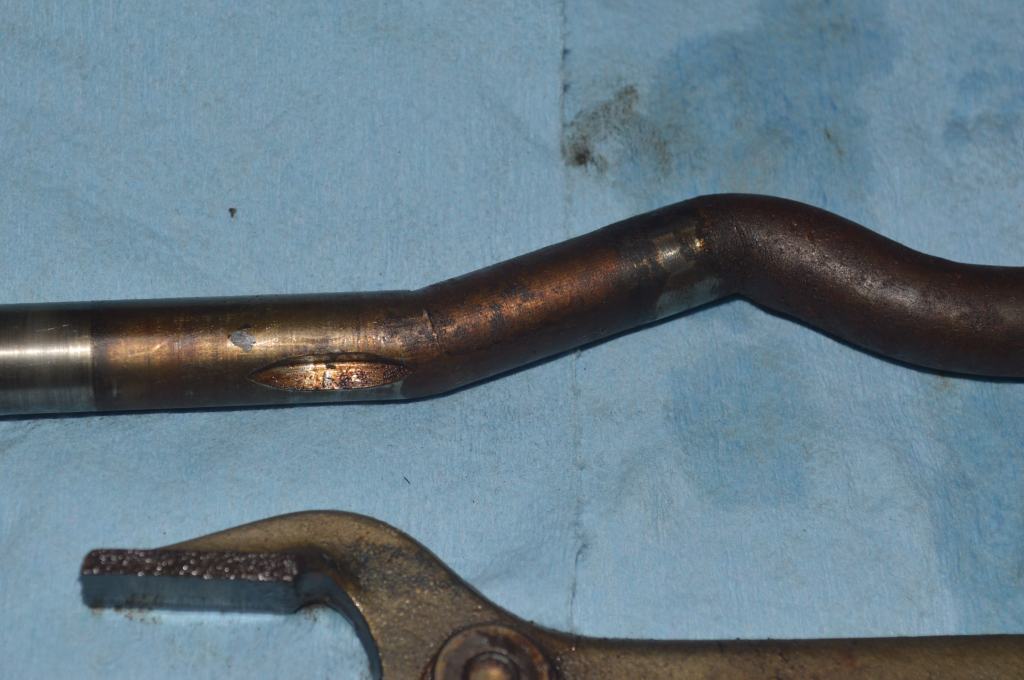
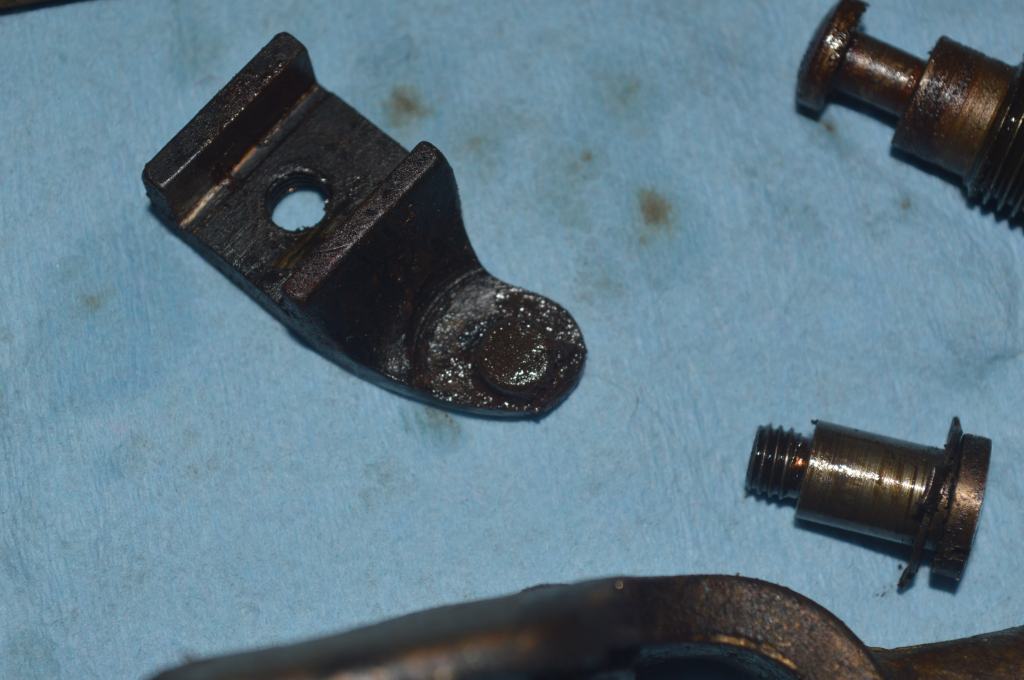
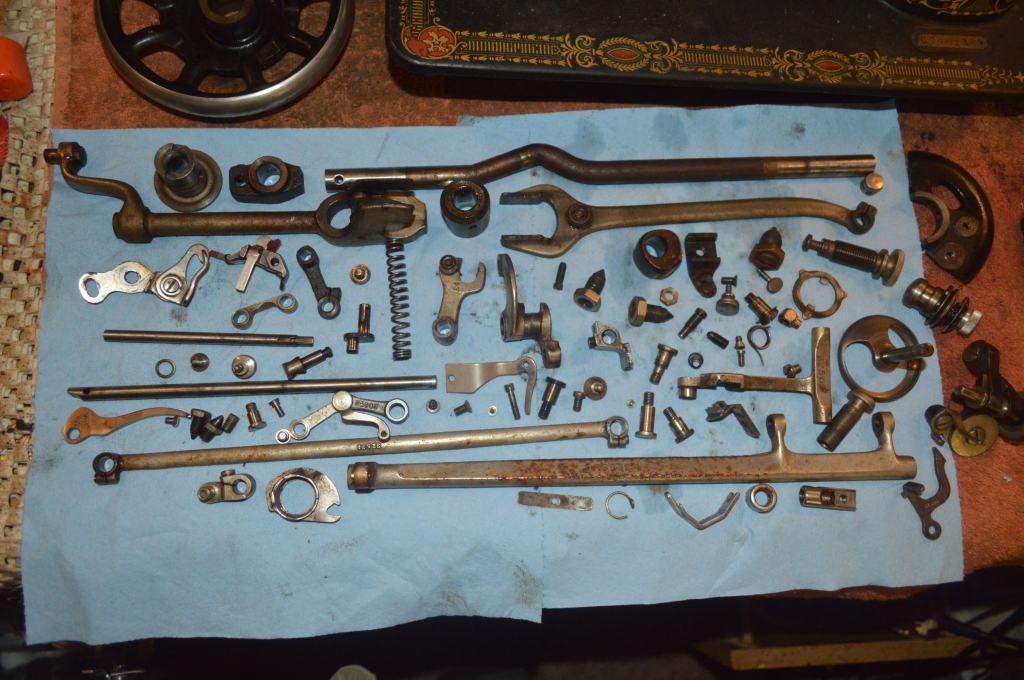
The oil varnish coating you see not only coats the outside of the parts, but also the inside of mating parts. Despite this, I considered this machine to be smooth running in it’s as found condition…. The question is, how much does all of this oil varnish take away from how smooth the machine was when it was new? That’s the thing, no one alive today can say how smoothly this machines felt like when it was new. My theory is that all of the parts were clean bright steel when new, and the closest I can get to new is to make all of the parts bright steel now. That’s the reason each part is cleaned and detailed… to find out. When the machine is reassembled, all of the parts will be as smooth and clean as they where when the machine was manufactured 102 years ago.
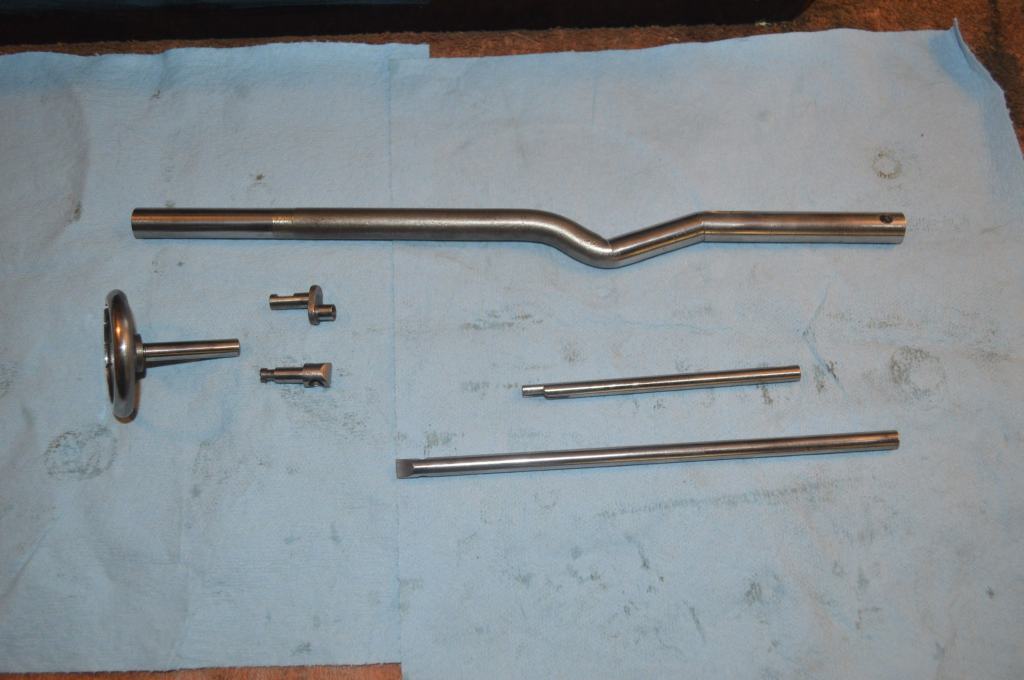
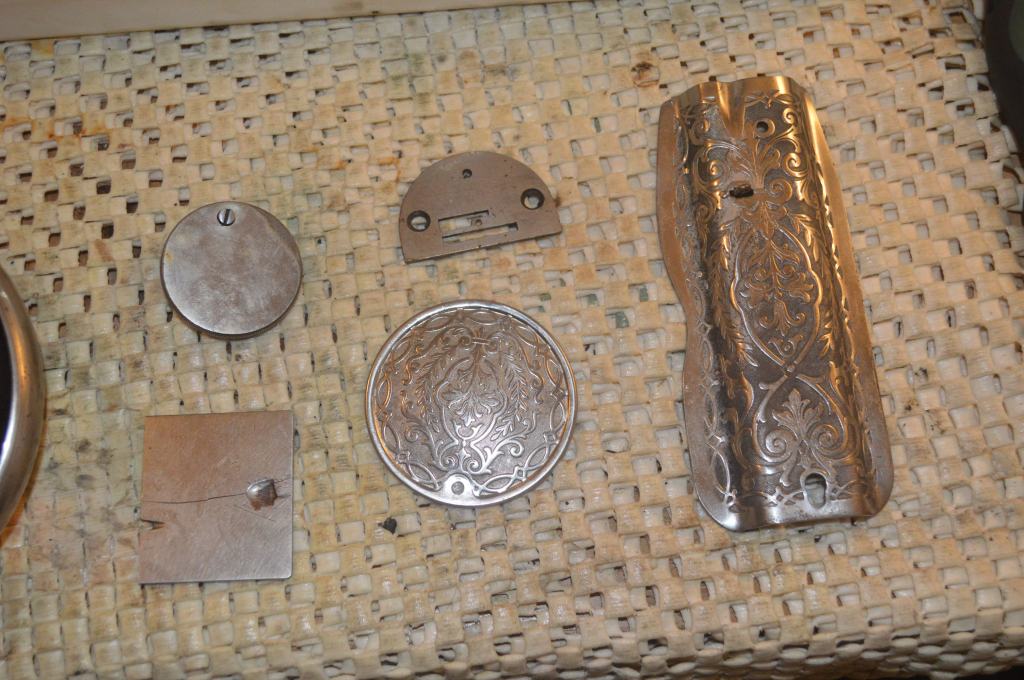
After ultrasonic cleaning, the parts are heated in oil to remove any water and then each part is wire brushed to clean bright steel.
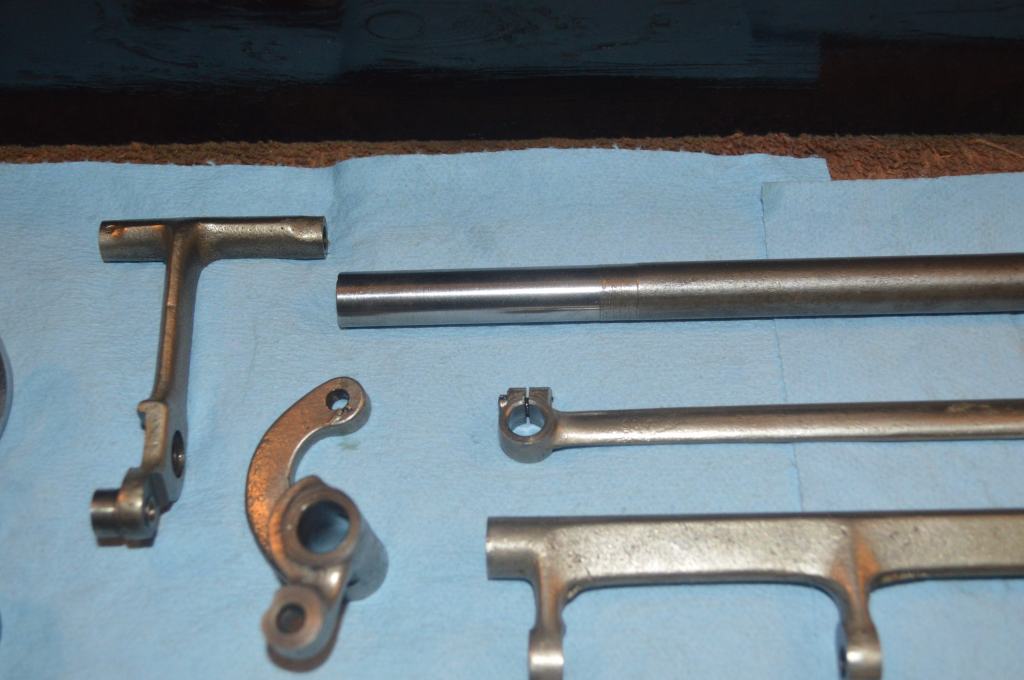
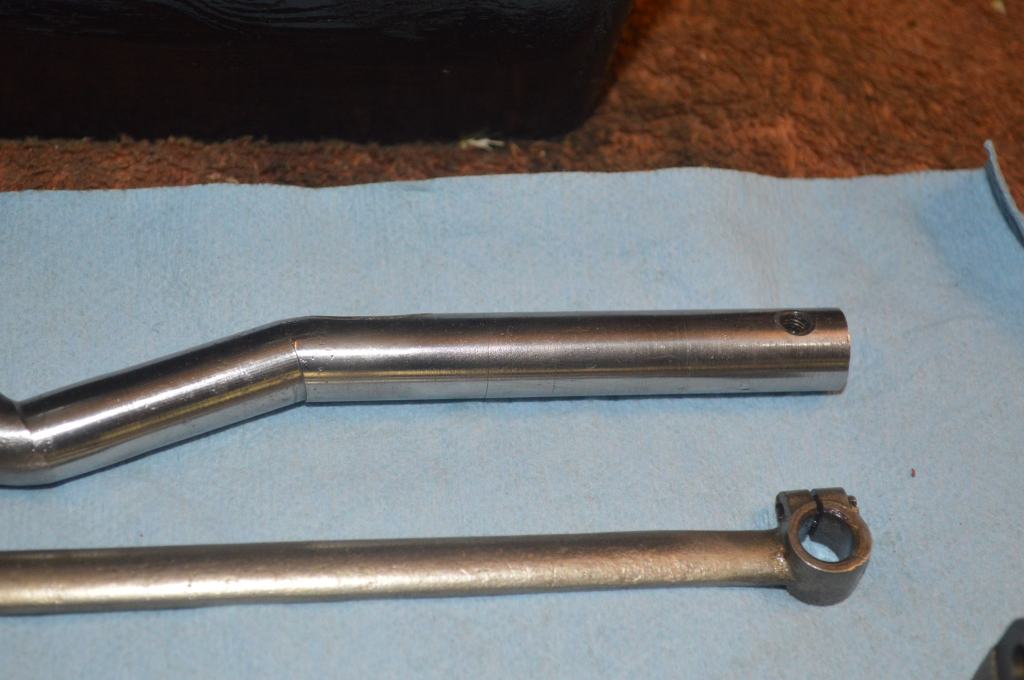
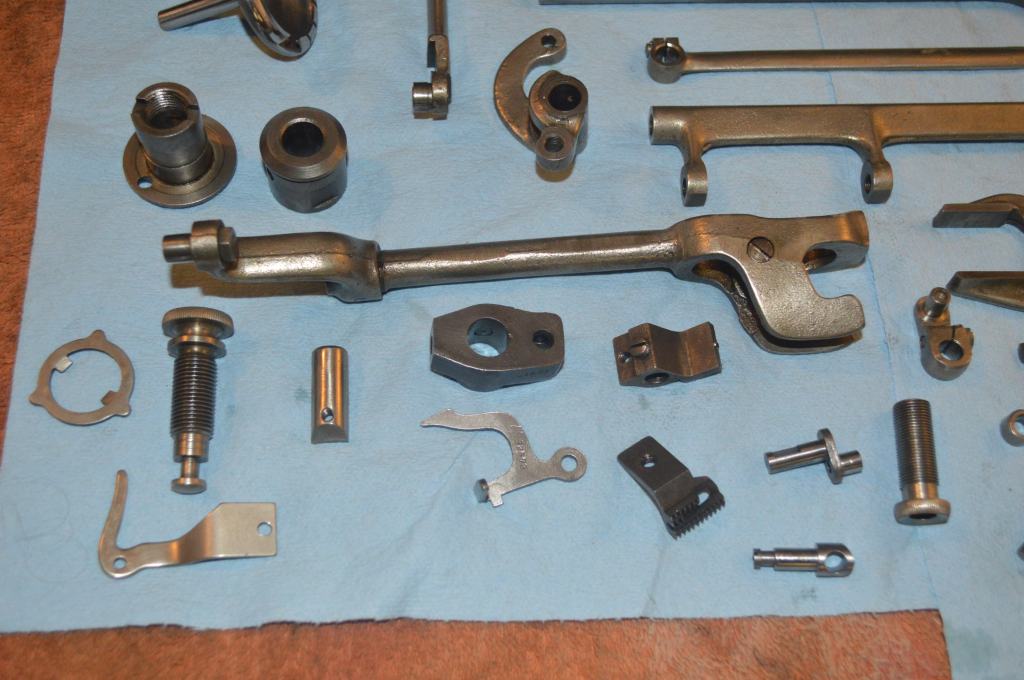

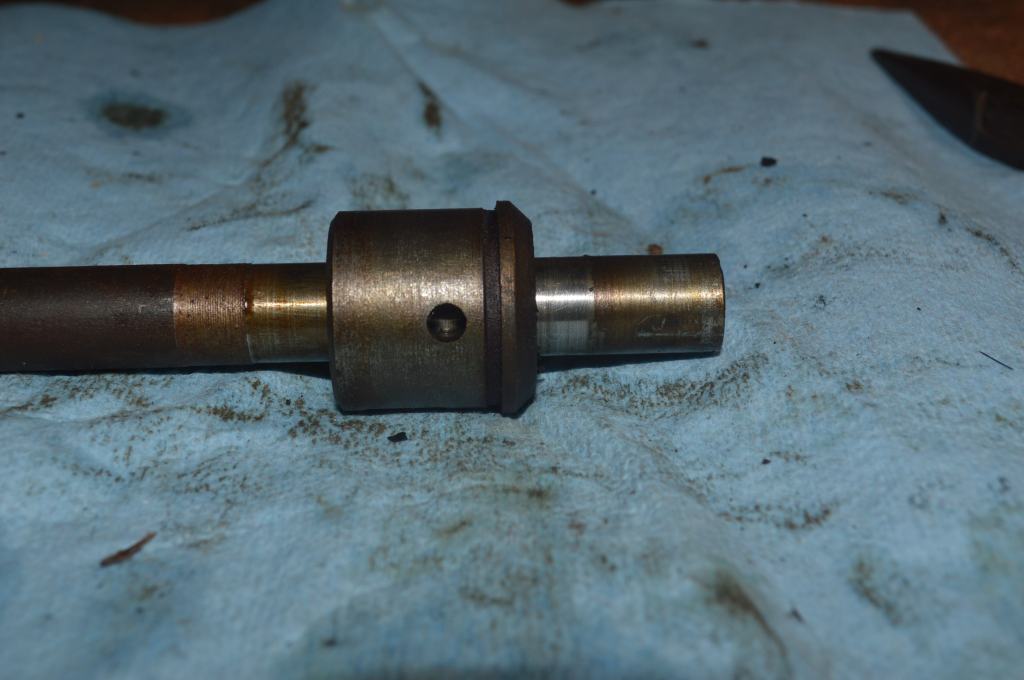
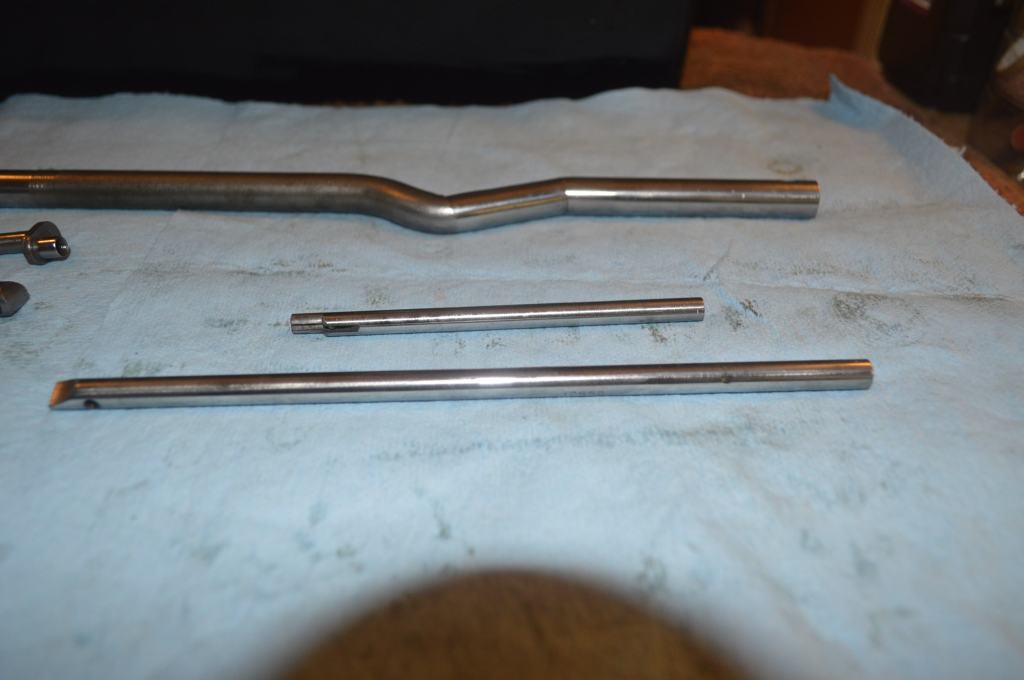
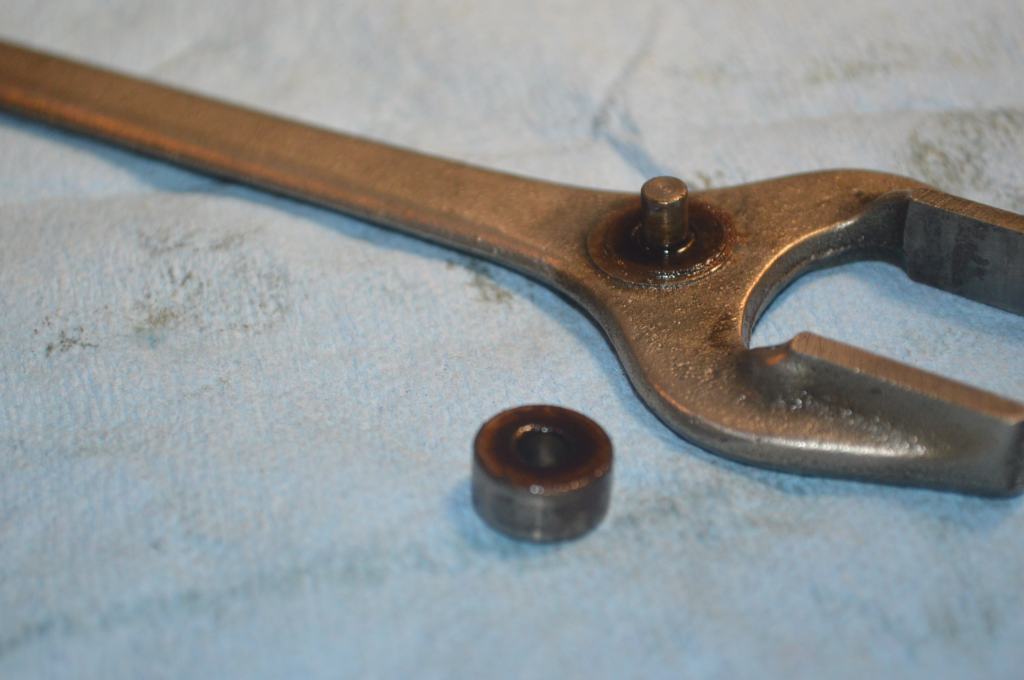
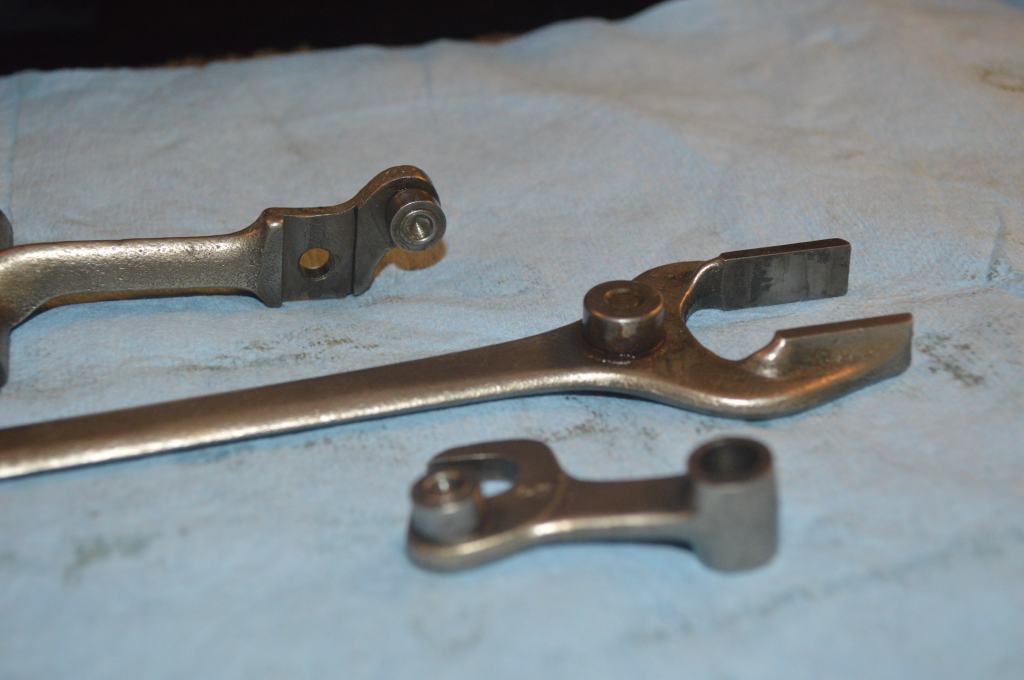
Cleaning parts that rotate in a linkage or in a bearing bore are taken a step further. These include the upper arm shaft, the bobbin race shaft, the needle bar, and the needle bar and take up arm linkages. These parts are rouge polished to an extremely smooth finish. Likewise, their bearing bores are wire brushed and cleaned. My goal is to get all of the moving and rotating assemblies in the sewing machine to move and rotate together as smoothly as possible.
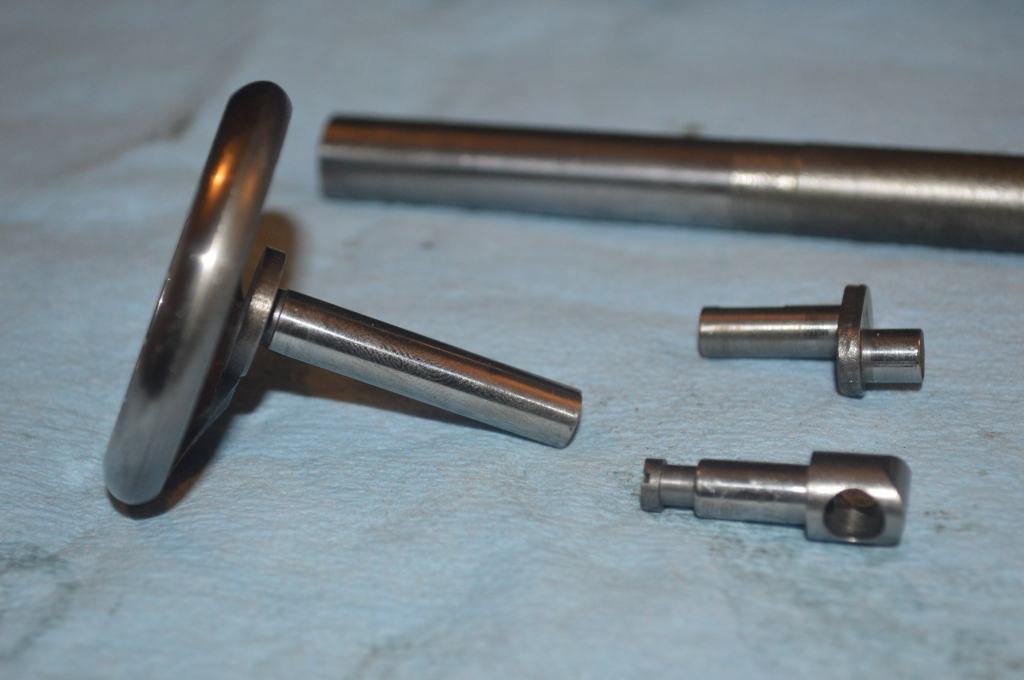
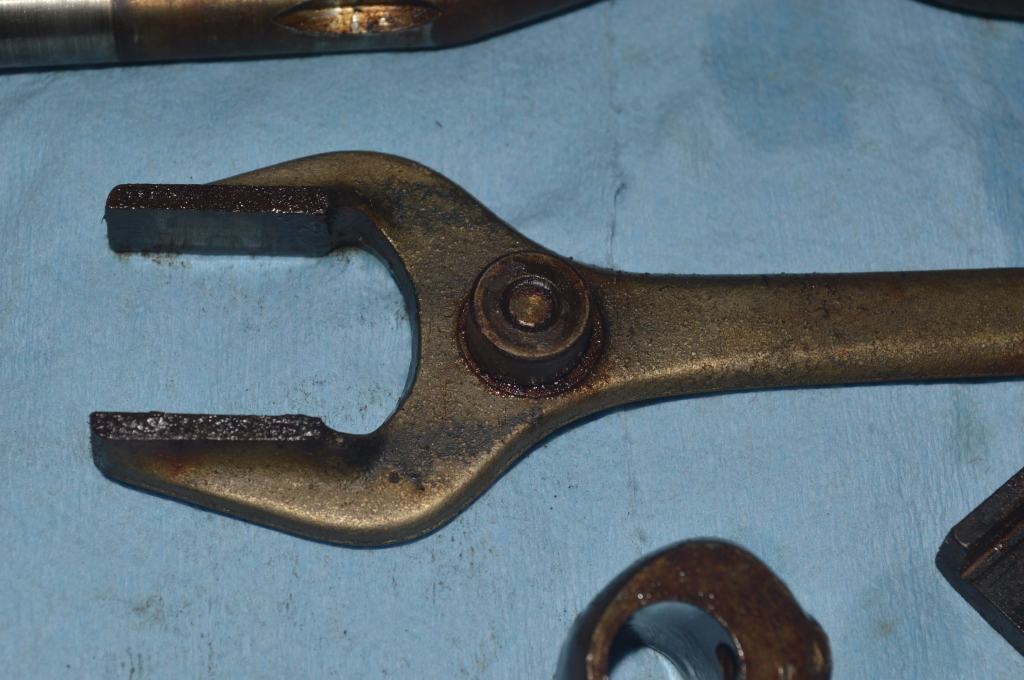
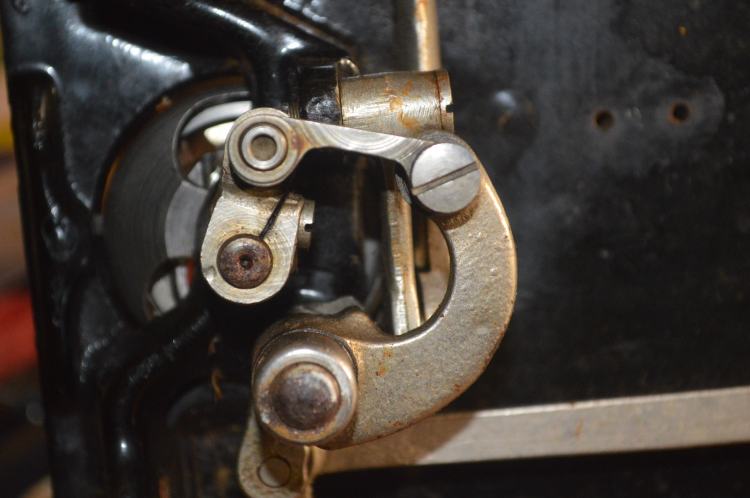
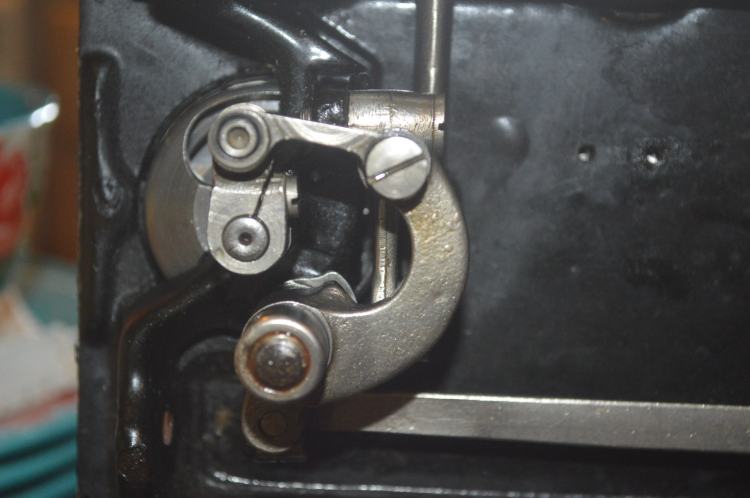
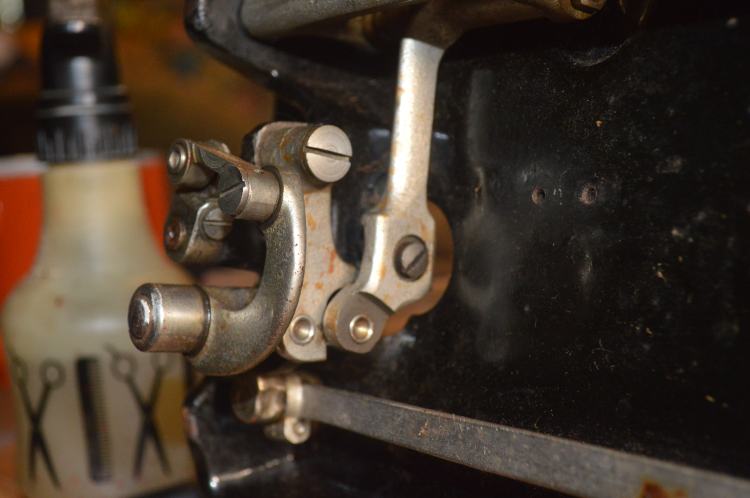
If you look closely, you will find parts that have rollers or bearings. Very often, they are seized up and no longer rotate. If they are seized up, you won’t notice it’s effect in the machine when running because you are just used to the way it runs now… not how it ran then. The sewing machine overpowers the friction in these parts and they slide against another steel part rather than roll. Singer used rollers for a reason and when they are free to rotate there is less friction in the mechanism. This in itself makes a big difference in smoothness and the way the machine sounds after cleaning.
Next, the tension control is disassembled and cleaned…
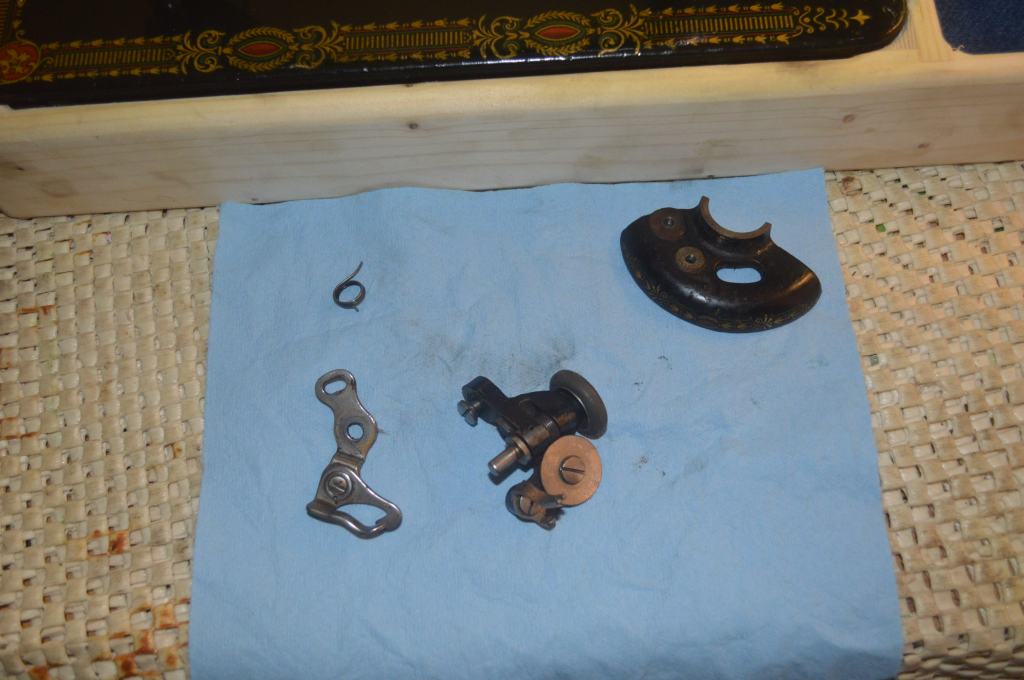
Likewise, the bobbin case is disassembled and wire brushed to remove any lint. oxidation, or oil varnish that has accumulated under the flat spring. Often overlooked, this ensures the bobbin thread tension is smooth and consistent.
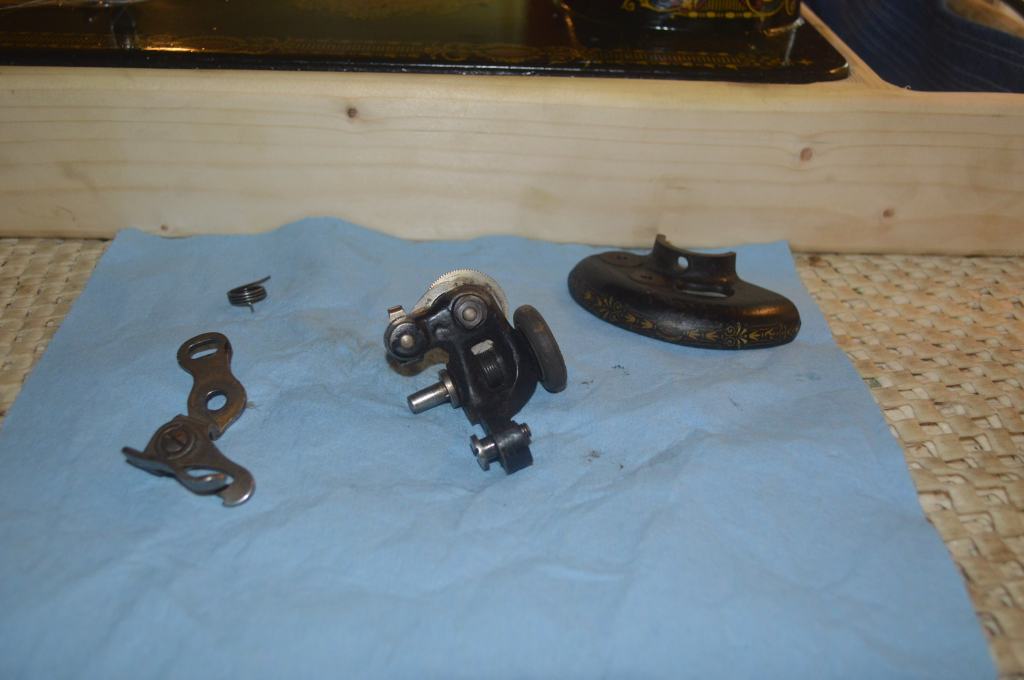
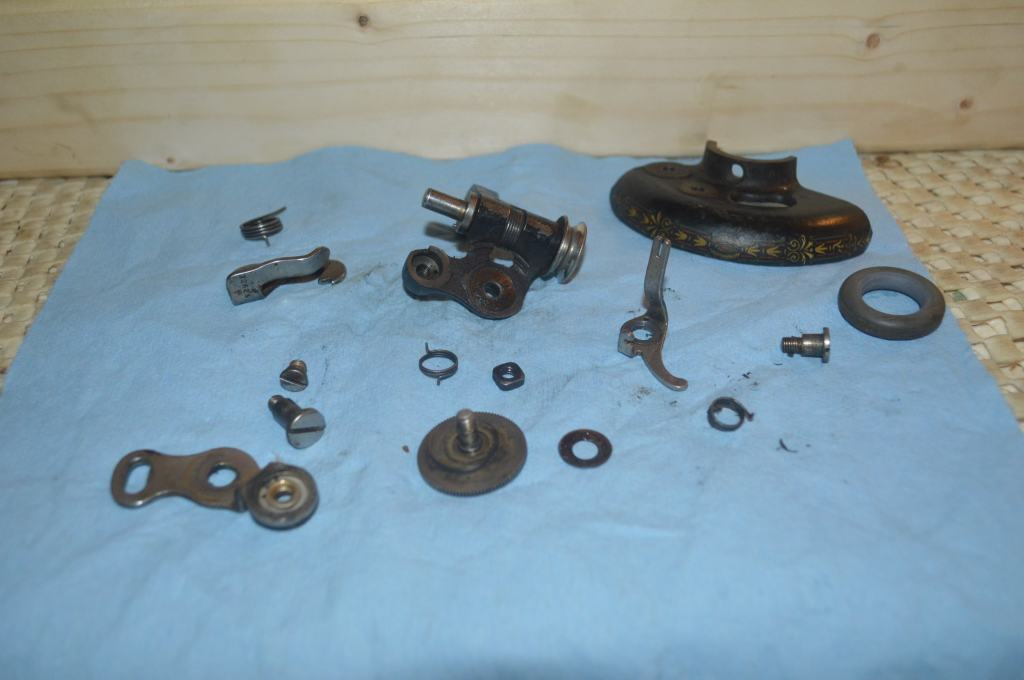
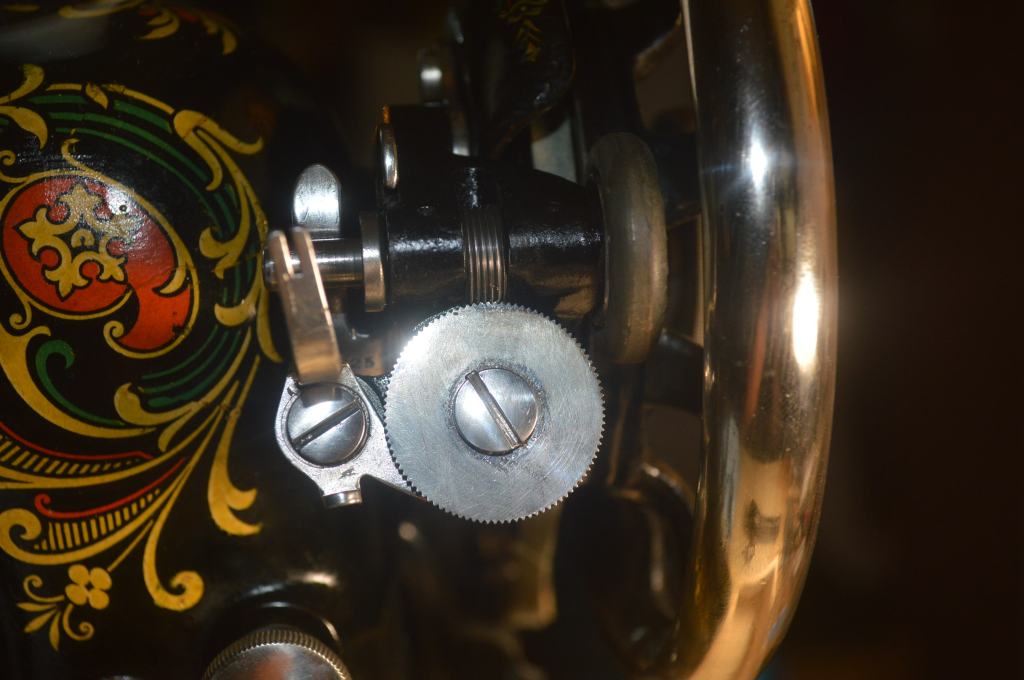
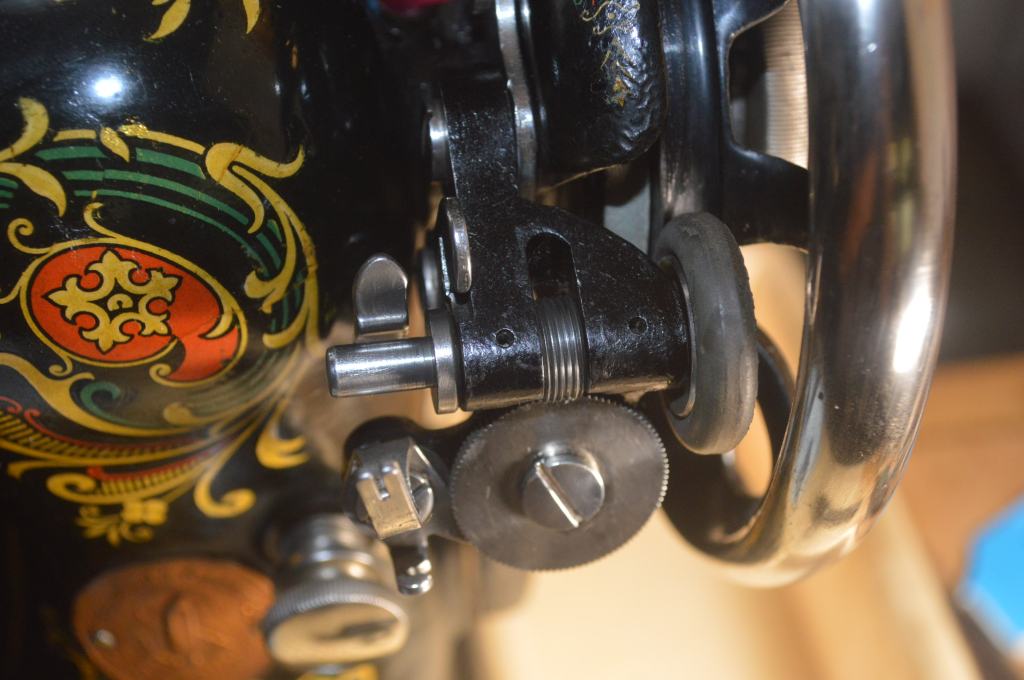
Now, the bobbin winder is disassembled and cleaned. These mechanical bobbin winders are a marvel to watch in action. The parts are cleaned, the nickel plated parts are rouge polished, and the cast iron arm is repainted. After reassembly the gear lash in the winder is adjusted for smoothness. Surprisingly, the gray “Singer” bobbin winder tire is still in good condition and I decided to reuse it rather than replace it. New bobbin winder tires are black and the replacement gray color tires are not available. It is not something that is readily noticeable, but again, details matter.

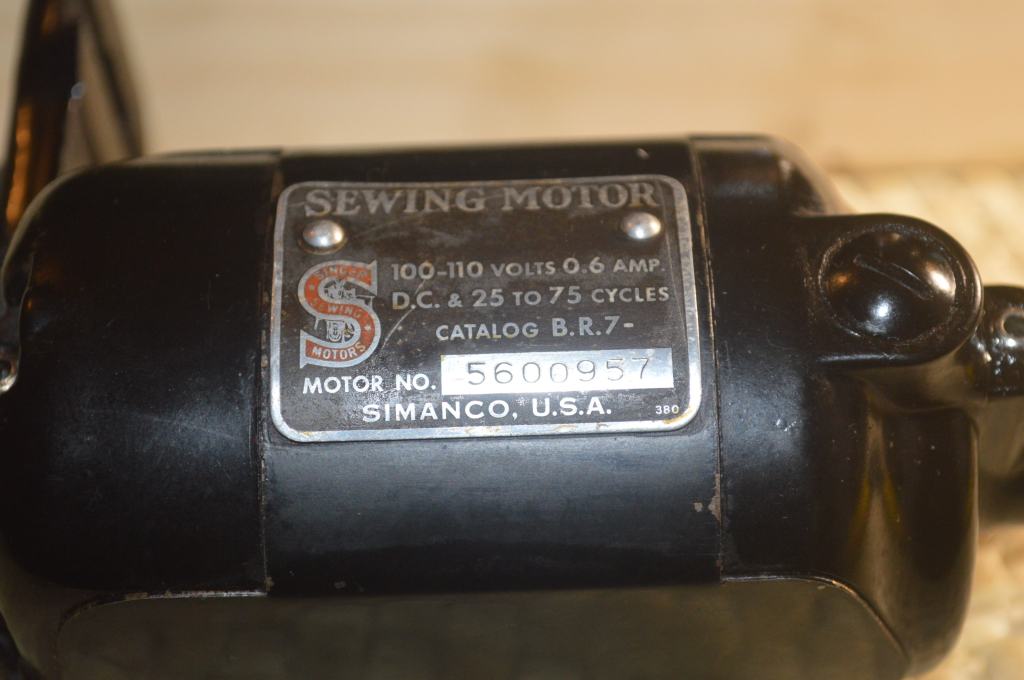
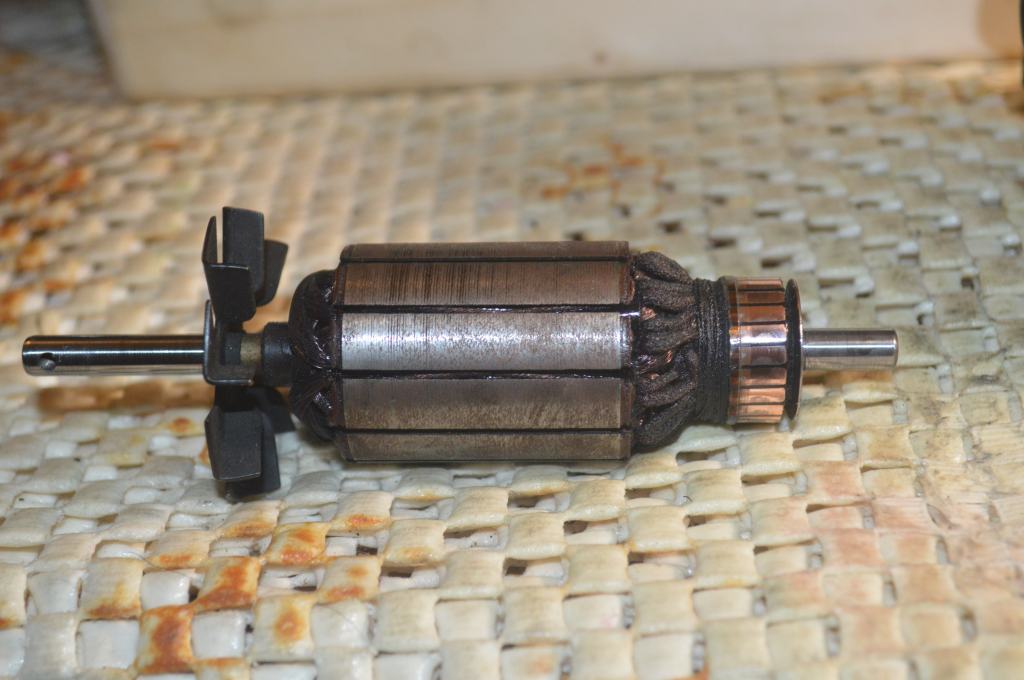
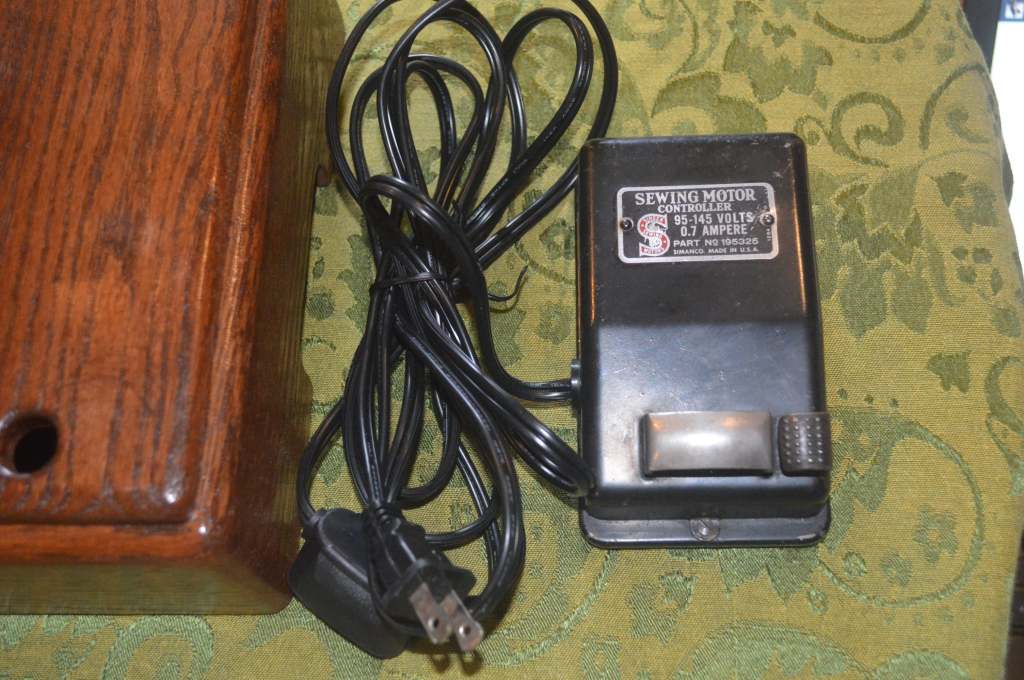
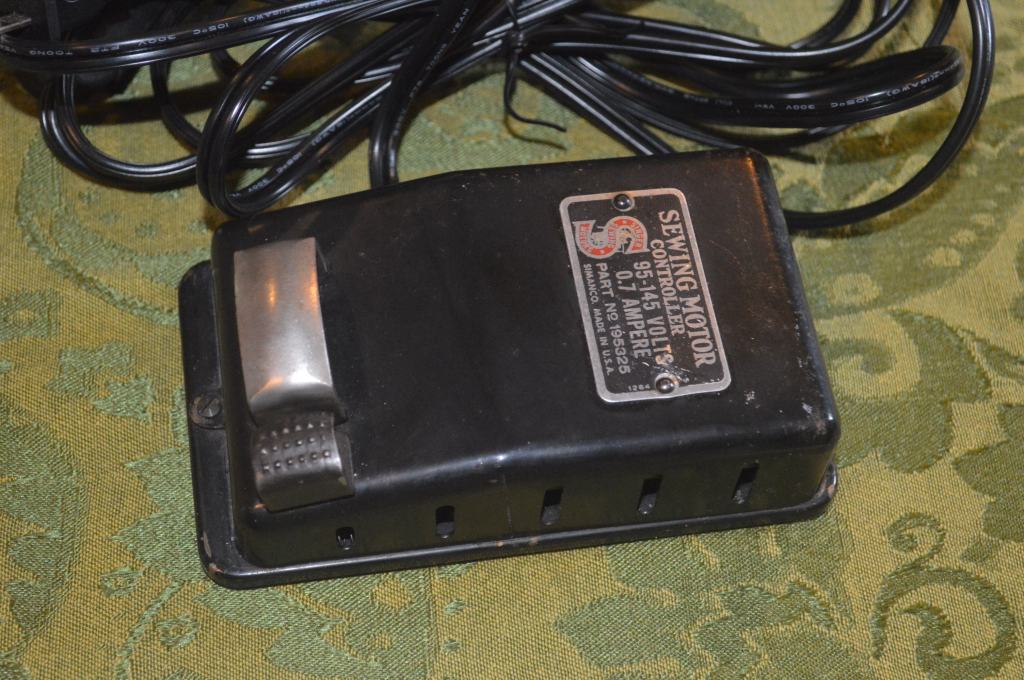
The motor chosen for the machine is a vintage Singer B.R.7 motor. While not the same vintage as the machine, it is a vintage 0.6 amp grease wick motor commonly found on the model 66 machines. It is disassembled, the wicks are removed and cleaned, the shaft bores are cleaned, the brushes are cleaned, the armature commutator is polished, the motor shafts are polished, and new main wires are soldered to the motor field coil.
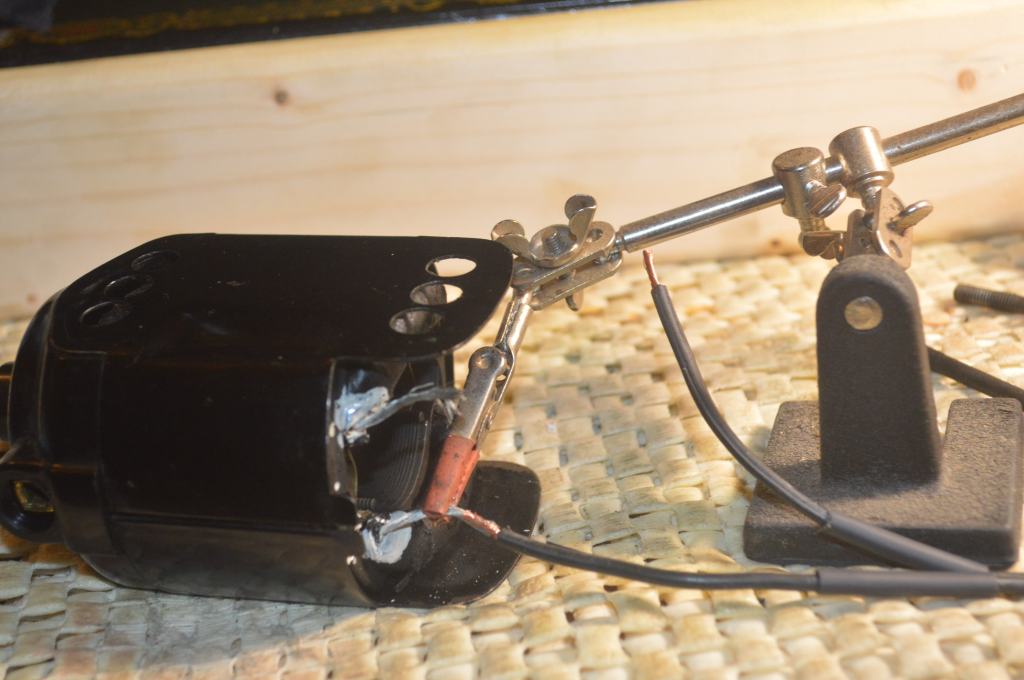
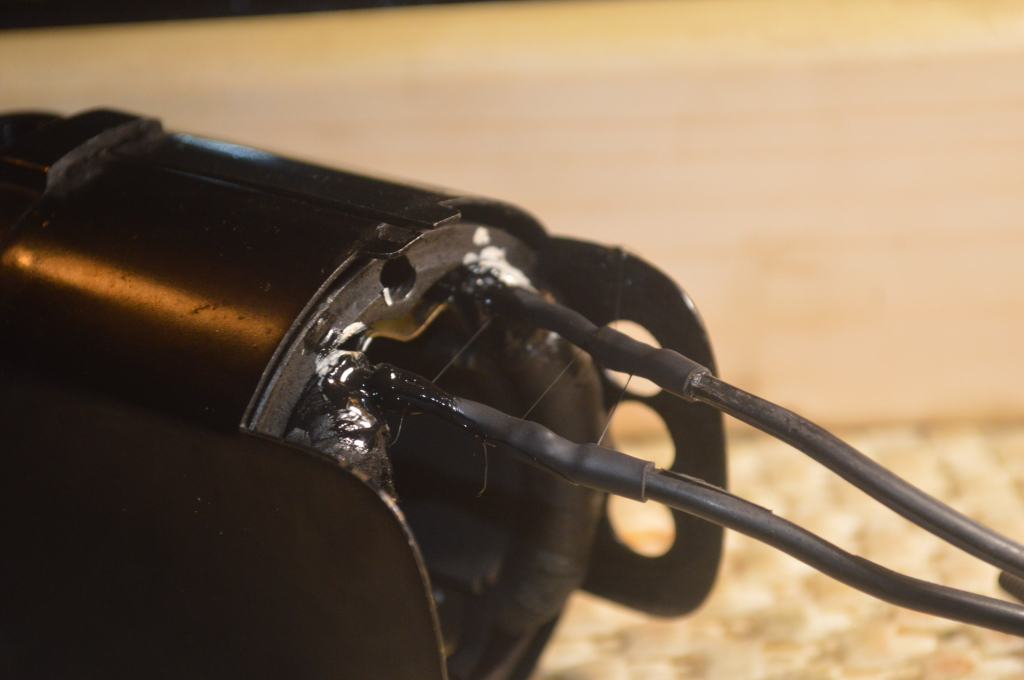
The motor plug terminal was wired to use a new double lead power cord and the vintage Singer foot controller that came with the machine. This configuration allows both the foot controller and power cord to be removed from the machine when not in use.
A vintage Singer style light is added to “upgrade” the machine for everyday use.
This completes the mechanical restoration
Cosmetic Restoration
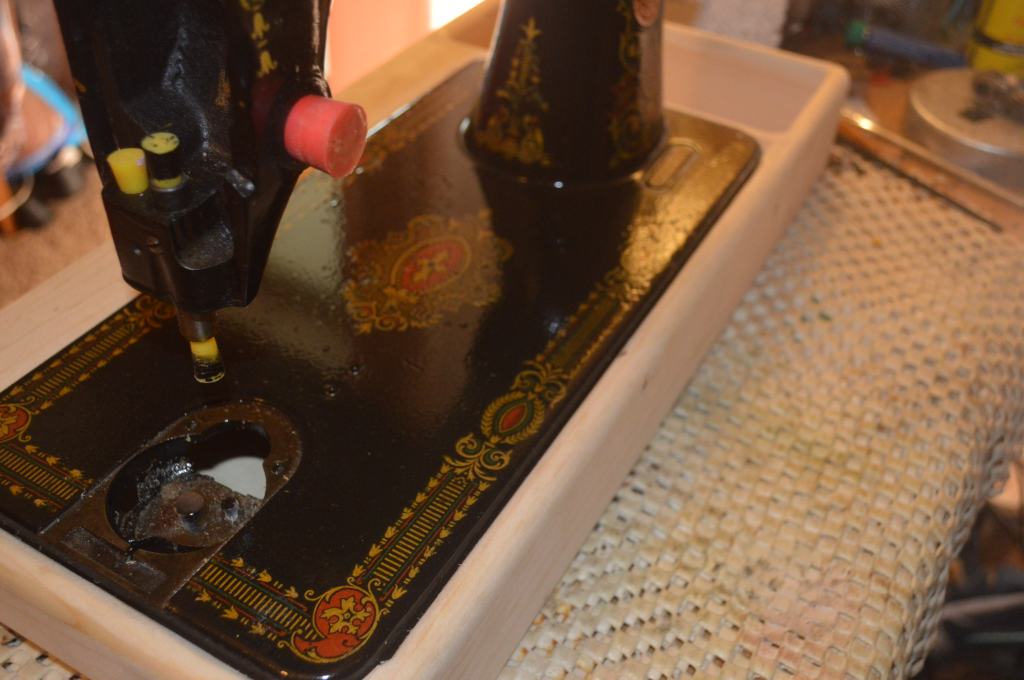
The first step in a cosmetic restoration is always cleaning. Once the machine is clean, the defects either blend into the background, or present themselves clearly. The cleaning is first done with GoJo and then the machine is coated with linseed oil. The linseed oil will nourish the original paint, any remaining shellac, prepare the paint chipped areas for repair, and prepare the machine for a new shellac top coat. The difference in appearance in cleaning alone results in a very noticeable improvement in the appearance of the machine.

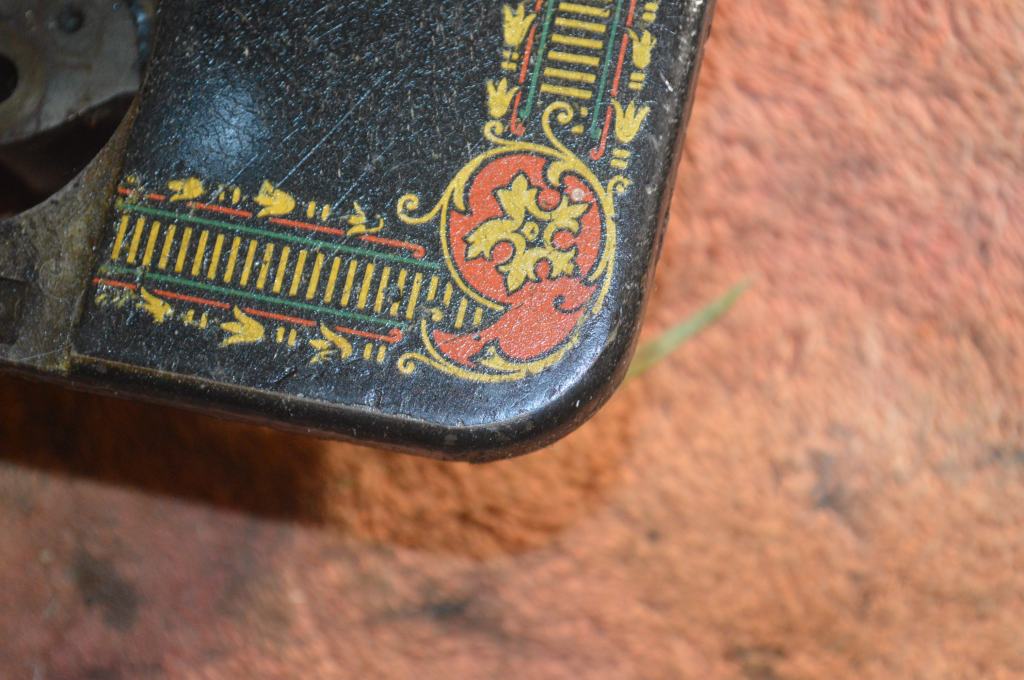
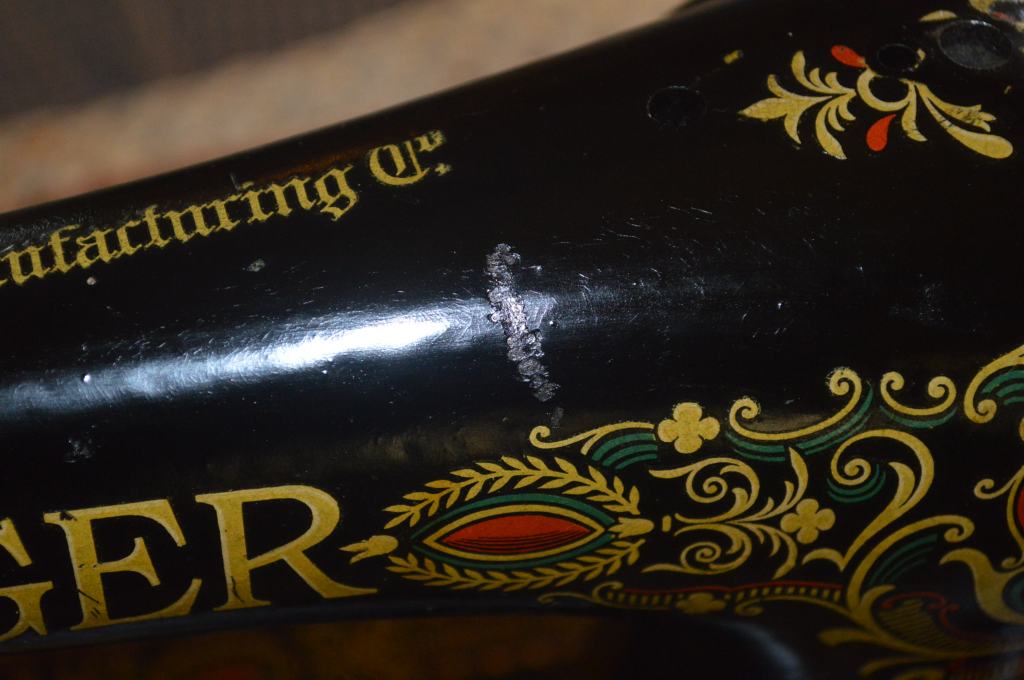
As the pictures show, the appearance of the machine is greatly enhanced. The paint is blacker and the color in the decals is accentuated. This machine has some paint chips caused by careless shipping. There is also an ugly scratch on the sewing arm. These go all the way through the japanned paint coat and are a challenge to repair. The original paint is quite thick and these chips must be filled in multiple stages of paint application. The paint I use is custom mixed to match the original “black” characteristic of black japanned Singer sewing machines. The recipe I use can be found at this link: A Tutorial – Mixing a Custom Color Black Paint for Singer Sewing Machines (and Others!) – Restored Vintage Fine Quality Sewing Machines (home.blog).
Successive applications of custom mixed paint is applied until it is slightly above the surface of the machine. Each stage is allowed to cure prior to applying more paint to fill the chip. When the needed thickness of paint is achieved, They are planed flush to the bed.
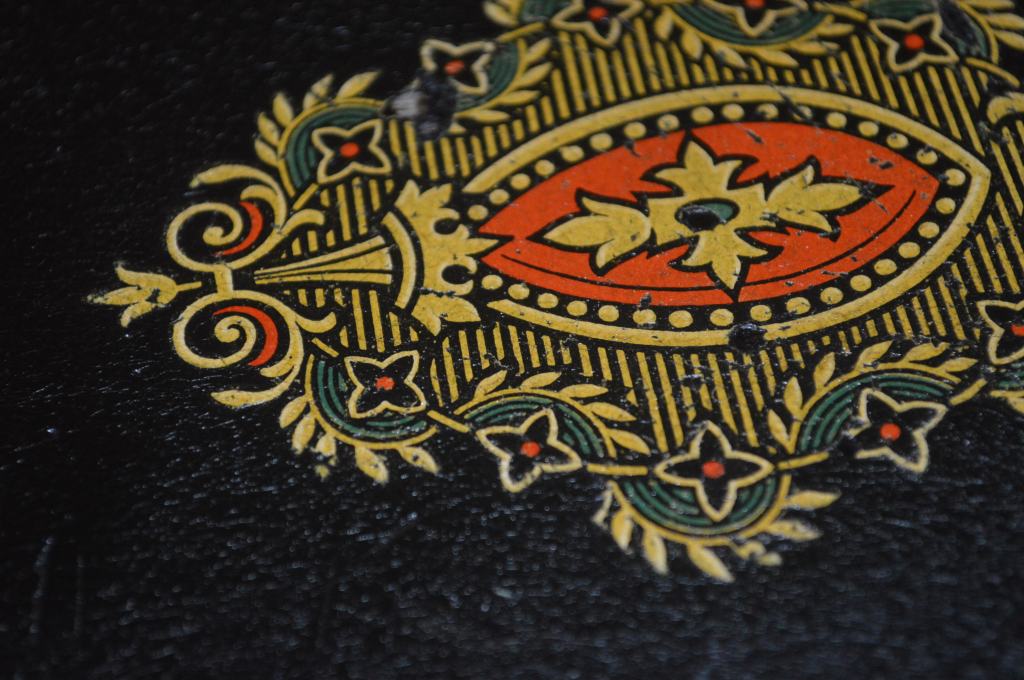
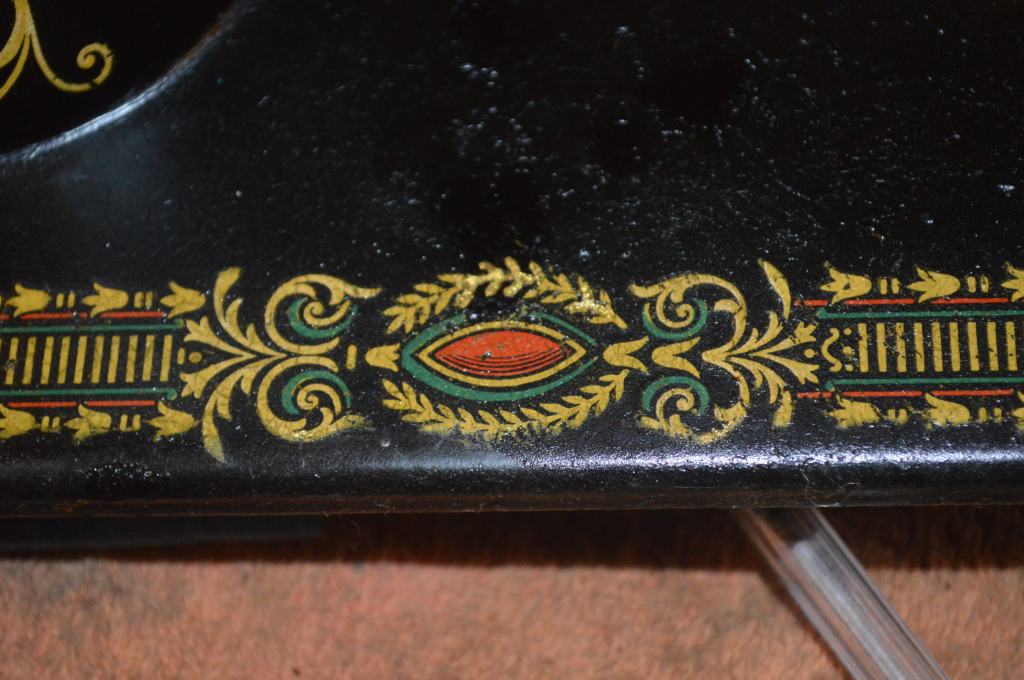
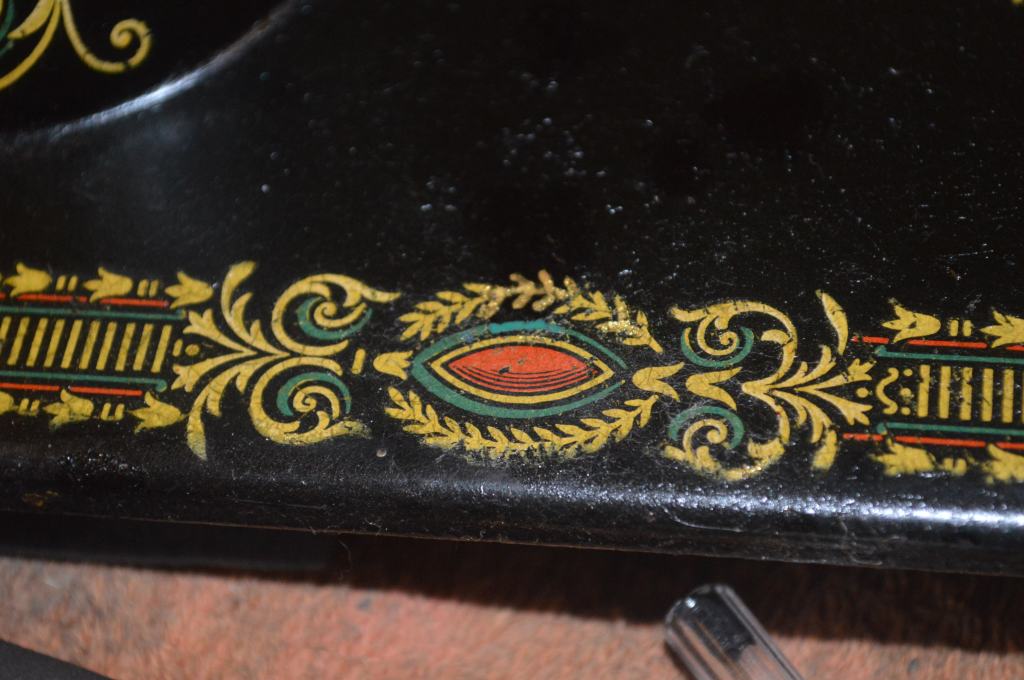
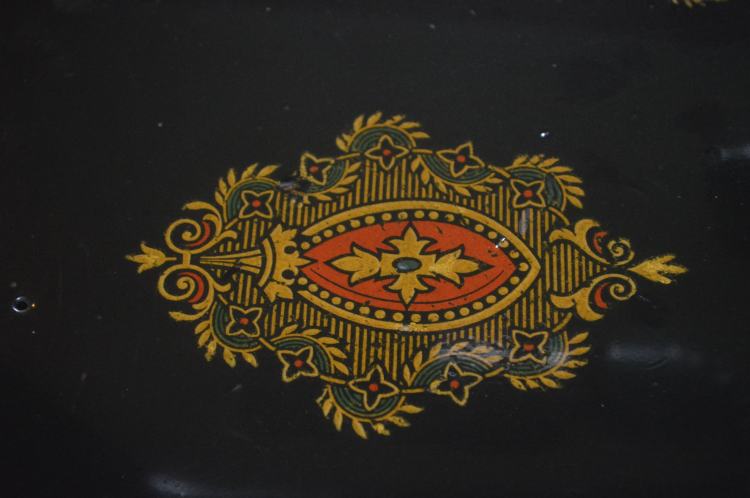
Now on to the detailed part of the cosmetic restoration… decal repairs. Red Eyes have very unique decals that consist of three colors… gold, red, and green. They also have very fine lines, geometric patterns, and details that make decal repair very difficult. With a Red Eye, the decals are typically worn away in places, and the difference between one red eye and another is the merely the extent of wear and where they are worn. I doubt that there is a 102 year old model 66 Red Eye with perfect decals… the wear in the decals varies by degree so the best outcome for a red eye is how much can be repaired, and if it will make a visual difference. The same applies here. Even with the chips on this machine caused by shipping, there is some wear on the decals. My goal is to selectively fill in chips that break the decal design and make it look intact. True for any red eye, there is no way that I can re-establish or correct all of the wear. My goal is to go for the most bang for the buck. In an ideal restoration, I look for cosmetic defects that are discernable with close inspection at 6 inches… the six inch rule. For red eyes, I extend this to a 12 inch rule. For this machine, it will hopefully fall somewhere in between. In reality, there is so much color and detail in the red eye decal, that my brain sees the whole picture and is not drawn to small defects… they blend into the field of color rather than pop out.
This machine has some defects that I can improve on, but it involves custom mixing paint. I am only concentrating on the gold and green because the red portions of the decals are in very good condition and I don’t think I can improve their appearance. The defects in green portions of the decals I am attempting to repair are where chips or scratches have broken lines in the decals. The same approach applies to defects in the areas in the gold decals. Paint matching these colors is an art, not a science. My daughter is a graphic artist and she spent quite a bit of time getting these colors to closely match. For example, the gold paint mixed here consists of four different values of gold paint and a tinch of green. The result is a quantity of paint that far exceeds the amount needed… imagine a half ounce of paint mixed when the all I need is about the quantity in a mouse’s tear… even less for the green. Still, for a restoration like this the effort is worth the reward. The following shows some, but not all of the areas repaired for contrast.


With the repairs done, the surface is again coated with thin layer of linseed oil in preparation of the new shellac coat and silicone plugs are used to keep the shellac out of places it shouldn’t otta be.

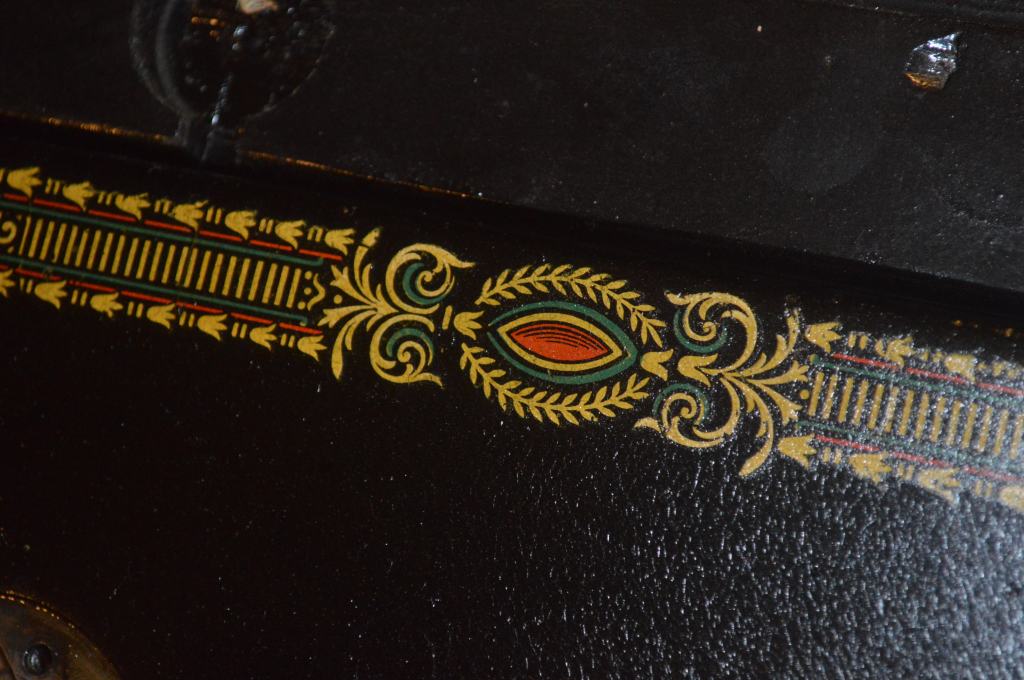
If you happened to notice in the pictures of the bed, the decals are actually raised above the surface of the bed. This means the shellac is thin or worn away and the decals are susceptible to damage. Singer decals should be submerged beneath the shellac. The machine will be sprayed with successive coats of shellac until the decals are once again protected with a substantial thickness of shellac. I won’t know how many coats it will take, but lets find out…
Well, it took six coats to get the thickness I wanted. The next step is progressive sanding to get to a polished finish. Because the shellac finish is fairly smooth already, I started with 1000 grit sandpaper wetted with linseed oil over the entire machine. This was followed by 1500 grit, 2000 grit, and 2500 grit sanding. The final polish finish was achieved with two rounds of glaze polishing. The result is a smooth finish that will protect the decals for years to come.
Before sanding and polishing…
After sanding and polishing…
The two repairs made and the overall appearance (smaller repairs included) give an example of why I elect to re-coat the entire machine… The old surface is smooth, the paint crazing is gone, and the colors in the decals are revitalized.


The next step in the cosmetic restoration is polishing the nickel plated pieces. The larger pieces are polished with a 6″ buffing wheel, the smaller pieces are polished with a dremel tool. Red jewelers rouge is used for a bright polished shine. It is difficult to photograph the bright nickel shine so the final polished pieces are shown on the completed machine.
With these pieces polished, the cosmetic restoration complete…
All that remains is to reassemble and adjust the machine. After reassembly, the machine is “run in” at slow, medium, and full speed with no fabric and the presser foot up for about 10 minutes. This seats all of the reassembled parts and pieces and allows them to settle in for final adjustment. Following run in, all of the assemblies and adjustments are checked and readjusted as necessary to allow for minimum clearances, proper alignment, and smoothness. All that remains is to thread the machine and sew with fabric to adjust the tensions, hook timing, needle depth, feed dogs, motor belt tension, and take up spring position.
That’s it! The restoration is complete and the end result has met all of my expectations when I started, and even exceed some. Is it perfect? No… but that was not my goal starting out and in my opinion it can’t be. There is always wear that time cannot erase. Some decal wear, small scratches, and a bit of nickel plate worn here or there is expected on a machine over a hundred years old. Is it original? Yes… except for the addition of a motor and the light, and my decision to replace the tension control knob to it’s original condition, all of the bits and pieces that came on the machine remain on the machine.
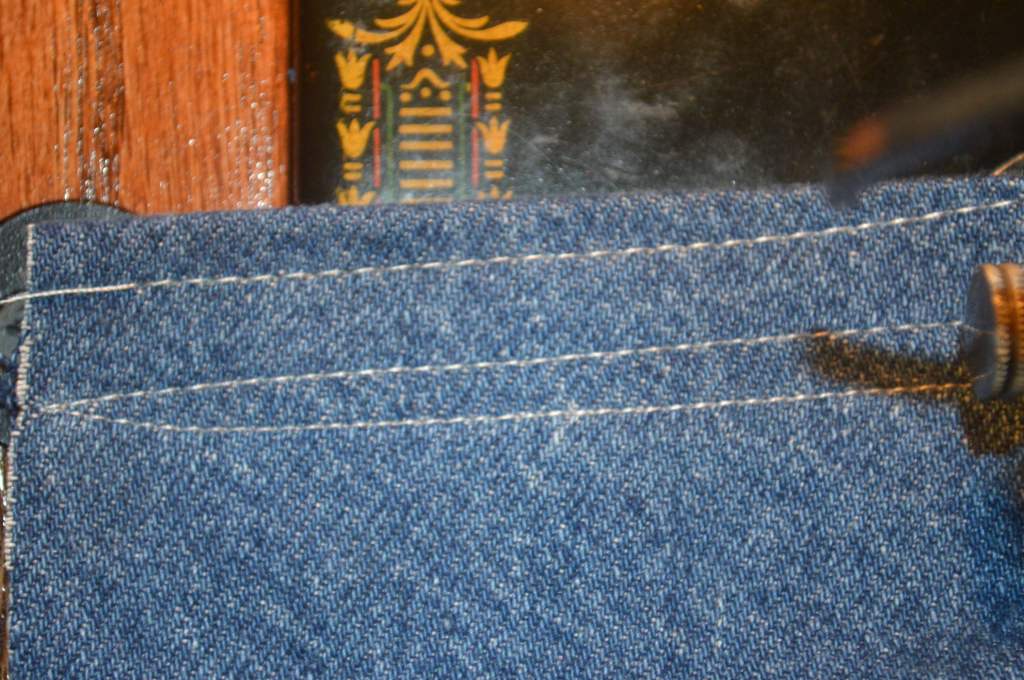
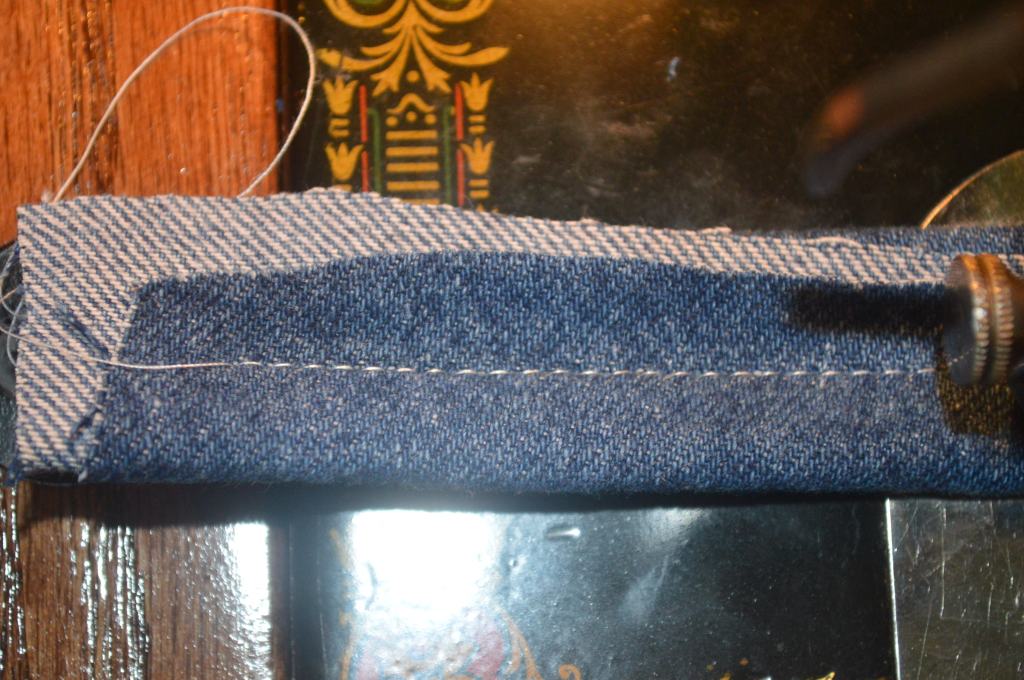
The stitches produced are straight and even at different lengths it sews easily through four layers of denim as easily as it does two layers.
The real result of this restoration is two fold. Cosmetically the machine has a beautiful new vintage correct finish that will protect the paint and decals from additional wear. The crazing in the original black japanned finish is gone. The paint chips blend smoothly into the finish. The colors in the decals are accentuated and the repairs blend into the surface rather than jump out when viewed at a close distance. All in all, the before and after pictures show it best. Mechanically, the machine is noticeably improved. The machine is quiet, runs smoothly, and makes a great stitch. Out of curiosity, I used a digital tachometer to determine how many stitches per minute the machine would produce. Every machine of this vintage will be different due to many factors associated with age and use, but after this machine warmed up, it was making 1023 stitches per minute! Not bad… Although the machine seemed smooth and quiet before, it is noticeably improved now. Turning the balance wheel by hand moves the needle up and down effortlessly and the action is buttery smooth. Running at slow, medium, and fast speed the machine is quiet, with only a hint of the ticking so commonly found in 66’s (caused by the oscillating hook as the thread passes over the bobbin and through the thread clearance spring). When sewing, the sewing mechanisms run smoothly with minimal vibration. In comparison to the other model 66’s I have of later vintage, it’s performance and feel is what I believe is “like new”… and that is what I was looking for when I started.
Before and After
Before restoration


This machine needed a base. The “after pictures show the custom red oak base stained in English chestnut and finished with shellac I built for the machine to live in.
Well, I hope you enjoyed the restoration process as much as I and look forward to the next!
It’s been a while since I included a restored sewing machine in my shop because most of my machines are restored for custom order, but if you like what you see please visit our Etsy store at https://www.etsy.com/shop/pungoliving and look for it there!
Looking for a similarly restored quality vintage all metal sewing machine for your sewing room? Let us know! We specialize in custom orders and are happy to locate and restore the “perfect” machine for you!
As always, If you have any questions, or if I can be of any assistance, please contact me through Etsy or send me an email to Pungoliving@gmail.com.
Thanks for reading!
Lee

My only comment can be summed up in a short THANK YOU! The detailed descriptions and video images are wonderful. You are a truly blessed example to me.
Wes
LikeLike
Hello Wes,
Thank you for your kind comment! I enjoy not only the restorations, but the tutorials to help folks keep their machines sewing!
Lee
LikeLike
Hello Lee, your website has become addictive and this post might well make it one of the most addictive websites on the internet. I don’t want to call it a “guilty” pleasure, because I have no guilt whatsoever spending time learning from and being inspired by you. Your restoration of this machine is truly a thing of beauty.
I’m now working on restoring my fourth sewing machine and in large measure it’s your inspiration and your support through giving me advice that has opened up this world of vintage sewing machine restoration.
I feel blessed to have had the opportunity to learn from you.
LikeLike
Good morning Jeffery,
I’m glad that you have found my website useful! I truly enjoy each restoration I do… so much so I look forward to the next. I consider my efforts to be a contribution to a growing sewing machine community and I spend a lot of time researching topics on vintage sewing machines. I have learned a great deal from others and found some great information (and some not so great information) on how other folks maintain their machines.
Knowing that you are on your fourth sewing machine restoration tells me that you see the same value in them that I do. The precision, quality of materials, and ornate presentation is unmatched by any sewing machine produced today. There is so much to do, and I know that restoring a 100 year old sewing machine to “like new” condition (as my abilities allow) will find them sewing a hundred years from now. Likewise, your restoration efforts are a contribution to others that will out live you as well (that’s not a bad thing!).
I’m happy to assist you and others and I hope you will reach out to me if I can be of any assistance… teaching is essential to learning, and learning is essential to preserve knowledge lest it be lost.
I’d like to know more about your restorations, each machine is different and I know that there is much I can learn from you!
Have a great day,
Lee
Sent from Mail for Windows 10
LikeLike
I found your blog a couple of years ago and appreciate your wonderfully informative posts. I accidentally acquired a couple of fixer upper machines at estate auctions in the early 2000s and always intended to get the machines back in working order. Limited mechanical knowledge/skill has been a barrier, though it hasn’t stopped me from bringing home machines. One machine that’s been sitting around for a while is a red eye 66 with a motor issue that I wasn’t sure how to deal with. After reading your post on the same I think I can figure it out now. Thanks for doing what you do and sharing your knowledge.
There is a step that I have a question about. Would you be willing to tell more about how the parts are heated in oil after the ultrasonic cleaning? Mainly, what type of oil and how is it heated?
Thanks again.
LikeLike
Hello Bev,
I’m you found some information useful to you!
Vintage all metal sewing machines have the ability to sew well with a thorough cleaning, oiling, and use. It is not always necessary to disassemble to clean (although disassembly restores a machine to near to new as possible). I have a tutorial on Singer motors that are commonly found on 66’s and perhaps it will clarify some questions about your motor. Search for “singer motor” in the search bar on my website and you will find it.
As you know, ultrasonic cleaning uses water, and water getting into tight spaces is hard to get out. If left in or on a part, it will rust. I use mineral oil in an electric skillet and heat it to 325 degrees for an hour. This is below the flash point of the oil and well above the boiling point of water This boils out any water in even the tightest places (like rollers) and replaces it with oil. I have found it to be very efficient.
I hope this helps and please let me know if I can be of any further assistance.
Have a blessed afternoon!
Lee
LikeLike
Hello Lee!
Your work is amazing! I just found this site today as I was searching for the best way to restore a 1921 Singer Red Eye that belonged to my husband’s great grandmother “Mimi”. It was gifted to me along with it’s original treadle, and the light and motor that was soon added to it. After sitting in a basement for 4+ decades, it still runs!
My husband’s also an engineer and I’m hoping he’ll do most of the mechanical cleaning/restoration, but do you have any suggestions for cleaning without an ultrasonic cleanser? We have a bit of rust, and some of the screws are really stuck, I’m still trying to wrap my head around how to get started.
Especially thank you for all your painting and shellacing information! I’m looking forward to that the most.
Warm regards,
Erica
LikeLike
Good evening Erica,
Thank you for your kind words. You really don’t need an ultrasonic cleaner for one machine. With the number of restorations I do, it is a useful tool. What you do need is a good set of quality hollow ground screwdrivers. I find that a set made for gun smithing by a brand named Weaver works well. They have a multi bit set of different size screwdriver bits in a single kit that I use and works great… it’s under $20. If you try to use regular screwdrivers, no matter how good they are you will damage the screws in your machine… It is 100% certain and hollow ground screwdrivers are a minimum to disassemble or loosen any screw in your machine.
The other tool that I would recommend is a dremel tool. You can get a Walmart brand one for less than $14 and if you use the available 1″ wire wheels, you can clean all of the parts to shiny steel with little problem. It will remove old oil varnish with no problem. At the end of a restoration, I will have used this tool on every part of the machine… despite if it was ultrasonically cleaned or not.
Your husband can get a lot of satisfaction taking on a project like this. I have done several Red Eye restorations and there are tips in each one. Just make sure to tell him that there is one screw in the needle bar head that is right hand thread… this means it loosens in the direction most screws tighten.
If you get started and run into any problems, please feel free to contact me at pungoliving@gmail.com I can offer you specific advice or explanation.
Have a great evening!
Lee
LikeLike
Looking at the good-as-new machine really helps one imagine why they were such wonders in their time, and why people were willing to pay as much as they did to get one!
LikeLike
I couldn’t agree more! Considering the cost of inflation, these machines were very expensive, and Singer offered monthly payment plans to help people afford them.!
LikeLike