

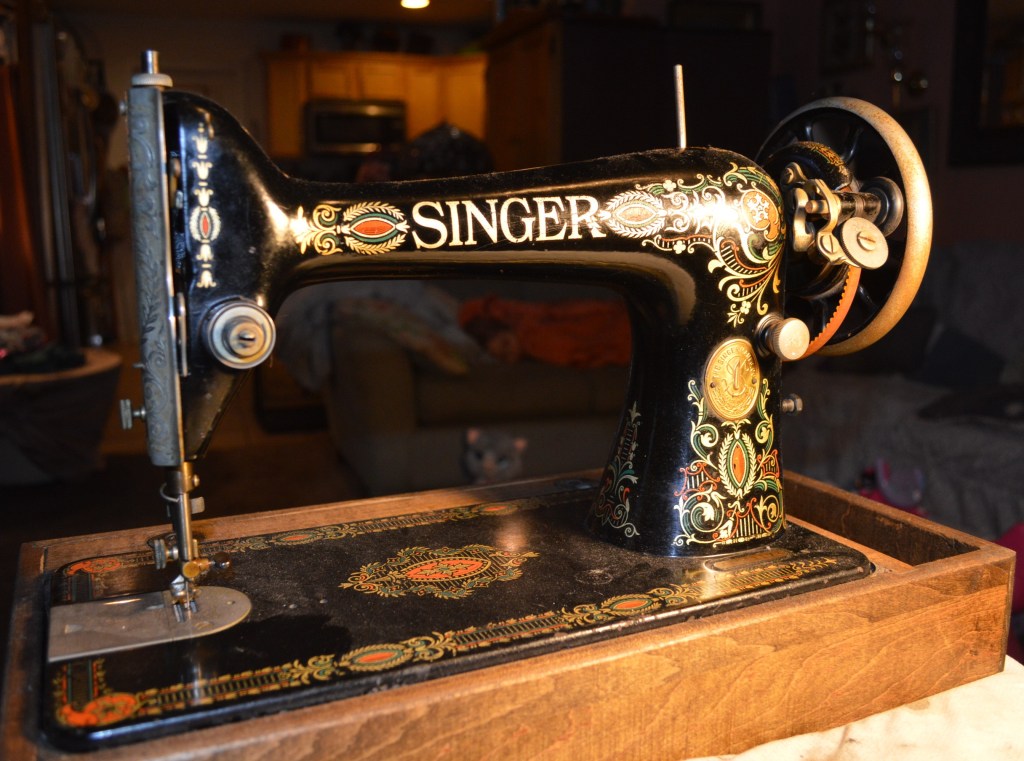
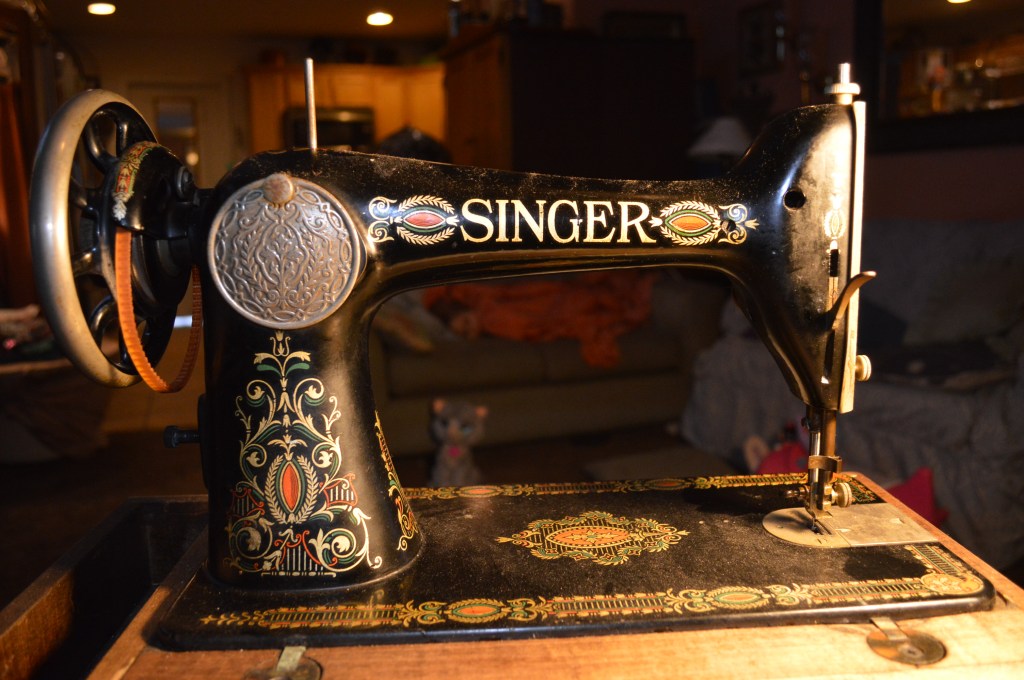
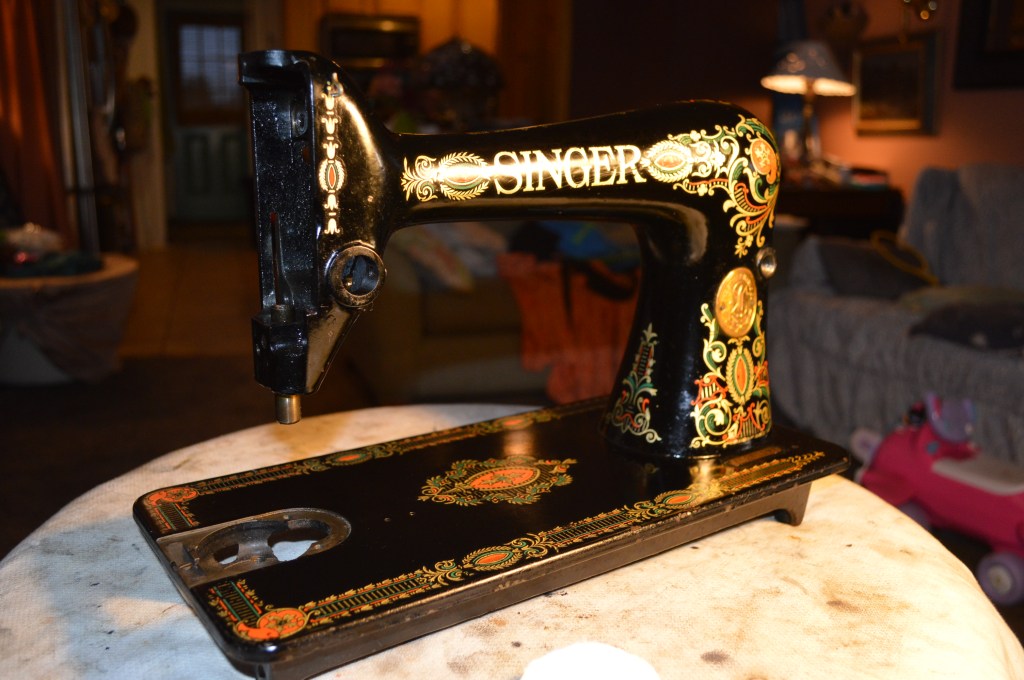
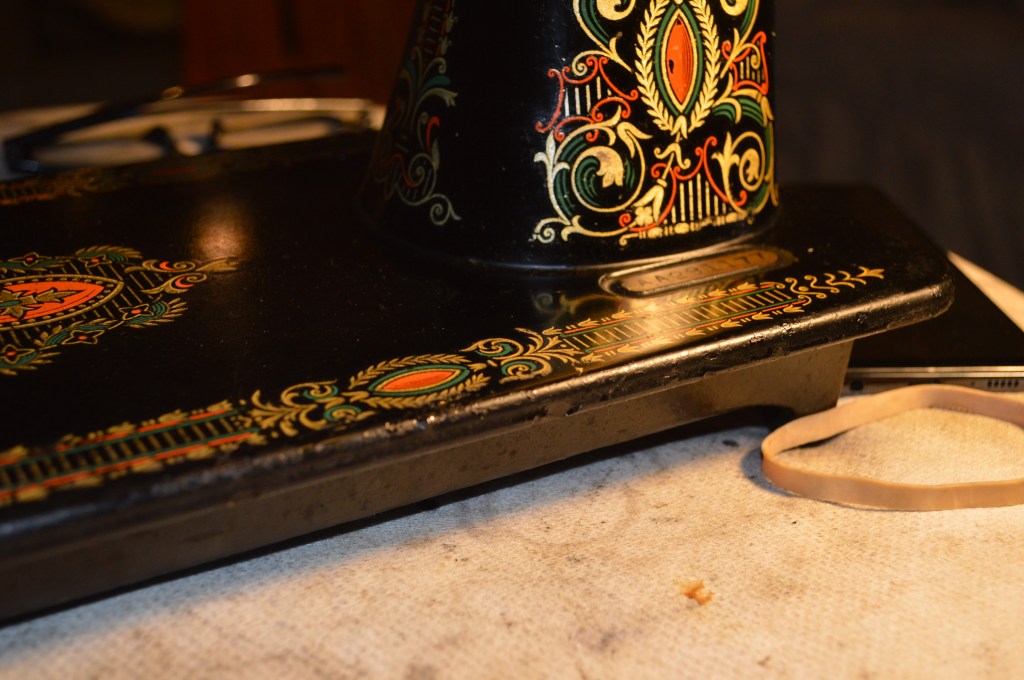
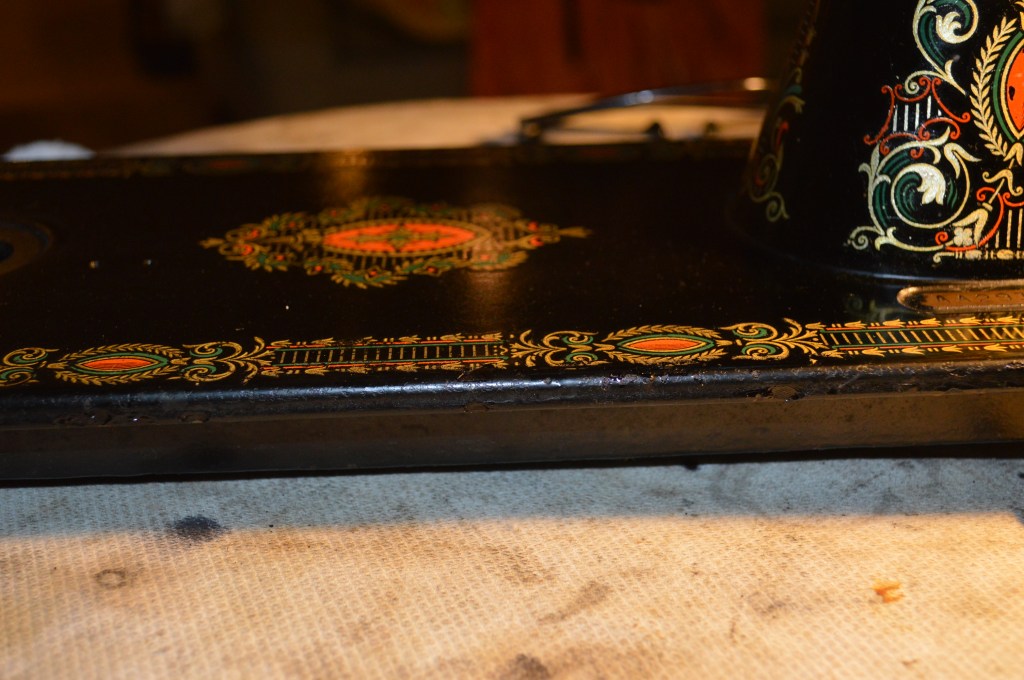
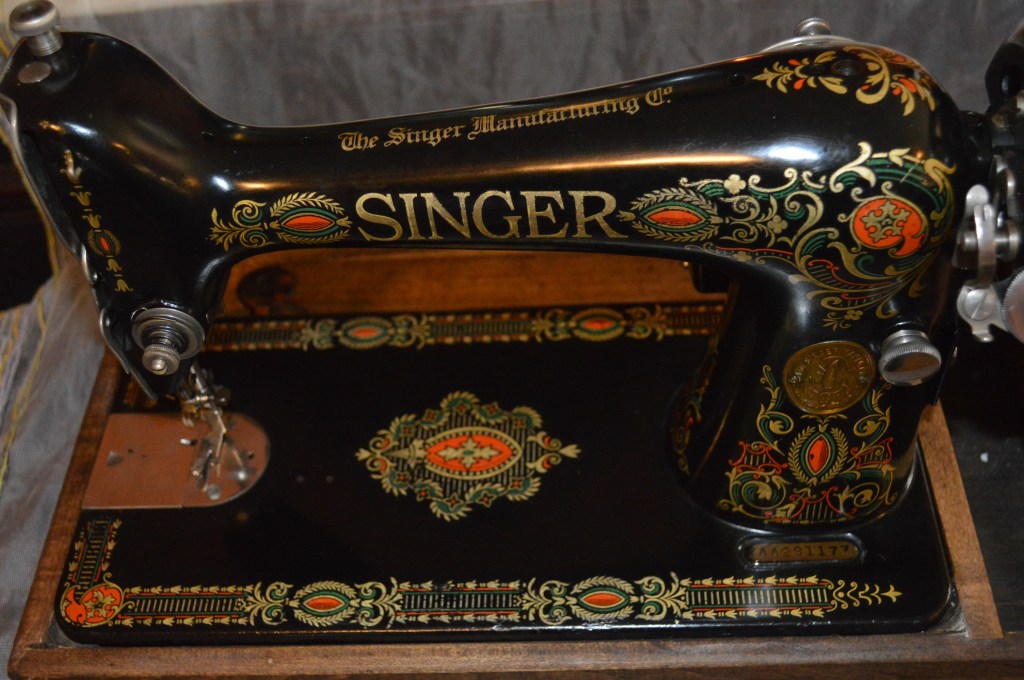
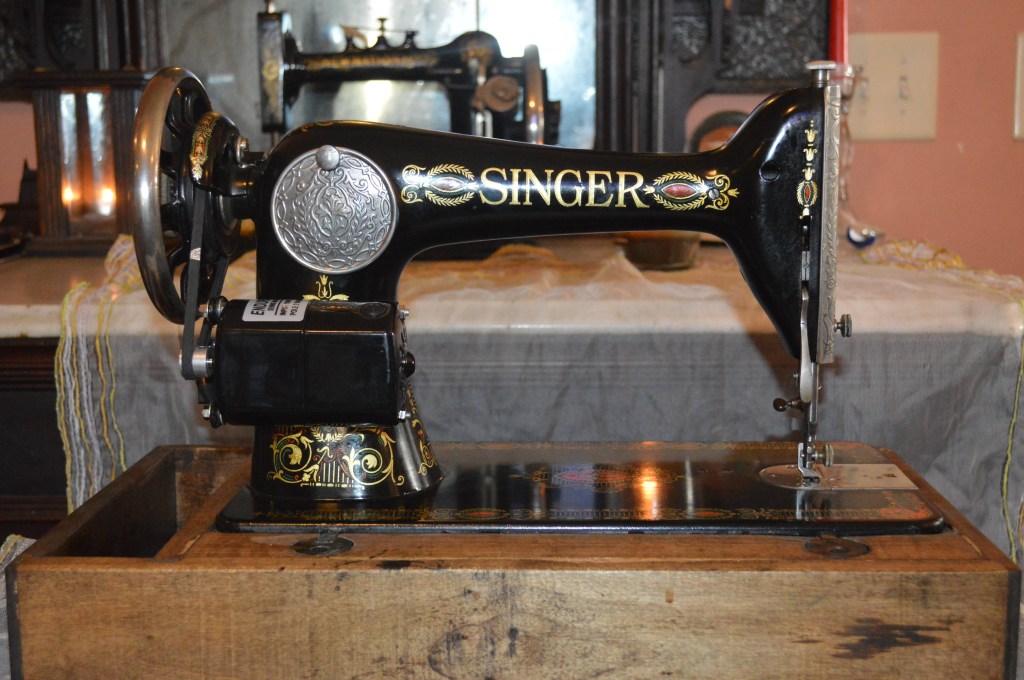
This restoration is for a Singer 66 Red Eye. I’ve been looking to do one of these for a while, but I needed a machine that had decent decals. If you look at the closely at decorative and complex colorful decals, you will see what I mean. There is a lot of detail in the decals on the bed, and decal loss is very noticeable. Although I see many red eye decals, many have significant wear on the leading edge, sewing arm, and on the bed. This is not surprising since the last red eye’s were made 95 years ago. This machine shows some wear, but for 95 years old, the decals are in very good condition, They look a little bit smudgy on the main bed decals, but the pattern is intact and the colors are still very well maintained. Due to it’s age alone, the machine is due for a total restoration. Because my goal is to always keep the original finish intact to the greatest extent possible, I will touch up the decals were practical. The machine will be treated to a new layer of shellac to stabilize and protect the decals from any additional wear. When the restoration is completed, it is going to look great and sew like new.
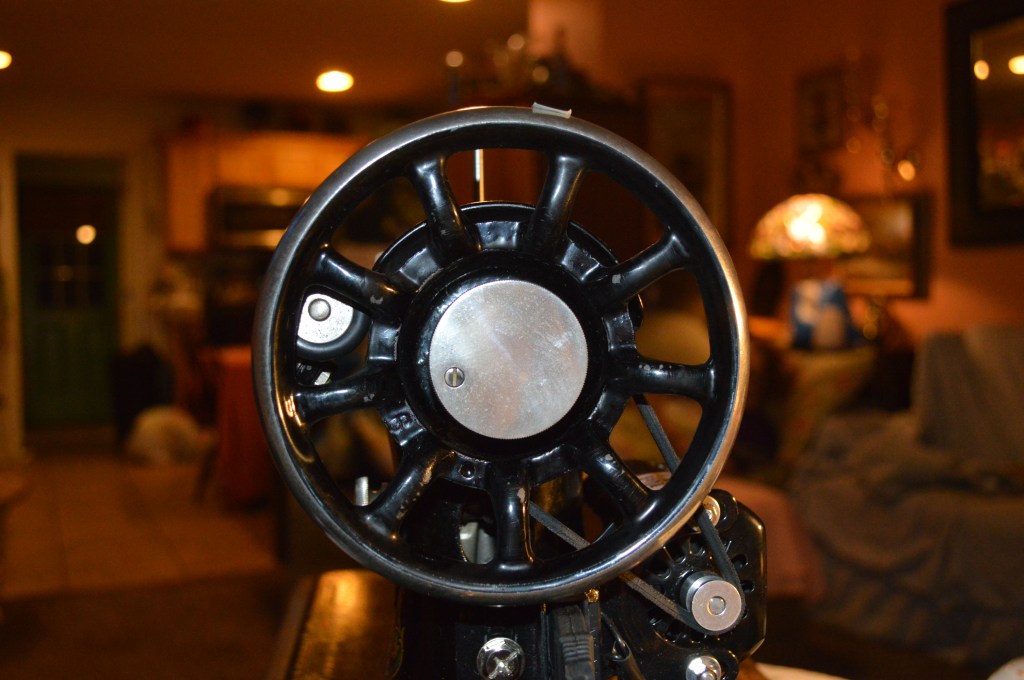
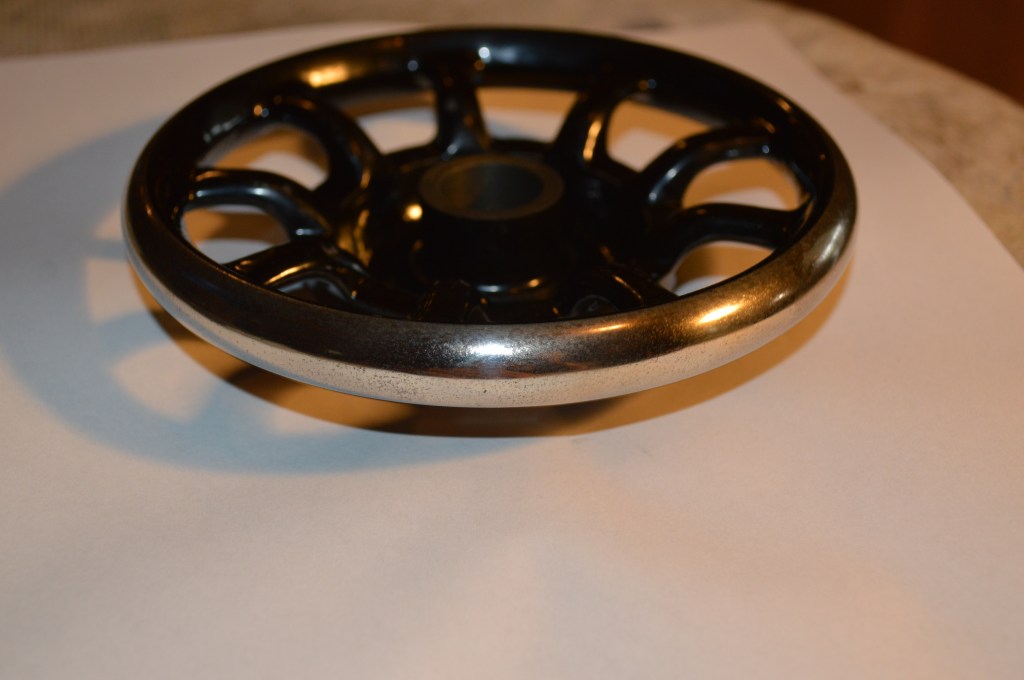
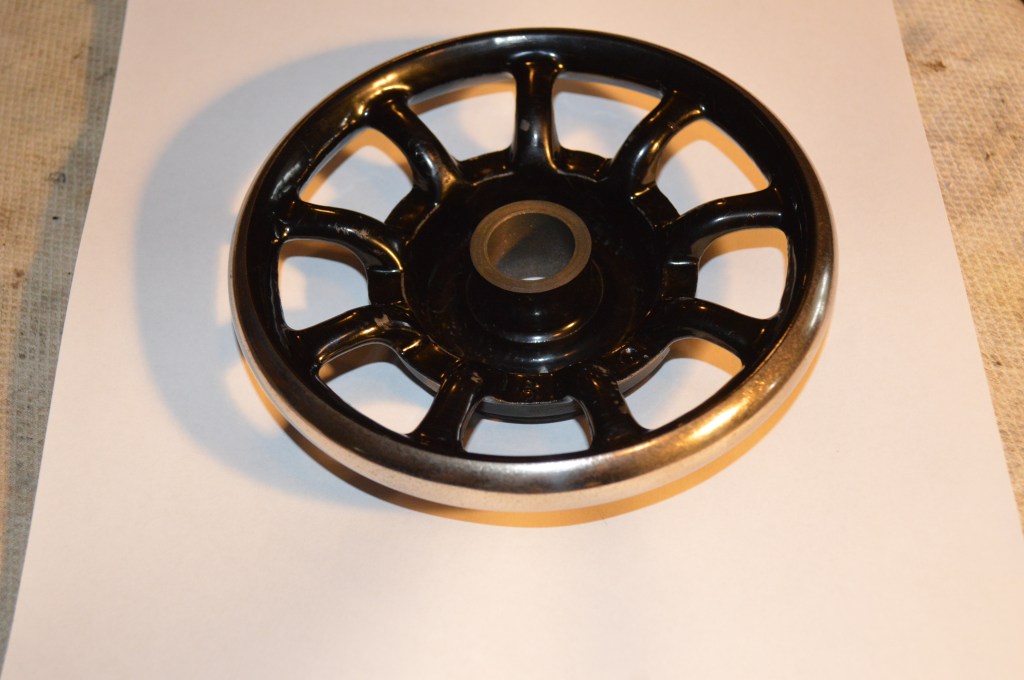
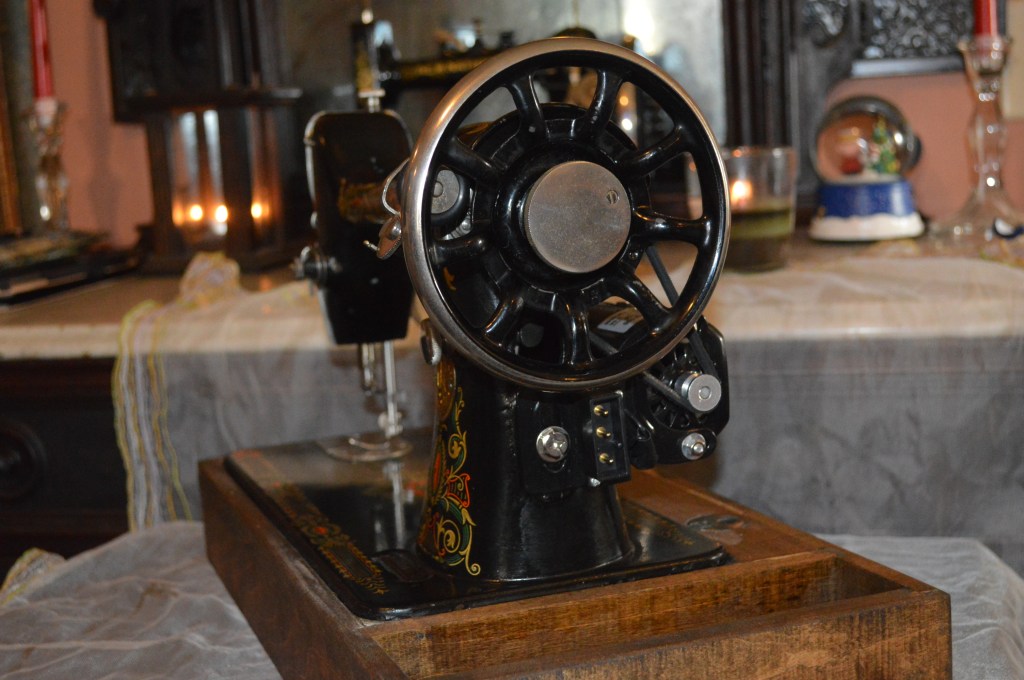
I suspect that this machine spent it’s entire life as a treadle machine. I got it with no motor or light. I will need to “upgrade” the machine with a motor to make it more convenient to use by today’s standards. The machine has some nickel loss on the needle plate and the cover and needle clamp screws, and the balance wheel rim has dulled with age. I suspect that with sufficient time on the polishing wheel, the appropriate patina can be restored. Bear in mind, I always want to keep the machine original as possible so I will focus on polishing these parts rather than replacing them. The gold decal loss will be corrected where the detail is not so fine that it is impractical for me to fix it. I will not attempt any aggressive polishing on the finish for fear of harming the decals. This will require applying multiple layers of shellac to stabilize the finish for long lasting durability. Still, this machine is in very good condition for it’s age, and I will focus on bringing it to it’s best without putting any stress on the decals. I will balance this out by removing any stress on the sewing mechanisms, these will be completely disassembled and restored to like new condition.
This vintage model 66 is a very simple machine. The stitch length is adjusted by a knob. There is no indicator to index a stitch length. I actually like this, it relieves our dependence on a “number”. You turn the dial until the stitch “looks right” for your project. There is no back tack. Folks locked the stitch by holding the fabric at the end of a seam to overcome the feed dogs, or lifted the foot, backed the fabric up, and sewed over the stitch to the end. The tension dial is also a very simple affair, again there are no numbers to rely on. Like the stitch length, without relying on a number on a dial, you turn it until the tension is perfect. I think that these “lack of features” has a benefit in focusing the user on the effect of making adjustments, rather than relying on a number on a dial… it provides a natural and “infinite” adjustment range.
I love restoring machines of this vintage because their construction is made with thick heavy parts that in my opinion are over built. It seems to me the machine was made to last forever. The build quality of this vintage 66 is second to none. It amazes me that the precision of machining is so high. All it needs is lubrication and occasional cleaning to keep the machine sewing smoothly. There are really no parts that should ever need replacement. These machines are engineered with adjustment for all parts that may wear. Occasionally, a spring will need to be replaced on the tension take-up or rge spring on a bobbin winder might wear out, but these parts are still available and will be for a long time to come. The action of these machines is something you need to feel to appreciate. Despite all of the rocking and oscillating parts that comprise the drive mechanism, turning the balance wheel by hand is effortless and smooth… amazing. Properly tuned, this machine will produce a straight stitch that will rival any machine made today… or then. So, lets begin the restoration.
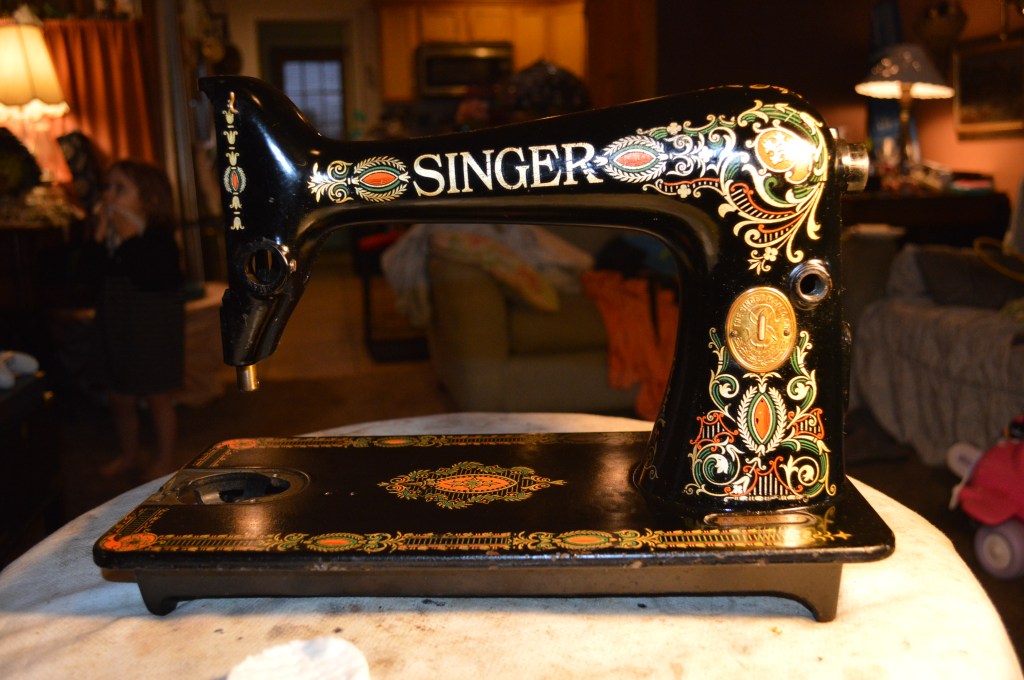
Starting the restoration, I like to document the process for a before and after comparison. Here is the machine before restoration…

It’s got it’s share of dirt, but the potential shines through. I have decided to disassemble the machine before I attempt to address the cosmetic condition. This starts with the assembly in the sewing machine head.

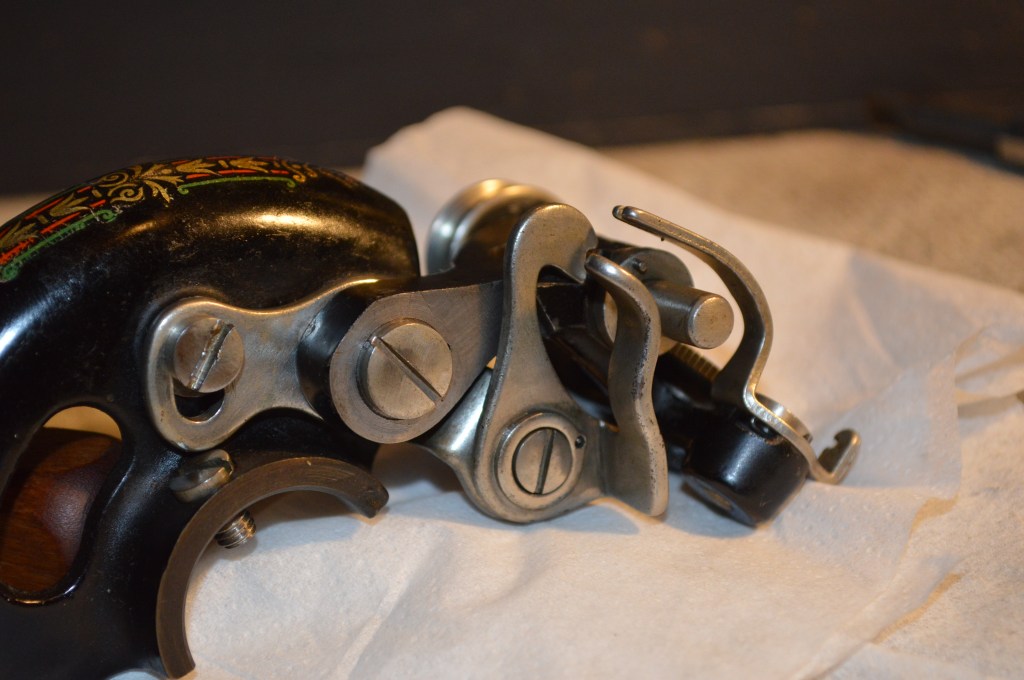
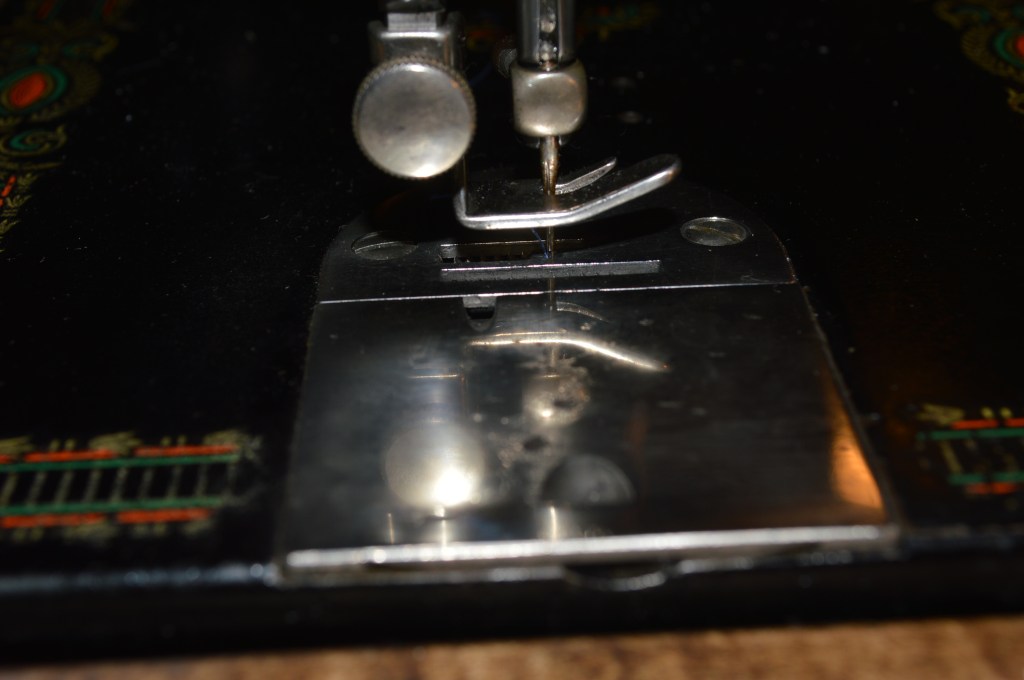
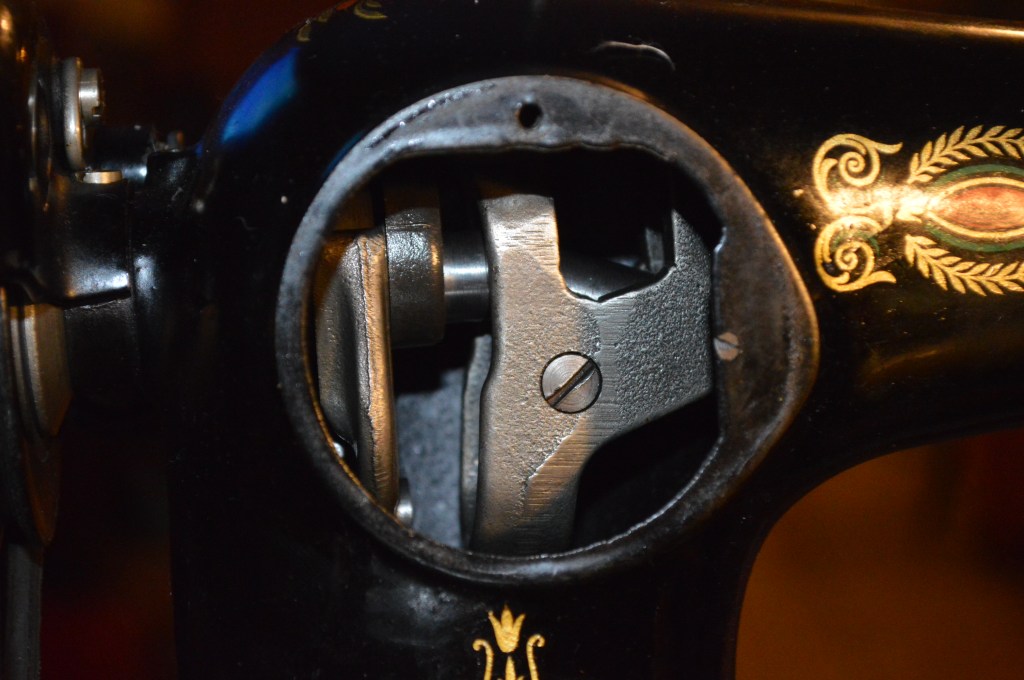
Next the feed dogs, thread clearance mechanism, and the hook race is removed.
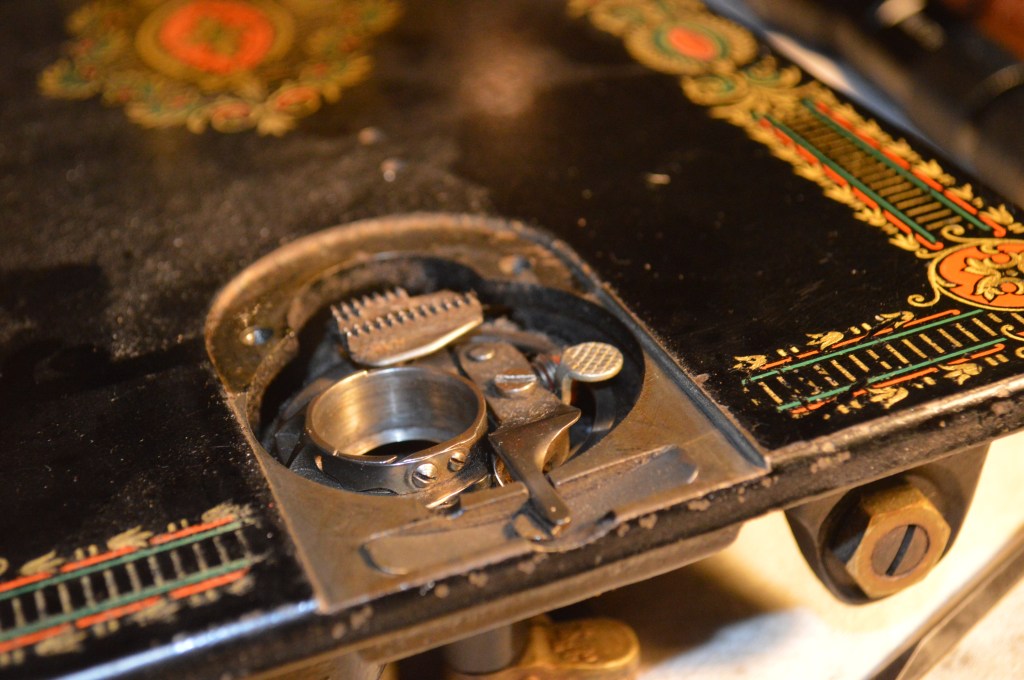
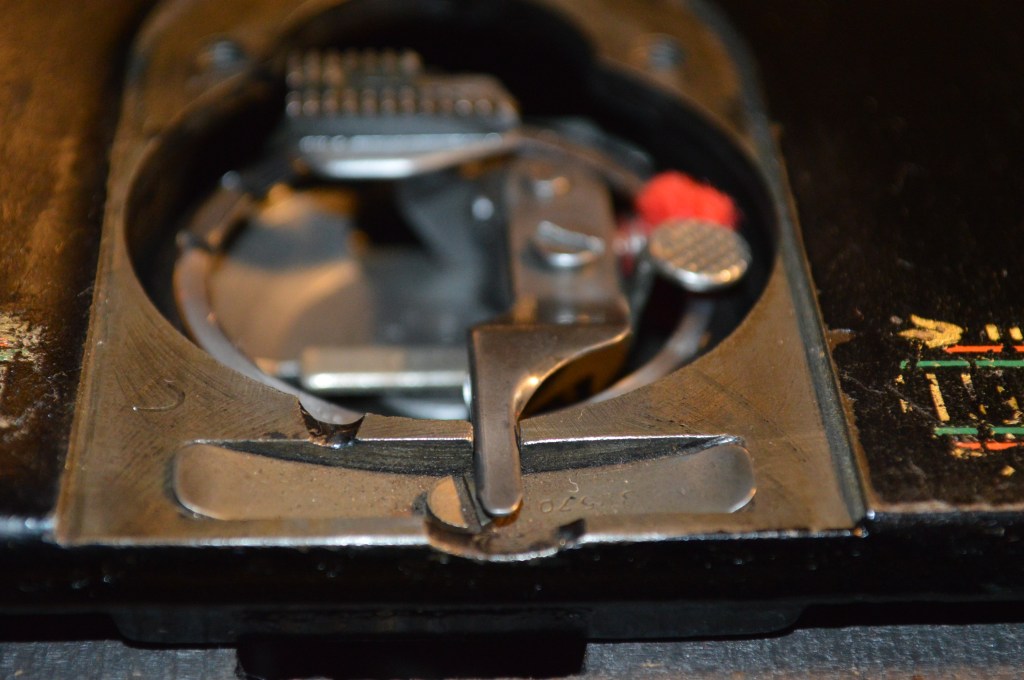
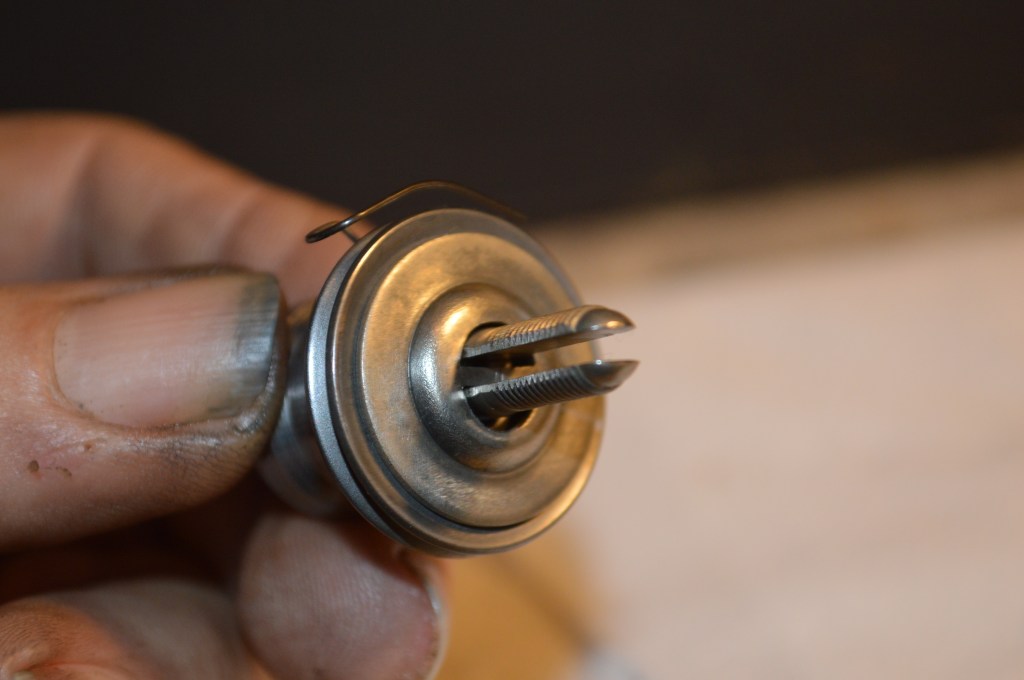
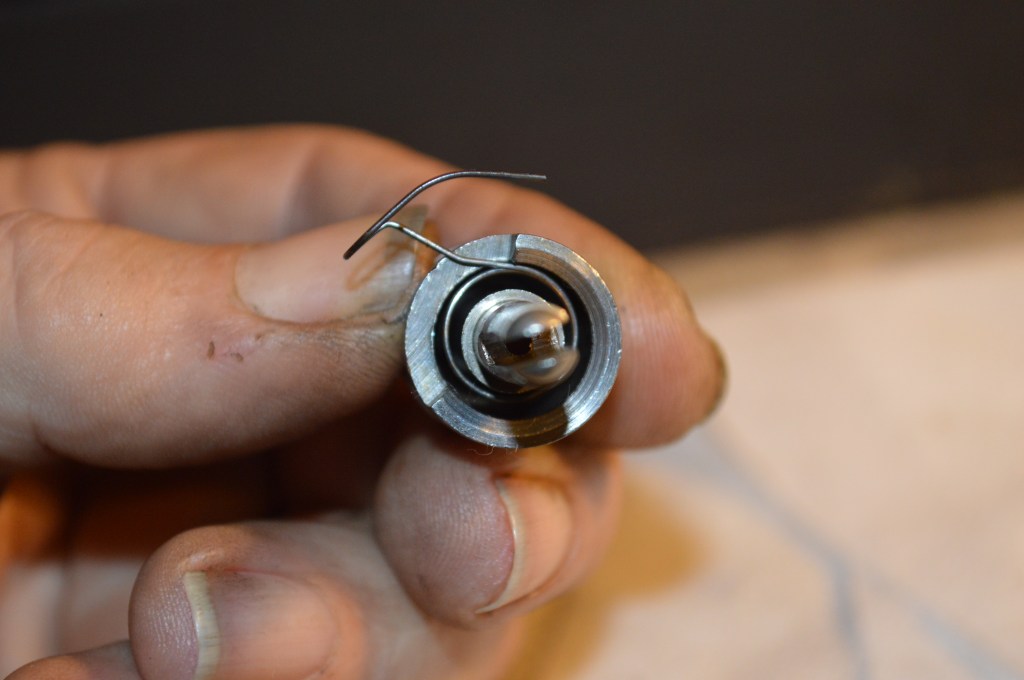
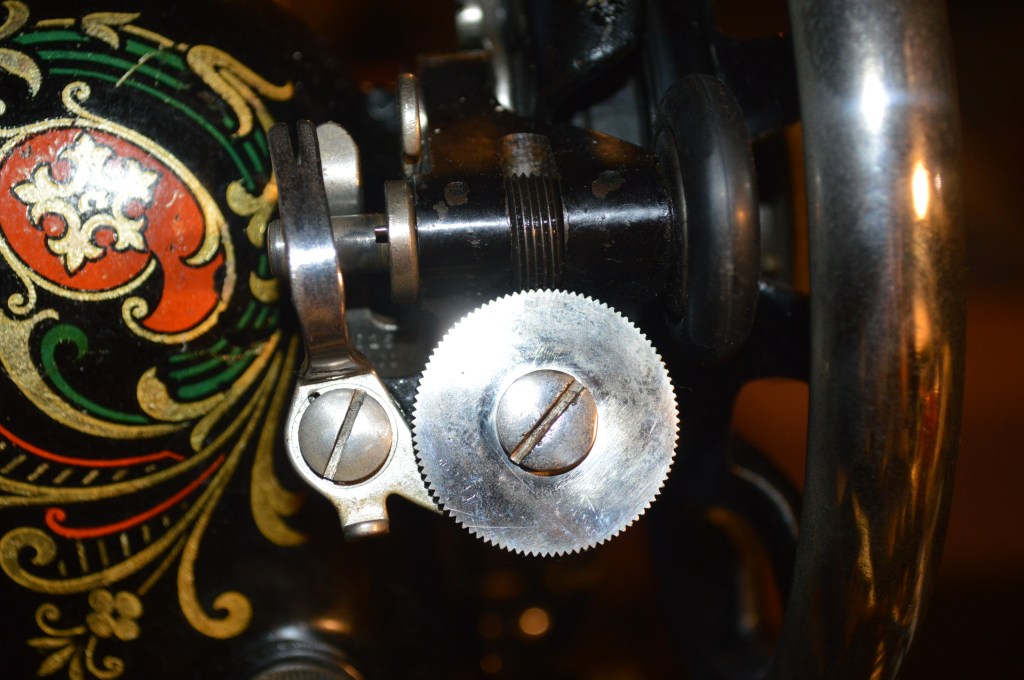
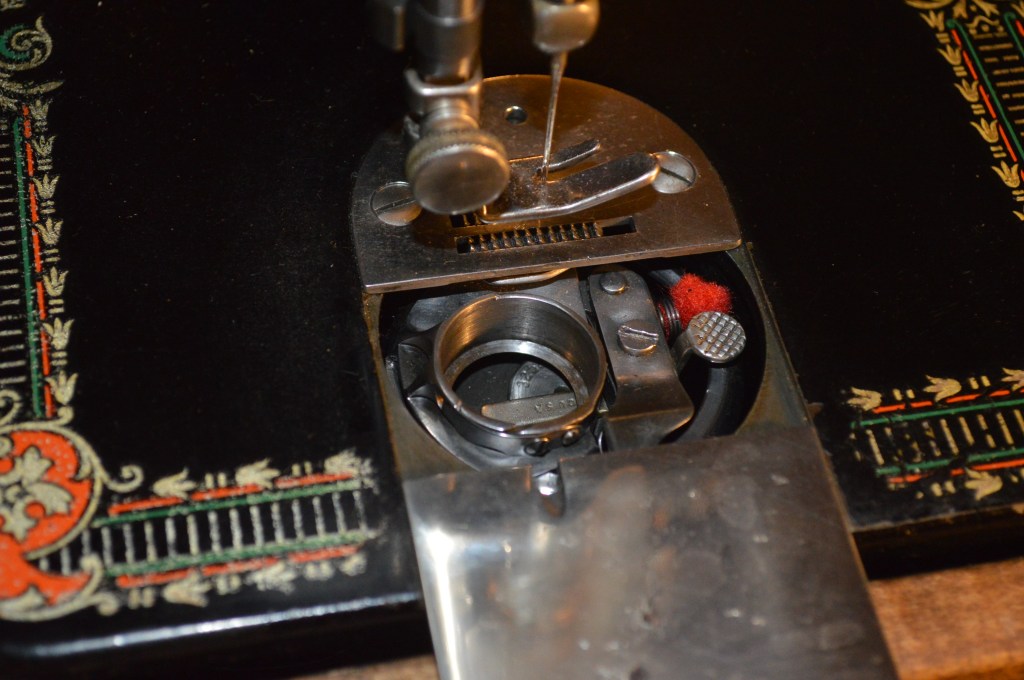
But wait… If you look at the picture above, you will see the thread clearance mechanism. It is to the right of the bobbin case. This is an important part so I want to spend some time and talk about this mechanism. Lets look closer at the mechanism… There are two things I want to discuss. First, notice the small piece of red felt, it is at the 11 o’clock position above the small round button tab, This is often removed in error or worn away. Because many machines I see do not have it, I will show you how this is restored. But before we get into that, look at the screw in the center of the mechanism. I will refer to this as “THE SCREW THAT SHALL NOT BE TURNED”. In short, do NOT attempt to disassemble the assembly further or disturb this screw. Do not loosen it. This screw holds the thread clearance adjustment. The mechanism is spring loaded. If the screw is loosened, this clearance will be lost and it is very difficult to re-establish. In short, leave this screw alone. Of course, if it is necessary for proper adjustment, I may turn this screw, but I have the proper gages and know how to make the proper adjustment. You can adequately clean the assembly with acetone and then add a drop of oil in the mechanism. This is all the cleaning it needs, and the sewing performance and stitch quality depends on proper adjustment… That’s all I’ll say about that. The red felt is a different story, we do want to fix that so lets look at how this is done.

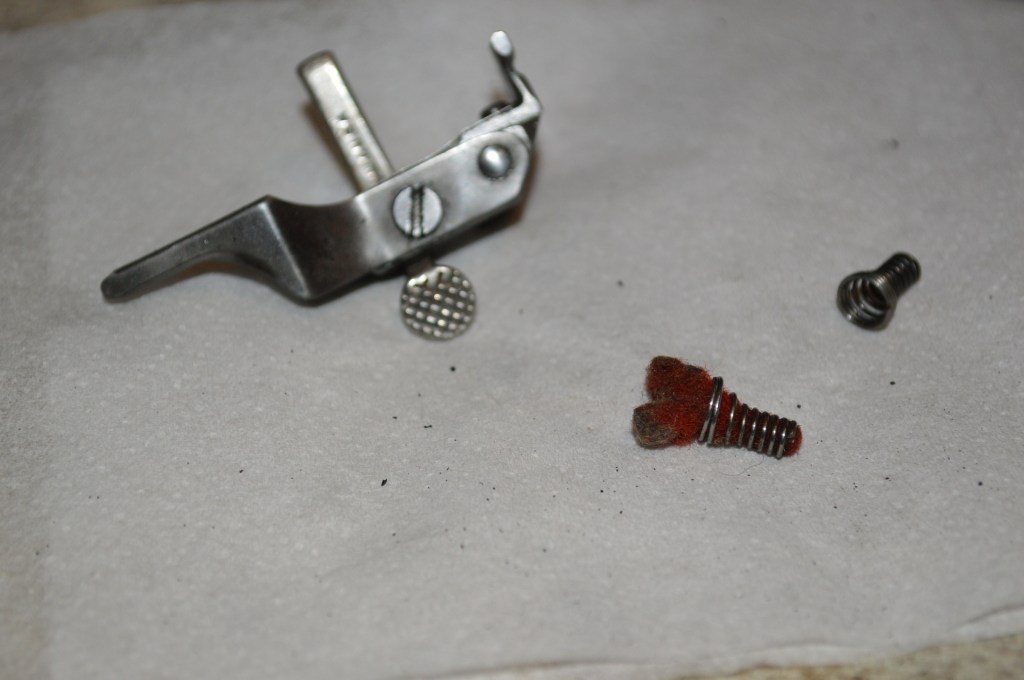
Here the part has been cleaned to show better… also “the screw that shall not be turned”… looks like someone already did 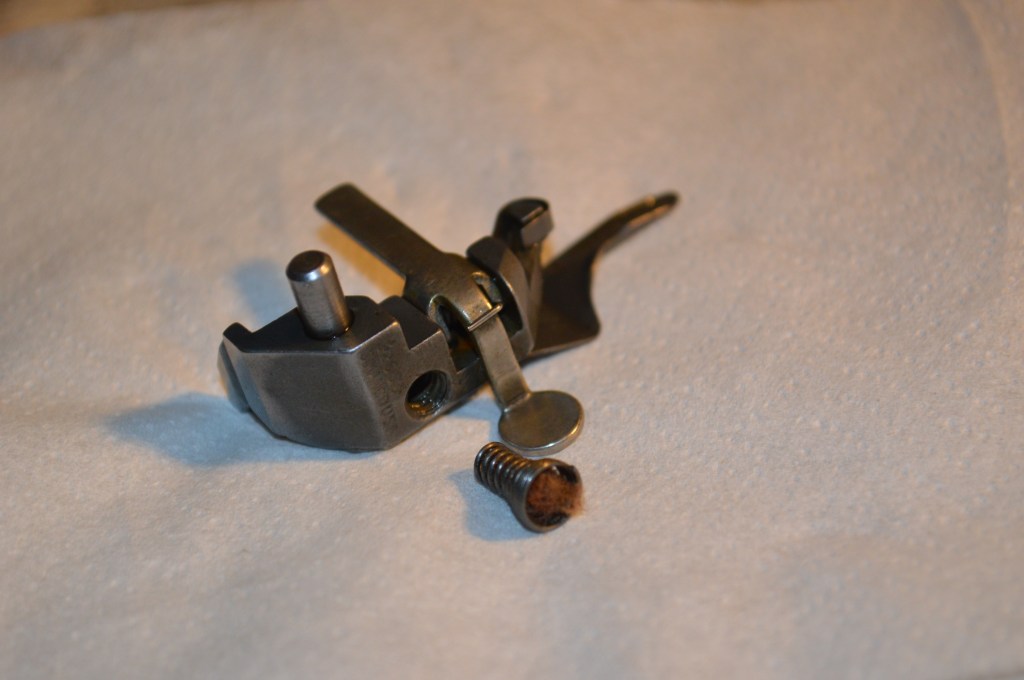
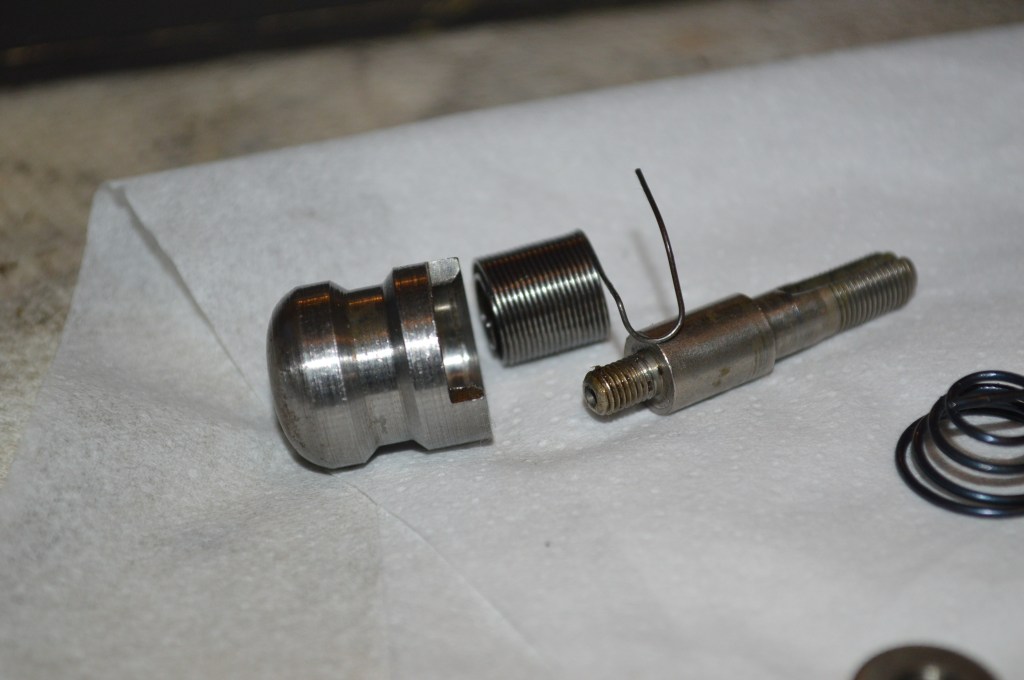
The felt is actually held in a “spring screw”… yep, that spring it fits in is actually screwed into the assembly for servicing… brilliant. Only one problem though, you can’t get a replacement felt anywhere I know of. Fortunately, I have a felt in good condition that I can use as a pattern. The felt is supposed to look like this. I got it from an old parts machine. I am not going to use it to replace the felt in this machine, but I am going to use it as a template to make a suitable replacement. I have already removed the old felt and you can see the felt holder spring from this machine in the picture.
The felt is not difficult to make and I am going to show the steps I use in a series of pictures. Dimensions are approximate and I will caption the pictures step wise.
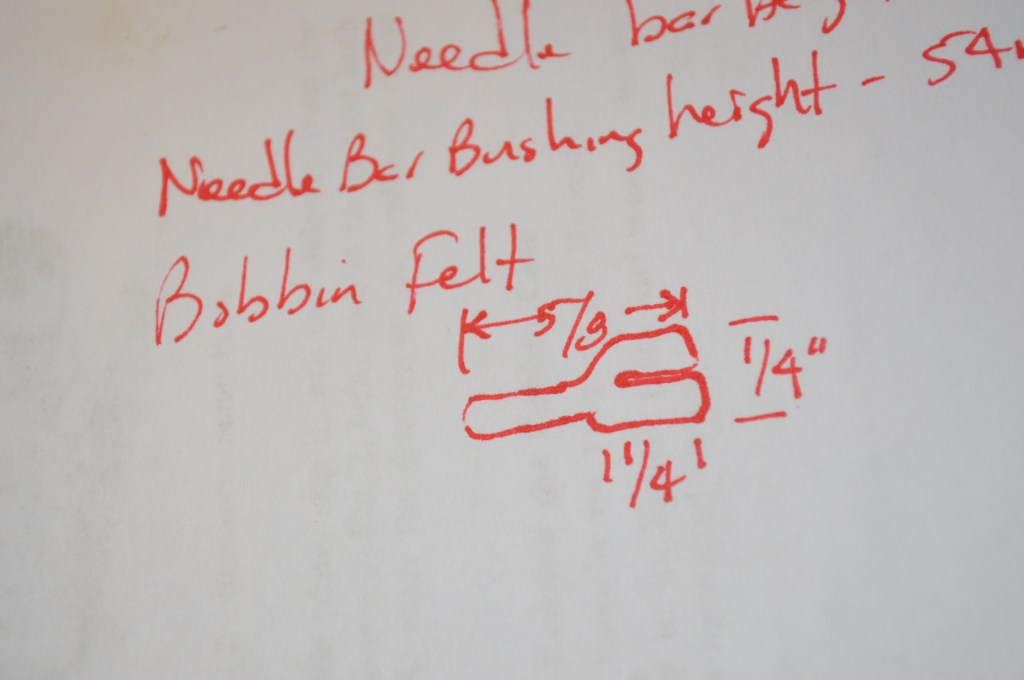
Dimensions of the bobbin felt replacement… +/-, it isn’t critical 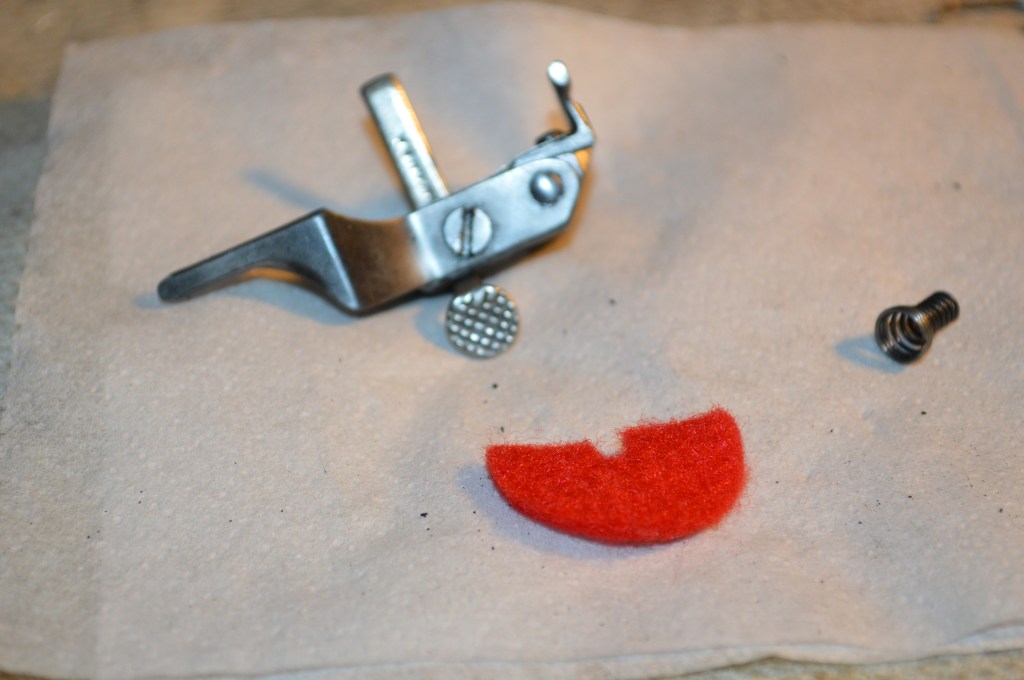
Cut a spool pin felt in two 
Cut a square to overall length and notch it in the center… there is some trial and error to get it right. 
Cut it roughly to this shape. Notice the bottom is wide 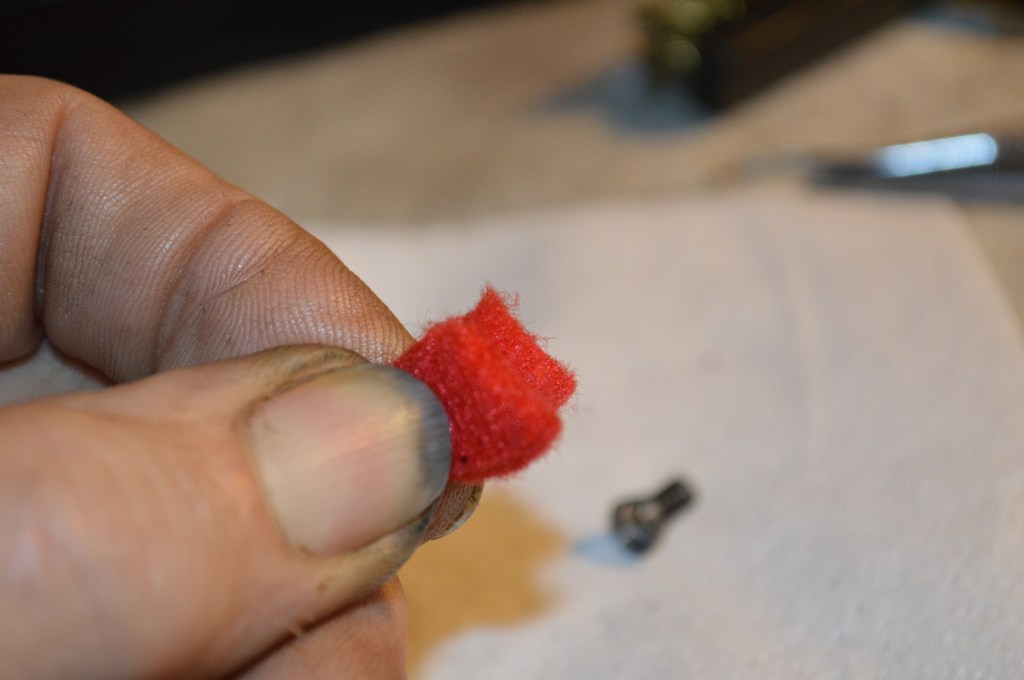
When it is folded over, the “ears” are formed… 
Roll the bottom into a tight “tube”… and screw it clockwise into the spring holder. It helps to add a drop of oil to help compress the felt and it aids in screwing the felt into the holder 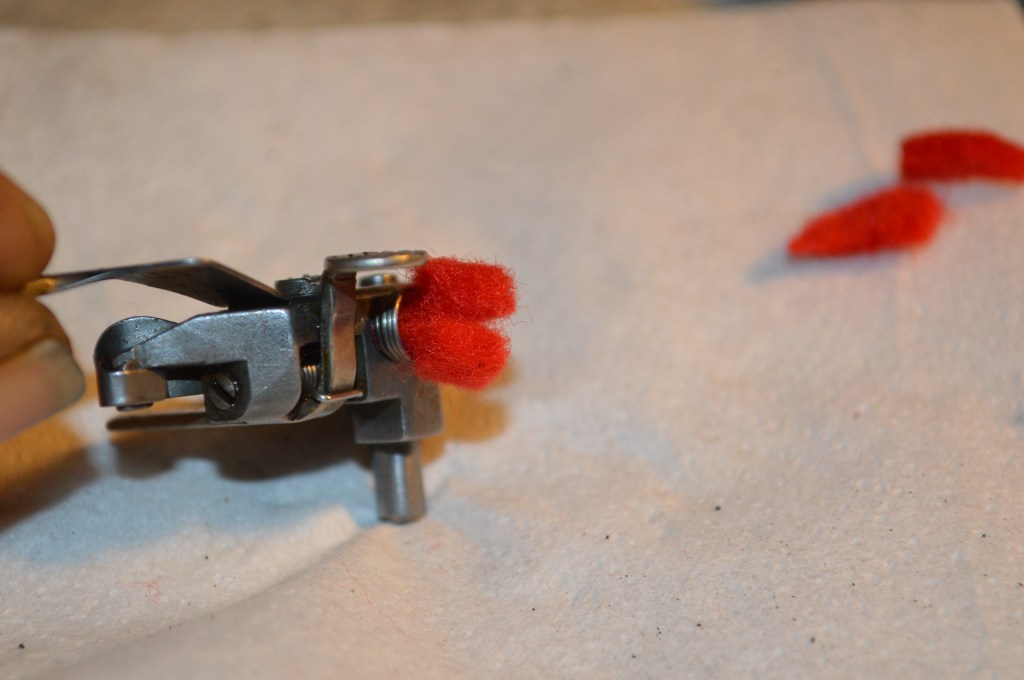
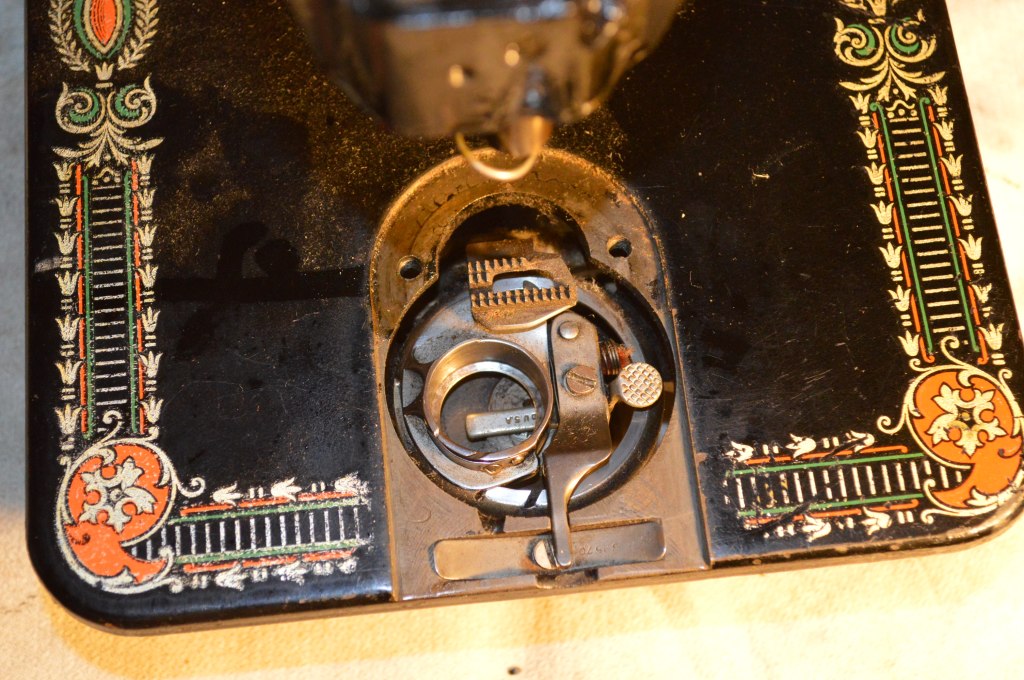
Reinsert the spring holder into the assembly. One “ear” of the felt at 12 O’clock and the other ear at 6 O’clock position
Then t he felt is oiled… that’s its purpose, to oil the top and bottom of the bobbin race rim The felt should look like this when the parts are reassembled.
Top 
Bottom
Now that we have gone to all that trouble, I need to tell you that later 66’s omitted this felt entirely. Did they decide that it wasn’t necessary? I don’t know. Perhaps it was a cost saving measure? I don’t know. Did we just waste a ginormous amount of time? I don’t know… you decide. I figure if it is there, it belongs there for a reason, and in a complete restoration, if it is missing it needs to be replaced. To be honest with you though, it does provide a film of oil that is listed in the later models as a maintenance oiling point, so I do think it is worth restoring it.
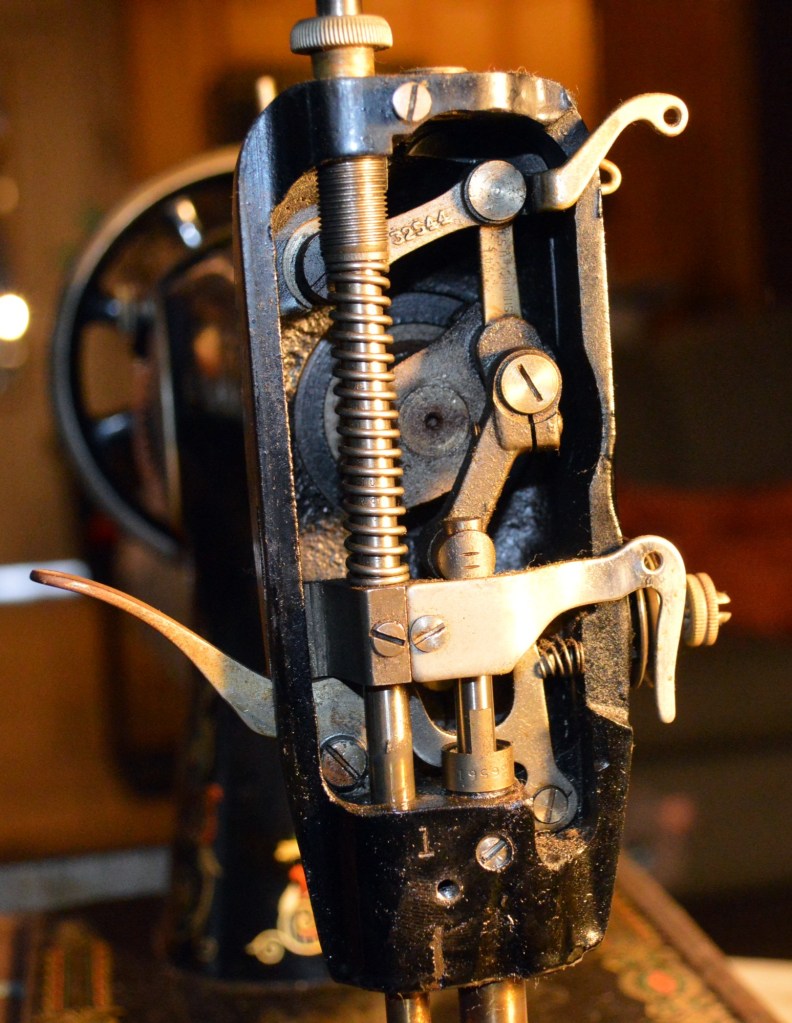
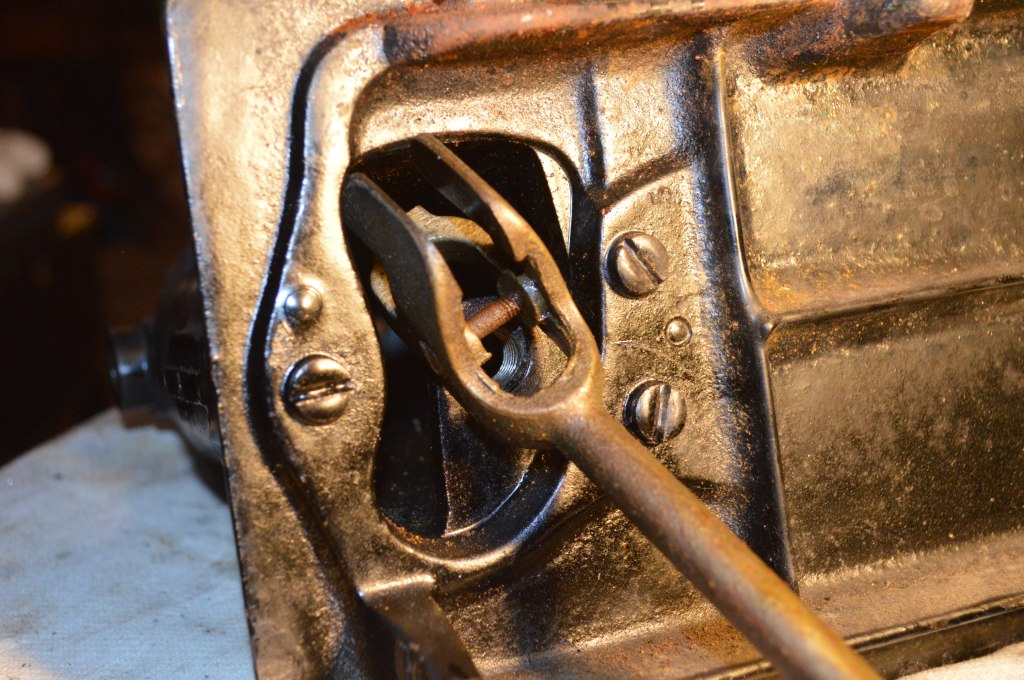
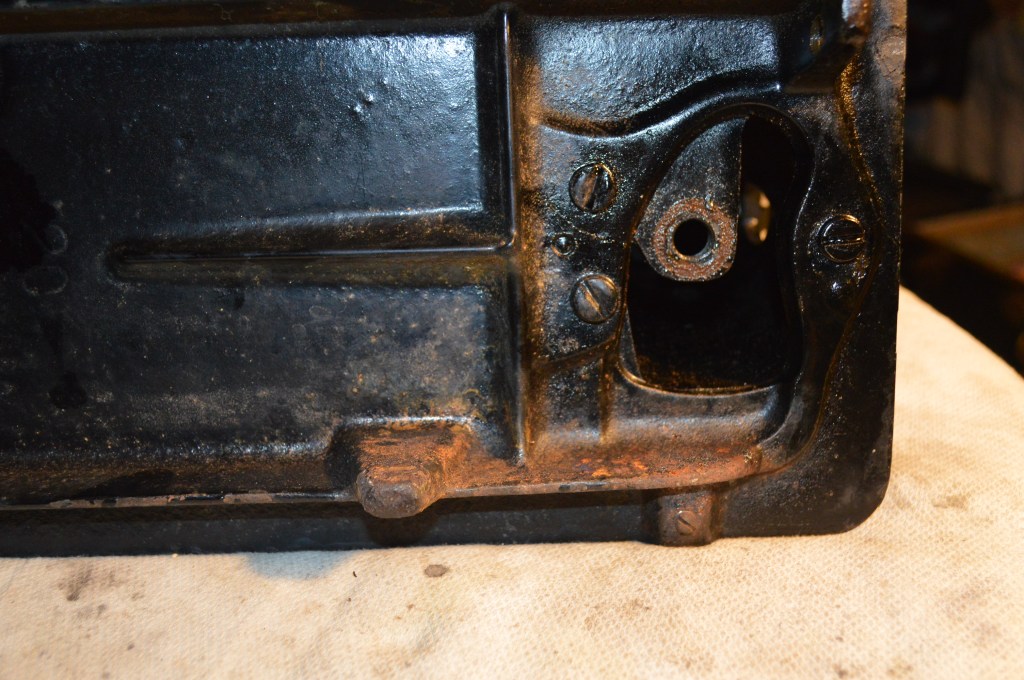
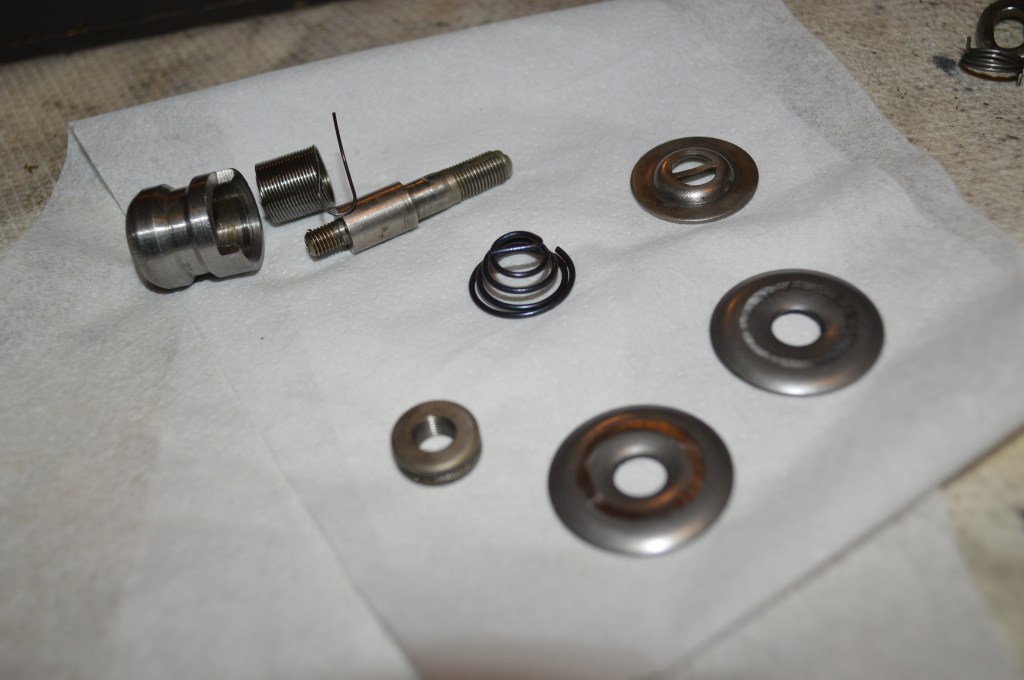
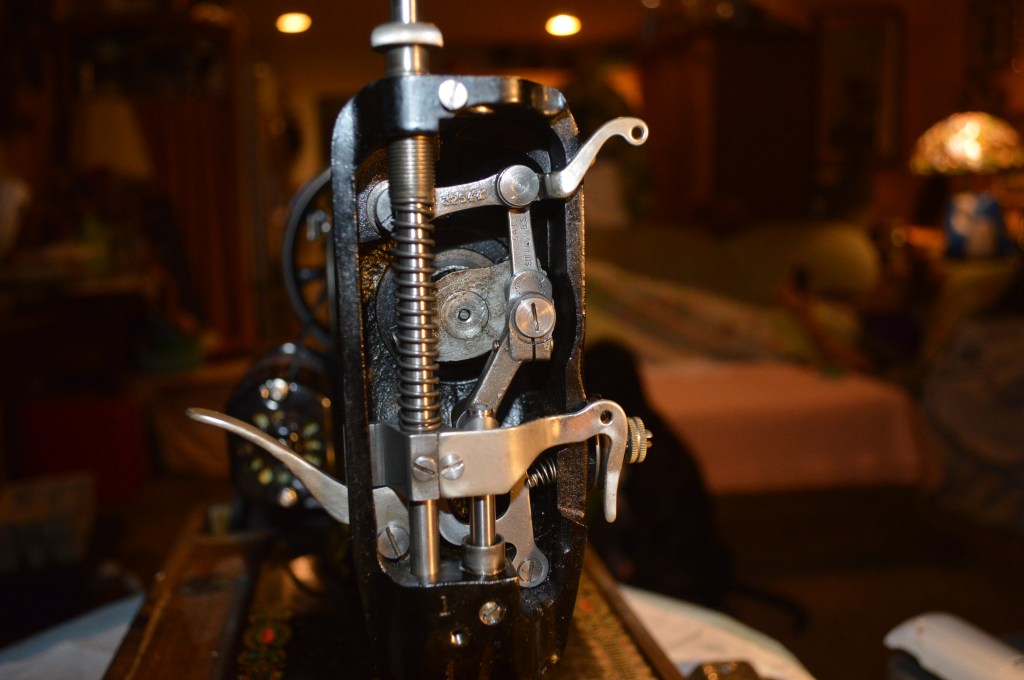
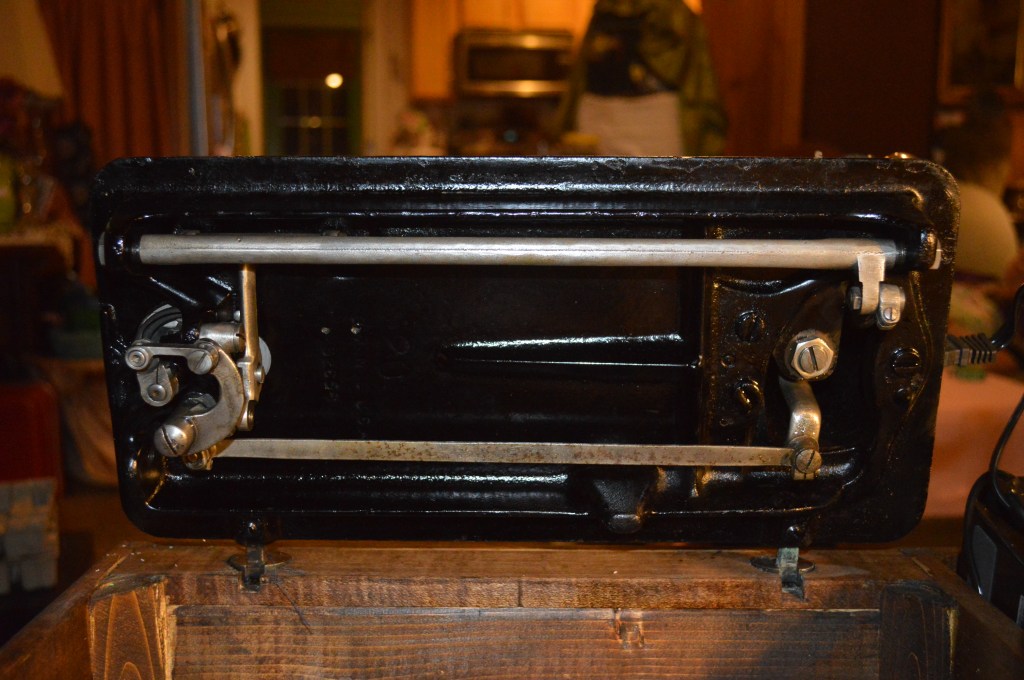
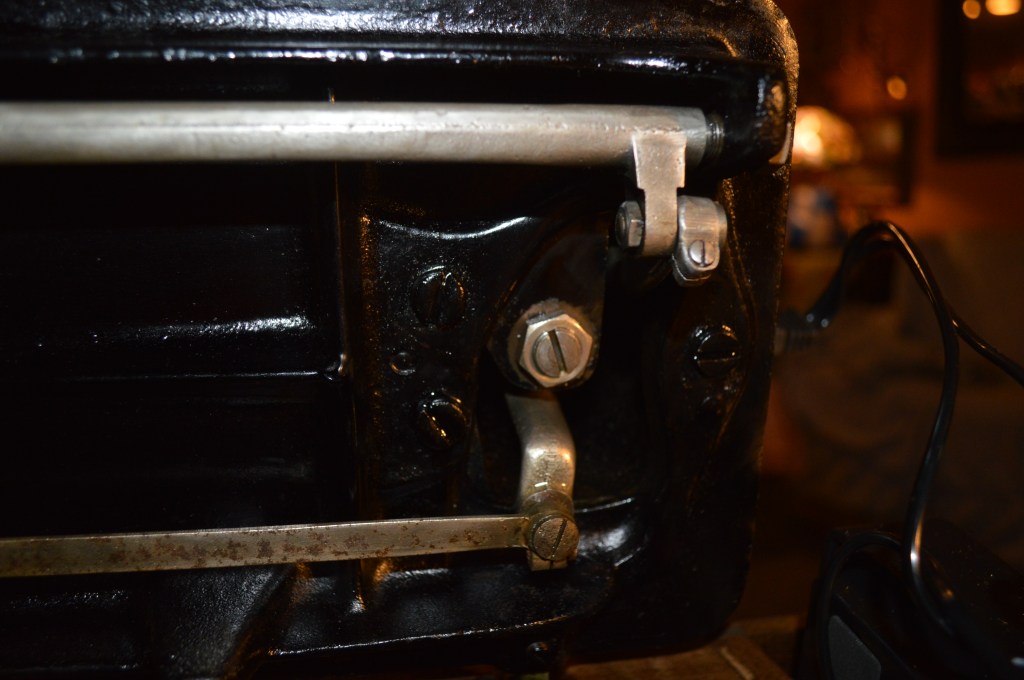
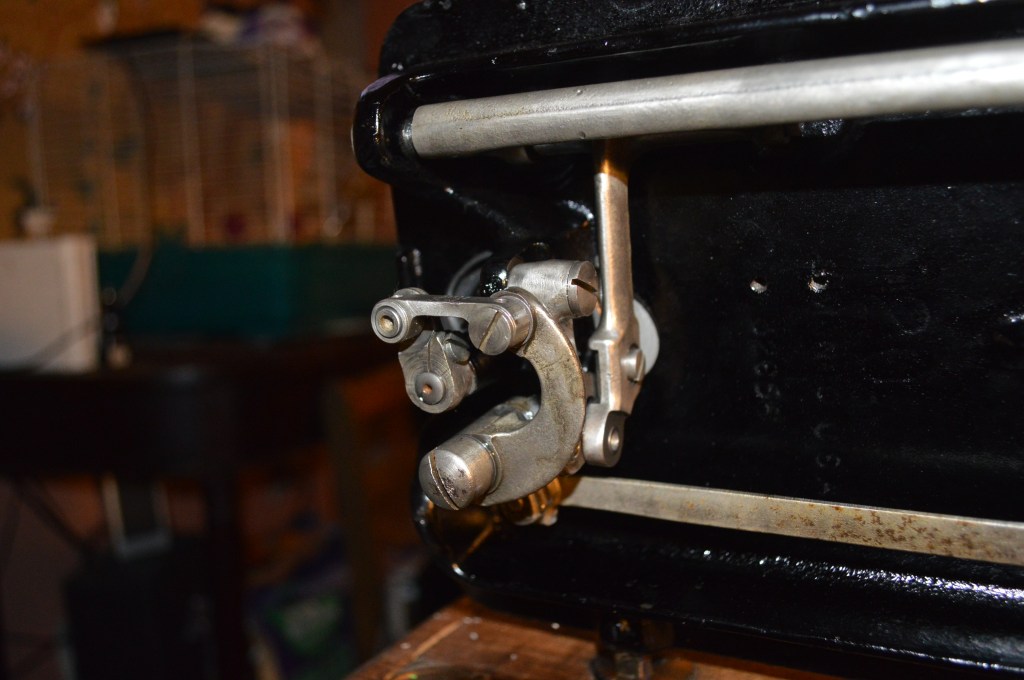
Moving on to the disassembly, the sewing mechanism under the bed is removed. This includes the stitch length fork and the feed dog rocker shaft.
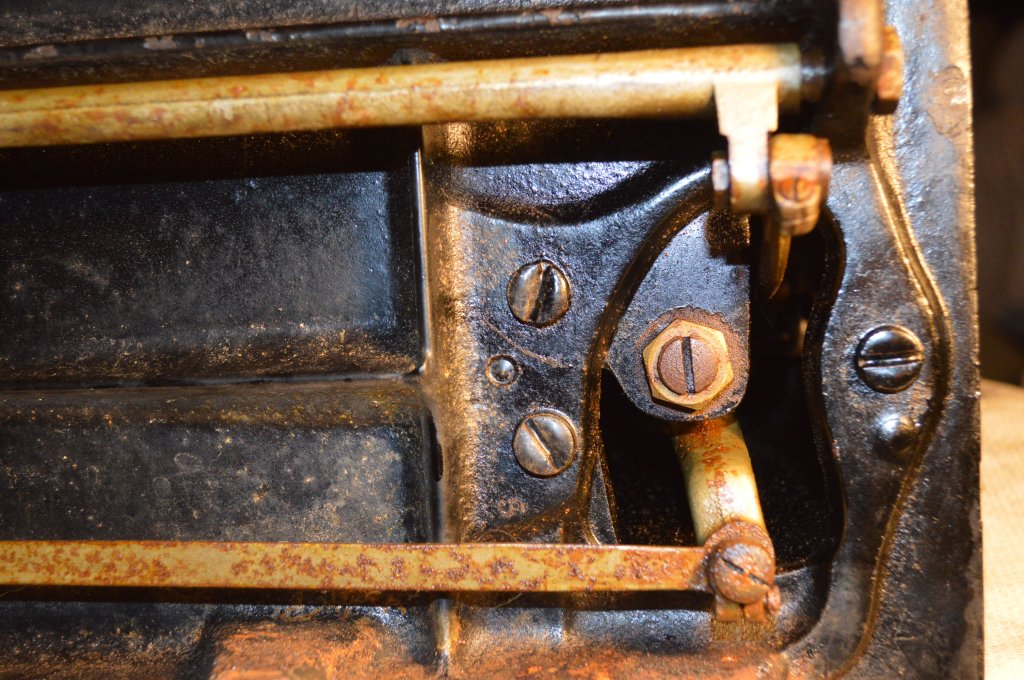
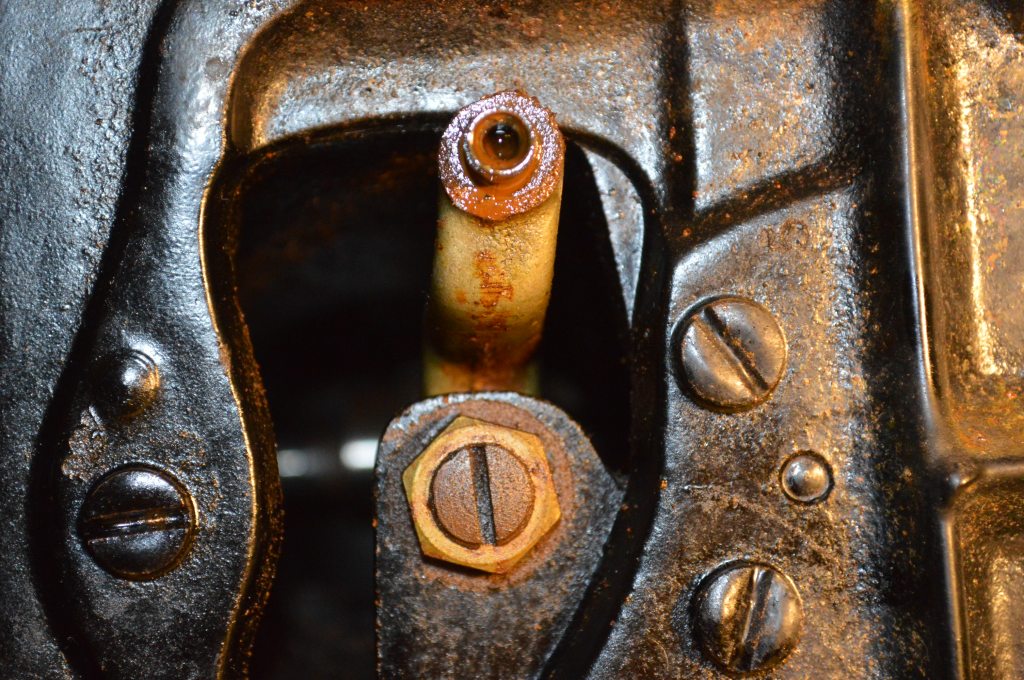
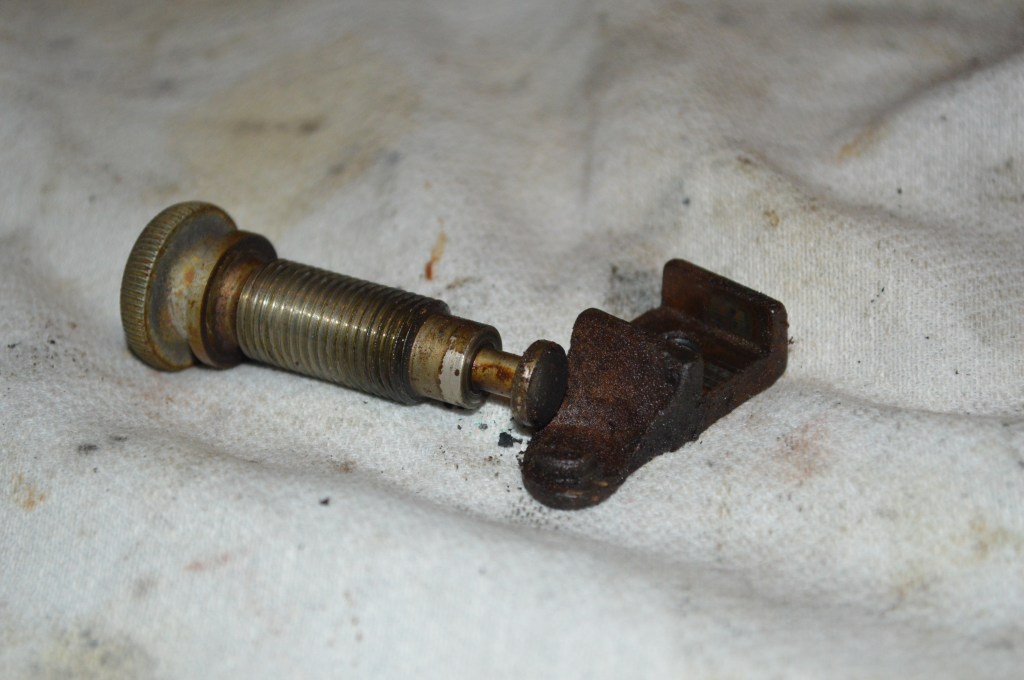
The stitch length adjustment screw, and feed dog shaft are in the pillar and they are removed and the parts shown below.
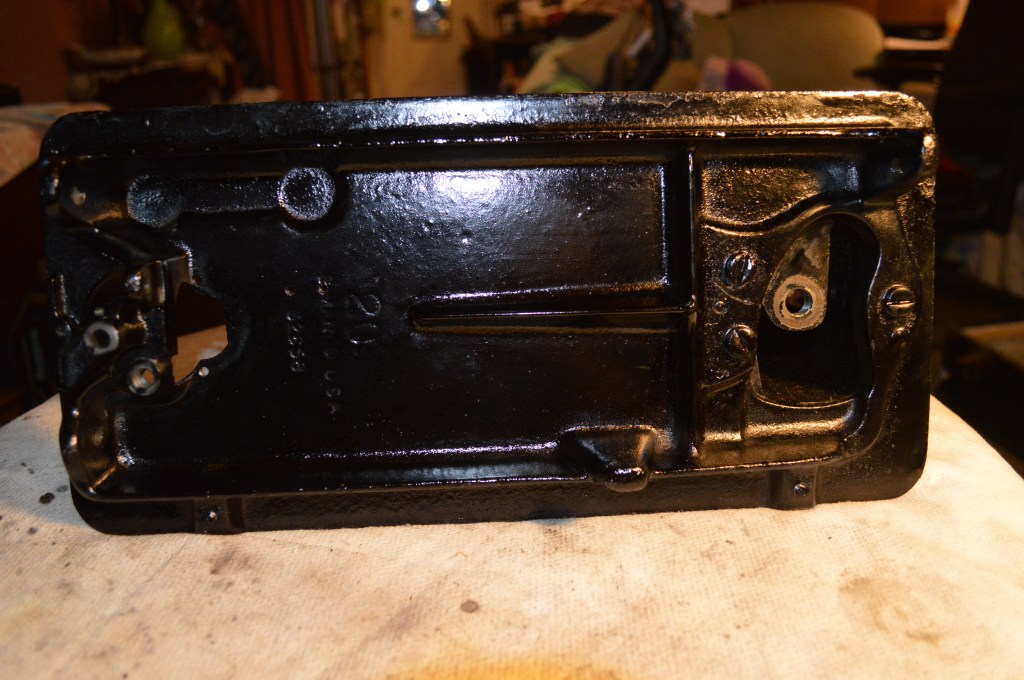
With all of the parts removed from under the bed, it is a good time to retore and repaint the underside of the bed. The paint I use is made from a home brew recipe of lamp black, alcohol, and shellac. It is the closest match I have found yet… which reminds me, black is not just black. The color of black on a Singer sewing machine is deep black. Every commercial color of black I’ve tried has a gray color in contrast to the color of black on these machines. This includes Krylon, Rustoleum, Testor’s, Grumbacher, Duplicolor, yada, yada, yada. Thus, they are not suitable for paint matching. This paint formula is. First, the bed is cleaned and then repainted.

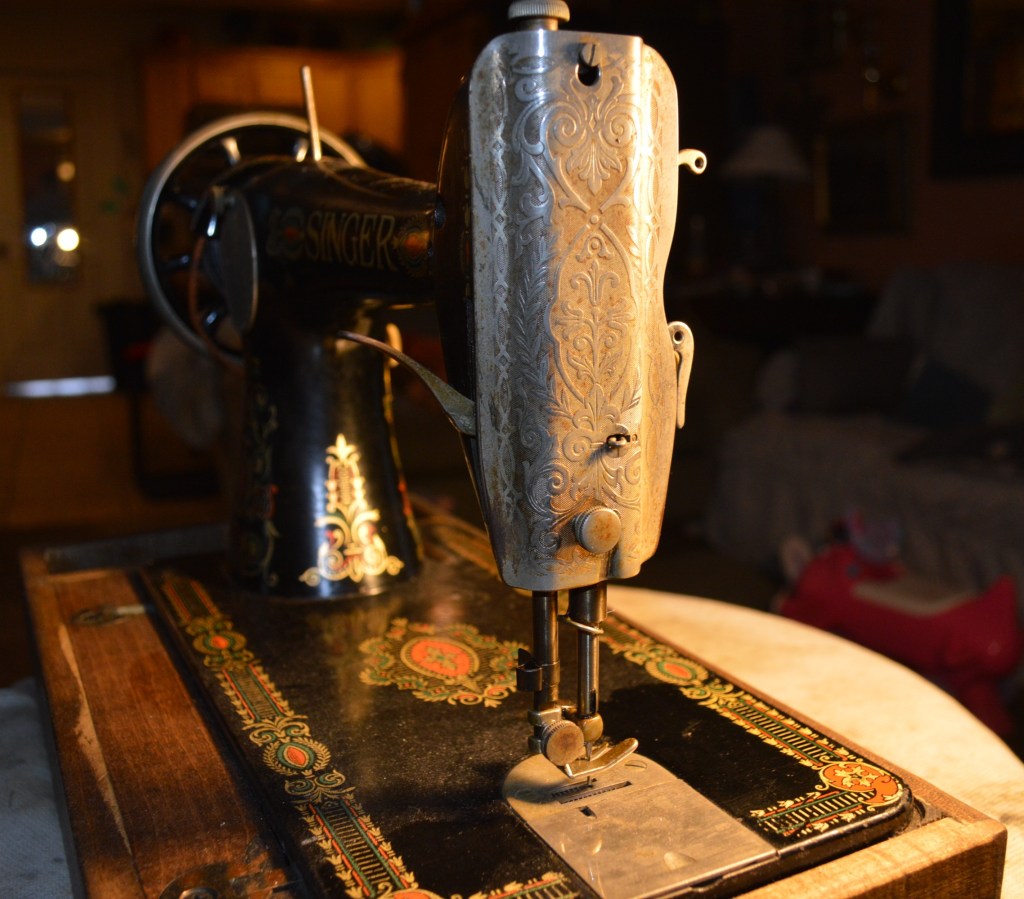
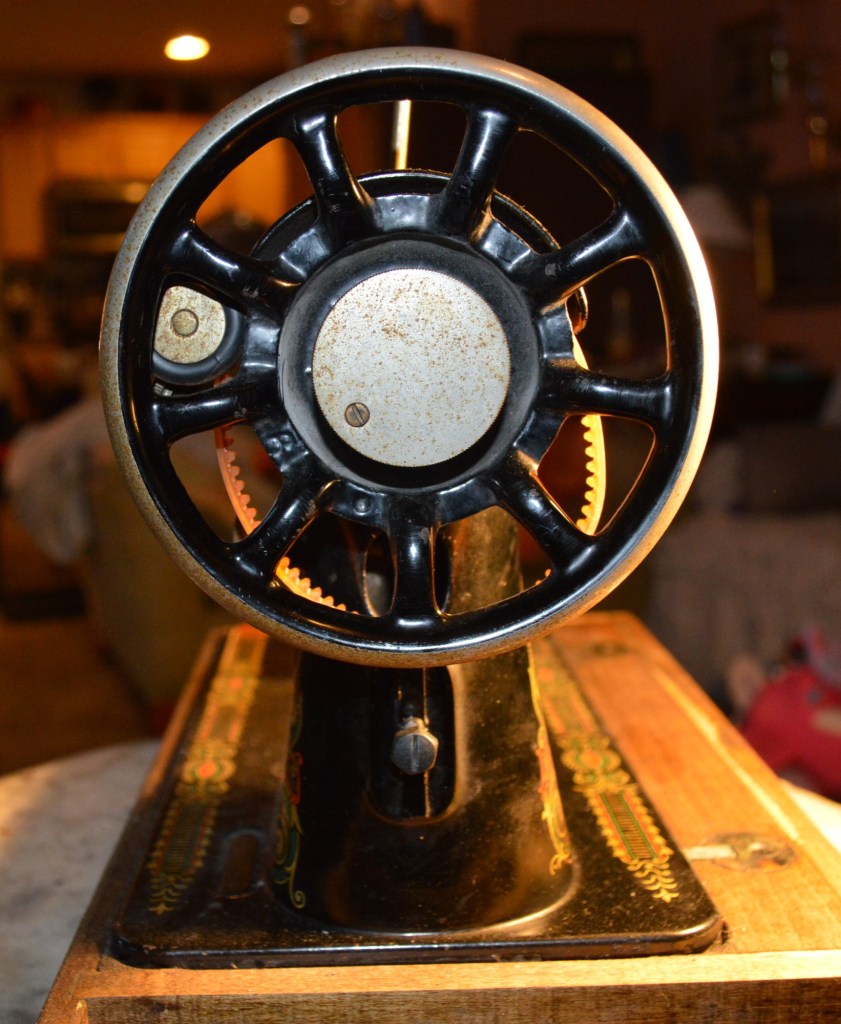
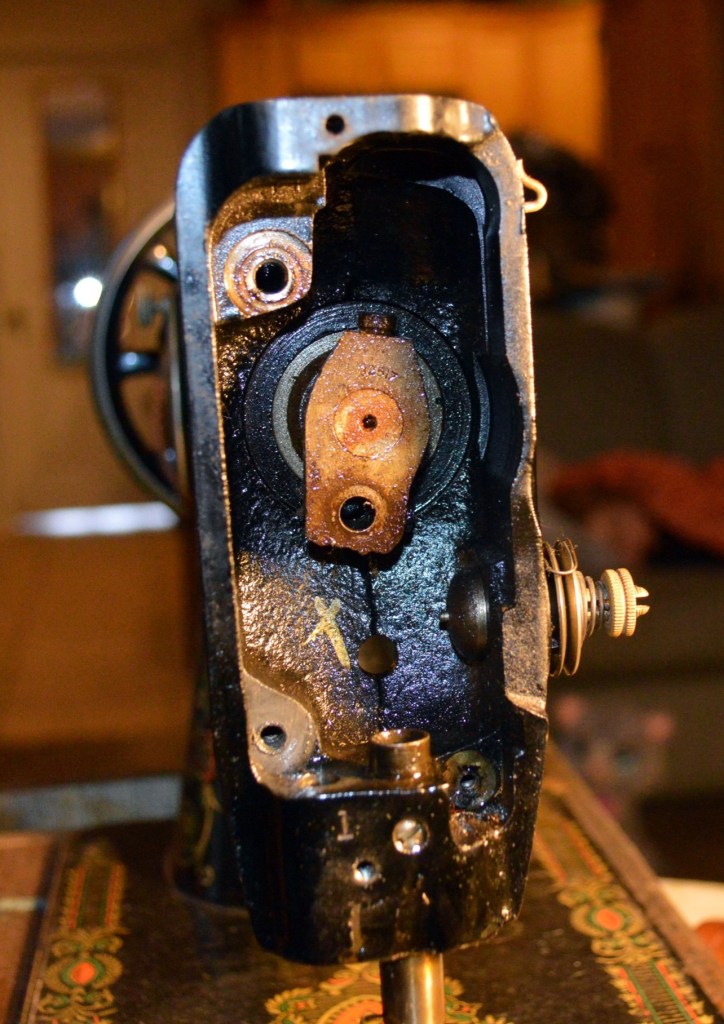
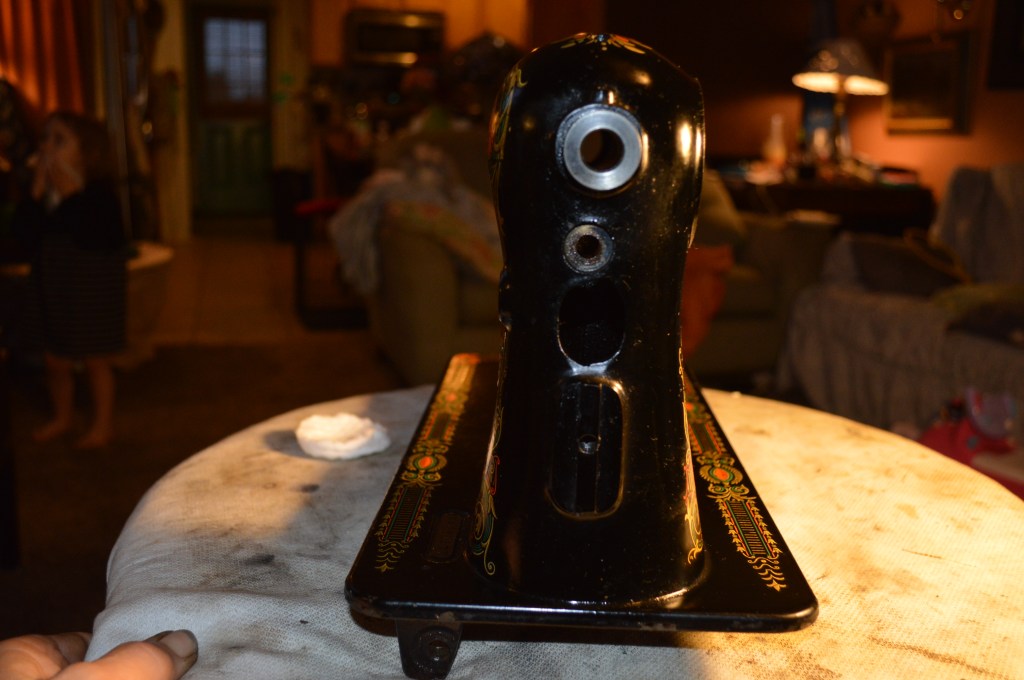
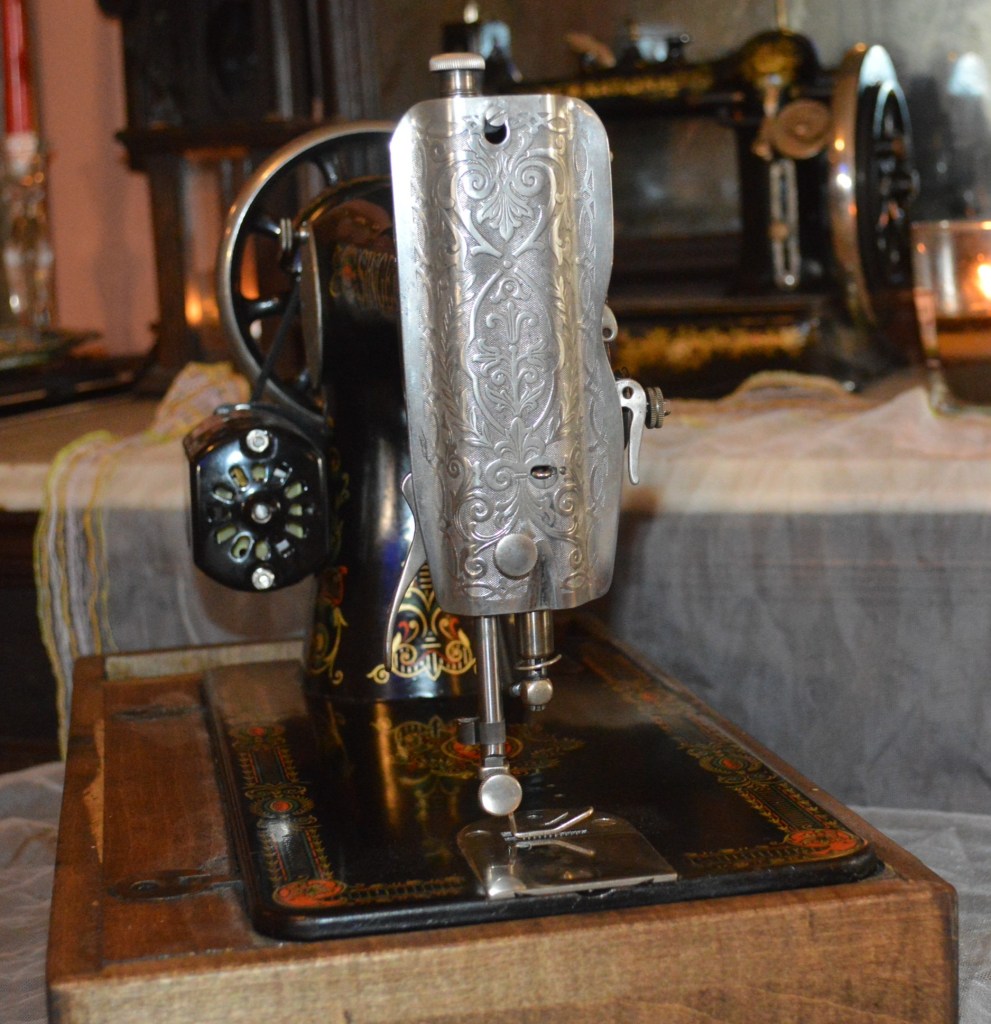
Moving on, the top arm shaft assembly is removed. Word of caution here… Do not attempt to drive the shaft out of the machine without first removing the balance wheel bushing. You may damage something and may just ruin the precision of a wonderful sewing machine. A gear puller is needed here. Some machines hold the bushing to the shaft with a screw, others use a roll pin. If you encounter a roll pin and are unable to remove it, don’t worry too much. You probably don’t NEED to remove it. The arm shaft rides on two rather large bushings and it generally turns smooth with just a few drops of oil. Only sometimes is removal necessary.
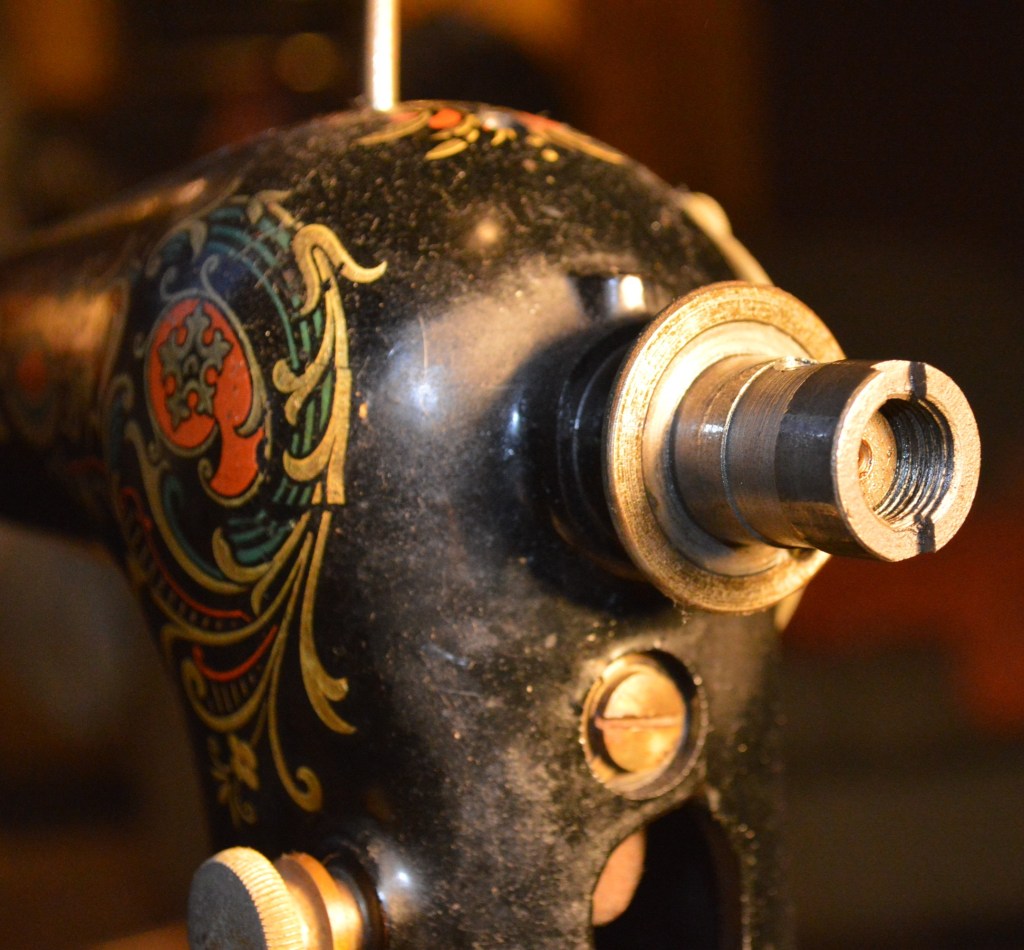
Remove bushing with a gear puller 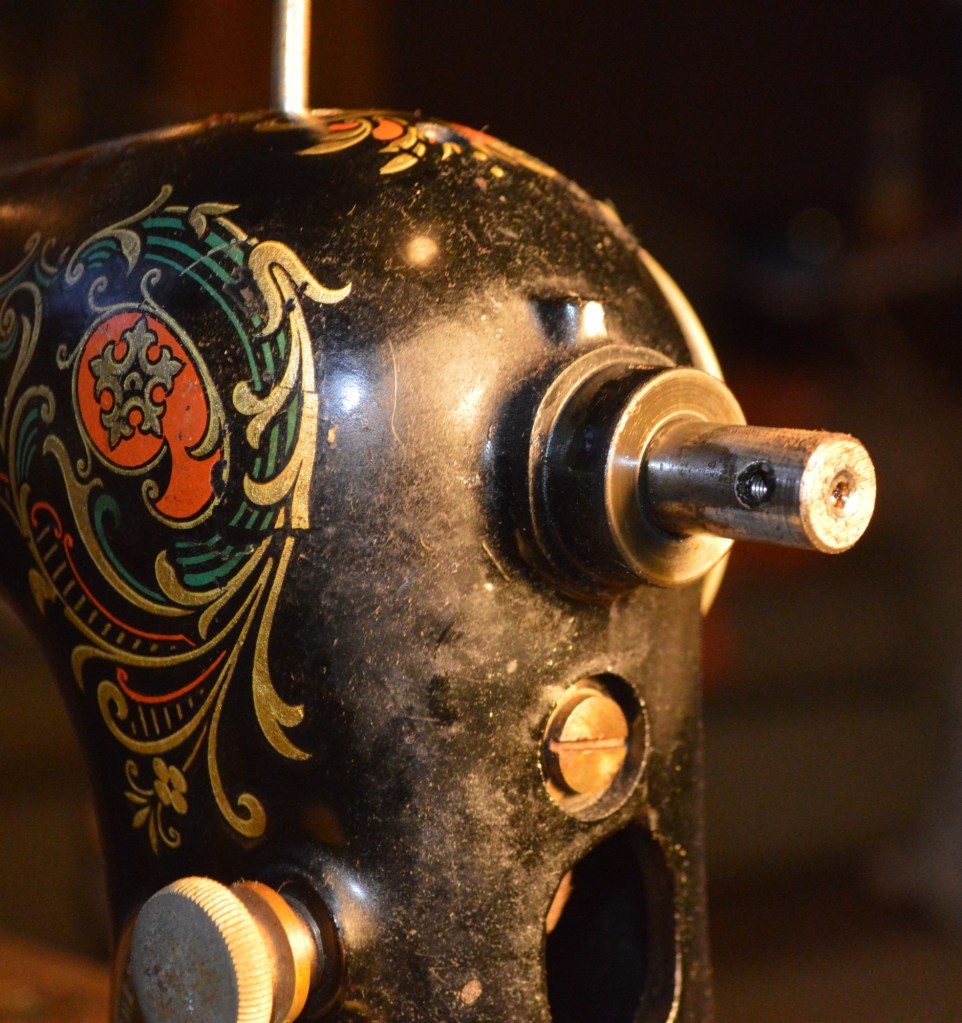
bushing removed 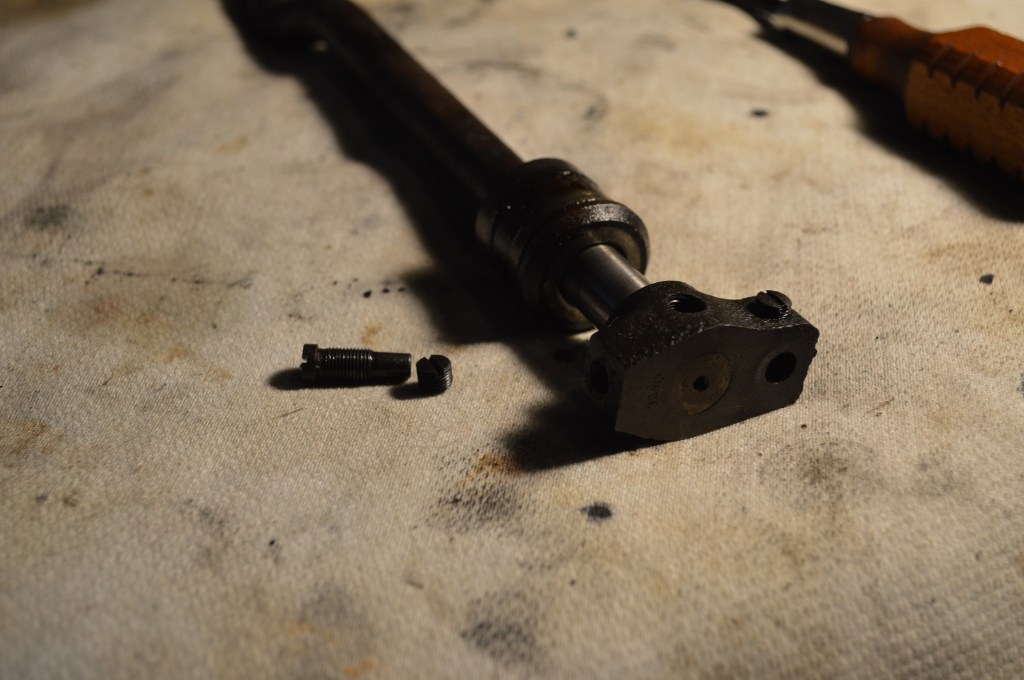
Arm shaft 
Arm shaft removed 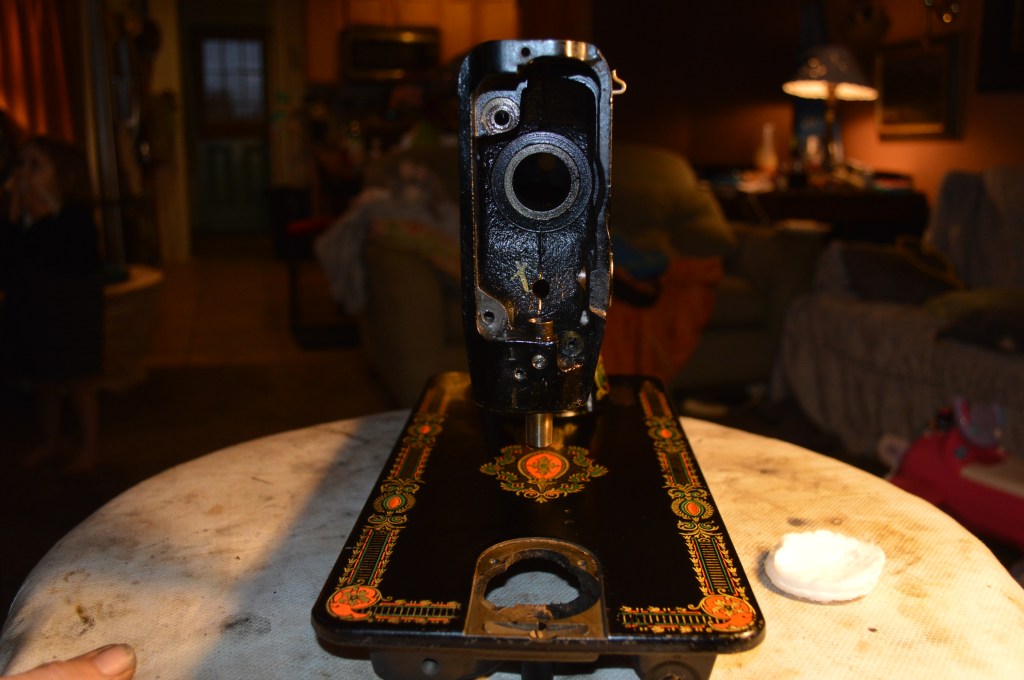
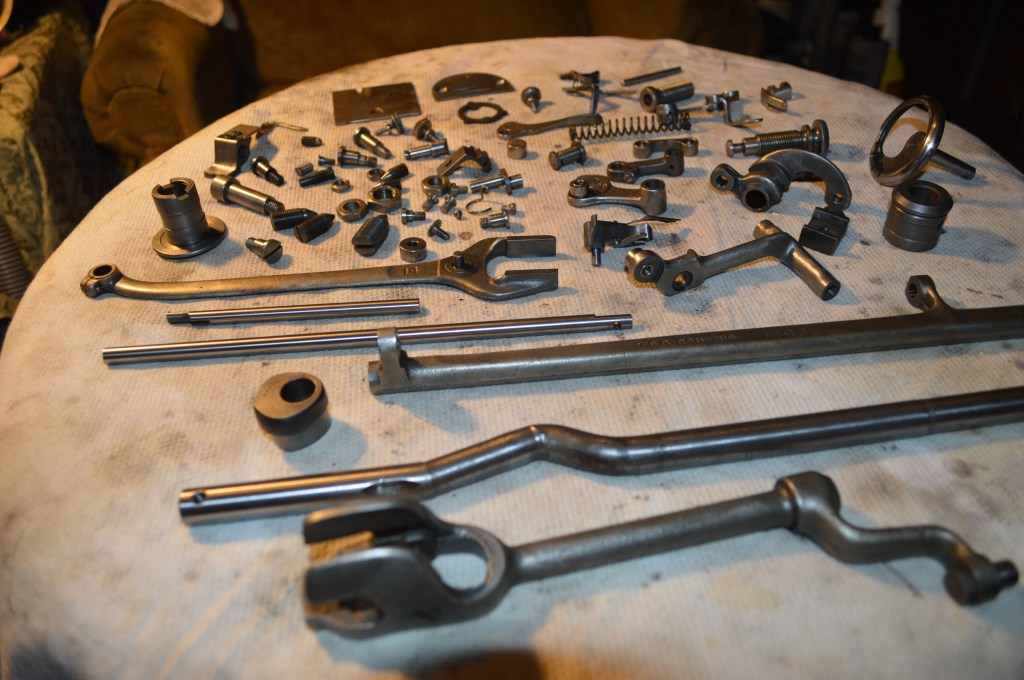
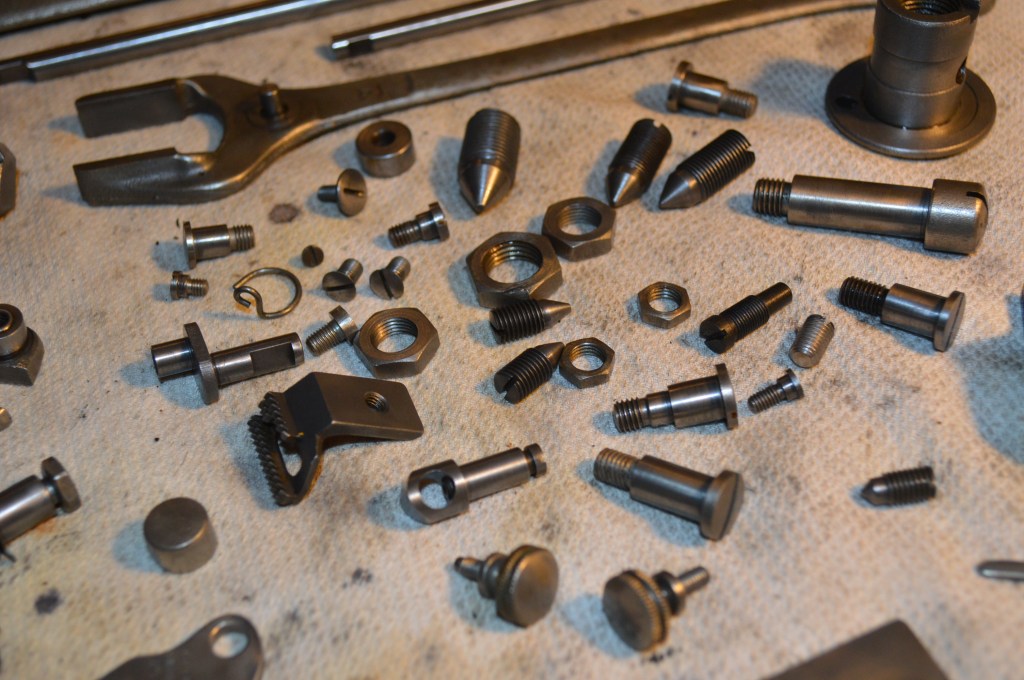
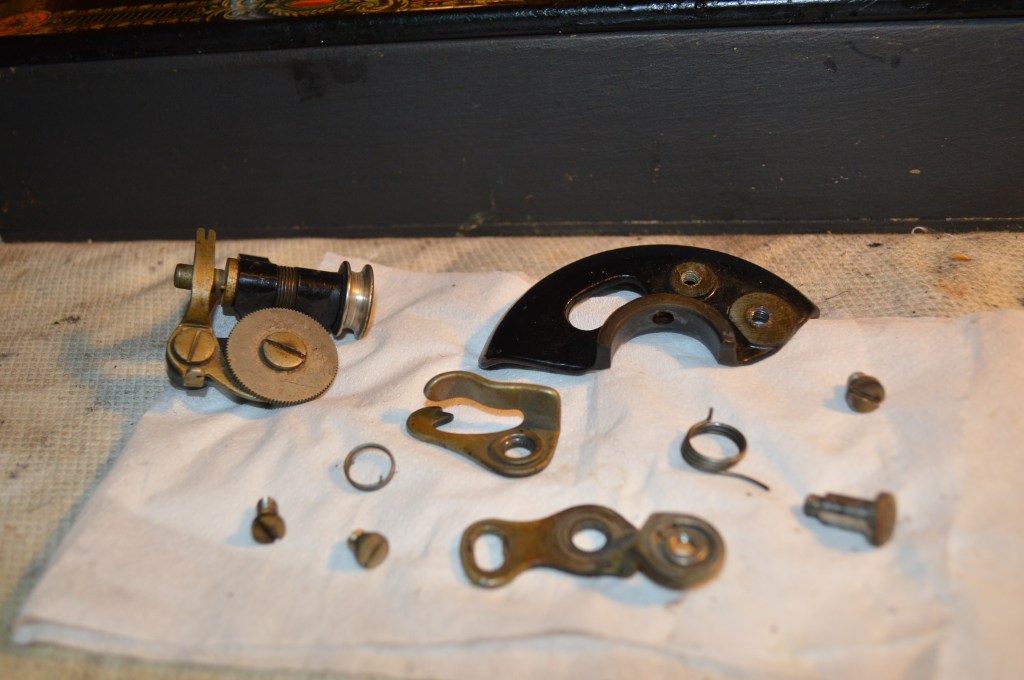
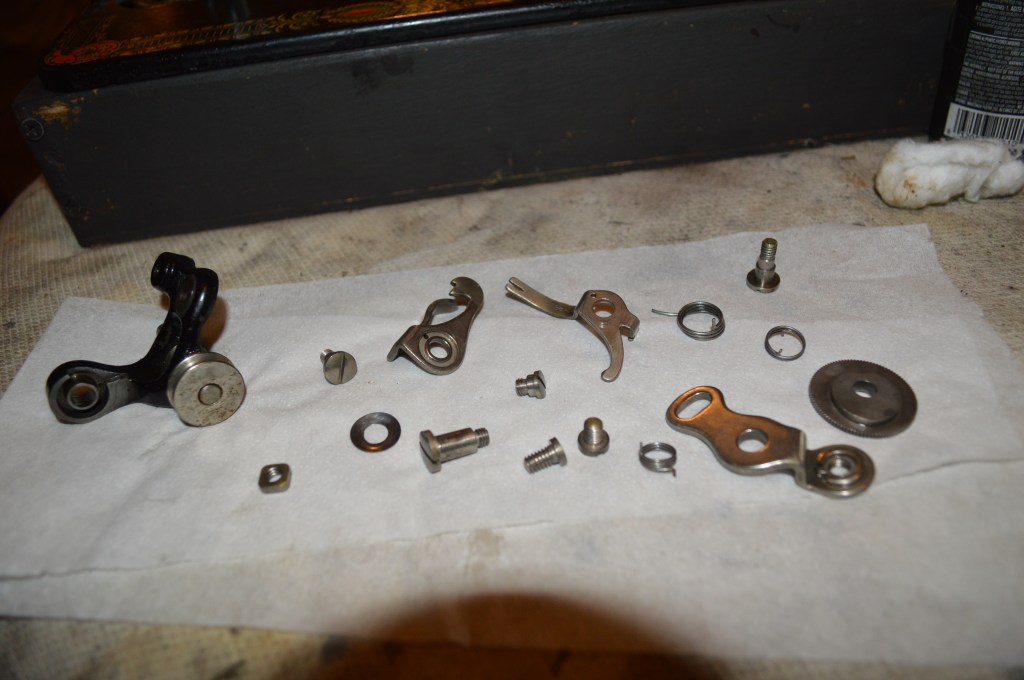
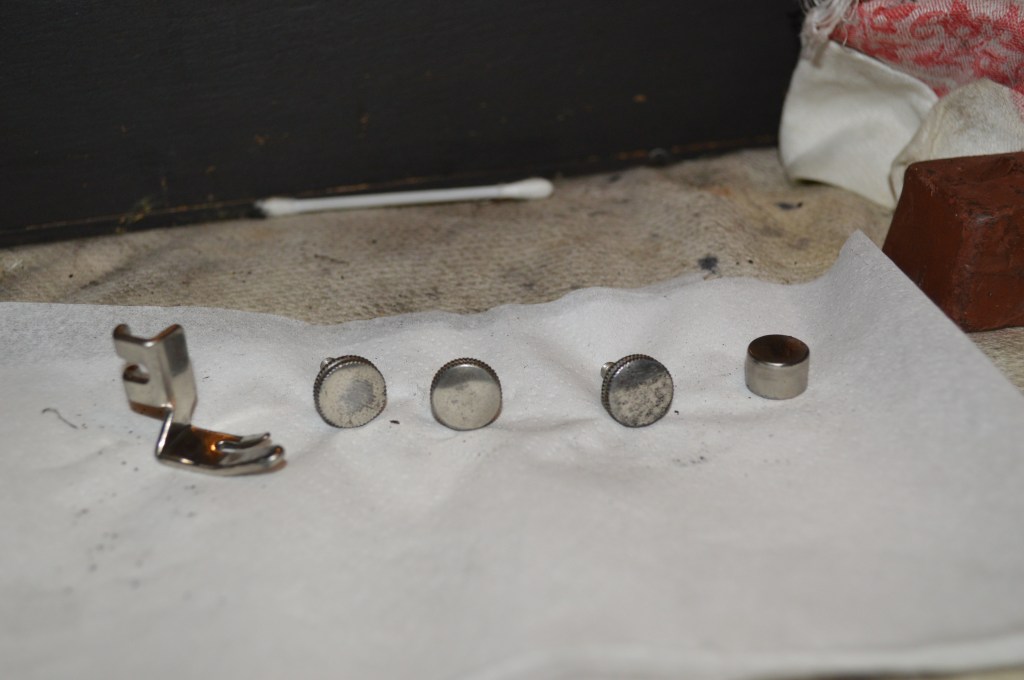
This is all of the disassembly possible for a restoration. All parts are removed. The parts are laid out for cleaning.

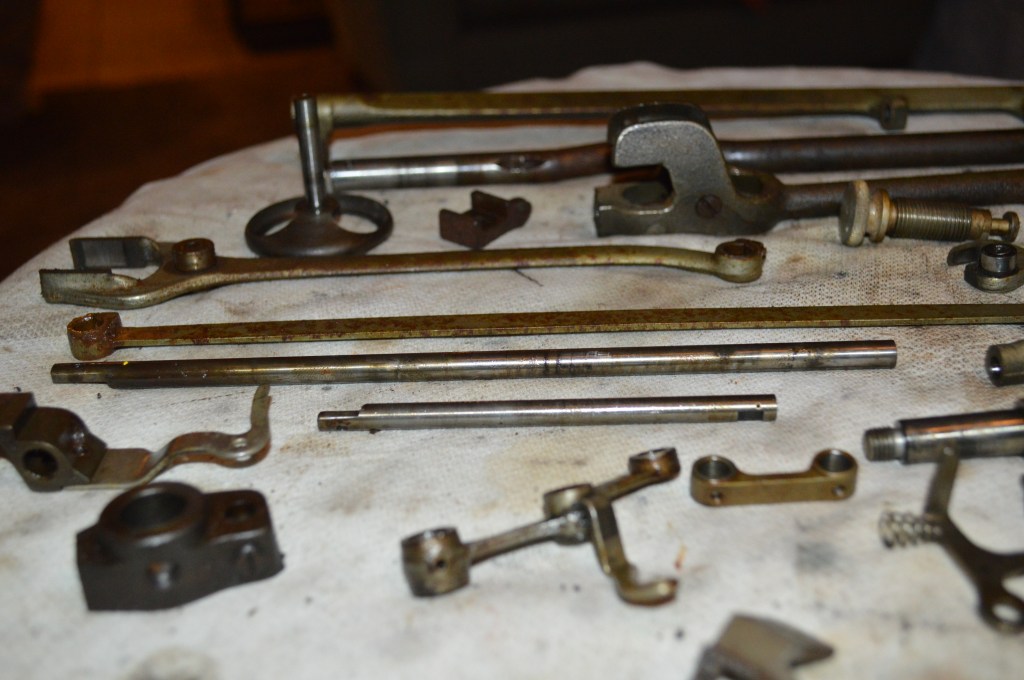
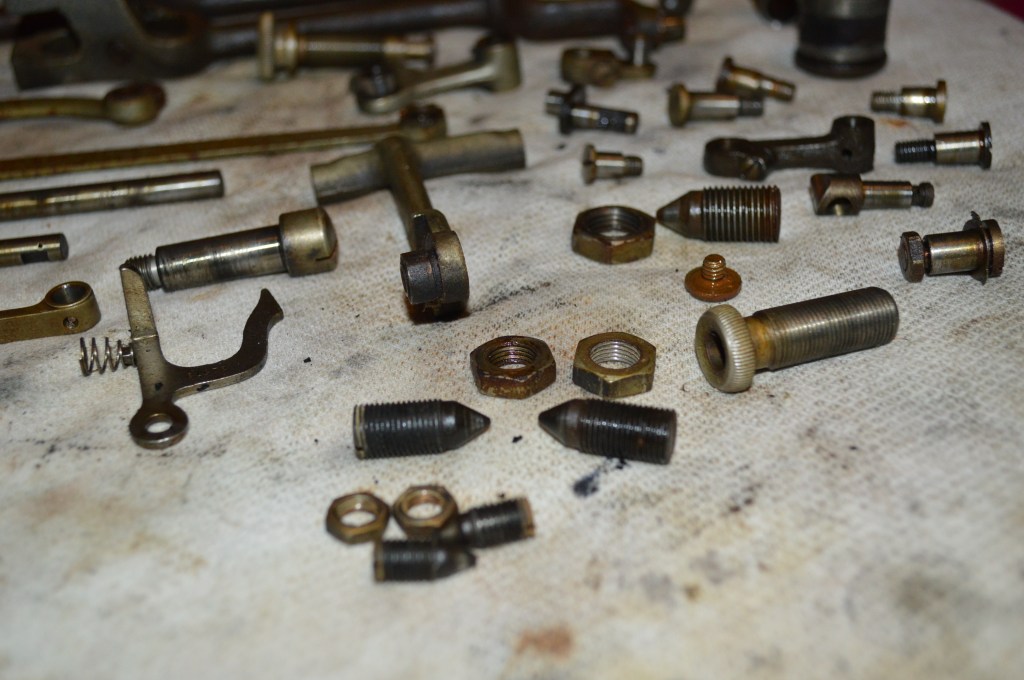
Again, the reason we are doing this is to return all these parts to clean, shiny, like new condition… the way they were when the machine was assembled 95 years ago. All of the oil varnish you see here hampers the smoothness this machine is capable of. I want it to run as close to new as possible and this is the only way I know to do it.
The parts are ultrasonically cleaned, wire brushed, and the needle bar, presser foot bar, arm shaft, and hook shaft are polished to a finish as smooth as glass. Likewise, all of the bushing bores are cleaned with a brass wire brush and cleaned. In addition, every bolt, every screw, and every nut will be cleaned and wire brushed before reassembly.
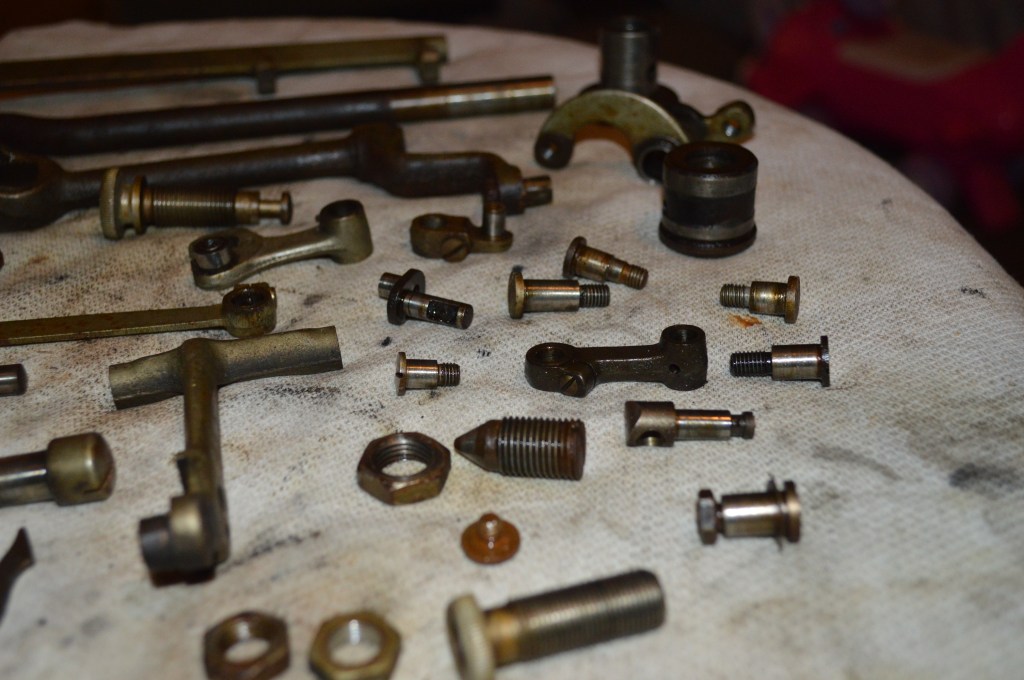
Here are the parts cleaned and polished… notice the difference.
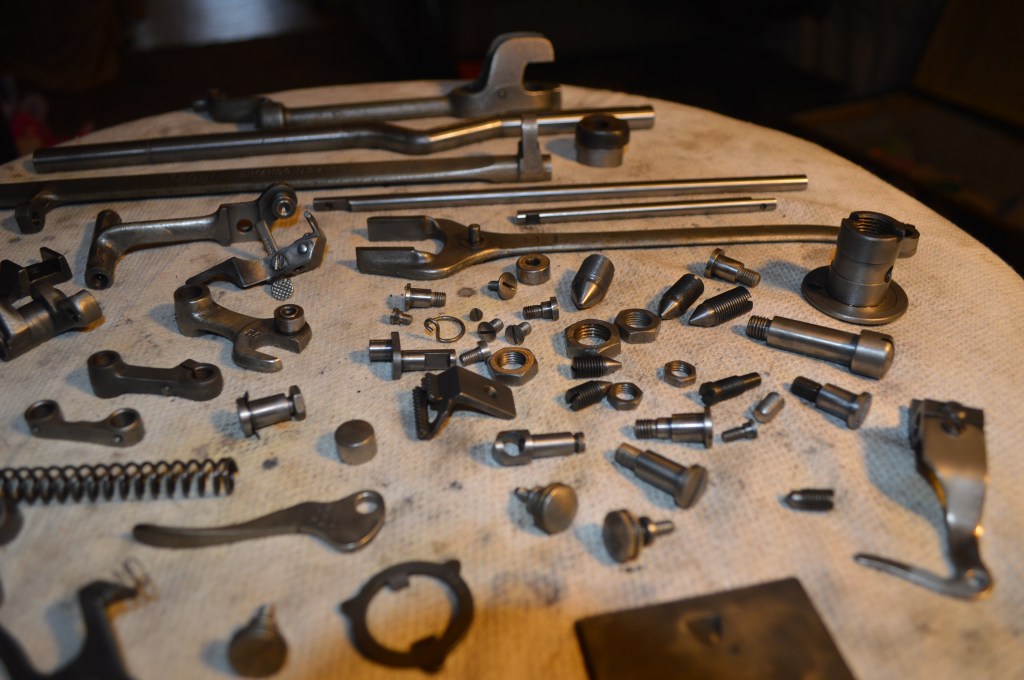
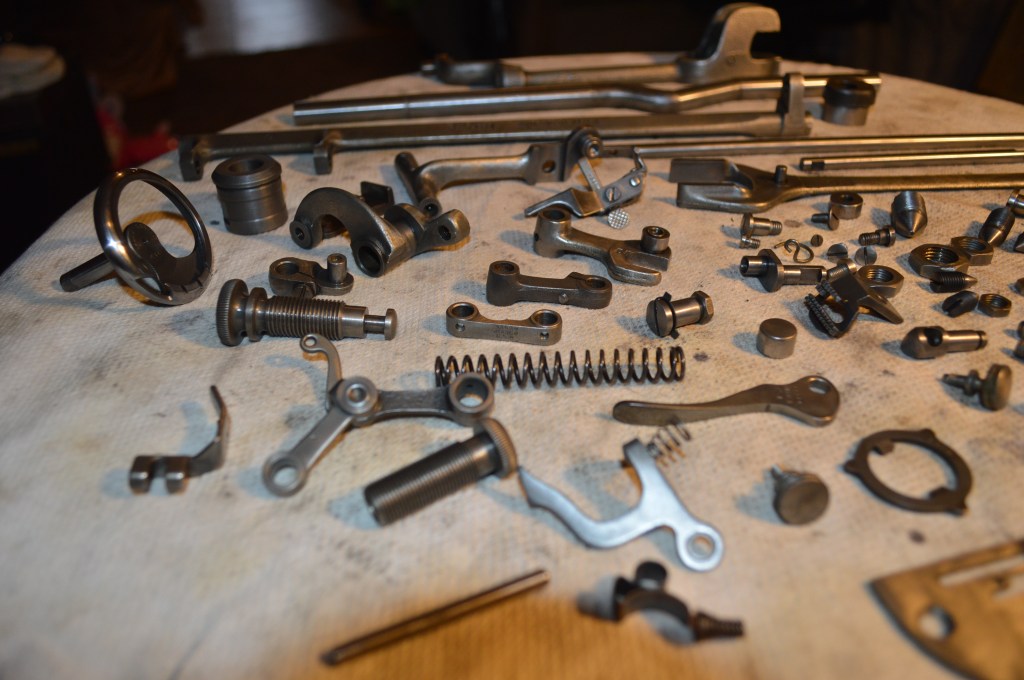

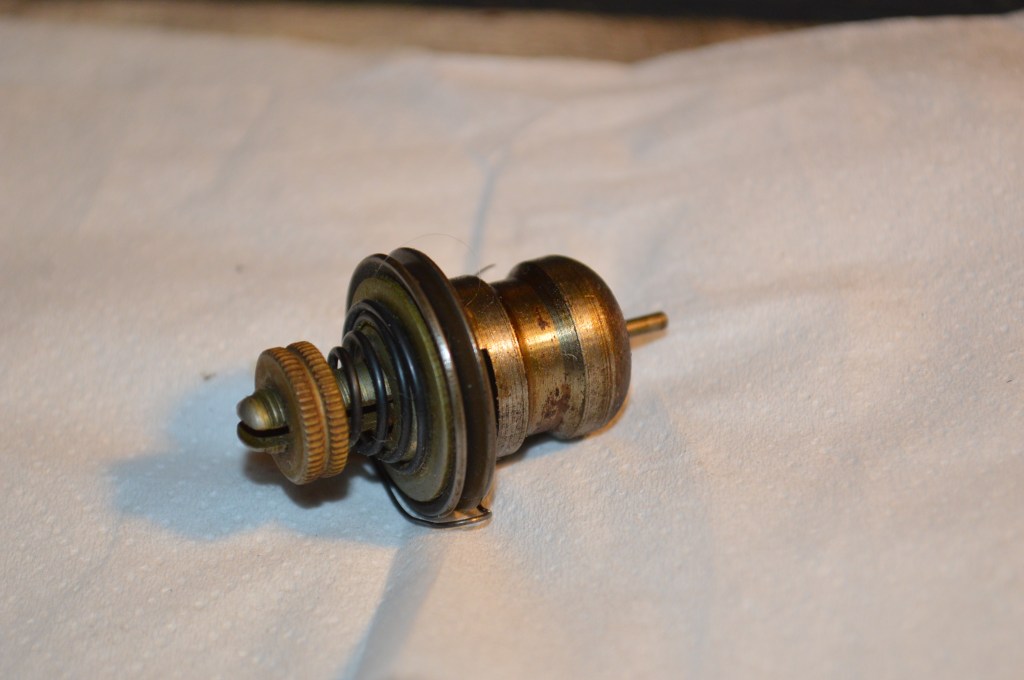
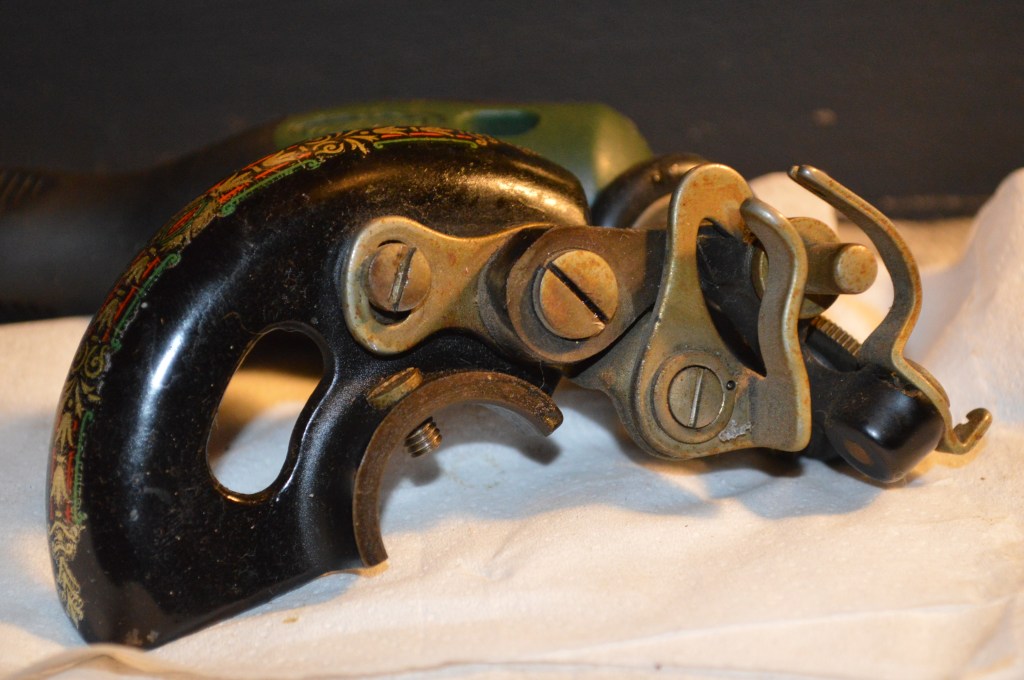
These are set aside for reassembly later. Now the tension mechanism is disassembled and cleaned. As you can see, it is in need of it.

Tip of the day:
To disassemble the mechanism completely, there is a trick to remove the take up spring. The spring is captured by the tension shaft against the housing. The tension shaft screws into the housing. Do not try to use a screwdriver in the shaft slot to unscrew the shaft. This will pry the slot apart and the tension screw nut will not thread properly when you reassemble it. The way to prevent this is to screw the tension screw not onto the shaft far enough that it will form a captured slot just large enough for the screw driver to fit. You can now use a screw driver in the slot to use as a lever and unscrew the shaft.

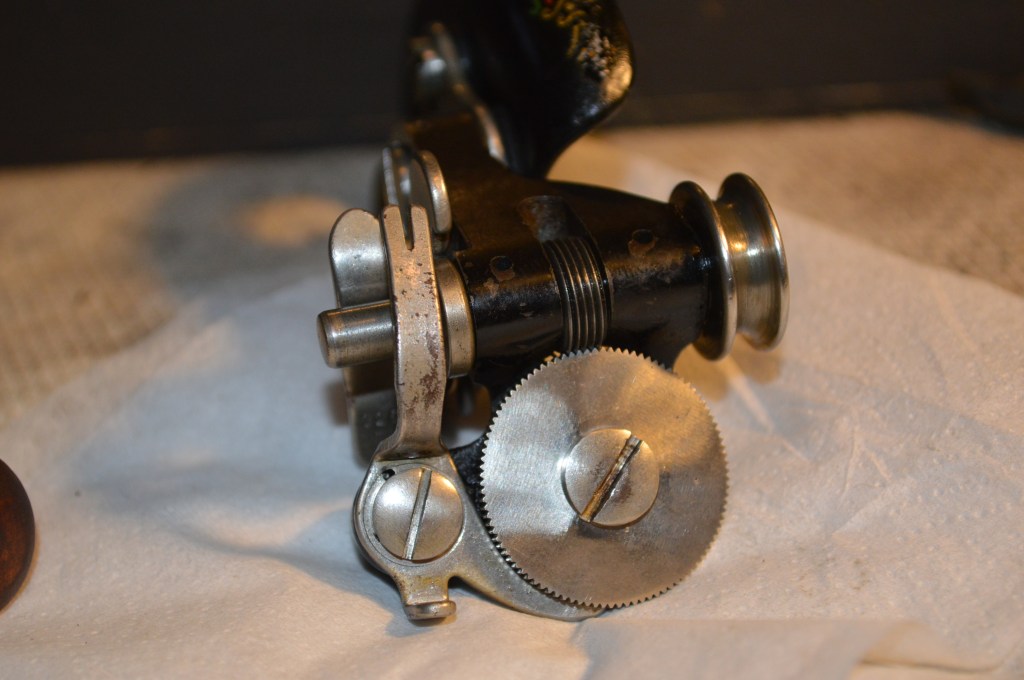
After cleaning, it is re-assembled and set aside. The next step is the bobbin winder.
The bobbin winder uses a fine tooth worm gear that turns a gear. on the back of the gear is an eccentric cam. the bobbin thread guide “finger” rides on the cam and moves back and forth to provide a tight wind of thread on the bobbin. It’s really a fun thing to watch! But care needs to be taken in disassembly, there are multiple springs and the gear or worm shaft can be damaged. disassembling this one is desperately needed, it is stiff and sticky from old oil varnish.

After cleaning, the varnish is removed, and the parts are wire brushed. It is ready to re-assemble.
Now all of the mechanical parts have been cleaned and restored, the cosmetic work can begin. As I mentioned before I started the restoration, red eye’s have ornate and intricate decals. I do not want to clean them aggressively. I’m going to use GoJo and apply it with my finger to clean the surface. I do not plan to do any aggressive polishing on this machine, so it will retain it’s vintage surface prior to being stabilized with a new shellac layer.
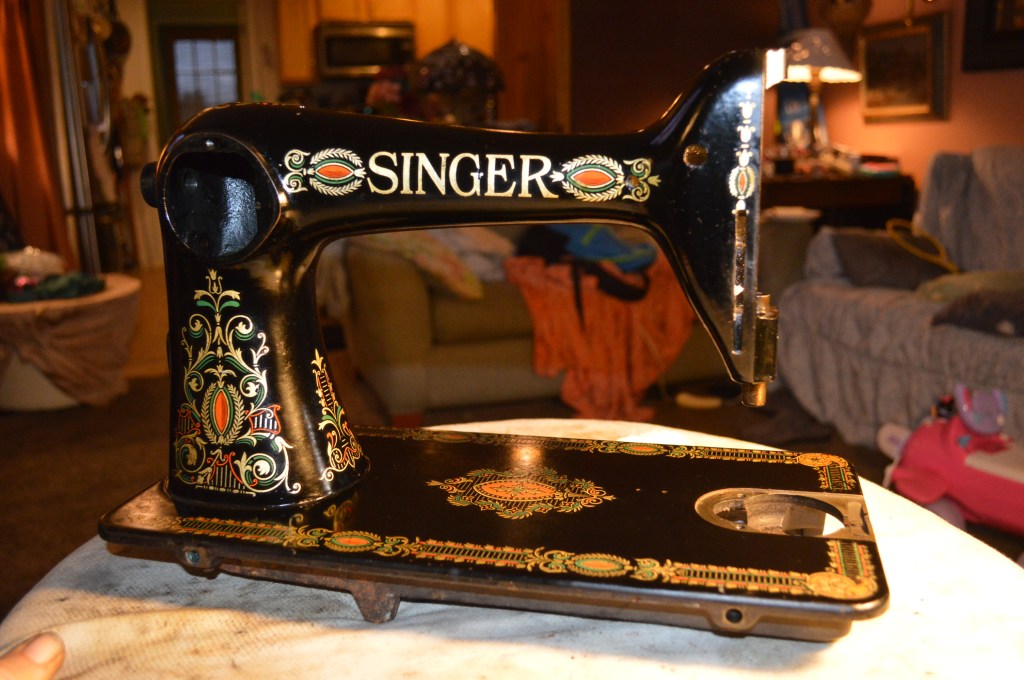

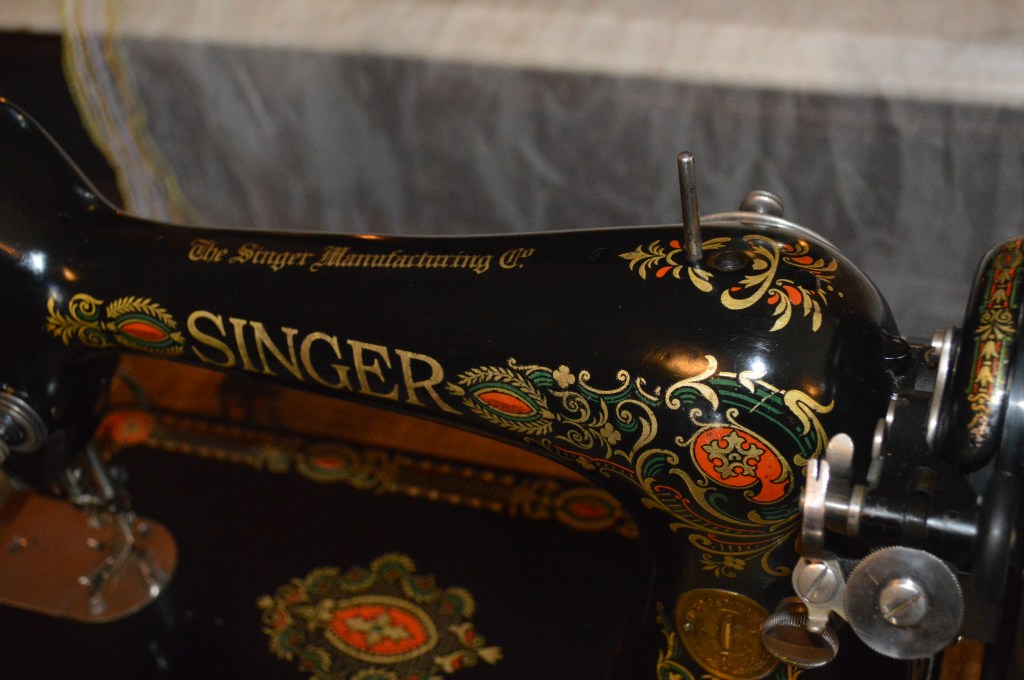
The brightness of the decals is restored after cleaning. Years of dirt and oil buildup can dull or even obscure the decals. Simply cleaning the machine makes a huge difference. Since I am going to do some decal touch up, I apply a light coat of linseed oil over the finish on the machine. I think it looks great!
The next step is to paint match chips on the edge of the machine.
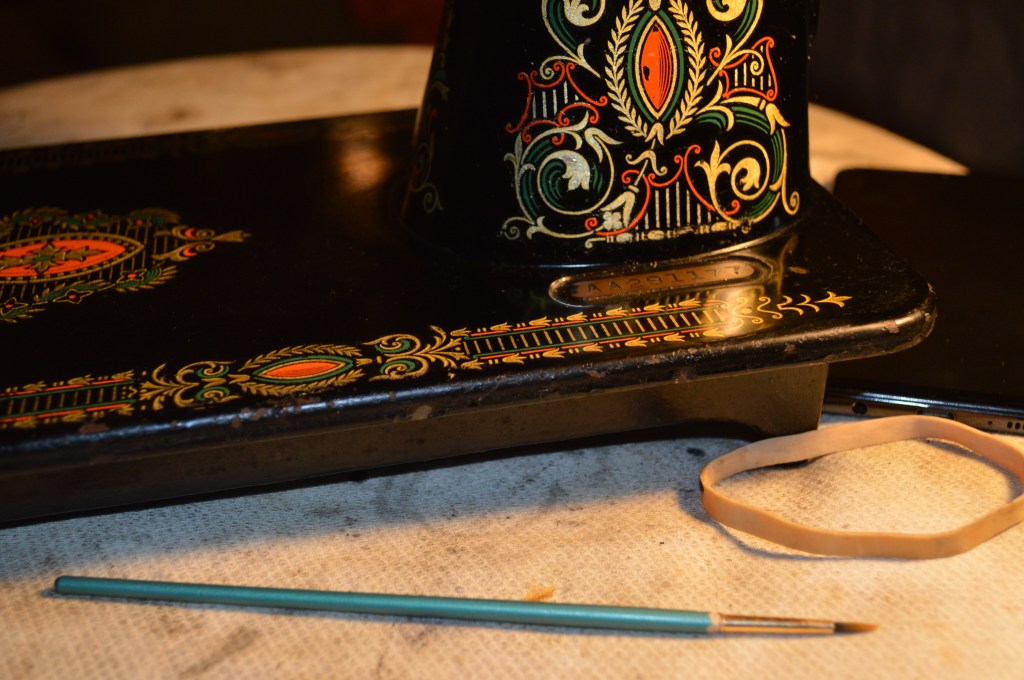
Looking at the decals, there are a few gold touch ups needed.

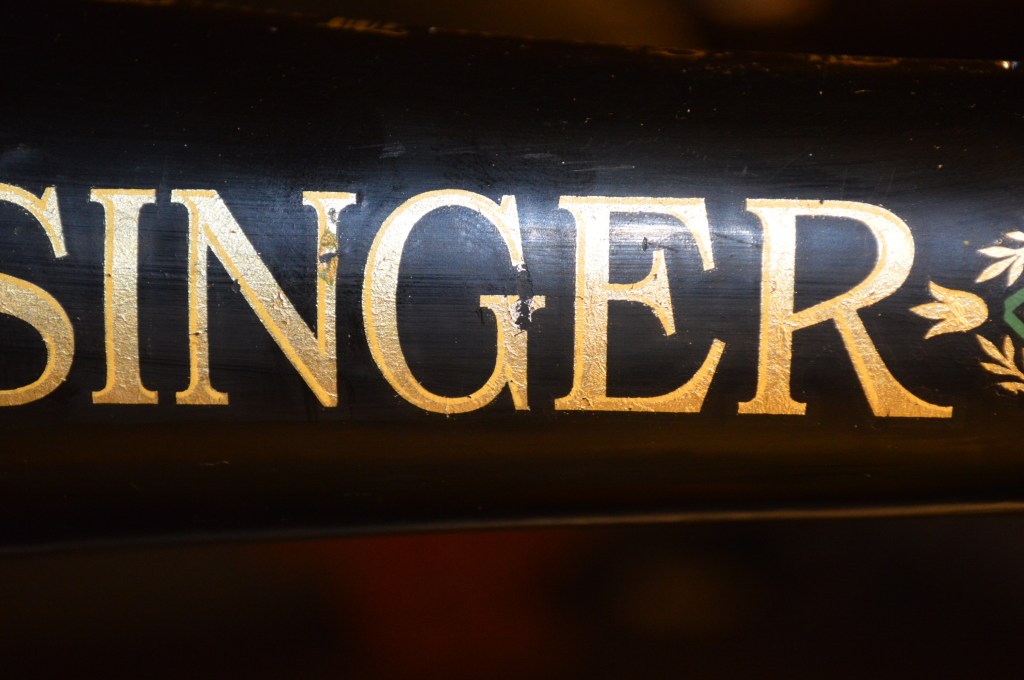
Before… 
After… 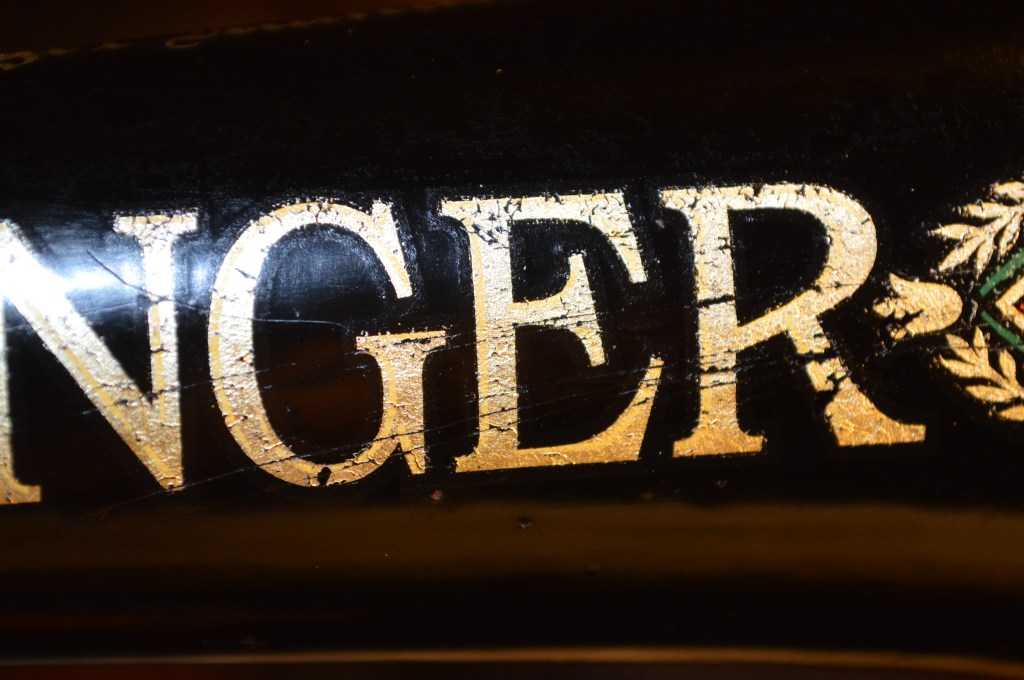
Before… 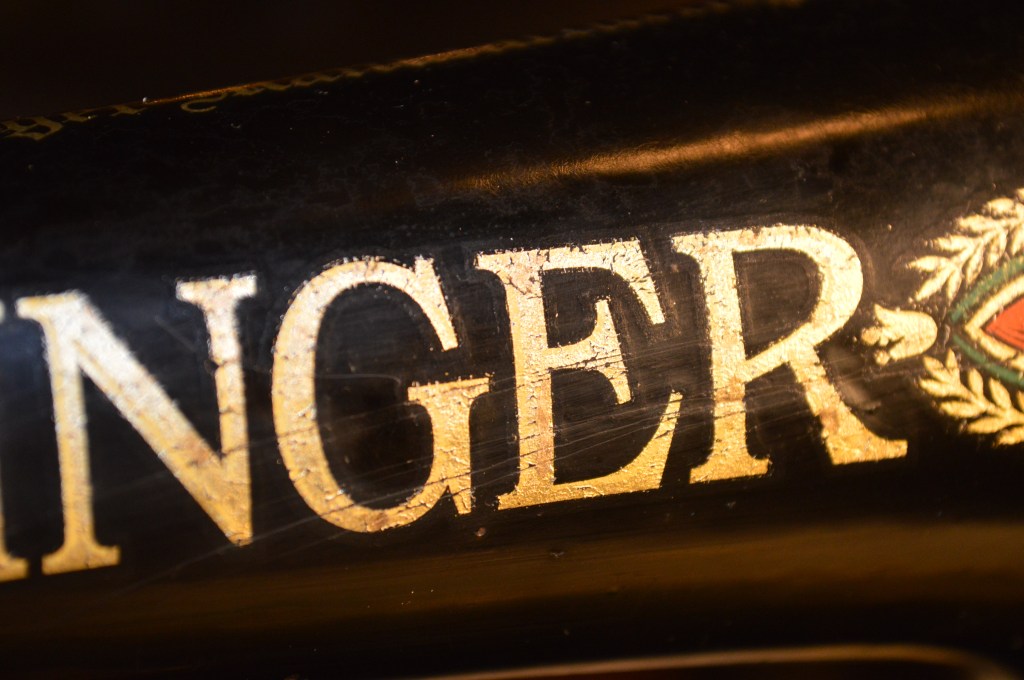
After…
Now, there are other places I touched up, but I’ll let you find them… if you can.
Because the red eye decals are so profuse and detailed, they are very prone to damage. These decals show some wear but are essentially intact. To protect the decal repairs and the decals over the rest of the machine. The machine is prepped for a new coat of shellac. Simply done, the machine is coated with a light coat of linseed oil, allowed to cure for 48 hours, then any remaining residue is wiped off. Then and the machine is sprayed with four coats of new shellac. Following another 48 hours for the shellac to cure, the machine is wet sanded in stages with successively fine grits of sand paper. Linseed oil is used as the liquid sanding medium. The machine is sanded with 1000,1500, 2000, and then 2500 grit paper. The final finish is achieved by glaze polishing. The final result is a smooth deep finish and a durable shellac finish that will protect the machine for years.
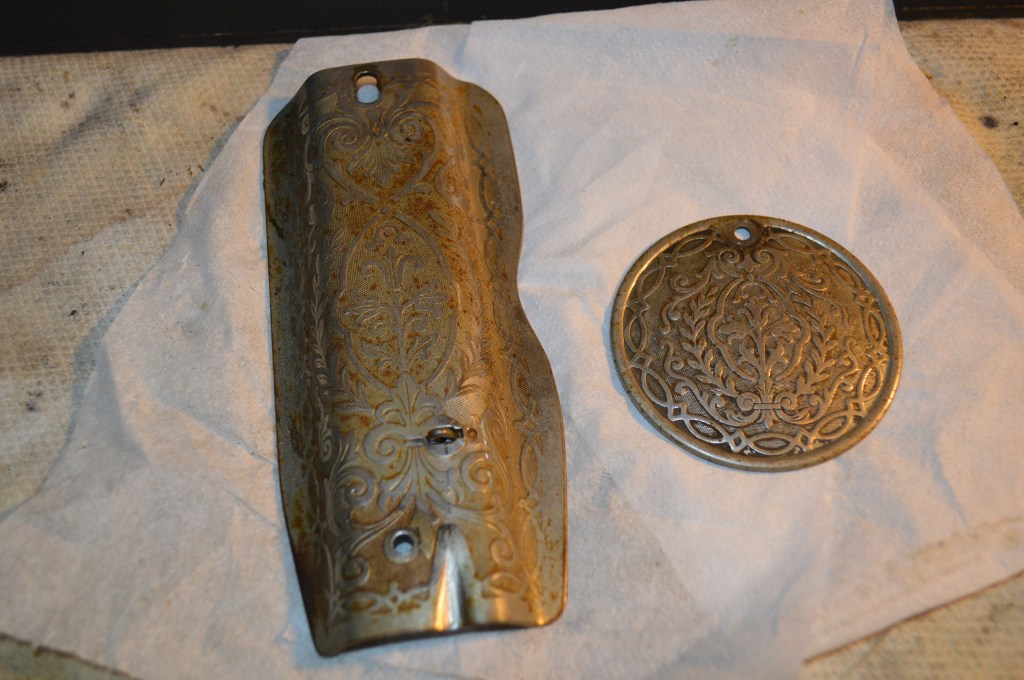
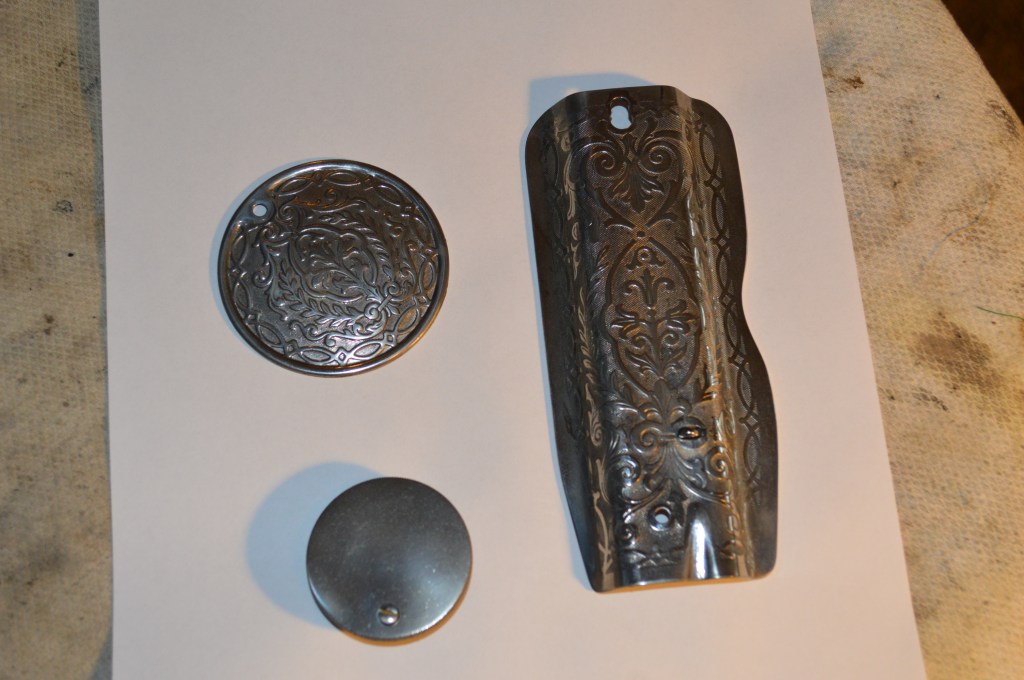
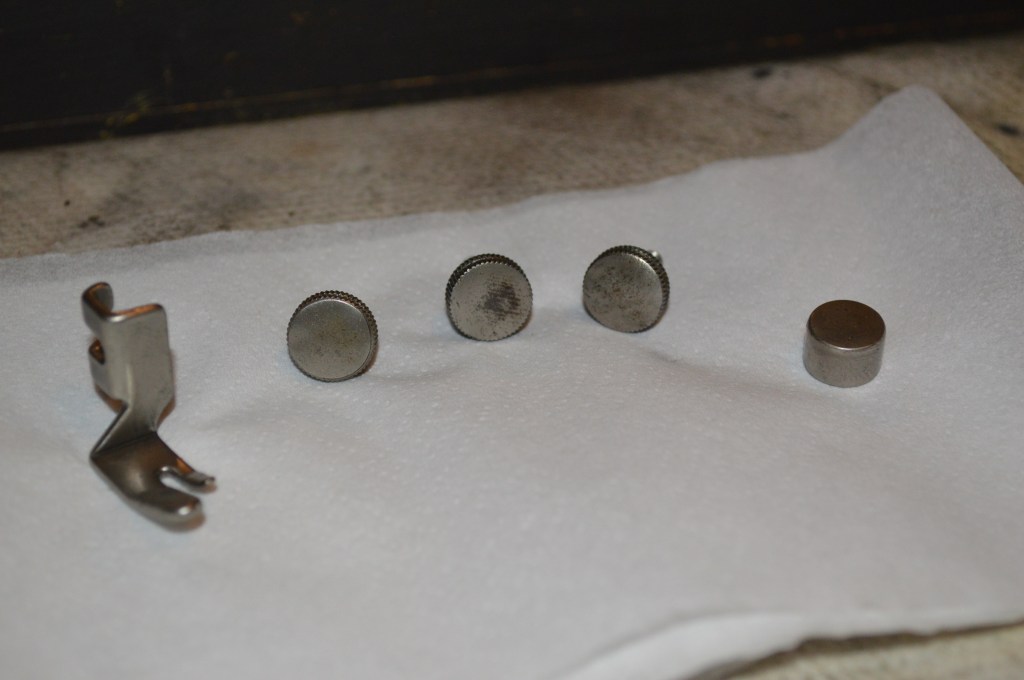
Now the plates and little bits are polished…


The machine is assembled…
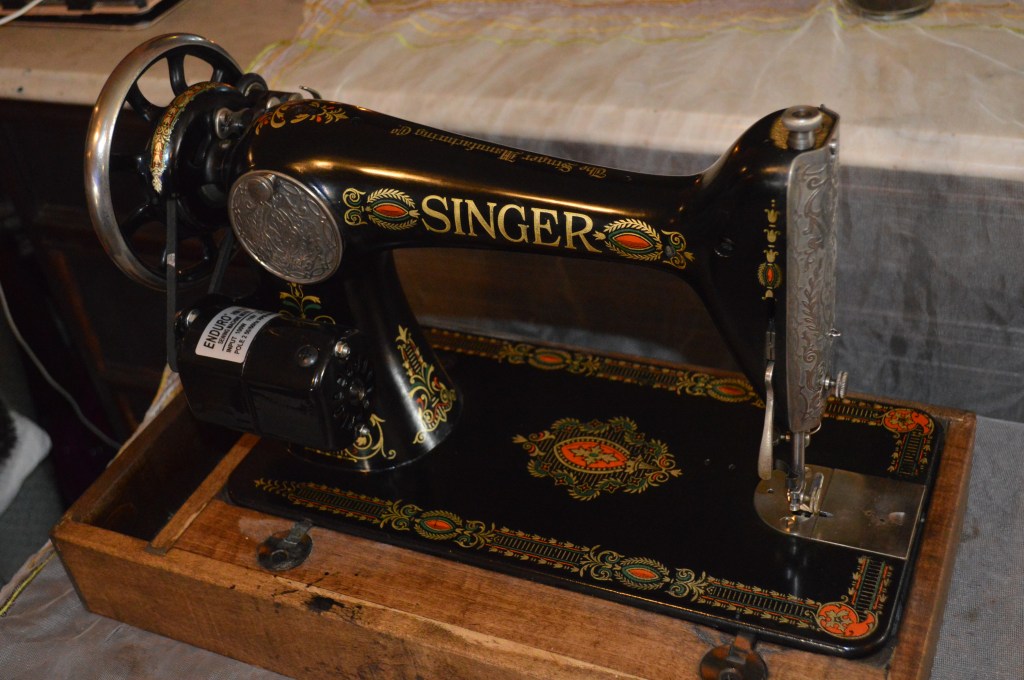
Next, the machine is fitted with a new sewing machine motor. I chose is a 0.9 amp 6000 rpm motor and an electronic controller. For a smooth running straight stitch machine, this is ample power and just right amount for a model 66.
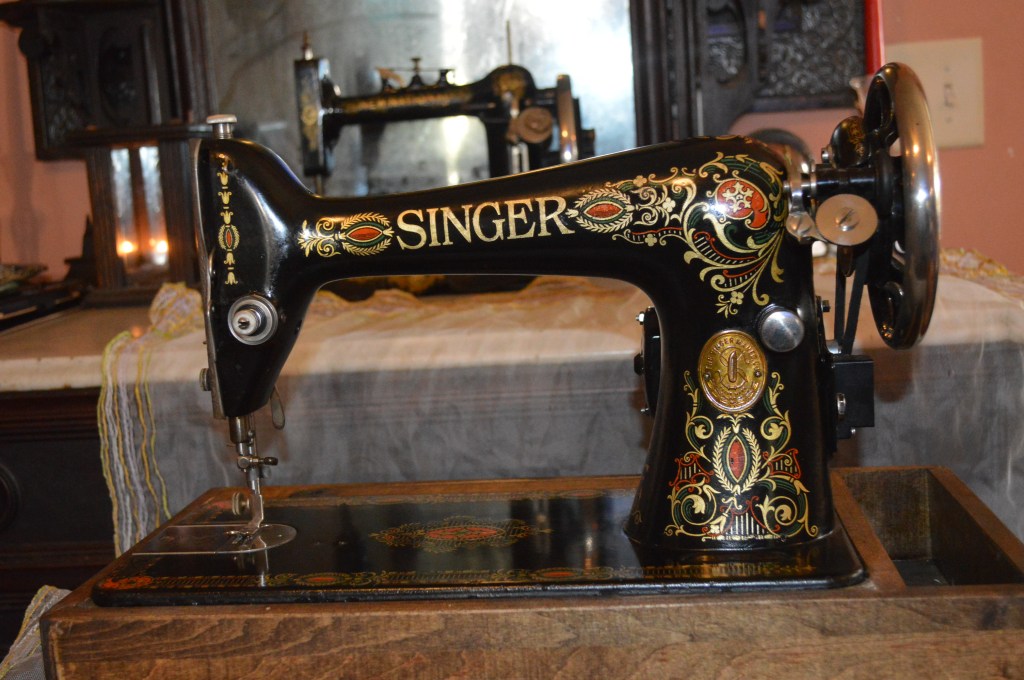
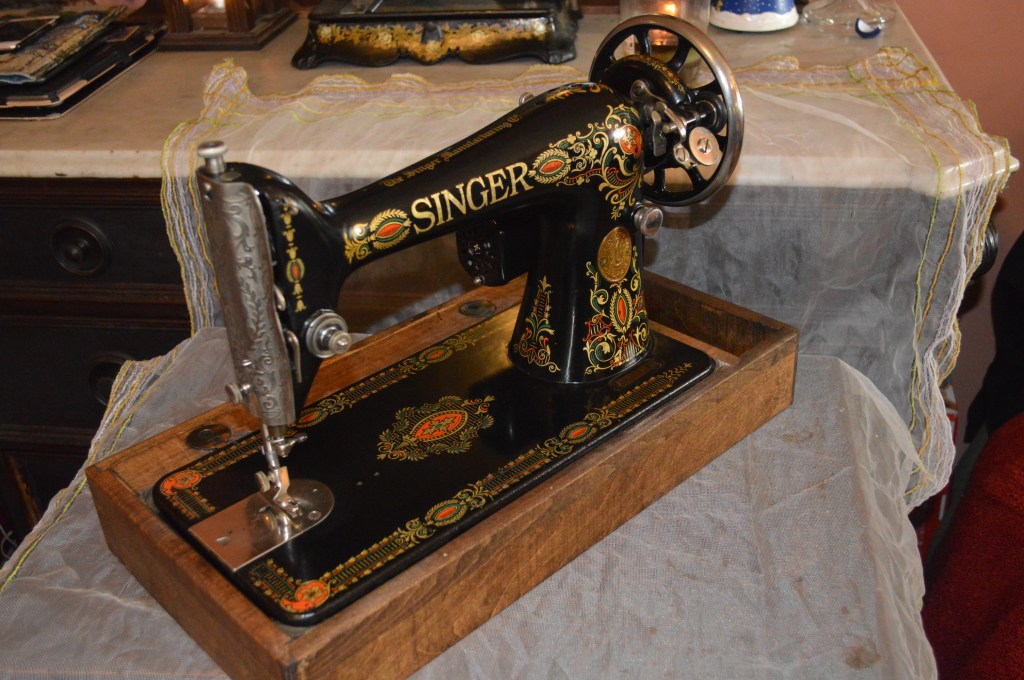
The restoration of this model 66 “Red Eye” is complete. It looks great and it sews great. In short, it is a fine example of what a should be… Rugged, durable, powerful, quiet, smooth, it sews a great stitch, and it has a beautiful and durable finish. What else is there?
For comparison, here is the machine before restoration…
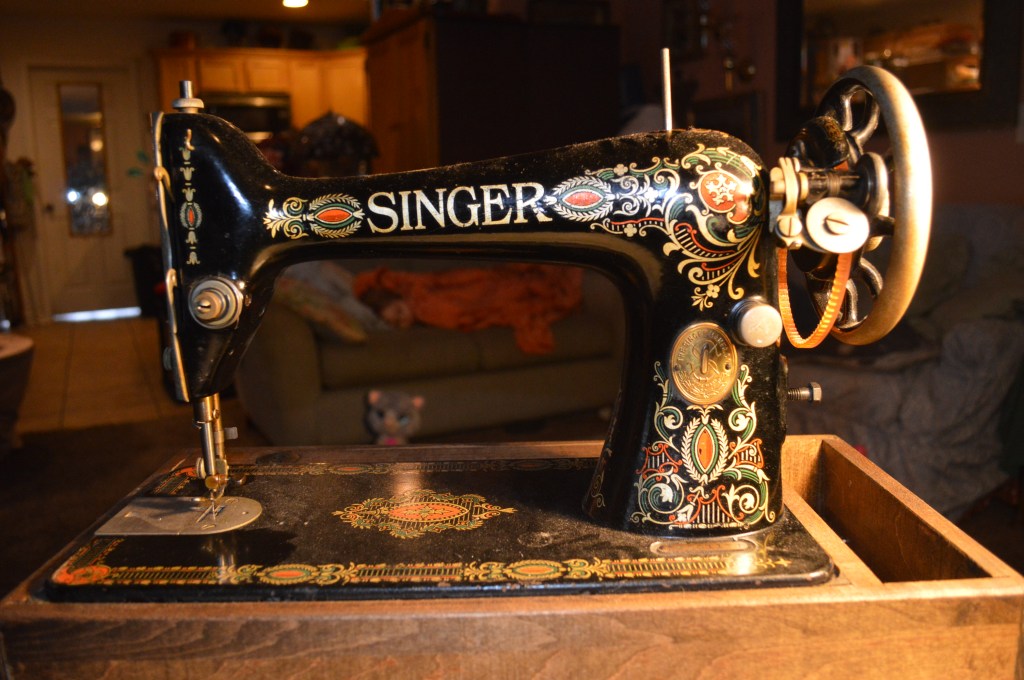


And the machine after restoration…
If you like what you see please visit our Etsy store at https://www.etsy.com/shop/pungoliving, and see this Singer Model 66 and all of our other restored fine quality vintage sewing machines. If you have any questions, please contact Lee at Pungoliving@gmail.com.
Tell me what you think!

Hello. I just picked up a 1920 Singer 66 with Red-Eye decals. I ordered a few things for it. I likely won’t get as involved with the “innards”, as the machine has been in a case, and isn’t too dirty. I see that the thread guide above the needle clamp is missing, so I need to replace it. Also, someone put a numbered tension dial on it, so I have a vintage assembly coming, to use the nut and spring holder from it. I have a 1930 99, and I love how it sews. I don’t mind that there are no numbers on the tension and stitch length. I usually don’t even have to adjust the tension. Beautiful stitches! Your information is very helpful, and I’m glad that you showed how to cut the spool pin felt for the wick. The felt on my 66 is blackened and very deteriorated. I’m going to bookmark this page so I can refer to it. Thank you. I now have 5 vintage sewing machines, four of which I have acquired since the middle of June. All are Singers except one, which is a 1917 Western Electric, which someone gave me. There’s not much info on those, but I know that The National Sewing Machine Company made them for Western Electric in 1917 and 1918. It has a Vibrating Shuttle bobbin system. Besides the two Singers I mentioned, I have a Singer 27 treadle machine from 1895, and my youngest Singer, a 1948 201.
LikeLike
Thank you Renita,
I’m glad you found the information useful! A Singer 66 will last an extraordinarily long time with regular oiling and lint removal. There is not much that can go wrong with them. I have to agree with you regarding the numbered dial, I prefer relying on the stitch rather than a number to tell me that the tension is correct. I don’t know much about Western Electric sewing machines, except they were badged machines with Western Electric motors… I think of them more as collector machines although I have no doubt there are folks using them everyday. National Sewing Machine Company has quite a history of their own and evolved from the Free Sewing Machine Company.
The model 27 machine you have is a fantastic machine. My Wife has a 27 and she loves the vibrating shuttle and the phenomenal stitch the machine creates. The 201 is my favorite Singer and a fantastic machine…. maybe a little over hyped but they have a deserved reputation.
Please let me know if you have any questions regarding your machines or if I can be of any assistance.
Have a blessed evening,
Lee
LikeLike
Wow! Thanks for such a great response. I’ll be sure to ask you for information if I’m stumped, or need clarification on anything. This weekend, I think I’ll start on cleaning up the 66. Have a great weekend.
Renita
LikeLike
Hello Lee. You had responded to my post back in September. I had just picked up a 1920 66, and was getting ready to go through it, though not as extensively as you did. Fortunately, mine was not rusted, but did have some dried oil and gunked lint. Behind the face plate, I remove a few things, including the presser bar. Someone replaced the original pressure adjusting screw and put one that has a tab that you press to release it from the detents. I want to find an original one. I put everything back in there today, and you have a great picture that l referred too. In the bobbin area, the “blackened” oil wick was actually a piece of leather. I had to apply some oil on it to soften it enough to get it out of the spring screw. I do have a couple of questions for you, if you don’t mind. On the bobbin winder, where the worm gear meets the teeth of the cam, are they supposed to mesh somewhat closely? Mine seems to barely mesh, and in one particular spot, the teeth might be worn a bit, because it drags in that spot. Also, I ended up taking the feed dogs out, to clean well the bobbin area. I also took the feed dog rocker off. I put the rocker back on a while back, but just got to putting the feed dogs back in today. The were slightly too far to the left, so I loosened the nut on the left so I could adjust the “bullet-shaped” screw and move the shaft to the right. That part is fine now, but my feed dogs are too far to the back. Do I need to remove the rocker to make an adjustment to the T-shaped part that is attached behind the feed dog rocker (as seen from the underside), or is there an easier fix? Thank you for any help you can give me. You may be sorry that you offered to help me with my project(s). 🙂 Except for these questions, I don’t think there will be much more that I’ll need help with…on THIS machine, anyway. LOL I still have the 1895 27 to clean up, as well as the 1917 Western Electric.
Thank you, thank you. Your machine is beautiful, and you have great pictures.
If the bobbin winder is something that should be replaced, I can look for one. In the meantime, I have two other machines that take the class 66 bobbins. Take care. Have a great weekend!
Renita George
LikeLike
Lee, I forgot one thing…what is the height of the feed dogs supposed to be set at? I can’t seem to find that information. My husband has feeler gauges that I can use. I am planing on getting an instruction manual for this machine, and was wondering how helpful it would be to also get the adjuster’s manual. The thing I’m finding its that the manual has to be 1920 or earlier, so it shows the old style positioning bracket, and I don’t see that one come up much, if at all. It’s even hard to find the instruction manual. I might have to get a reproduction one that I’ve seen. Thanks again.
Renita George
LikeLike
Hello Renita,
Sorry to get back to you so late. I hope I can help answer some of your questions. The feed dog height is 3/64″. The bobbin winder on these machines is adjustable. The screw in the center of the larger gear is actually eccentric. Loosen the not on the back of the gear and turn the screw to raise or lower the gear teeth to mesh with the worm gear. This should overcome any rough spots in the mechanism.
The adjustment for the feed dogs is actually 2 steps. Centering the feed dogs in the needle plate is what you have already done. There is an adjustment to set the front to rear travel that is done by adjusting the screw at the rear of the rocker mechanism where the stitch length fork attaches to the rocker assembly. Loosen the nut and turn this screw and you will notice the feed dogs moving forward, then backwards. Set the dogs so the feed dogs are as far forward (without hitting the plate) as you turn the balance wheel. Then tighten the nut.
I have some instruction sheets to show you how to do the above, and if you give me your email address, I will send them to you.
I hope this helps get your 66 adjusted and sewing well, and please let me know if I can be of any other assistance.
Have a blessed day,
Lee
LikeLike
Hello Lee,
After exhaustive searching online, I am very thankful to have found your site. Your photos and descriptions are terrific, and dating your entry, so infrequently done by most, is so helpful in judging where we are . It’s amazing how much incorrect information one can find online, such as “the tension shaft does not unscrew!” Your statements are correct, the result of real experience, and so helpful.
I head up a humanitarian group of volunteers here in NJ seeking to aid orphan children and youth in Malawi Africa, and in addition to installing solar lighting (in a country where 7% have electricity) and collecting books and building libraries, we are just beginning to accept treadle machines to restore and ship to initiate vocational training for these kids without hope our libraries there. We have received (4) – “red eye” 66’s, 2 – 127’s, and a really old Singer made in 1896. As a retired engineer, I appreciate your philosophy of cleaning the internal workings of varnish and dirt, before shipping these machines to a new 100 year life where further maintenance will be impossible. Would you help me with a few details?
1. I’ve been successful in backing out the tension shafts, armed with Kroil, your suggestion of leaving the nut on the shaft to prevent spread damage, and patience. But the tension shaft housings are another matter. Been trying to exert extractive pressure via jamming against an aluminum plate drilled to straddle the tension shaft housing with a bearing separator under the tension shaft nut, (after removing the set screw and injecting copious amounts of Kroil), but nothing moving and I worry about those tension shaft threads being pretty delicate to be pulling against. And, got 5 more machines to go. Still, removing those housings seems the way to go
2. The stitch spacing screws on a couple of the machines are incredibly tight despite antisieze thread lubricant, so apparently the mechanisms within are restricted. Perfectly willing to take apart the linkage, clean with my newly acquired ultrasonic cleaner, and attempt to reinstall correctly, but are there adjustments and settings I could be losing and thereby doing more harm than good?
Any additional suggestions and instruction would be greatly appreciated!
LikeLike
Hello Paul,
What you are doing is great! The tension assembly on the 66’s have a barrel that is tightened by a set screw accessible on the back of the front needle head. You will see a hole that lines up with the tension barrel. If this does not allow you to rotate the barrel and remove it, you have 2 options: Apply concentrated heat (a small butane torch), or leave it alone and clean everything else. Don’t try to pull it out as it may damage the threads or worse, the machine.
The 127 does not have a tension barrel. It is cast into the sewing machine body (at least mine is). If not, treat it the same as the 66.
The rocker shaft pins adjust the side to side clearance between the feed dogs and the needle plate. Loosen the jam nut and adjust unyil the dogs are centered. leave just the slightest perceptible play in the shaft and tighten the jam nuts to lock in the adjustment.
The screw and nut joining the stitch length fork to the rocker shaft is eccentric. When loosened, it adjusts the feed dogs front to back in the needle plate. The proper adjustment is as close to the front of the needle plate feed dog slots as possible. Tighten the nut securely, but make sure the screw does not tighten and bind the stitch fork.
Please let me know if I can be of any assistance and any other questions you may have.
Have a blessed evening!
Lee
LikeLike
We Just aquired a 1920 Model 66 with the Red Eye decals. It’s looking a little dull and has lost most of the decals on the base. Eventually we plan to get into the workings but for now I want to clean the outside and see if I can brighten it up a bit. Can you suggest a cleaner that will not damage the decals?
LikeLike
Good morning Dawn,
Your model 66 is a very good candidate for cleaning and tuning. They respond very will to oiling and lint removal to return them to very smooth running and they make a great stitch.
It is very common to see red eyes with decal wear and they do need to be cleaned carefully in those areas. I have written a few tutorials on cleaning the machine that willl help you. I invite you to read my blog https://pungoliving.home.blog/2019/12/08/a-tutorial-cleaning-an-vintage-singer-model-15-sewing-machine/ and https://pungoliving.home.blog/home-2/topics-tips-and-tricks/cleaning-a-vintage-black-singer-sewing-machine-what-to-use-and-not-use/. There are also a few tutorials on cleaning assemblies on your 66 so I hope you find information to help you. If there is a particular question you have, let me know and I will be happy to help.
Have a blessed day!
Lee
LikeLike