
Introduction
It occurred to me that some folks may have questions on how to properly thread a vintage sewing machine. It also occurred to me that it has been a while since I posted a tutorial. This tutorial is a a remedy for both!
Some machines thread one way, while others thread another way. If the user manual is lost, it is not always readily apparent how to properly thread the machine. Take Singer for example. Depending on the model of the machine, the threading is similar, but some pass the thread thru the needle from left to right, other pass the thread thru the needle from right to left, and some pass the thread thru the needle from front to back!
One thing is for sure, an improperly threaded machine will sew miserably or not at all. The result is frustration and unpleasantness.
As a general rule, as you sit in front of the sewing machine you can look at the position of the thread guide closest to the needle. If the thread guide is on the left side of the needle bar, the machine threads from left to right. If the thread guide is on the right side of the needle bar, the machine threads form right to left. If the thread guide is in front of the needle bar, the machine threads from front to back.
Universal to all sewing machines, two things are most important to proper threading.
- Inserting the needle properly in the sewing machine. The orientation of the needle is an indicator of which way direction the machine threads. The needle has two sides. On one side of the needle, the shank has a flat surface. If you look at the other side of the needle (opposite the flat), you will see the needle has a long groove. Without exception, a sewing machine needle is always threaded thru the side with the long groove. This means it is always threaded thru the opposite side of the flat.
- The presser foot must be raised when the thread is passed around the top tension assembly. This ensures the thread is passing around the tension shaft between the discs. With the presser foot down, the discs are clamped together, and the tension control will be poor and result in a bad stitch. This is true for ALL sewing machines regardless of age, make, or model. The thread must pass thru the top tension assembly with the presser foot raised!
Besides these two precautions, the thread path may be different from one machine and another.
This tutorial relates to threading Singer Slant needle models including the 401A, 403A, 404, 501, and 503A and I hope the pictures will help you learn the thread pattern for these machines. On these machines, the proper needle orientation is such that the flat of the needle faces the rear of the machine.
There are a lot of thread guides to thread thru and it is most important to a slant needle machine to use them all.
How It’s Done
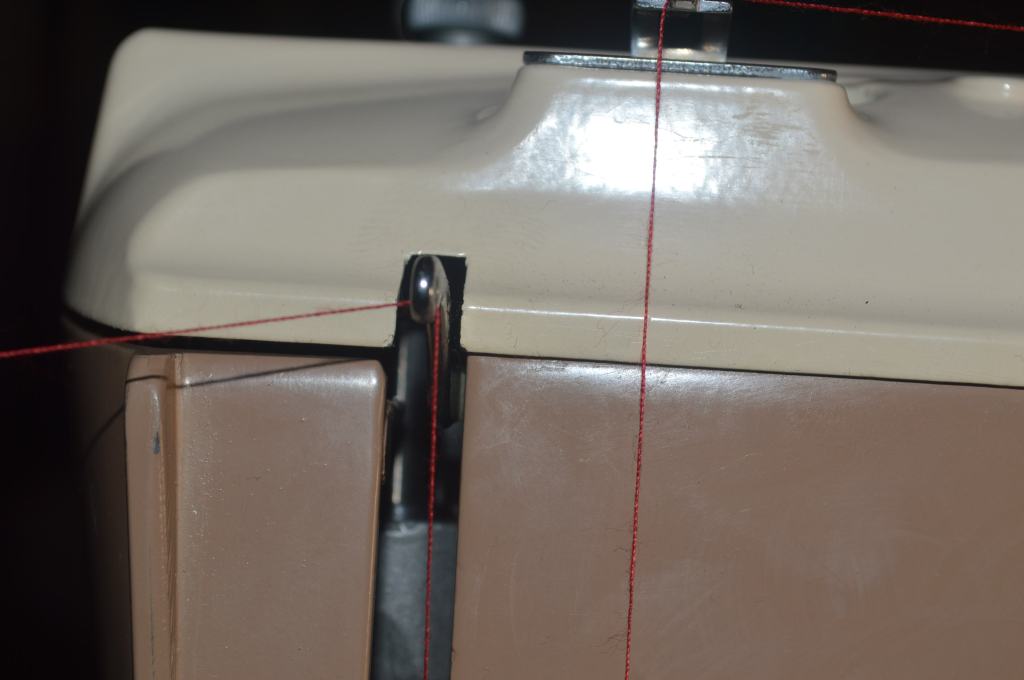
The first step is to thread thru the guide on top of the machine. The thread should be feeding off of the back of the thread spool.
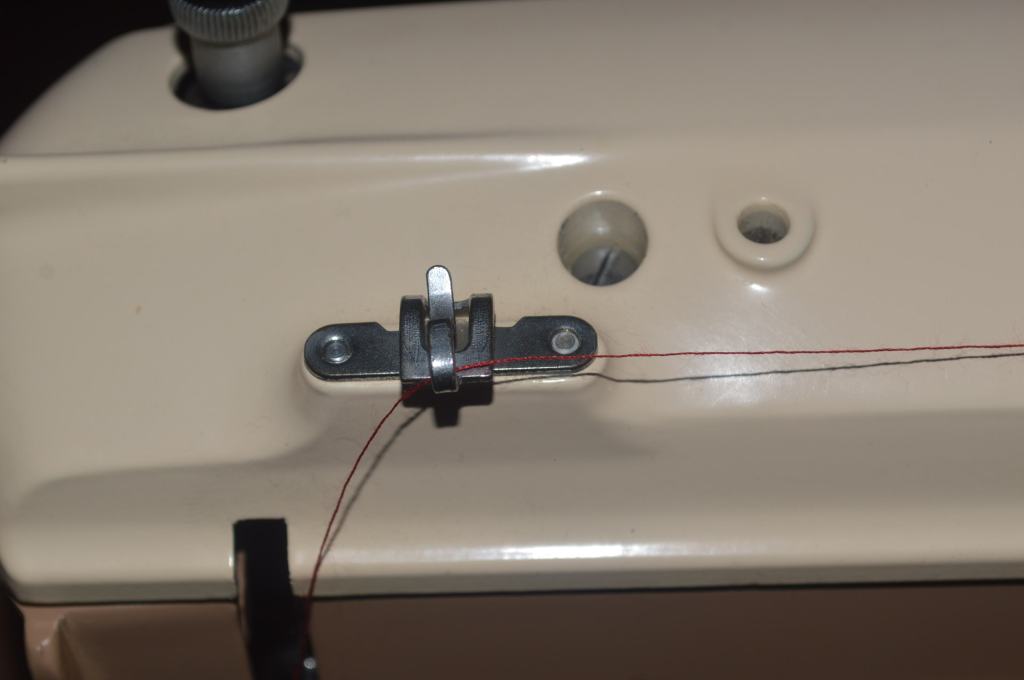
Raise the presser food and bring the thread around the top tension assembly.
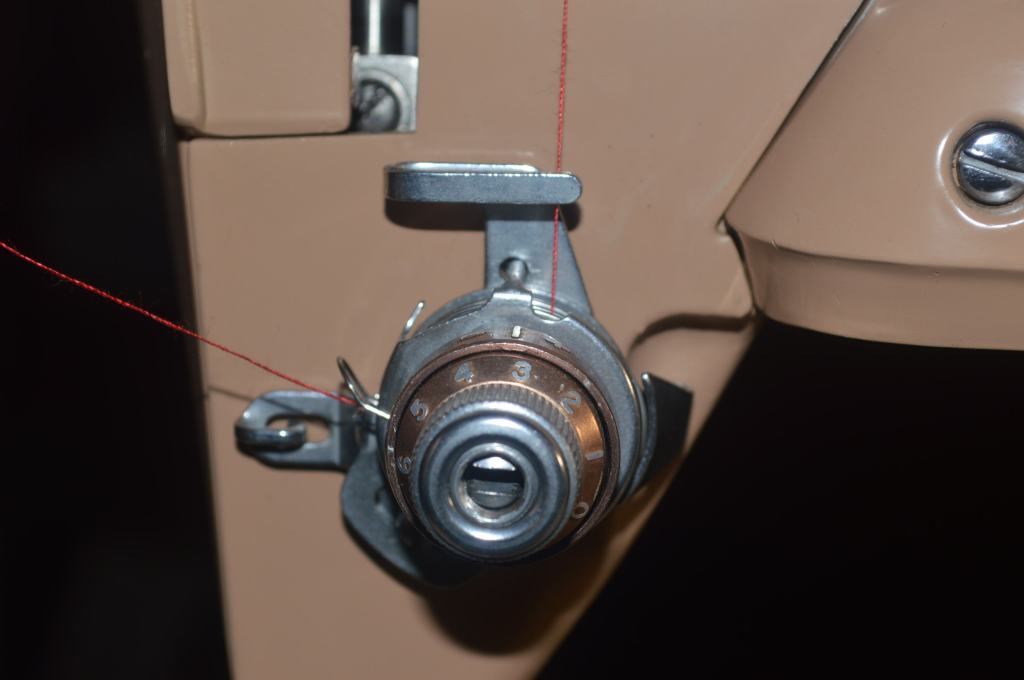
Now you can lower the presser foot and draw the thread towards the back of the machine until it slips behind the take up spring.
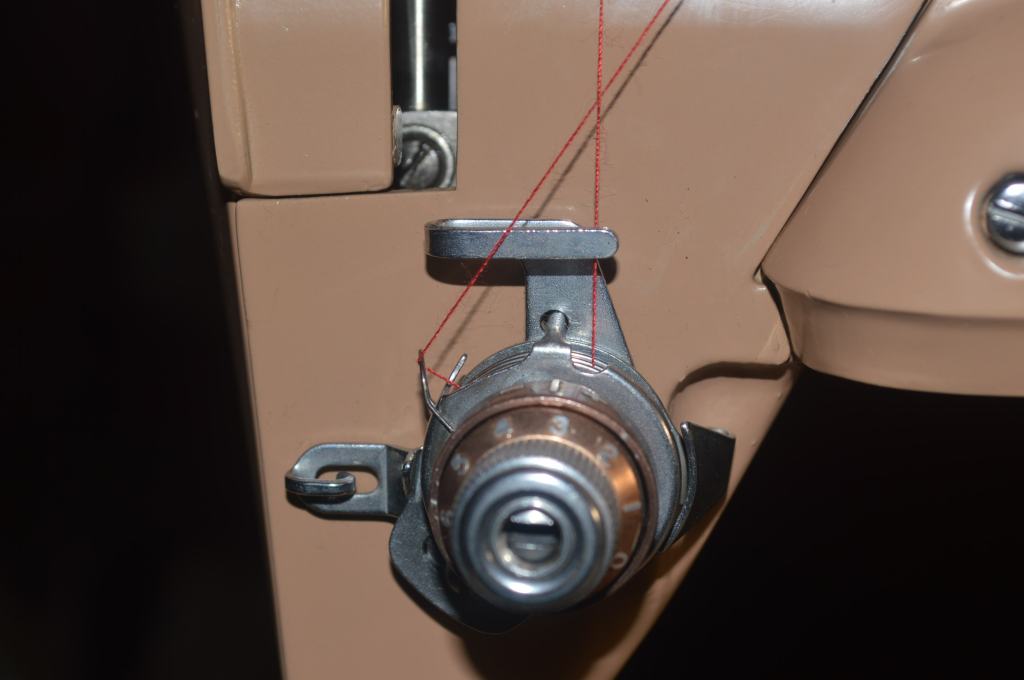
Bring the thread behind the guide and thread thru the hole in the thread take up arm.
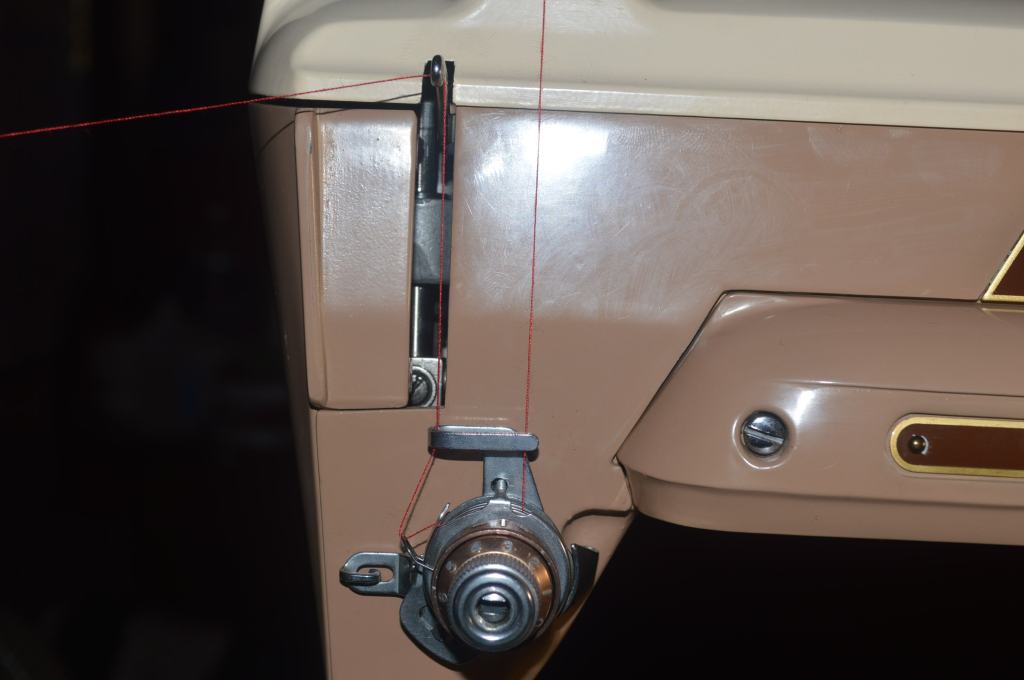
Pass the spring thru the thread guide adjacent to the tension assembly
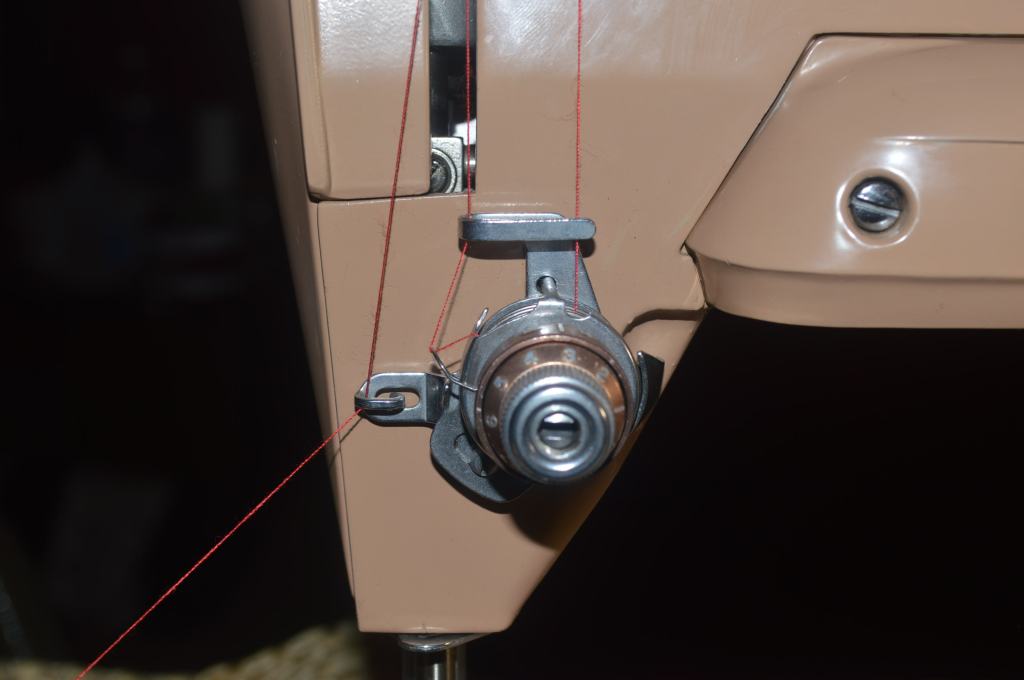
Next, pass the thread thru the thread guide on the bottom of the nose.
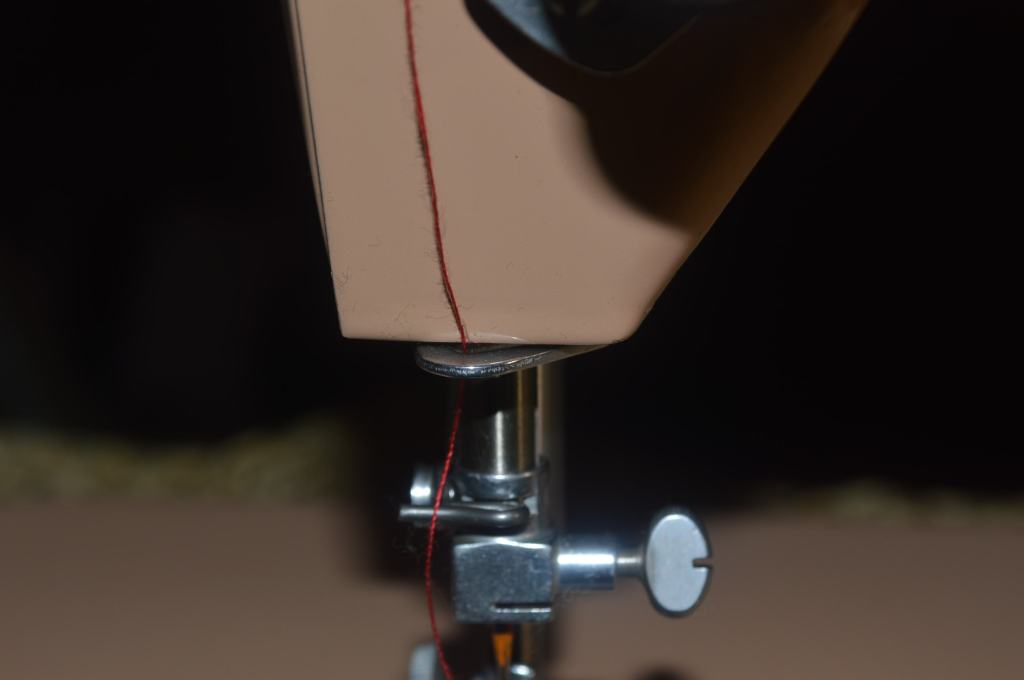
Now pass the thread thru the thread guide above the needle clamp.
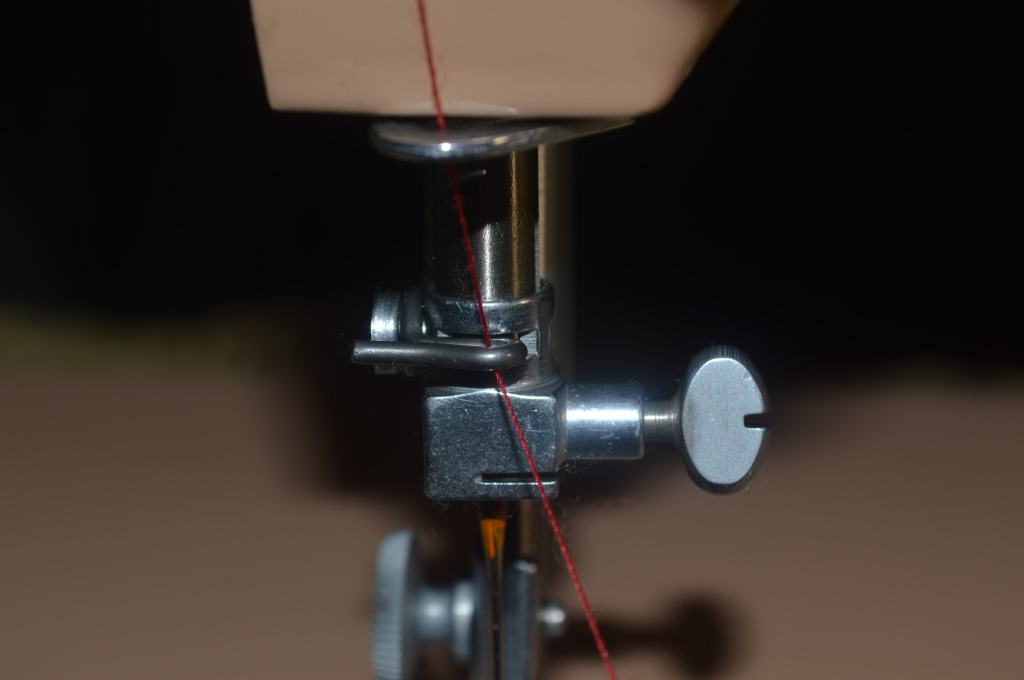
Pass the thread thru the thread guide slot in the needle clamp

Finally, to finish the threading, pass the thread thru the needle from front to back.
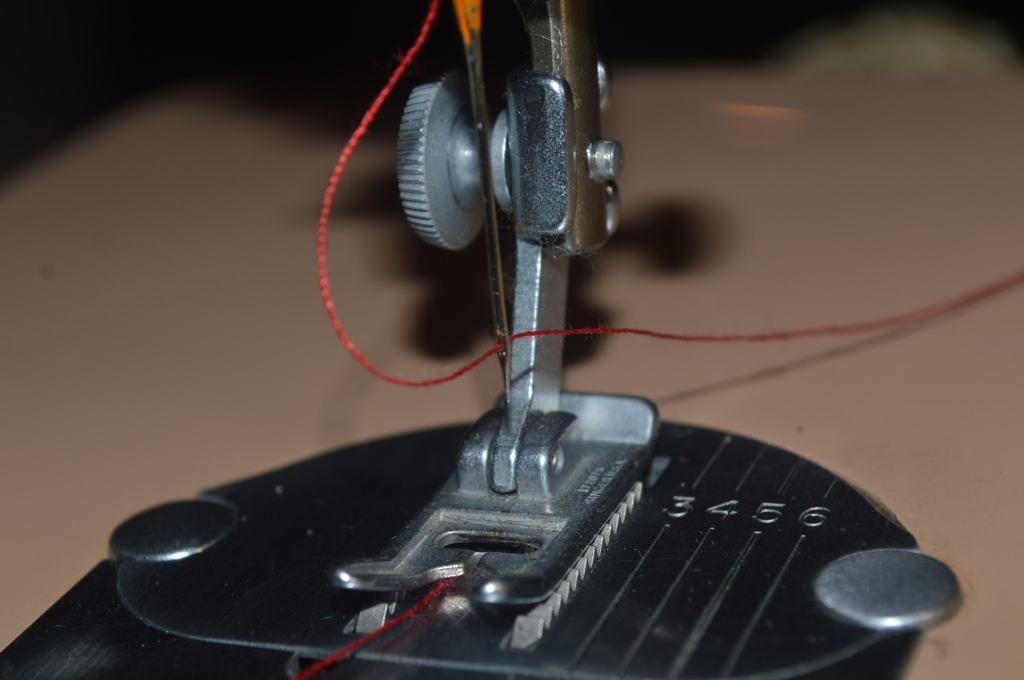
That’s it! It’s easy and will avoid any problems due to improper threading on these machines.
Help Support Our Site!
As always, our tutorials are provided as a free resource to help you learn and maintain your vintage sewing machine. As our site has grown, so has the cost to keep and maintain it. Despite these costs, I will strive to continue posting tutorials and other relevant content for the benefit of the sewing community. If you found the content of this tutorial useful, please consider making a small donation to help me grow the site and help defray my costs… every little bit helps.
Make a one-time donation
Make a monthly donation
Make a yearly donation
Choose an amount
Or enter a custom amount
Your contribution is appreciated.
Your contribution is appreciated.
Your contribution is appreciated.
Please let me know if I can answer any questions or if I can be of any assistance by emailing me at pungoliving@gmail.com.
Thanks for reading!
Lee

“Without exception, a sewing machine needle is always threaded thru the side with the long groove. This means it is always threaded thru the opposite side of the flat.”
“Finally, to finish the threading, pass the thread thru the needle from front to back.”
Only one statement can be true. The flat of the needle faces forward on the slant.
LikeLike
Do you have the manual? If not, send me an email to pungoliving@gmail.com and I will send you a copy.
The flat side of the needle inserts towards the back of these machines. If you insert it otherwise, it will not sew properly. Just remember the thread always goes thru the long groove and insert the needle accordingly.
Hope this clarifies my statement.
Lee
LikeLike