

Introduction
This is a custom restoration of a wonderful Singer model 201-2 sewing machine. The story behind this machine is really a testament to the sentimental value and “part of the family” mystique these wonderful vintage sewing machines have. A history built on use and more importantly the fond memories of your mother or grandmother mending everyday clothes, making prom dresses, sewing curtains, or… well, you name it! It’s fascinating, and this memorable attachment is the signature of an heirloom meant to be passed down through generations and used with affection now as it was then. Even more so for vintage and even antique sewing machines because they are one of a very few items that can work decades after they were manufactured as well as they did when they were new.
So, what’s the story this machine shares with its family? I don’t know all of it, but from what I gathered, the customer’s wife’s grandmother purchased the machine new in 1946 and used it often. The machine was passed down thru the family where it ultimately ended up in storage. Safely tucked away in its cabinet, the machine sat unused for 50 years or so. Because of his wife’s interest in sewing, he wanted to have the machine restored so she could continue to use the machine and build on its family history and continue the story.
I am always pleased to hear stories like this about machines of this quality and know that it has been preserved in a state that makes it possible to bring to new life. So often, old vintage sewing machines are lost or have been discarded. For my part, I enjoy making every effort to restore them to sew at the peak of their performance and look their very best.
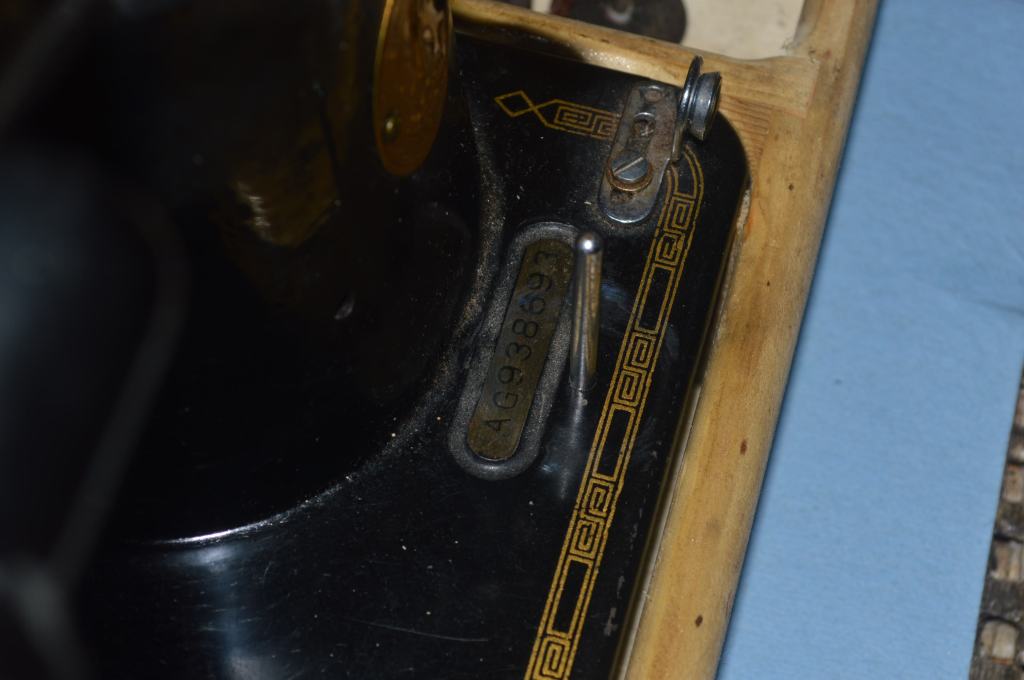
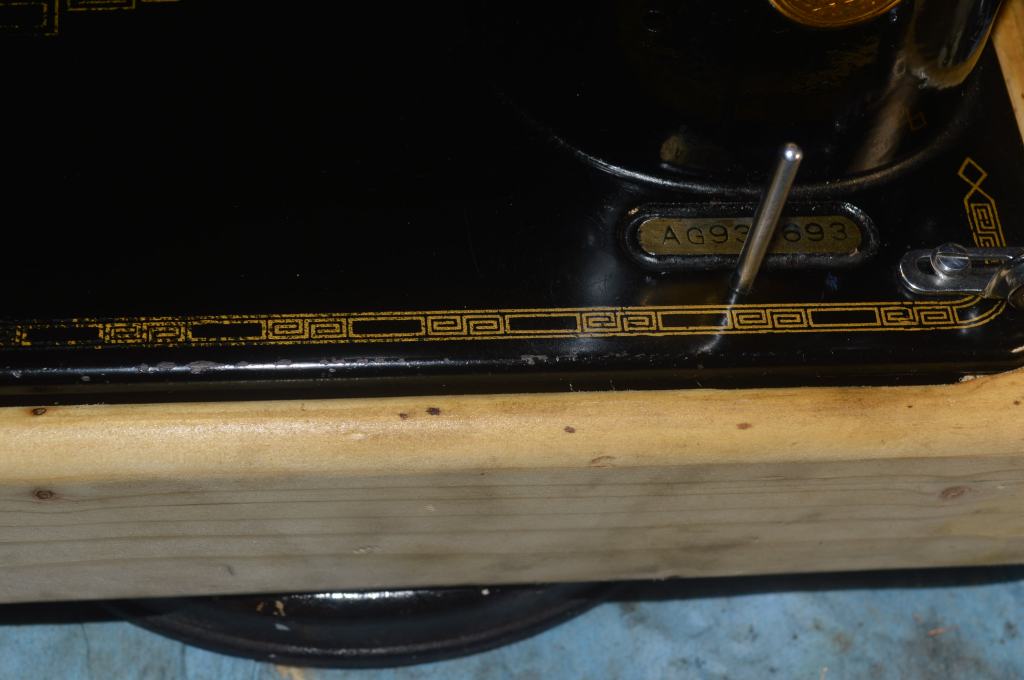
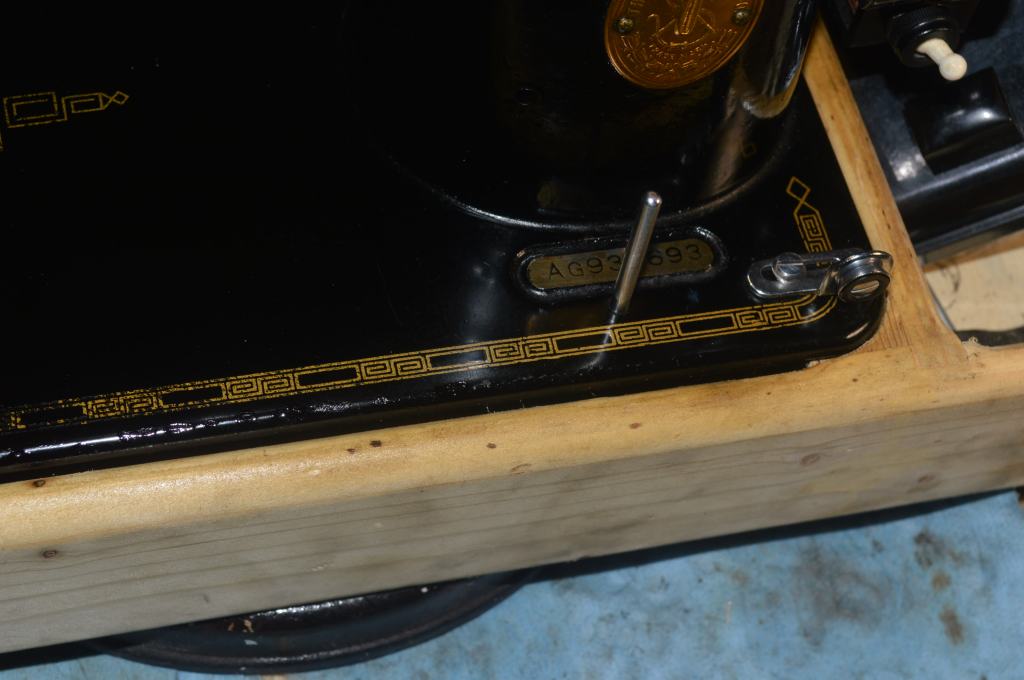
According to the serial number this model 201-2 was one of 15,000 commissioned for manufacture on December 20th, 1946. The year of manufacture is significant because 1946 was the year Singer recommenced production of domestic sewing machines following WW2. Between 1942 and 1946 Singer ceased production of domestic sewing machines to support the US war effort and concentrated on producing things like .45 caliber automatic pistols and bomb sights. It didn’t take Singer long after the war to resume manufacturing their fine quality sewing machines. The model 201-2 is an iconic sewing machine. Many people consider the 201 to be the finest sewing machine Singer ever produced. A step above, it transcended the moniker of “domestic sewing machine” and introduced a separate class of machine known as a “professional” sewing machine. It is not industrial or commercial grade, but it was built to sew reliably for long sessions with minimum maintenance. The heaviest sewing machine Singer produced for the domestic market, the 201-2 is very robust. It features a full gear drive sewing mechanism and “potted” motor, a full rotary hook, it has a feed dog drop mechanism, variable stitch length with back tack, and it uses a class 66 drop in bobbin system and a standard 15×1 sewing needle. Three sets of matched and balanced gears power the machine quietly with minimal vibration and it is rated to produced up to 1100 exceptionally straight stitches per minute. It is quite a machine and in fact, an entire cottage industry of seamstress’ and tailors working at home to provide extra income grew around the machine. Truly, the 201-2 has quite a history and there is much more information one can find online. Regardless of condition, it is my personal belief that any model 201 is worthy of restoration. That said, let’s move to the restoration of this machine.
Restoration Plan
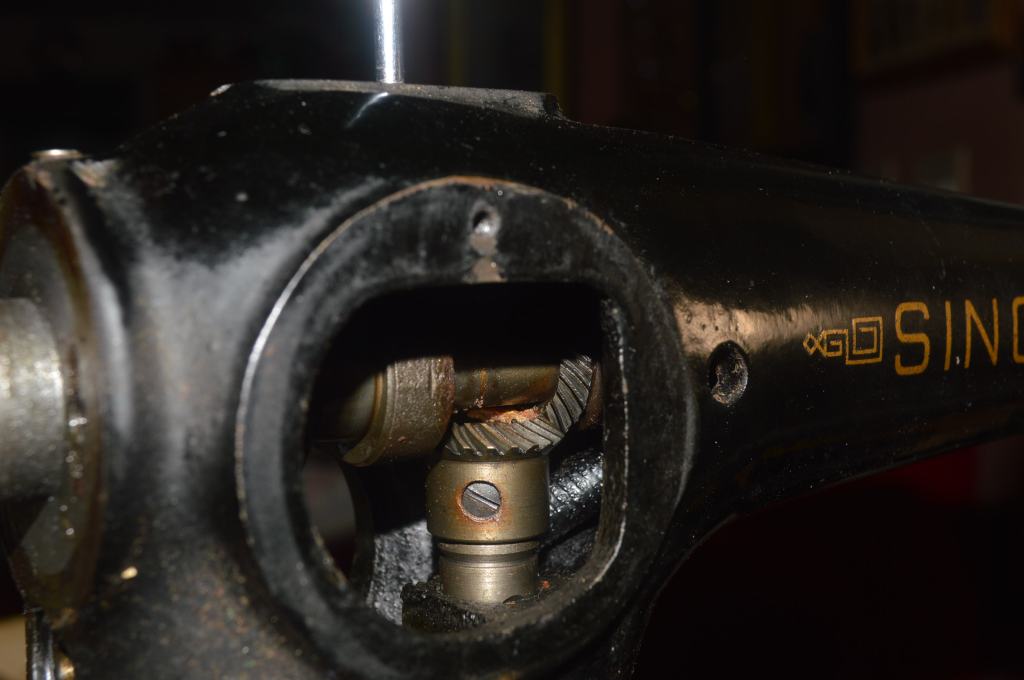
This machine is planned to have a detailed mechanical restoration. It will be disassembled as far as the gears allow. Unlike most machines, the 201 was manufactured with sets of gears that were balance and tooth matched to each other. With the exception of one gear to allow for hook timing adjustment, it is not recommended to remove the gears or disturb their position orientation. It is because of this high tolerance in manufacturing the 201 runs as smooth and quiet as it does. The gears and the position of the shaft counterweights in a model 201 should never be disassembled. Instead, they must be cleaned in place.
All of the other assemblies are fair game. All of the linkages and rocker shafts, along with the connecting rod and stitch length fork is removed for complete cleaning. The motor, balance wheel, and tension assemblies will be completely disassembled for cleaning.
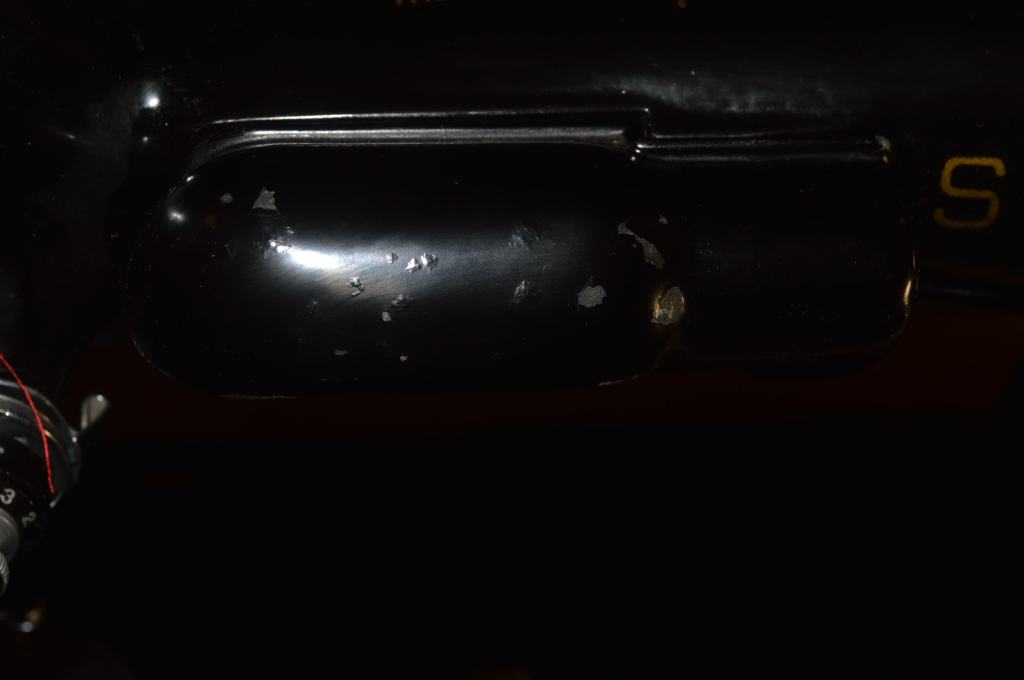
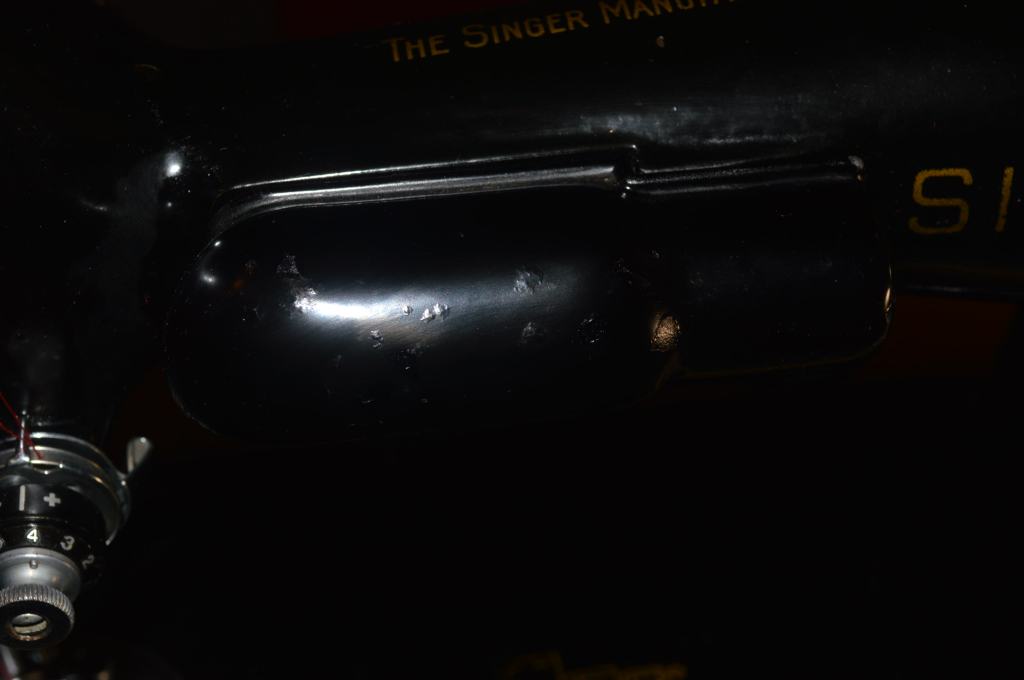
The cosmetic condition of the machine is in good condition, except for a few chips in the black japanned paint, the finish is still in great condition. The decals show some wear commensurate with age and use and the amount of decal wear suggests that the machine saw moderate use. The machine will be deep cleaned to remove any residual oil buildup and restore the deep black luster of the paint. Chips in the paint will be color matched and all of the chrome plated pieces will be polished.
The Restoration
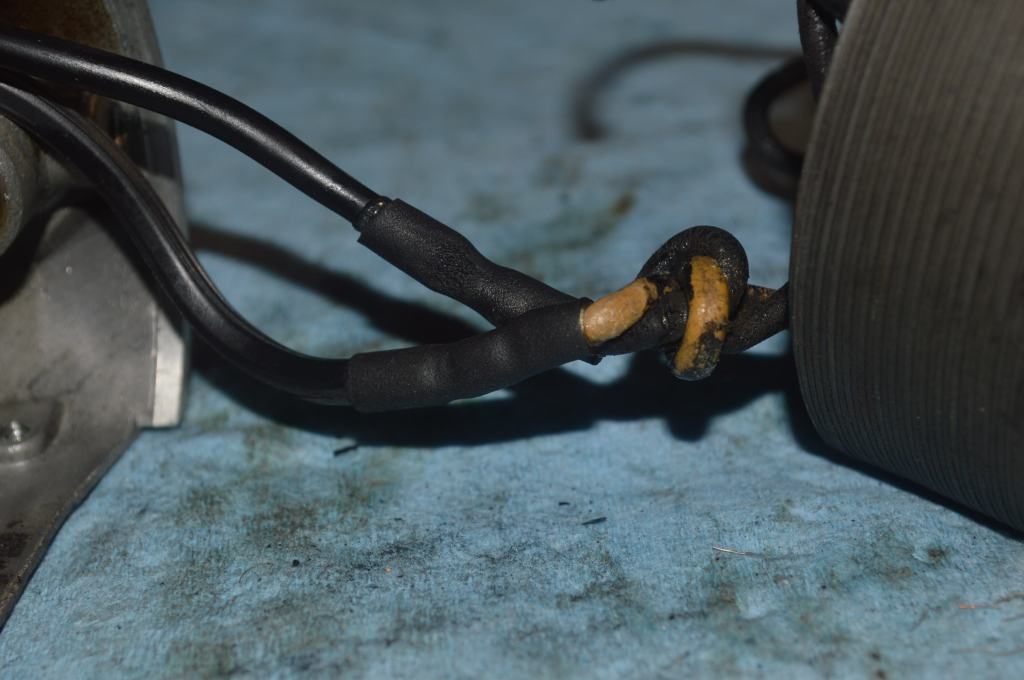
As usual, the success of the restoration is judged by a “before” and “after”. Cosmetically, this is shown by pictures, mechanically, it is judged by feel… how smoothly the machine turns by hand. I did not run this machine before I began the restoration due to concern over the condition of the main motor wires. Typical to most potted motors of this vintage, the main wires are cracked and it is not worth the risk of damage to the motor by attempting to run the machine until they are replaced. Improvement in the feel and smoothness of the machine will be inferred by the pictures in the restoration steps taken… I will summarize why this is so when the restoration is complete and the machine is properly adjusted. Until then, keep in mind that the machine turns smoothly by hand now. So, let’s get started.
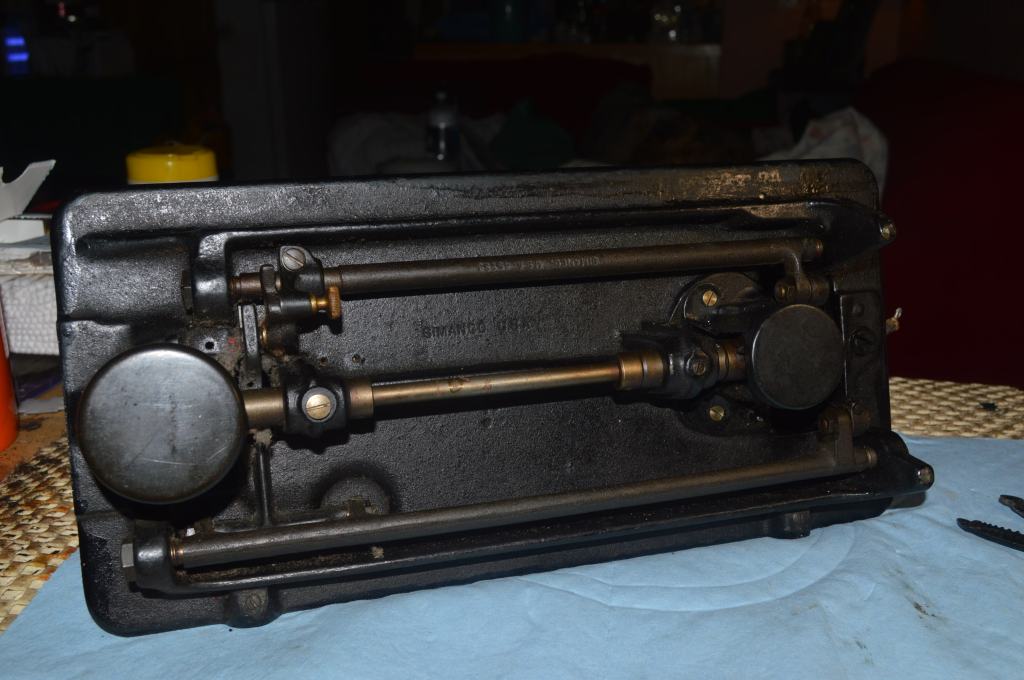
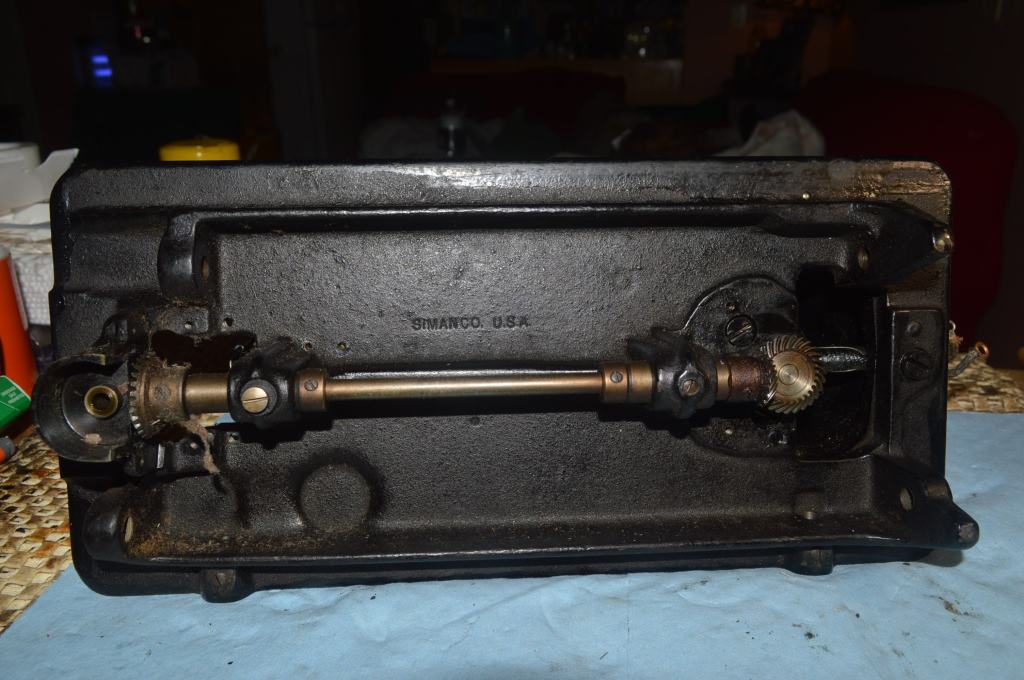
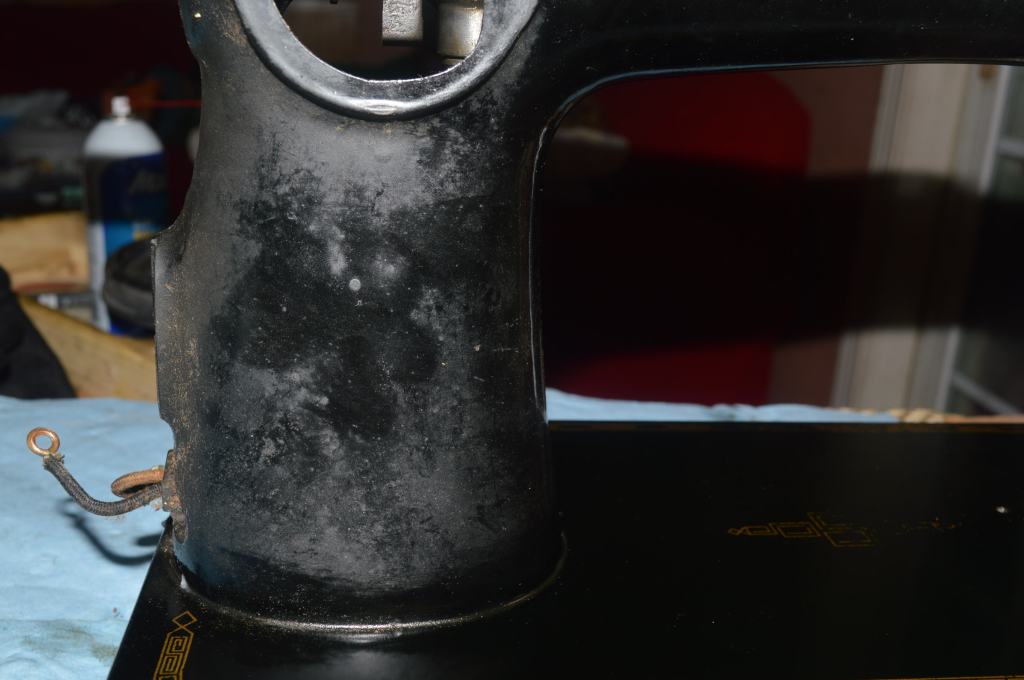
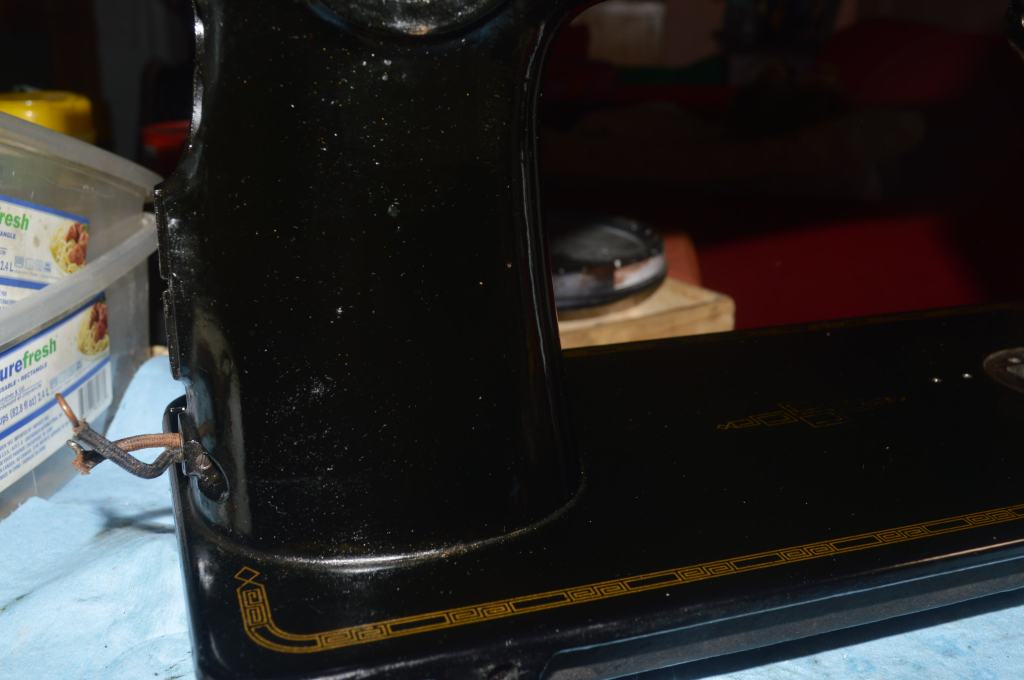
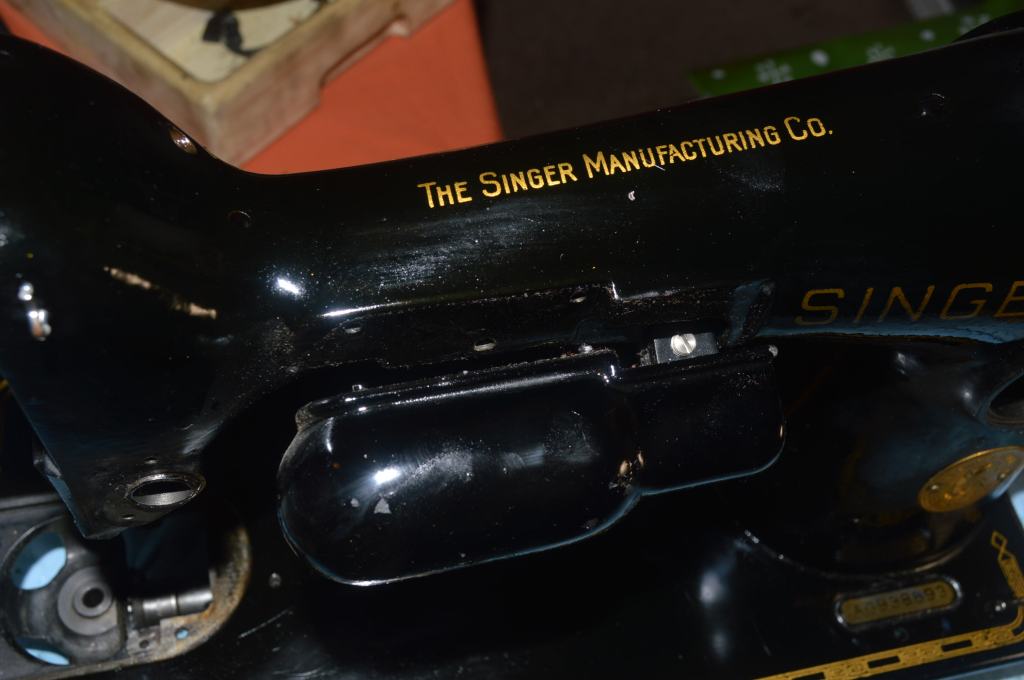
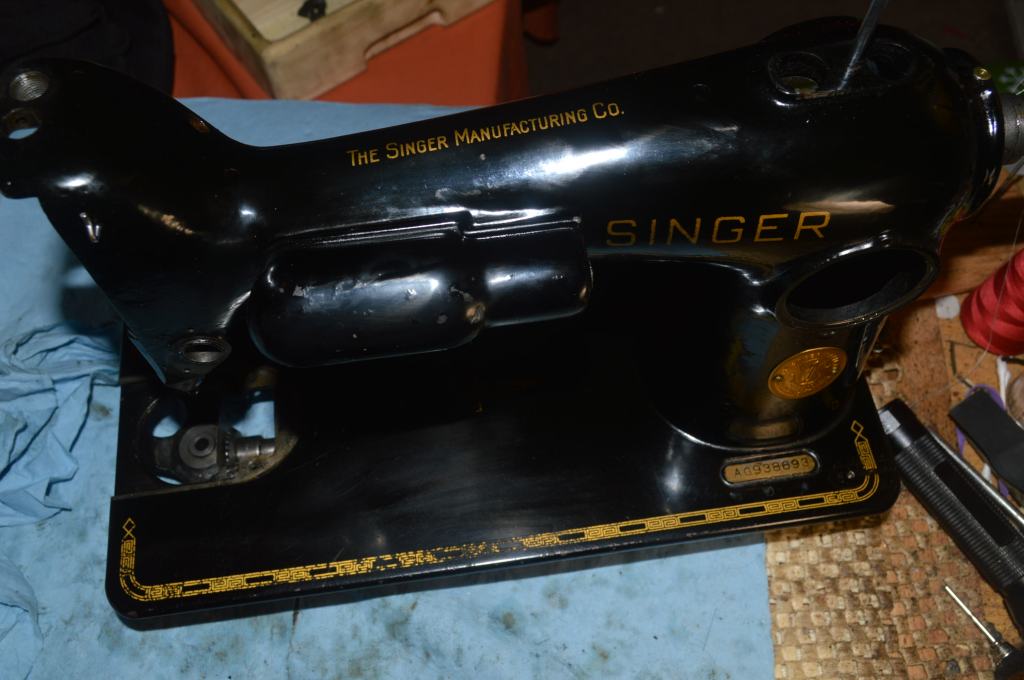
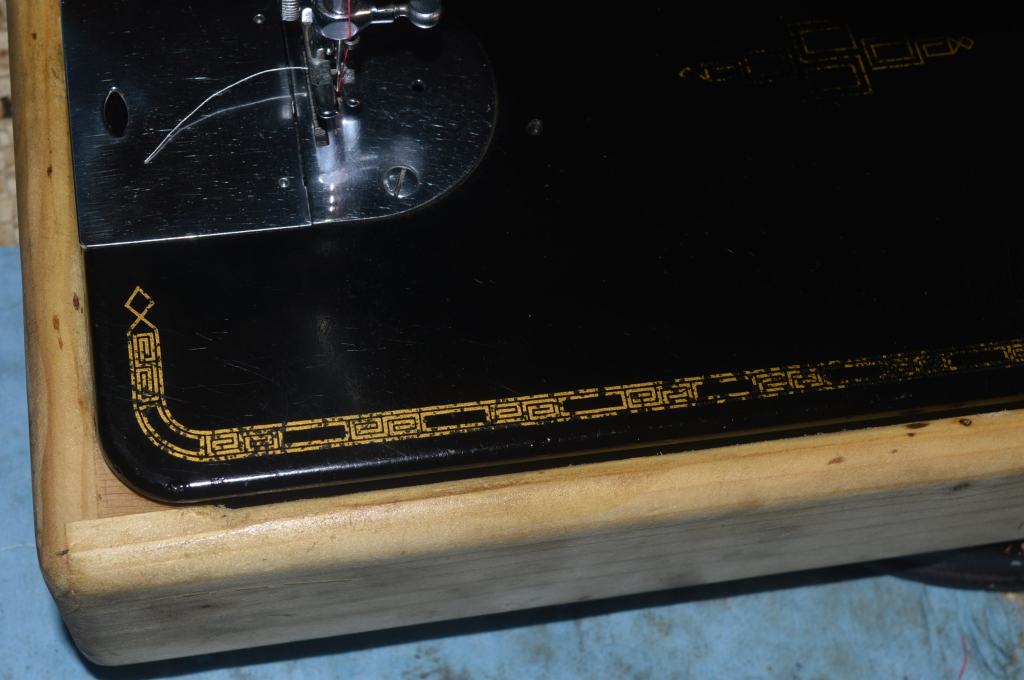
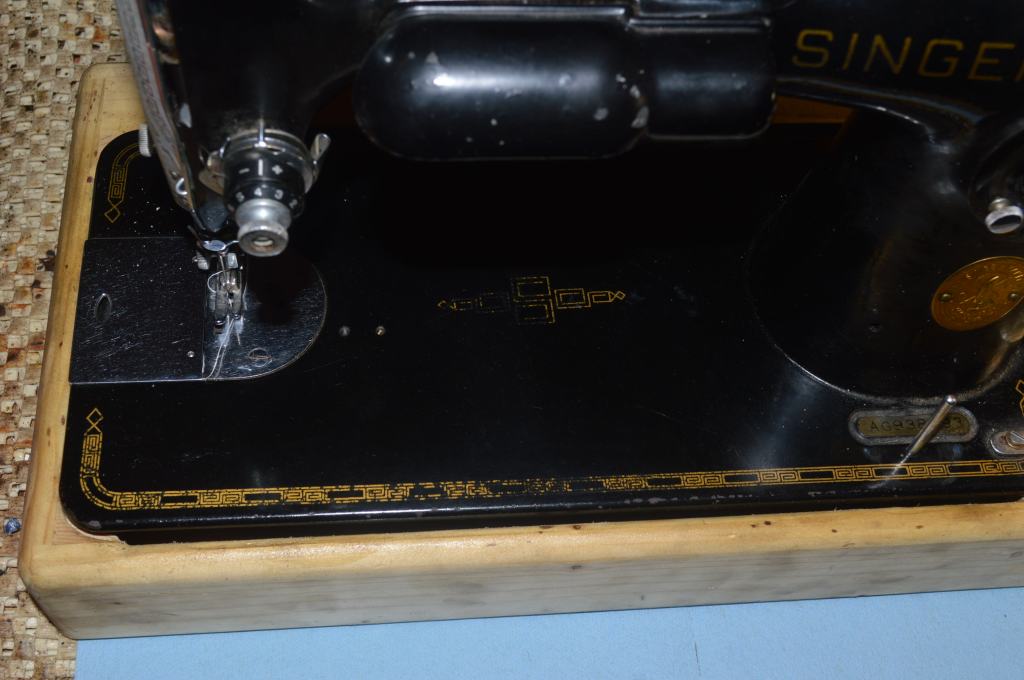
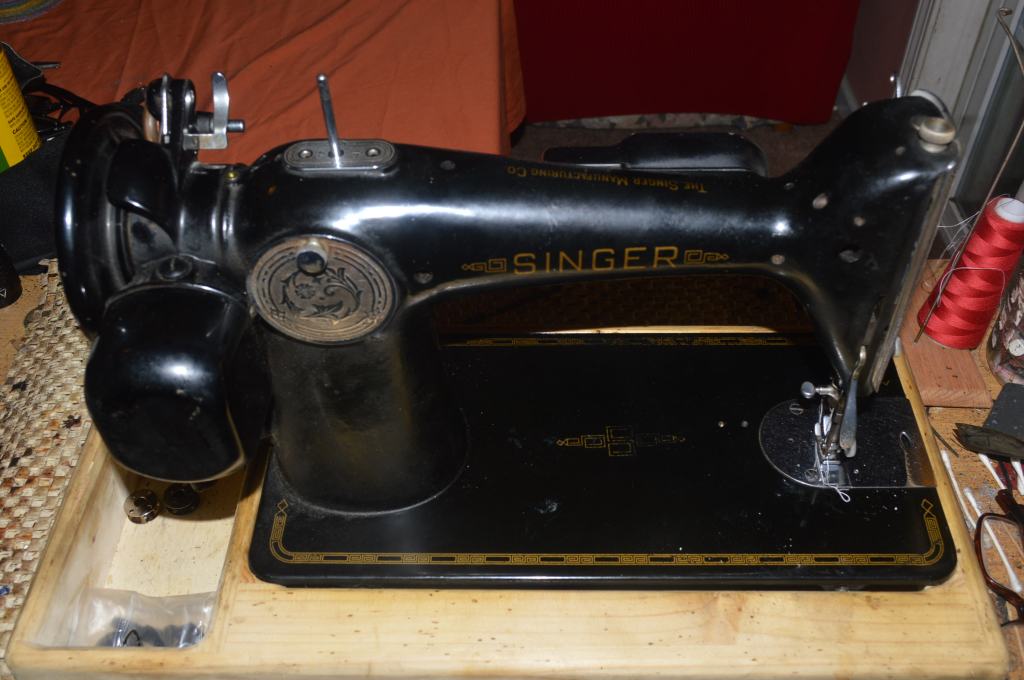
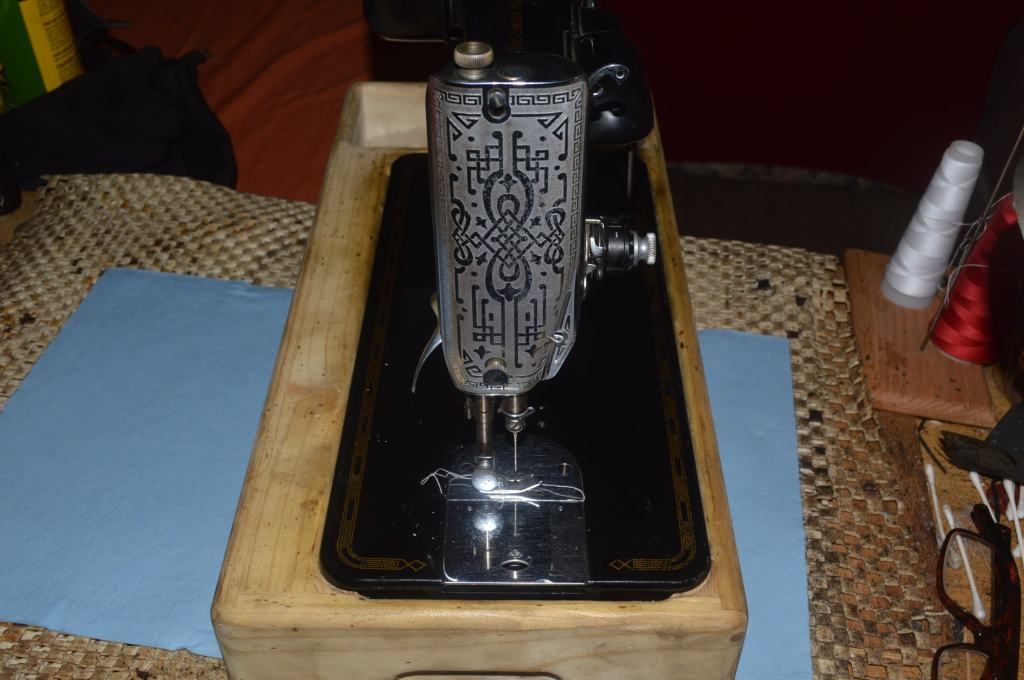
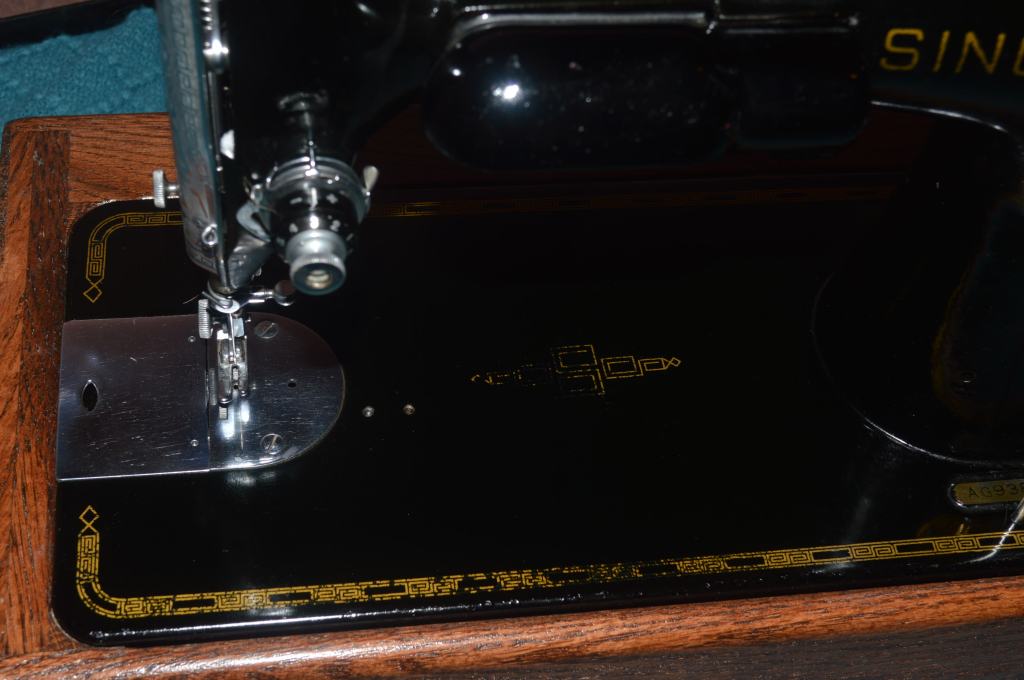
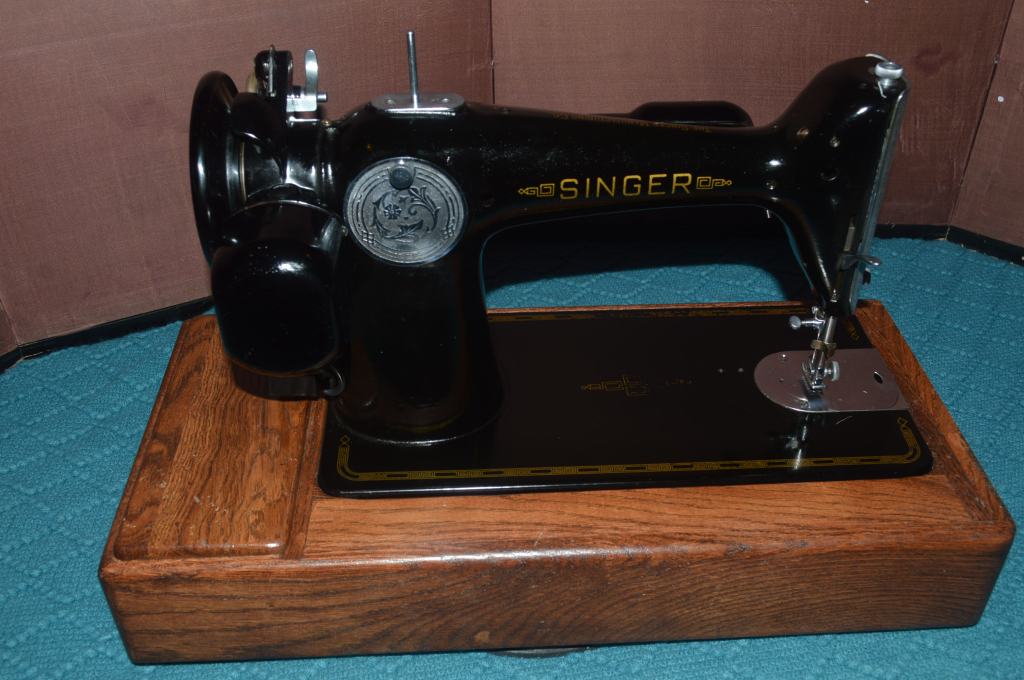
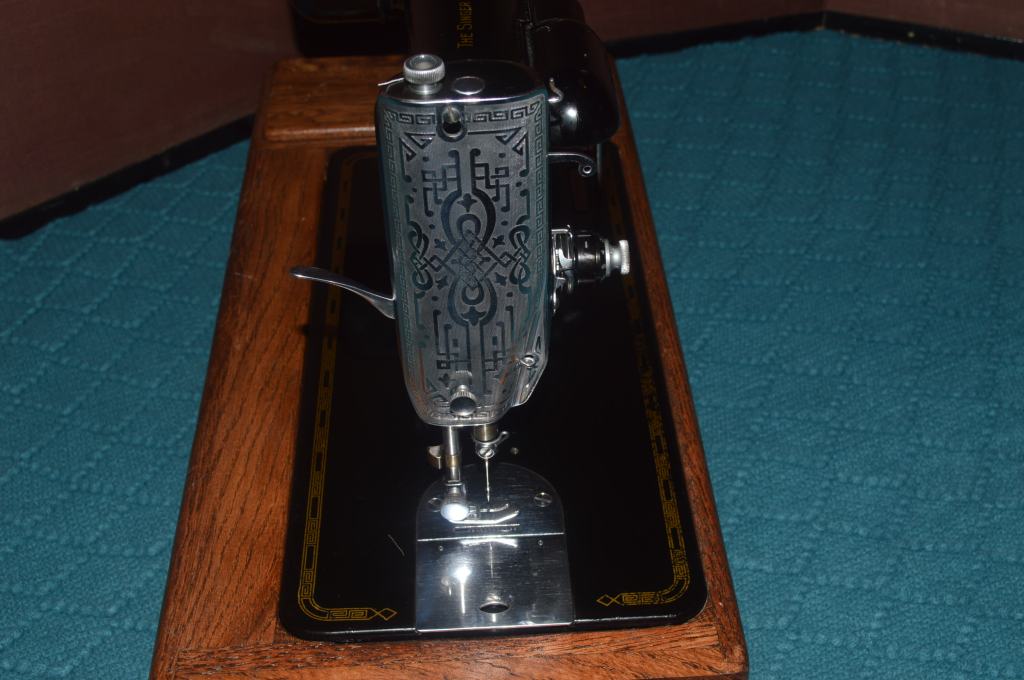
Here is the machine before the restoration begins.
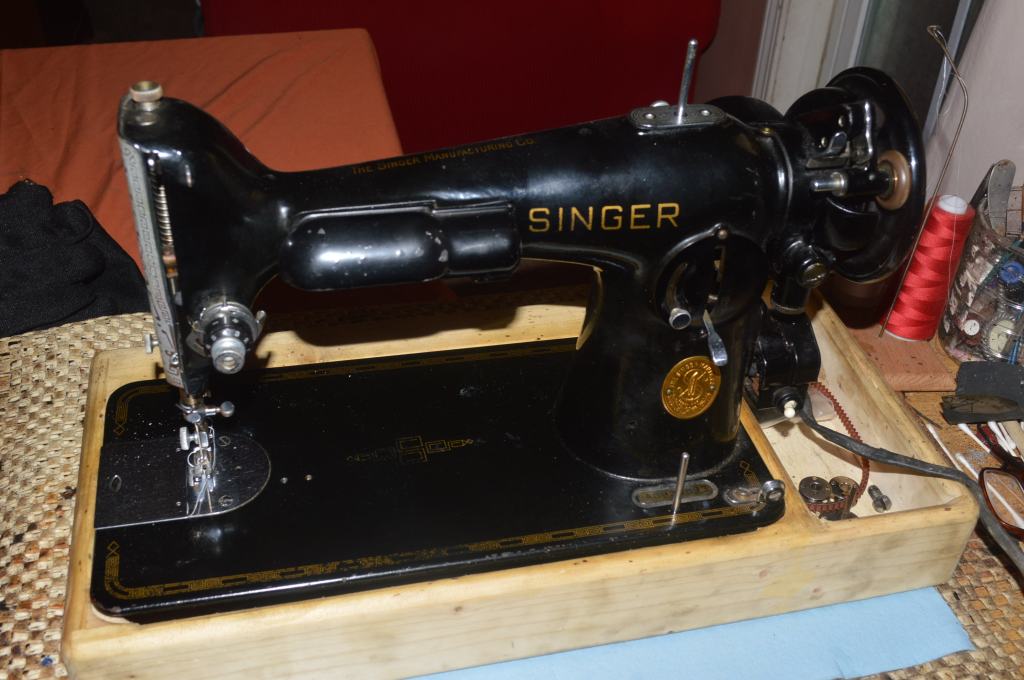


Considering it’s 76 years old, the machine looks pretty good! The sewing mechanism turns smoothly and except for old oil varnish and lint buildup, there is nothing to suggest that the machine has any mechanical issues. The paint has a reasonable amount of oil and dirt buildup on portions of the machine, but the paint is smooth and not crazed. The bed decals show some wear and this is normal for a machine that is used over a period of time. Yet, there is much that can be done to improve this machine and following the restoration it will look great and mechanically, it will sew and feel as close to new as possible.
The Mechanical Restoration
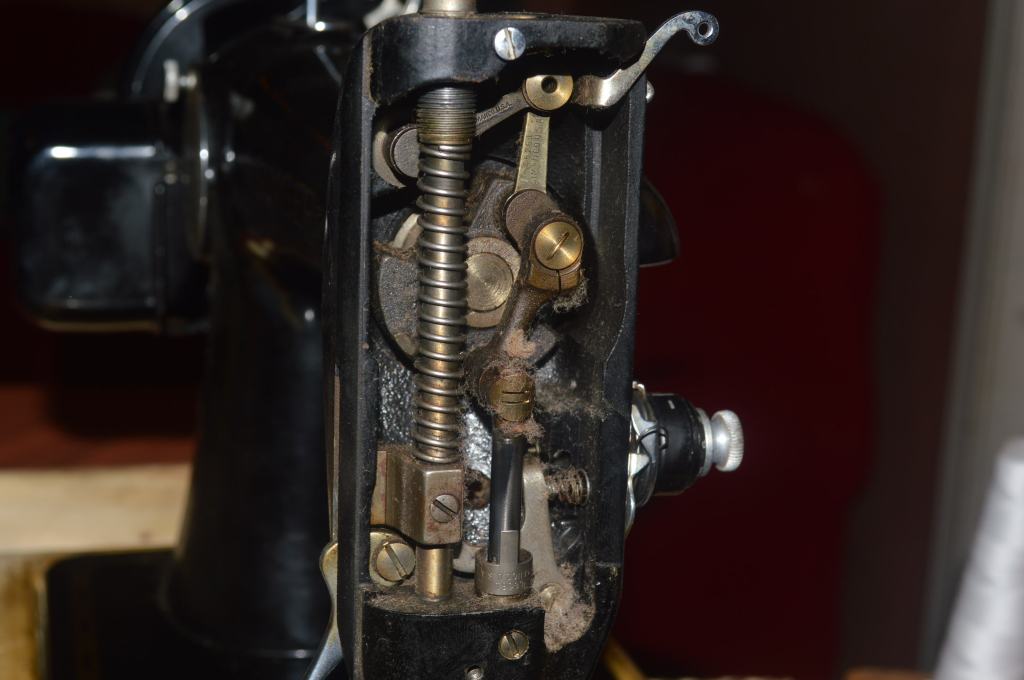
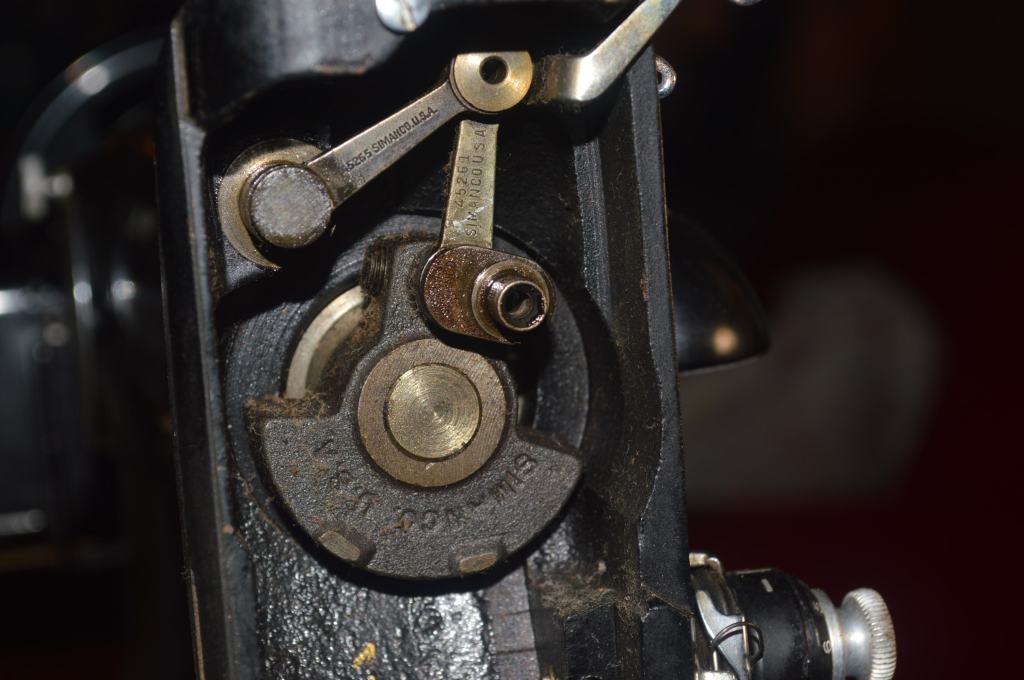
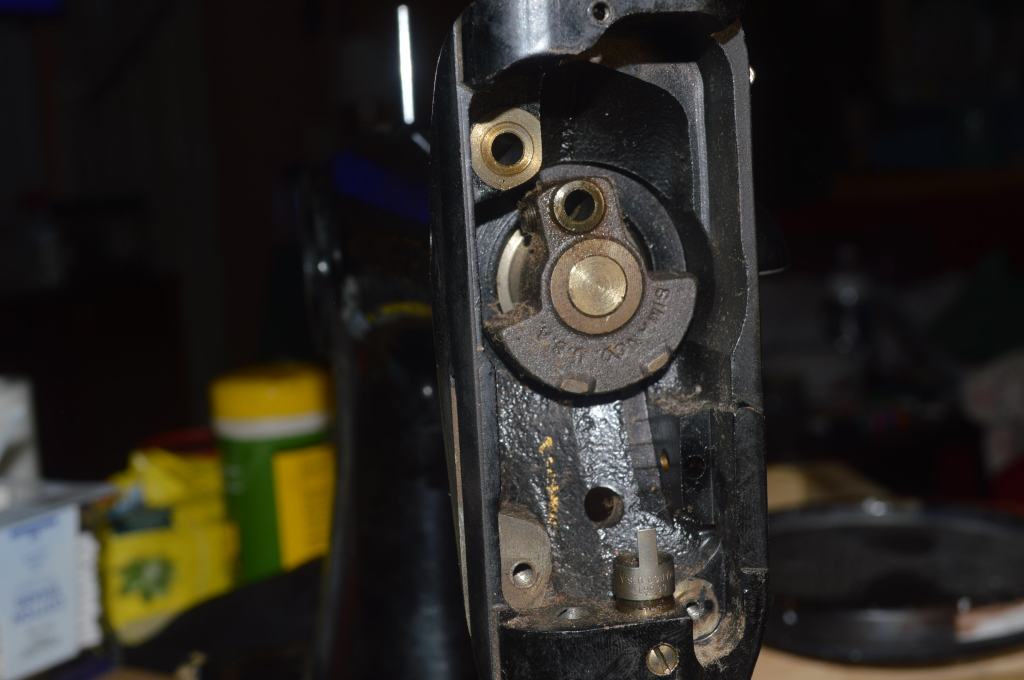
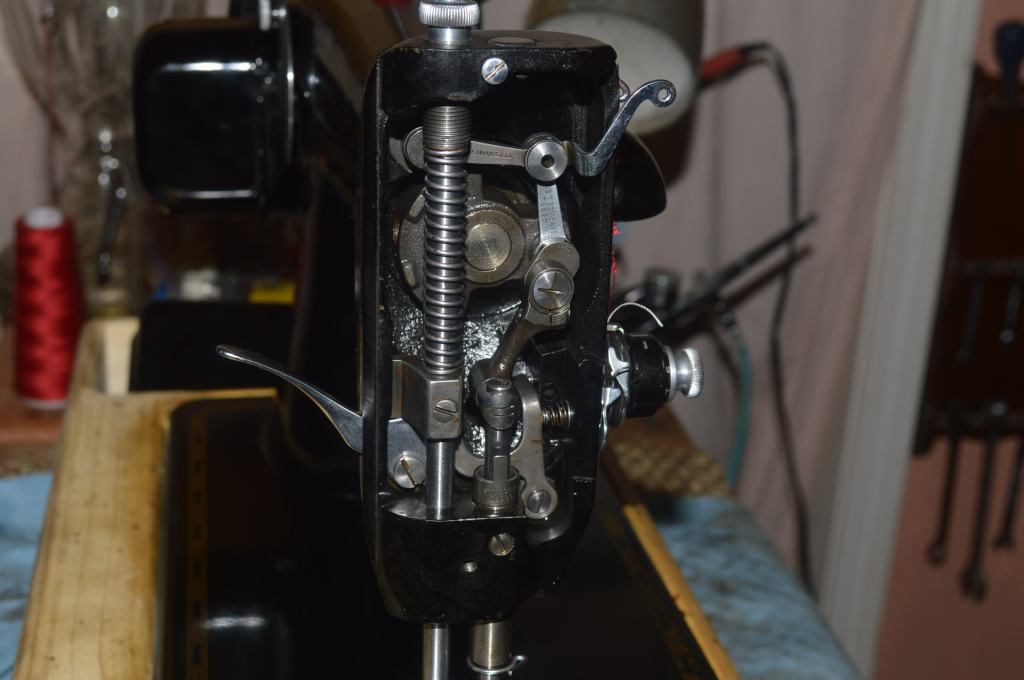
The mechanical restoration begins with disassembly. All of the parts in the sewing machine head are removed and disassembled. These include the presser foot bar, the needle bar, and all of the linkages.
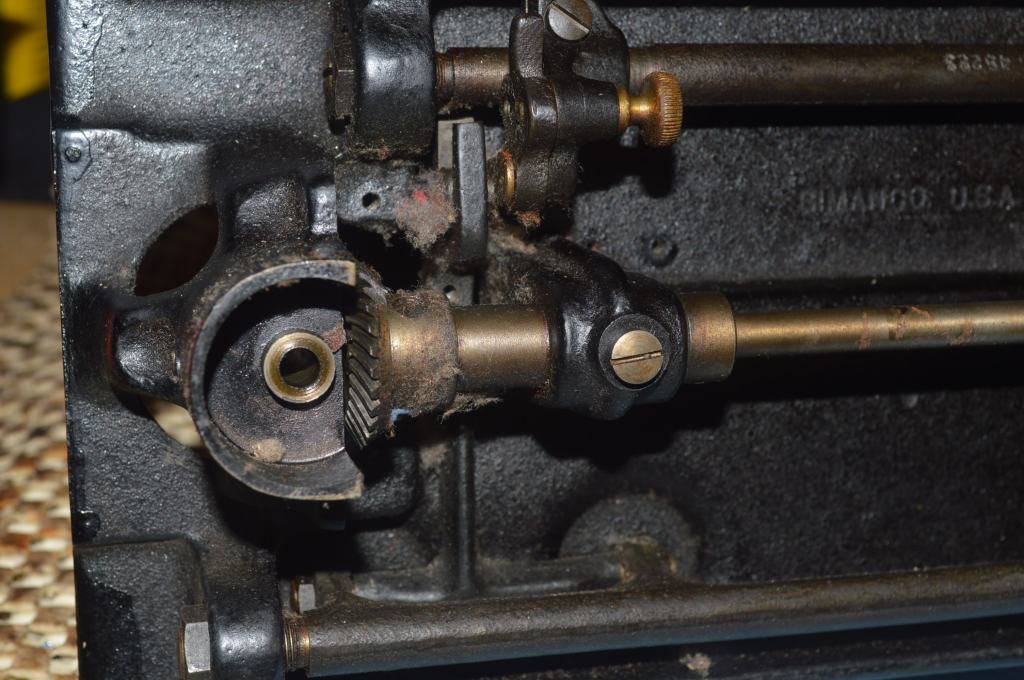
Next, all of the rocker shafts under the machine are removed and disassembled.

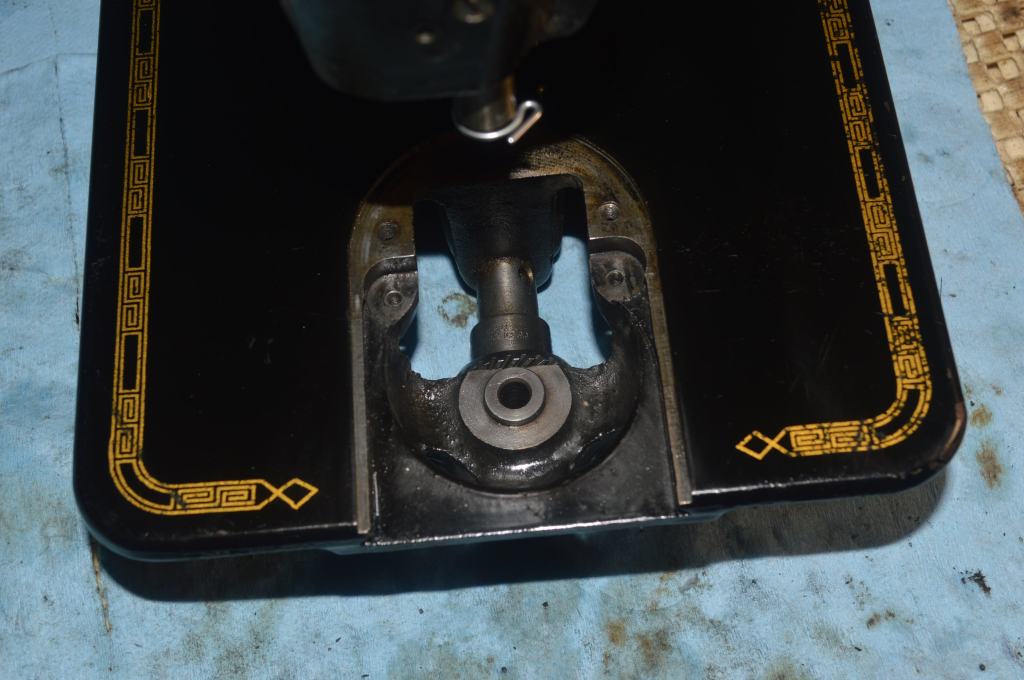
The feed dogs, bobbin hook case, and bobbin hook shaft are also removed.

The connecting rod and stitch length fork is removed.
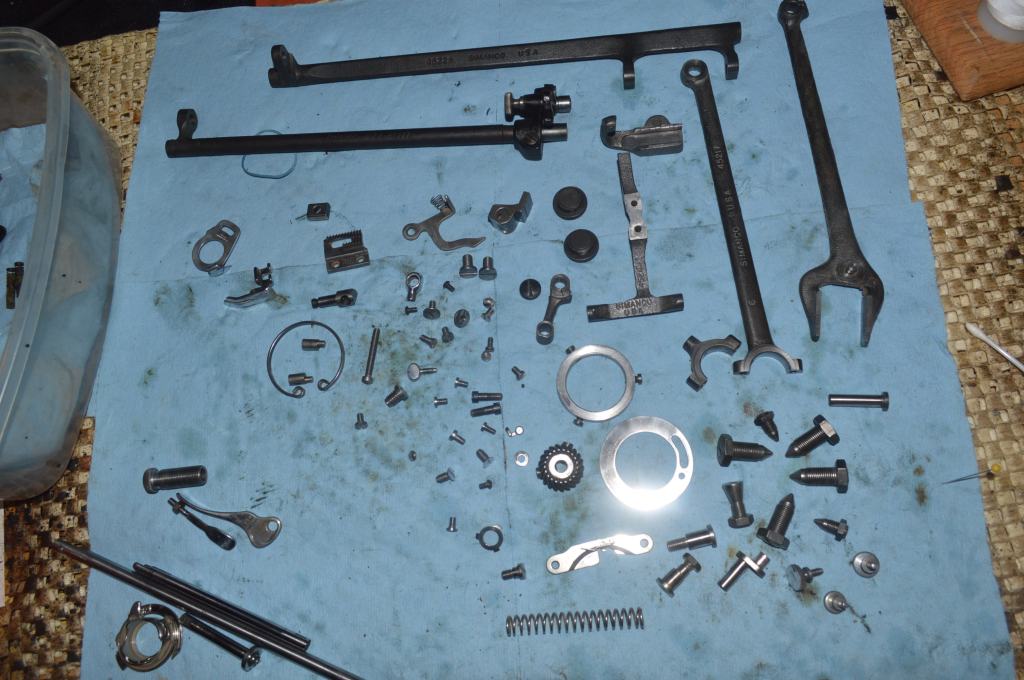
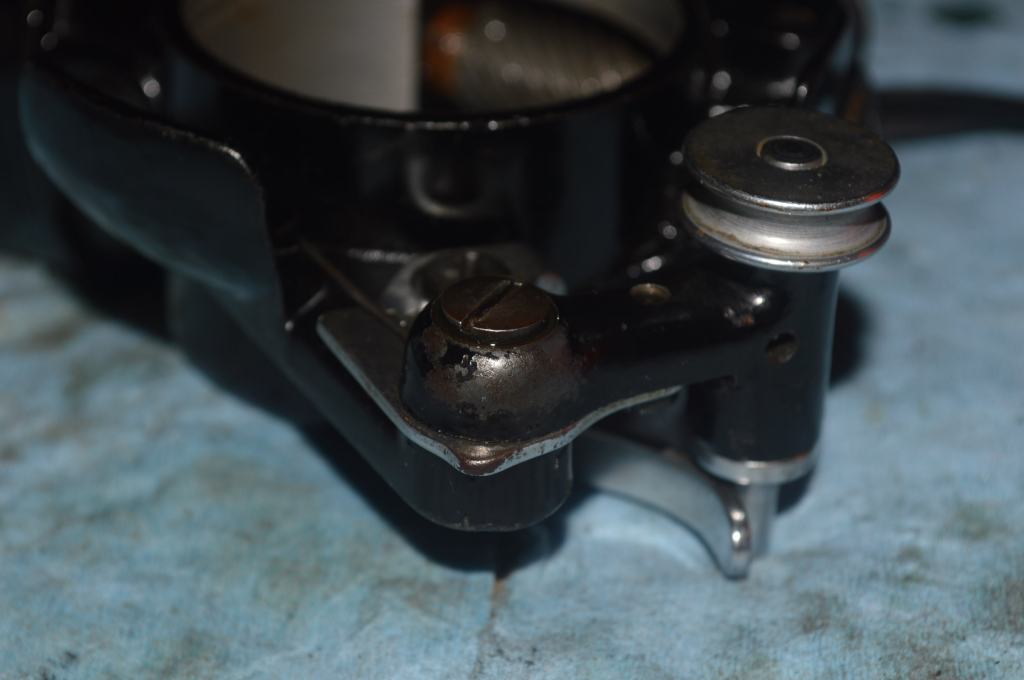
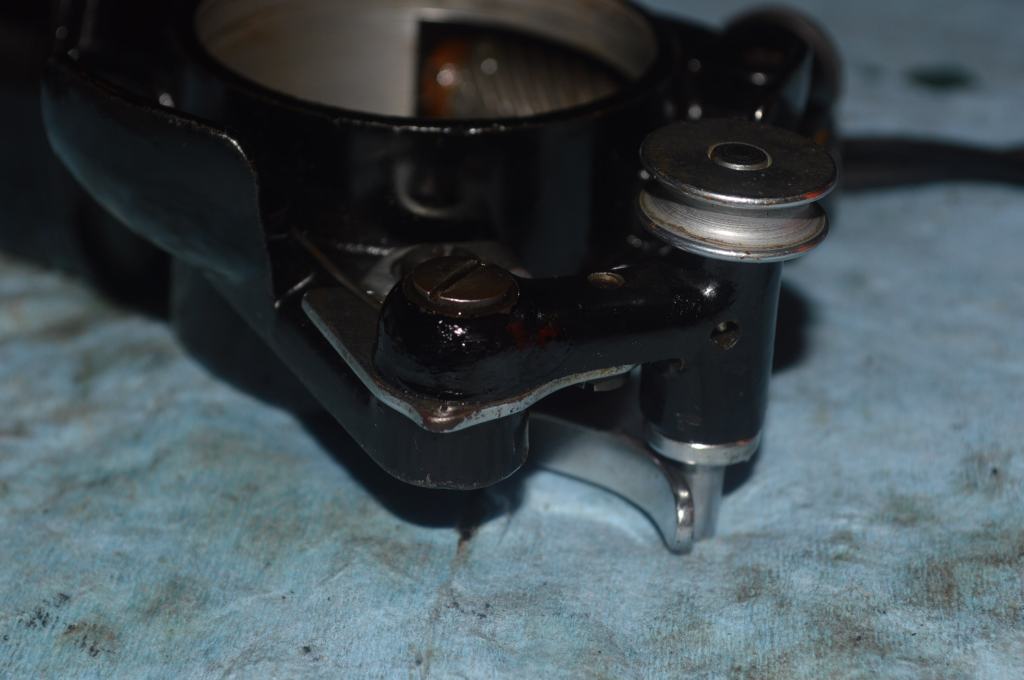
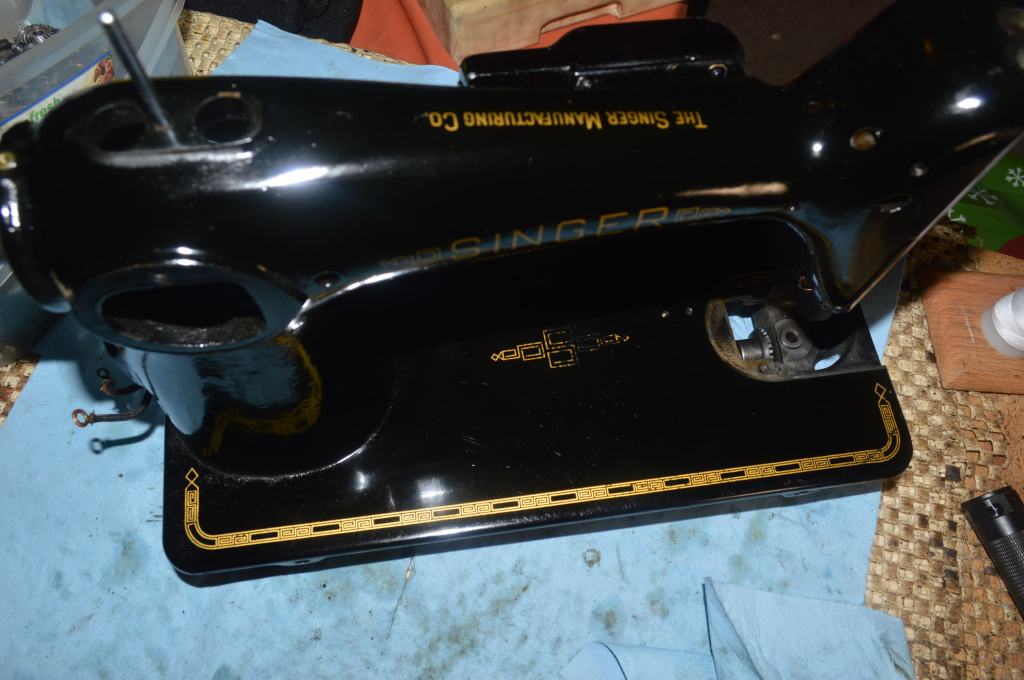
The balance wheel, motor, tension assembly, and all plated covers are removed. All of the mechanical parts removed are laid out for cleaning
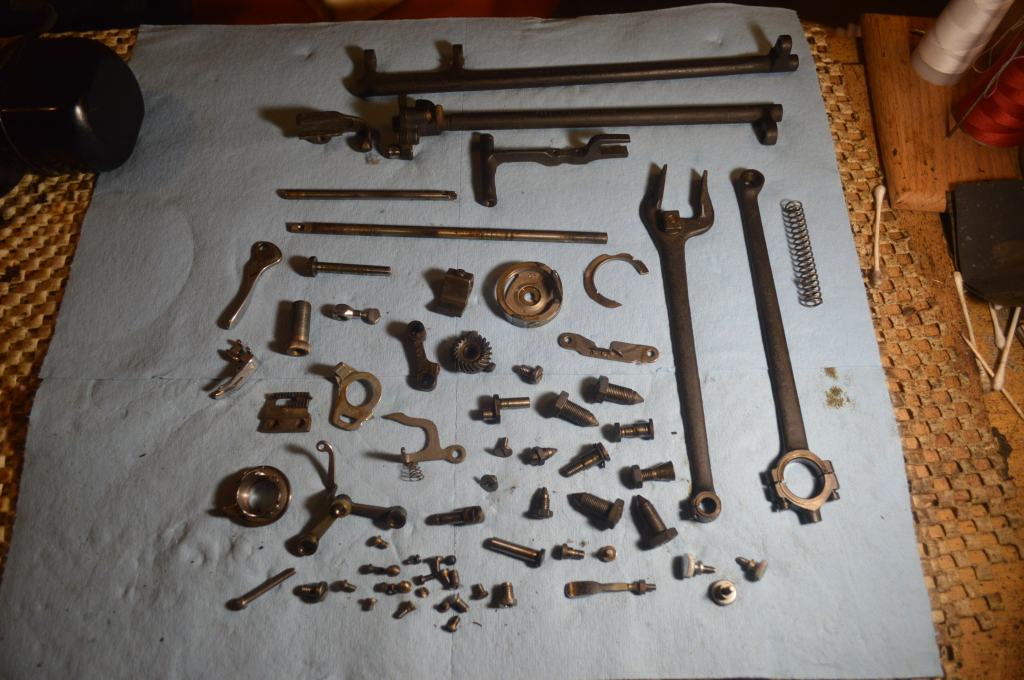
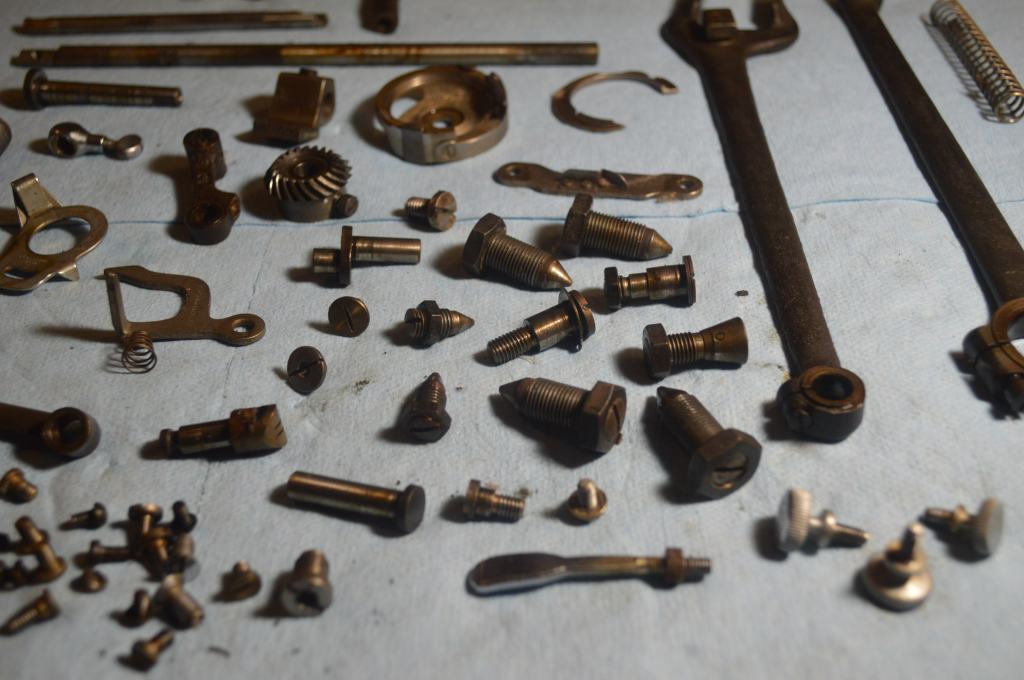
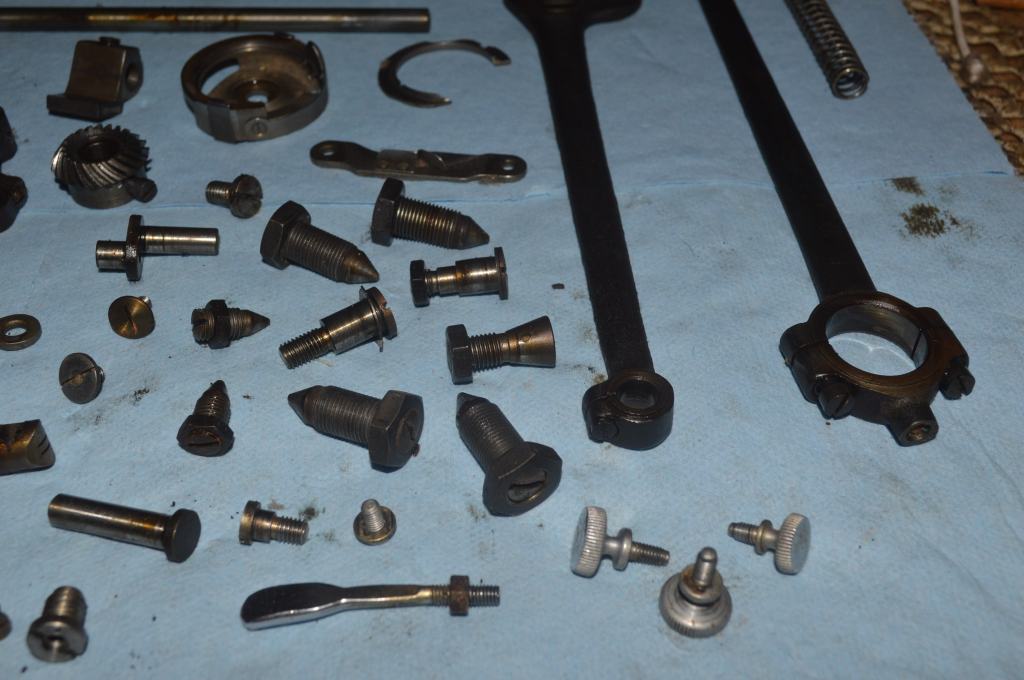
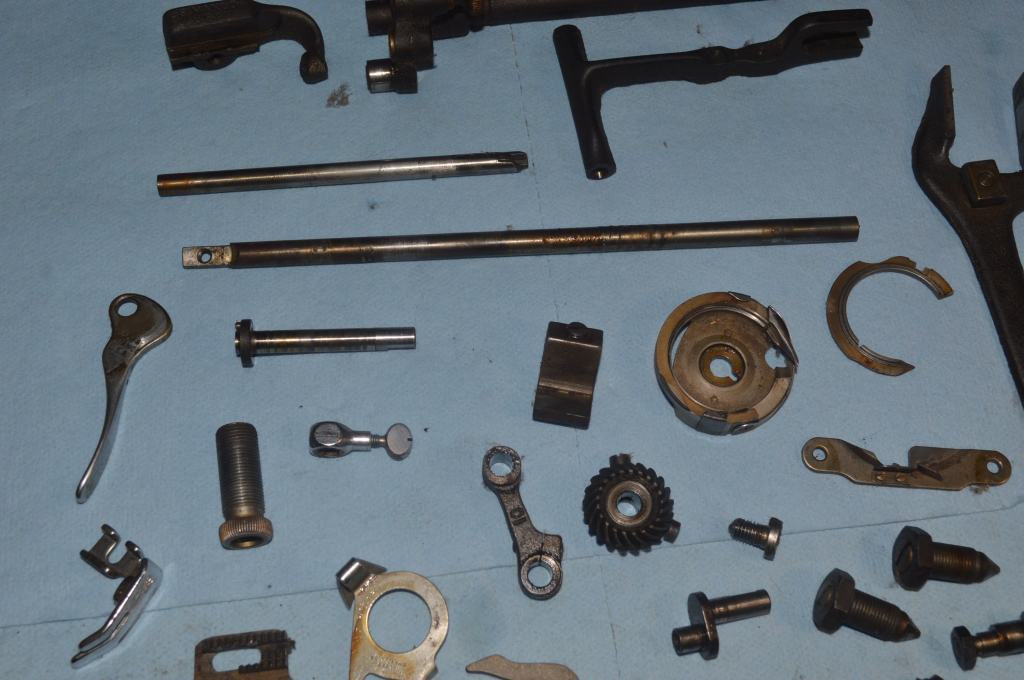
If you look at the parts you will see that they are coated with old oil varnish and other contaminants. Even so, the machine turned smoothly. Removing this varnish and cleaning to bright steel will make a marked difference in smoothness. All of these parts will be ultrasonically cleaned and wire brushed to bright steel before reassembly. This includes every nut, bolt, shaft, and screw. Some parts will be further disassembled for cleaning and the needle bar, presser foot bar, and bobbin hook shaft will be polished.
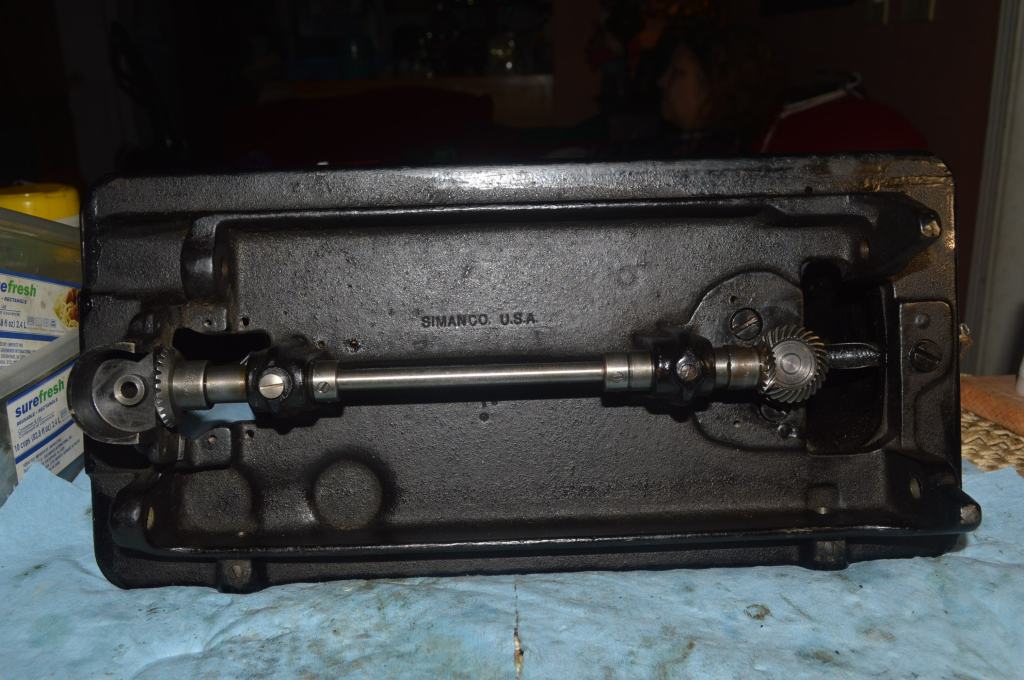
Here are the parts after cleaning.
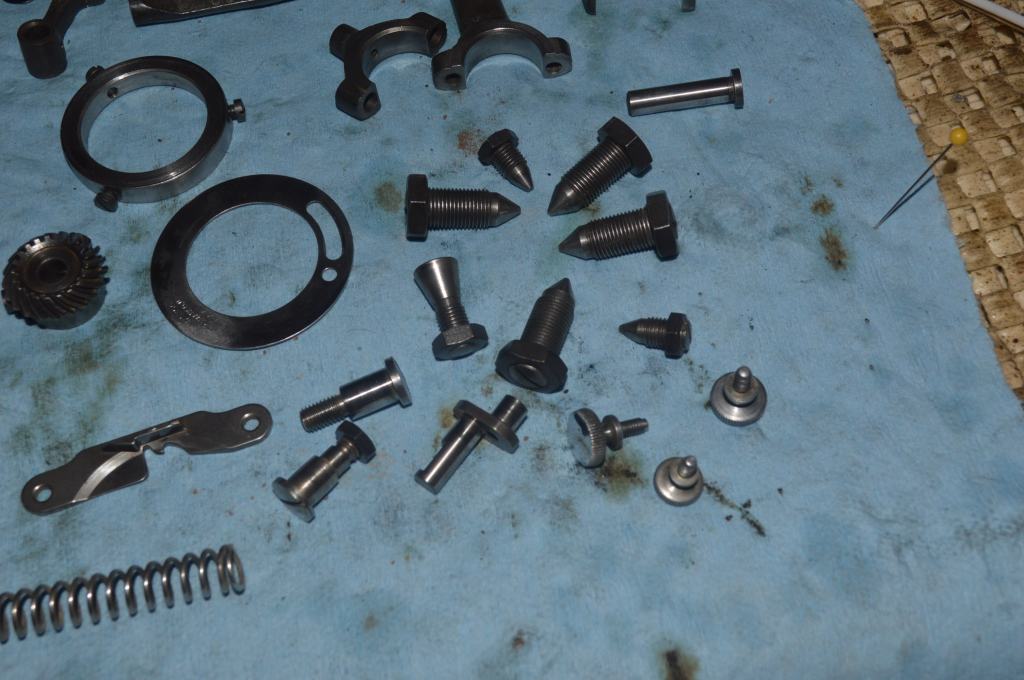

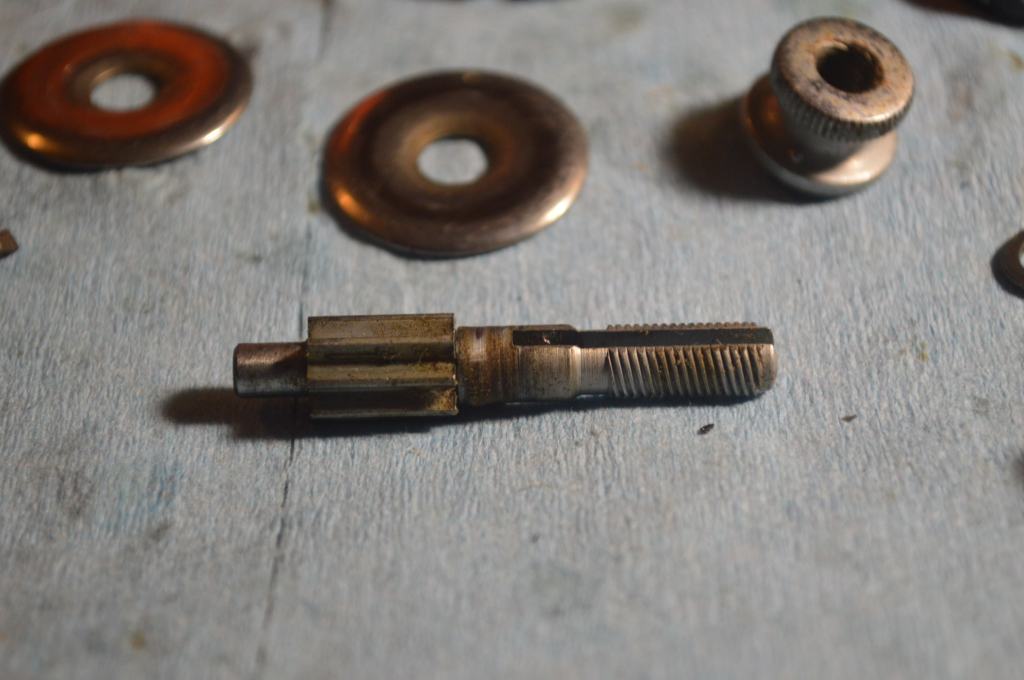
In case you noticed, there is a gear in the picture. What about the part about not removing the gears? Well, this gear is the exception. The bobbin hook shaft needs to be polished, and it is necessary to remove this gear to remove it. However, a tooth on the gear was marked with a tooth on the gear it mates with so it will be assembled with the correct tooth match.
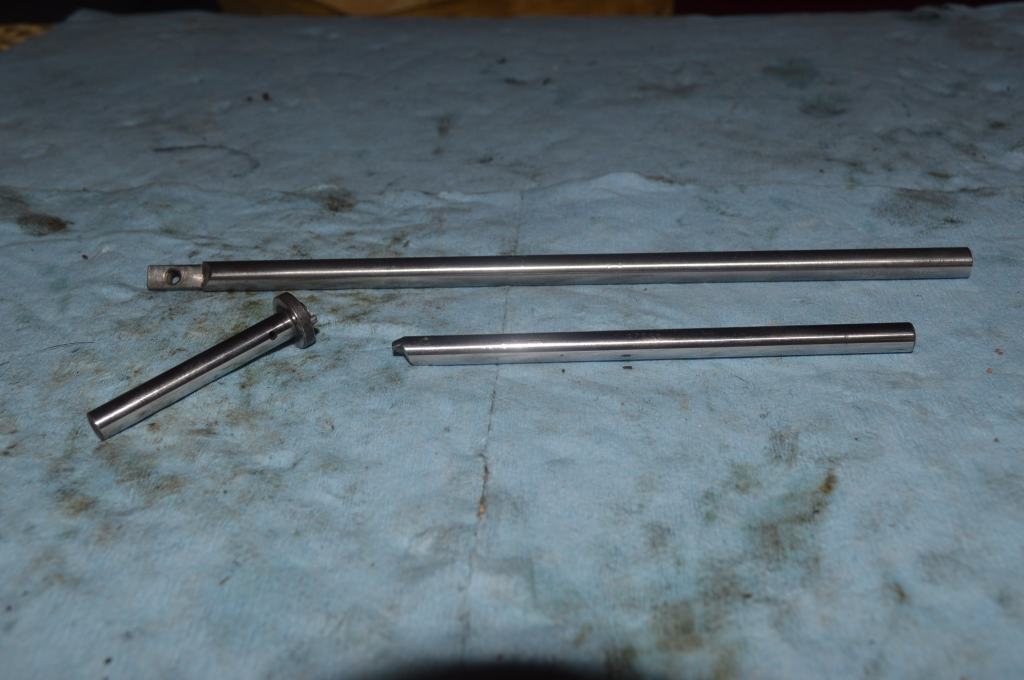
The presser foot bar, the needle bar, and the bobbin hook shaft are polished smooth as glass.
All of the bores these parts run in are cleaned with a round brass bristle brush.
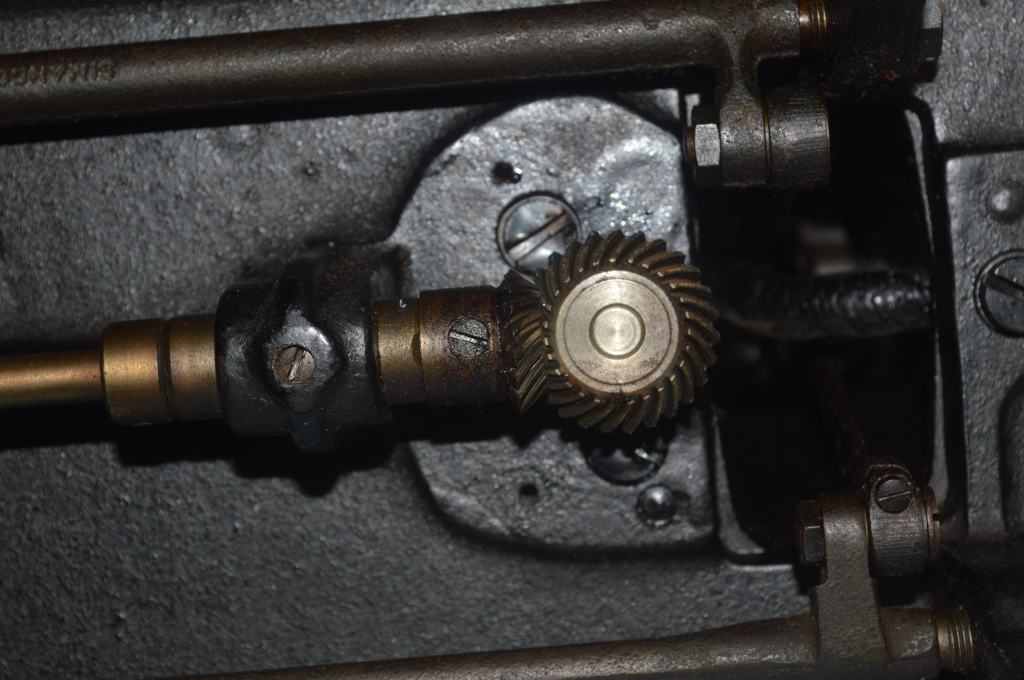
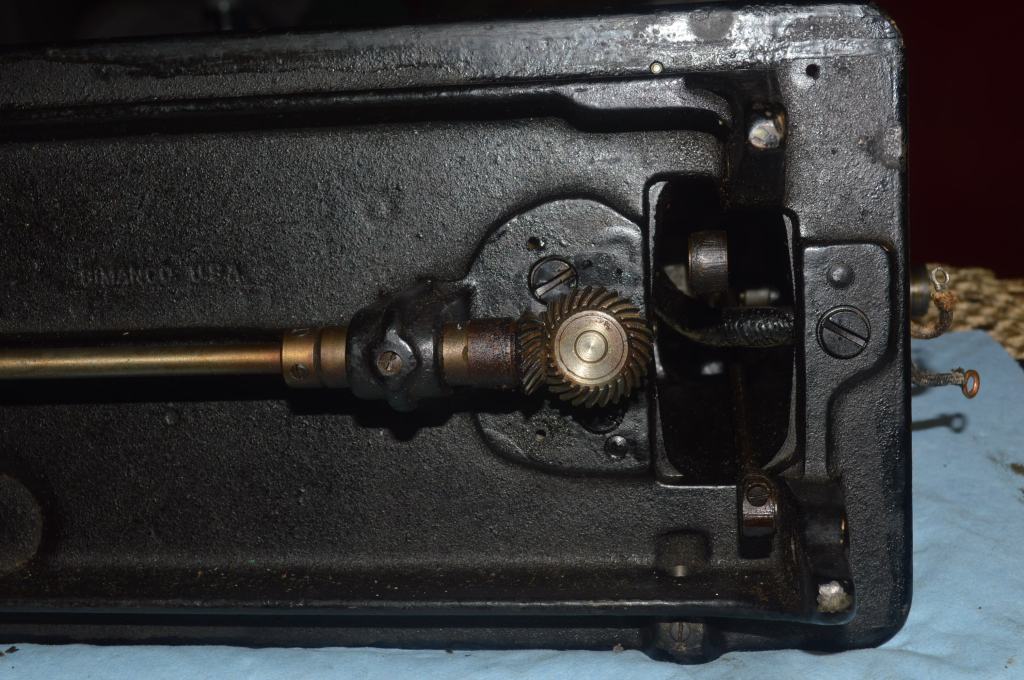
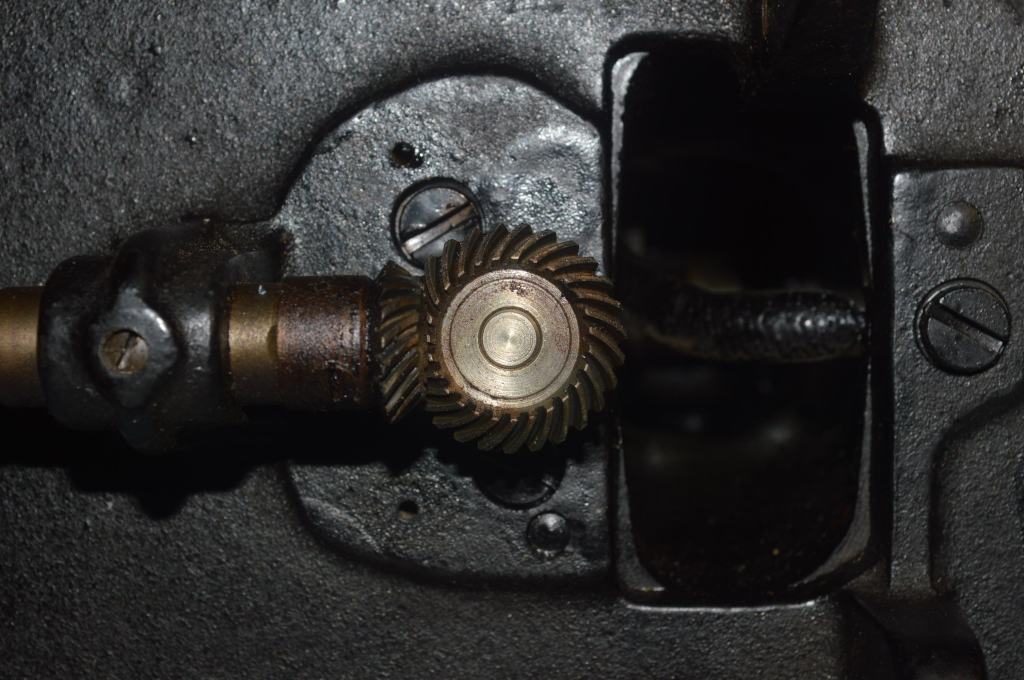
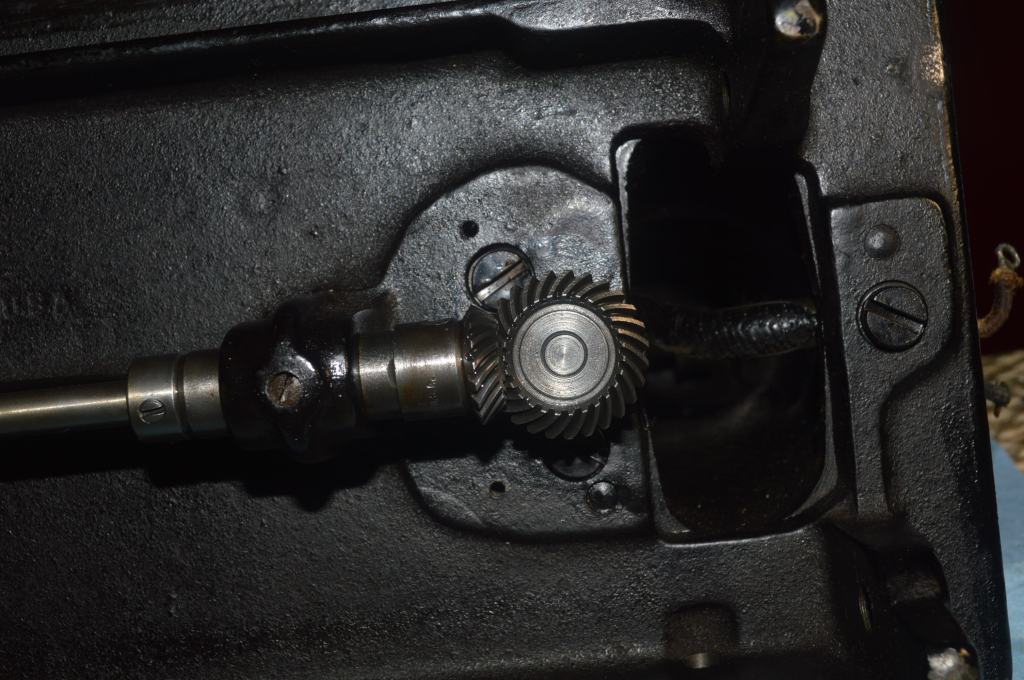
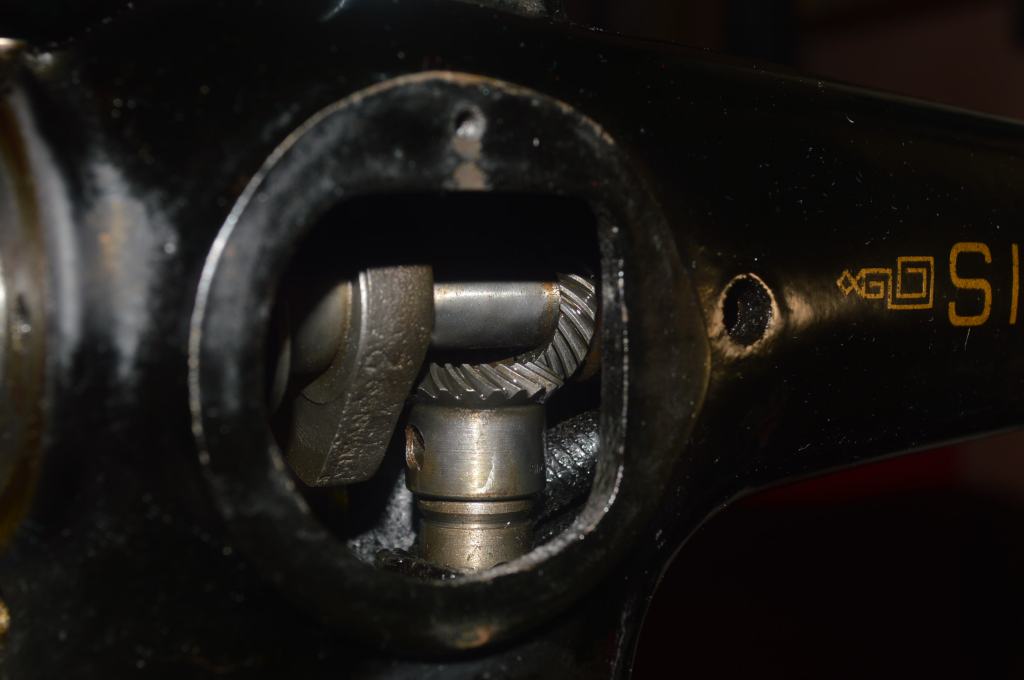
Next, all of gears are cleaned in place. Having them remain in the machine makes this more difficult, but the extra time it takes is worth the effort.


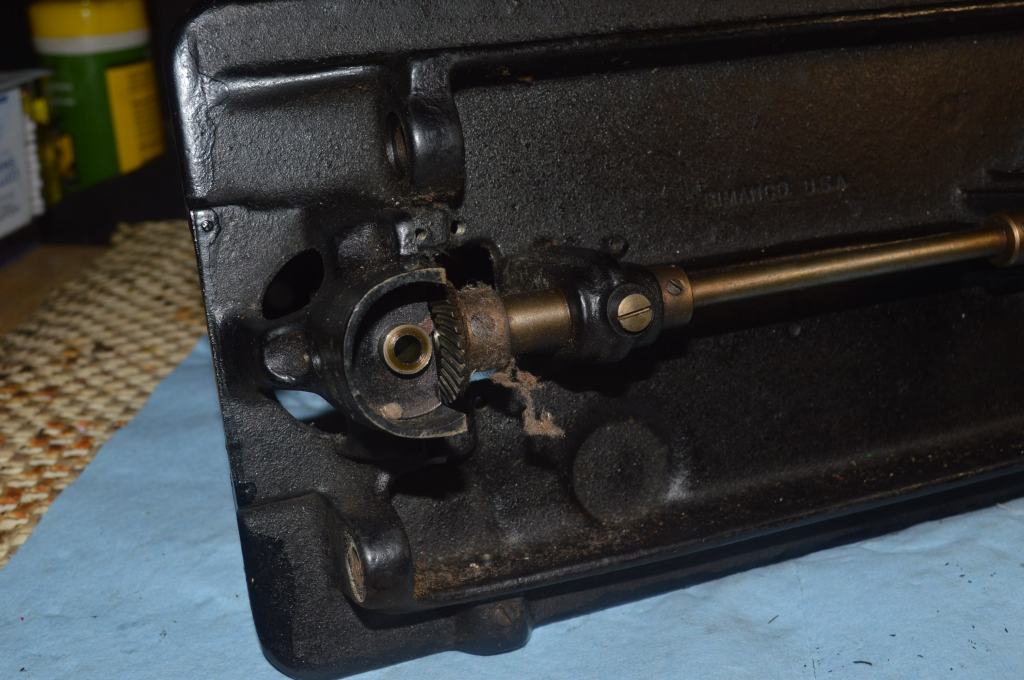
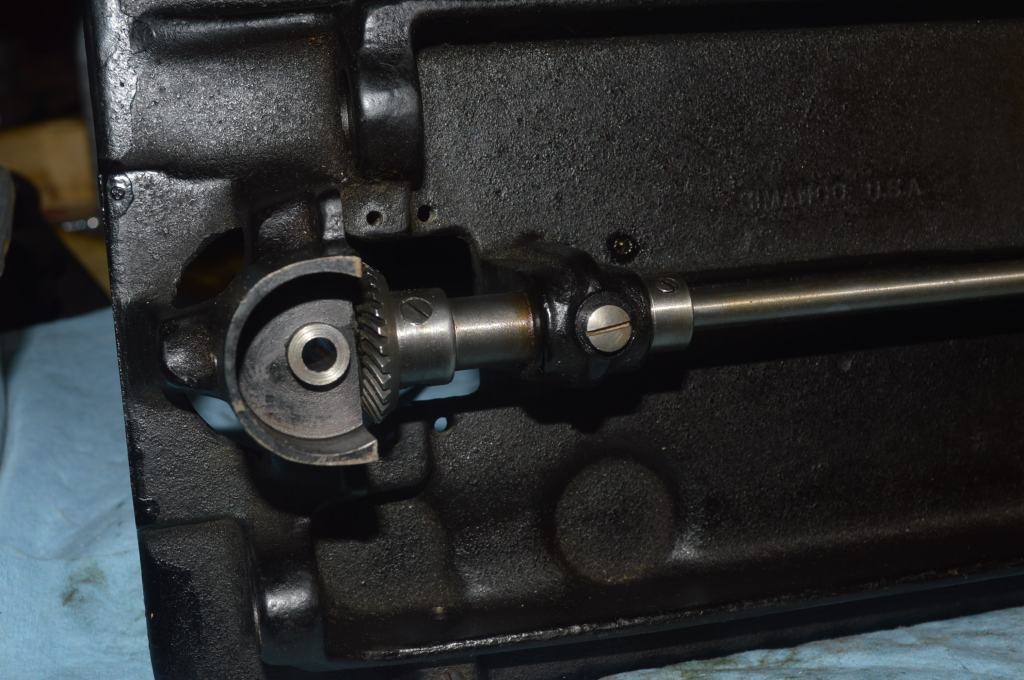

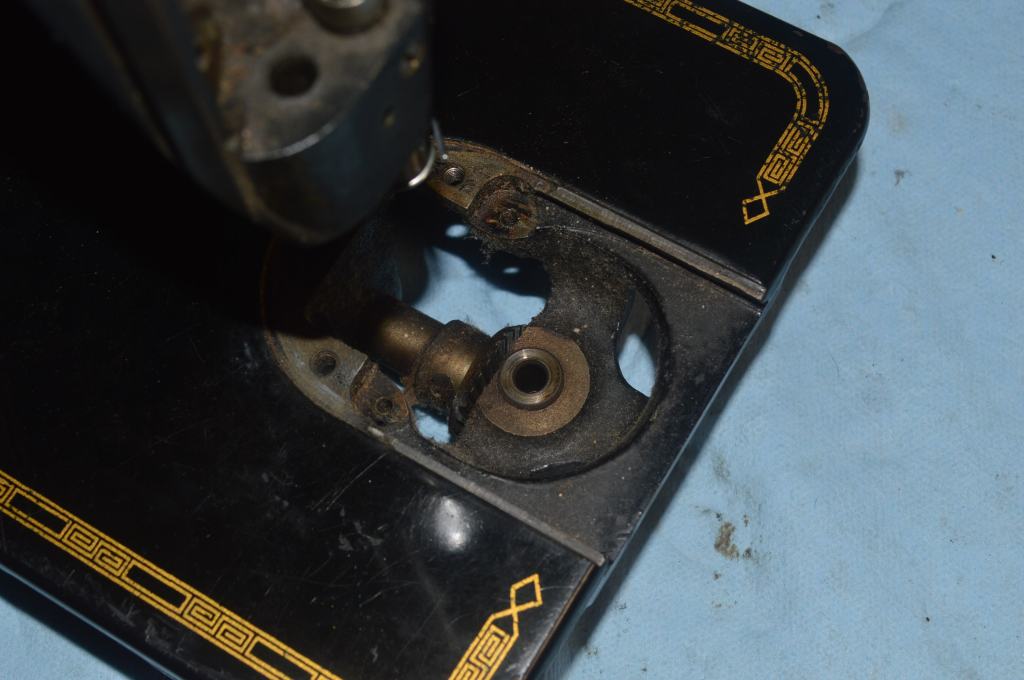
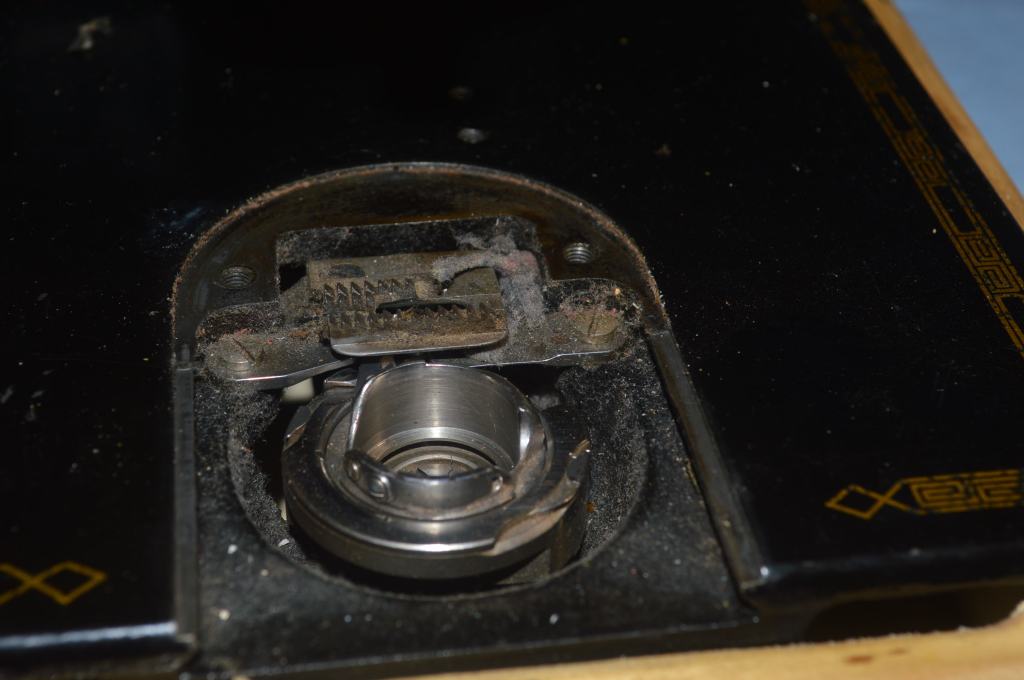
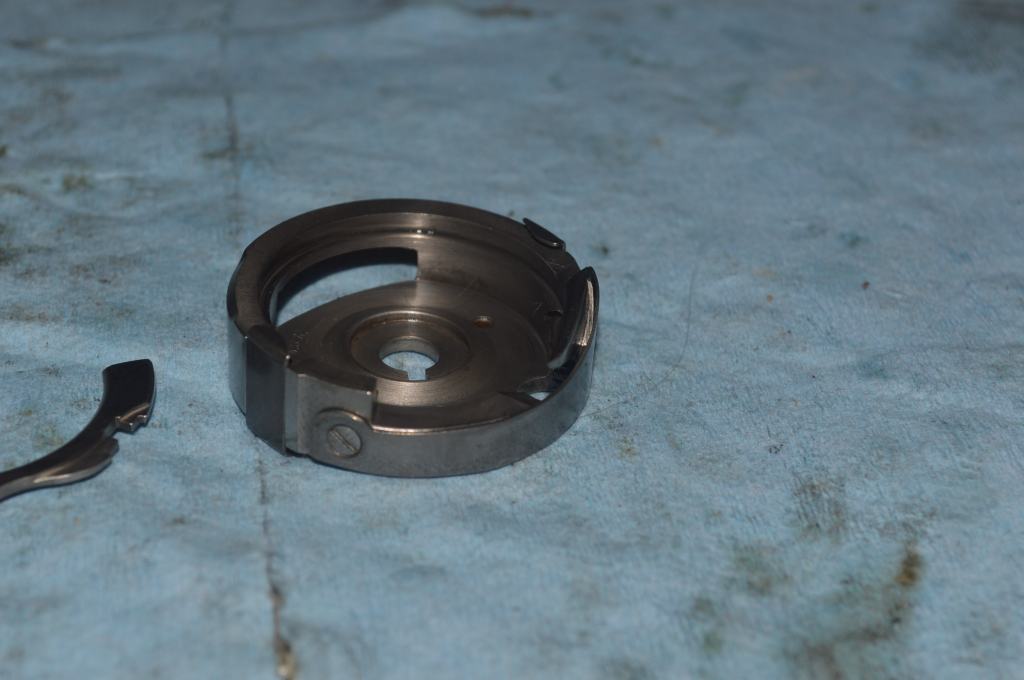
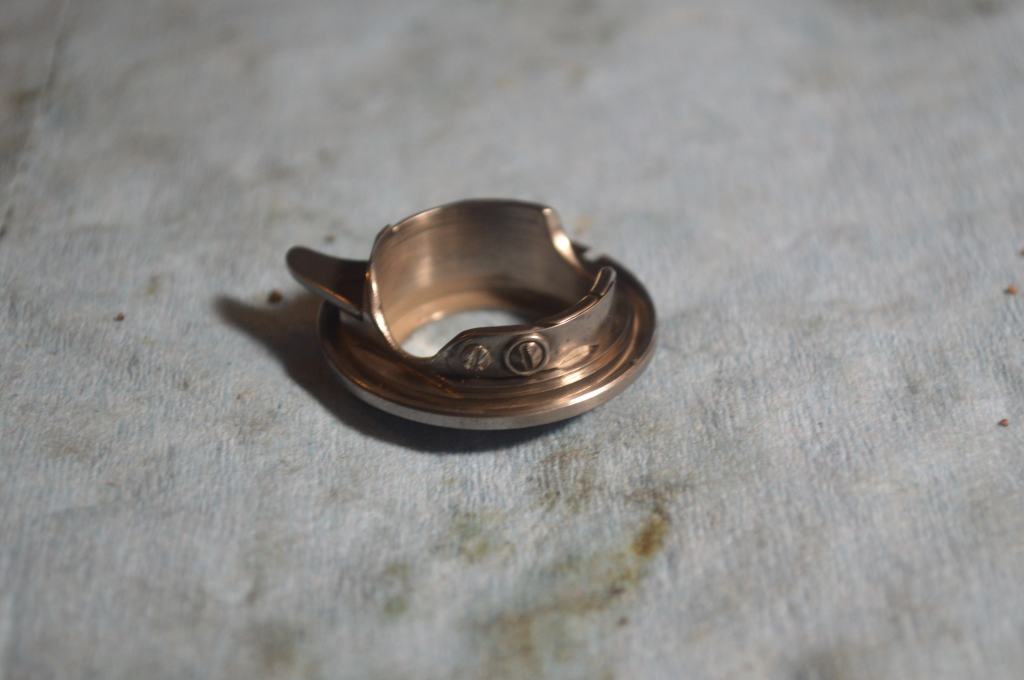
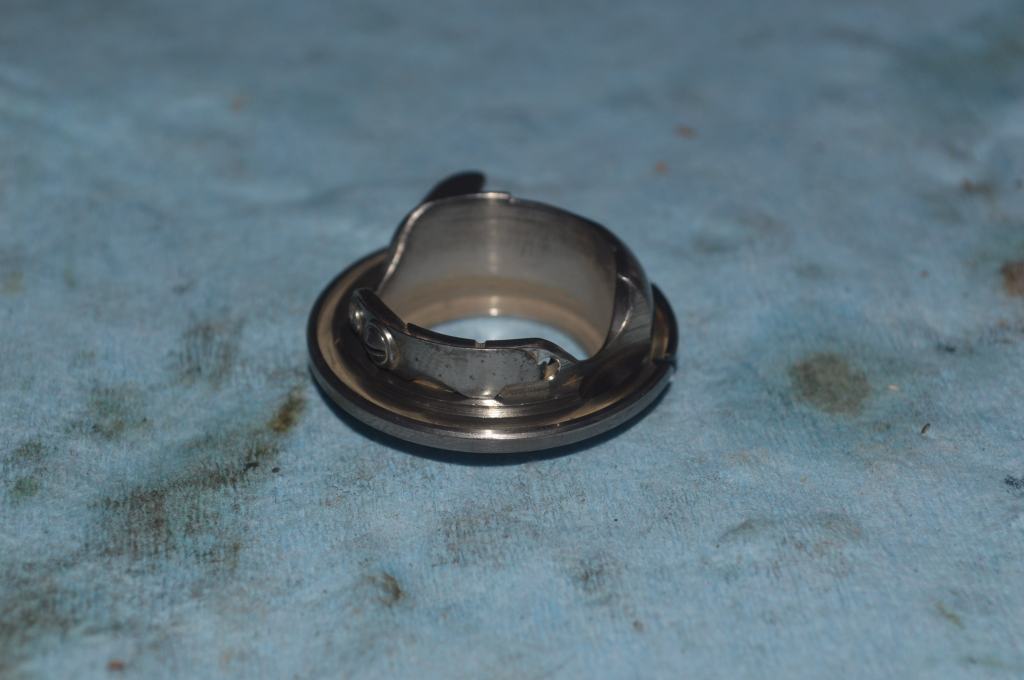
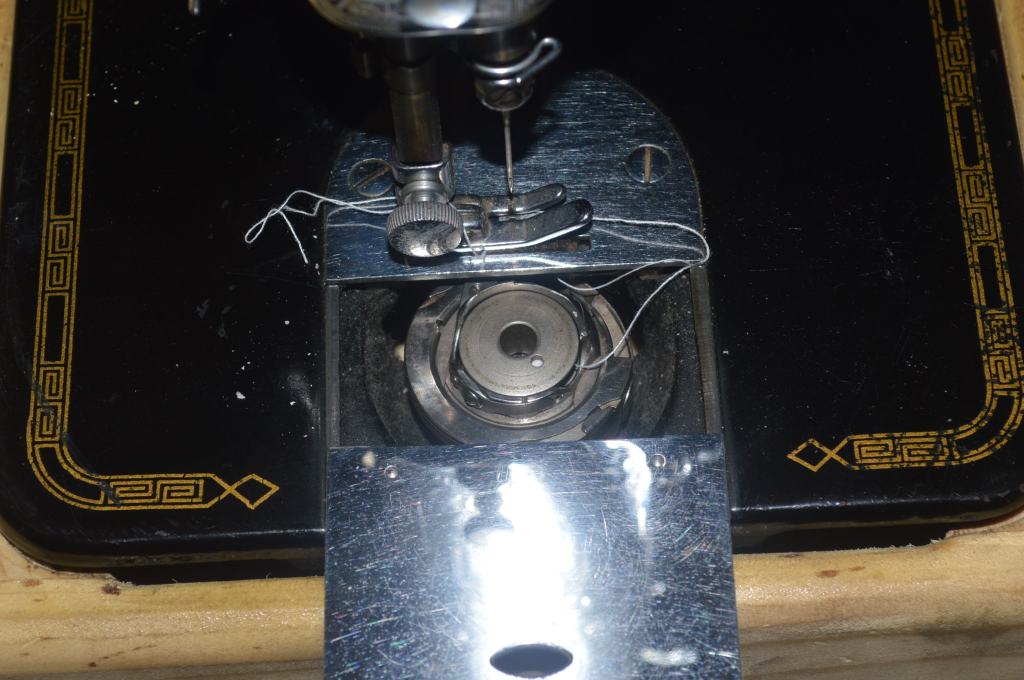
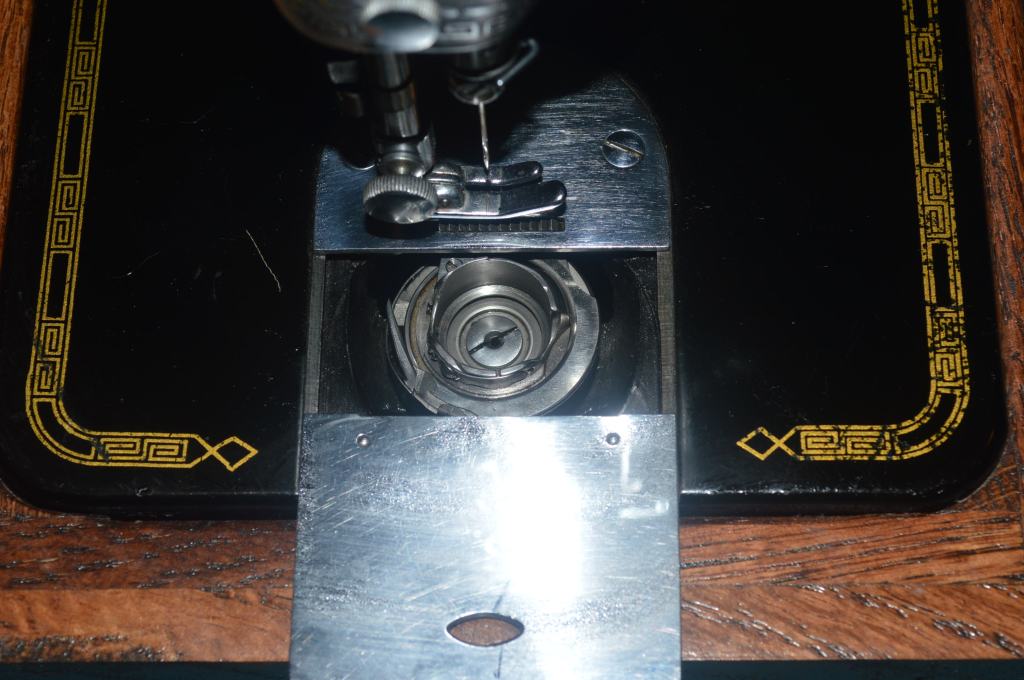
Part of the reason a 201 runs so smoothly is due to its rotary hook, instead of oscillating back and forth, it runs in a 360-degree circle. The vibrations inherent in oscillating is eliminated. The bobbin case is quite a wonderful design in itself and because the hook is responsible for the stitch, particular attention to cleaning and polishing it is essential.
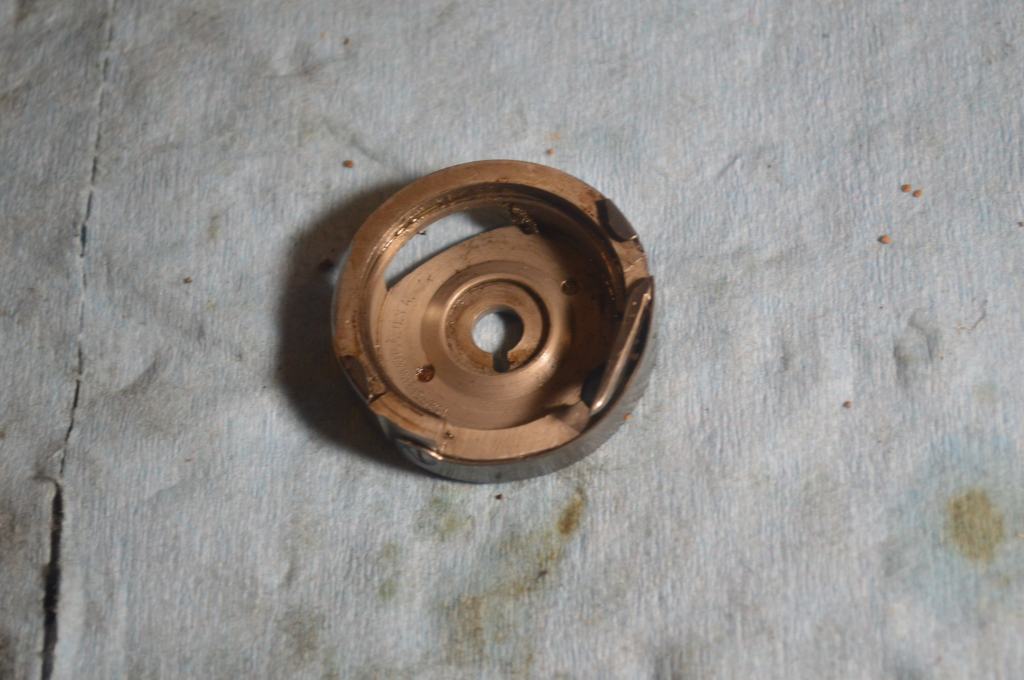
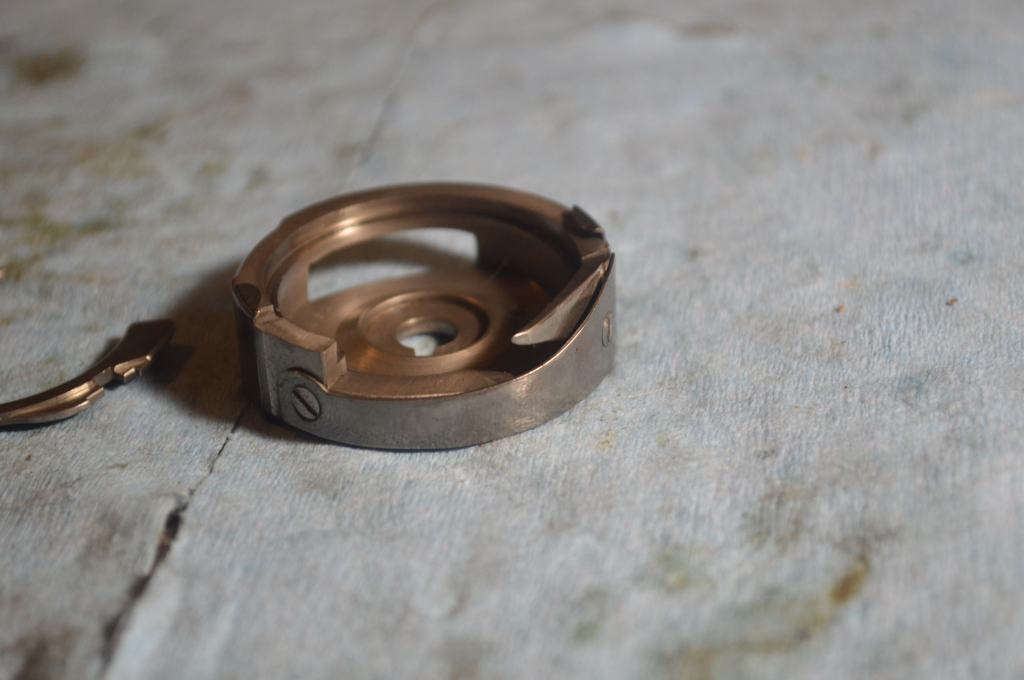
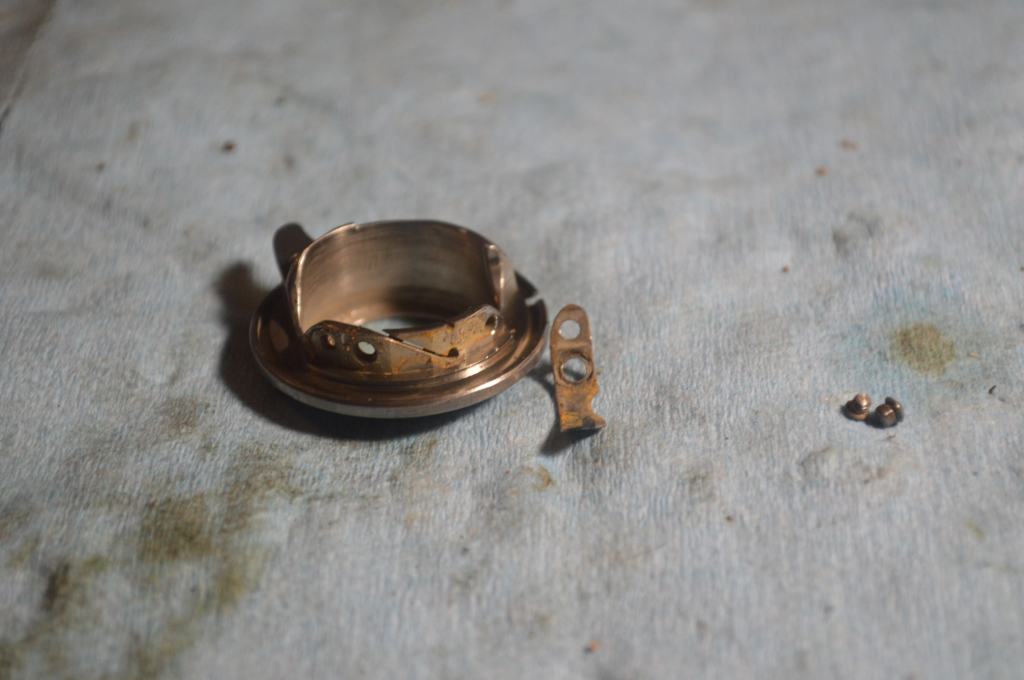
The bobbin hook case is an assembly, so it is further disassembled and cleaned.
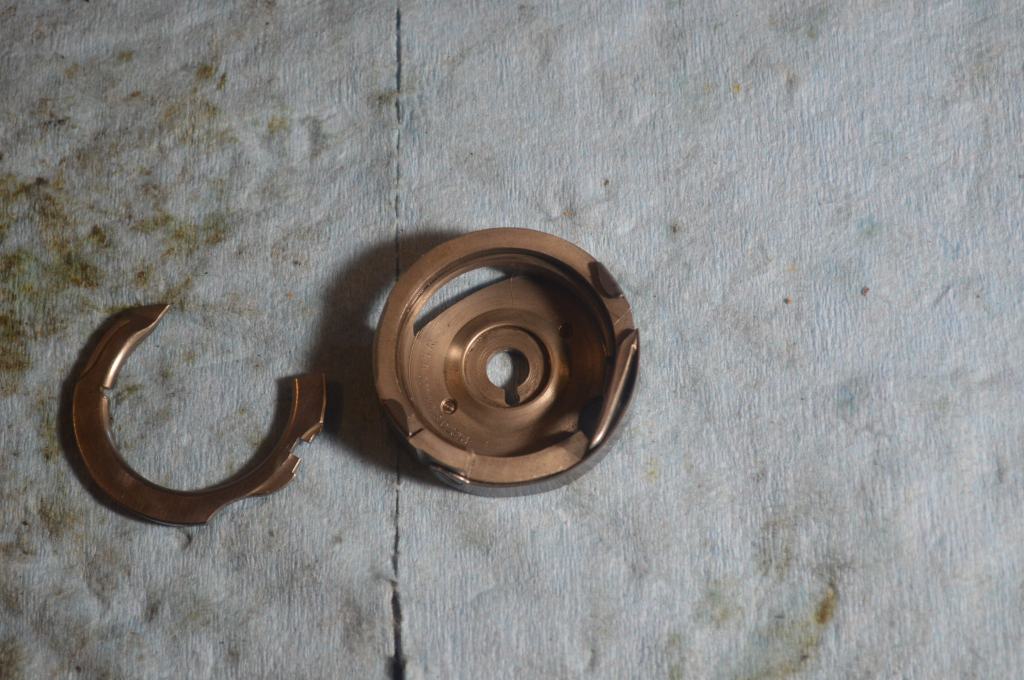

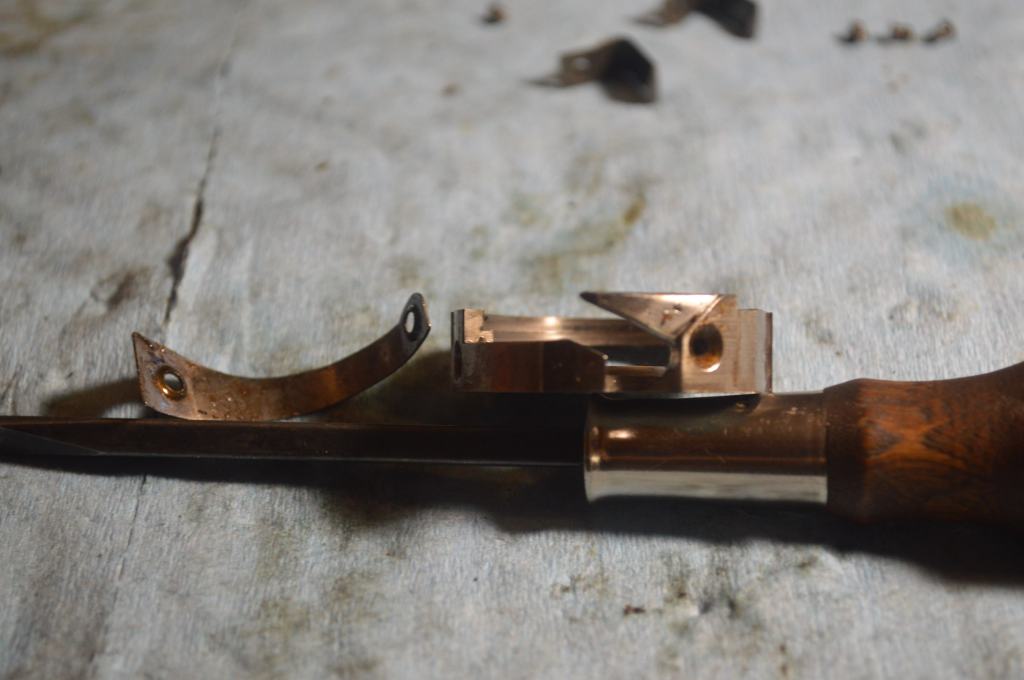
The bobbin case is responsible for regulating the bobbin tension. It is directly in the bobbin thread path and any dirt or accumulation can result in irregular thread tension that affects stitch quality. Disassembling and cleaning it is essential in a restoration.
Next, the tension assembly is disassembled and cleaned.
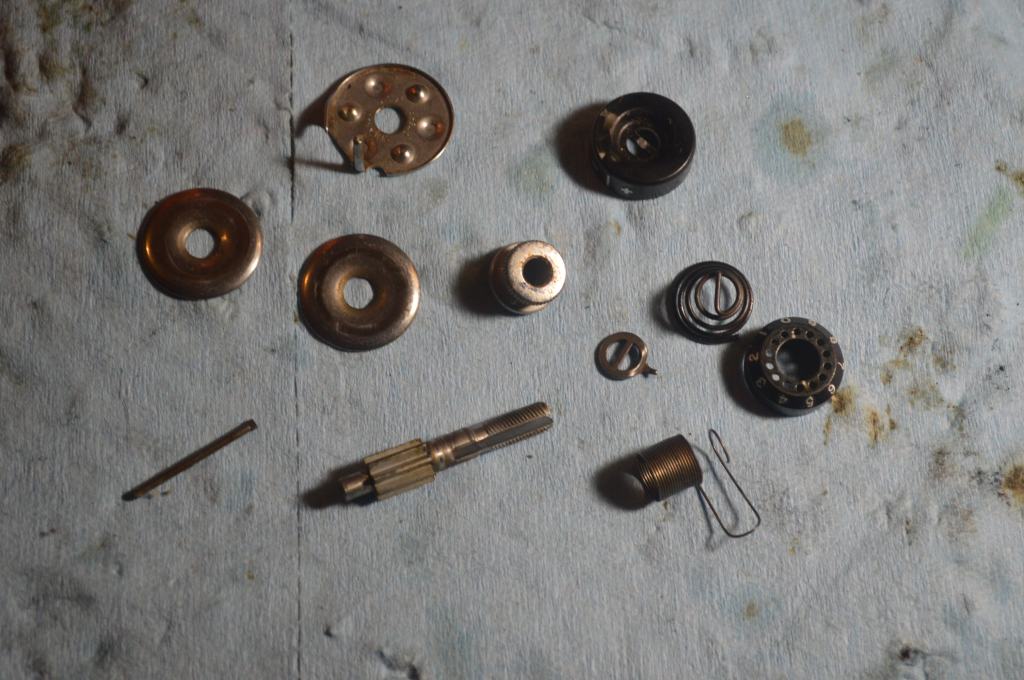
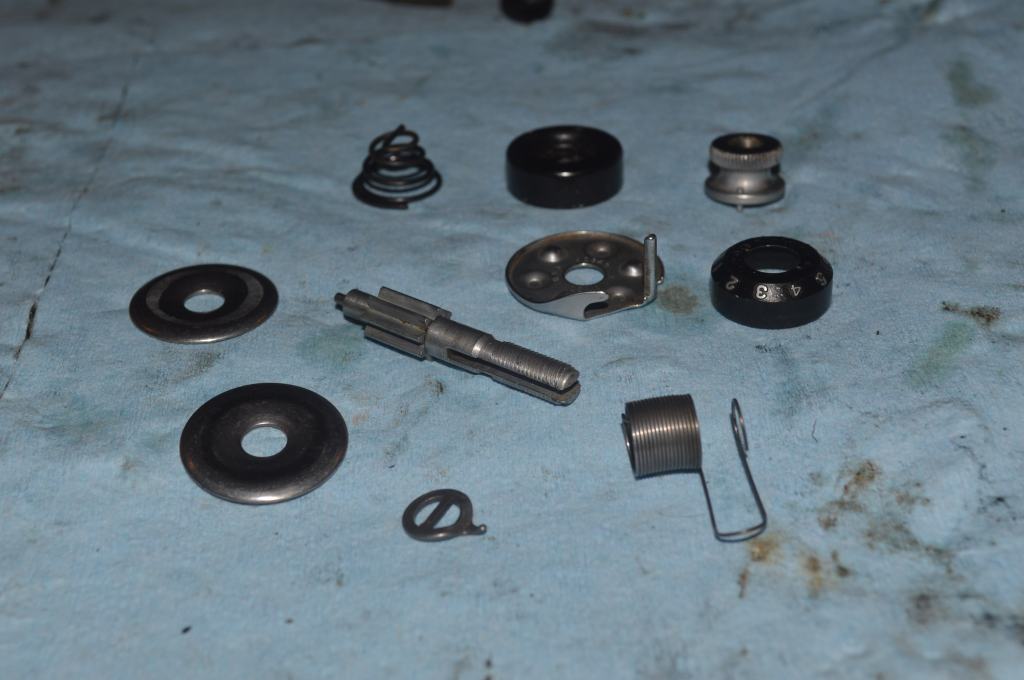

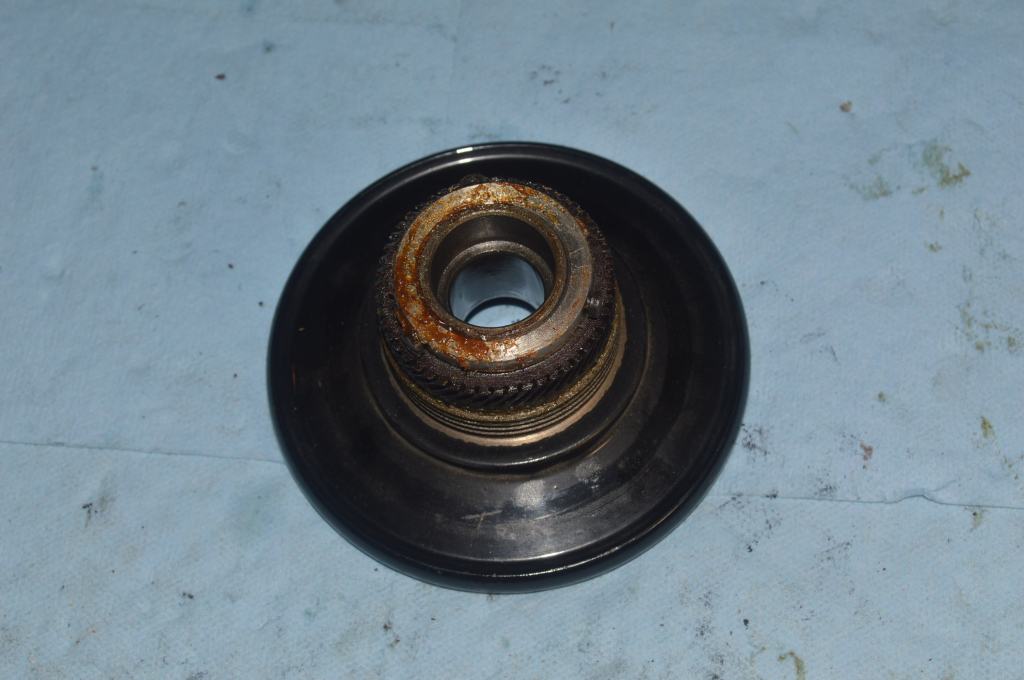
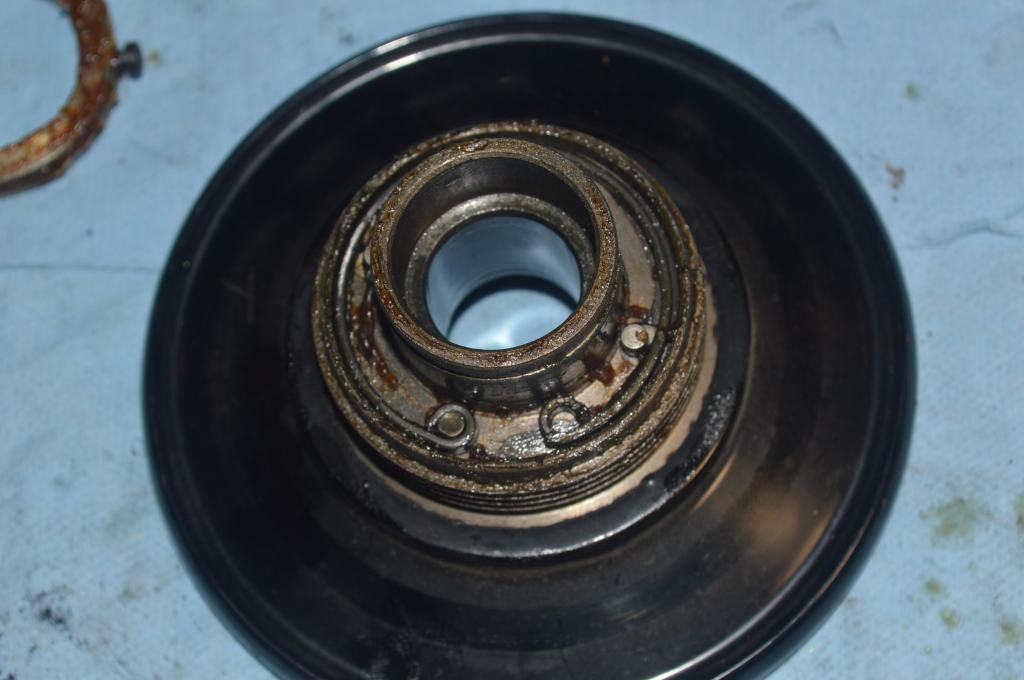
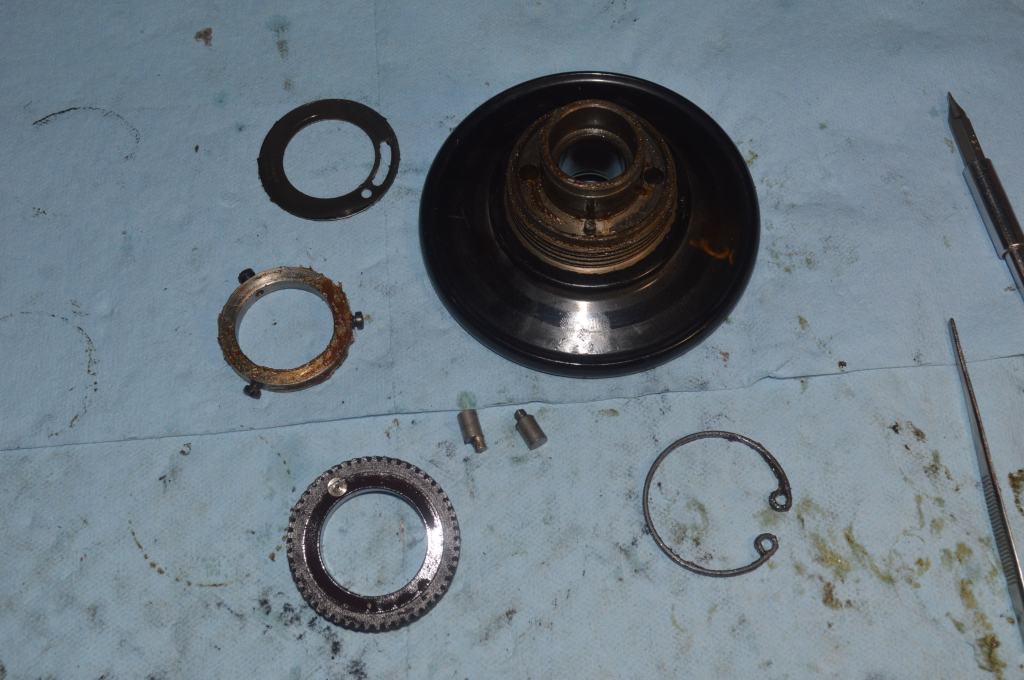
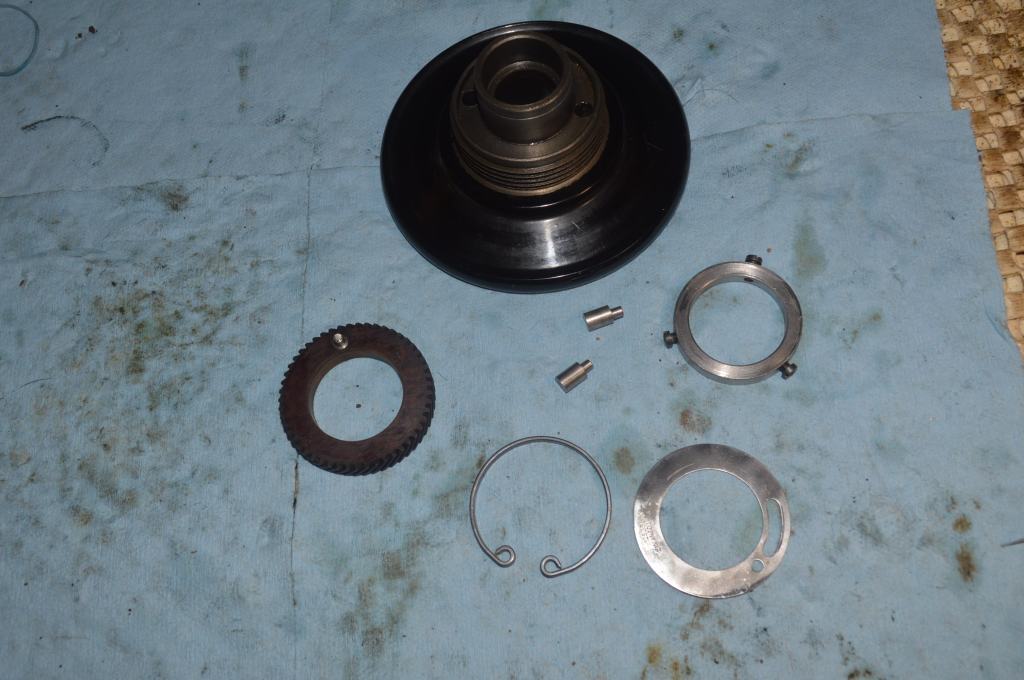
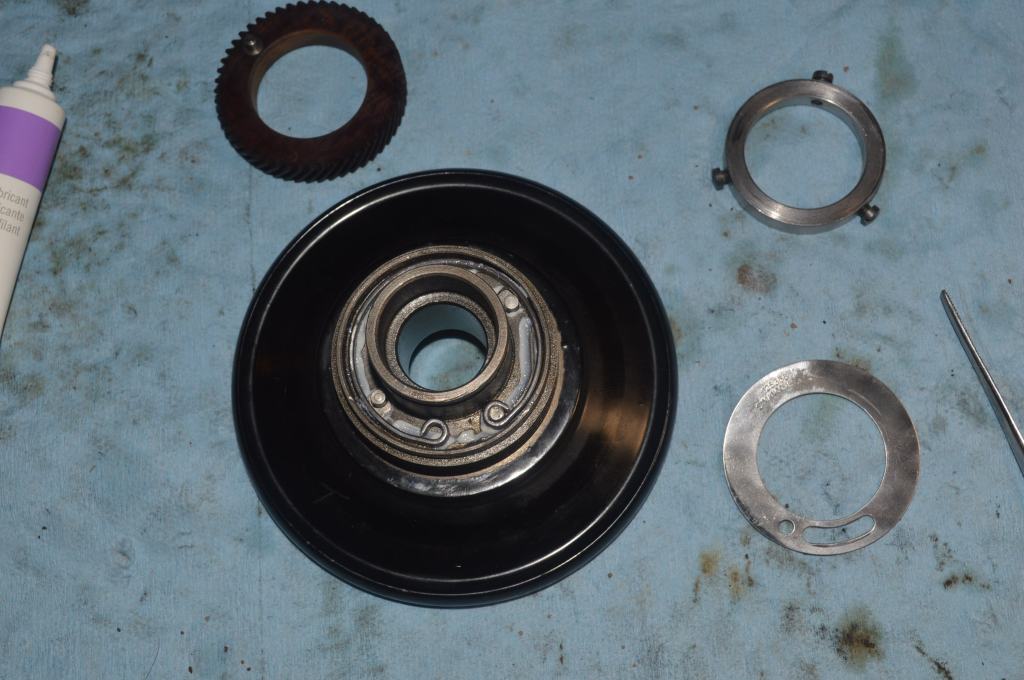
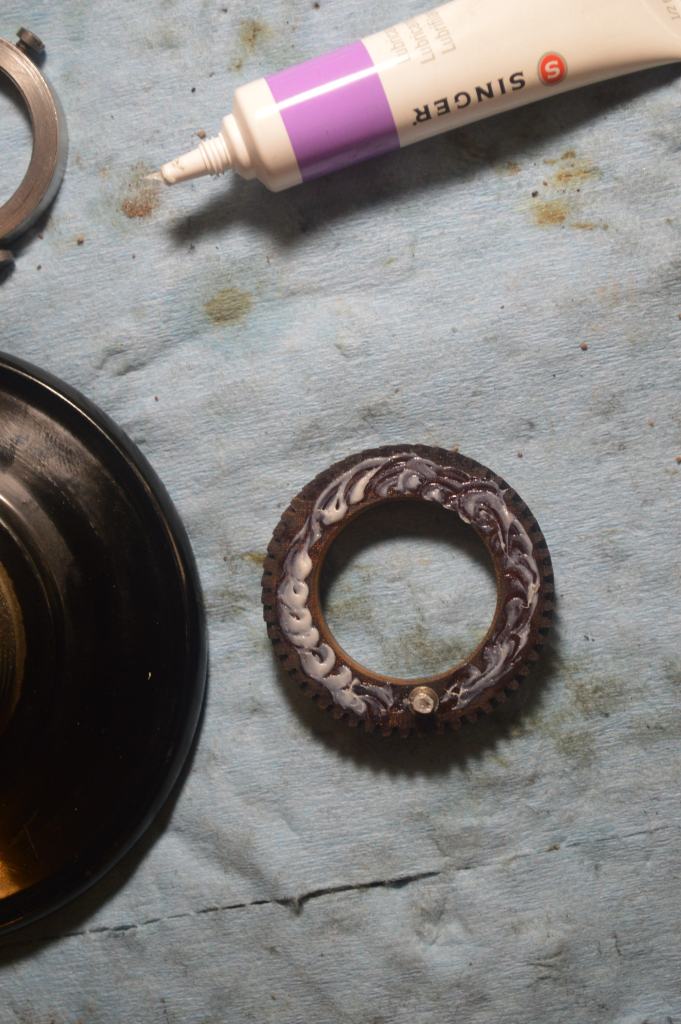
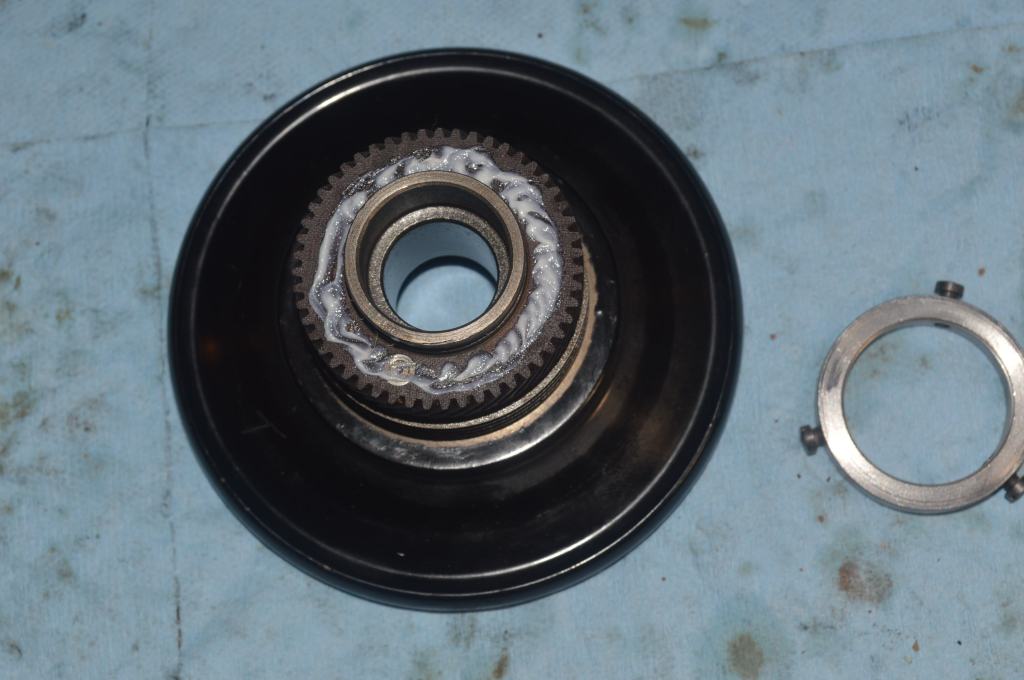
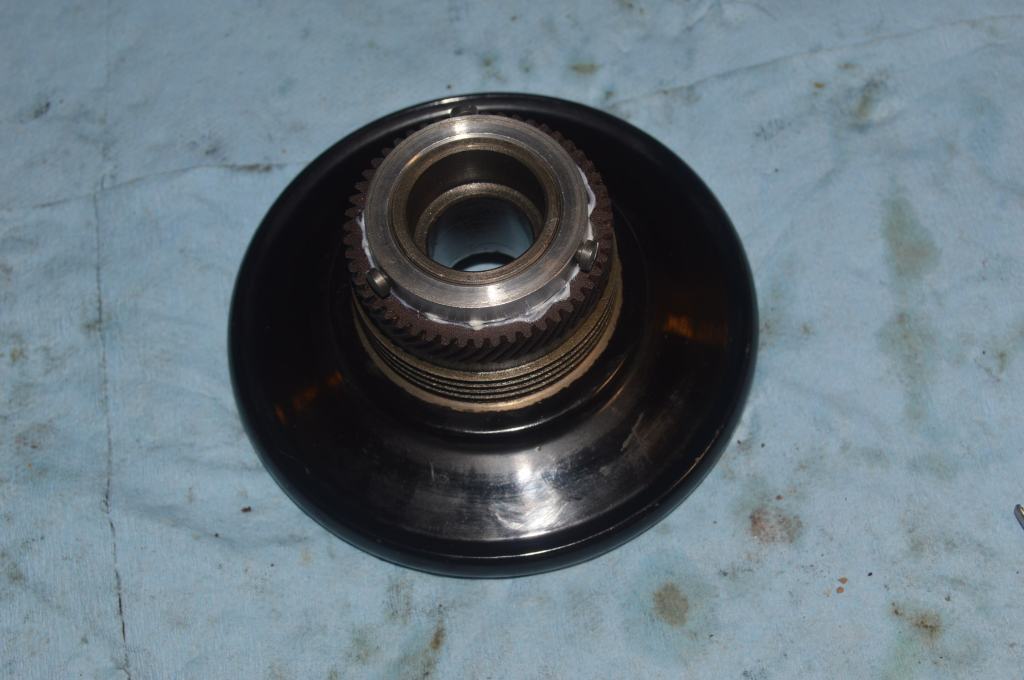
Then, the balance wheel is disassembled and cleaned. This is an important step for this machine. The spring behind the textolite gear acts as a shock absorber for starting and allows the motor to get a “kick start” when the machine begins sewing, thus improving piercing power. When gunked up with old grease, it ceases to function smoothly.
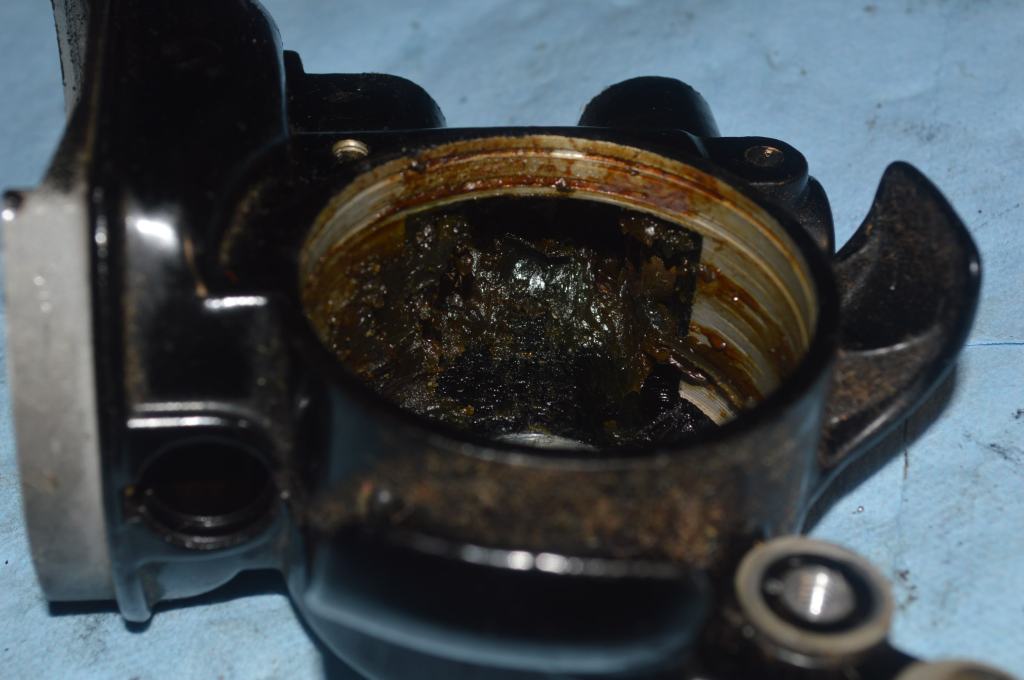
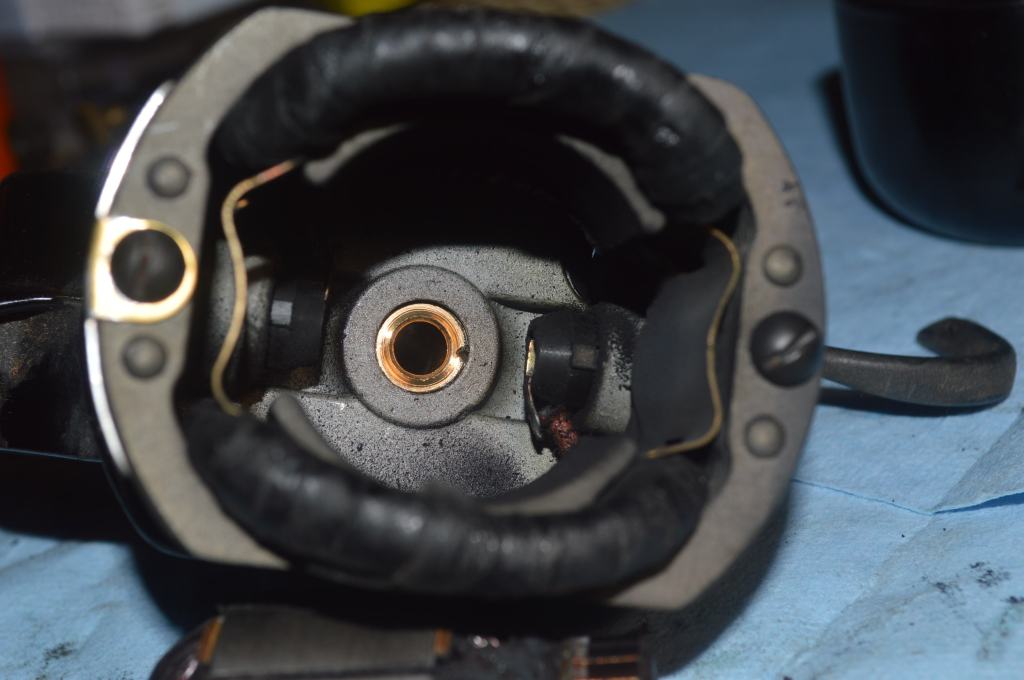
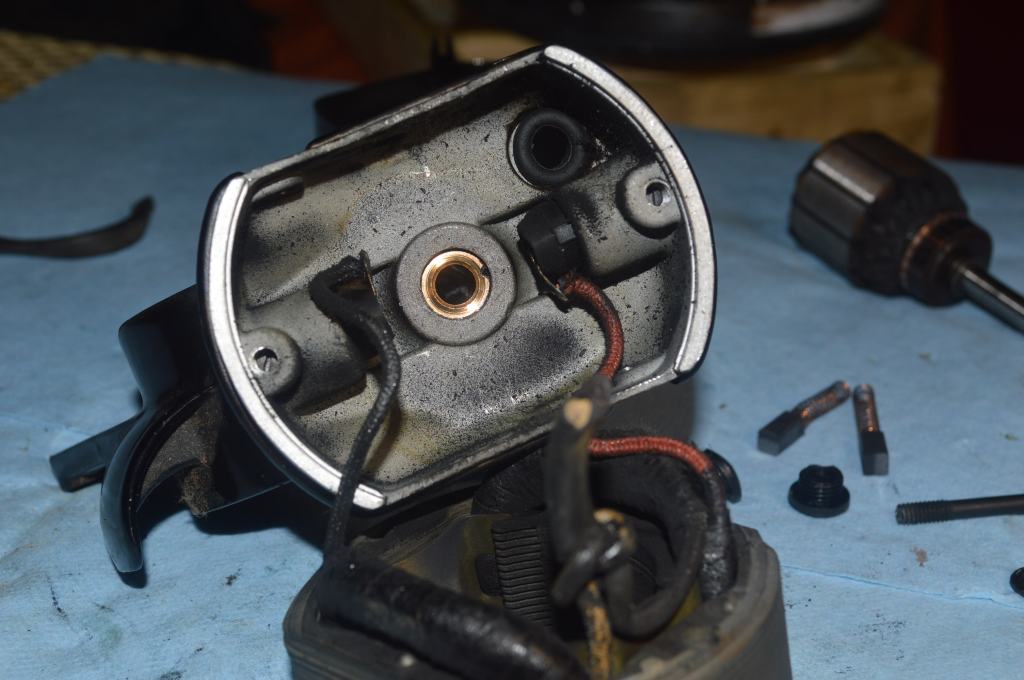
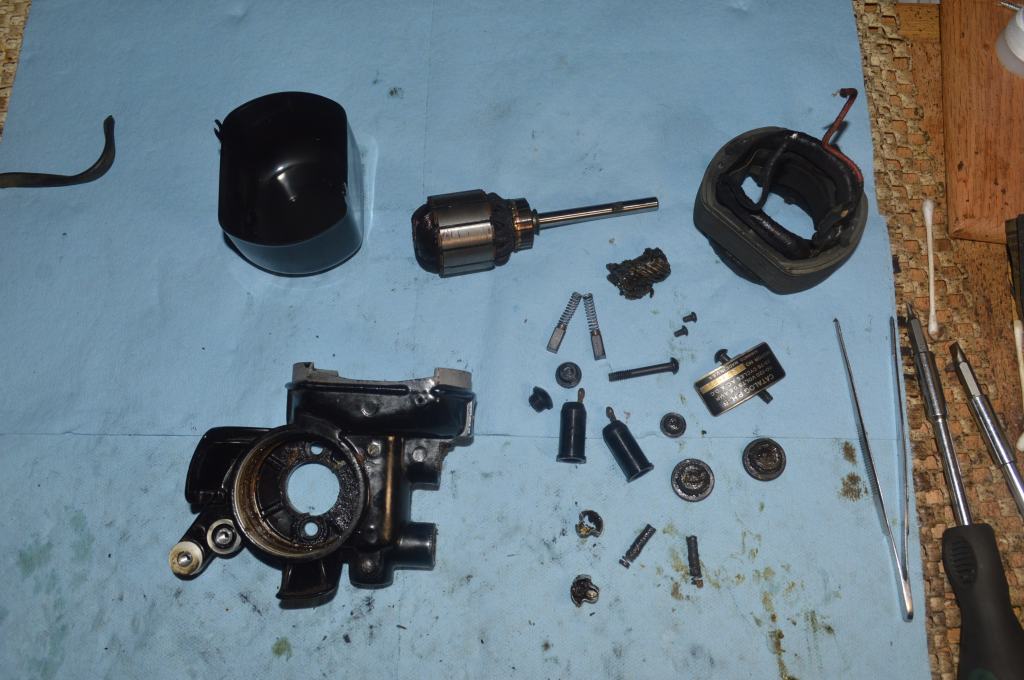
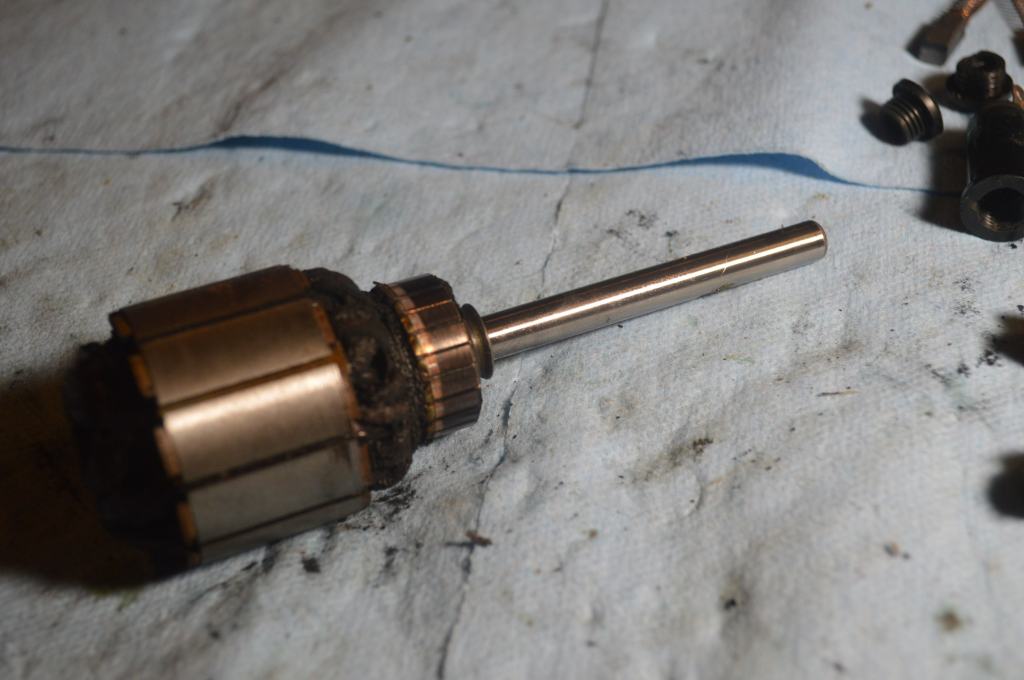
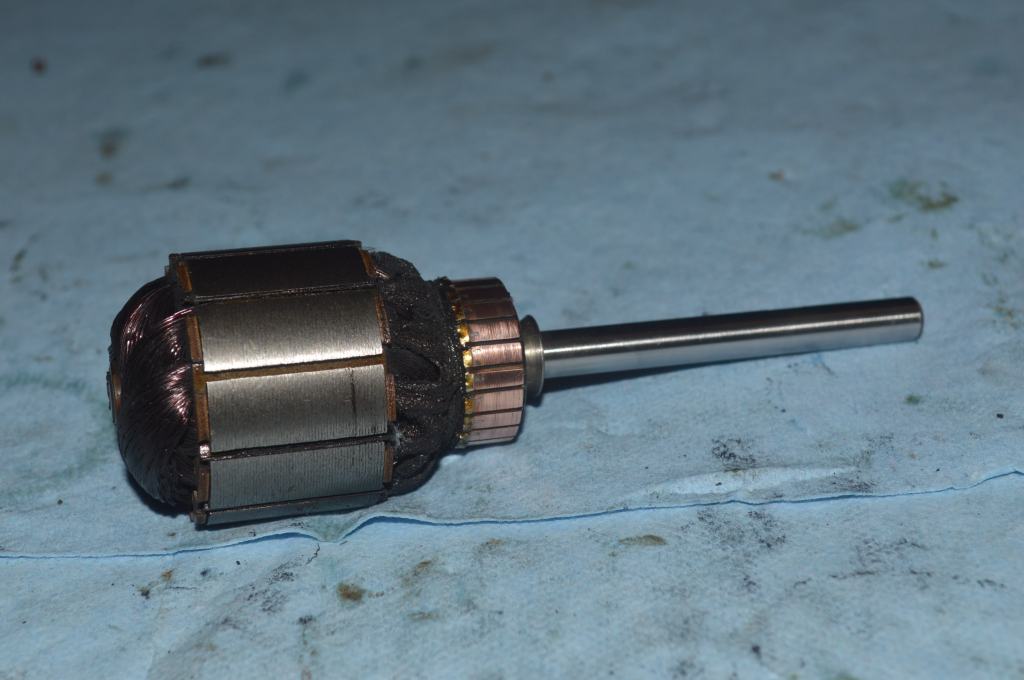
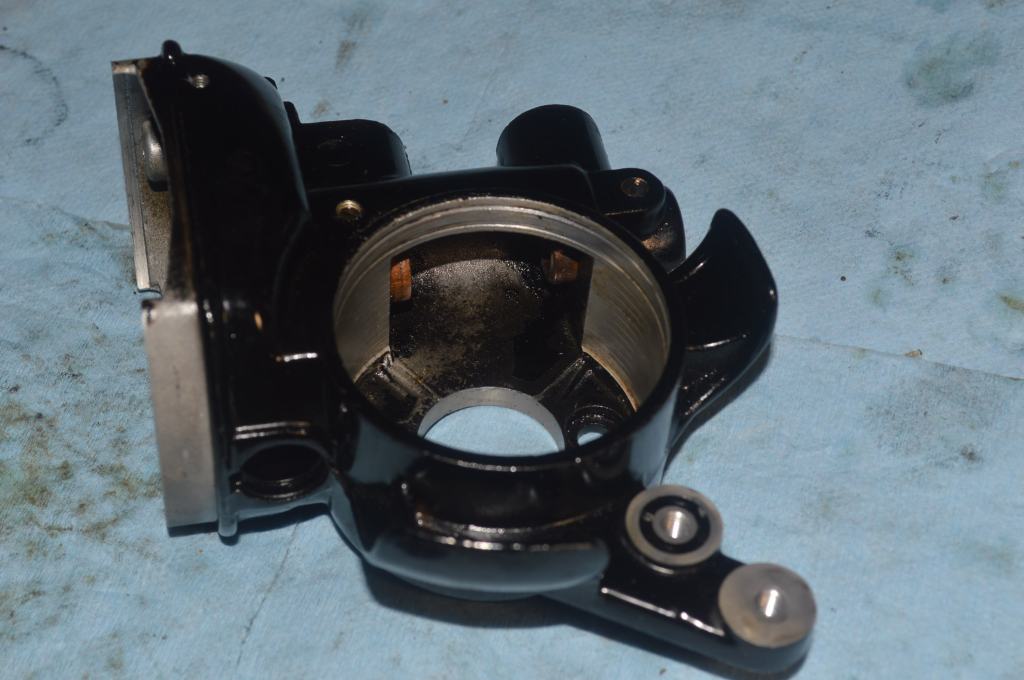
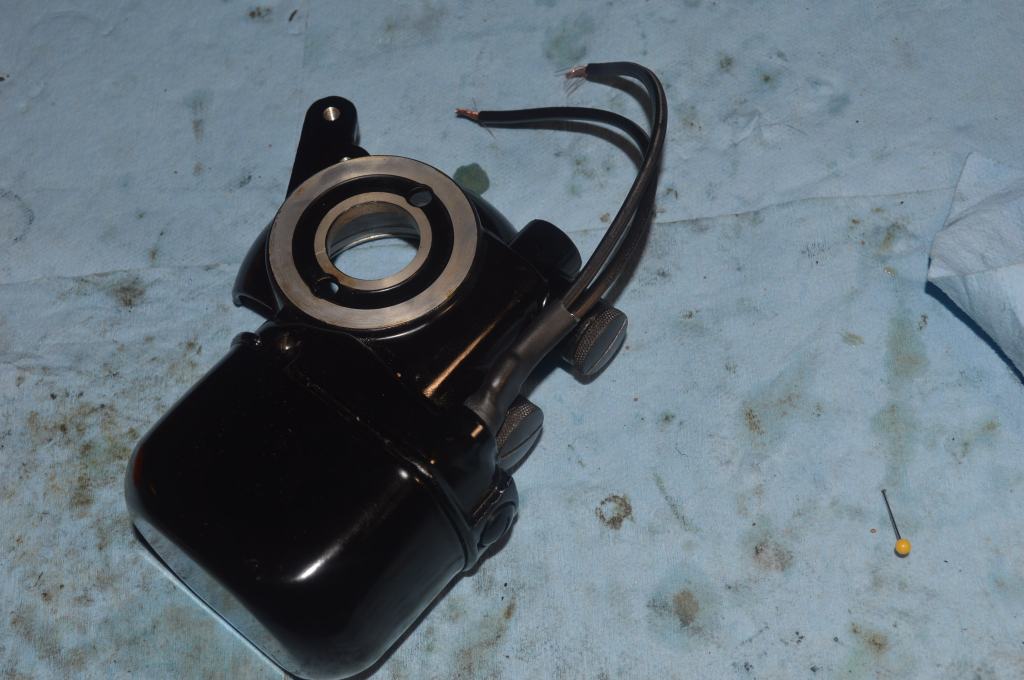
A major part of the restoration is restoration of the motor. The potted motors on these machines are not manufactured today and there are no new replacements for them. They must be disassembled and cleaned. To get the most out of a vintage motor, it must be cleaned to the greatest extent possible. The brushes, grease wicks, armature, worm gear, field coil, and the armature is removed. The bare motor housing is soaked in kerosene for 24 hours to help melt the old grease, after which it is completely cleaned of any grease residue with compressed air. In all cases, the main wires must be replaced. All of the steps shown are necessary to get the motor running at it’s peak performance.


After the motor is completely reassembled, it is run for about 10 minutes to break in and test for performance. This motor runs smooth and strong. Running the machine full speed, I clocked it at 935 stitches per minute. Thats 85% of its target performance and after 76 years that’s not bad!
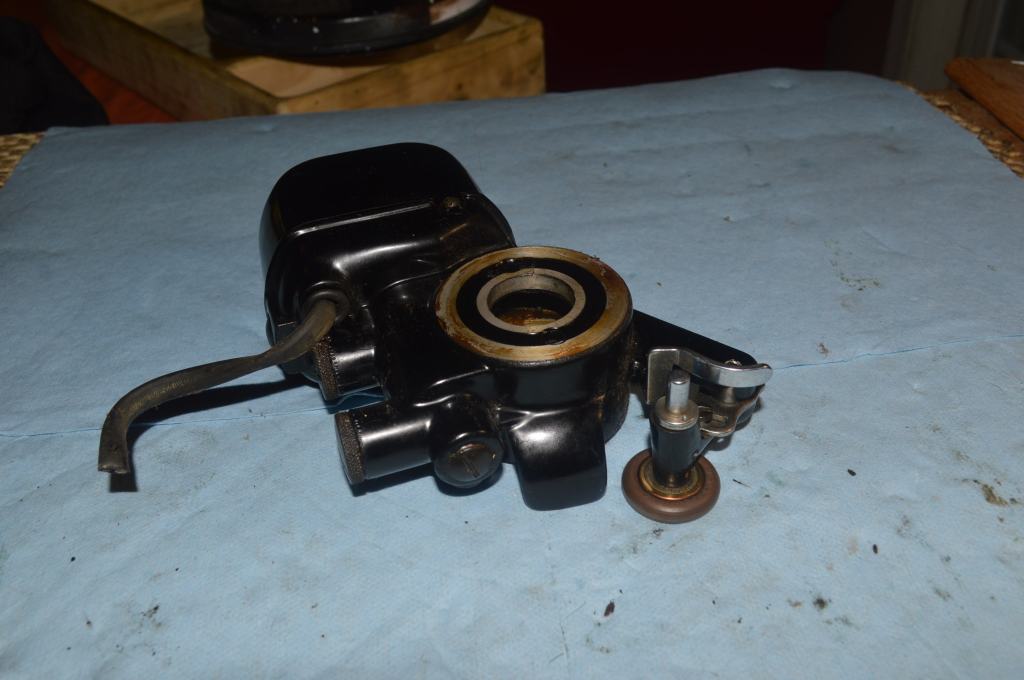
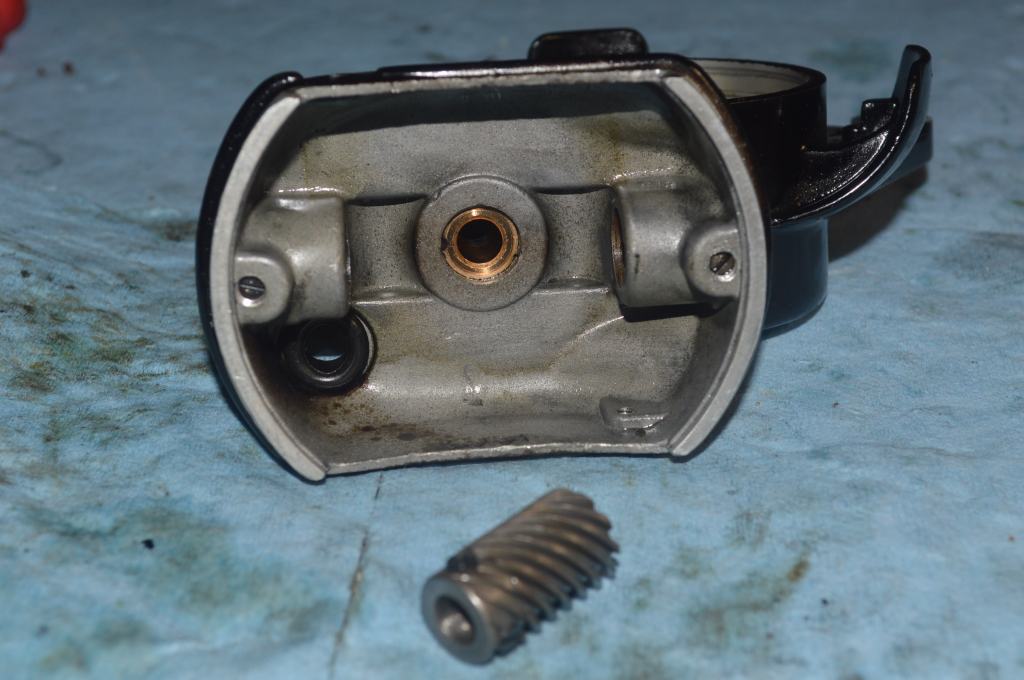
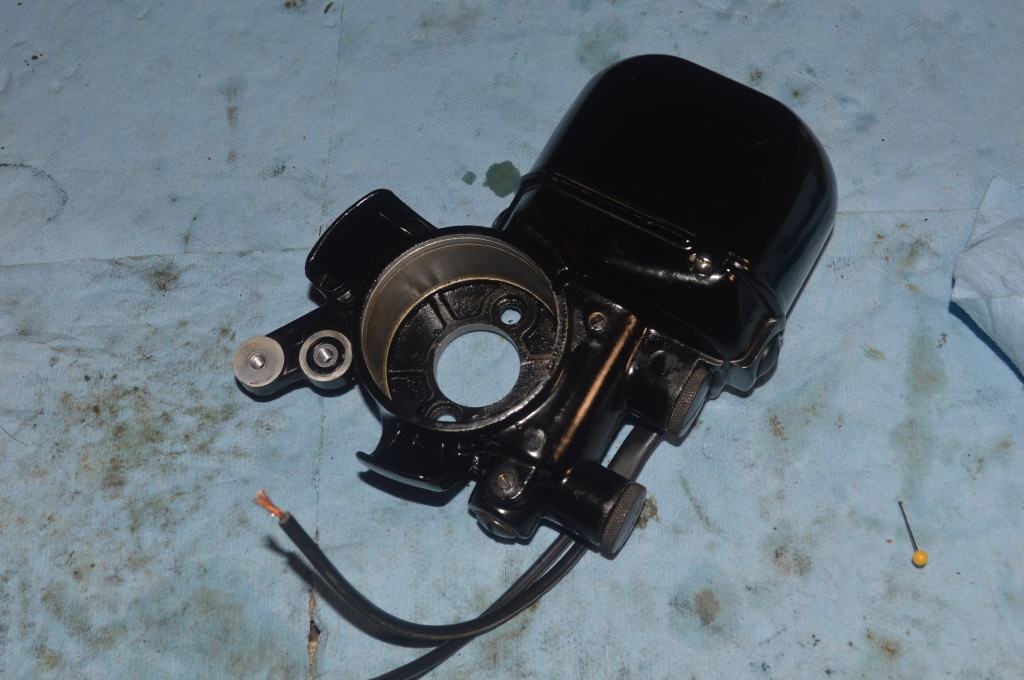
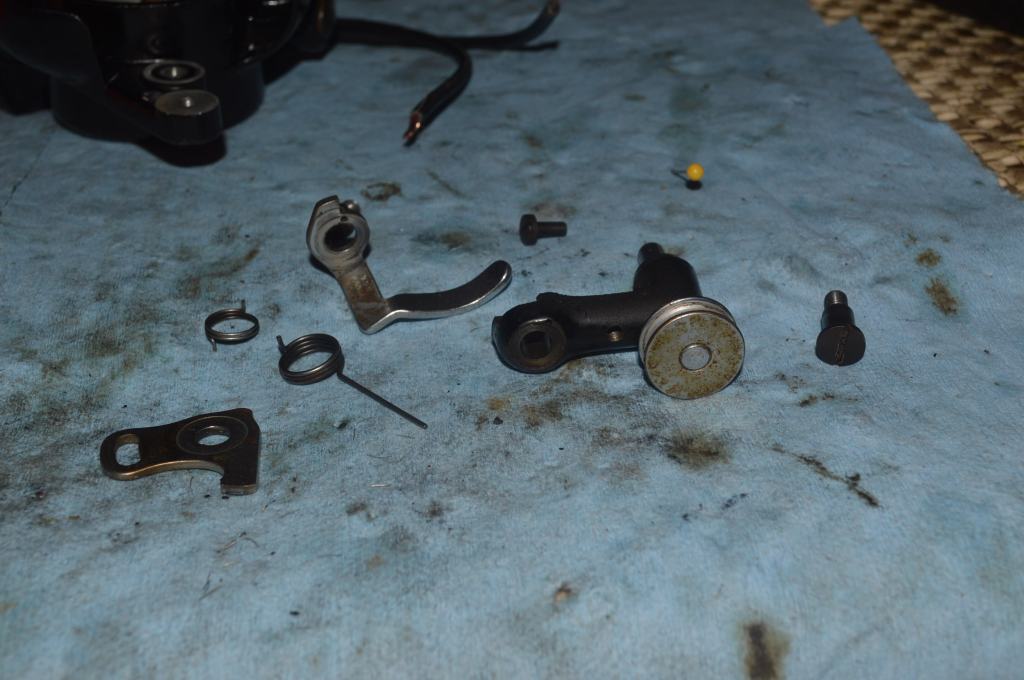
The bobbin winder mechanism is integral to the motor housing so it is disassembled and cleaned at this point in the restoration.
With this step complete, the mechanical restoration is complete. The only steps left are cleaning, polishing the plated pieces, reassembly, and adjustment.
There’s an old saying in golf… “drive for show, putt for dough”. Sewing machine restoration is kind of like that. The mechanical restoration is the drive. Everything is clean, smooth, and lubricated. Each piece is restored to as close to new as possible. A sewing machine does not need to look good, but it does need to sew great. The cosmetic cleaning and polishing is the putt. As unimportant as it is to the performance of the machine, the cosmetic condition of a vintage sewing machine is what you see. The best outcome for any restoration will result in a machine that not only sews at the peak of it’s performance but look as good as possible when doing it.
The cosmetic restoration begins with polishing all of the plated pieces… I’ll try to show this with pictures, but try as I might, the camera has a hard time focusing on the polished pieces.
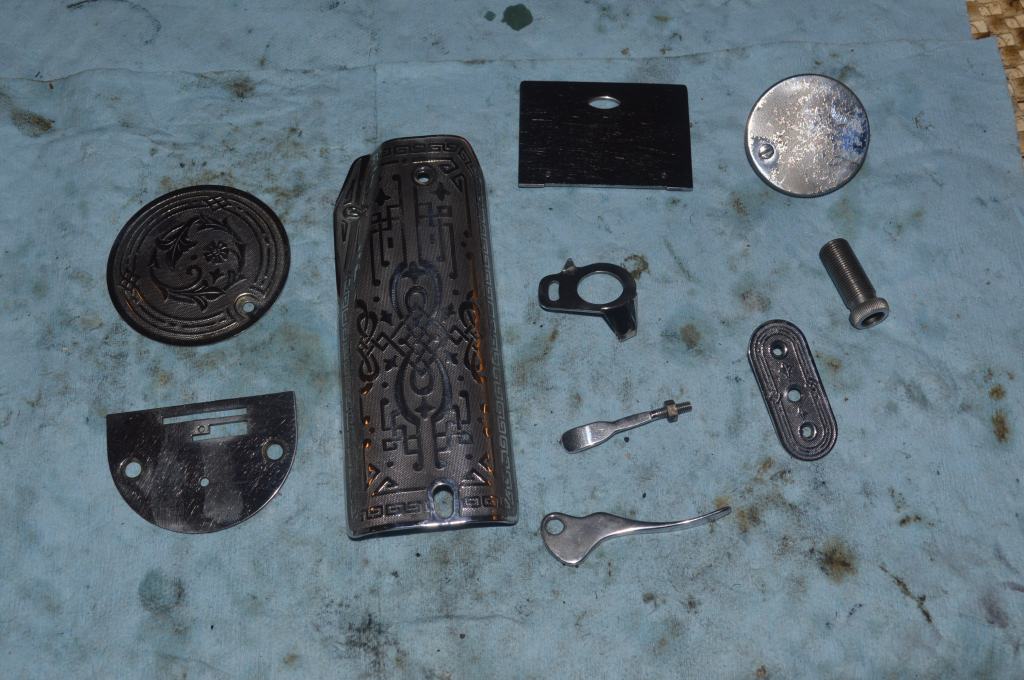
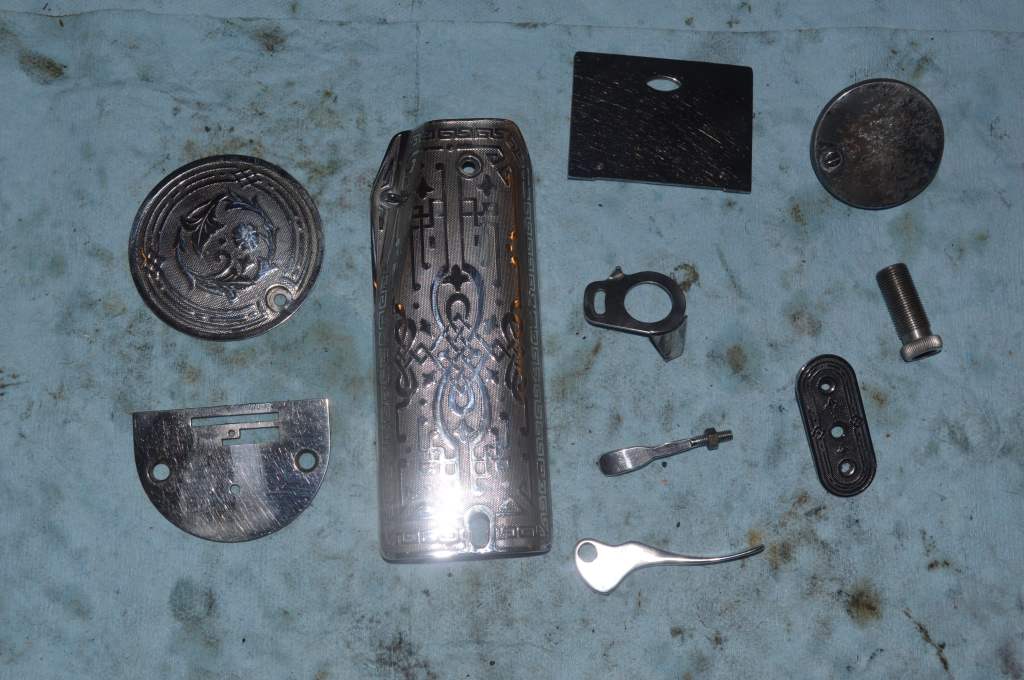
Naturally, places where plating is missing cannot be restored by polishing, but the base metal will polish to a bright shine.
Now the body of the machine is deep cleaned. I have found that the best cleaning is accomplished by hand applying GoJo and rubbing the surface with my finger. This allows me to feel the dirt and most importantly, the smoothness when it is clean. A follow up cleaning on tough old oil residue is done with GoJo and a cotton swab. The result brings out the deep black color of the paint and the gold in the decals. When maintained with a slight coat of sewing machine oil on a regular basis, it will maintain it’s high gloss.

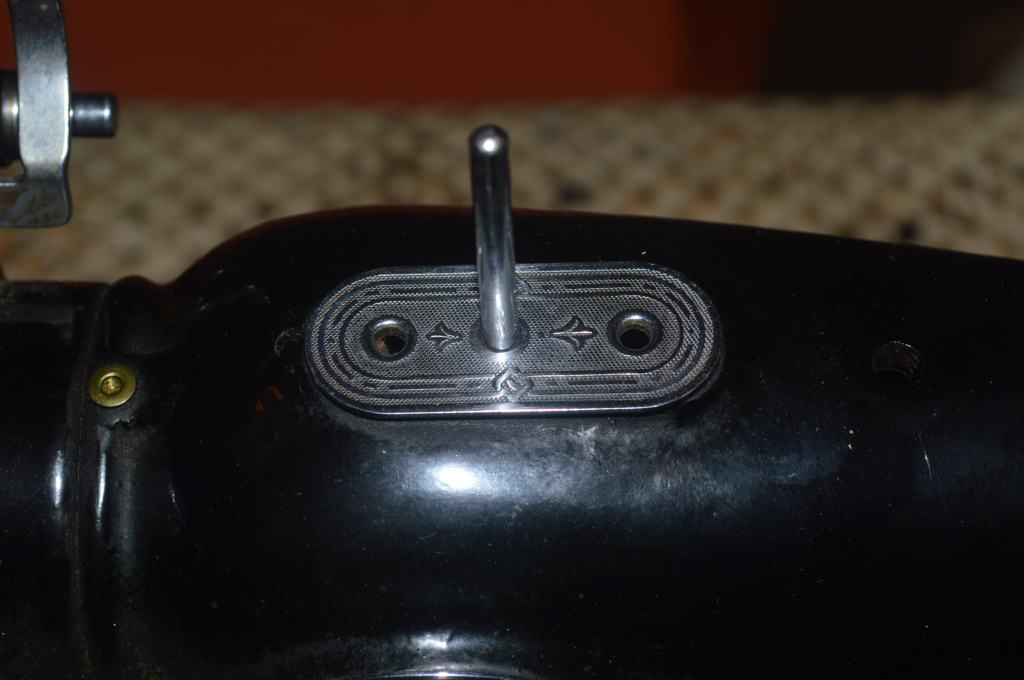
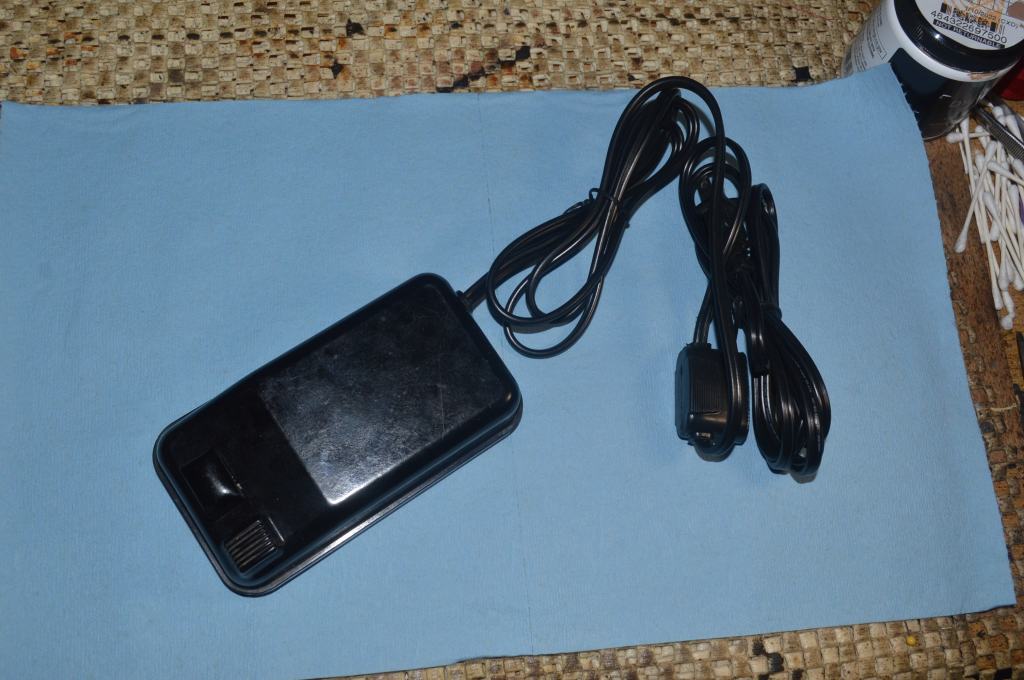
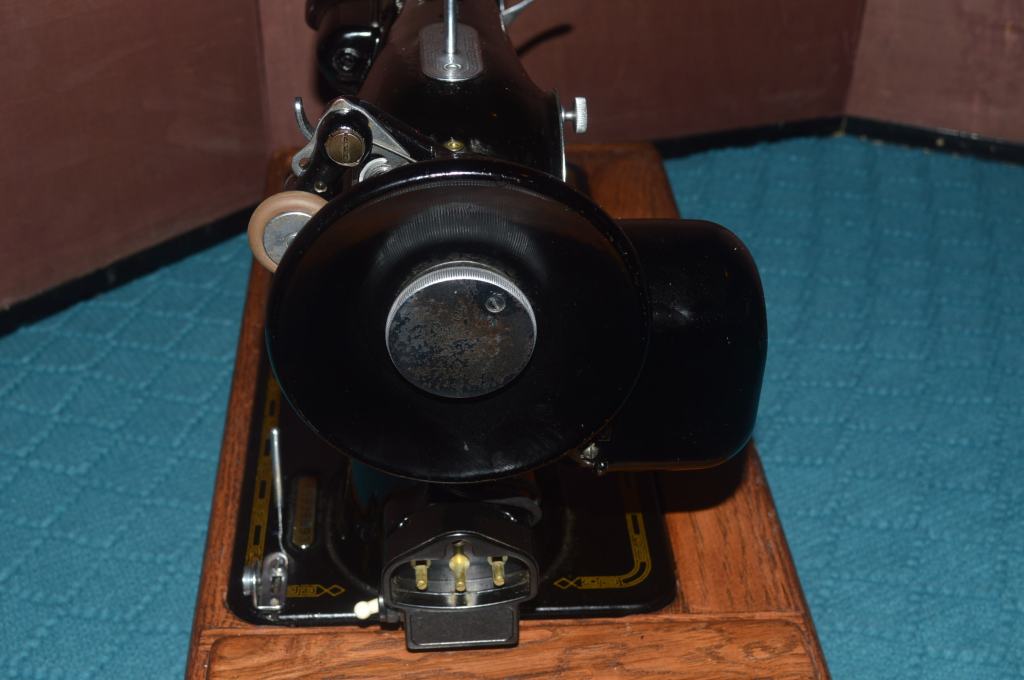
This machine is having the power and foot controller wiring replaced. When the machine was new it was mounted in a sewing cabinet. In this configuration, the foot controller was wired directly to the machines plug terminal and a single lead power cord was plugged into the terminal to power everything. It works great for a machine married to the sewing cabinet, but it means that the foot controller is physically attached to the machine. This is not optimal because it poses the risk of scratching the paint when the machine is removed from the cabinet (where do you put the controller?) and inhibits portability for service. A new dual lead power cord is provided to alleviate this problem. A dual lead power cord includes the foot controller wiring and the main power wiring in the molded plug. When the power lead is unplugged, the foot controller is unplugged with it… problem solved.
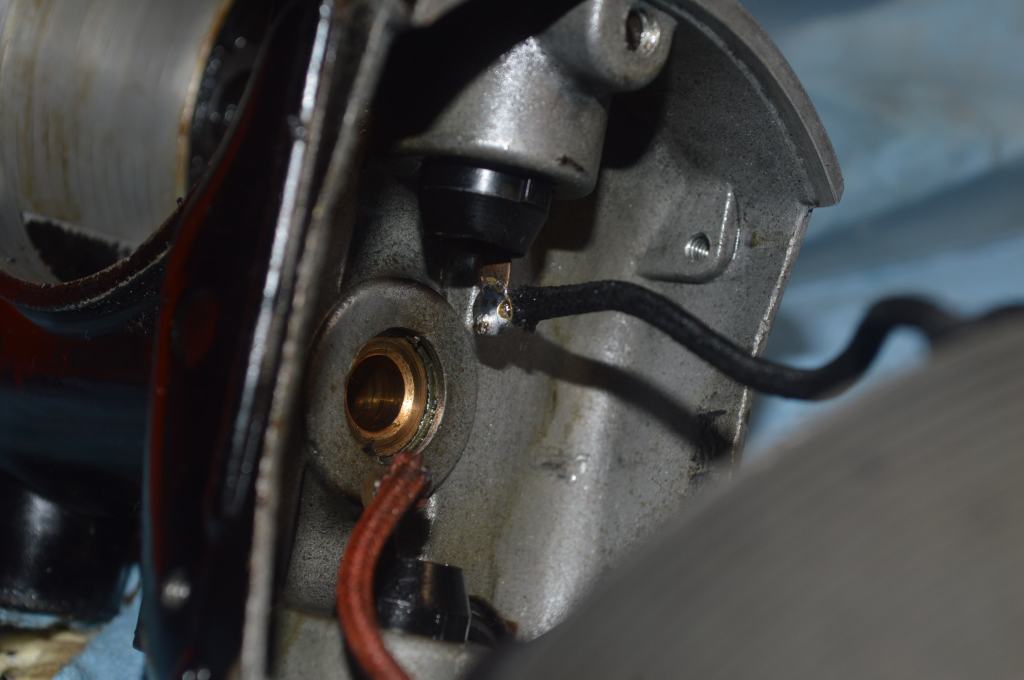
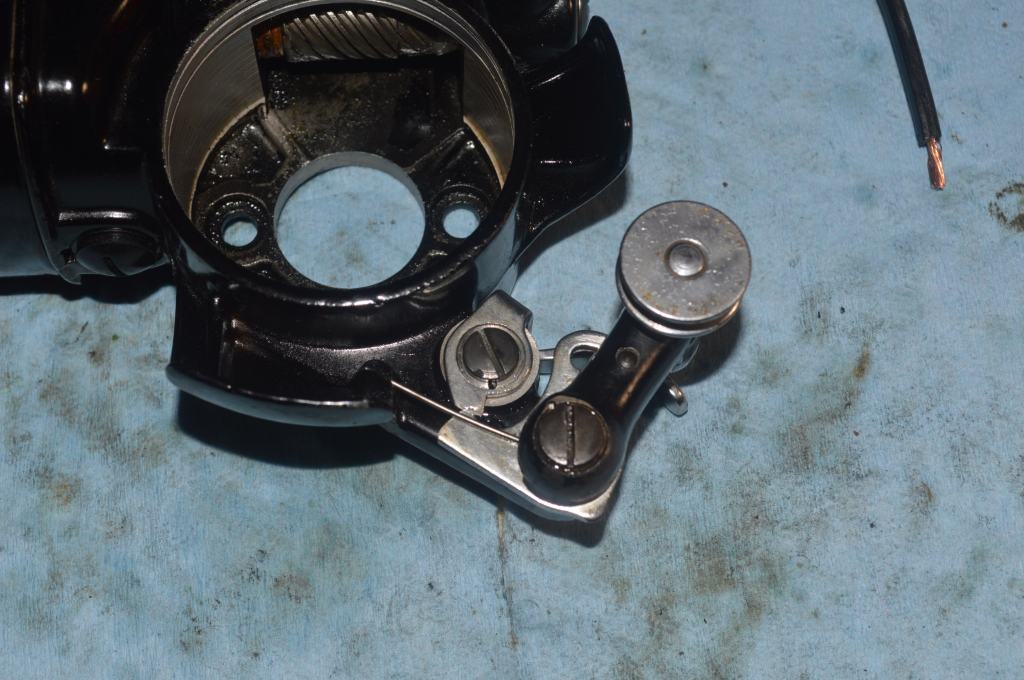
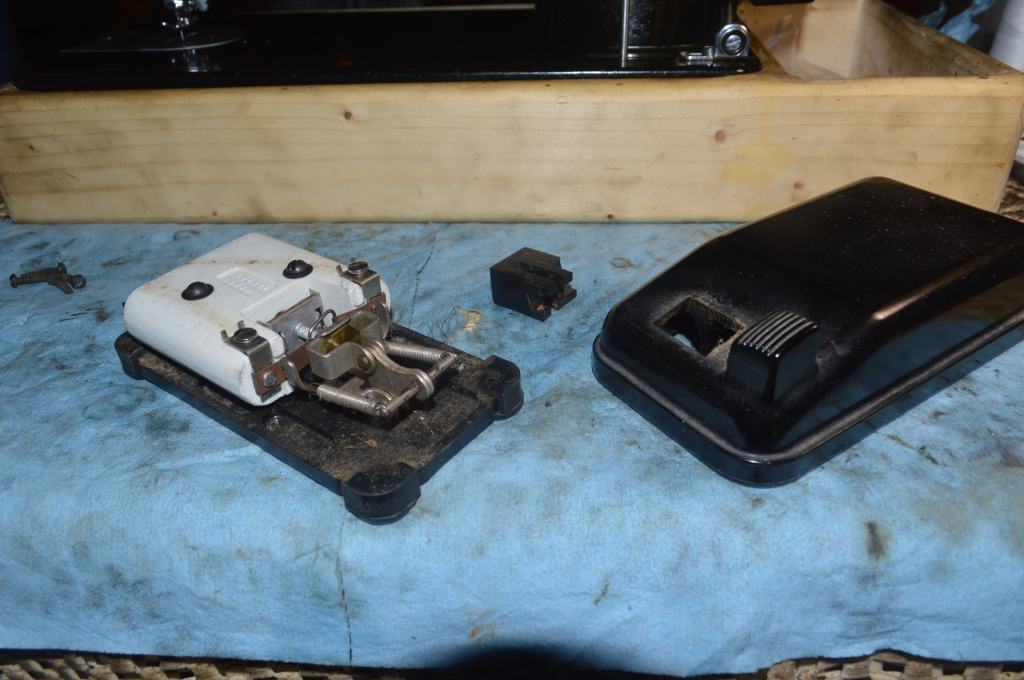
This presents the opportunity to clean and adjust the foot controller. While it is seldom necessary to do anything with a Singer foot controller, they can be cleaned and adjusted.
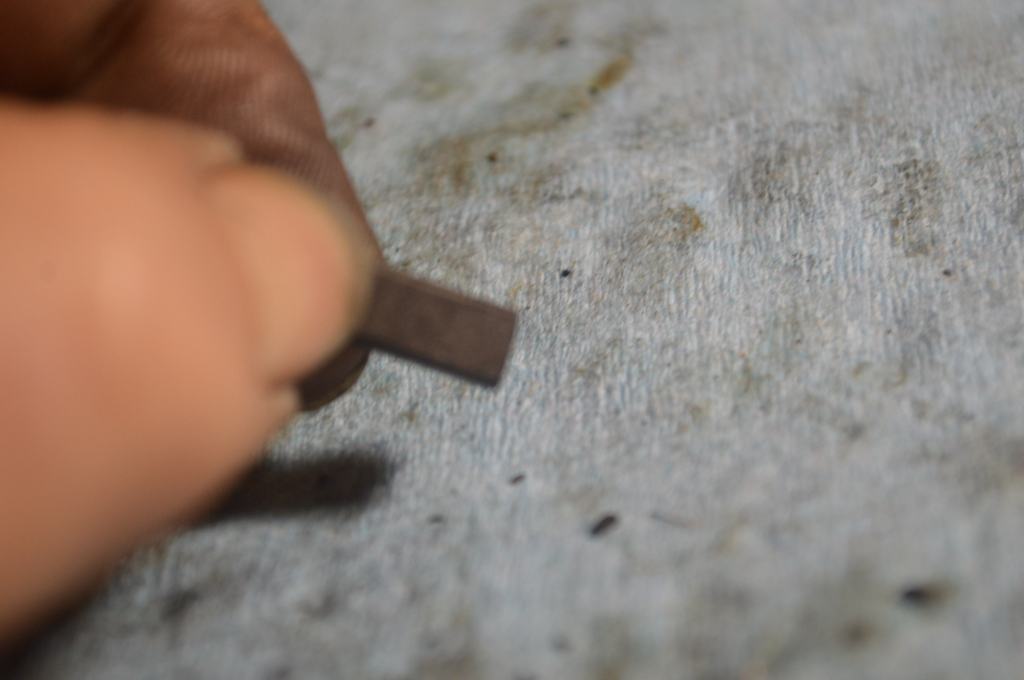
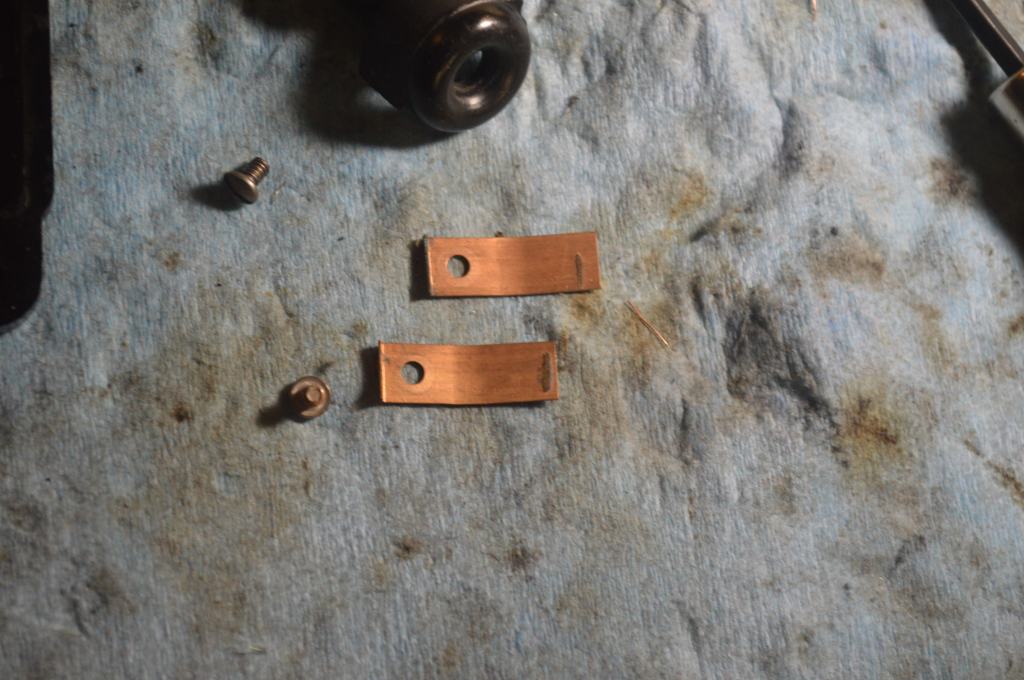
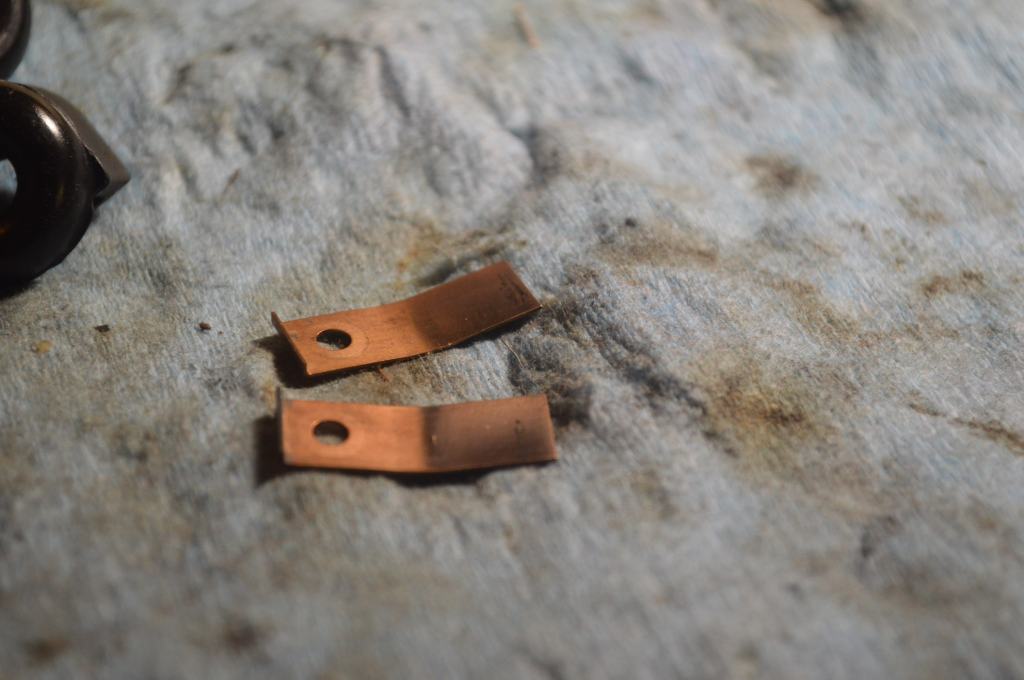
There is a little corrosion on the copper contacts that can be removed. They are wire brushed and then bent so the foot corresponding foot controller contacts them at the same time. This is only important when the foot controller is operating the machine at full speed, but still worth making the adjustment.
The foot controller case is cleaned, and the new wires are connected to the foot controller… This completes the foot controller cleaning.
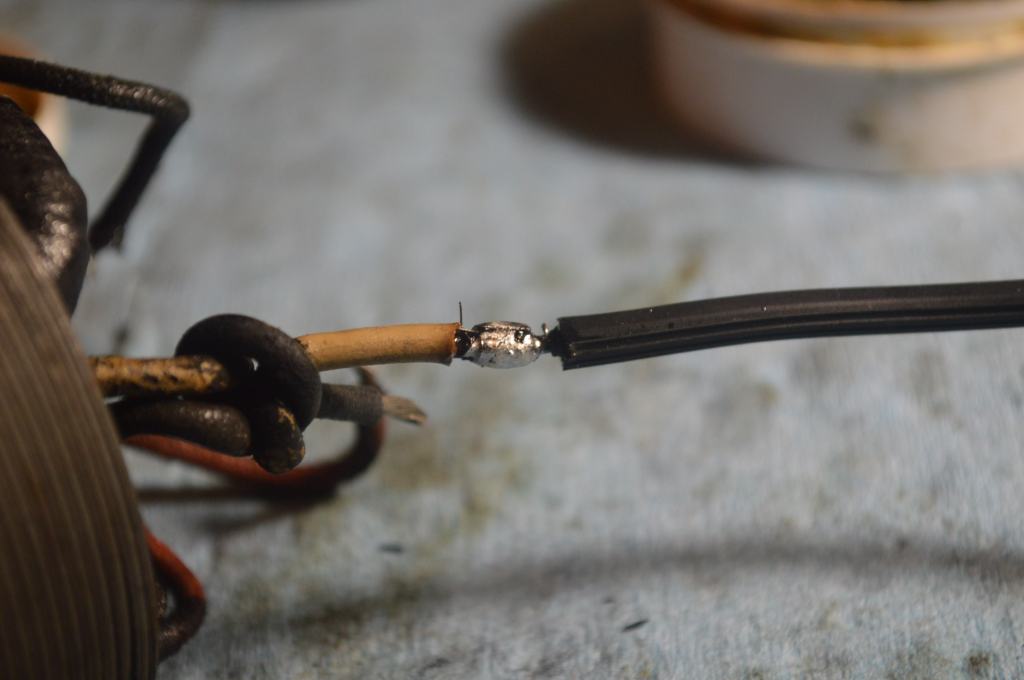
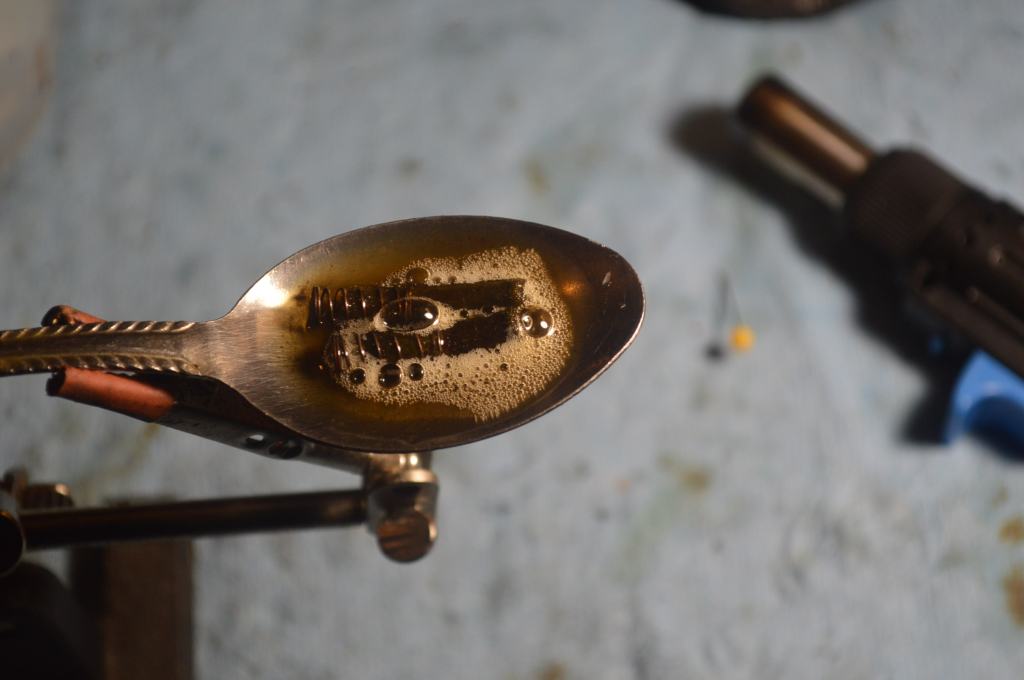
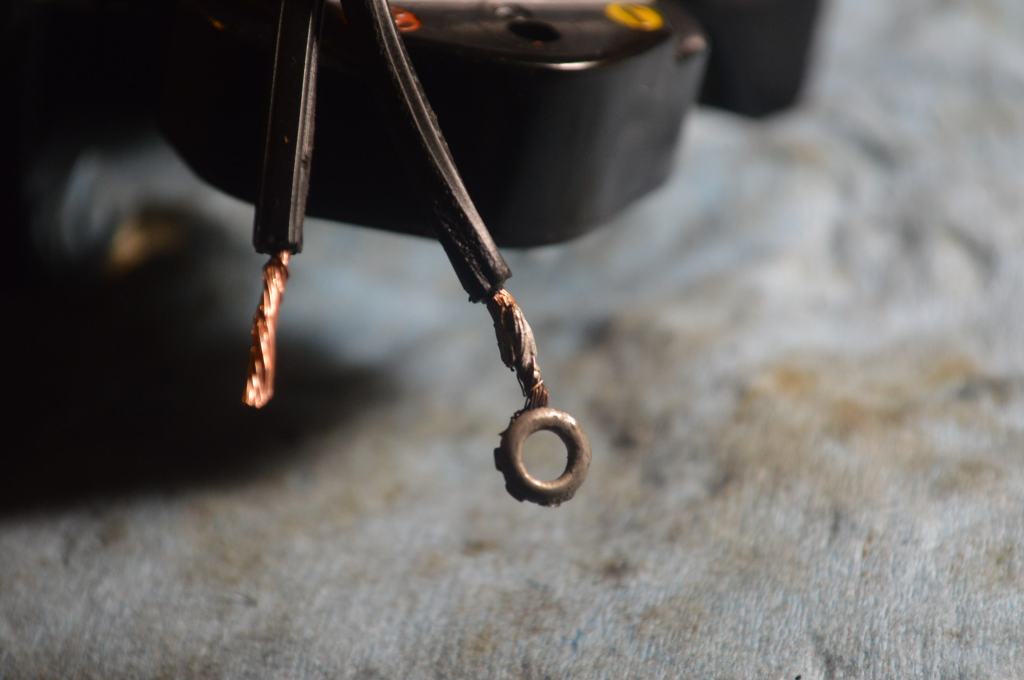
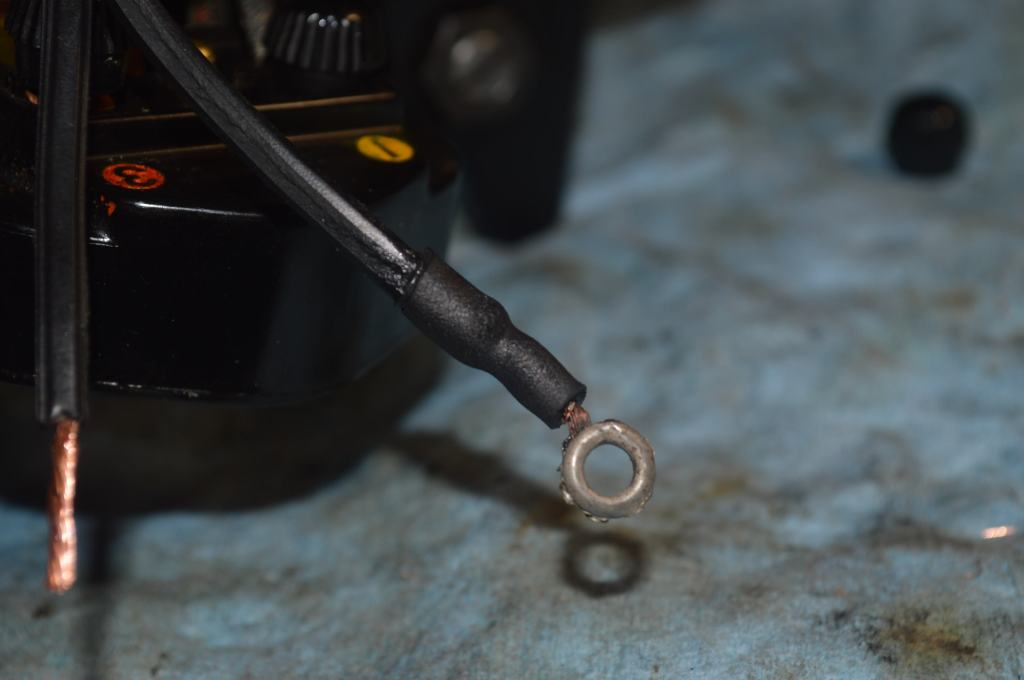
The motor is reattached to the machine and the new motor wires are prepared for connecting to the plug terminal. Terminal ends are soldered to the wires and shrink tubing is used to provide insulation.
Almost there… the last step is paint matching, but first, the machine is reassembled, and all of the adjustments are made. There is no need to risk handling the machine after the paint chip repairs.
After reassembling all of the parts, the feed dogs are adjusted, the needle timing is set, the needle depth is set, and the machine is run in to seat and settle all of the adjusted assemblies. All of the adjustments are then rechecked and readjusted as needed before they are locked in. Except for test sewing and setting tensions, the mechanical restoration is complete, and the paint chip repairs are made.
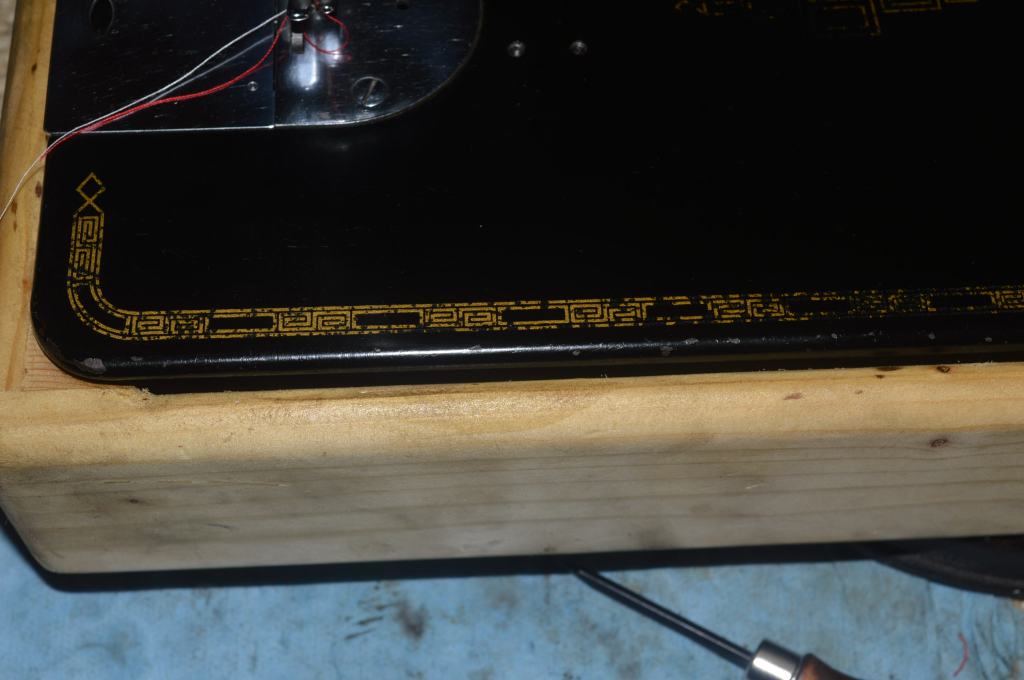
The chips are minimal… there are a few chips on the light shroud and as always, on the edge of the bed, and here and there. These are easily repaired.
A little paint goes a long way, and the overall look is improved… and that completes the restoration!
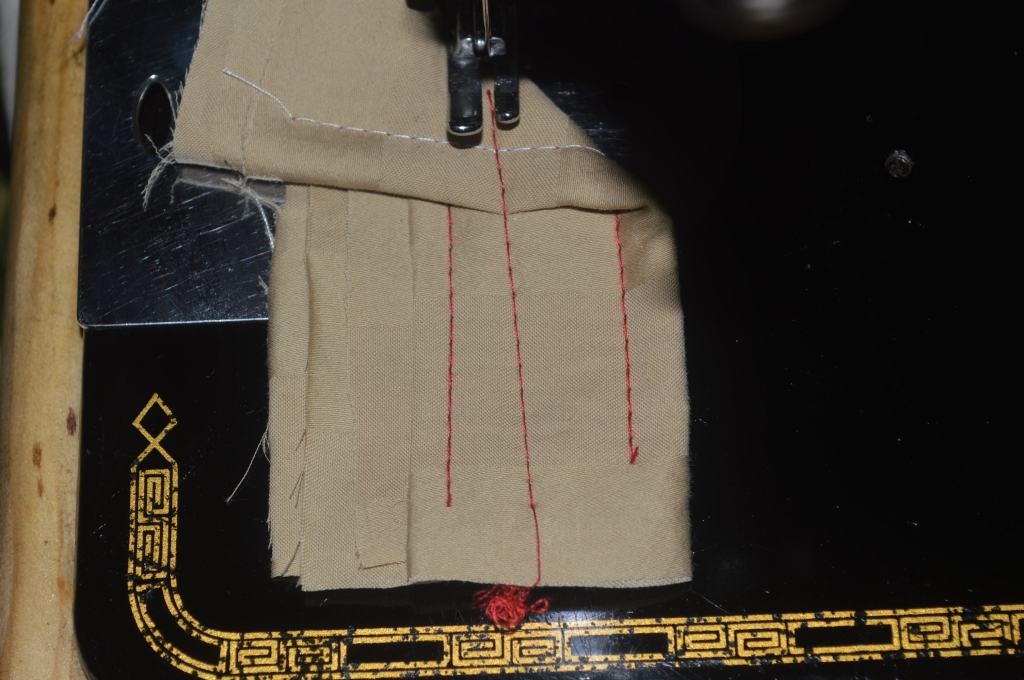
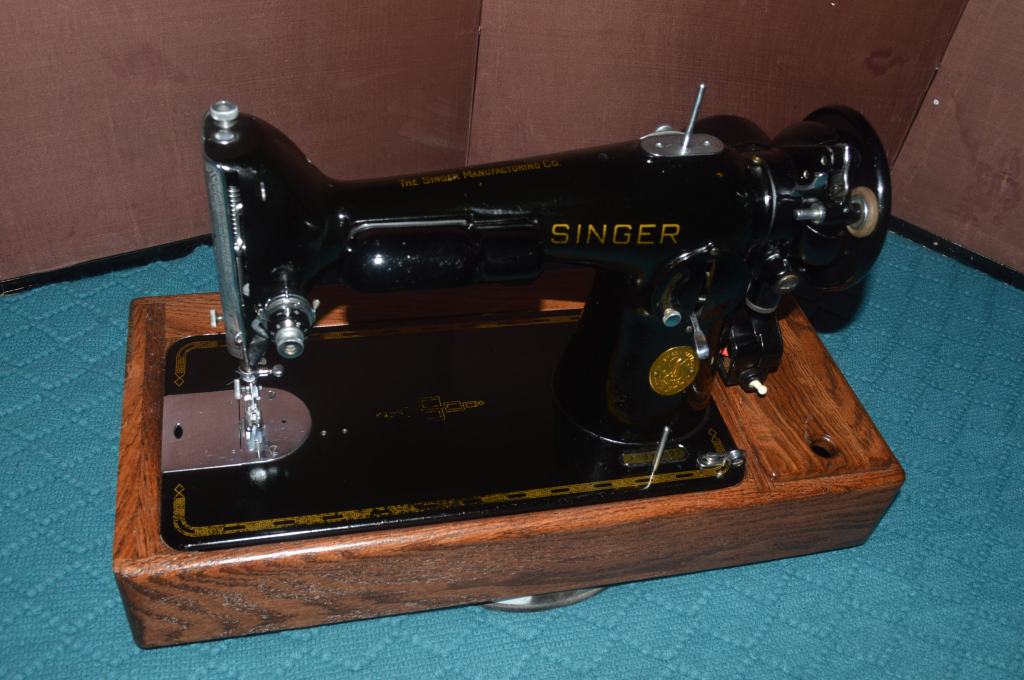
As always, the before and after pictures show the condition of the machine. It’s easy to see that all of the parts are clean and shiny, the paint is a deep black, and all of the assemblies are adjusted and timed, but what you can’t see is the feel of the machine as it sews. 201’s are known for their power, smoothness, and quiet stitching. This machine lives up to its name and excels at all three! I mentioned that the machine turned smoothly before the restoration began. It turns very smoothly now. It is only now that you realize that as smooth as it felt before, there was drag and resistance to turning that is now gone. The real success is shown in the stitch…
Before:


After…
Well, I hope you like what you see and enjoyed the restoration process as much as I did… this 201-2 looks and sews great! Like I always say, some sewing machines need more, some need less, but they all get what they need and now I can look forward to the next restoration!
Looking for a similarly restored quality vintage all metal sewing machine for your sewing room? Let us know! We specialize in custom orders and are happy to locate and restore the “perfect” machine for you!
As always, if you have any questions, or if I can be of any assistance, please contact me through Etsy or send me an email to Pungoliving@gmail.com.
Thanks for reading!
Lee

What a beautiful job!
LikeLike
I just purchased my first 1946 201-2 and would like to restore it to use as my daily driver. Do you recommend I learn how to do this myself, via You Tube (I also read your blog)—or take it to a professional? I’m an engineer, and my hubs a great mechanic, but neither of us know a thing about sewing machine parts or construction. I’m in South Florida. I wouldn’t know where to take it—any ideas? Thanks in advance. Diane
LikeLike
Good morning Diane,
The 201 is a great machine and it really does live up to it’s reputation. I enjoy restoring the 201’s more than any other machine (mostly because it is the machine I inherited from my mother). It is not an easy machine to work on. I have several 201 restorations on my website and in all of them I caution about disassembling past the gears. The 201 is a gear driven machine and the gears were mated together when the machine was manufactured. Aside from the gear related to proper hook timing, they should not be disturbed in the machine or disassembled from the machine. That said, if your 201 turns smoothly, it probably doesn’t need to be disassembled to sew well and be a reliable machine for you to use regularly. When they are disassembled and cleaned, there is a noticeable difference in the smoothness of the machine, but it is only noticeable in comparison before and after… they are great machines!
Because it would be your first attempt at a sewing machine restoration, and the 201 is a difficult machine to restore, I would suggest before you commit to disassembling your 201 to the extent shown in my blogs, you take a stepped approach to restoration. There are a few things that do need to be done to all 201’s and have a great impact in performance. these include restoring the motor and disassembling and cleaning the balance wheel. Other important parts to disassemble are the top tension control and cleaning behind the bobbin case thread tension flat spring,
Without seeing your machine, I would predict the wiring to the motor needs to be replaced… 99% of them have cracked wires. Contrary to what folks normally assume, the gears on the 201 are lubricated with oil, not grease. Assuming otherwise, they usually end up with grease on them and need to be cleaned. This does not require disassembly, but it does require patience.
I have no doubt that with your background and your husband’s mechanical skills you are capable of going as far as you wish in disassembly and restoration. I have published tutorial blogs detailing the motor, balance wheel, bobbin case disassembly, and proper cleaning methods and you can use the search function on my site to find them. If you complete these, it will give you some familiarity working on your machine, and you can decide if you want to go deeper into the restoration. I will be happy to assist answering any questions you have along the way and provide you with a copy of the 201-service manual to make all of the necessary adjustments in re-assembly. There is only one thing I would ask in return… you must get a set of quality hollow ground screw drivers to disassemble the parts on your machine. A quality set of gun smith grade screwdriver bits is less than $20 and they are essential. If you do not have them, I can recommend a suitable set to purchase. Household or mechanics grade screwdrivers are not the proper profile, and they WILL destroy the heads of most of the screws you will need to remove.
There is a lot of good information on YouTube and online, and these are sources I use extensively, but you need to be aware that some of it isn’t correct or complete. Researching a topic over multiple sources will reveal this, so don’t assume what you find is correct until you see it repeated the same way by multiple sources. In general, soap and water, household oil, grease, (except for the motor) and car paint restoratives such as wax and products like Nu-Finish are a no-no. The service manual is really the source to use for mechanical adjustment, and cosmetic maintenance is a simple as wiping the machine with sewing machine oil
As far as taking your machine to someone for restoration? I often get this question. Sewing machine repair shops are not equipped to work on vintage machines… especially a 201 and many of the private restorations I have done started off there. They are committed to using new parts and if a part is needed, they will tell you it cannot be repaired. I think that aside from cleaning and lubrication, they do not have the experience to work on them… really, you can do the work better. Think of it like this. If you had a model T ford, would you take it to a modern Ford dealer for mechanical repair? That said, there are folks dedicated to genuine restoration and repair of vintage sewing machines. Unfortunately, I don’t know anyone to recommend to you. You might find someone local by asking the question in a sewing machine forum. They have much useful information to share.
I hope I have answered some of your questions and I will be happy to assist you in any step of restoration you undertake. Please avail yourself to any of the tutorials I have posted for detailed instructions and let me know if I can help you at any point in your restoration.
Have a wonderful day!
Lee
LikeLike
Hello. Thank you for your time and effort in posting such detailed steps to restoring vintage sewing machines. I have a 201-2 and 99k that are waiting for restoration, so your blog has been most helpful. Regarding the set of quality hollow ground screwdriver bits, would you please let us know where and/or what brand to look for? Would the $20 set you mentioned have all the size and shapes we would need to access our vintage sewing machines? Thank you in advance. I can’t wait to get started on fixing my machines up!
LikeLike
Hello Niky,
Thank you for asking this question! Much damage has been done to sewing machine screws using a “universal” screwdriver instead of a hollow ground screwdriver.
The kit I use is the Weaver Compact Gunsmith Tool Kit item number B004NC17VM. Google the item number and you will find several sellers. Amazon is currently selling the set for $22.39. I paid just shy of $18 but that was some time ago.
This kit has all of the bits you will need for your vintage sewing machines plus many more that you won’t need. You can find similar kits but this set has more than you need and is inexpensive compared to other sets with even more bits that you won’t need.
I hope this helps!
Have a blessed day,
Lee
LikeLike
Impressive! How many hours were put into this?
LikeLike
Hmmm. Depending on the machine, I will spend 35 hours or more. Aside from disassembly, cleaning the gears in place, and wire brushing every bit and piece disassembled to like new condition takes the most time.
Cleaning and polishing is laborious but is good bang for the buck. Some of the steps (the potted motor) is carried out over several days. I enjoy it though and for me the outcome acheived deserves the amount of time it takes. It is important to attend to the details and I don’t know how much time a machine will take when I start… some machines need more, some need less, but the important thing is that they all get what they need.
I don’t doubt that it could be done in less time, but for me, I enjoy the attention to the details.
Thanks for asking!
Lee
LikeLike
Lee,
From the post here showing the extensive restoration process, I’m sure 4-5 working days would be entirely reasonable. Sincere respect.
LikeLike