
Introduction
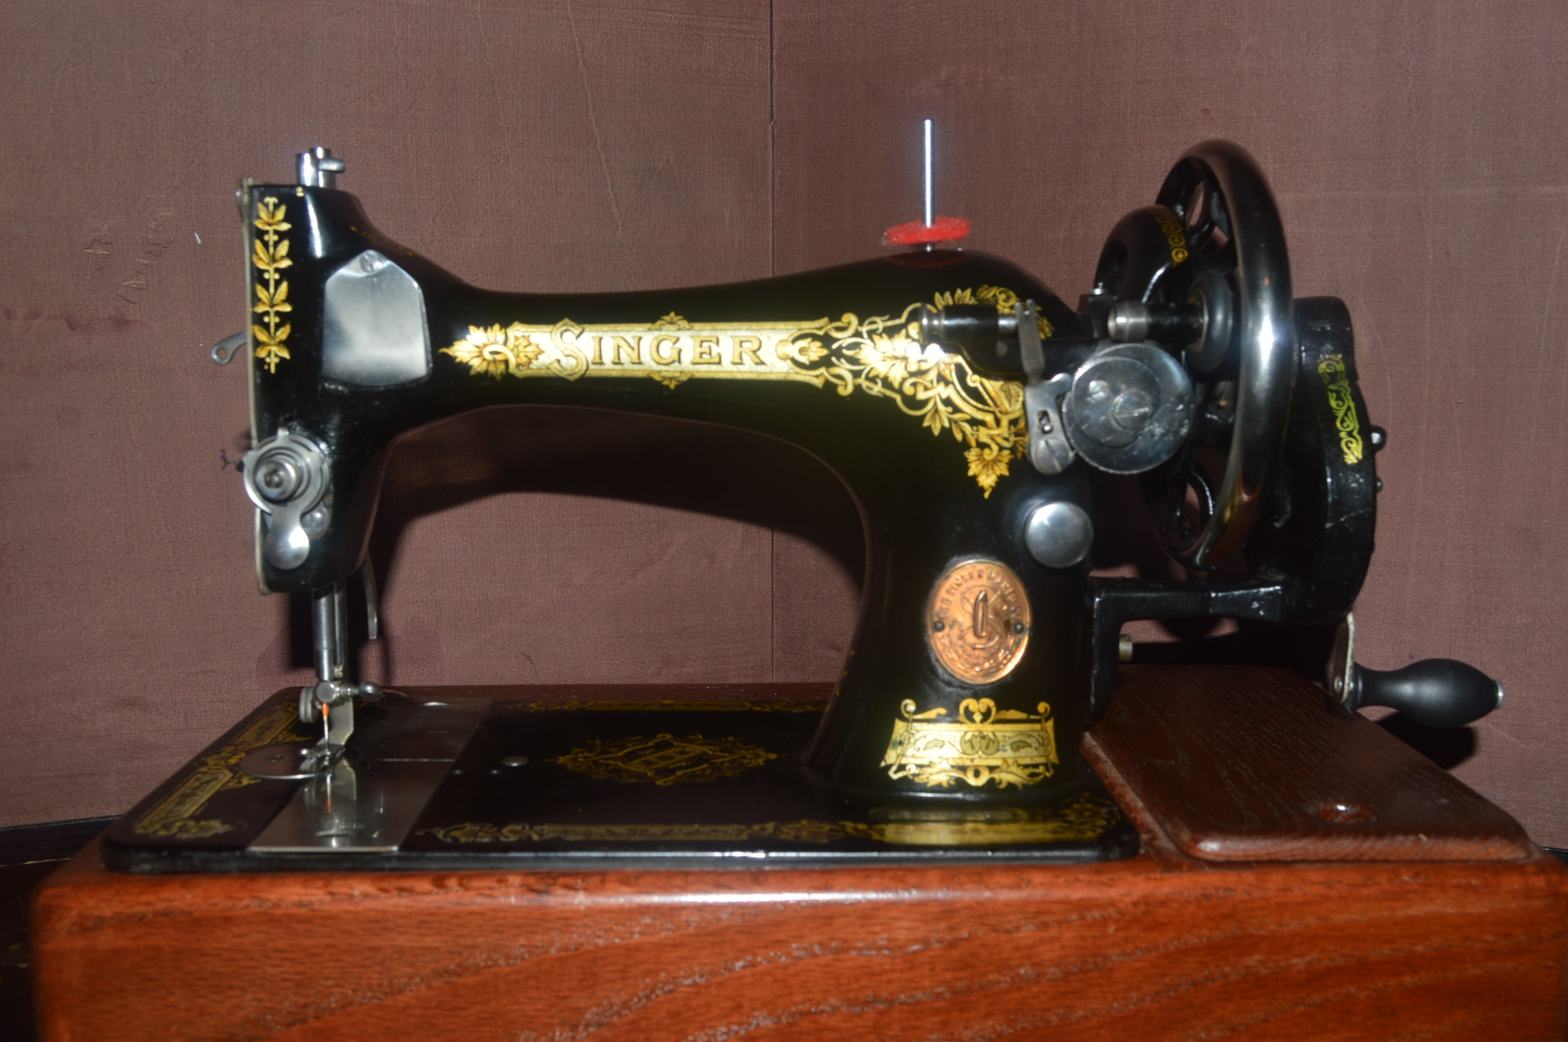
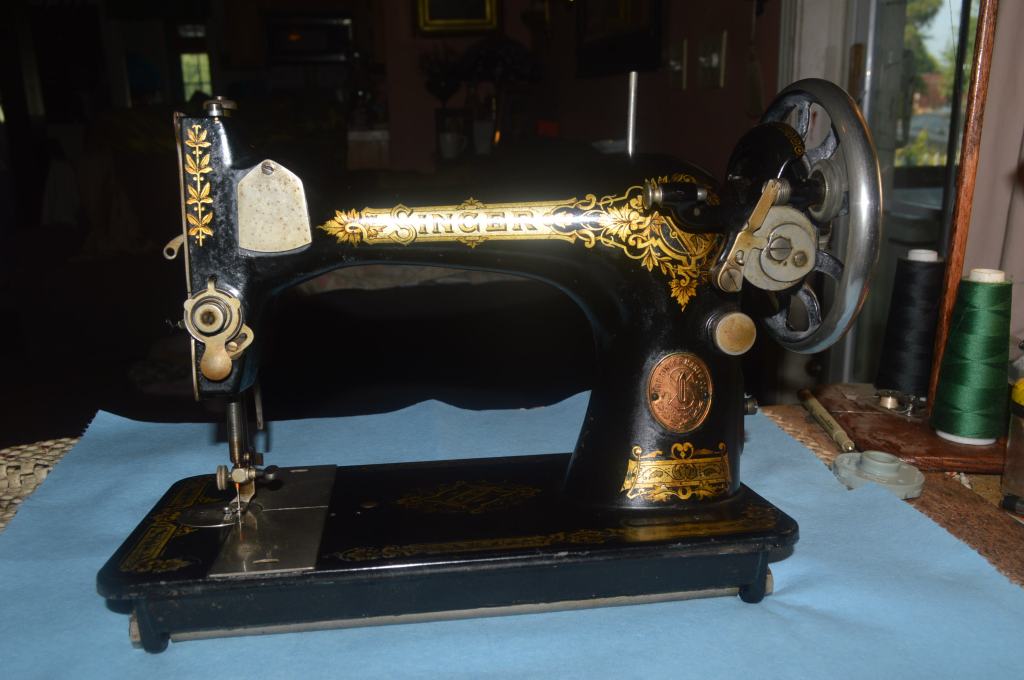
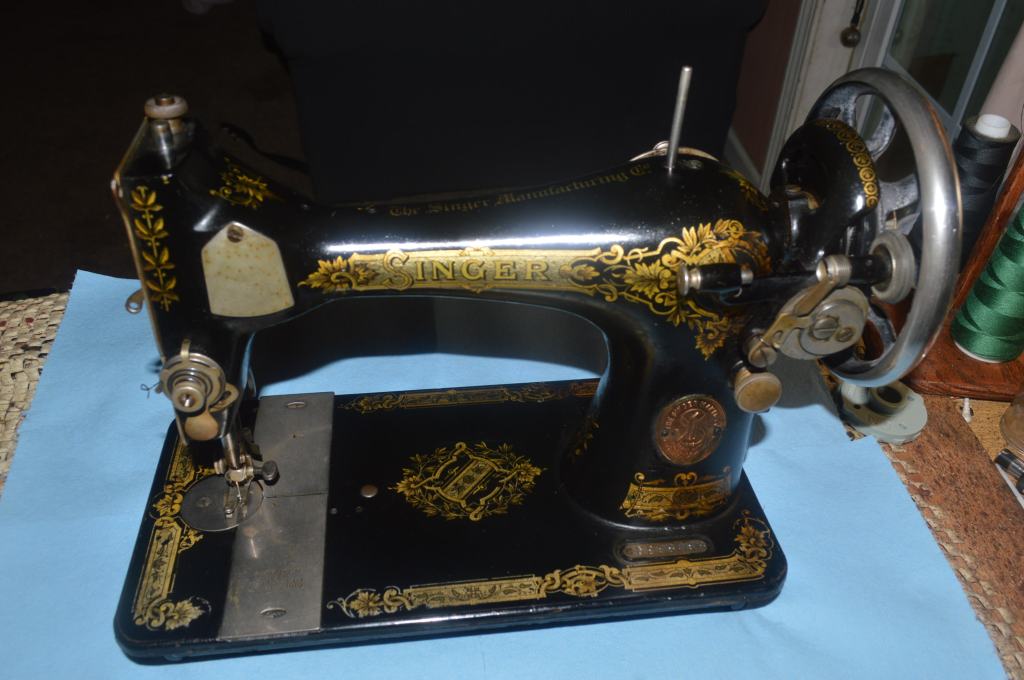
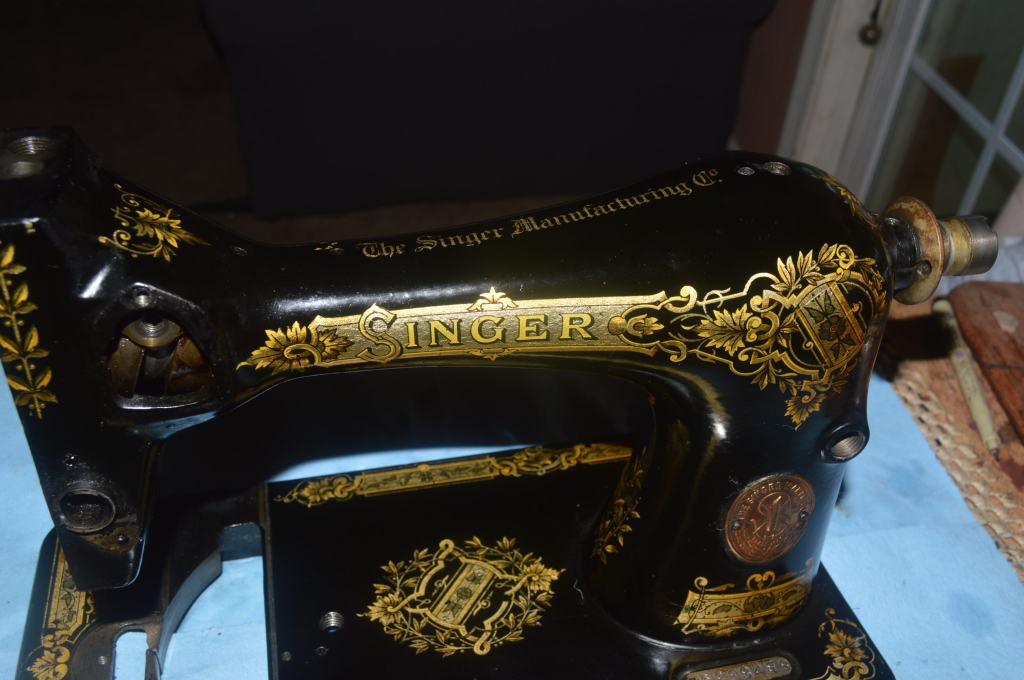
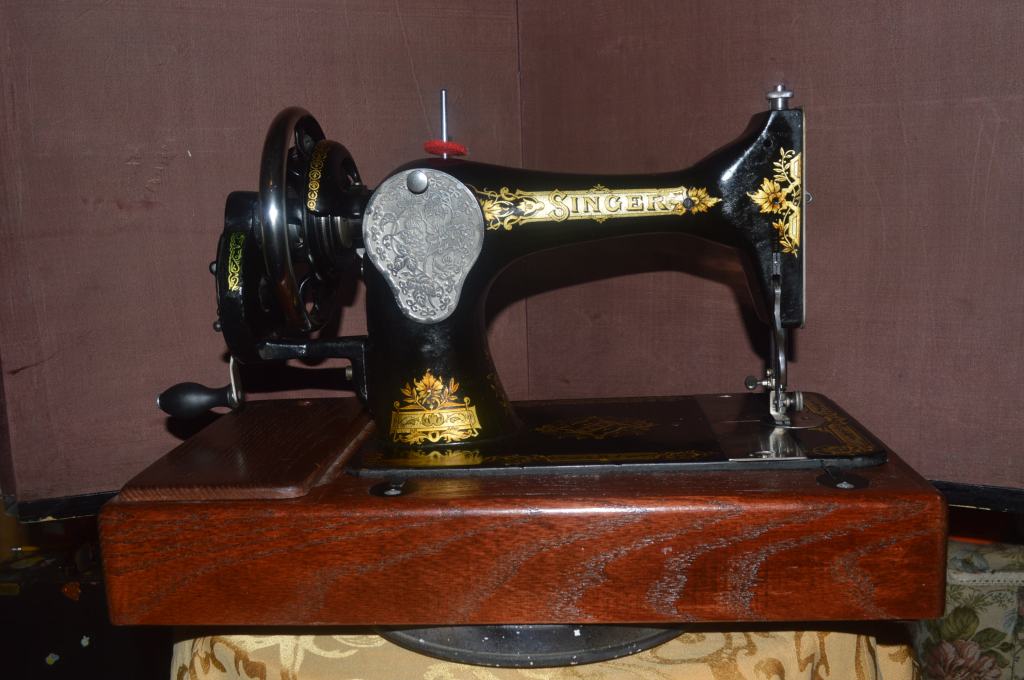
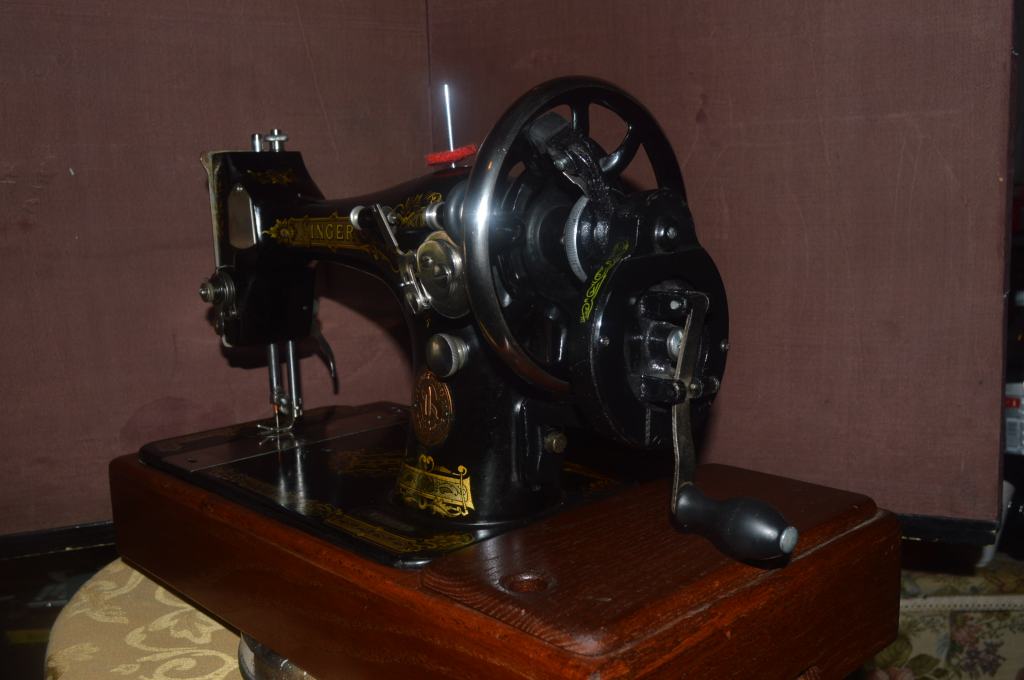
Recently, a customer contacted me to help her find a Singer model 28 with a hand crank (Singer called it a hand drive). She wanted a vibrating shuttle machine and was looking at a few model 28’s on the Shopgoodwill auction site. She asked me for my impression on the machines she was looking at. I told her I would be happy to find her a suitable machine and her criteria was simple. She was not particular about the cosmetic condition of the machine, but she was not fond of a lot of color in the decals. It had to be a vibrating shuttle machine, and she wanted it hand driven. Her plan was to purchase the machine and have it delivered to me for a restoration. All of the candidates on her list were either in quite worn condition, too colorful, and for auction prices, quite expensive. After looking at the machines on her list, and looking for a suitable machine, it occurred to me that I had a model 28 that I purchased several years ago that would suit her quite well! I purchased the machine based on the condition of the finish and the decals and my plan was to do a restoration and list it in my shop… well, I never got around to it, and it quite frankly it faded from my memory. Anyway, the machine is adorned with the “Victorian” dual tone gold decals that was just what she was looking for. The bonus was the condition of the original finish and decals. Even before the restoration, it is a beautiful machine. While not perfect, for an age of 104 years, the condition of the machine is quite good. This restoration is a custom order for her, and I look forward to her using the machine and adding it to her collection.
There is something special about the Singer model 28 that just makes it a joy to use. The model 28 uses a vibrating shuttle and when driven with a hand crank, it makes a distinctive “clicking” sound as the needle bar moves up and down. Also distinctive is the slight jog the needle bar makes as it reaches the bottom of its stroke… it’s kind of like it can’t decide if it should go up and down, and finally decides to go up. Another thing that is undeniable about all vibrating shuttle machines is that they make a very nice lockstitch.
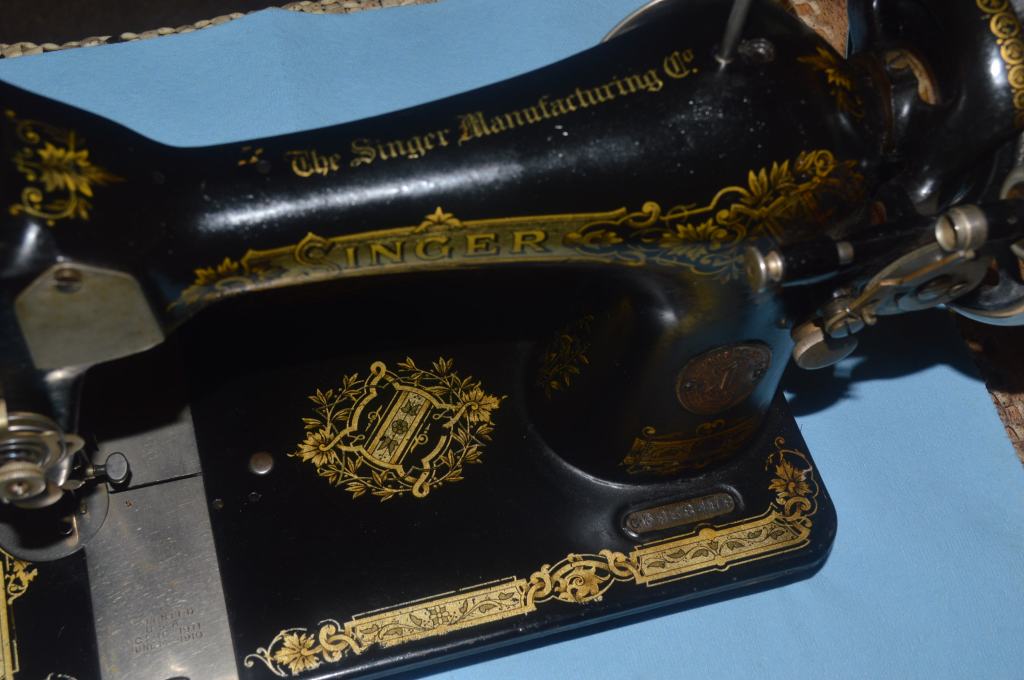
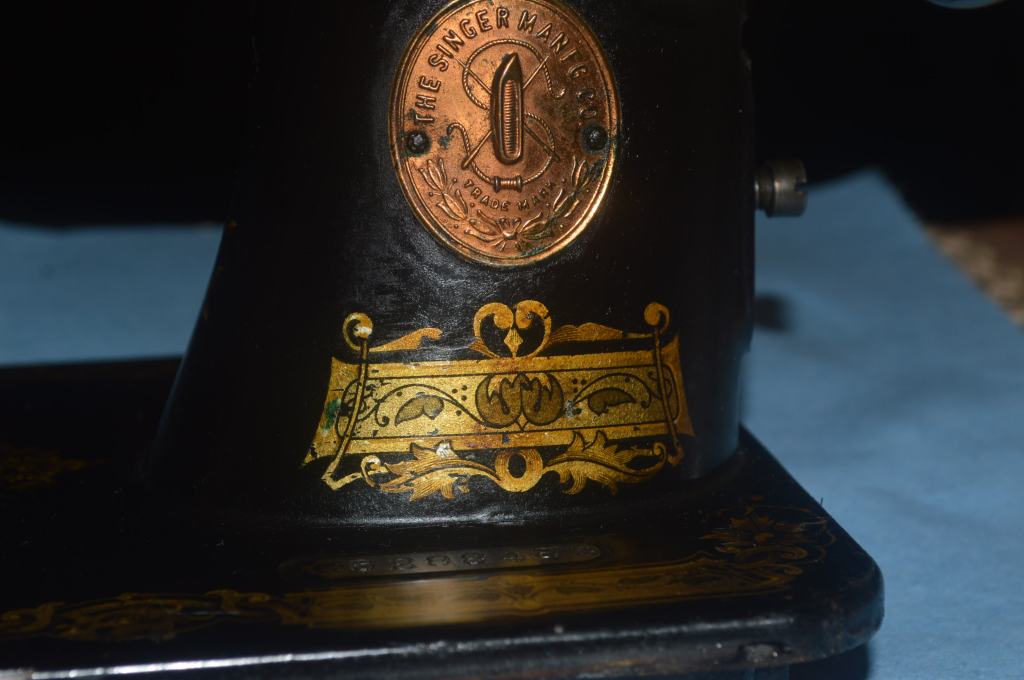
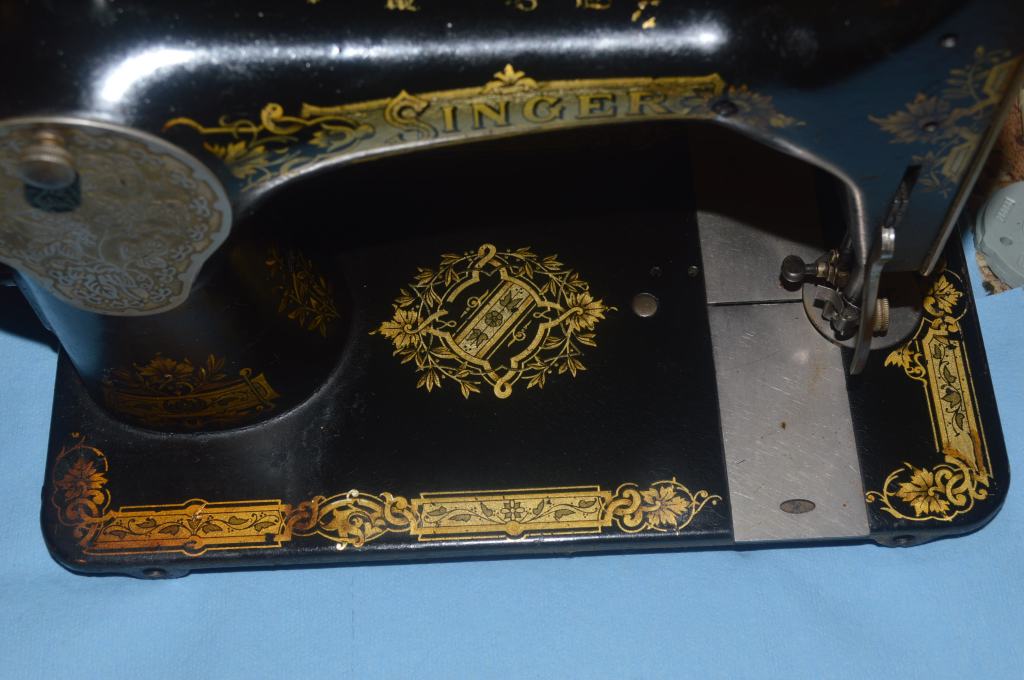
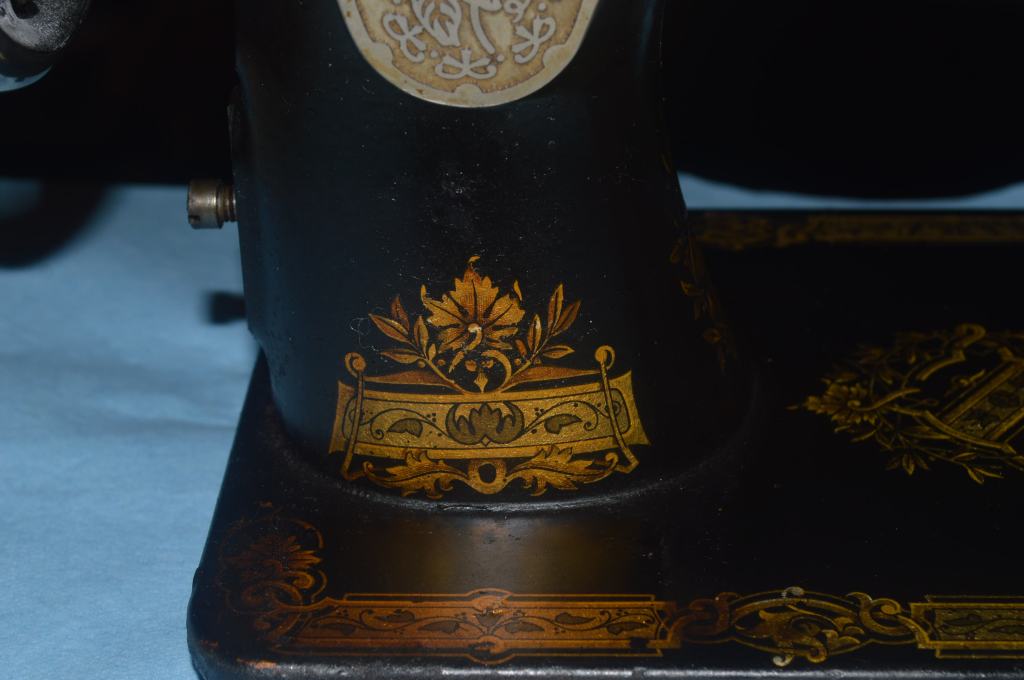
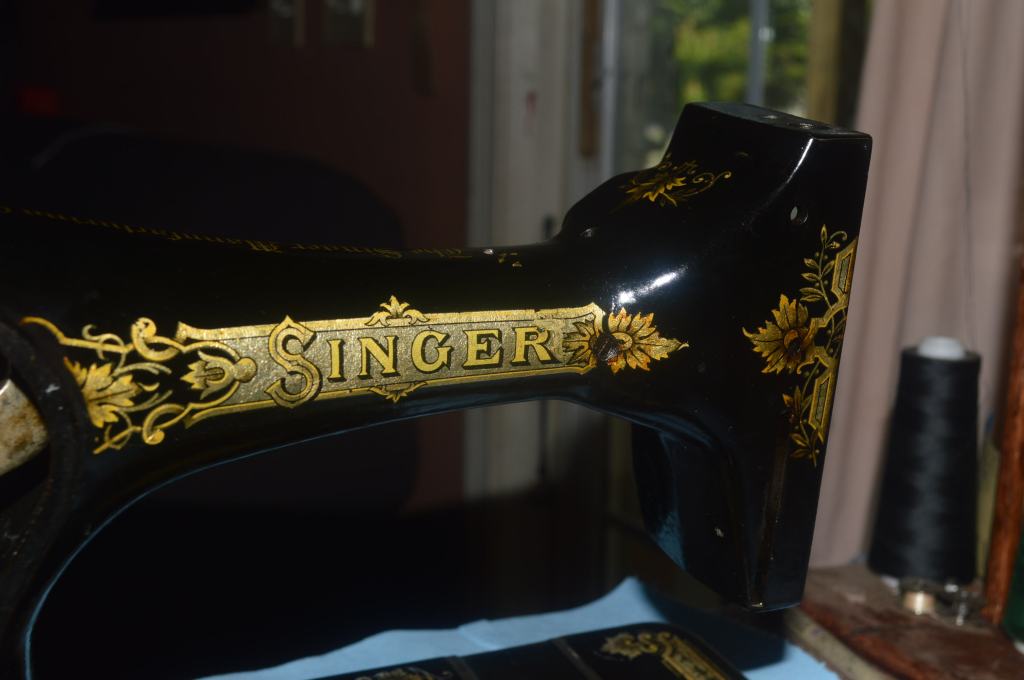
Very similar in body style and size of the model 99, the model 28 arrived on the scene in 1890, while the model 99 first appeared in 1923. The model 99 uses a scaled down version of the model 66 drop in bobbin, while the model 28 uses a scaled down version of the model 27 vibrating shuttle. Both are excellent machines, but the model 28 was offered with a variety of decals the model 99 never saw. The 99 came with simple (but nice) gold decals on the bed with “SINGER” emblazoned in gold on the arm shaft, the model 28 came with a variety of decals, some very colorful such as the “La Vencedora”, “Tiffany” and “Ottoman Carnations” decals. Some were very ornate such as the “Scrolls and Roses” and “Cloured Roses and Daisies” decals. Some were painted, such as the “Pink and White Roses”, and there are a variety of dual tone gold decals such as the “Victorian” decals found on this machine…and there are others! So many in fact, that I am on a constant lookout for model 28 machines with the less commonly found decal sets.
Regardless of the decal set or how worn it may look, the model 28 is a solid machine with a fairly simple sewing mechanism, and everything about it just works…
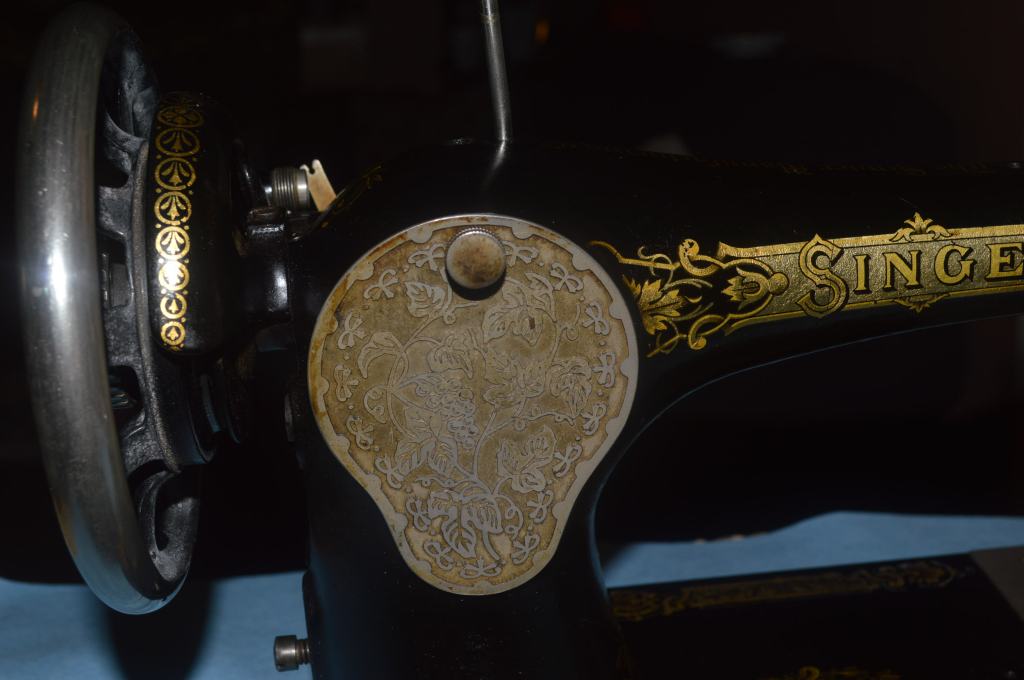
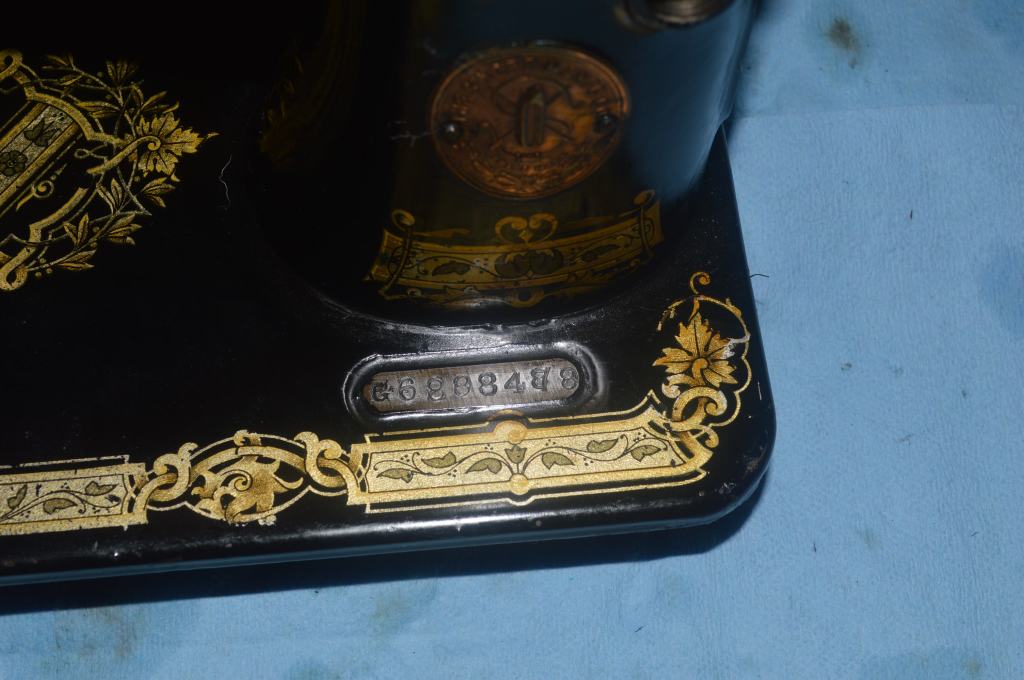
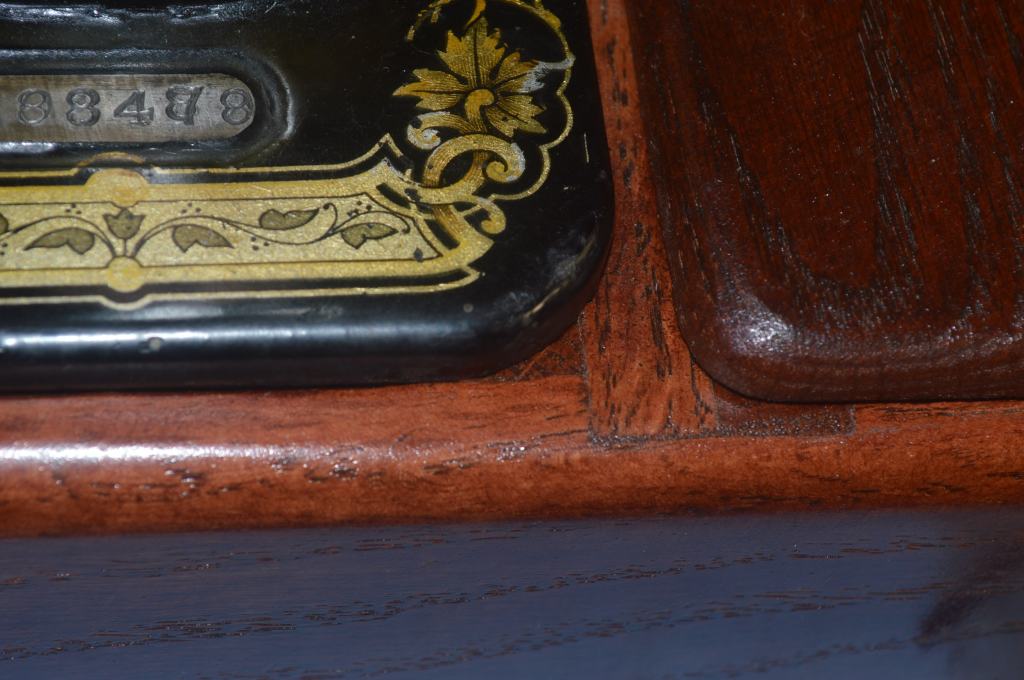
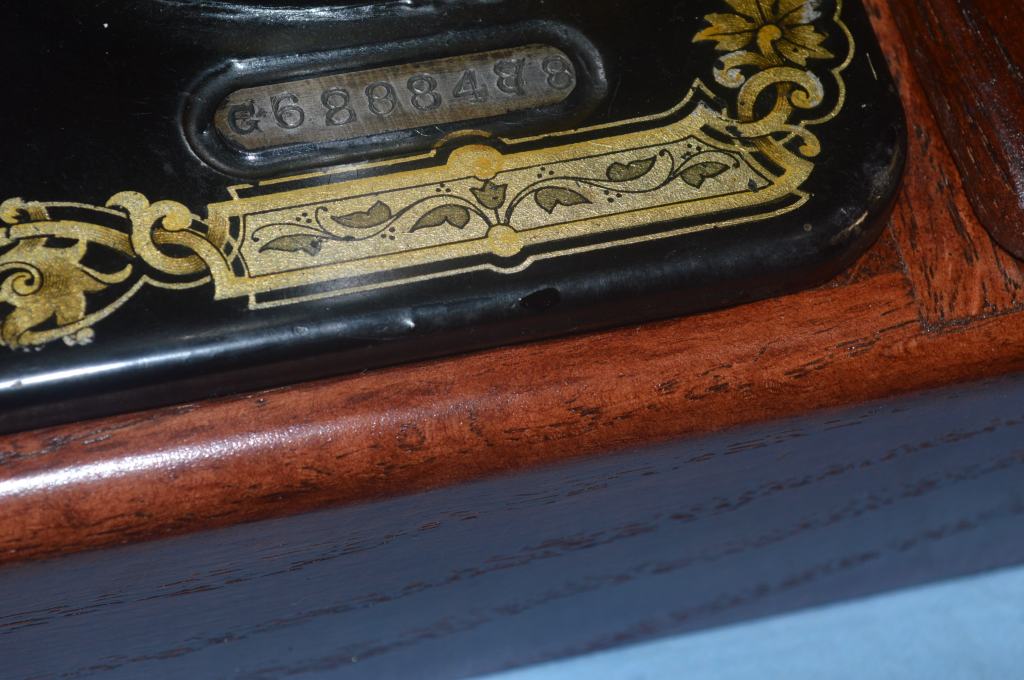
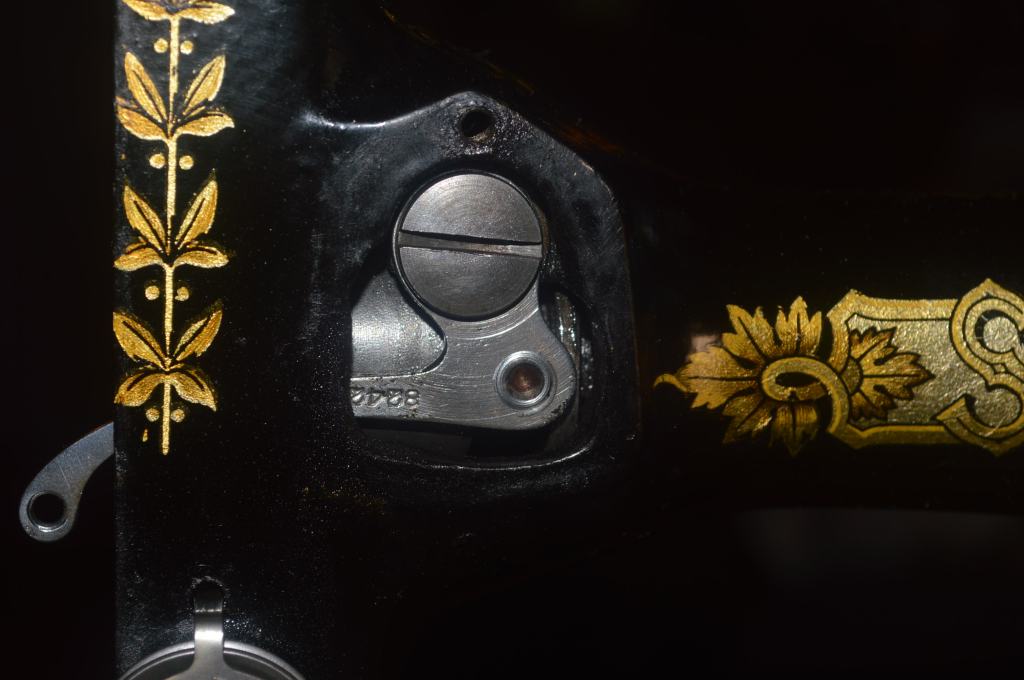
So, what is this machine all about? Well, it is sort of a mystery as to the serial number. The original serial number has been overstruck with several numbers stamped over others. It has (what I believe) is a “G” prefix, and one of the number combinations I made from the numbers fit a model 28 machine dated to April 17, 1918. The other possibility is that the machine has a “C” prefix. If this is the case, it was made in Germany, and when the Russian army entered Germany in 1945 the Singer factory was stripped of all equipment and machinery. There are no surviving serial number records for any machines with the “C” prefix. Because I don’t know if the model 28 was ever manufactured in Germany, I doubt it was made there. I’m going with the “G” prefix. but it does not differentiate between a model 28 made in the USA, or a 28K made in Scotland. There are clues to further help identify it. The faceplate design on the machine (vine + 2 corner dots) was used on the 28K. Based on this, I’m going with calling it a model 28K. Does it make a difference? Not really, they are the mechanically and cosmetically the same machine, but I do think pedigree and provenance is important.
Restoration Plan
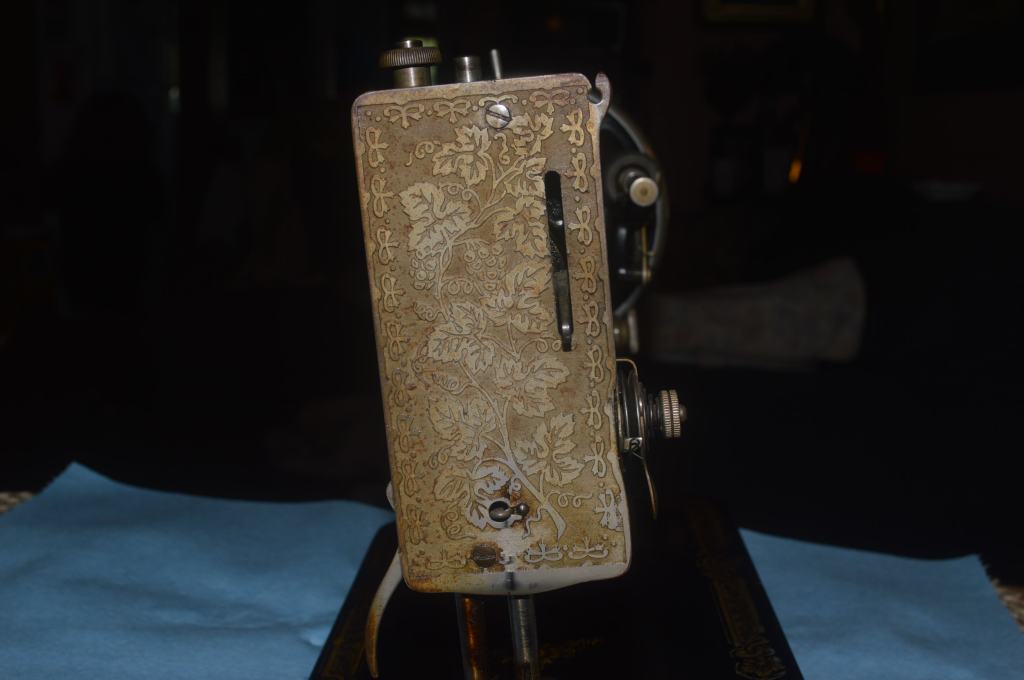
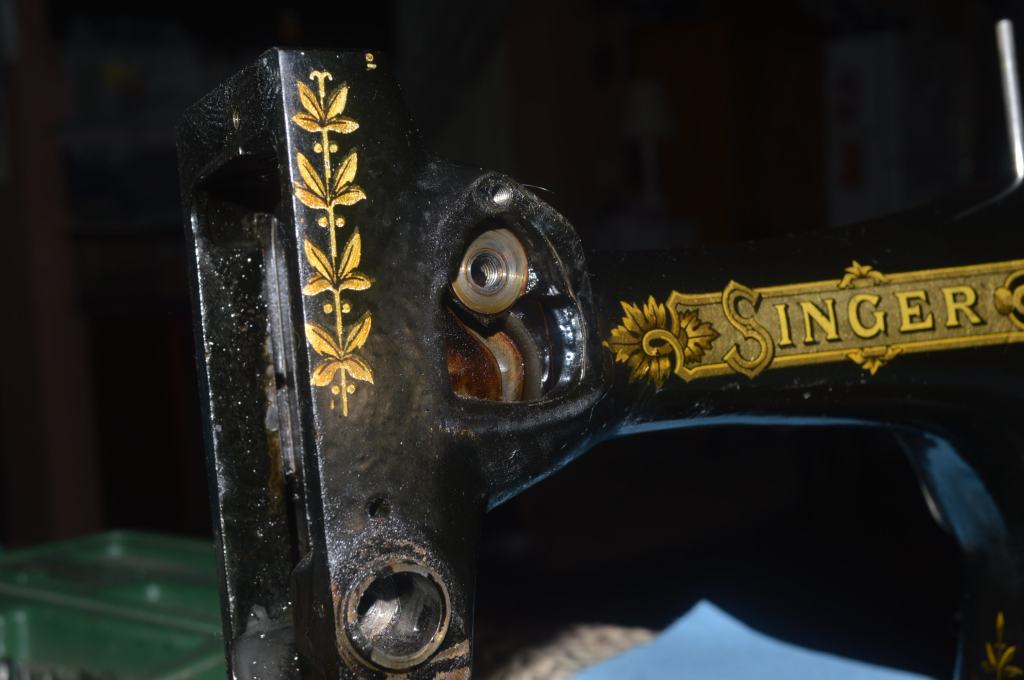
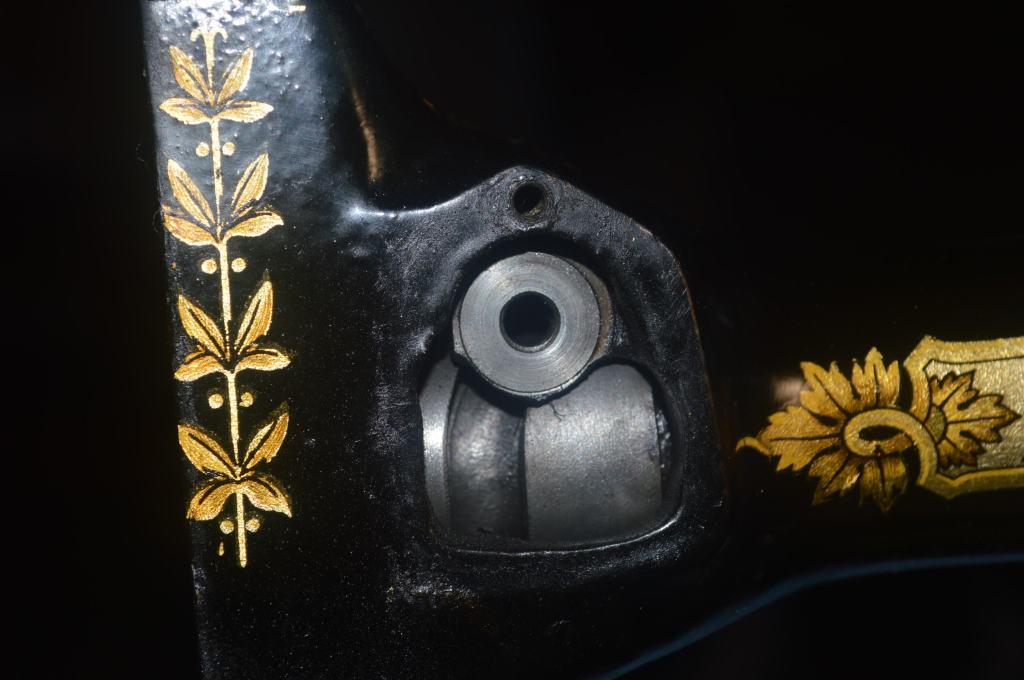
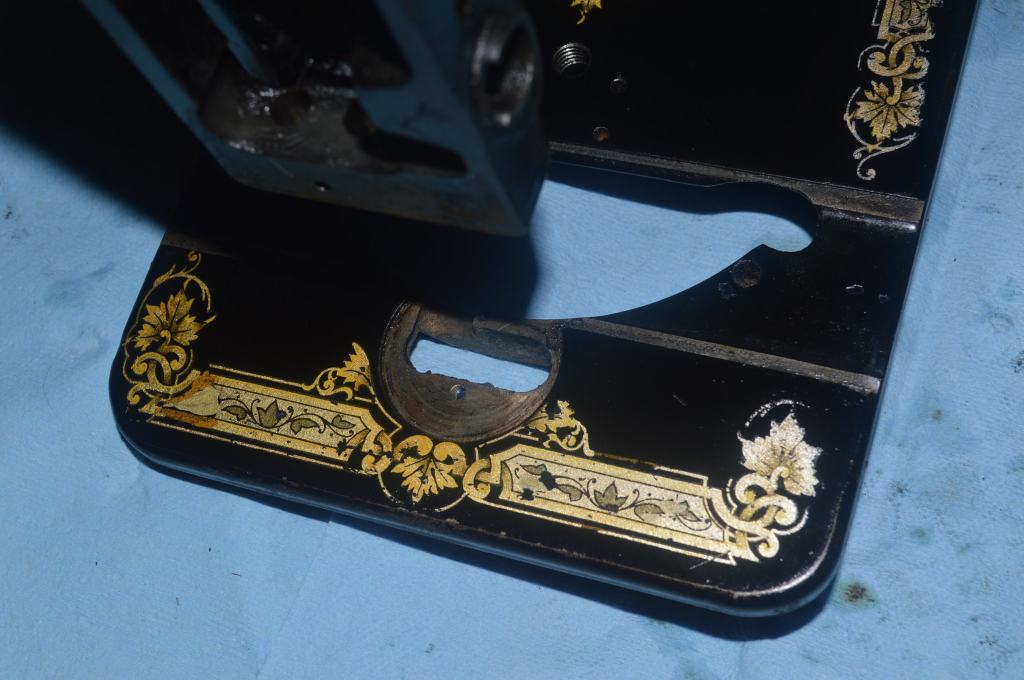
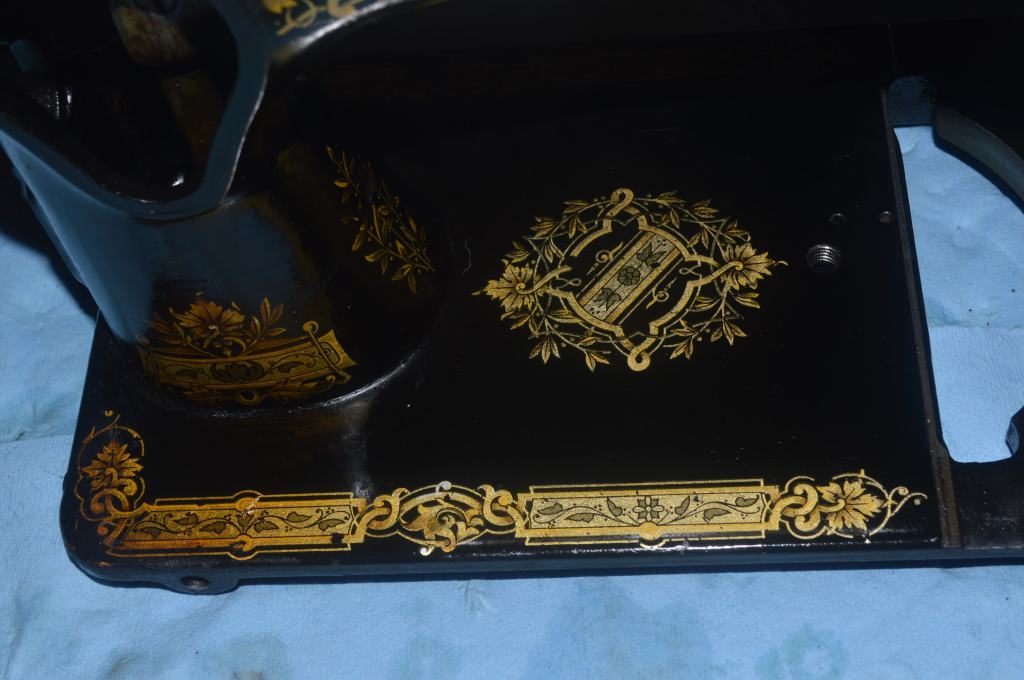
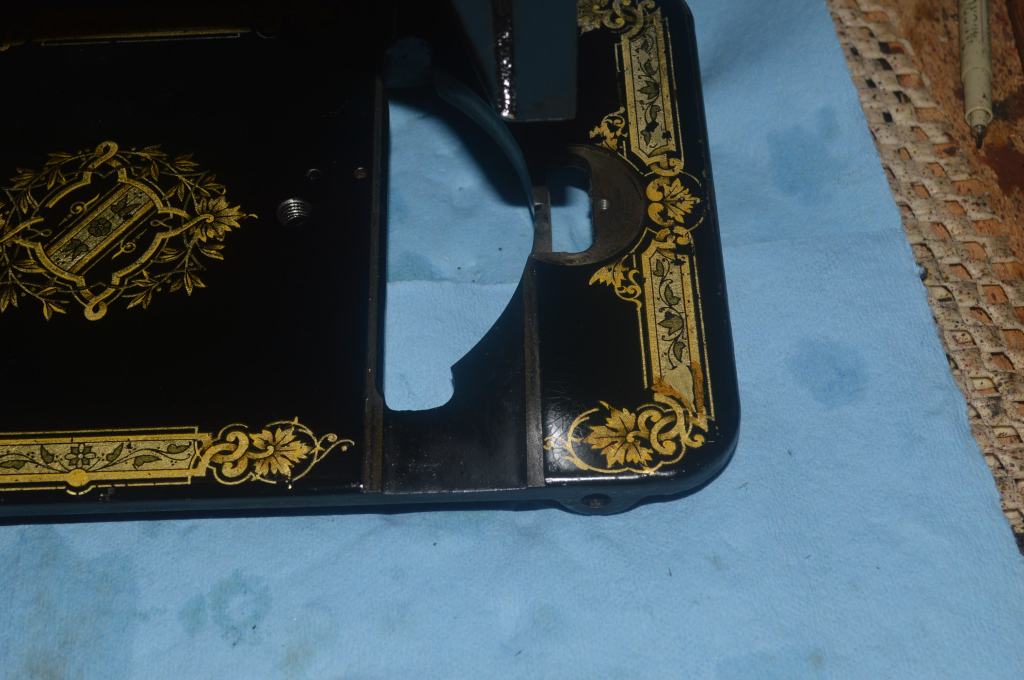
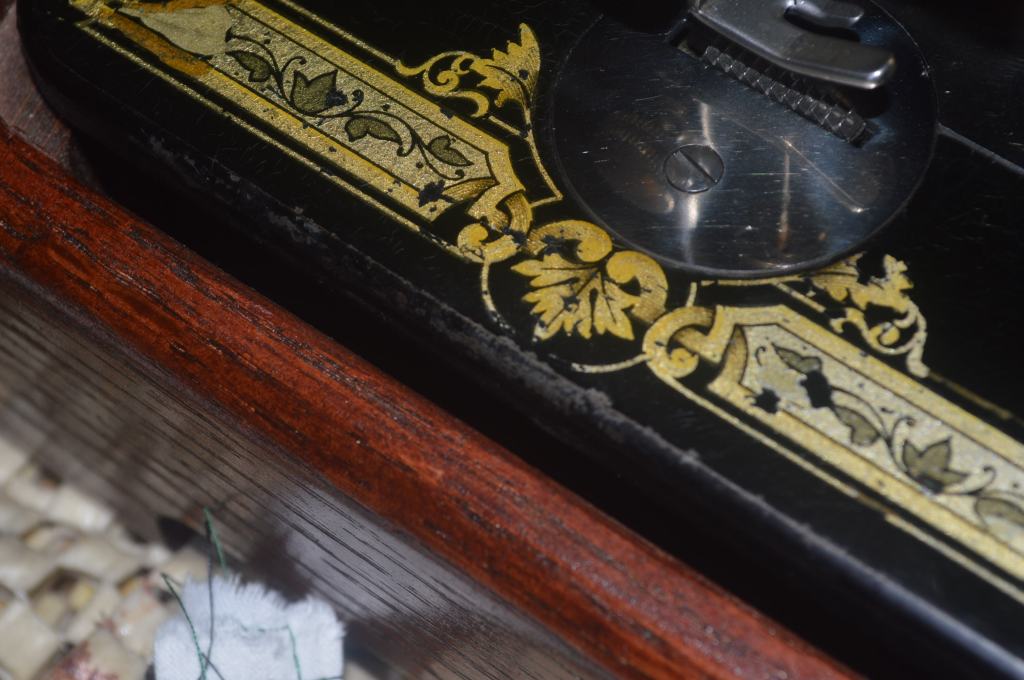
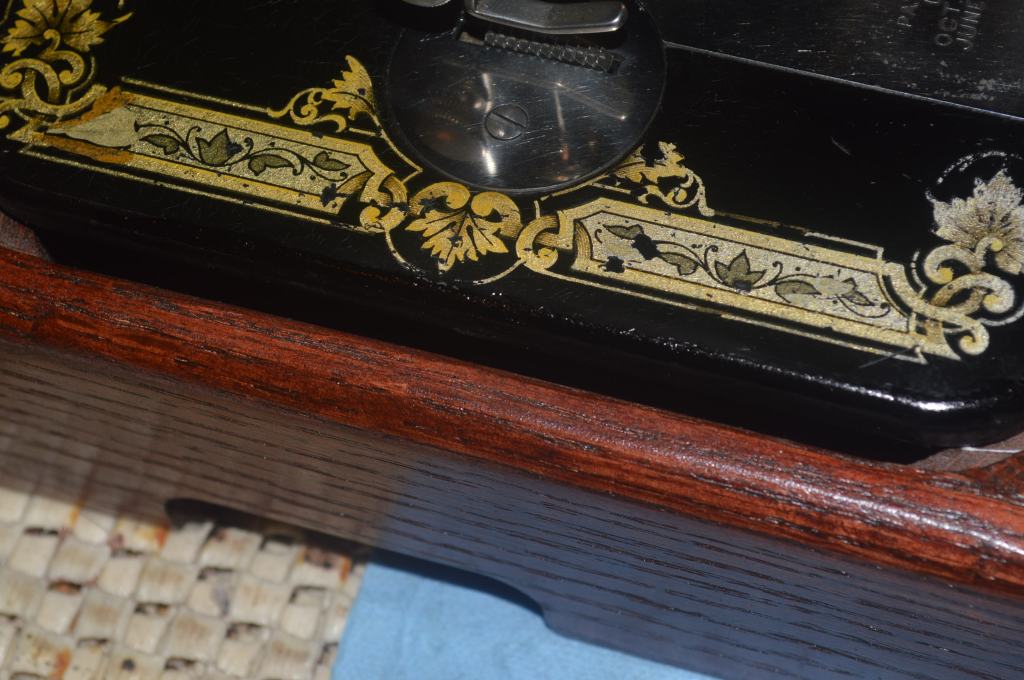
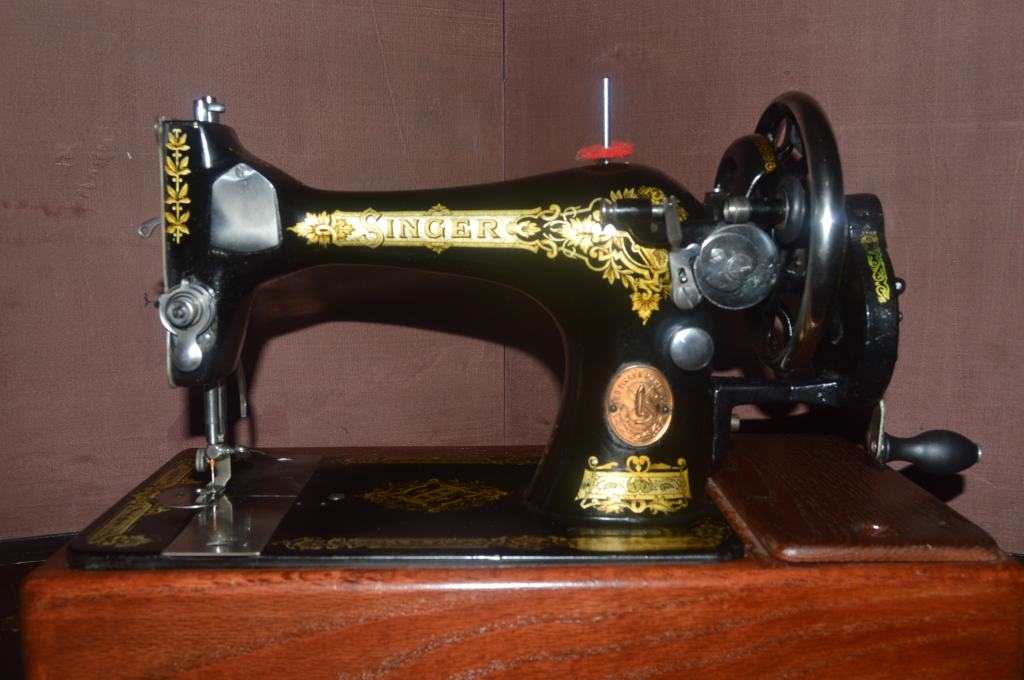
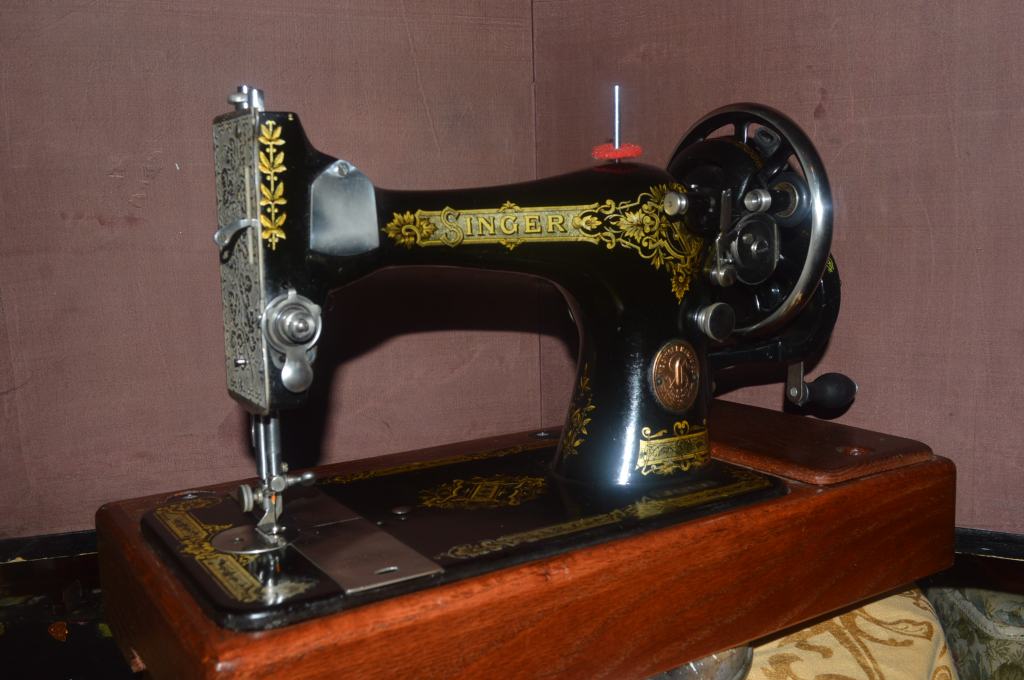
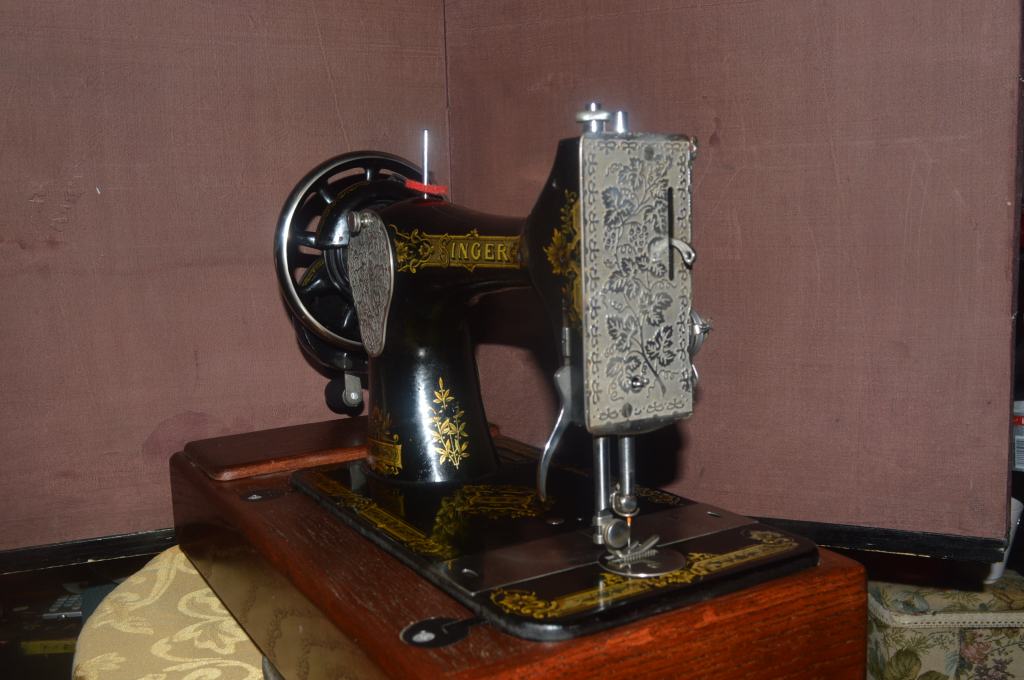
One great thing about this machine is the condition of the decals. While there is some minimal wear, the machine presents itself very nicely. The areas where there is decal wear are not such that it is apparent or noticed except by looking for it. While there are flaws, a machine with decals in this condition are much harder to find. The paint is in really good condition too. There is a slight glazing in the bed of the machine, but the paint is a nice deep black color. The plated pieces are in quite good condition with virtually no pitting or rust.
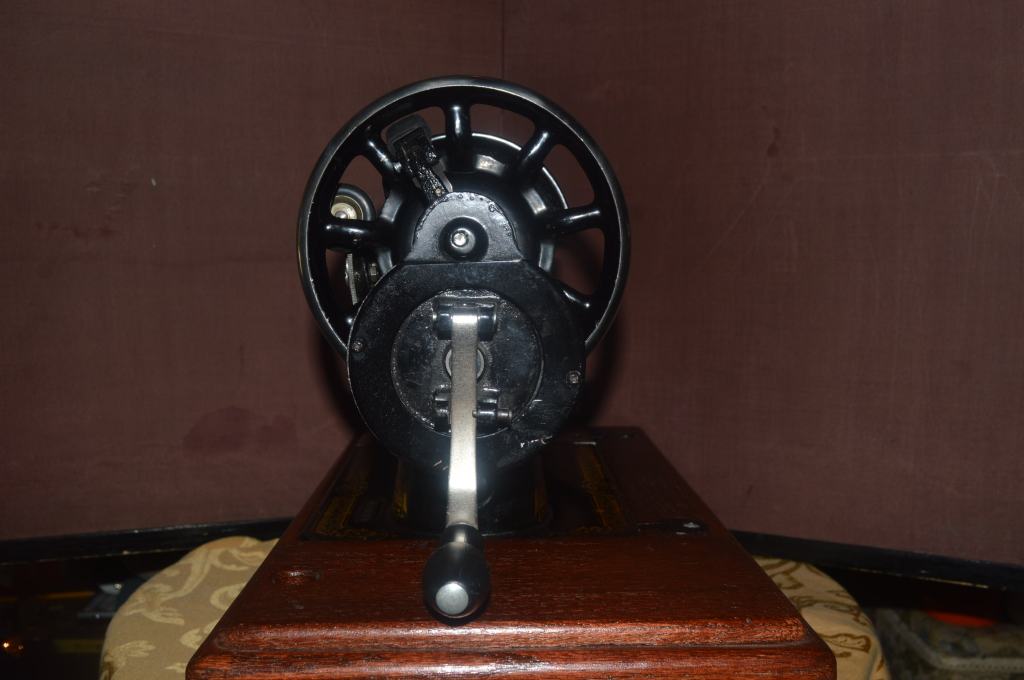
All in all, this is a great candidate for a restoration. As it sits, the machine is exceptionally smooth in operation. The sewing mechanism is silky smooth. There is a considerable amount of old oil varnish coating the parts and this will be removed. To address this, all of the assemblies in the machine will be disassembled and cleaned. I have decided not to remove the upper arm shaft because I don’t think it is necessary. To do so requires driving a pin out of the balance wheel bushing, and because this machine is so smooth, I just can’t justify driving this pin out with a punch and a hammer. Consequently, all moving parts here will be cleaned in place. All of the plated pieces will be polished, and the body of the machine will be deep cleaned to reveal the depth of the dual gold color decals, and then it will be glaze polished to a beautiful deep black shine. The machine does not have a hand crank. Because vintage Singer hand cranks are so ridiculously expensive and scarce, and new Taiwanese hand cranks so inexpensive and plentiful, I am fitting the machine with the Taiwanese brand. They are not as solid as their vintage counterparts, (this can pretty much be said comparing anything vintage to what is sold new today) but they work just fine. So, lets get started!
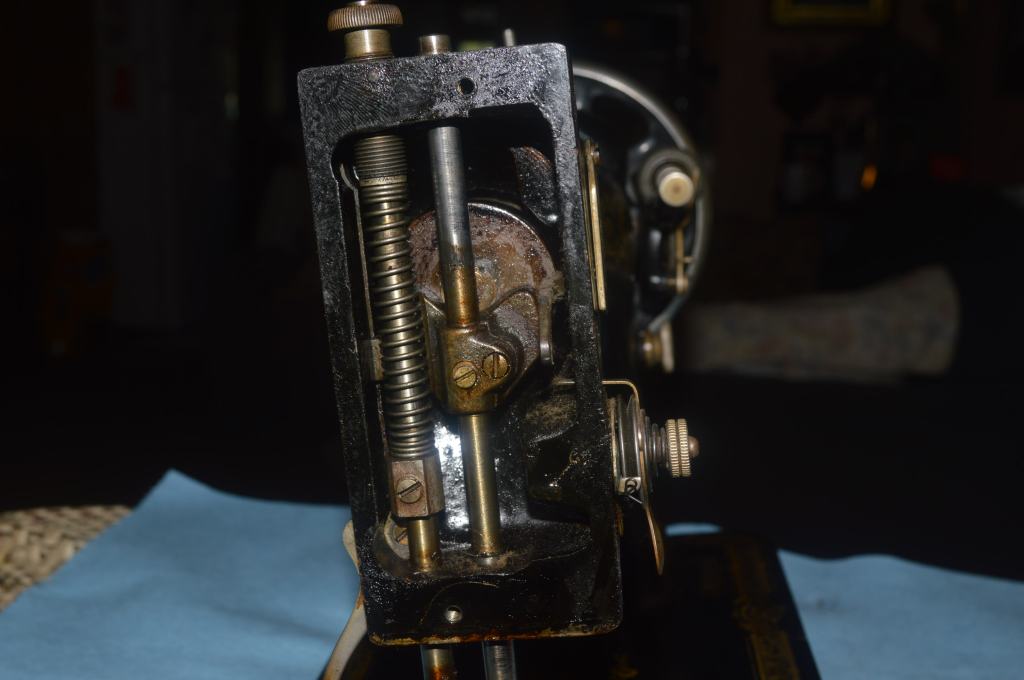
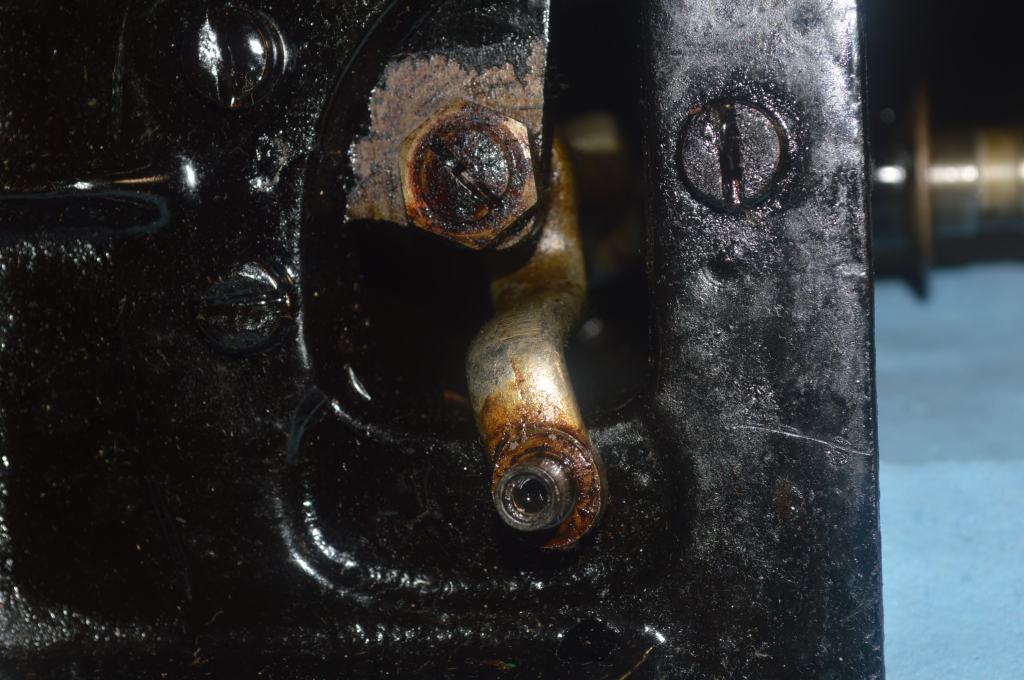
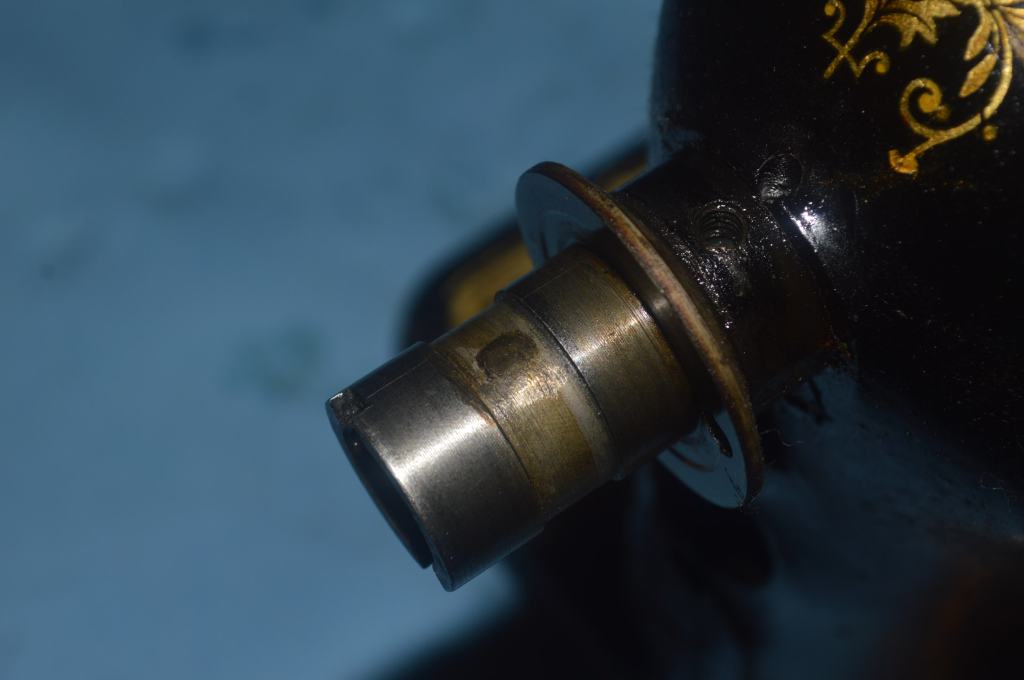
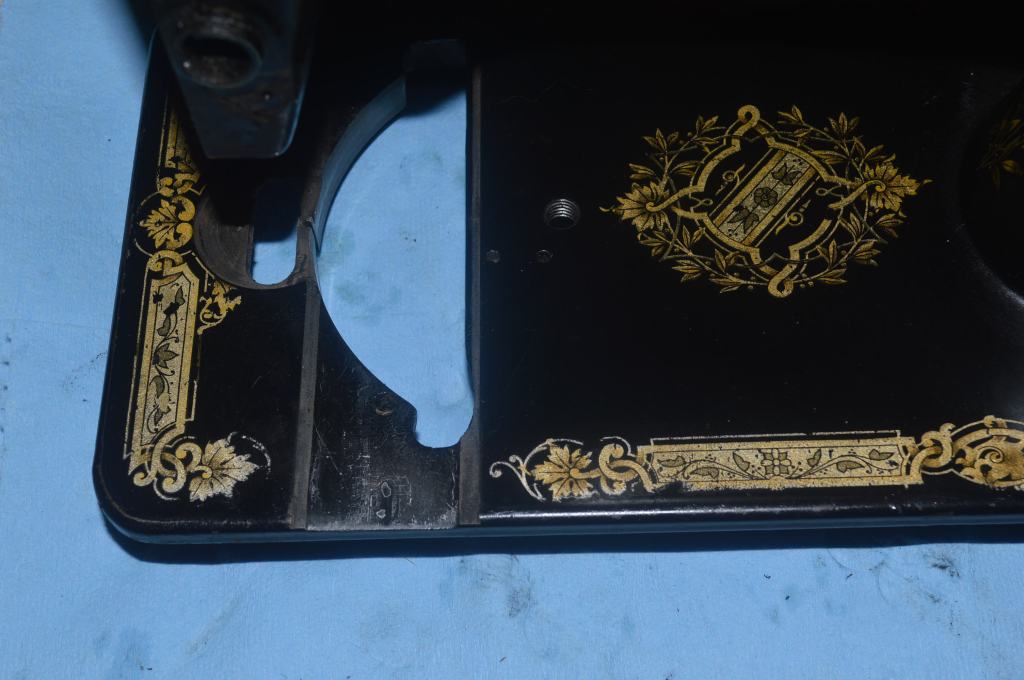
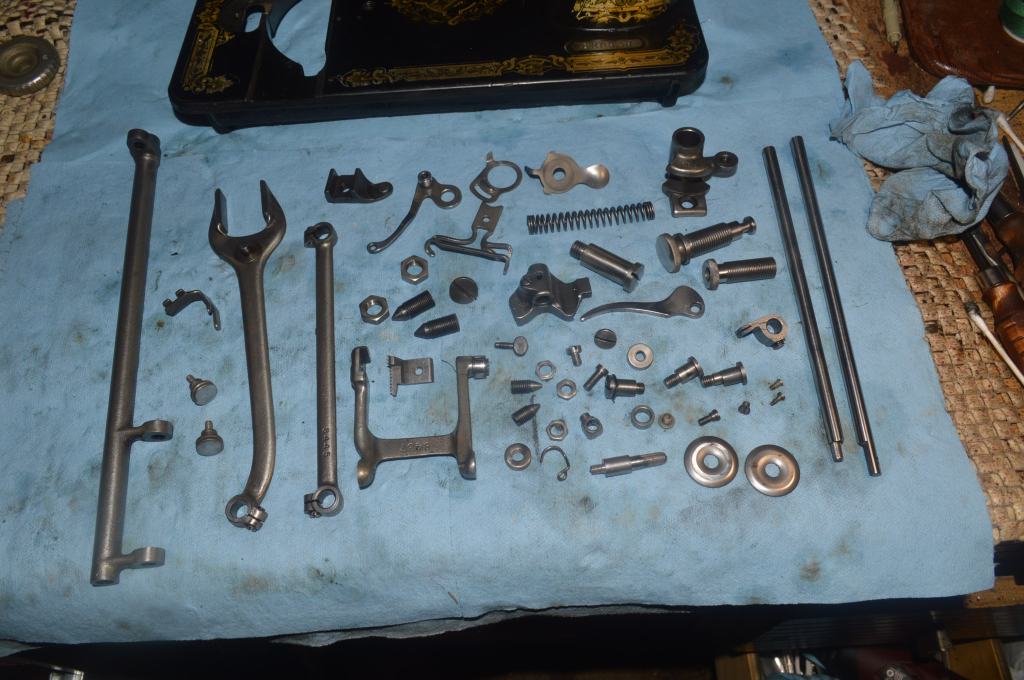
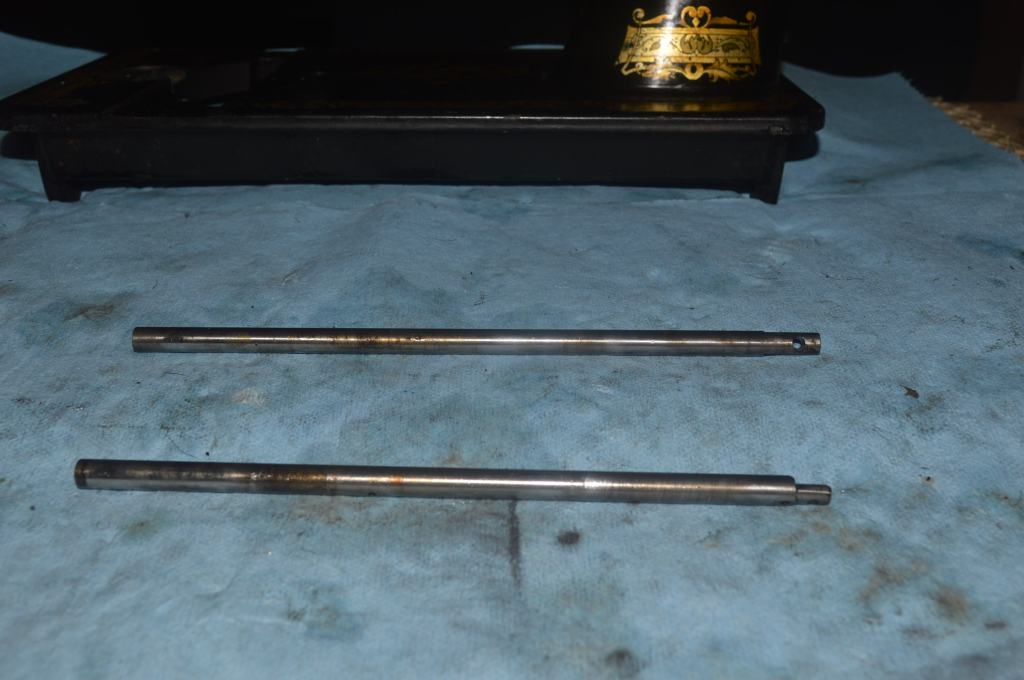
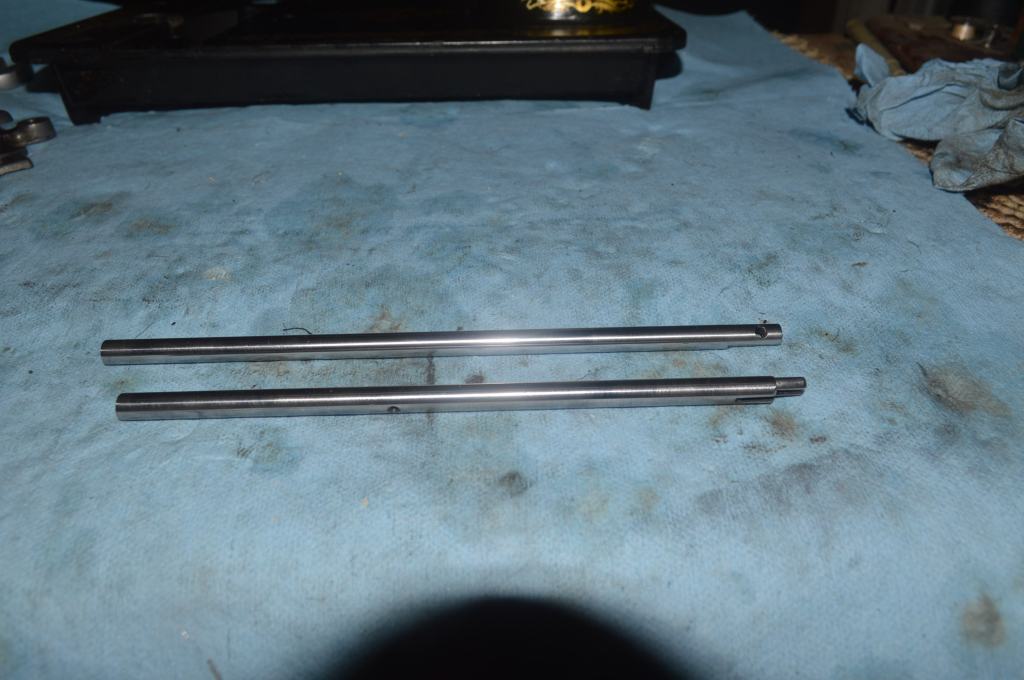
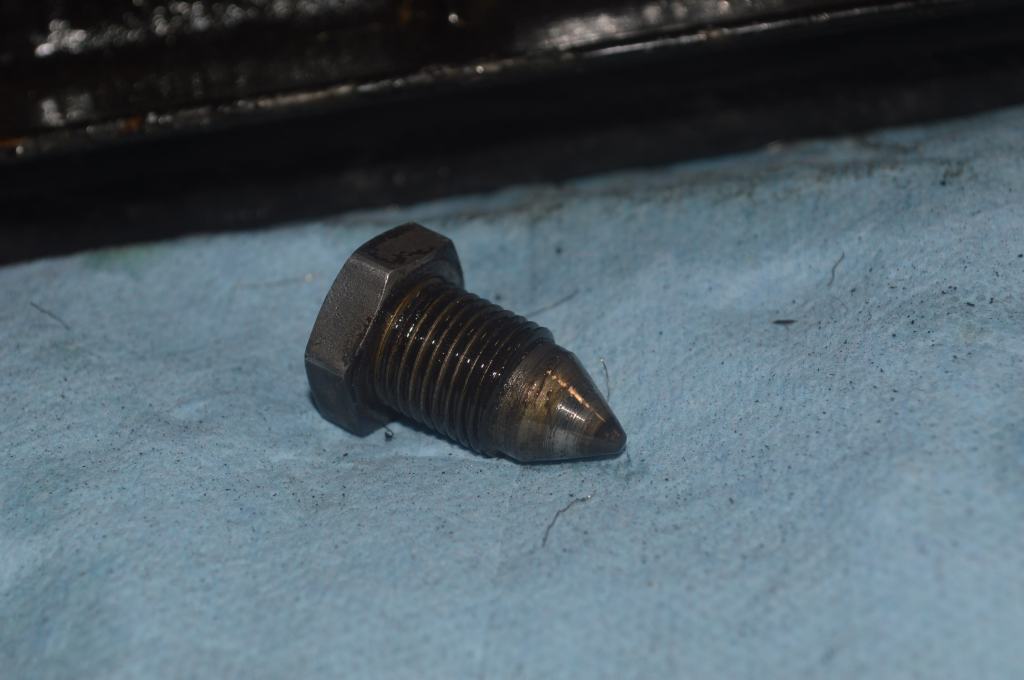
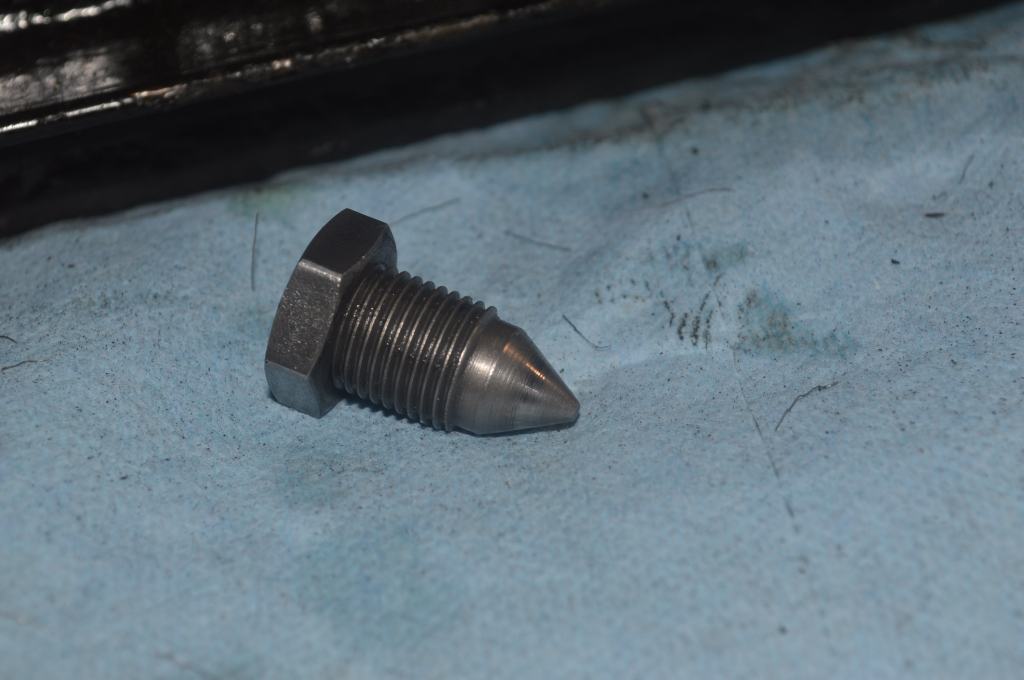
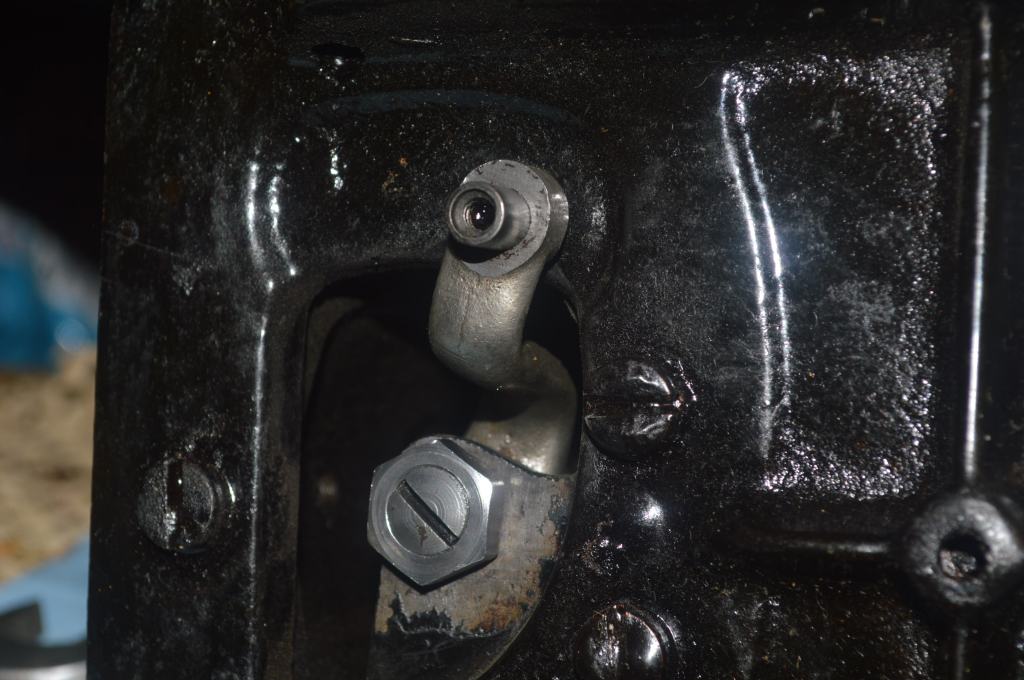
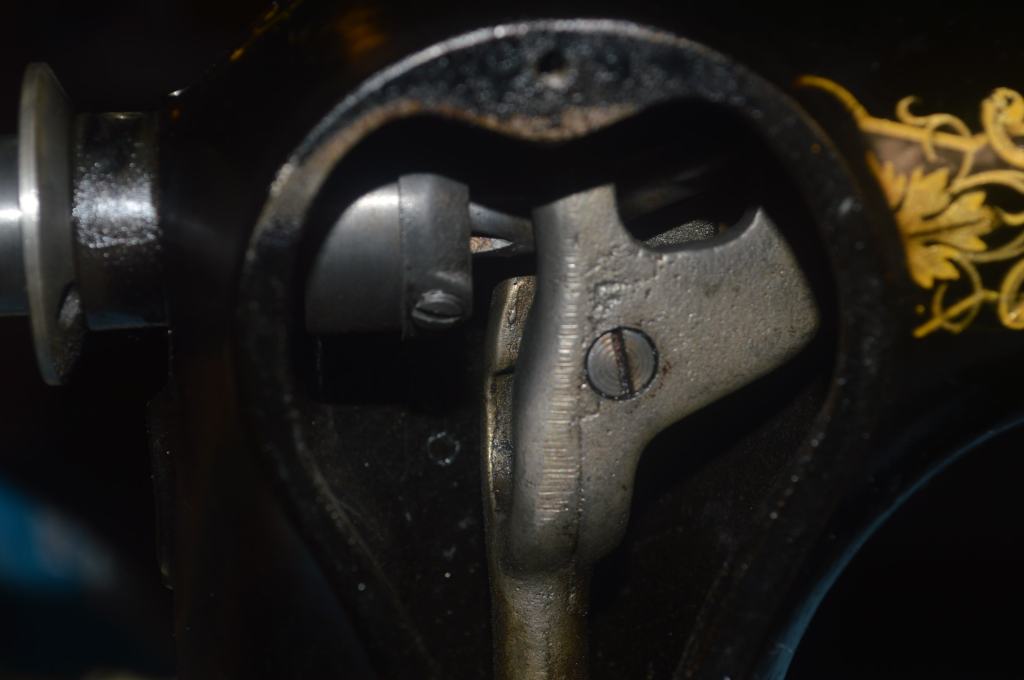
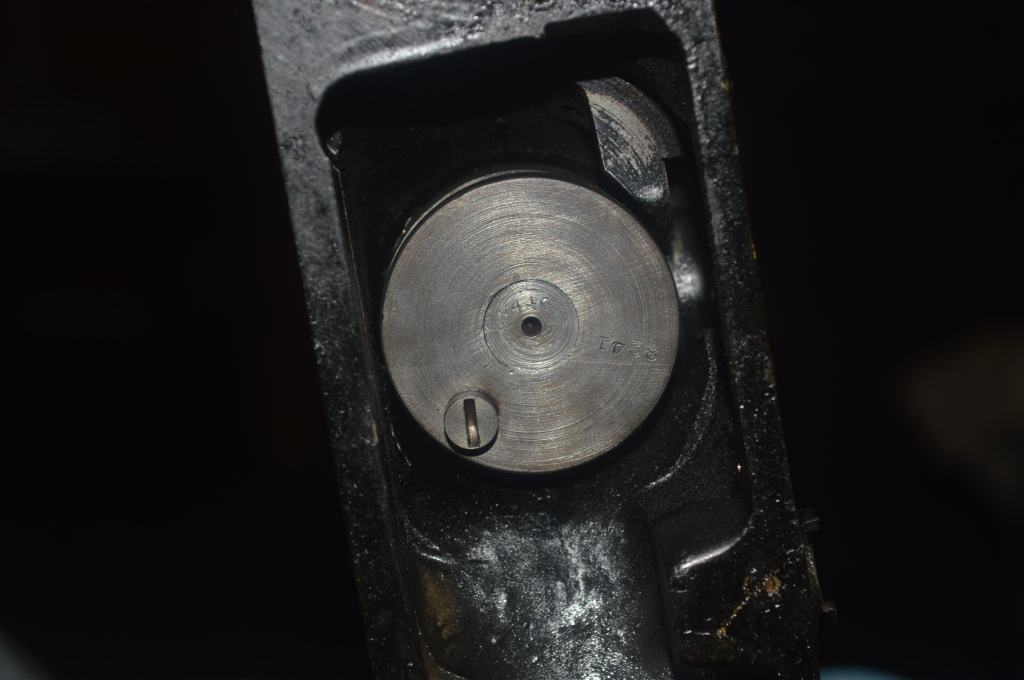
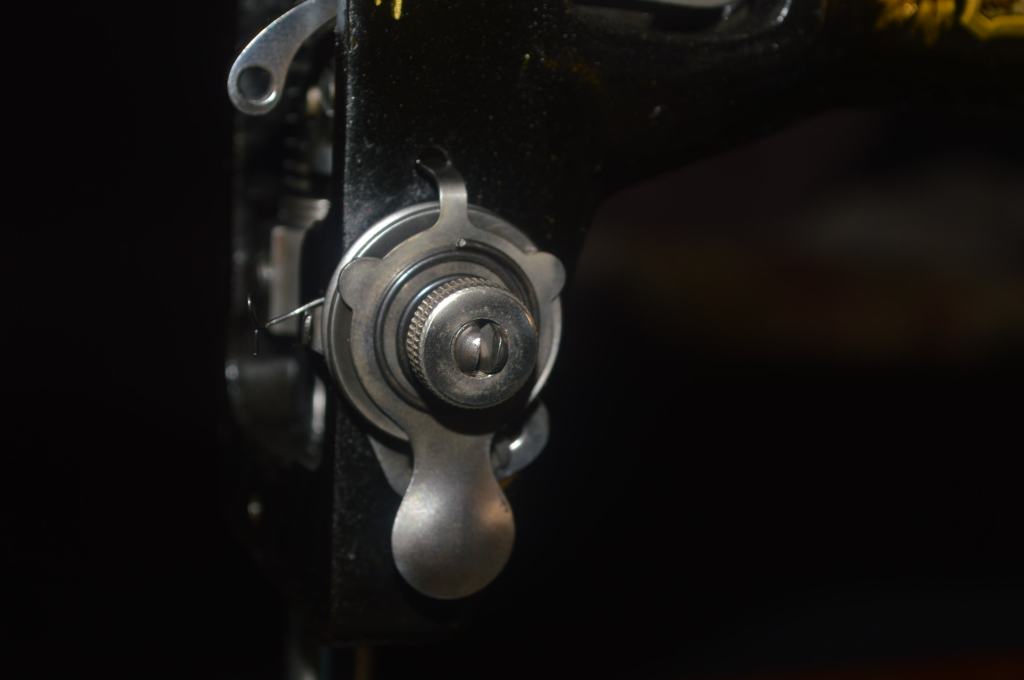
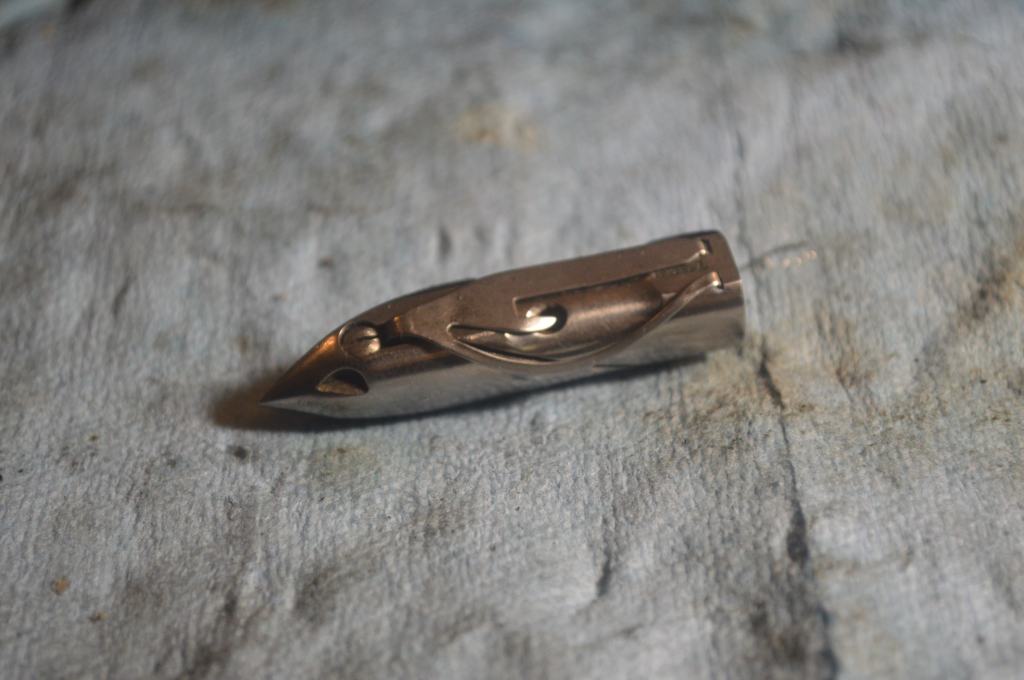
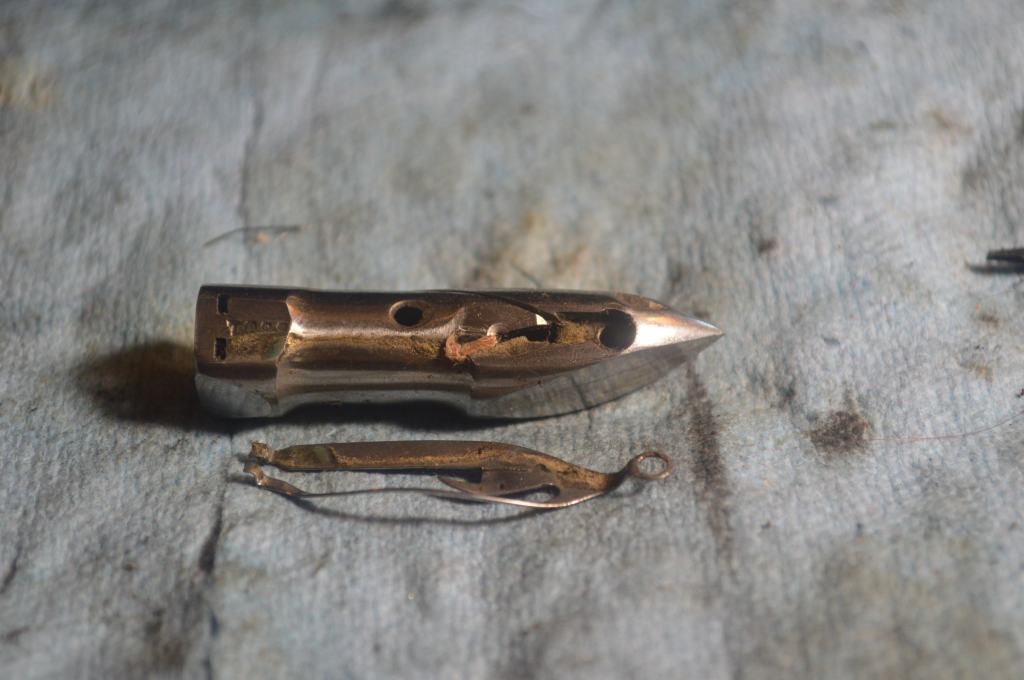
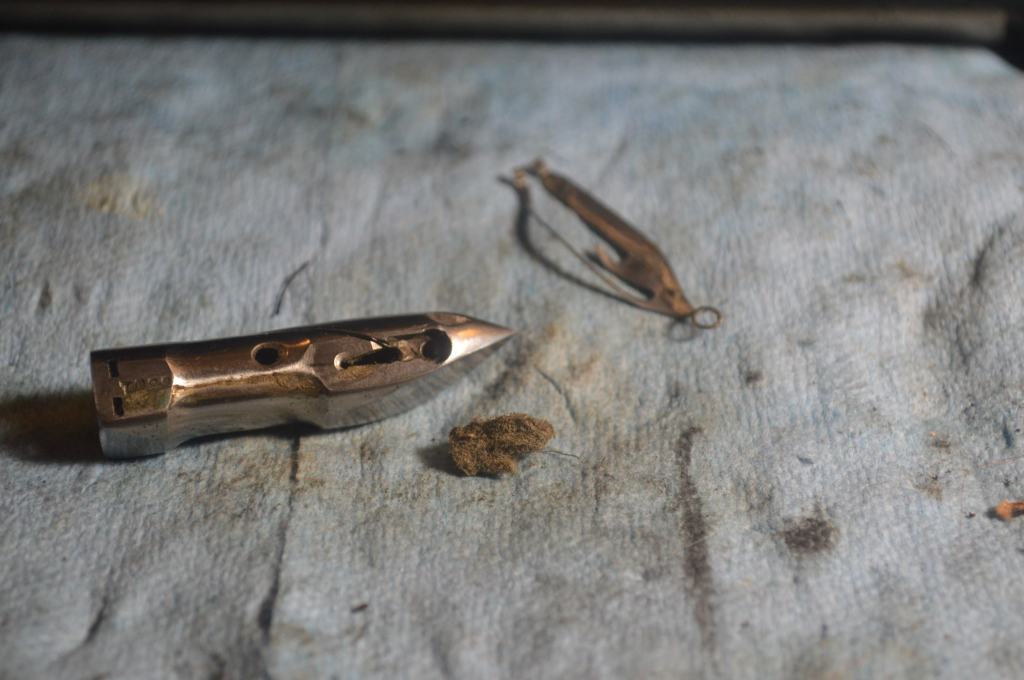
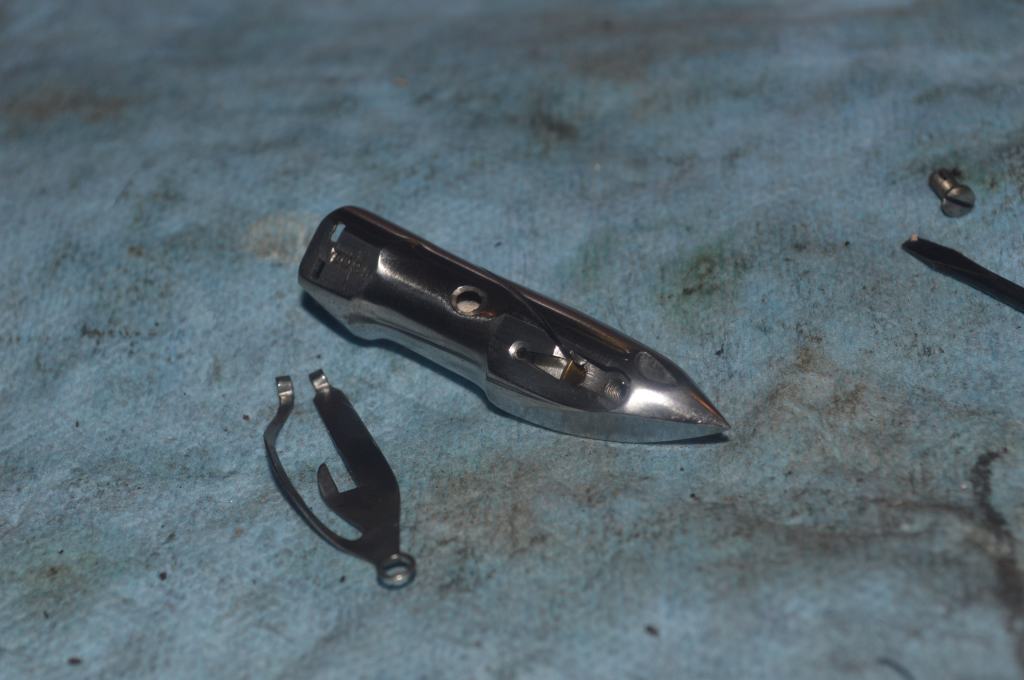
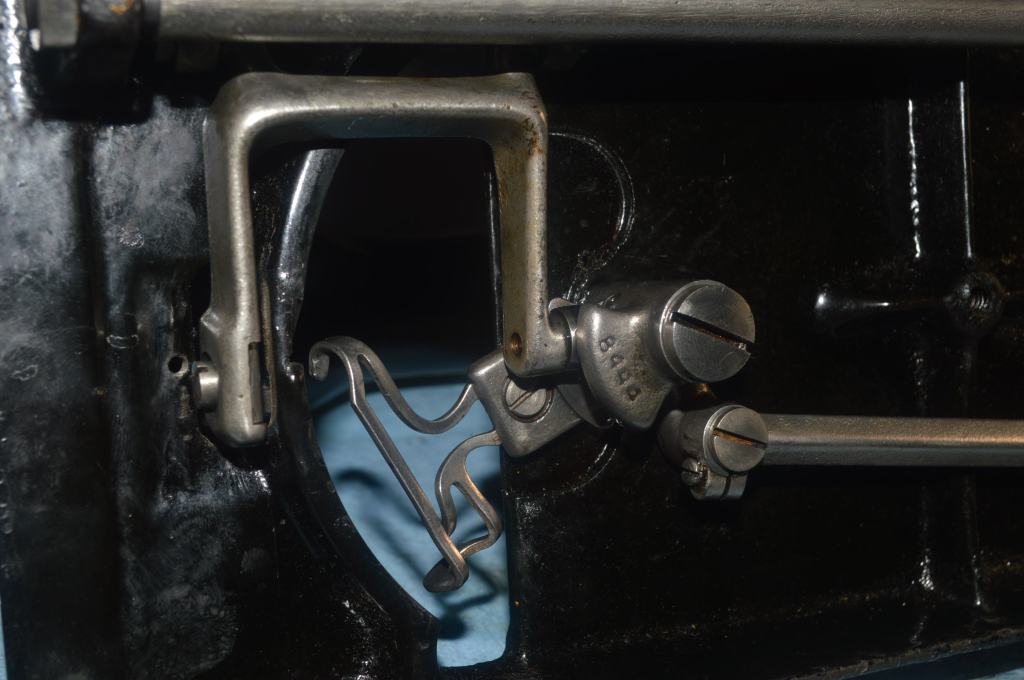
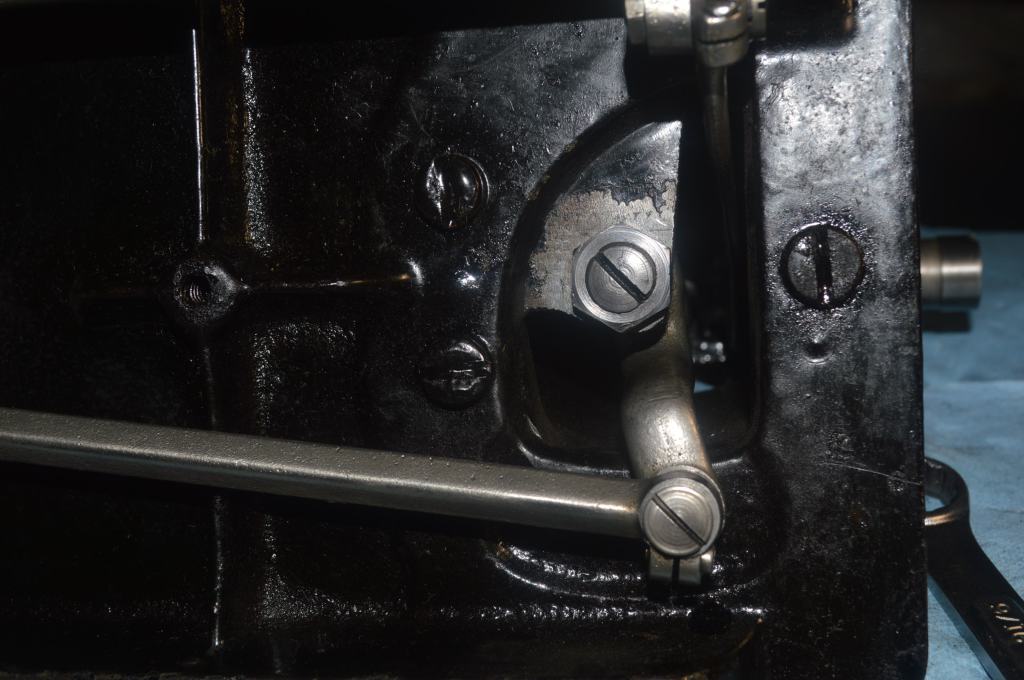
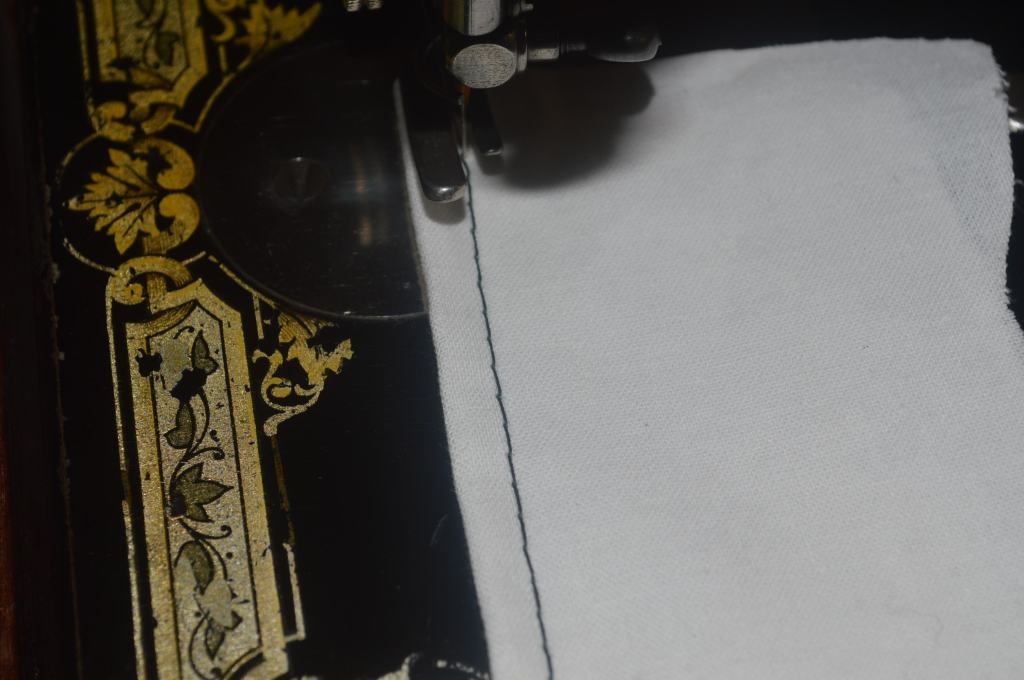
These pictures are taken before the restoration begins.

The Mechanical Restoration
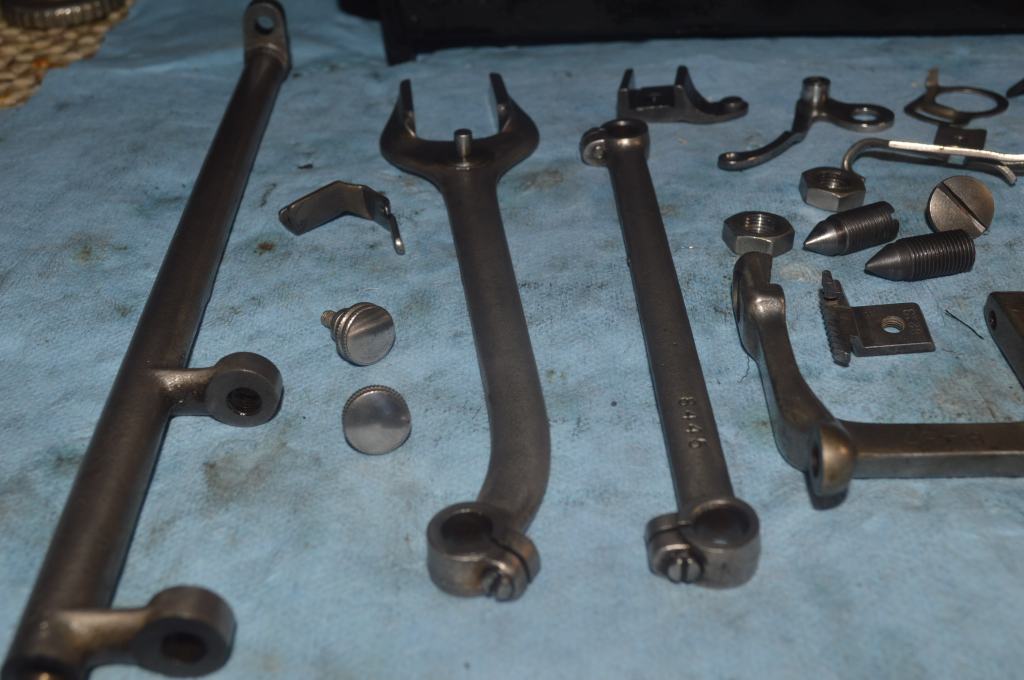
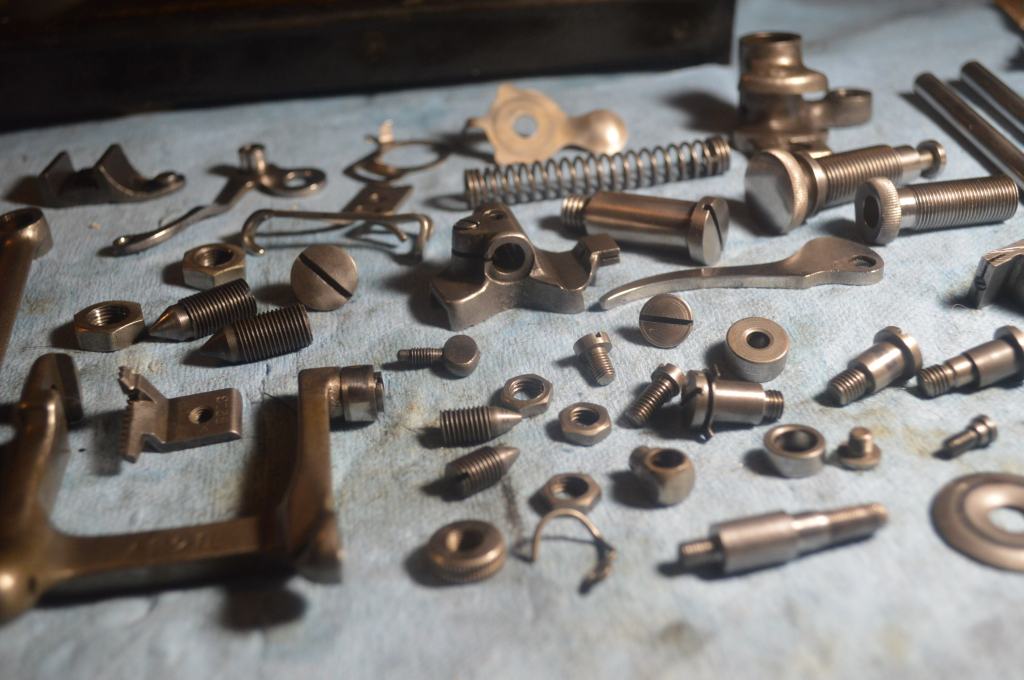
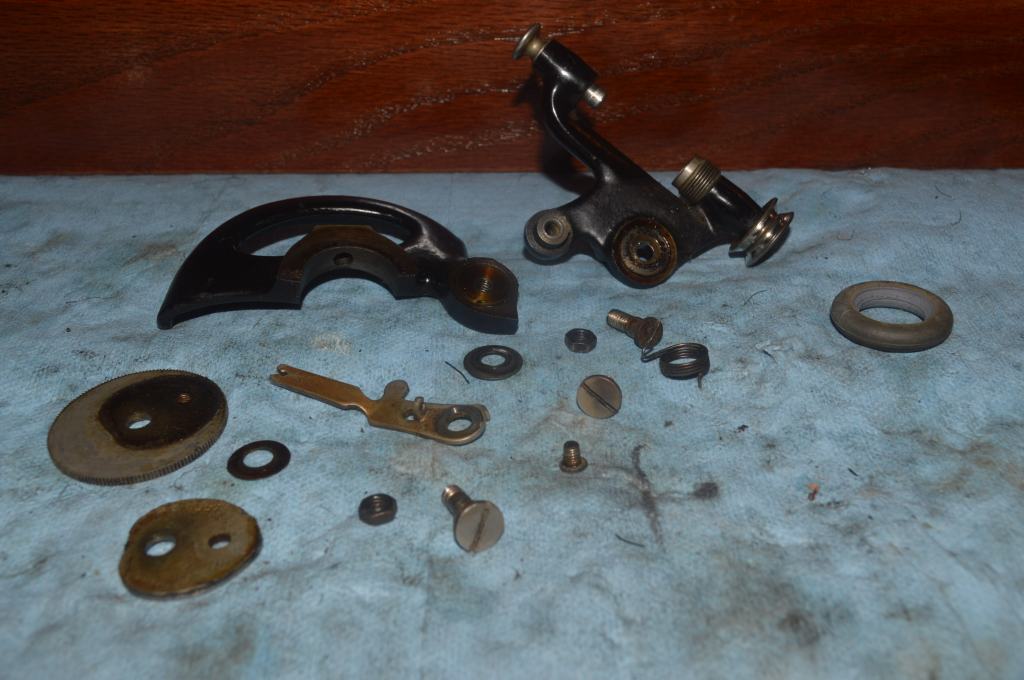
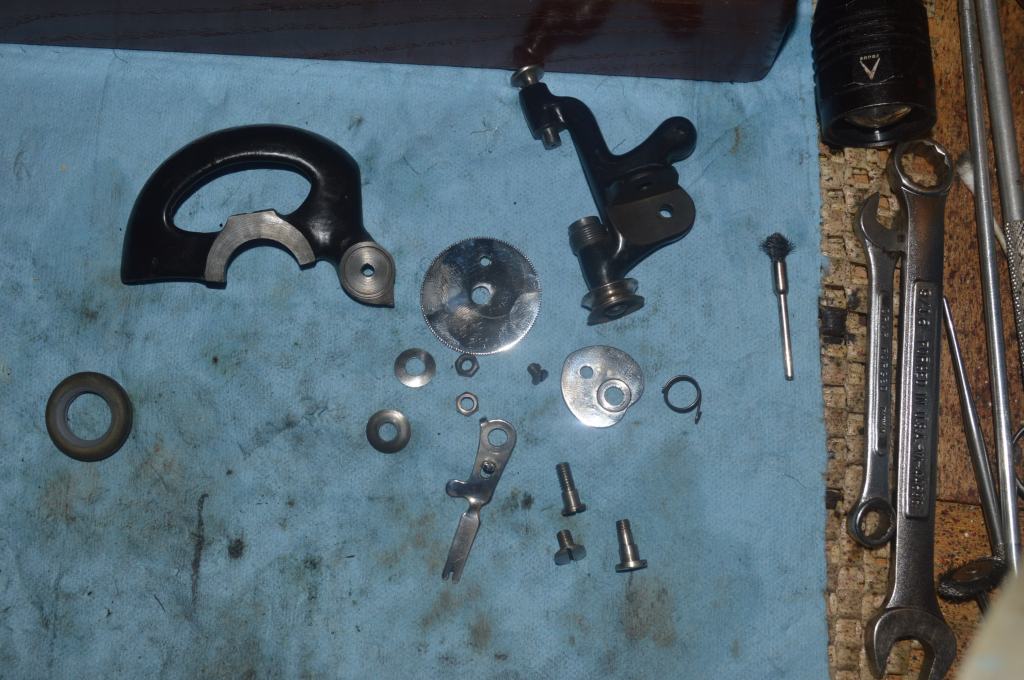
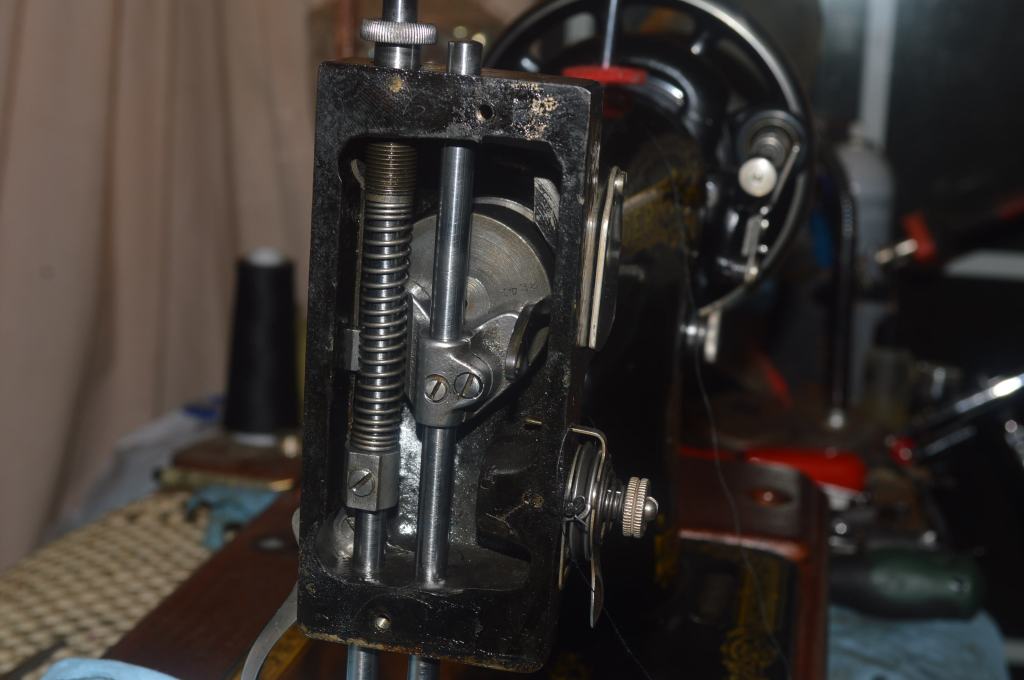
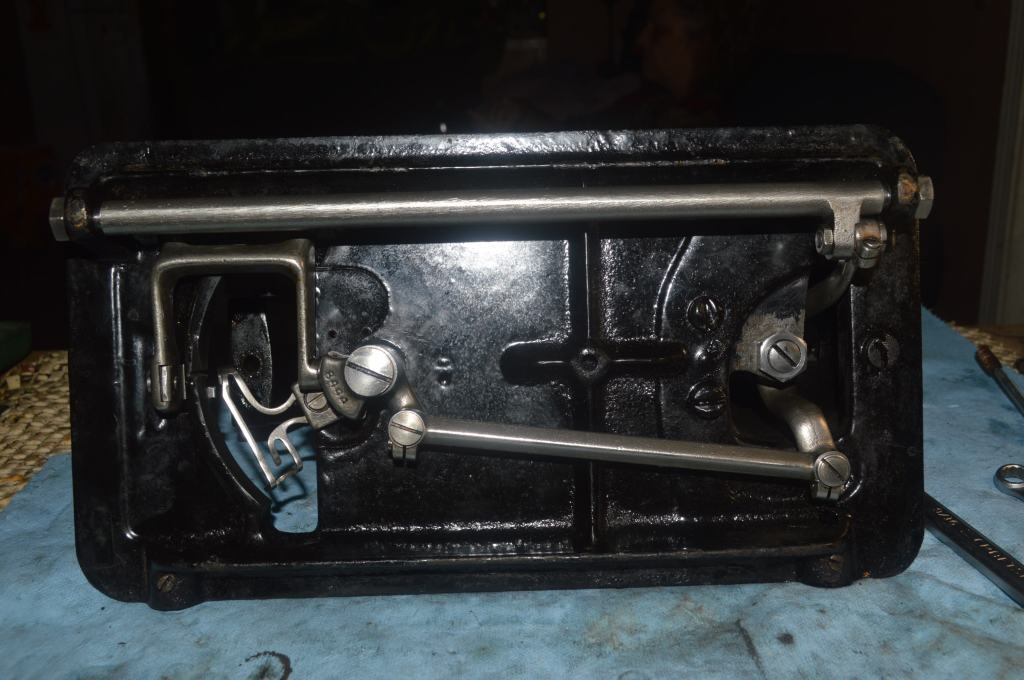
The mechanical restoration begins with disassembly. All of the parts, with exception of the top sewing arm shaft and feed dog driver fork are removed.
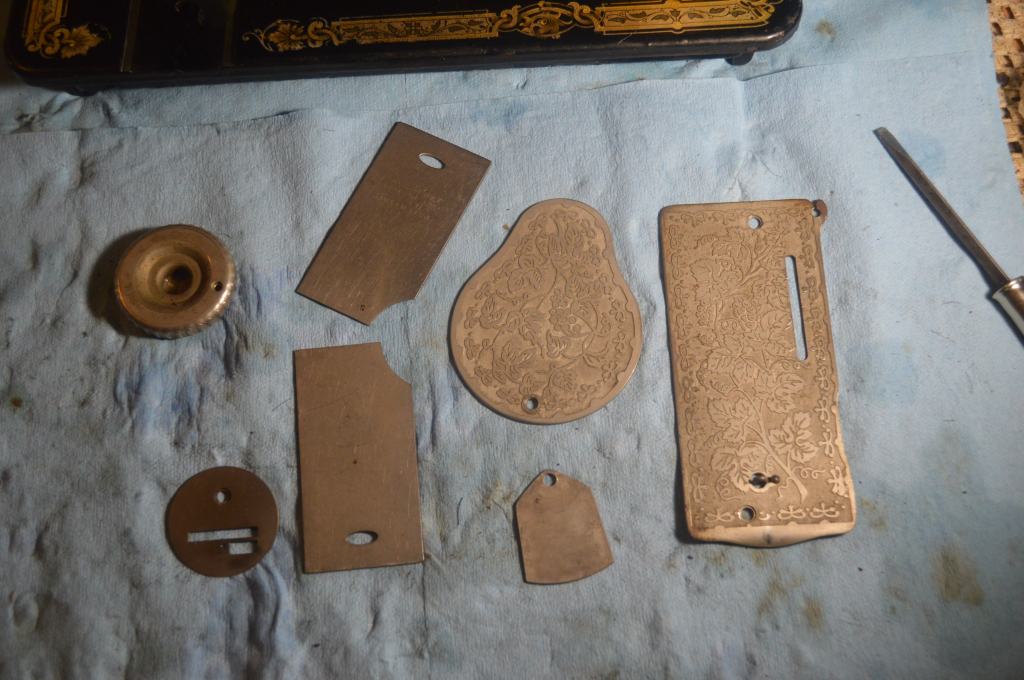
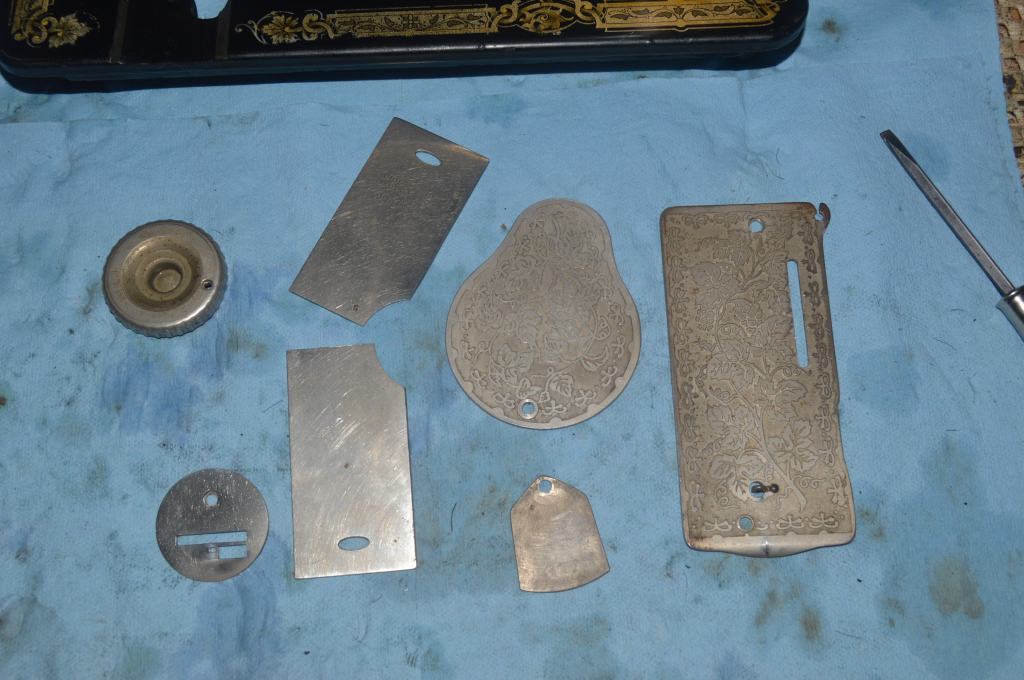
All of the parts removed are laid out for cleaning.
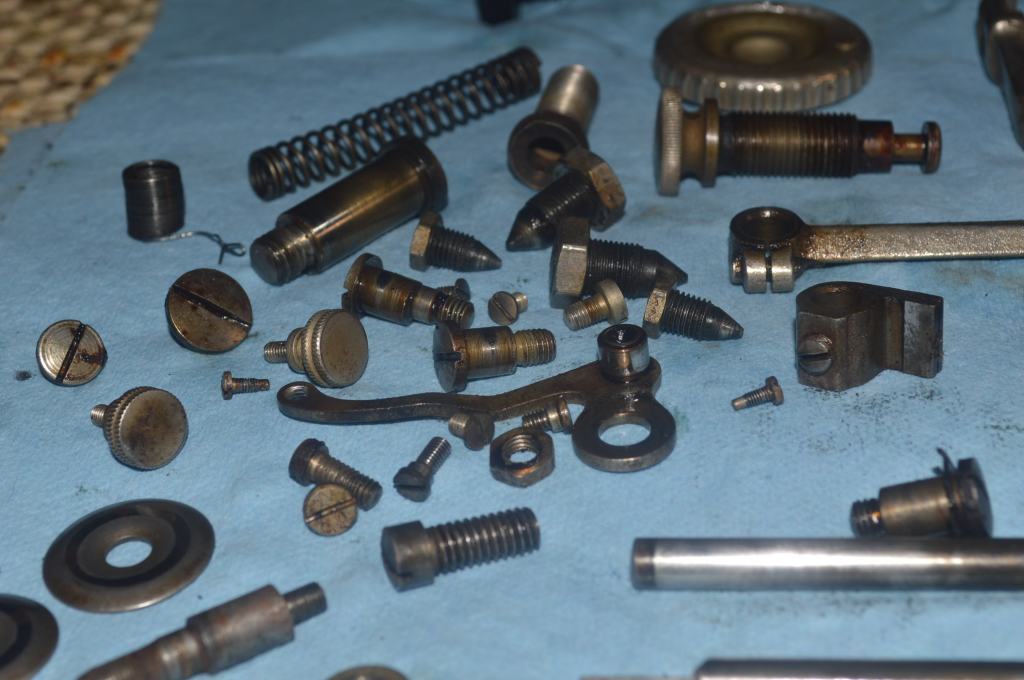

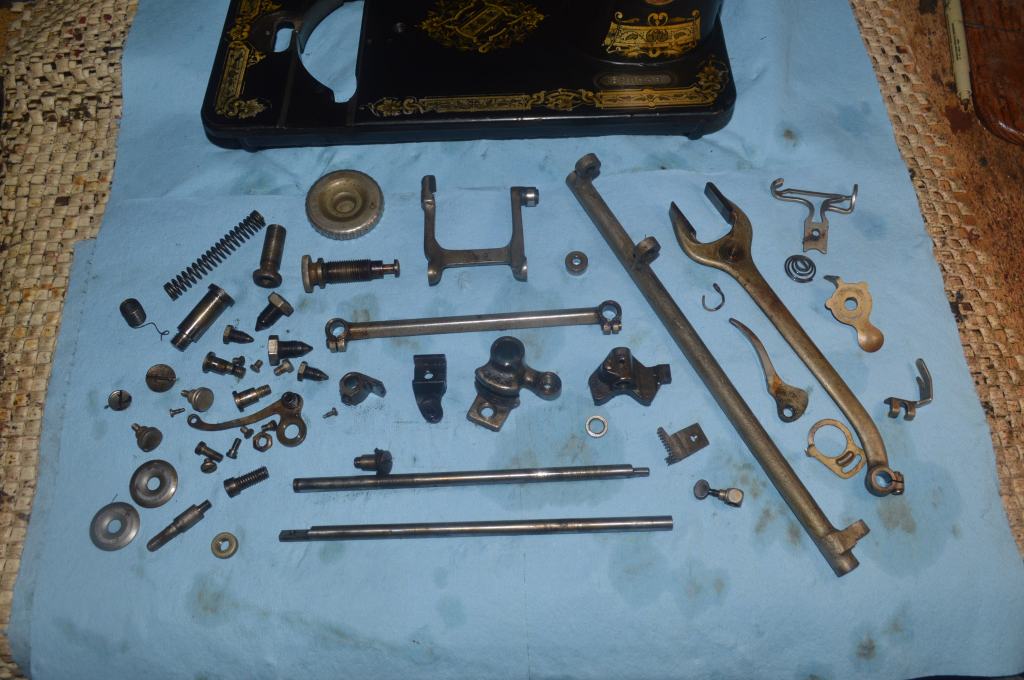
As you can see in the pictures, there is a lot of old oil varnish in and on the parts. They are ultrasonically cleaned, heated in oil to drive off moisture, and then wire brushed to clean steel.
All of the corresponding bores these parts moved thru are cleaned bit round brass bristle brushes.
The needle bar and presser foot bar are polished smooth as glass.
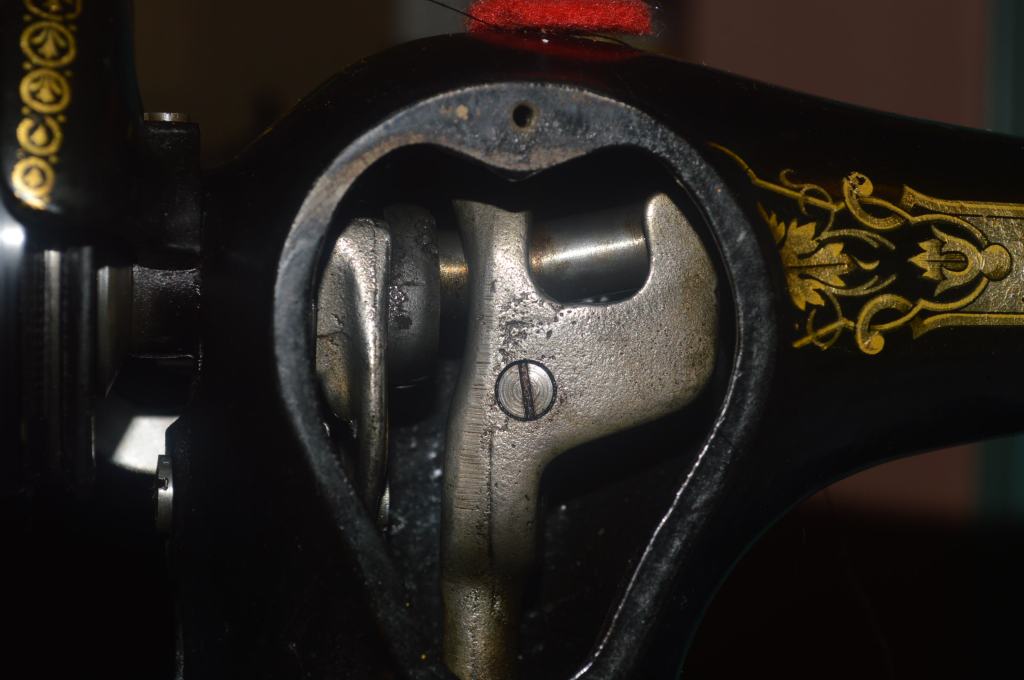
Next, the arm shaft assembly is cleaned in place.

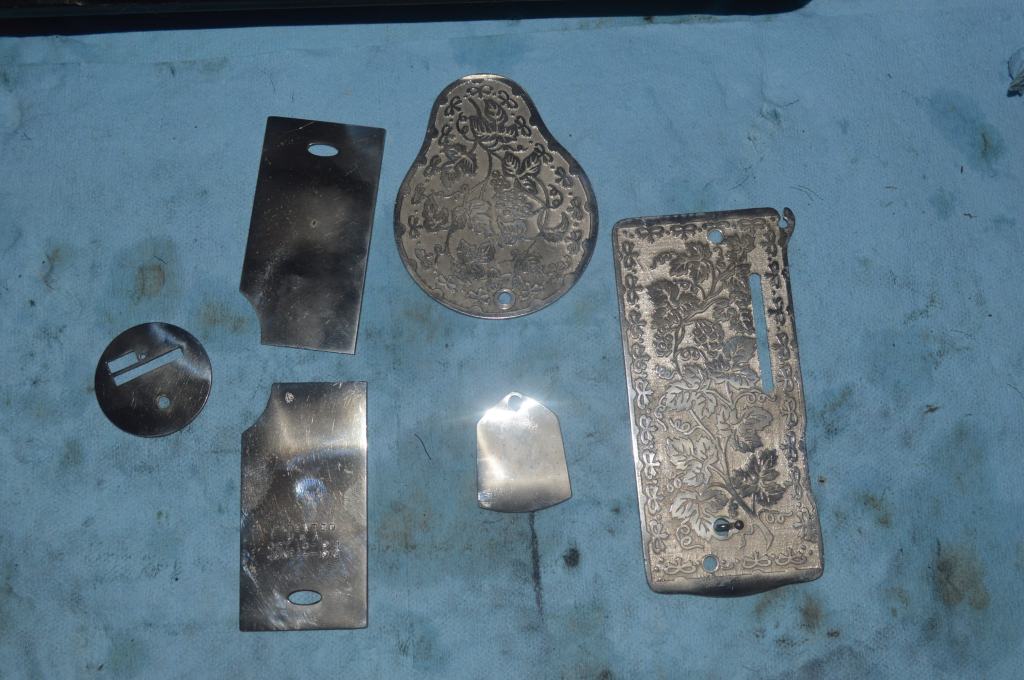
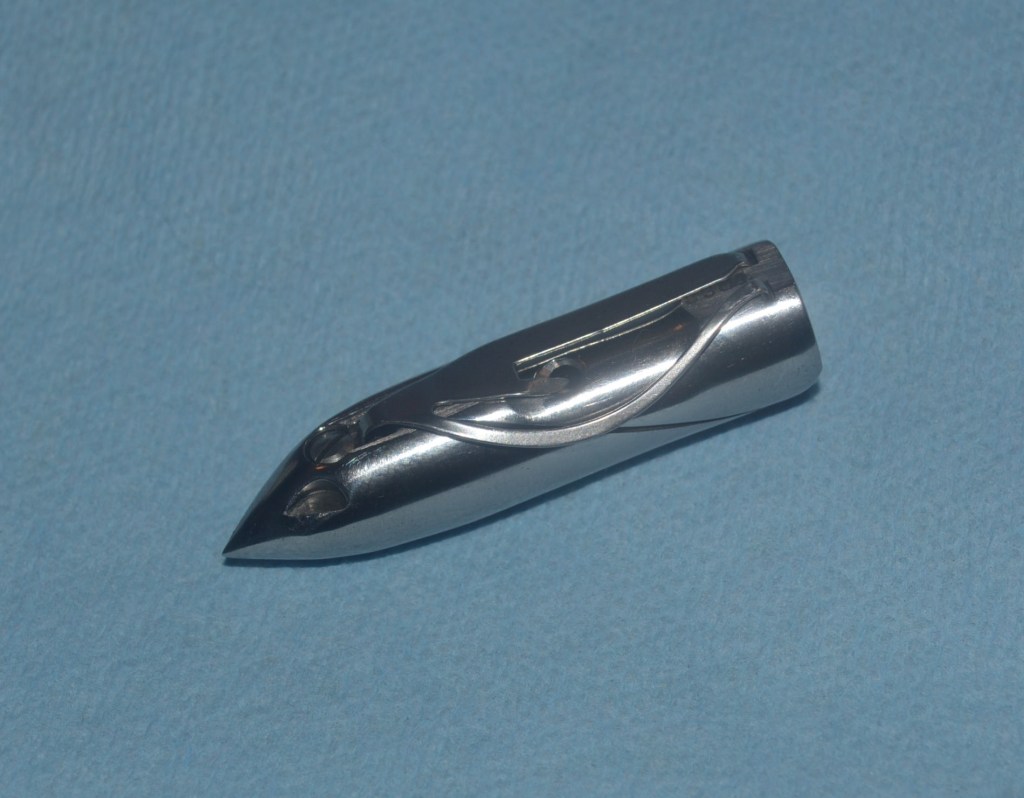
Then the plated parts are polished.
The top tension control and bobbin shuttle are next. These parts get polished anyway, so it saves me an extra trip to the polisher. While I’m at it, it is also an opportunity to polish all of the knobs, Presser foot lifter, take up arm, and all of the other little plated bits and pieces found on the machine.
The top tension control is disassembled and cleaned. The individual parts of this style of tensioner have plated parts meant to shine, so, except for the springs everything is polished.


A very important part of the restoration is to clean and polish the bobbin shuttle. It is the heart of the sewing mechanism, and it must be as clean and smooth as possible.
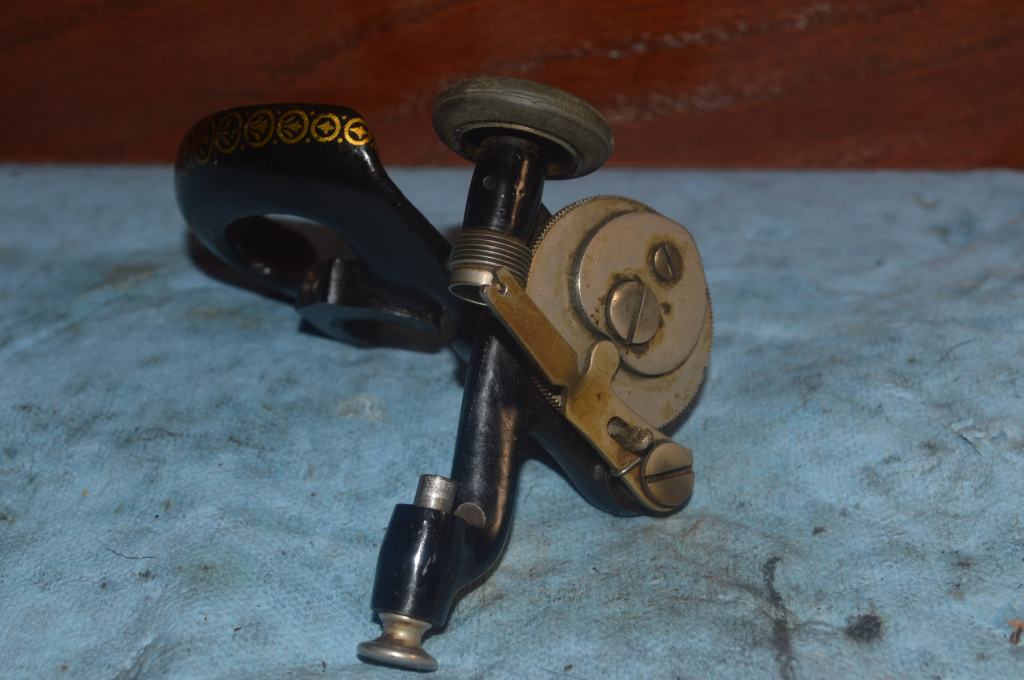
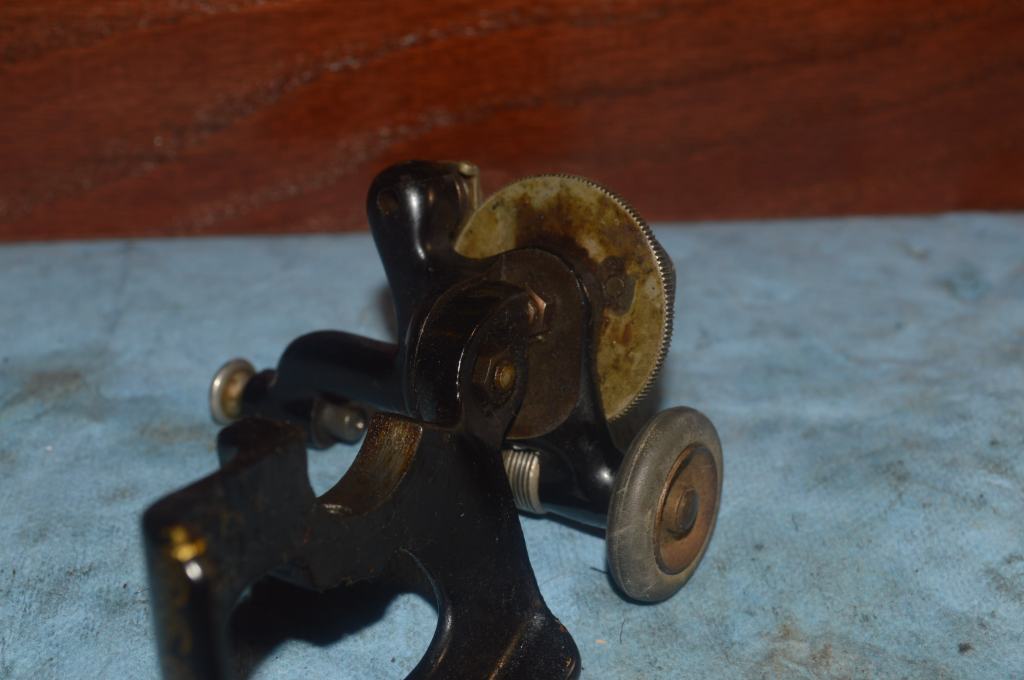
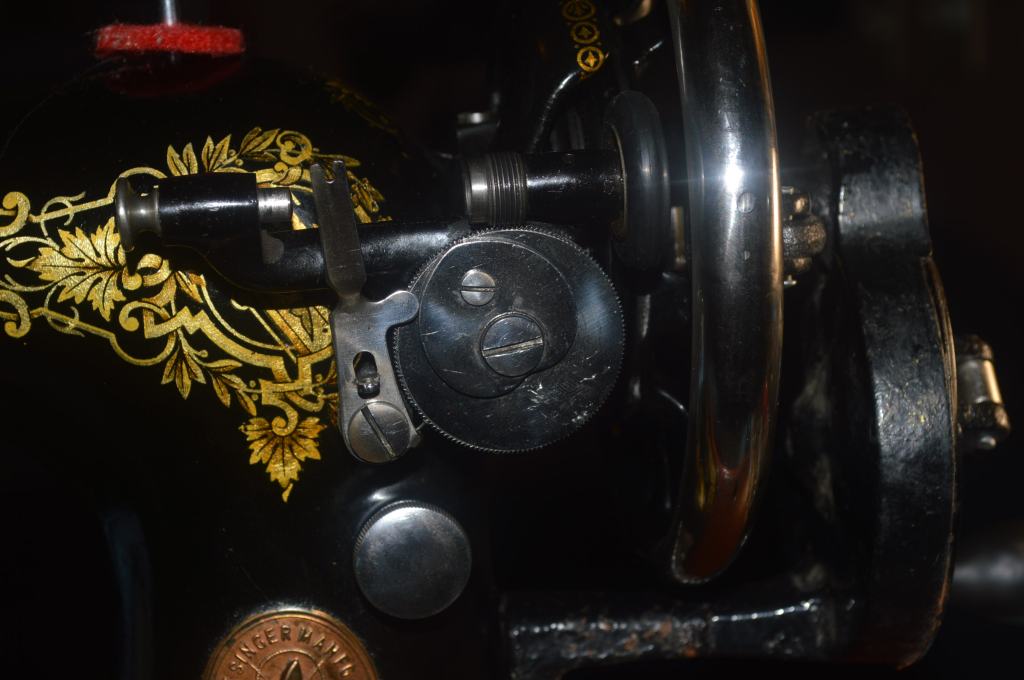
The next step in the restoration is the bobbin winder mechanism. Because it is a separate assembly, I usually save the bobbin winder for the end. Here the bobbin winder is disassembled, cleaned, and polished. Singer went to great pains with their bobbin winders, and they made them shine. They add a lot to the overall look of the machine… You’ll see what I mean in the final restoration pictures.
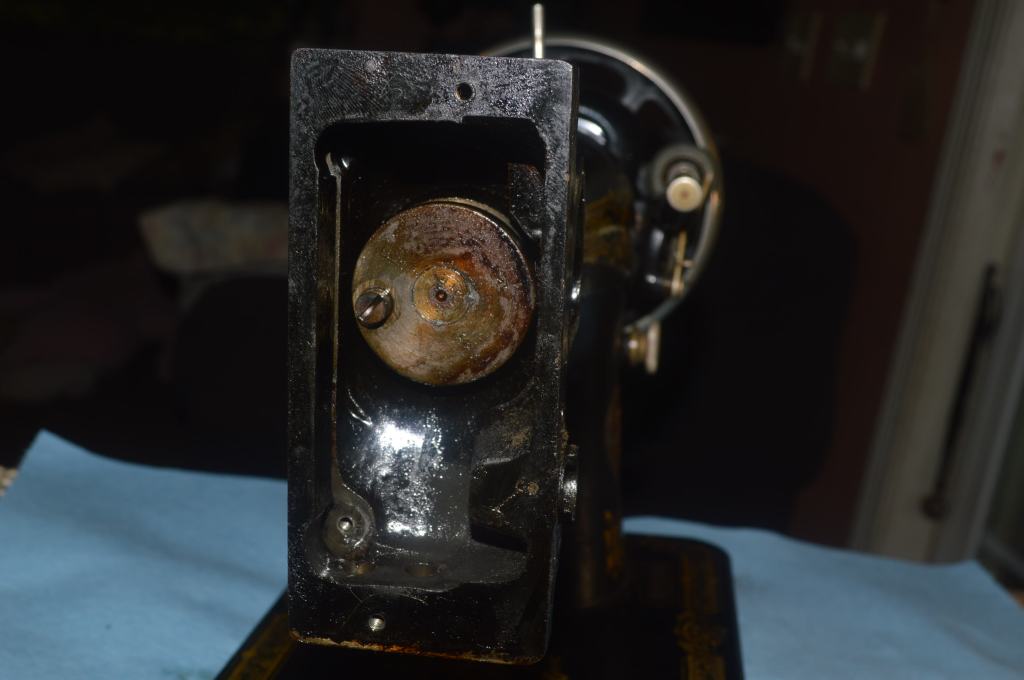
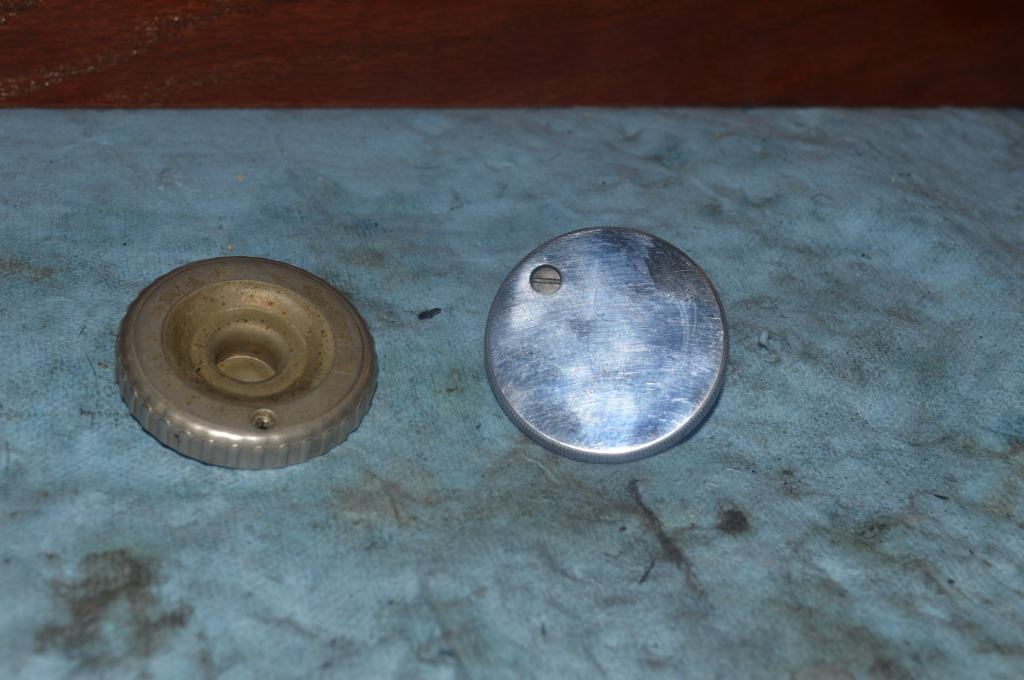
The stop motion knob on the machine is not original to the machine… at least not this machine. I opted to replace it with a proper stop motion knob.
The only thing remaining is to reassemble the machine and make all of the adjustment. Now the mechanical cleaning is complete, the cosmetic portion of the restoration begins.
Cosmetic Restoration
The cosmetic restoration starts with deep cleaning. The object is to make an already good condition as good as it can be.
The machine is cleaned with great attention to the decals.

Although it isn’t really noticeable, there are a few nicks in the paint on the edge of the bed. These are simple to fix and it makes a difference in the overall look of the machine. These nicks are paint matched using custom mixed black shellac paint.
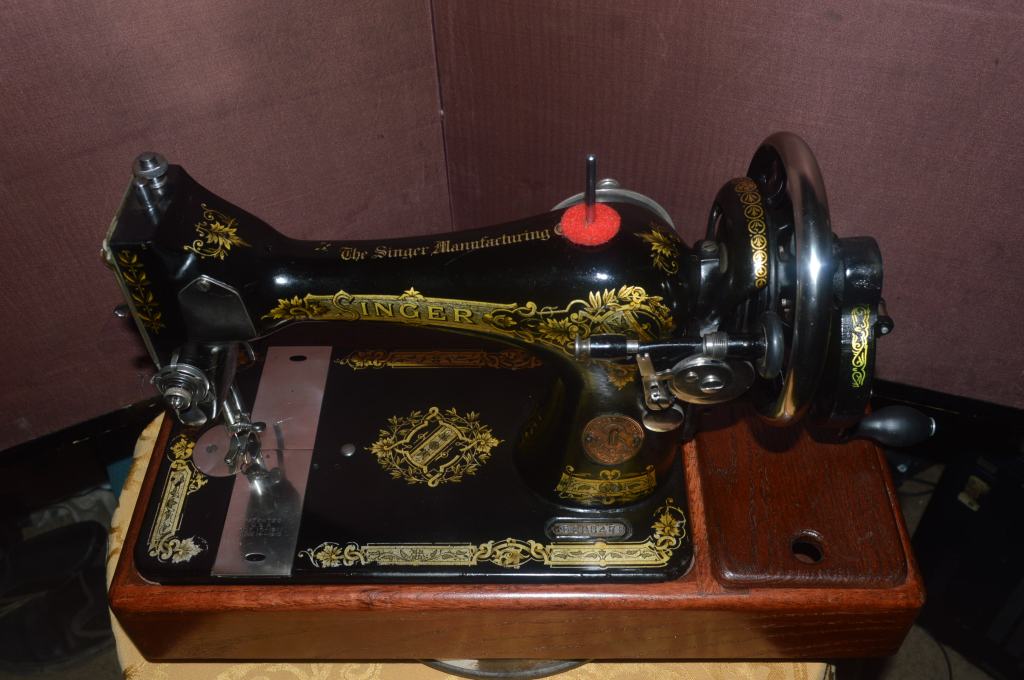
Finally, the machine is glaze polished.
Now the machine is reassembled and adjusted.
The needle bar height, shuttle clearance, shuttle timing, and the top and bottom thread tensions are set and the machine is test sewn.
A light coat of sewing machine oil is applied to the body of the machine. From now on, a light coat of SMO is the only cleaning the machine will need to keep the finish looking great. It nourishes the original finish and keeps the decals and paint looking great.
Finally, the restoration is complete! This machine has met all of my expectations and given proper oiling and cleaning, it should last for at least the next few hundred years (give or take a century). I hope my customer enjoys using it as much as I enjoyed restoring it!
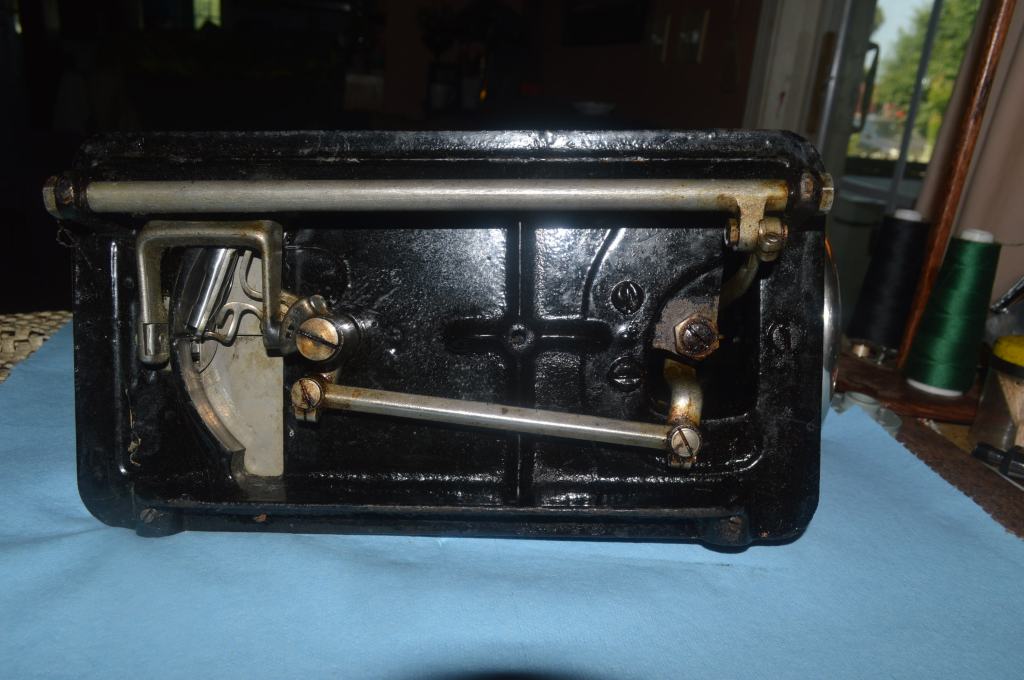
Here is the machine after the restoration.
Well, I hope you like what you see and enjoyed the restoration process as much as I did… Like I always say, some sewing machines need more, some need less, but they all get what they need and now I can look forward to the next restoration!
Looking for a similarly restored quality vintage all metal sewing machine for your sewing room? Let us know! We specialize in custom orders and are happy to locate and restore the “perfect” machine for you!
As always, if you have any questions, or if I can be of any assistance, please contact me through Etsy or send me an email to Pungoliving@gmail.com.
Thanks for reading!
Lee

You did an outstanding restoration on that machine. I can’t believe the before/after difference in all the metal parts and the body decals. It’s stunning! I’m sure the owner was thrilled to get it.
LikeLike
Good morning Eileen,
Thank you for your kind comment! I enjoy trying to get the full potential out of every machine. The quality of material and construction make it so much easier to get a good outcome.
Have a wonderful day!
Lee
LikeLike
What a gorgeous little “old lady”! I’m sure your customer will LOVE it. I always appreciate knowing how and what you do to bring these beauties back to lovely condition.
Just a little something I recently tried: you mentioned “another trip to the polisher”. For quite a while now, I’ve been using some professional, flexible nail files/emery boards for shining up small items. For example, after removing the dirt from the faceplate or the bobbin cover, I go over them with the buffer side of the fine grain board. In seconds, it’s mirror-like. The kit includes multiple boards, another one of which is excellent for smoothing out “chowdered” screw tops quickly and easily. They last quite a while too and some are washable. I have a dremel with polishing bits, but sometimes these emery boards are quicker and almost as easy. The set I’m using now is called Morgles Professional Nail File Set and it’s available on Amazon; not very expensive either. (And yes, I do use some of them for my fingernails!) As always, your help and advice are VERY much appreciated!
LikeLike
Hello Suzanne,
For the number of restorations, I do a 6″ buffer is a huge time saver and the results are spectacular. That and an ultrasonic cleaner have become invaluable to me. Before I added a buffer to my shop for polishing, I used a few different metal polishing compounds. For the most part, they worked quite well! For face plates, I found that comet and a toothbrush work very well for cleaning, and metal polish gave me good results. Like you, I use a dremel for polishing smaller parts as well as wire brushing tight spots and small pieces. I do have an emory nail board in my tool chest, but it is pretty coarse. I didn’t even know you could get on as fine as yours. I do like your idea about using them for removing burrs from screw heads. I have a small set of very fine files for this, but it takes patience and good dexterity… unfortunately, time has taken a toll on my hands and limits me in some respects.
I’m glad you enjoyed my blog, and please don’t hesitate to let me know if I can be of any assistance to you.
Have a wonderful day!
Lee
LikeLike
Lee this was awesome!! I am looking for a hand crank singer. If you happen to hear of one please let me know. I still have my 101 and I have not restored it yet. I am going to need it done by a professional. I don’t have the knowledge. I am wondering about the cost. We talked about it briefly a while back but I haven’t moved forward yet. I think I needed to send you pics. Also I’m wondering if a 101 can be made into a hand crank if the electrical motor is too damaged?? Looking forward to hearing from you, Kelly Weber
On Mon, May 23, 2022 at 5:20 PM Professionally Restored Vintage Fine
LikeLike
Hello Kelly,
I come across some pretty nice machines now and again. I see a nice model 28 now with very nice colorful La Vencedora decals. It will probably sell for a high price, but you never know! Often times I pass them up because prices have gone up and I just don’t have the room for every machine I would like to buy.
You can add a hand crank for just about any Singer machine with a spoked handwheel. Vintage singer hand cranks fetch upwards of $100 and I can’t afford to build them into a restoration without pricing the machine too high (in my opinion). Taiwanese hand cranks are readily available for around $25 and while they are not as “solid” or nice as the Singer, they work just fine. They are easy to add because they use the same mounting bolt as the motor.
101’s are very nice machines, and they are much scarcer to find. They are difficult machines to work on because the drive mechanism is fairly complicated. Unfortunately, they will not run without a motor. There is no option to power it otherwise. Restorations are not inexpensive with shipping and packing making up a large portion of the cost, but for certain machines and those with high sentimental value, some folks consider the quality unmatched by new machines and opt for a restoration.
If you would like to know more, please send me an email to pungoliving@gmail.com and I can break it down for you. Also, if you are looking for a particular machine, I can find a worthy machine for you, purchase it, and restore it for you. Again, let me know your thoughts via email, and please send me some pictures of your 101.
Thanks and have a wonderful day!
Lee
LikeLike
Where do you live? How much would you charge. I’m disabled and just will not be able to do mine.
LikeLike
Hello Eleanore,
I live in Virginia Beach, VA.
If you would like to know more about private restorations, please send me an email to pungoliving@gmail.com.
I will be happy to answer any questions you have!
Lee
LikeLike