
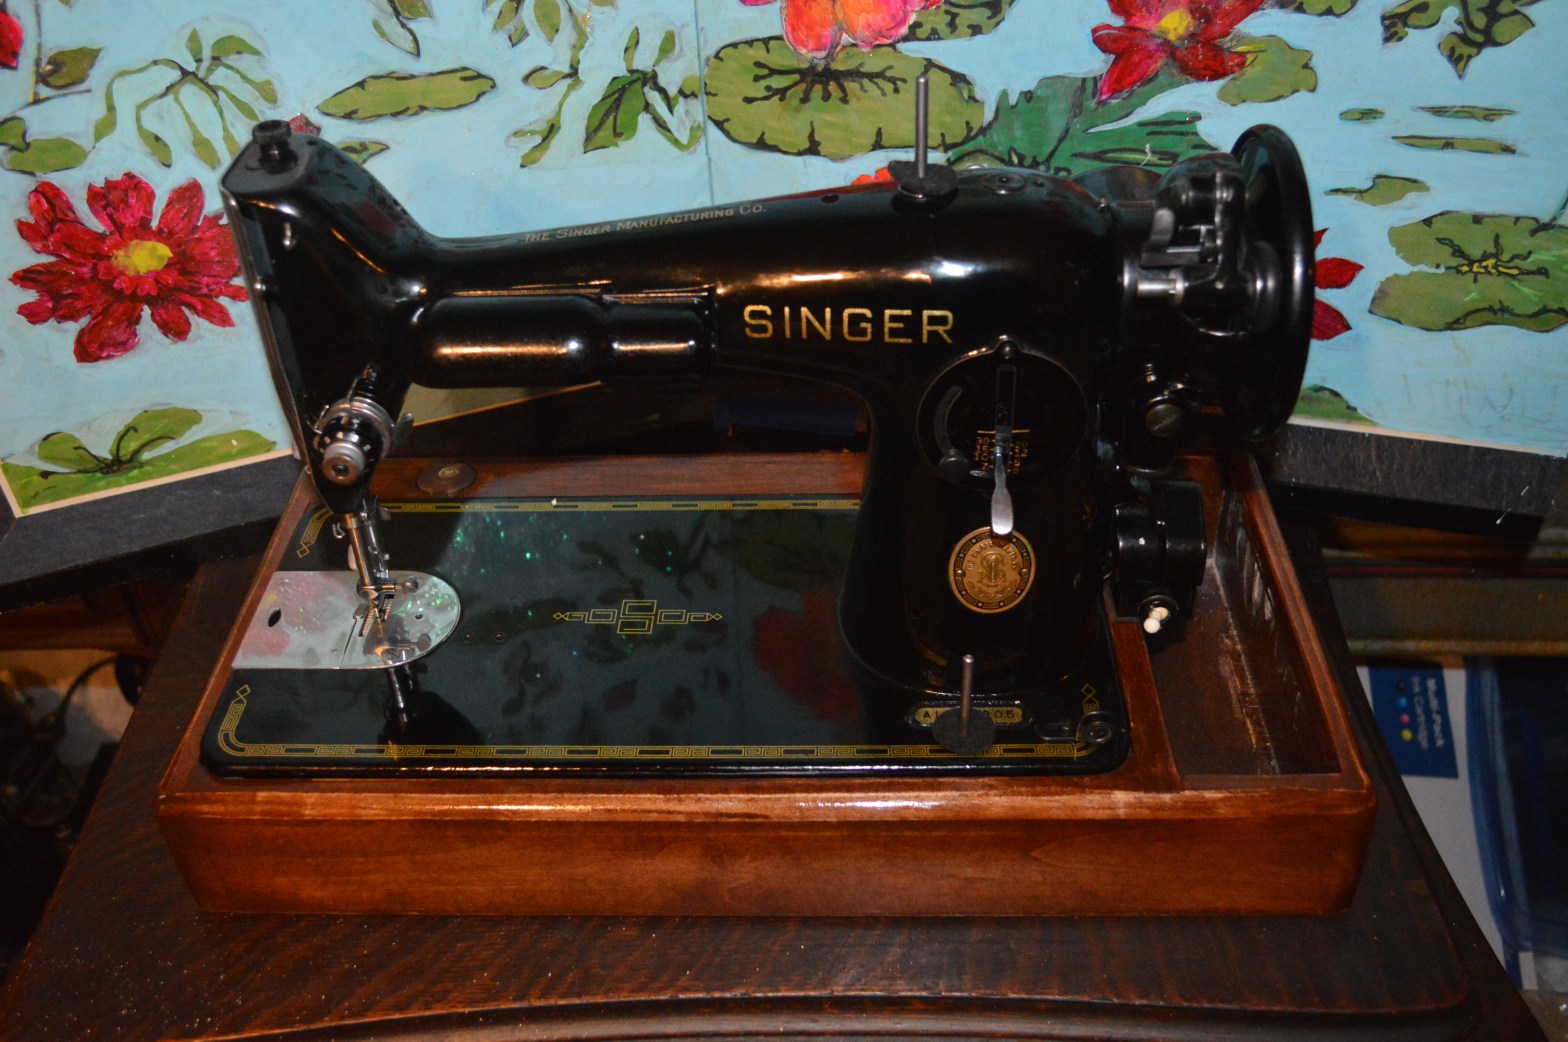
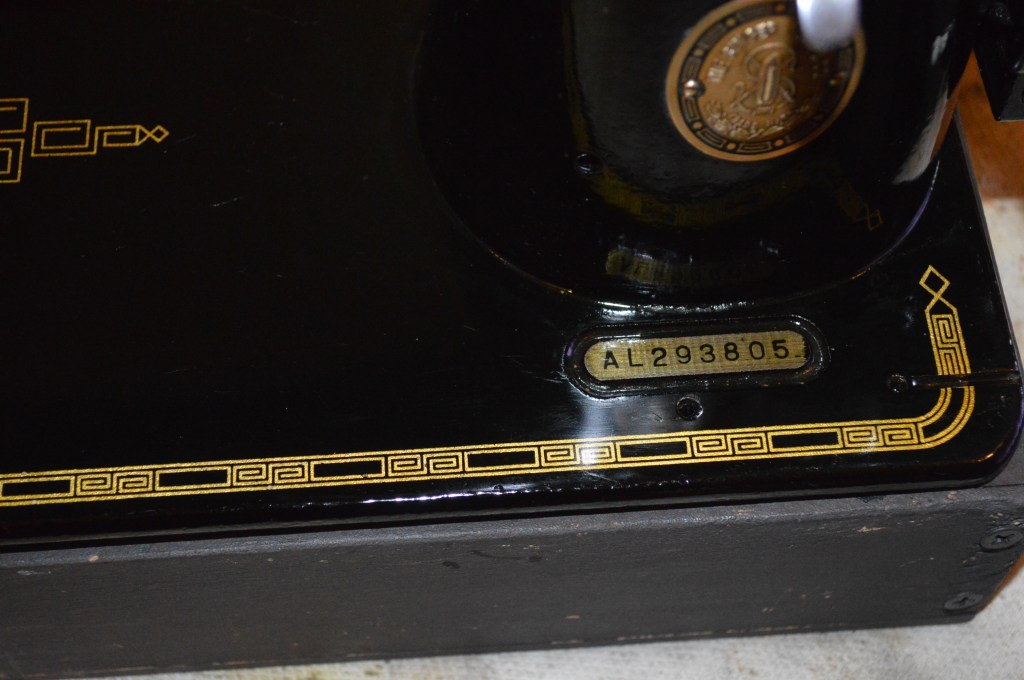
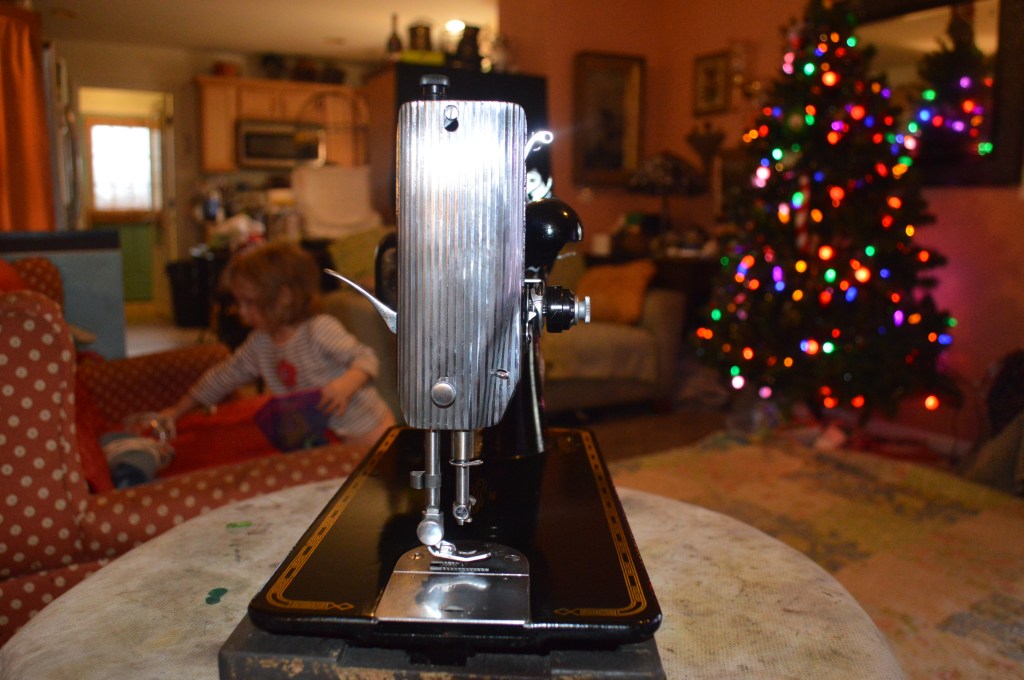
This restoration is for a Singer model 201-2 with serial number AL293805. It was one of fifteen thousand 201’s commissioned for manufacture on December 18, 1952 and it has a story… actually it has two stories. The first is its history. This 201 was purchased new and given by a man as a gift to his wife on their 25th anniversary. The couple this machine shared a home with were fortunate enough to celebrate their 75th anniversary together. What a wonderful story! As it is with so many of these wonderful vintage Singers, it was passed down thru their family. The daughter it passed to did not sew but she didn’t want to part with it because of her sentimental attachment and past memories from childhood. It remained in her home stored and unused for many years. As is the way of the world, times change, people change, people move, people downsize, and people clear out unused belongings that they have stored for many years. I can’t say for which, but for one of these reasons, this 201 came to me.
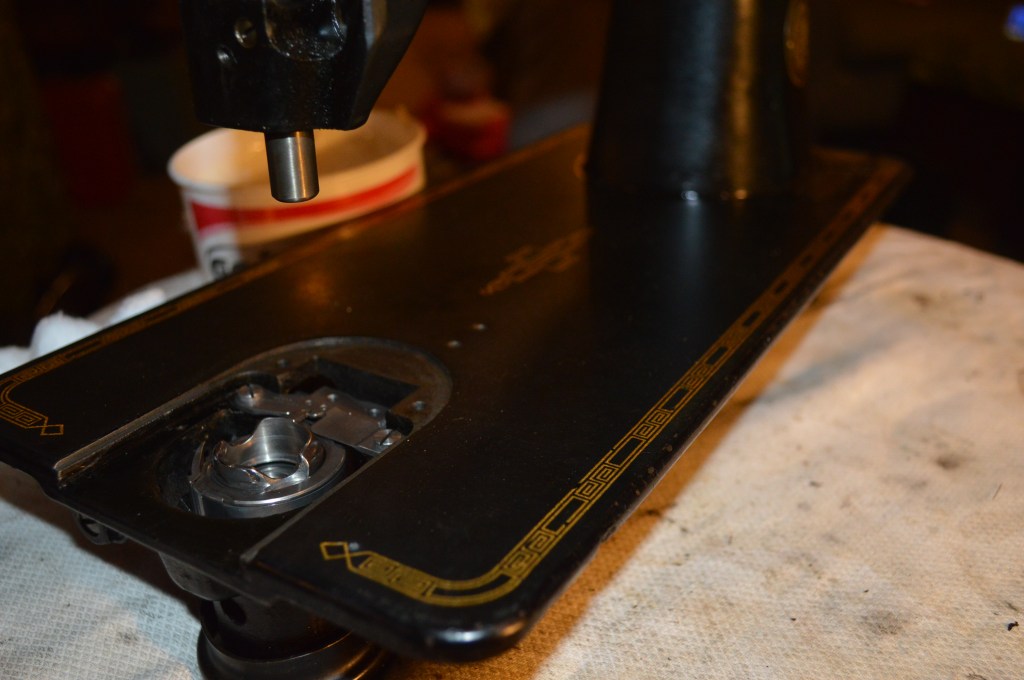
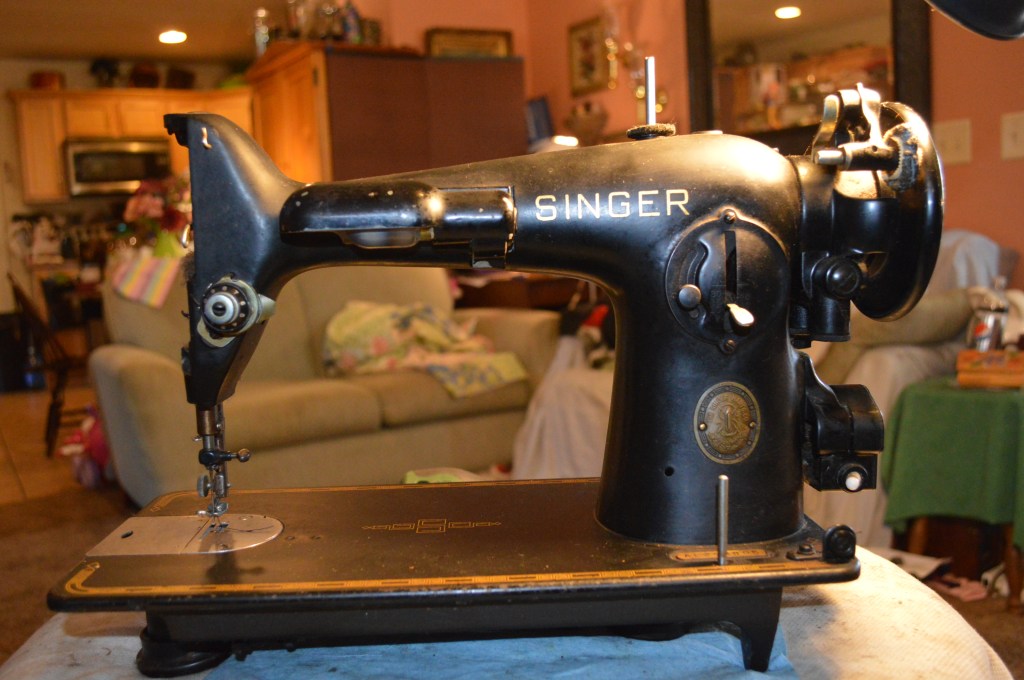
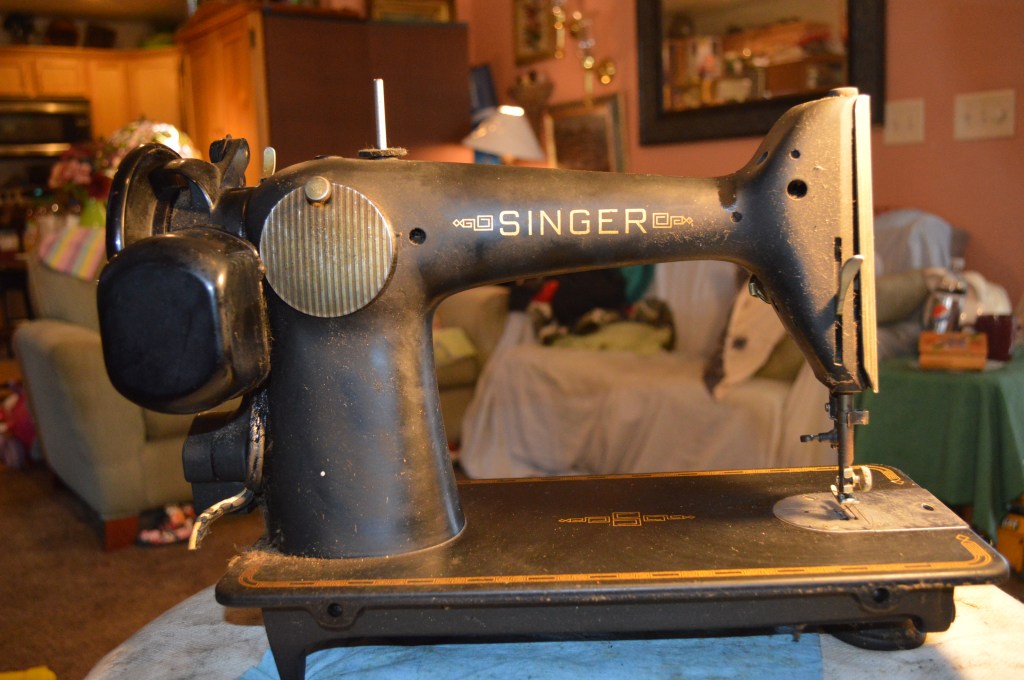
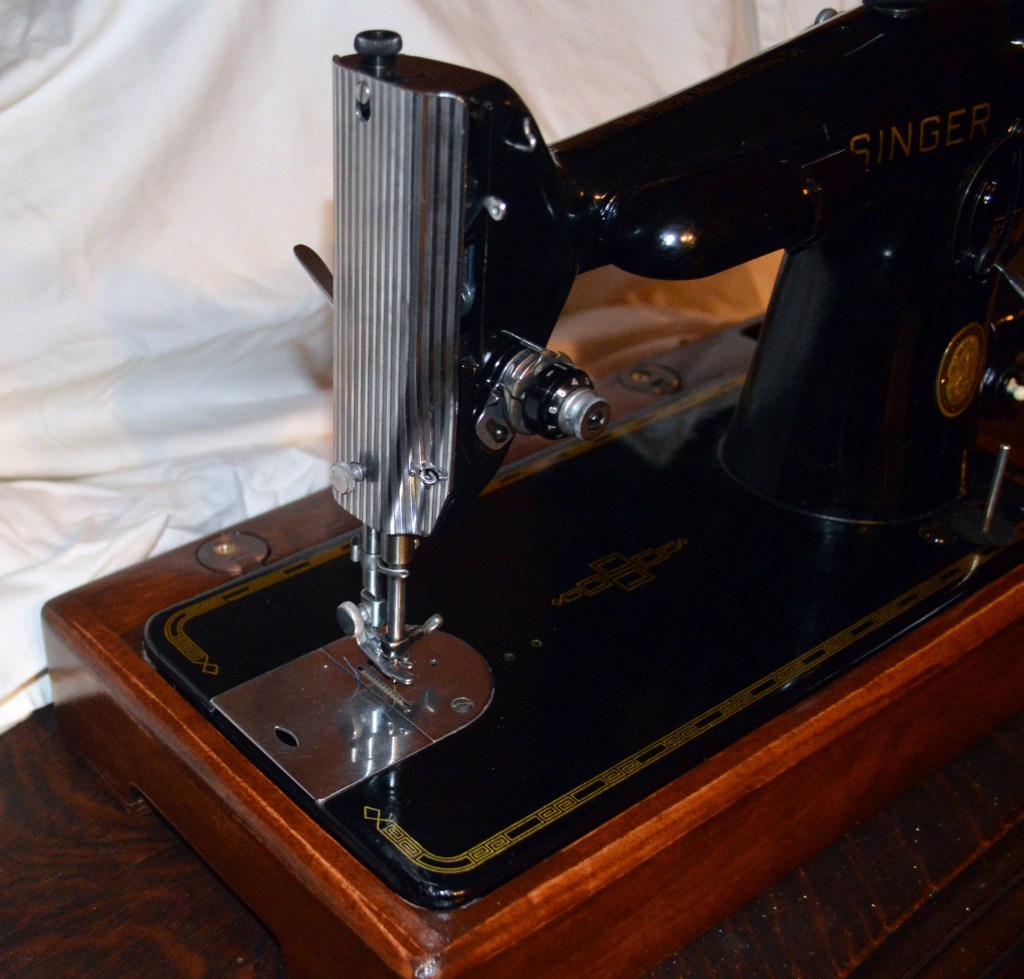
On first sight, I determined that the machine must not have been seen for many years. Dust, dirt, and spider webs on and around the machine made this abundantly clear. Not surprisingly, the machine was in a poor cosmetic condition. After getting it home, I realized that mechanically it was even worse. There were positives though. The shellac coating is relatively intact over the whole machine. It had taken on a dull and rough finish but served it’s primary purpose of protecting the decals from wear. No amount of cleaning will bring back the deep black and depth of shine hiding under this shellac. The decals are in great condition and show only slight loss in a very few places. The machine has all of it’s parts and many of these are “blackside” finish.
between 1941 to 1953 Singer occasionally produced what are known as ‘Blackside’ models. During and sometime after world war II, chrome and nickel was scarce. Generally on these machines, the needle plate, bobbin cover, face plate, and most otherwise shiny bits would have a chemically applied black finish. This is referred to as blackslide. On this machine, the otherwise shiny bits such as the bobbin winder guide, the needle clamp, the stitch length setting knob, and the presser bar adjustment knob are finished black. I often come across blackslide parts on vintage Singer sewing machines but I wonder how they came to be mated to any particular machine. Their presence appears to be random. On any given machine, some parts may be plated, some may be blackslide. Many machines have parts that are all plated, but rarely are all of the parts blackslide. It’s a mystery to me, but my guess is that Singer had barrels of blackslide parts laying around and the used them here and there until the supply was used up.
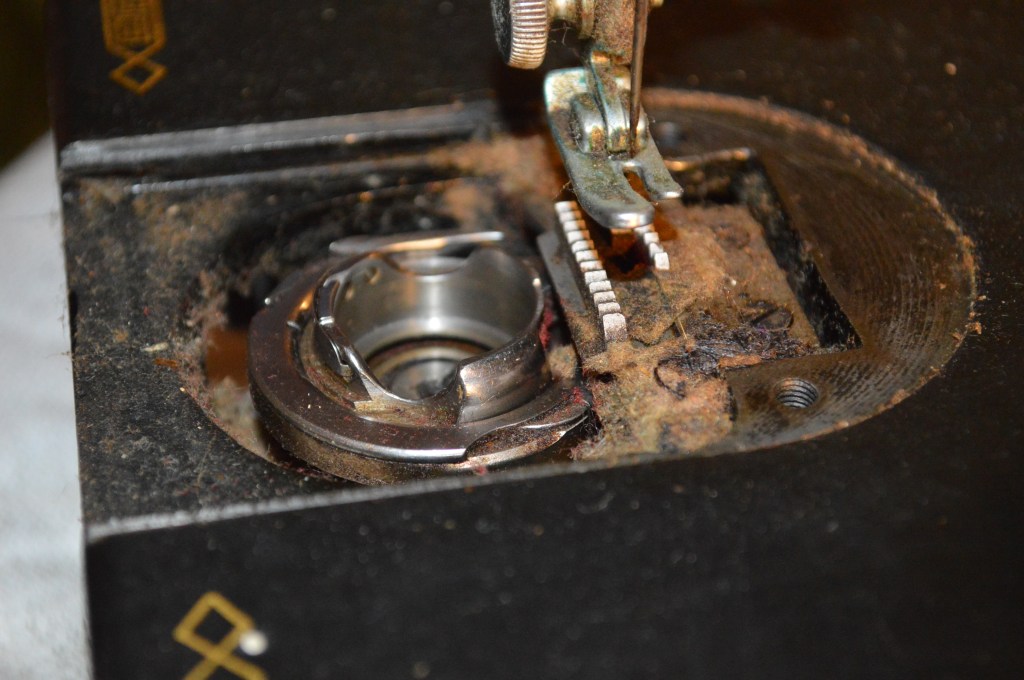
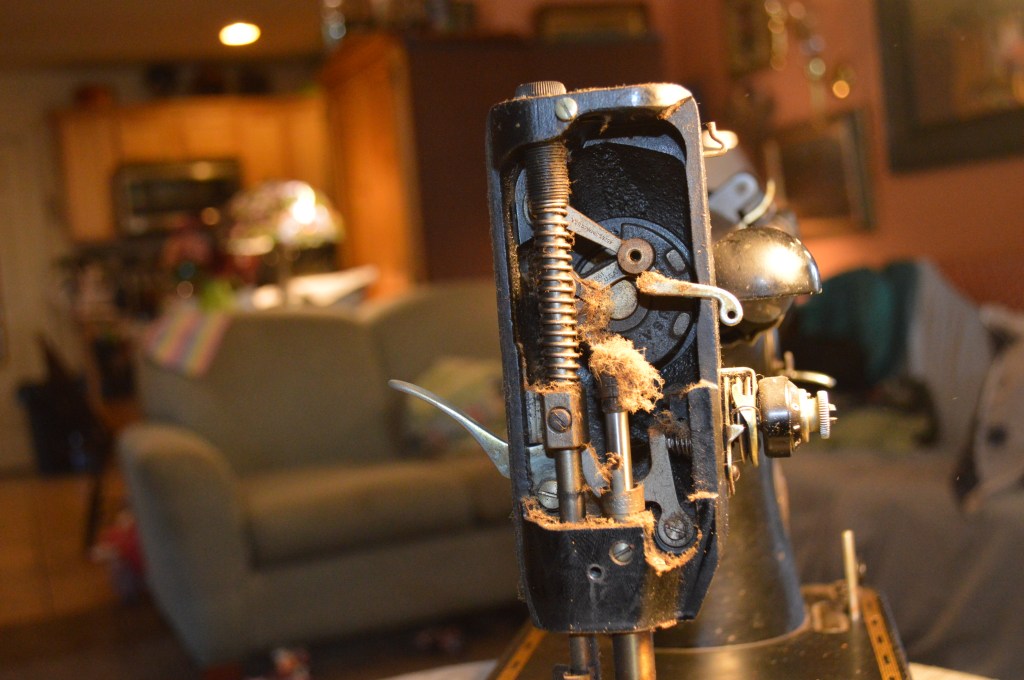
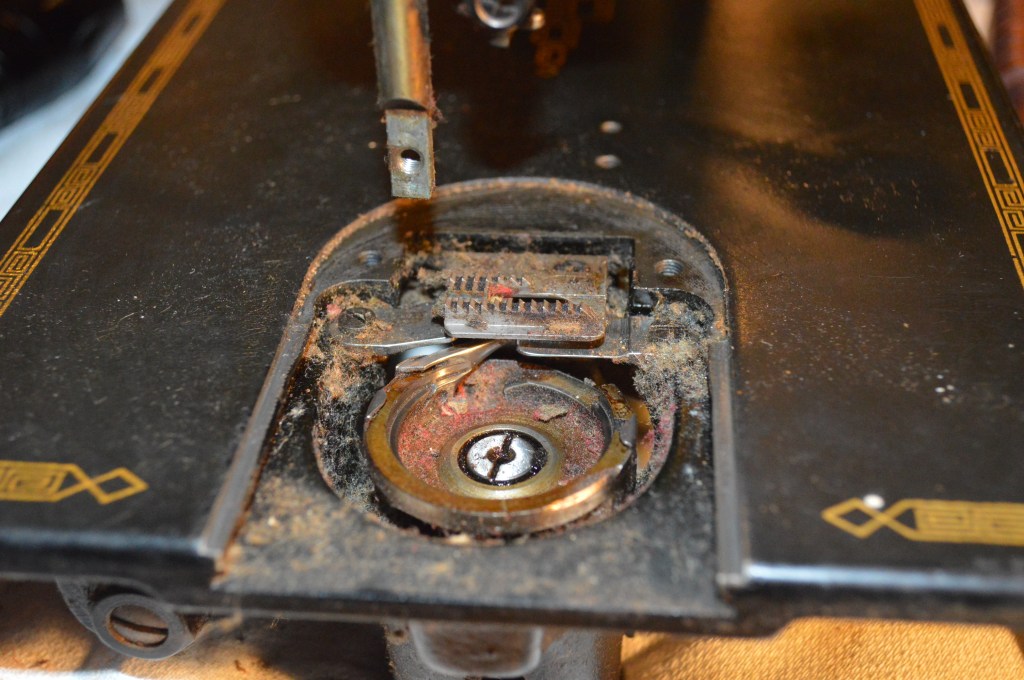
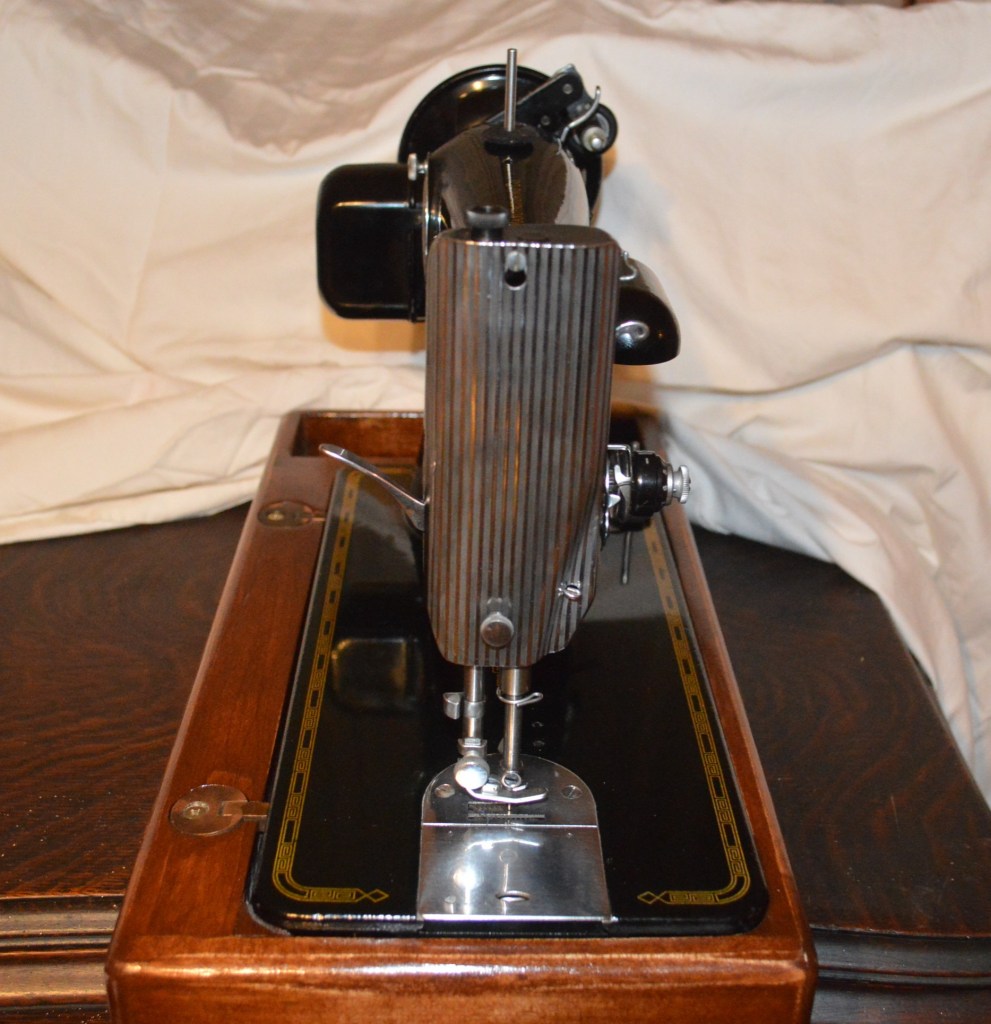
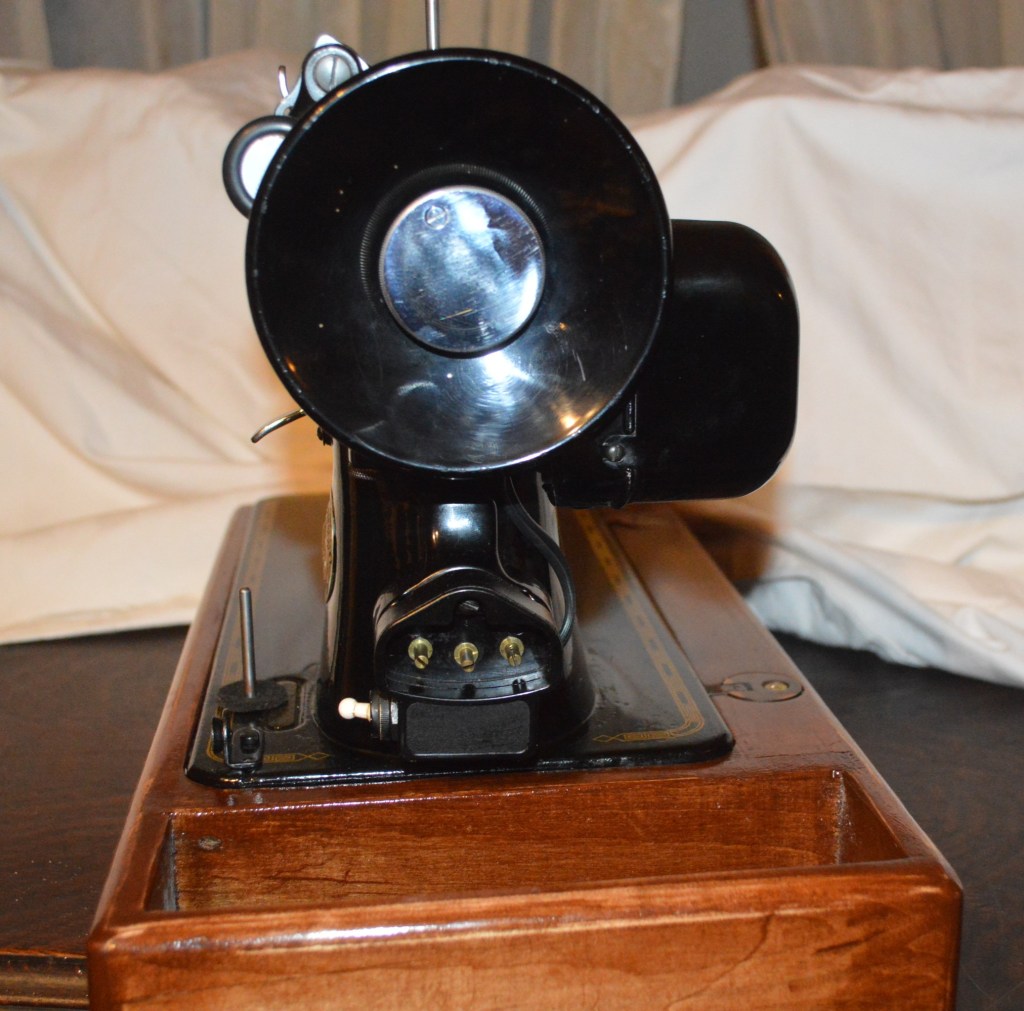
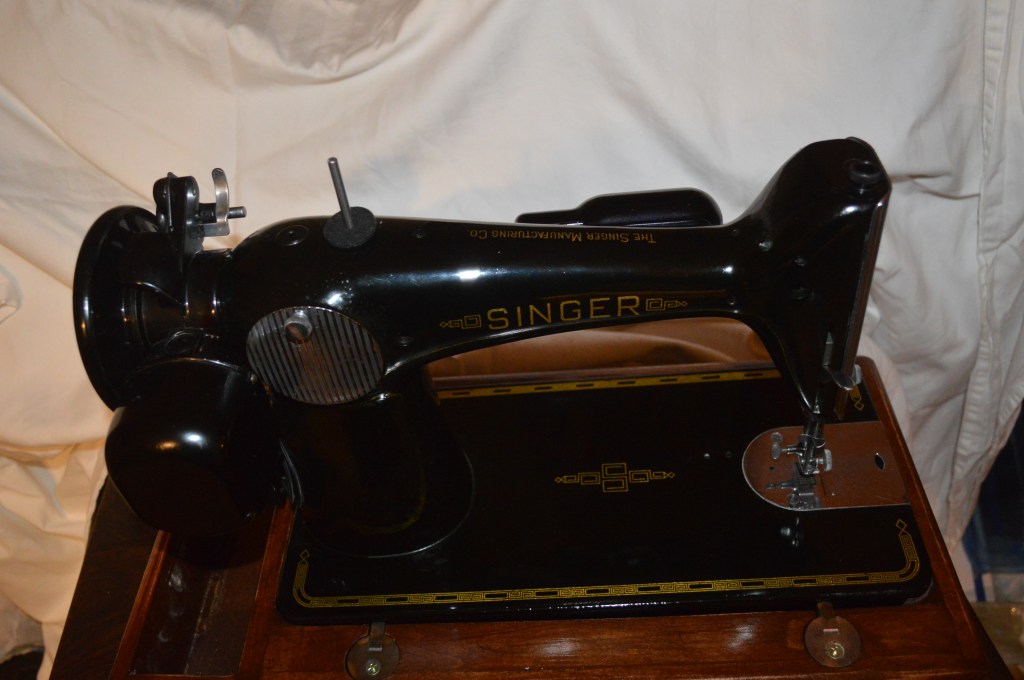
So, getting back to the condition of this machine, opening the bobbin cover plate I found the feed dogs and gears were packed lint and dust. The machine was locked up and would not rotate. All of the parts that are plated with nickel are dull. The motor wires are cracked and brittle and the condition of the Potted motor was unknown. To sum it up, this 201 is a real “barn find” and that makes it a perfect candidate for restoration! Take a look, here is the machine in the found condition.


See, if there is one thing I know for certain, the quality of the 201 is such that despite its present condition, it can be restored to look and sew like new. Quiet and smooth, the machine’s sewing mechanism is gear driven and it utilizes a horizontal full rotary hook with a class 66 bobbin. It uses standard 15×1 needles. The machine delivers about 1100 stitches per minute and the precision in manufacture and the quality of the steel parts ensures this machine can be restored without loss of precision or tolerance. Dare I say like new?
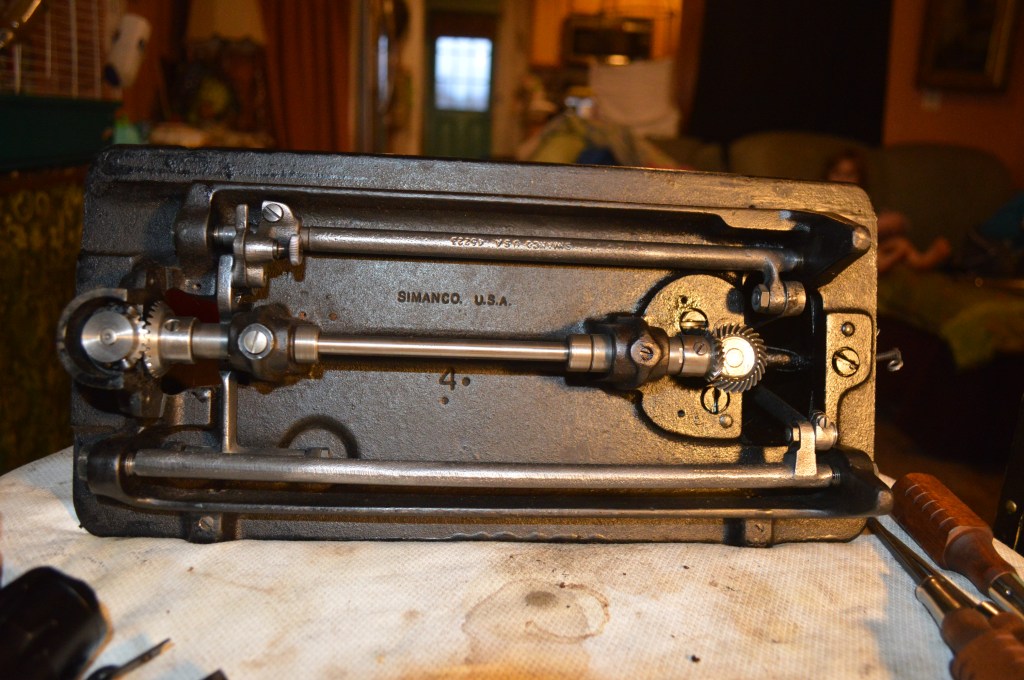
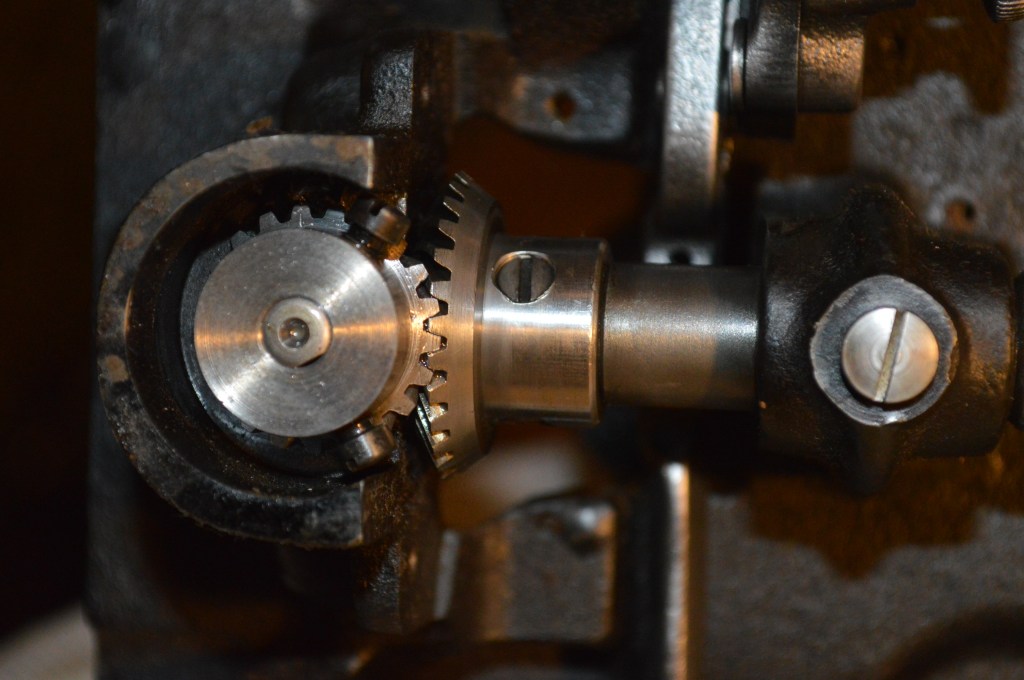
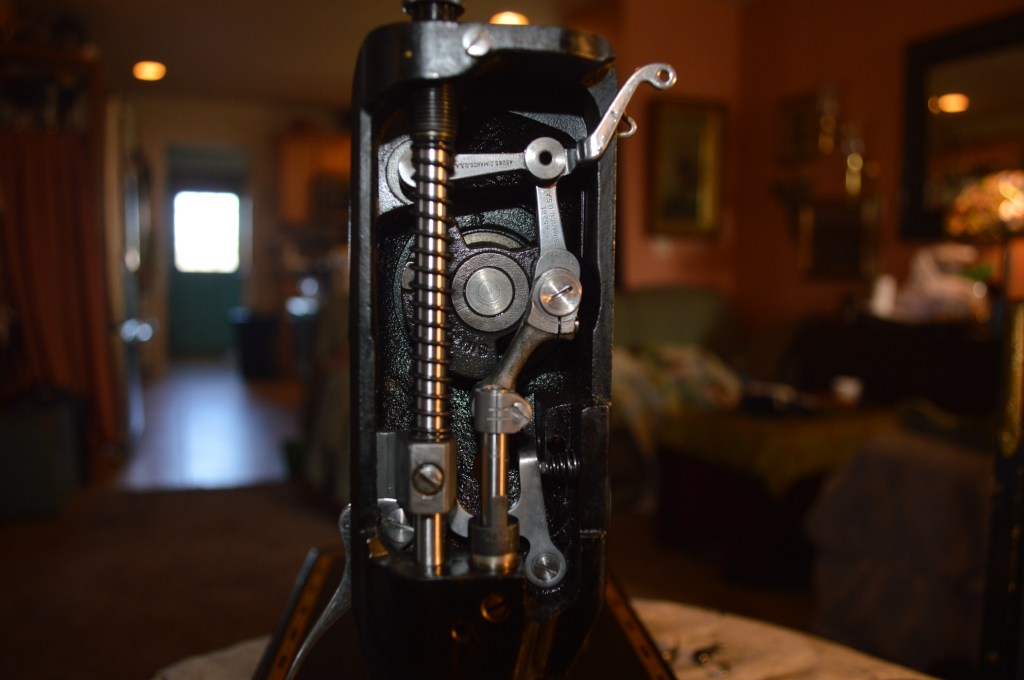
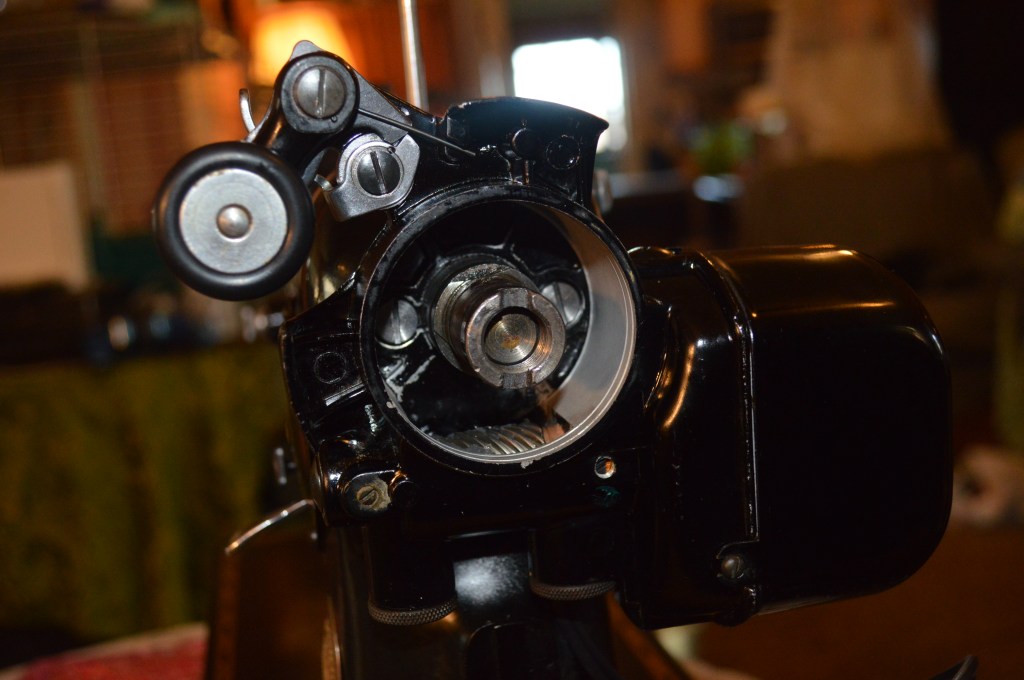
The 201-2 is a professional grade domestic machine. As far as a domestic sewing machine goes, it is in a class by itself (with her almost identical twin sister the model 1200). Known as the “Rolls Royce” of Singer machines, it was designed for a tailor’s or seamstresses demanding needs, and for this purpose it was designed to run reliably for long periods of use. The 201 is considered by many to be the finest quality domestic sewing machine Singer ever produced and they are renowned for the quality of their straight stitch. The flip side is that the Singer 201 is arguably one of the most difficult vintage Singer sewing machines to restore. Part of this is because the 201 should not be disassembled past the gears. The reason? The 201 was manufactured with three matched sets of heat treated steel gears. These gears were assembled and balanced with the complete rotating assembly in manufacture. Except for the gear designated to adjust the hook timing, disassembling the gears will ruin the balance and affect the smoothness of the machine. Singer made it quite clear in it’s instructions that any disturbance or replacement of a gear would require the machine be returned to the factory for repair. Since there is no Singer factory on planet Earth today, it is best to heed this warning and leave the gears alone. With the exception of this one gear, all of the restoration in and around the gears must be done in place. No matter, this restoration will be taken to extremes anyway and all of the effort and time invested in it will be well rewarded with the outcome.
The second part of the story begins here… with this 201’s restoration. I am restoring this machine as a surprise gift. My sister-in-law’s name is Pat. Pat is a quilter and she makes beautiful quilts. She uses only the best sewing machines for her work… Top of the line quality Pfaff and Bernina’s are her sewing machines of choice. But, like all new and newer machines, her machines are chock full of electronic and servo driven mechanisms. And like all machines tied to these electronics, they are prone to problems when something goes bad. A fine quilt requires a fine stitch and when something goes bad, the quilt and the quilter suffers. Pat is an accomplished quilter and with her years of making quilts her sewing skills rise to the expert level… she knows the nuances of what a sewing machine can do, and most importantly what a sewing machine should do. In short, she needs a sewing machine of exceptional quality for her exceptional work.
After I decided that she could appreciate and realize the full potential of a fine high quality vintage Singer sewing machine, I began the search for just the right machine to suit her quilting demands. It couldn’t be just any machine to deliver the performance and quality of stitch she requires, and there are so many great vintage sewing machines that would be fine for quilting. Picking the right machine for her is a big deal for me, so my biggest challenge was the choice of machine to restore for her. Well, I thought about it for a long time, and then I decided that the only real candidate suitable for her is the finest domestic sewing machine Singer ever manufactured… the 201-2… This machine.
I guess I could find a machine that is in much better condition, but I wanted this gift to have the labor of love in bringing it back to an excellent condition… good just won’t do. The many extra hours I spend on this machine’s restoration will be with this purpose in mind, and that makes it all the more special for me.
Because it’s a surprise, I have waited to post this blog until the day she receives the machine. So, if you have read this far, share in the moment and send your best wishes to Pat. And from Carole and I … Surprise!
So now the second story begins to unfold… and while it starts here, my hope is that it will continue to be written for generations to come.
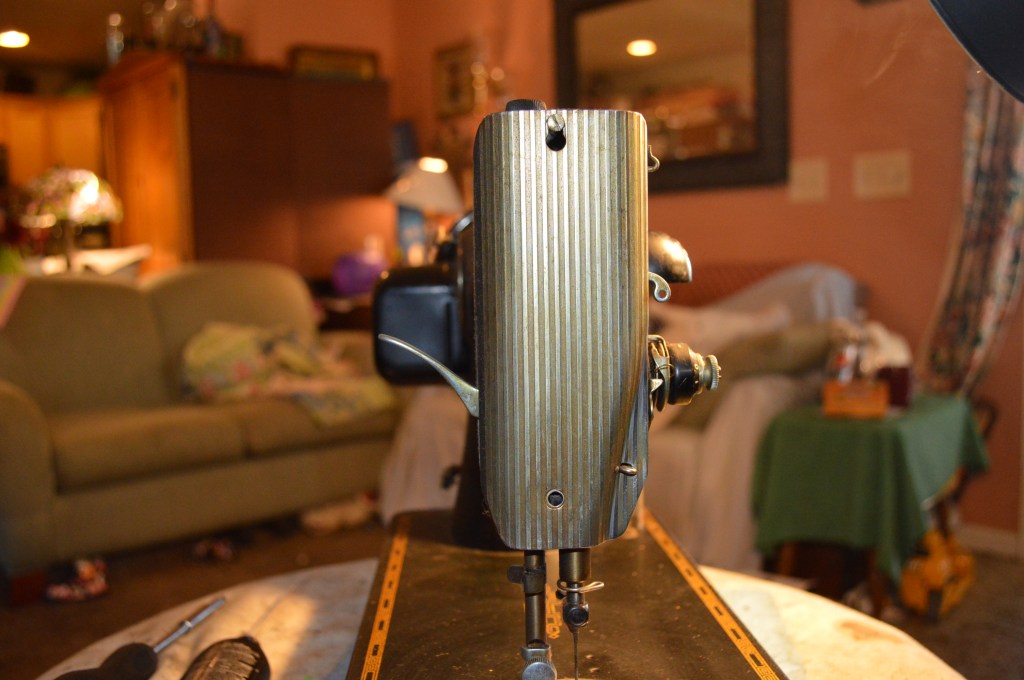
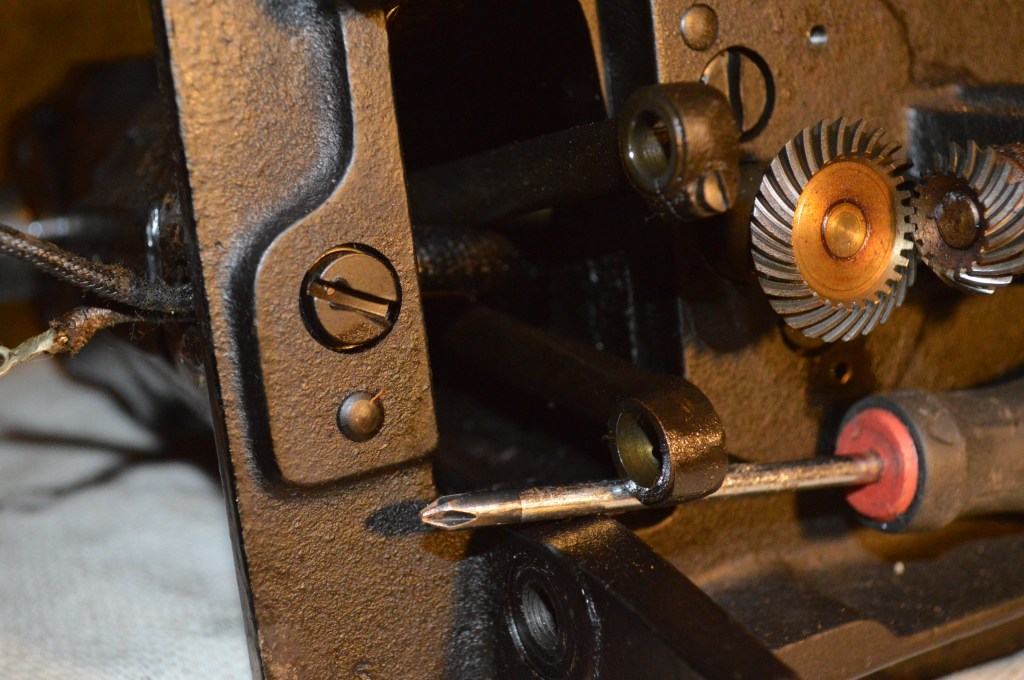
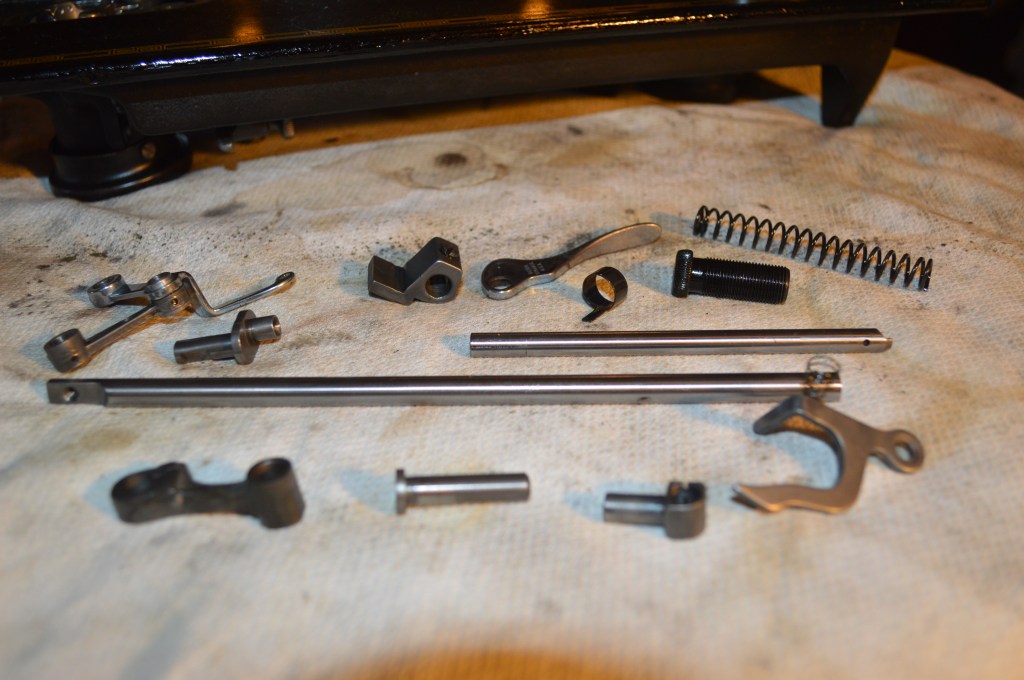
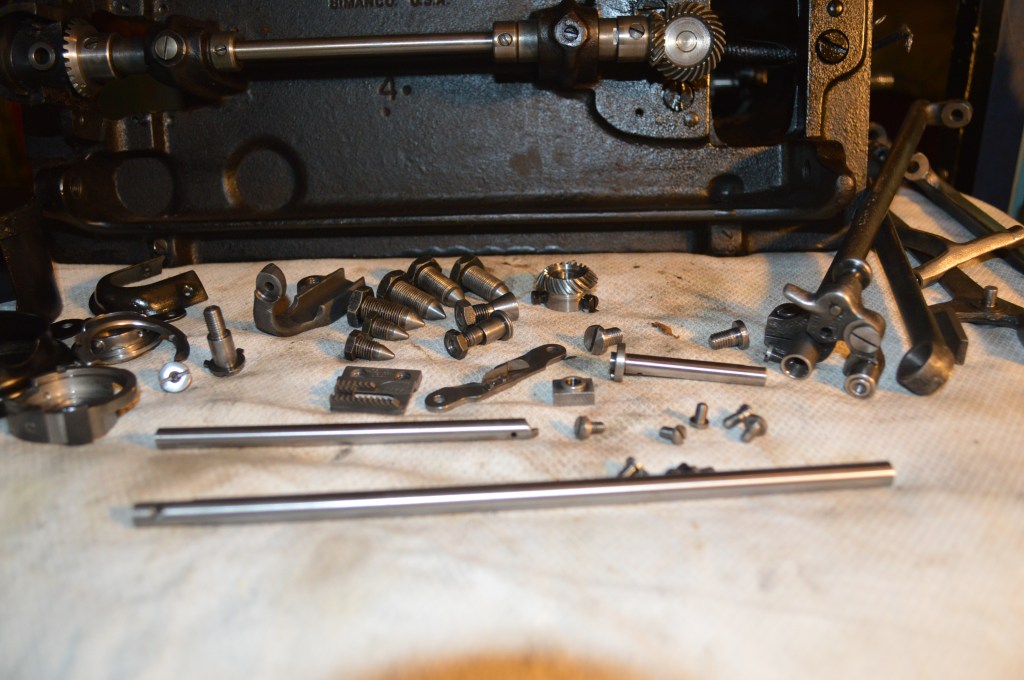
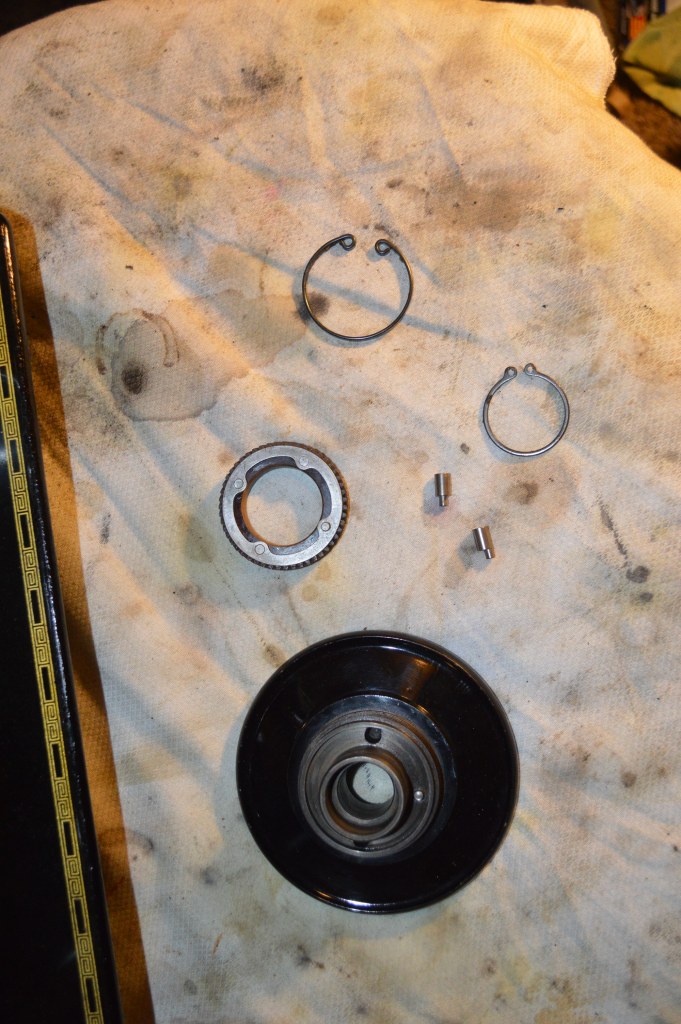
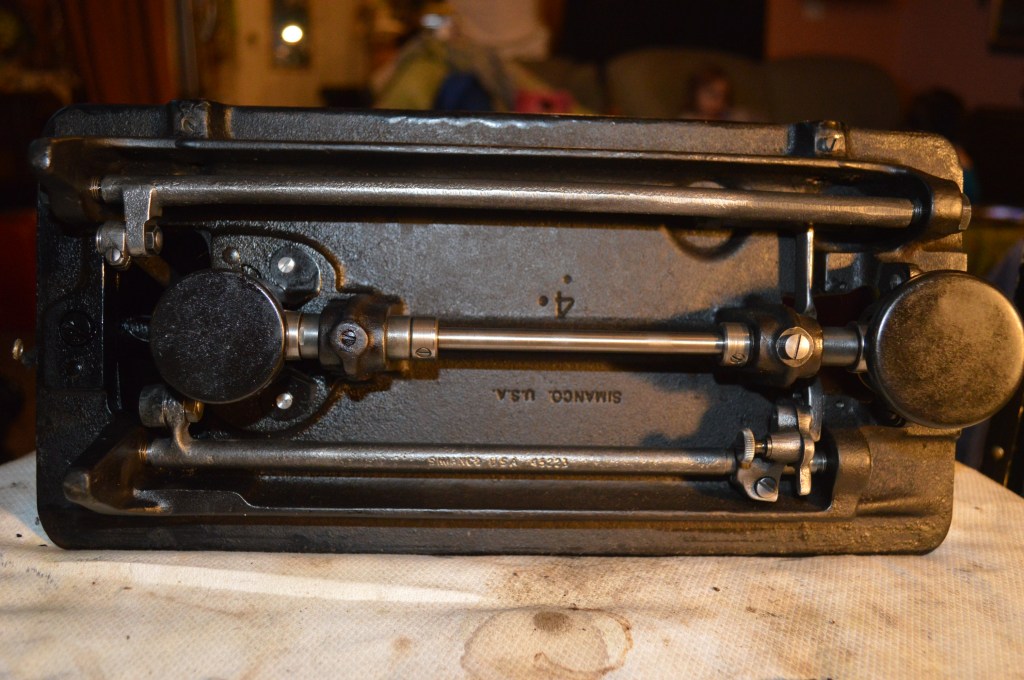
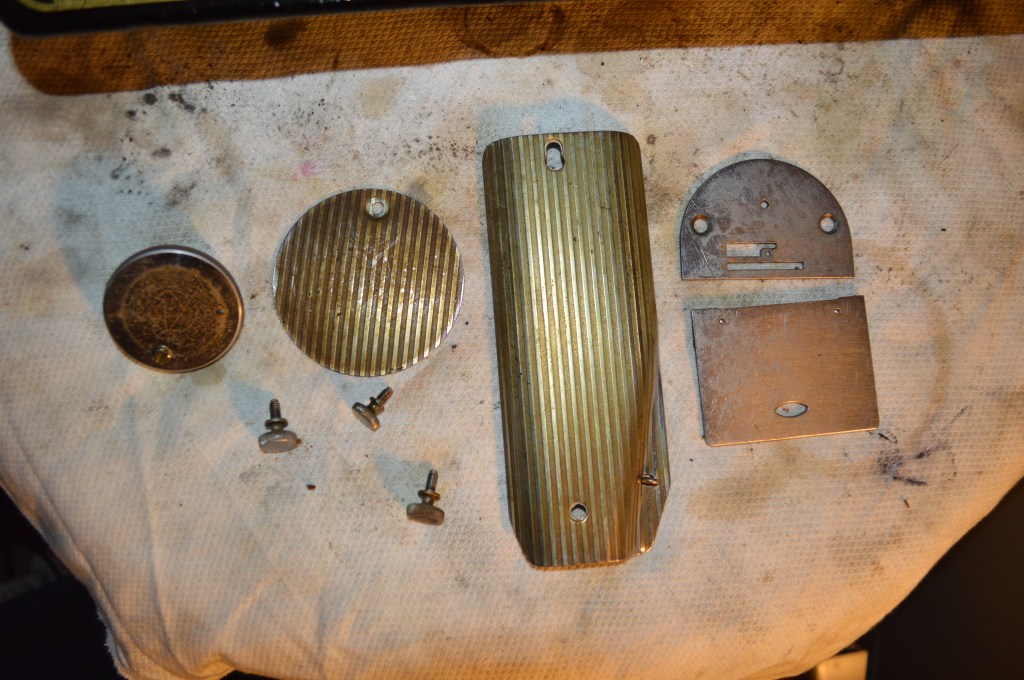
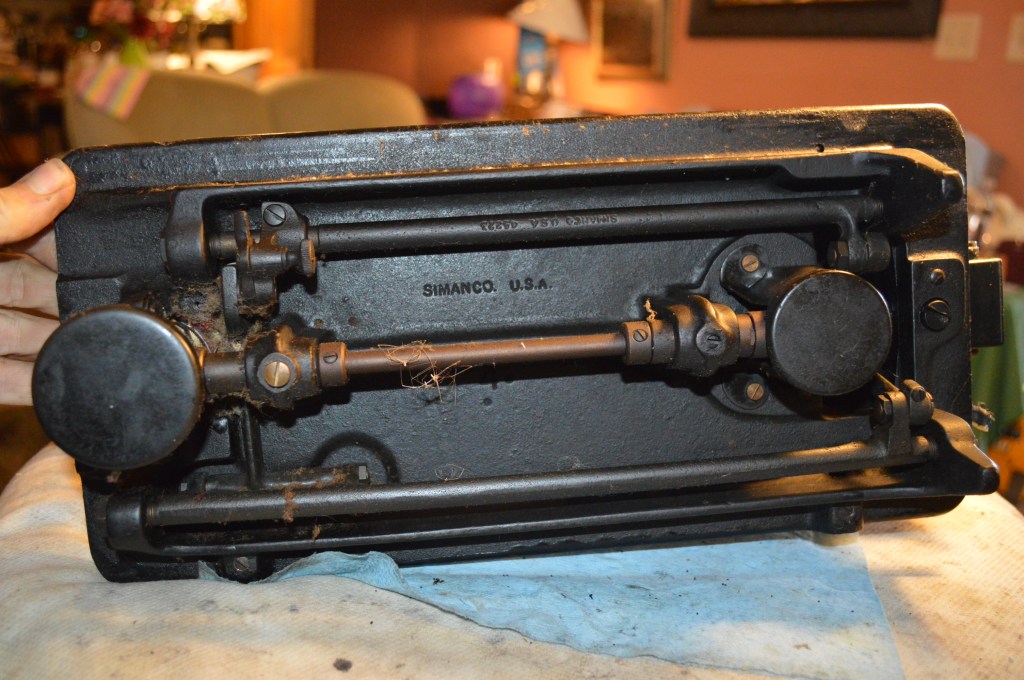
Chapter one is the restoration. The first step is to disassemble the machine as much as possible. Everything but the gears and gear shafts are removed. The parts in the sewing head and pillar, the tension control, the bobbin case, the hook shaft, the rocker arms, the stitch length rod, the connecting rod, the plates and covers, and all of the shiny bits is removed. The balance wheel and the motor is removed, and everything is laid out for cleaning. The only gear removed, the one responsible for hook timing, is marked at adjacent teeth so it can be reinstalled with the same tooth orientation… just in case. The following pictures show what is disassembled…


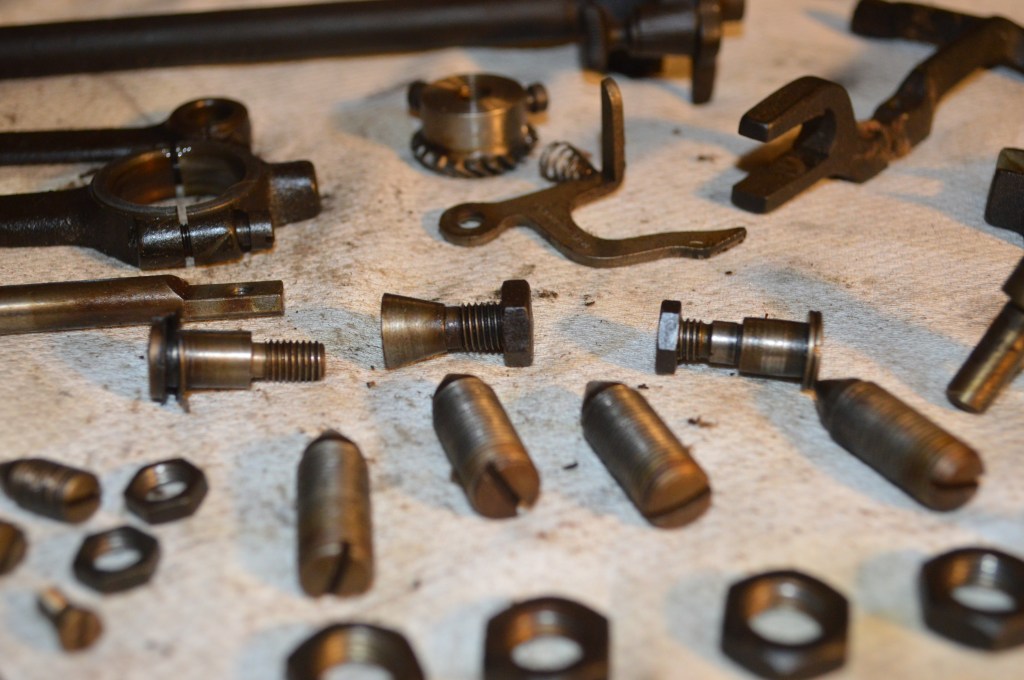

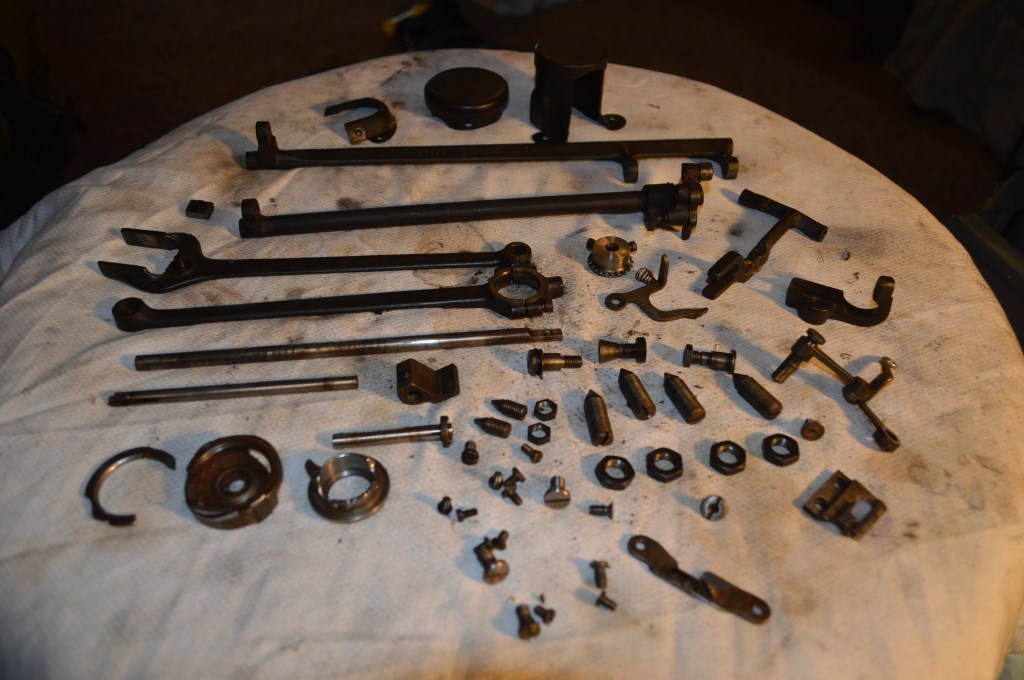
All of these parts have a layer of oil varnish that contributes to reducing the power and smoothness of the machine. No matter, they are ultrasonically cleaned and then each part is further hand cleaned using a soft wire wheel and a dremel tool. All traces of this varnish is removed. All of the bores are cleaned with a wire brush to remove the oil varnish lurking there as well. The bobbin hook shaft, the presser foot bar, and the needle bar are then polished to a glass like finish. Ultrasonic does a great job of cleaning, but before this restoration is complete, every single screw, nut, bit, or nit part removed will be cleaned or polished by hand as well.
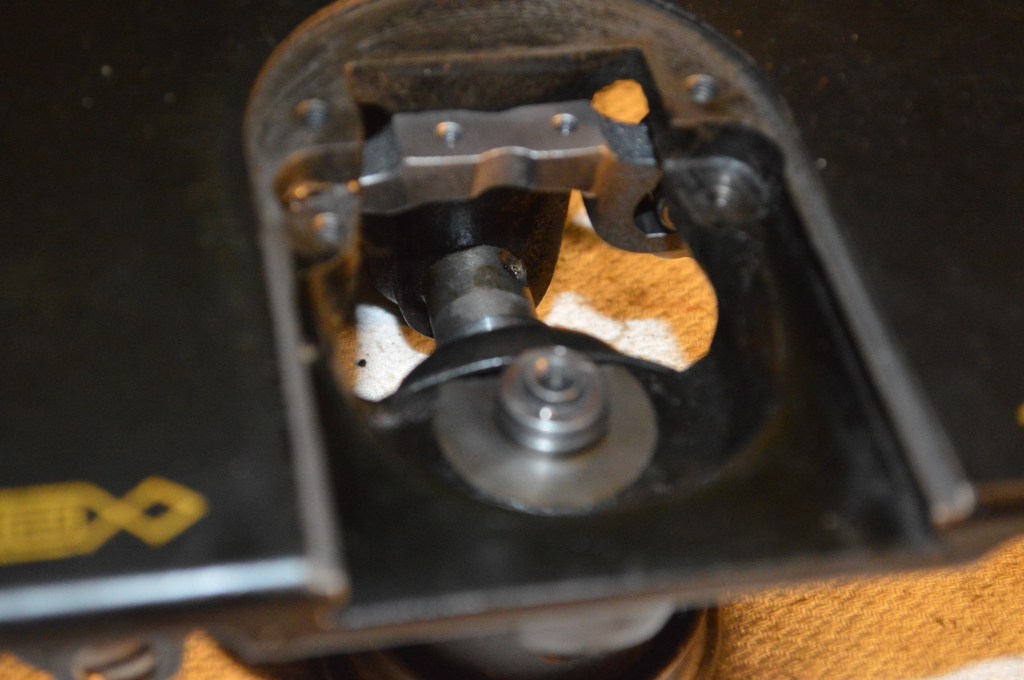
Restored like new…. When I think about it, all of the parts were shiny and smooth when the machine was new, and they are restored shiny and smooth as new now. On a 201, you need to look deeper. The 201 has parts where dirt and gunk can hide. These parts are further disassembled and cleaned. You can see the varnish has even made its way here. Likewise, the upper tension assembly is disassembled and cleaned.
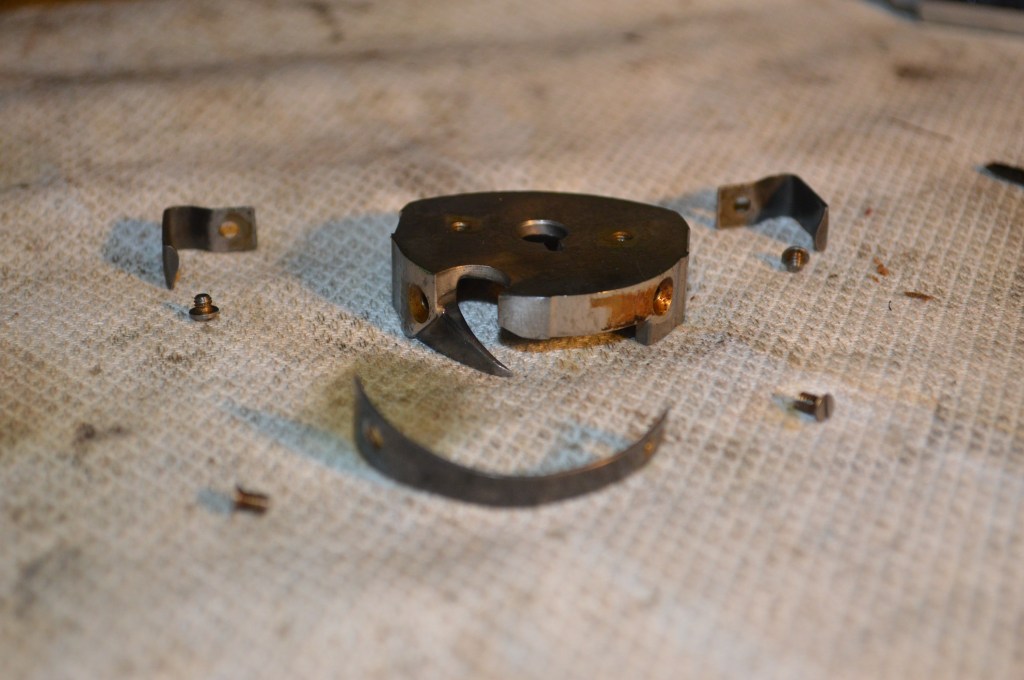
Hook case disassembled 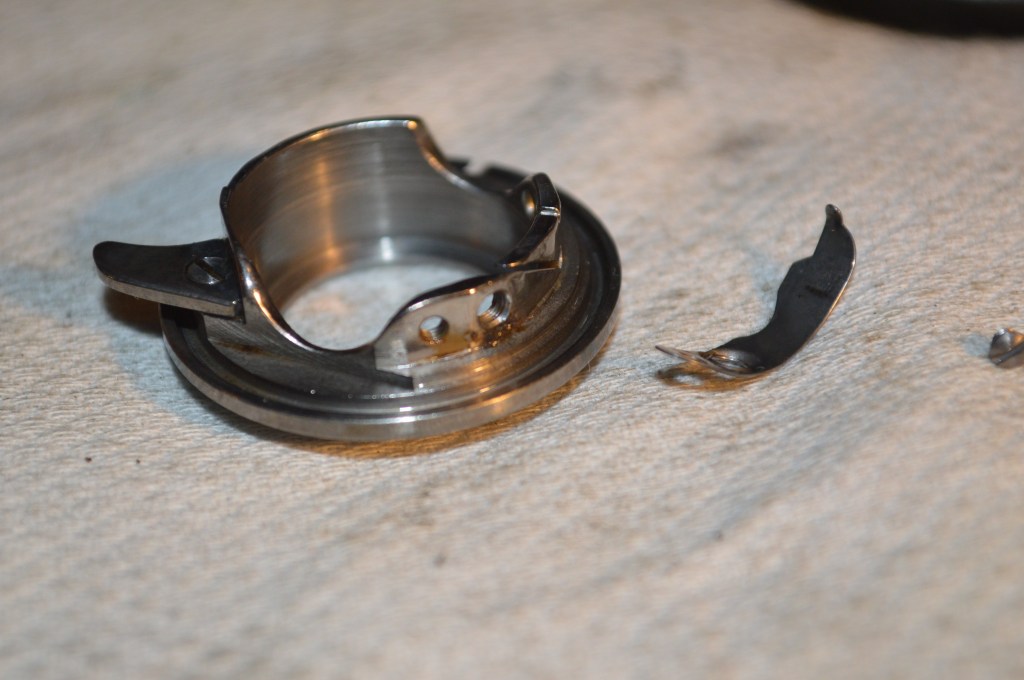
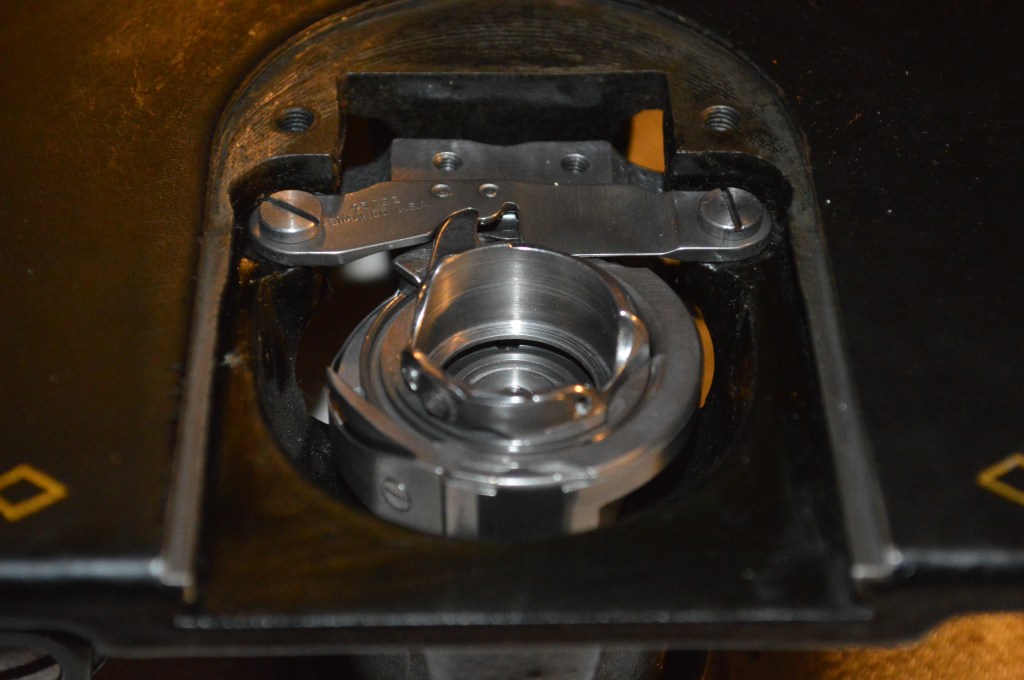
Bobbin case disassembled. See the varnish? Being the second tension control mechanism on any sewing machine, it is very important to clean to assure good tension control 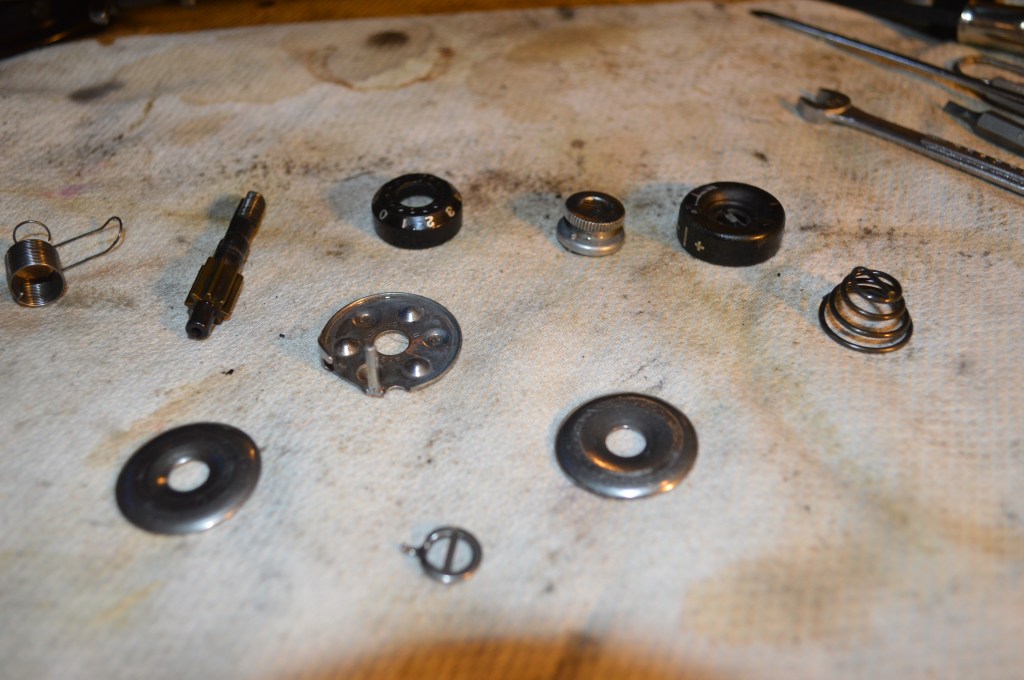
Tension assembly disassembled
After these parts are shiny and like new, they are ready for reassembly, but first the machine’s gears need to be cleaned.
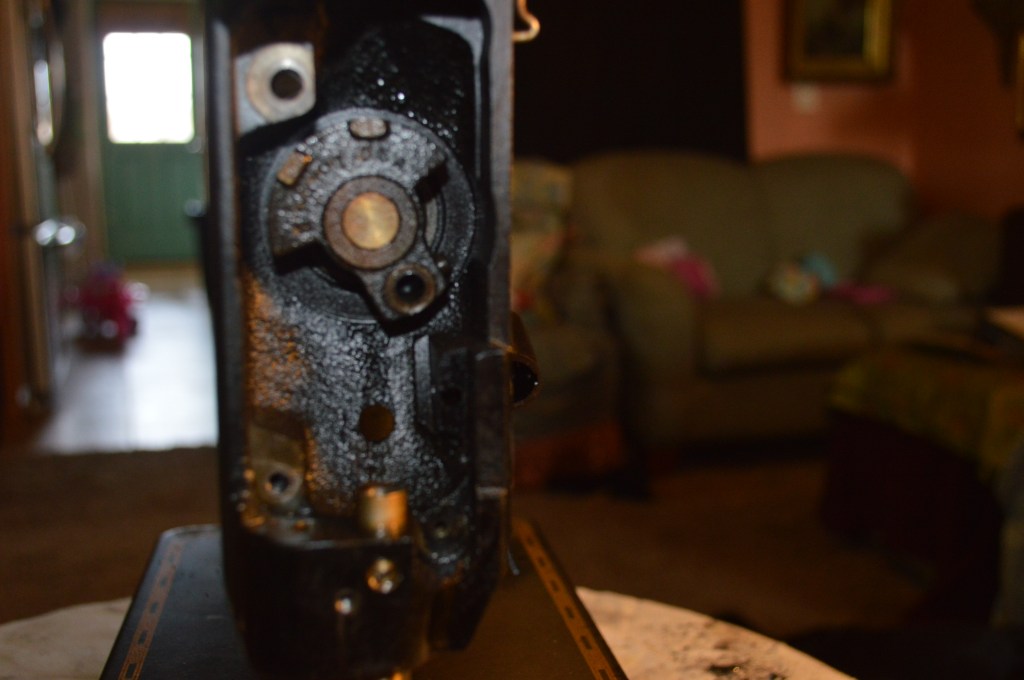
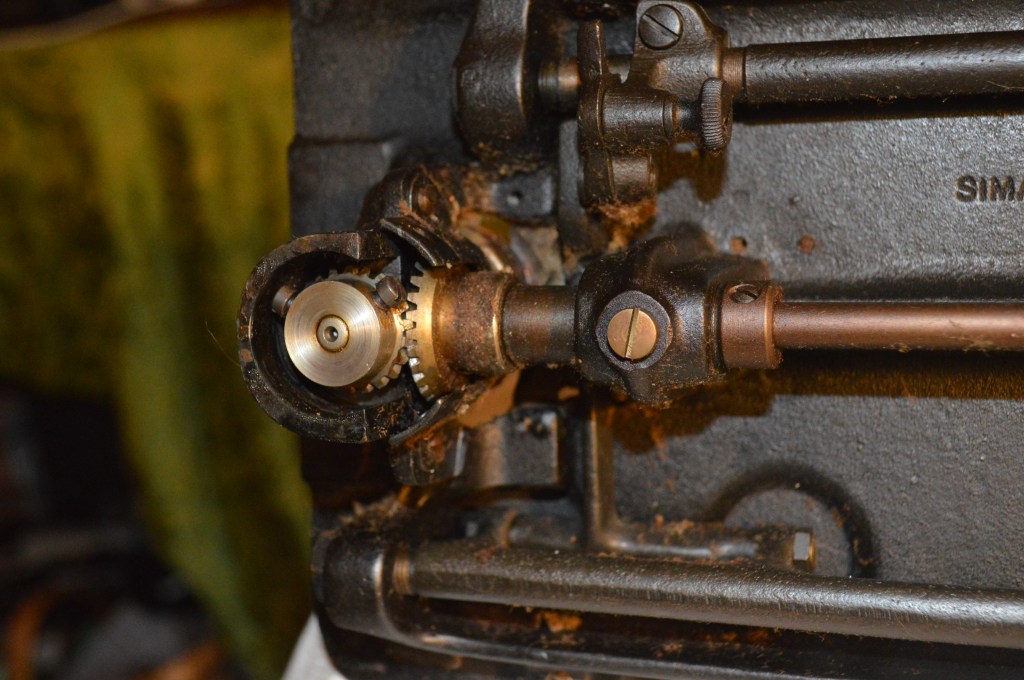
Now, when I first evaluated this machine, I noted that the machine was locked up. So much so that it took great effort to turn the arm shaft (the shaft attached to the balance wheel). I thought it was gunk jamming the gears… well, I was wrong. In fact, the cause was deeply embedded in the machine. Turns out, the cause was oil varnish in the gear shaft bushing bores. Over time, the last oil the machine had dried out. The oil varnish left behind seized the shaft in the bores. Now, here’s the truth about oil varnish. When steel parts are in contact with each other, they need lubrication to reduce friction and rub smoothly against each other. This lubrication is provided by oil. Oils other than those formulated for sewing machines have additives in them (often wax) that will remain behind as a residue long after the oil has “dried out”. This results in a coffee colored varnish like film. Oil varnish is what happens when a machine is left to sit, often for years, without fresh oil supplied to replenish the lubrication these parts need. Oil varnish does not lubricate. In fact it is the opposite of lubrication. Its presence creates a bond between the steel parts in contact, creating a force the machine has to overcome. Given enough time, it will seize completely.
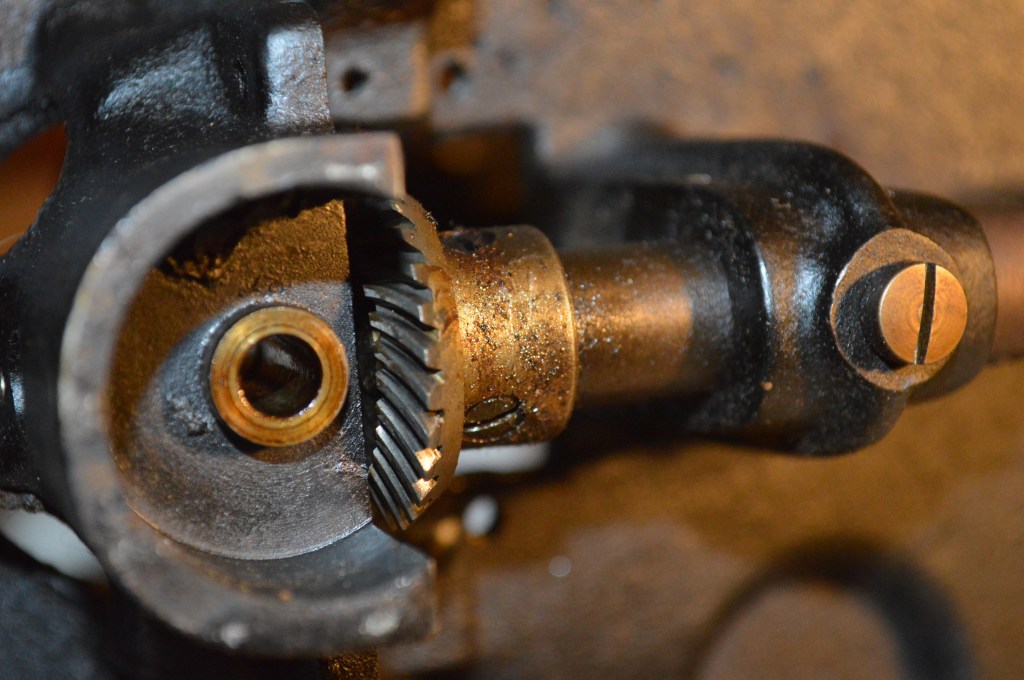
This is why disassembly and cleaning is so important in restoring a vintage sewing machine. Oil varnish not only forms outside of the many moving parts where you can see it, it also forms inside of moving parts where they rub together and you can’t see it. To get the smoothness any sewing machine is capable of, it is essential that the oil varnish inside of these parts be removed. On most machines, disassembly allows access to remove the varnish in these places. Because the 201 cannot be disassembled to access the gear shaft bores, another method must be employed to “un-stick” the machine.
If you read the owners manual, Singer addresses this problem and provides a cure. For a stiff running machine, they recommend a drop of kerosene at the oiling points to dissolve the varnish. The idea is to run the machine enough to dissolve the varnish, restore smooth running, and then lubricate the machine with a good quality sewing machine oil. This makes sense because kerosene in itself is an oil and it dissolves other oils (I use it to dip the motor housing in to dissolve the old gear grease, as you will see later). But, kerosene is not a good lubricant for metal parts in contact at high speed or under load. Once used, it must be flushed out with lubricating oil… It is a pain to do and I hesitate to use it for this reason, but here it is needed.
After oiling the shaft bores with kerosene, the machine is much improved, but still very resistant to rotation by hand. At this point, there is little left to do except apply heat. Fortunately, oil varnish melts at a relatively low temperature. Often, heating with a hair dryer is sufficient to get things moving again. Unfortunately, getting heat where this machine needs it is not easy to do. I can’t use a flame and a hair dryer wont get enough heat to the source to do any good. Perhaps I could put it in the oven? Nah, my Wife won’t approve and I don’t want to damage the paint finish trying to get it hot enough (seriously, don’t put a sewing machine in your oven). The only other way I can think of get this machine running smoothly again is to create the needed heat by friction. To create this friction I have to turn the shaft rapidly. In resisting the rotation, the oil varnish will heat up and melt and in doing so allow the kerosene to further dissolve the bond. To accomplish this, I coupled the machine to a shop lathe and turned it at 900 rpm for about 5 minutes, adding Tri-Flow synthetic oil during the process to maintain lubrication. This works great and I was able to find the area responsible for the problem. After running the shaft for 5 minutes, the rear bushing in the sewing arm got warm to the touch from the friction… the source of the resistance. After this, the machine turns as smoothly as it should and the problem is resolved. Now the gears can be properly cleaned. Cleaning is accomplished with acetone, cotton swabs and a small chip brush. Care is taken to keep the acetone from touching the finish.
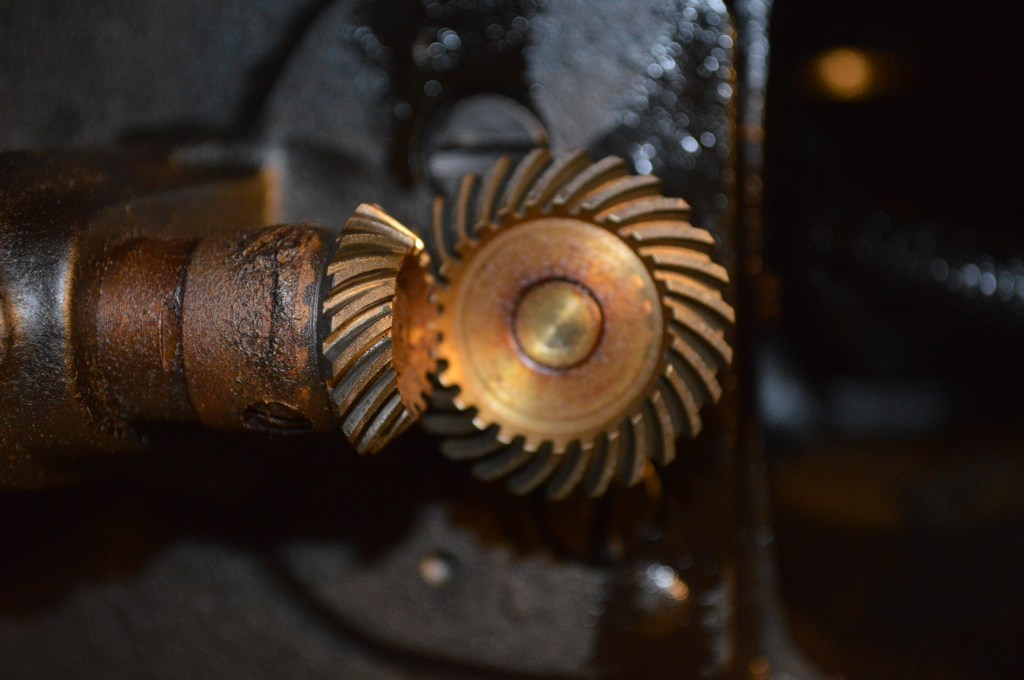
Before cleaning 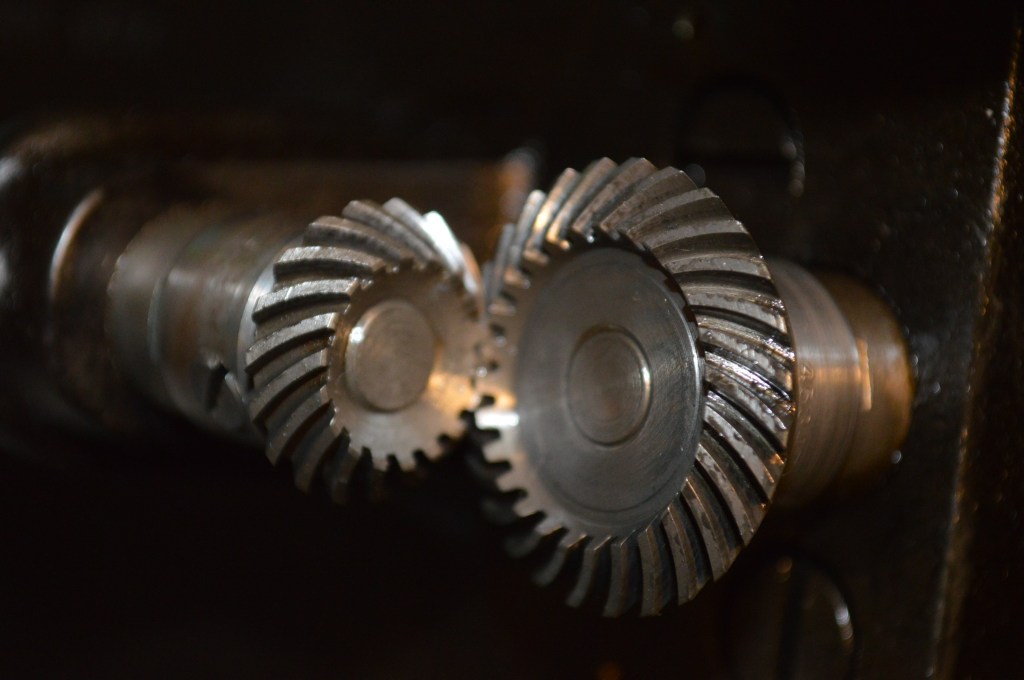
After cleaning 
Before… 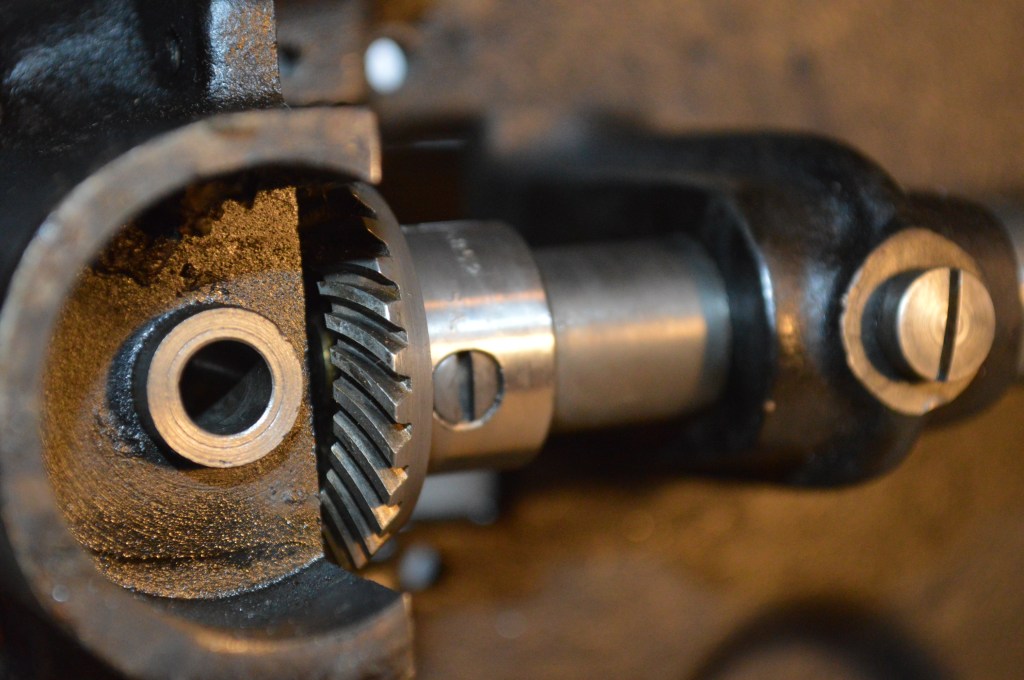
After 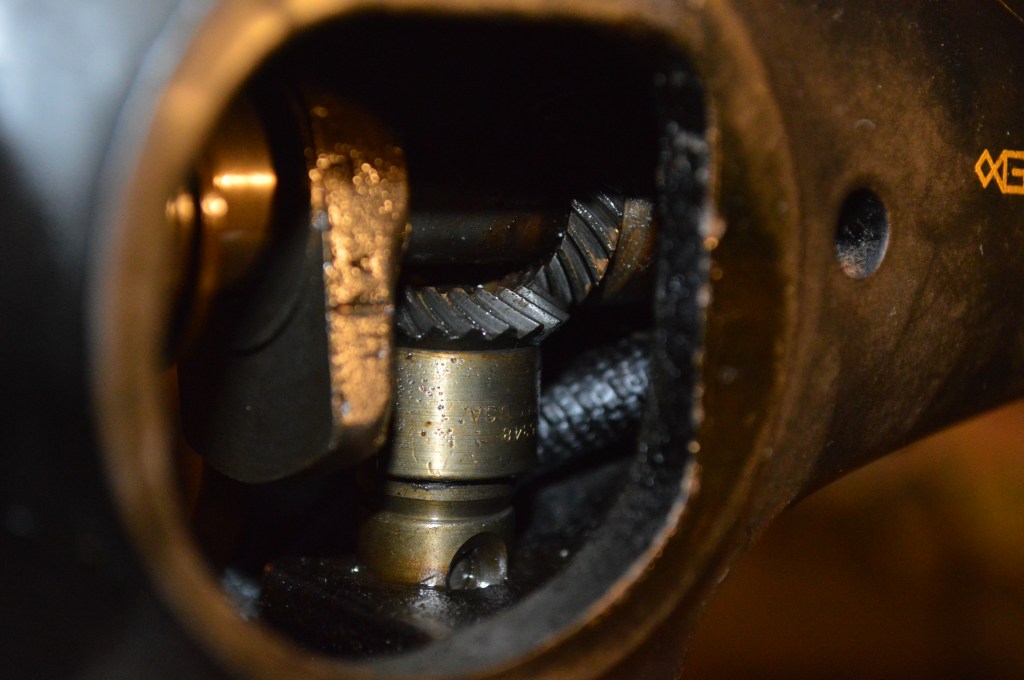
Before 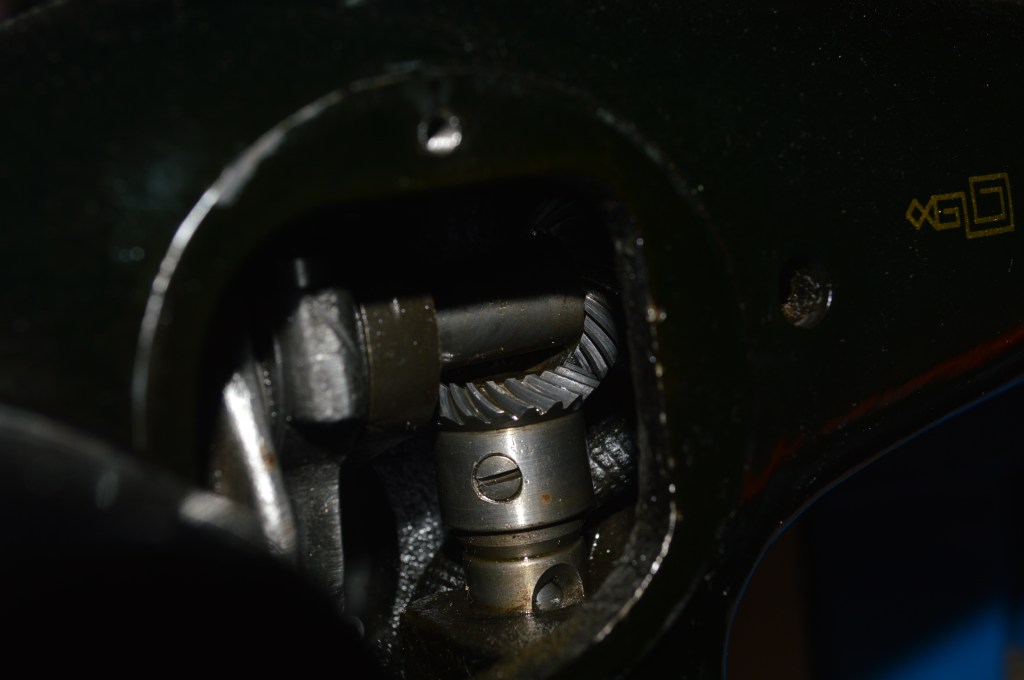
After
The gears are re-lubricated and the shafts spin with very little resistance. This is a testament to the quality of these machines… they can be restored instead of replaced!
Next, the potted motor is restored and rewired. This is a lengthy process and I will use pictures with captions to describe the steps. Only the basic steps are covered. A complete tutorial on how to restore a Singer potted motor is a blog that can be found by following the link: https://pungoliving.home.blog/2019/12/31/a-tutorial-restoration-of-a-vintage-singer-potted-motor/
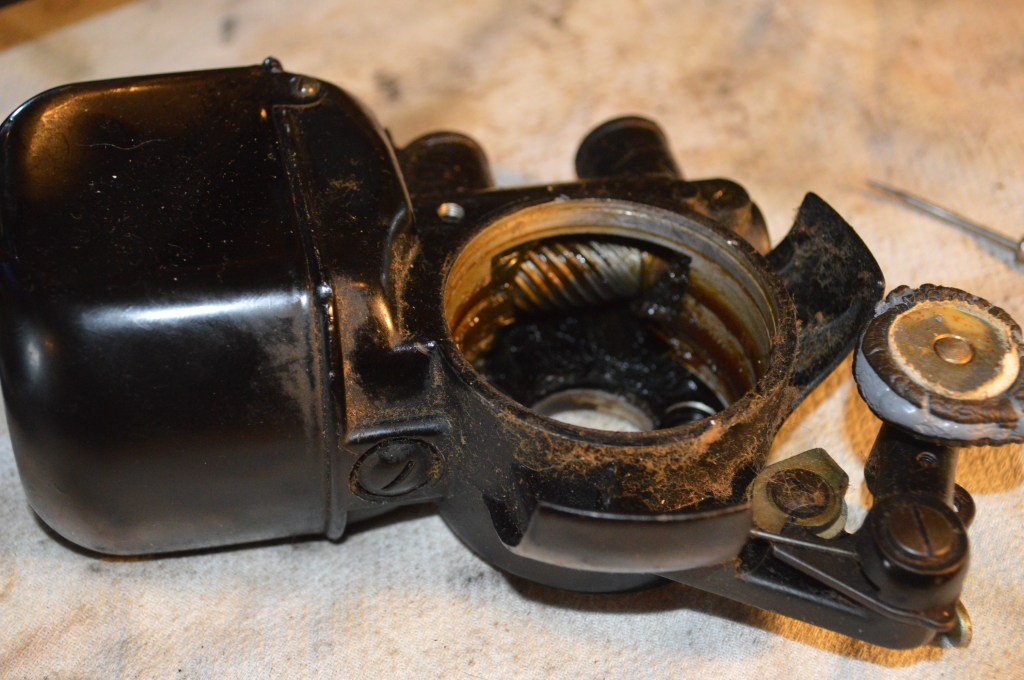
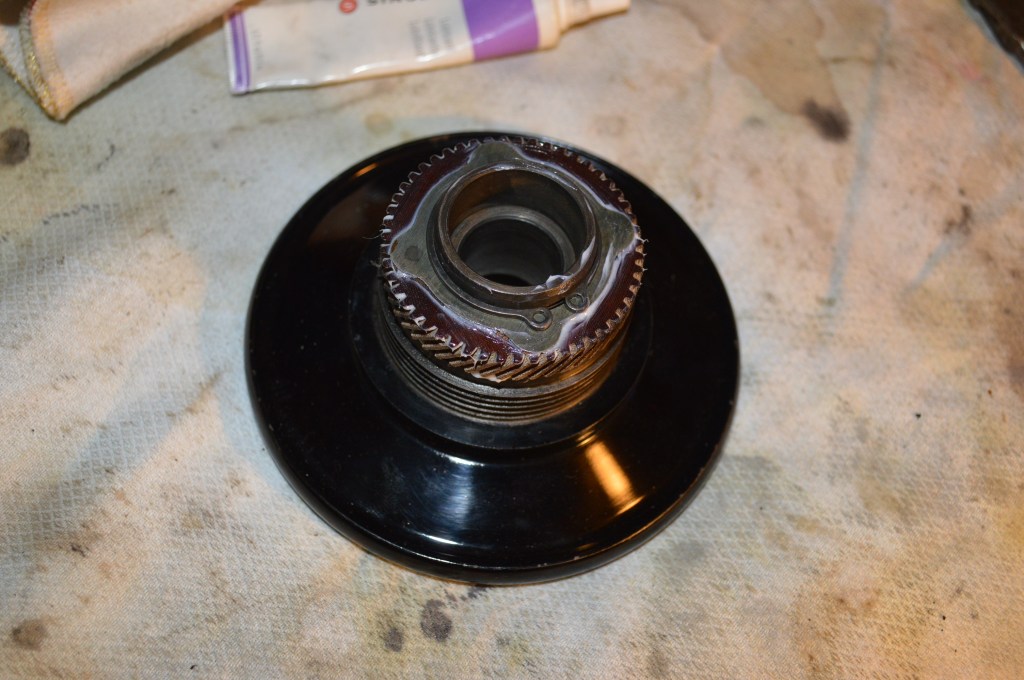
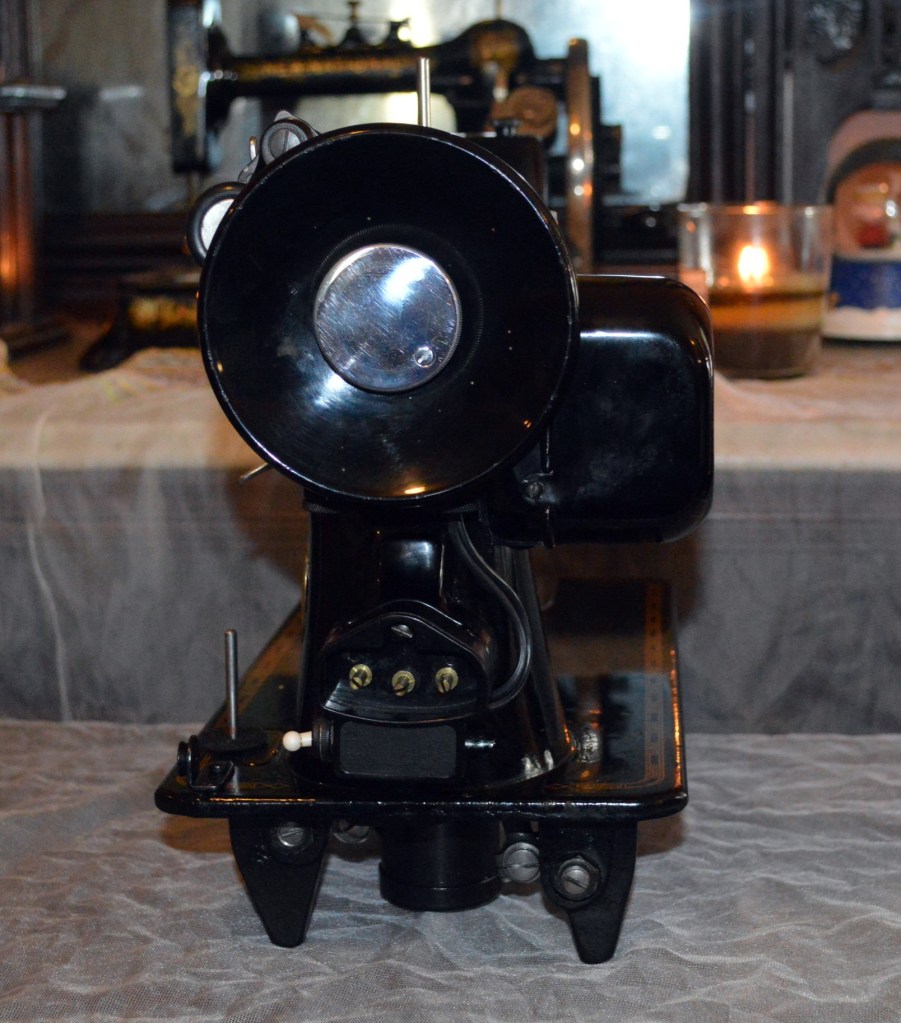
This is a “potted motor” typical on 201 and model 15-91 machines 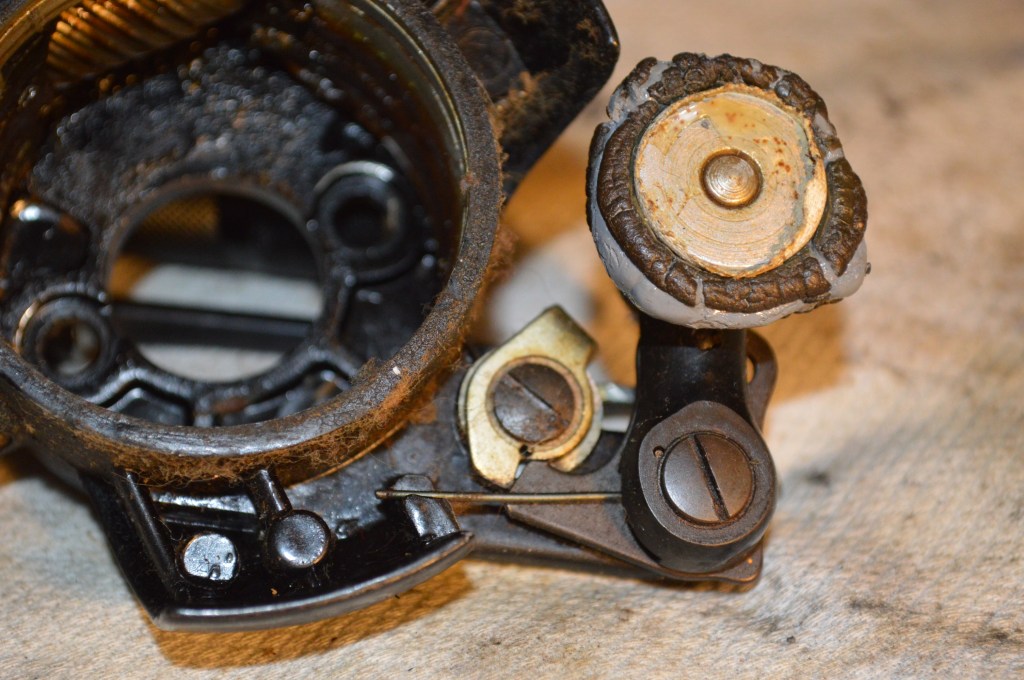
Bobbin winder prior to disassembly – It is part of the motor housing 
Notice spiral gear coated with old grease 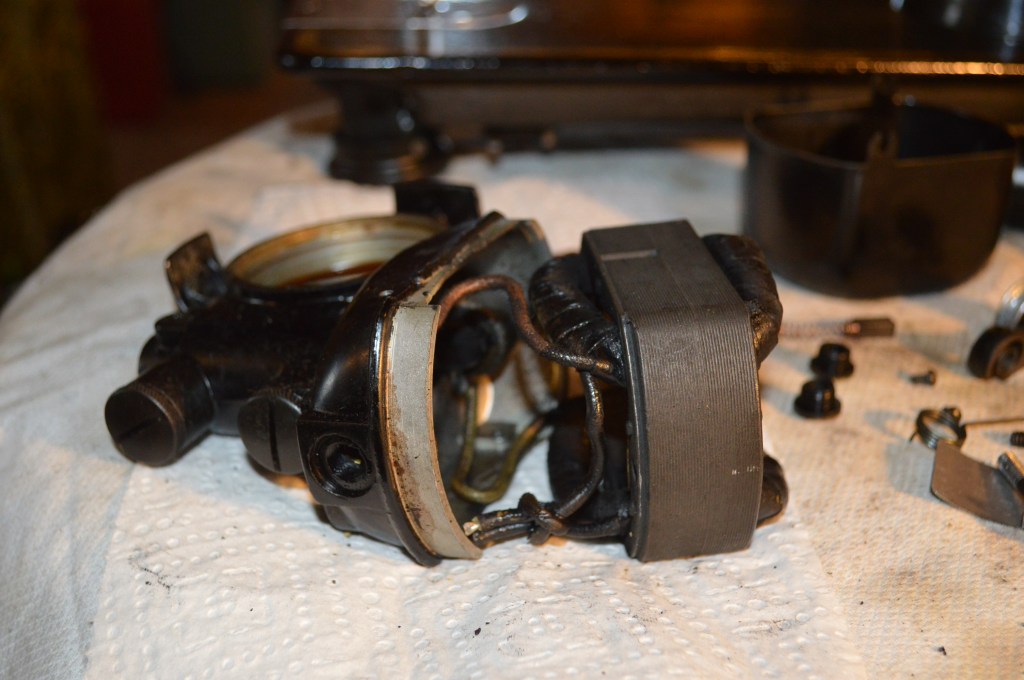
Motor brushes and armature removed 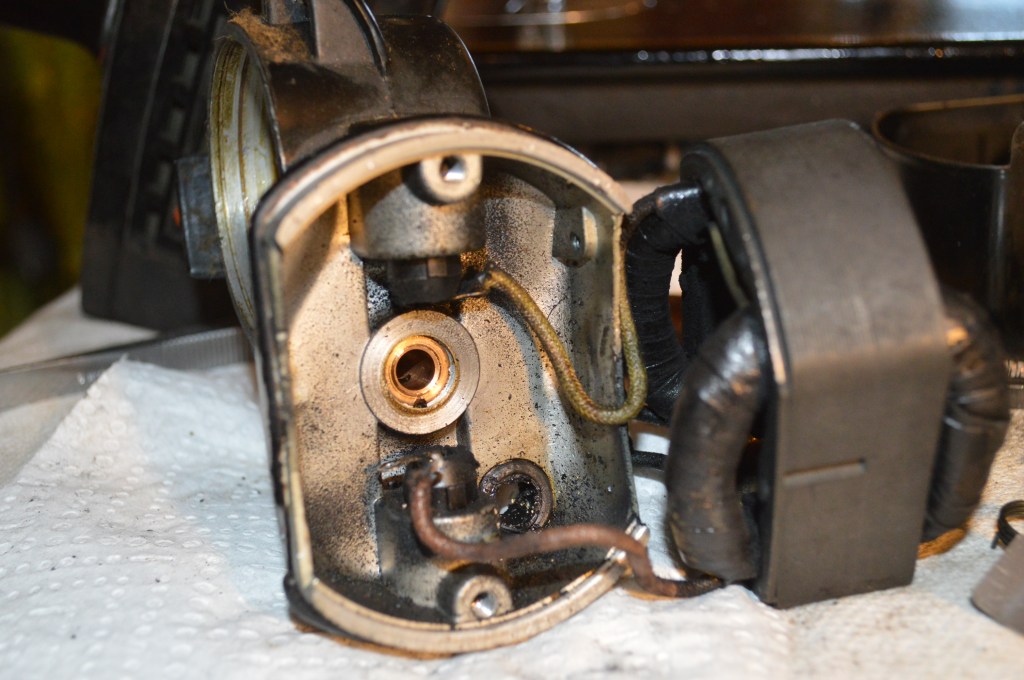
Brush tube wires are desoldered to remove the field coil 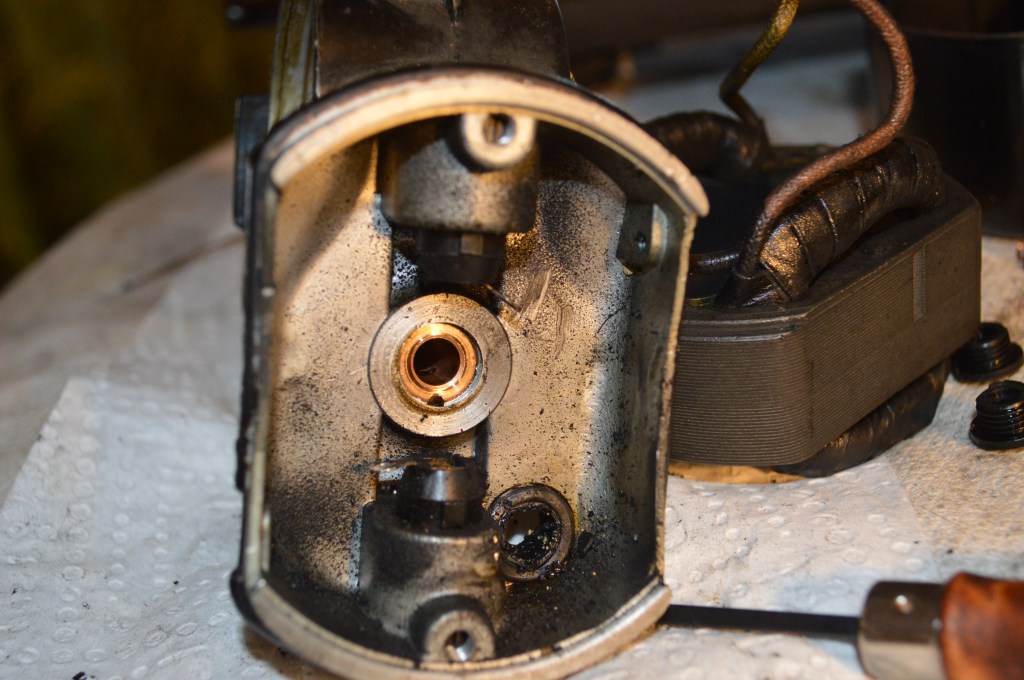
Brush tubes can now be removed – Note the small set screws in the housing over the tubes. loosen these and push the tubes out, not in the housing 
Grease caps removed and wicks and wick springs and retainers are removed 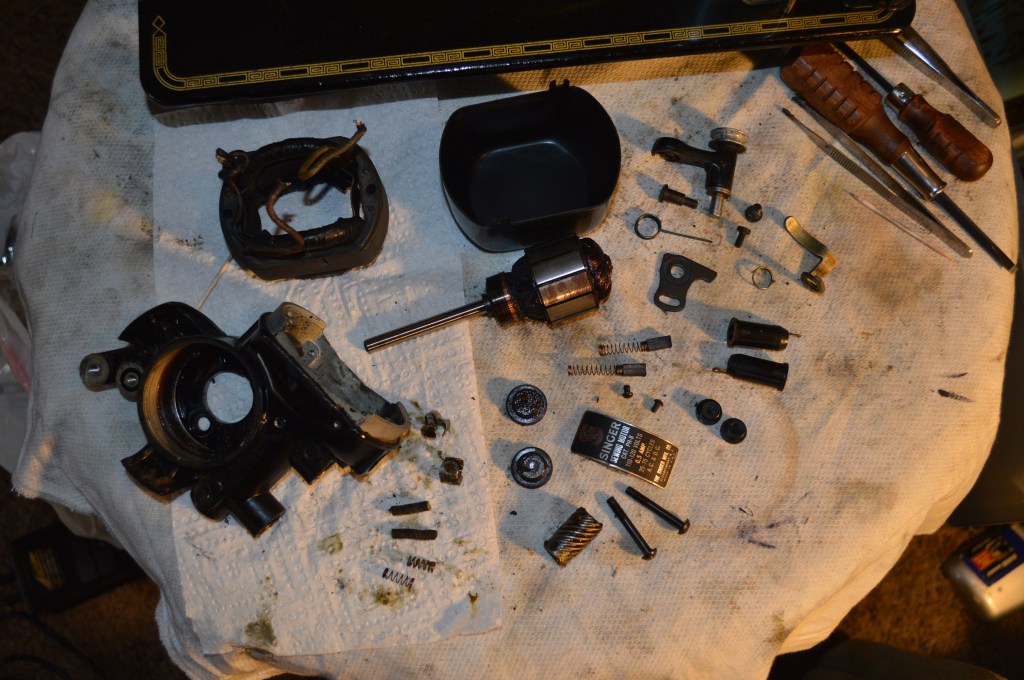
All parts laid out for cleaning 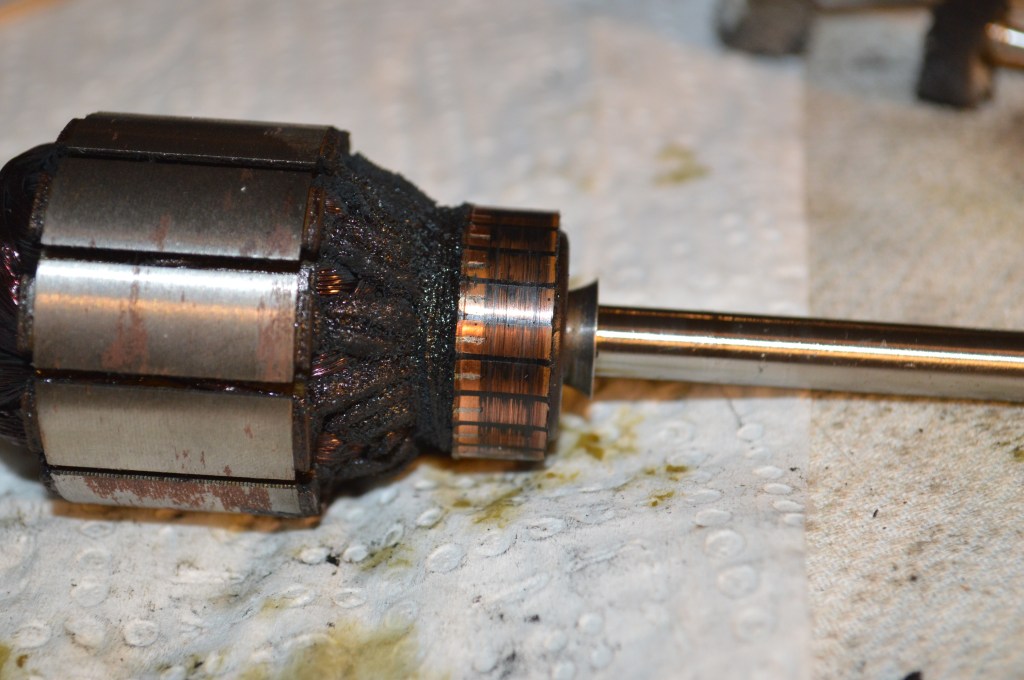
Commutator and armature shaft prior to polishing 
Commutator and armature shaft after polishing 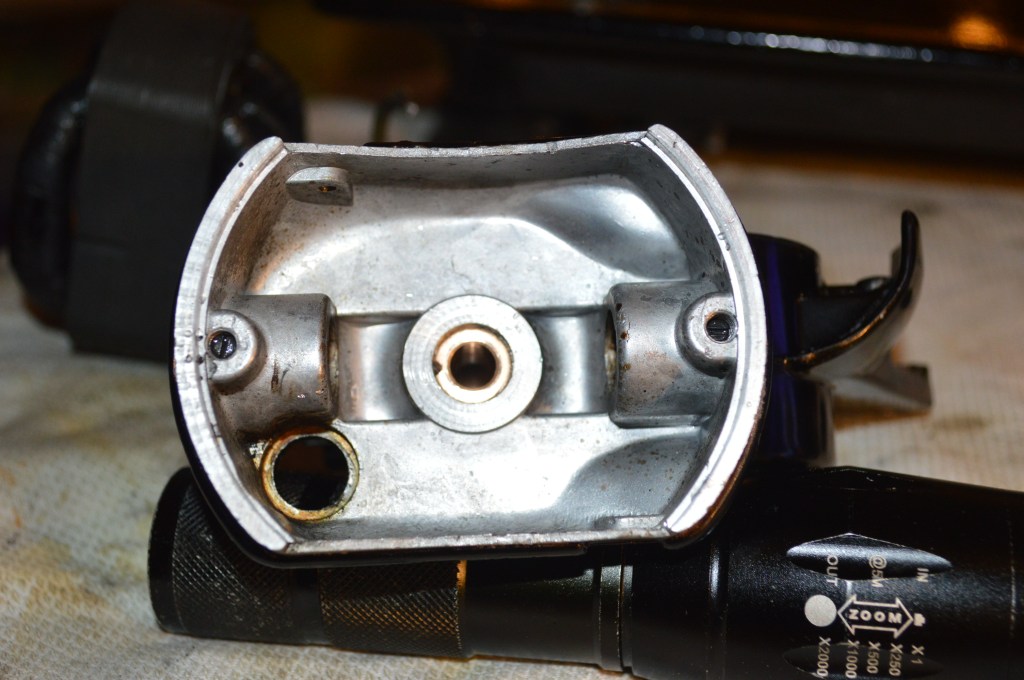
The motor case cleaned with kerosene and compressed air 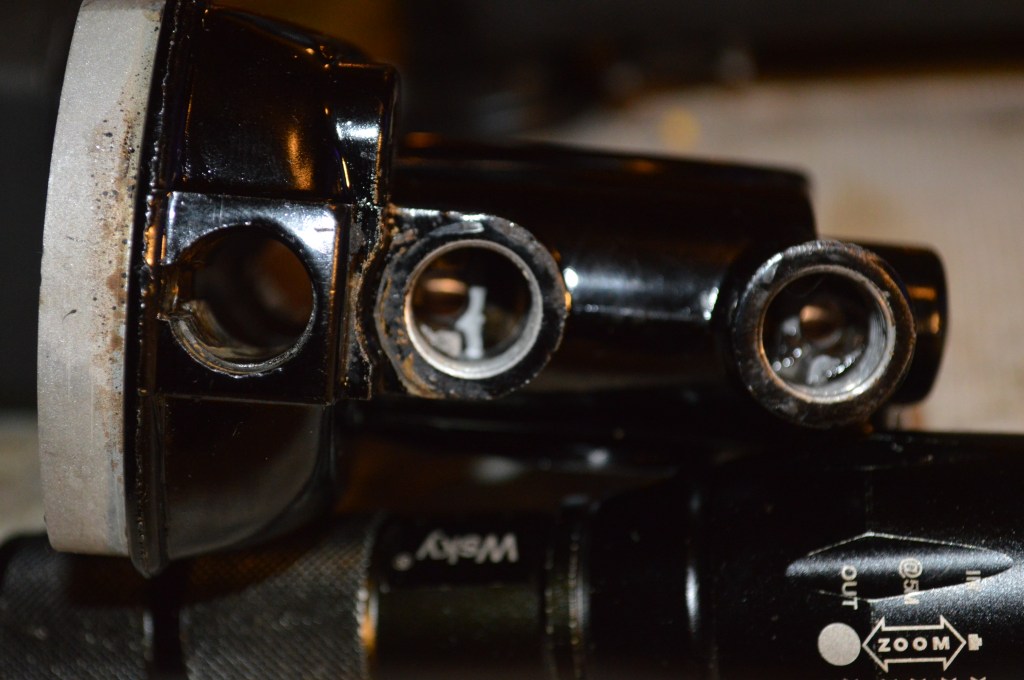
wick tubes are cleaned 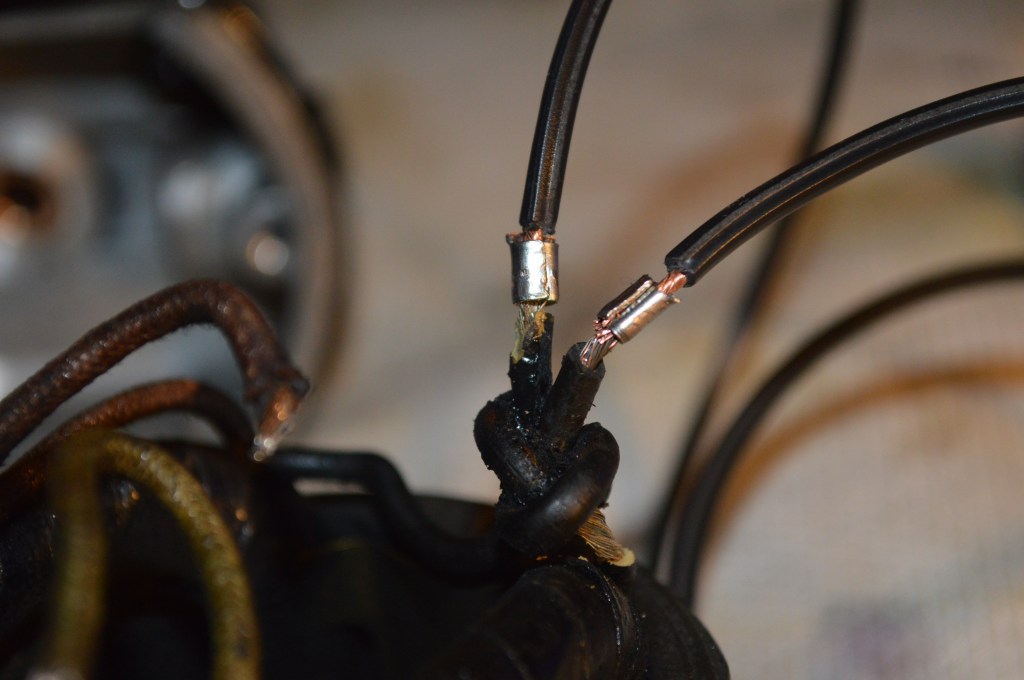
New primary wire attached with solder joints 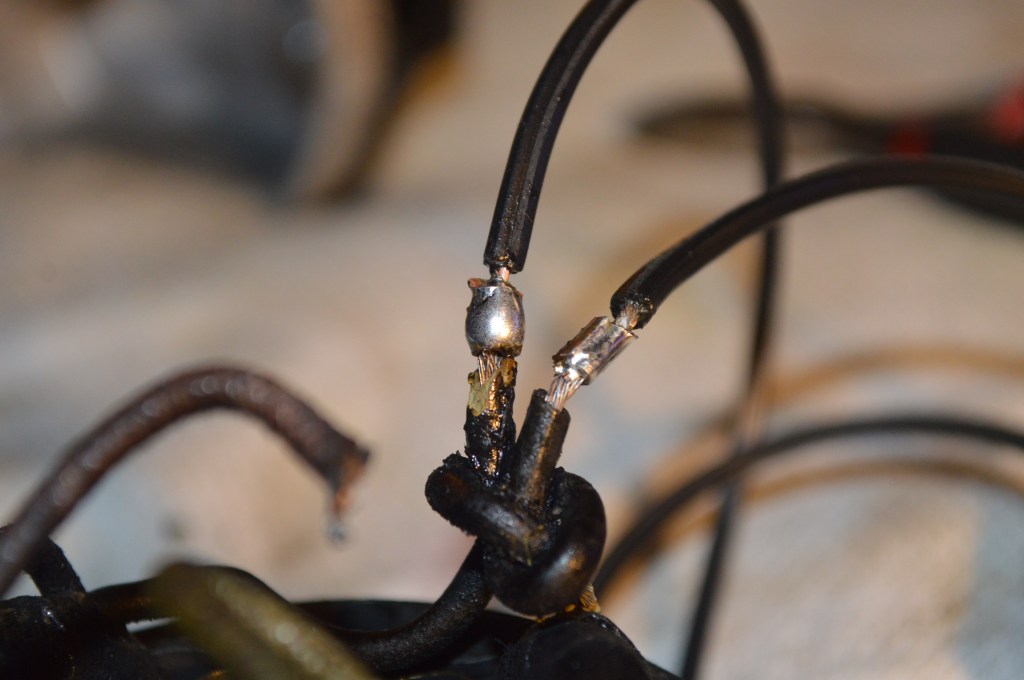
new wires soldered 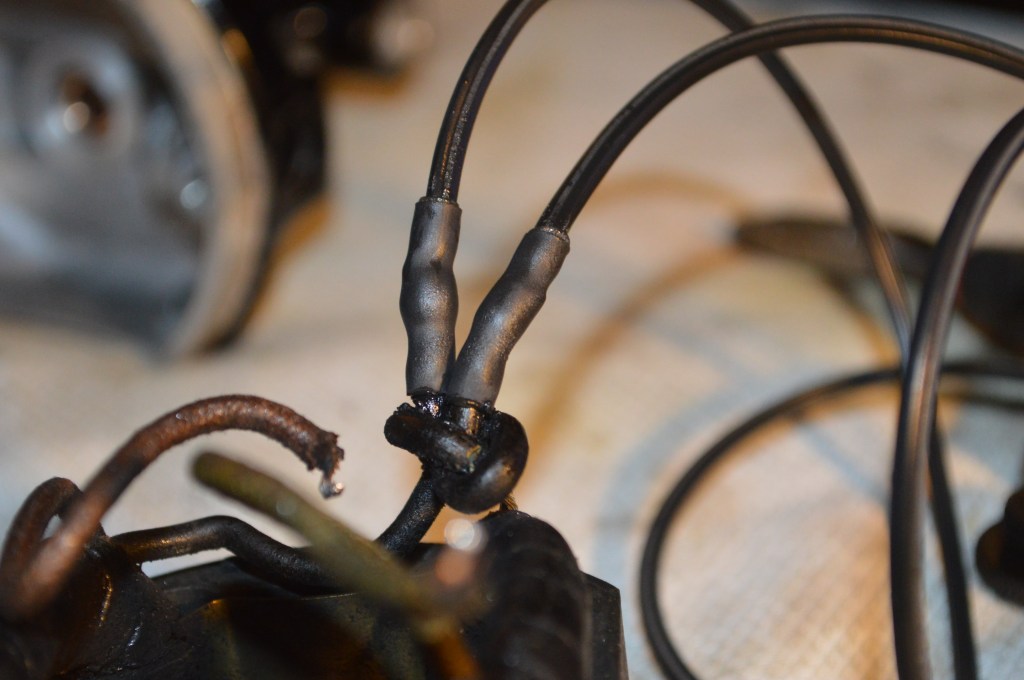
shrink tubing insulates the solder joints 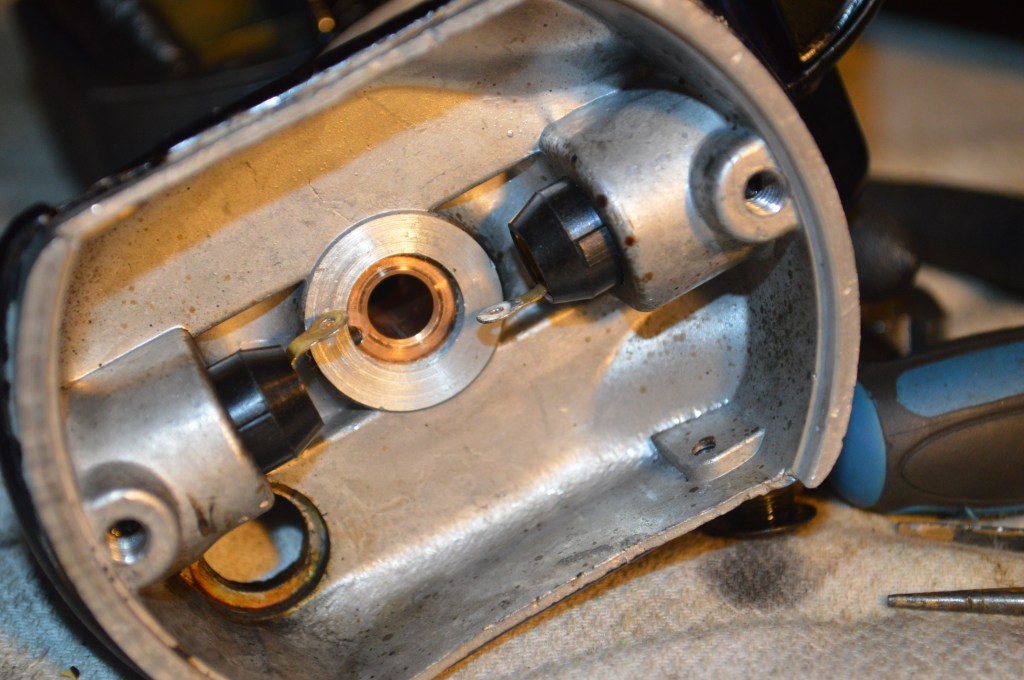
brush tubes are reinstalled 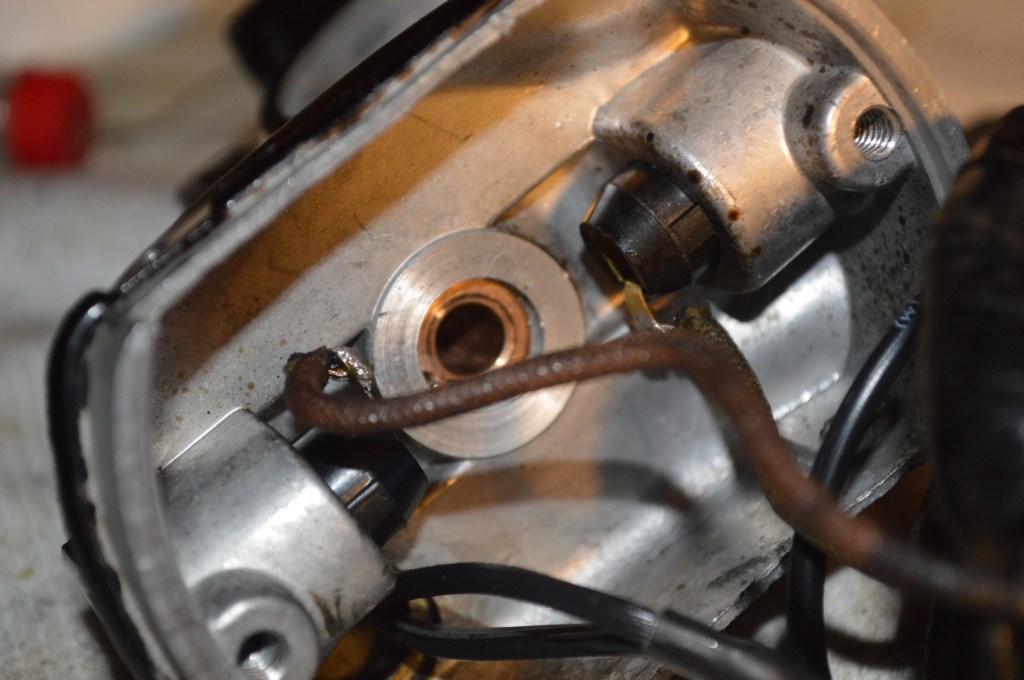
Brush tube wires are resoldered 
Brush before reconditioning… note the curvature from contact with the commutator. 
Brush reconditioned by squaring face 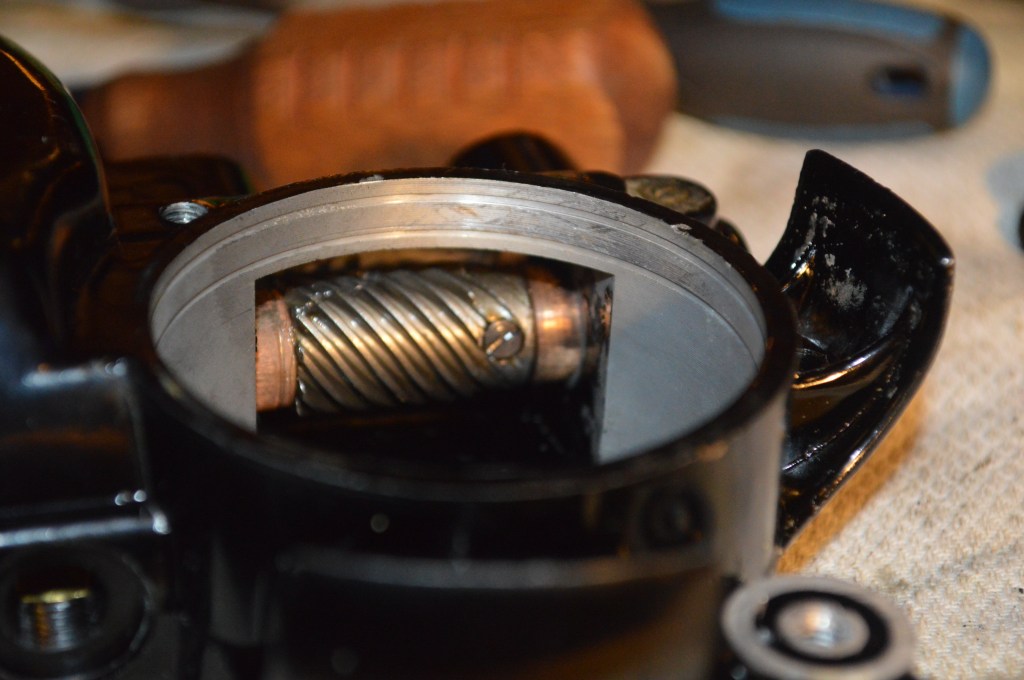
The motor is reassembled and ready for grease 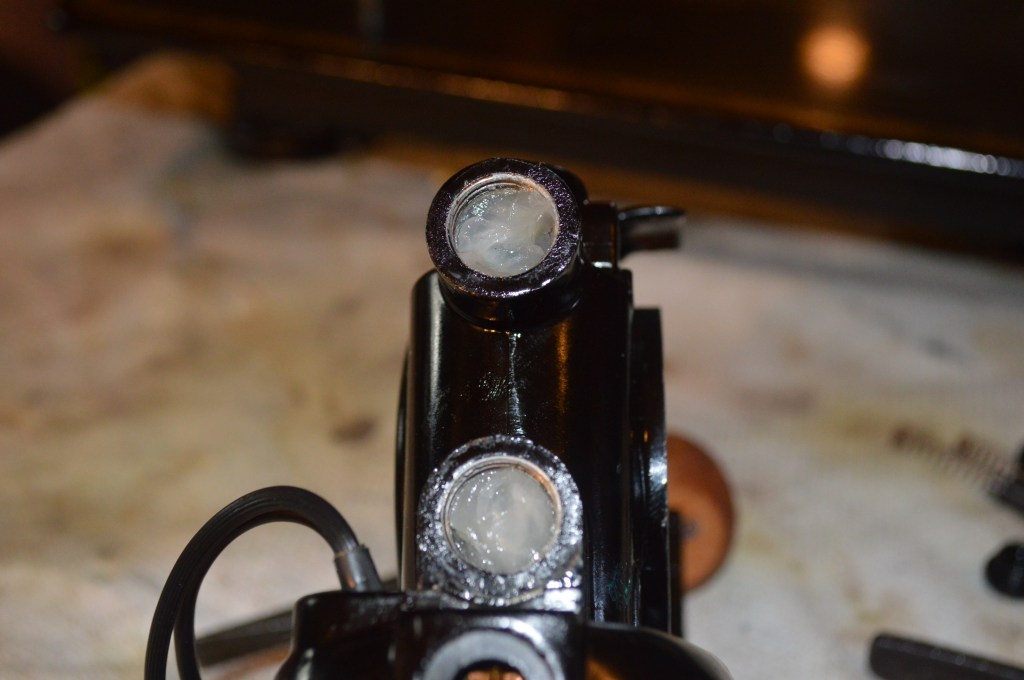
Cleaned grease wicks are reinstalled and the tubes are filled with grease
After the motor and bobbin assembly is reassembled it is test run and this motor runs perfectly… smooth and strong. The motor is set aside for the time being.
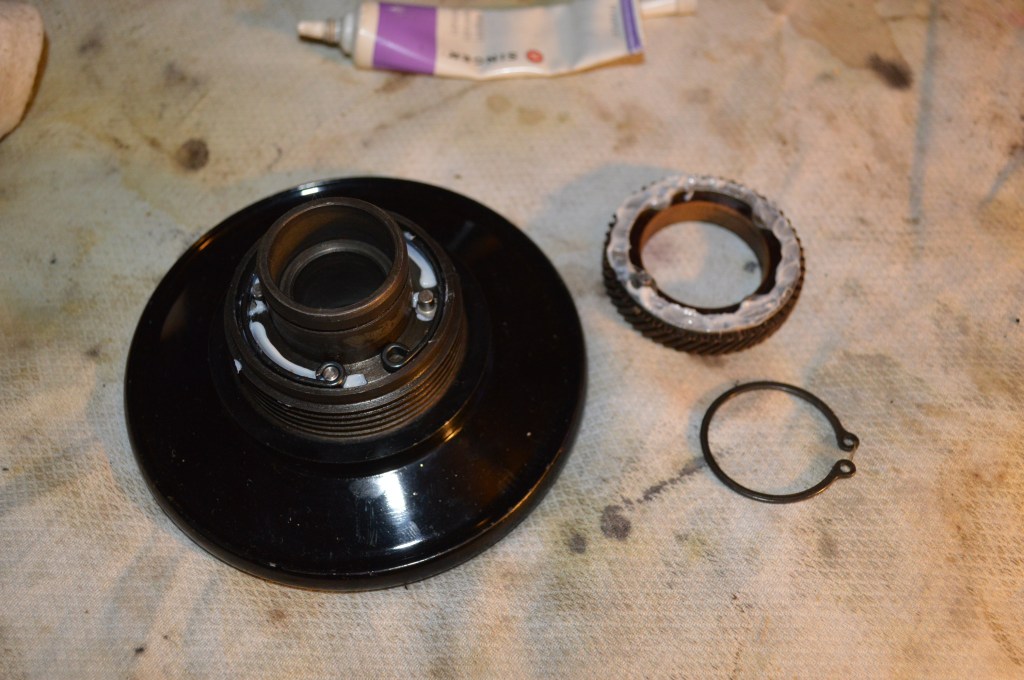
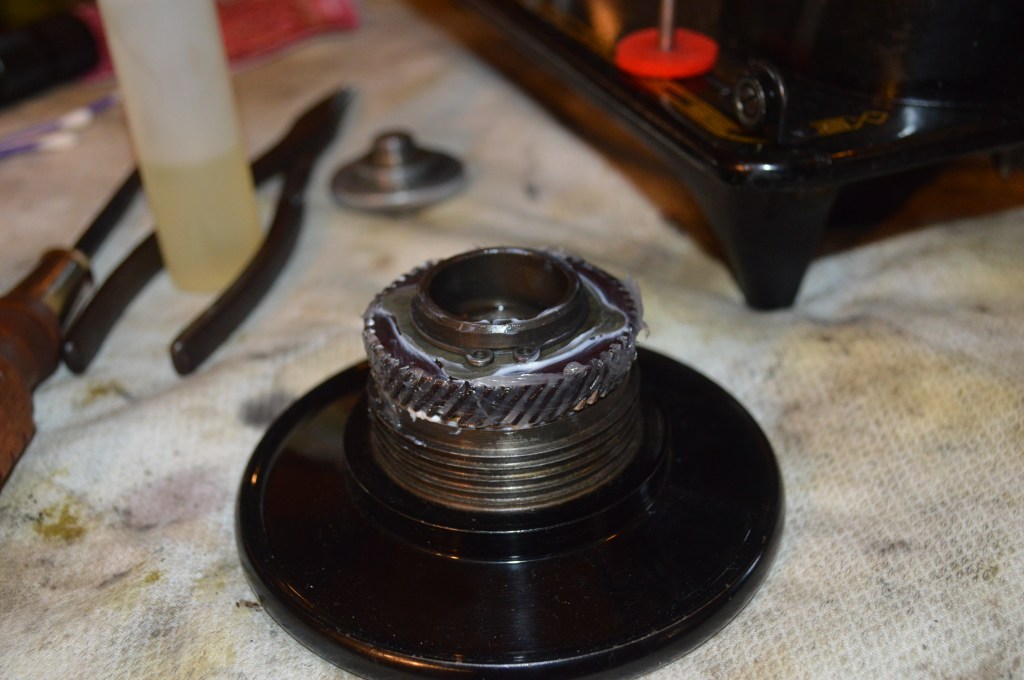
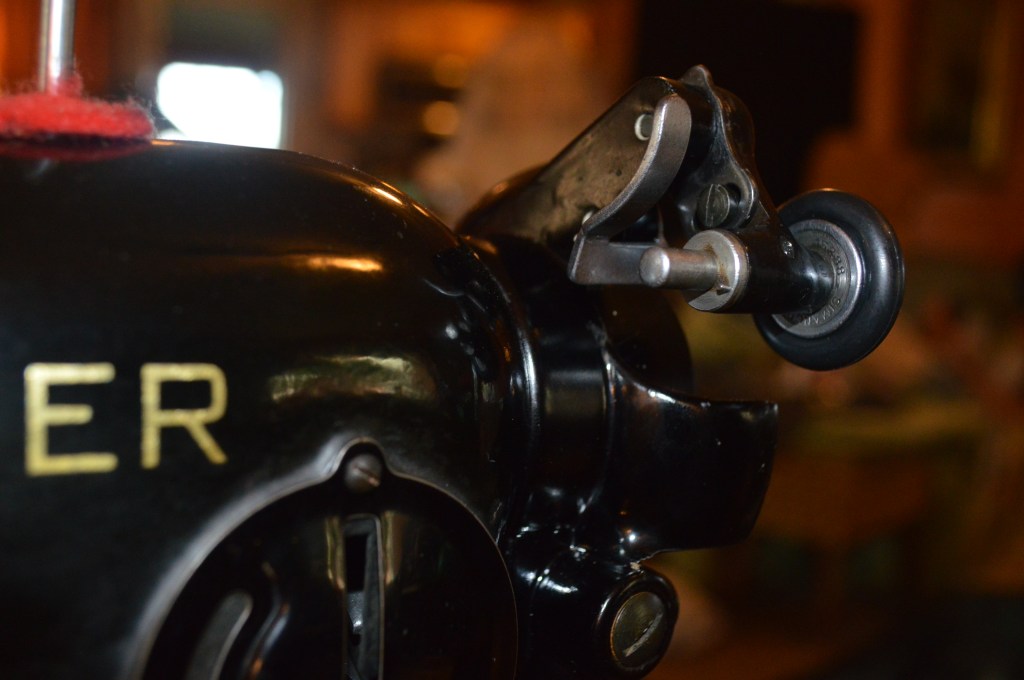
The next step is the restoration of the balance wheel shock suppressor system. The textolite gear attached to the hand wheel is designed to allow a cushioned “flex” when load is applied and released from the sewing mechanism when the machine starts and stops. It acts like a shock absorber in your car, it smooths out the machine when it encounters a shock load (sudden change in fabric thickness for example). Often ignored or overlooked, it is disassembled, cleaned, and reassembled. A tutorial on how to do this can be found by following the following link: https://pungoliving.home.blog/2020/01/08/a-tutorial-restoring-a-singer-201-2-or-singer-15-91-balance-wheel/
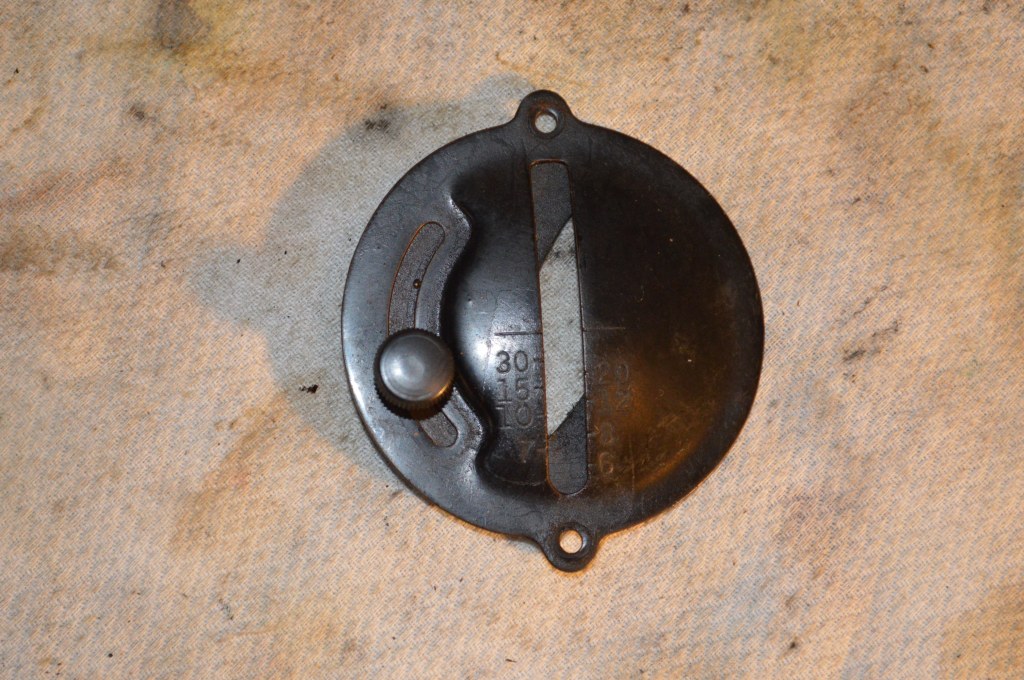
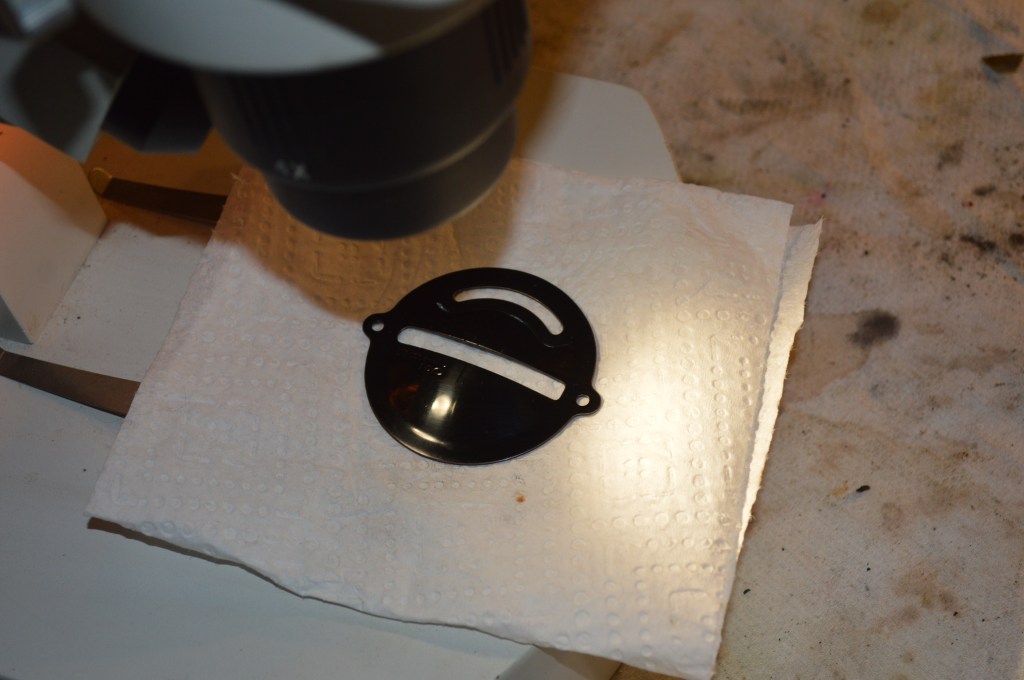
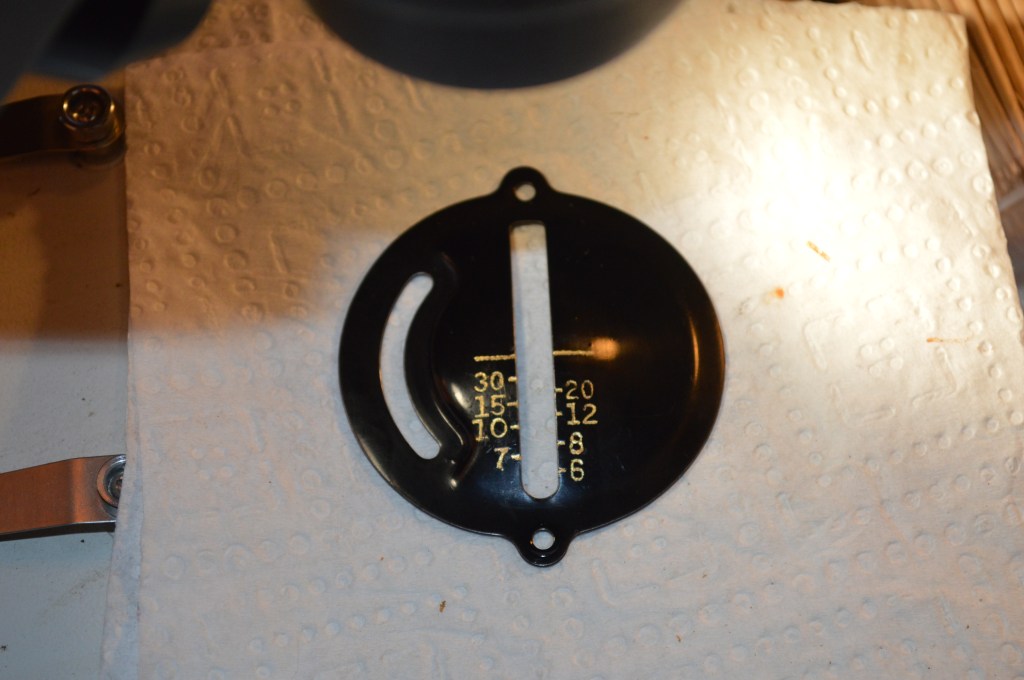
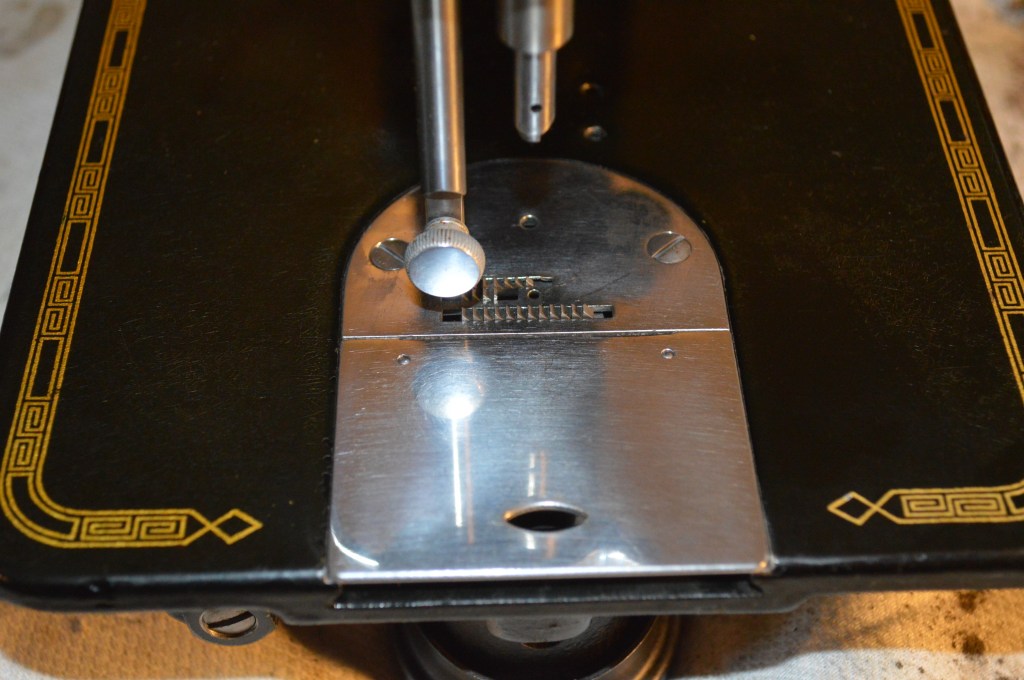
The stitch plate cover originally had gold decals to highlight the stitch length graduations. The stitch length graduations are actually impressed into the plate. The decal is gone so I am going to fill the graduation marks with gold paint. To accomplish this, I needed to use a 20X microscope and an artist brush trimmed to the width of a few human hairs. The gold lettering is very fine, and my hands are not very steady so I need all the help I can get.
The next step is to take on the cosmetic restoration. The first step is to deep clean the entire machine. The bottom assemblies are installed to allow the machine to sit flat and avoid excessive handling of the machine later.

After cleaning, the condition of the machine is greatly improved but still somewhat dull… the shellac has oxidized from lack of nourishment from oil. There are also some decal and paint defects that need fixing. The decals are repaired with gold paint while the paint chips are color matched with custom mixed lamp black paint. A very fine thin artist brush and a 10X loupe is used to stay within the borders and fill the chips on the decals. The paint chips are much easier and a larger brush is used. To get the original depth of shine, the original shellac coating needs to be smoothed and the layer of old deteriorated shellac removed. These steps are not much different than refinishing a piece of furniture, but on a sewing machine, the finish must be much smoother. This is accomplished by wet sanding the machine with successive grits of sandpaper. Boiled linseed oil is used as the liquid medium and the machine is sanded with 800, 1000, 1500, and then 2000 grit sandpaper. Care is taken not to remove the the old shellac or sand down through the decals, but only to smooth it by removing the dull oxidized layer. Then the decals and paint can be repaired.
Machine is clean, but shellac finish is still dull 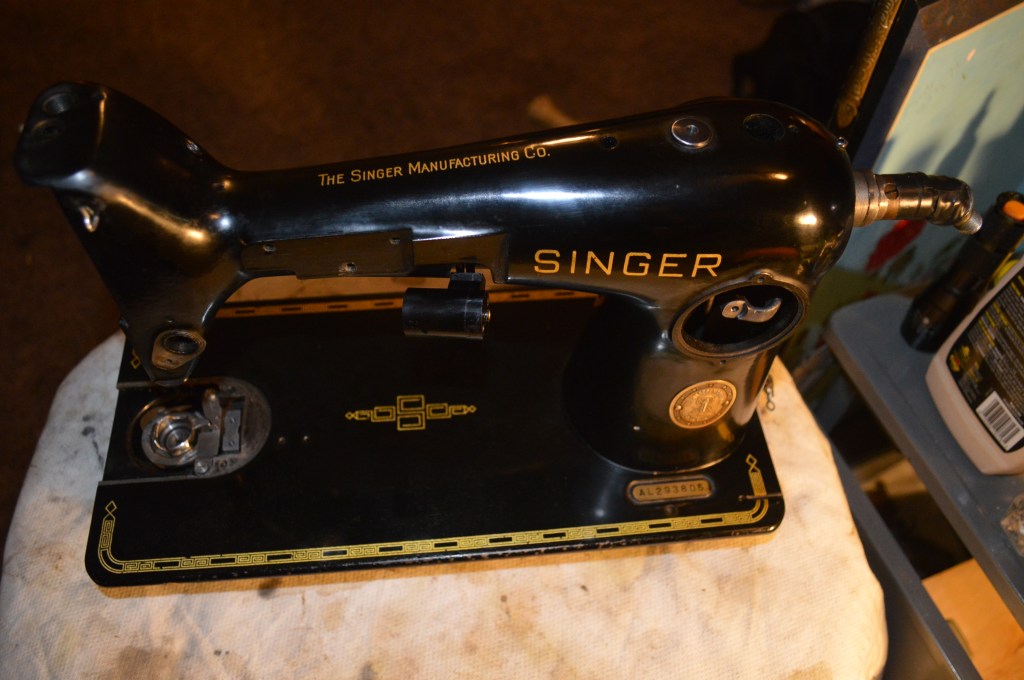
Machine has been wet sanded using linseed oil and successive grits of 800, 1000, 1500, and 2000 grit sandpaper 
After sanding, the black color shows through and the finish is exceptionally smooth 
“N” and “G” in Decal scratched 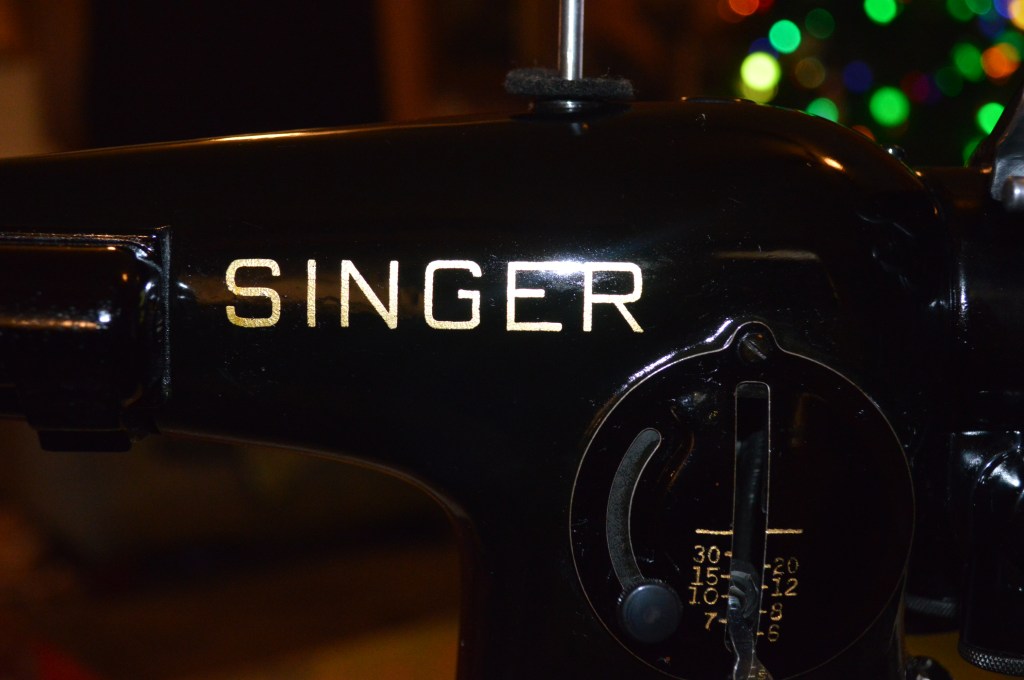
“N” and “G” in Decal repaired 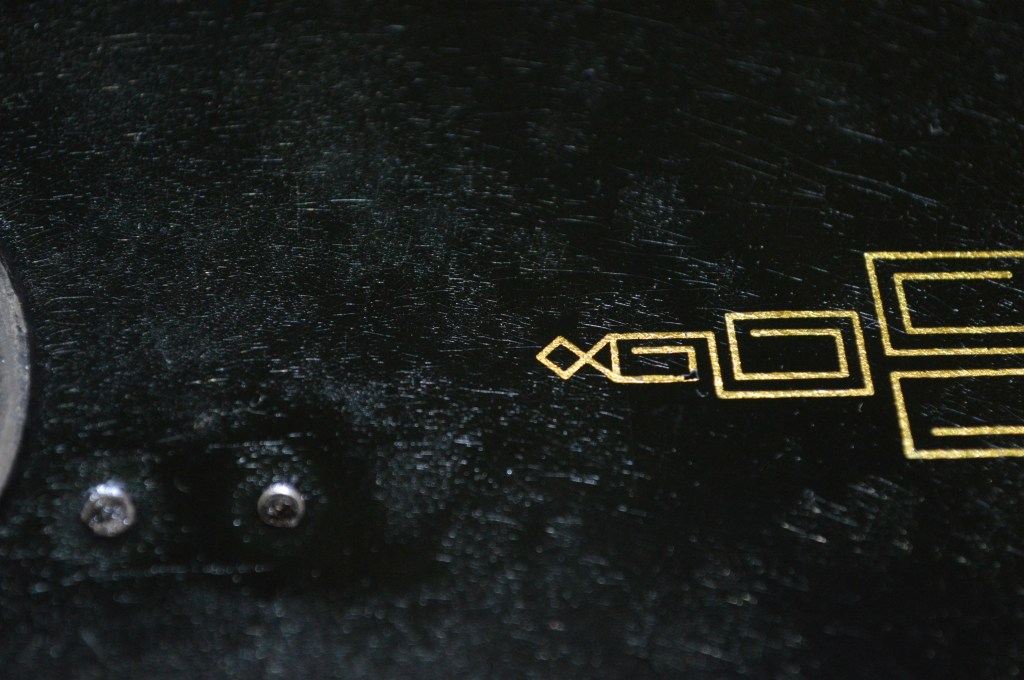
Chipped bed decal 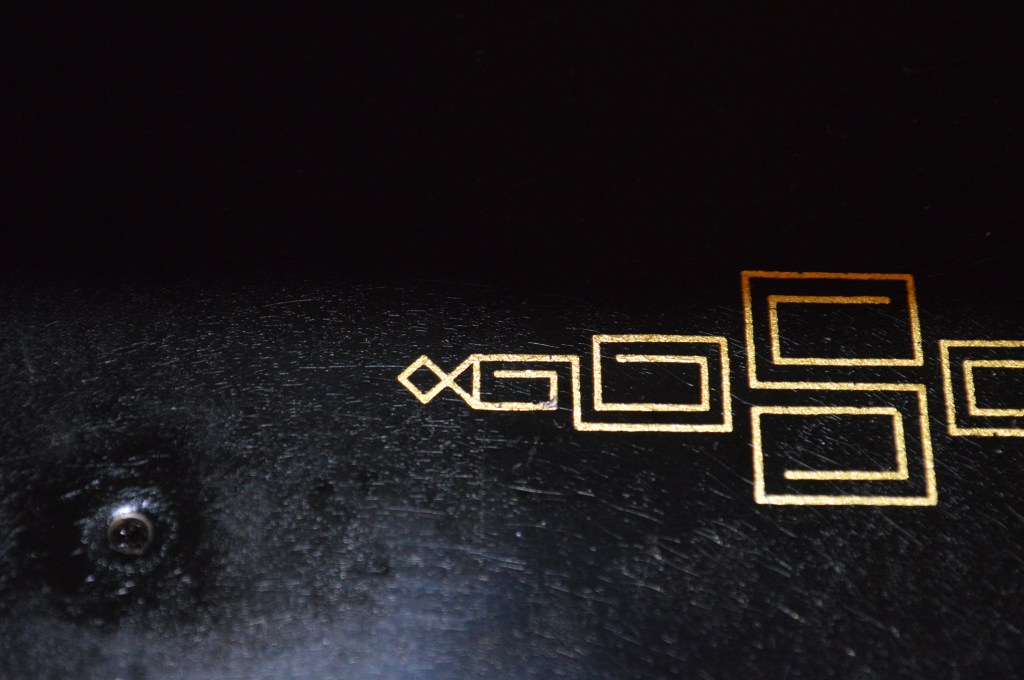
Decal repaired 
Chipped decal 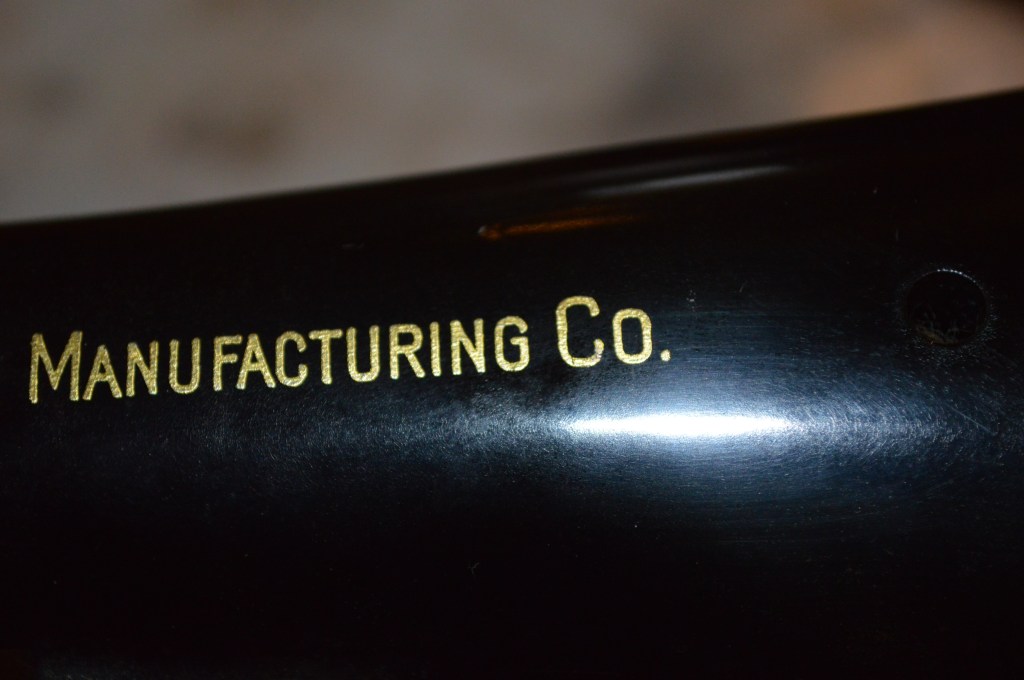
Decal repaired 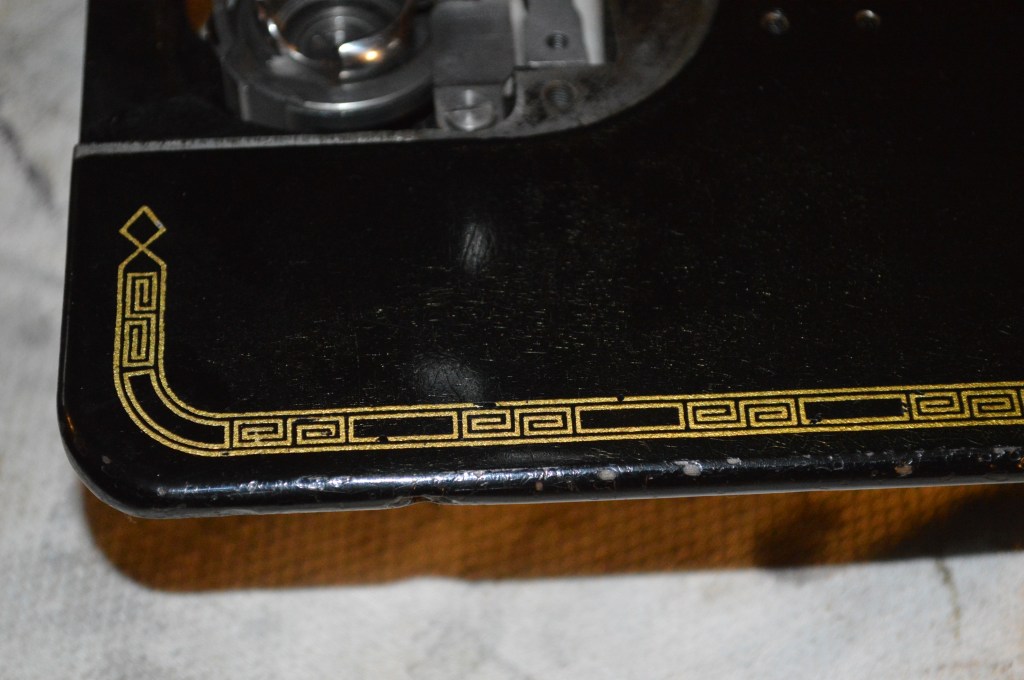
Chipped decals 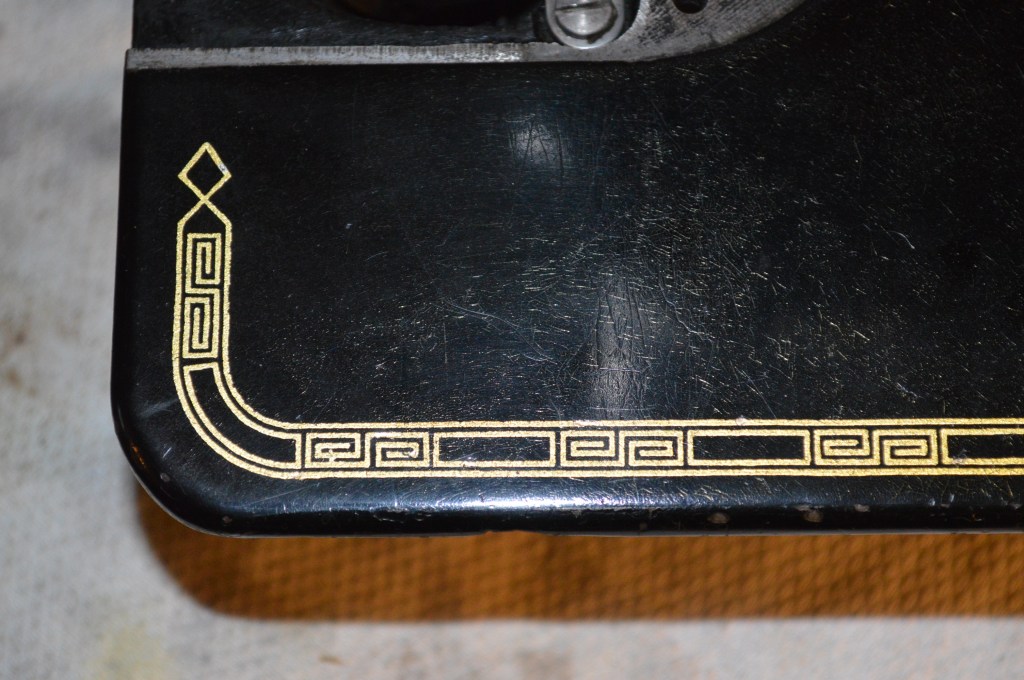
Decals repaired 
Front edge prepped for color matching 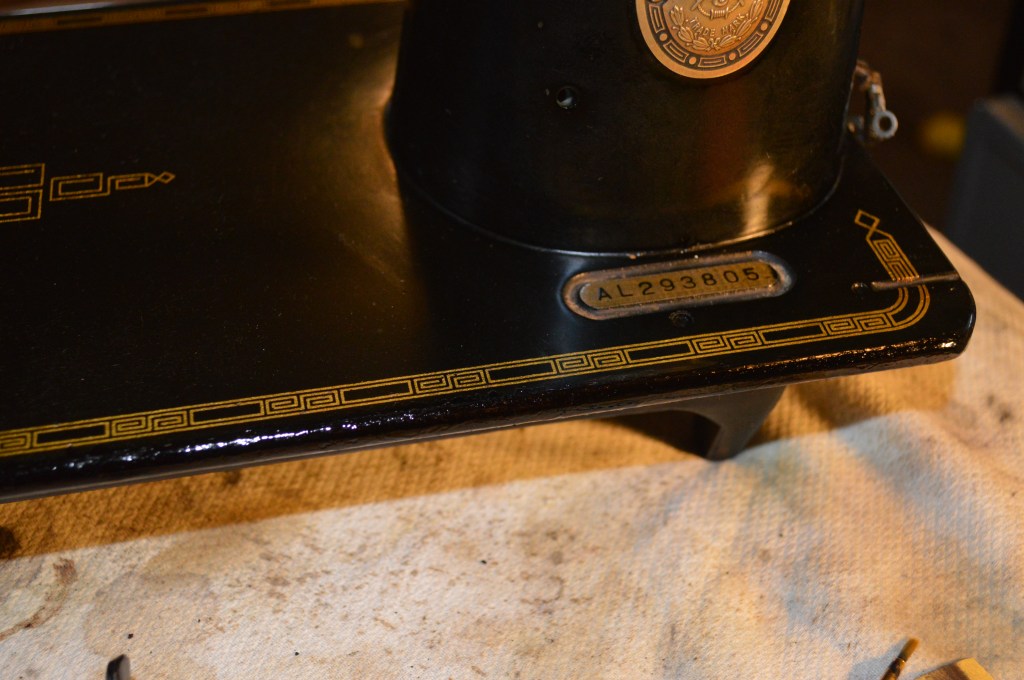
Front edge color matched 
Front edge before color matching 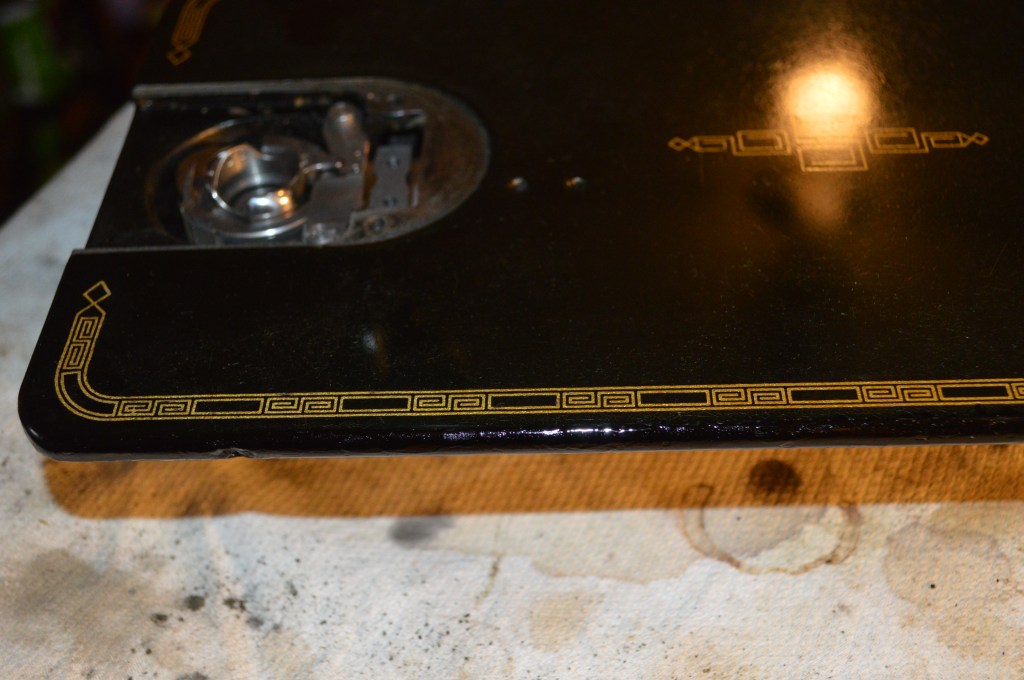
Front edge color matched
Now I can bring out the best potential that the original black japanned finish has to offer. You may have noticed the slight crazing in the paint texture on the bed. Shellac dissolves shellac and this will disappear in the next few steps. Recall the machine was wet sanded with successive grits of sand paper using linseed oil as the sanding lubricant. Linseed oil is compatible with shellac and is in fact a component in the french polishing method. The benefit of linseed oil is twofold. It nourishes the existing shellac finish, and prepares it for the new shellac finish. The machine is set aside for three days to allow the linseed oil to “cure” before any residue is wiped off. After this time, the machine is wiped down and sprayed with 4 coats of shellac.
Following another 48 hours of cure time for the shellac, The machine is again wet sanded with 1000, 1500, 2000, and then 2500 grit sand paper. The final finish is obtained by glaze polishing the machine to bring out the smoothest finish I can obtain. The result is a machine with an original black japanned finish, corrected decals, and a new coat of protective shellac. Its a labor intensive process, but the result is fantastic. Not forgetting the light shroud, it was stripped of paint, sprayed with the custom mixed lamp black paint, and coated with shellac. The color is perfect.
Next, the nickel plated parts are cleaned and buffed and polished on a 6″ buffing wheel. The smaller bits are polished with jewelers rouge and a dremel tool.
Before… 
After… 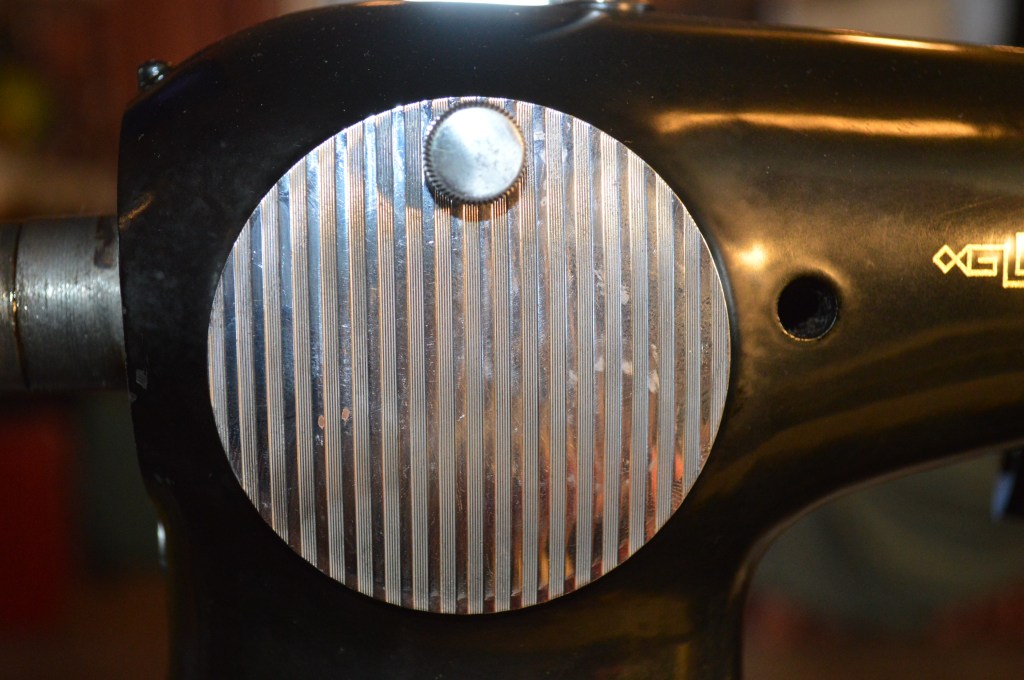
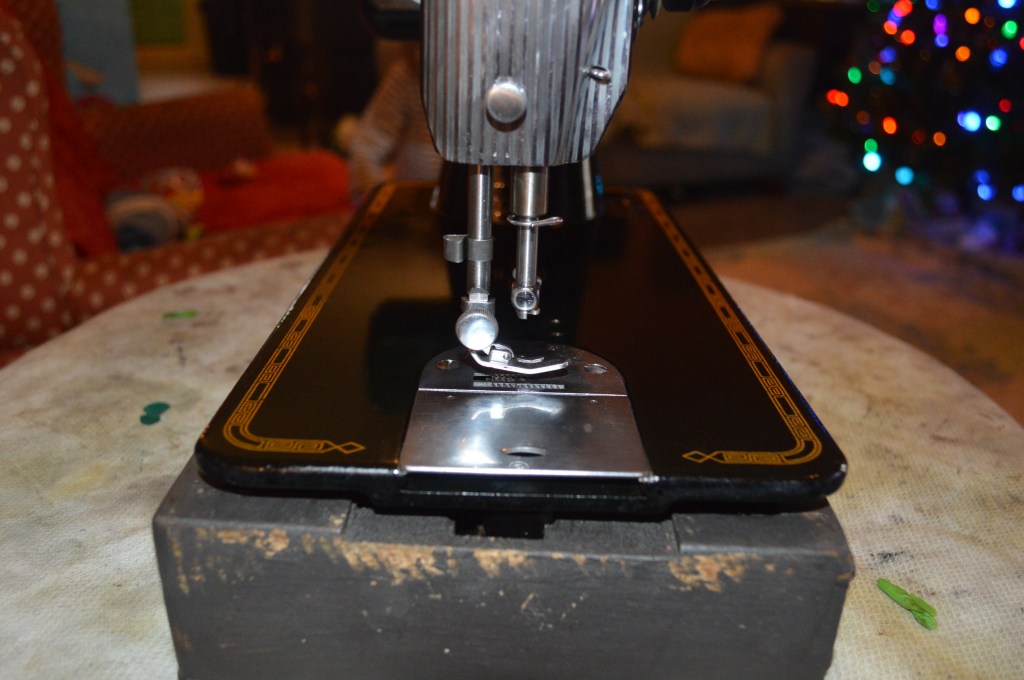
All that’s great, the machine is shiny… but what has really been accomplished by all this cosmetic detail? Well, its part of a detailed restoration. But in truth, the machine would sew the same if it was sand blasted and painted battleship gray. Ask yourself where the restoration really counts. Bottom line, it counts where the stitch is made, and a great stitch requires smooth delivery of the fabric under needle and through the feed dogs. Proper adjustment is critical, but long story short, there is a detail I want to attend to on this machine. The bottom of the presser foot comes in contact with fabric, so it is polished glass smooth to reduce drag between the fabric and the feed dogs. It might be a small detail, and beats me if it matters, but in a sewing machine restoration, all details matter.
Before polishing 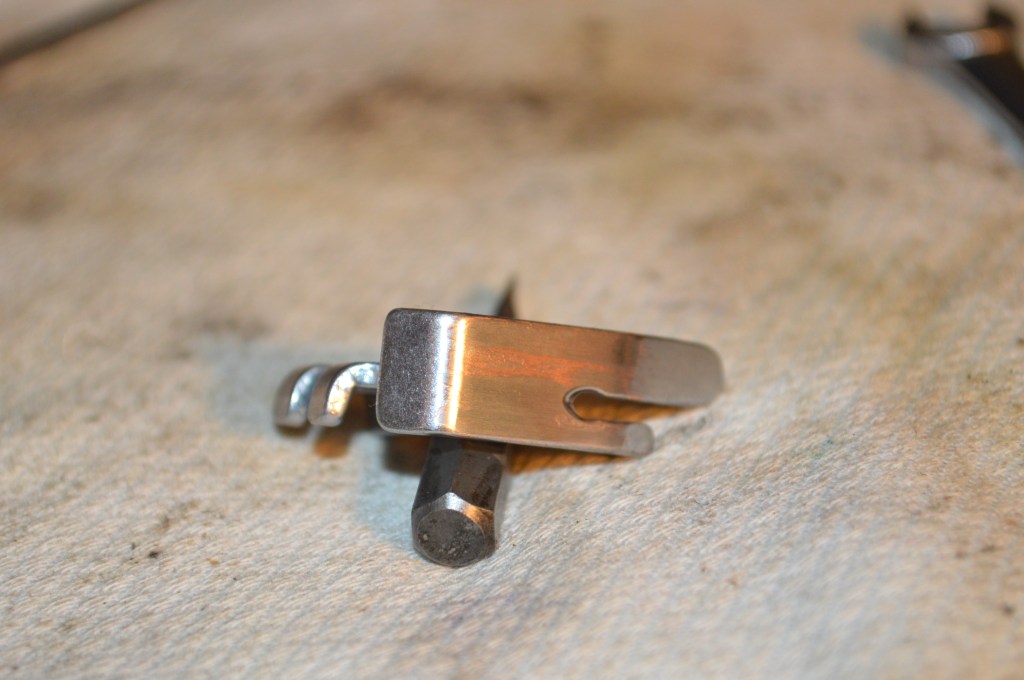
After polishing
The machine is carefully reassembled to avoid damaging the new finish, and it is ready to adjust by sewing.
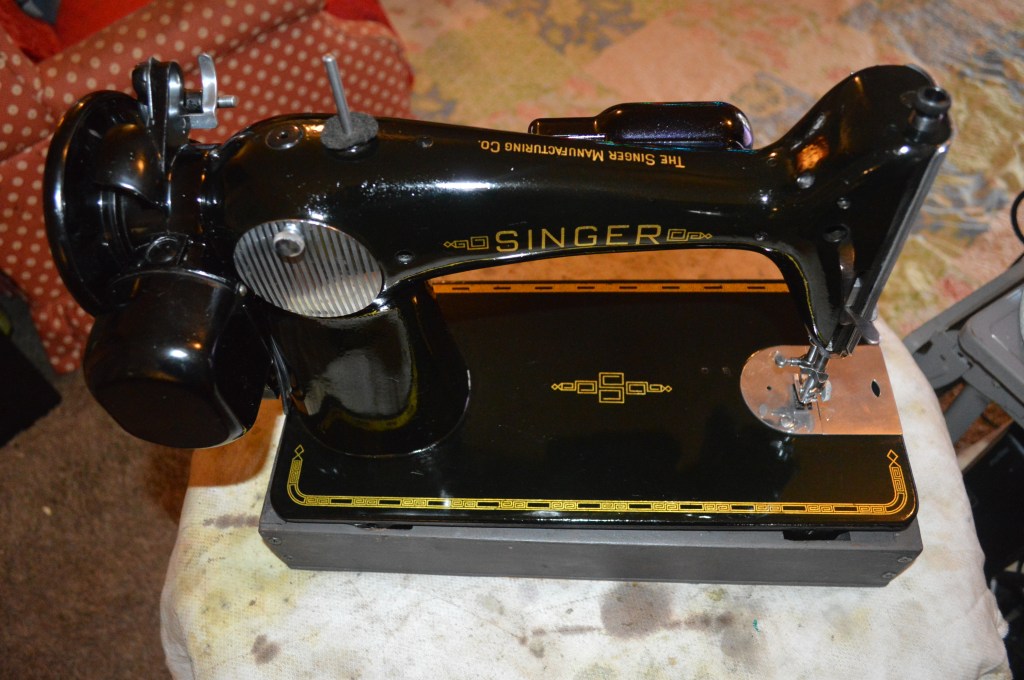
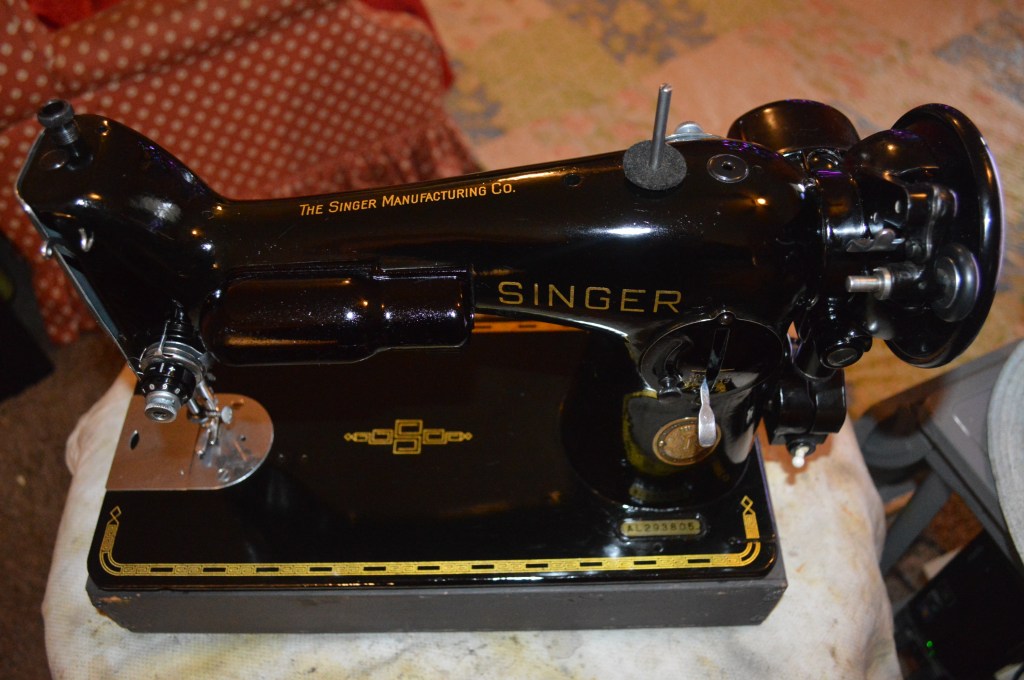
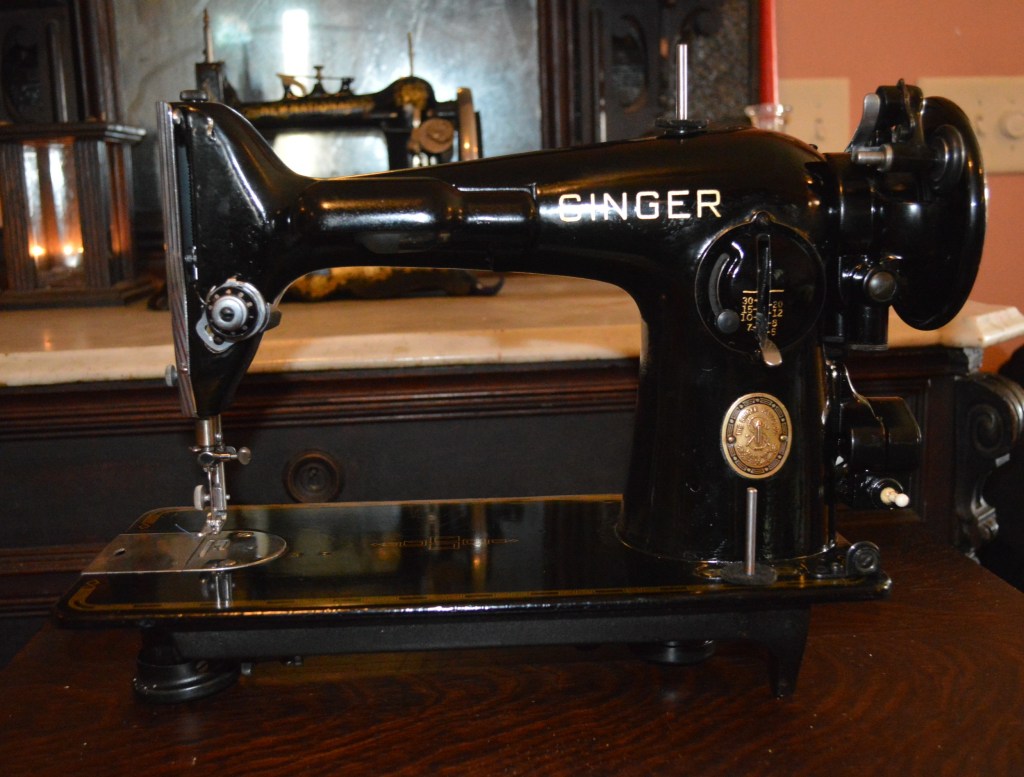
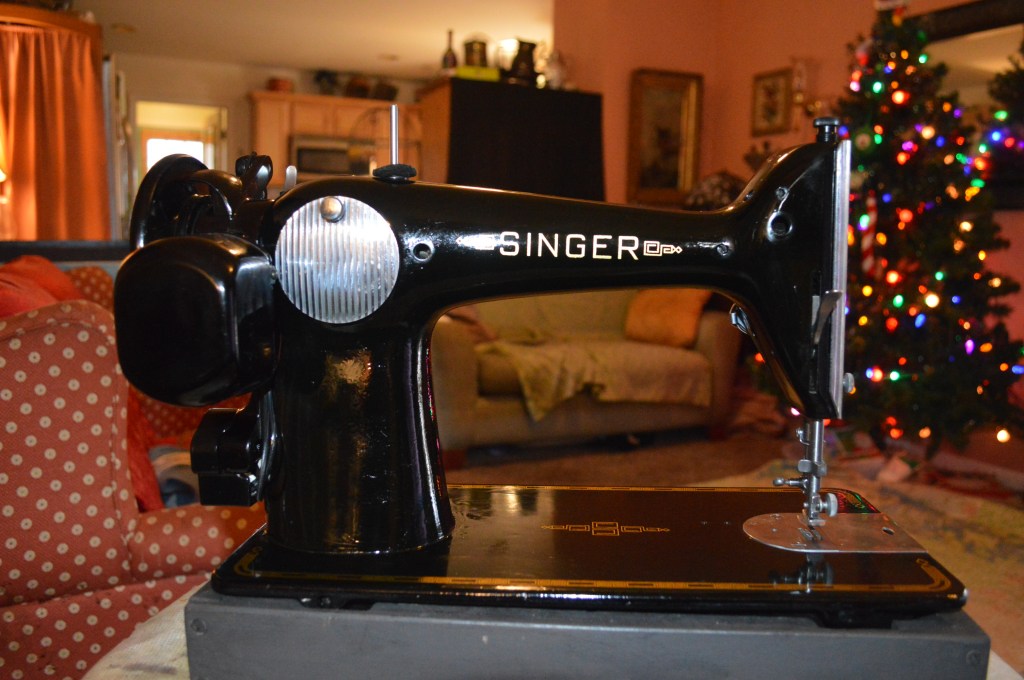
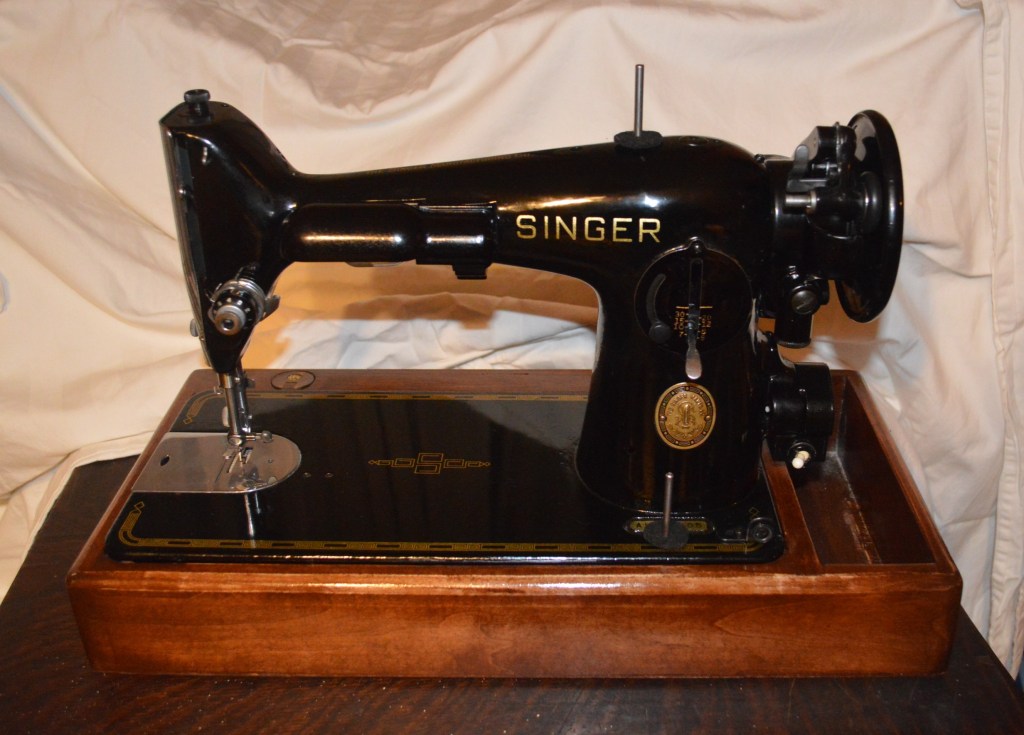
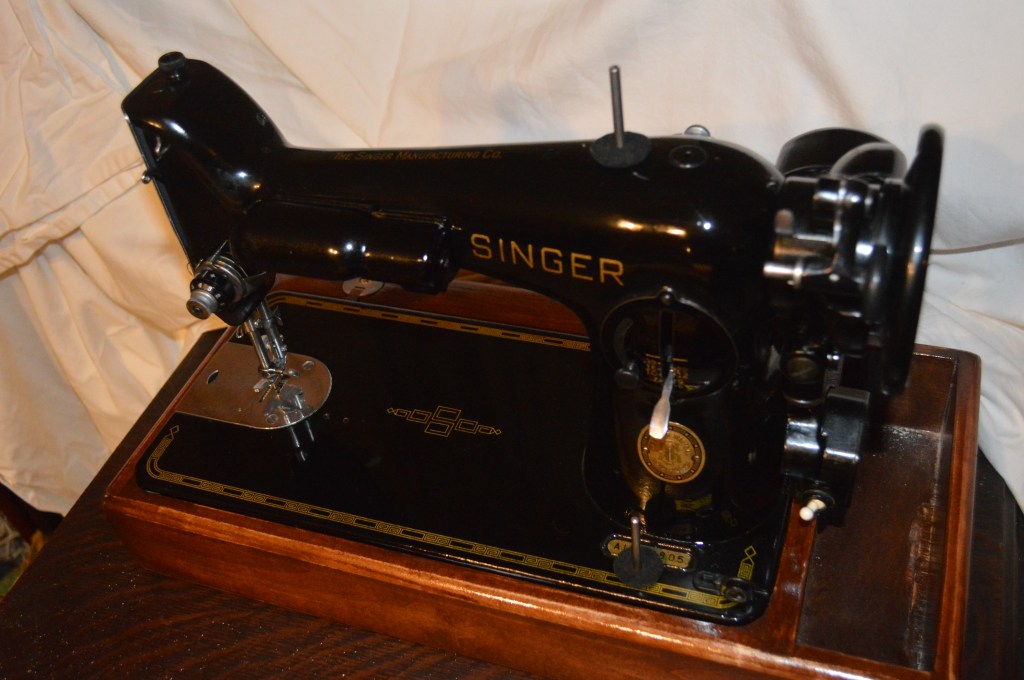
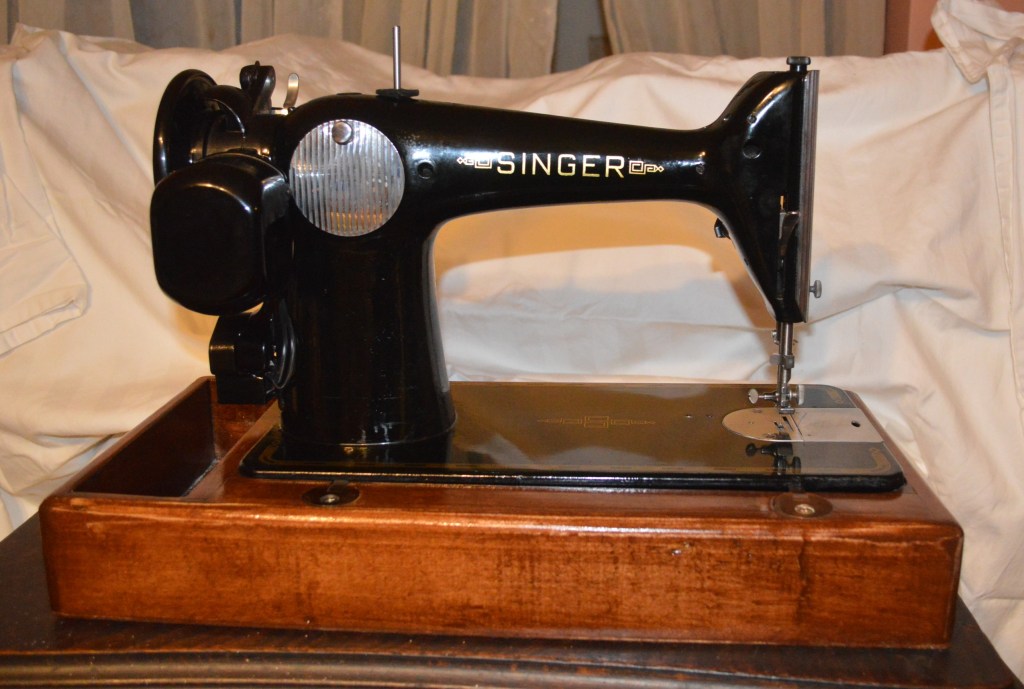
After assembly, the machine looks fantastic. After some minor adjustments to get the bobbin tension, the take up spring pressure, the hook timing, and the needle depth set properly, the machine sews great. It is powerful, smooth, quiet, and ready to make a quilt!
For comparison, here is Pat’s machine before the restoration…

And here is Pat’s machine after restoration…


I don’t know how her sewing room is set up, or if she has a cabinet that will fit this 201. For a machine of this caliber, a sewing cabinet is best, but it will also fit in a full size bentwood or singer style case. I do not have any of these to offer, so I have matched the machine to a custom made base… Pat worked for the EPA, so I think she will appreciate knowing that I made it from reclaimed Maple and finished it with shellac!
Next consideration is the foot controller. There are two options here… a vintage Singer button controller or an electronic controller. For this machine, either is a good choice and based on my Customer’s feedback, I think it is more about user preference than function.
The Singer button controller is at the top of the heap as far as vintage controllers go. Instead of a resistance style controller that have coils of wire and a rheostat design, the Singer controller is a carbon pile design. The speed control is fantastic, but as with all vintage controllers that use electrical resistance to vary the speed of the motor, they build up heat during use. The slower you sew, the warmer it gets.
The electronic controller is typical of the type found on most newer machines. Instead of resistance, they use a circuit board to control the speed of the motor and they do not build up heat. They are quite a bit lighter in construction, but offer more surface area for foot placement and I think they are easier to use… especially if you are used to this type of controller.
Anticipating her use, I am going to fit an electronic foot pedal to her machine. After all, despite my urge to “keep it vintage” I don’t mind taking a 21st century approach and consider this an acceptable alternative.
Last but not least, and this is an upgrade I recommend, is an LED bulb for any sewing machine that will accept it. They provide great illumination of the sewing bed and stay cool… besides using only 4 watts of electricity instead of 15 watts.
That’s it! The restoration is complete! That’s all this machine needed to go from a dirty locked up gem of a sewing machine to a beautiful smooth running gem of a sewing machine… and yes, the stitch is exactly what you would expect from a Singer 201-2… the best domestic sewing machine Singer ever produced.
Enjoy your new sewing machine Pat! I hope you like it!… man, for me it just doesn’t get any better than this.
If you like what you see please visit our Etsy store at https://www.etsy.com/shop/pungoliving, and see all of our other restored fine quality vintage sewing machines. If you have any questions, please contact Lee at Pungoliving@gmail.com.
Tell me what you think!

Really?
No reply? after all that work?
not even from the Lady you did this for?
wow.
Ok! so I think it was a lovely restoration, enjoyed reading this, learning something about the shellac finishes and as a fellow (less accomplished/qualified) tinkerer, loved it!
keep up the good work, i shall check out your other tinkerings too.
Over here in the UK, potted motor singers are a thing of wonderment.
ie, they just
DONT
exist.
BUT… we can funk about and upgrade them etc.
I just noticed one post by someone who changed the motor out for a 110 watt motor and was banging out 2000 spm!
best not to sneeze when sewing at that rate.
ok thats all, thanks for sharing this, again. The info on the oil varnish was GREAT to learn.
cheers,
bye for now and all the best.
LikeLike
Hello and thanks for your comment!
I like potted motors and they are excellent motors. As you pointed out, they are getting scarce and one day will be almost impossible to find in good rebuildable condition. The Achille’s heel to these motor is the main wiring. It is very likely cracked and needs replacement. There are lots of blogs on how to replace them, (some good, some not so good) and I include the process in my tutorial on restoring the potted motor. There is so much more that should be done on these motor besides wires that I see little point in replacing the wires without restoring the rest of the motor.
The 201-2 was rated at around 1100 spm while the 15-91 is good for about 850 spm (based on what I have read). This seems consistent with my experience as I have measured 201’s at 1090 spm and the 15-91 at right at 850. I suspect it has to do with the 201’s rotary hook versus the oscillating hook in the 15-91. The 185K is rated at 1100 spm and it has am oscillating hook, but it is a horizontal bobbin… hmmm. Still, I think you can overdrive these domestic machines. At 2200 spm the lubrication would become very important. Industrial machines can do 2200 spm all day, but they have oiling systems built into the machine and use bearings in places domestics don’t. Then again, I am not someone who could benefit from such a pace,
I had a question from someone asking about converting a potted motor to an external motor on a 201 and I just can figure a good way to do it. My solution? I have a 201K with an external motor and it is a wonderful machine. Thanks for your comment and please let me know if I can be of any assistance to you on your machines!
Have a great evening,
Lee
LikeLike