

This post is intended to clarify the procedure for replacing the small red felt found in the bobbin case of a Singer model 66 or model 99 sewing machine. I have seen posts on this topic that tampers with the thread clearance mechanism and while accomplishing the task, disturbs a critical adjustment in the mechanism that is difficult to re-establish.
One huge advantage of owning a vintage machine is that they are made to be adjusted. This allows them to maintain their sewing performance for generations rather than junk them because they wore out in a few years. However, there are some critical adjustments that are difficult to re-establish if disturbed and can degrade sewing performance if lost. Thread clearance is one of them and this tutorial shows you how to replace this felt without losing the thread clearance adjustment. Because this is a normal part of the restoration on our model 66’s and 99’s, I am taking excerpts from earlier posts to describe the procedure.
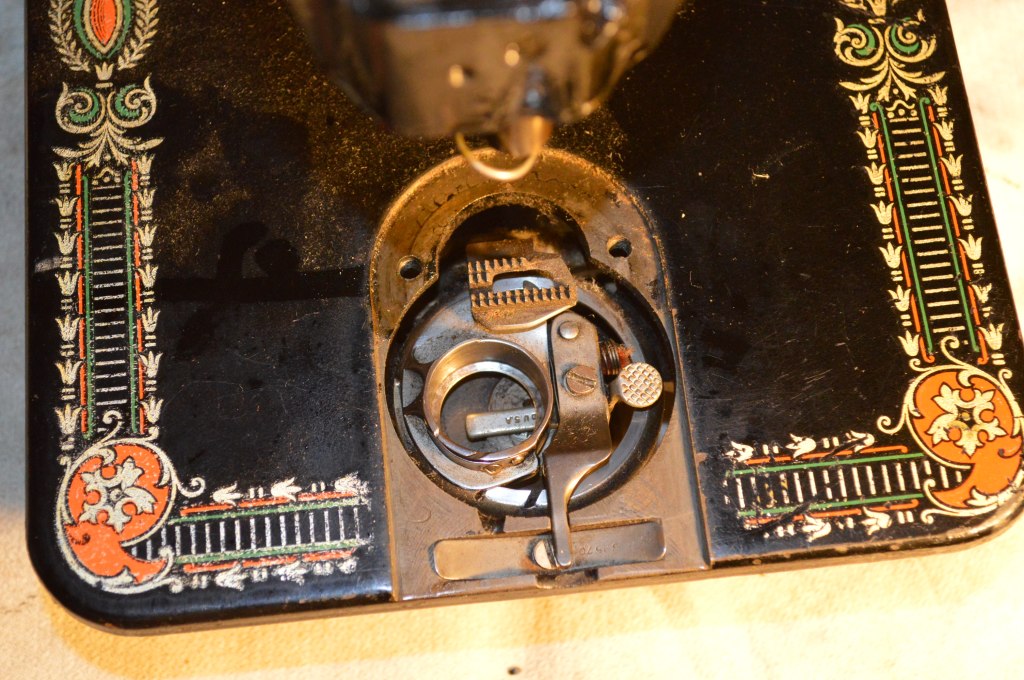
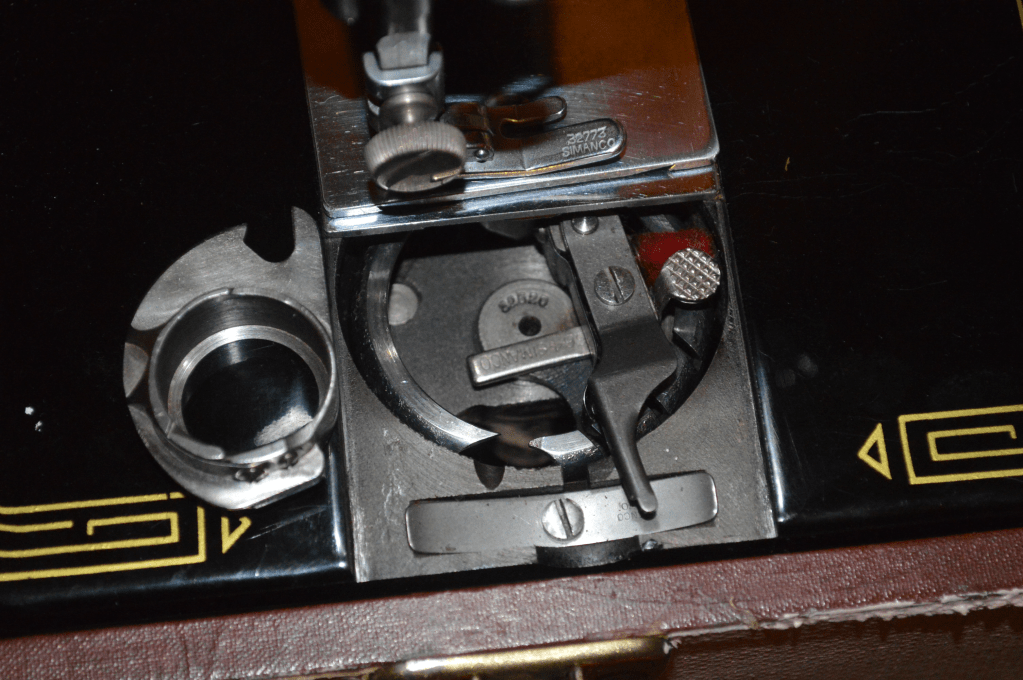
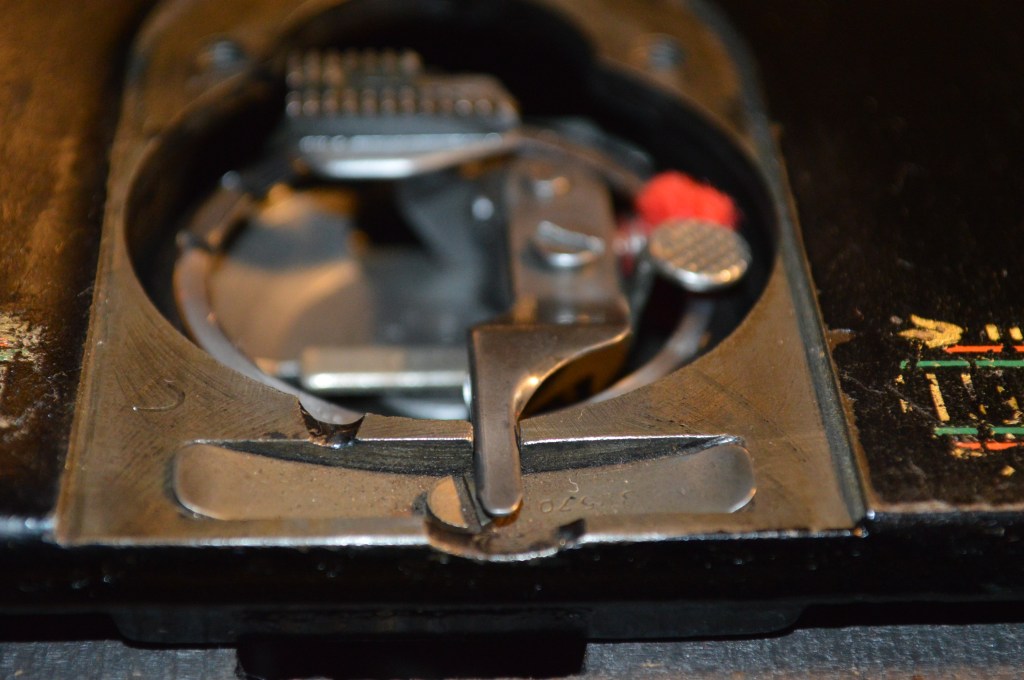
If you look at the picture above, you will see the thread clearance mechanism. It is to the right of the bobbin case. Lets look closer at the mechanism… There are two things I want to discuss. First, notice the small piece of red felt, it is at the 11 o’clock position above the small round button tab, This is often removed in error or worn away. The purpose of this felt is to oil the top and the bottom of the hook race. Because many machines I see do not have it, I will show you how it is replaced. But before we get into that, look at the screw in the center of the mechanism. I will refer to this as “THE SCREW THAT SHALL NOT BE TURNED”. In short, do NOT attempt to disassemble the assembly further or disturb this screw. Do not loosen it. This screw holds the thread clearance adjustment. The mechanism is spring loaded. If the screw is loosened, this clearance will be lost and it is very difficult to re-establish. In short, leave this screw alone. Of course, if it is necessary for proper adjustment in a restoration, I may turn this screw, but I have the proper gauges and service manuals to make the adjustment properly. You probably do not.
So, if you want to replace the red felt, this is how to do it correctly. Lets take a look at the thread clearance mechanism. Make a note to self that the screw shown in the center of the mechanism must not be tampered with. Consider it “THE SCREW THAT SHALL NOT BE TURNED” Fortunately, we don’t need to.

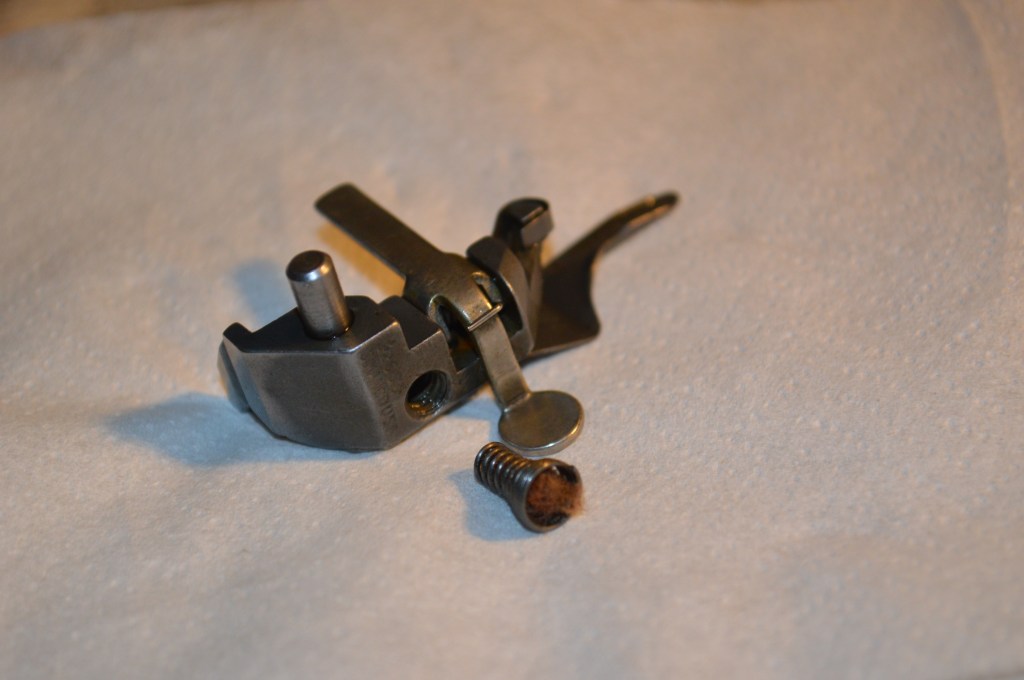
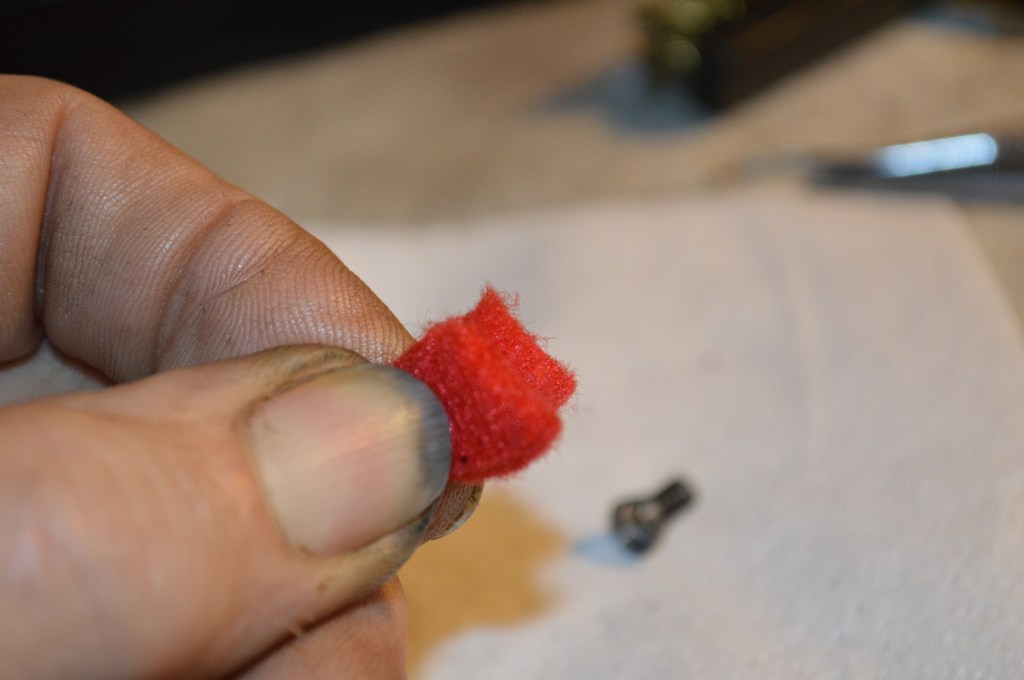
The felt is actually held in a “spring screw”… yep, that spring it fits in is actually screwed into the assembly for servicing… brilliant. Only one problem though, you can’t get a replacement felt anywhere I know of. Fortunately, I have a felt in good condition that I can use as a pattern. The felt is supposed to look like this. I got it from an old parts machine. I am not going to use it to replace the felt in this machine, but I am going to use it as a template to make a suitable replacement. I have already removed the old felt and you can see the felt holder spring from this machine in the picture.
Some of the posts I have seen remove this screw in error, and while the felt can be removed this way, the proper way is to remove the entire thread clearance mechanism from the machine. It is fidgety to remove, but not to difficult to remove. To remove the mechanism, a few other things need to be removed first. These are the bobbin plate, the bobbin case, the needle plate, and the feed dogs. Make sure to remove the needle and raise the needle bar to its highest point before proceeding.
To remove the bobbin plate, remove the presser foot and raise the presser foot bar (I know, I don’t show that in the picture). Lift the end of the bobbin plate that closes against the needle plate slightly up and push it towards the needle plate. The plate will slide off easily…
Note, putting the plate back on is the reverse of this procedure, making sure the curved spring plate engages the slots on each side of the bobbin plate.

To remove the bobbin case, lift the end of the thread clearance lever up and to the right as much as possible.


Wiggling and jiggling the bobbin case will eventually remove it from the hook race.
Removing the needle plate is self explanatory. Remove the 2 screws holding it in place.
Now remove the feed dogs. The feed dogs are held by a screw under the bed near the front of the machine. Remove this screw and pull the feed dogs up and out of the machine. It is the screw in the middle of the following picture.

With these parts removed, we can now remove the thread clearance mechanism.
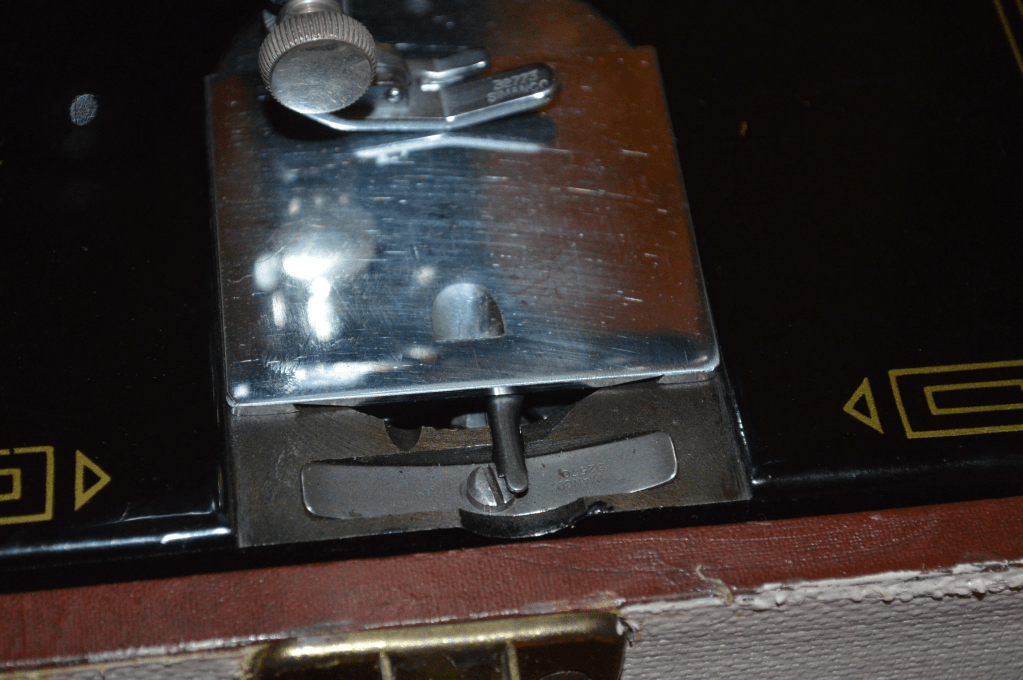
Look at the following picture. You will see a small set screw that keeps the mechanism in place.
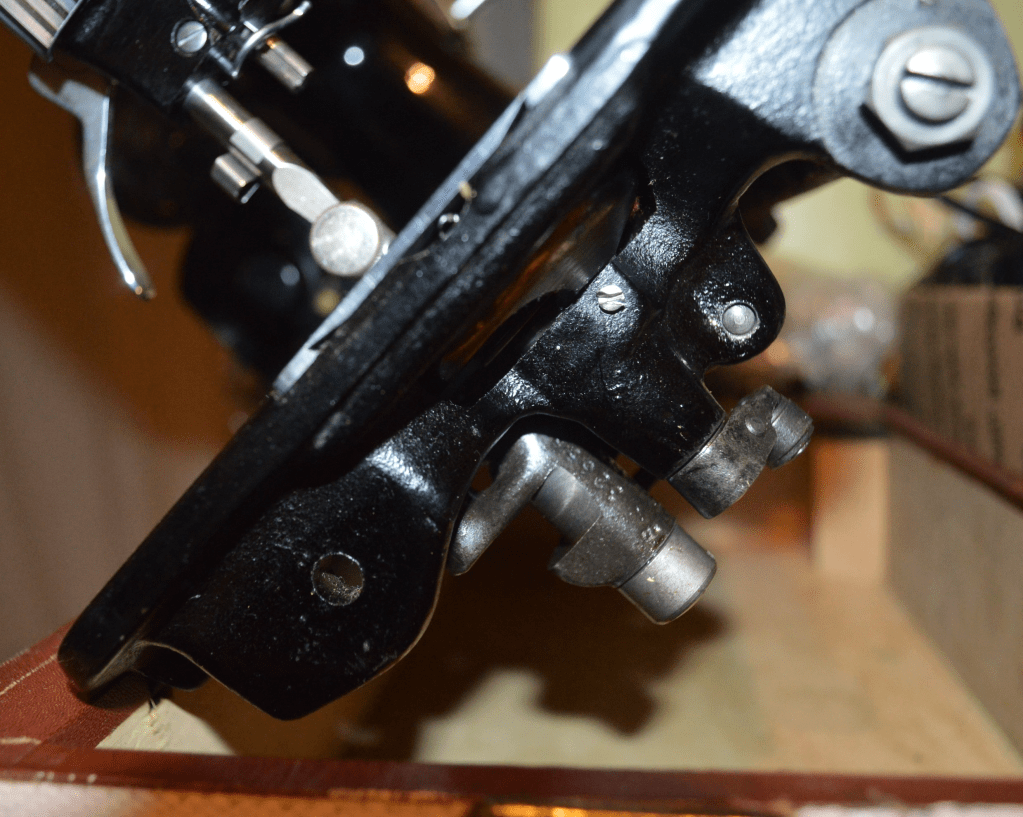
Loosen this set screw.

With this screw loosened, the thread clearance mechanism can be removed from the top side of the machine. There is no real procedure for removing this mechanism, but gently prying the back of the mechanism up while moving the lever back and forth will allow it to come out. a little WD-40 or sewing machine oil at the back of the mechanism will help.
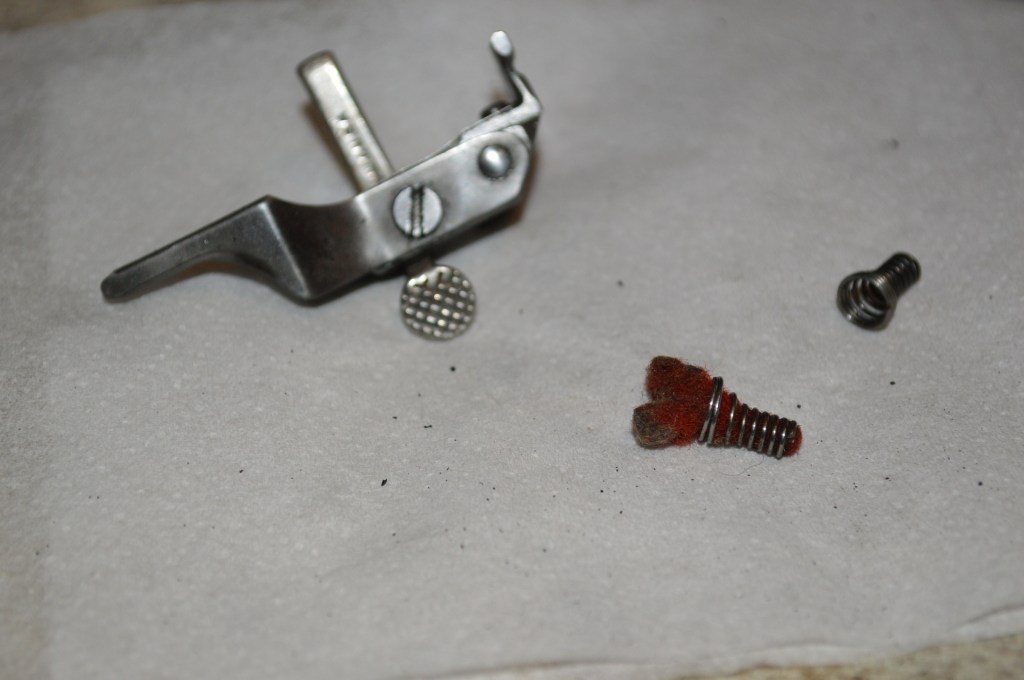
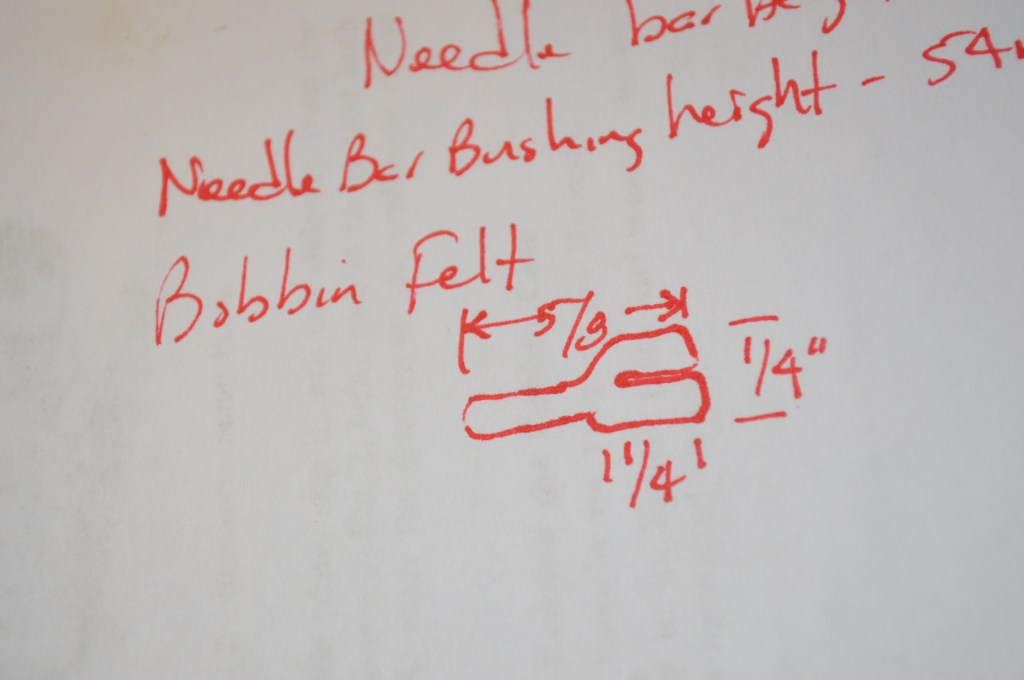
That’s the hard part, and the felt is not difficult to make. I am going to show the steps I use in a series of pictures. First, remove any remnants of the old felt from the felt retainer… this can be accomplished by tweezers, picks, needles, or any similar instrument. In a pinch, it can be burned out with the flame from a BIC lighter… Be careful with fire and don’t hold the felt retainer in your fingers if you do this. Dimensions below are approximate and I will caption the pictures step wise.
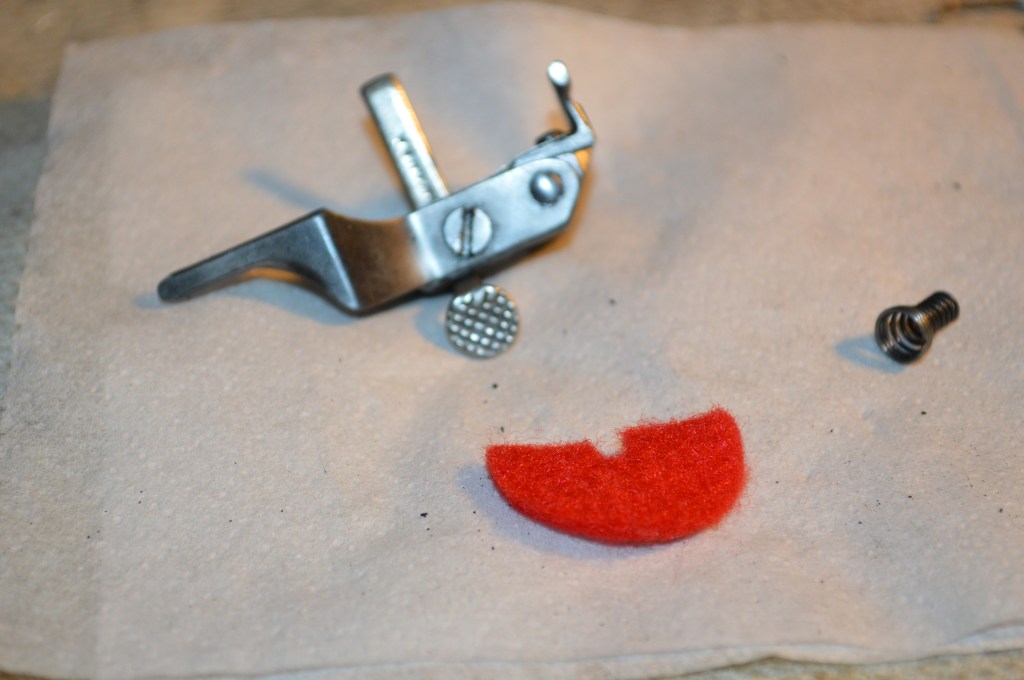


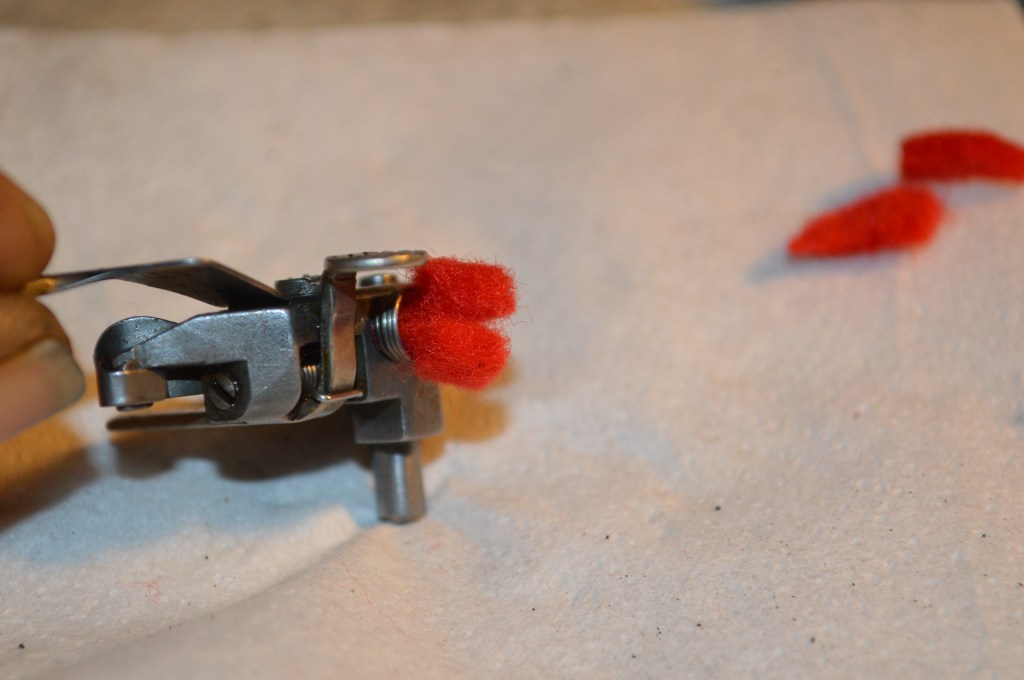
Then the felt is oiled… that’s its purpose, to oil the top and bottom of the bobbin race rim The felt should look like this when the parts are reassembled… one ear on top, the other on the bottom.
Reinstall all of the parts in the reverse order of disassembly… That’s it! The felt is restored, the top and bottom of the hook race will be oiled, and the thread clearance adjustment has not been disturbed. Note… The feed dogs have an adjustment too, To adjust the feed dogs, raise the feed dogs to the highest point. The bottom of the teeth should be level or just a bit lower than the top of the needle plate. This is accomplished by setting the depth with the screw that you took out to remove them and retightening the screw.
Now that we have gone to all that trouble, I need to tell you that later 66’s omitted this felt entirely. Did they decide that it wasn’t necessary? I don’t know. Perhaps it was a cost saving measure? I don’t know. Did we just waste a ginormous amount of time? I don’t know… you decide. I figure if it is there, it belongs there for a reason, and in a complete restoration, if it is missing it needs to be replaced. To be honest with you though, it does provide a film of oil that is listed in the later models as a maintenance oiling point, so I do think it is worth restoring it.
I hope you found this information useful, and I hope you found this tutorial before you decided to replace this felt following other blogs where the “THE SCREW THAT SHALL NOT BE TURNED” was shown to be removed. If not, consider this blog something like a public service announcement and tell a friend so that this mistake will not be repeated…
As always, our tutorials are provided as a free resource to help you learn and maintain your vintage sewing machine. As our site has grown, so has the cost to keep and maintain it. Despite these costs, I will strive to continue posting tutorials and other relevant content for the benefit of the sewing community. If you found the content of this tutorial useful, please consider making a small donation to help me grow the site and help defray my costs… every little bit helps.
Help Support our Site…
Make a one-time donation
Make a monthly donation
Make a yearly donation
Choose an amount
Or enter a custom amount
Your contribution is appreciated.
Your contribution is appreciated.
Your contribution is appreciated.
https://www.etsy.com/shop/pungoliving
Thanks for reading!

Well, well, well. First, thank you for this. I just picked up a 1954 Singer 66. So much gunk under the needle plate, and look….here is some packed red lint. As I was digging the darn thing out I wondered, “maybe this is supposed to be here”. Well at least I stopped and found you here. I mostly pulverized the felt…and I tried to turn the screw that that should remain unturned. It wouldn’t budge. Again, I’m glad I found you here. Thank you for taking time to post.
LikeLike
I’m glad you found my post helpful! An thank your guardian angel for foiling your attempts to remove the felt, and loosen the “screw that shall not be turned”! Let me know if I can be of any assistance with your 66.
Lee
LikeLike
Hi and thank you for the tutorial. Unfortunately, when cleaning the machine anche adding oil I turned that screw. It was stucked, I thought because it was old. I have set it back but I honestly do not know how to calibrate it. How do I see if it works good or not? Thank you
LikeLike
Good afternoon Arya,
When you loosened the screw, did the mechanism under the screw shift? If so, I will try to explain how you can reset the proper clearance. If not, it was stuck in place and didn’t move. if that is the case, no need to do anything.
This information would be useful. so please let me know so I can help.
Lee
LikeLike
Hi,
I removed the screw but not sure what you mean by did the machanism move. Since I don’t know if it moved, I assume it did. It seems like the screw and guide post only allow it to be reinstalled one way.
Please let me know what i’m missing and how to recalibrate.
I have learned a ton from your blog posts and greatly appreciate your knowledge and assistance.
Thanks in advance
Buddy
LikeLike
Thank you for this guide! I also thought the felt is stuck there by accident and tried to remove it with pliers. Luckily it stood there firmly, so I did not continue. 🙂
LikeLike
The manual for the Singer 31-20 says:
Apply a few drops of oil to the small felt pad on the side of bobbin case each time a bobbin is replaced. “TYPE D” Oil should be used when an oil is desired which will produce a minimum of stain on fabrics, even after a long period of storage.
In the past Singer recommended using “TYPE D” (Manufacturing machine oil, Stain-free, Heavy grade) and “TYPE E” (Stain-free Thread lubricant – for lubricating the needle thread of sewing machines for stitching fabrics or leather {where a stain-less thread lubricant is required}).
Is this the kind of oil that is supposed to be used here on this wick?
What name would “type d” or “type E” oil be the known as, now?
LikeLike
Hmmm. I’m not sure I can satisfactorily answer your questions. The 31-20 is an industrial machine and as such had a documented maintenance schedule. .I’m sure the type of oil had a standard or equvilant. I do know an example of a suitable oil is velocite It comes in different weights and is non-staining. You might google velocite and find the information you are looking for… I wish I could be more help!
Lee
LikeLike