

The Singer 201 is known as Singer’s “Rolls Royce” of Singer sewing machines. It is undeniably a quiet, powerful, smooth running “professional grade” sewing machine capable of forming a beautiful straight stitch. The 201 was manufactured in the late 1920’s thru the late 1950’s and the sewing mechanisms remained unchanged throughout production.
There are many factors that affect stitch quality and the formation of a consistent straight balanced stitch. The horizontal full rotary bobbin hook on the 201 is one reason the 201 runs so smoothly, but like every other sewing machine (horizontal, vertical, oscillating hook, rotary hook, or shuttle), the condition of the bobbin case is one key component to the quality of the stitch.
The bobbin case is responsible for the bobbin thread tension. Any accumulation of lint, oil residue, or corrosion on the bobbin case or behind the bobbin case flat spring can cause intermittent problems in stitch quality that masks itself and leads one to think the remedy is to adjust the top thread tension. If you continue to see inconsistencies in the stitch and find yourself repeatedly adjusting the top thread tension to get a good quality stitch, chances are the problem is in the bobbin case.
Removing the bobbin case in a 201 is not intuitive, but it is not hard to do. Considering that the “newest” 201 is nigh on 65+ years old, removing and cleaning the bobbin case should be done, regardless of how the machine sews. I’m about 100 percent certain that it needs to be cleaned and to get the best stitch quality out of your 201 it should be cleaned… Here’s how it’s done.
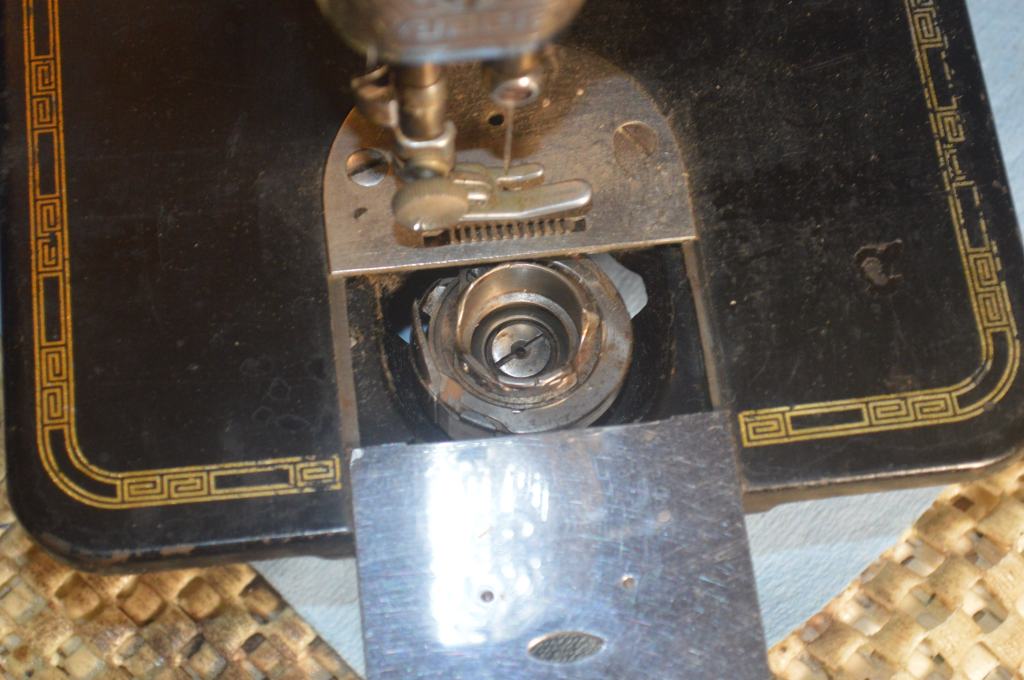
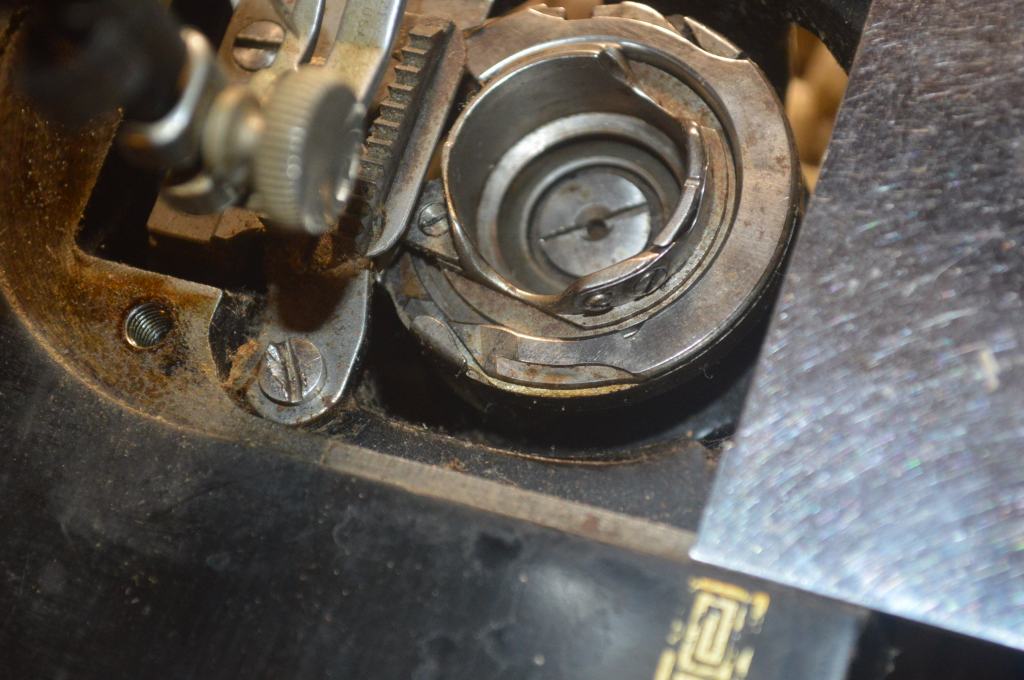
You don’t need to remove the bobbin plate cover, but you do need to remove the bobbin throat plate. Remove the two screws and lift the plate away from the machine.

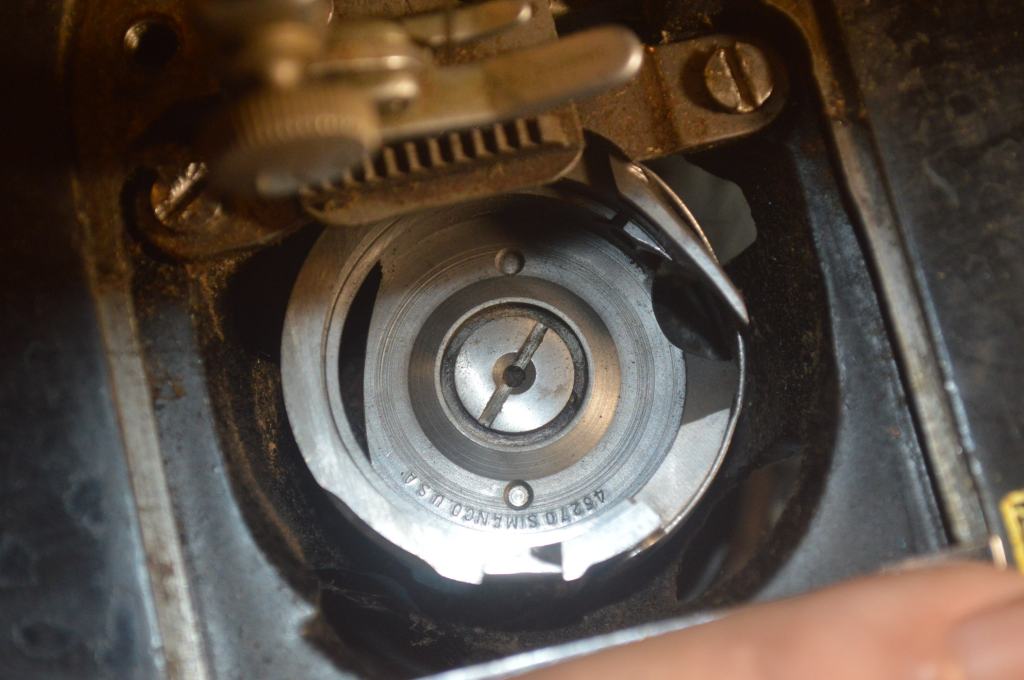
The bobbin case is held in place with a flat retainer. Look closely at the picture and you will see a small spring clip on the right (3 o’clock position). Looking at the 9 o’clock position, you will see a clip that holds down the retainer on the left. The spring clip on the right is key to removing the retainer.
Follow the instructions below to remove the retainer.
Place a small screw driver against the small spring clip and pry it away from the retainer.
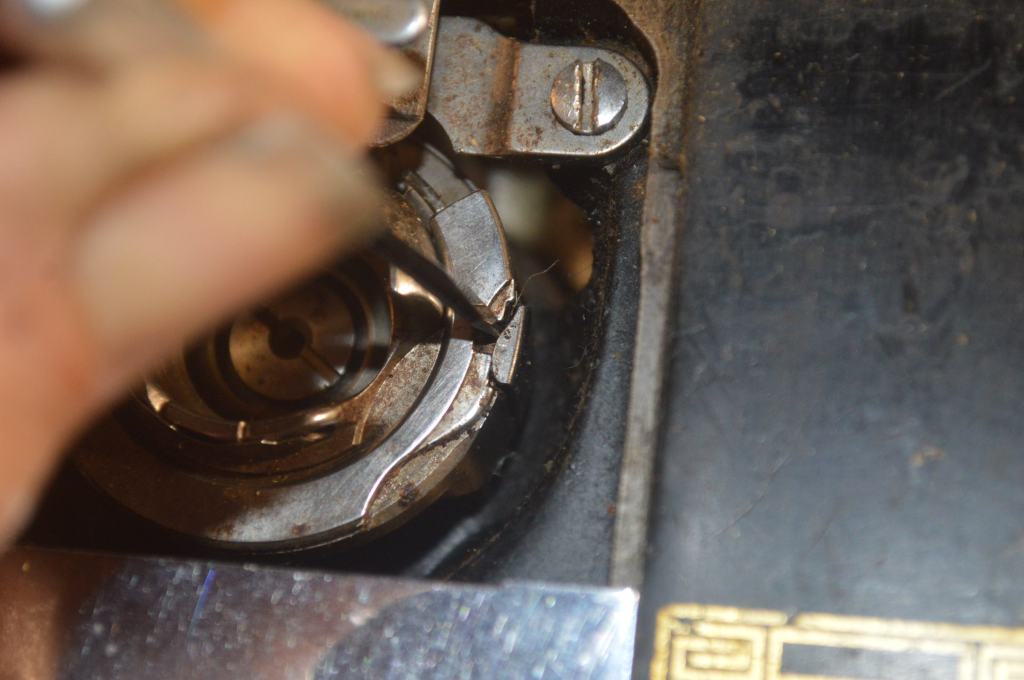
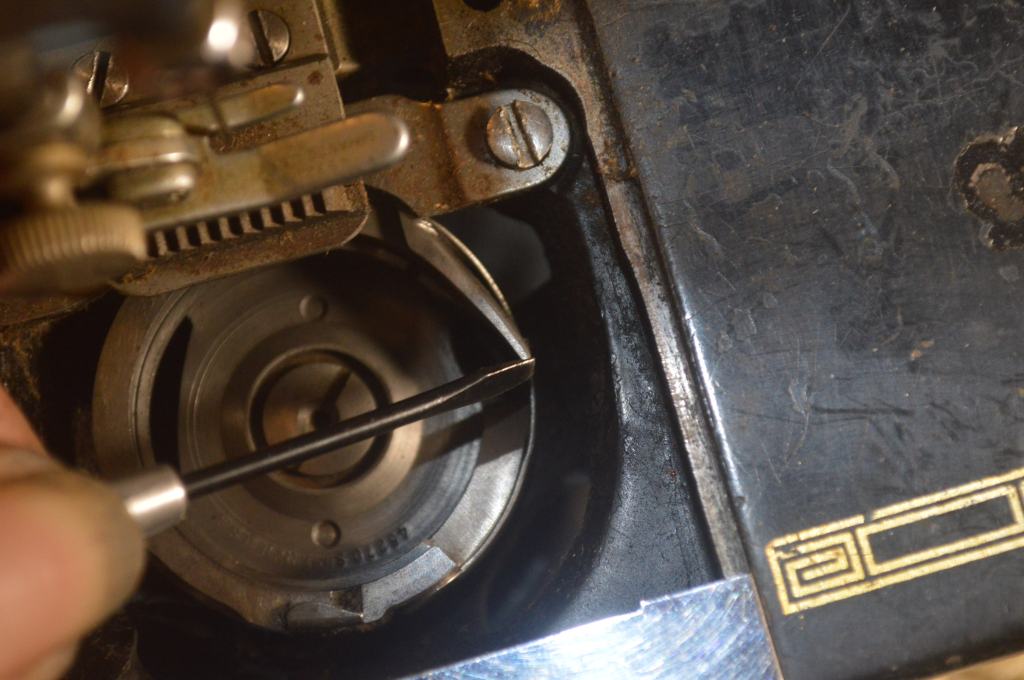
With the spring pried away from the retainer, gently twist the screw driver to lift the retainer above the clip.
With the clip disengaged on the right side, place the screw driver in the small slot on the retainer as shown.
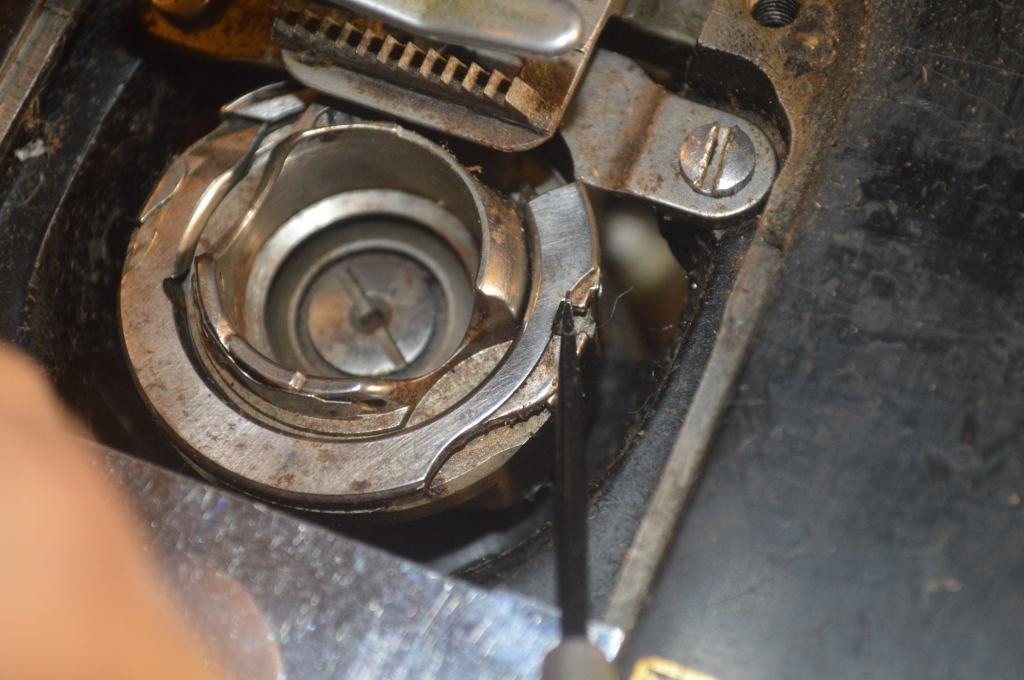
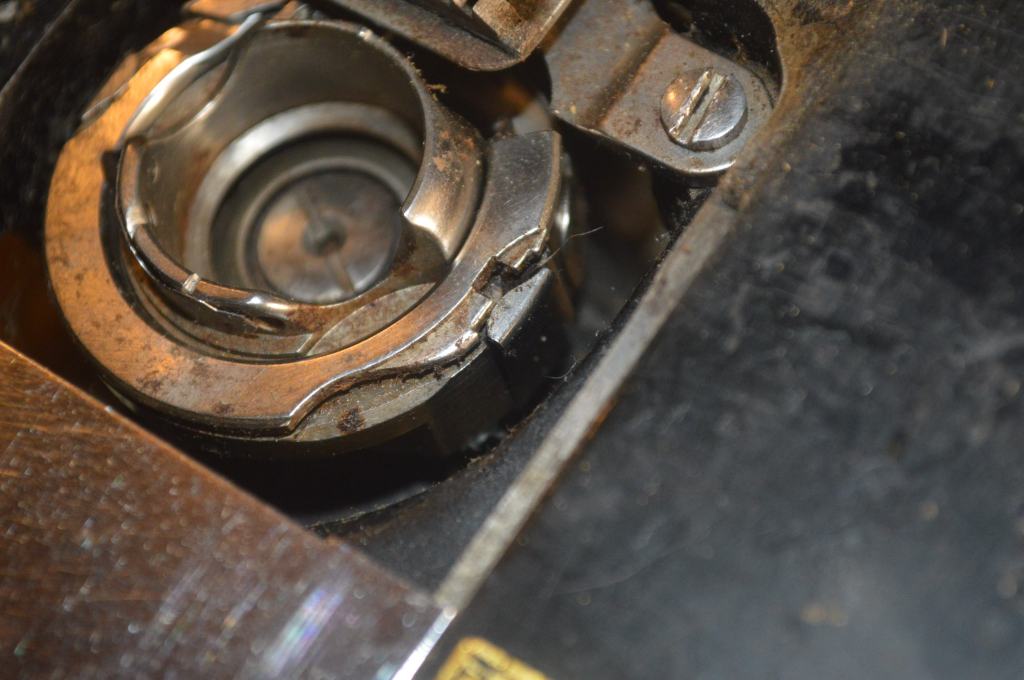
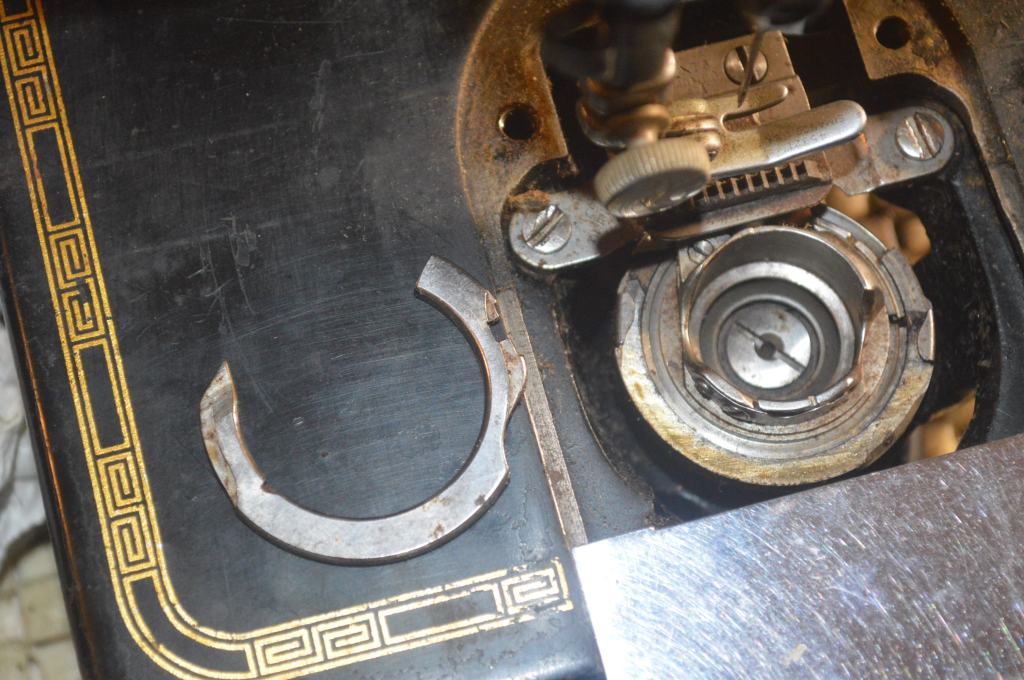
With the screw driver in the slot, gently turn the hand wheel clockwise (towards you). The bobbin hook will turn and disengage the retainer on the left side. If you look closely, the left side of the retainer is tapered and it will slide from under it’s clip.
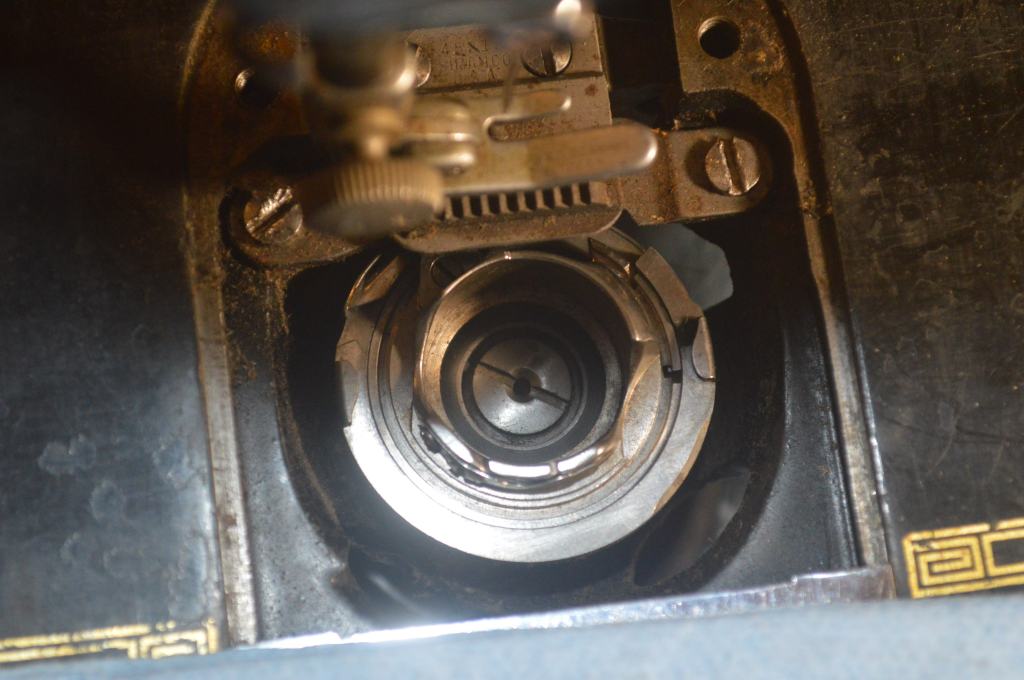
The retainer can then be lifted away from the machine.
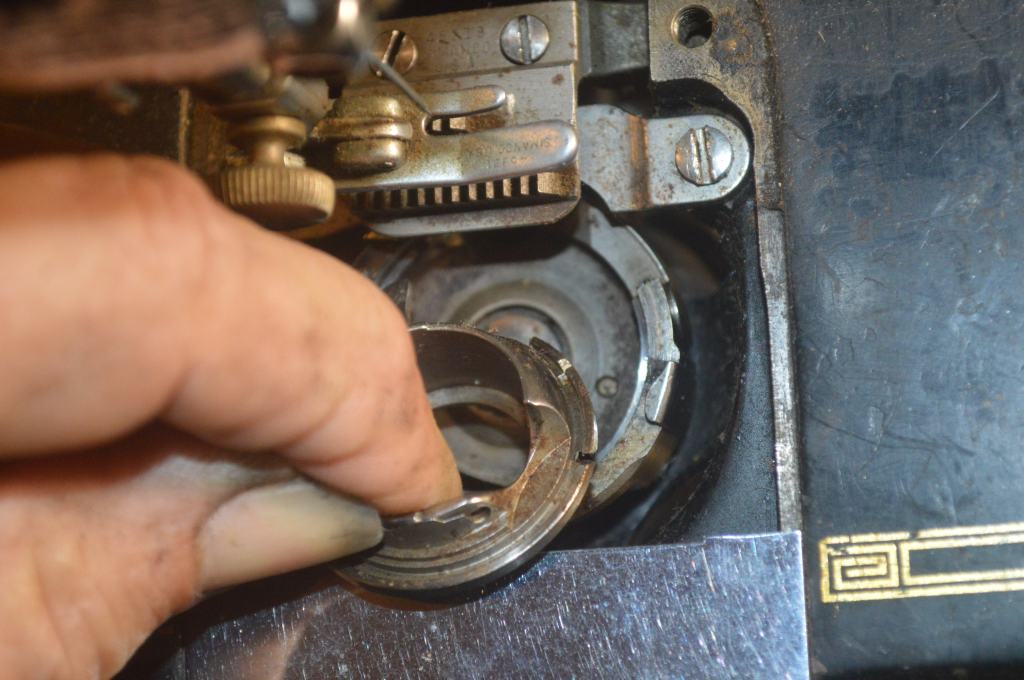
The bobbin case can now be lifted up and away from the machine. Note the finger on the case fits under the thread clearance plate under the feed dogs.
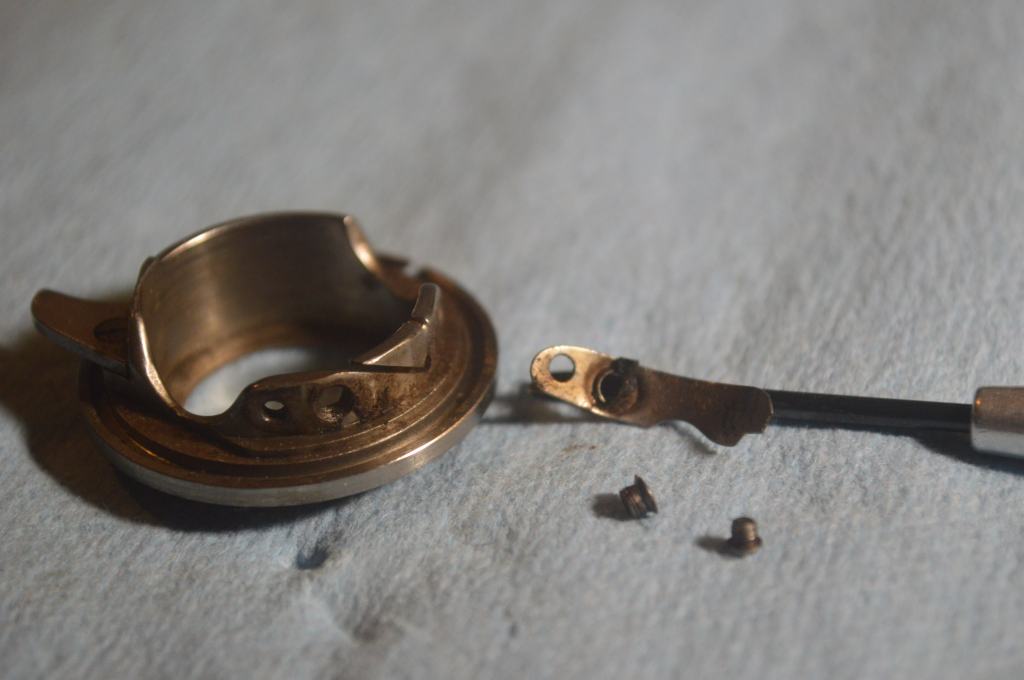
Now, lets look at the steps necessary to clean the bobbin case. You will soon see why this is important. Being in direct contact with thread, any obstruction can affect thread tension. The bobbin case has two very small screws. One screw tensions the spring plate and adjusts the bobbin thread tension, and the other holds the spring clip to the bobbin case.
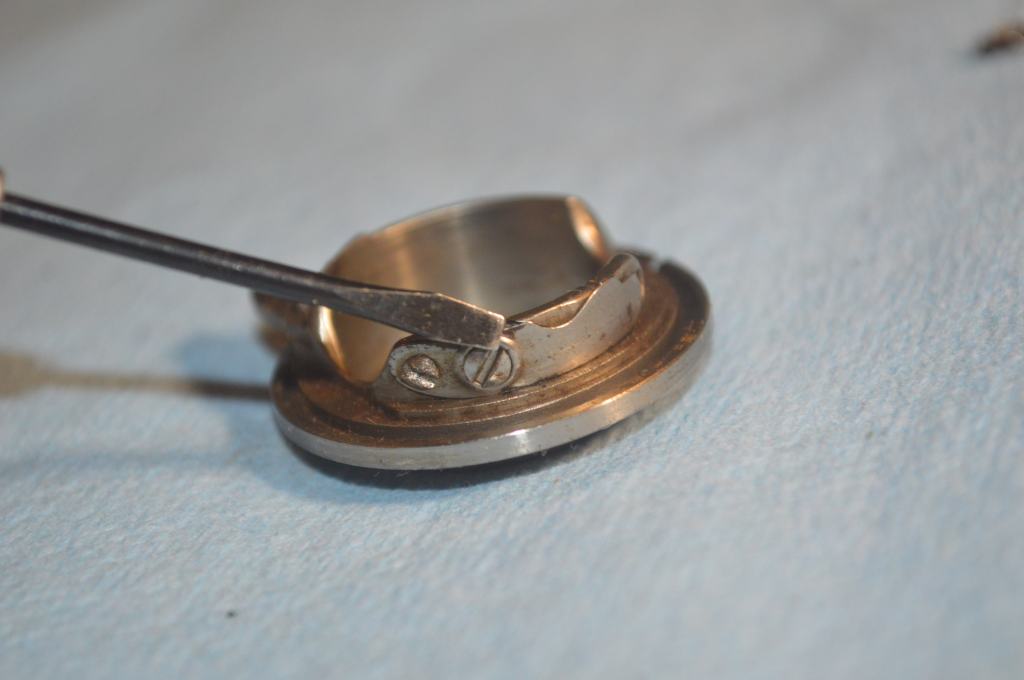
This screw is for adjusting the bobbin thread tension 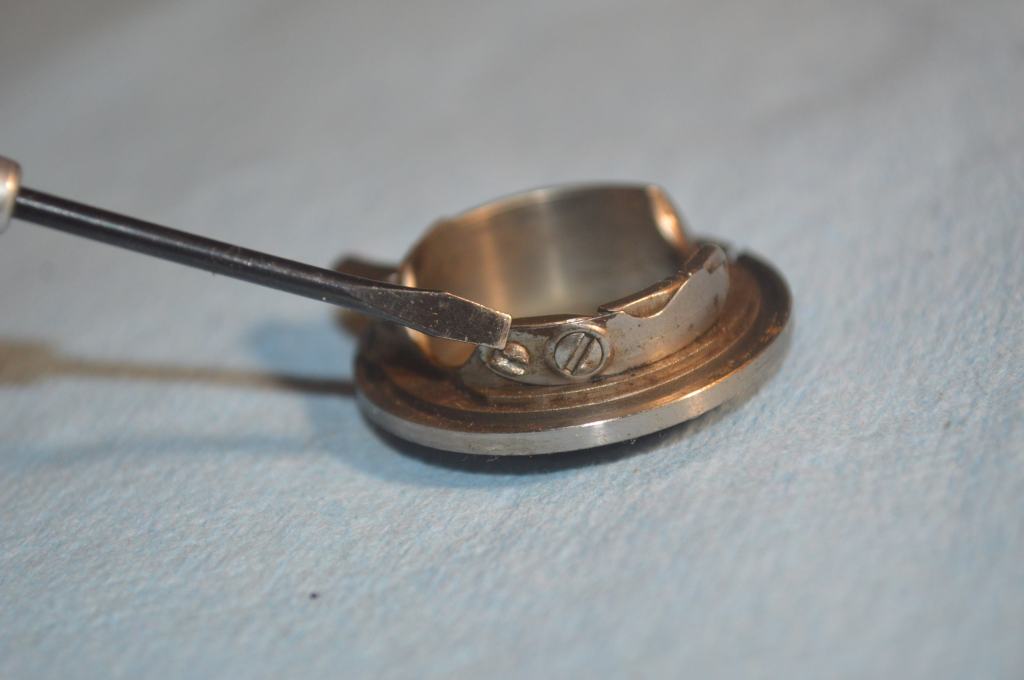
This screw holds the spring to the case.
Remove both screws. Either or both of these screws can be very tight and difficult to loosen, especially the small screw. A small high quality screw driver is needed. Also, these screws are VERY small so take care not to lose them. With both screws removed, the spring plate is removed and the old oil and lint is revealed.
Take your time and clean the bobbin case and backside of the spring thoroughly. I use a wire wheel, but acetone or alcohol on a cotton swab can be used to dissolve the residue and the case can be cleaned with a tooth brush. How it is cleaned is not as important as getting it completely clean.
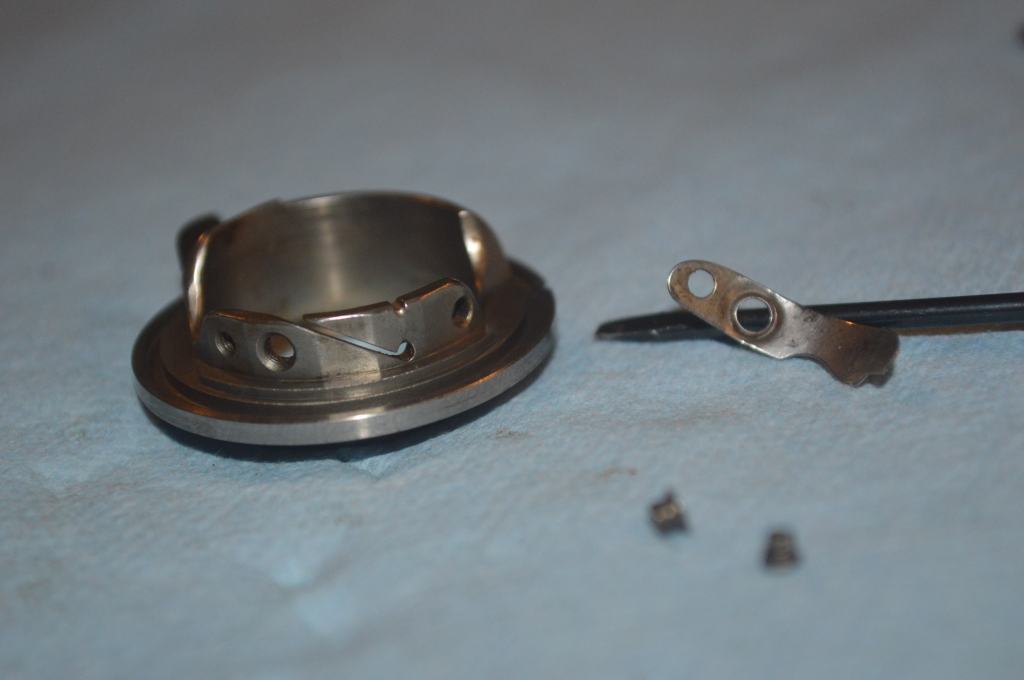
Reassemble the bobbin case. I find it useful to magnetize the screwdriver. Simply put the end of the screw driver on the magnet, and a small amount of the magnetism will transfer to the screw driver. This will allow you to pick up the small screw and place it in position… again, take care not to drop or loose the screw.
Now, clean all of the dust and dirt out of the bobbin hook race and inspect the hook… it should be smooth and have a sharp point.
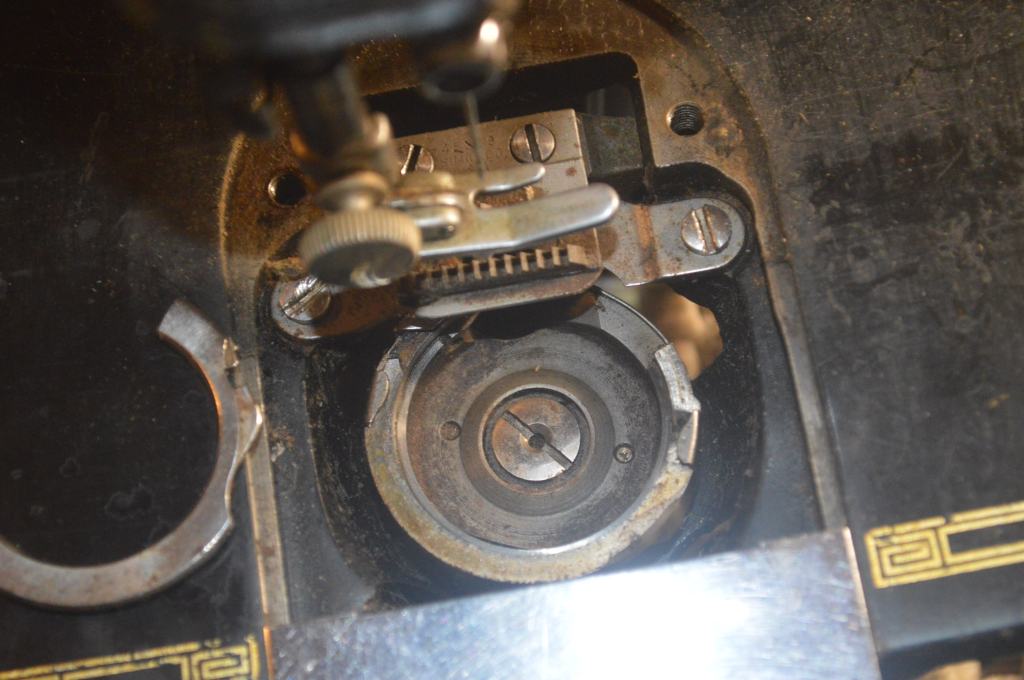
Inspect the hook
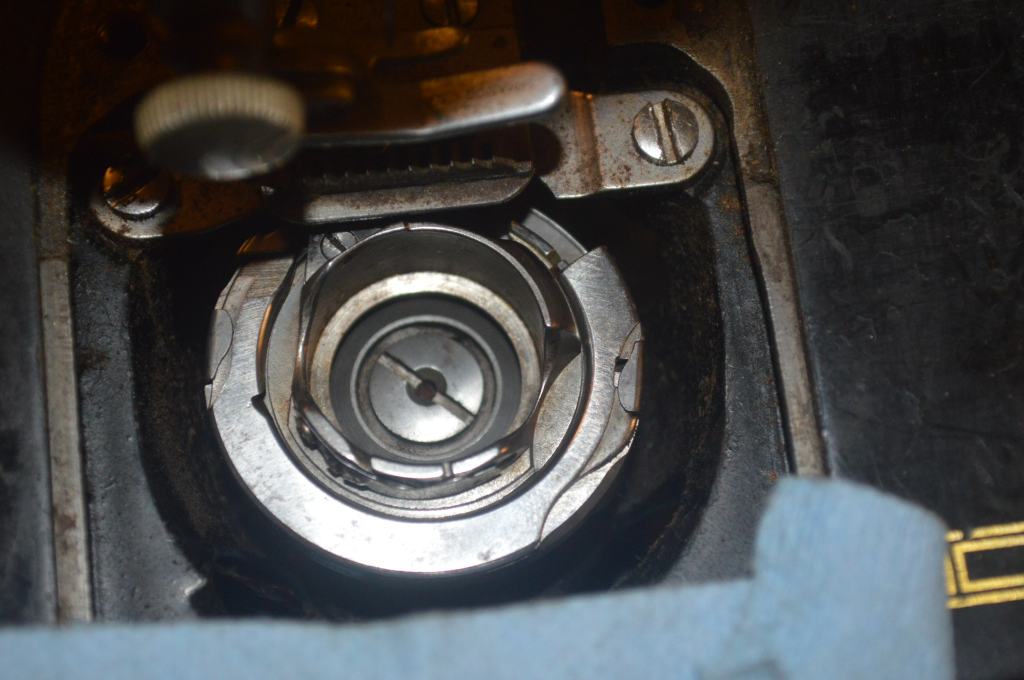
Now the bobbin case is clean It’s time to reinsert the bobbin case and the retaining clip.
Place a drop of oil on the top and bottom lip on the bobbin case and in the small hole in the center of the bobbin race screw. Insert the bobbin case with the “finger” pointing towards the feed dogs. It will seat in a slot in the thread clearance plate. Set the retainer ring such that the tapered end almost engages the clip.
Holding the balance wheel, gently rotate the retainer counter clockwise. It will slide under the clip. Continue to rotate it until the spring clip (the one you pried away before ) snaps into place on the retainer.
Load a bobbin in the bobbin case and adjust the bobbin tension. A slight drag should be felt and it should pull smoothly.
That’s it! The good news is that this cleaning should last a long time. The reward will be consistent and smooth bobbin thread tension and a great improvement in the stitch quality and stitch regulation.
As always, our tutorials are provided as a free resource to help you learn and maintain your vintage sewing machine. As our site has grown, so has the cost to keep and maintain it. Despite these costs, I will strive to continue posting tutorials and other relevant content for the benefit of the sewing community. If you found the content of this tutorial useful, please consider making a small donation to help me grow the site and help defray my costs… every little bit helps.
Help Support our Site…
Make a one-time donation
Make a monthly donation
Make a yearly donation
Choose an amount
Or enter a custom amount
Your contribution is appreciated.
Your contribution is appreciated.
Your contribution is appreciated.
Please let me know if I can answer any questions or if I can be of any assistance by emailing me at pungoliving@gmail.com.
Thanks for reading,
Lee

Wish to Thank You for your Help. Am serving a 201-2. Was a headache, then Reading your material HAS Been a Answer to the problem. Thank You very kindly…
LikeLike
Hello Dave,
I’m glad you found useful information to help with your 201. they are not the easiest machines to work on.
Please let me know if you have any questions or if I can be of any assistance.
have a great night!
Lee
LikeLike