

Introduction
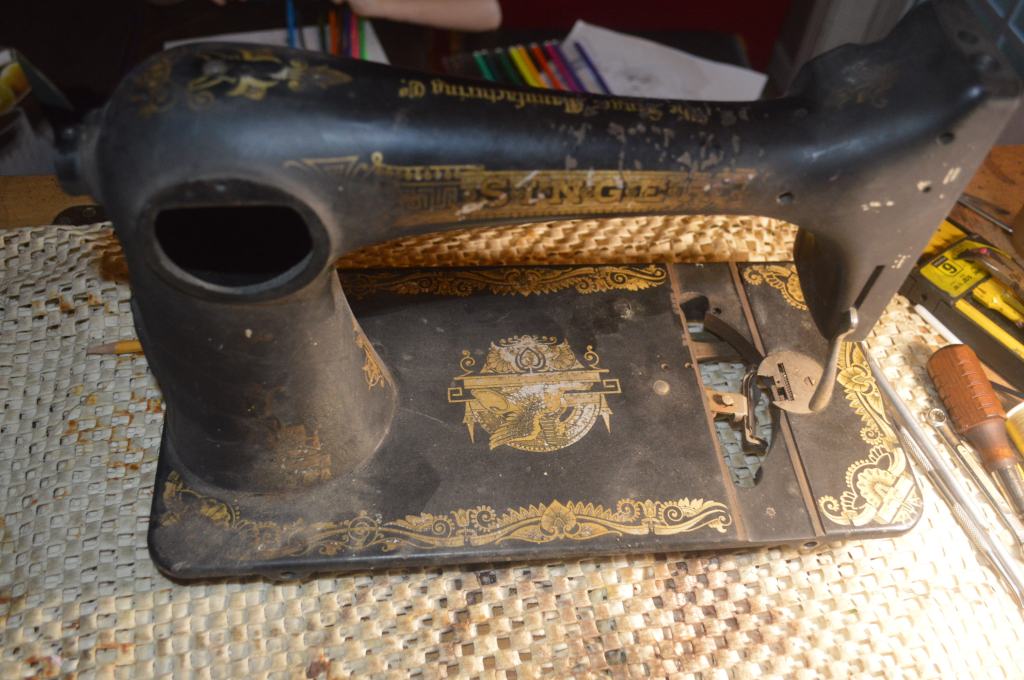
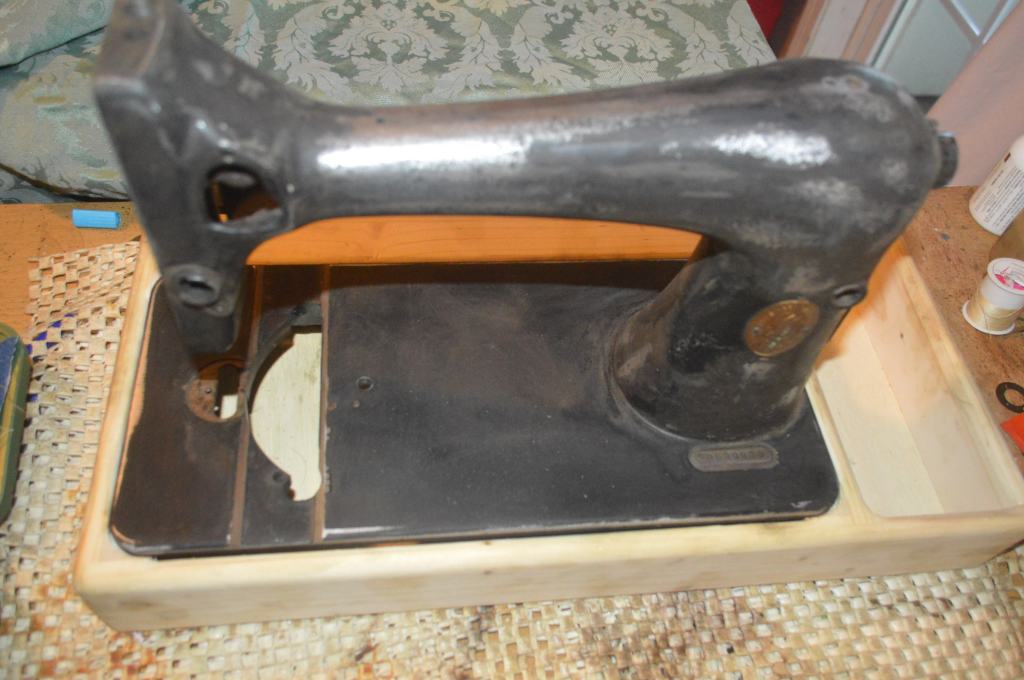
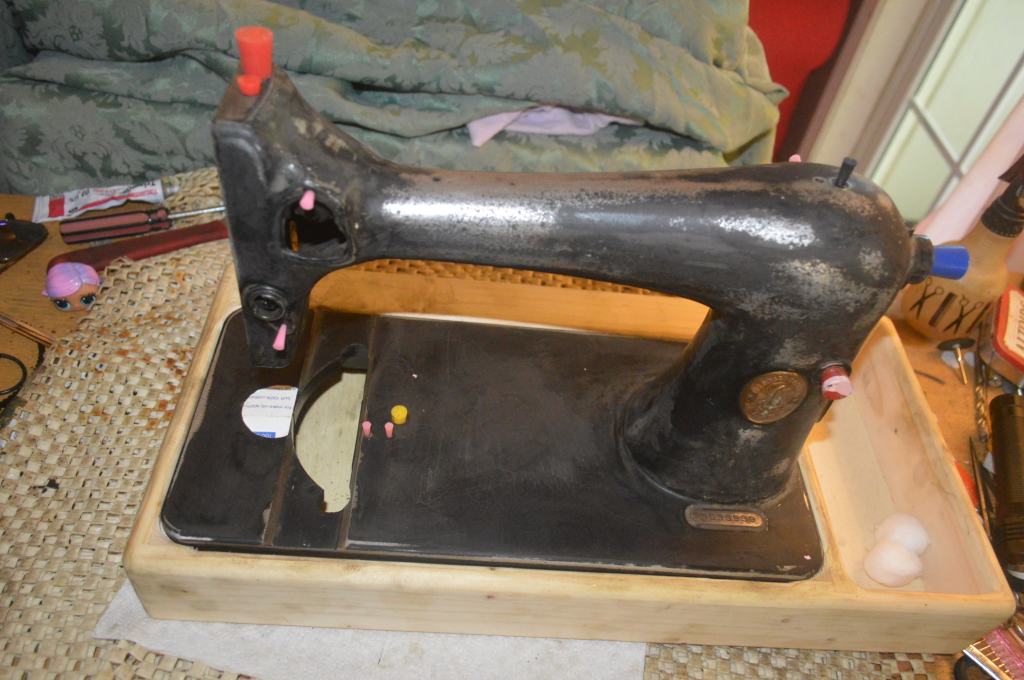
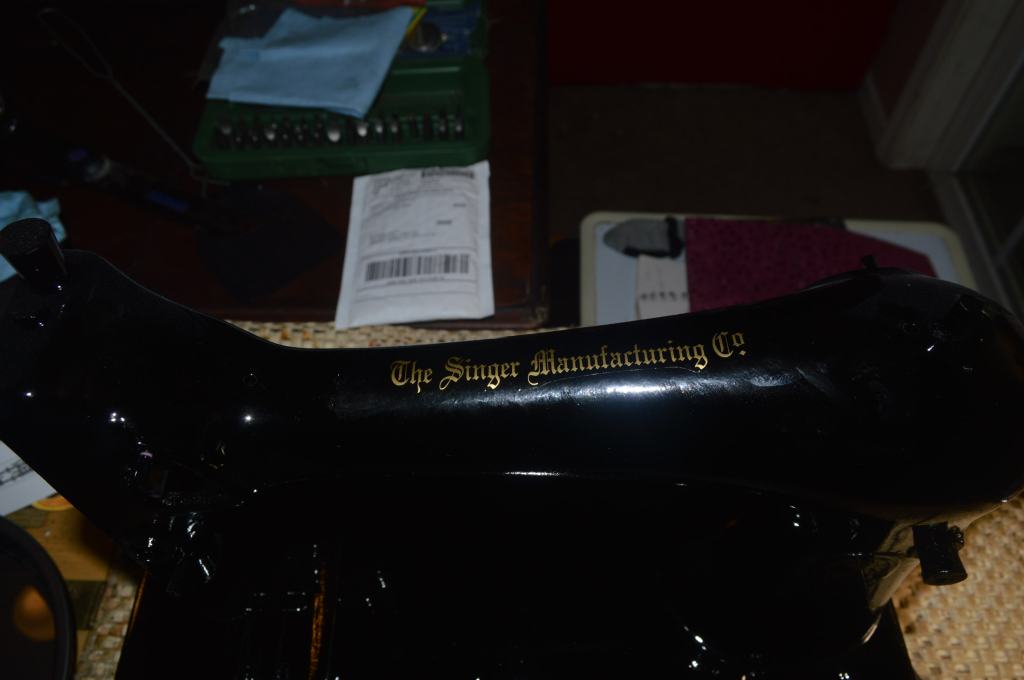
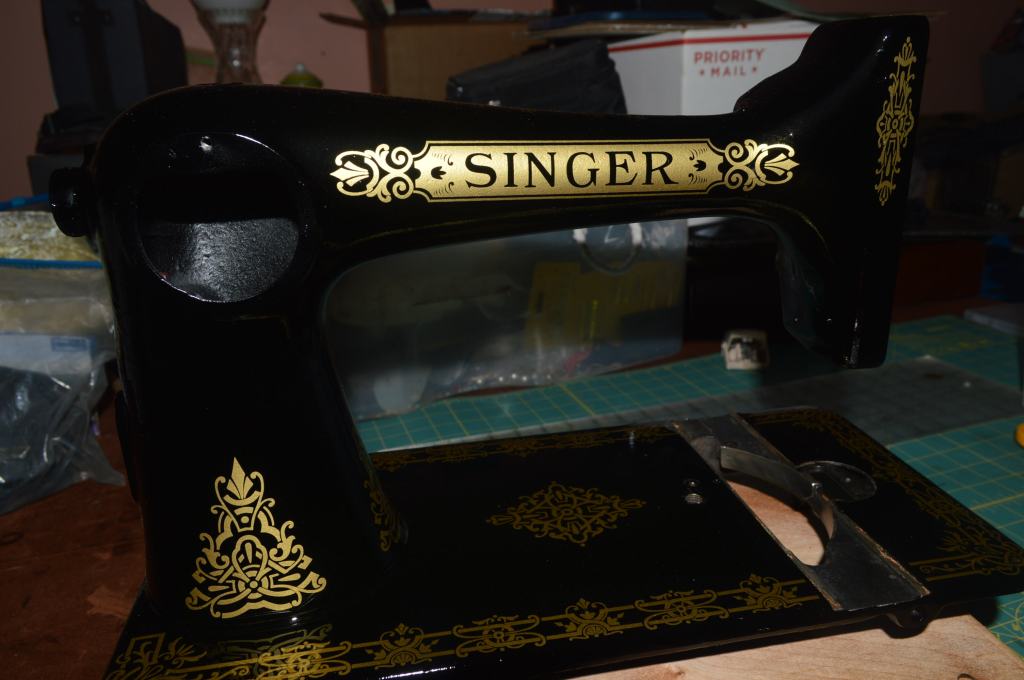
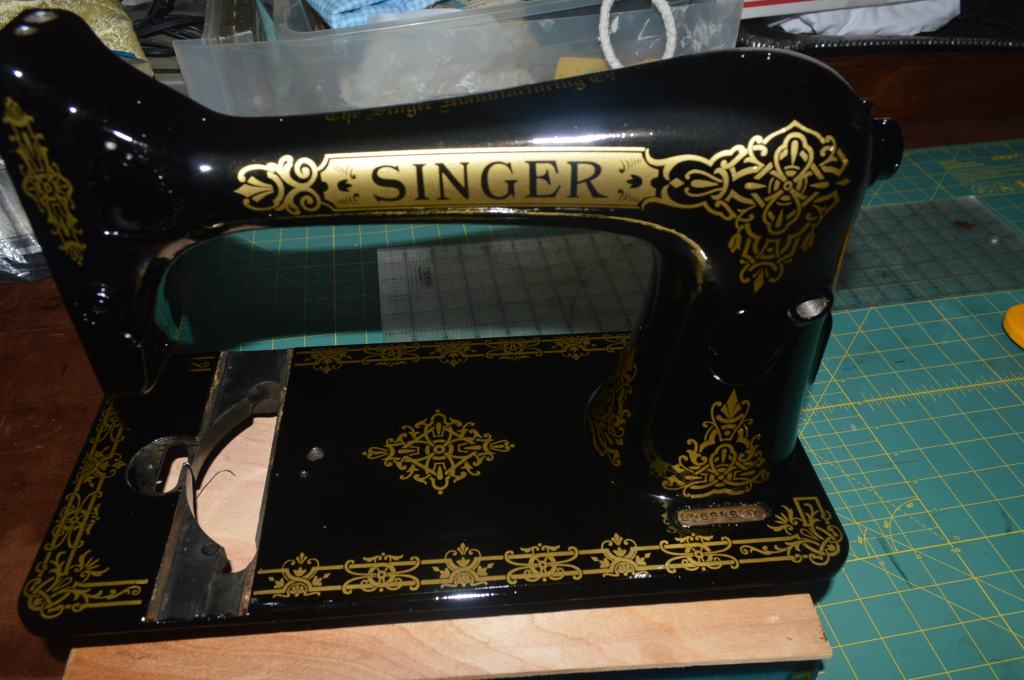
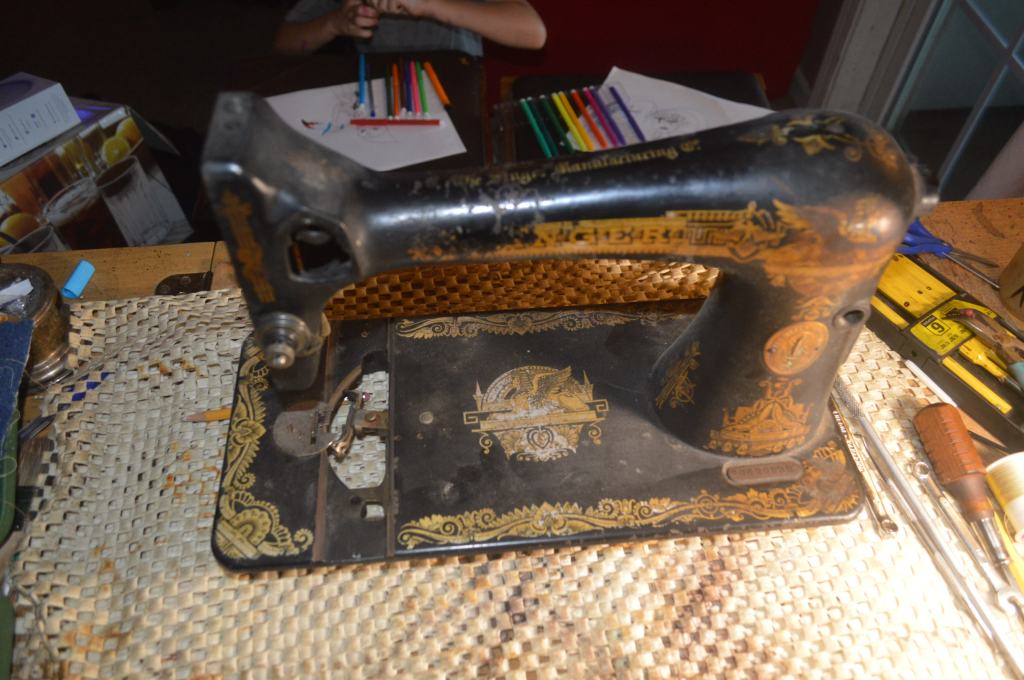
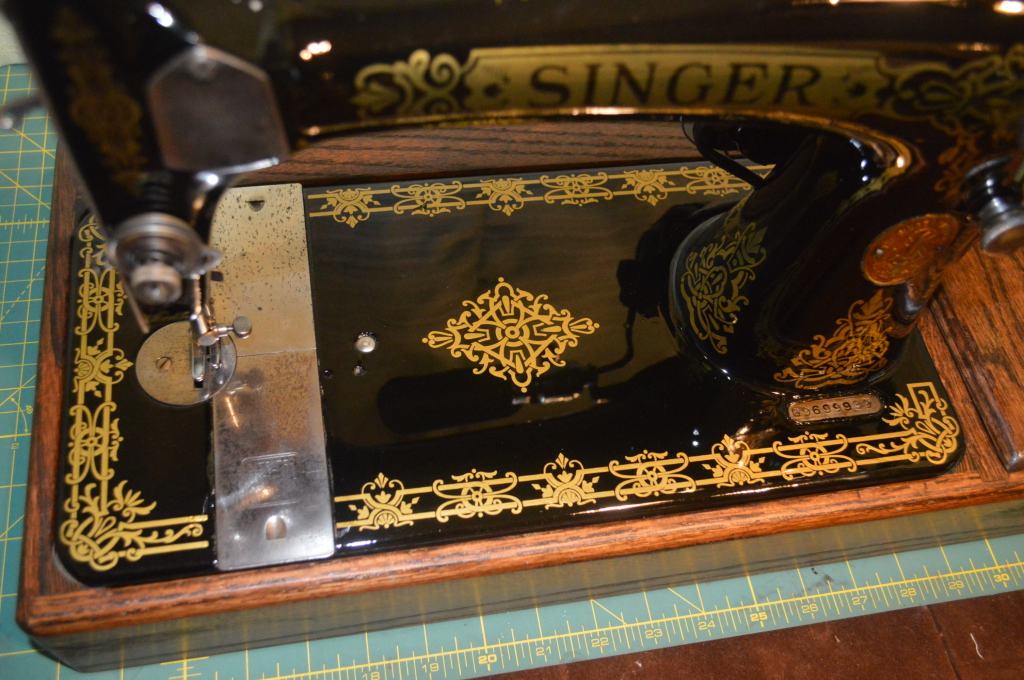
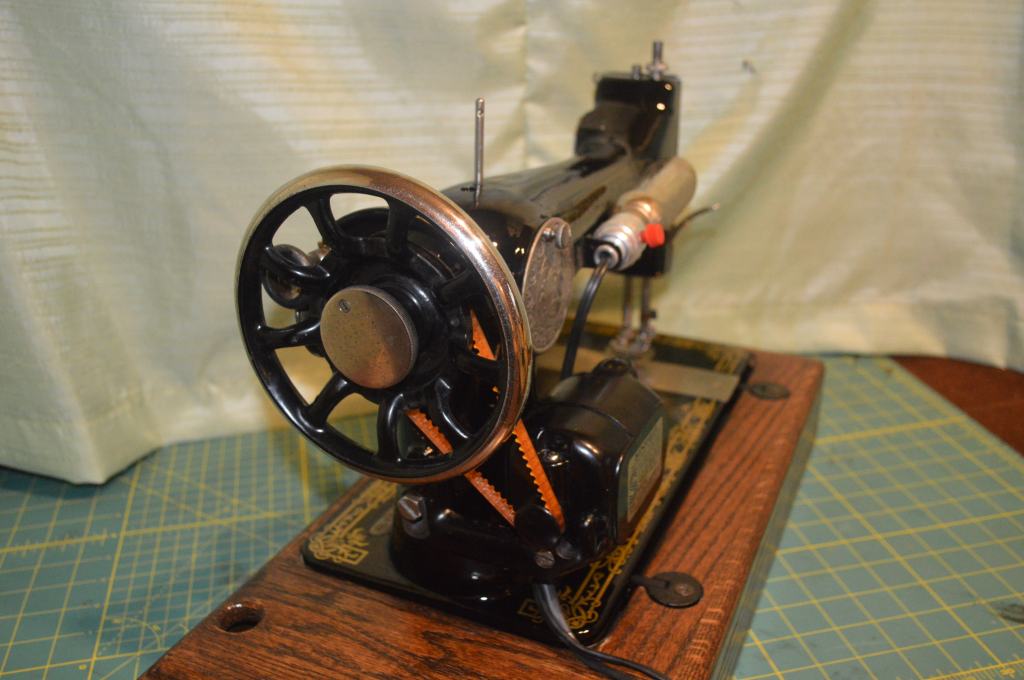
For full transparency and disclosure, this Singer model 127 was my parts machine. It’s beat up, frozen solid due to oil oil varnish, and lack of lubrication… and it missing parts. As much as I hate to admit it, I acquired this machine with the intention of using it as a parts donor. I never intended it to sew again, and I never intended to restore it. The machine was in relatively poor condition. It had a severe case of “pin rash” on the sewing arm that had ruined the decals on both sides. Hundreds of deep scratches in the paint at the front of the sewing arm indicate that the machine had been used extensively. The person that owned it obviously used it a lot and I can speculate it sewed at least a hundred miles of stitches in it’s lifetime. The “Sphinx” decals were silvered in the center of the bed, but otherwise the bed decals looked pretty good. The machine was completely seized up. There was not a hint of oil in any of the mechanisms. I disassembled the machine to get a part I needed for another 127, and kept the other parts in a card board box. It’s primary use to me was as a pattern to fit my custom made model 27/127 sewing machine bases… my my, to think how far this once fine machine had fallen in the space of a hundred years is truly sad. The reason I am restoring this machine is to prove a point. I’m betting that a full restoration will bring this machine back to it’s peak of performance and look great in the process.
The model 127 (and sister model 27) are vibrating shuttle machines. Like most machines of it’s vintage it is very basic in it’s function and does not have features such as a reverse stitch, indexed stitch length controls, indexed tension control, or ability to drop the feed dogs, but as a class of machine their ability to make a beautiful straight stitch seems to be built into the design. I have restored several, and I am always impressed with the stitch… no wave, no wandering, just plain heel to toe straight. If harp space is important to you, In comparison with other full size domestic machines (then and even now), it boasts a large 45.4 square inch harp space and a 14-1/2″ bed. In comparison, the Singer model 66 has a harp space of 44 square inches and a 14-1/2″ bed. For those interested in harp space to handle bulkier projects (such as quilts), this makes a difference.
Restoration Plan
The plan is simple… The purpose of this restoration is to revive this machine to “like new” condition. The mechanical restoration will be detailed and complete. It will be completely disassembled and all of the parts will be ultrasonically cleaned and then wire brushed to bright steel. Parts that rotate or rub against another part will be polished. Originally a treadle machine, a motor and light will be added to achieve the minimum expectation for convenience in use. Any broken or missing parts will be replaced with parts from another model 127 donor machine I just acquired for this purpose (also in sad condition).
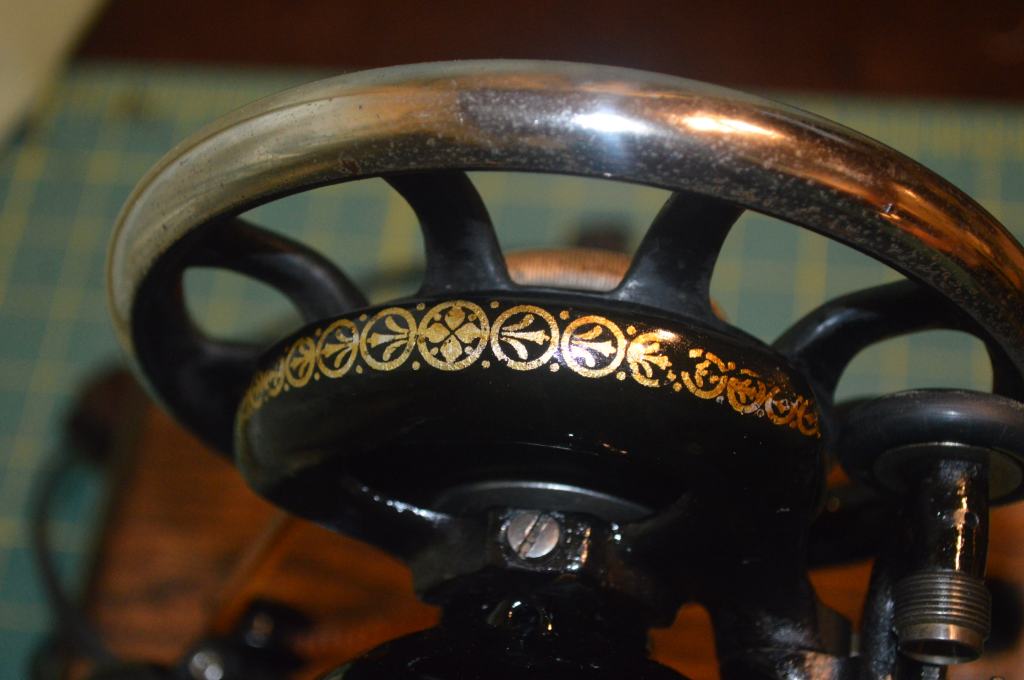
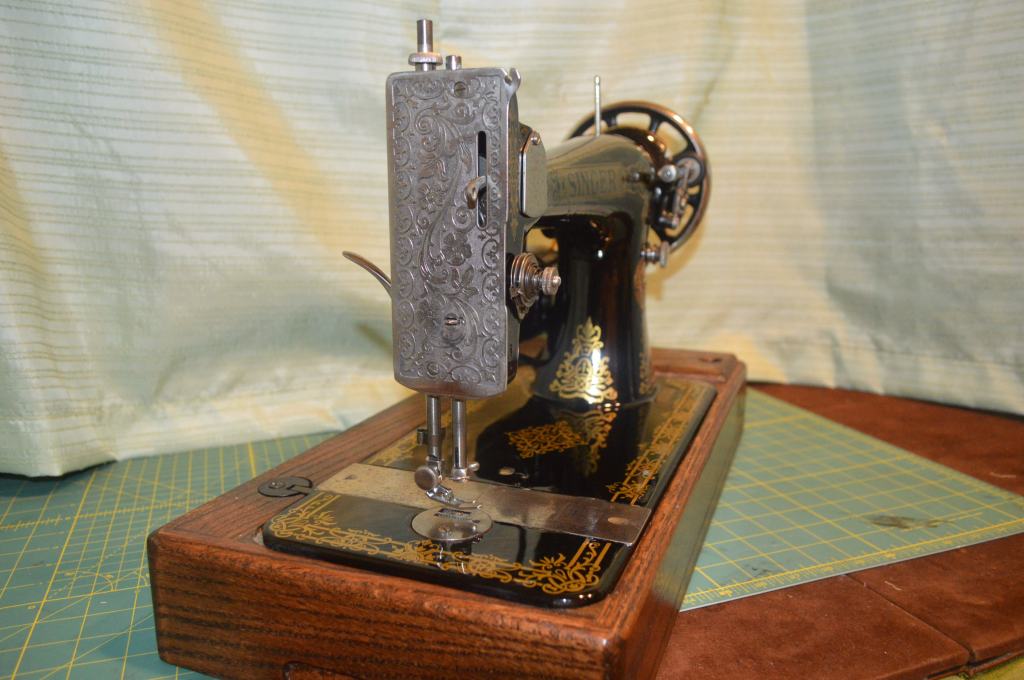
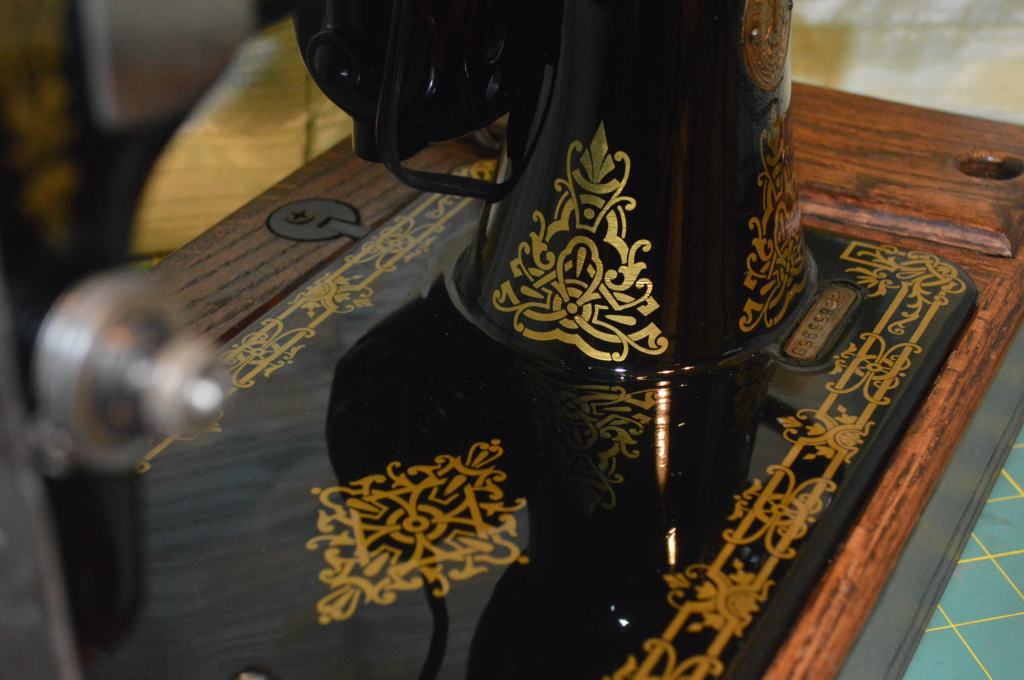
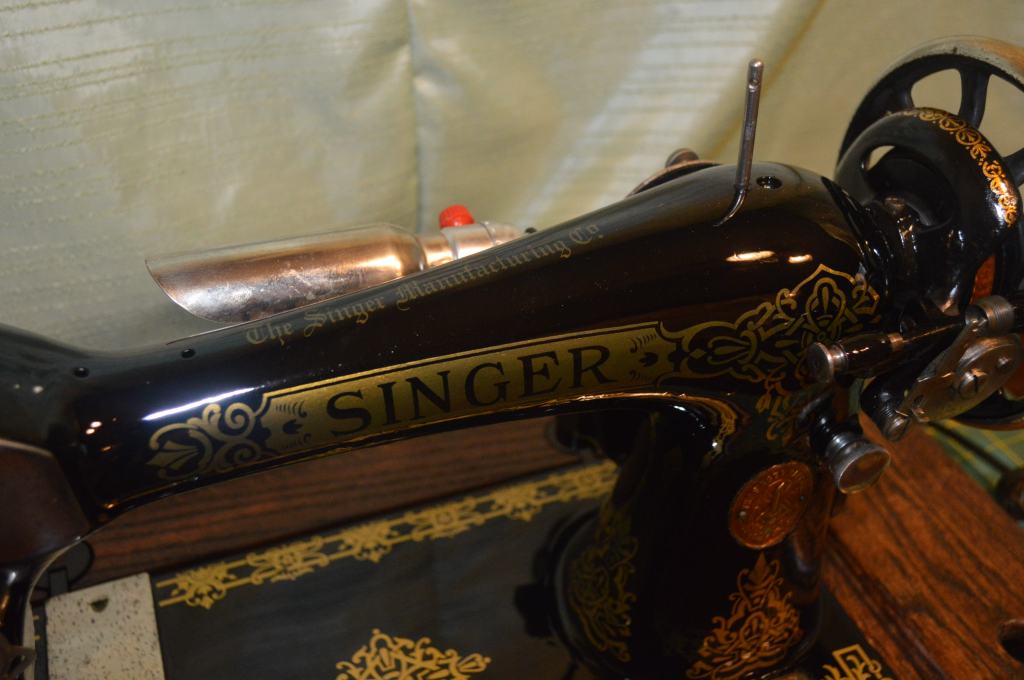
The cosmetic restoration will include new paint and decals. Instead of using the “Sphinx” decals original to the machine, I am using “Celtic” decals. Both are correct for the vintage but I like the simple gold design in the Celtic decals. All of the nickel plated parts and pieces will be polished. Some nickel plated parts have areas of corrosion or loss of plating, and polishing will not remove corrosion nor will it add plating, but it will still look good. Areas like this will remain a reminder of a useful life. The final finish will yield a beautiful smooth shiny deep black finish. In short, it will look like new.
At the end of this restoration not only will the machine look new and run as smooth as new. It will also demonstrate that regardless of how dirty or seized up a vintage Singer sewing machine is in, it is possible to restore it to like new condition.
The Mechanical Restoration
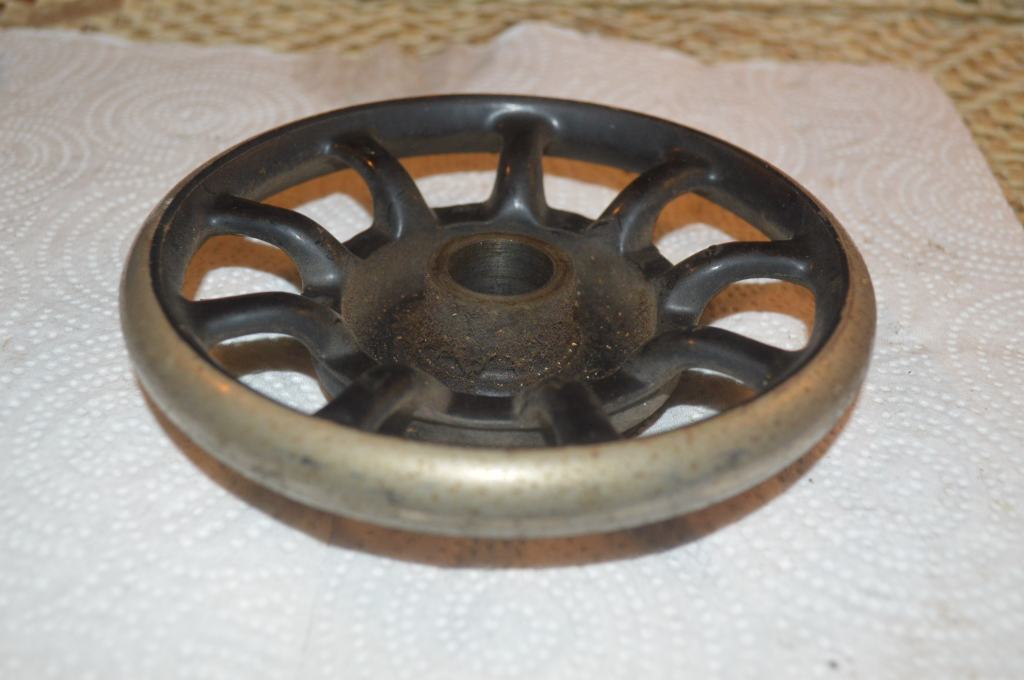
Here is the machine before restoration… There was not a hint of any remaining lubrication and the oil varnish had frozen the rotating parts together,. No wonder the machine was frozen.


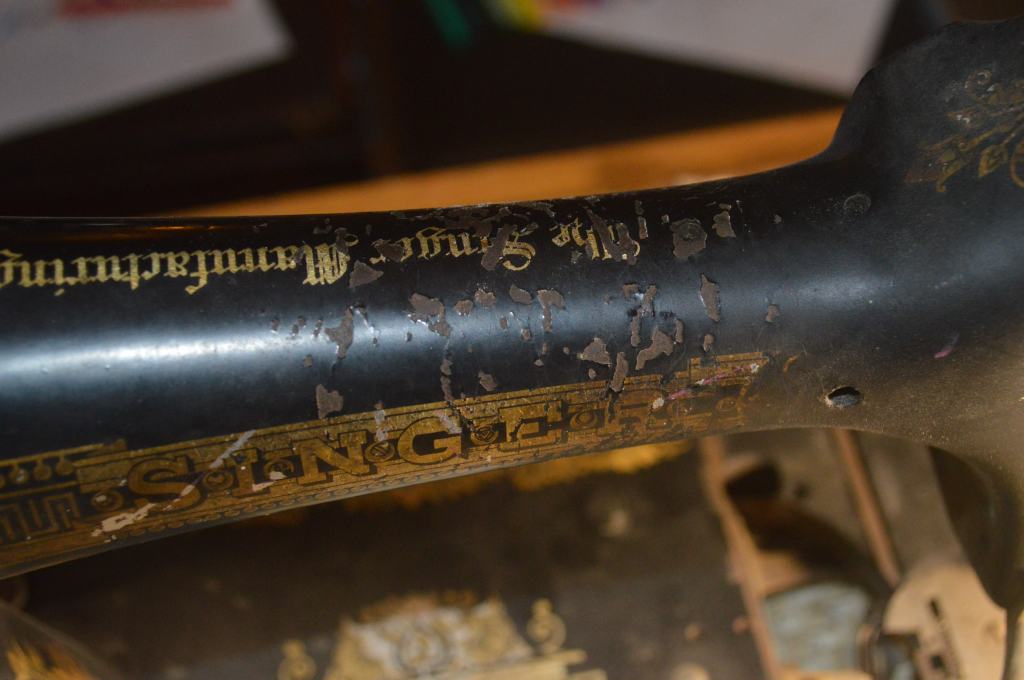
pin rash 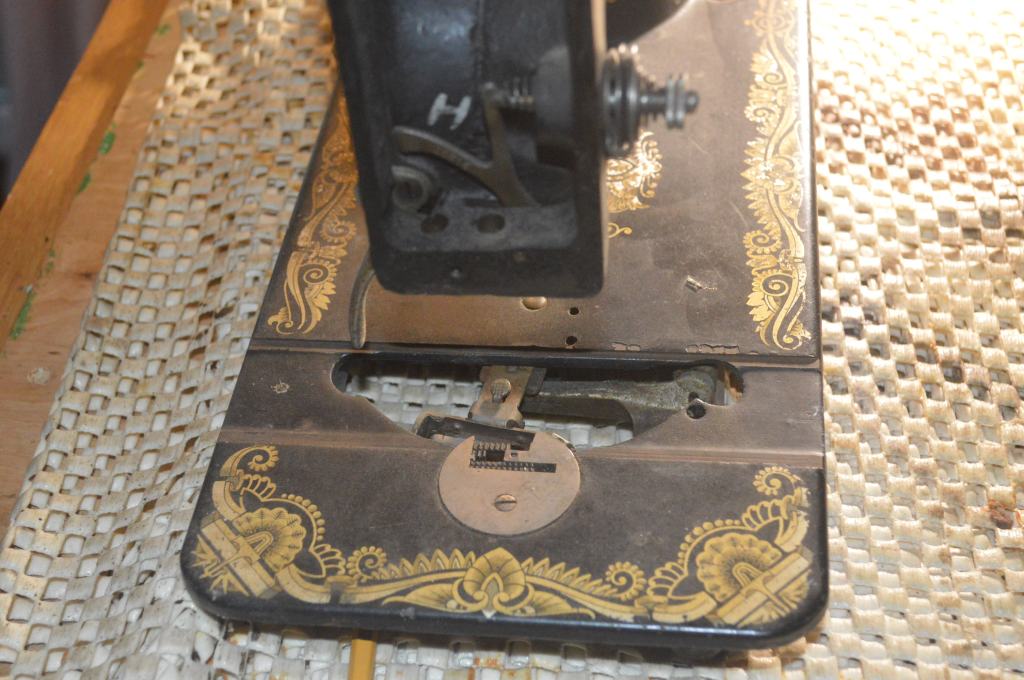

More pin rash 
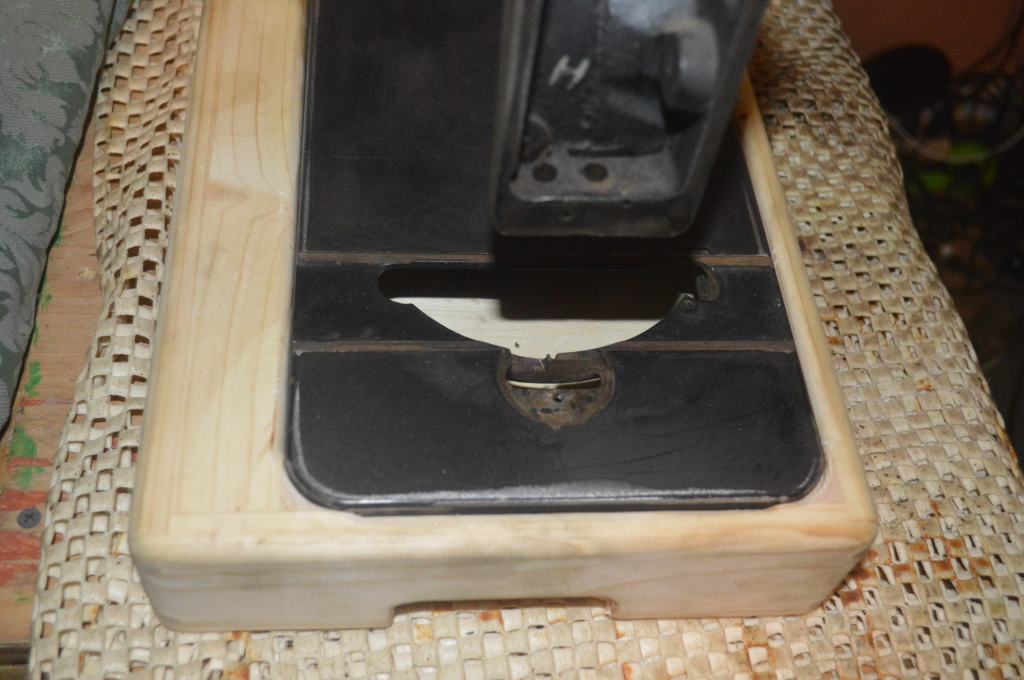
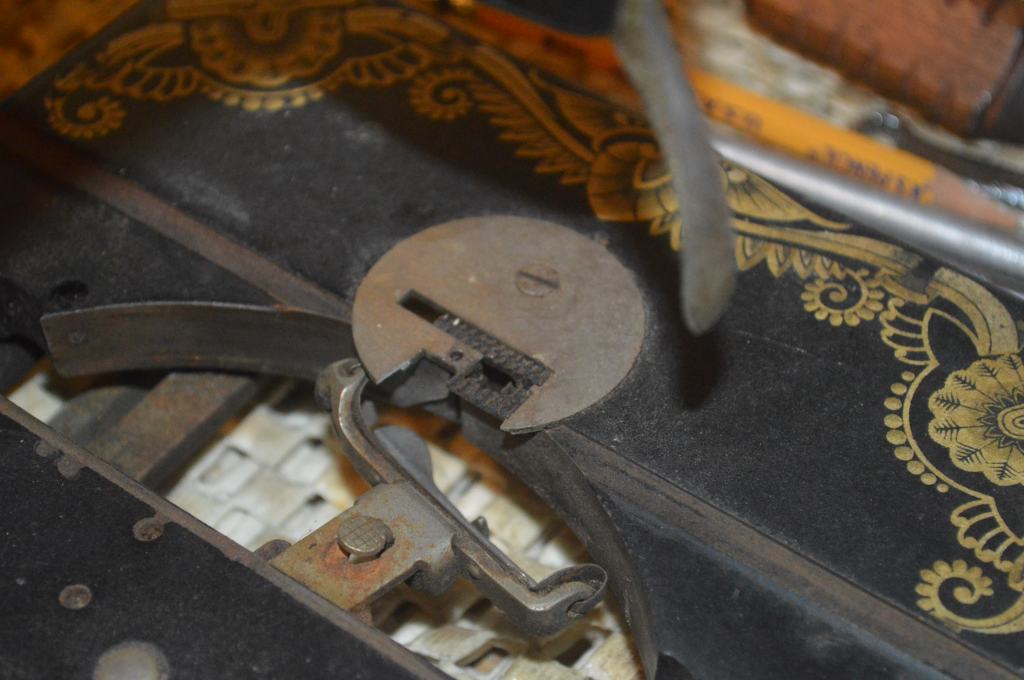
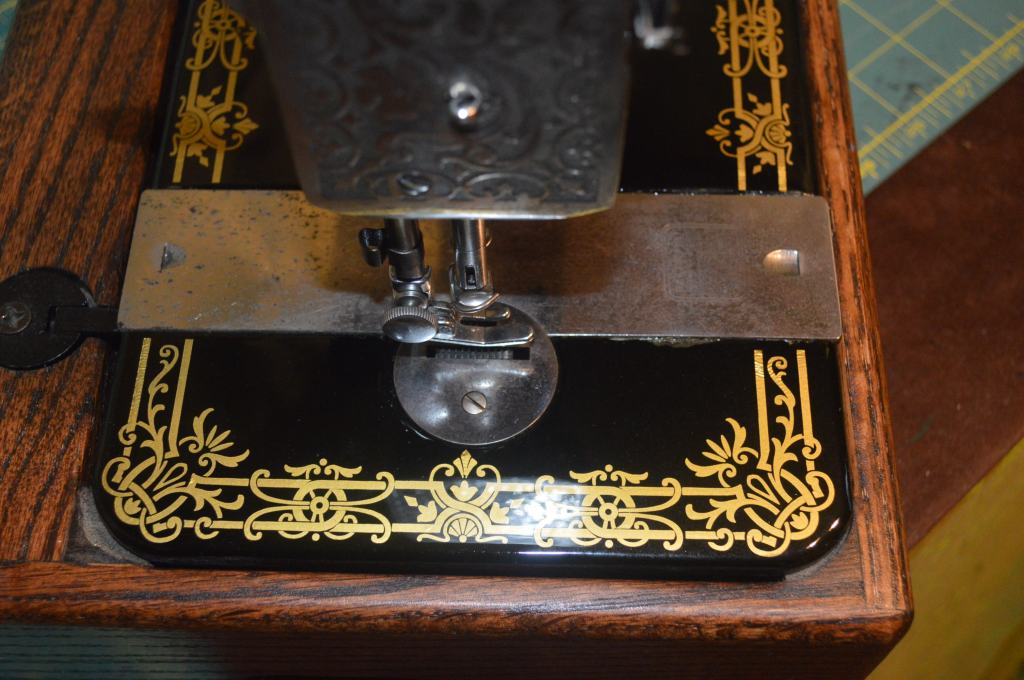
Needle plate is broken 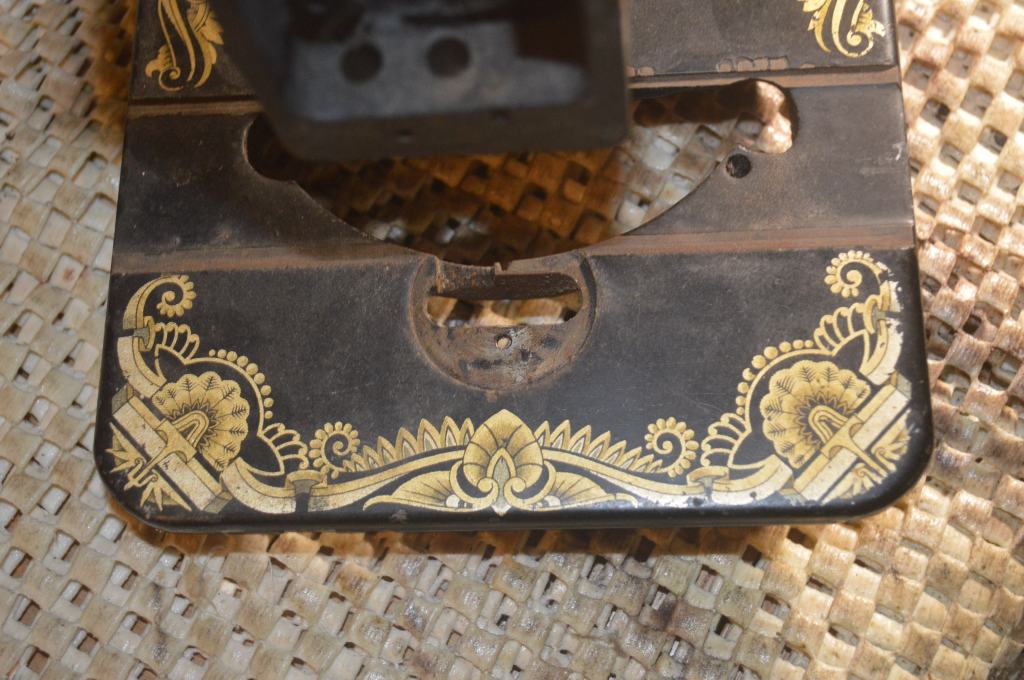

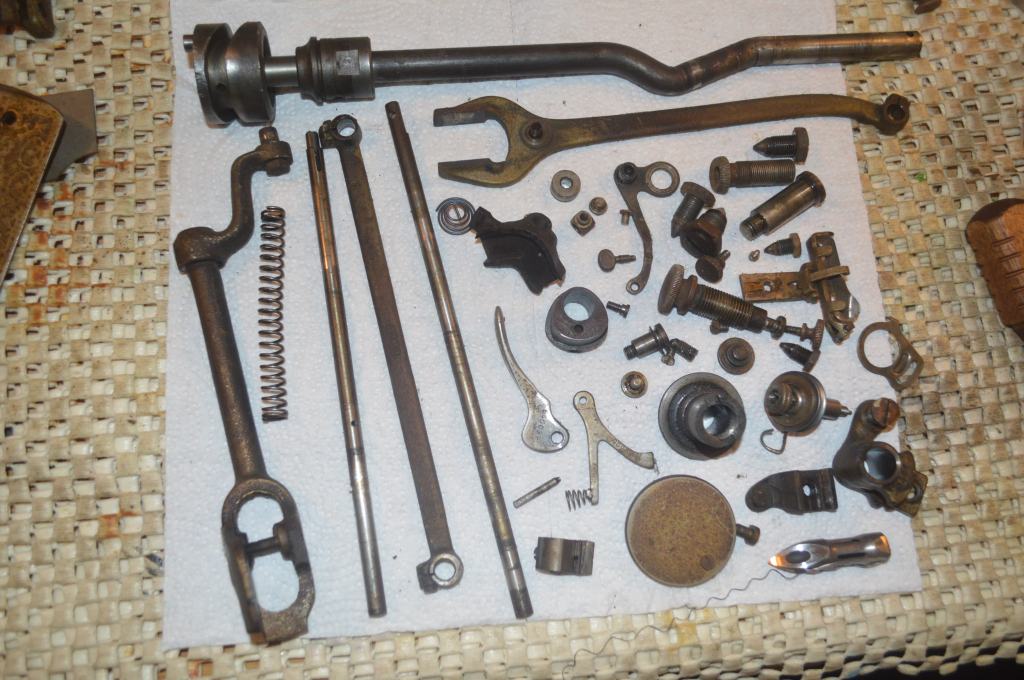
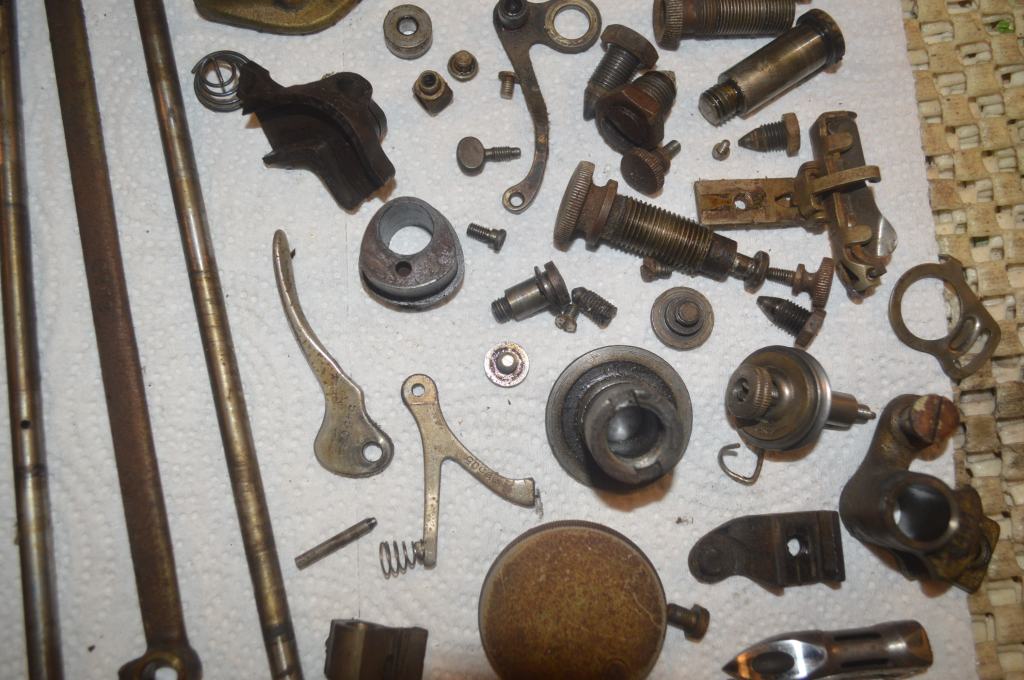
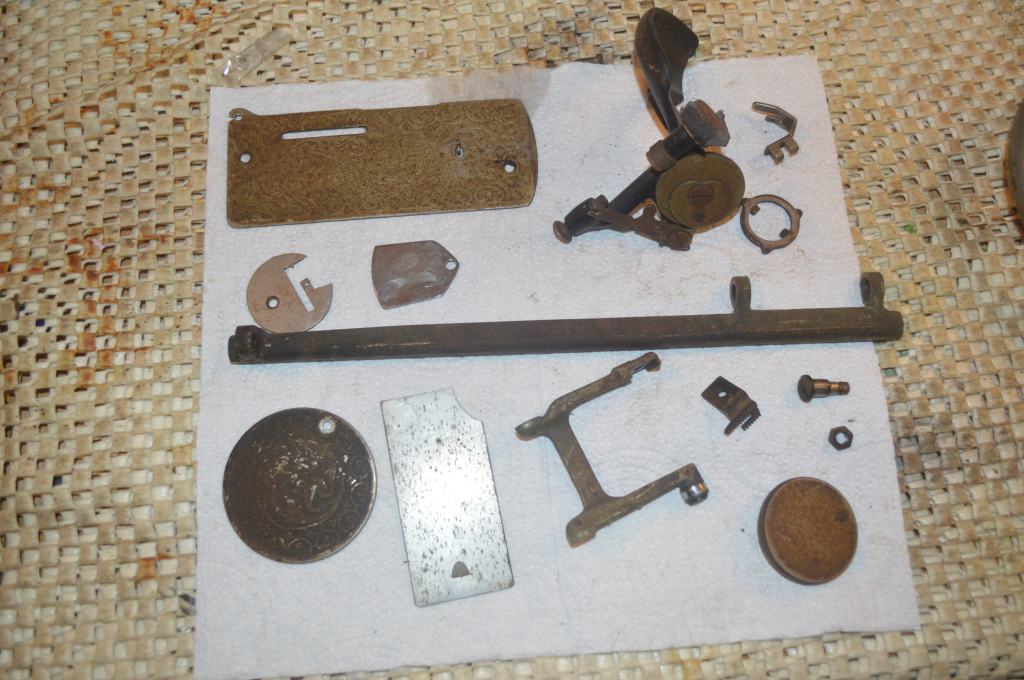
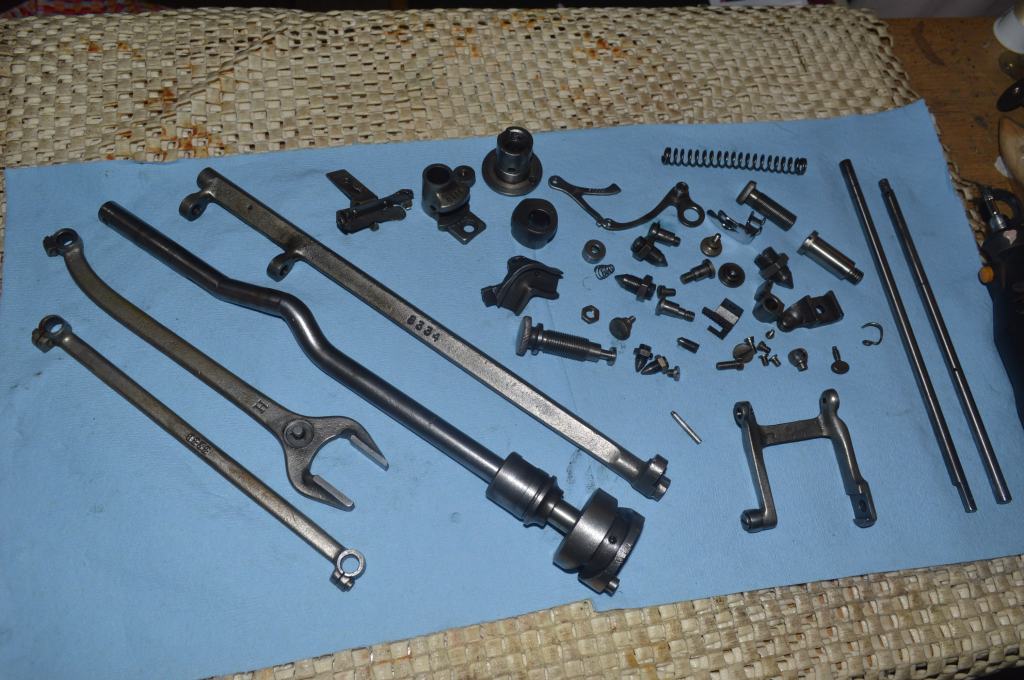
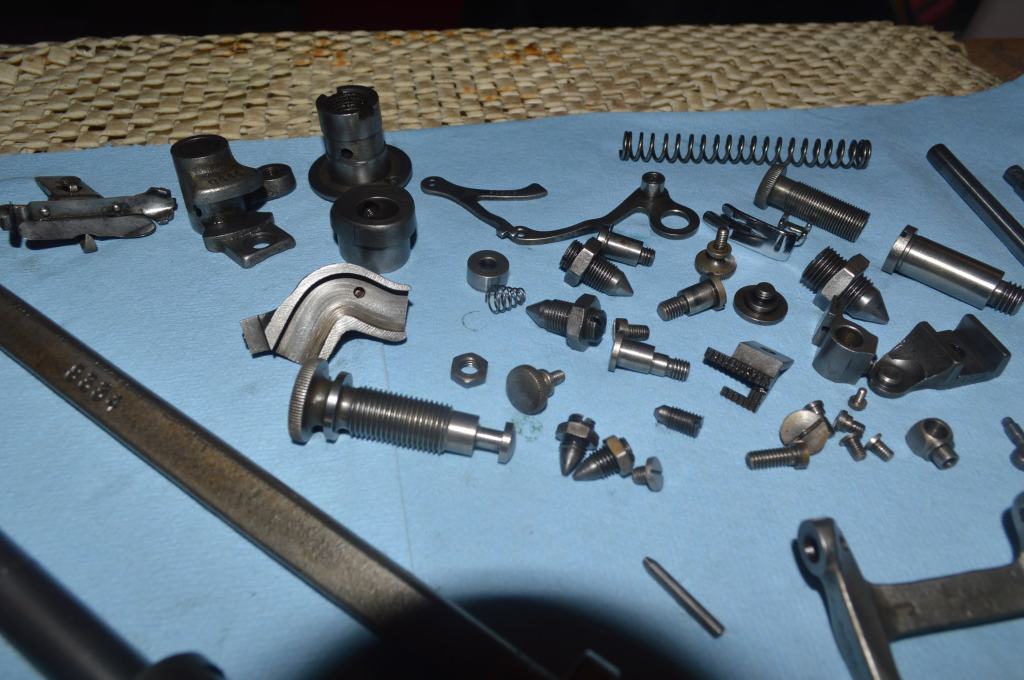
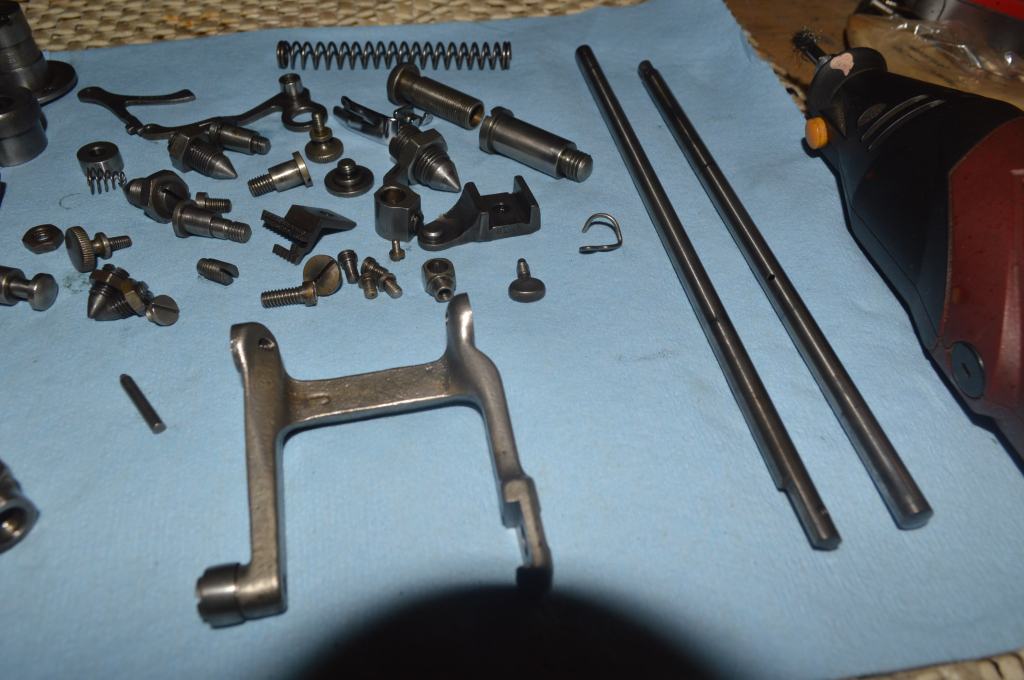
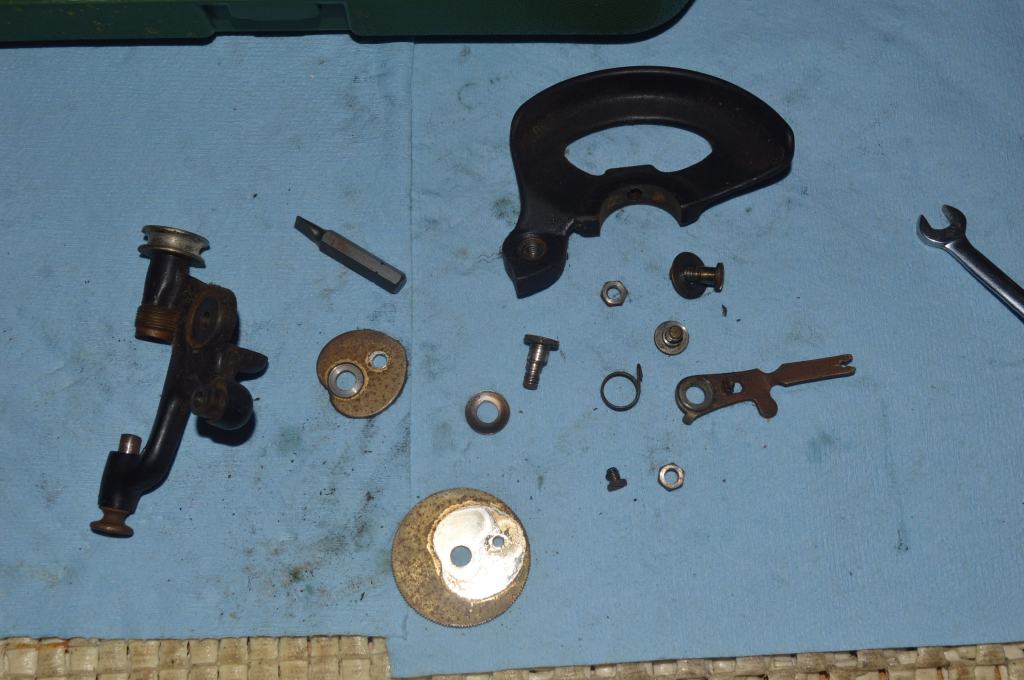
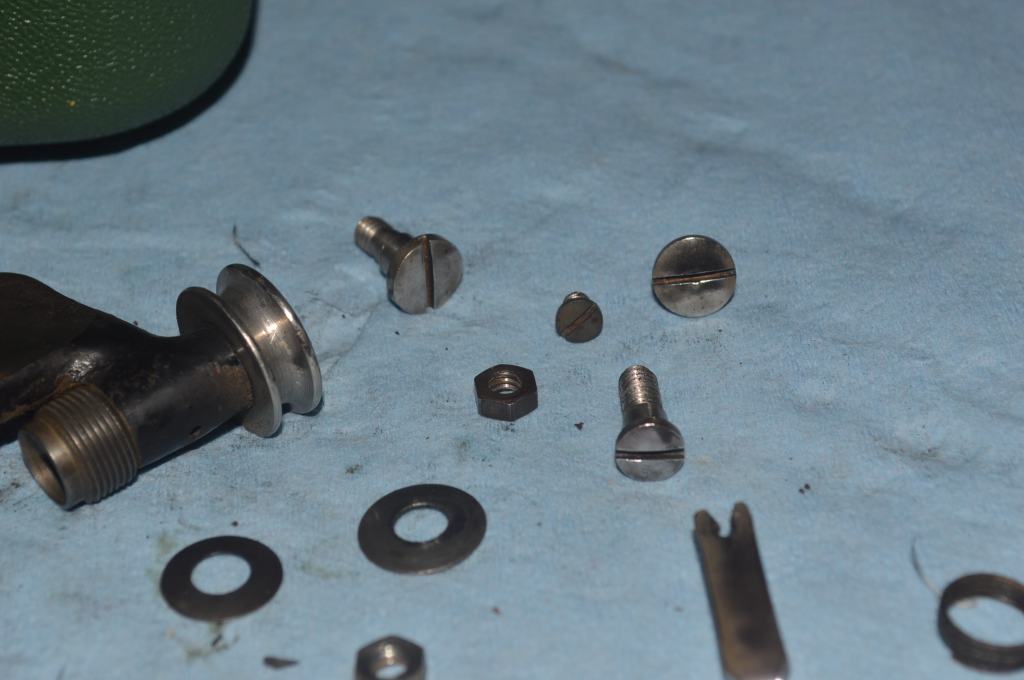
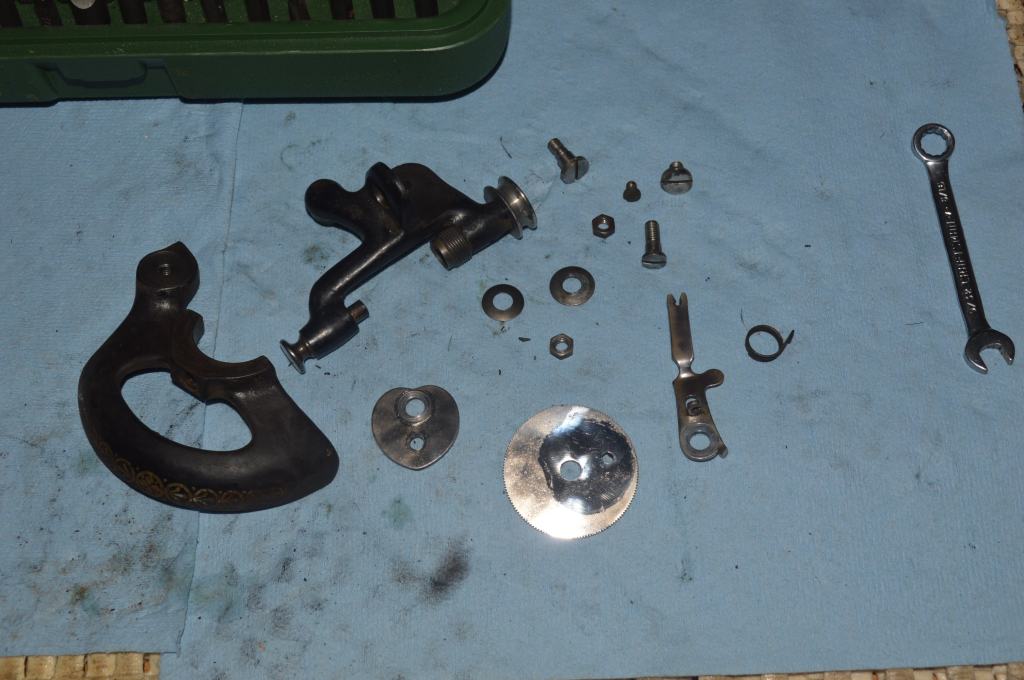
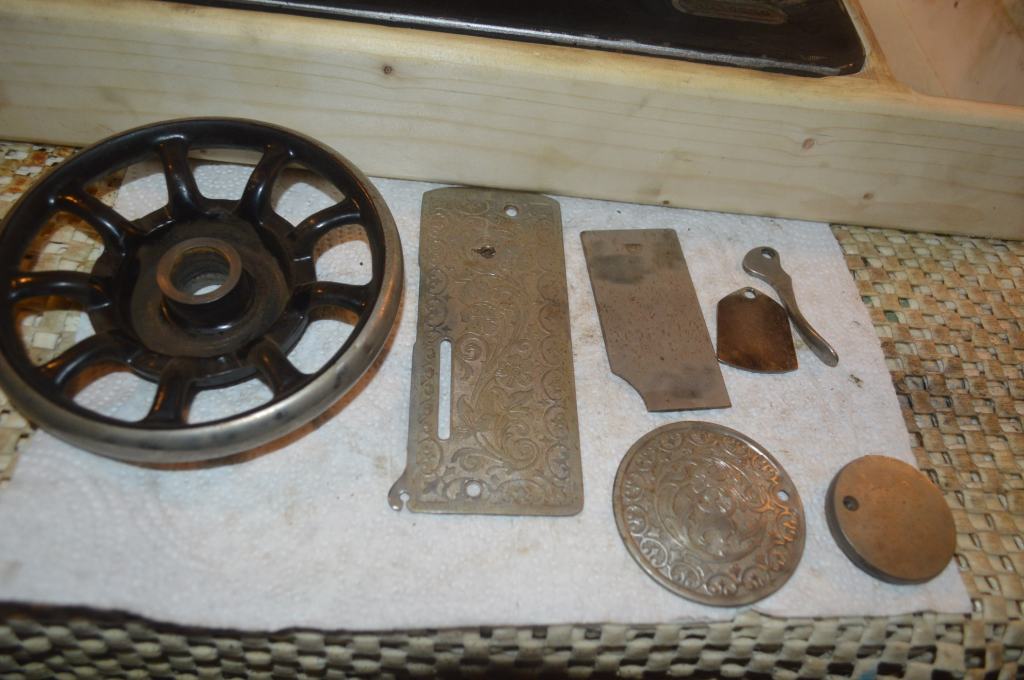
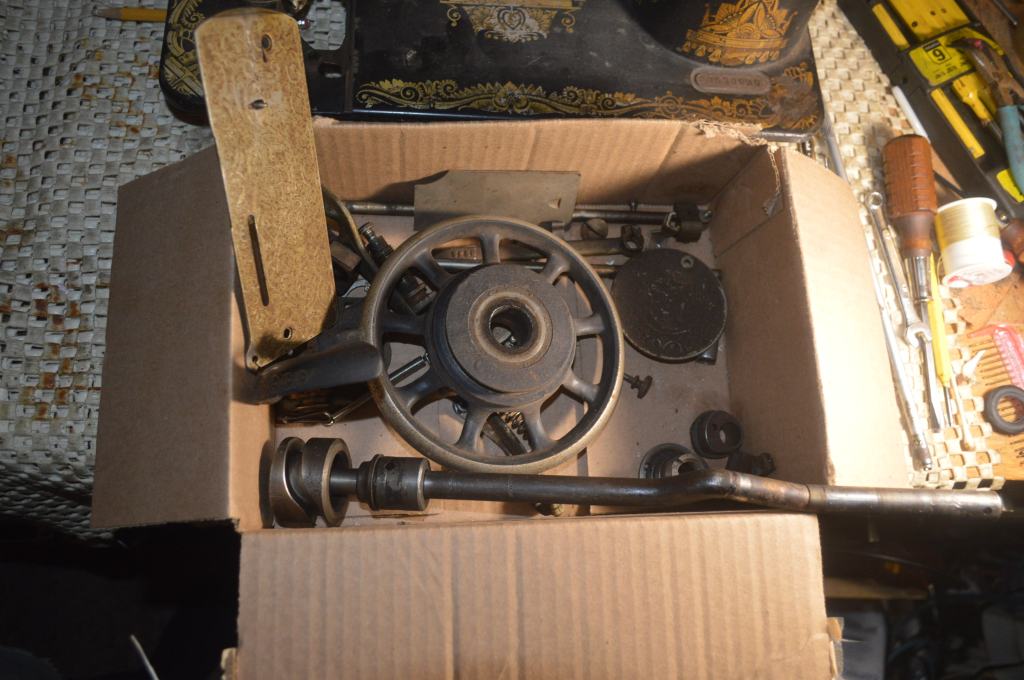
The parts in the box are laid out for cleaning.

After ultrasonic cleaning, the parts are heated in oil to 325 degrees for an hour to drive off any moisture and then they are wire brushed to bright steel.
Parts after cleaning…

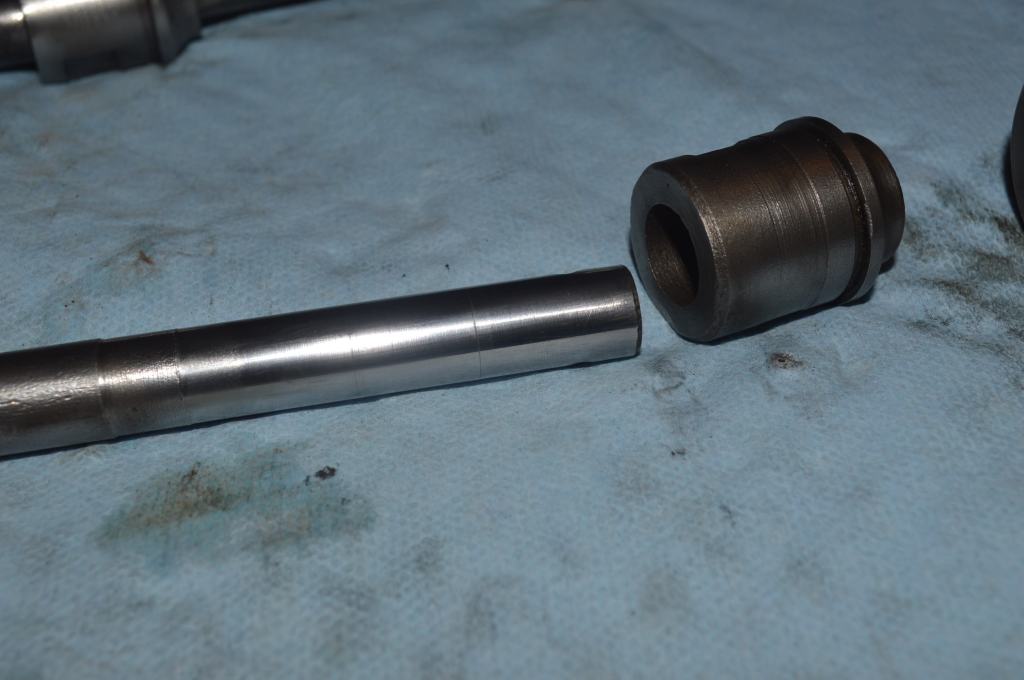
There is more than one benefit to wire brushing each piece. Reassembly of the machine with clean parts is much easier when everything is clean and smooth. The other advantage is that it gives me the opportunity to closely inspect them for damage. After cleaning and wire brushing, I noticed some galling and rough edges on the upper arm shaft thread take up cam. Looking at the edge of the groove, my concern is that the roughness will impede the smoothness of the thread take up arm. This begs the question of how it happened. I’ll never know. Smoothness in all of the parts is the key to smoothness of any sewing machine so I am going to replace it. The easiest way to fix this is to use the donor machine and replace the entire upper arm shaft. However, looking at the shafts side by side, they are slightly different… sometime between 1901 when the donor machine was manufactured and 1922 when this machine was manufactured, some slight changes were made in the design. Take this as a warning… just because two machines are the same model, unless they are the same vintage, do not assume all of the parts are interchangeable. Many parts are, but some are not. The upper arm shaft thread take up cam is the same, so I will replace this part and keep the arm shaft original to the machine.
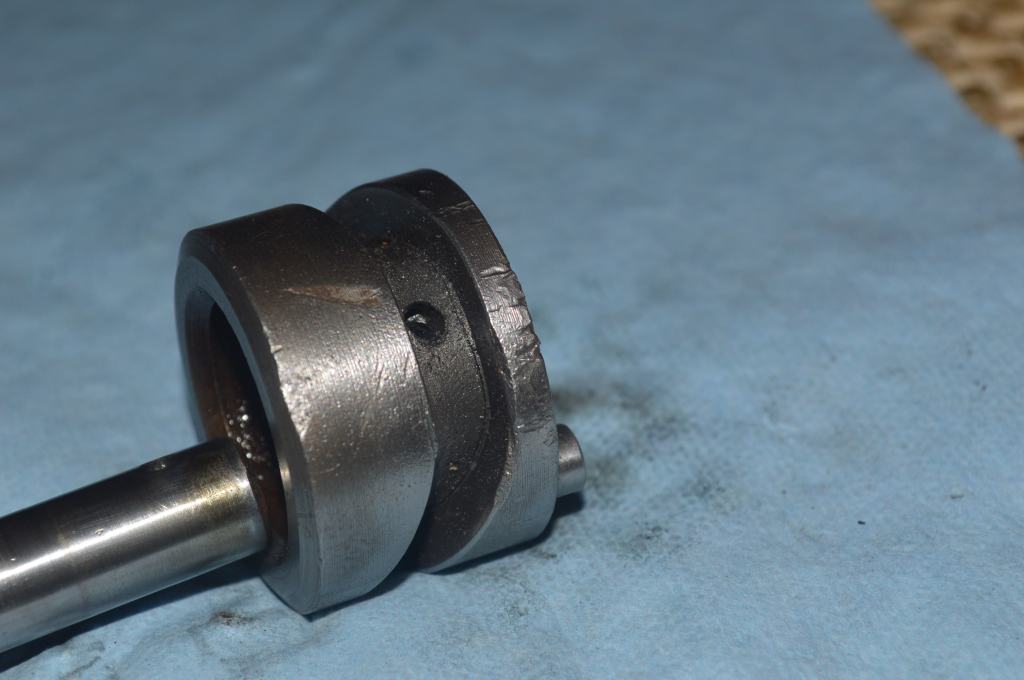
Replacement of this part allows me the opportunity to polish the upper arm shaft where it rides in the bearing bushing… That a plus!
The next part of the restoration is the bobbin winder. I always look forward to doing this part because the bobbin winder adds a lot of character to the machine. The are very mechanical and fun to watch winding a bobbin.
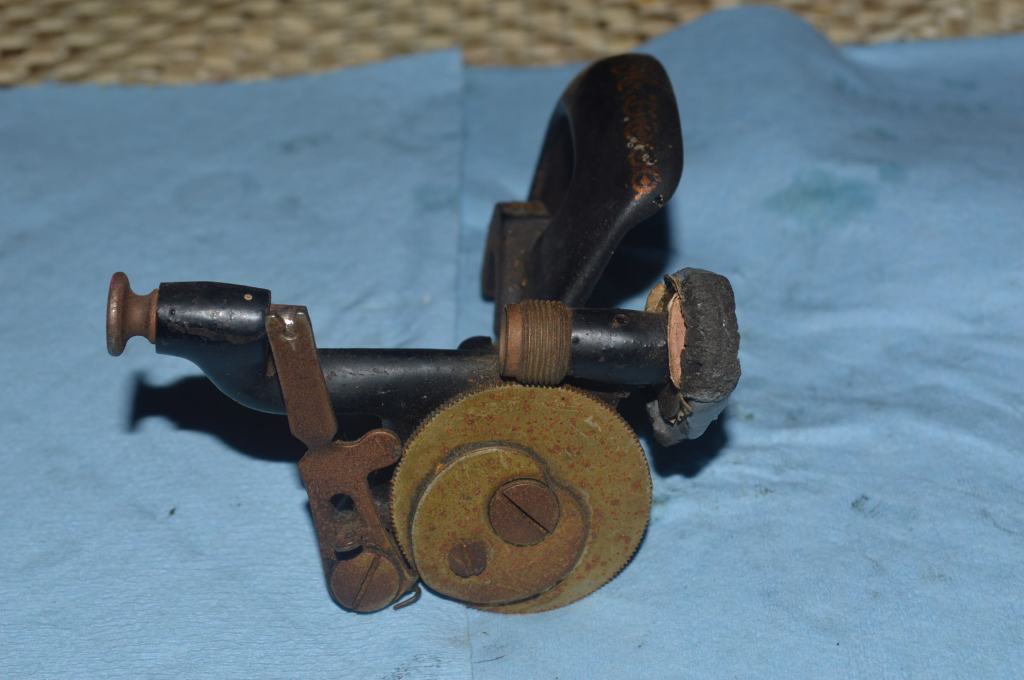
The bobbin winder is disassembled and cleaned, and all of the plated pieces are polished.
The restoration decal set did not include a decal for the bobbin winder so I decided to preserve the original decal… it’s in reasonably good condition and is a mark of the machines history. The body of the bobbin winder is cleaned and the old decal is preserved. There is a bit of corrosion on the gear that cannot be polished out and the winder finger spring is broken. The spring is replaced and the remnants of the corrosion in the plating is a testament to the machines history.
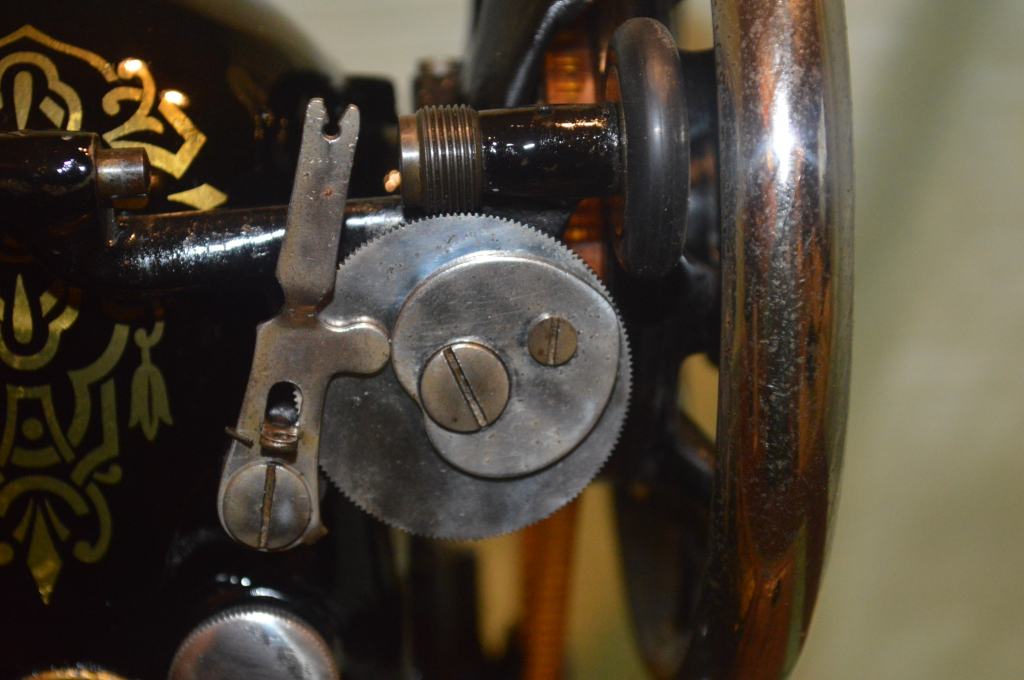
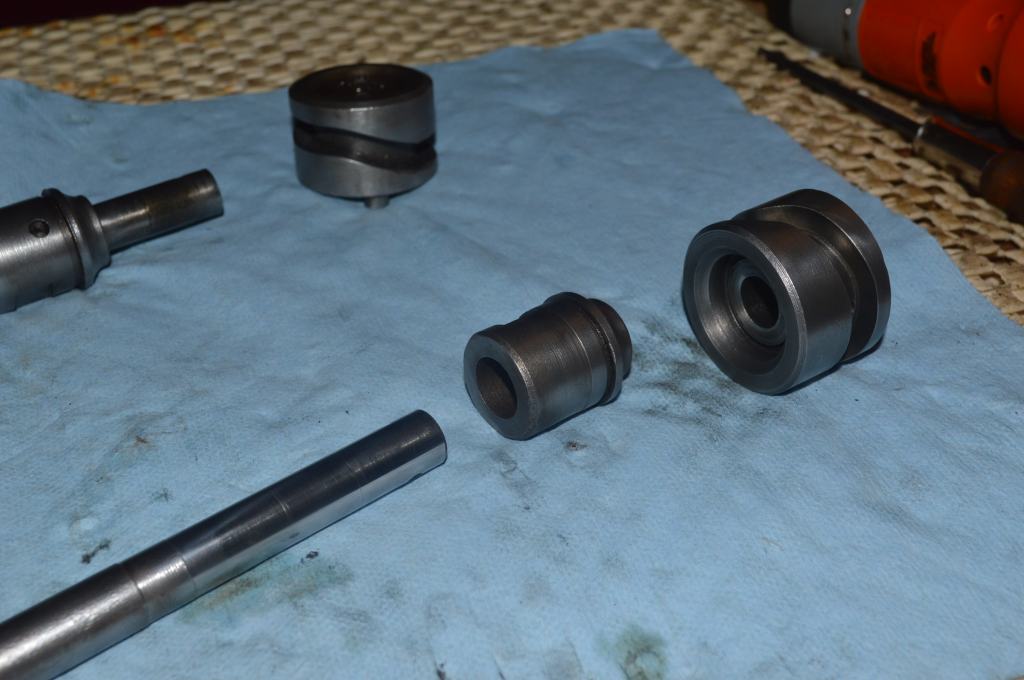
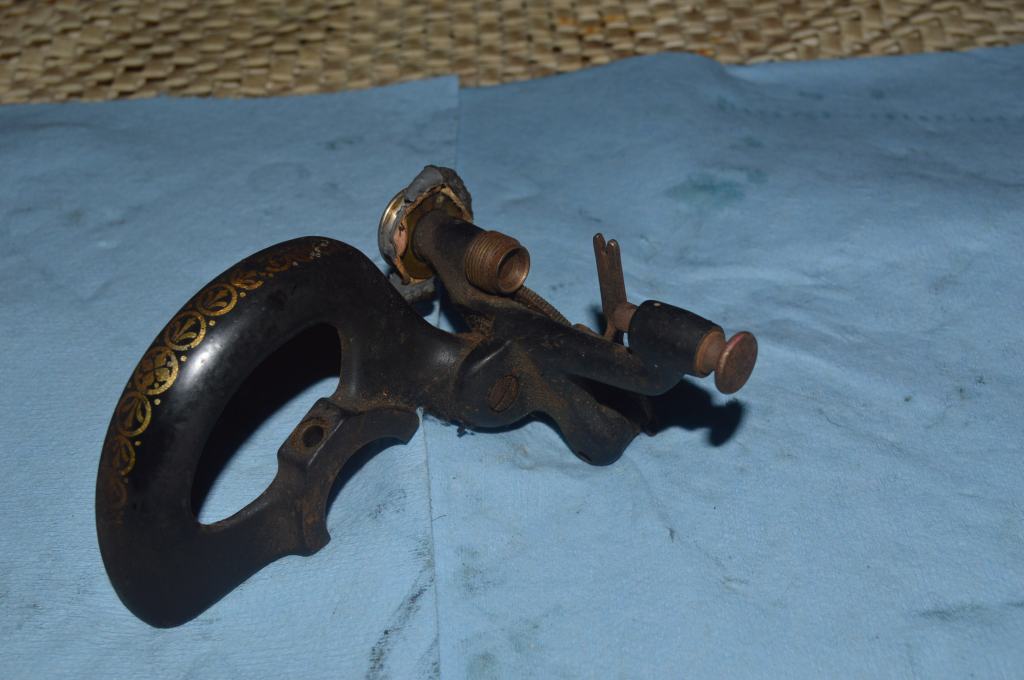
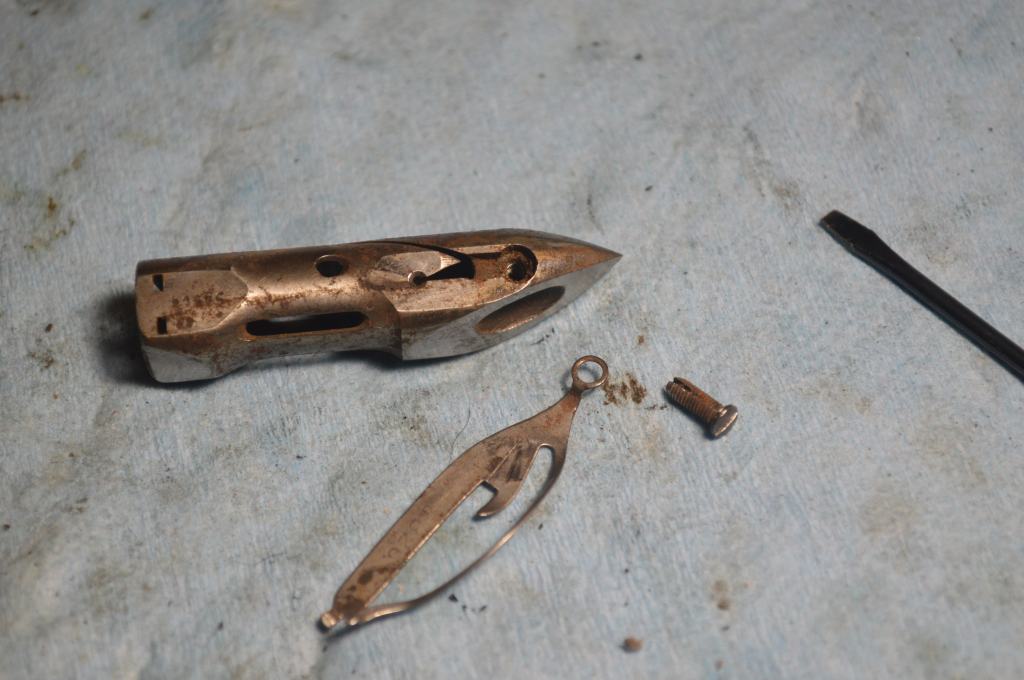
The real reason for the donor machine was to replace the feed dog driver fork. One of the two “ears” on this part was broken in the machine and was the reason I decided to use it as a pattern machine for my sewing machine bases in the first place. This part is salvaged from the donor machine.
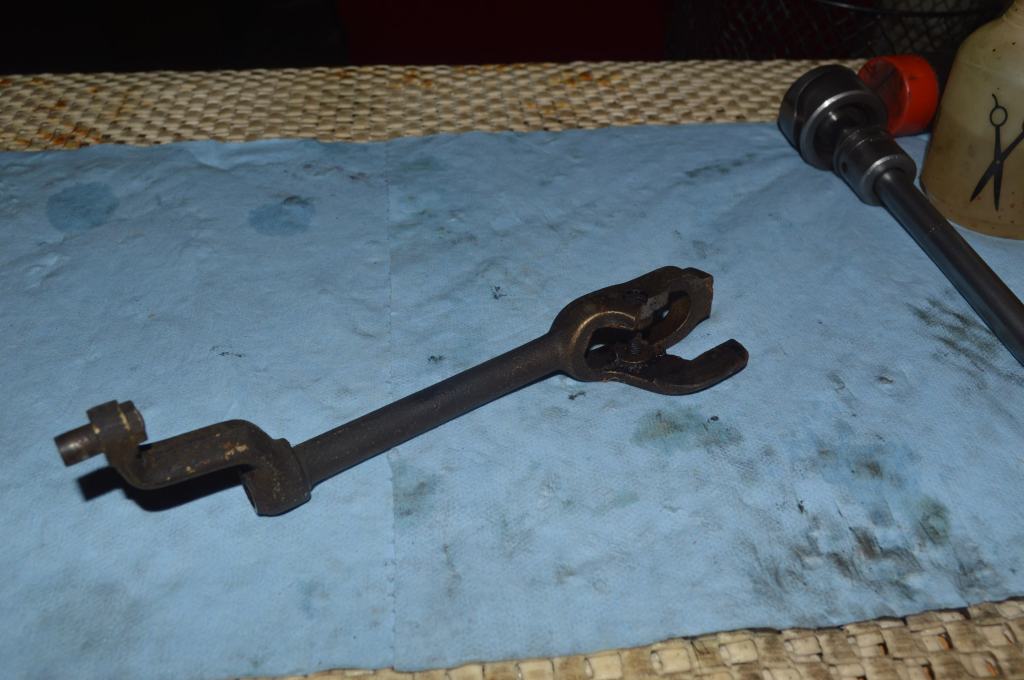
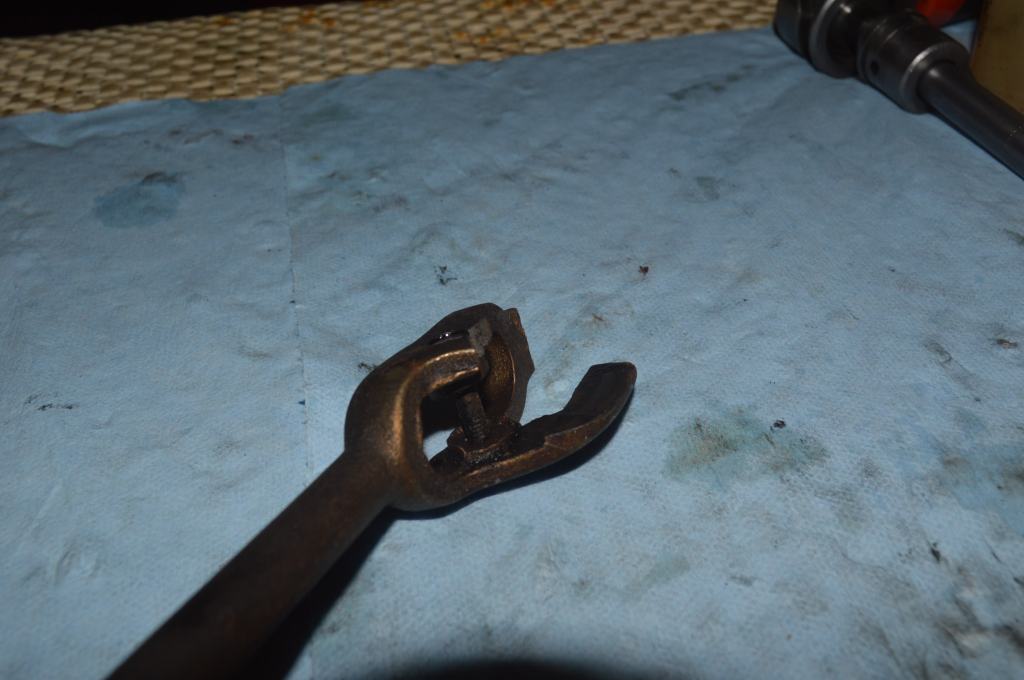
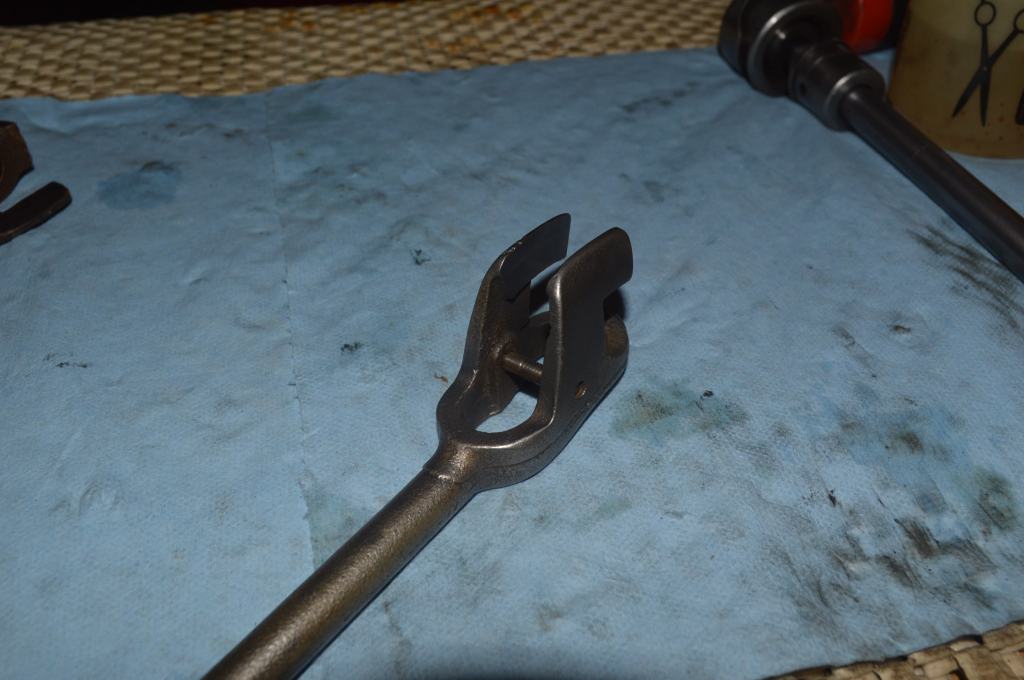
Donor part cleaned and ready for installation
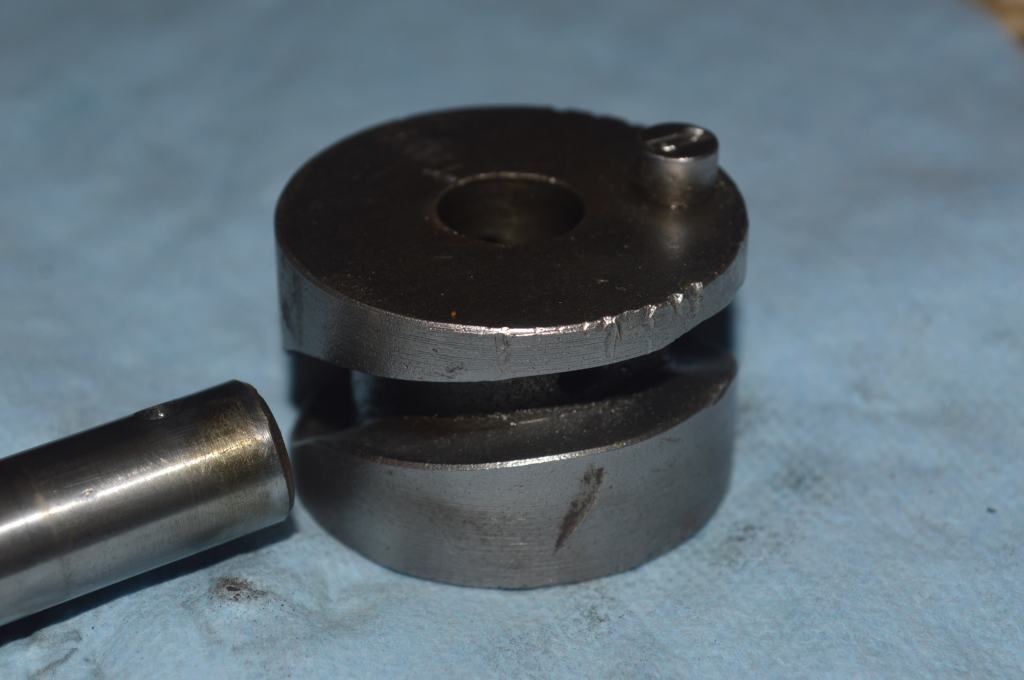
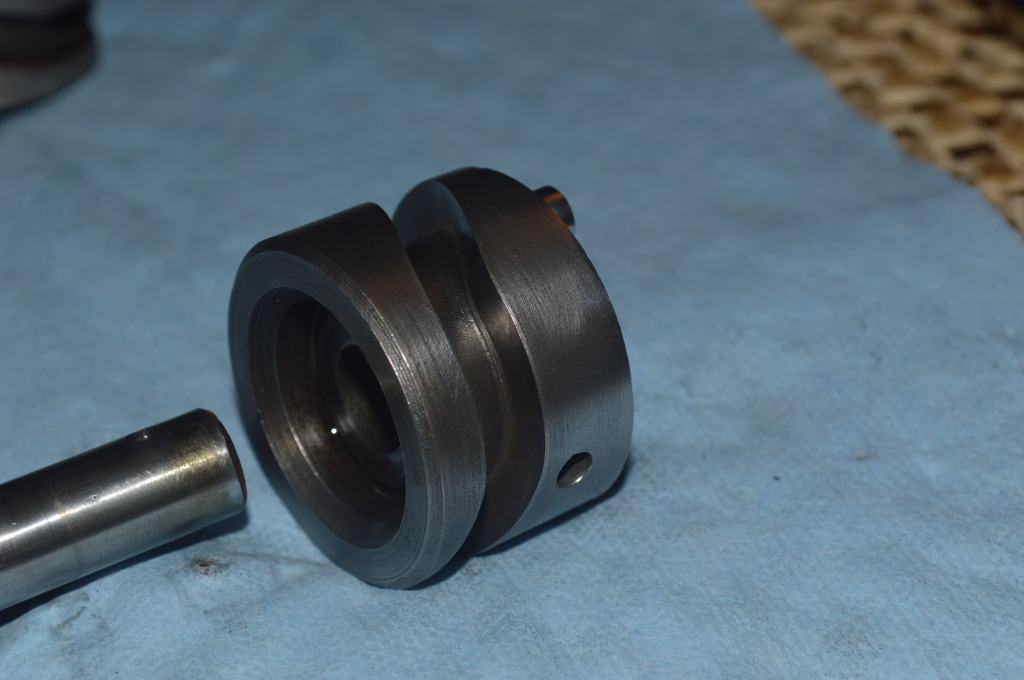
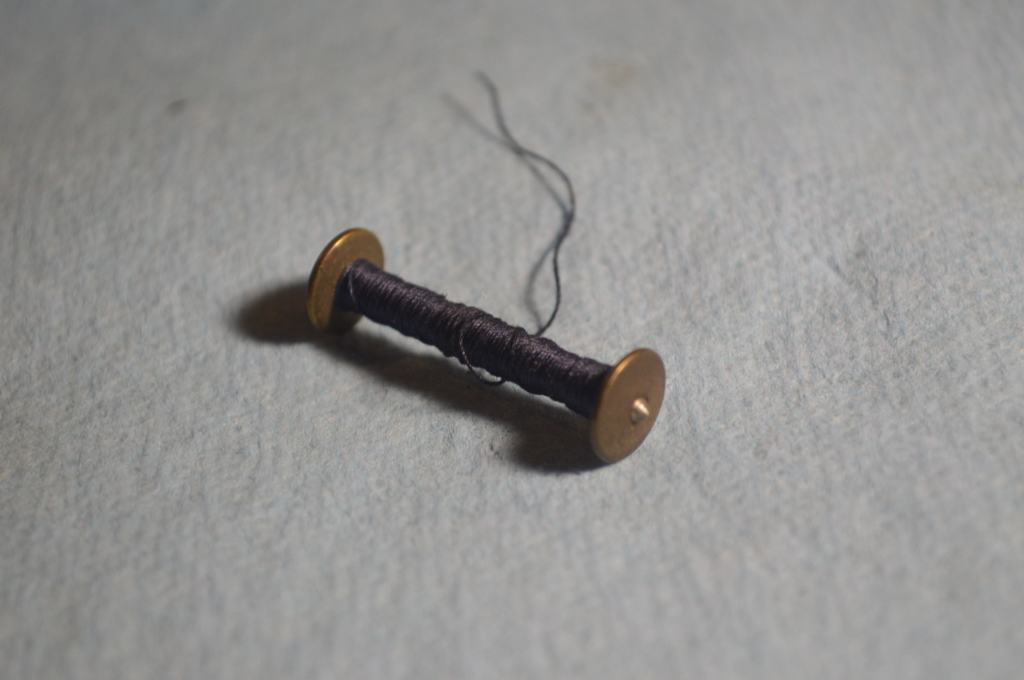
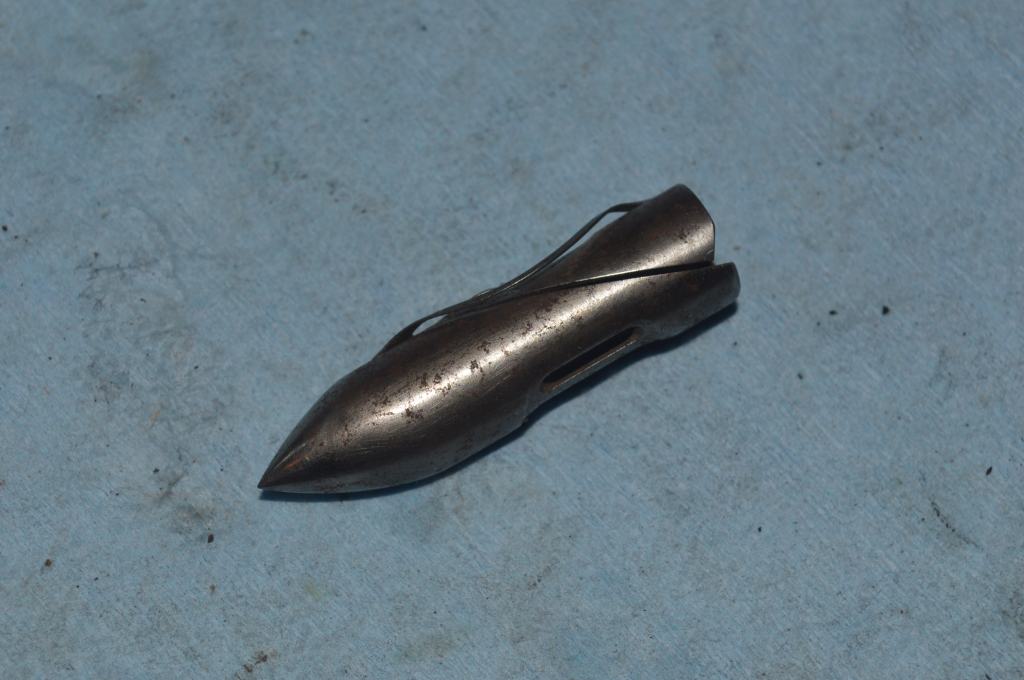
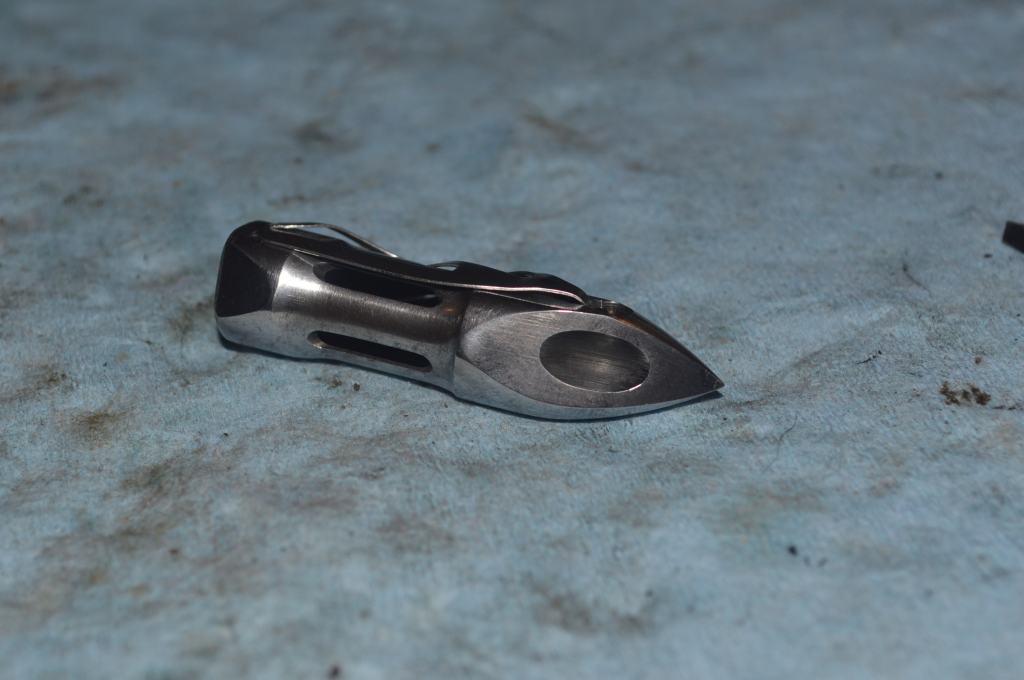
The heart of a shuttle machine like the mode 27 and 127 is the bobbin shuttle. Unique to it’s design, it not only acts as the hook to catch the top thread, it also contains the bobbin and bobbin thread. The bobbin looks like a small bar bell and is quite different from the bobbins in class 15 and class 66 machines.
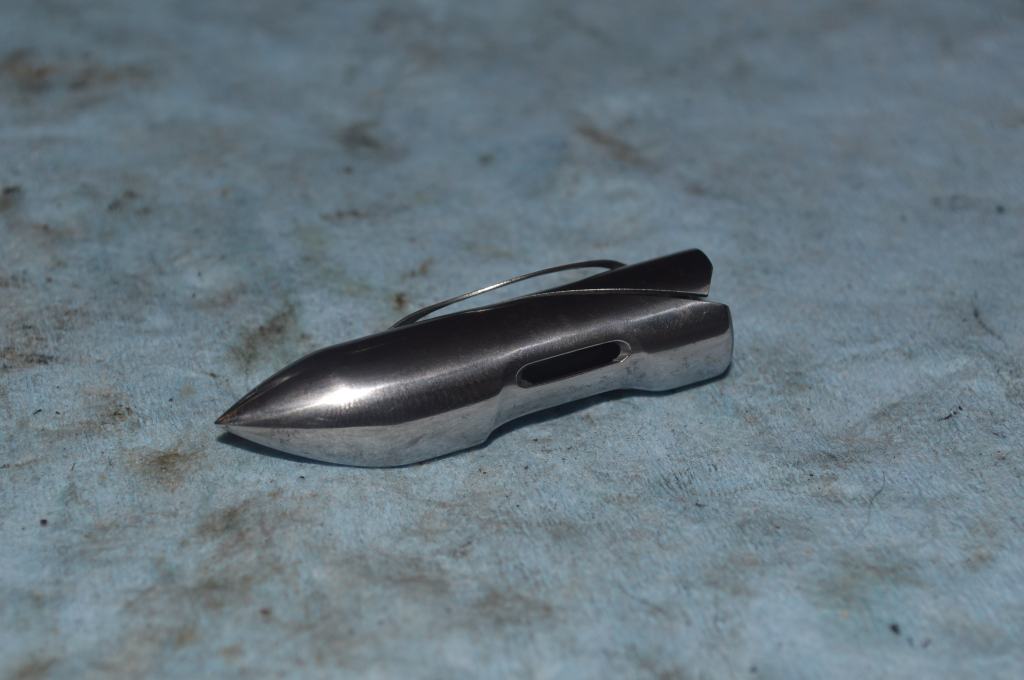
Because it serves this dual purpose, it is very important that the shuttle be as clean and smooth as possible. To accomplish this, the bobbin shuttle is disassembled and cleaned. Then it is polished to a glass smooth finish. The pictures below show the shuttle and the need to clean it.
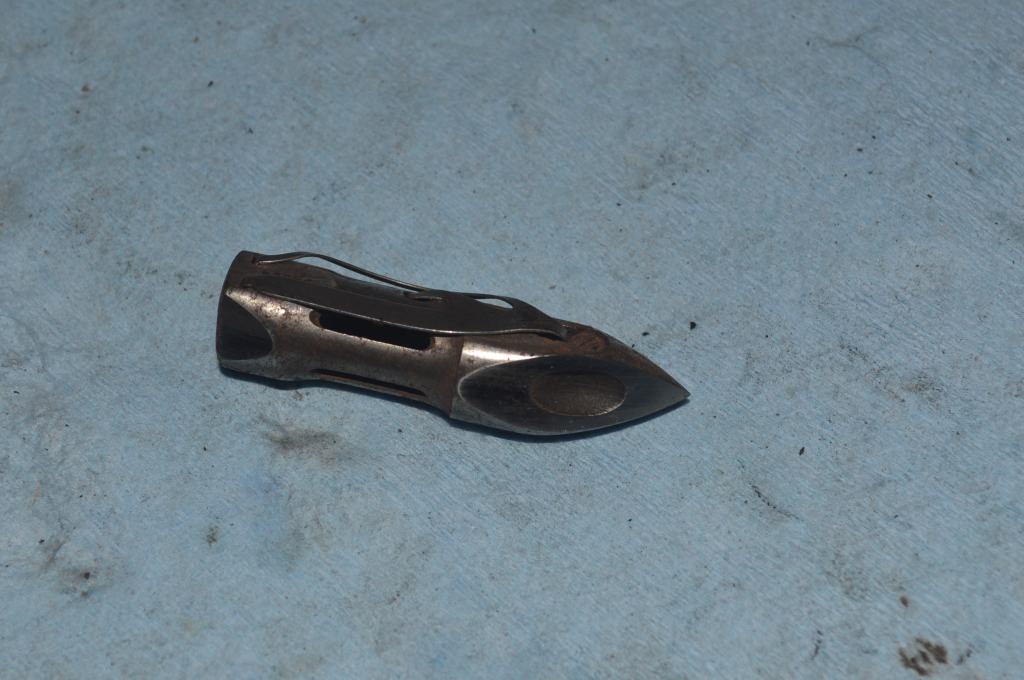
I can’t stress enough the importance of a smooth shuttle. Because it catches the top thread and the thread passes over the top of the shuttle, any roughness on the shuttle can drag on the thread and cause tension problems or uneven stitches. After polishing the shuttle is smooth as glass.
Now is the time to choose the motor. A vintage motor with grease wicks is the best choice for this machine. I decided on a B.R.8S motor and plan to wire it for a motor terminal block configuration. This means it will have a separate plug for the motor and light. Rated at 0.5 amps, it will provide plenty of needle piercing power and speed for this machine.
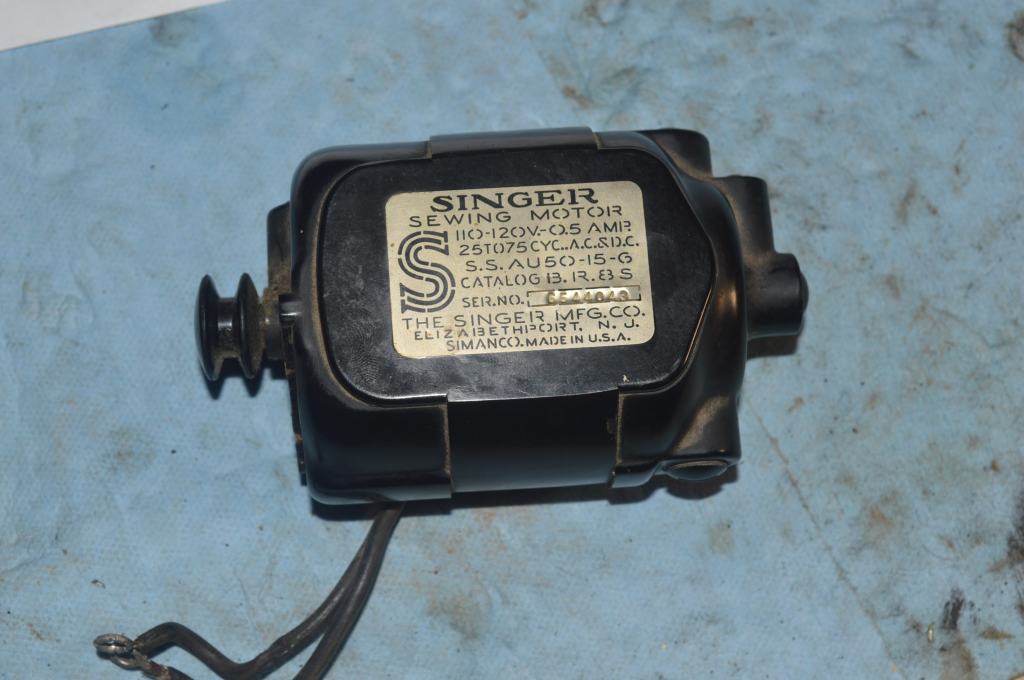
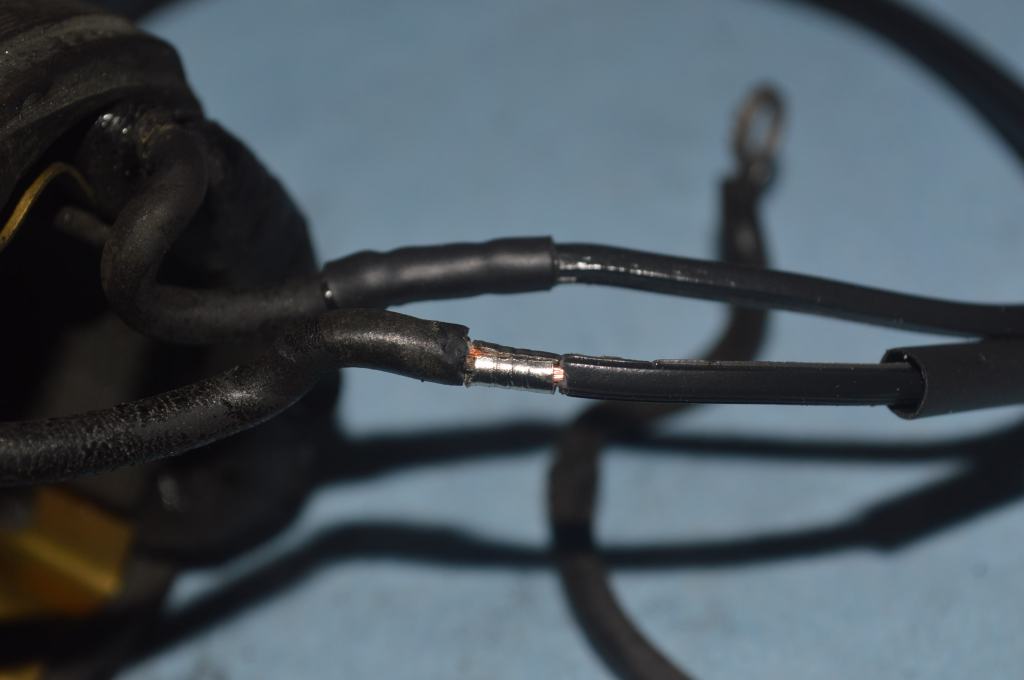
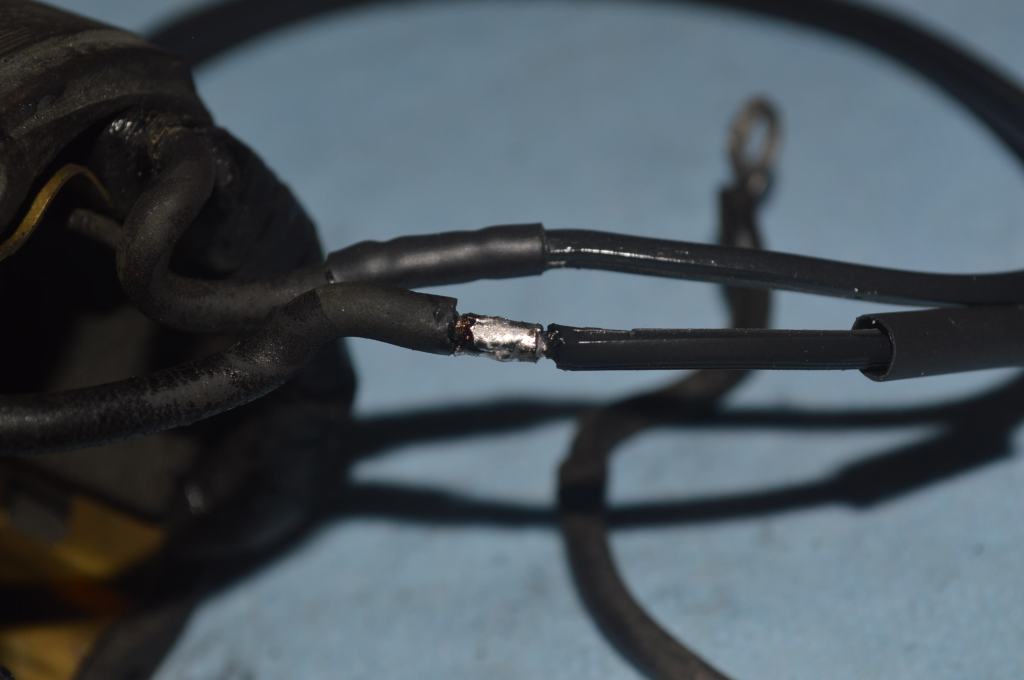
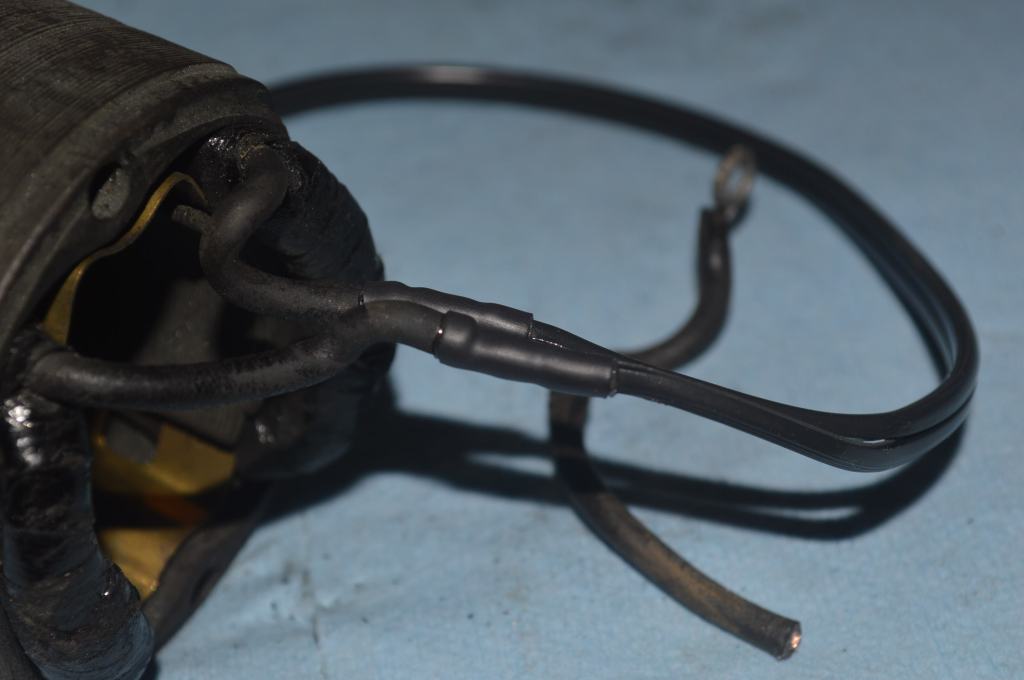
The motor itself is in very good shape. The main wires are supple but due to their length, will be replaced with new wires.
The motor is disassembled for cleaning.
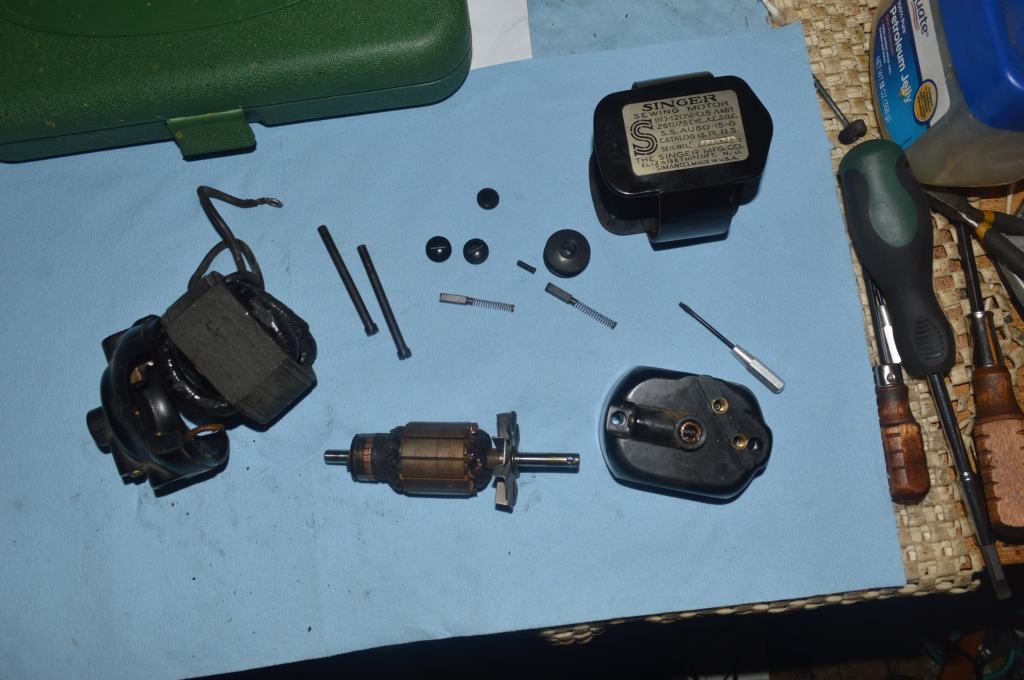
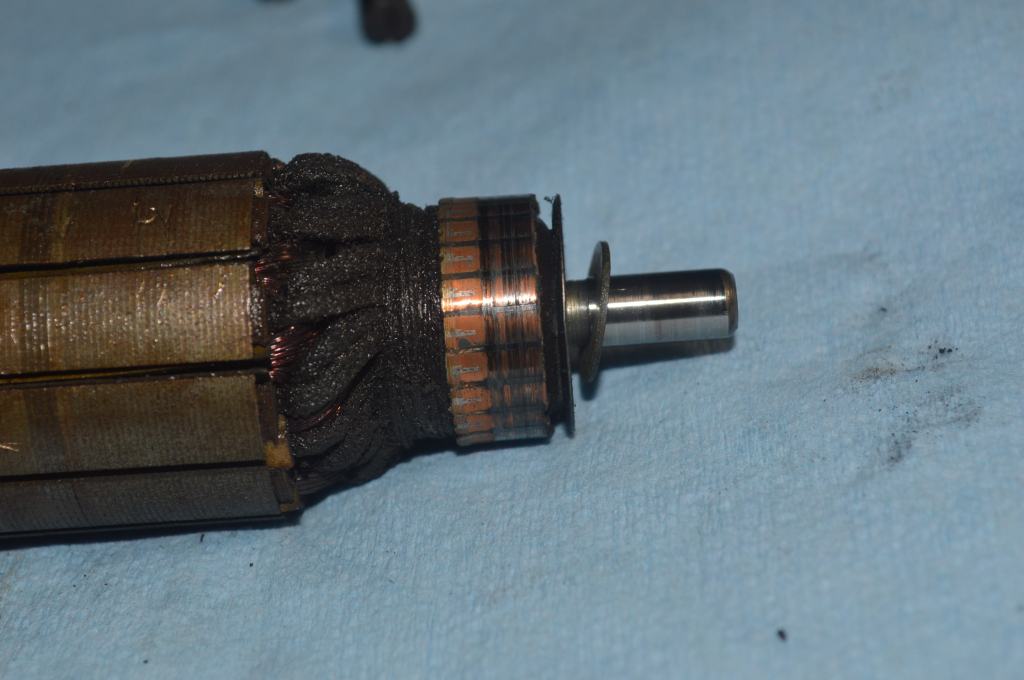
The armature shaft is polished at both ends and the commutator is polished with jewelers rouge.
Before 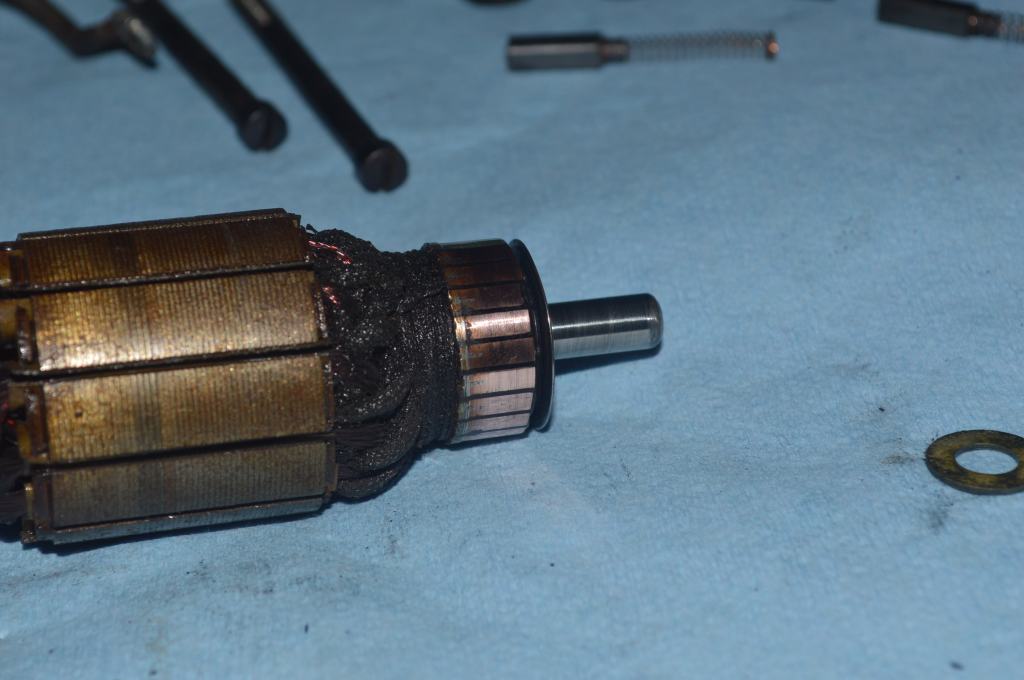
After 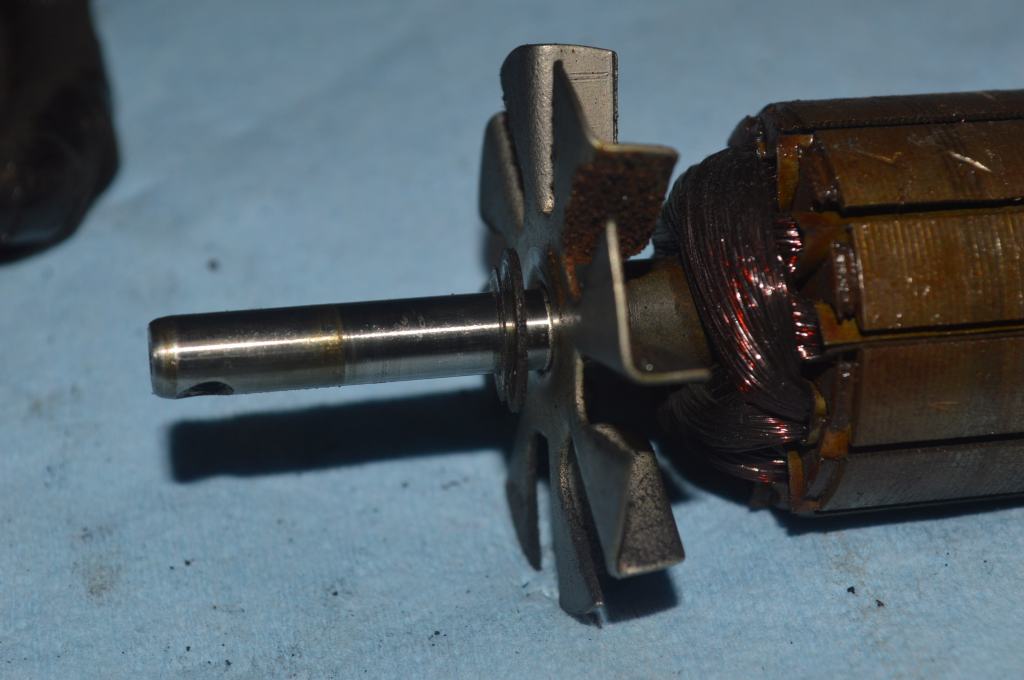
Before 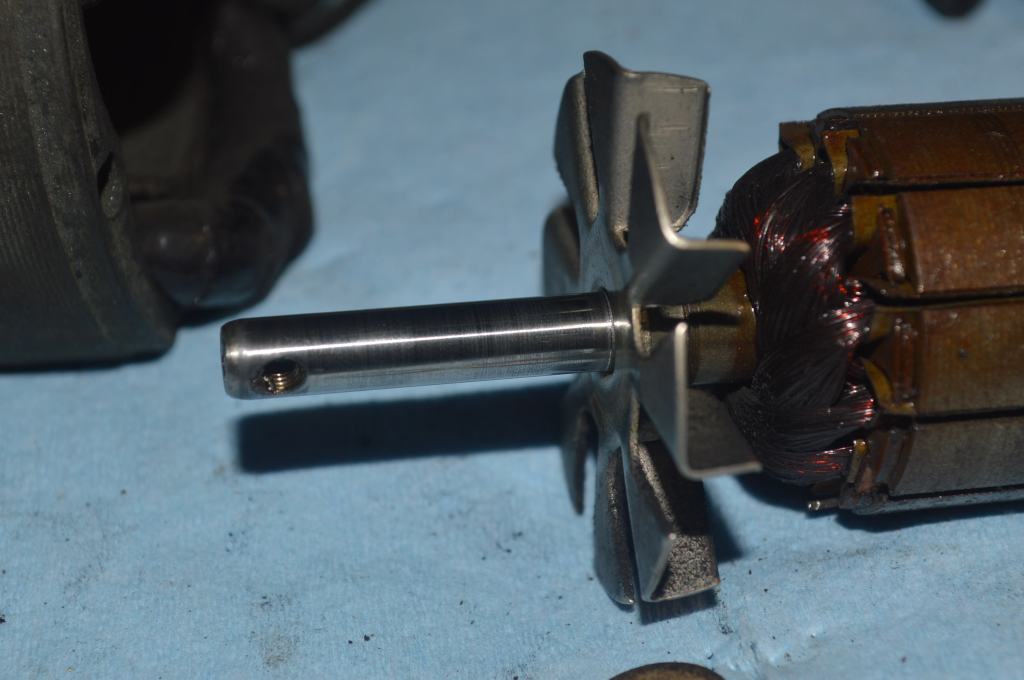
After
After disassembly, I noted that the wicks slide freely in the grease tubes. This is important as it tells me that the motor was properly lubricated and the wicks were in contact with the motor shaft at each end. Normally, I find the wicks are stuck in the tubes with old grease and need to be replaced. These wicks are in great shape and they will be reused.
New wires are soldered to the primary field coil wires using solder couplers and then shrink tubing is used to insulate the solder joints.
The shaft bores and the motor case is cleaned and the motor is reassembled.

After reassembly, the motor is run for a total of about 10 minutes to make sure everything is seated in and the motor runs as it should.
The Cosmetic Restoration
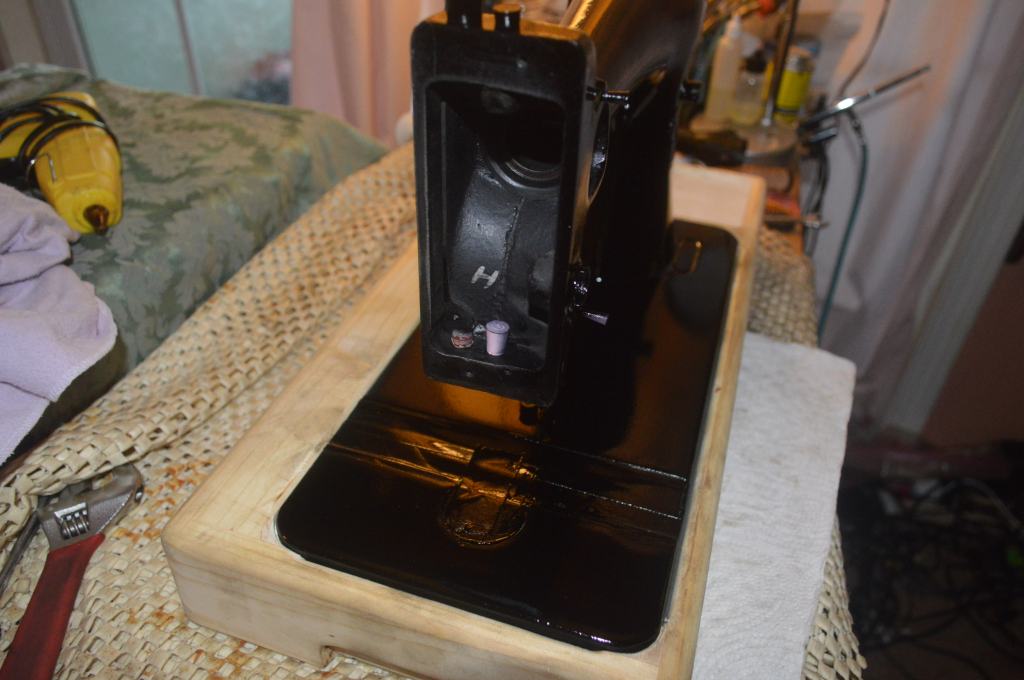
Given a choice, I prefer original finish restorations. An original finish restoration preserves the original decals and black japanned paint. Careful cleaning, paint matching, and judicious decal repair prepares the machine for a new shellac topcoat. This preserves the vintage look of the machine and protects the paint and decals using a vintage correct finish. Unfortunately, this machine is not a good candidate for an original finish restoration. Still, it can still be given a beautiful new finish. To get this finish, the machine will be repainted and have new restoration decals applied. This is a different approach altogether. My goal is to use similar paint and finish, but it is not original. The paint I am using is a custom mixed black paint using a ebony black aneline dye stain dissolved in alcohol and mixed with shellac. The color produced is a match to the original black japanned finish color. The decals are restoration decals, and although they look great, they do not have the patina Singer decals get after aging for 100 years. The top coat is a clear oil based polyurethane. Unlike shellac used as a top coat for original finish restorations, polyurethane is impervious to water and this is essential when applying the new waterslide decals. While polyurethane is more durable than shellac, they are not vintage correct. Still, I feel it is the best finish for this restoration and the result will speak for itself.
Starting the cosmetic restoration, I didn’t attempt to clean the machine… I went straight to sanding. The decals were removed, the original paint was sanded and feathered to get a smooth surface, and the chips and scratches were sanded to bare metal. Next, the machine was cleaned with Naptha to remove sanding dust and any oil residue that may contaminate the new paint and prevent it from bonding to the surface.
The holes and places I don’t want paint to get into is filled with silicone plugs. The badge, serial number and the slide plate guides are masked off with painter’s tape.
The machine is sprayed with 4 coats of the custom mixed paint… it doesn’t take much and 4 ounces of paint yields a smooth and consistent deep black color.
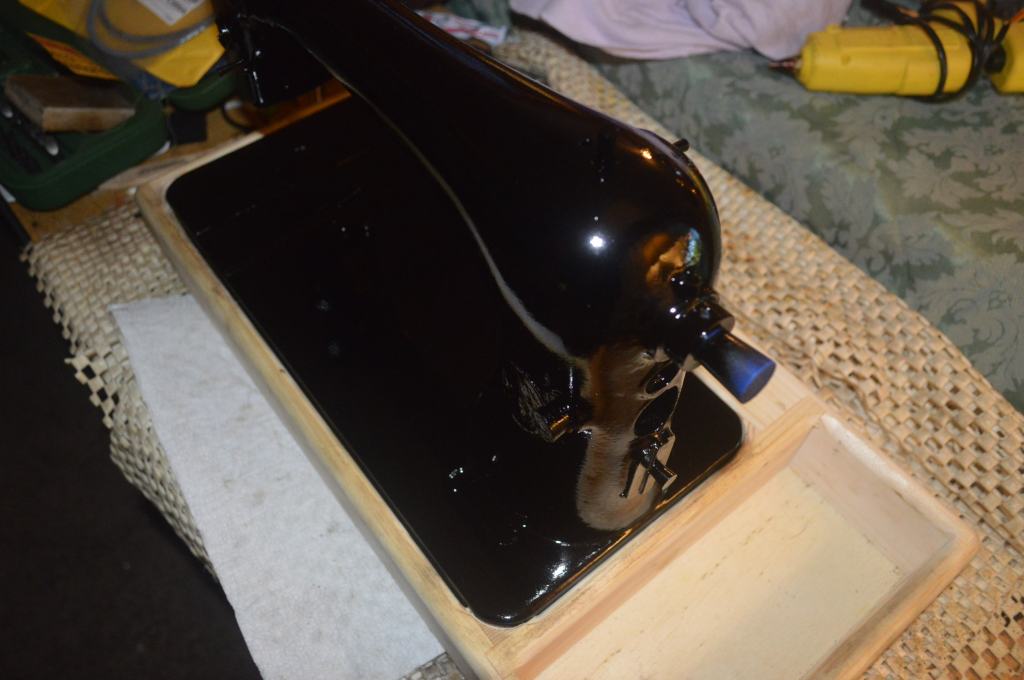
Here’s the hitch to re-decaling a sewing machine. Waterslide decals require a wet surface to apply them, but the new shellac based paint I applied is susceptible to damage from the water used to apply them. A water resistant barrier of oil based polyurethane is sprayed on the machine to provide a water resistant barrier between the paint and the decals. For compatibility, polyurethane is the only finish I will apply from this point on. The machine is set aside for a few days to ensure the poly is well cured.
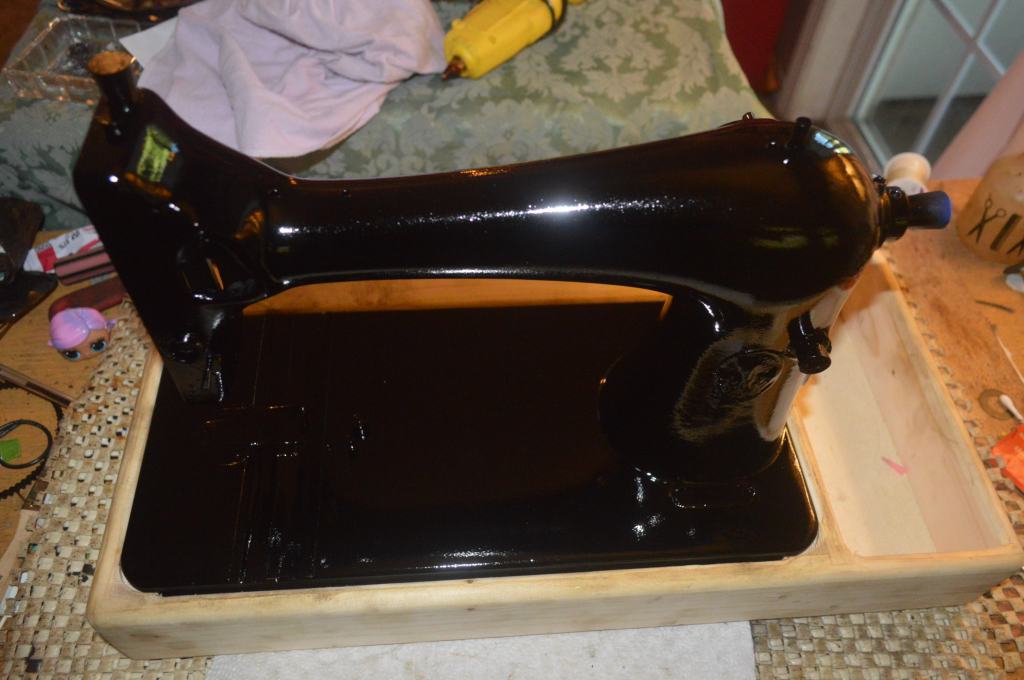
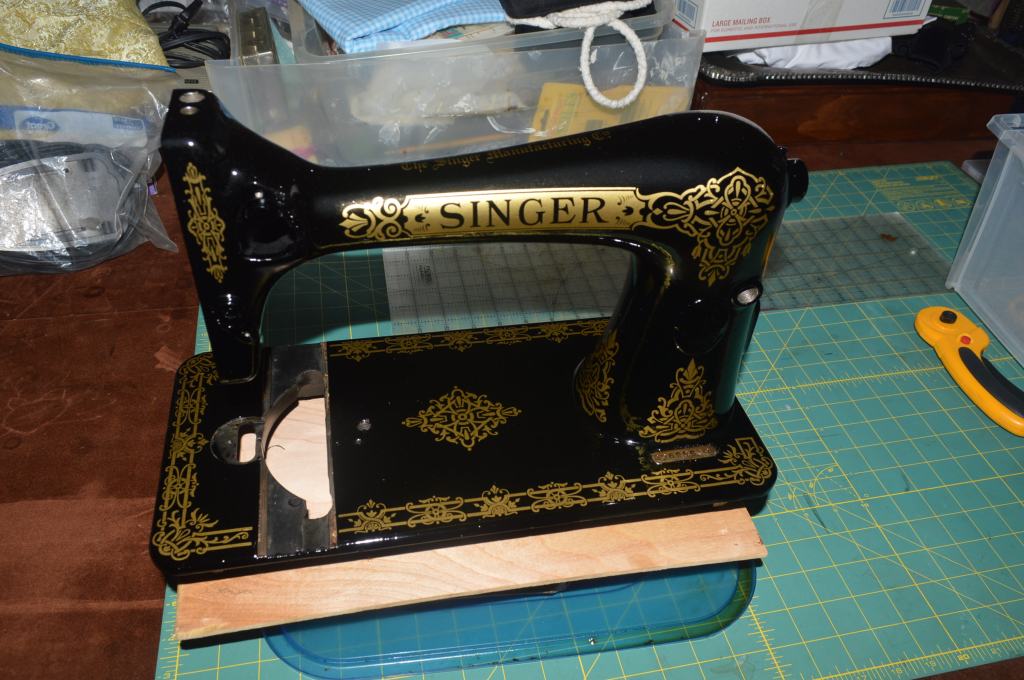
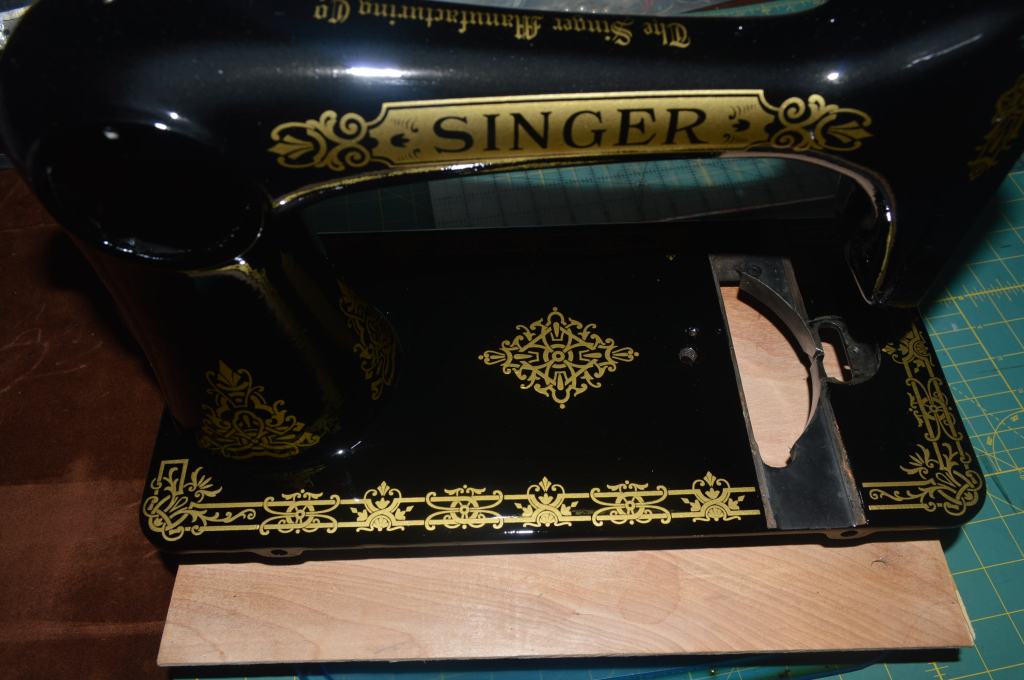
The restoration decals are applied and the machine is allowed to sit for a week before the oil based polyurethane is applied. The original “Sphinx” decals are replaced with “Celtic” decals. I like the look of the Celtic decals and they are period correct for this machine.

After the decals are applied the machine is set aside for several days to ensure all of the water from the decals has evaporated, then the entire body of the machine is sprayed with multiple coats of polyurethane as a final top coat. The goal is to submerge the edges of the decals so they do not show in the final finish, and multiple coats are required to do this.
The next step is to restore the nickel plated parts. All of the nickel plated pieces are ultrasonically cleaned, wire brushed with a soft wire wheel, and polished on a 6″ buffer with jeweler’s rouge for the maximum shine.


Considering the as found condition of these parts, they look much better. The pitting caused by corrosion on the shuttle cover plate had fully penetrated the plating, and there are some small pits here and there. How do you correct this? Have the piece re- plated. That’s not really an option for this restoration and there is really nothing more I can do… but that’s okay! They look great for a machine that is 99 years old and neglected for decades. These are permanent scars that give a glimpse of the machines history… kind of like the wrinkles on my forehead!
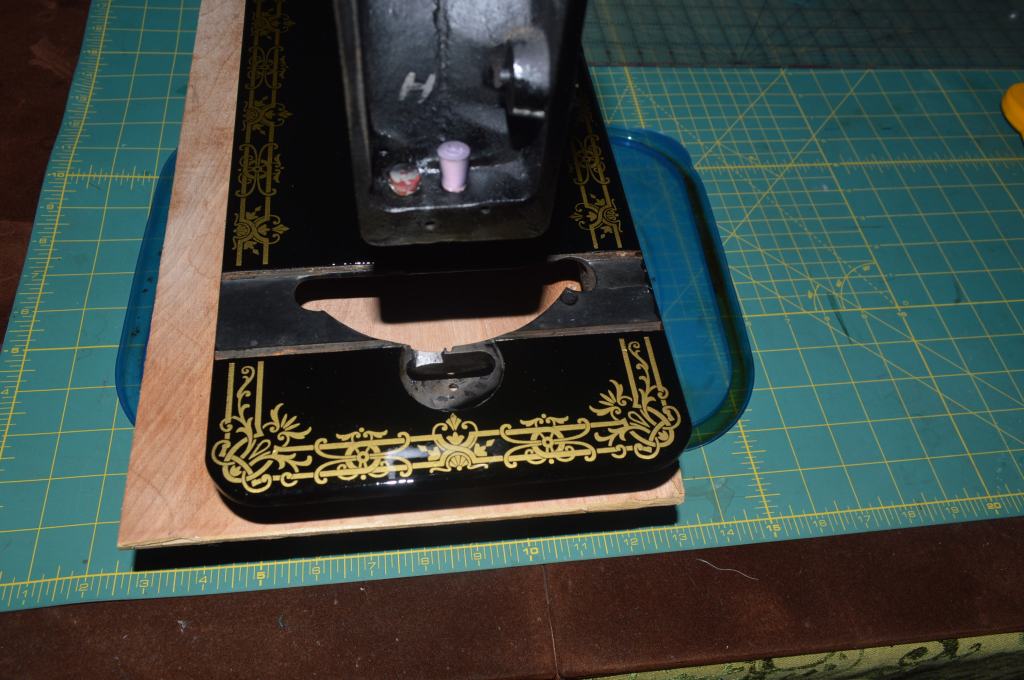
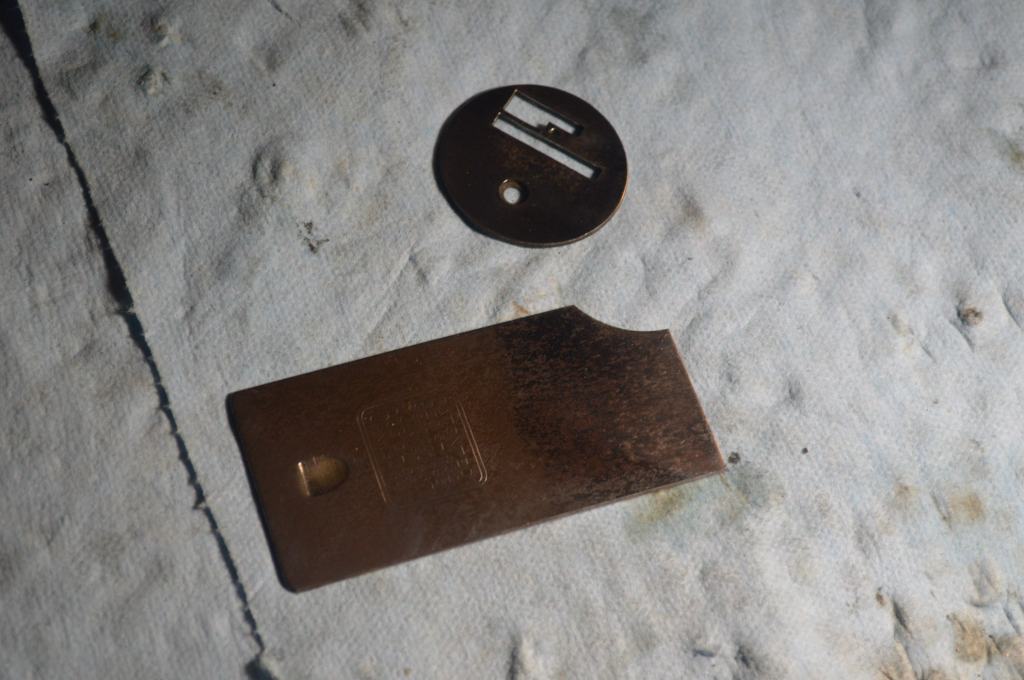
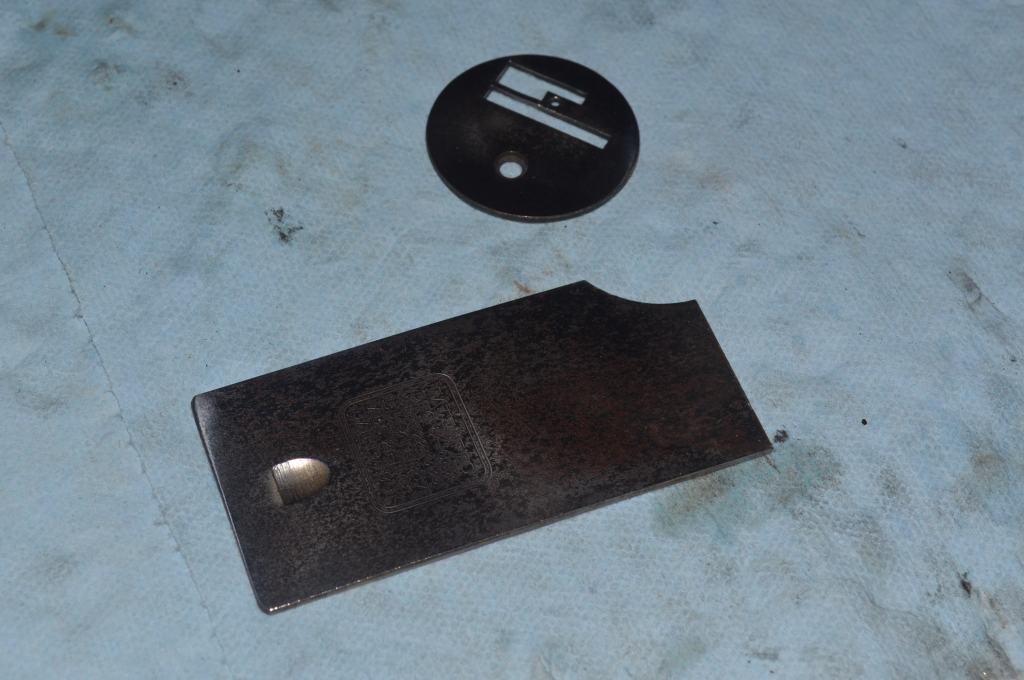
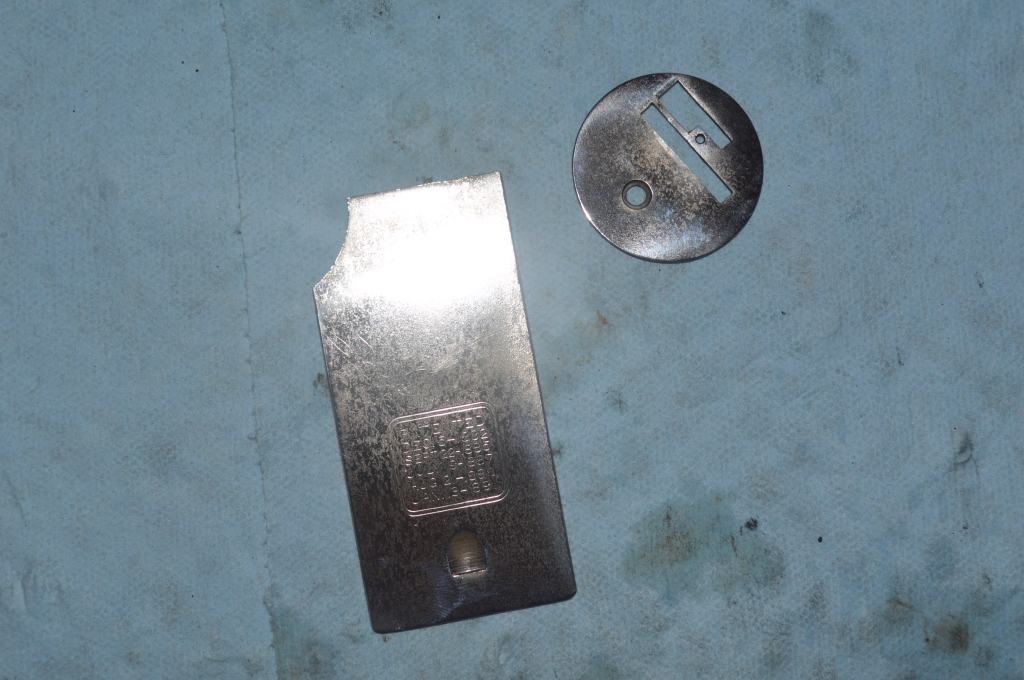
The only other parts I need from the donor machine is the feed dog plate and the front bobbin shuttle slide plate. I don’t know why, but I see so many machines with a bobbin plate missing.
The replacement parts are cleaned and polished.
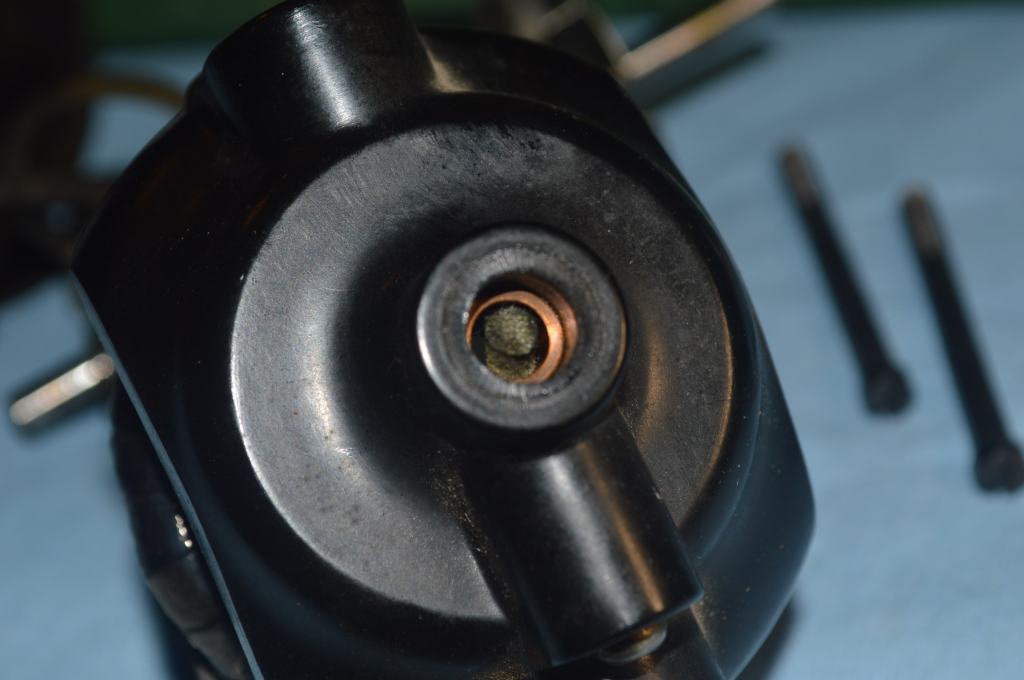
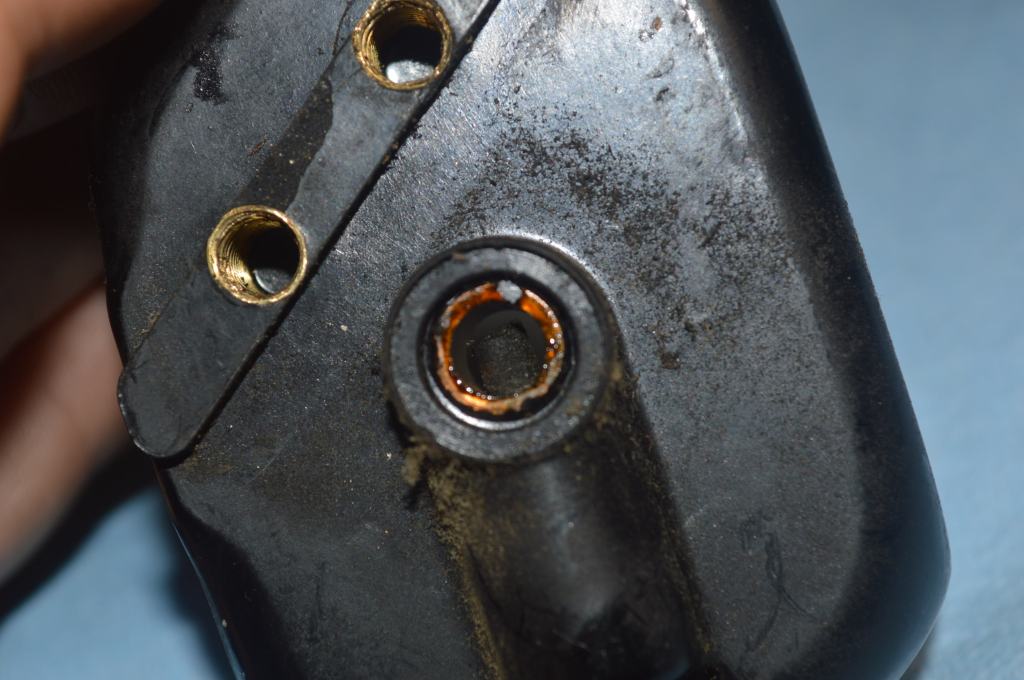
Adding a vintage light is a simple matter of removing the back cover plate and mounting it behind it. It is wired to a terminal block so a standard singer power cord and controller can be used.
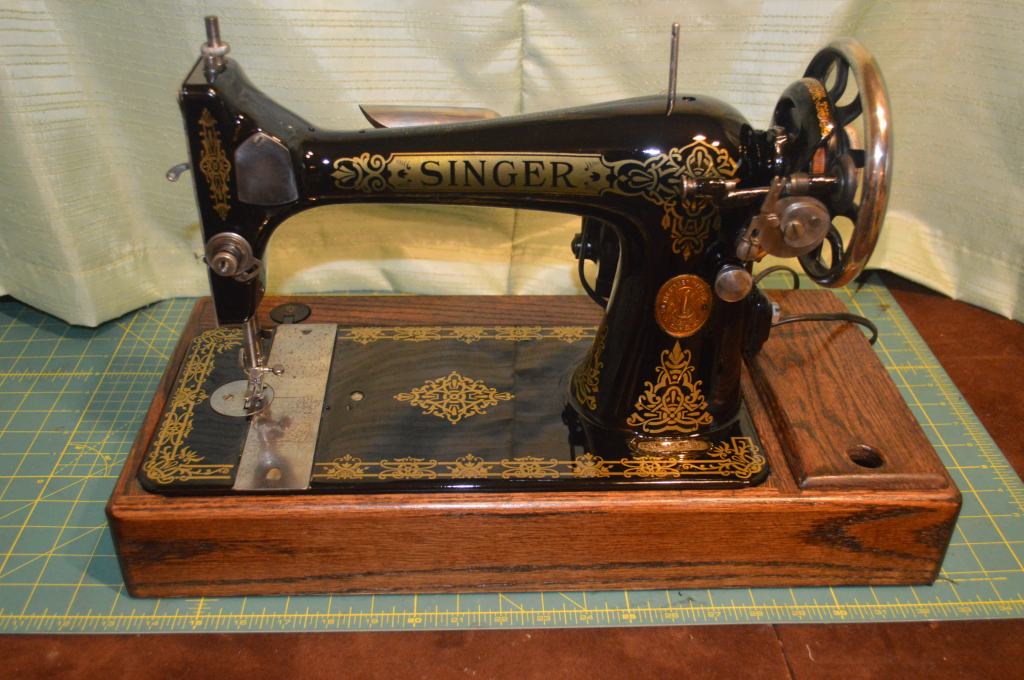
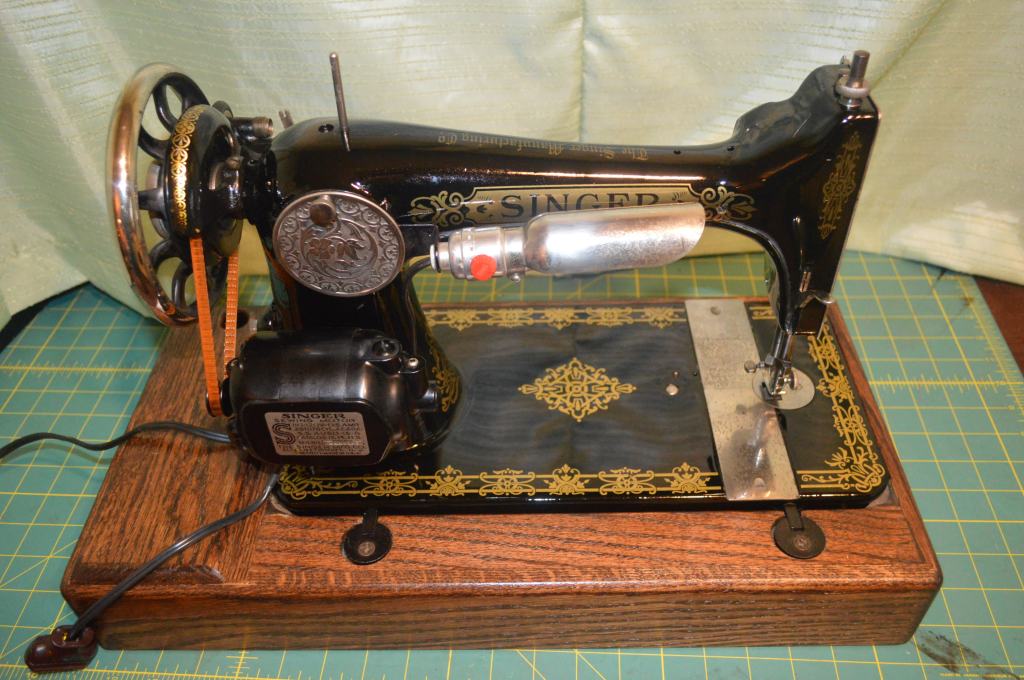
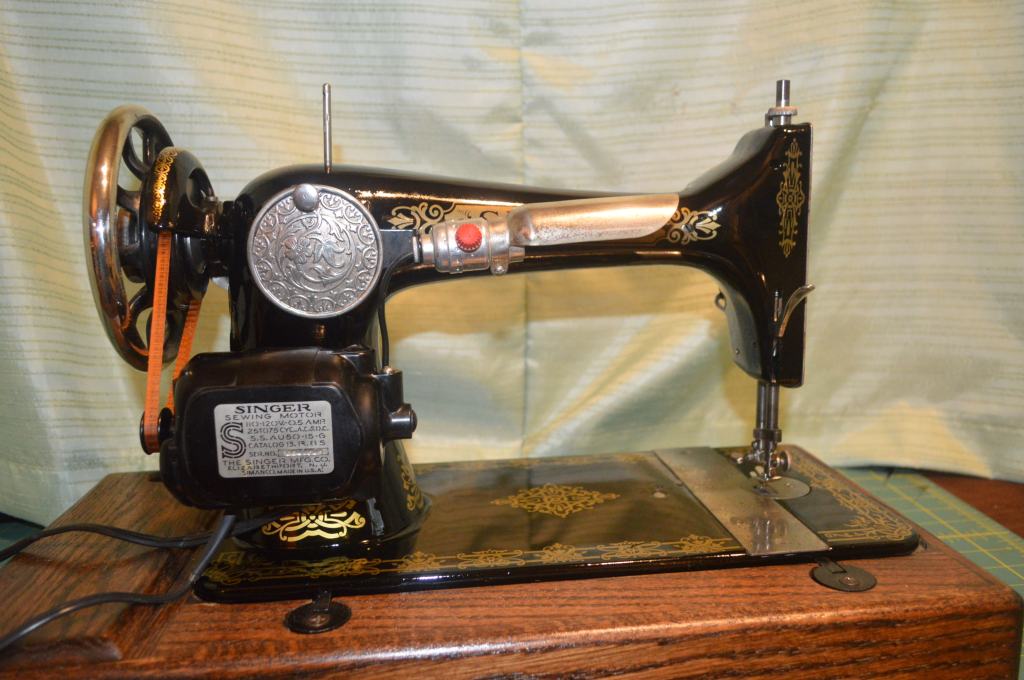
Finally, it is time to reassemble and adjust the machine and ensure the machine runs and sews as it should. True to form and as expected from the extensive mechanical restoration, the machine’s shuttle has the distinctive sound and smoothness of the shuttle mechanism. The stitch formation is straight and consistent, and the appearance of the machine is much improved. The addition of the motor and light adds the conveniences a machine of this vintage needs to be used without limitation. Overall, the restoration is a great success! Here are the “before” and “after” pictures to show the outcome.
Before:


After:

Well, I hope you enjoyed the restoration process as much as I did… this one took a long time to complete but it was time well spent. Like I always say, some sewing machines need more, some need less, but they all get what they need! Now I can look forward to the next!
Looking for a similarly restored quality vintage all metal sewing machine for your sewing room? Let us know! We specialize in custom orders and are happy to locate and restore the “perfect” machine for you!
As always, If you have any questions, or if I can be of any assistance, please contact me through Etsy or send me an email to Pungoliving@gmail.com.
Thanks for reading!
Lee

Lee,
I saw this and it sparked me into going through my 1908. Mine will have the cosmetics preserved and the mechanics extremely cleaned and restored to new. Some of the shiny bits will be re-nickeled and the others polished as best they can be.
I should put a coat of shellac on my 1926 model 66 now that it is cleaned. Mmm
Absolutely beautifully done.
Thank you,
Bill
LikeLike
Thanks Bill,
Let me know if I can be of assistance!
Lee
LikeLike
Correction, I read the 1925 restoration.
LikeLike
Omg! I’m trying to remove what I think is what you called the feed dog driver fork (image 31), and I cannot for the life of me figure out how to get it and the horizontal shaft it’s attached to out! I would love to know the trick so I don’t break anything (more so than it may already be). Mine is a 27/127, but from 1901 and is the Sphinx design. Mine is in way worse condition than even this one, but I wanted to try my hand at repainting it, so I have to get all the guts out. Your picture tutorials are going to be so useful as I work my way through putting this bad girl back together, thank you!
LikeLike
Hello,
I think I can explain it in simple steps if I can see where you are having the problem. If you send me a few pictures to pungoliving@gmail.com, I think I can walk you thru it.
Have a great day!
Lee
LikeLiked by 1 person
Hi! I’ve been trying for a while now to get the main arm shaft out of my 127 from the 1920s-ish, but the metal on the bushing is too soft to push out the way the adjusters manual says to and I’m at a loss. Is there a way to remove the take up cam while it’s still in the machine so I could have better access to the bushing? Or do you have any advice on how to get the bushing out? Thanks so much in advance, this page has been so helpful!
LikeLike
Hi! I left a comment yesterday but I’m not sure it posted properly so here’s a second one just to be sure. I’m trying to get the main arm shaft out of my singer 127 from 1936 but the bushing metal is so soft that I can’t push it out. Would you have any advice on how to get it out? Also, is it possible to remove the thread take up cam while the arm shaft is still in the machine so I can get a better look at the bushing? These blogs have been live savers already so thank you so much for making them, I hope to hear any advice you can give to get this girl up and running again!
LikeLike
Hello!
.
Sorry for the late reply but I have been unavailble to answer questions for the past few weeks and I am trying to catch up. You would be better off to leave the arm shaft in place. There are some machines that just don’t give up and you are likely to damage it using brute force to remove it.
Fortunately, the armshaft does not need to be removed to restore smooth motion. A drop or two of kerosene or a penetrant oil will dissolve the oil varnish that has formed between the shaft and the bushings. The more it is turned, the smoother it will be until it is completely smooth. Follow up with repeated applications of sewing machine oil and it will run fine.
It is possible to remove the thread take up cam and it is secured with a thru bolt… however, it is likely holding on for dear life, and I really don’t think it is worth the risk… again, the bushings can be relubricated as discussed above,
I hope this helps!
Lee
LikeLike
Thanks so much for the response! Unfortunately, I got too cocky after getting the machine running smoothly and tried to get it out, at which point it promptly stopped spinning no matter what I tried so I couldn’t really go back. My father did manage to get it out with brute force, but, as you warned, the arm shaft and the bushing were quite damaged. He thought he could get a friend to remake the pieces but his machines aren’t set up yet. This was my first try at a restoration and I definitely learned my lesson. Luckily, a 1906 model 27 dropped into our lap for only 20 dollars, so hopefully I can redeem myself. Thanks again for all your help, I wish I had heard it before I screwed myself over but better late then never! Now I know for next time haha
LikeLike
Great! Give it another try. Some one once told me that “You better learn from the mistkes of others… because you won’t live long enough to learn them all on your own.
LikeLike