

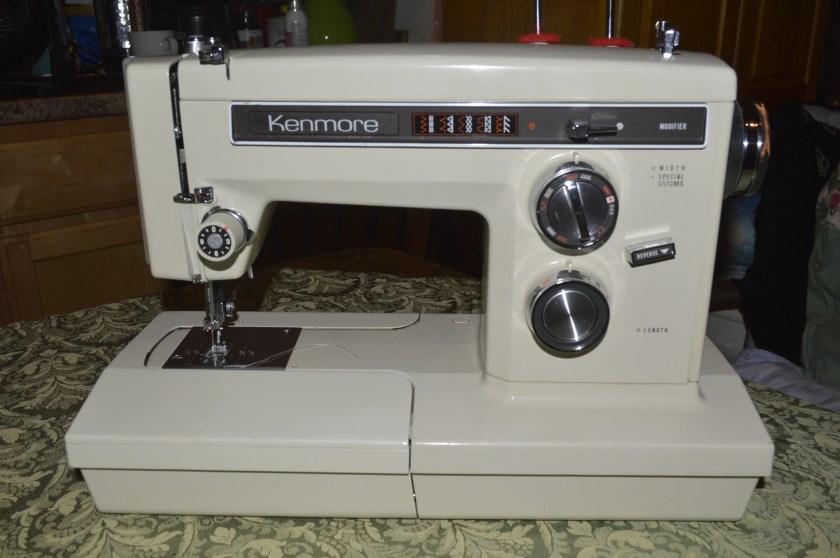
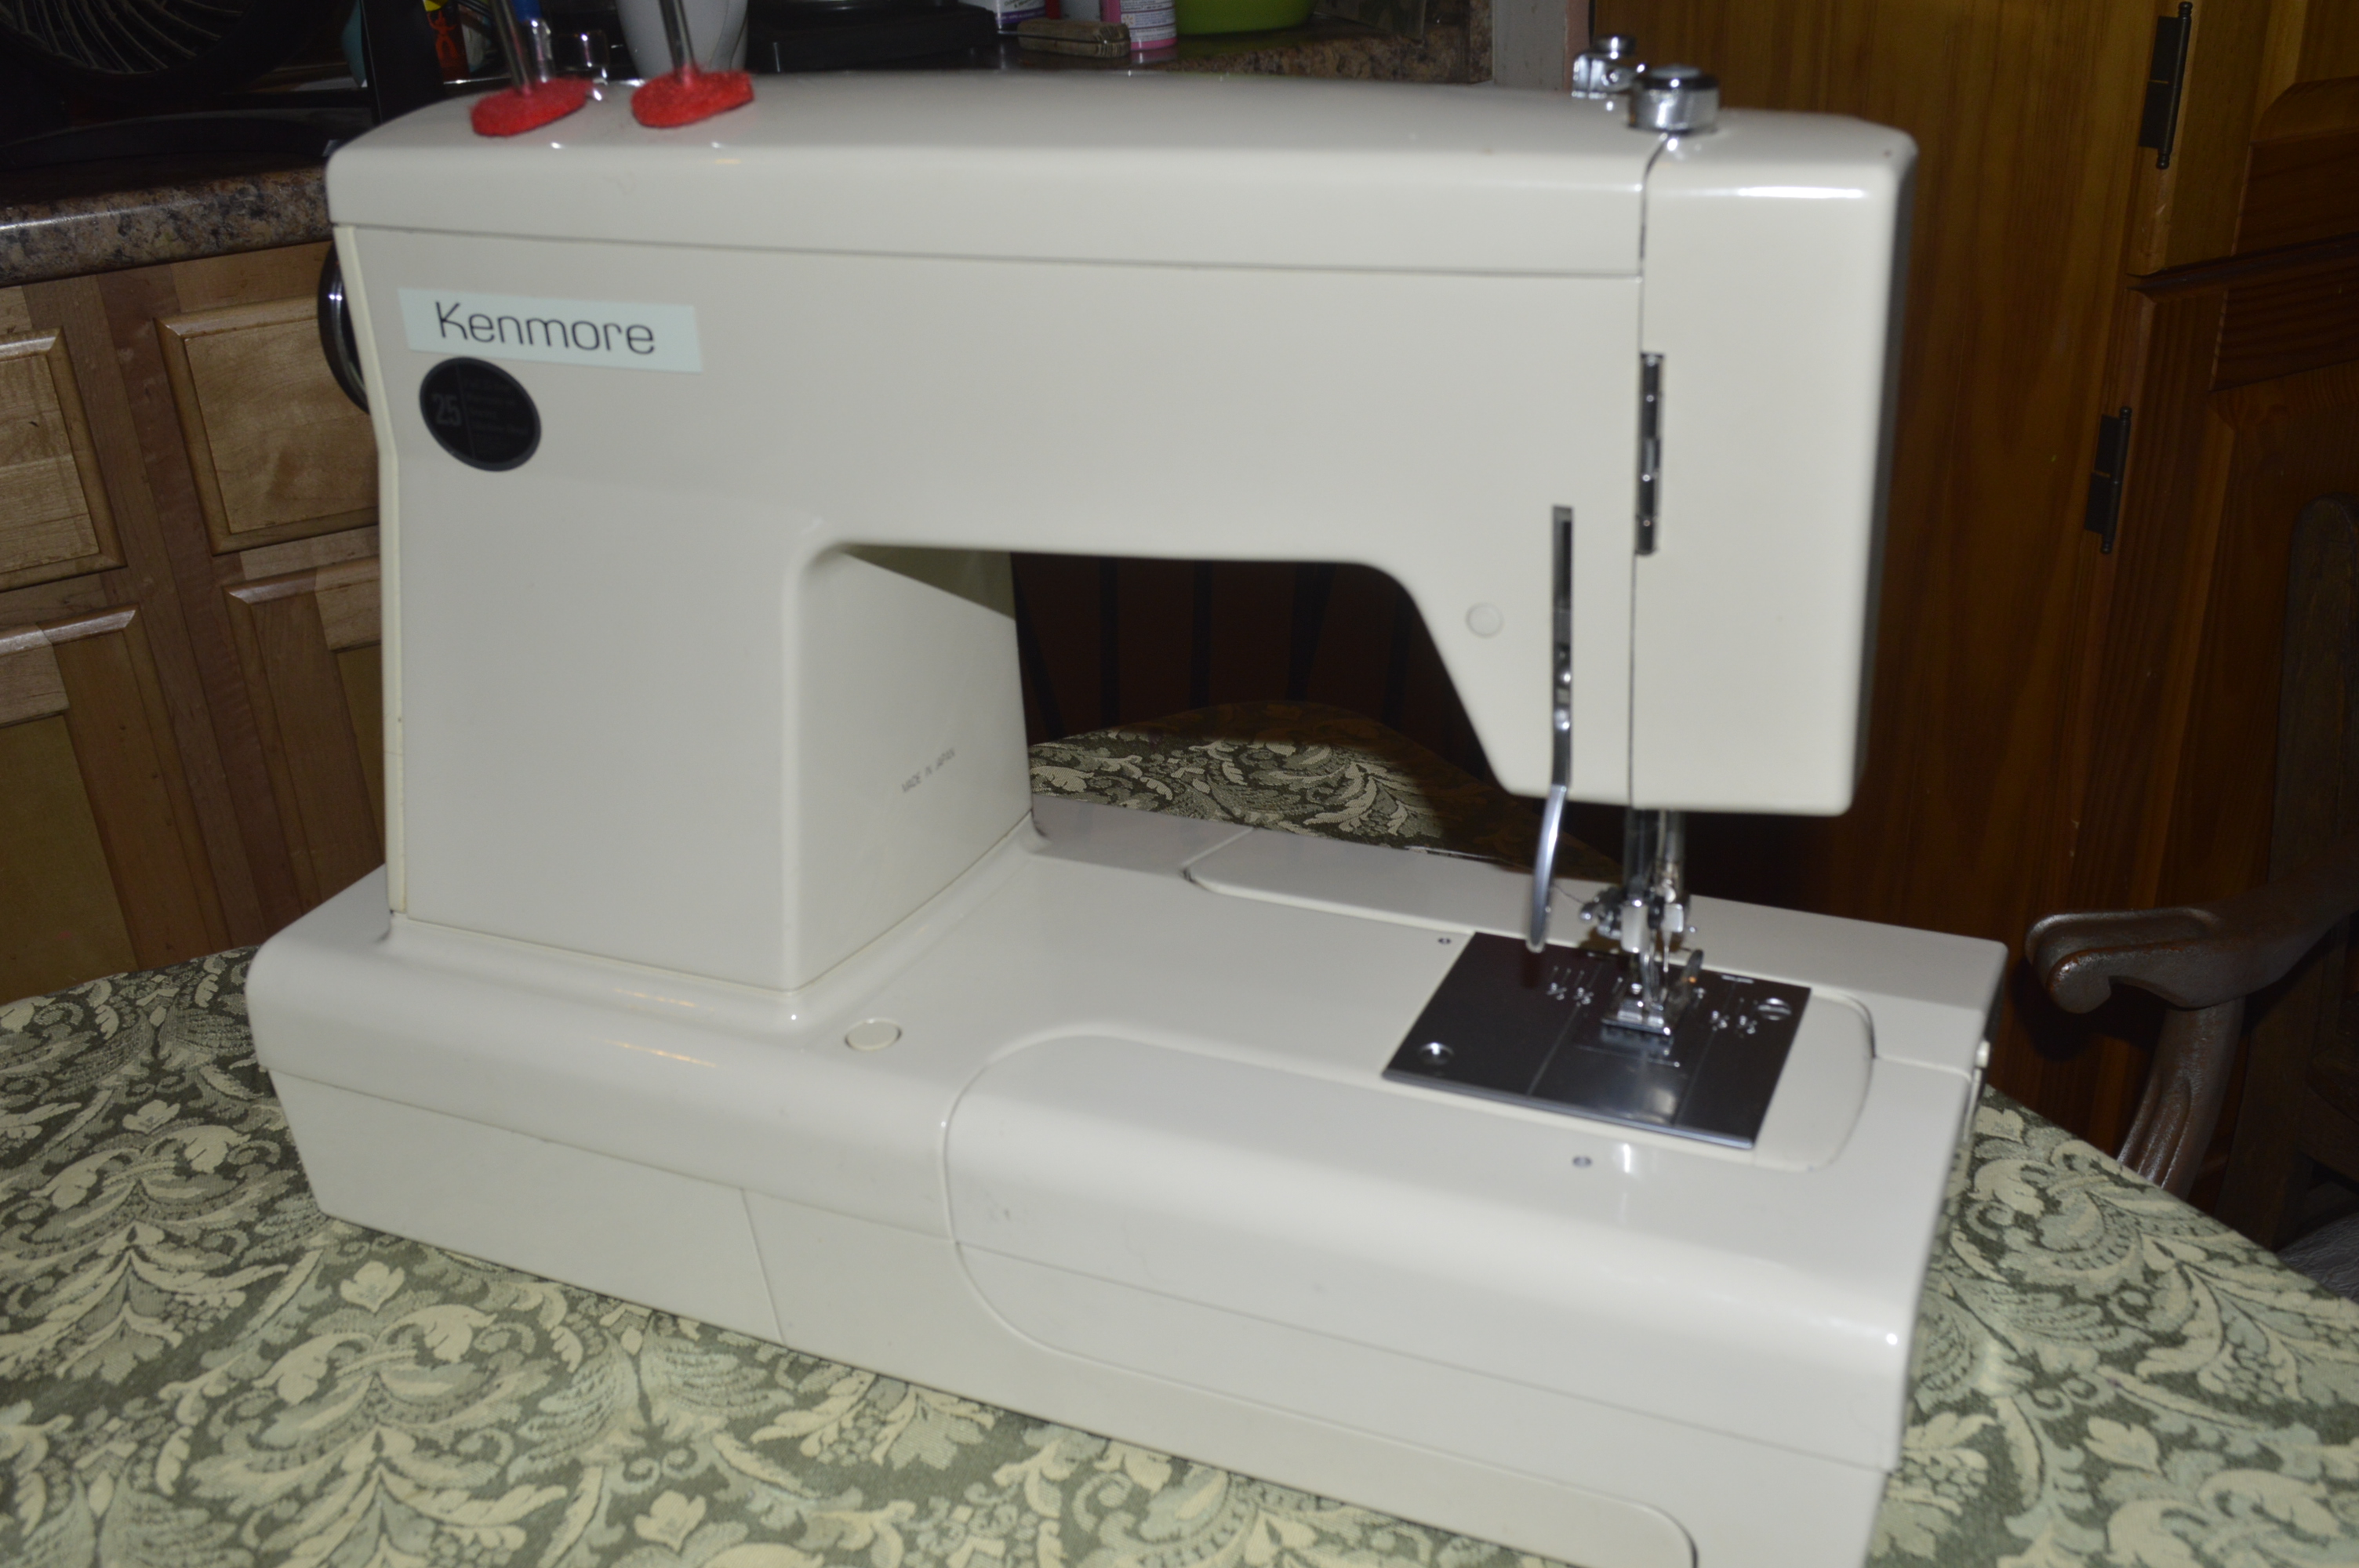
To start with, the Kenmore model 158.1941 series of sewing machines is at the top of my list of “convertible” sewing machines. The model is among the last of the all metal Kenmores, and certainly the best of their free arm (or as they marketed them… convertible) machines. Manufactured in Japan by the Maruzen Sewing Machine Company in 1975, it is well regarded both for it’s versatility and durability.
This model 1941 features ten different pattern stitches plus a great straight stitch. Perfect for garment construction, Kenmore included a good selection of stretch stitches among the stitch selections. The machine features a 1.0 amp motor with a double belt reduction drive mechanism to multiply the torque delivered to the needle. Smooth running and quiet, the model 1941 is perfect for both light weight and heavy weight fabrics. Similar to the 1600 and 1800 series, the model 1941 is a super high shank machine and has a generous hyper extension of the presser foot bar. Typical to free arm machines, the removable bed and accessory tray of the model allow for sewing hems, sleeves, and other portions of garment construction where it is convenient to have a small sewing area under the needle. The removable bed and accessory tray of the model 1941 is made out of metal.., and that’s a big plus. The bed snaps into place and attaches to the machine with a secure and satisfying “click” when the bed latch engages. The machine features feed dog drop for free motion quilting and embroidery, and is twin needle capable.
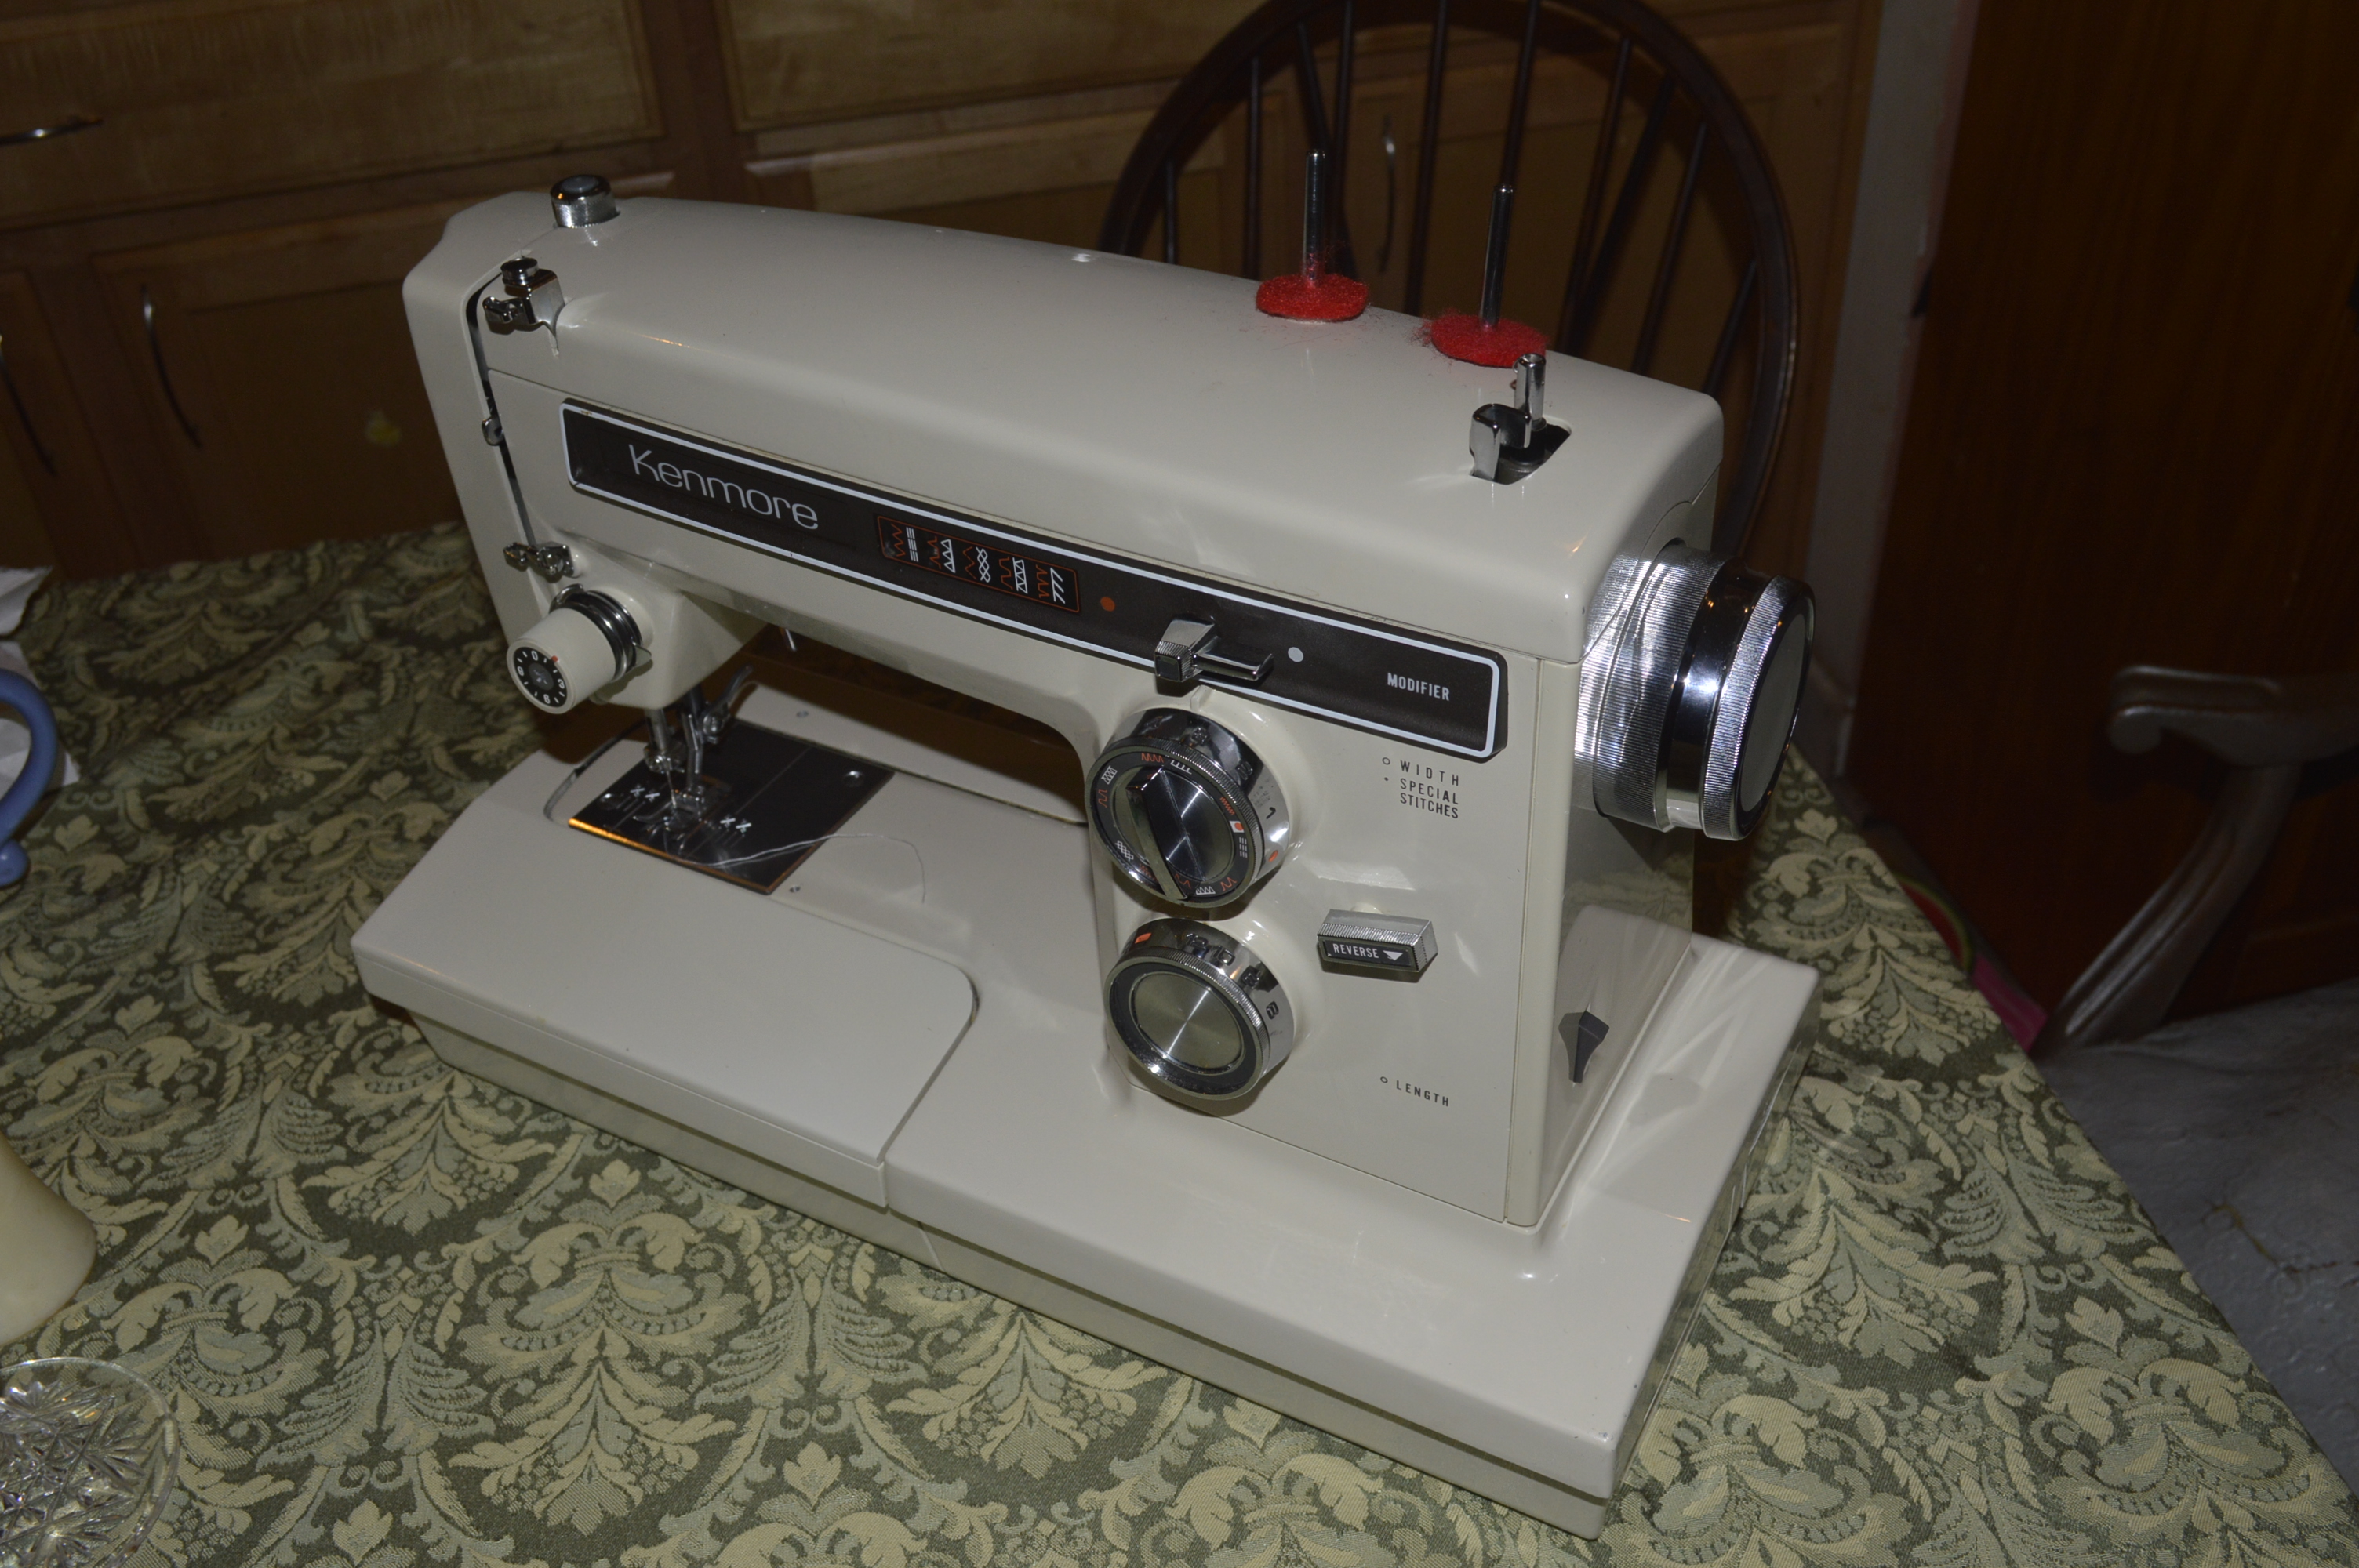
The project today is cleaning and servicing a model 1941 that came in the shop as a custom order. The machine is already in great condition from visual inspection, the sewing mechanism is clean, and the color of all of the body pieces are the original paint color. Often, Kenmores of this vintage have parts that have “yellowed” with age, typically the tension knob, balance wheel, and badge plates. Not so with this machine. The following picture is before reconditioning.

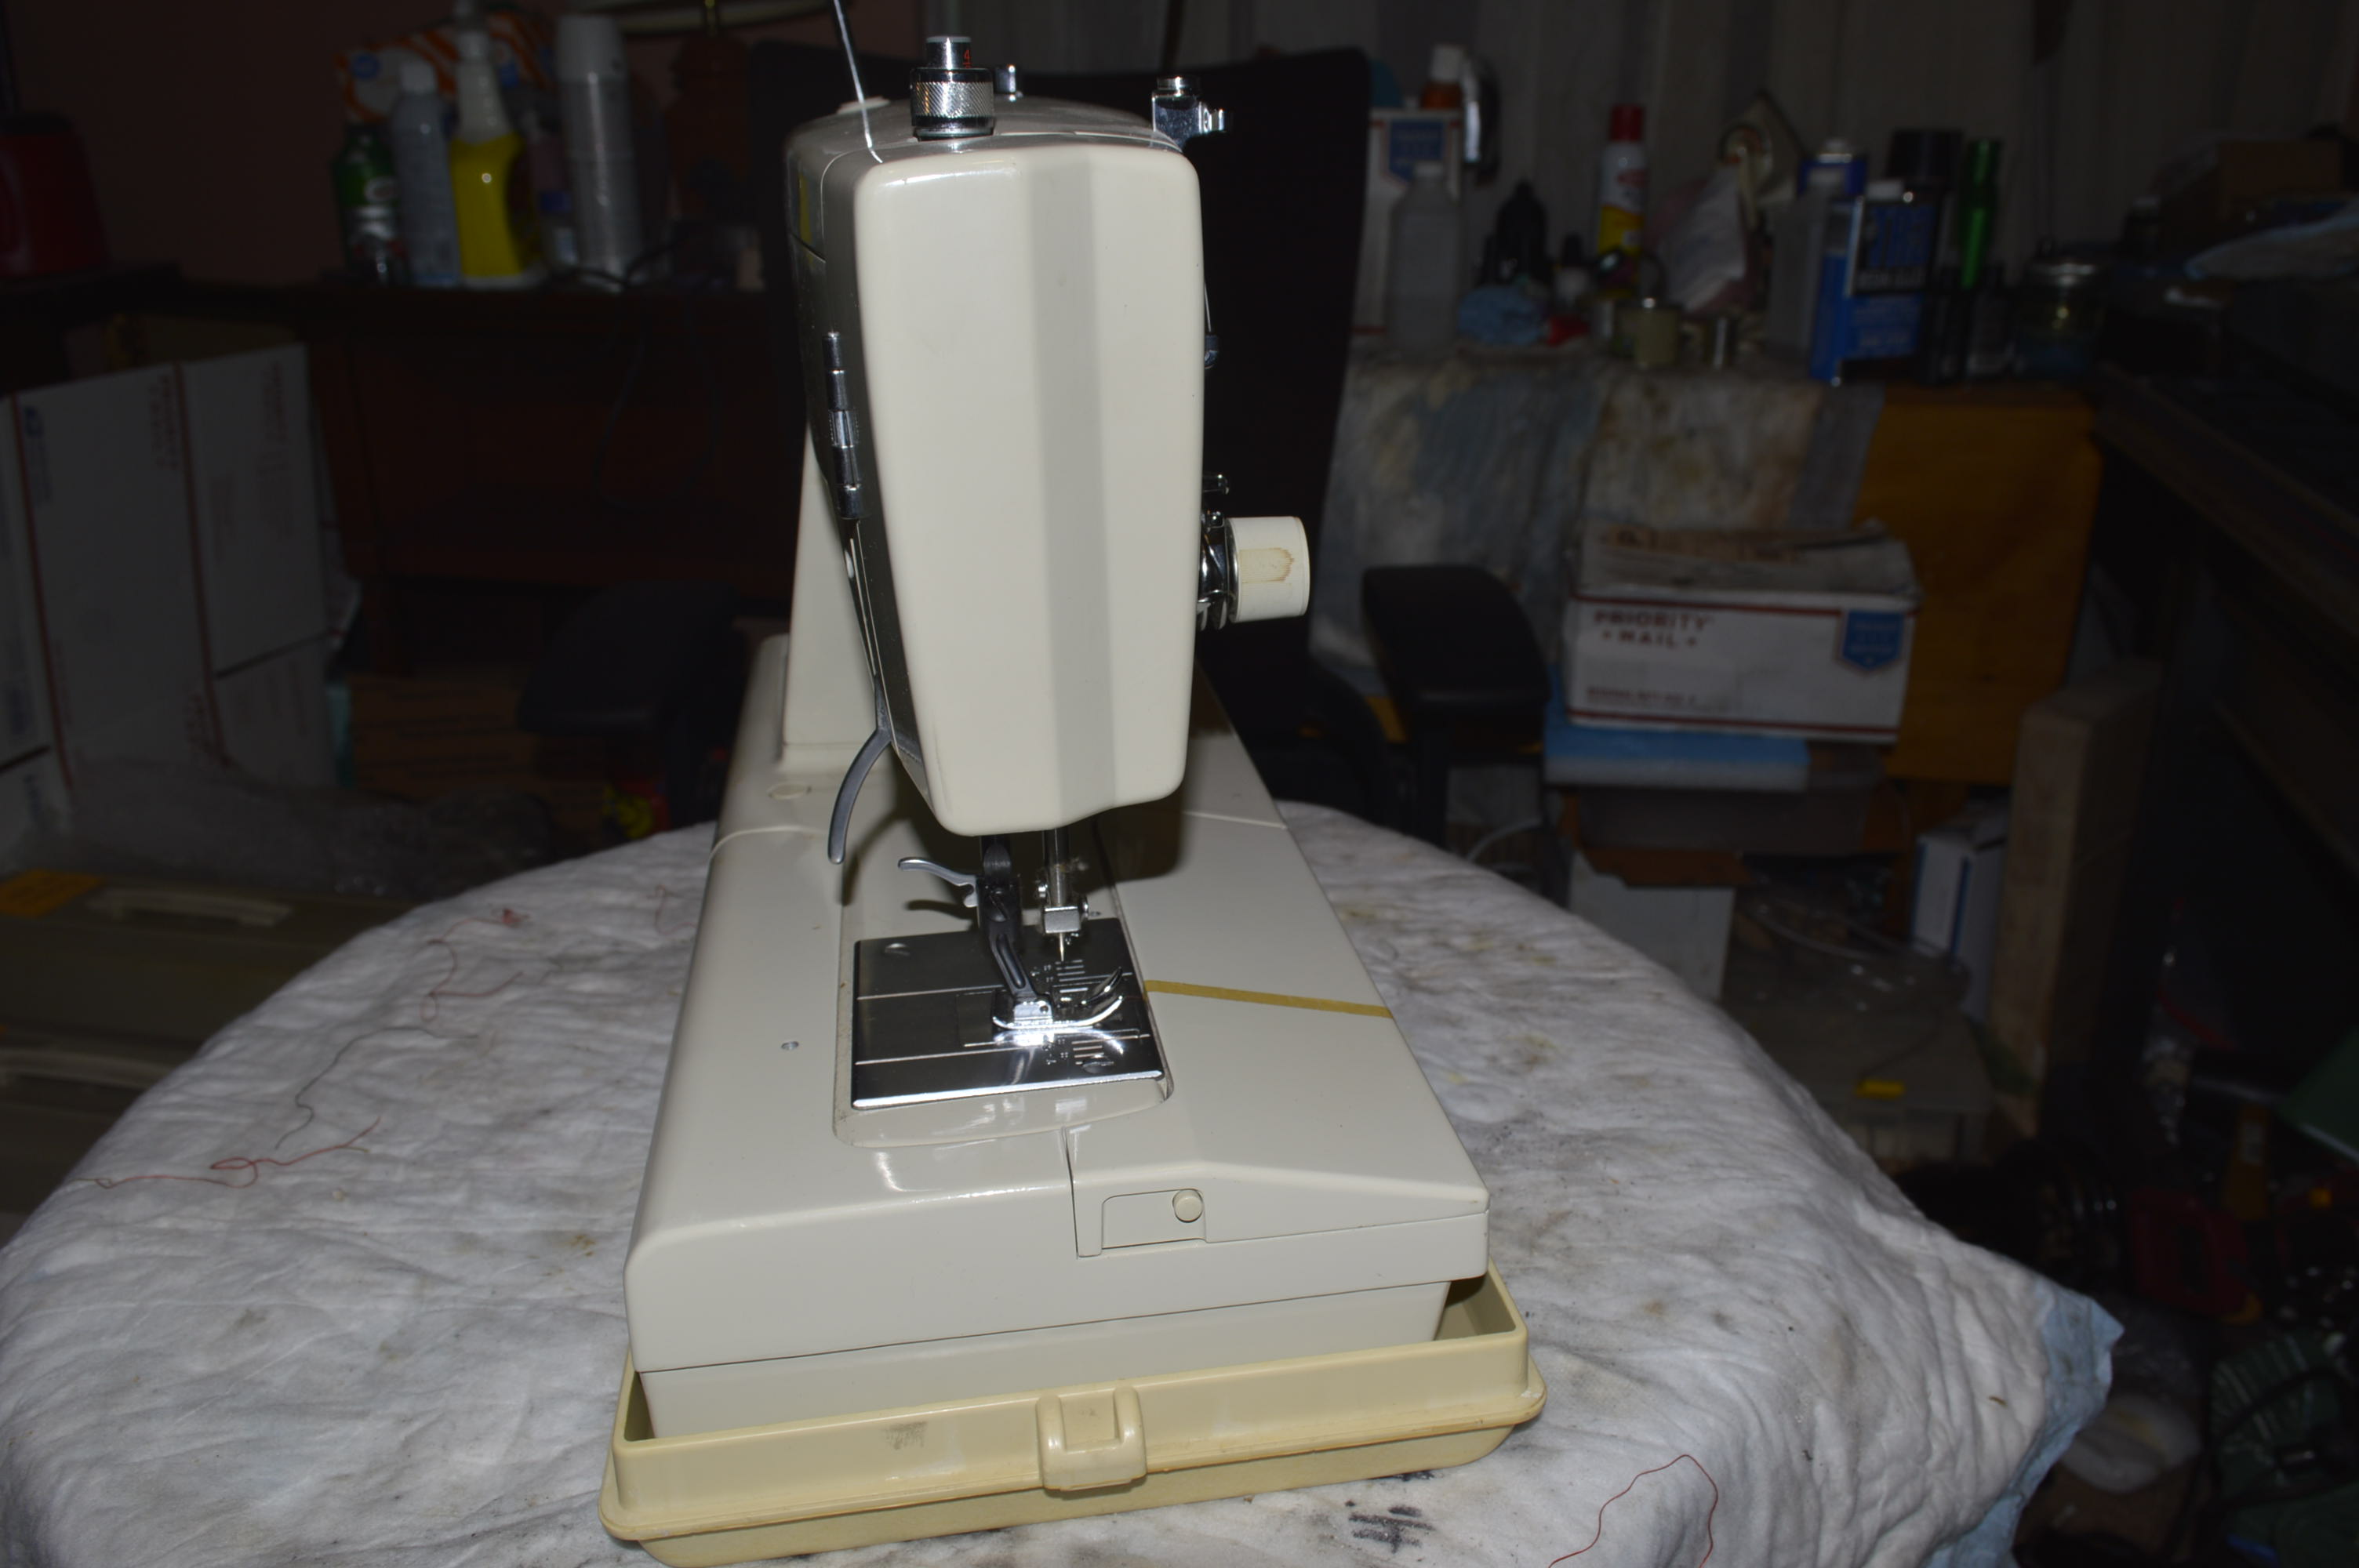
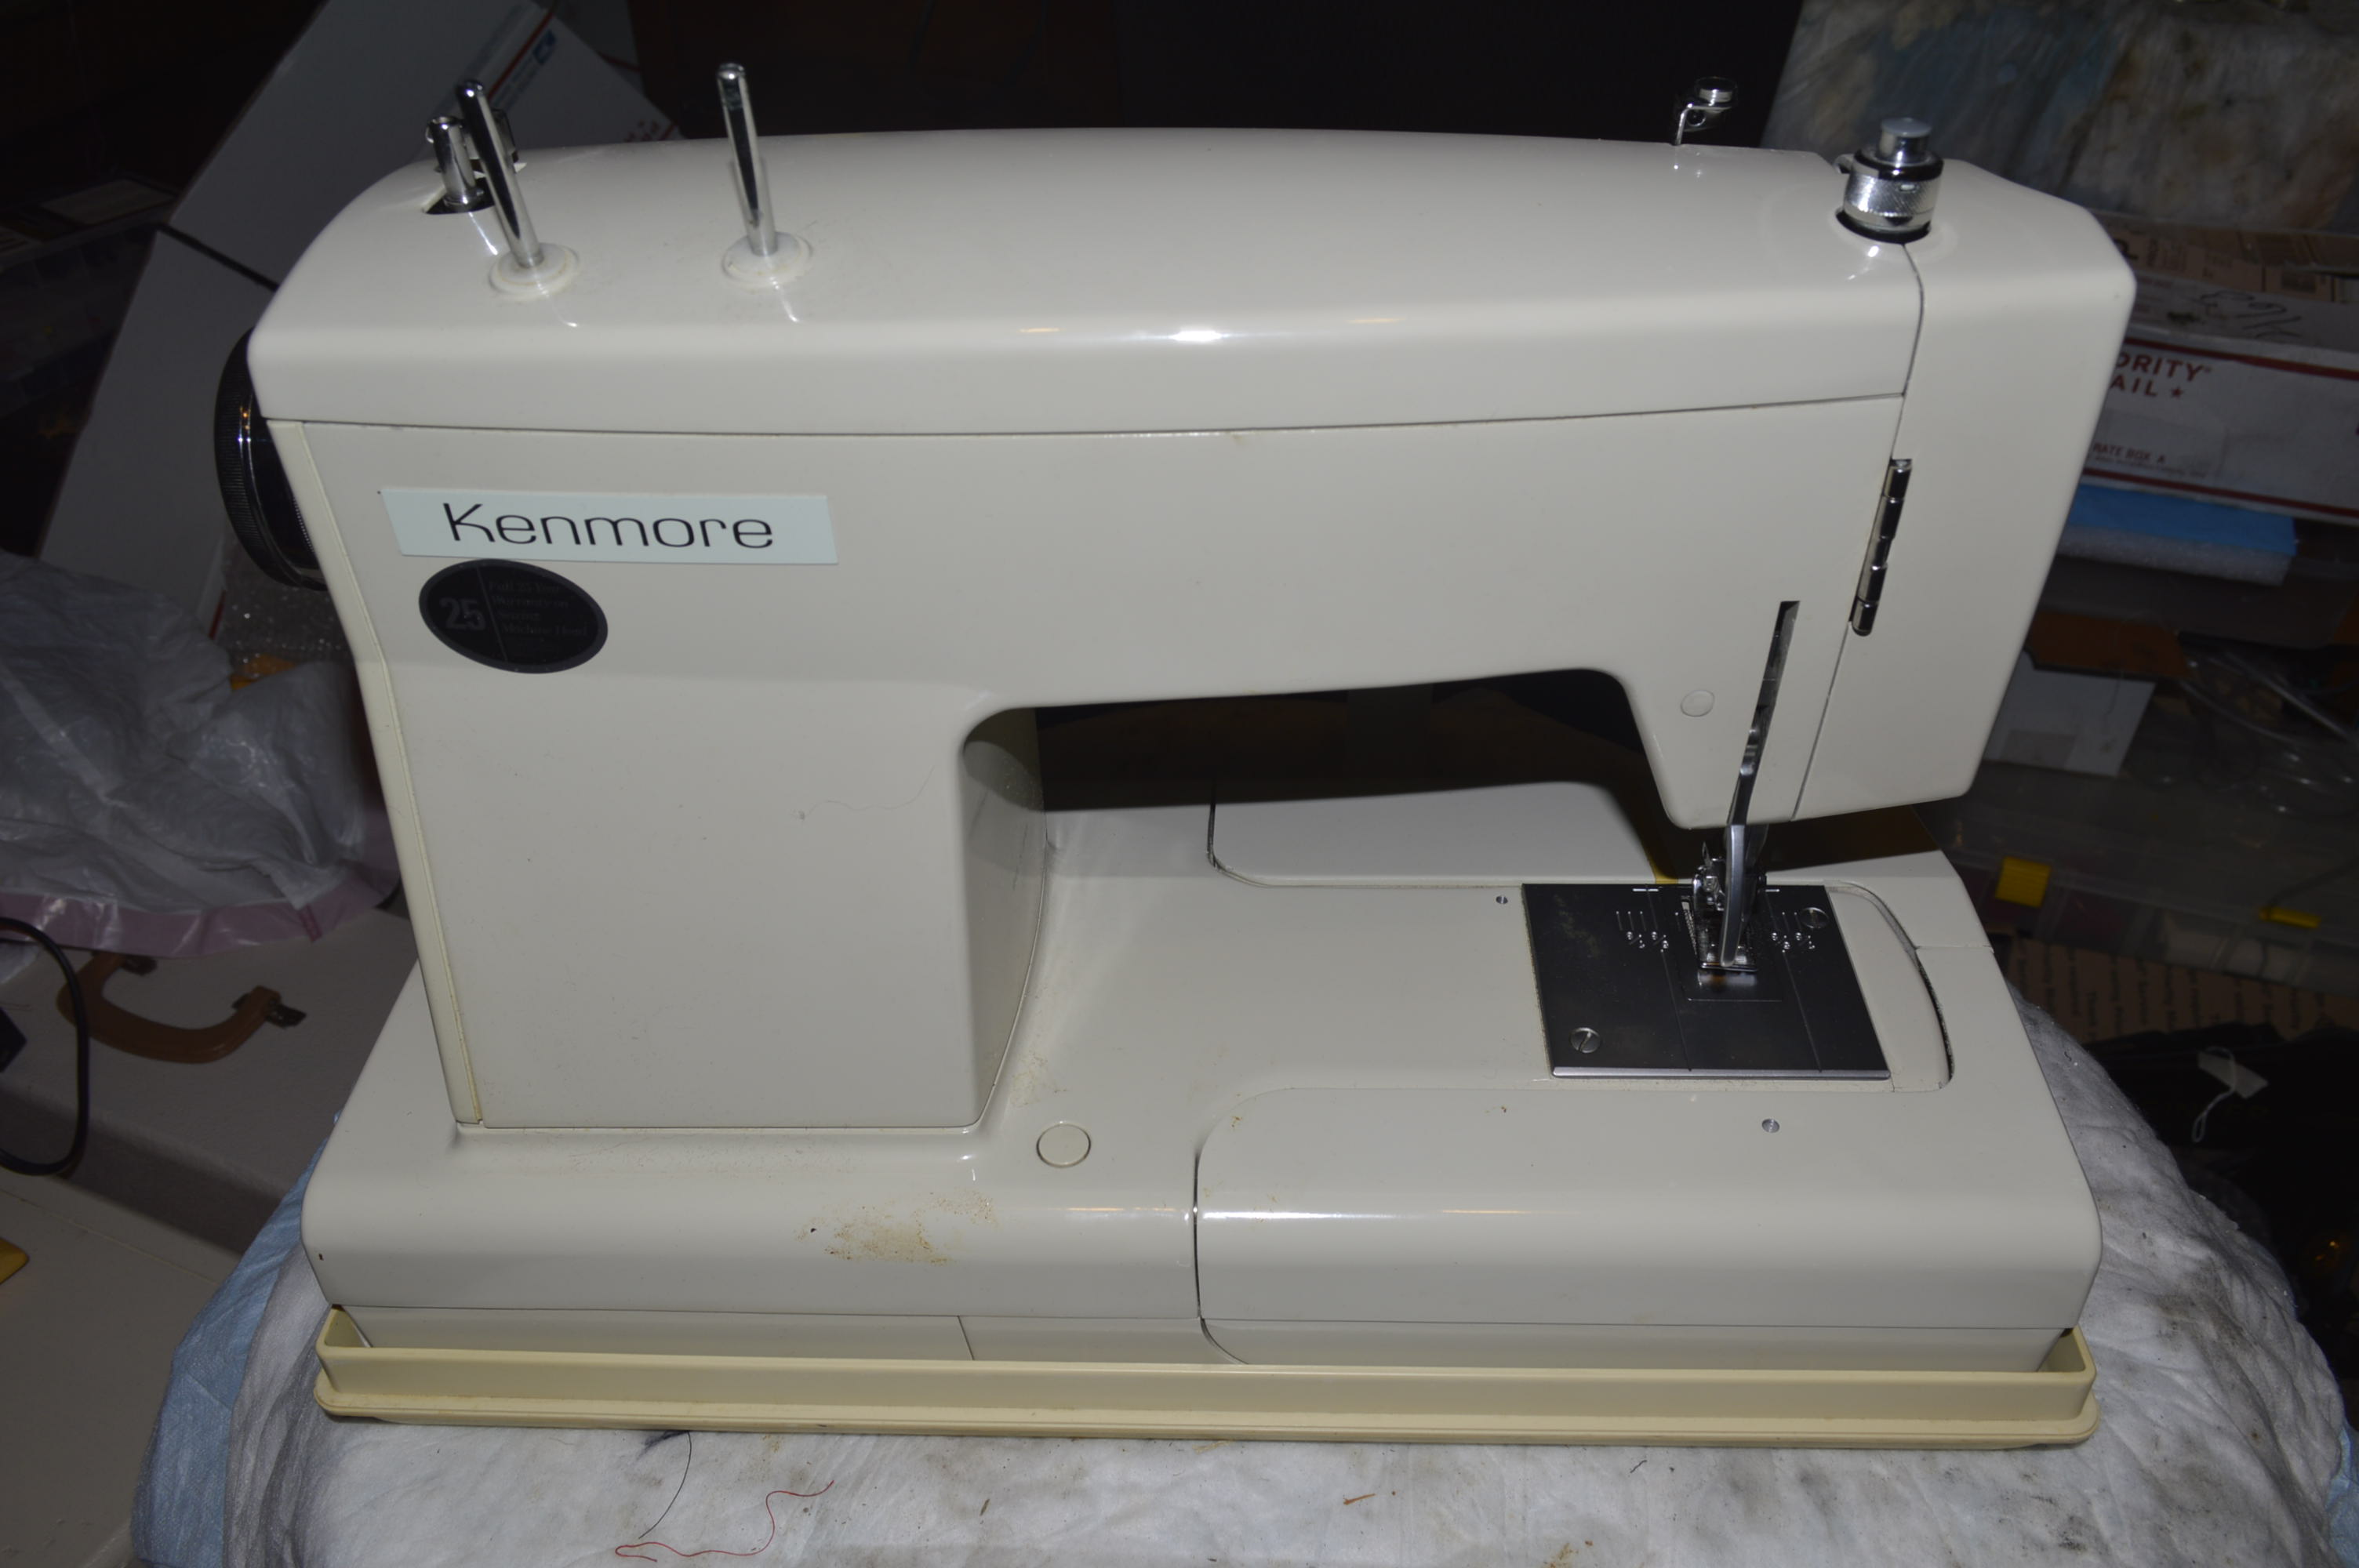
The machine looks clean, but there is dirt to be found and we will find it. This 1941 will shine like a new penny when the reconditioning is finished. The major part of the reconditioning includes motor disassembly, tension disassembly and cleaning. We are also servicing the bobbin case and the bits and pieces responsible for longevity and good stitch formation. The first step is to remove as much as possible to get deep inside the machine, and to clean hard to get places…
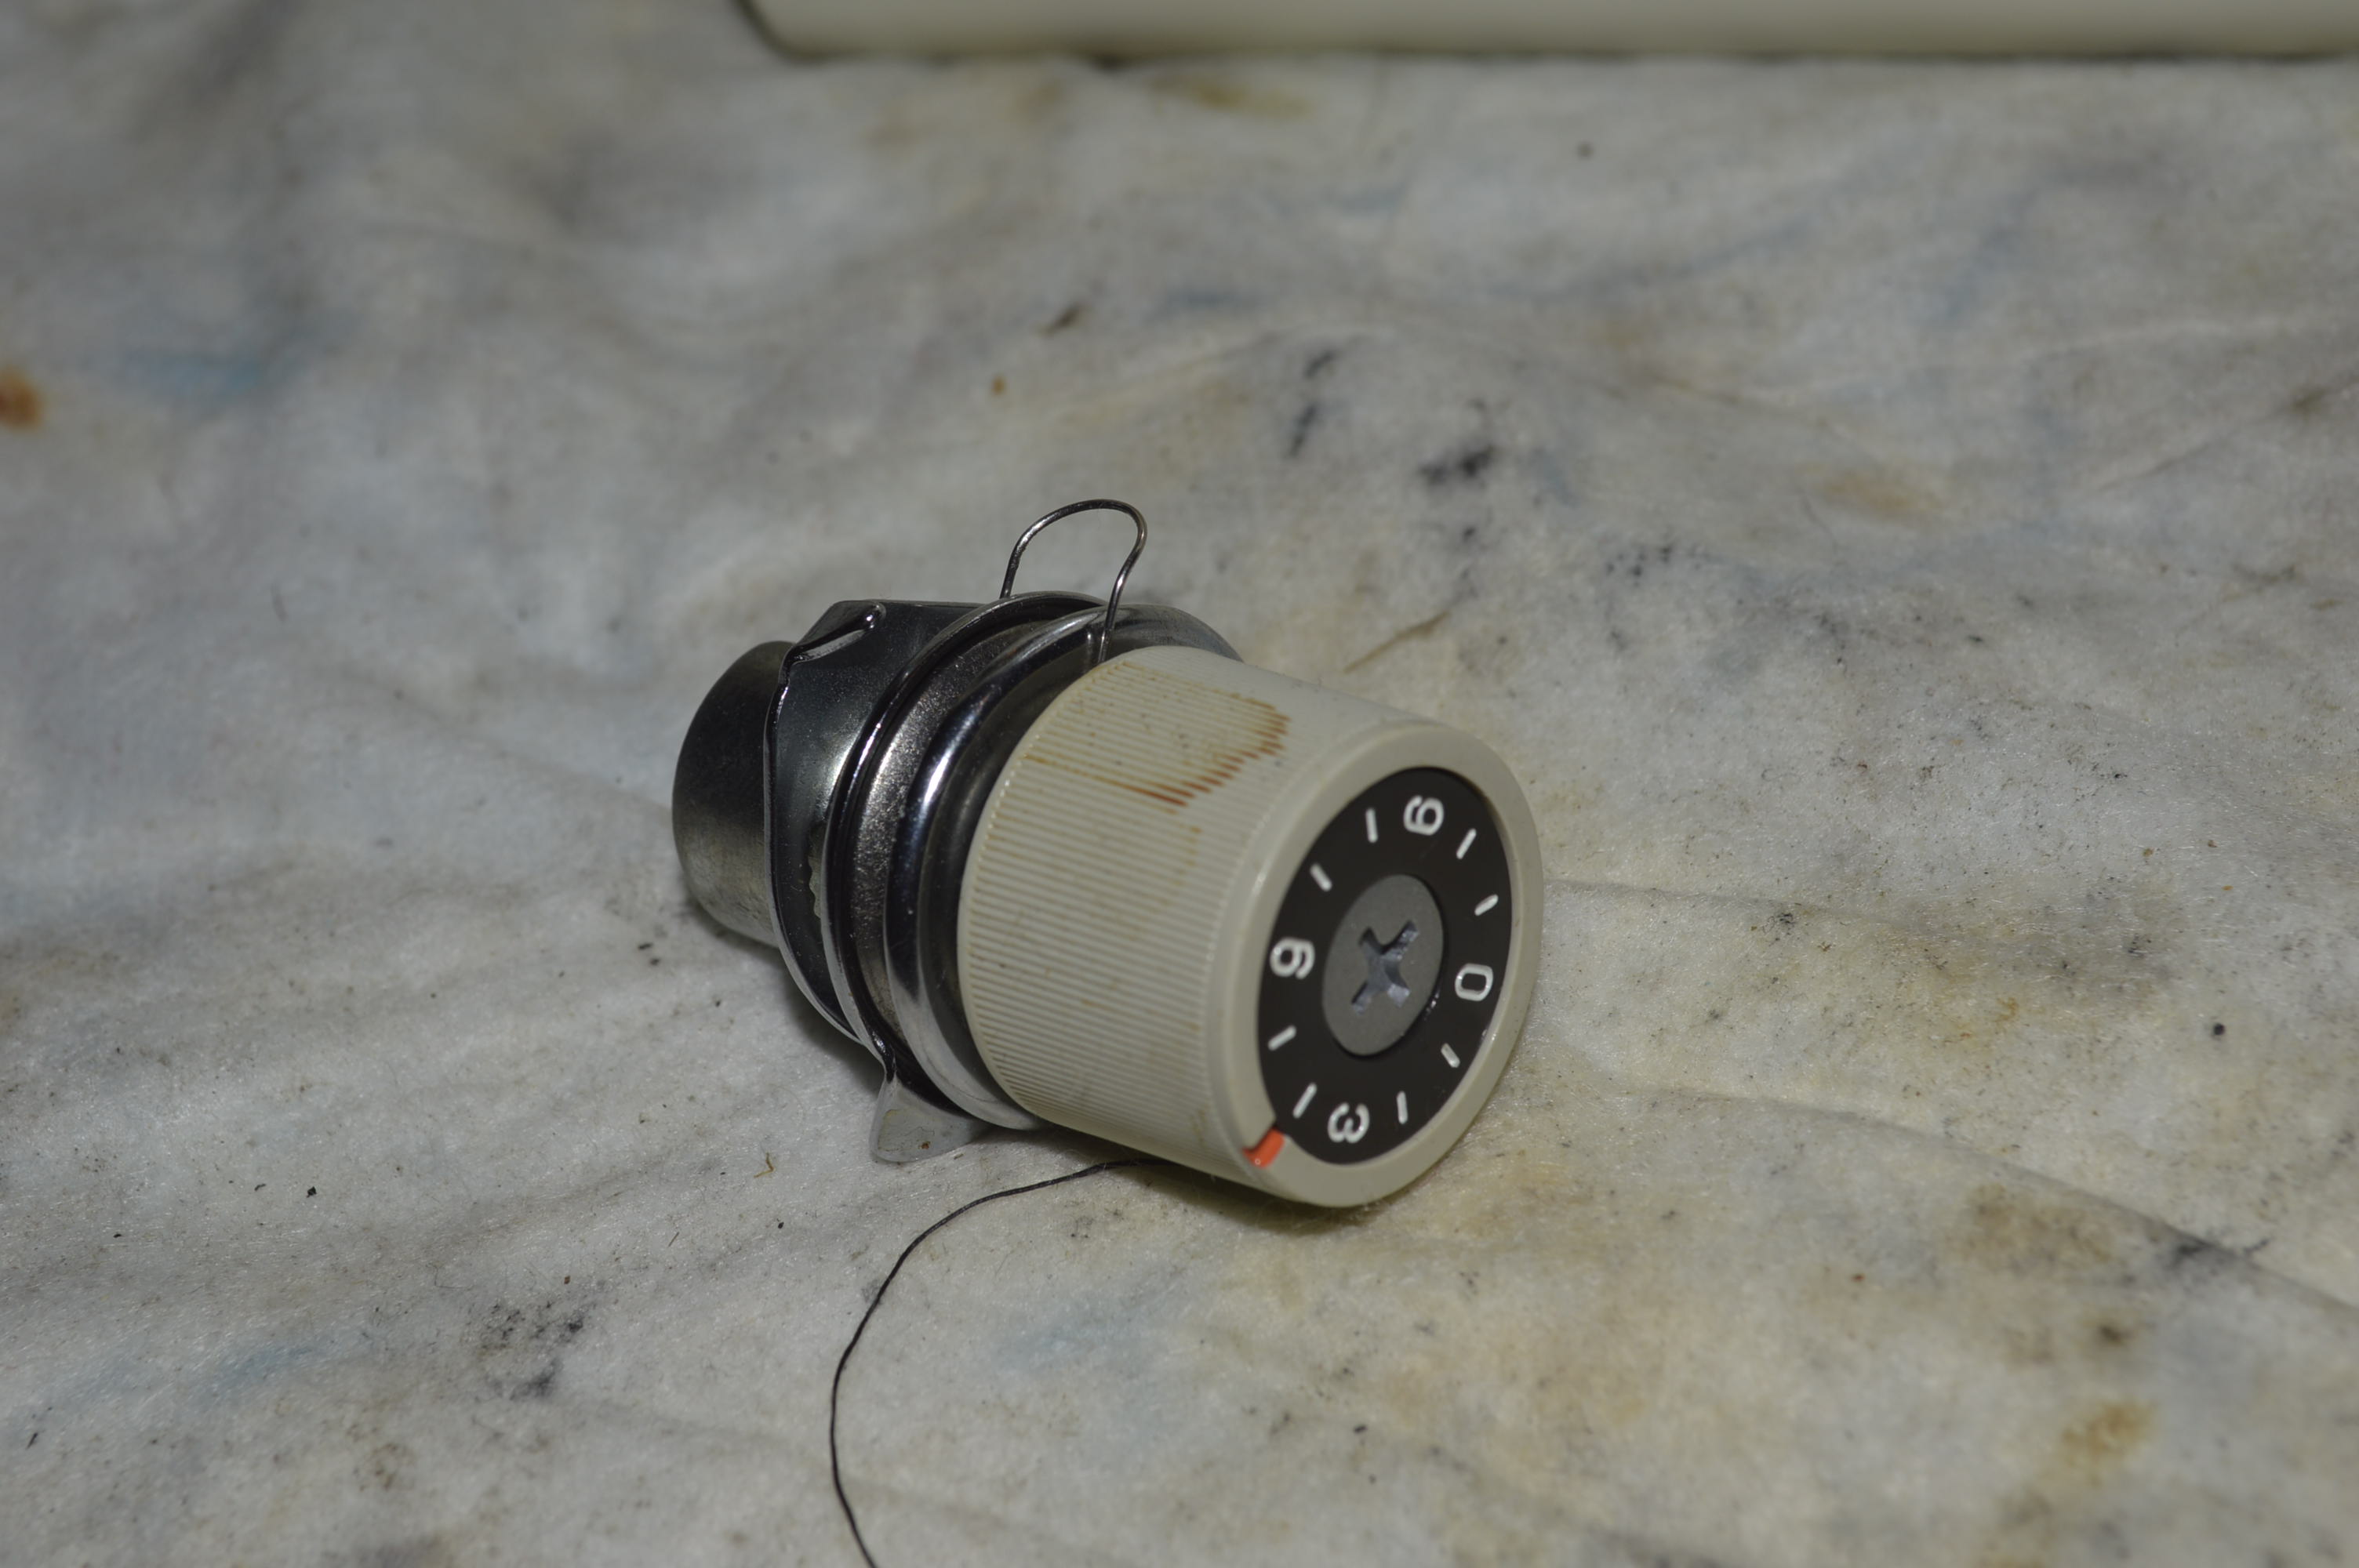
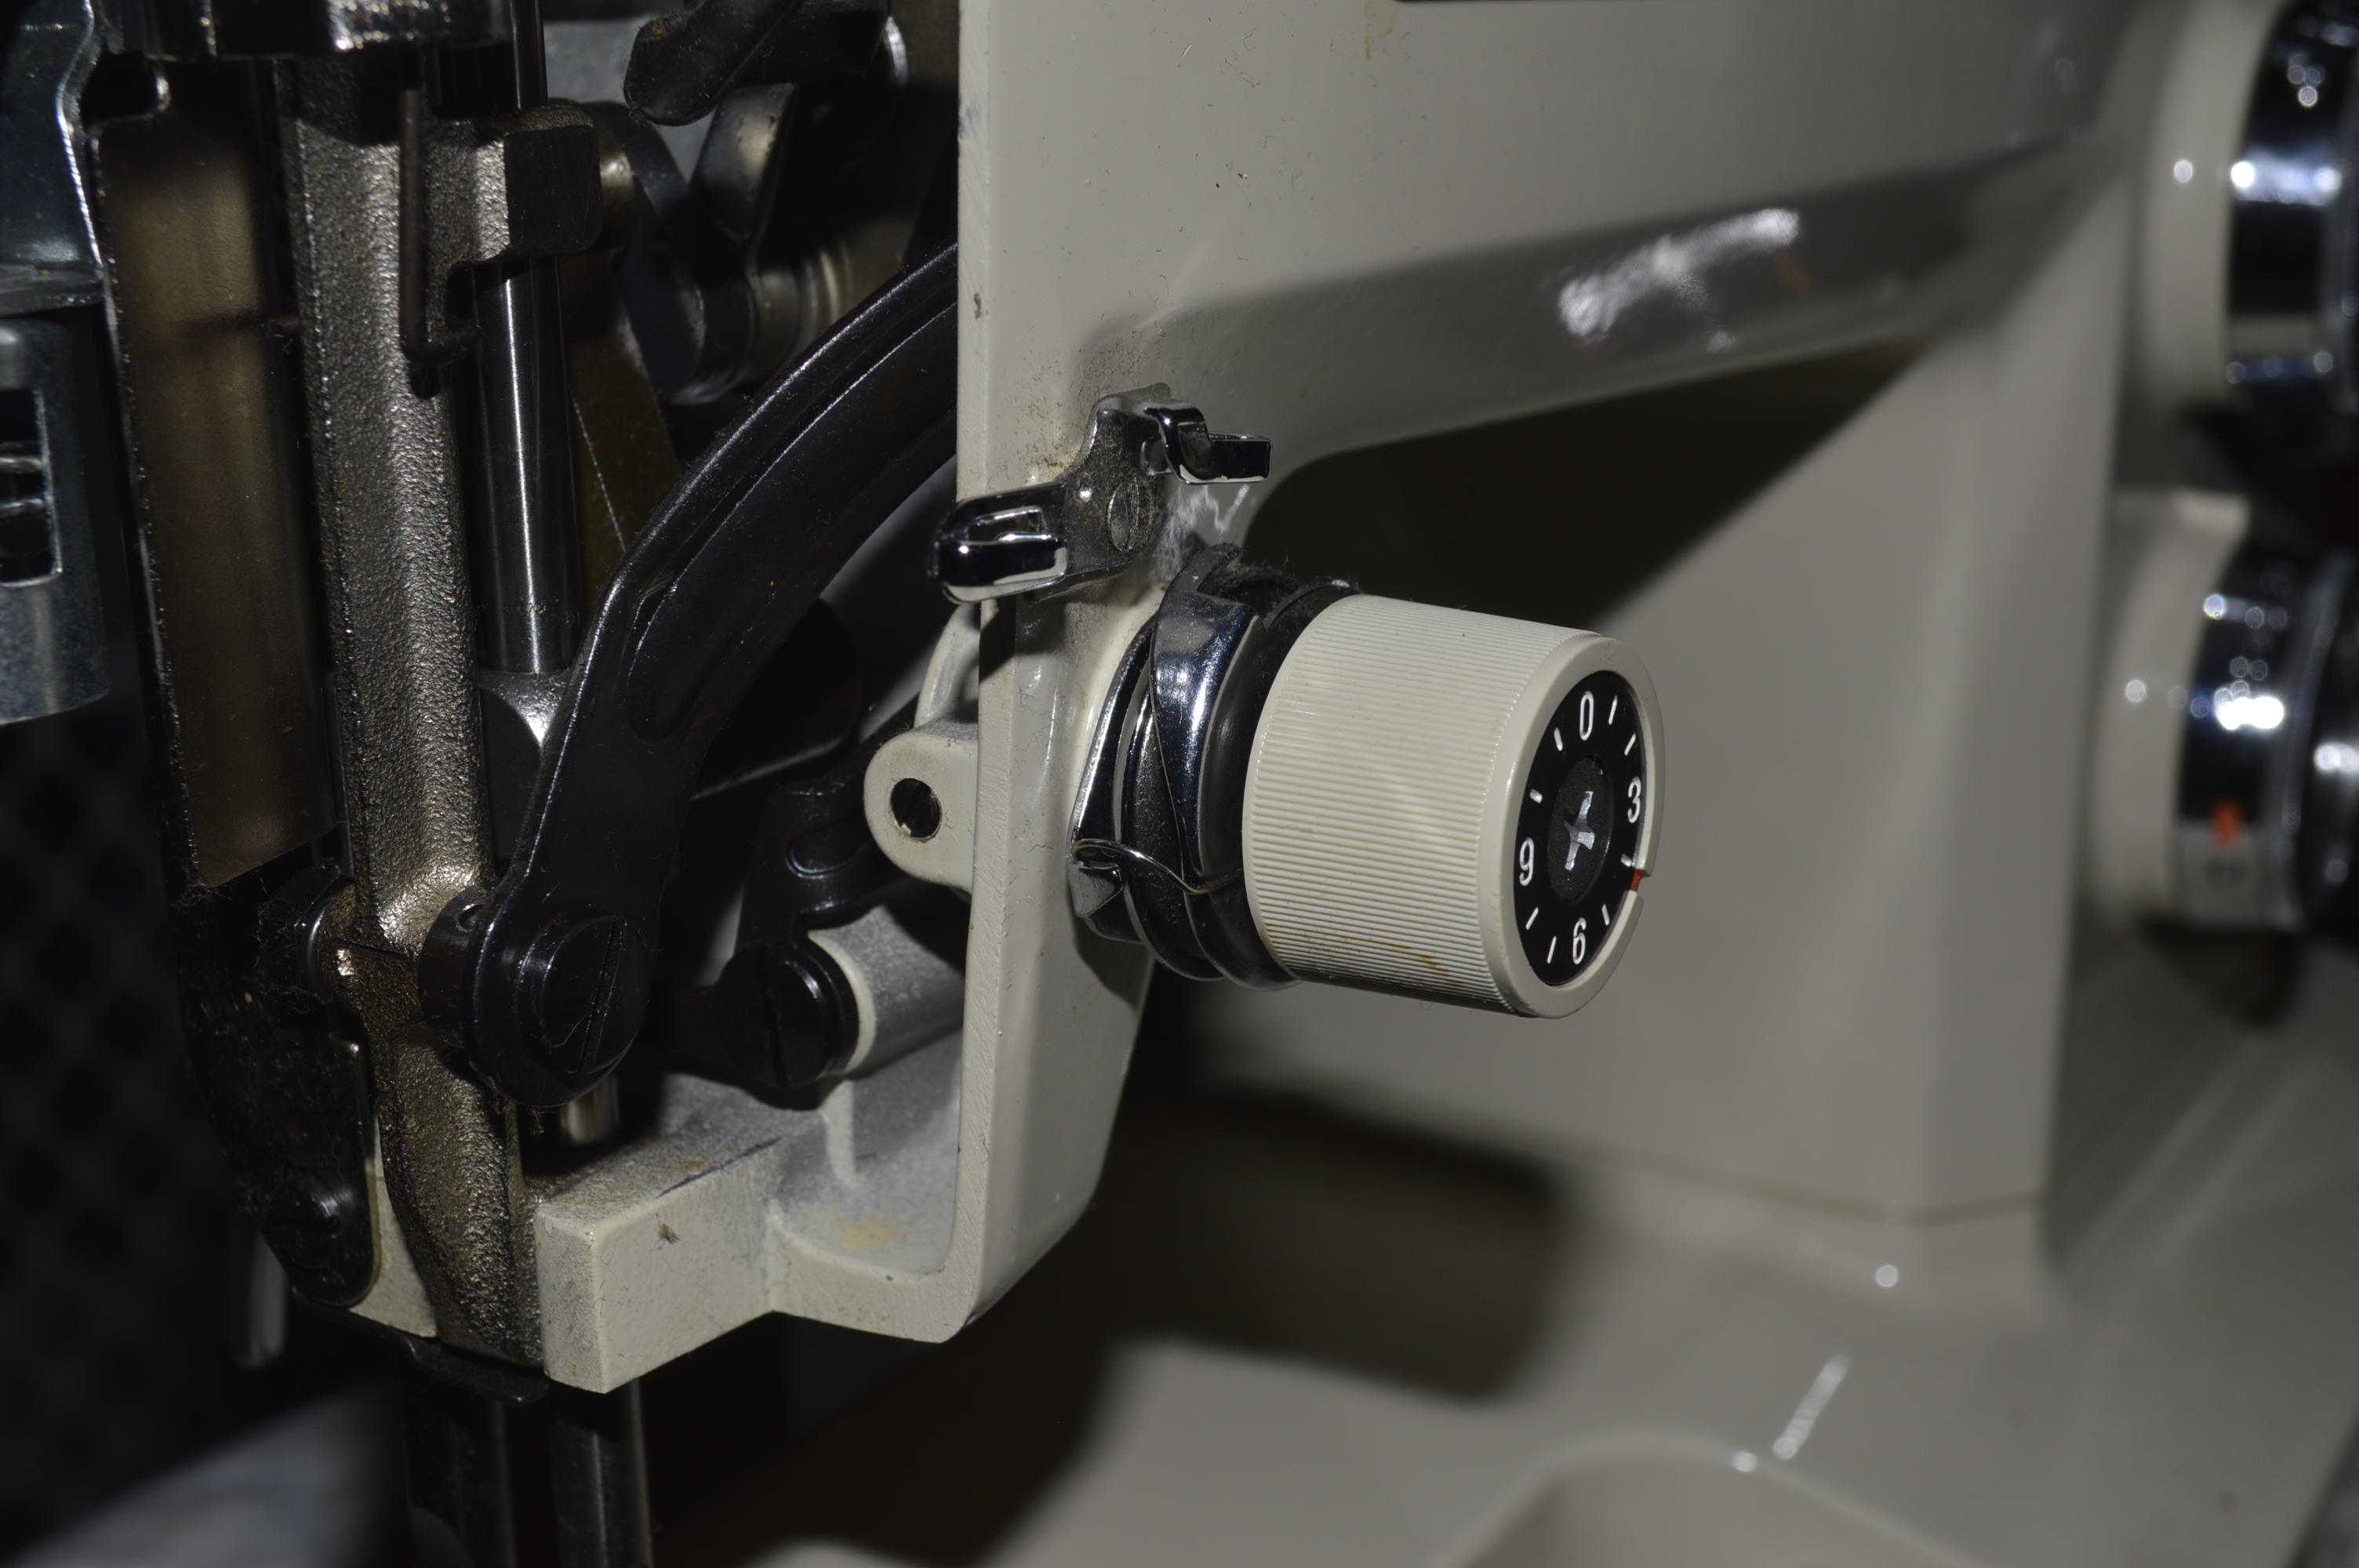
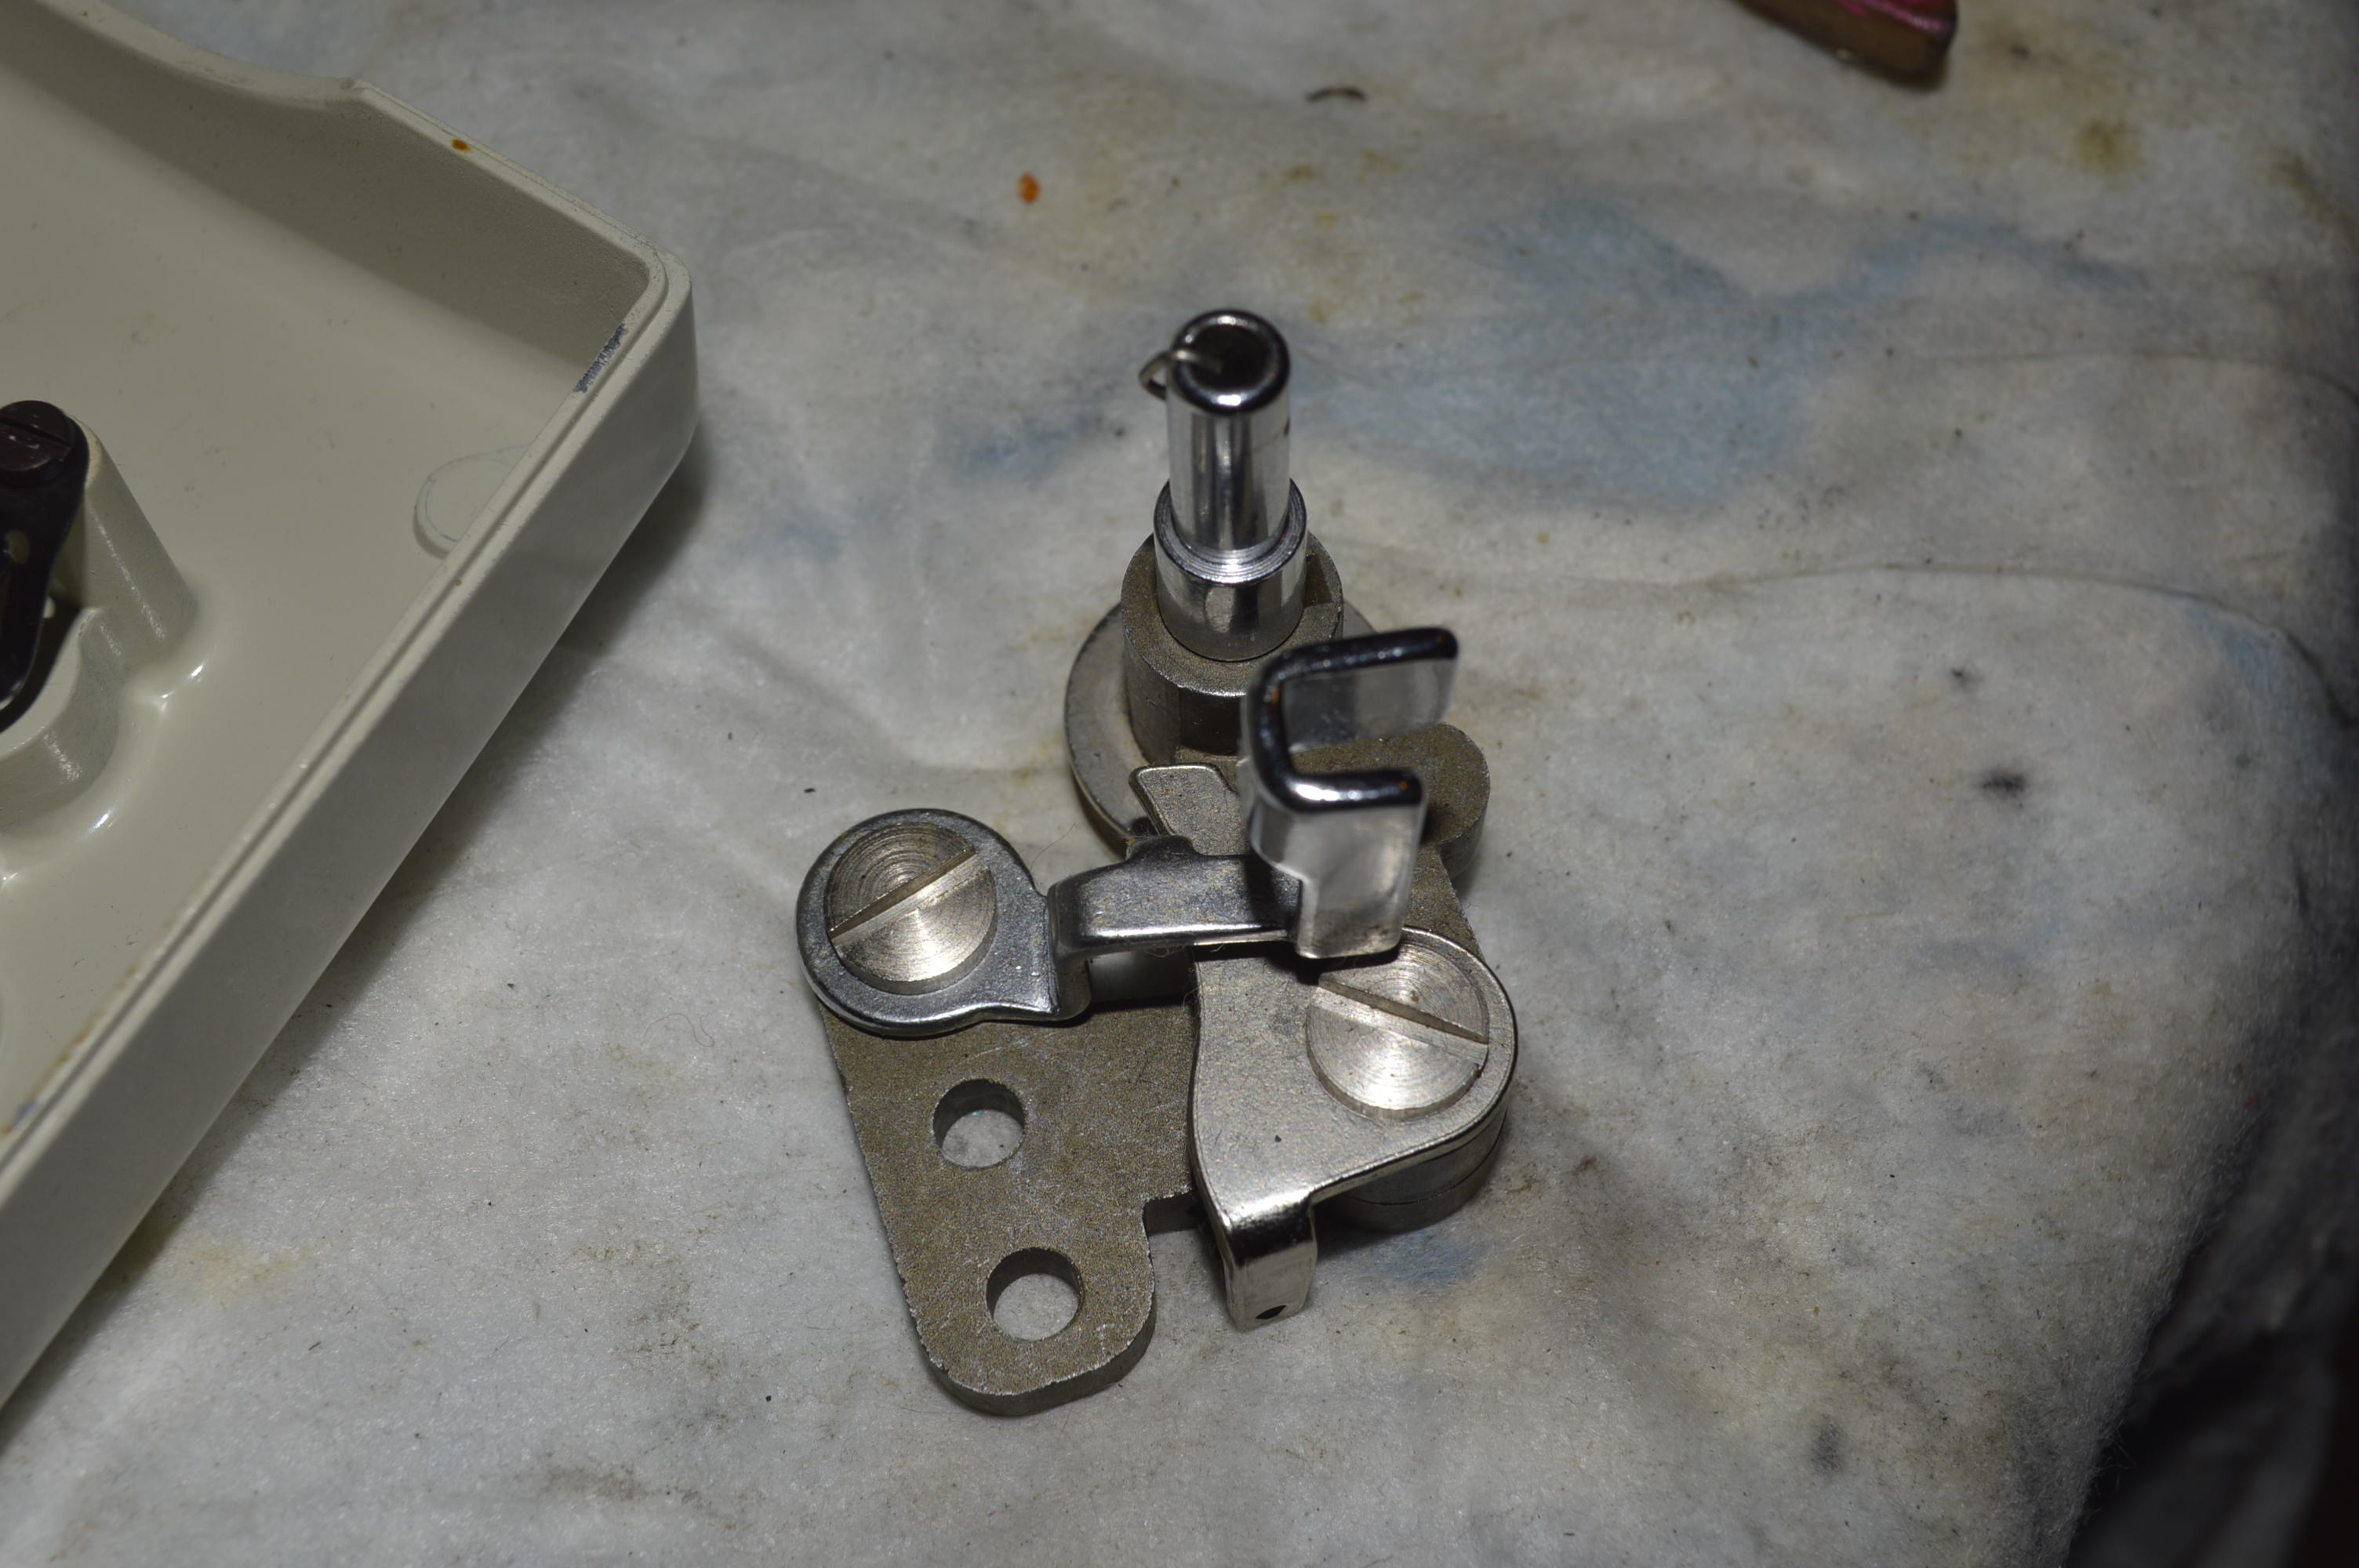
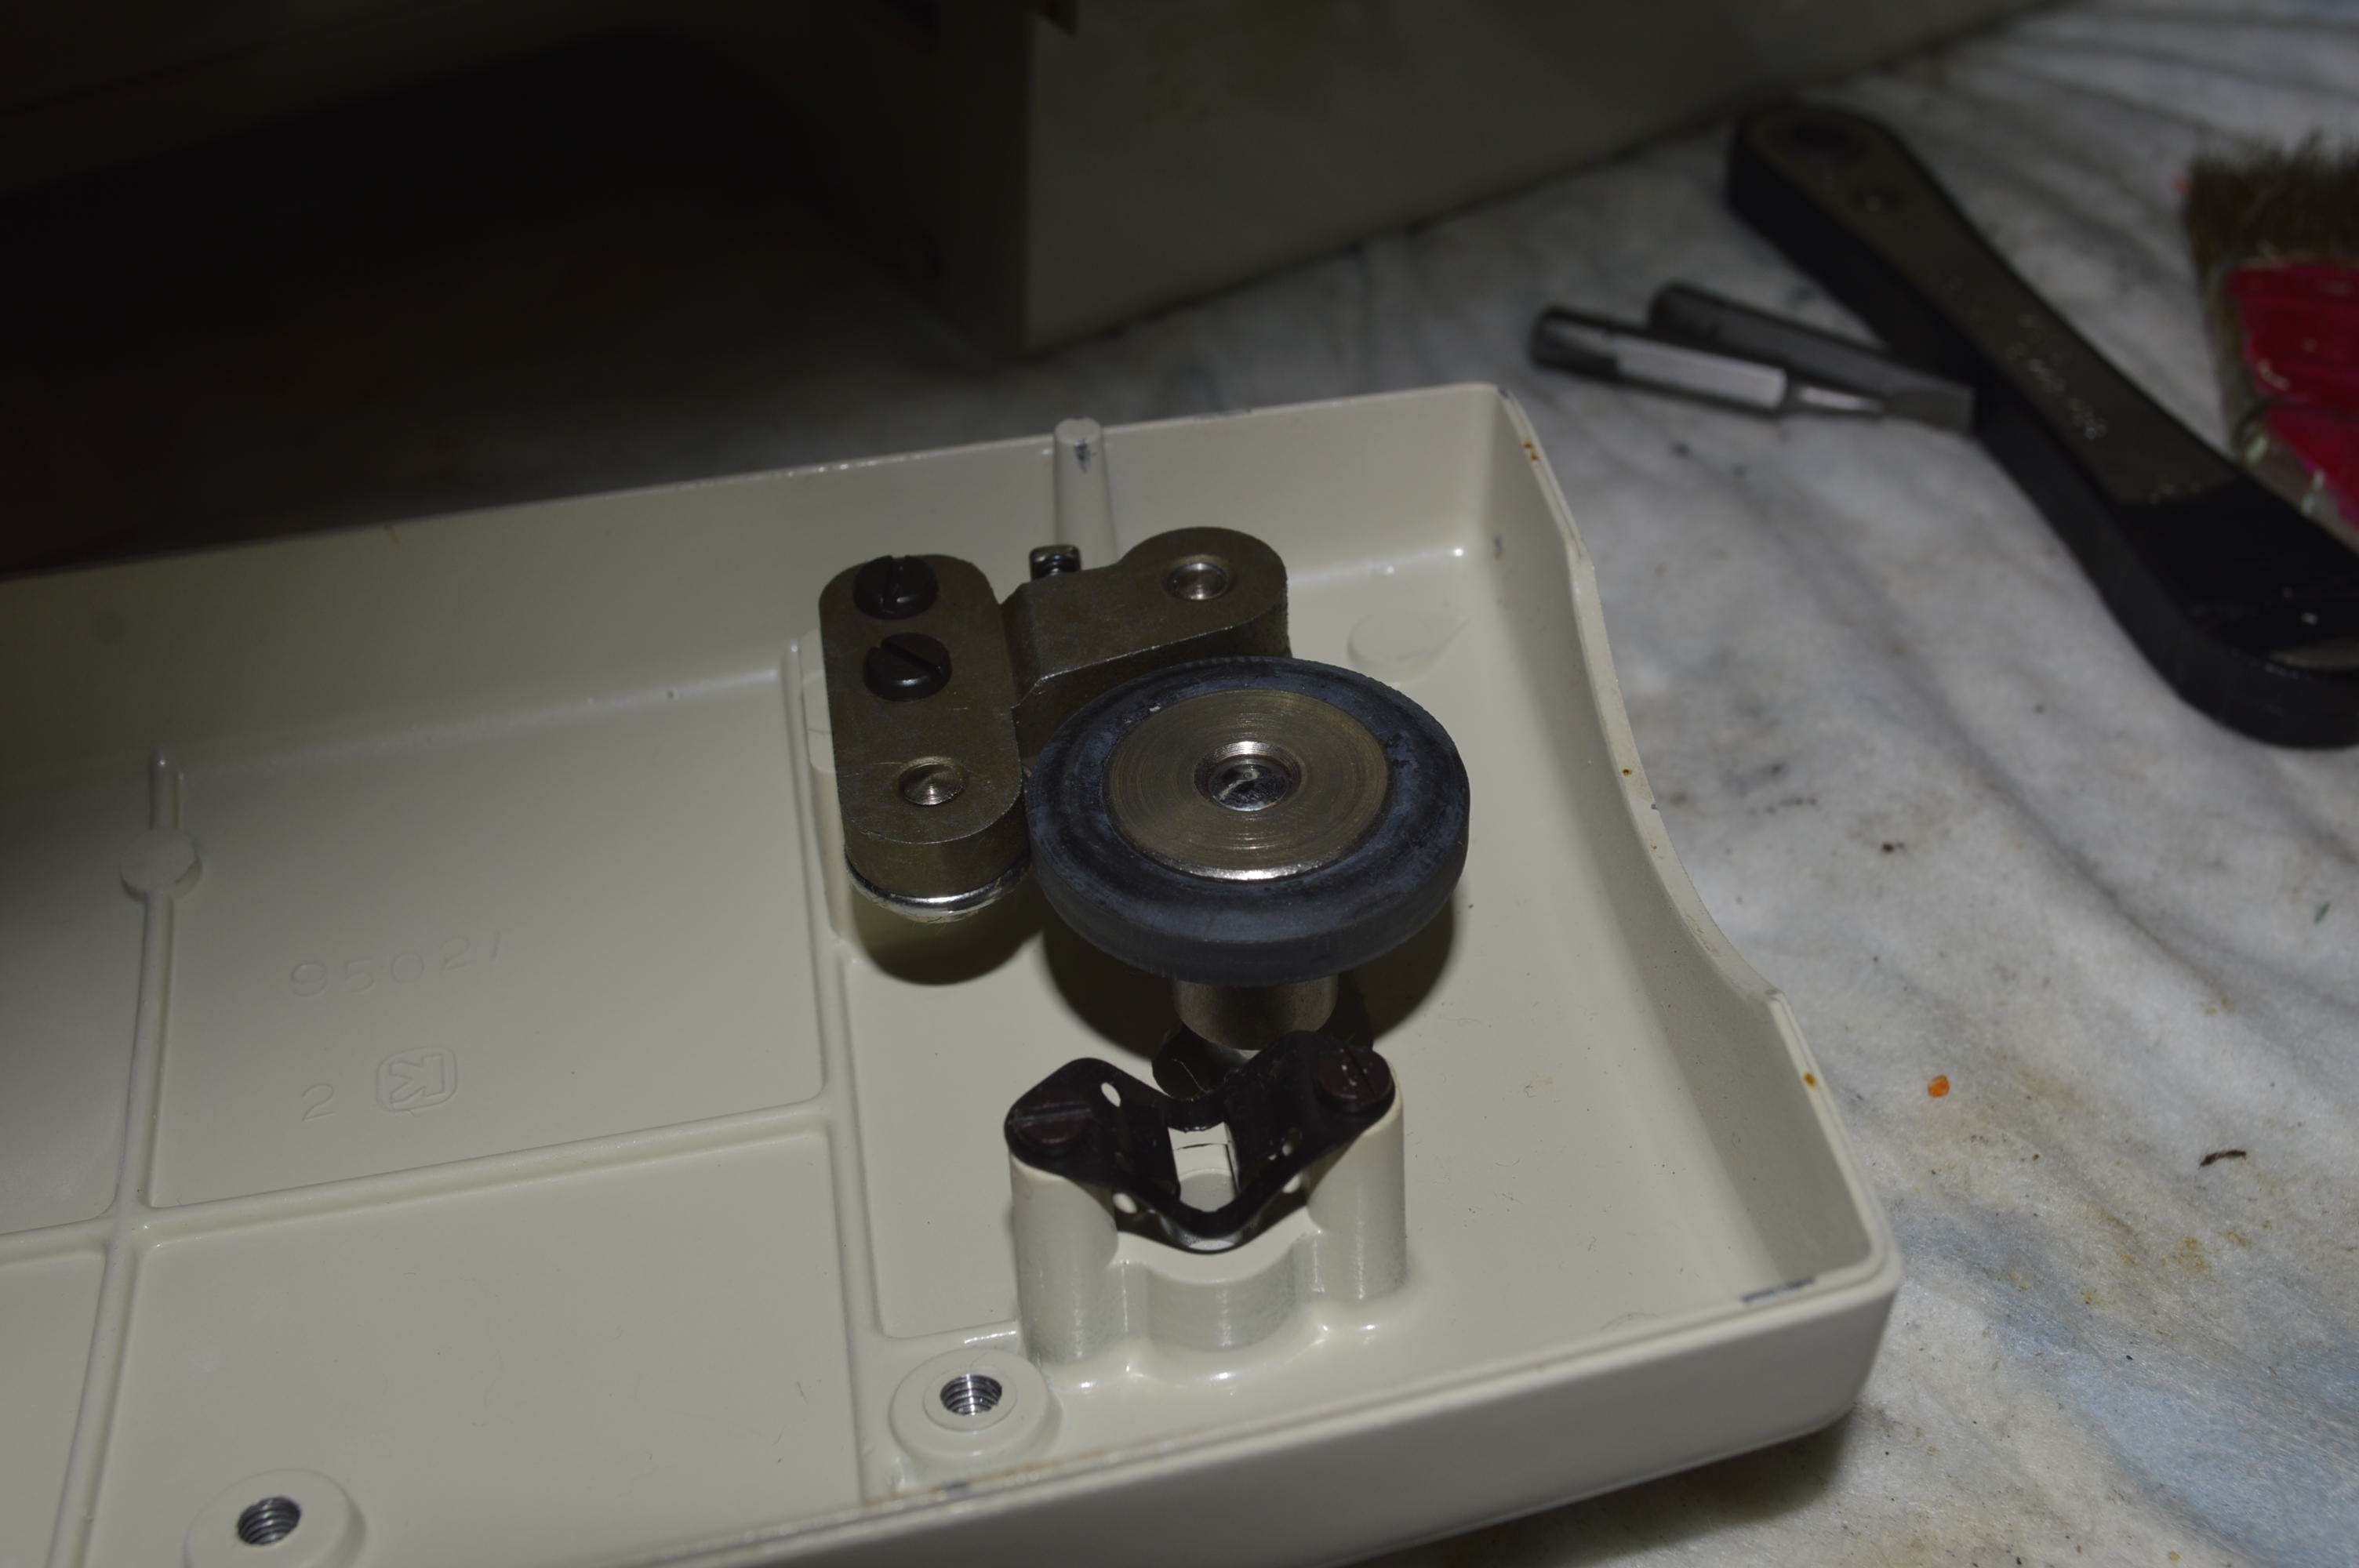
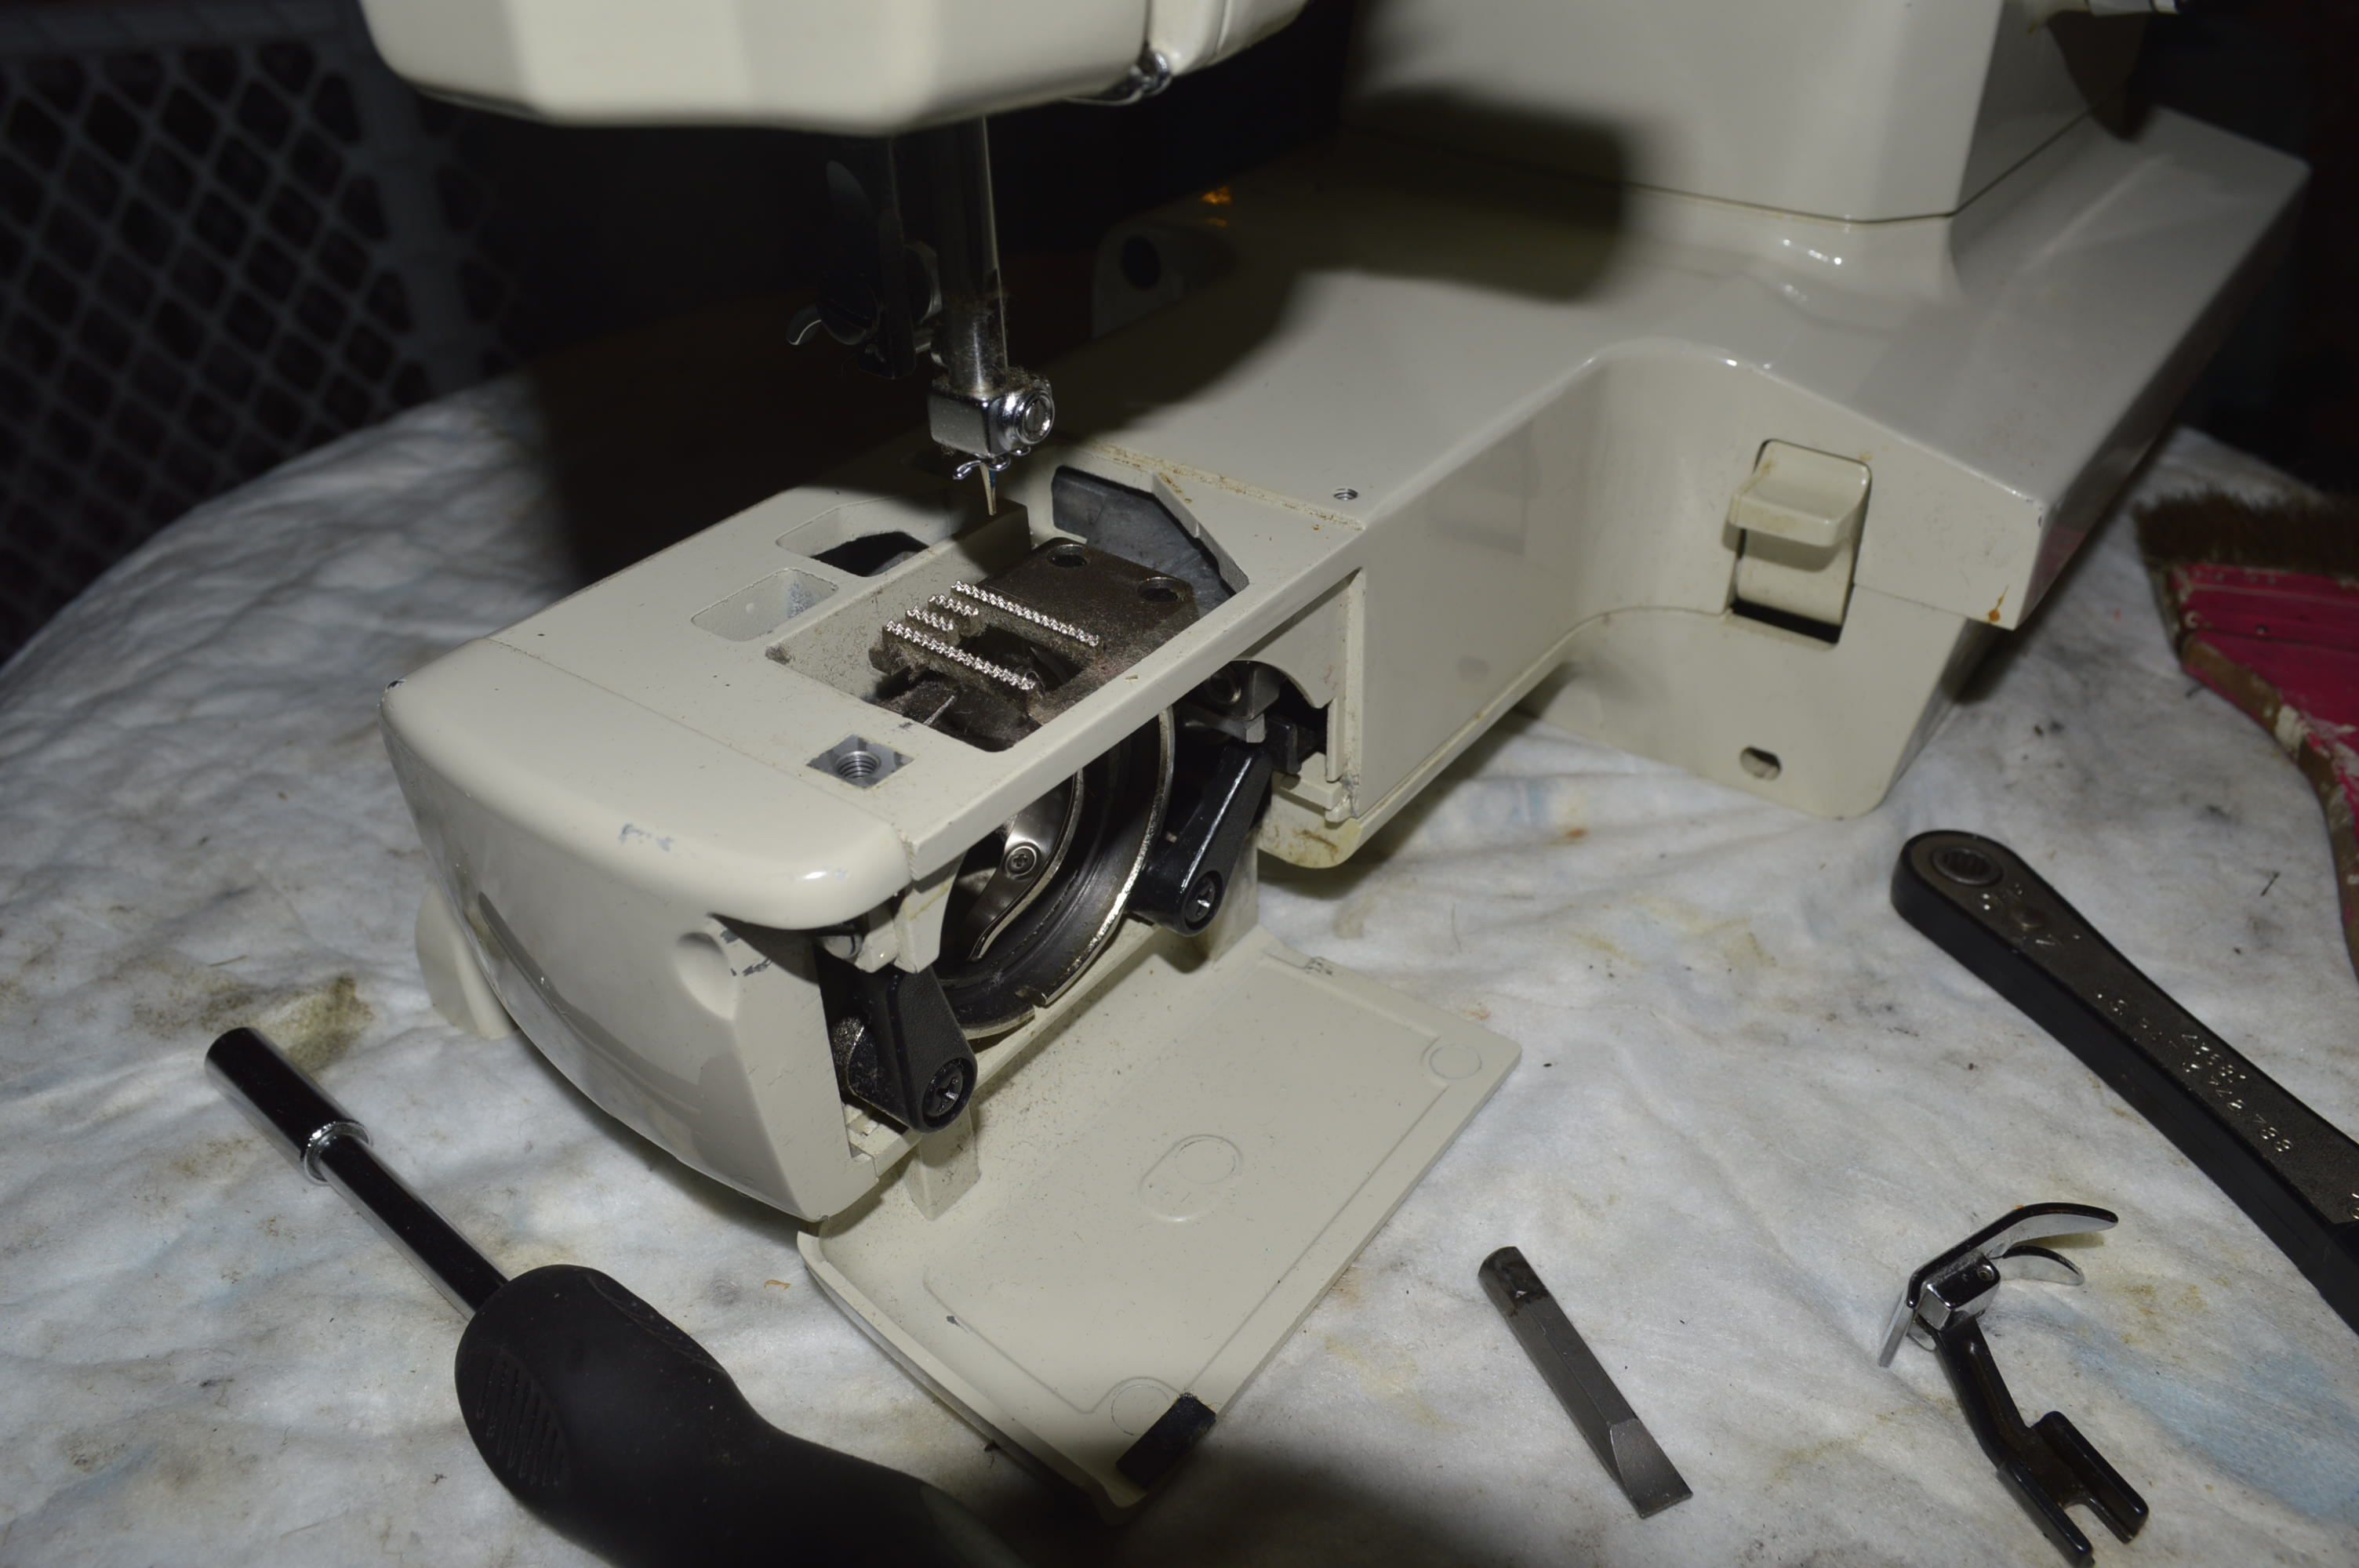
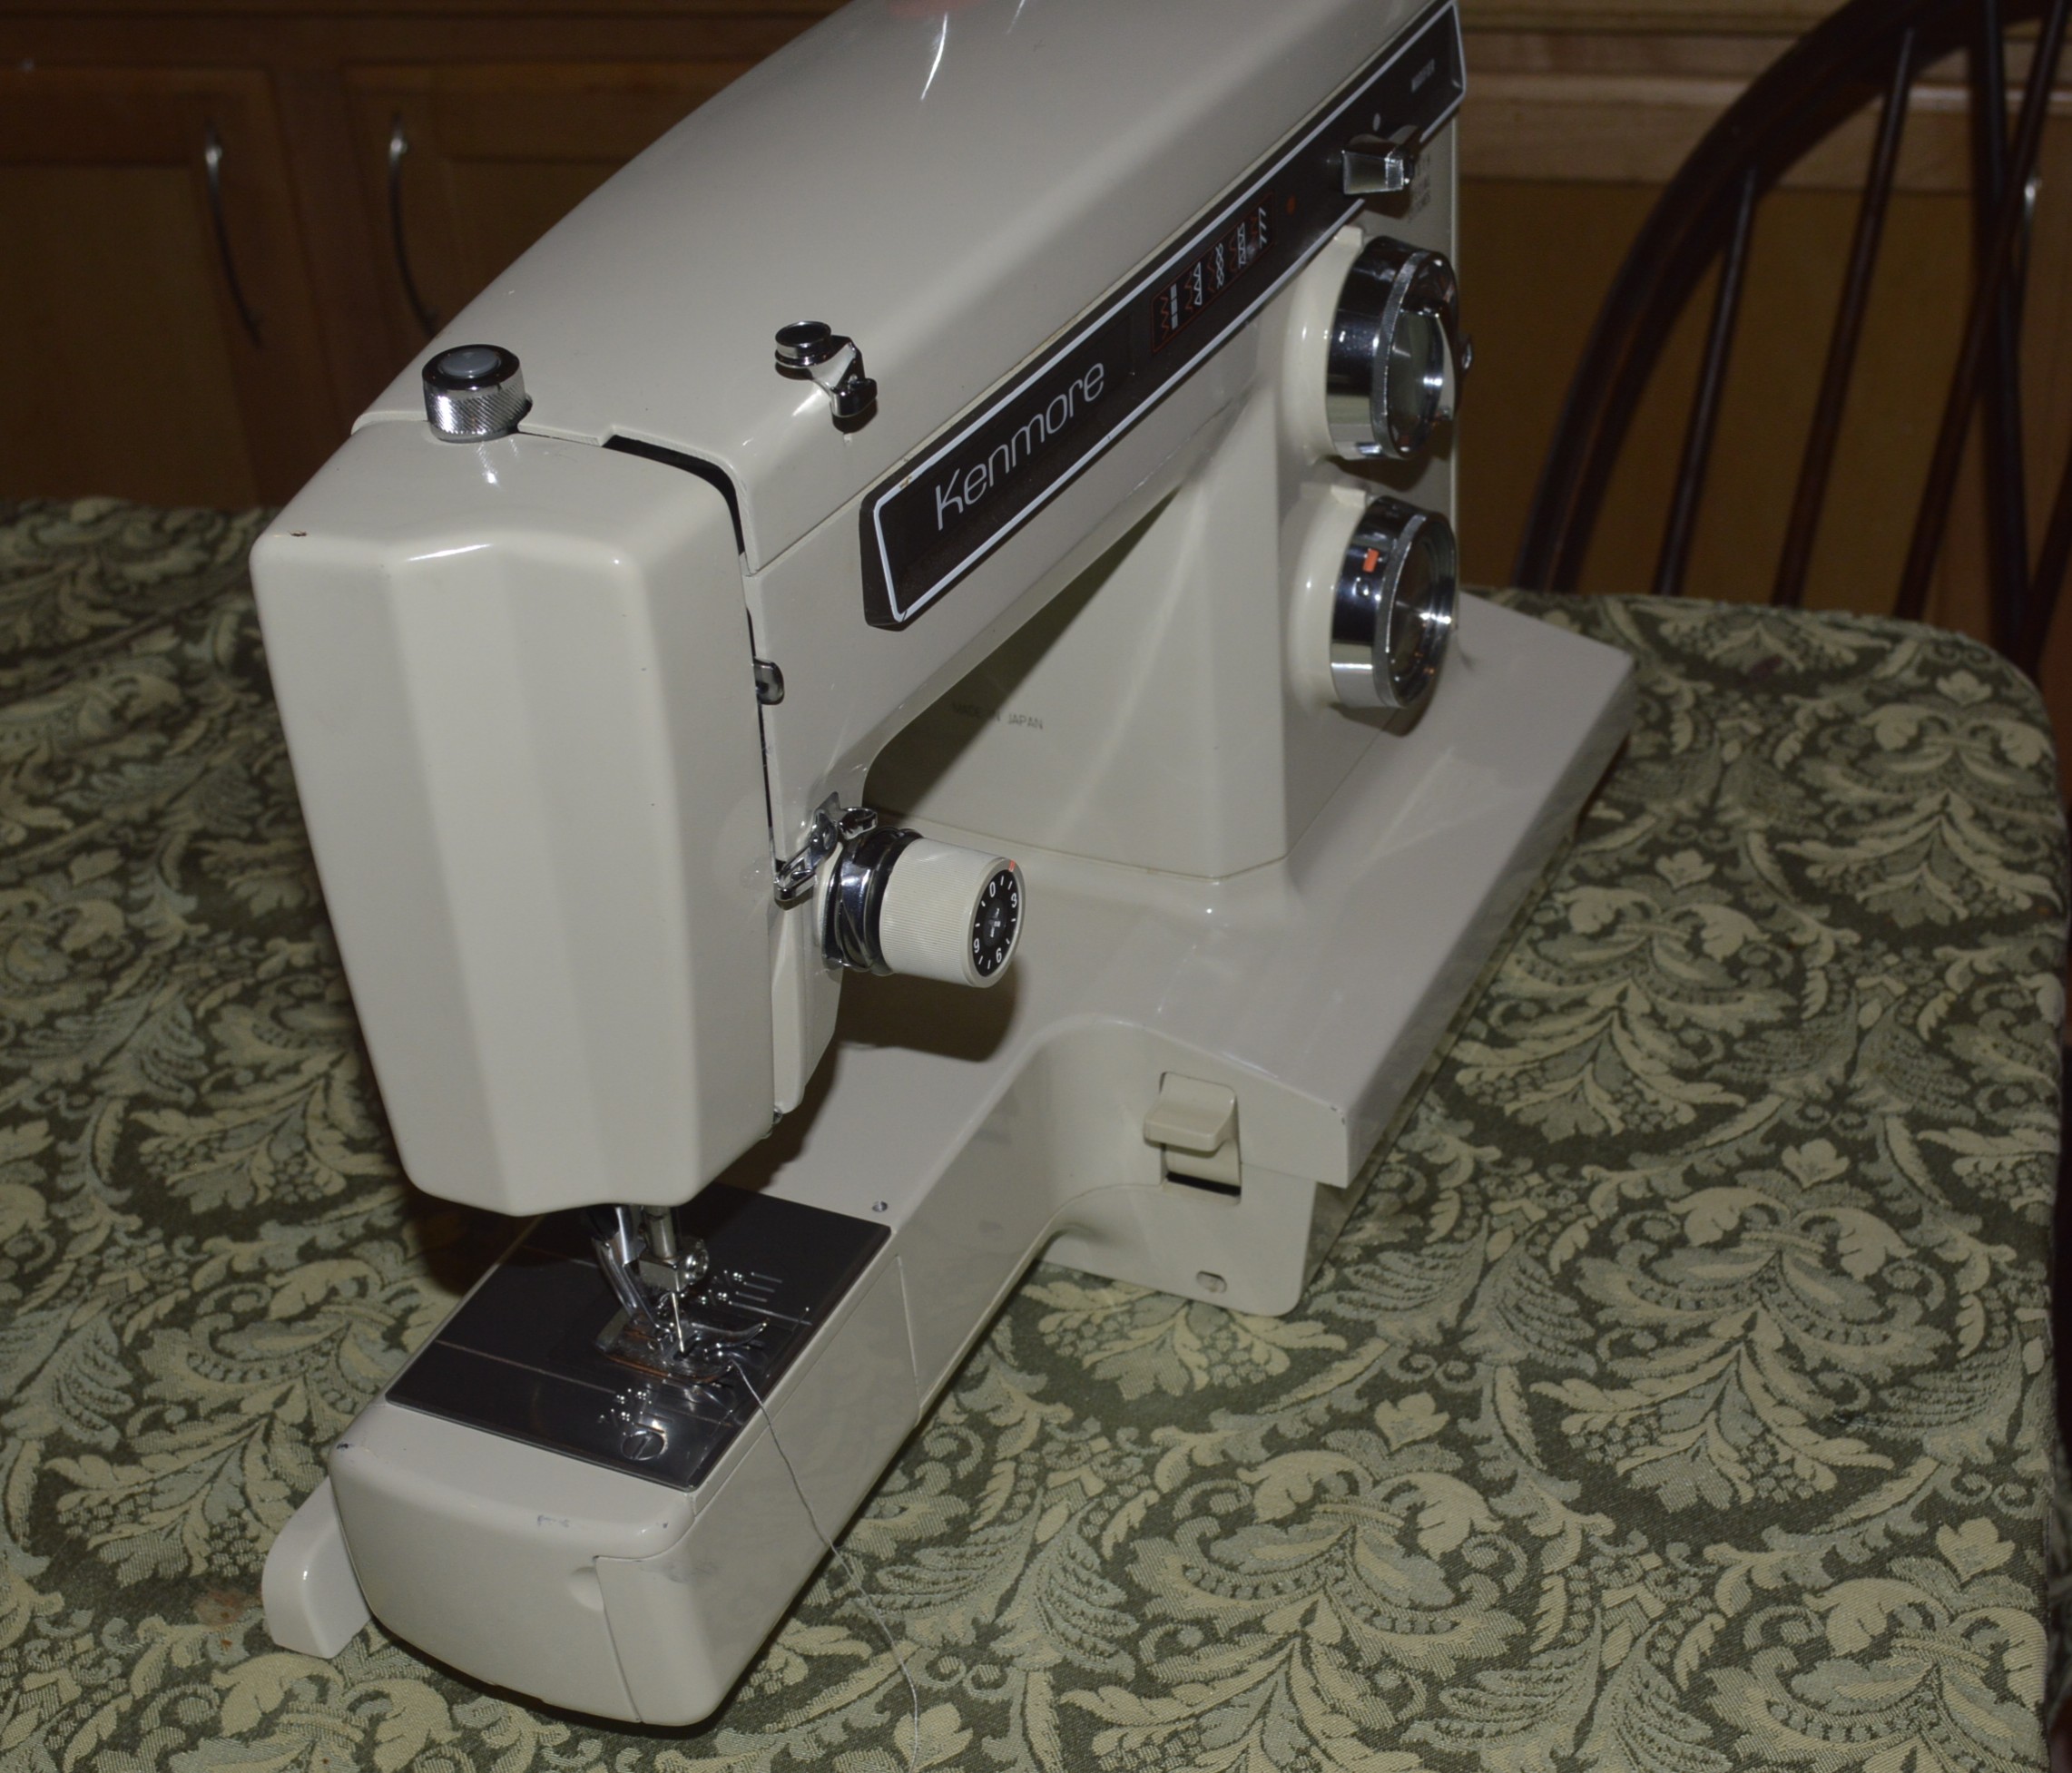
Here the needle cover plate, feed dogs, bobbin winder assembly, and top tension mechanism are removed. Next come the sewing machine body covers.


All of the parts removed are laid out for cleaning…

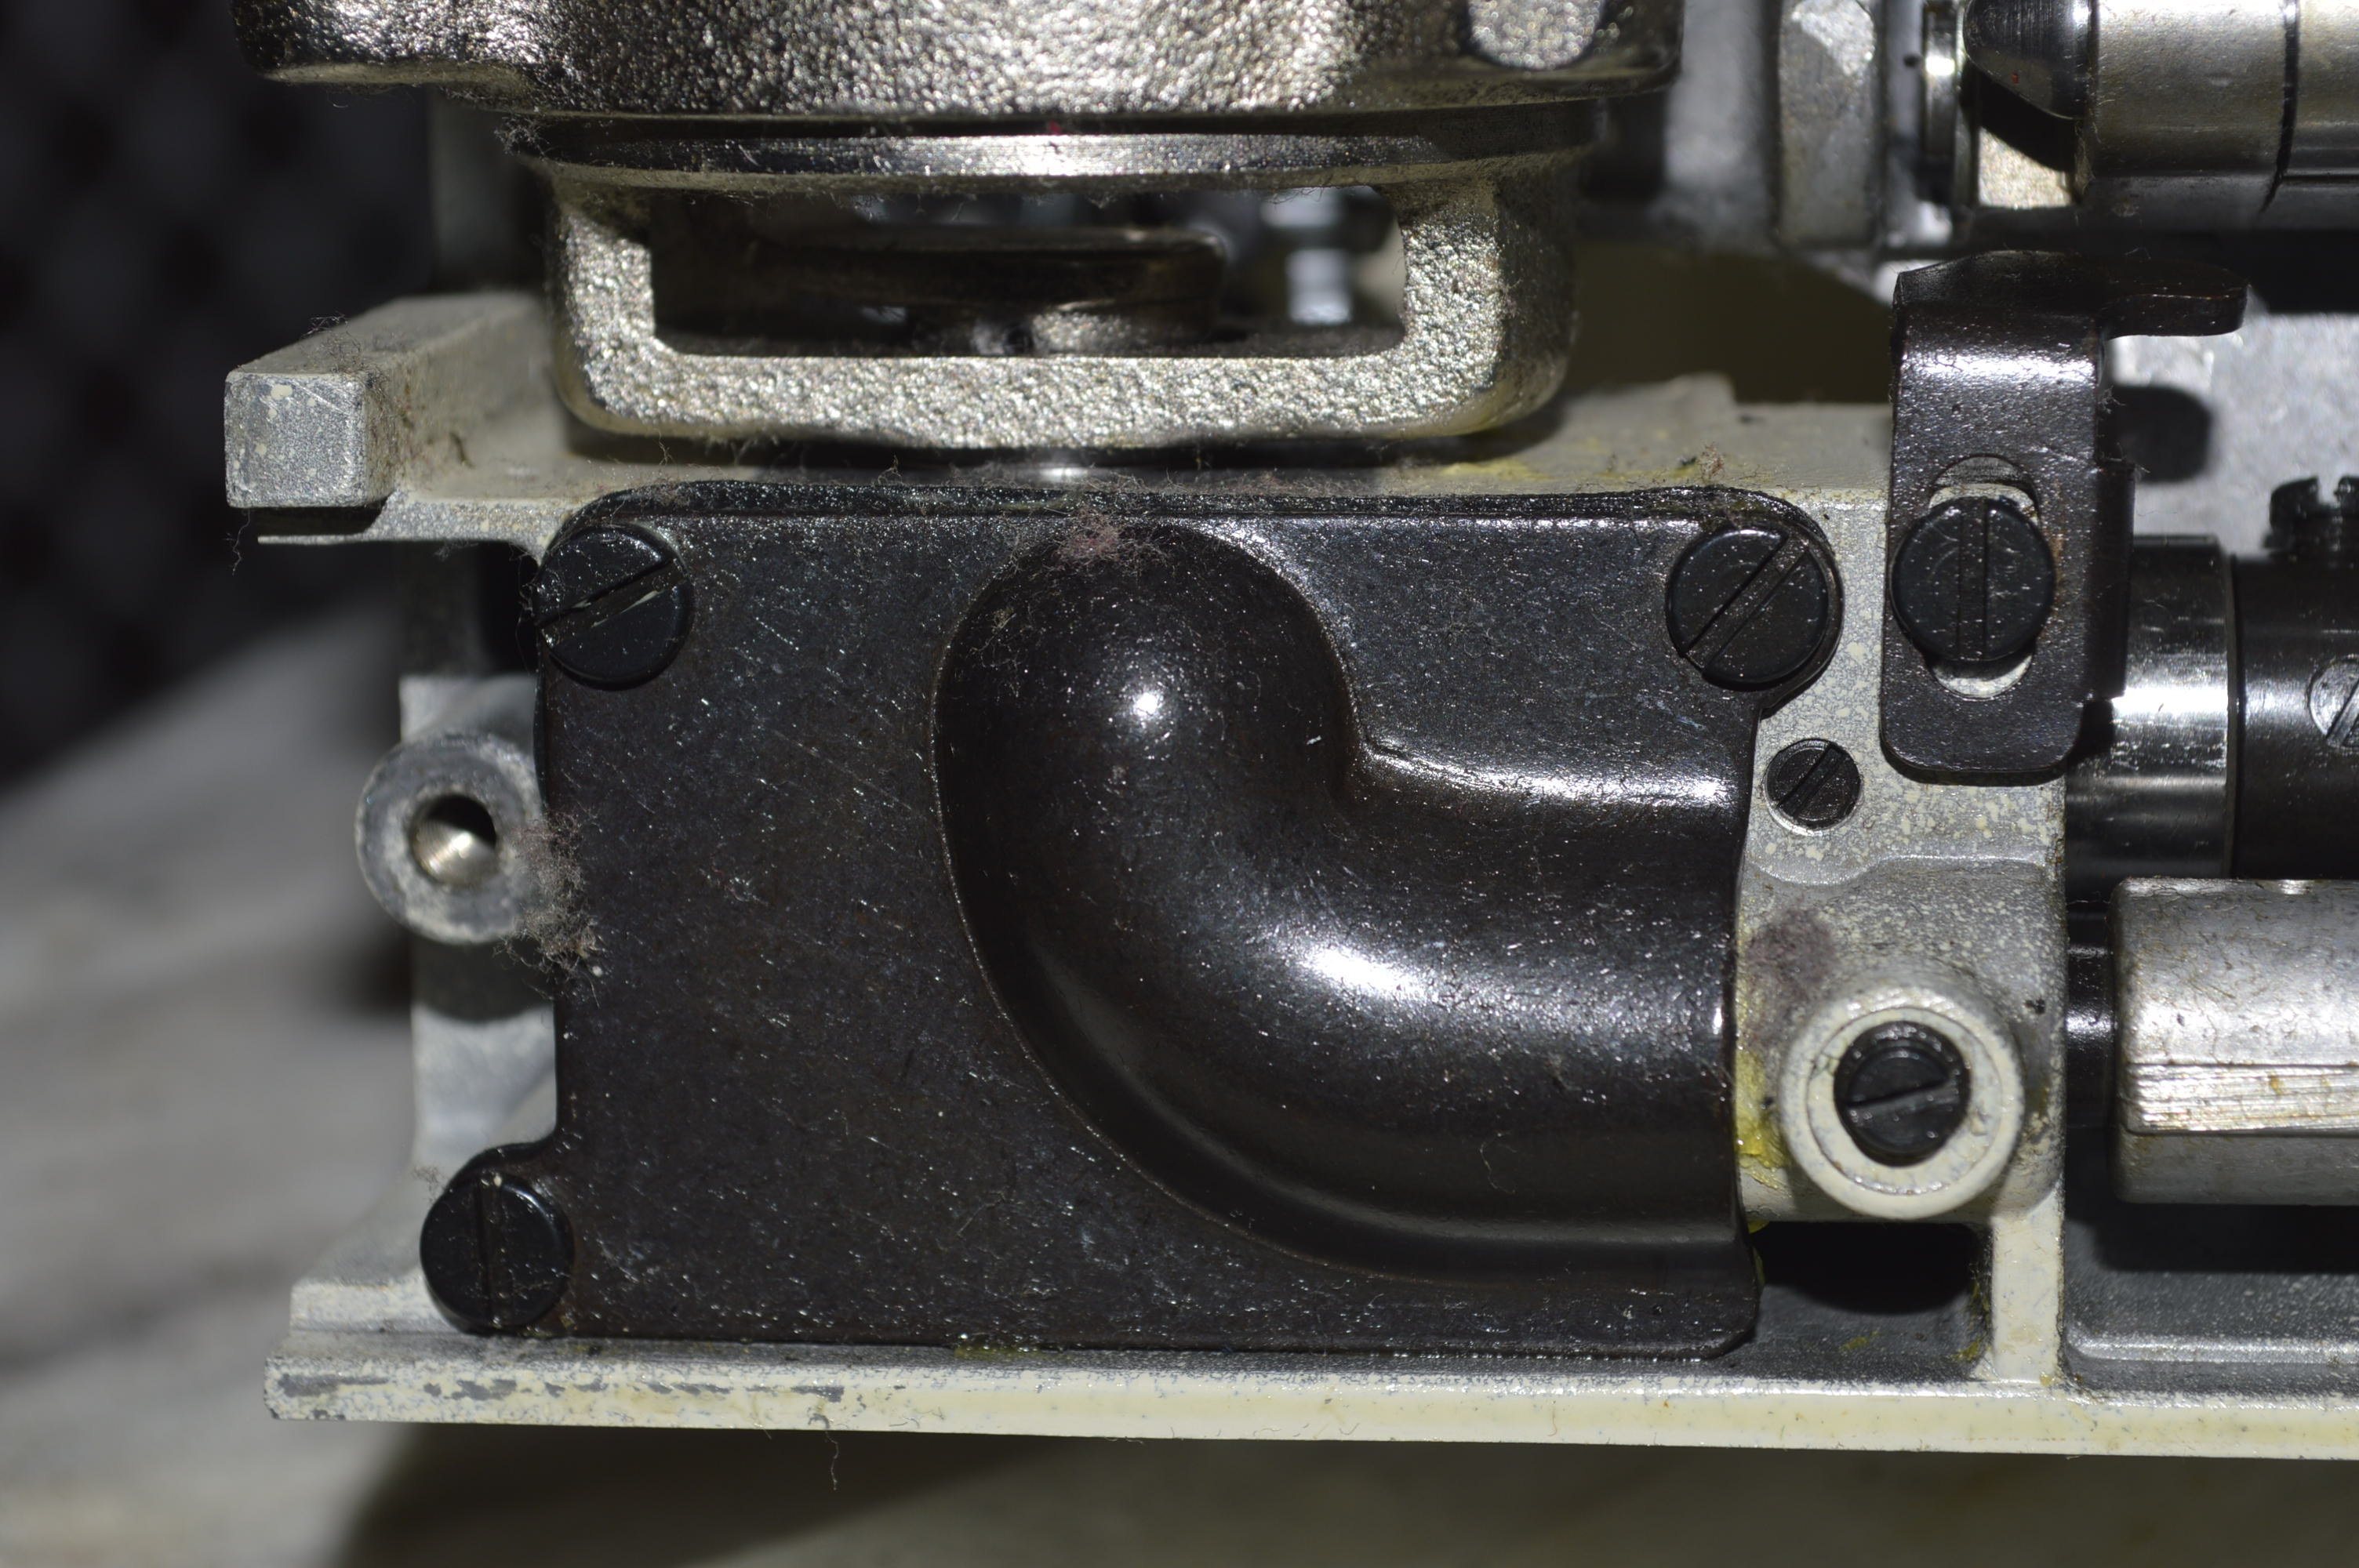
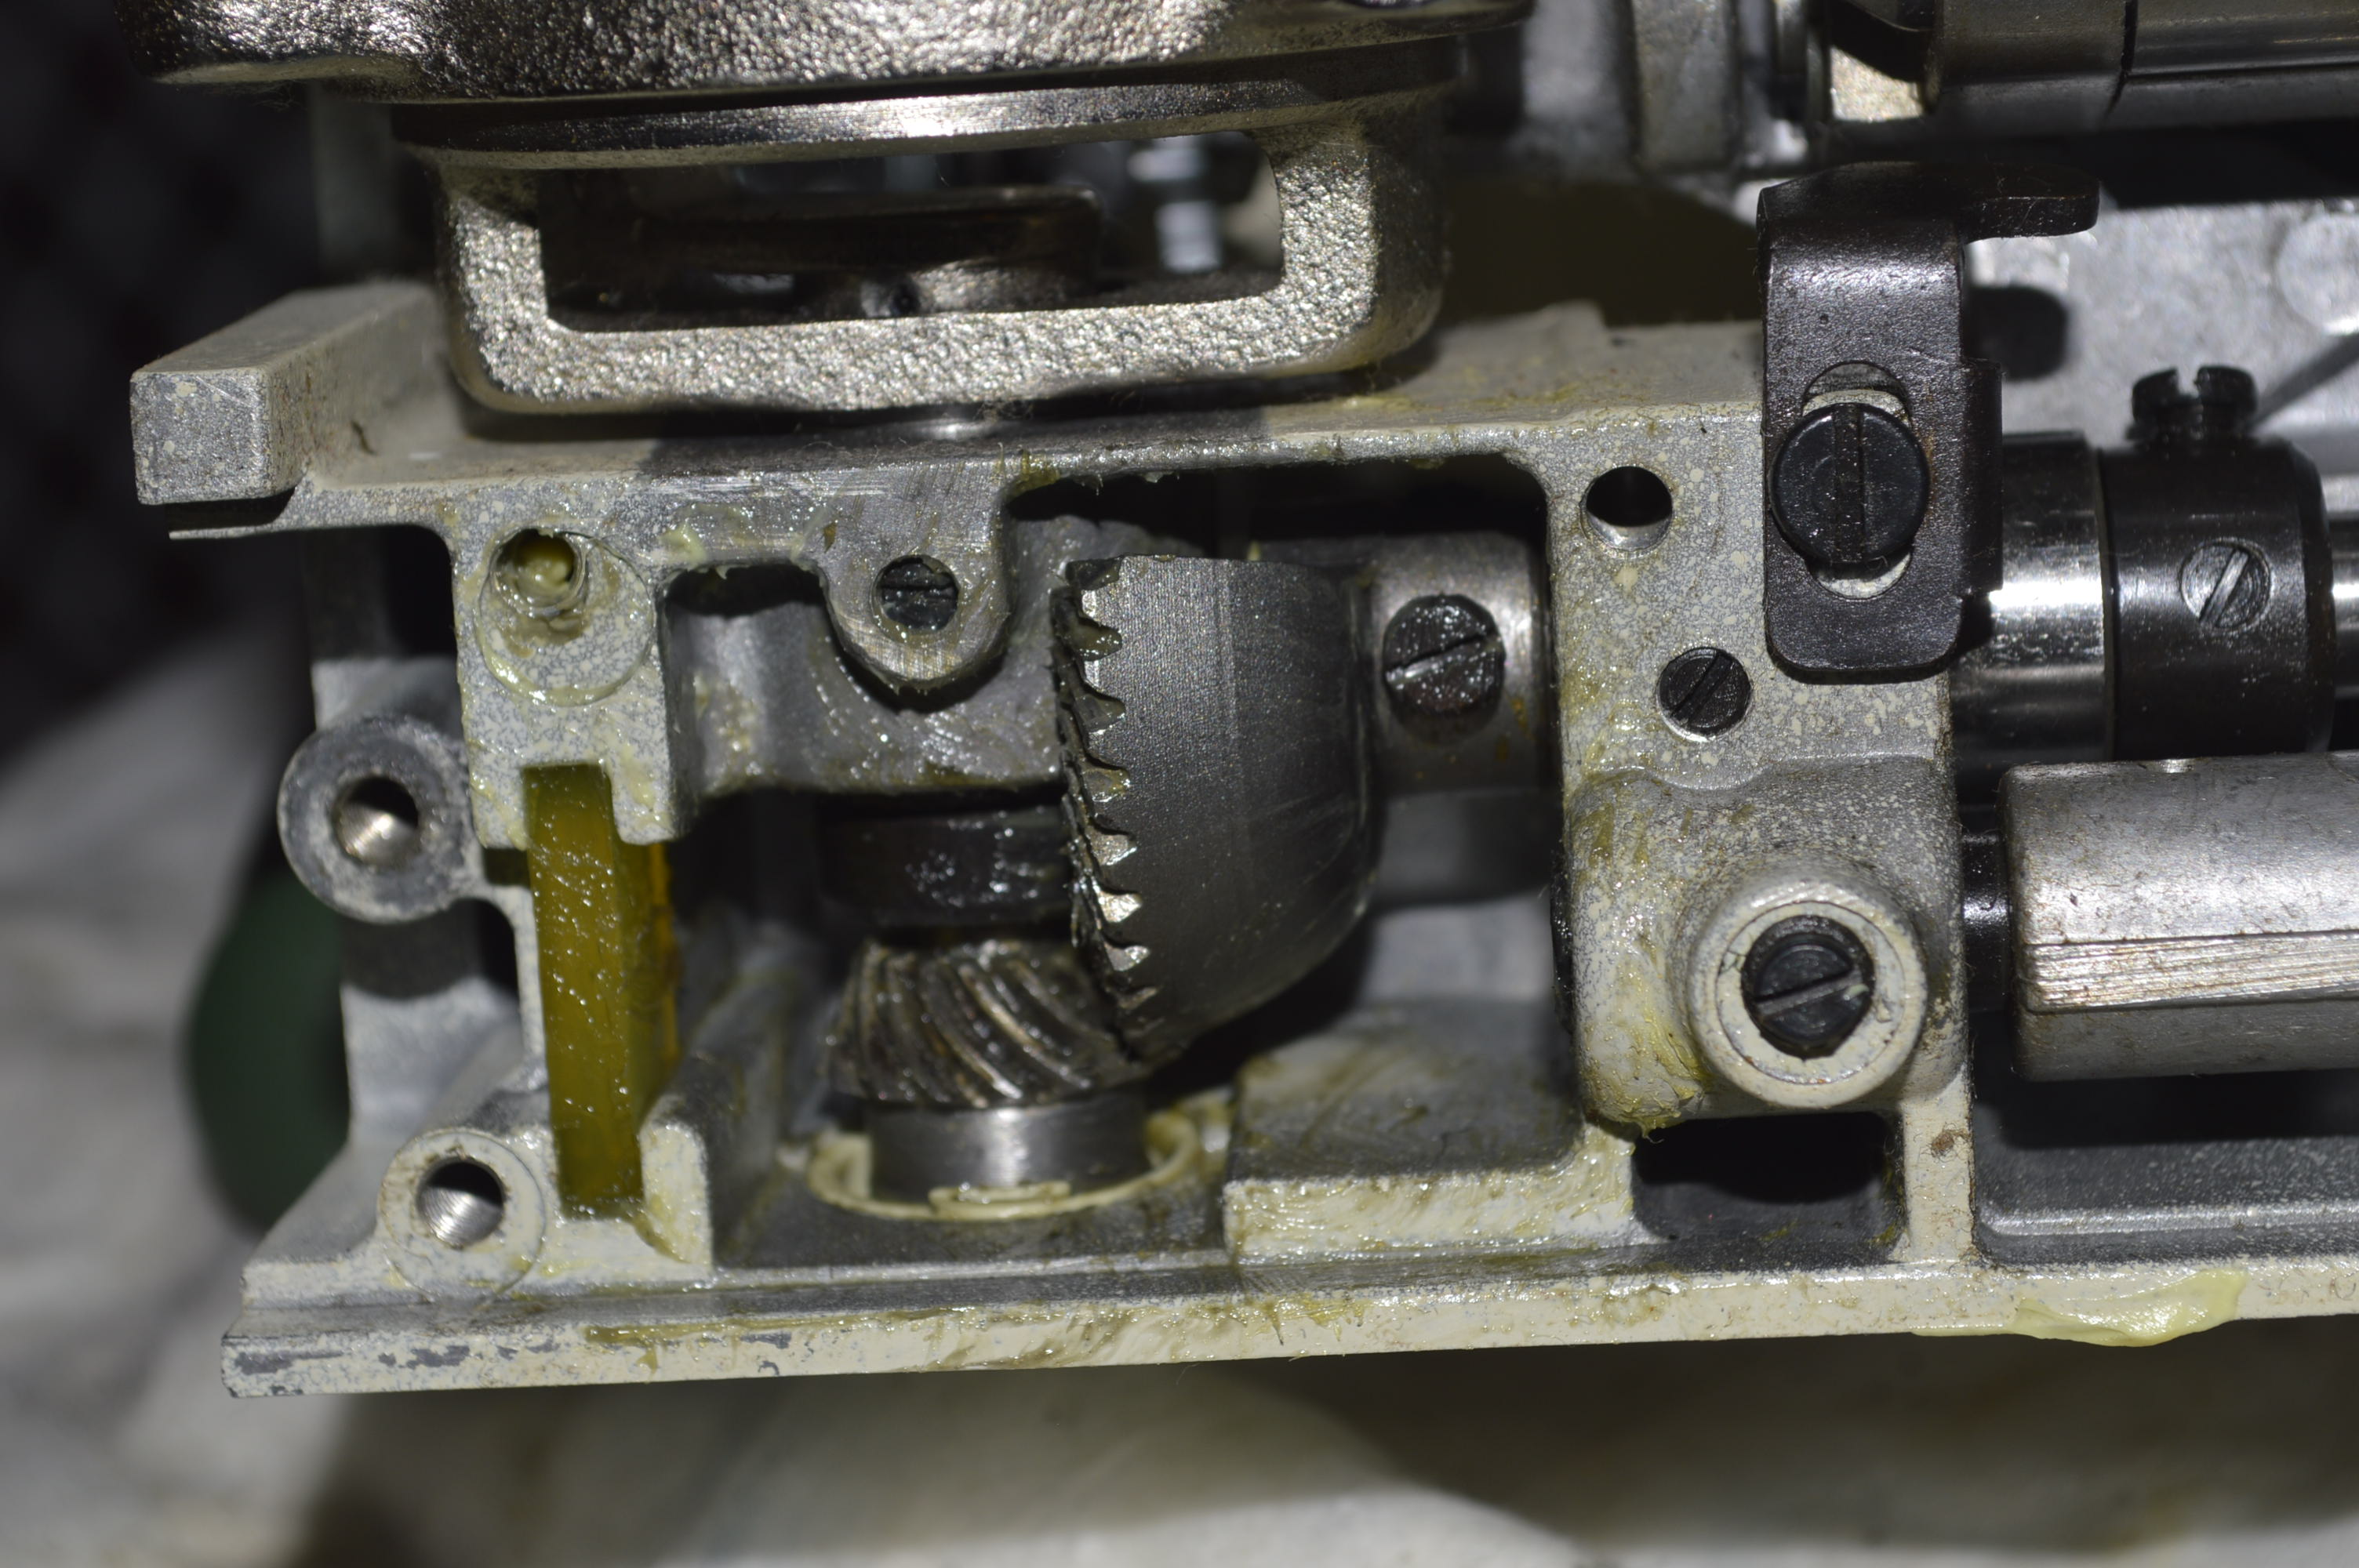
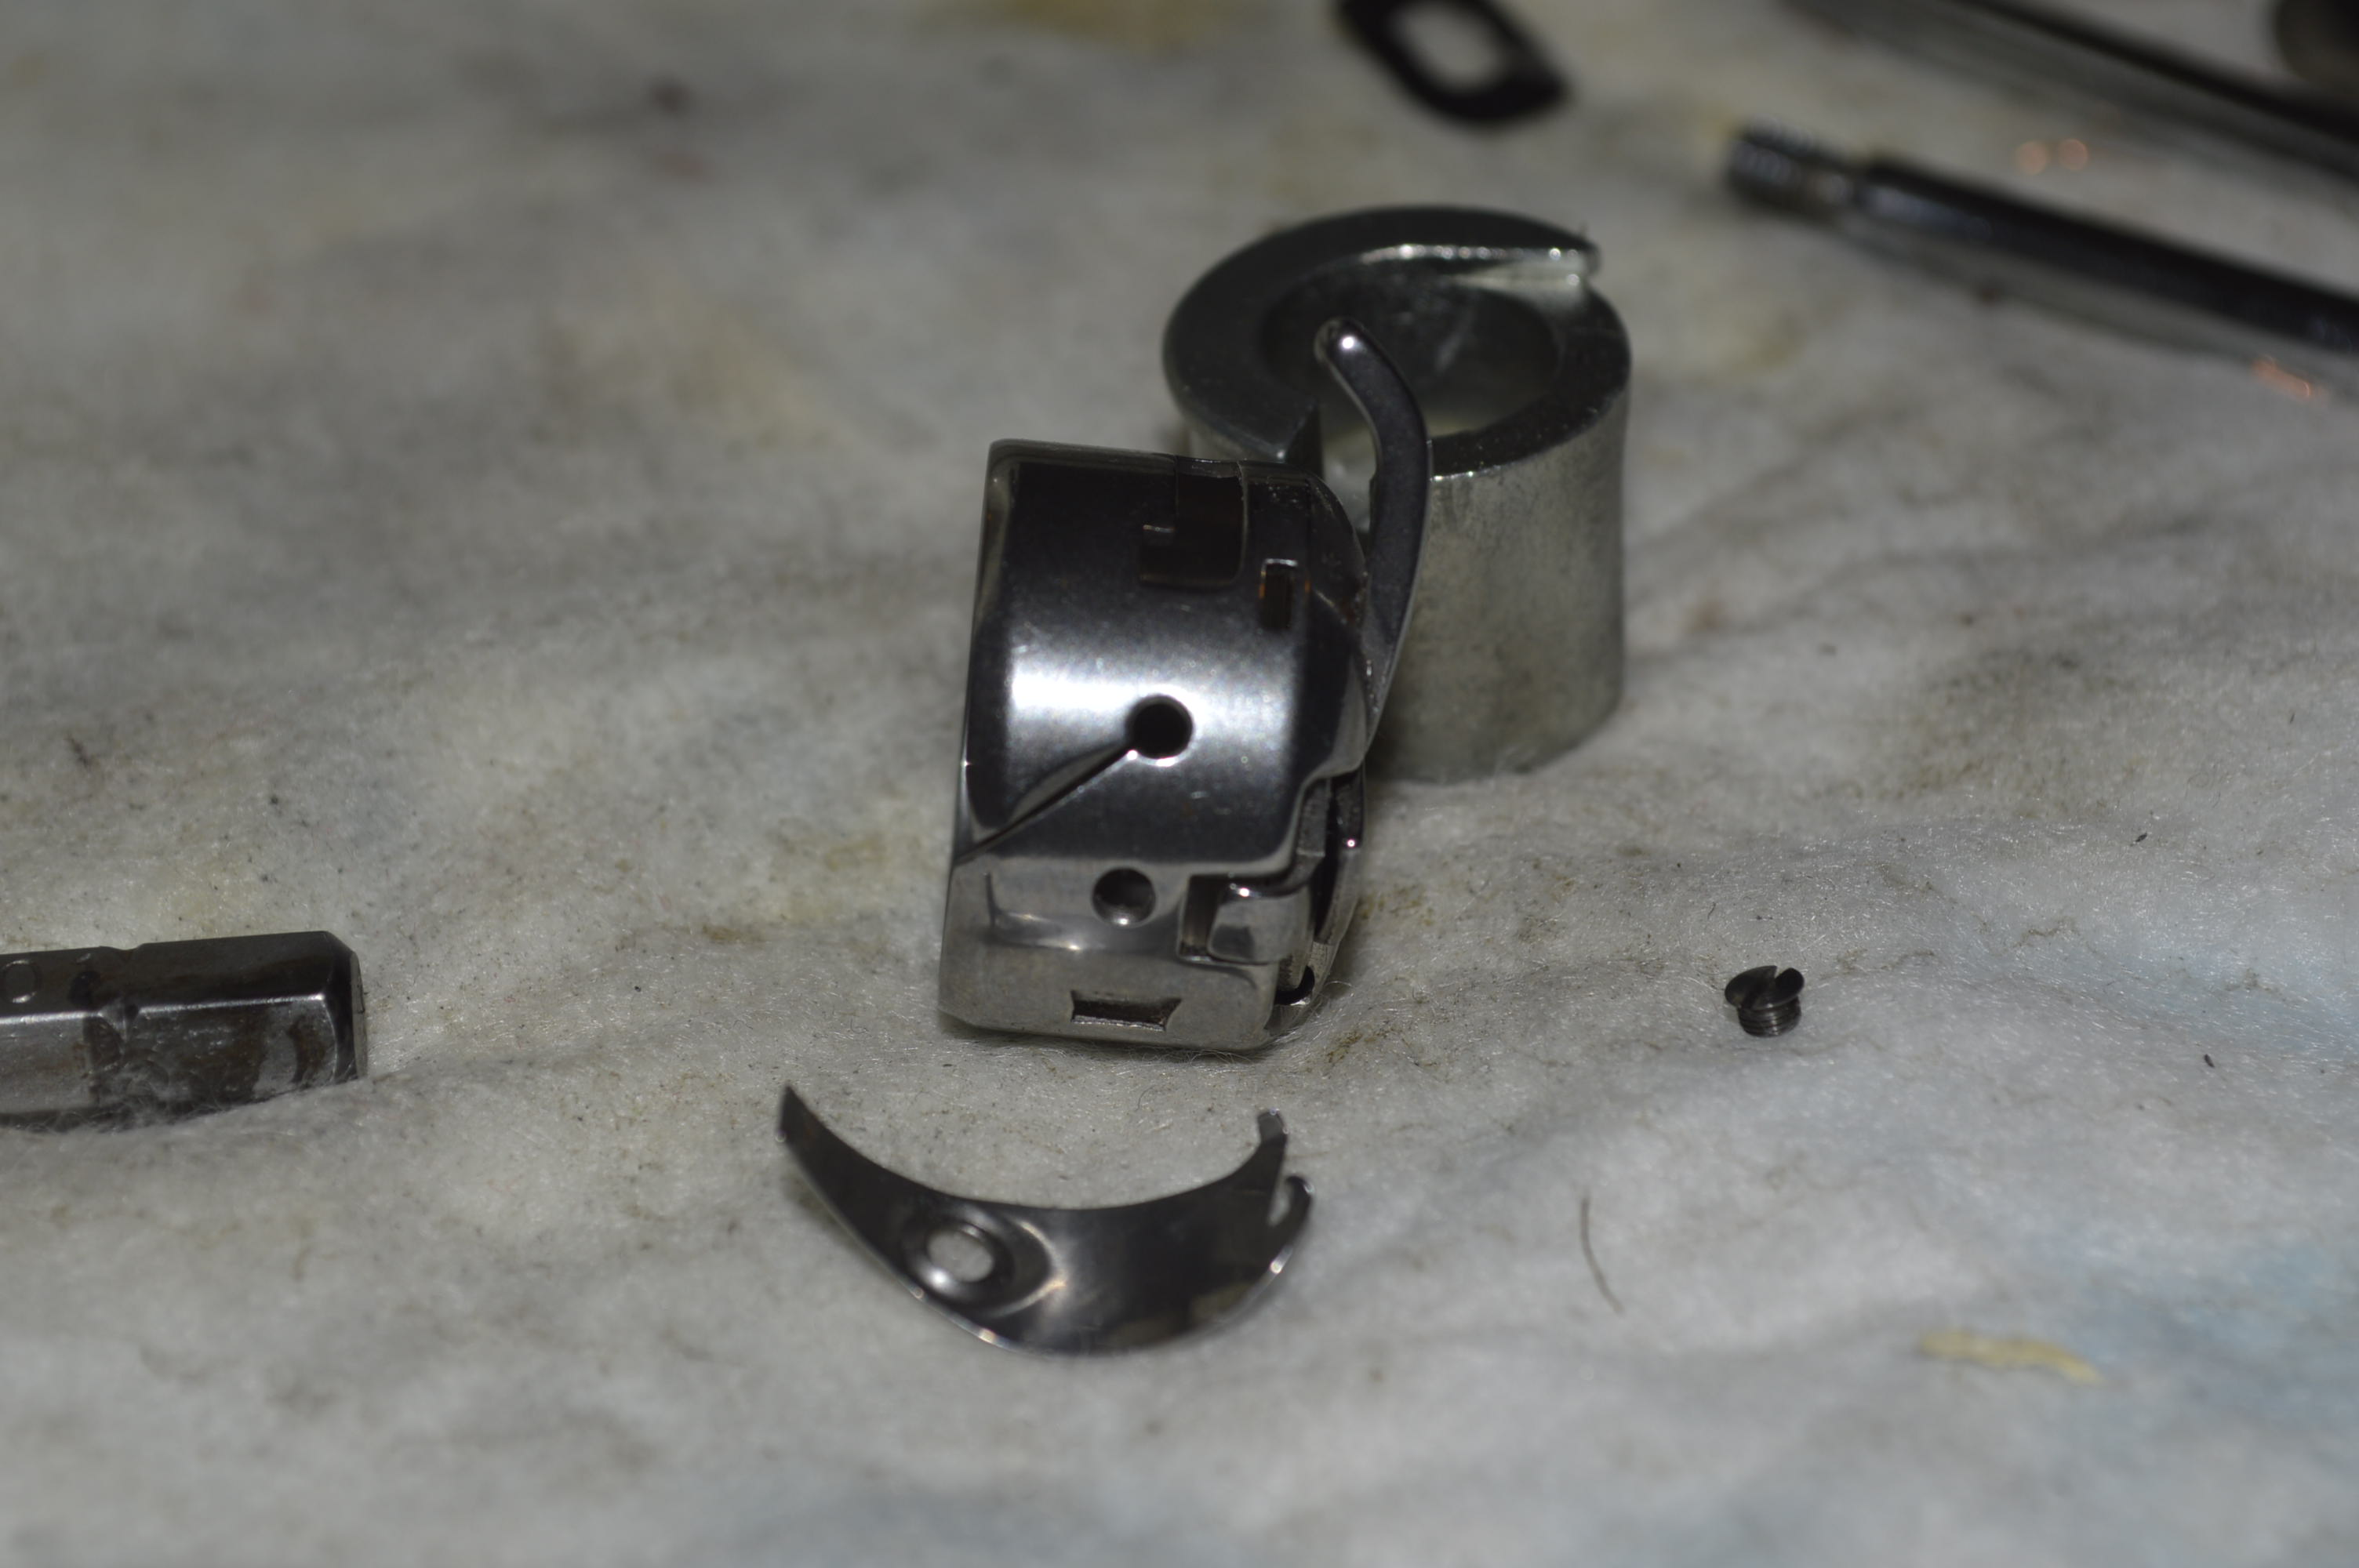
One important area to clean and service is the hook gear case.
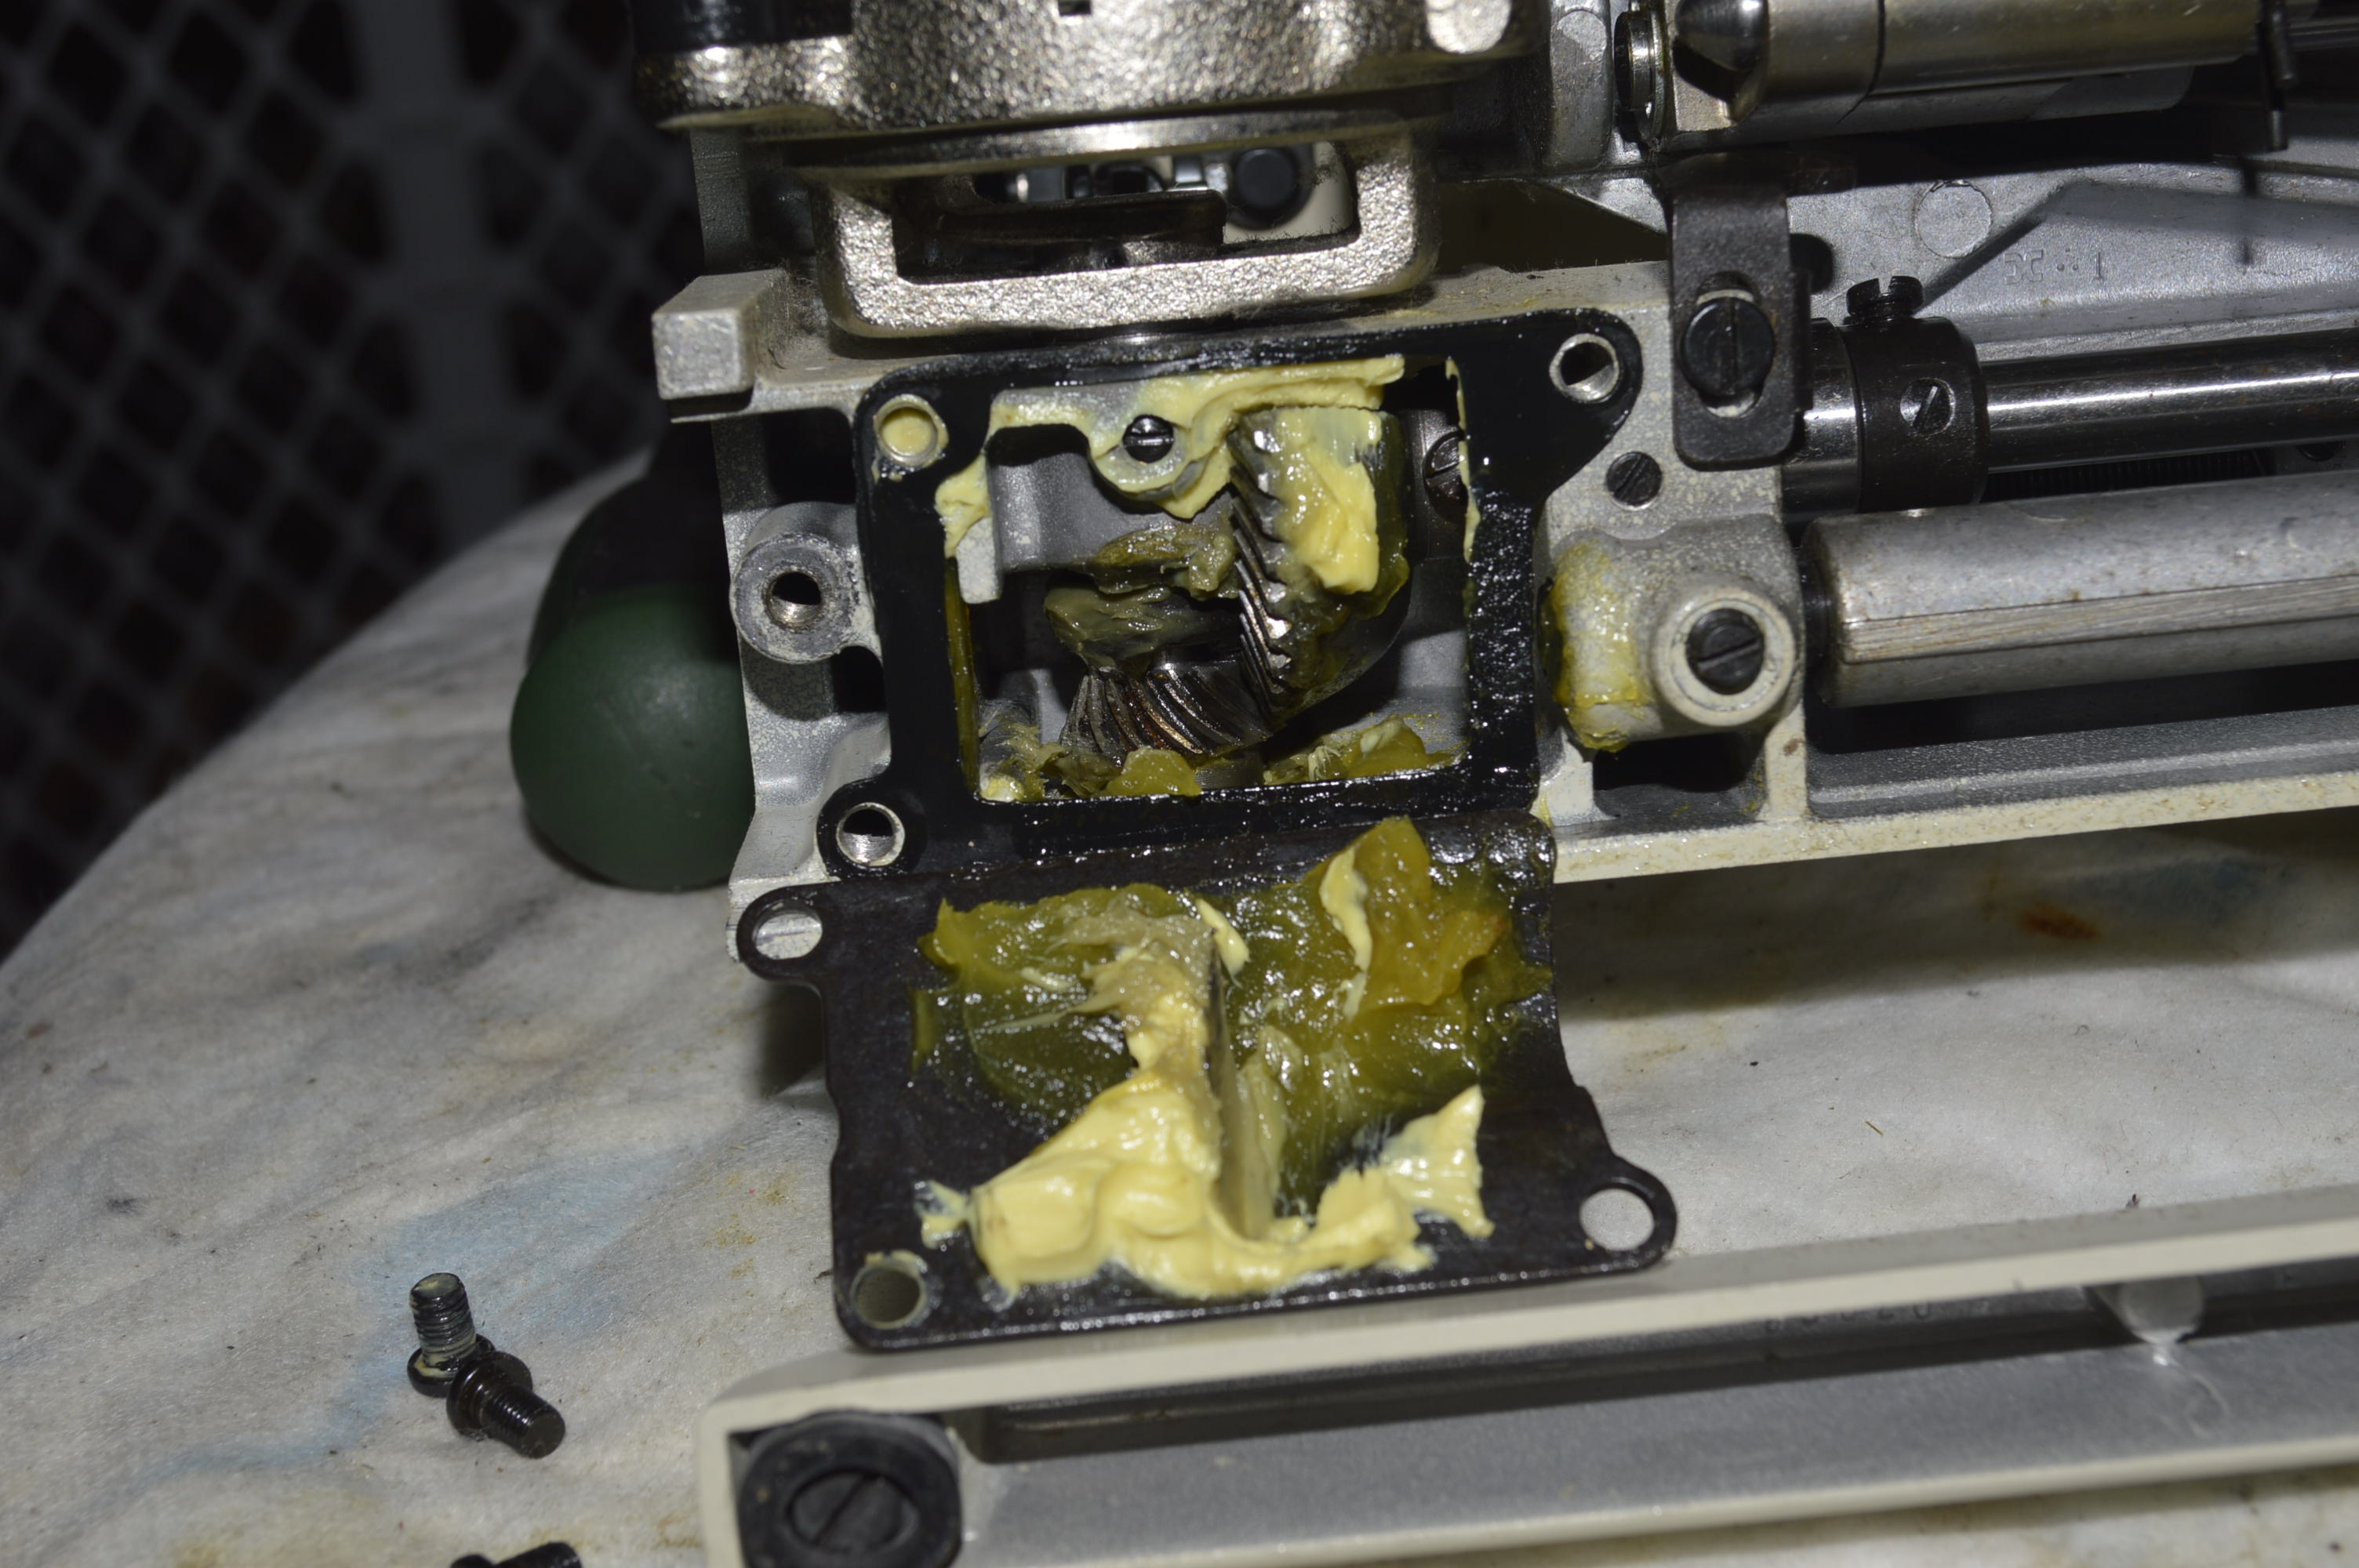
The old grease has broken down and is no longer coating the gear teeth. This old grease is removed and the gear case is cleaned…
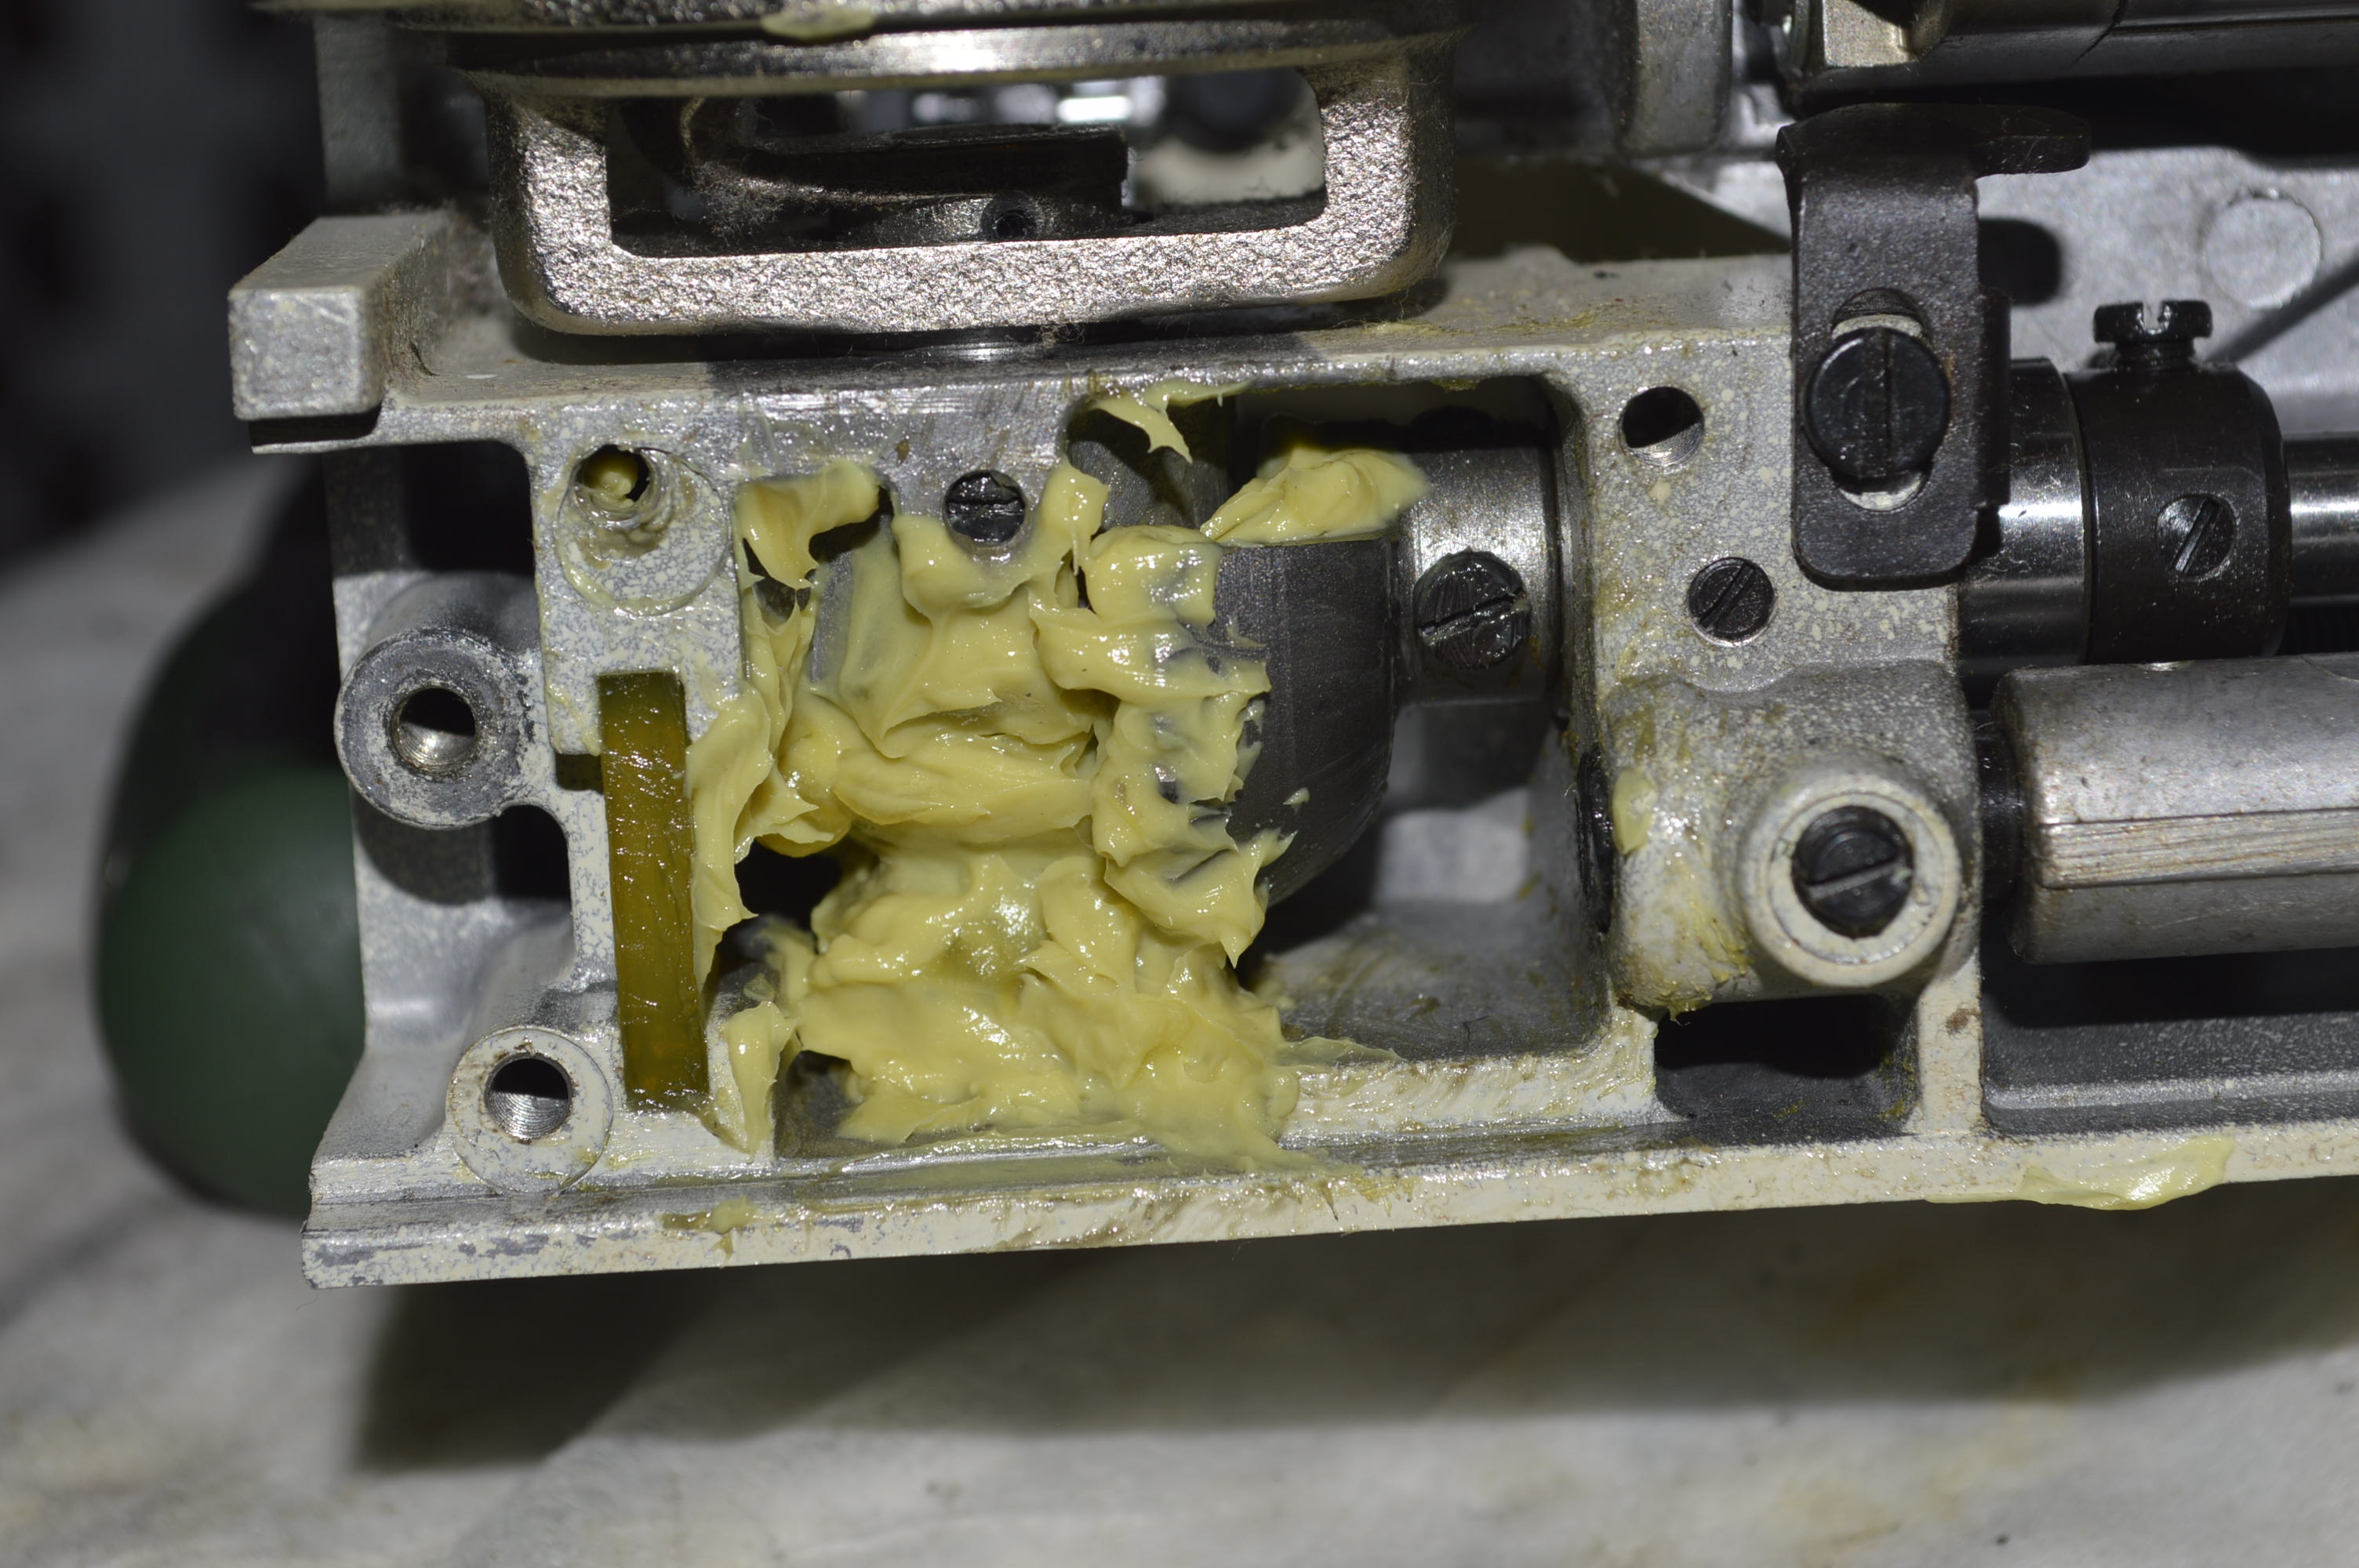
It is then repacked with motor gear grease…
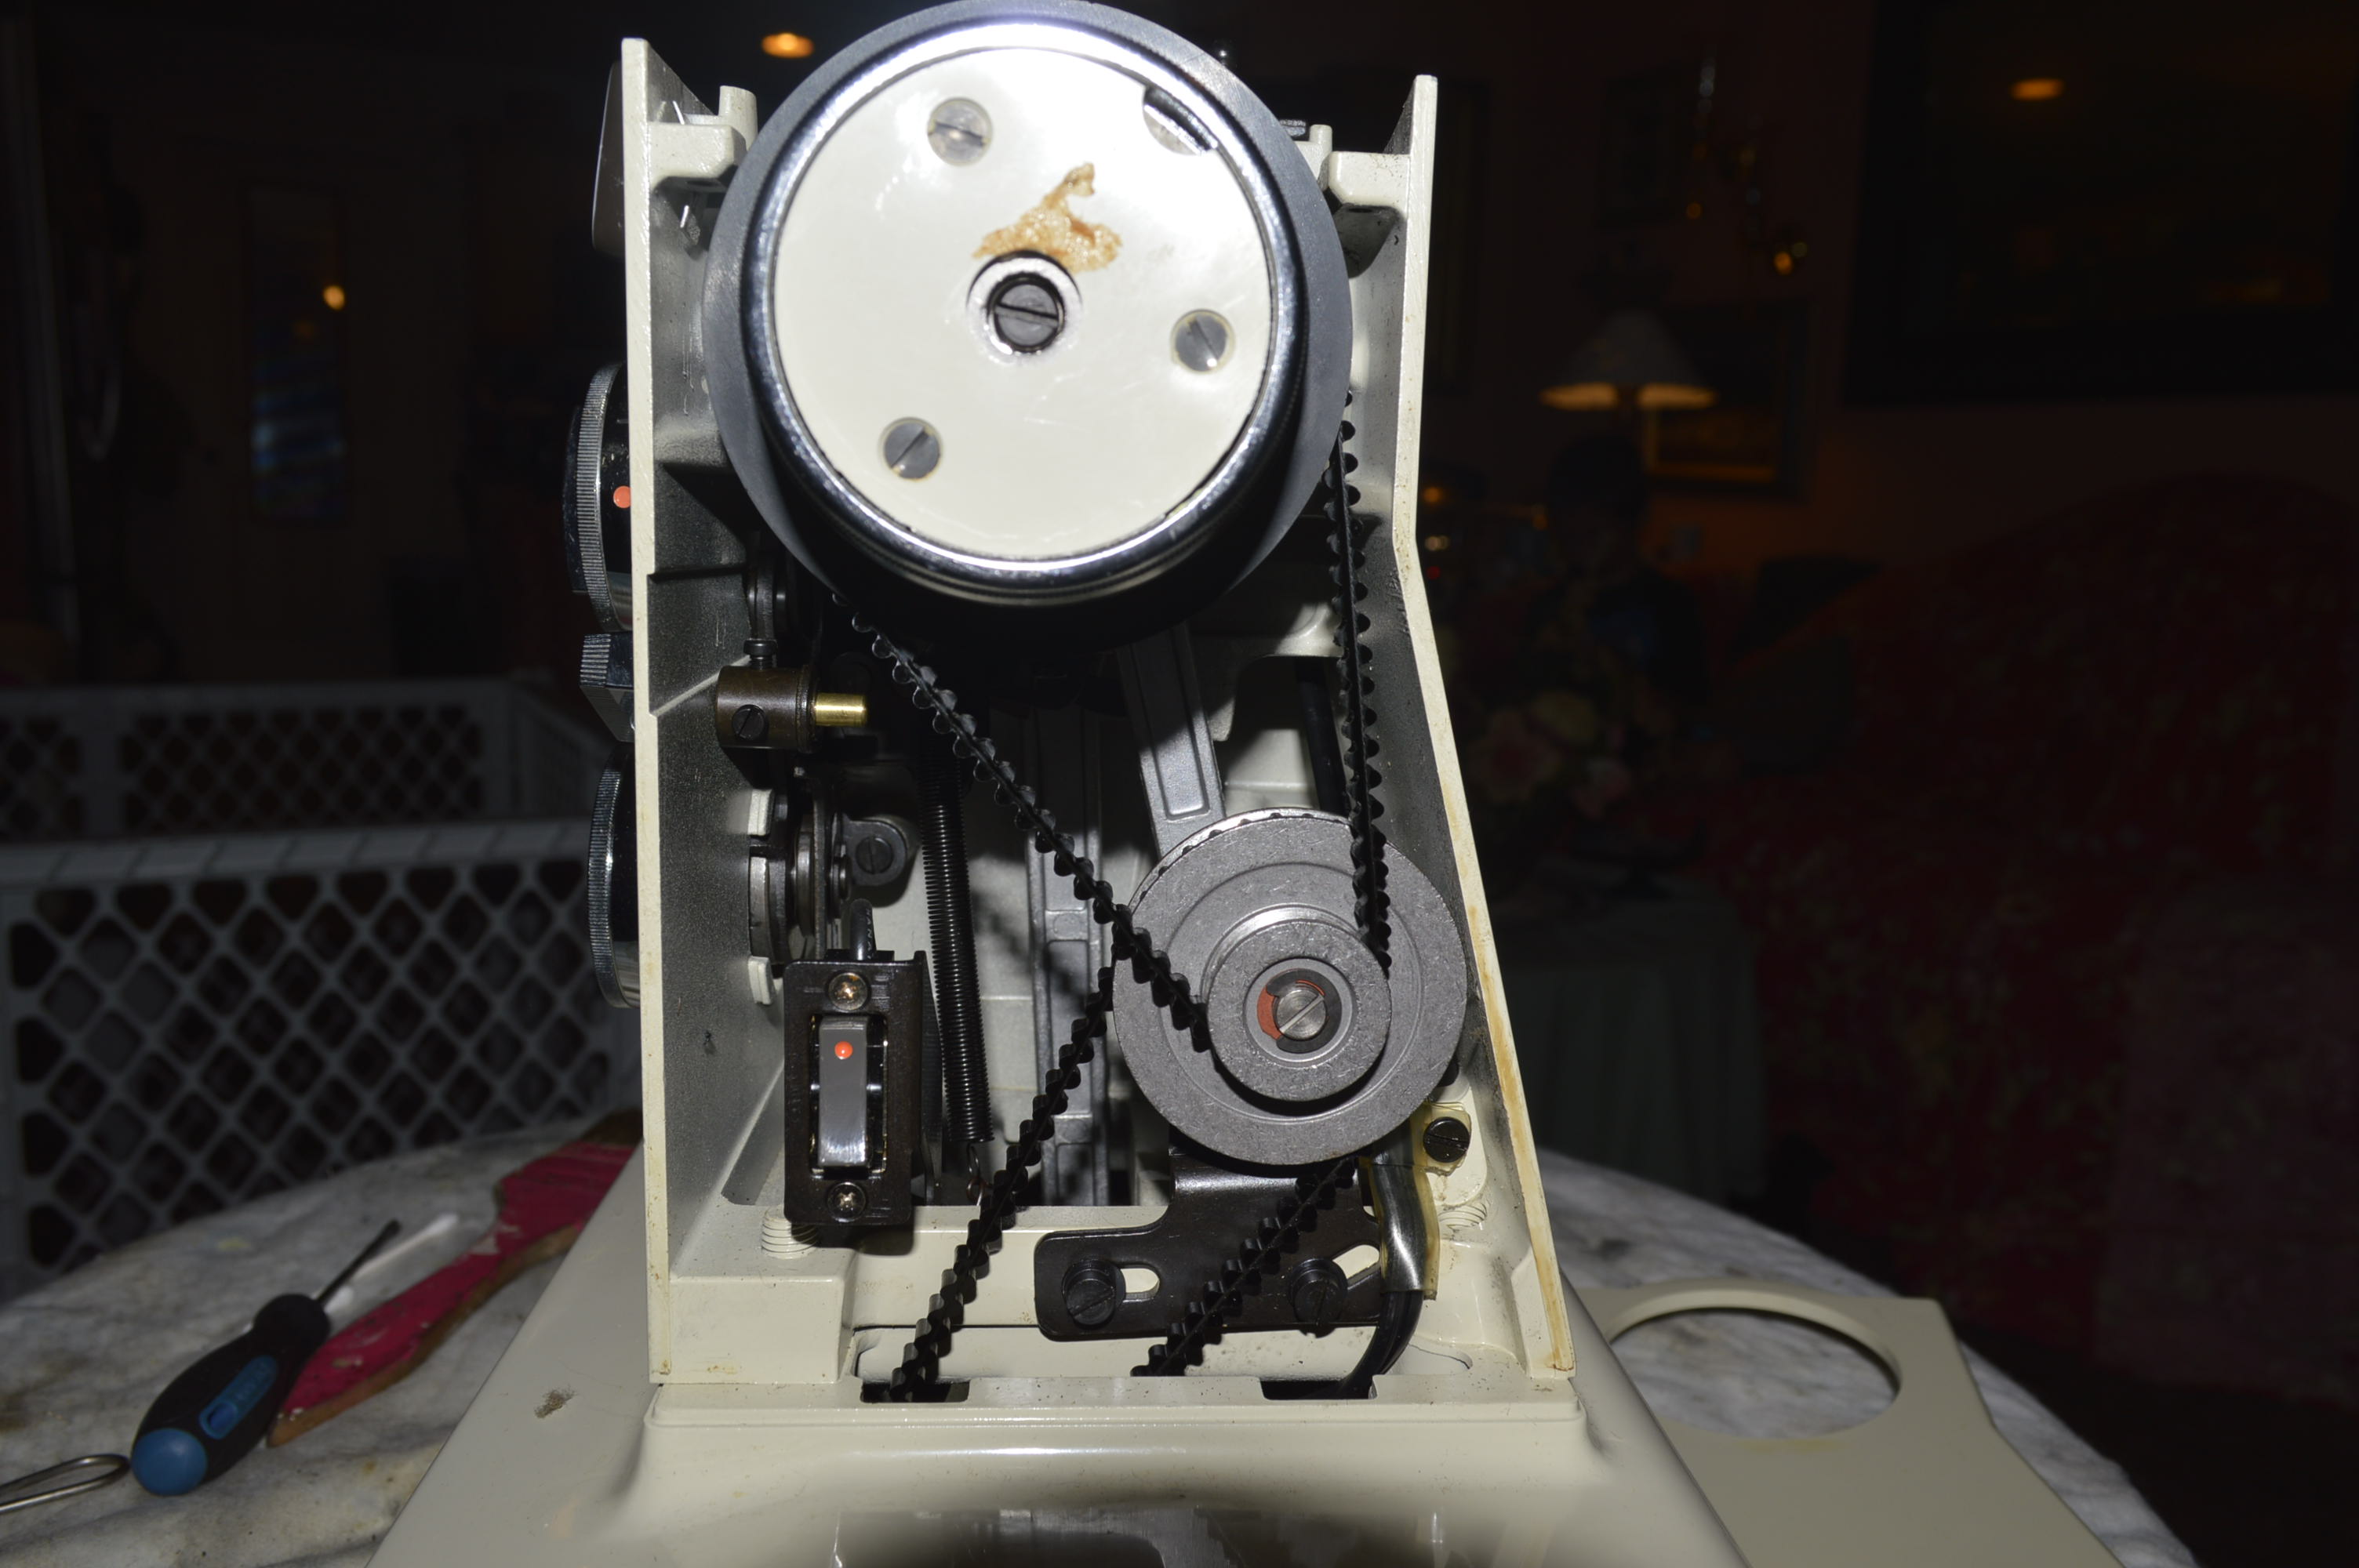
Attention is now turned to the motor. It is disassembled to clean, polish the armature, clean the brushes, and relubricate…
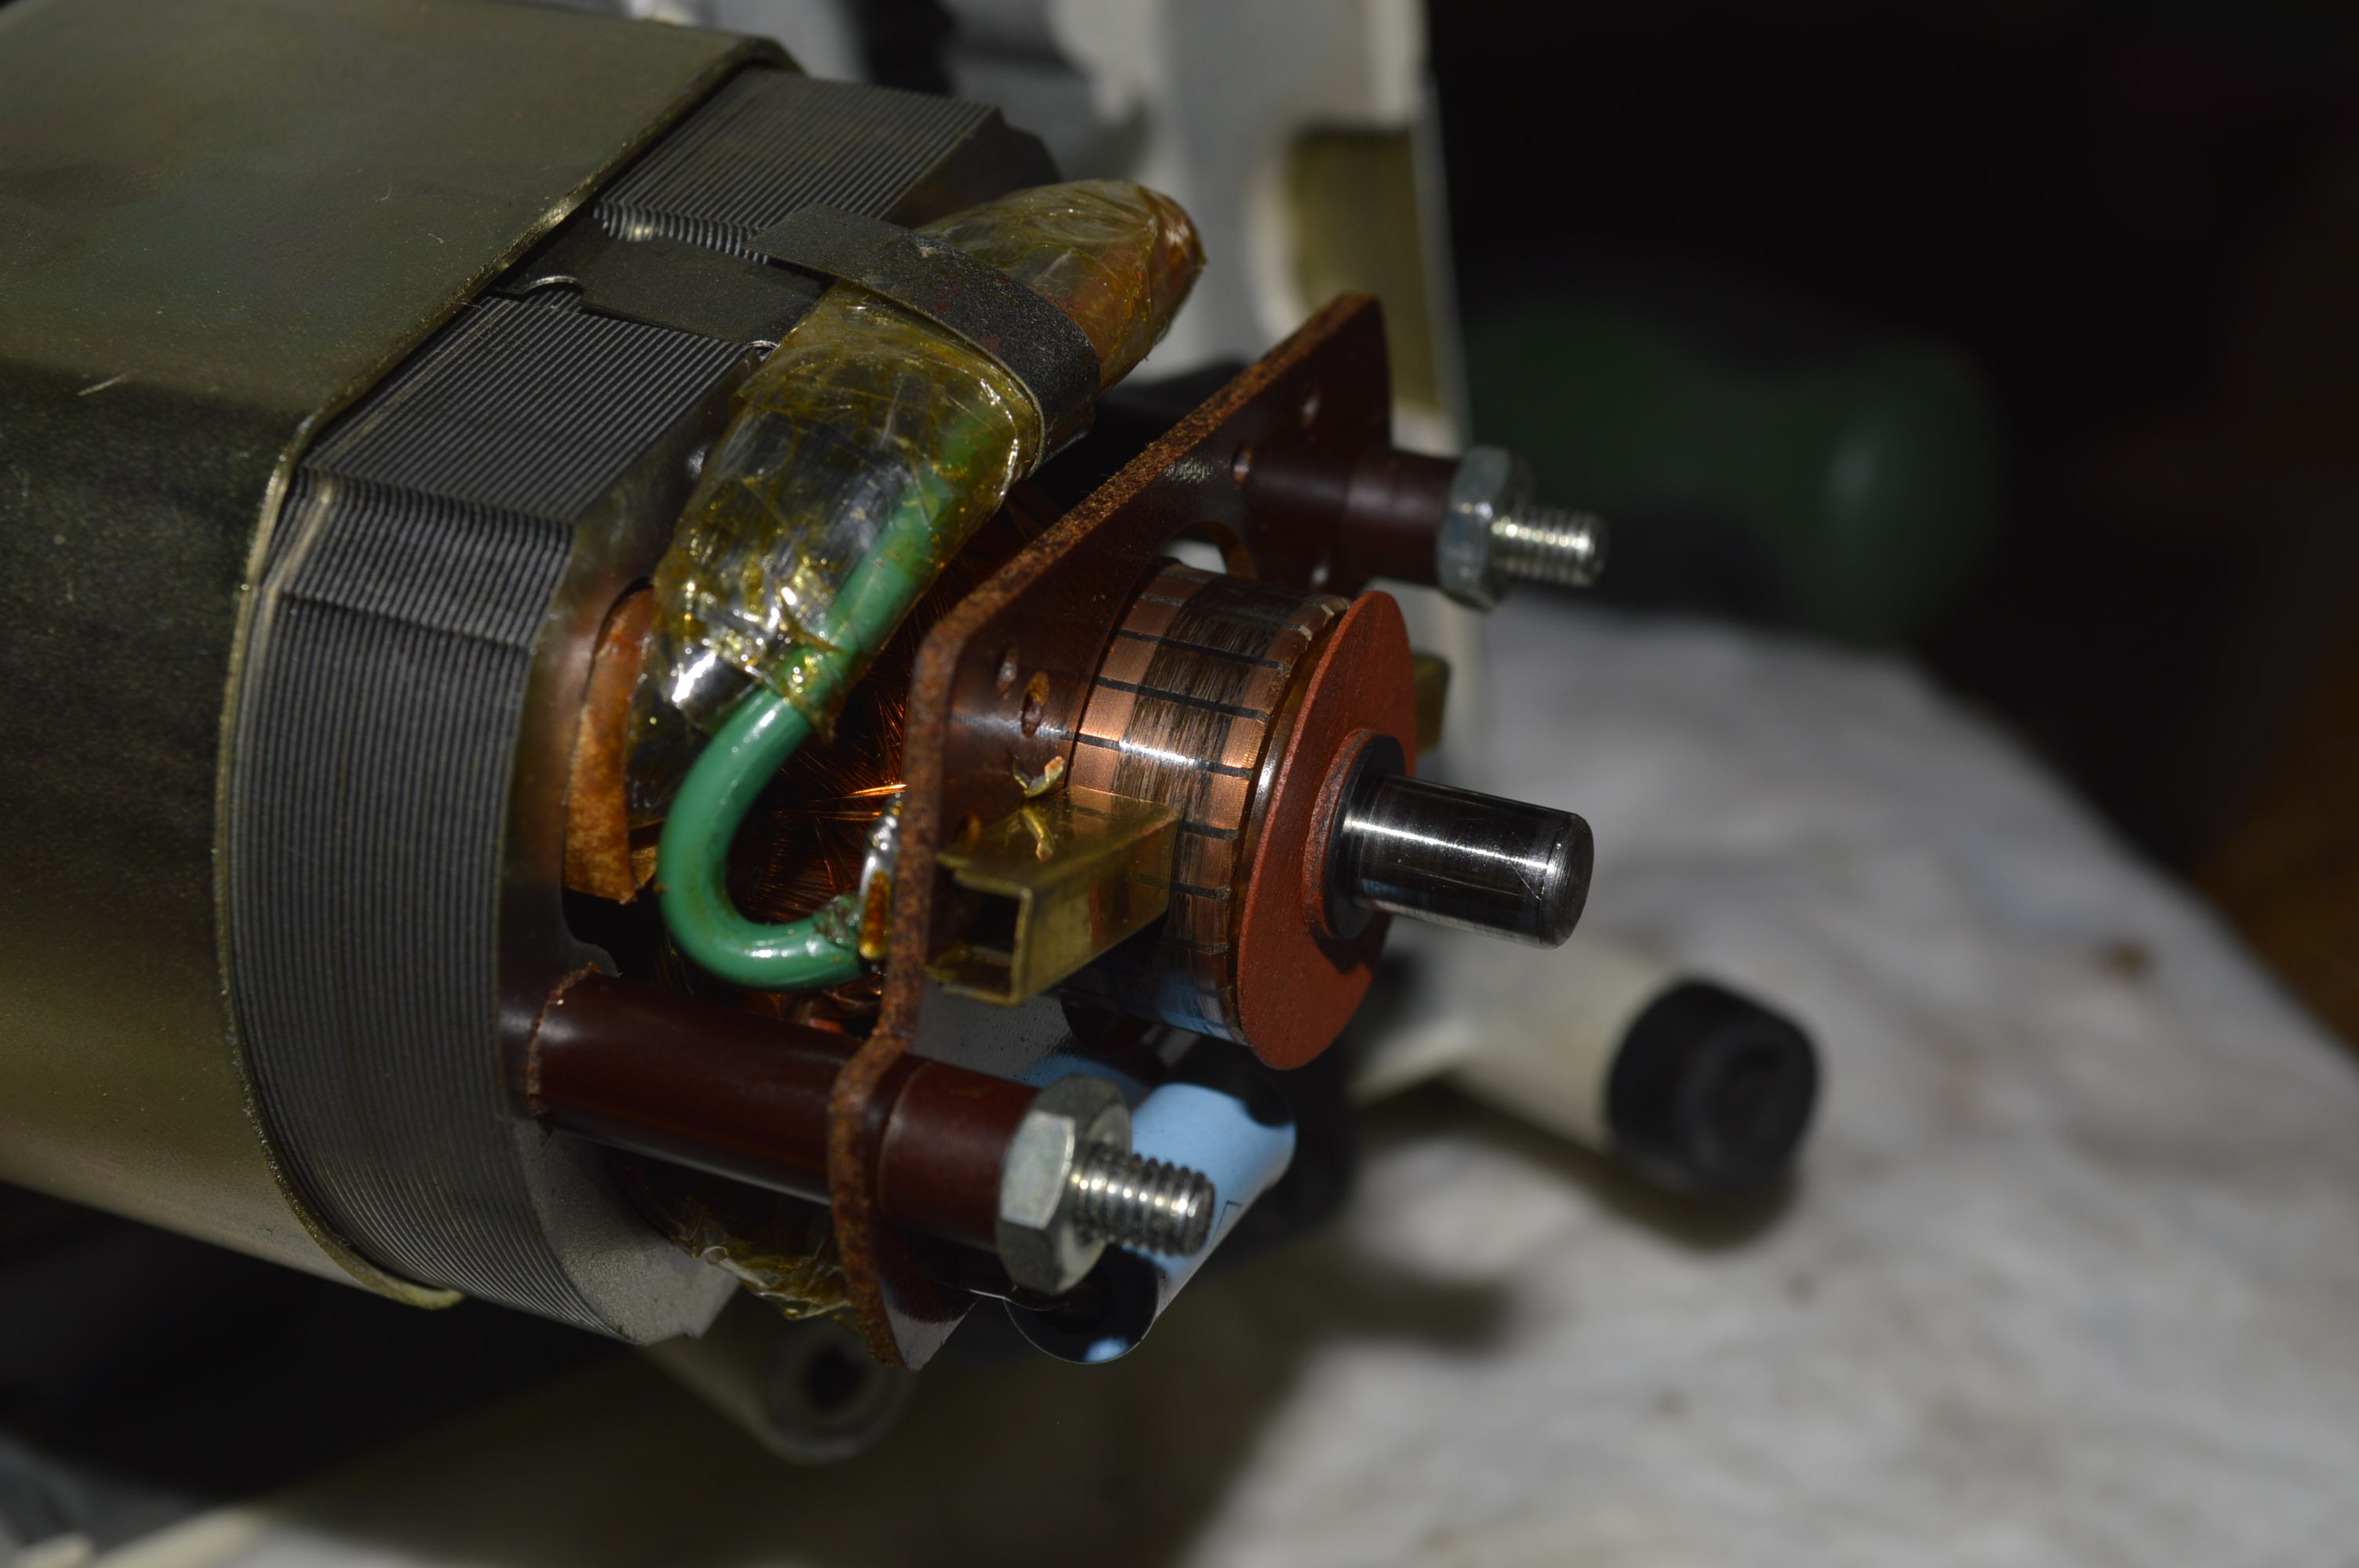
The armature is in pretty good condition on this motor but the armature is polished and the brushes reconditioned to run like new. Oiling the felts and reassembling the motor completes this task.
The bobbin tension assembly is disassembled and ultrasonically cleaned.
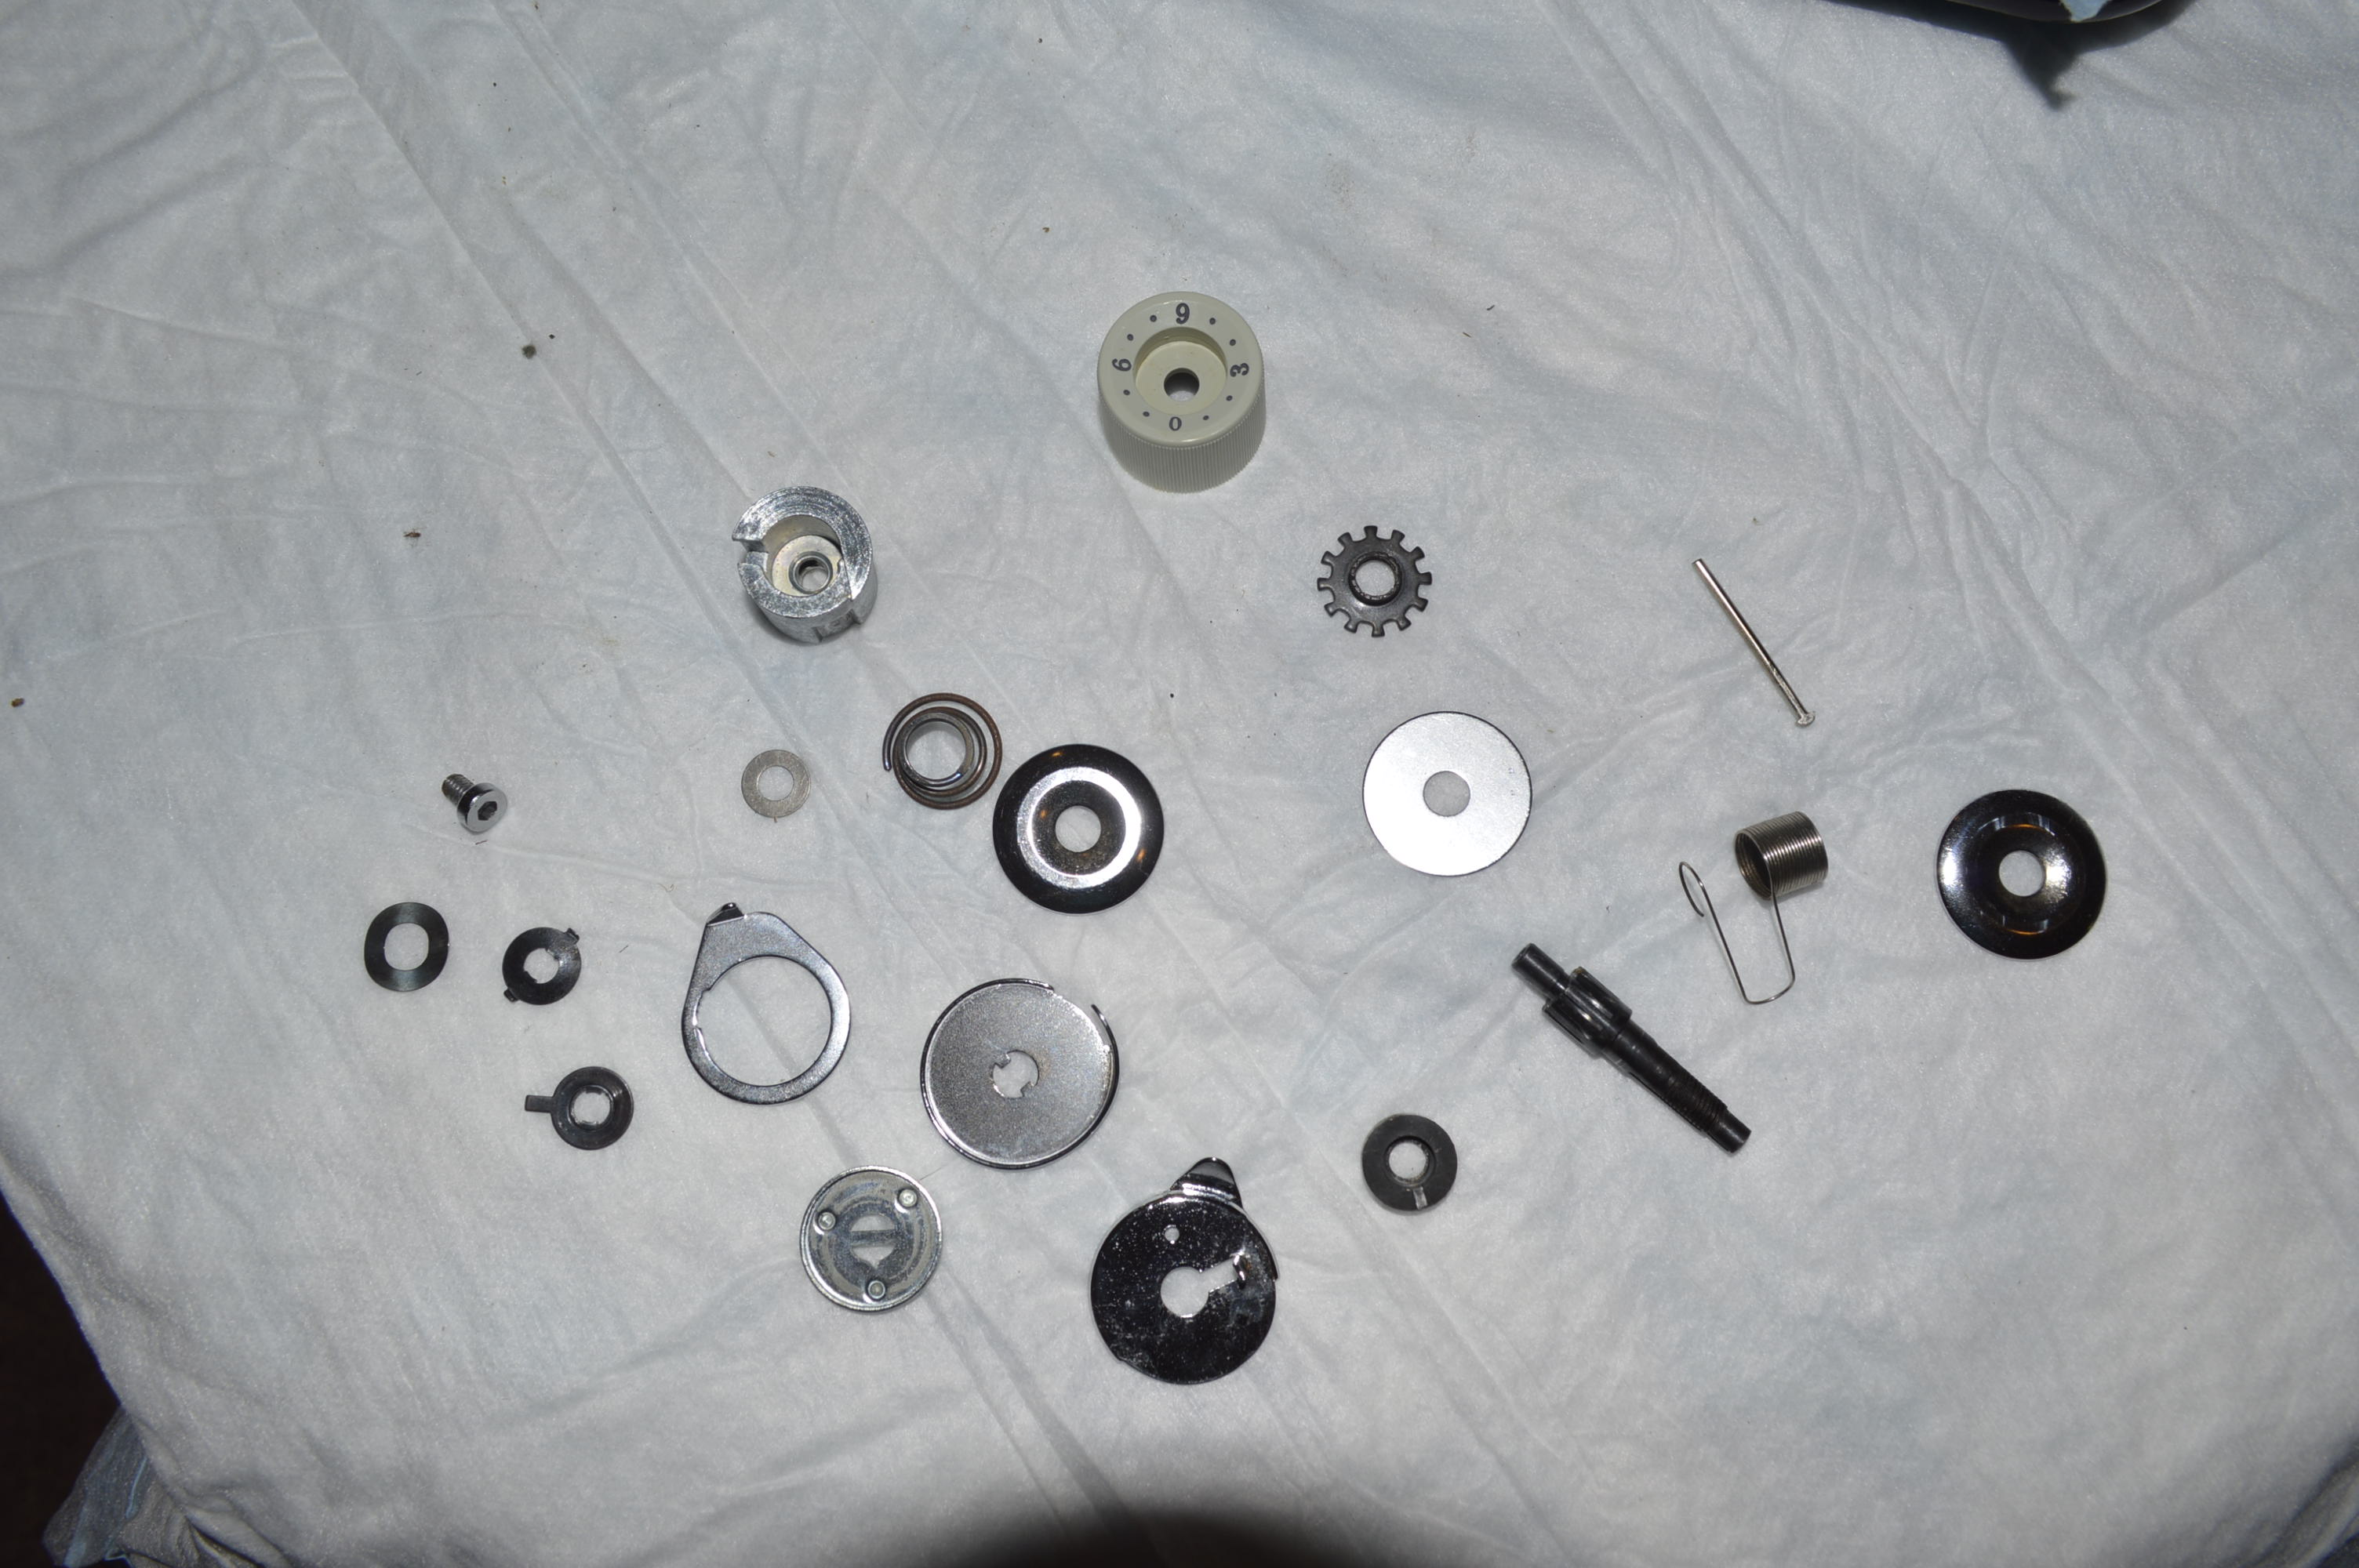
This step is necessary to assure smooth tension control and adjustment. For a complete written description with photos of the reconditioning of this tension assembly, see my blog post titled “Kenmore Upper Tension Assembly – How to Disassemble and Reassemble It the Right Way”.
It is also important to focus on any place thread residue, lint, dust, or dirt might hide. These locations include under the bobbin case spring and the bobbin hook race cover spring. Note that these areas must be cleaned by hand. Ultrasonic cleaning is the firt step with these parts, but it will not dislodge any gunk here.

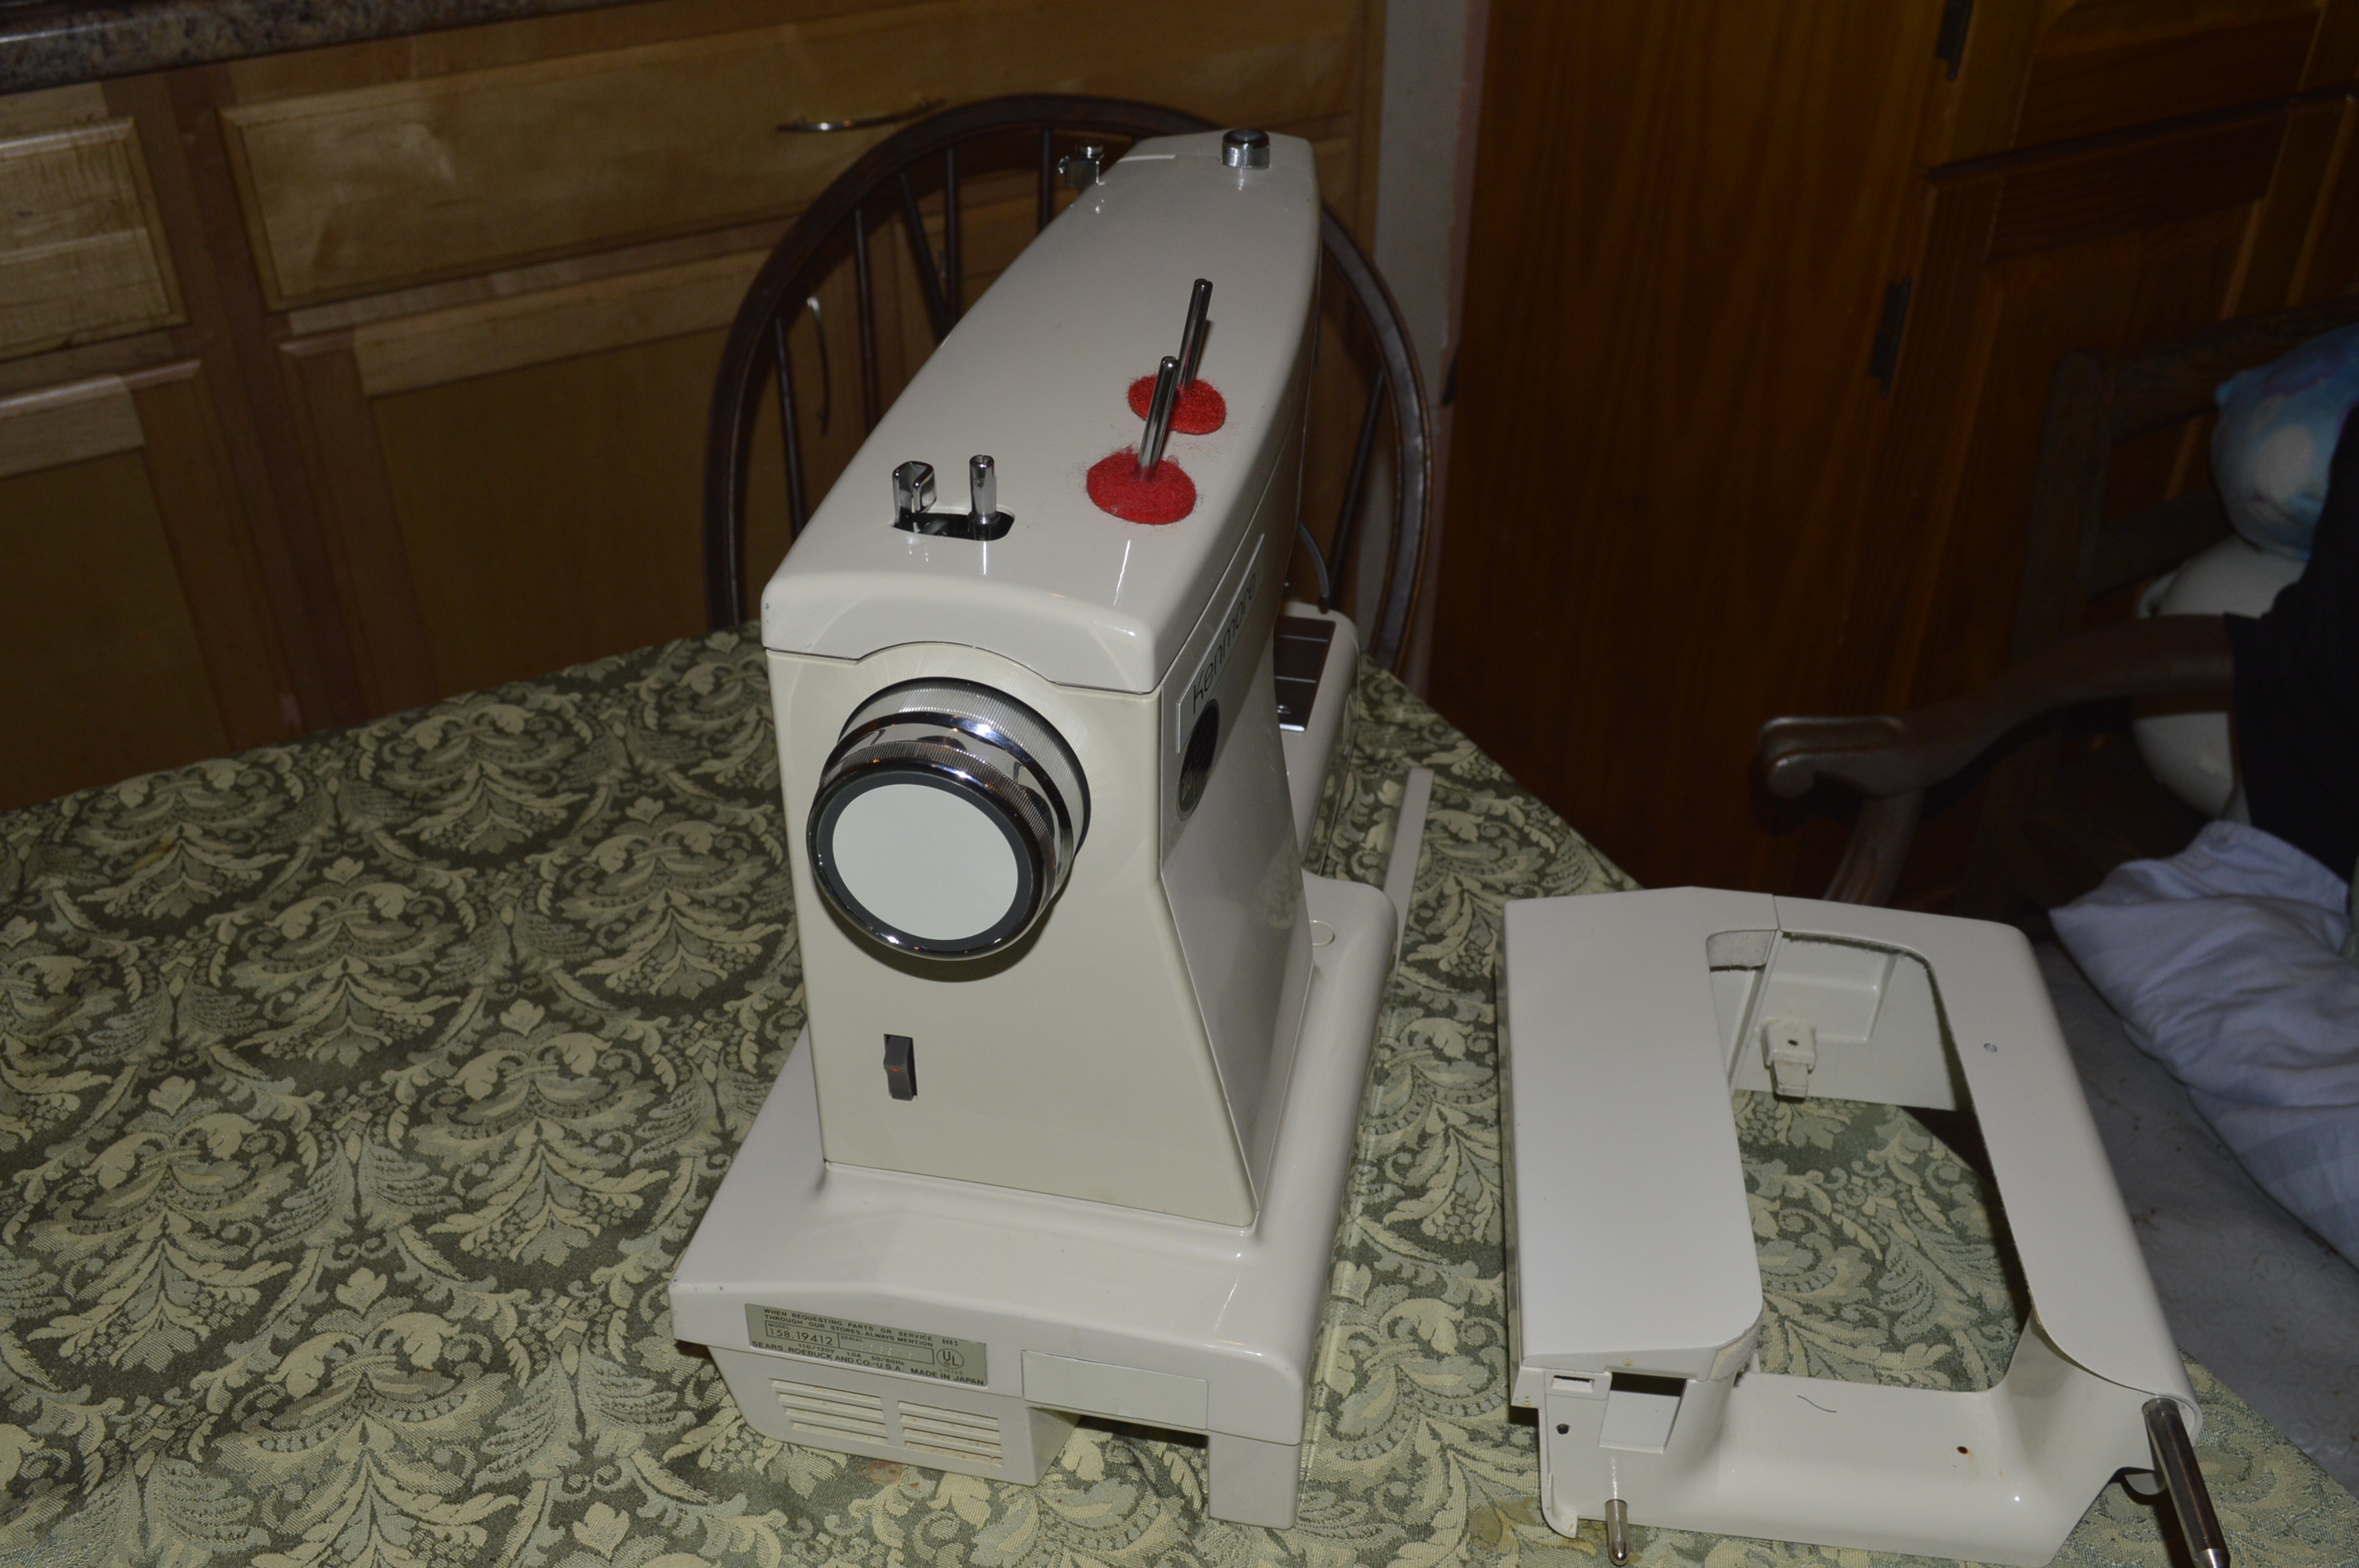
Next, the body is deep cleaned and all traces of dirt removed. All of the cleaned parts are reassembled and the machine is adjusted for a balanced stitch. This machine is fitted with an LED light and an electronic foot controller. As expected, the machine looks great. After the machine is completed, it is test run to ensure that all stitches are as they should be and another wonderful machine is ready to be used trouble free for years to come… Before and after, here’s the final outcome!


After
Tell me what you think!

Pretty nice post. I just stumbled upon your blog and wished to say that I’ve
truly enjoyed browsing your blog posts. After all I’ll be subscribing to
your feed and I hope you write again very soon!
LikeLike
I pulled out my Kenmore 158.1941 from the closet last week to make face masks so we can get in a store to buy groceries. I bought it in 1978 after graduating from nursing school. Probably spent my first paycheck on this machine. I love it. Sewed a lot in the 80’s and 90’s for my daughter then occasionally over the years. I don’t even want a new fancy one. This one has been well cared for and loved.
So glad I came across your blog. It is so interesting to see how you take these apart and refurbish them to their original beauty and functionality. I would love have this done to mine. Will have to find an expert like you to take on that task.
LikeLike
Hello Donna,
Thank you for your kind words… You should know that the 1941 is a favorite Kenmore for many people. I like it for it’s versatility and all metal construction. If you keep it oiled and lint free, it will likely be sewing great when you pass it down for your daughter to use… memories are what make these sewing machines so special, and the fact that they last long enough for memories to happen is what makes them worth keeping.
Have a blessed evening and keep safe.
Lee
LikeLike
I have a kenmore free arm sewing machine just like this one. I got it in 1971 and still works great. My model number is 158.16410 110/120V. I’ve sewn so many things with and I’m so happy With the all metal machine. Right now I’m in need of a zipper foot which I can’t seem to find anywhere. Everything now these days is plastic. I sure would appreciate if someone could tell me where I could find one for my machine.
Thank you
LikeLike
Hello Sonja,
I have been looking for a high shank zipper foot too! I have not found one in any of the feet assortments I have come across. I’ll still be on the lookout on Ebay and Etsy… perhaps someone will leave a comment revealing an aftermarket source.
Good luck and sorry I couldn’t have been of more help…
Lee
LikeLike
Hello, I was looking to find a Kenmore for someone as a gift and found someone selling a Kenmore 158. 19412. Is it similar to this machine? I don’t know anything about sewing machines but the 158 models look sturdy and seem to run smooth from some videos I’ve see. The seller told me it runs well, I was wondering if this machine is still repairable in case we ever run into any problems? I also read a review mentioned something about its high shank and adapter to make it low shank. I don’t know what that really is but it’s seems important. Would you happen to know what that adapter might look like? Thank so much for any information you might be able to provide. 🙂
LikeLike
I have recently pulled out my Kenmore 158.19412 after it being idle 10 years, and it’s running life a charm despite never having been professionally serviced. It was a birthday gift from a grandmother in the late 1970s. A very solid machine. It has a “special high shank” meaning it’s longer than a normal high shank. I have been searching for presser feet/adaptors as I’ve just begun quilting. Please let me know what solution you have found, much appreciated!
LikeLike
Hello Julie,
It is wonderful to hear from folks that have kept and still use machines that they got new either as a gift or a special purchase. Kenmore’s like yours are great machines and very desirable. I’m not surprised that it is running and sewing well, regular oiling and lint cleaning is all it should need to keep it sewing reliably for many more years.
Your machine has Kenmore’s proprietary “super high shank” presser feet. They are no longer made and not supported by aftermarket suppliers. You really have two options though… you can either find original Kenmore presser feet on Ebay. There seems to be a pretty constant stream available, or you may opt for a super high shank to low shank quick disconnect adapter. I have seen these, but I have not used one. I have heard folks generally say that they work fine, but they are made in China, and you should read reviews from folks that have purchased them. Your 1941 is a center homing machine so if you go this route, you can use any low shank quick disconnect foot and they are very inexpensive.
My inclination is to stick with vintage, so I will continue to use original Kenmore accessories, but it may make sense for you to explore your options to suit your sewing preferences.
I hope this helps and please let me know if I can be of any further assistance!
Have a wonderful day,
Lee
LikeLike
Sorry I left a previous message but forgot to ask about another machine I am debating on. It’s a Singer 3270c. I tried to look for a review or blog on it but I couldn’t find much. Is this machine good ( interested in sewing denim)? Would a newer model pedal work on it, it doesn’t come with its pedal. Thanks again! 🙂
LikeLike
Hello! I will answer this question first… I cannot recommend a Singer 3270c machine as there are many far superior machines to consider. The machine is made with a variety of critical parts made with plastic. It is not a heavy duty machine, and it is not readily serviceable… Now I’ll get to your first message.
The 158.19412 was made in 1977 and is a fine machine. Except for the balance wheel, it is all metal. Earlier models, the 158.19411 and 19410 were all metal throughout. This machine is capable of sewing denim and other heavy fabrics. They are very serviceable and very good and easy to use machines… very tolerant to changes in fabric, thread, and stitches. The super high shank refers to how high the foot attachments attach to the presser bar. In use, there is no difference between low shank, high shank, or super high shank… they all work fine, and they are all available.
The advantage to a machine like the 1941 is that it is a “convertible”. That means the front of the machine’s bed detaches to allow easy sewing of cuffs and collars. With the front cover removed, it is what is known as a “free arm”. I can’t find anything to dissuade me from recommending a machine like this for general sewing, as it was made to construct garments. If your interest was quilting, I think there are better machines.
I can’t recommend a shank adapter. Depending on what type of machine you have, they may or may not work. I also question the build quality. I have one, but I don’t use it. With the availability of proper vintage accessories, I see no advantage to using one.
I hope this helps to answer your question!
Have a blessed evening,
Lee
LikeLike
I have the 158 19131 model. It sews great. I just help trying to replace the stitch dial knob. I have a replacement but it is more complicated than i thought it would to replace it. Please help me thanks in advance.
LikeLike
Hello Allen,
I don’t any experience with the 19131 model, but it looks like the same design as the 1941, except it accepts cams. You didn’t indicate if it is the stitch length dial, or the stitch selector dial.
The stitch length dial is much easier to replace than the stitch selection dial. On many Kenmore’s, the stitch length dial can be removed by removing the two small screws hidden behind the center cap on the dial. It may also be necessary to remove the rear cover to loosen a small set screw that adjusts the friction on the dial (adjusts the firmness turning the dial).
Replacing the stitch selection dial is a much more difficult repair in that it requires some linkage disassembly and indexing upon reassembly. Again, I have not made this repair so I am lacking specifics.
I wish I could be more helpful, but lack of familiarity with your machine narrows any useful advise I would otherwise be happy to give you.
Let me know if I can be of any other assistance!
Lee
LikeLike
Kenmore 158-19411. Reliable, used for a variety of projects. When I flip the feeddog lever down the feeddogs won’t lower. Buttonhole template stills works with feeddogs up on practice buttonhole but I’m sure it would be better with feeddogs lowered, per directions. I think I remember they used to lower when I last made buttonholes many years ago. I removed the bottom cover and feeddog lever slides large pin just fine, but dogs won’t lower. Just cleaned and oiled, and has been various other times as well over the years.
LikeLike
Hello Martha,
Looks like you got halfway through to getting your feed dogs to drop. You mentioned that the pin slides just fine, but the pin slides into an assembly (the left side) that is gummed up. I see this a lot. Many people do not use the feed dog drop and oil will gum up and build up oil varnish inside the assembly so it will not work. Disassembly is generally not required to free this side of the mechanism and I have found that a solvent oil like WD-40 works well. Looking at the sliding pin under the machine, spray WD-40 on both sides. With the pin retracted, gently press down on the feed dogs. You will notice the left side of the pin assembly move down slightly. Gently push it back so it again lines up with the pin… repeat this action over and over and as you are exercising the assembly, you should feel it loosen up to the point it will work. If you don’t have or want to use WD-40, you can try heating the assembly with a hair drier. Oil varnish melts at a relatively low temperature. Focus the hair dryer on the left side of the assembly until it is very warm. It may take a few minutes for the heat to soak into the assembly. Exercise the assembly as previously described. With either method you use to free up the mechanism, make sure you oil all of the connections on the assembly with sewing machine oil to keep it moving.
Please let me know if this information has been useful and let me know if it works.
Lee
LikeLike
Wow, Lee, what a nice detailed message. I was encouraged when you seemed to know what the problem is and that you see it a lot. I’ve never heard of it!
I have 4 identical items to sew, each with 7 buttonholes, for a friend. I am a bit afraid of messing with it in case I actually make something worse, and I just worked on the first item functionally, but I shall try your hair dryer suggestion tomorrow and see how it works. I do have WD-40 but will avoid the overspray if I can get the hair dryer to work.
Thank you very much for your response. I shall let you know how I do.
Martha
LikeLike
I used WD-40 this afternoon but have no/little success in feeling a part free up slightly when I push on the feed dogs. At one point I did think I felt the part in picture 1 “Does this part move?” move slightly, with both pressure on the feed dogs and on this part – down as if the machine were set upright correctly, not down in this picture. Is this 3/8″ part what is supposed to move? Everything feels so very concrete. But we are leaving it overnight and will see what pushing on the feed dogs feels like in the morning.
Thank you again for your input.
I am being careful so as NOT to crack the feed dogs or some other ridiculous thing which would make the sewing machine useless for regular sewing which is the vast majority of what I do, as I obviously have not done buttonholes in about 20 years.
Please let me know you have gotten this message.
Martha
LikeLike
Hello Martha,
Did you send pictures? If you did, please try resending them to pungoliving@gmail.com… The bracket that the pin slides into is supposed to move freely back and forth… Let it sit overnight and see if it frees up. If you did send pictures, perhaps I could point out the par that needs to be moving.
Thanks,
Lee
LikeLike
Hello there, I think your website could possibly be having web browser compatibility issues. When I take a look at your site in Safari, it looks fine however when opening in I.E., it’s got some overlapping issues. I simply wanted to give you a quick heads up! Aside from that, excellent website!
LikeLike
Thank you for letting me know! I publish my blog on the cheap because I can’t afford an expensive WordPress subscription… I guess they know there is a problem and I need to upgrade to fix it!
Let me know if I can be of any assistance.
Lee
LikeLike
I’ve just dug my 158.19412 out – – it’s been in the basement for a very long time. I need to find someone to give it a good dusting and cleaning.
LikeLike
Hello Joanne,
Thanks for contacting me. I don’t repair sewing machines because they are too expensive to ship 2 ways and the liability for damage is to great.
Your Kenmore is a great machine and I know it will sew great when cleaned and oiled. You can clean it with a little dish detergent and a damp rag. Remove the needle plate to remove any dust. Oil the machine at each of the oiling points. Use about 8 drops of oil in the motor instead of the 3 recommended to recharge the felts as most likely, the felts are dry from long storage. Pay particular attention to the feed dog drop mechanism, as they often “freeze” because the mechanism is not used much by most folks who own these machines.
Do you have the users manual?
The 1941 is my favorite Kenmore convertible and it is certainly worth the time cleaning and oiling… remember that these all metal machines sew better the more they are used, so it will improve with use.
I hope this helps and please let me know if I can be of any assistance!
Have a blessed evening,
Lee
LikeLike
I’m a novice at reconditioning sewing machines. Usually work on Singers. Question is, is it imperative to use so much grease in those gears? Seems counterproductive to me.
LikeLike
It’s only necessary to use as much grease as necessary to maintain lubricity of the gears. Kenmore’s have a gear case to hold grease and from the factory they had enough grease to keep the gear in contact with grease. In the post pictures it may look like the case is full, but it is really only about enough to half fill the case (plenty of room behind the gears). From my experience, it is not a critical fill volume. Too little grease in the case is worse than a little more. More than about half to three quarters of a case full is too much.
I’m just glad to hear that you are replacing the grease!
LikeLike
Buenas tardes tengo una kenmore modelo 158.17600 que no tiene la placa de la aguja y su base donde la puedo conseguir.
LikeLike
¡Hola Carmen!
Partes como esta no son fáciles de encontrar, pero es posible que tenga suerte en Ebay. Busque una máquina de piezas bajo las piezas de la máquina de coser kenmore. ¡Suerte!
Lee
LikeLike
RVFQM,
Firstly, thank you for your advice on ‘freeing’ gummed up feed dogs to other commentors. I was able to make use of that on my own inherited 158.19412 Kenmore after finding your site. The feed dogs are working well now.
Secondly, I’d like to ask a question about the following: just to the right of the front-facing needle clamp screw, around the ‘corner’, facing towards the main body of the machine, there is an empty screw hole on my machine of a smaller diameter.
I don’t know if I’m missing an attachment or if it’s as intended, however, I’ve noticed that if I want to attach an ‘even feed’/’walking’ presser foot, I require a specific style of thumb screw with a long shaft ‘shoulder’ that would attach its fork or rest its bar about where that screw hole is located, and where, on other models/brands of machines, the needle clamp screw is located. Was there a bar that was available for that screw hole?
I presume, if there was, it’s hard to find now, so, would you happen to know what size screw fits into that hole on the 19412? Is it imperial or metric? Being made for the North American market circa 1970s, I would guess imperial, but, in any case, I can’t position myself to measure it accurately enough with my micro.
The online repair manuals aren’t very high resolution, so I appreciate any help you might give to a distant Canadian on this matter.
Thanks again, for your adhoc mentoring to strangers on the intertubes.
LikeLike
Hello!
I’m glad you found some useful information! Vintage sewing machines of different manufacture offer a maze of construction differences, most of them slight. Kenmore’s are a good example since some of the nuts are metric, and some are SAE. Fortunately, they are all on the smaller size and small wrench sets in both metric and SAE are fairly inexpensive.
I don’t know why Kenmore added the second threaded hole on the side of the needle clamp. I did a little research in the service manuals and online to see if I could identify it, but didn’t have any luck. I do believe that it was a remnant for side clamp needles. At first I thought it was to ensure the needle was set in the clamp for proper distance to the needle plate. If I recall, an 1802 would accept a needle clamp screw but it’s been a while since I tried it. Because there is very little play and the front clamp holds the needle securely, I don’t think this holds up as the answer. You don’t need to fill this hole and I can’t think of any attachments that would use it… I wish I knew the answer!
If you should find out, I would appreciate you letting me know since I like a good mystery solved.
Have a blessed day!
Lee
LikeLike
I just found a 158.19412 today at a thrift store and have been researching the super high shank situation, and almost everything I’ve read has said these machines won’t work with a walking foot. However, I ran into a solution that somebody came up with. Look for ‘Kenmore Long Attachment Screw “B” #2337’ on this page: https://sewingmachine221sale.bizland.com/store/page106.html
LikeLike
Hello Joy,
IYou can find super high shank adapters that fit your machine. I have not looked for them lately, but I have seen them online. They use the original machine hardware and quick detachable feet. The link you showed makes modifications to your machine that I would not be comfortable with. I wish that there were more super high attachments available.
The quick detach mechanism on your machine is difficult to remove and reassemble properly, but in a pinch, any presser foot screw used on other machines will work just fine.
Have a great day!
Lee
LikeLike
Hello Joy,
I’m glad you found my post helpful! The gears on these vintage machines always need the grease replaced. The machine runs quieter too.
If you don’t feel comfortable taking the motor apart, it definitely needs to be oiled. Some machines sit for years, and the motor oil felt dries up. The motor tells us to use 3 drops of sewing machine oil every 6 months, but I would recommend that you use 7-8 drops at each oil hole location to recharge the felts.
If the motor runs then you really don’t need to do anything to it. I make it a part of a restoration for completeness. Kenmore motors are very durable and in the worst case, there are plenty of Kenmore motors available on Ebay if you need one.
Please let me know if you have any questions or if I can be of any assistance and have a wonderful day!
Lee
LikeLike
Hello Lee,
I found your info on the 19410, 11 and 12 very interesting. I am seeing a 158.16410 for sale that looks exactly the same as the 19410. Is there much difference between these machines? The one I am looking at is very cheap on an auction site, will probably go for $40 or less. Or should I wait for a 19410 to be come available? The “30 Stitch” Kenmore is also highly recommended. What do you think of that compared to the 19410? Thanks for any info you can share!
LikeLike
Roy,
I’m sorry that my response is so late it is probably of no use.
The 1641 is a capable machine and I would not see any disadvantage to it. The 1941 is a popular machine and because it is an all metal convertible machine, it is very durable.
Often, Kenmore models came out with different versions and model numbers that had the same functions as other machines in their lineup. There may be some slight differences in the sewing mechanisms, but they worked.
sorry for the late reply!
Lee
LikeLike
Hello Lee!
Thank you for the good information! I’m so glad there are people still refurbishing old sewing machines.
I was wondering how to open the clutch on the 1941 model. With other models there is a screw but this model does not have one. Actually do I need to open it to oil the hand wheel? It’s old and dry and I heard it’s another area where oil is needed. Thank you!
LikeLike
Hello Jenn,
The clutch on the model 1941 does not and should not be oiled. You can add a drop of oil to the top shaft where it goes in the machine. This will serve to oil the balance wheel.
I hope this helps!
Lee
LikeLike
Thank you so much for your response! I’m glad I asked.
LikeLike