
Hello! The feature image is our dog Ruby… I don’t want to spoil the surprise of this restoration, so I thought she would stand in for a cute picture! The subject of this blog is actually the restoration of a Singer 185K sewing machine, and this restoration is cathartic for me. The idea was to do something fun to keep me busy and help me take my mind off of the worrisome things I see in the news every single day. This restoration is going to be different.. challenging and unique. It is one of my ways of dealing with the isolating effect of the COVID-19 pandemic that has paralyzed the World… The horrific death toll and the far reaching effect it has had on people, Global economies paralyzed, record unemployment, awkward social distancing, closed businesses, shortages of essential supplies and food, and the list goes on… I wonder if we will ever return to our “normal” lives in it’s wake.
Don’t get me wrong, I am fortunate to have a close nuclear family living in my home. In my retirement, I have not been affected nearly as much as the people around me, and no doubt many of you. Staying at home and only venturing out for necessities, I am trying to weather the storm and being eternally optimistic, I am going to make the best of it.
I have not completed many sewing machines restorations in the past few months… This is partly because suitable machines have been harder to acquire, but also because I have been looking for the motivation, which has been dulled by the effects of social isolation. Then, I had an idea… I want to do something fun. Something different to look at the bright side…kind of like thinking about butterflies, puppies, and kittens. Of course, it involves a sewing machine restoration to express my optimism. Hmmmm, lets see what I can come up with!
This restoration is a Singer 185K born on August 8, 1958. I have had this machine sitting around for quite a while and decided it would be perfect to play with and do something out of the ordinary. It’s a surprise ending, so I won’t give it away too soon, and you will need to read on to see exactly what it is! If you do, I promise it will bring a smile to your face!
For Singer aficionados who believe any restoration that involves disturbing original finishes on a vintage Singer sewing machine is wrong, be warned… there will be paint!
I chose the 185 because it is a fun machine to start with. It is 3/4 size and has a retro body style. I think Singer intended it to be a fun machine and chose it’s mint green and cream color palette for that reason. Not to mention the fact that it’s impressive power and high quality of construction make it a perfect choice for any sewing task. Hopefully, even the Singer aficionados will give me a pass on this restoration.
As with all of our restorations, the machine will be disassembled to the greatest extent possible. In this case, that means everything but the cast iron shell. All of the parts will be restored to like new condition. The motor and the light will be disassembled and restored, The foot controller will be disassembled, restored, and rewired. The machine will be re-painted and re-decaled. The only part that wont be touched is the stitch length plate (it is painted and embossed with the Singer logo… no way to paint this without losing the badge), the bobbin tire (because it is green), and the inner ring of the tension control knob. Leaving these parts their original color will preserve and display some of the legacy of the machine. Everything else I can do in a sewing machine restoration will be done.
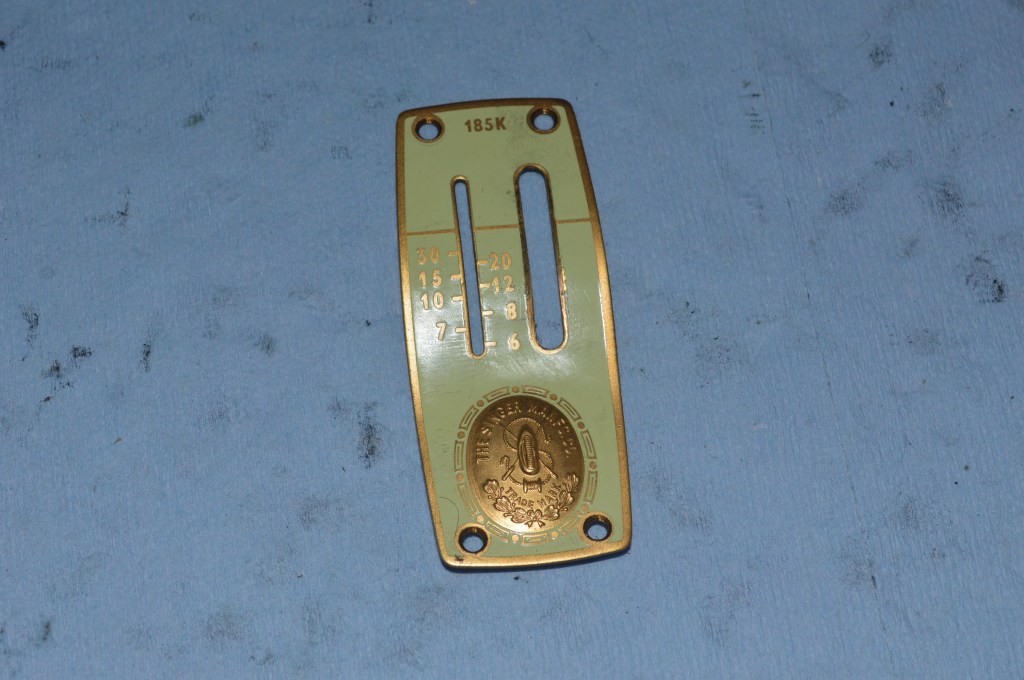
Stitch Length Plate
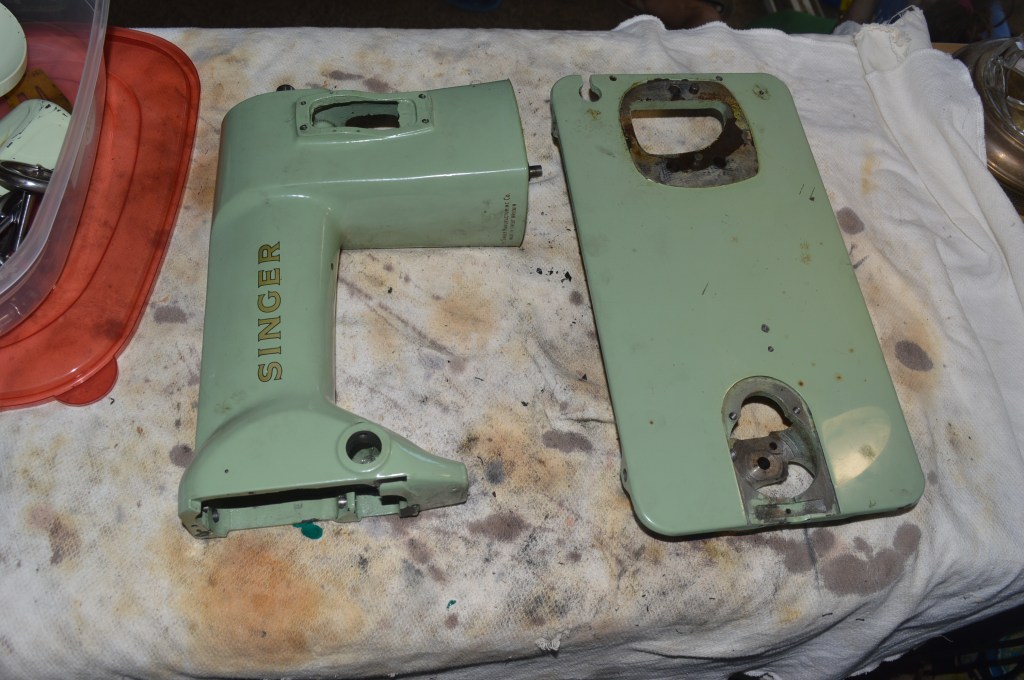
Here it goes… This is the machine before the restoration.
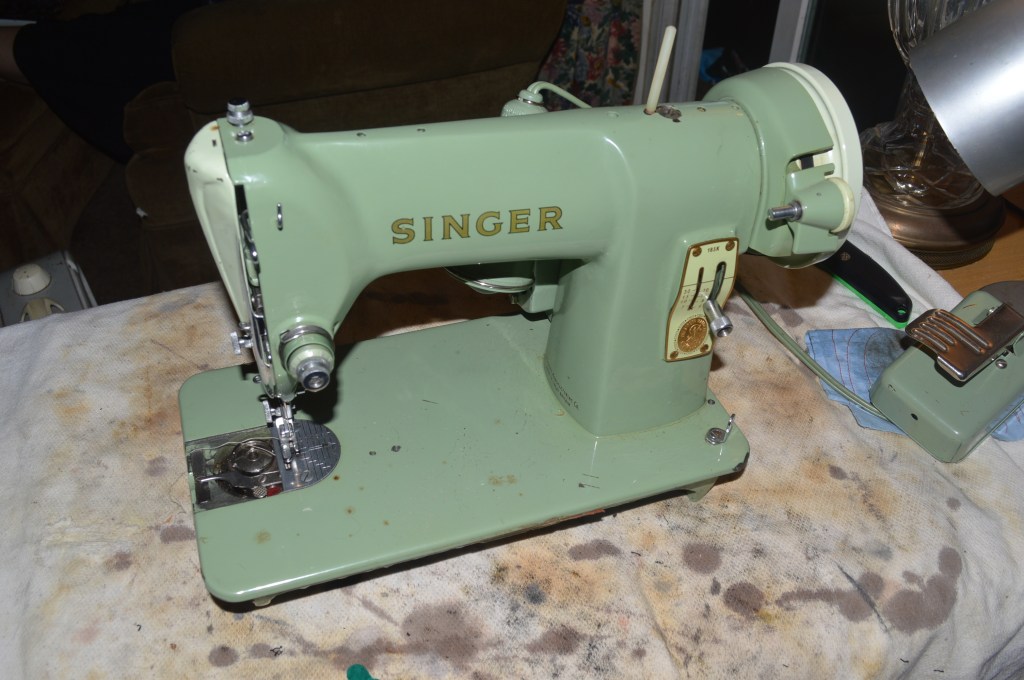
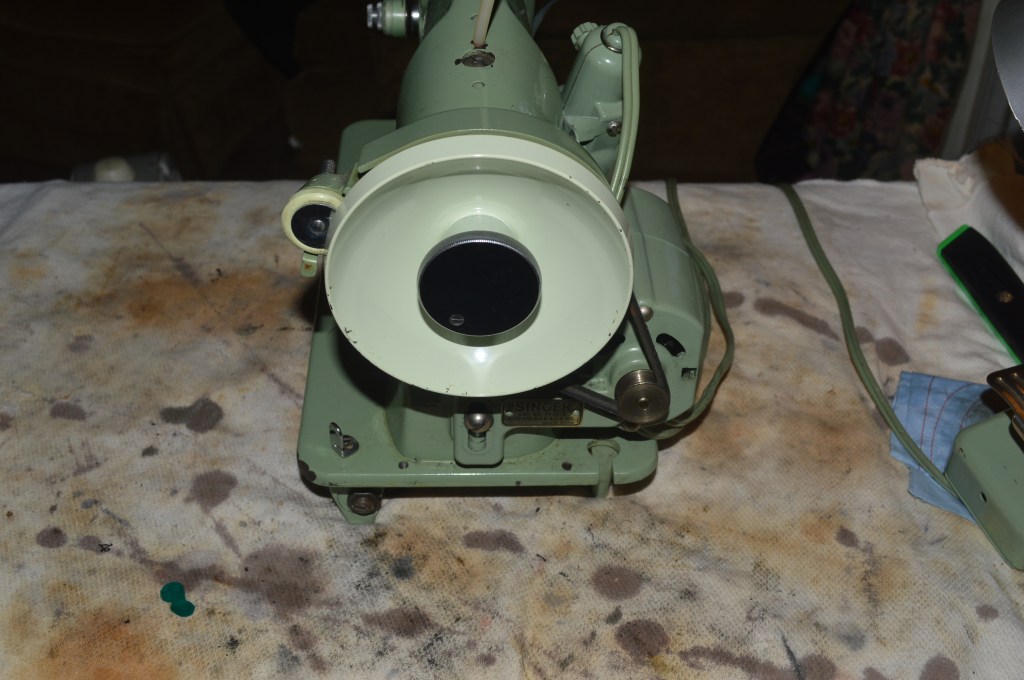
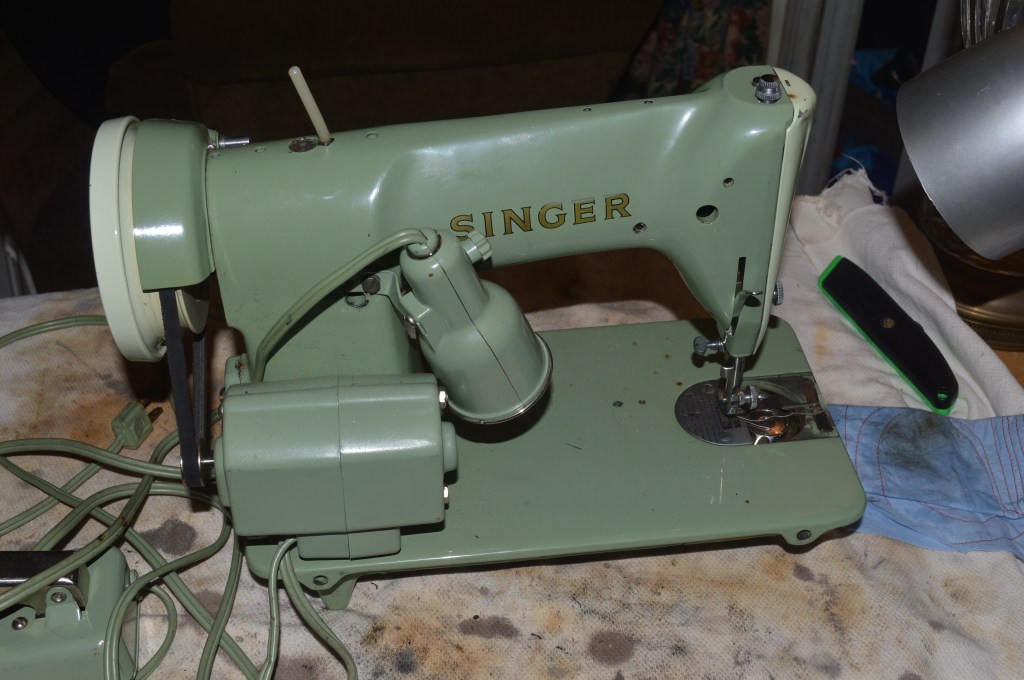
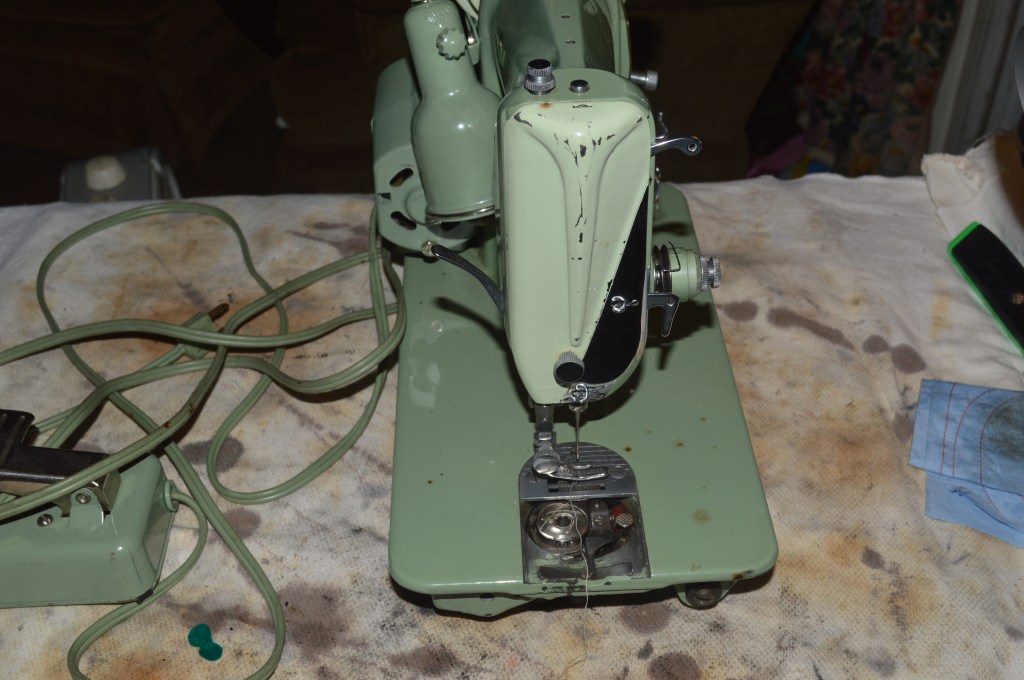
The machine is in pretty good condition to start with… there is a lot of cosmetic restoration that would require color matching, but the sewing mechanisms are in good shape. Take a good look at it now, because you won’t recognize it when I am done!
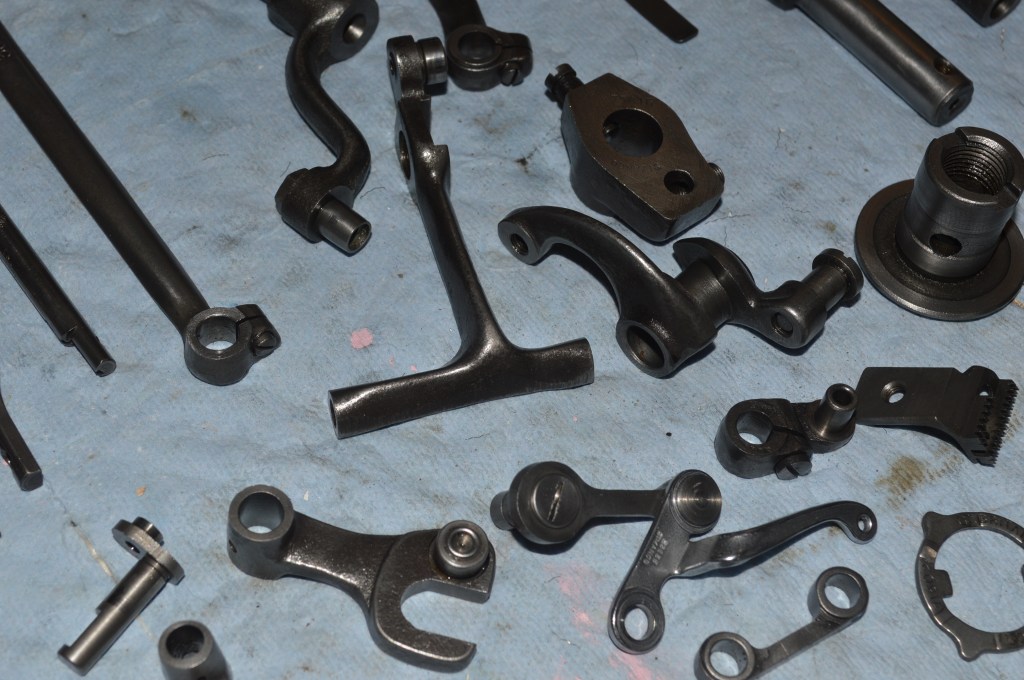
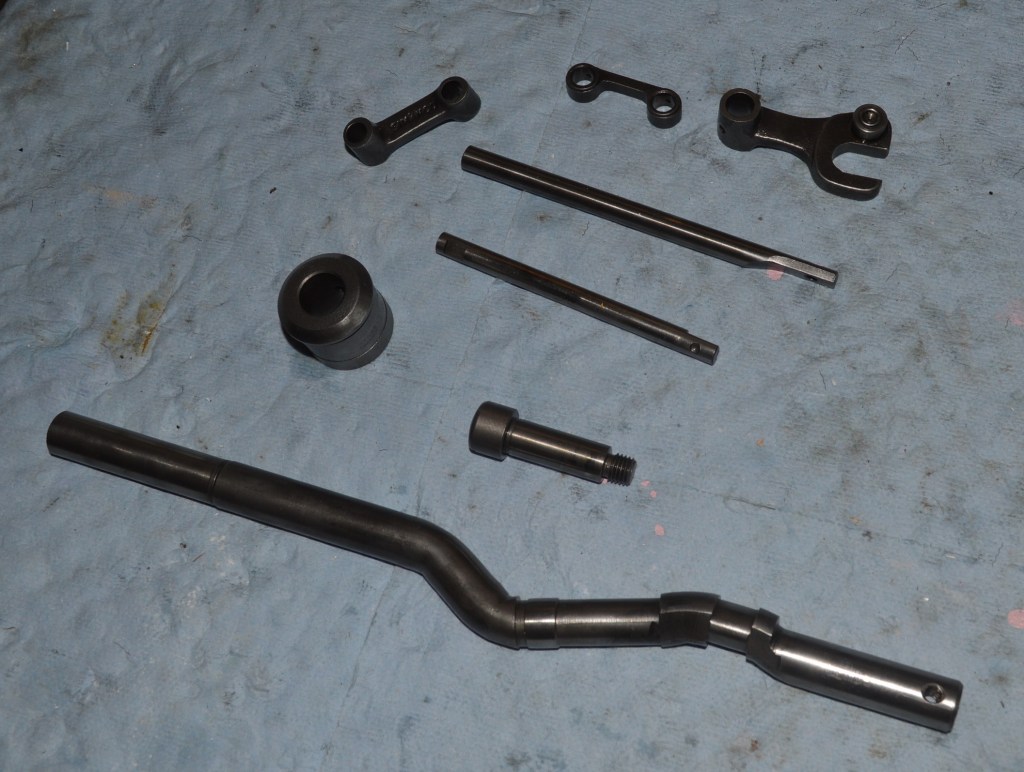
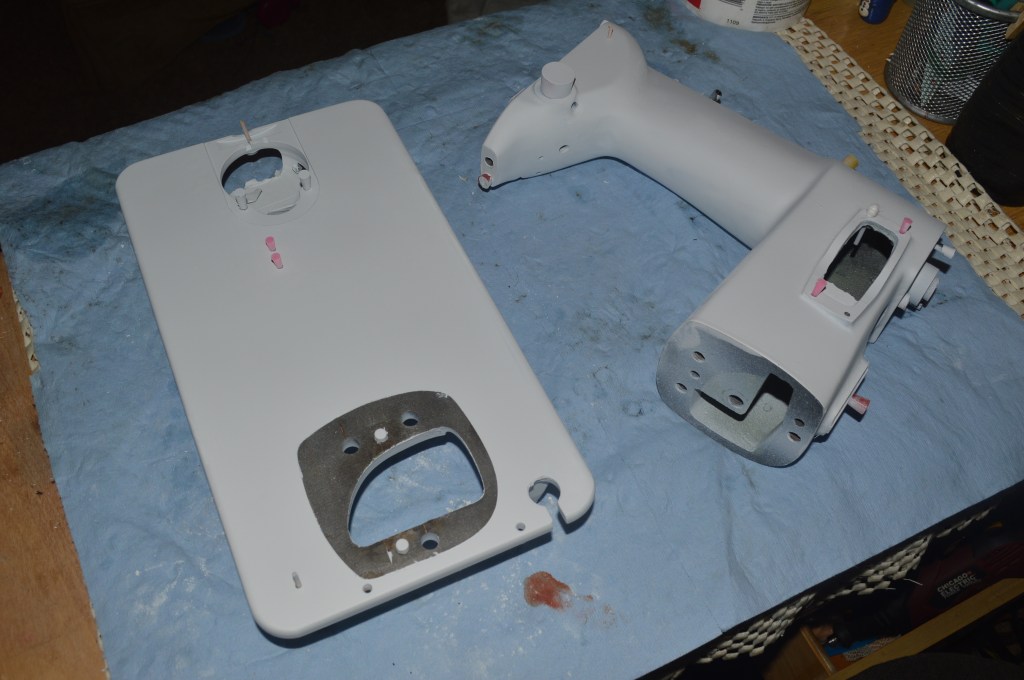
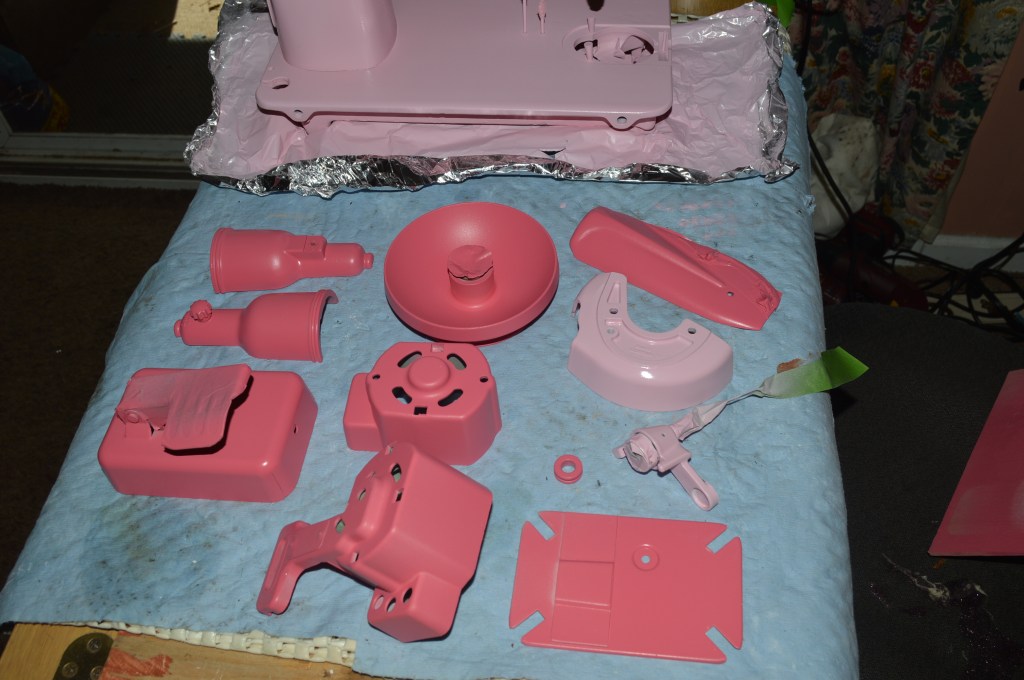
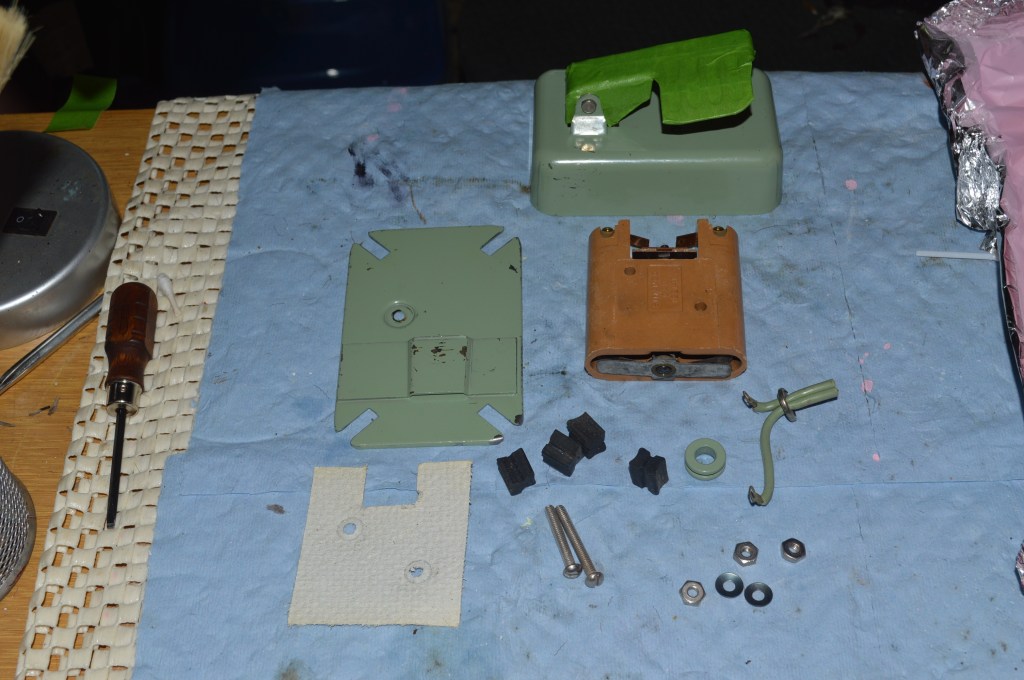
The sewing mechanisms and all of the bits and pieces are removed from the body of the machine and laid out for ultrasonic cleaning.
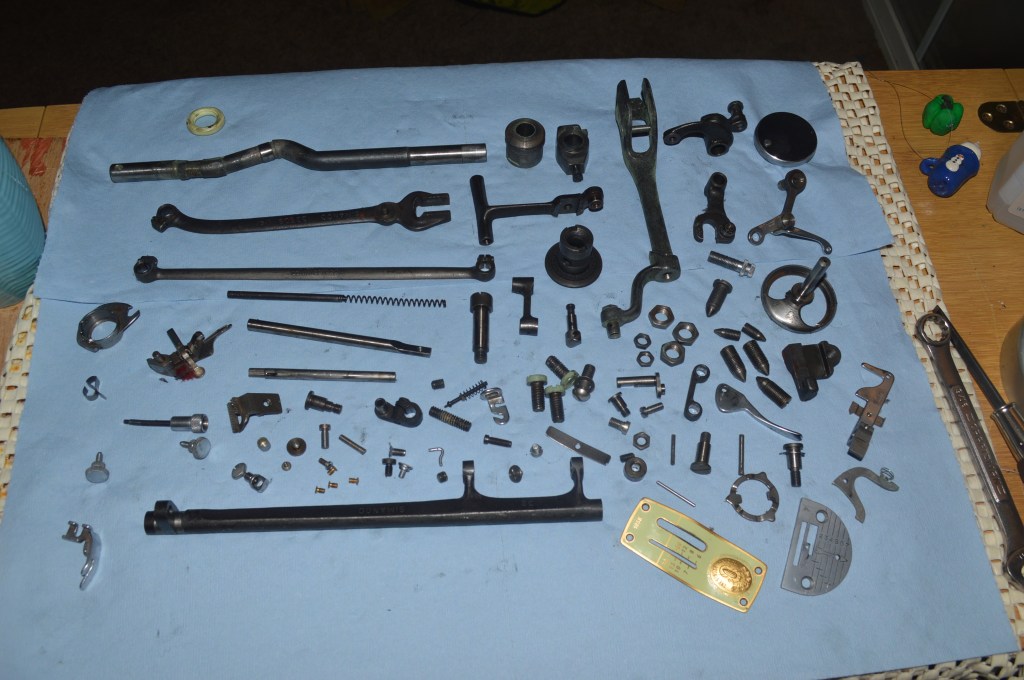
Ever wonder how many bits and pieces Singer put in this sewing machine? Well, there are127 separate bits and pieces in the body of the machine. This does not count the body parts, balance wheel, bobbin winder assembly, or the needle. The pieces that go into the motor, light, and foot controller are also not included. All of these pieces will be cleaned, wire brushed, polished, and conditioned by hand before they are reassembled.
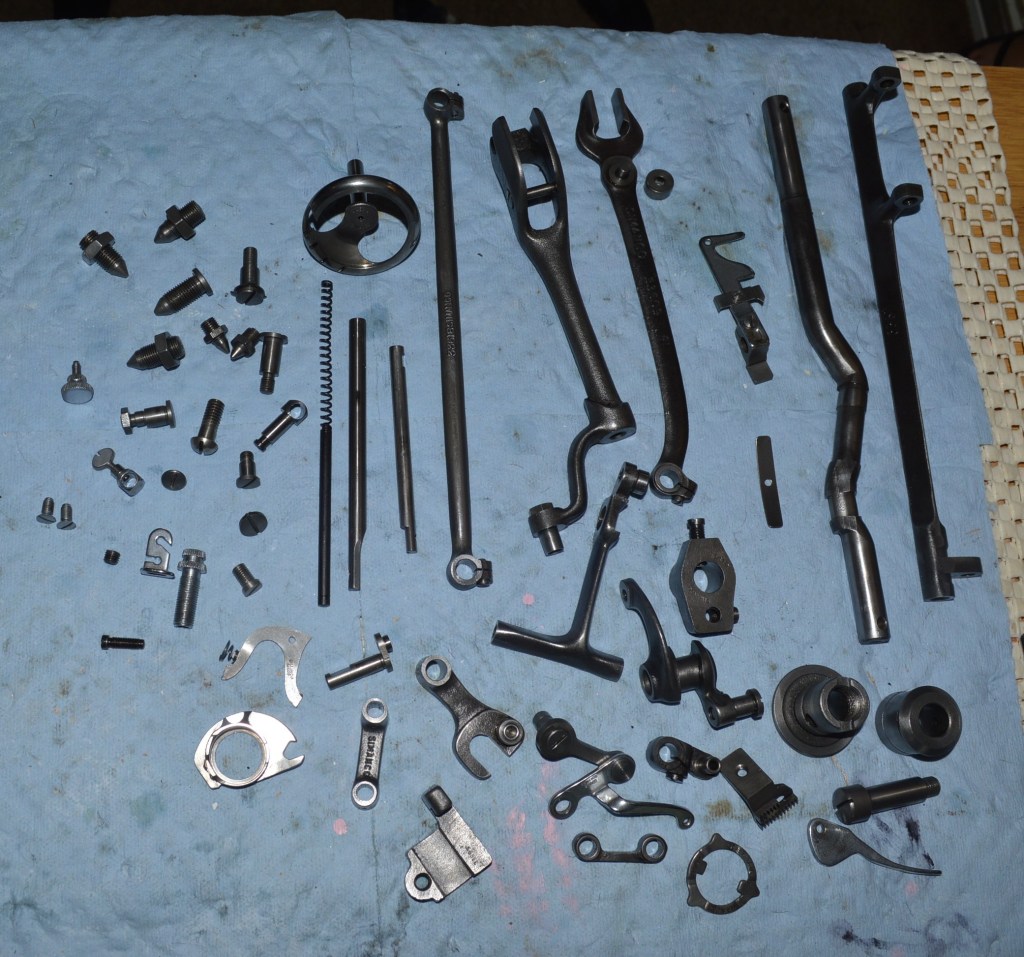
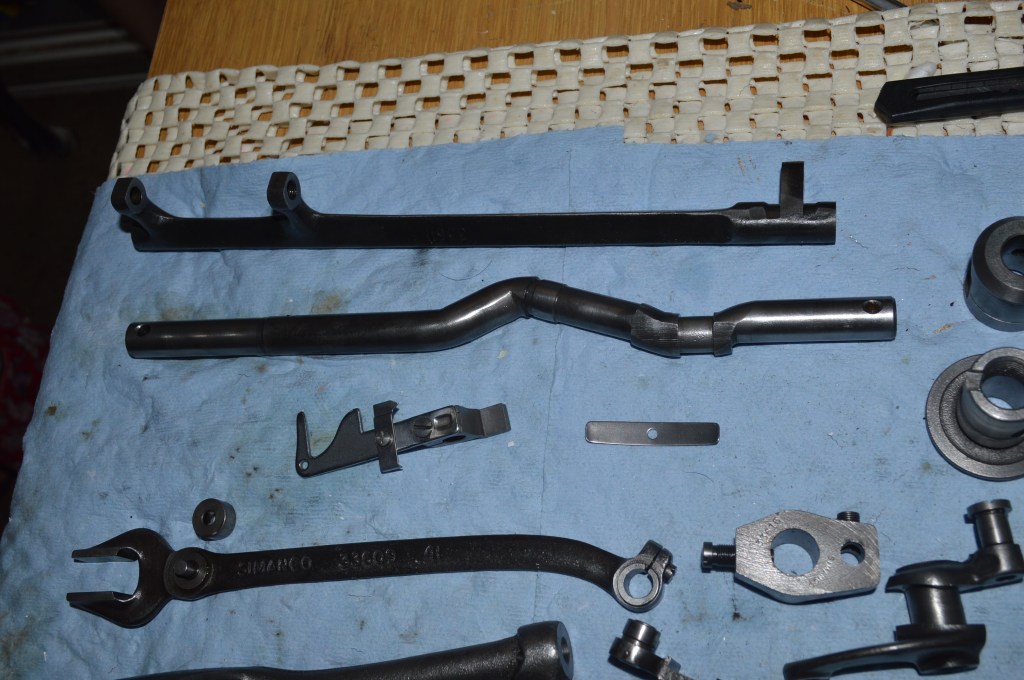
The cleaned parts are heated in oil to drive off any moisture due to the ultrasonic cleaning, They are then wire brushed to remove all traces of dirt or old oil. All these pieces have been cleaned and set aside for final assembly.
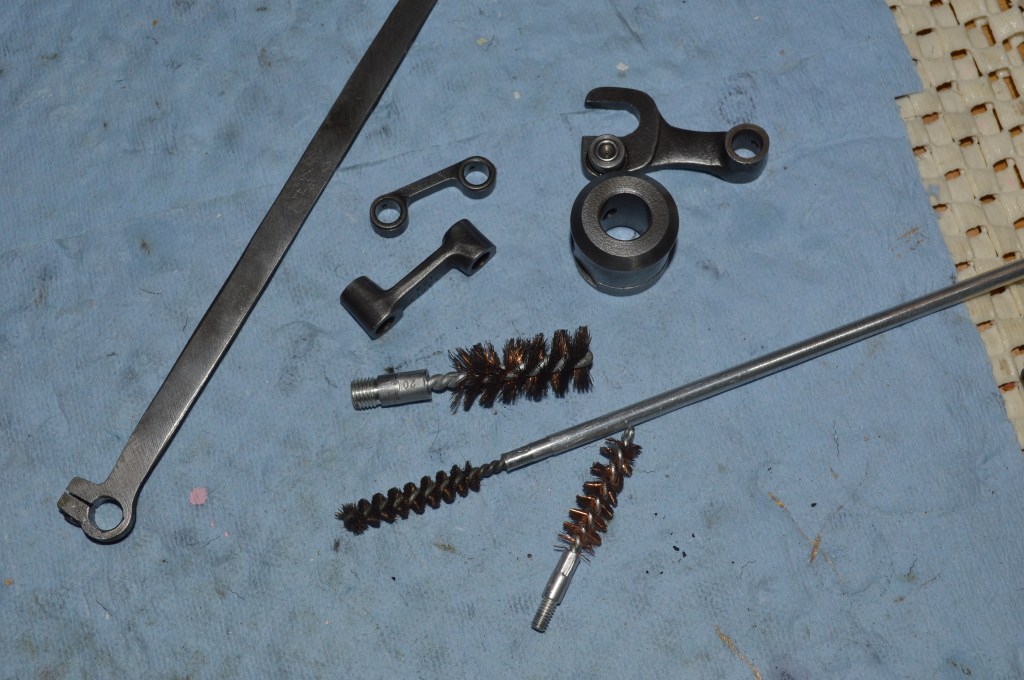
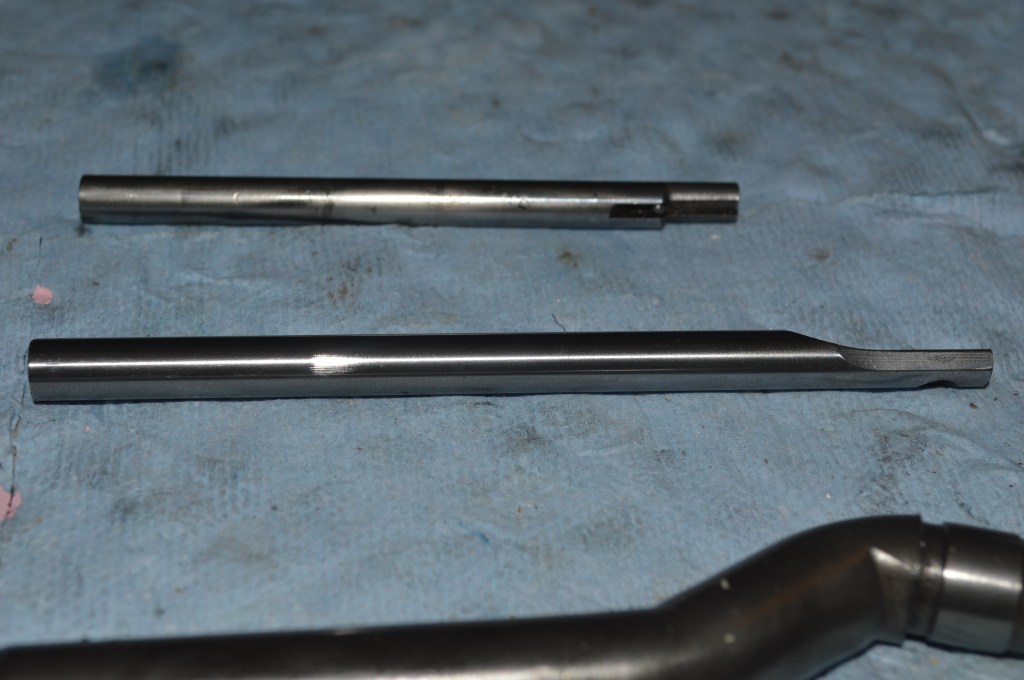
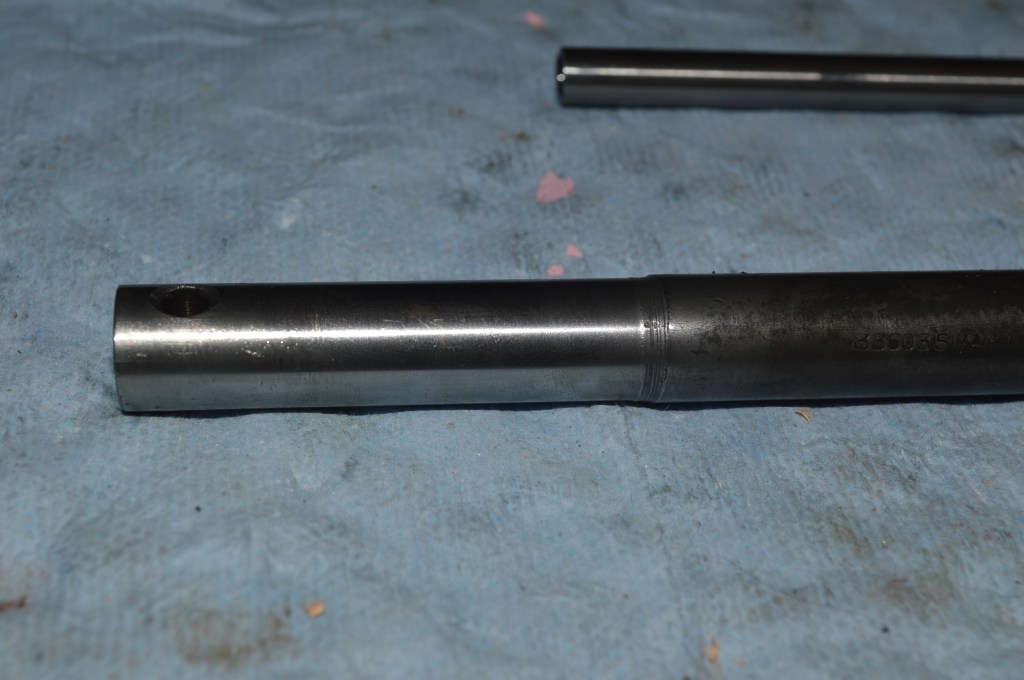
Some parts need more attention. Not only do all of the shafts need to be polished, the bores need to be brushed clean too. The objective is to restore these parts to like new condition. This means bright steel running on bright steel with nothing between them but clean oil… like when it was new! To accomplish the polishing, I use 2500 grit oiled paper. For cleaning the bores, I use brass bristle brushes.
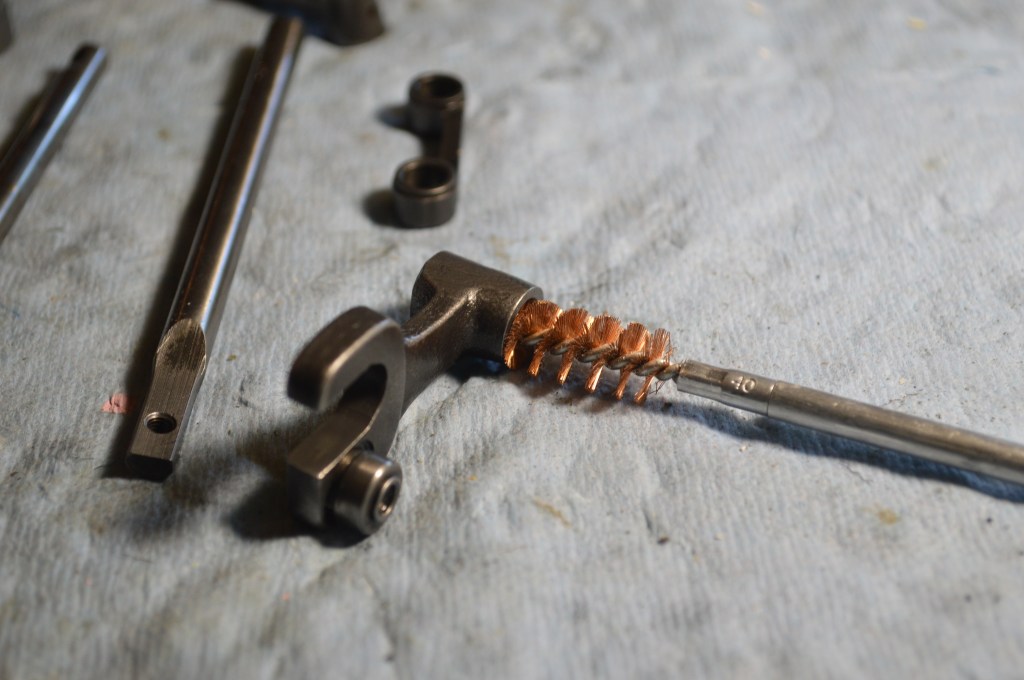
While the difference is subtle, it is a detail that should not be ignored… can you tell the difference?
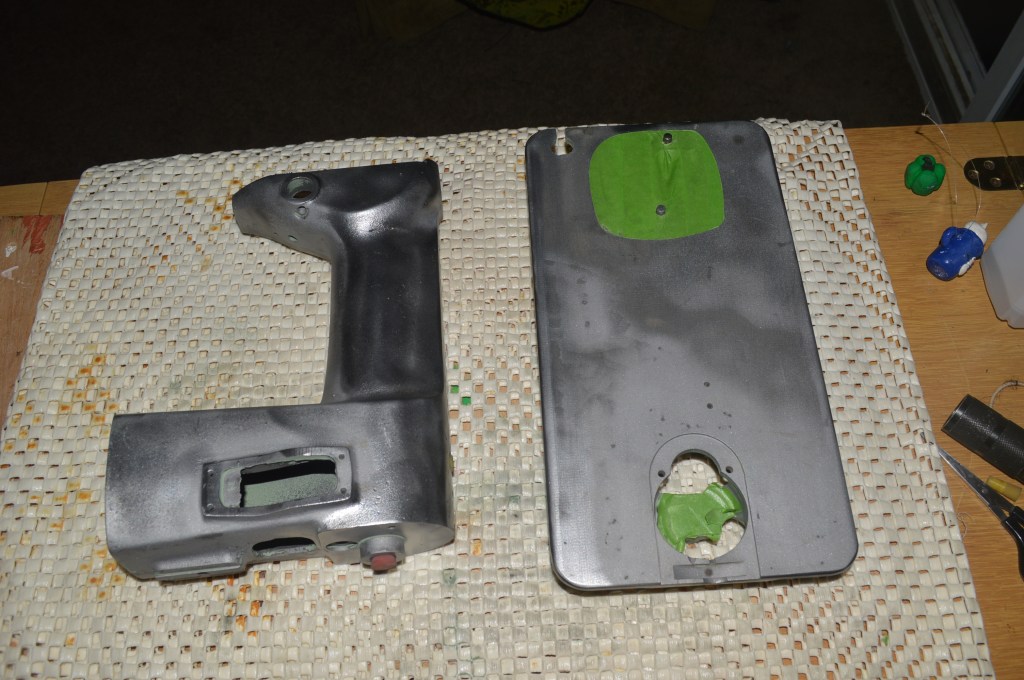
Now, the body is separated and prepared for paint removal. The sewing arm has dowel guide pins, so I know that the alignment will be maintained when the two halves are reassembled.
To get the surface finish I want, the original paint on the sewing bed and arm is sandblasted to “white” metal and masked off for priming.
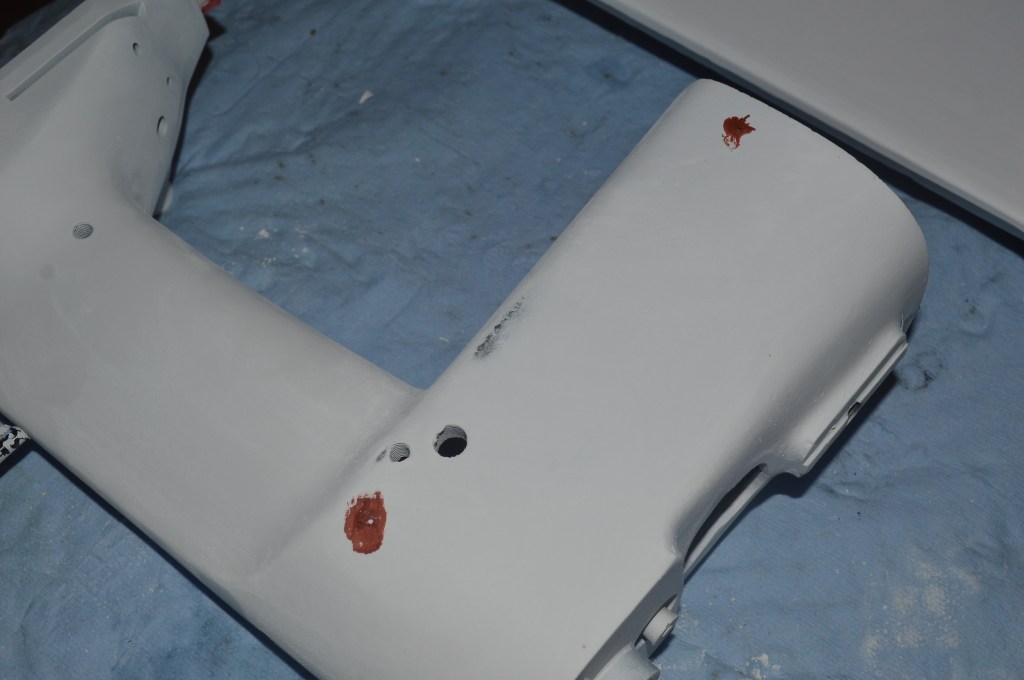
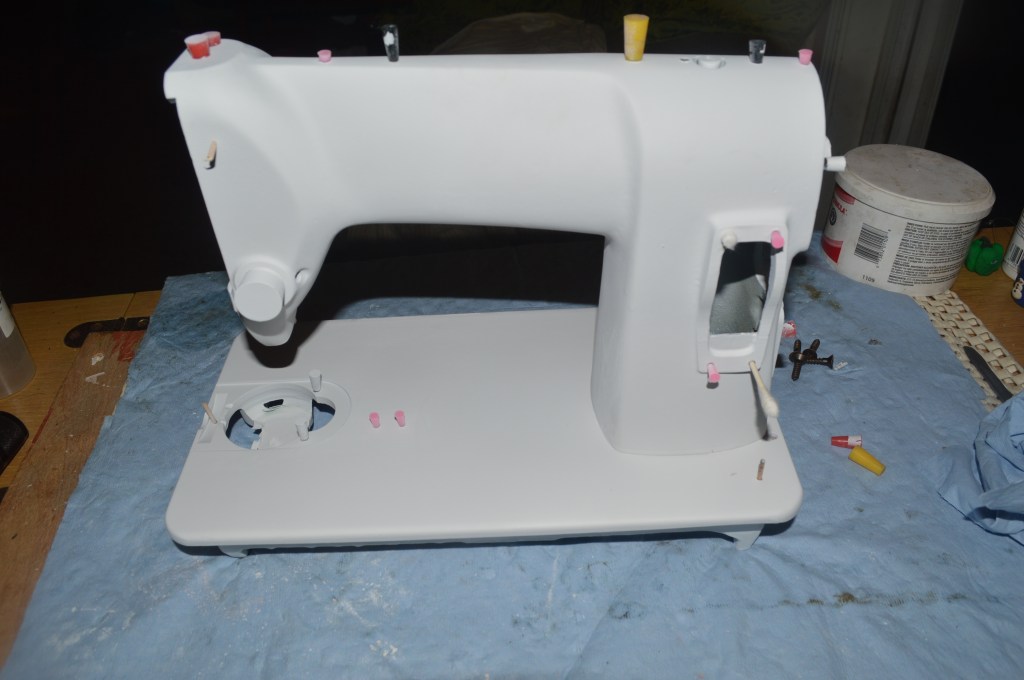
The bed and sewing arm is primed with three coats of white primer and sanded smooth between coats… the little “horns” are silicone plugs to keep primer and paint out of threaded and other holes I don’t want primer or paint to get into.

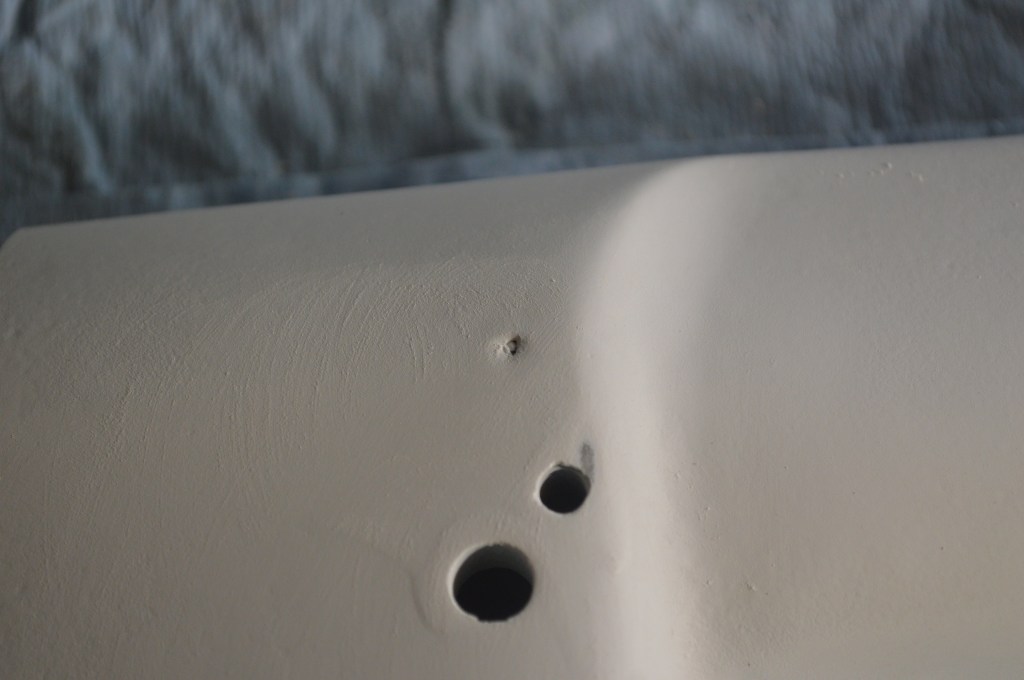
Sanding between coats of primer is a perfect opportunity to see and fix some small casting defects and inclusions formed when the machine was manufactured. A small bit of glazing compound fills these imperfections and they disappear under the final primer coat.
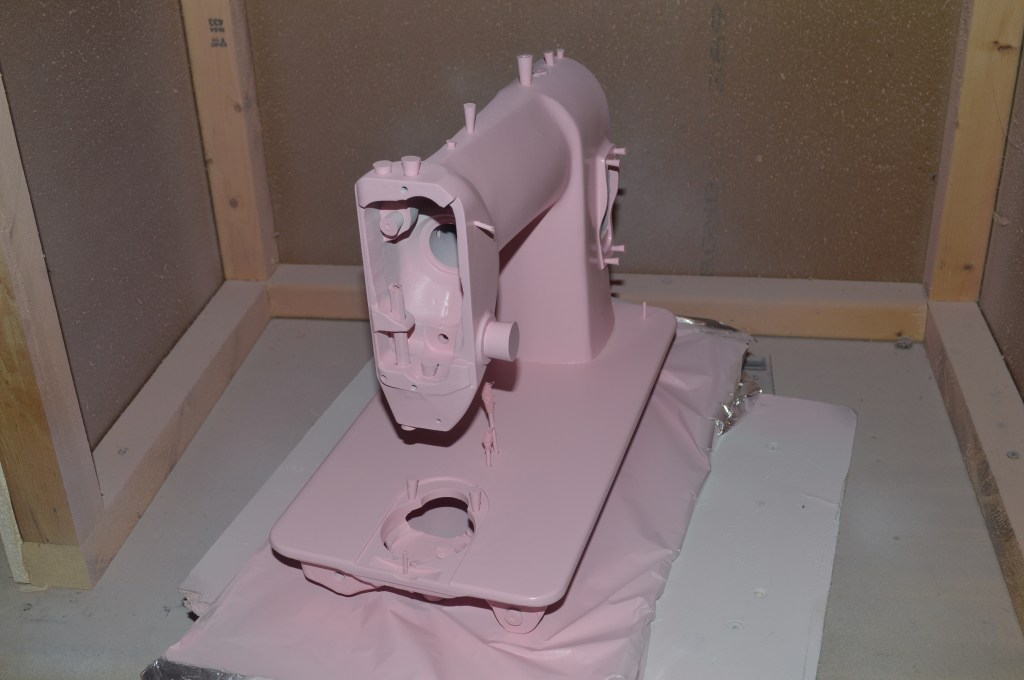
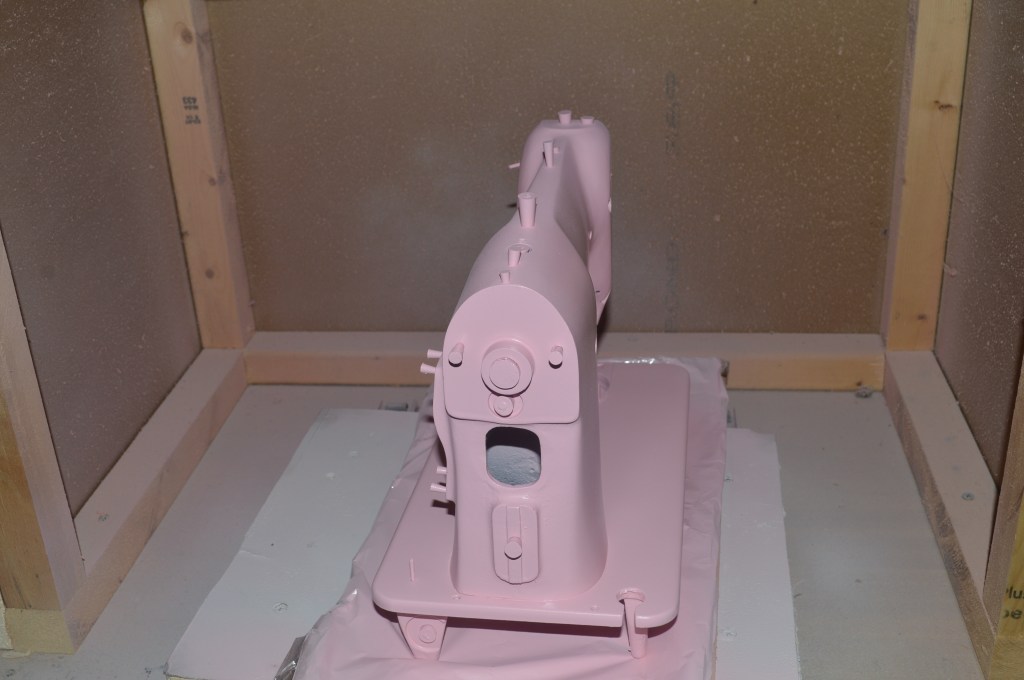
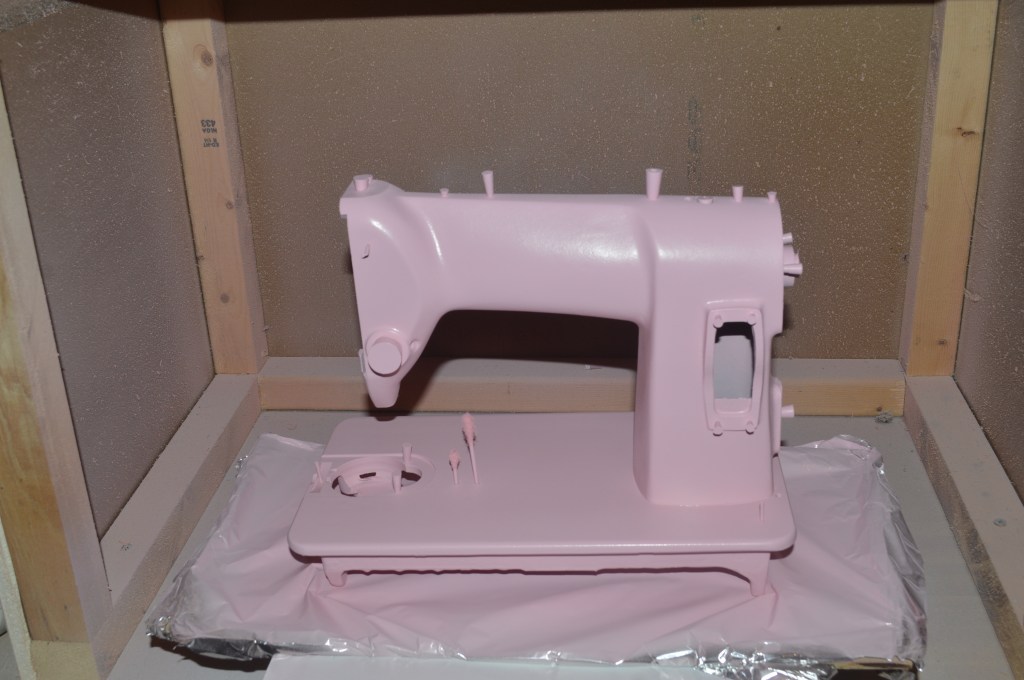
Now comes the fun part… paint! My plan for this machine is a 2-tone paint scheme. The body of the machine will be painted the predominant color. The nose plate, balance wheel, motor, light, and foot controller are going to be painted a contrasting color after they are restored. The body of the machine is painted first, so the sewing arm is reattached to the base prior to painting.
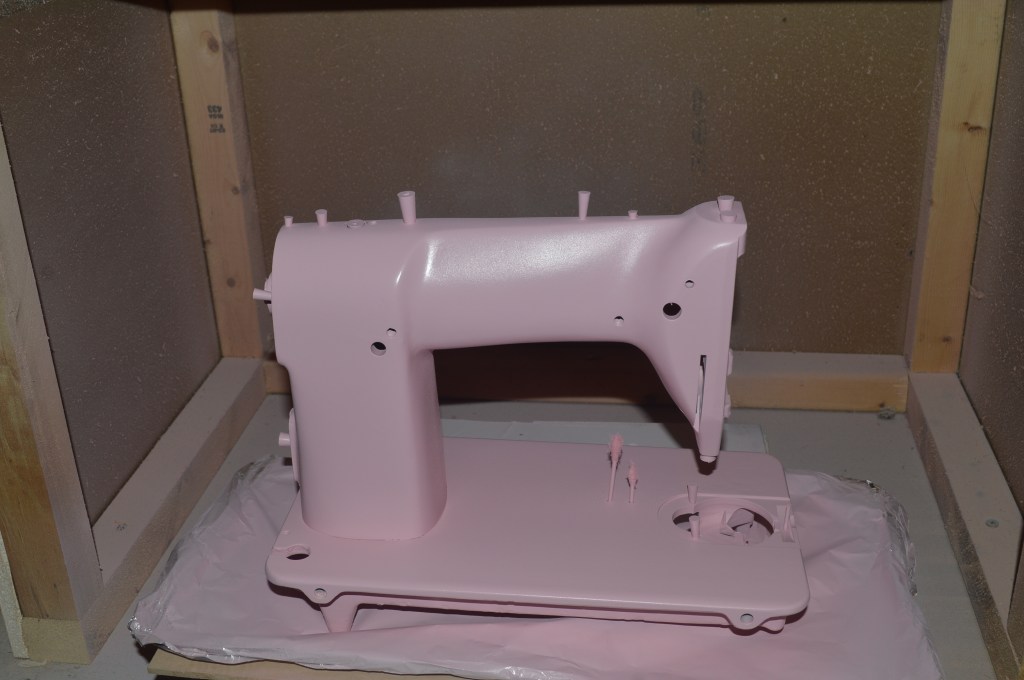
The body of the machine is taken to the paint box and the first four coats of the primary color is sprayed. The machine is beginning to look somehow “happier”… or maybe it’s just me!
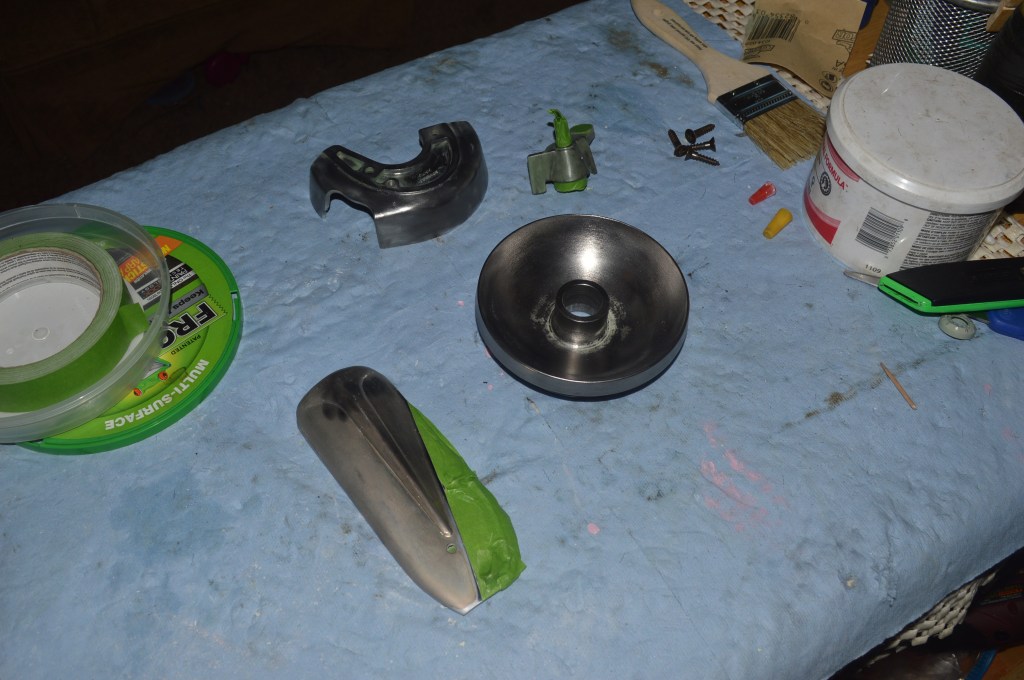
The machine will be set aside to allow for plenty of curing time. My attention is turned to the bobbin winder, the balance wheel shroud, the balance wheel, and the nose plate. They each need to be disassembled for restoration anyway, so in the process I stripped, prepped, and sprayed them with primer before being painted.
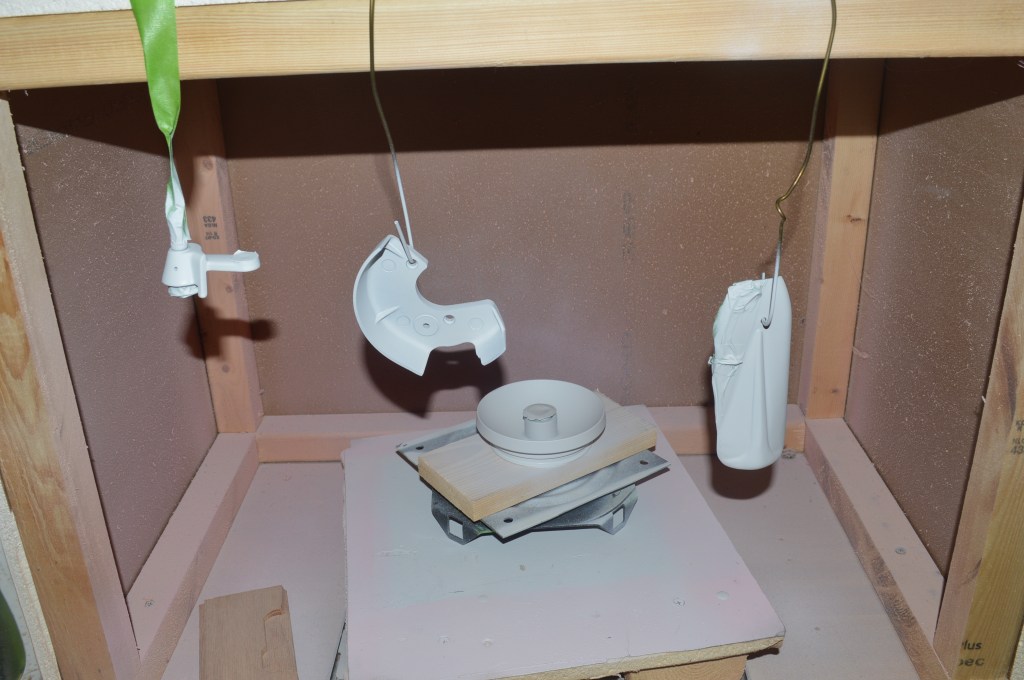
Because it is so important to allow for proper curing time, all of the pieces are painted and set aside. Three coats of paint are applied.
Next, a coat of clear polycrylic is applied to all of the painted parts. This provides a protective finish and allows me to handle the machine for reassembly. I chose polycrylic because it is crystal clear and very durable.
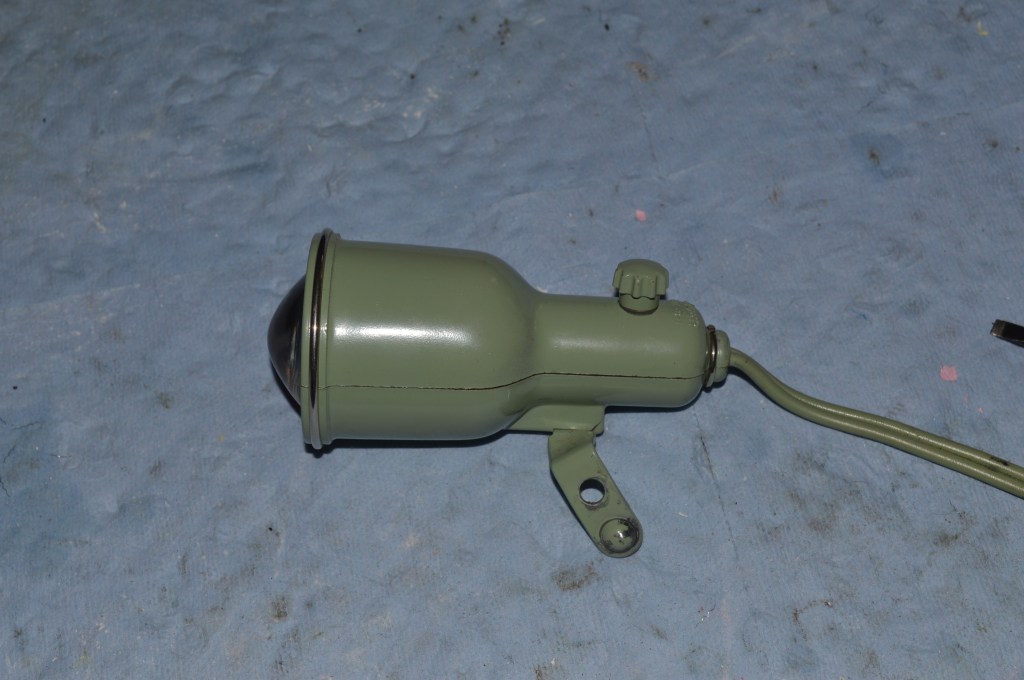
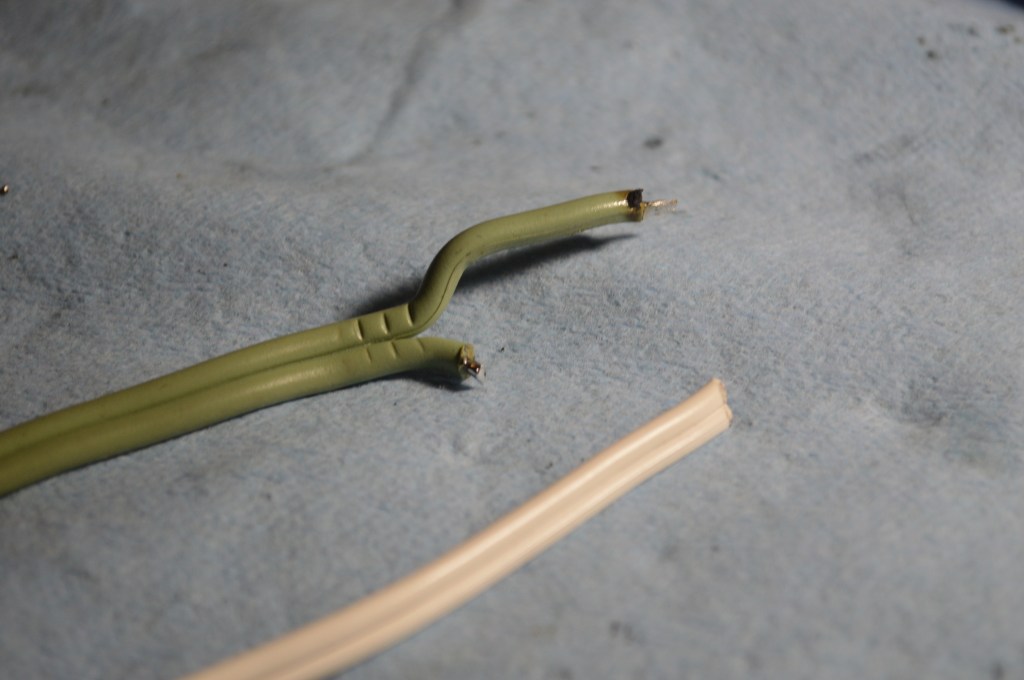
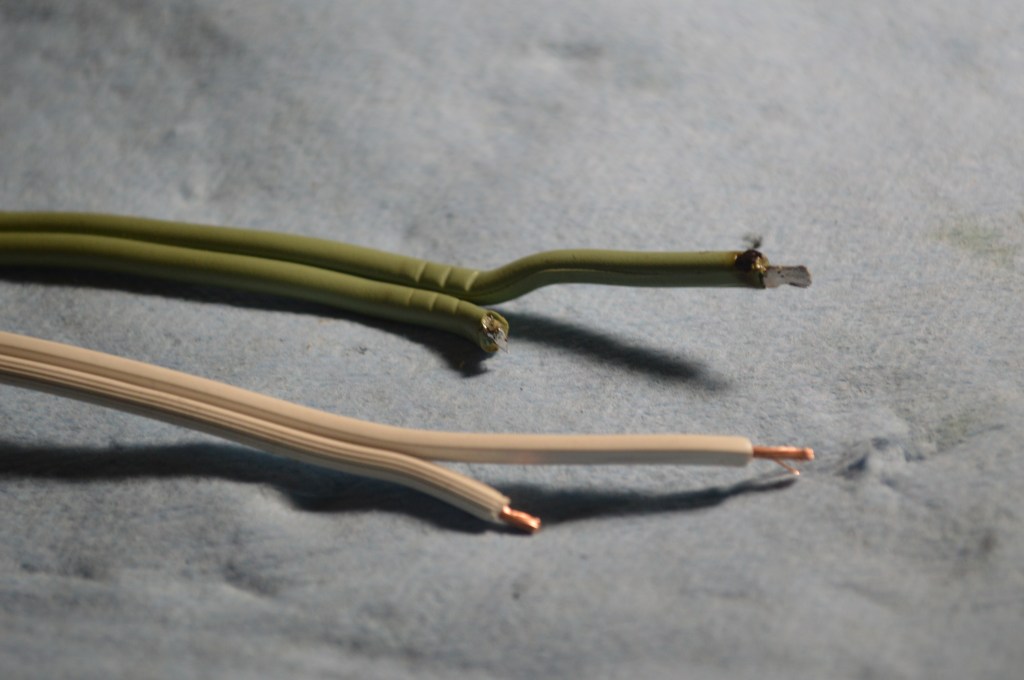
The following pictures show the light disassembled to replace the wires… before the light shroud was prepped and painted.
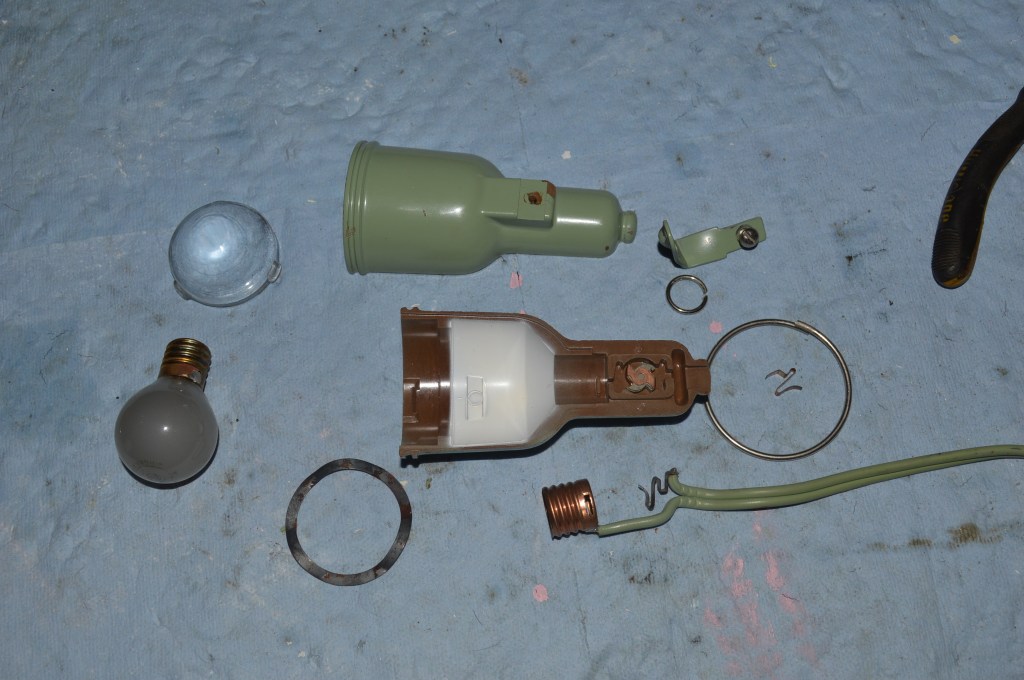
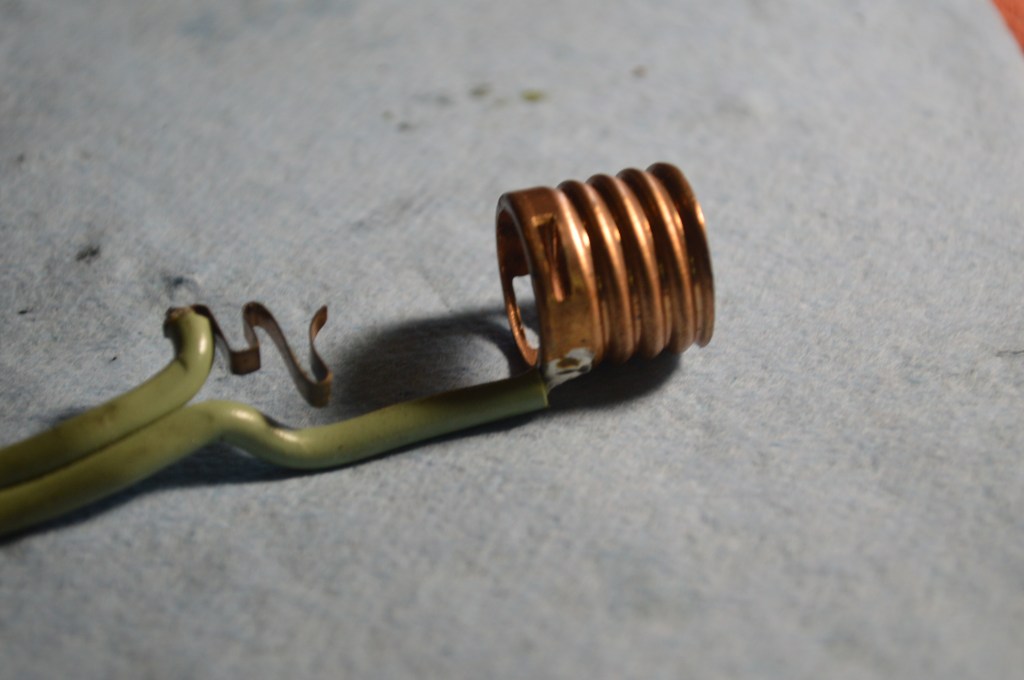
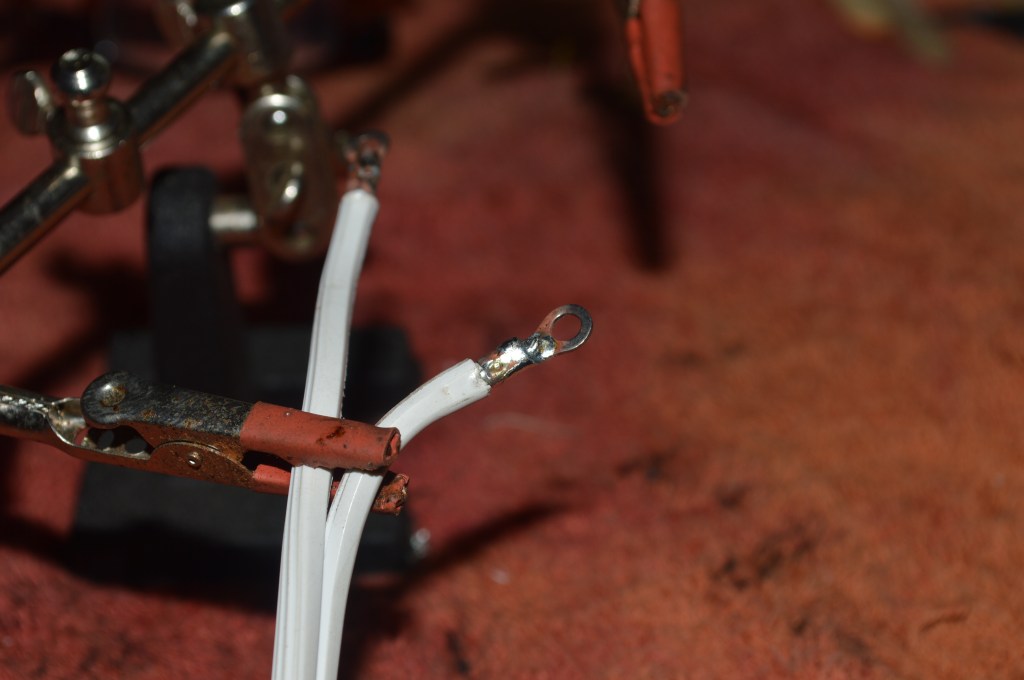
The old wire is de-soldered from the light components and the new wire is cut to length and profile of the old wire. The new wire is soldered to the components and the light shroud is reassembled.

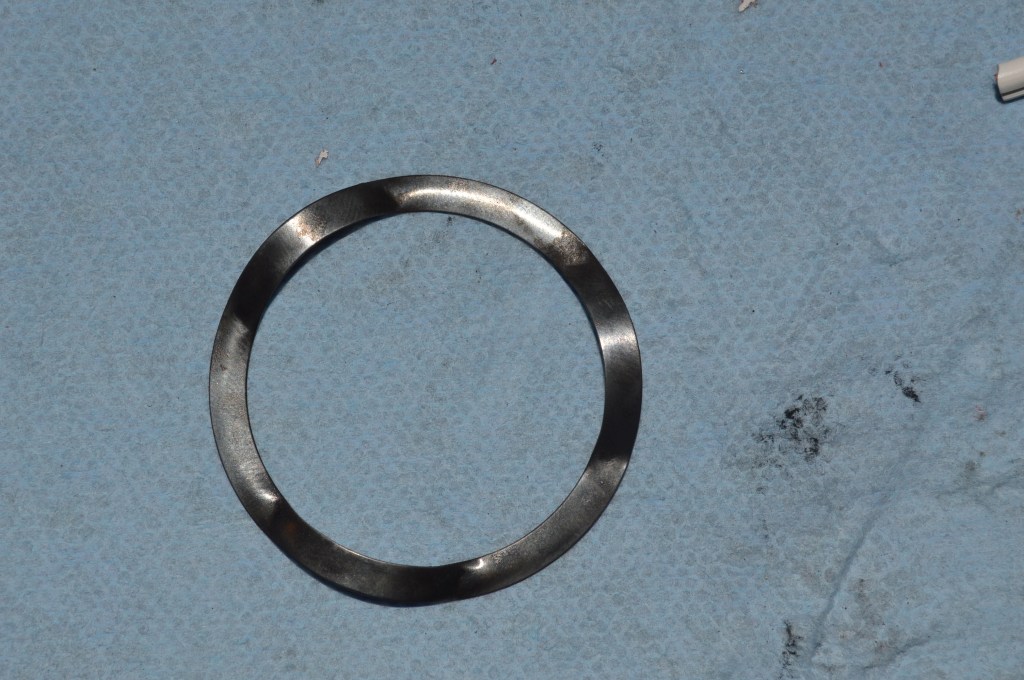
The bug eye light lens is held in with a deformed flat spring washer. Oftentimes, it is difficult to remove the lens to change the bulb because rust will form on the washer and make it difficult to turn against the lens. That is the case here, so the washer is wire brushed smooth. With this done the light is reassembled and complete.

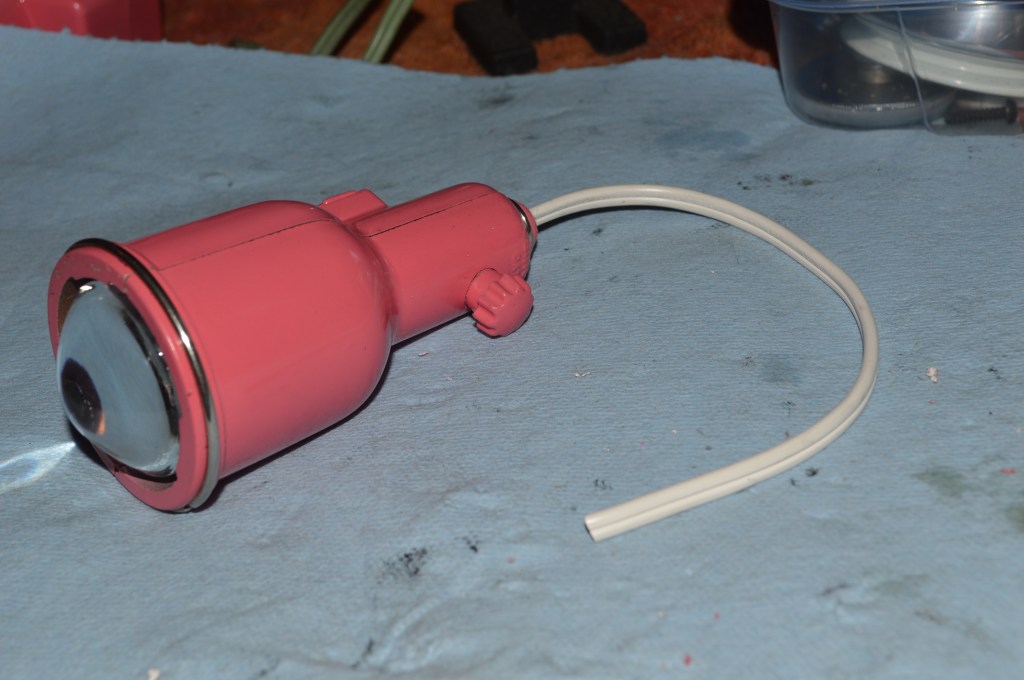
Final assembled Light
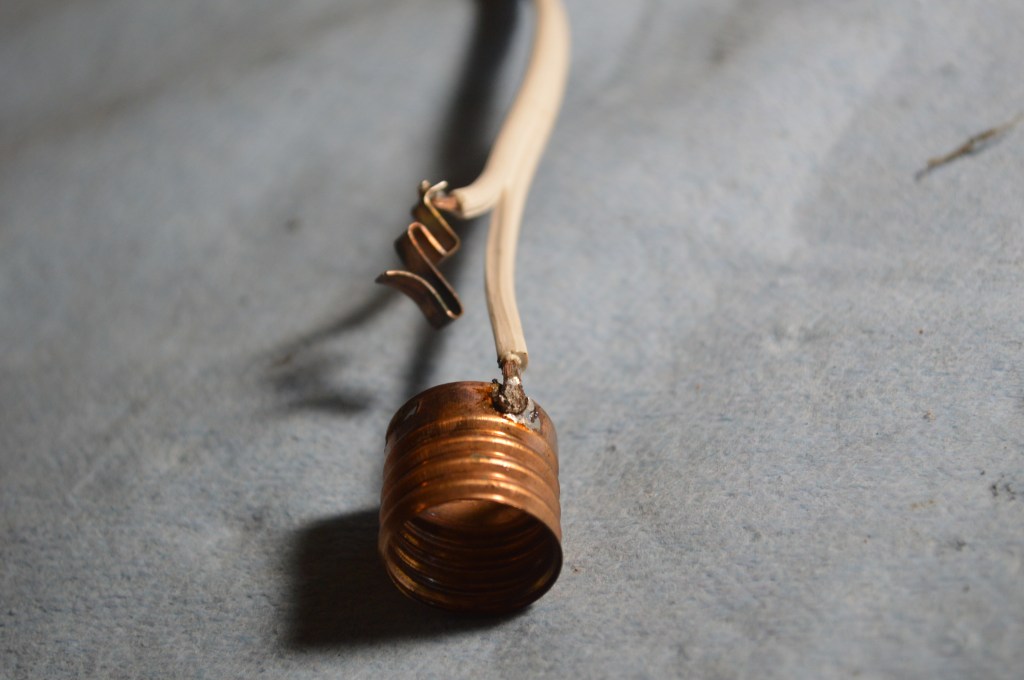
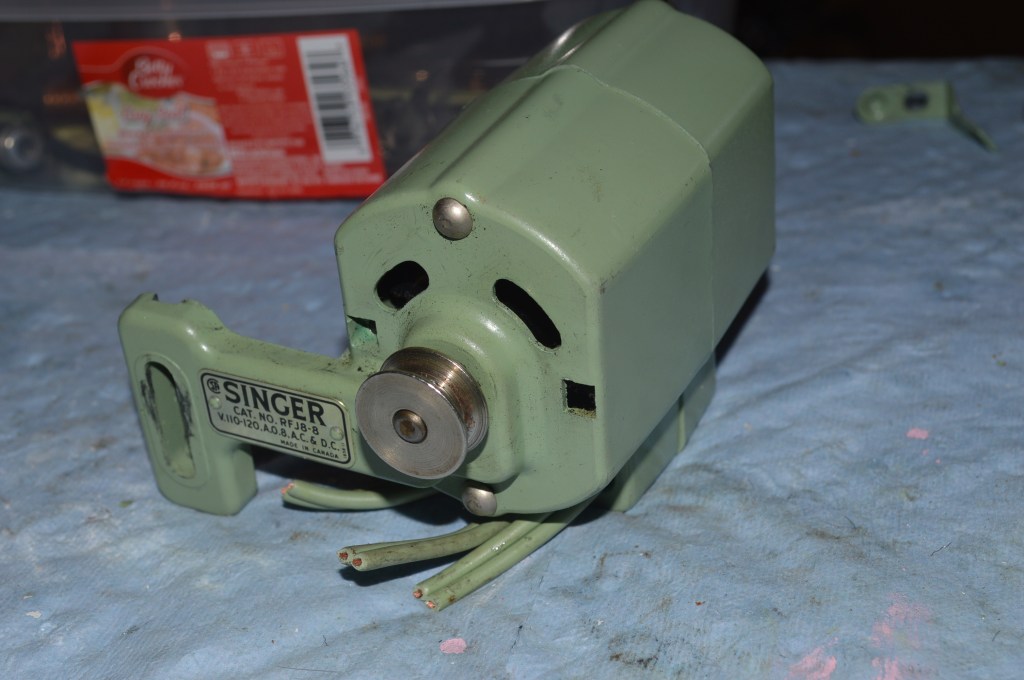
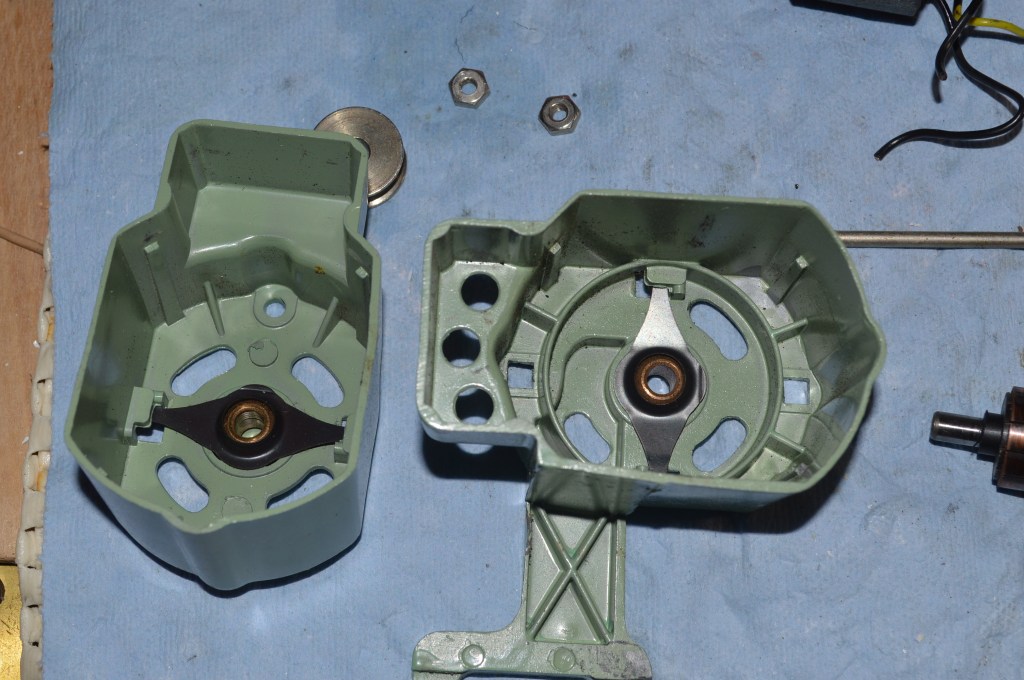
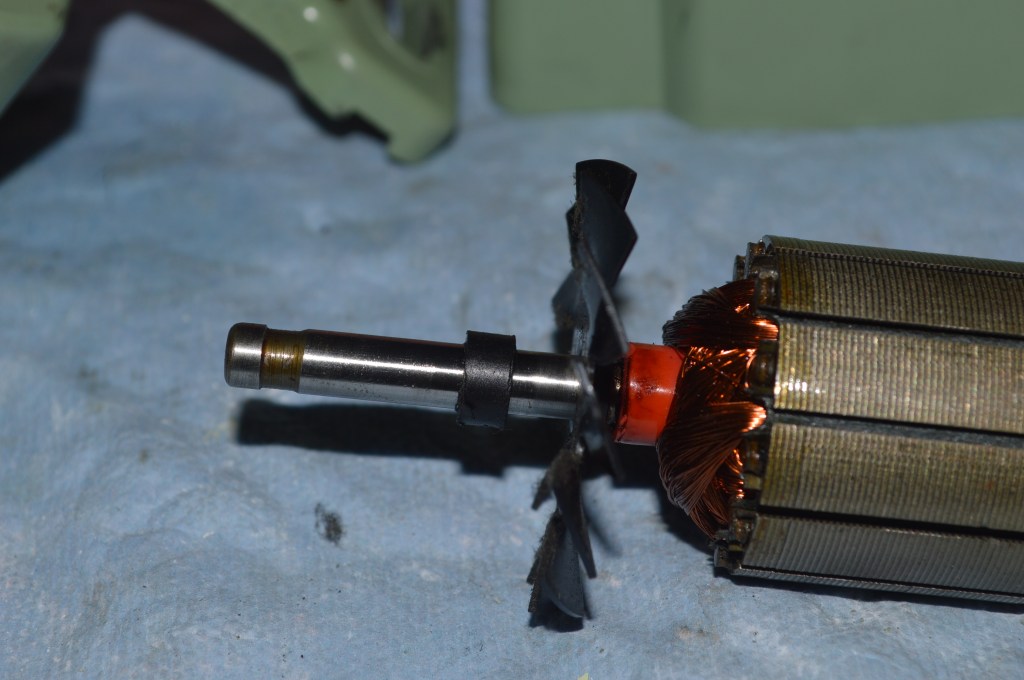
Restoration of the motor also requires complete disassembly. This motor has self lubricating bronze sintered bearings and they are removed and soaked in hot oil to restore lubrication (boiled in oil!). The commutator and armature shafts are polished, the brushes are reconditioned, and the wires are replaced. Like the light, the motor case was prepped and painted after disassembly.
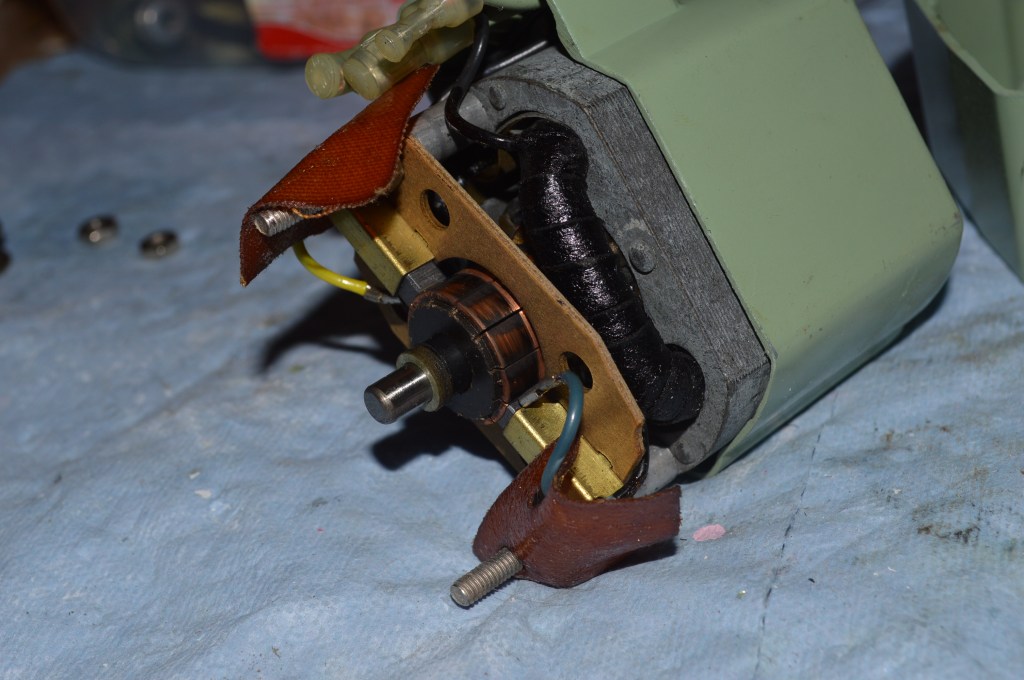
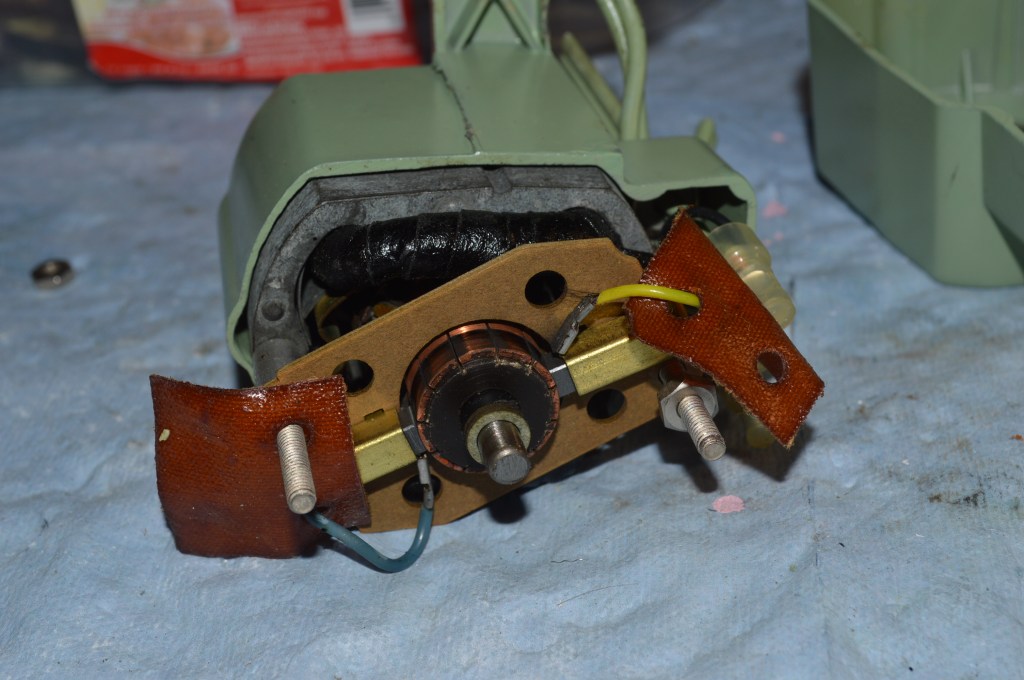
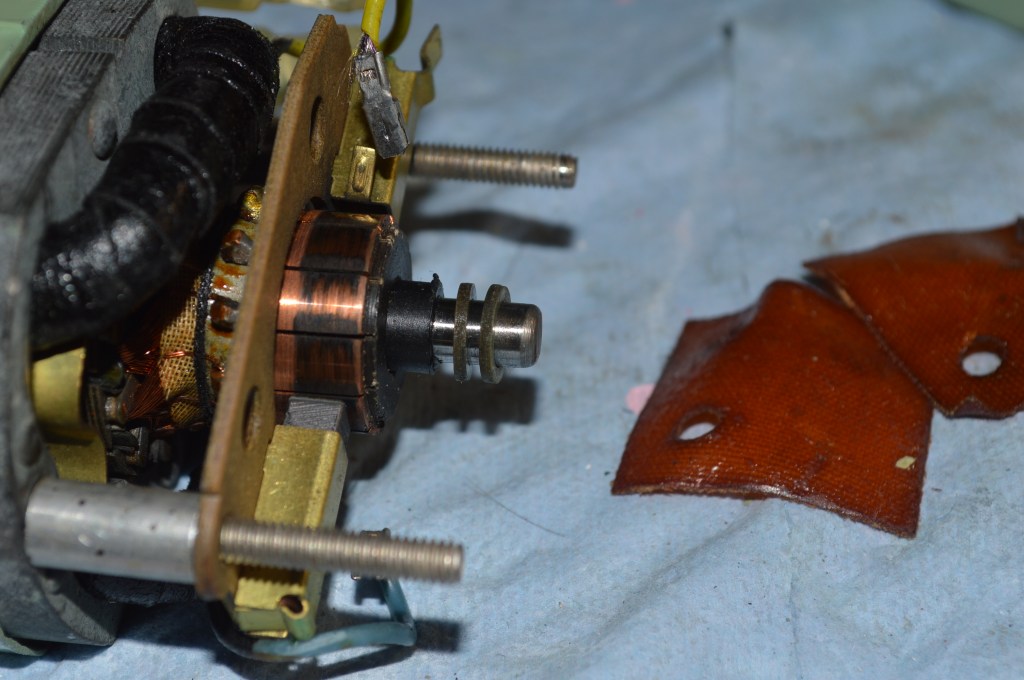

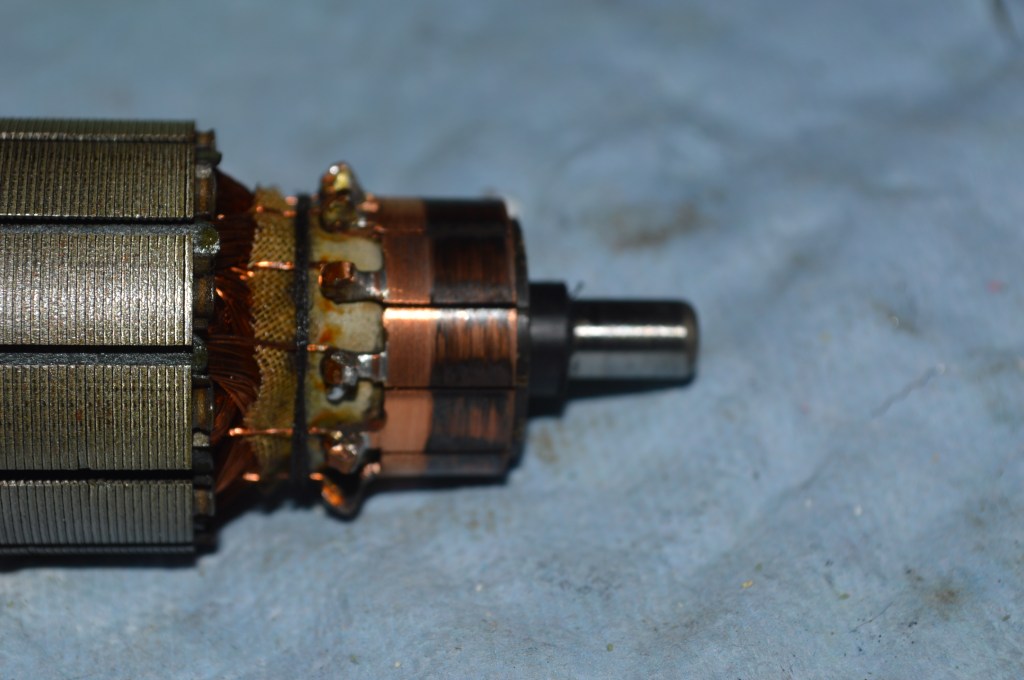
The brushes are reconditioned, the commutator polished and the shafts are polished, and the wires are replaced…

Bruses have curved faces 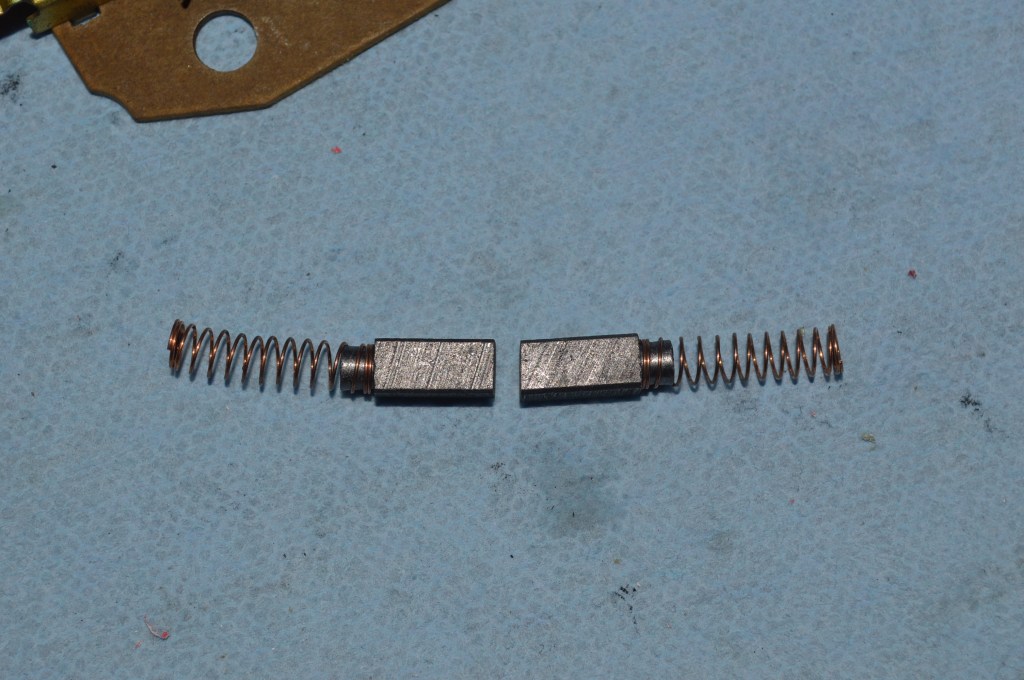
Brushes restored to flat faces 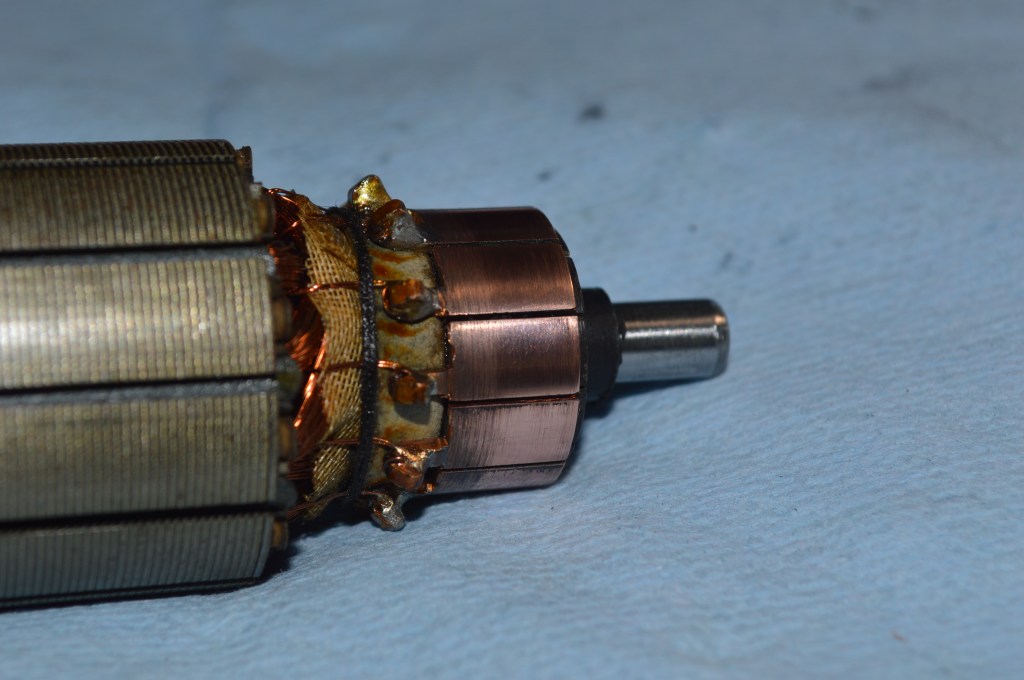
Commutator and shafts polished 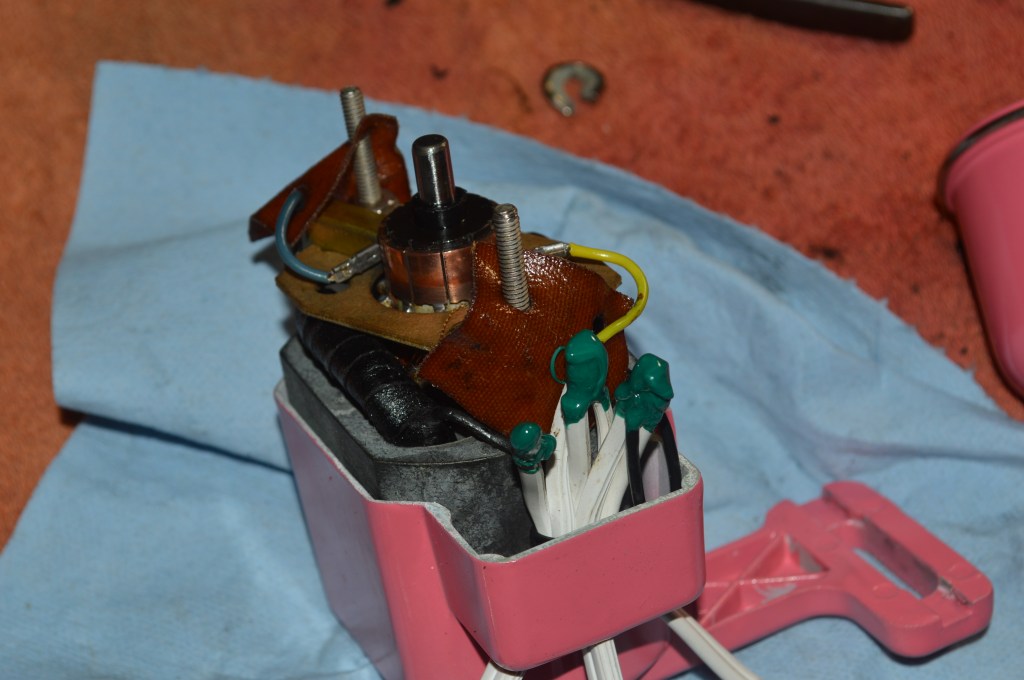
New Wires with Soldered Connections
Finally, the motor is reassembled and tested to assure it is running as it should.
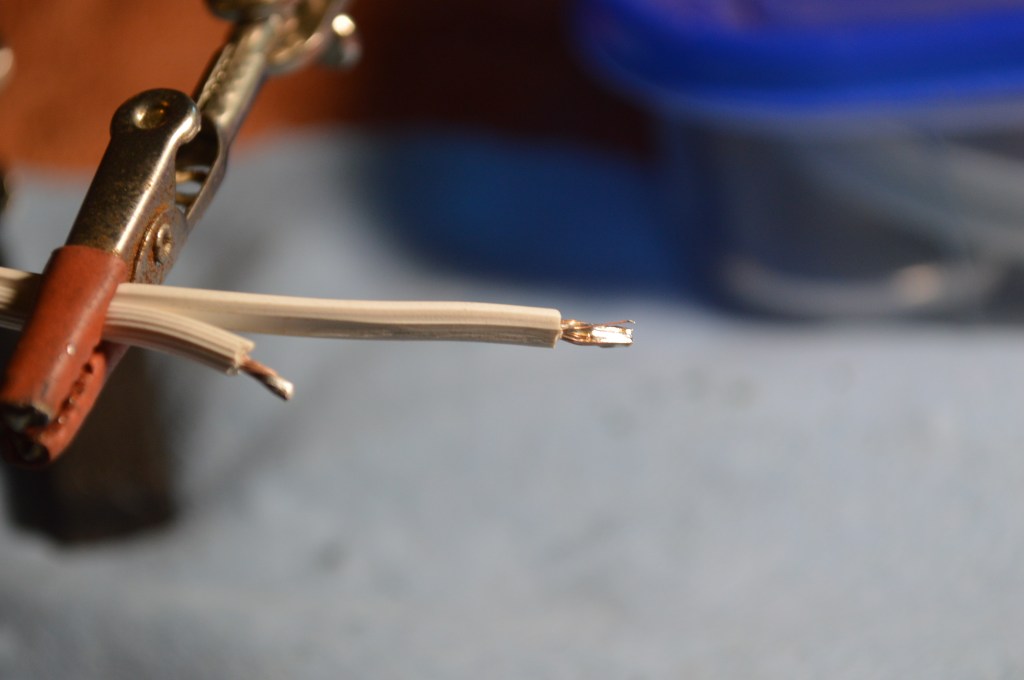
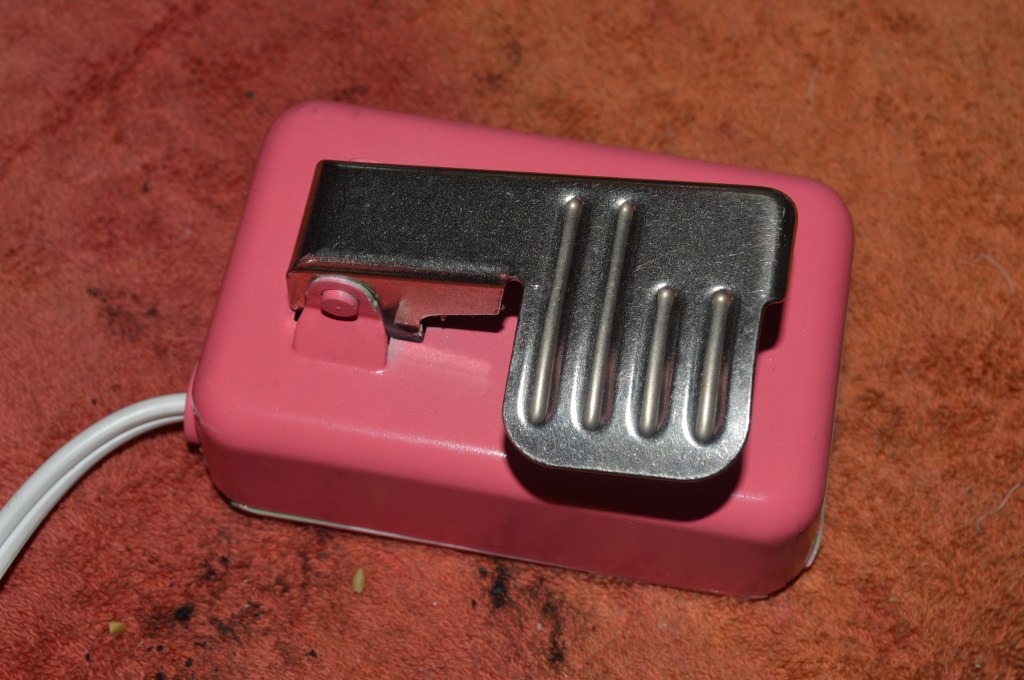
The foot controller is disassembled to clean and replace the wires… and you guessed it… prepped for painting!
Replacing the wires is a simple matter of soldering new contacts to the new wire and attaching them to the carbon pile controller inside the controller case. Once done, the controller is reassembled.
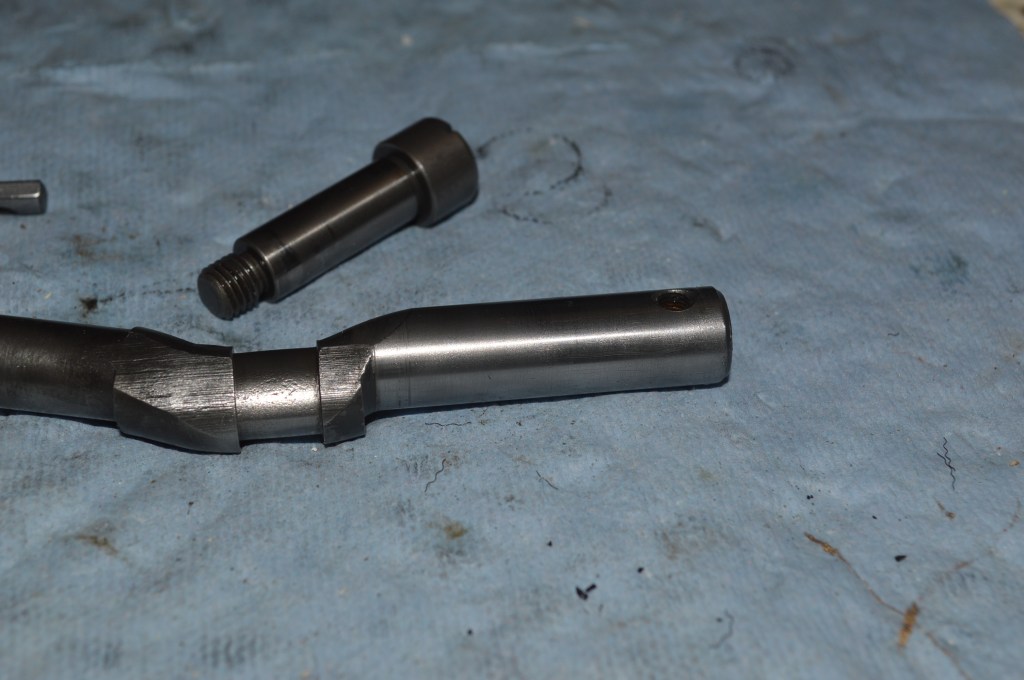
The motor, light, and foot controller restoration is now complete and ready to be assembled to the machine. This is still a ways off, but the upper arm shaft is reinstalled to allow the balance wheel to be re-installed.

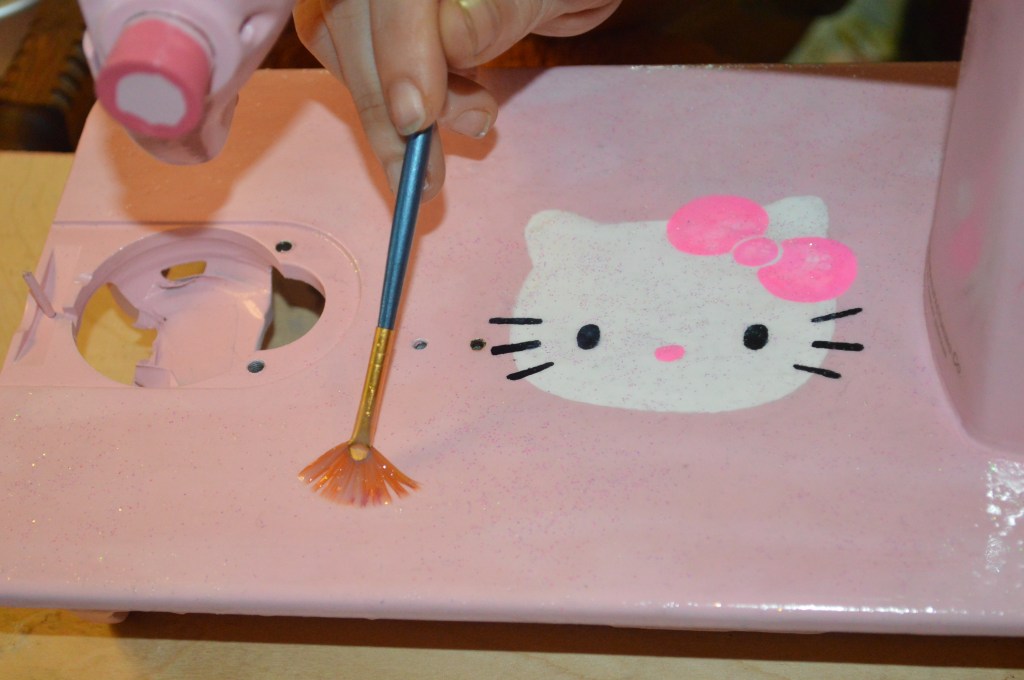
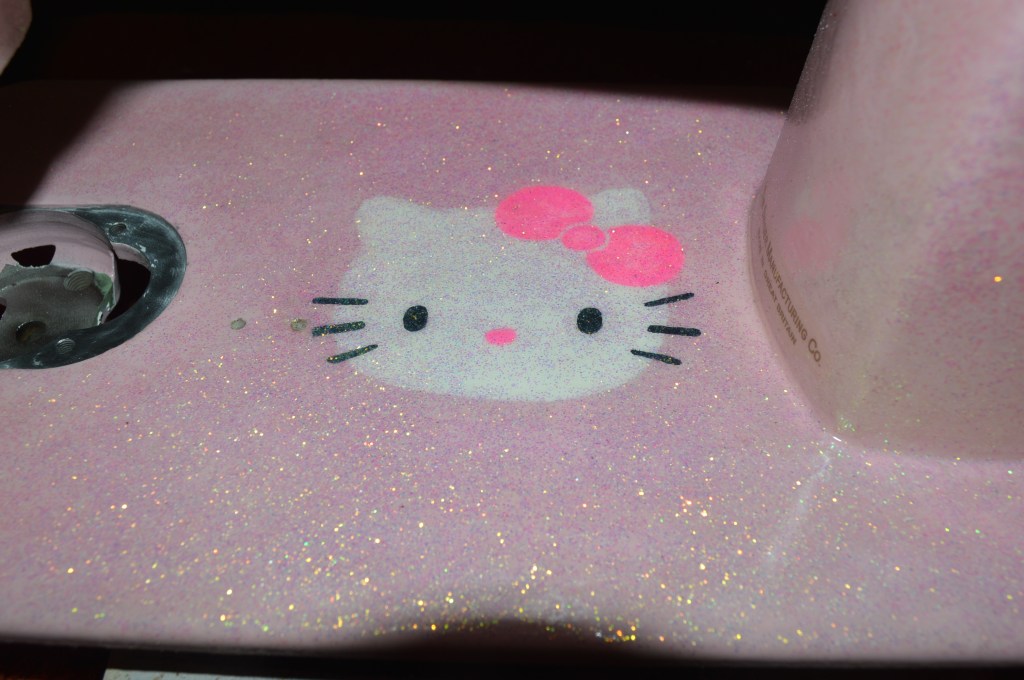
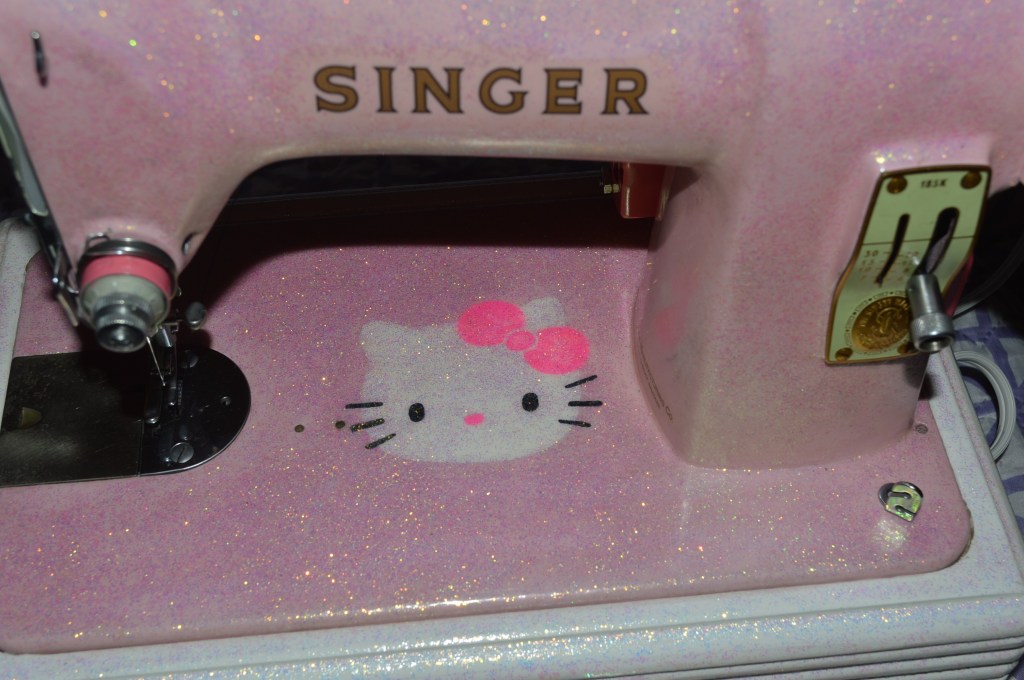
The machine has had a good base coat of polycrylic in preparation of applying the new decals… but I want this restoration to have an added special touch. This requires some hand painting rather than applying a decal. Since I have the artistic ability of a clam, my daughter adds her artistic talents and imagination to the project… I think it is a nice touch and truly adds a certain personality to the machine. Can you guess what it is? Hint… it is upside down.
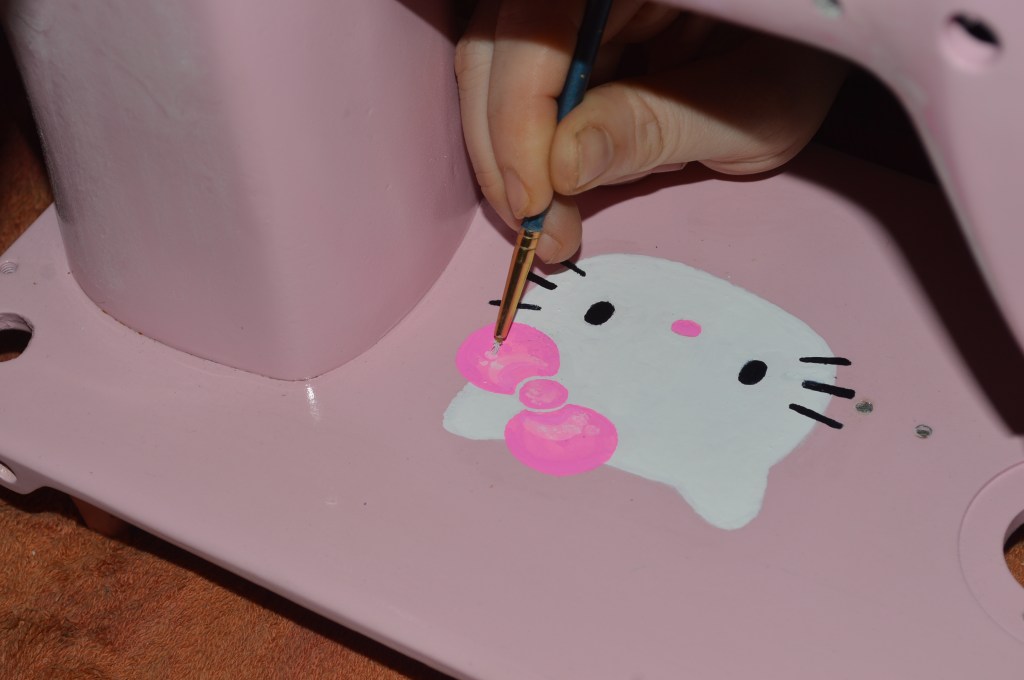
I can’t be certain but I suspect that’s what the “K” in 185K means, and this project is coming together nicely. Leaving the machine to cure in preparation of applying the decals, the cosmetic portion of the restoration (hmmm. at this point, can I really call it a restoration?) is in full swing.
The decals are applied and the decal edges softened to “blend” into the background. They are allowed 24 hours to completely dry before the next step.

Now, here’s the thing about artists… there is always an idea in their head waiting to be explored. What does one do? Hmmmm… let’s try some mother of pearl glitter!
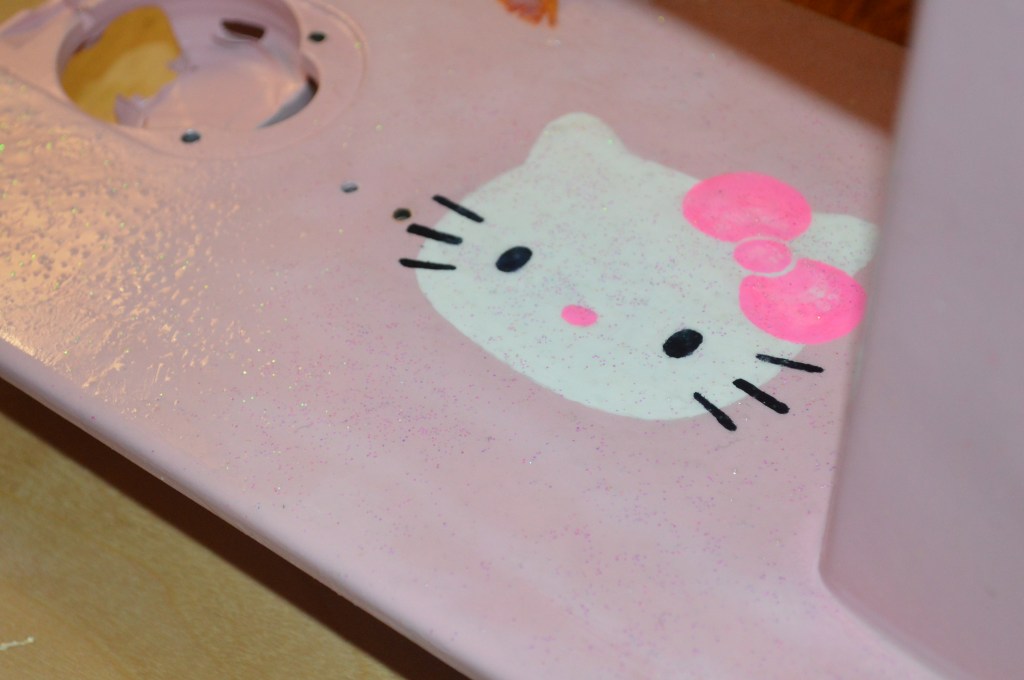
To me, glitter has always been pretty scary stuff, It always seems to end up everywhere, but here it seems to be somewhat contained.
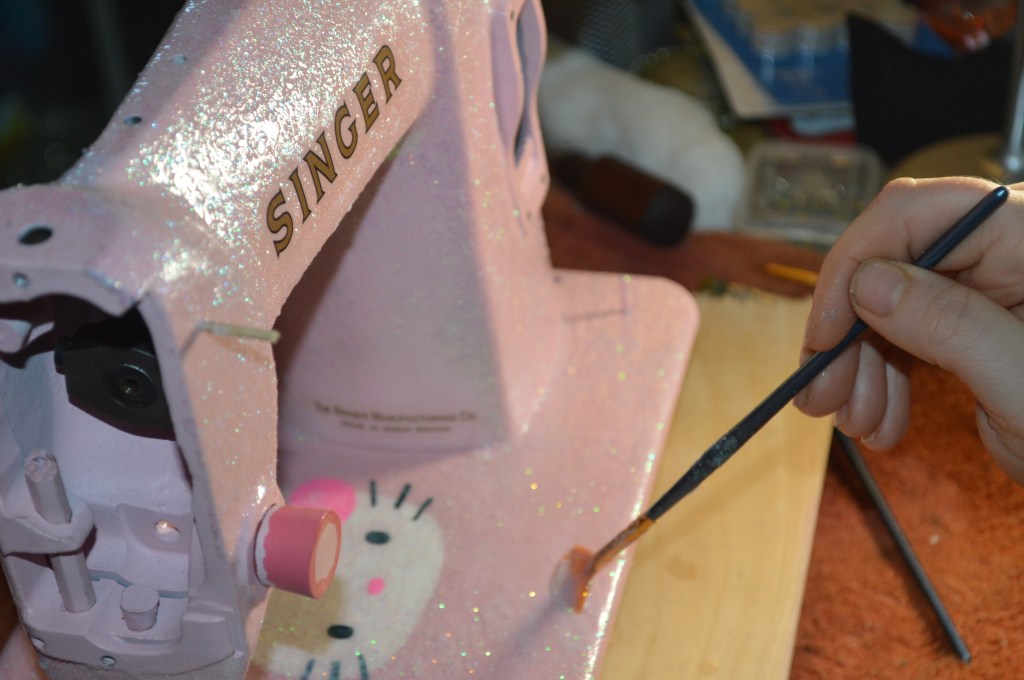
The glitter creates quite a buildup of polycrylic that must be sanded to a smooth surface. I quickly discovered that this required applying more polycrylic to fill in the glitter dimples and then more polycrylic to allow sanding high spots without removing the glitter. No problem, as it is only VERY time consuming… but there is plenty of time in my days lately anyway.
The process to get a smooth surface turned out like this… apply a coat of ploycrylic, sand with 220 grit sand paper to flatten the peaks, apply another coat of ploycrylic, sand with 220 grit sand paper to get a medium smooth finish… apply another coat of polycrylic, sand with 220 grit paper to get a nice smooth finish. Now it is ready to polish.
Here is the machine before starting the final finish polishing…
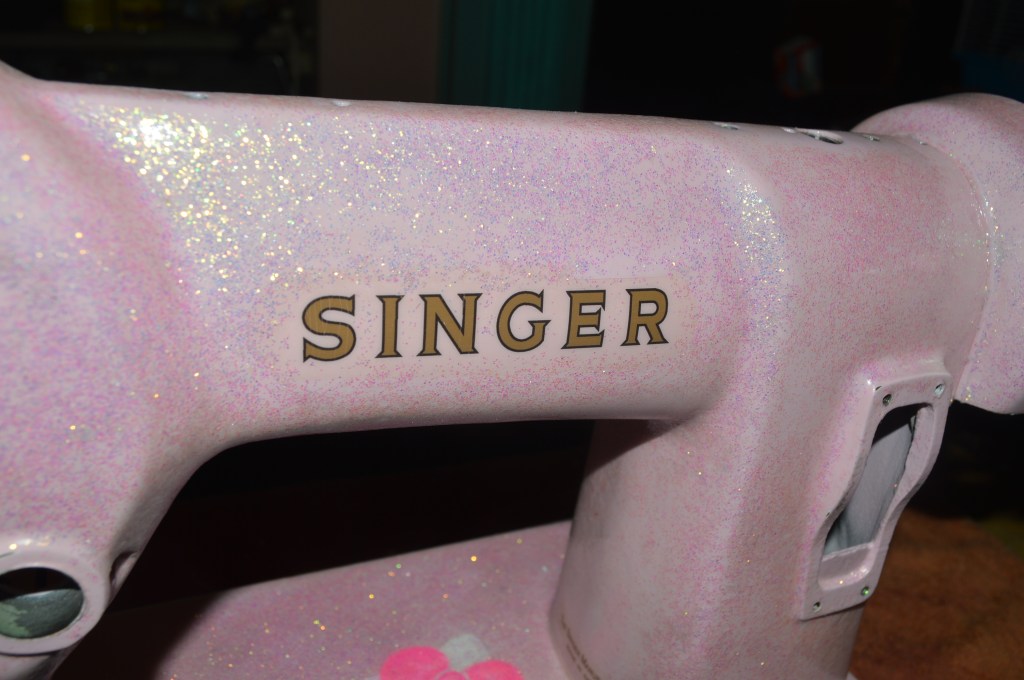

Next, the finish is wet sanded with different grades of sandpaper (1000, 1500, 2000, and 2500 grit). The final finish will be achieved by glaze polishing. The surface before the fine polish sanding is pretty smooth and glossy, but starting off with 1000 grit sandpaper will finish the smoothing, and follow-up polishing with 1500 thru 2500 grit will lead to a mirror finish… I want the Kitty to shine through! After sanding, the machine gets two rounds of glaze polishing, the first with a high quality glaze polish to get a great smooth finish and shine, and the second with a finer glaze polish to get a great smooth finish and beautiful shine.
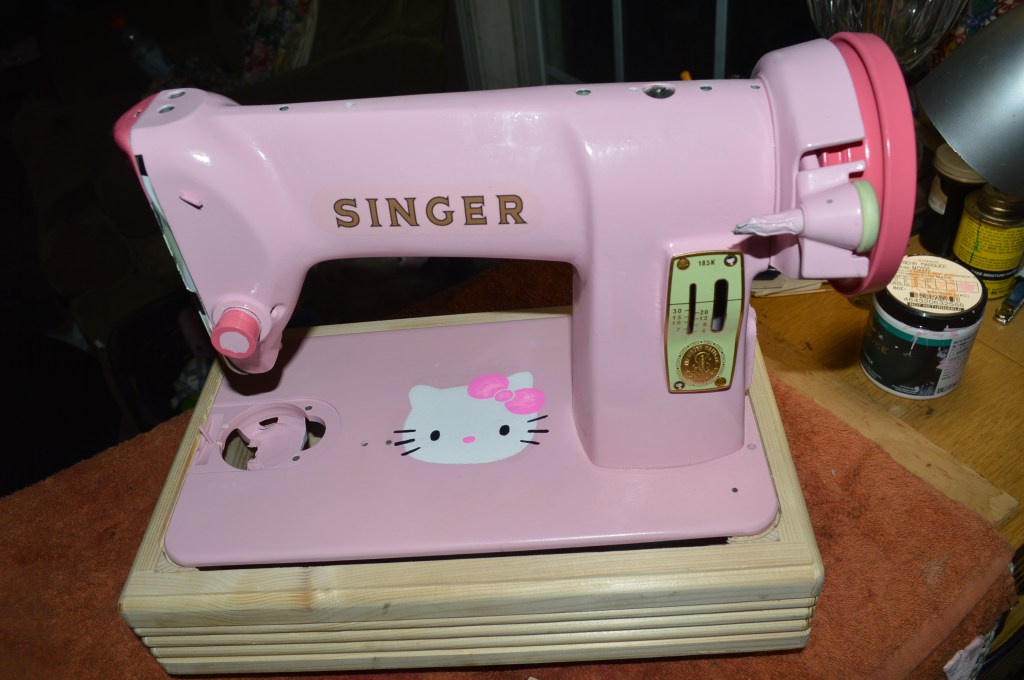
Now that the cosmetic finish is achieved and the finish has cured, the sewing assemblies are ready to be reinstalled. Everything set aside earlier is now reassembled. I decided to change the bobbin plate and needle plate to a chrome plated finish. The original is brushed stainless steel, but I like the “shine” of the chrome. The original spool pin is plastic, this was changed to a chrome spool pin for the same reason. The machine is adjusted, the timing is set, and the final steps are ready to be taken… aside from sewing well, the machine needs a complimentary base… I think white is a great choice! And guess what… there will be glitter!
Take a look and see how it all came together…
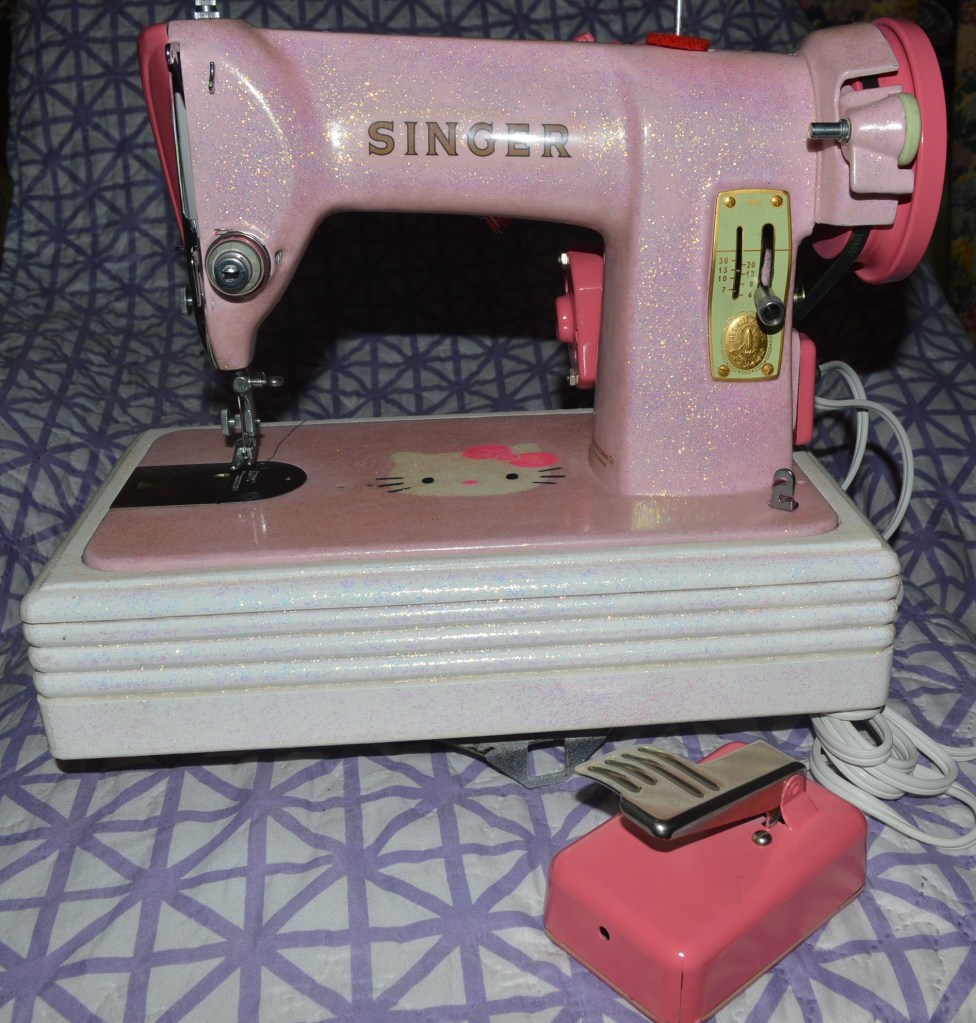
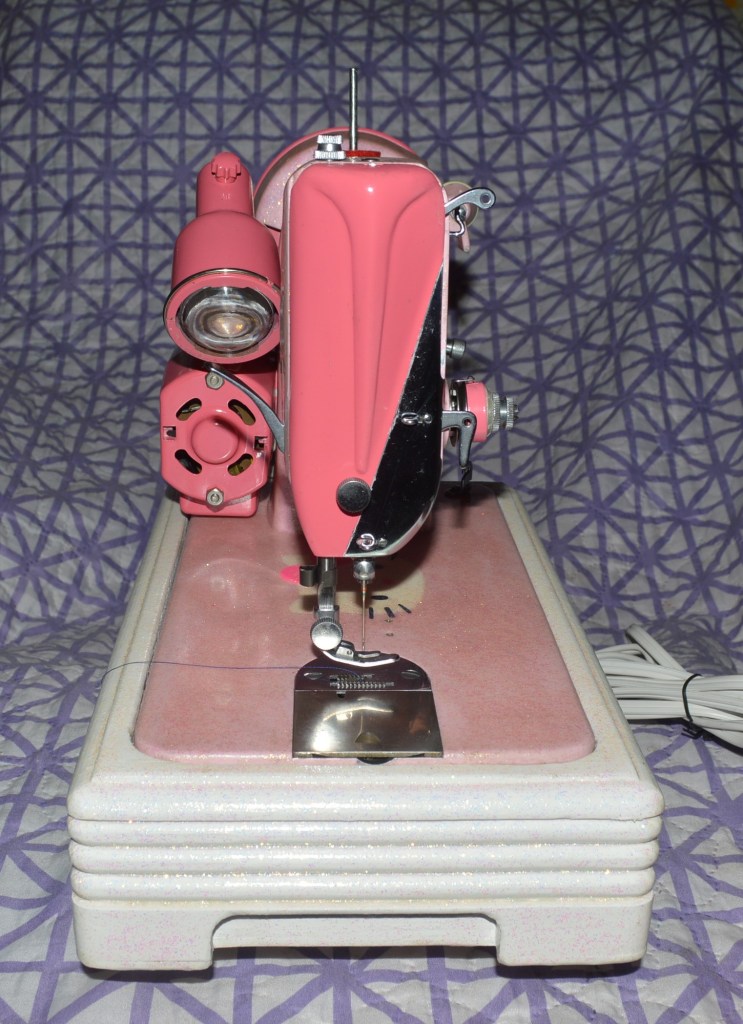
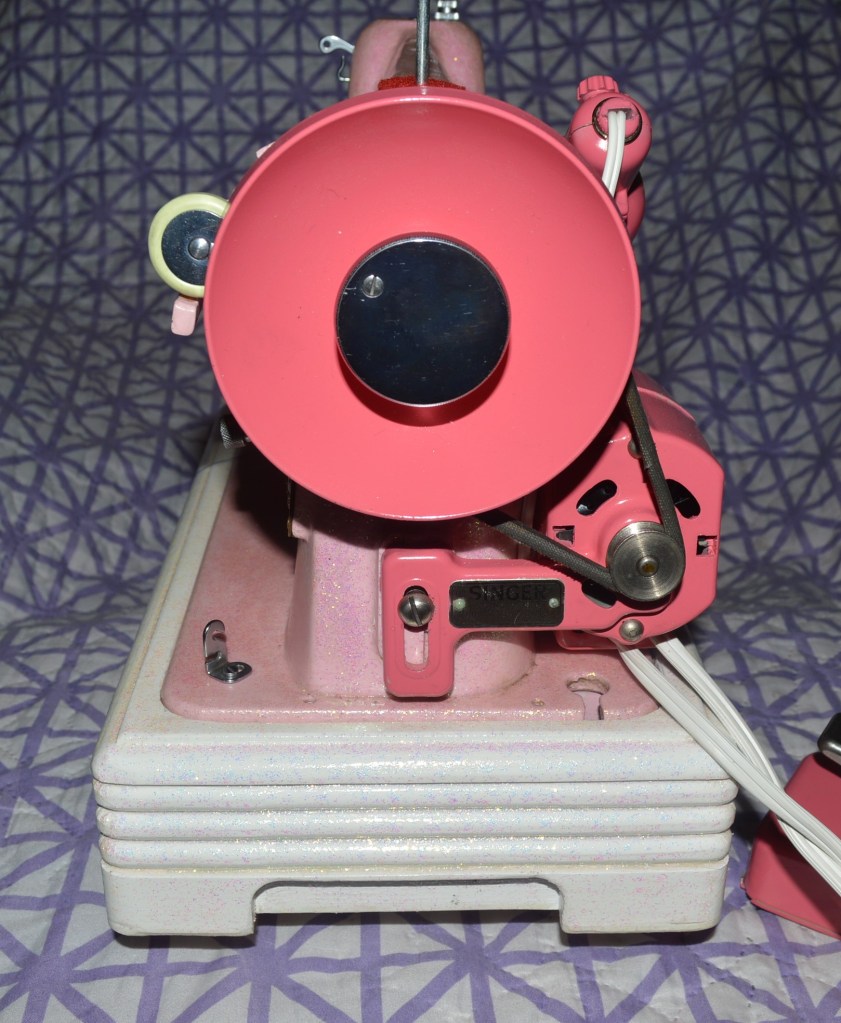
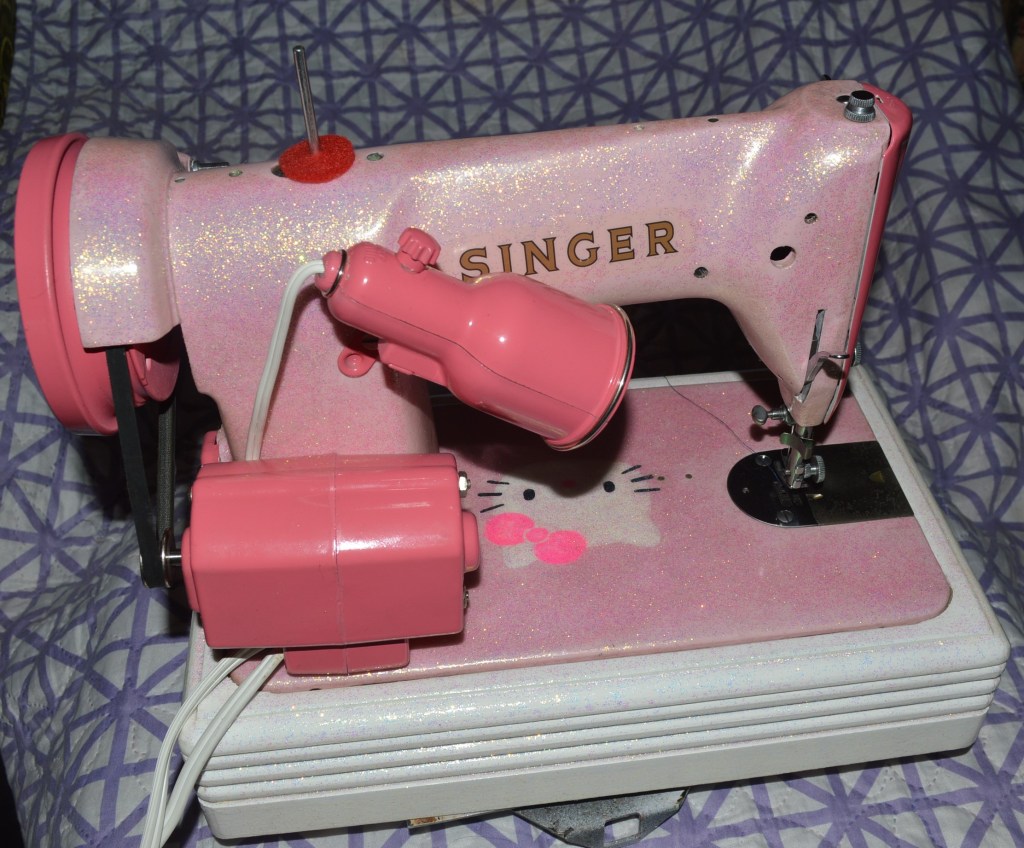
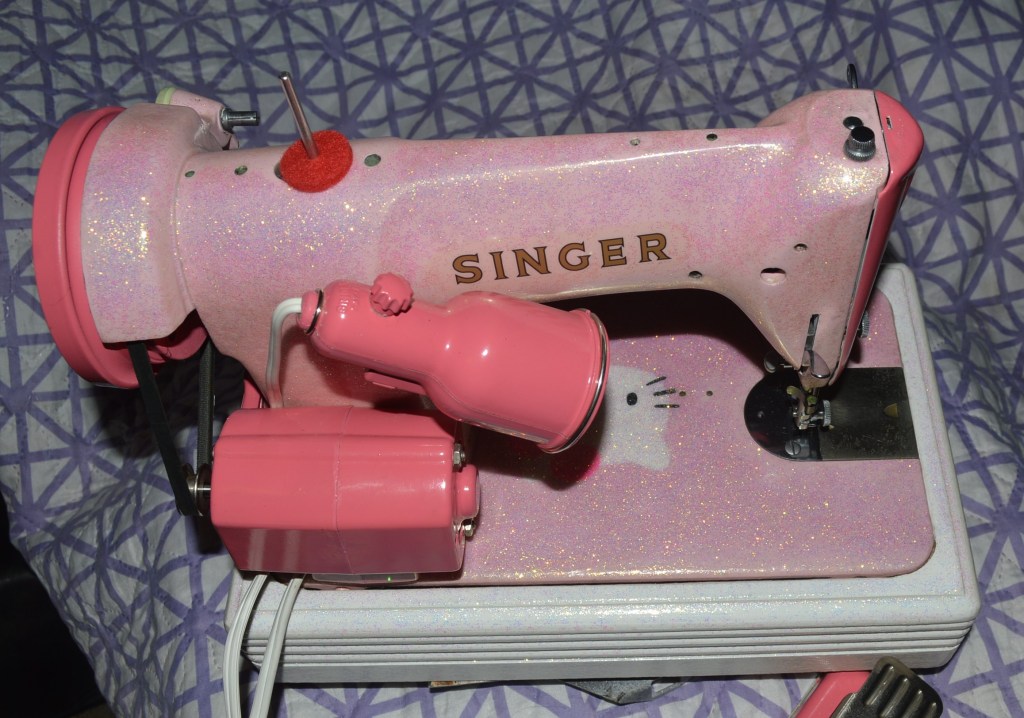

Ahhhhh… I feel better now… Kitty is finished and it was a fun restoration. My motivation is restored as well! Consumer Alert: Don’t let looks fool you. She might look cute, but looks are deceiving. She is still a Singer 185K and a very powerful and capable machine.
I can’t wait to start my next restoration… I think I just heard a Singer 15-91 crying out “me next!” but… it will be black.
If you like what you see please visit our Etsy store at https://www.etsy.com/shop/pungoliving, and see our other restored fine quality vintage sewing machines. If you have any questions, please contact Lee at Pungoliving@gmail.com.
Thanks for reading and tell me what you think!
Lee

I think this is fabulous! Fun, fun, fun!
LikeLike
Beautiful! How in the world did you get the little snap ring off the end of the light? Kitty is going to make some magical memories for someone.
LikeLike
Hello Jeffery,
Thanks for your encouraging comment! You ask a great question… The small snap ring is very difficult to remove. It needs to be pried away from the fixture with a thin blade screwdriver while turning the light fixture. Getting the small snap ring back on is even a bigger challenge… patience and concentration ultimately pay off!
Have a blessed evening,
Lee
LikeLike
Thank you very much indeed for the tip!
I’m in the process of restoring a very beaten up Singer 15-90 and the small snap ring on the end of the light had me stumped. A small, thin blade screwdriver did the trick. The ring was so closely fitted that I had to look at the gap under a magnifying glass, and lo and behold, the ends of the ring are cut at about a 45 degree angle. Exactly enough to fit a screwdriver in and pry it off with a bit of work and great deal of patience.
Most important tool in the tool box: patience.
I’ve looked over your pictures of Kitty a few times now. Magic. Plain and simple
Stay safe Lee
LikeLike
Fun fact: “Hello Kitty” is not a cat. According to her creator, Hello Kitty is a British school girl. It seems that her creator was puzzled as to why anyone would think differently. Clearly, Japanese culture is not the same as North American!
LikeLike
Hello Jeffery,
Good to know! I have another 185J that I am planning to do something special with for my Granddaughter. I’m thinking Sakura!
LikeLike
Hi!! I recently came in possession of this machine and would love to talk to you about it— please email me!! it’s is work of art and your love is evident in ever micro meter of the machine.
LikeLike
Good morning Riley,
Please email me at pungoliving@gmail.com and I will be happy to answer any questions you have.
Thanks!
Lee
LikeLike