
Wow, I haven’t posted for a while but I just can’t get this topic out of my head. Maybe because I have been getting more interest from folks contemplating a restoration on their sewing machine and I am worried they don’t know this very important fact.
To me, this blog is like putting a message in a bottle and tossing it in the ocean. I just hope somebody finds it in time to help. So, if you got this far and read a little farther, hopefully I can keep you from making a huge and un-recoverable mistake when you are disassembling your sewing machine.
Aside from telling folks to only use quality hollow ground screwdrivers to remove any screws in a sewing machine (an inexpensive gunsmith screwdriver set is perfect), there is one screw in your machine that is different from all of the others.
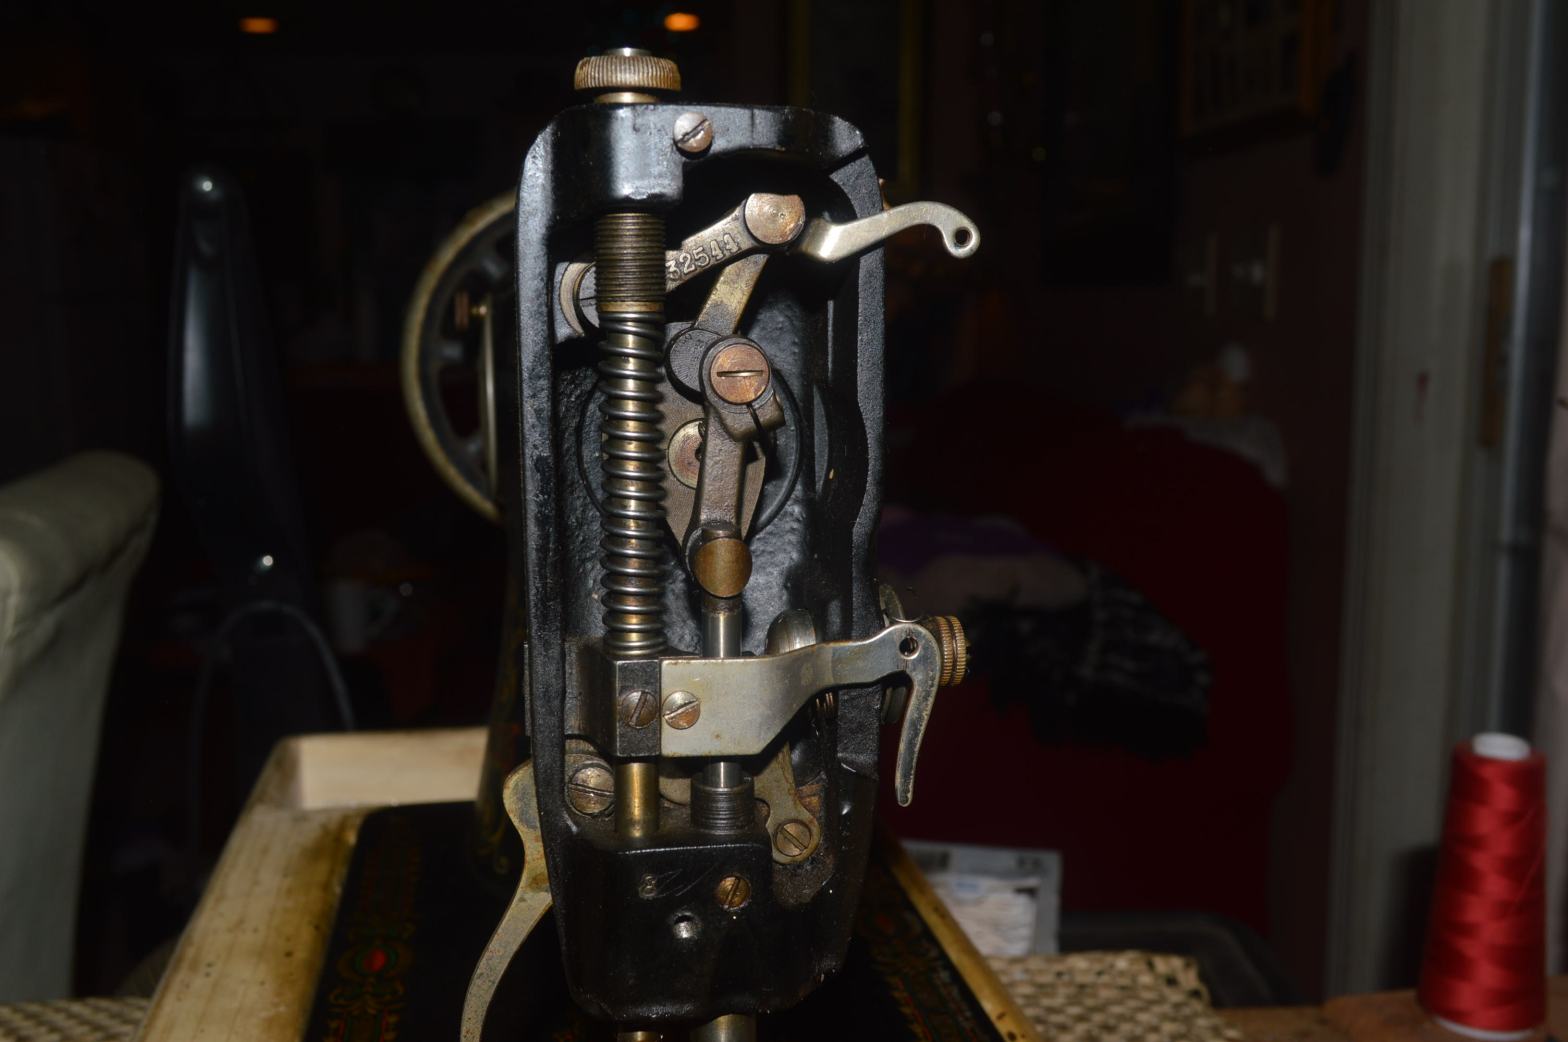
Here is a picture of it…

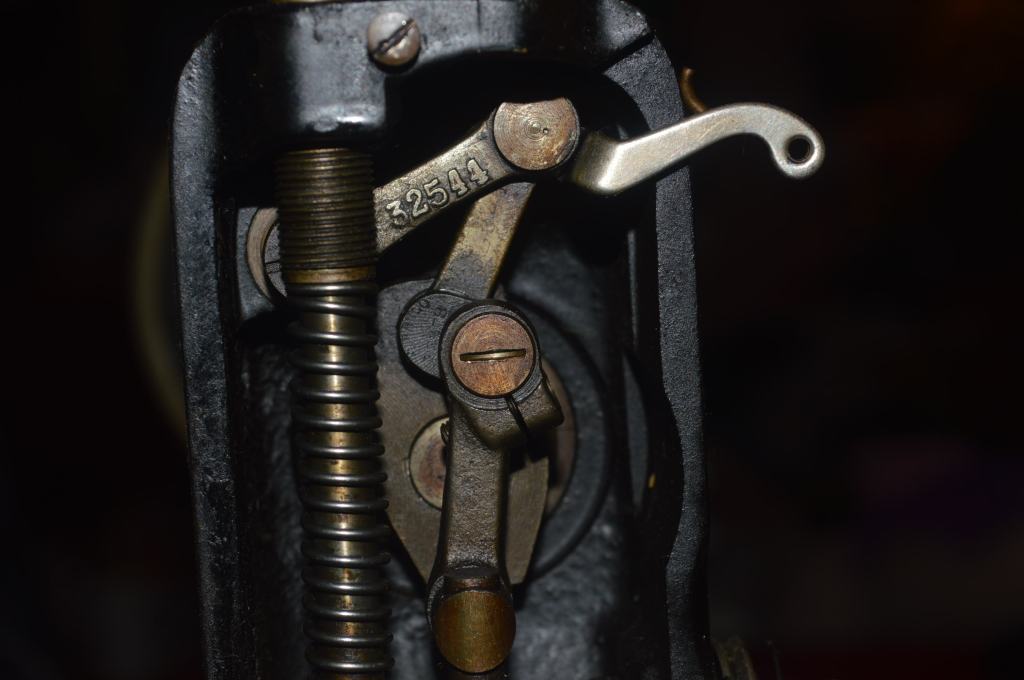
How is this screw different? It is different in that it is a right-hand thread screw. A right-hand thread screw is one that has its threads cut in the opposite direction from a left-hand thread screw. Left hand threaded screws are predominant in practically every clamping application on the planet and you would have to look hard to find a right-hand threaded screw in a hardware store.
You already know that to remove a bolt or a screw you turn it counterclockwise (towards the left) to loosen it… they are left hand thread screws. Not this one… you can’t tell by looking at it, but this screw is turned clockwise (to the right) to loosen it.
f you don’t know this when trying to remove this screw when disassembling the needle bar linkage, you will actually be tightening it and either strip the head of the screw or shear it off trying to loosen it by turning the screwdriver counterclockwise.
Is this screw the same in my sewing machine? Yes, it is the same in all sewing machines… Kenmore, Brother, Atlas, Wizard, Universal, Morse, Necchi, Singer, White, Domestic, Davis, New Home, Dress Maker, and the list goes on. Every machine I have ever seen. Regardless of make, model, or vintage… this screw is different from the others.
I hope you got my message in a bottle in time to help!
As always, our tutorials are provided as a free resource to help you learn and maintain your vintage sewing machine. As our site has grown, so has the cost to keep and maintain it. Despite this cost, I will strive to continue posting tutorials and other relevant content for the benefit of the sewing community. If you found the content of this tutorial useful, please consider making a small donation to help me grow the site and help defray my costs… every little bit helps.
Help Support our Site…
Make a one-time donation
Make a monthly donation
Make a yearly donation
Choose an amount
Or enter a custom amount
Your contribution is appreciated.
Your contribution is appreciated.
Your contribution is appreciated.
Please let me know if I can answer any questions or if I can be of any assistance by emailing me at pungoliving@gmail.com.
Thanks for reading!
Lee
P.S.
Why is this a right-hand thread screw? Good question! It’s because the direction of rotation of the assembly would tend to loosen the screw if it had a left-hand thread.

Hi,
I really appreciate your blogs and stories. Thanks so much for the information.
I am a TRUE novice at sm repair, I oil all the areas as shown in my machine’s manual.
It is a Dressmaker S6000 from my grandmother, and the stretch stitch won’t work. It won’t engage when I press the button and it sounds like metal clanking against metal. Works great otherwise.
Will you please give me your experienced opinion of how to fox this? Could the part be taken from another machine?
I’m new to this area,and am unsure of sm dealers & repair shops nearby.
I’m also open to purchase a replacement: Dressmaker S6000, Janome S6000, or New Home 580 sewing machine if available.
Thank you.
Tia Payne
Tiap413@gmail.com
LikeLike
Hello Tia,
I am not familiar with the Dressmaker S6000, and it looks like the Janome S6000 and New Home 580 are essentially the same machine.
I would guess that they were all manufactured by Janome… Dressmaker is a badge name and New Home is owned by Janome as well.
Your machine has some plastic gears and it may well be that a stripped gear is the problem.
I looked at a picture of your machine and I see where the stretch stitch button is located on the top. It would engage a mechanism directly under the top cover.
If you can remove the top cover (simply held by a few screws) and send me a picture of the mechanisms under the cover, I can better help identify the problem.
Send them to pungoliving@gmail.com.
I hope I can help you!
Have a great day,
Lee
LikeLike