
I received a comment from a gentleman asking for information on how to remove the balance wheel from his Kenmore 158.1755. I can see how this seemingly simple task is mystifying, as the balance wheel becomes stuck and trapped by the motor belt before it clears the machine. Thinking that this blog would help him, and hopefully others with the same question, I am going to outline the process as simply as I can.
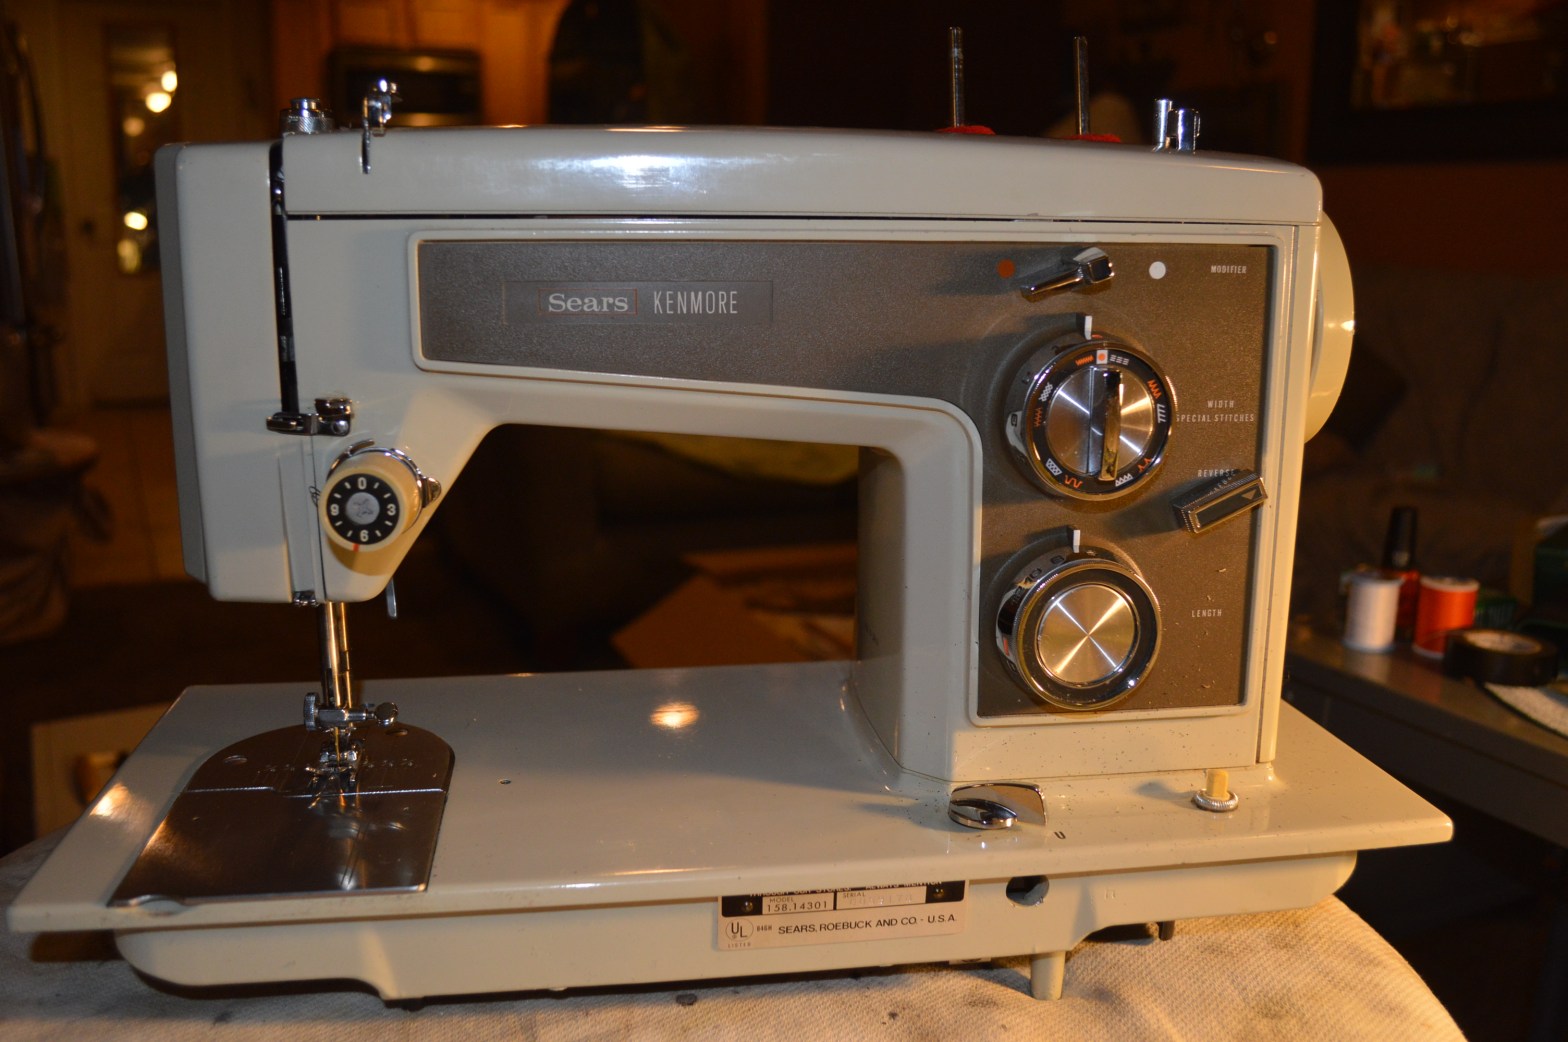
This is a model 158.1430 in my inventory that is awaiting restoration… It is not his particular machine, but if your machine looks even similar to this, read on.

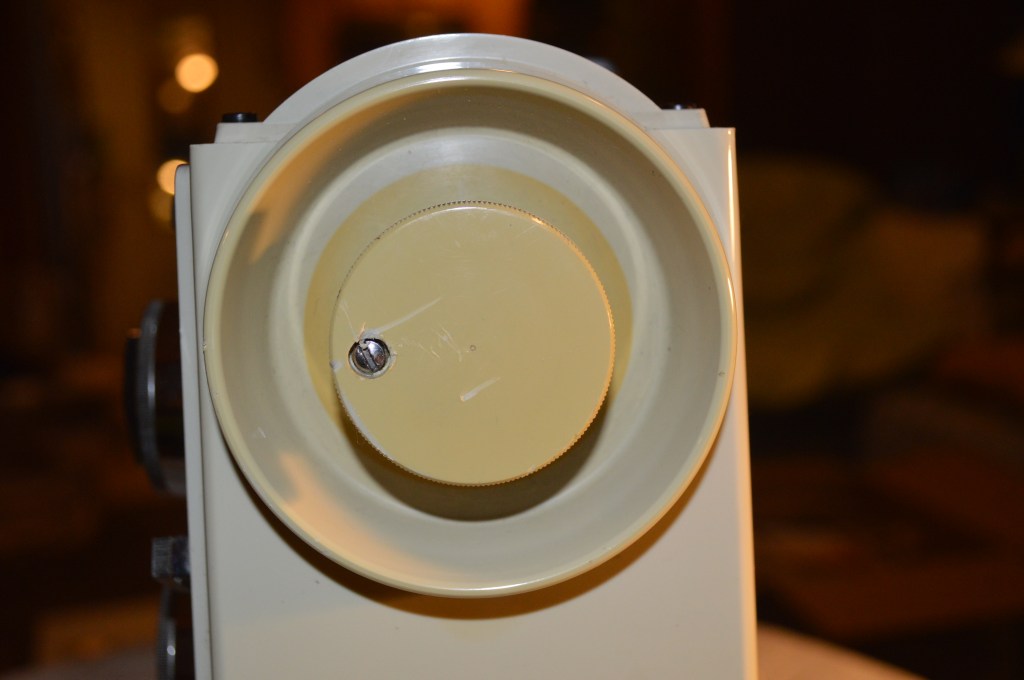
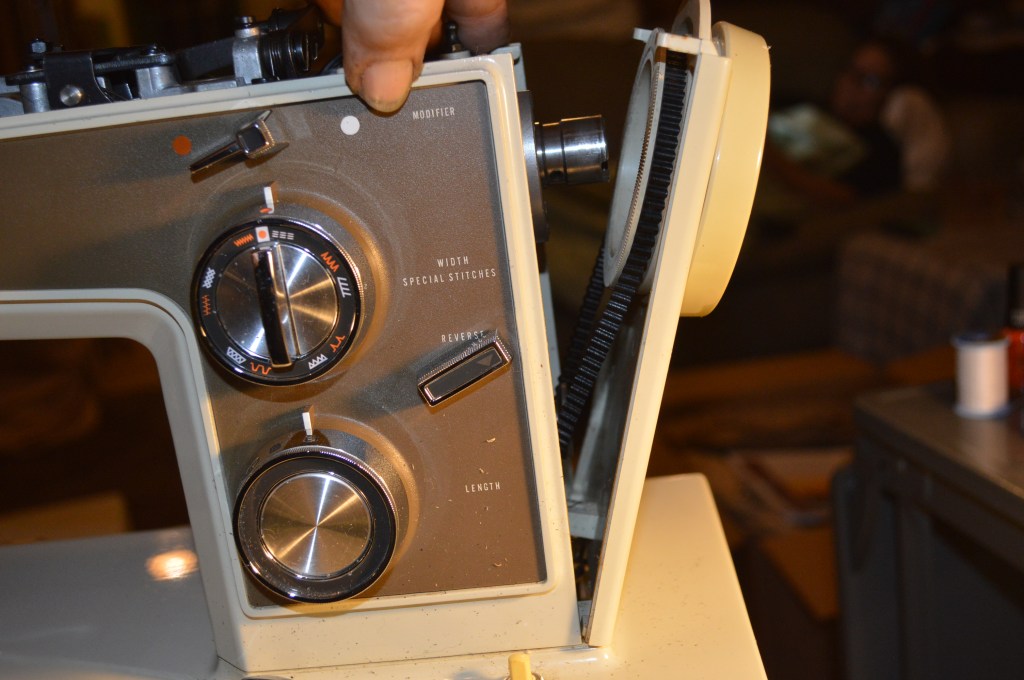
On a Kenmore it is a little harder to remove the balance wheel than on some machines, but not too hard. First thing to do is to remove the stop motion knob screwed into the back of the balance wheel. It has a small set screw that must be loosened to remove the knob. Remove the small screw from the knob before unscrewing it. Otherwise, it will prevent the knob from being unscrewed all the way. There is a large washer behind the knob. This will have to be installed in a proper position when you are putting the knob back on the balance wheel. I’ll cover that in a bit. The first thing to do is remove the stop motion knob from the balance wheel.
Next remove the top cover… it just pops off by gently prying on the rear corner of the cover. With the cover off, you will see two screws that hold the rear plate in place. They are behind but on both sides of the balance wheel. Remove these screws.
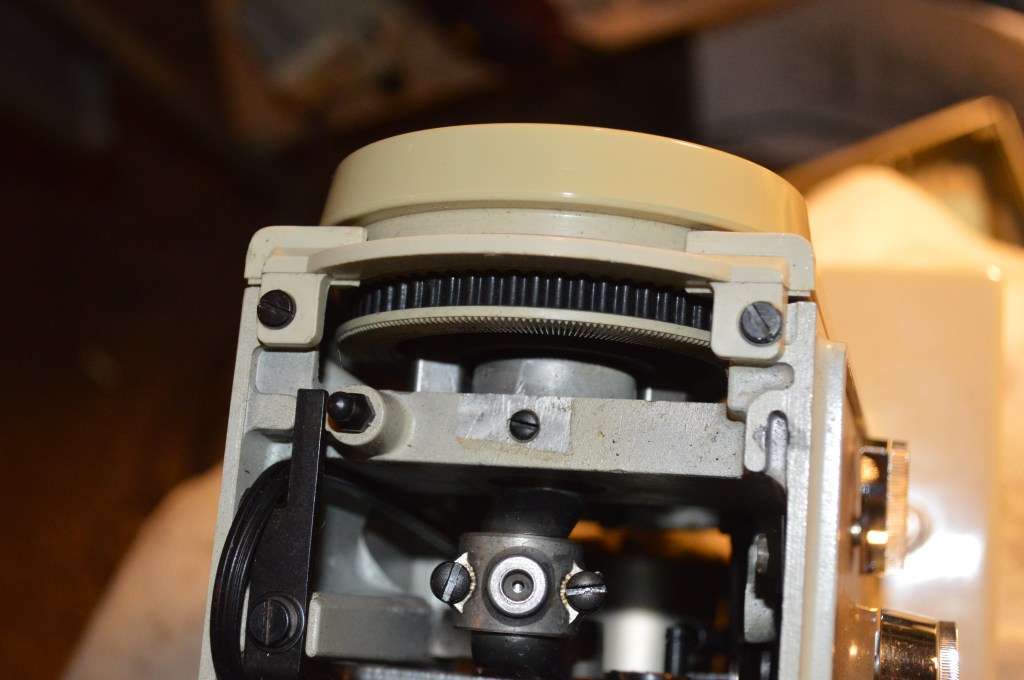
With these screws removed, the cover plate will allow the balance wheel to be pulled back slightly, but not enough to remove the wheel. Don’t be tempted to remove the wheel yet… something may break.
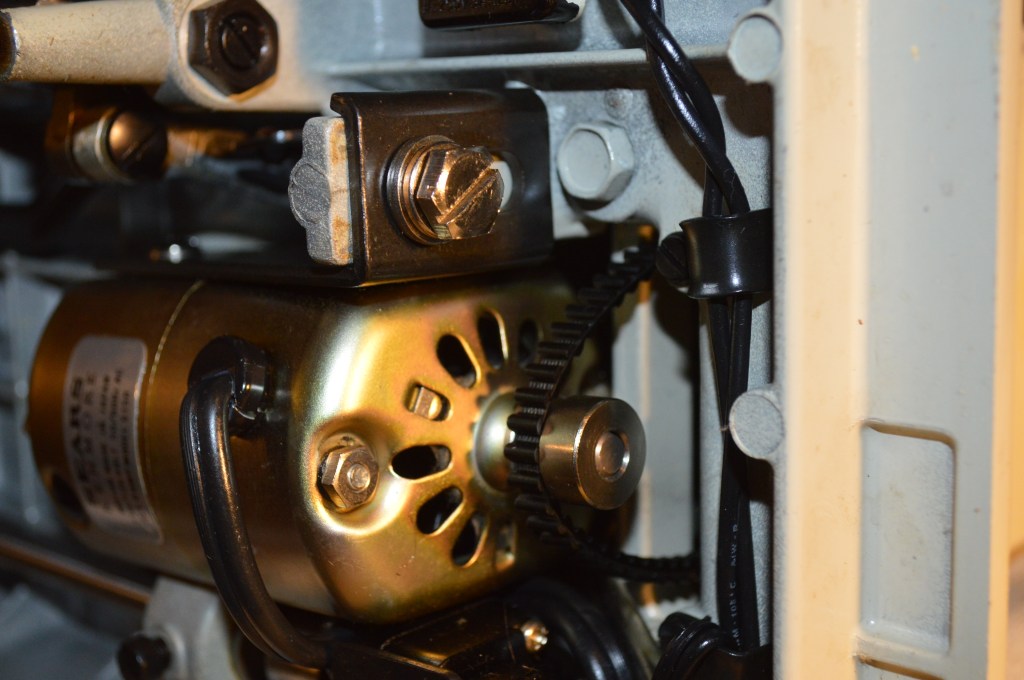
The trick to removing the balance wheel is to loosen the motor. Turn the machine on its back and look at the motor. It is held in place with a bolt. The bolt is tight. You may be able to remove it with a large screwdriver, if not, use a a 1/2 inch sized wrench, or a crescent wrench to loosen it.
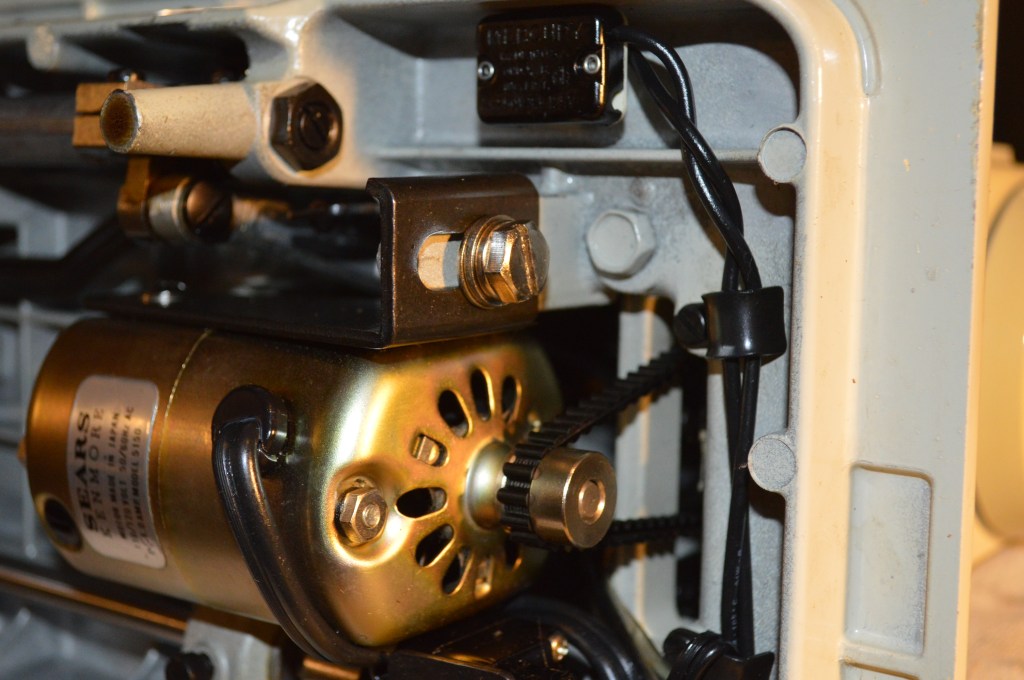
With the belt loosened, push the motor higher in the machine. This will loosen the belt.
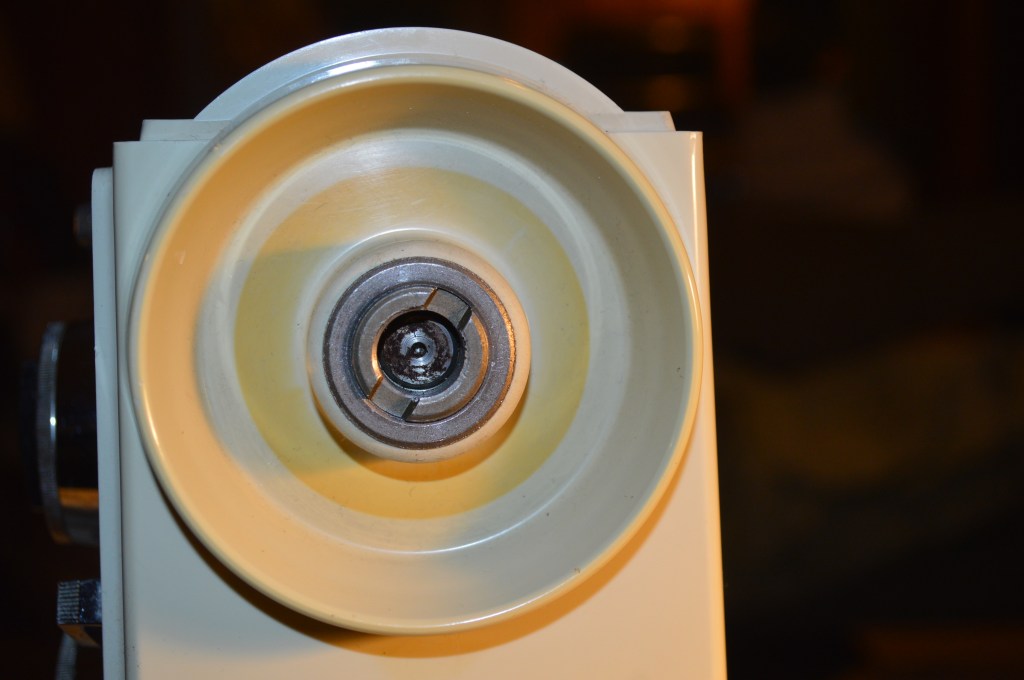
Turn the machine back upright. Using one hand or the other, reach under the machine and push the motor upward and at the same time, pull the balance wheel off of the bushing.
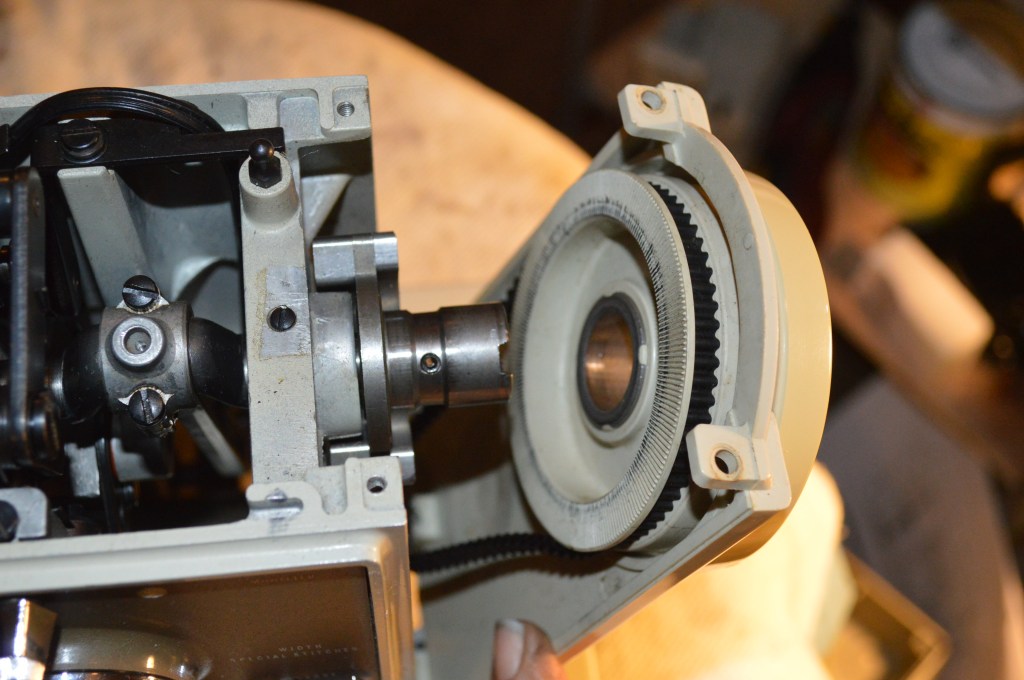
The balance wheel is captured by the rear cover, so you need to remove the belt before the balance wheel will come free.
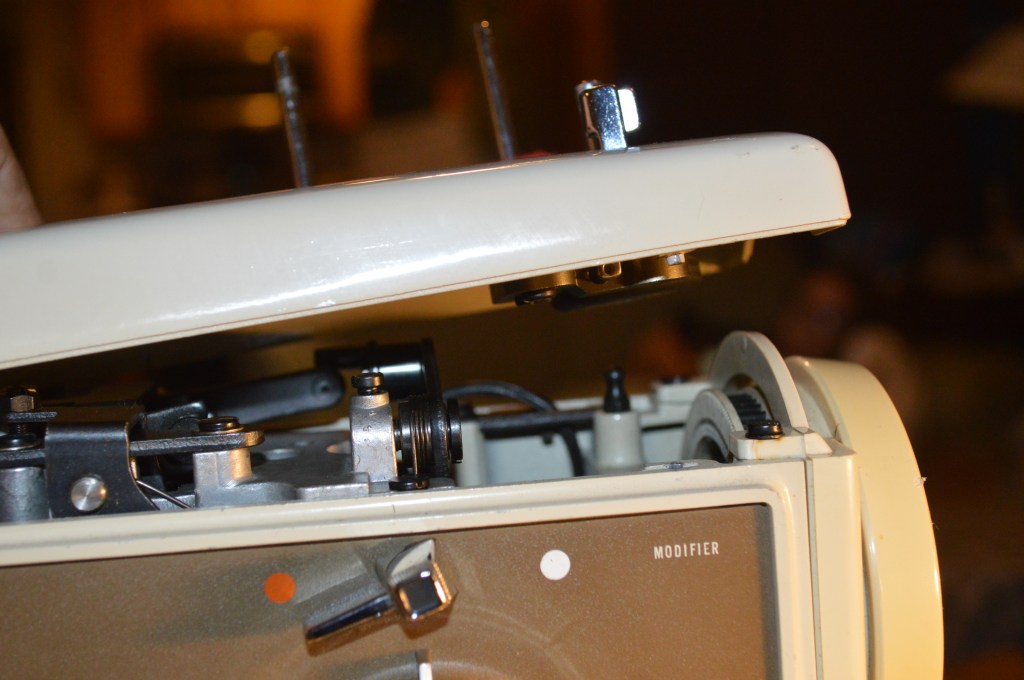
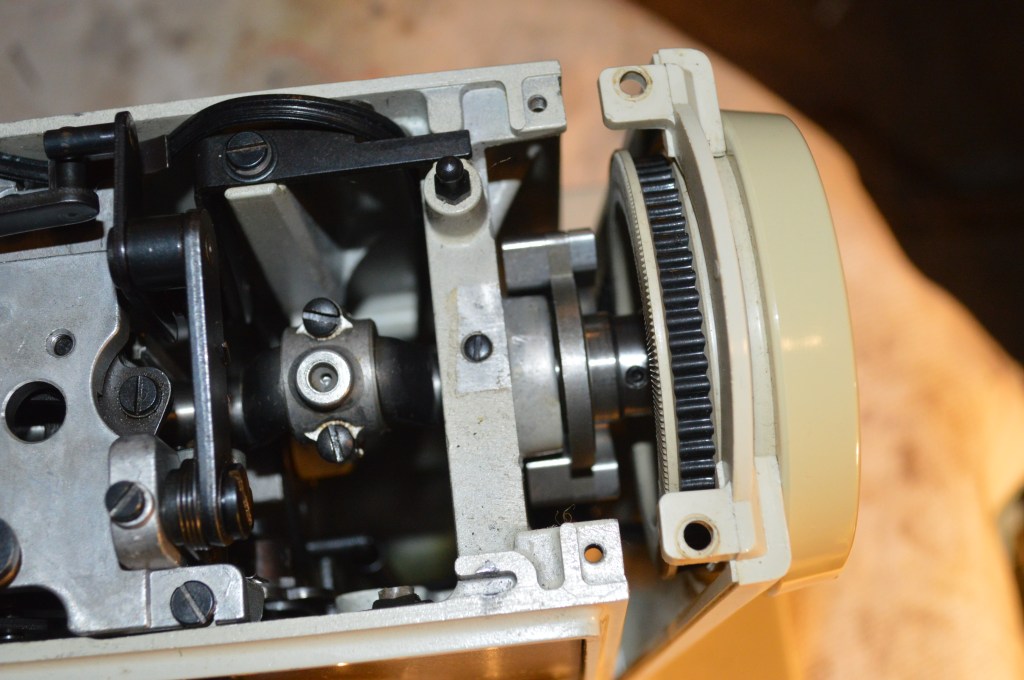
With the cover off, you will see why it is not so simple to remove the wheel as it is on some machines… the reduction belt pulley. This is why these machines have so much piercing power.
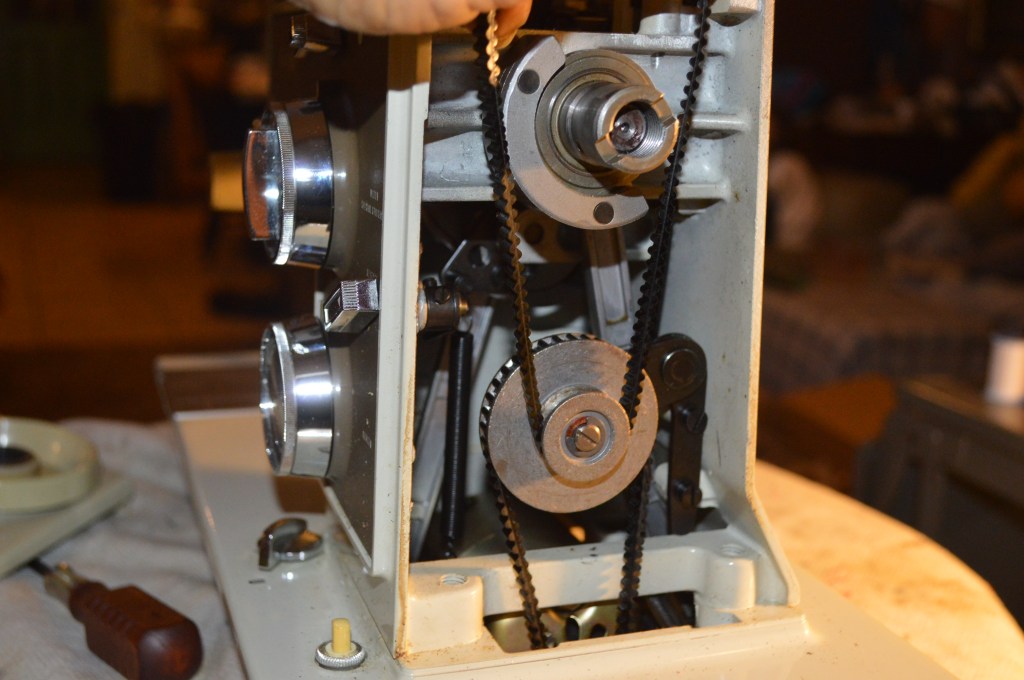
Now is a good time to check the belts and add ONE drop of sewing machine oil at the screw in the center of the pulley. Be careful not to get oil on the belt.
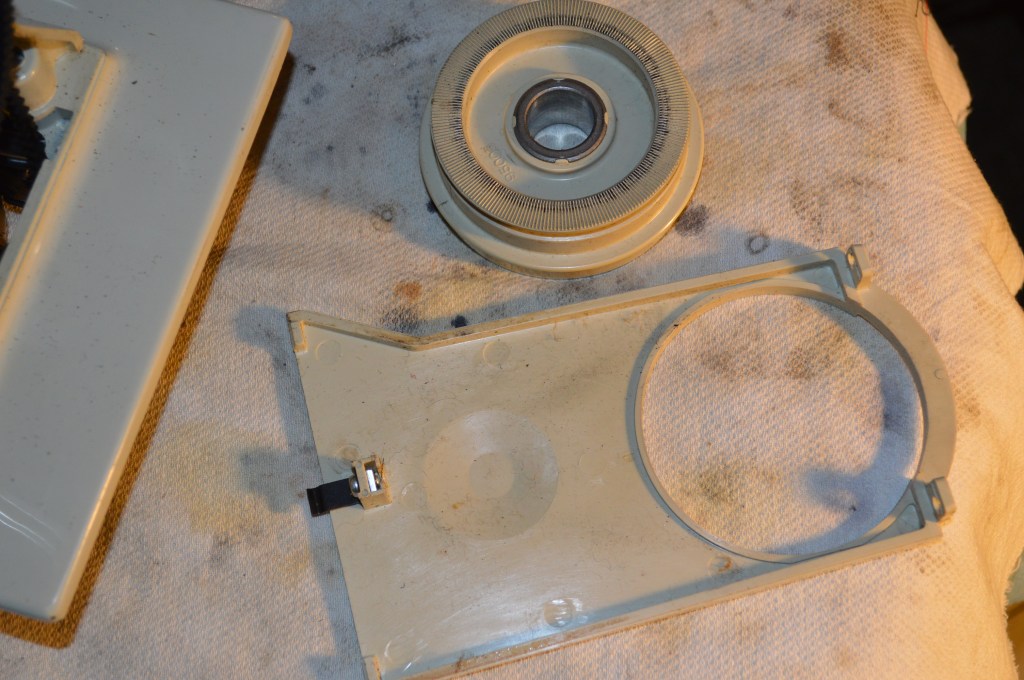
The next few steps to replace the cover and balance wheel are simply the reverse of disassembly. Be sure you notice the tab at the bottom of the rear cover, it needs to be set in at the bottom first to fit the cover in place.
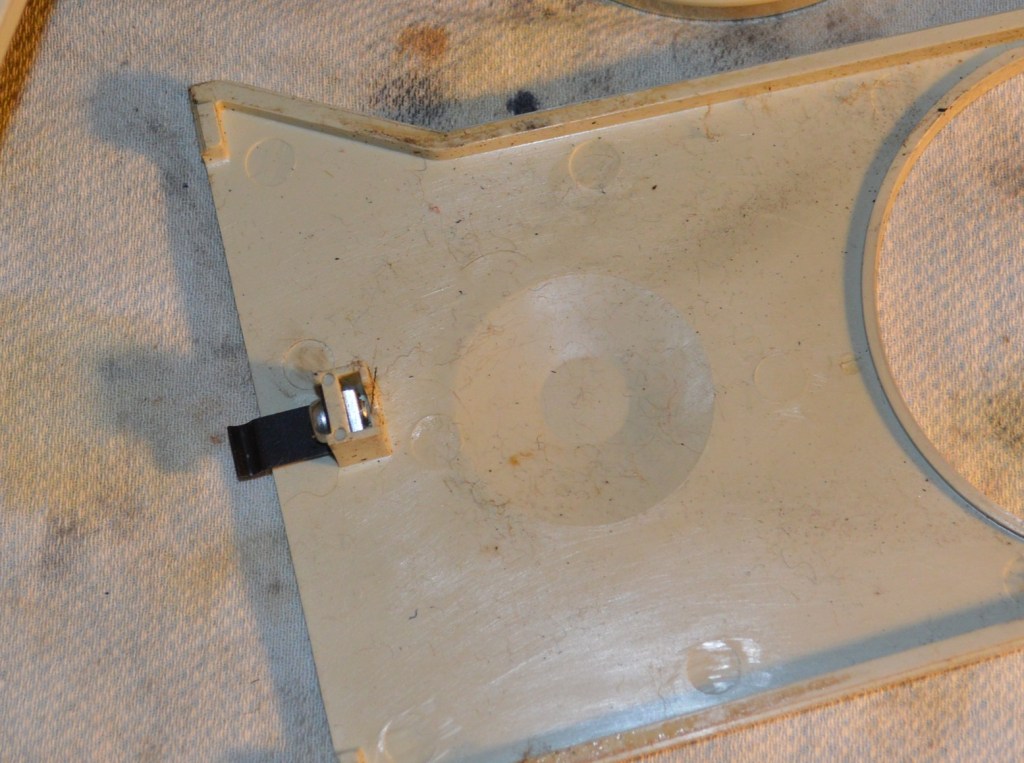
Remember, the cover goes behind the balance wheel. Put the wheel through the cover, set the bottom of the cover in the machine so the clip will engage the body of the machine. Place the top motor belt on the pulley and pull up on it to hold it in place. Rotate the balance wheel and cover up to put the belt in the balance wheel groove, and slip the balance wheel back on the machine.
If this is done correctly, the rear cover will fit flush against the machine. Replace the two screws and the top cover. They do not need to be very tight, just snug to prevent cracking the cover. Next tighten the motor by prying down on it gently to tighten the belt as you tighten the bolt. Do not make the belt too tight, it should have some play in it if you push on the side of the belt. A belt that is too tight will cause the motor to work harder, slow the machine down, and prematurely wear out the motor.
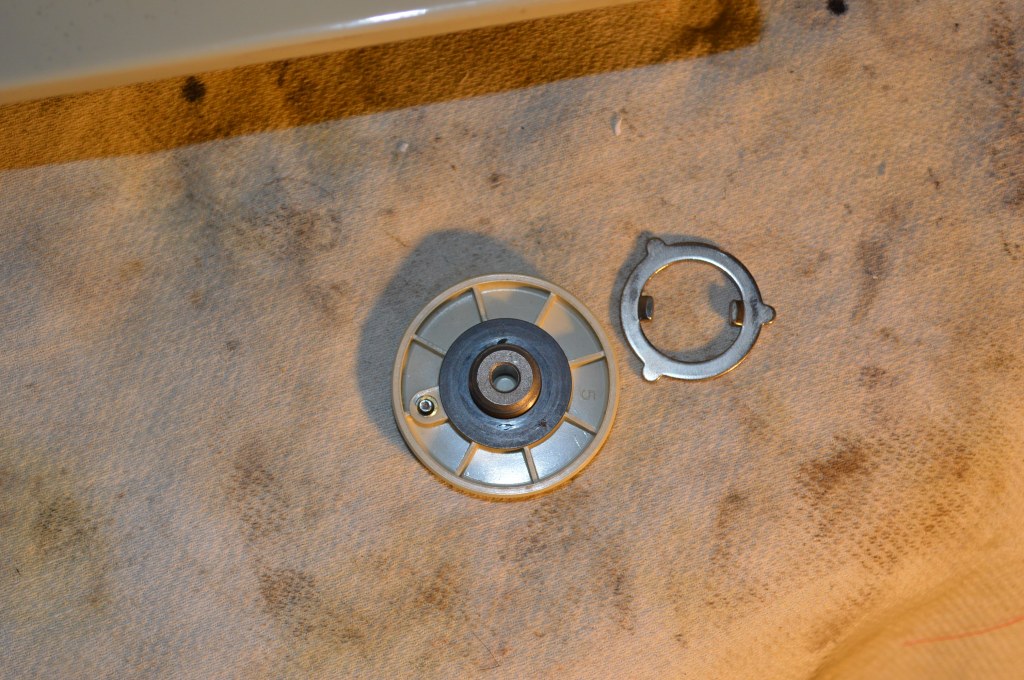
The washer that was behind the stop motion has an orientation. It must be positioned with the small “ears” in the bushing slots a certain way. Notice that the ears are bent. Statistically, you have a 50/50 chance of getting it right on the first try. I usually get it right 20% of the time, but that’s why I don’t gamble or play the lottery.
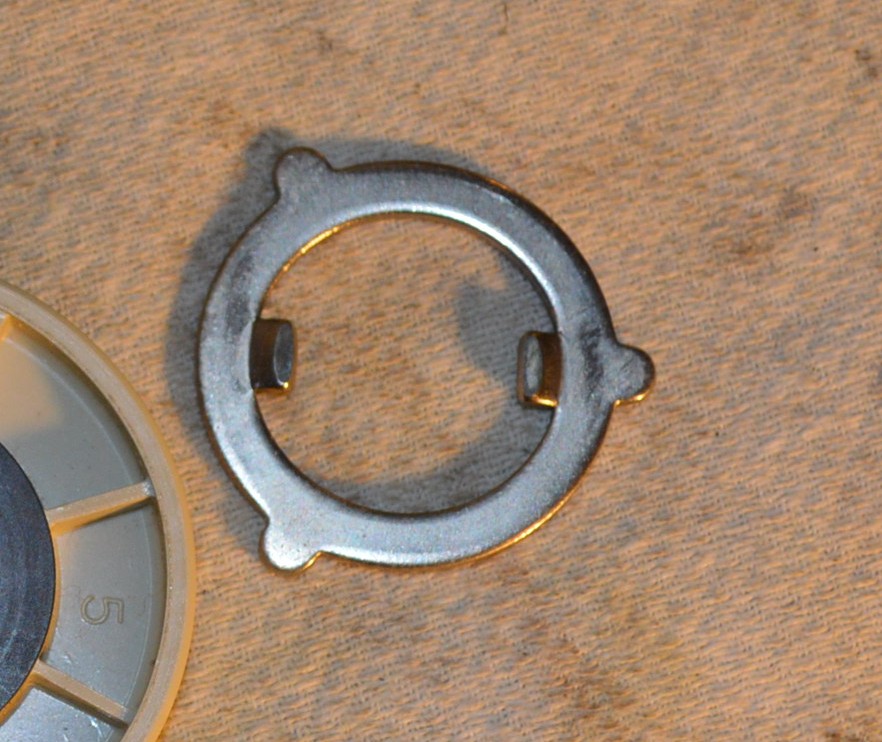
The ears fit into these slots
The easy way to put this washer and screw the knob on the machine is to tilt it on its nose, place the washer with the “ears” in the bushing slot facing out. Remember, these ears are bent, so place them pointing up and screw on the knob.
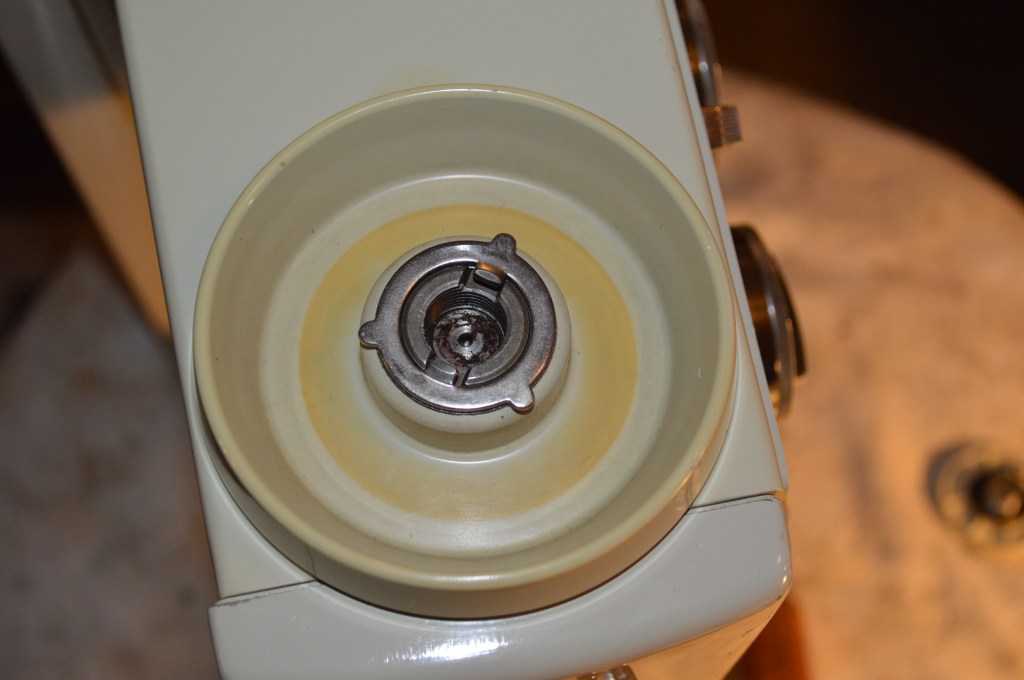
Tighten the small screw in the end of the knob, rotate the knob so the screw is at the 12 o’clock position and look down between the back of the balance wheel and the body of the machine. If the screw is against one of these ears, or just past the ear, your luck failed you as it often does me. You need to loosen the screw, remove the knob, and rotate the washer 180 degrees. Put the knob back on, and tighten the screw. In the proper position you will be able to loosen the knob until it stops and allow the balance wheel to turn free to wind a bobbin.
That’s it! Pretty straight forward and a good thing to know.
If you have any topics or problems I can write a blog around, let me know and I will be happy to help if I can. Hopefully, this will help others and keep these great vintage machines in the stream for a long time to come… they deserve it.
I Hope this helps! and please visit our Etsy store at https://www.etsy.com/shop/pungoliving to see our selection of restored fine quality vintage sewing machines.
As always, our tutorials are provided as a free resource to help you learn and maintain your vintage sewing machine. As our site has grown, so has the cost to keep and maintain it. Despite these costs, I will strive to continue posting tutorials and other relevant content for the benefit of the sewing community. If you found the content of this tutorial useful, please consider making a small donation to help me grow the site and help defray my costs… every little bit helps.
Help Support our Site…
Make a one-time donation
Make a monthly donation
Make a yearly donation
Choose an amount
Or enter a custom amount
Your contribution is appreciated.
Your contribution is appreciated.
Your contribution is appreciated.
Please let me know if I can answer any questions or if I can be of any assistance by emailing me at pungoliving@gmail.com.
Thanks for reading!
Lee

I have this machine in front of me. I can NOT loosen the wheel to wind the bobbin. I see the set screw isn’t in its place. Seems the washer wasn’t put back on correctly. PLU there was nylon thread wound around the inside of the wheel! I couldn’t get it all out. So now how do I get the wheel off to clean this mess out? As I said, the knob which loosens the wheel is STUCK and won’t loosen at all much less come off.
LikeLike
I have experienced tight stop motion knobs on Kenmores before. What model is your machine?
LikeLike
It looks just like the one you have pictured. Model 158.14301
LikeLike
Hello Pamela,
The bobbin winder works with the balance wheel declutched from the sewing mechanism. Loosening the stop motion knob takes the clamping force applied to the 3-eared washer away and only the balance wheel will turn to wind your bobbin. It is declutched from the sewing mechanism.
With the washer properly oriented, the set screw will only alloy the stop motion knob to loosen by 1/3 turn (max)before it stops against one of the ears. Any other orientation of the washer will cause the set screw to tighten against one of the ears on the washer and bind the stop motion knob. It only takes this amount of loosening to declutch the sewing mechanism. Some how it is stuck…
Look at the end of the stop motion knob look for a small screw. If it is there, loosen it almost all of the way out. Now, by holding the balance wheel firmly in your left hand, try turning the stop motion knob towards you. If the screw is not there and if the washer is not installed properly, the machine was tampered with to remove the balance wheel… perhaps to replace belt, and not assembled properly.
If this is the case, the stop motion knob was likely overtightened making it difficult to remove. It may be necessary to bind the sewing mechanism (instead of holding the balance wheel) to get enough leverage to loosen the knob. One way to do this is to make sure the machine is unplugged, then remove the needle and place your left hand around the needle bar with one finger under the needle clamp screw. Turn the balance wheel towards you until the needle bar presses on your finger. In this position, you can apply greater effort to turning the stop motion screw while your hand is preventing the mechanism from turning… You can also get a better grip on the stop motion knob by wrapping it with a dish cloth to increase your leverage.
Holding the needle bar firmly and preventing it from moving will apply more force to the screw threads when you try to loosen the stop motion knob, and it should loosen.
This has always worked for me, but if it doesn’t work for you, let me know. There is one other method I can think of.
Please let me know if this is successful and I hope it works.
Lee
LikeLike
Thanks so much for getting back to me!!! This machine looks brand new!! (It was given to me——) and someone just allowed all of that nylon thread to get wound up in there! I would send you a picture if I could!!! I will try your suggestion tomorrow and let you know if I get it going!!! Thanks again!
LikeLike
Thanks and let me know when you get it going… btw, if the screw is missing on the stop motion knob, you probably want to get it replaced!
Lee
LikeLike
I was needing help with my Kenmore 158.14101. Seems it wasn’t piercing the material. I followed your directions and pictures and had NO problems getting the wheel off and put it back together without frustration. Apparently when I fixed the reverse stitch I didn’t get the wheel lined up correctly. Your site was ABSOLUTELY spot on. Thank you so very much for your easy to follow knowledge!!
LikeLike
Hello Elaine,
I’m glad you found my blog useful!
The Kenmore 1410 is a great machine and have a preference for it, the 1430, and the 1400 because they are so dependable!
Have a wonderful evening,
Lee
LikeLike