
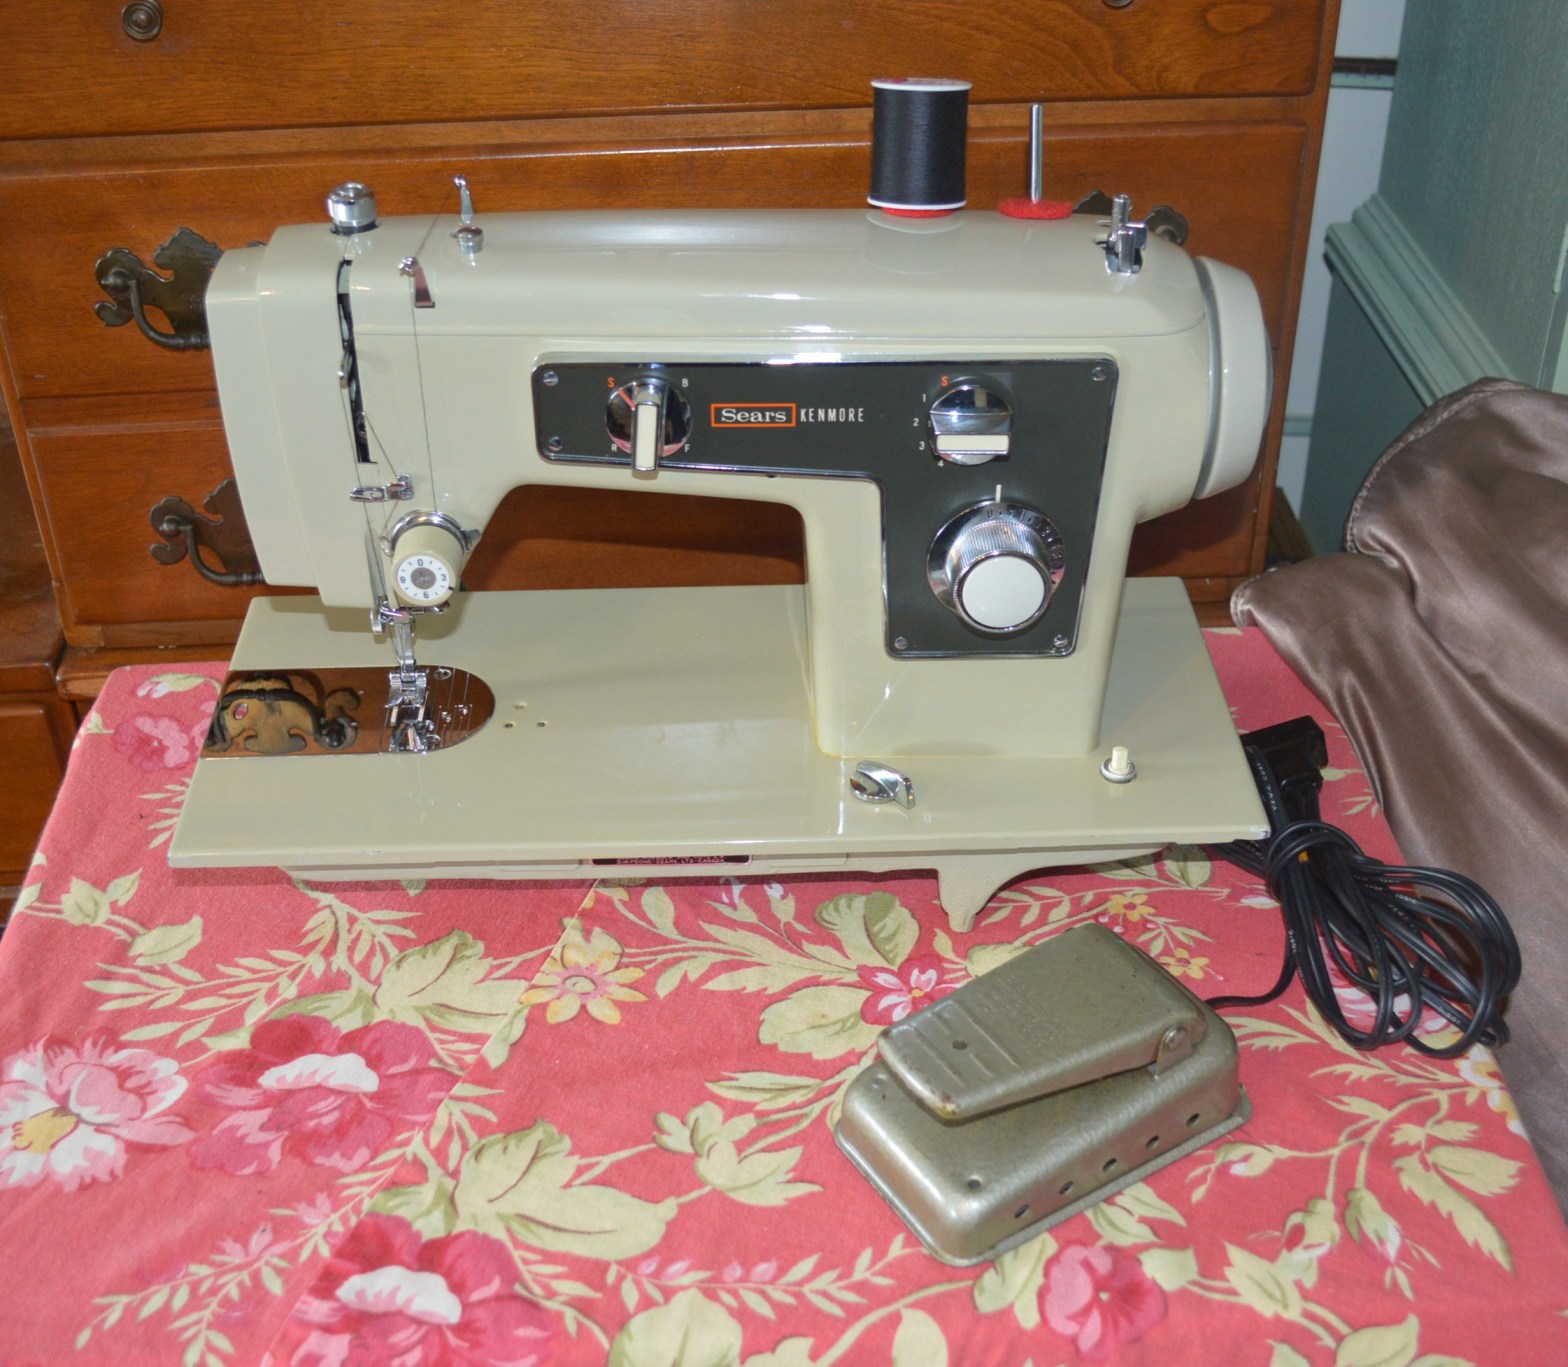
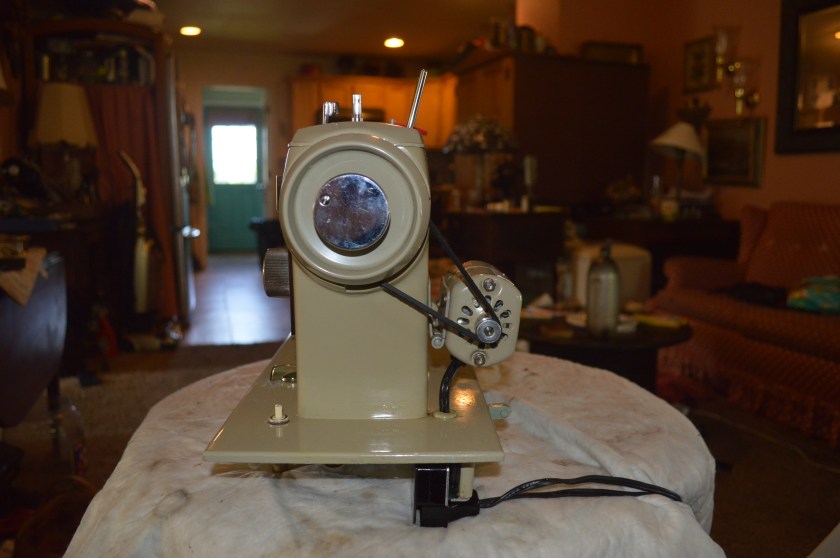
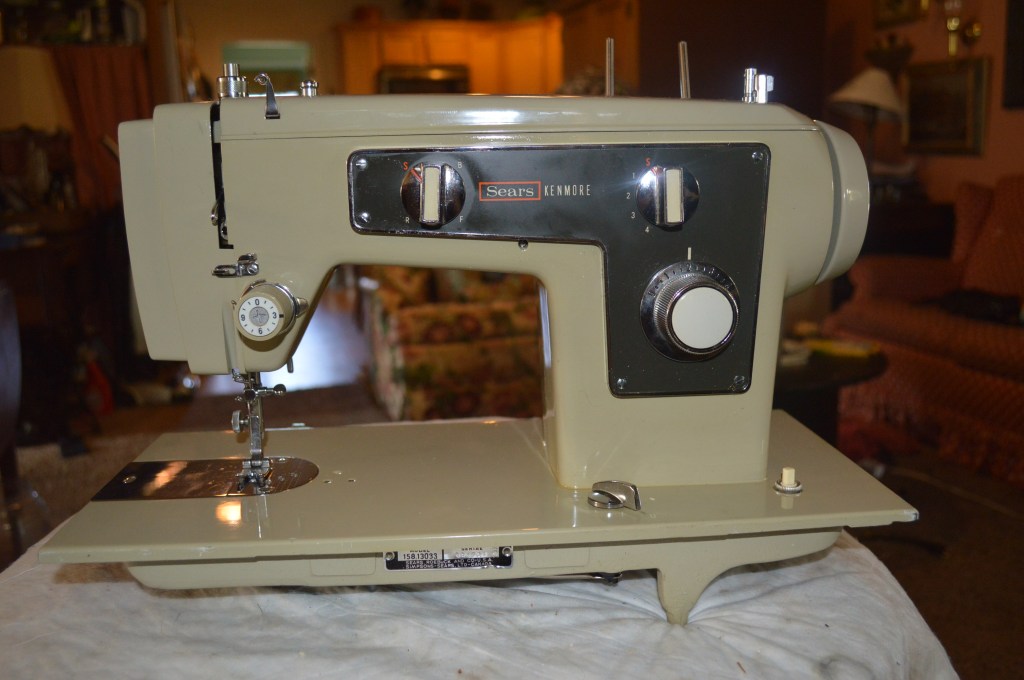
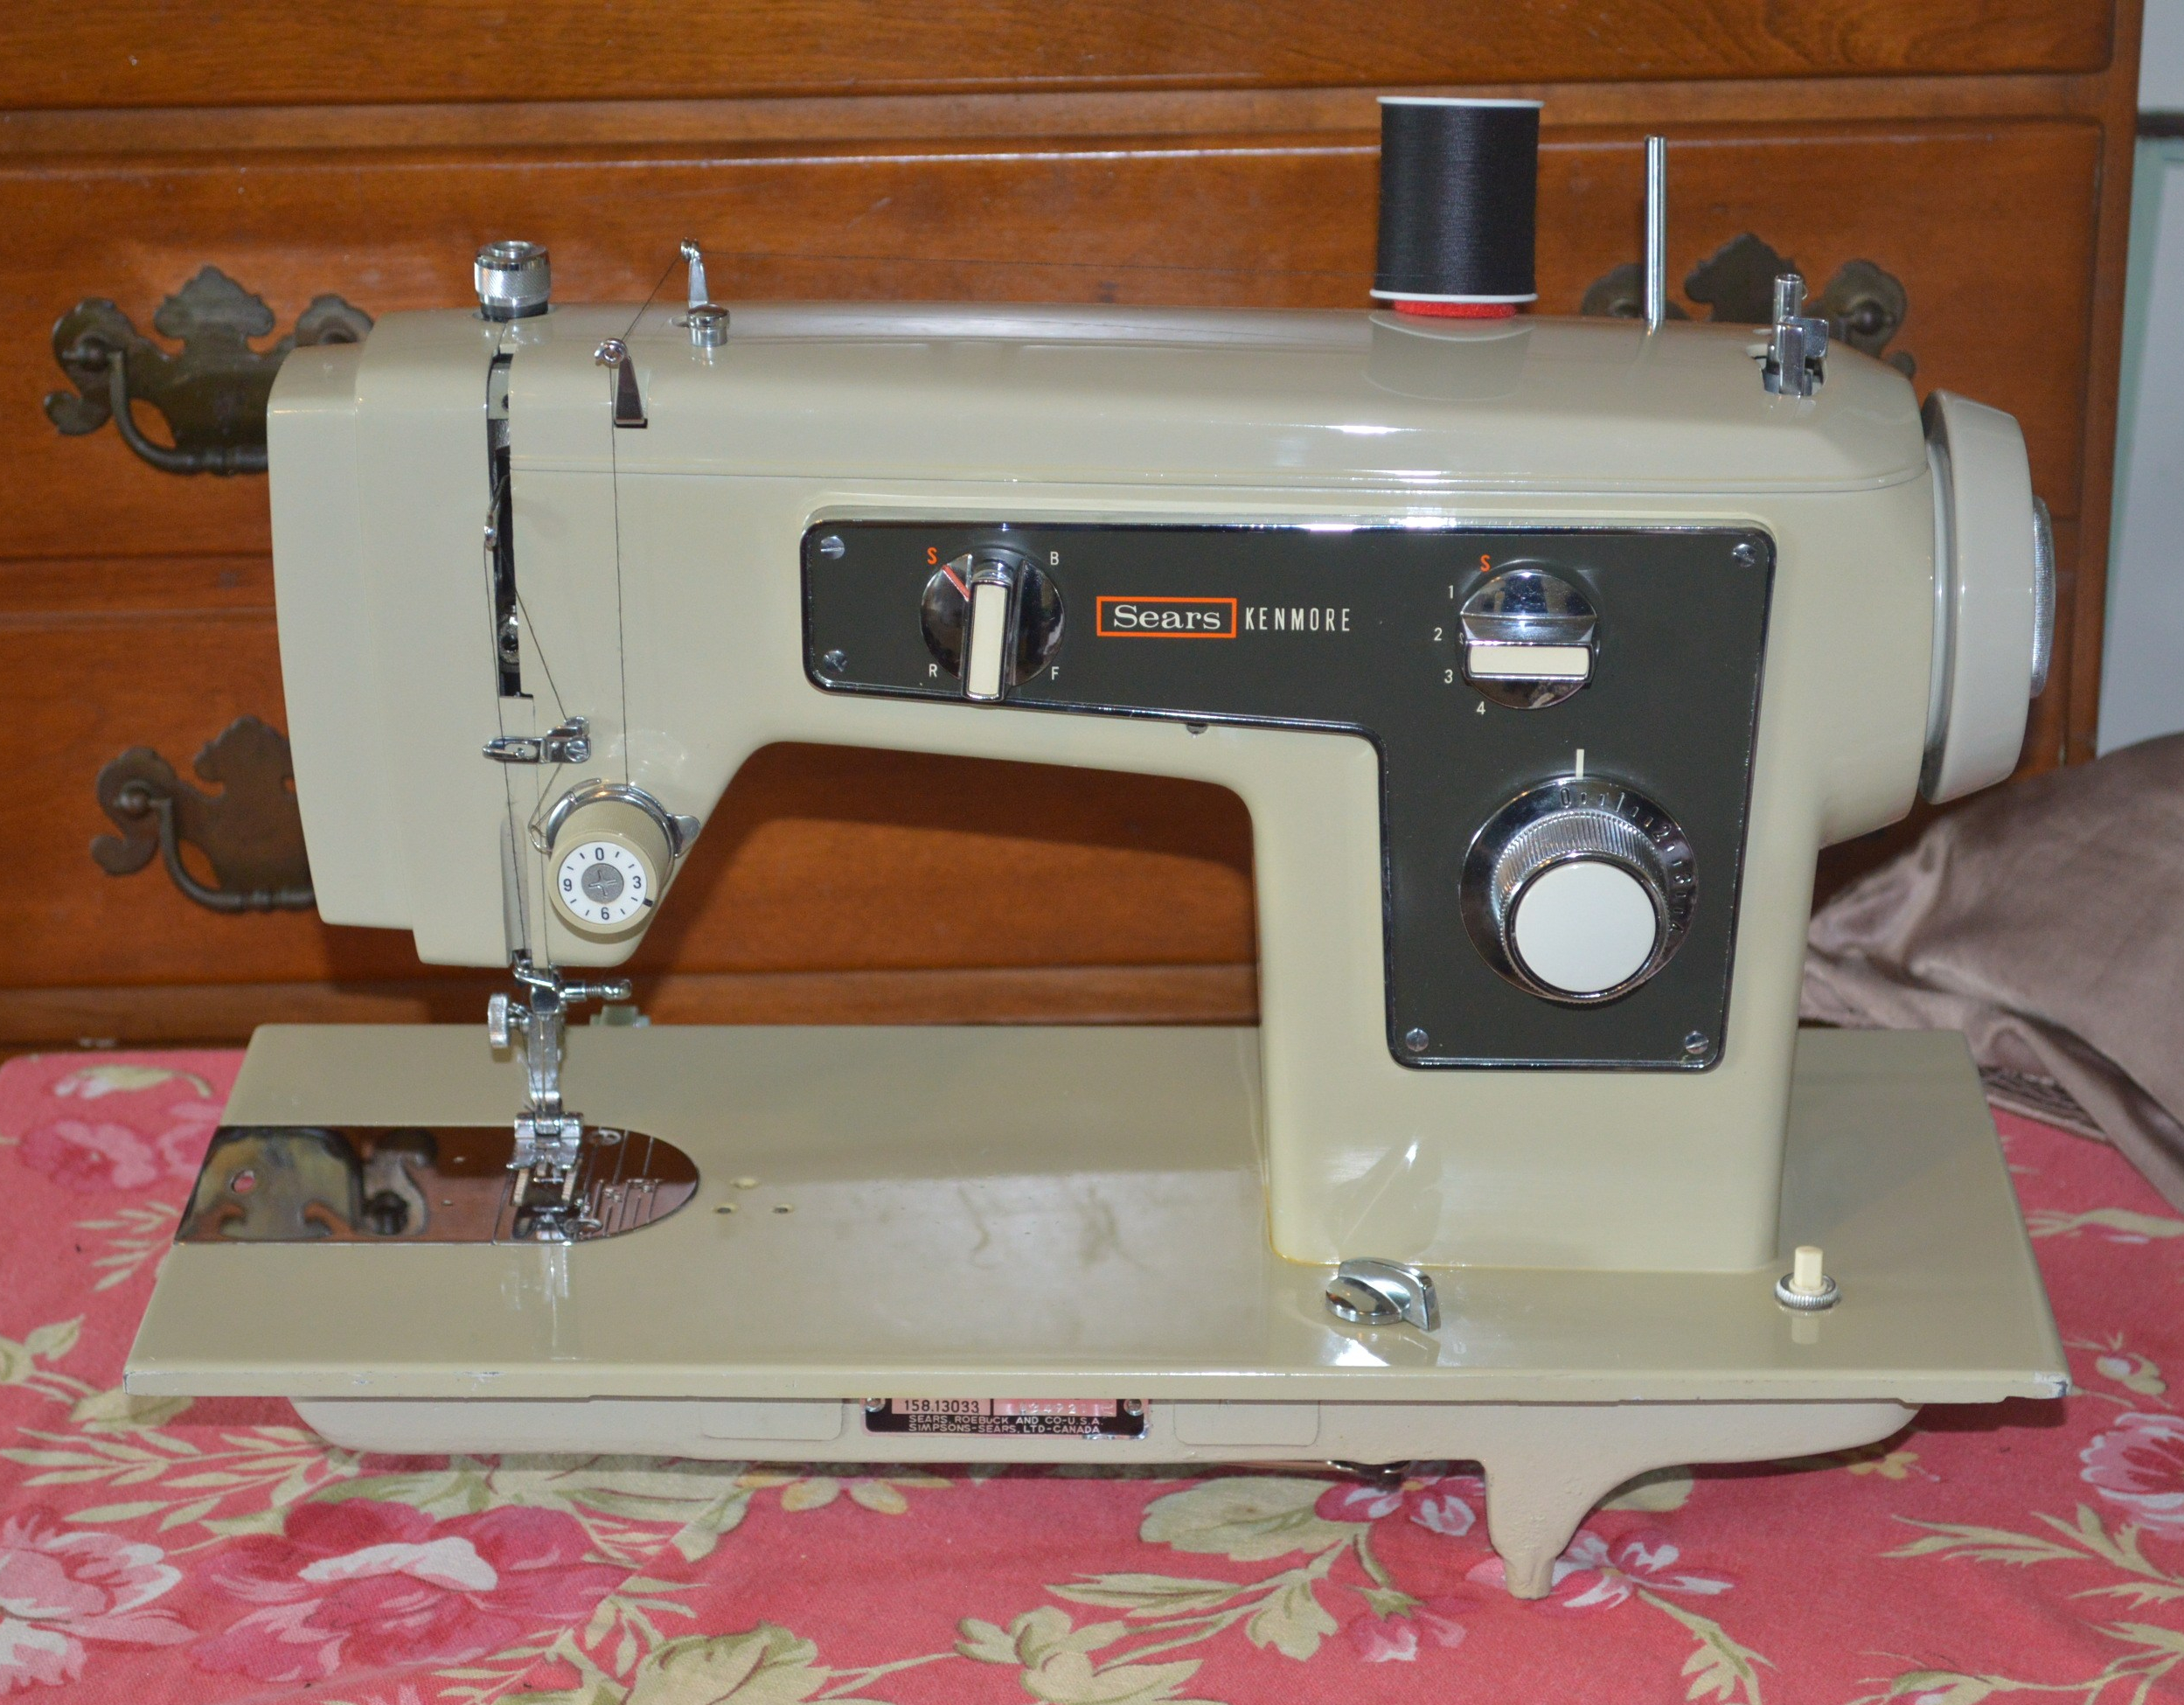
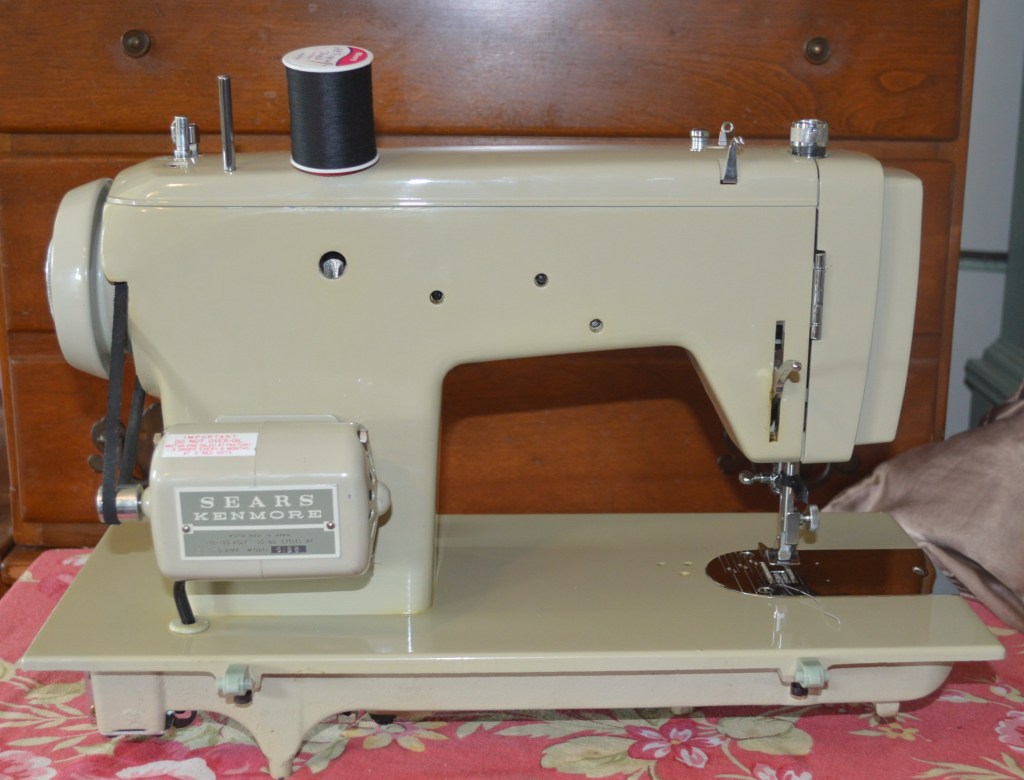
This restoration is for a Kenmore 158.13033 all metal 1969 vintage sewing machine. The 1303 was one of three variants… 13031, 13032, and the 13033. The machine body styling and sewing mechanism is the same. The only visible difference is the styling of the control knobs. This machine is a custom order, and the Customer wants the 13033 because it is the machine that she remembers while learning to sew… no other variant except the 13033 will do… and right down to the foot controller style and color. That’s what makes this project so special, and it is another example of someone with a nostalgic attachment to a particular machine with fond memories . She will enjoy using this machine for the memories it brings, and enjoy her sewing experience more deeply. This is one characteristic these vintage sewing machines have that is unique, and I don’t think it can be equaled by any new machine manufactured today. One thing is for certain, any new domestic sewing machine built today will not survive 50 years or be similarly appreciated! It took about a month to locate her machine, but I knew that my efforts to find this exact model in this condition and why my efforts to restore it to “as new” condition will result in a fine sewing machine that will she will use and enjoy for many years to come.
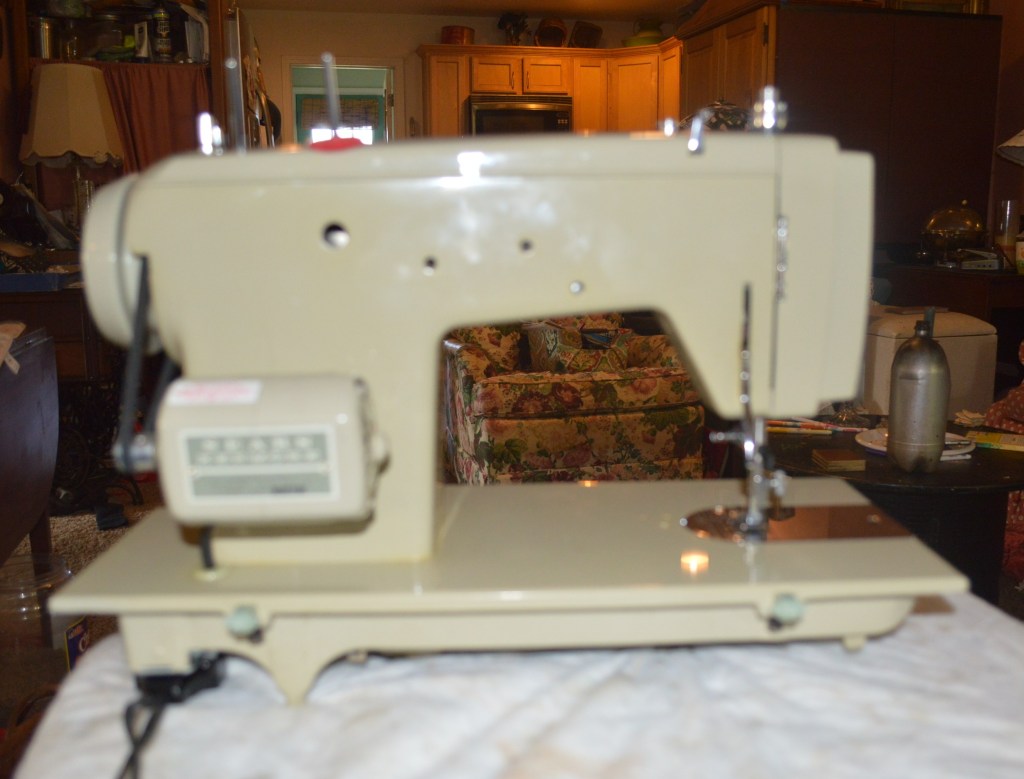
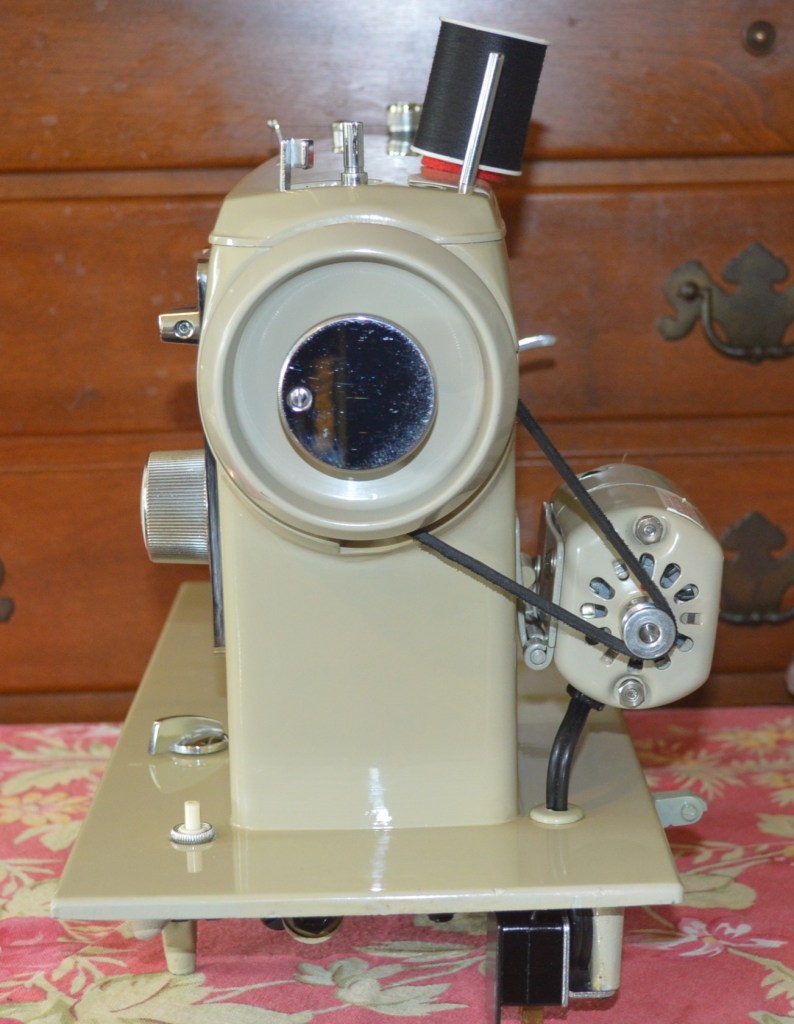
The 13033 features a high shank presser bar, drop feed dogs, an external 1.0 amp motor, class 15 side loading bobbin, and a manual zig-zag stitch mechanism. The controls are simple and straight forward, Stitch length, zig-zag width, and a built in blind stitch and button hole feature are selected by 3 clearly marked control knobs. Constructed of cast iron and an all metal drive mechanism, the 13033 is deceptively heavy… to me, it weighs more than it looks!
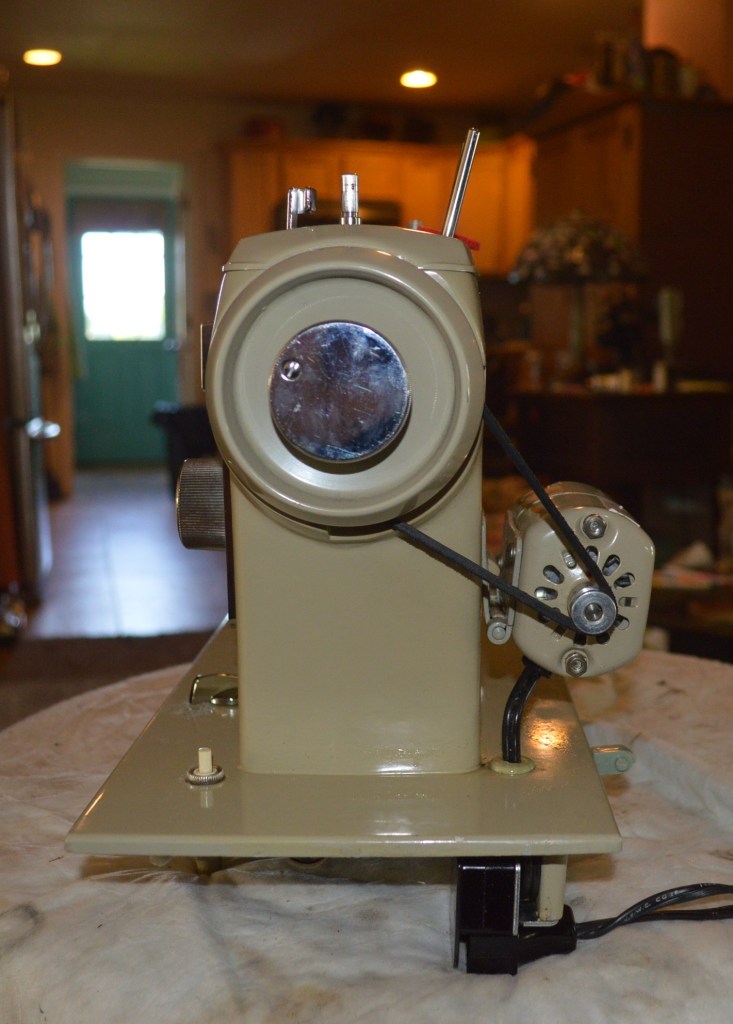
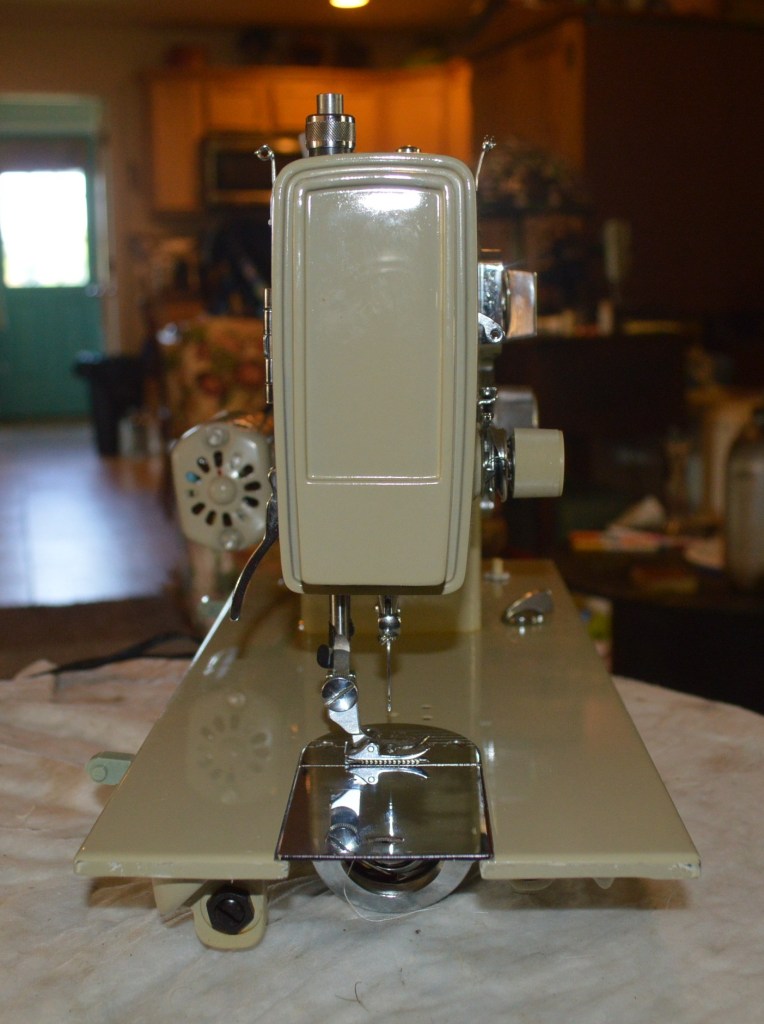
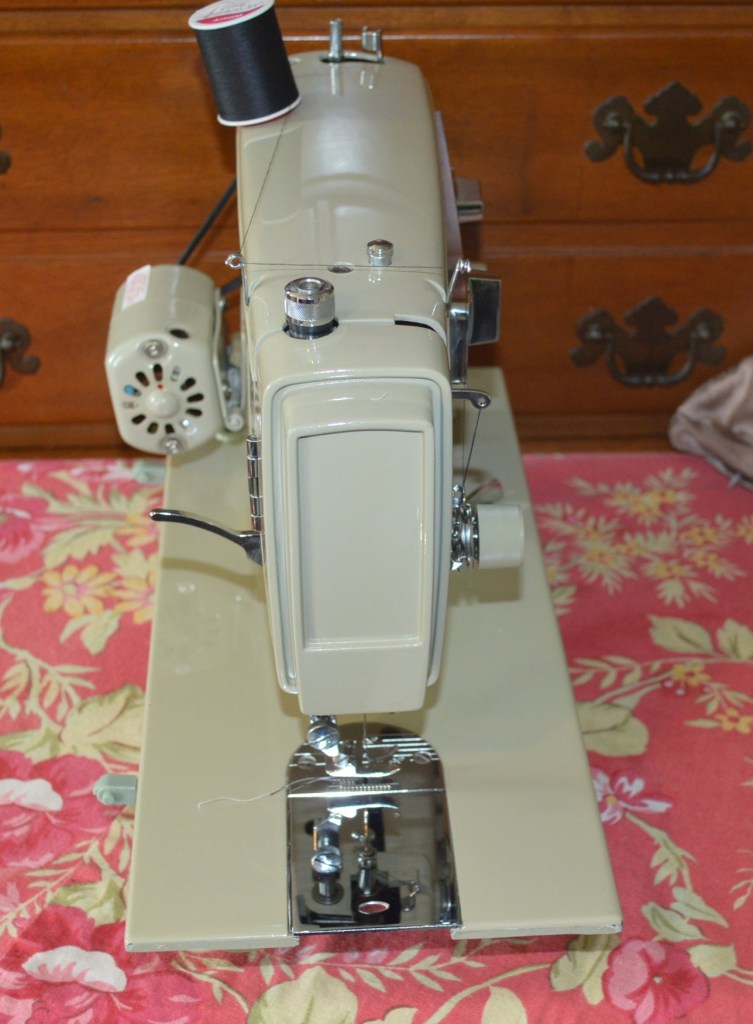
The machine is in excellent cosmetic condition. Inspection of the needle bar head, the top drive mechanism, and under the sewing bed reveals the machine is in good condition. The only traces of oil varnish appear under the bed, and this is somewhat unexpected. I thought that it would be uniformly deposited thru out the machine. The machine turns smoothly and it makes a good stitch, but, I believe it can be improved. The plan for this machine is to disassemble the hook shaft and bobbin race head, clean all of the parts that rotate. The top mechanism does not need disassembly and the adage of “if it ain’t broke, don’t fix it” applies here. There is very little to be gained by removing parts that can be effectively cleaned in the machine. The needle bar will be removed for cleaning and polishing. The motor and the top and bottom tension controls will be disassembled and restored. The machine will be cosmetically detailed, and it will be adjusted for optimum performance. Here are the before pictures…
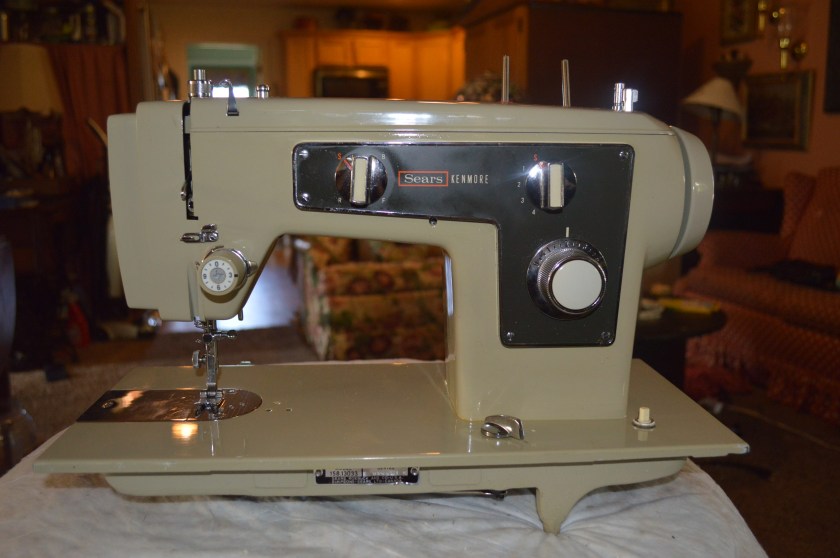
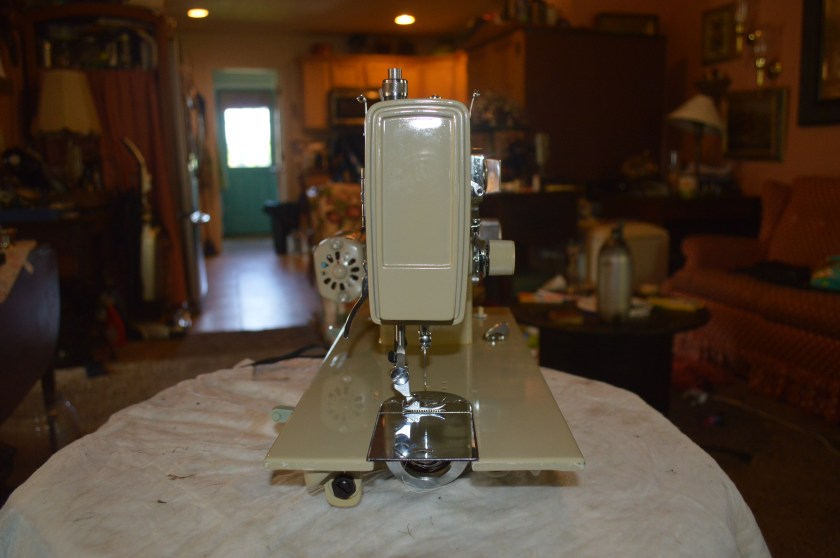
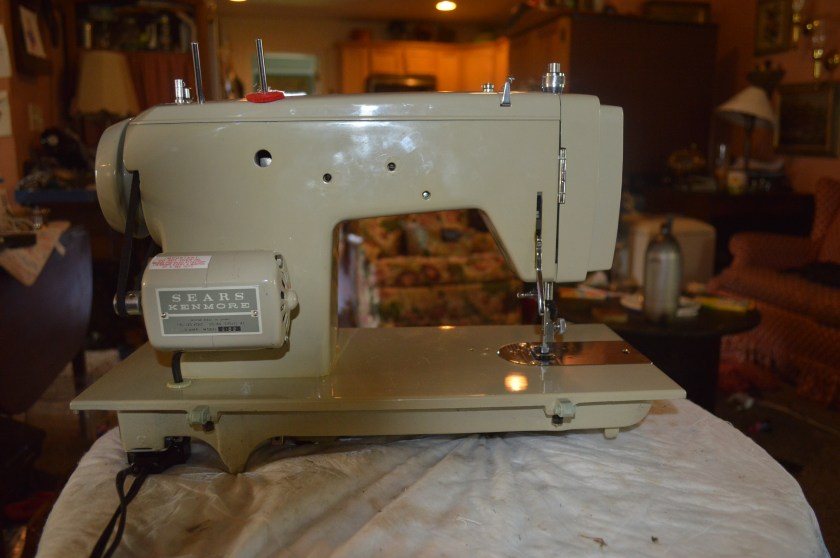
I don’t expect a noticeable difference in the before and after pictures, the condition is already excellent and aside from a few inconspicuous places, would look great with a quick wipe down with a damp cloth… but there will be a difference in the “feel” of the machine. Oil varnish does not allow the the smoothest operation. Only clean, lubricated, steel moving on steel can do this… and that’s what I am going for. Here are some pictures of the mechanisms before disassembly.
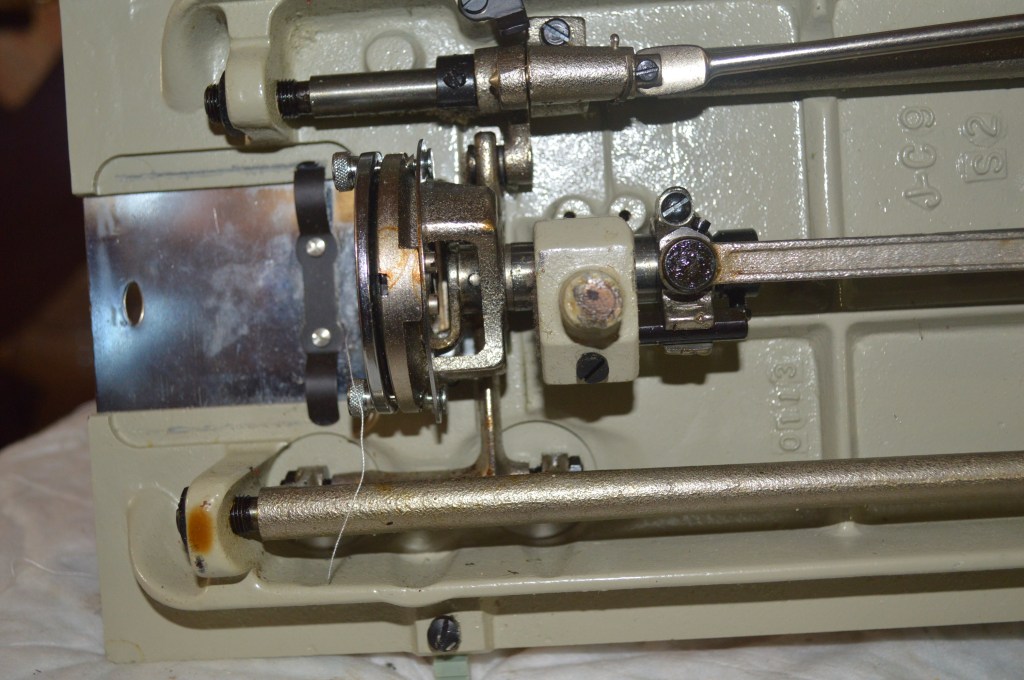
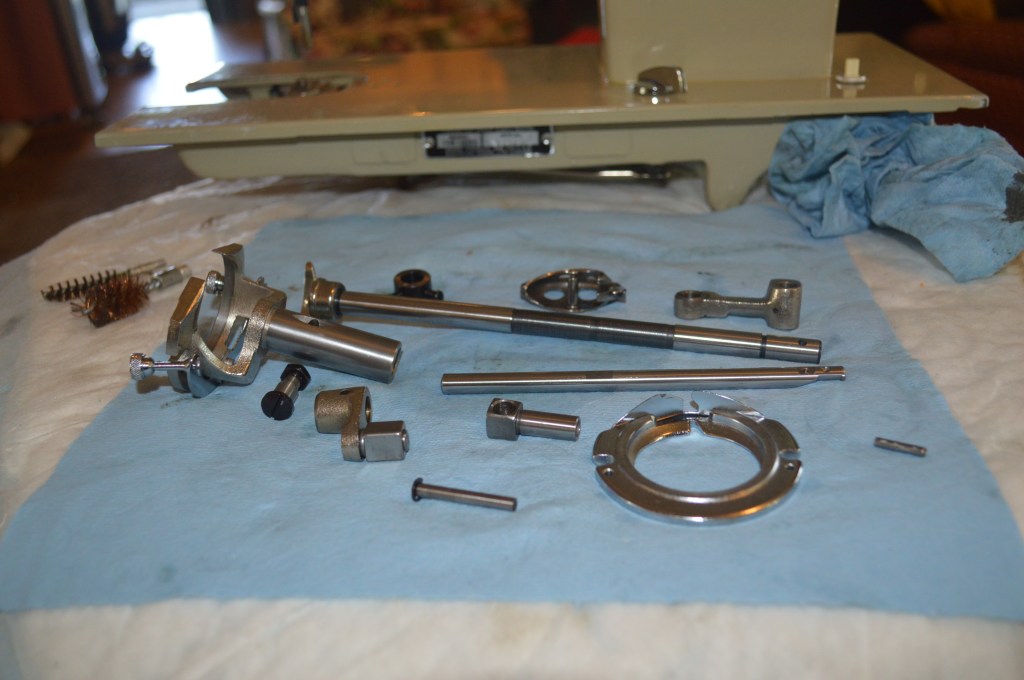
Starting at the bottom, the hook shaft, the hook shaft case, and the connecting arm is removed. This is where the sewing action takes place and a lot happens here to make a zig-zag stitch. The 1303 is a mechanical zig-zag machine. This means that as the hook shaft is oscillating in the hook shaft case, the hook shaft case is moving in and out to match the swing of the needle. Although it would probably be fine after a proper oiling and run in, the smoothest machine operation necessitates removal for cleaning and polishing. The feed dog rocker arms are cleaned in place, including the adjustment pins.
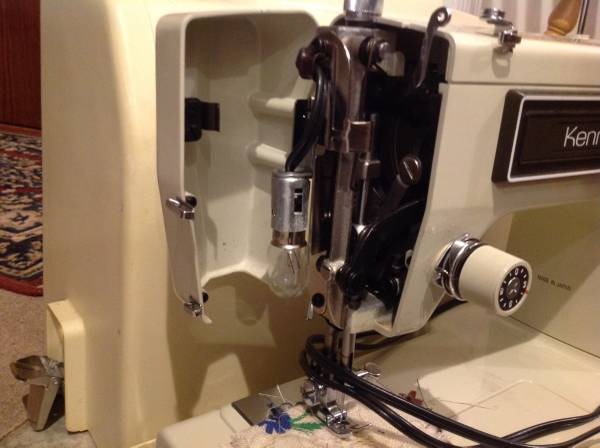
Next comes the needle bar head. Again, there is a lot of movement to turn the rotation of the arm shaft into an up and down movement of the needle. Again, not much indication of oil varnish here, but the needle bar and rotating linkage must be removed for proper cleaning and polishing. The presser foot pressure control knob and spring are removed to access the presser bar. The assembly looks like this before disassembly…
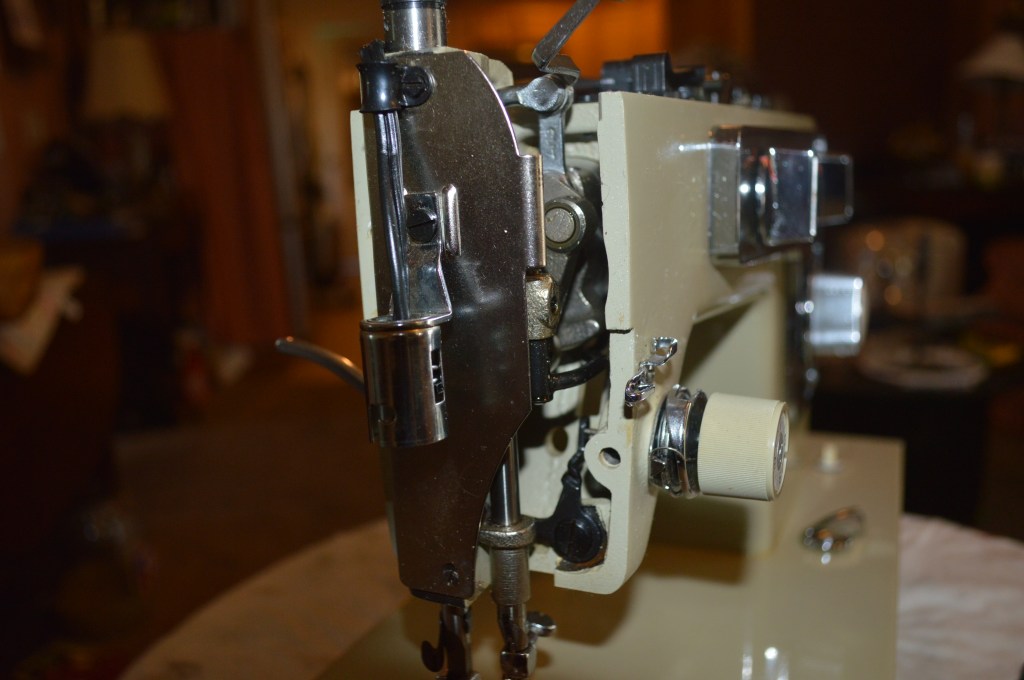
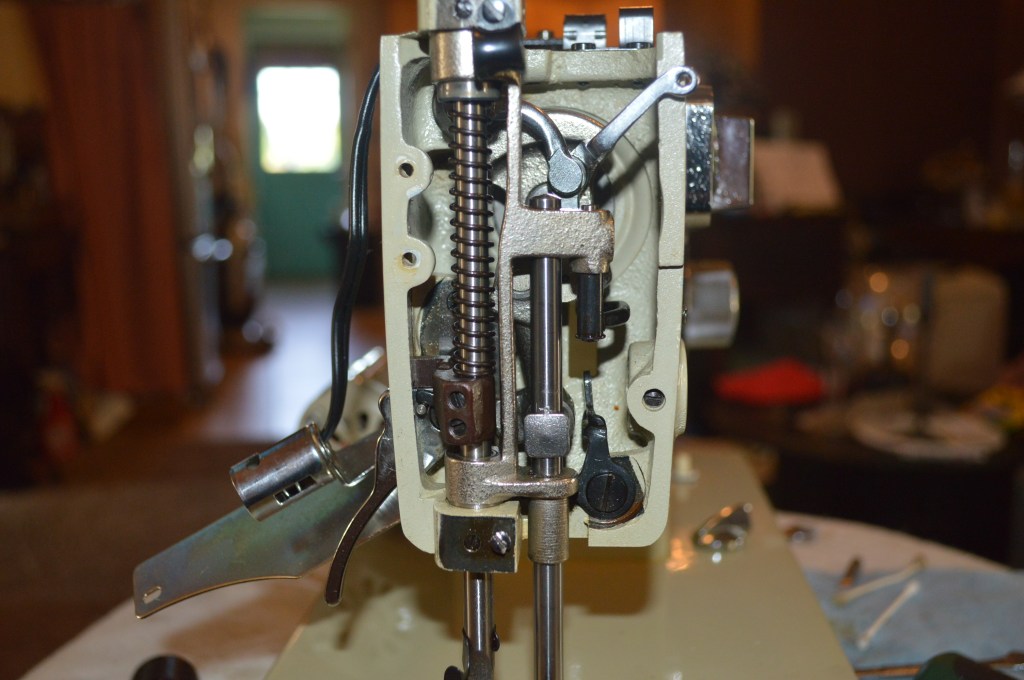
After removal, the parts are laid out for cleaning… these parts are all directly responsible for forming a stitch, and smoothness here is necessary. Take a closer look, the parts removed showed the reason they needed to be removed… oil varnish coating mating surfaces.
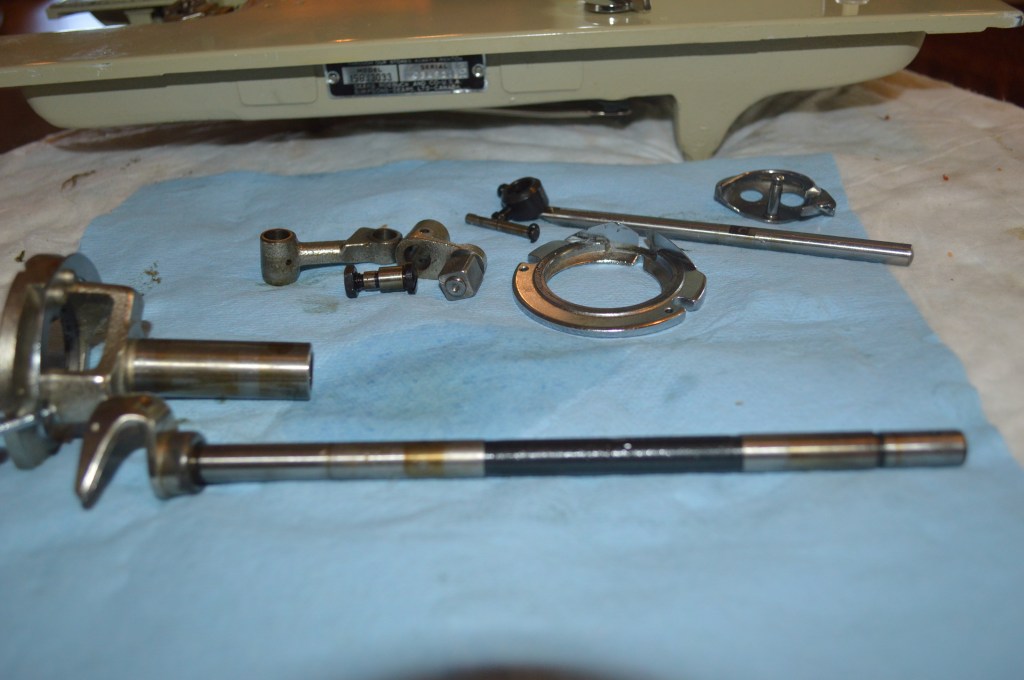
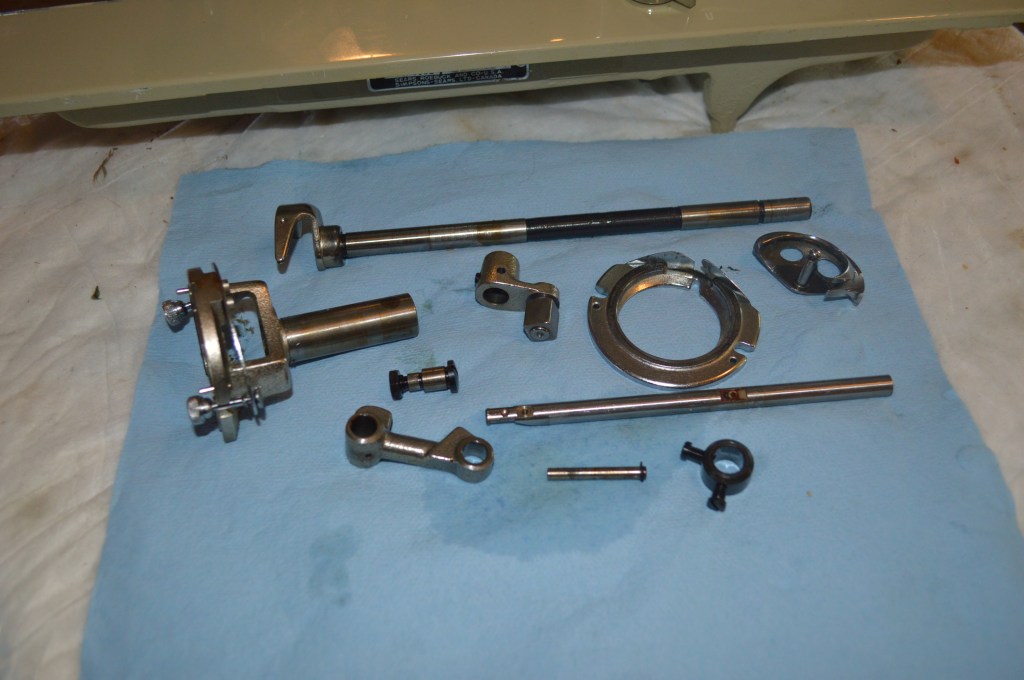
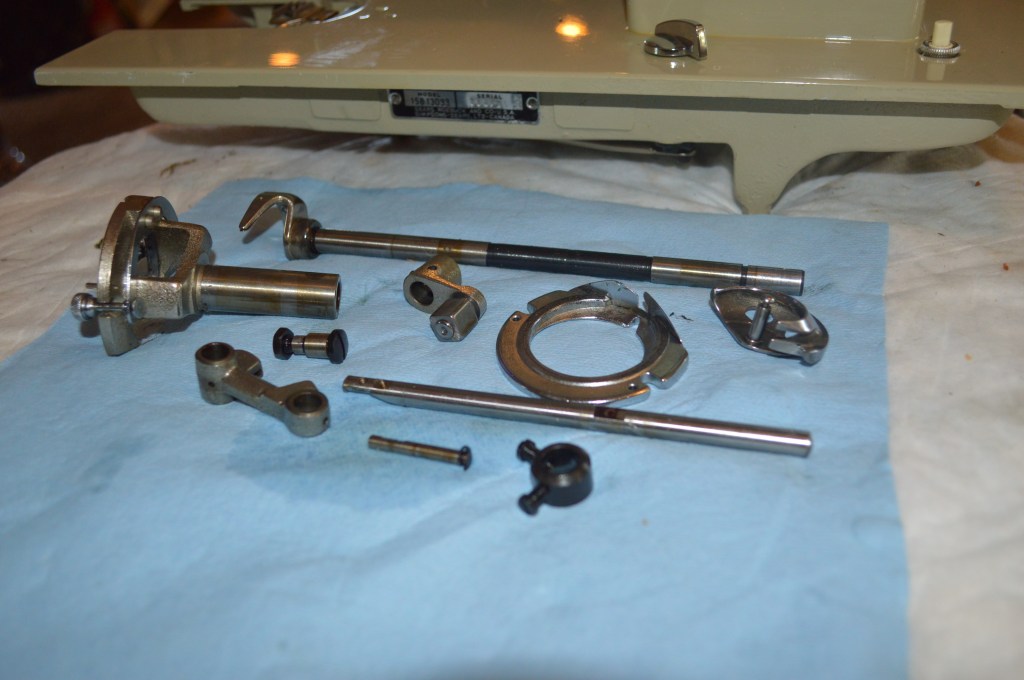
After cleaning, these parts are wire brushed and the shafts are polished…
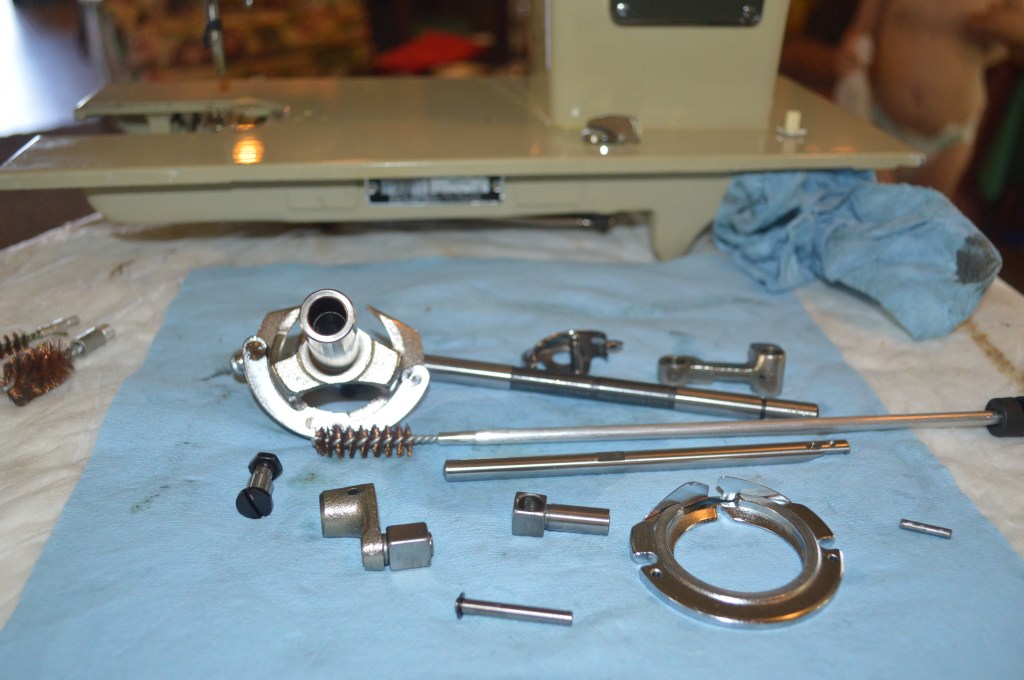
The picture above, shows another important area to clean. The bores that the shafts turn in need to be cleaned as completely as the shafts. A gun barrel cleaning brush doe a great job cleaning these bores. Different caliber brushes suit every bore size I have encountered on a sewing machine. Here the needle bar bushings are cleaned…

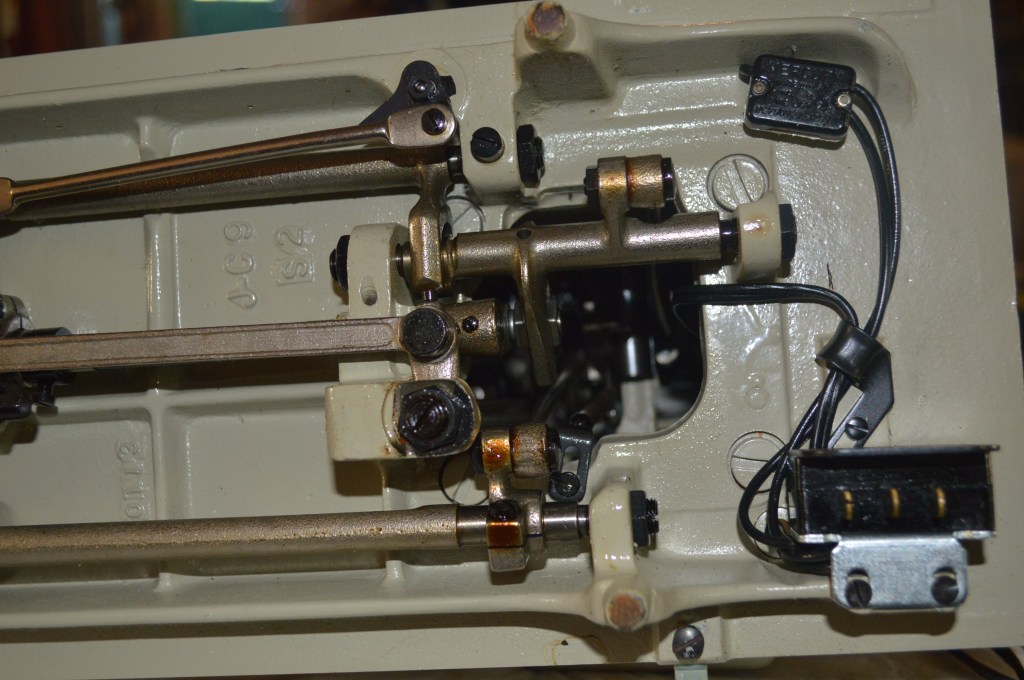
Despite not having a built in cam stack, the button hole and blind stitch mechanism is quite complex…
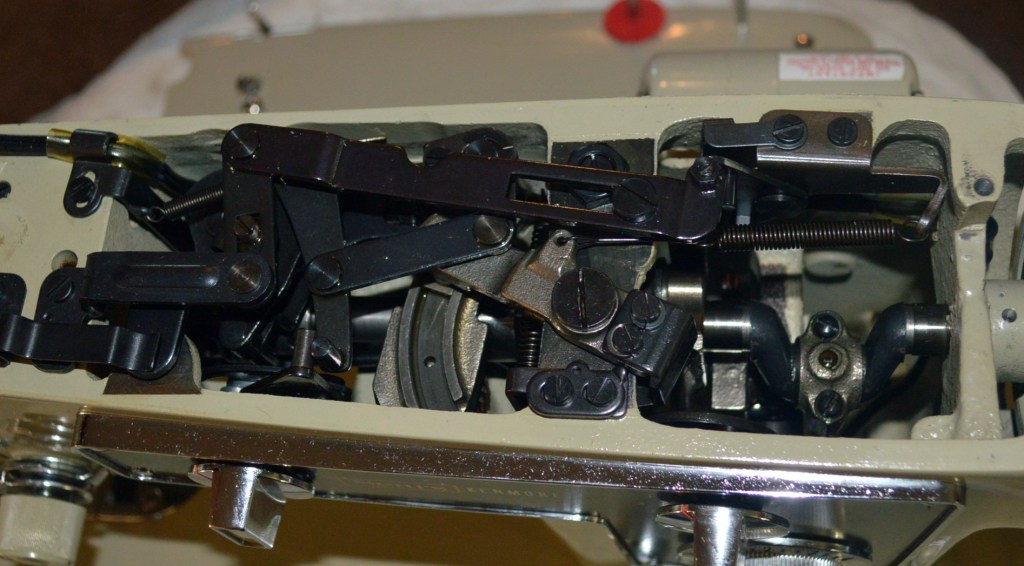
Despite how it looks, there is really very little that needs to be addressed here by disassembly. Keep in mind, disassembly is for the purpose of cleaning moving parts gummed up with old oil varnish to restore smooth operation. If there is no contamination, it is better to leave the assembly alone… there is nothing to gain here that can’t be achieved with a high quality oil like Tri-Flow. Remember… it it ain’t broke, don’t fix it.
If you look near the center of the machine in the above picture, you will see the zig-zag width control mechanism, it is the arc shaped part, and it has a tab that slides one way or the other to move the needle bar and translate this movement to the hook shaft case under the machine. On this machine, there is no sign of oil varnish, and disassembly is not necessary. All of the linkages are cleaned with Tri-Flow oil spray and compressed air. The same applies to the arm shaft connecting rod. It is smooth running and needs no disassembly. The gears hidden beneath these linkages are lubricated with Tri-Flow synthetic grease. The control linkages are checked for proper adjustment and indexing to the control knob positions.
The next step in this restoration is disassembly of the tension control mechanism. This is a necessary step for even the most basic service. While Kenmore tension controls are not the easiest to disassemble and put back together (lots of parts with certain orientation), a Kenmore sewing machine is very forgiving. Here is the tension assembly…
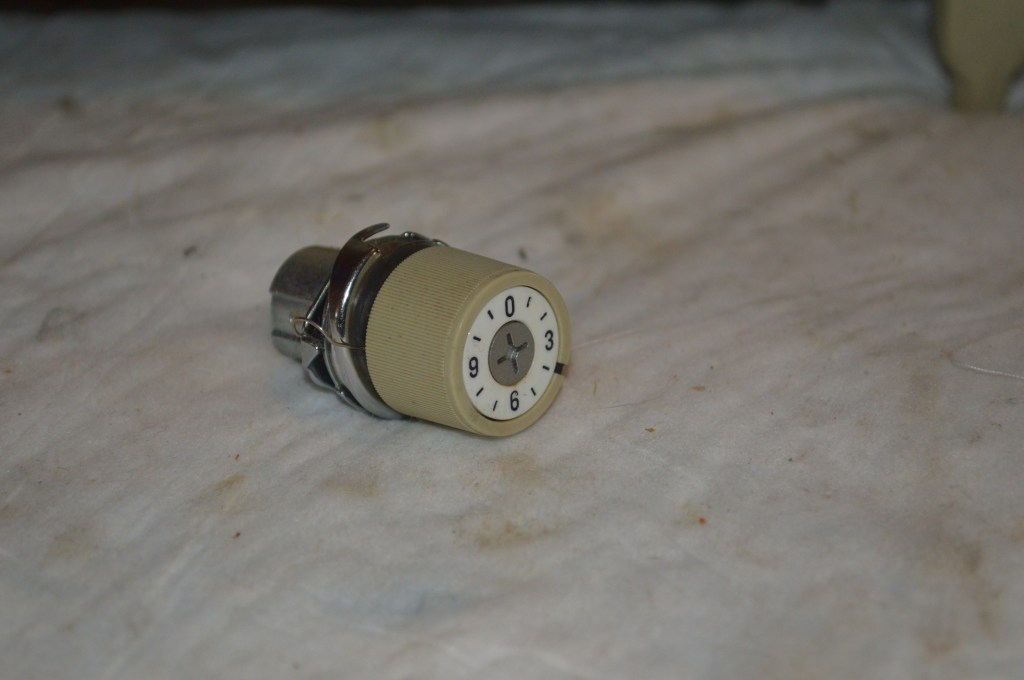
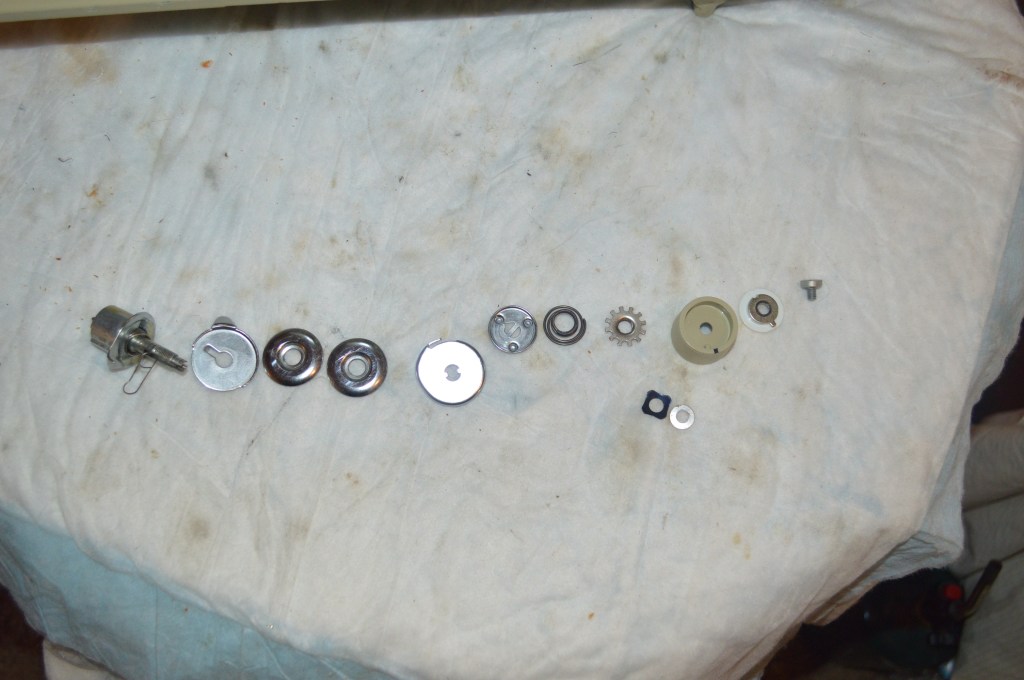
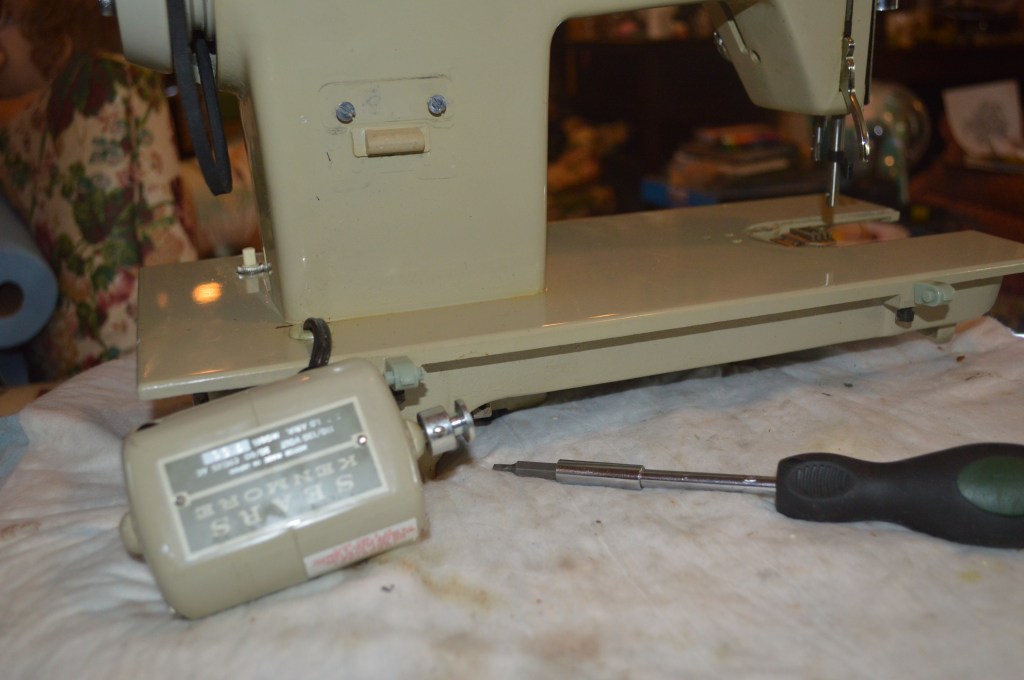
After cleaning, the assembly is ready to be put back in the machine. The tension adjustment will be made when the machine is tested and set at “4” on the tension dial. The next step is to disassemble the motor. Because the wires are in good condition, I do not want to cut the wires and the motor restoration is done with the motor laid to the side.
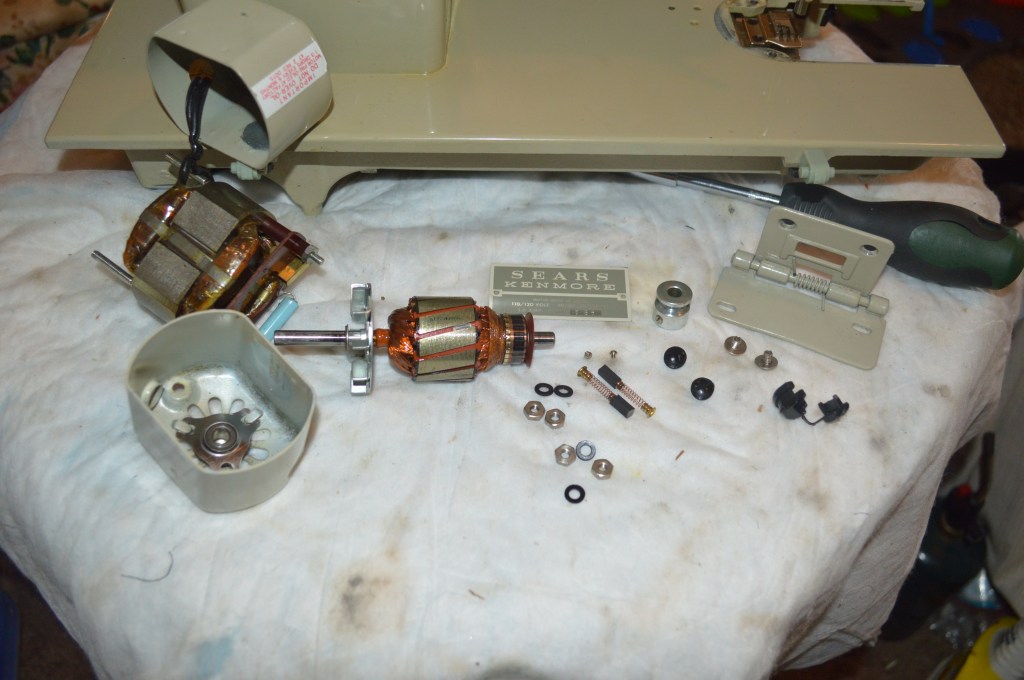
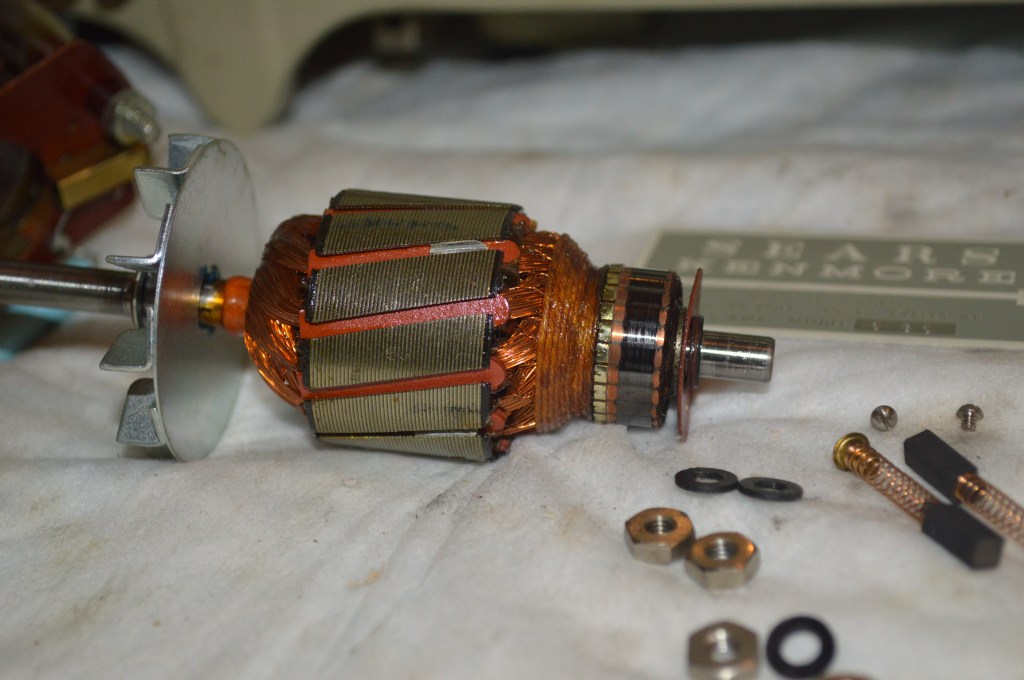
The armature is in need of polishing. This restores lost conductivity and extends the life of the brushes.
This consists of removal of the brushes and the armature. The armature and armature shafts are polished, and the brushes are cleaned. After reassembly, the motor is run in to ensure it is running as it should.
With the motor off, now is a good time to clean the machine. The entire machine is cleaned with GoJo and then carnauba waxed for a high shine. The machine yields a little dirt, but it was pretty clean to begin with. The biggest difference is that all of the scuff marks were removed in cleaning.
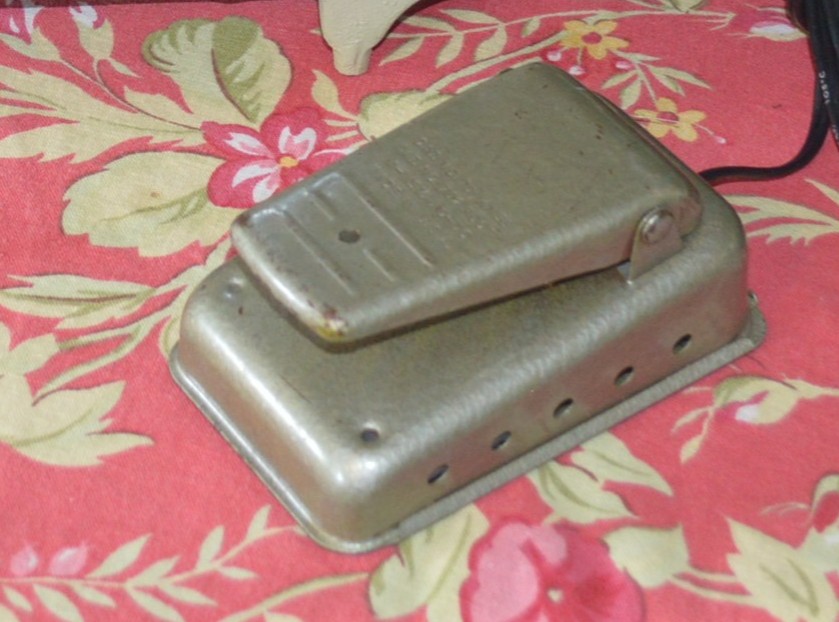
This restoration is a custom order. The Customer wanted a machine to be exactly like the sewing machine she had when she learned how to sew… right down to the foot controller. After showing me a picture of the controller she remembered, I happened to have exactly what she remembered.
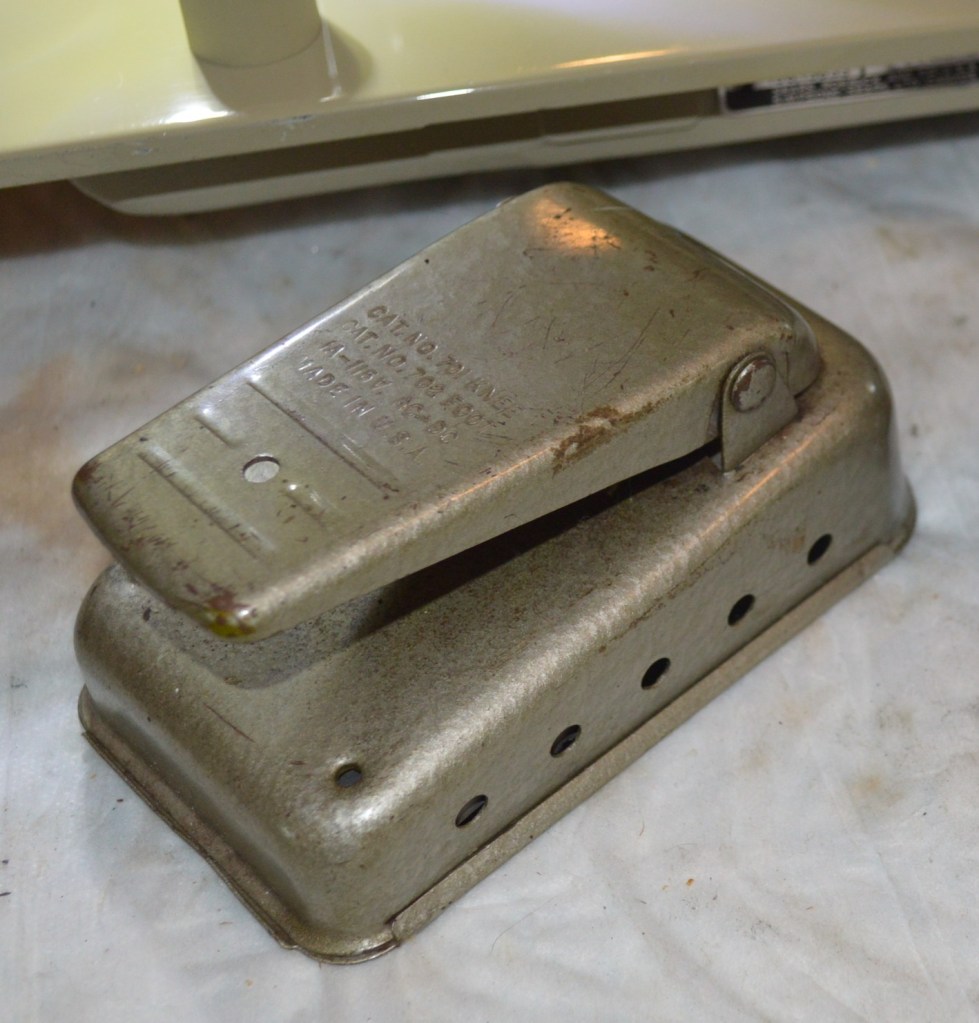
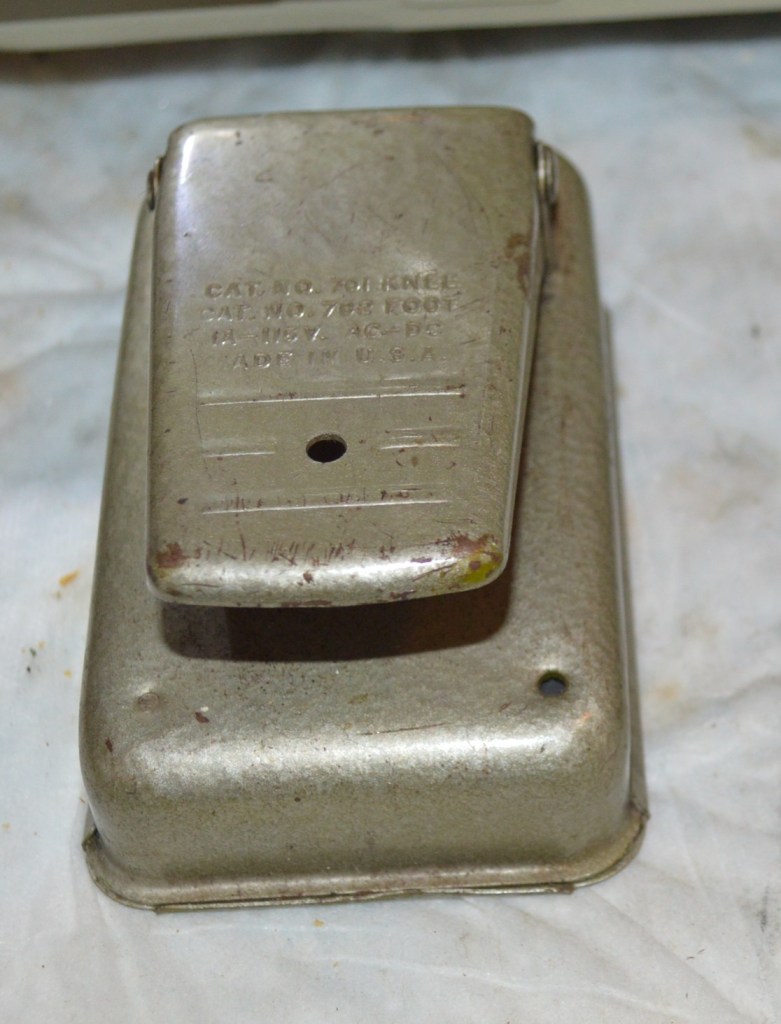
The next step is to restore the controller. The vintage resistance controllers worked by passing a brass contact bar over a series of brass contact “buttons” to control the speed, The brass contact bar and buttons will both wear due to oxidation and friction that accumulates over time. Aside from cleaning, this controller will be disassembled, the contacts will be cleaned and new wire terminals will be soldered for proper wiring to the controller.
The brass contacts are first cleaned with a wire brush and then finished by polishing with jeweler’s rouge. The smooth finish restored will ensure long life, provide better speed control, and reduce heat buildup caused by the oxidation.

Buttons cleaned and polished 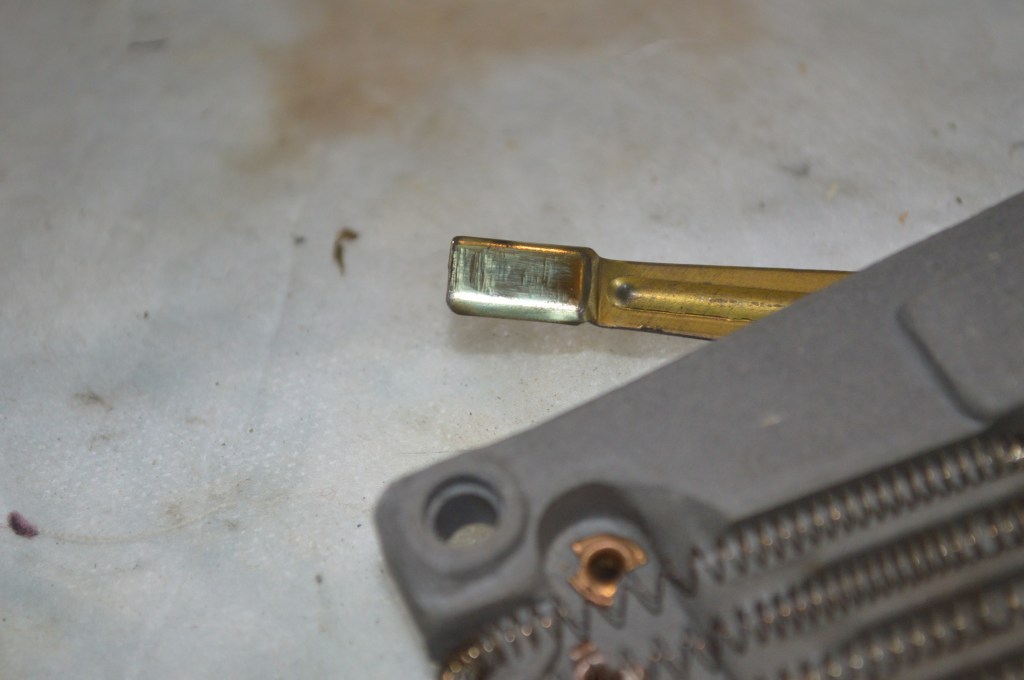
Underside of contact bar polished
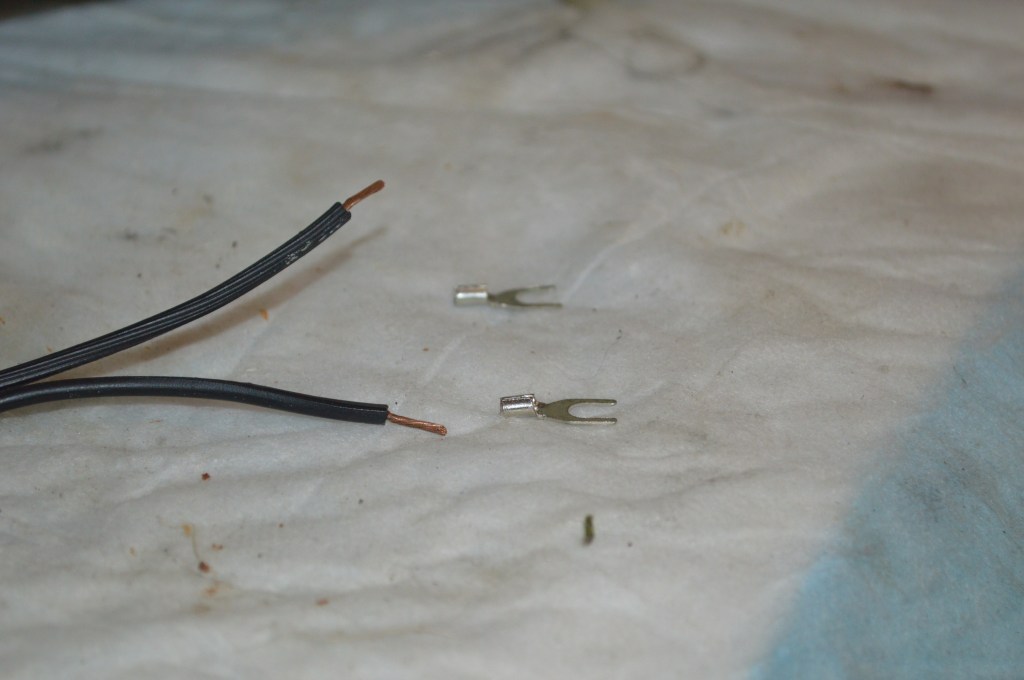
New wire terminals prepared for soldering 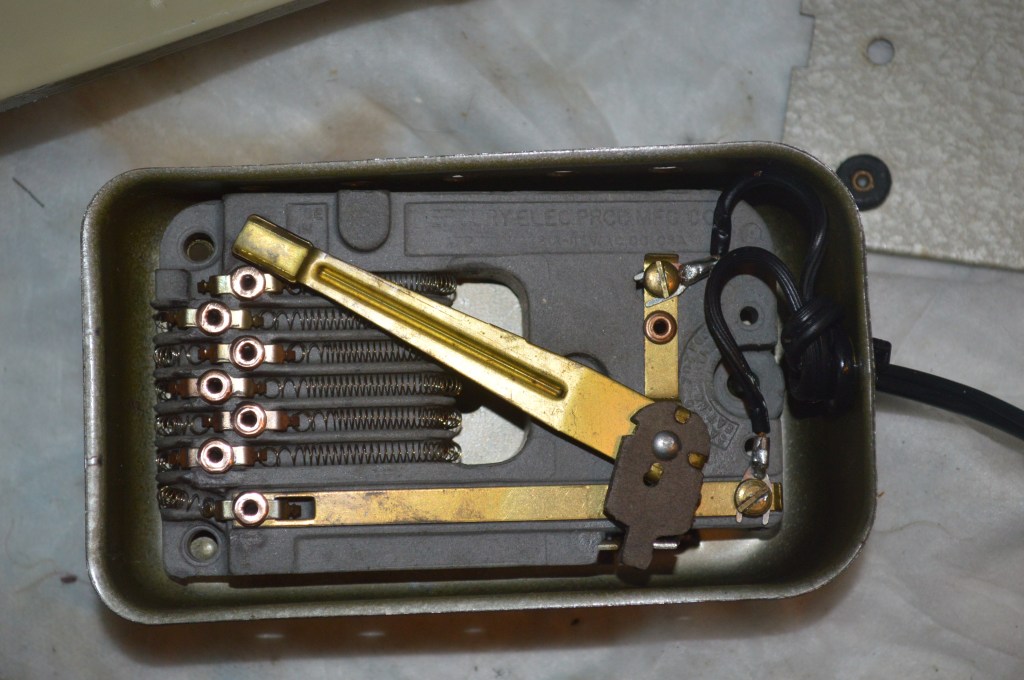
Controller reassembled
The final wiring and reassembly complete…
Finally, the machine is reassembled and tested. All final adjustments are made at this point. The machine makes a great stitch, turns smoothly, sews smoothly, and is quite powerful.
Thats it!
This has been a great restoration and I know that the Customer will be quite satisfied and excited to sew with this machine for many years to come… and that’s what this is all about!
Here is the machine before…
And here is the machine after…
To see other high quality restored vintage machines, visit our Etsy store at:
https://www.etsy.com/shop/pungoliving?ref=seller-platform-mcnav
If you have any comments or questions regarding the machines we list, please contact us!
Thanks for visiting and tell me what you think!

I have this sewing machine and I need help. The belt is not moving and I’m not sure why. The motor works.
LikeLike
Hello Andrea,
If the motor is turning but the belt is not, then the belt is slipping. Make sure the machine will turn easily by hand. If it does, the belt needs to be tightened. If not, then something is preventing it from turning. It does not turn by hand, often times the bobbin is not inserted correctly. Check this by raising the needle to the highest point. Then remove and reinstall the bobbin… finger up. It should click into place.
If the belt is loose, there is a bolt that holds the motor bracket to the machine . Loosen the bolt and move the motor downward to tighten the belt.
Please let me know if either of these causes are corrected on your machine.
Than Kim s,
Lee
LikeLike
I have thus machine. It was a demo at Sears in Los Angeles. It’s been in the shop 3 times I think in its 50 year lifespan. Bought it in early 70s. Sews like a dream. It’s a keeper love my machine!
LikeLike
It is truly heavy duty in comparison to any new plastic machine you can buy today. You can tell from the weight of the machine that it is well made and will last at least another 50 years. It’s a keeper!
LikeLike
I have a Kenmore model 158 13033. I need a foot pedal control for it can u help me get one i bought 2 on ebay but it is not working right connection light is coming on but no power to run the motor can u help me please thank u
LikeLike
Hello Elton,
the foot controller for the 1303 is a generic controller… any resistance controller should work. The 3 prong plug at the end of the Kenmore power cord sends power to the light continuously, and power to the motor through the controller. It is possible to buy 2 bad controllers. but not likely.
Have you seen the machine run? or is it a machine you acquired and connected a power cord to and the motor won’t run. If this is the case, the wiring to the plug on the machine may be the culprit, or the motor may be bad.
Knowing a little more history of your machine may allow me to help you sort out the problem.
I hope this helps!
Lee
LikeLike
buenos dias mi maquina model Kenmore 158.13033 no embobina, por favor ayuda
LikeLike
Buenos días, estoy traduciendo del español al inglés, así que tengo un pequeño problema para entender el problema que tiene con su 13033. Si puede contarme un poco más sobre el problema que tiene, es posible que pueda ayudarlo. en arreglarlo.
¡Qué tengas un lindo día!
Lee
LikeLike
I just found this in storage after 30 years.
LikeLike
Hello Peter,
Wow! It was in storage unused for 30 years? That’s a long time. I’m sure the machine will run but you need to oil the assemblies and the motor. The machine has a cam stack under the top cover. You should spray this with WD40 and let it sit for a few hours… then spray it again. The cam follower tends to get stuck with old oil varnish and needs to move smoothly to change stitches properly.
Do you plan on using the machine?
Let me know!
Have a blessed day,
Lee
LikeLike
Thanks for the comments! My wife tried it recently year and it worked fine without oiling, but I sold the house where it was stored for 30 years, and it is now in a garage in Northern California. Because it is in such good shape, I would like to sell it to a good home. Made in Japan. Where are you?
LikeLike
Hello Peter,
Sorry to get back to you so late… I live in Virginia. Typical, it doesn’t look like we could live any farther apart without getting wet. I think you could probably expect you could sell it locally or another good option is to donate it to a charity thrift store. People are looking for good machines.
Have a great day!
Lee
LikeLike
Thank you so much for the reply. I am happy that there are people reviving these great machines, as I have no time to tinker. I found someone who will pay $30 and restore it (probably just needs oiling and maybe clean pedal inside.) I will add you to one of my many websites, but not sure which.
Trisoma.com
LikeLike
Thanks!
LikeLike
You don’t have to post my websites above- just for your use. Maybe I will add to this one below, because many Senior ladies in that area.
LikeLike
Hi! I bought this machine recently, and I have been wanting to find a new home for it, because there is no slow speed. (I sew a lot of Scout patches, lol!) The presser foot takes me from 0 to 60 mph. After reading what you wrote about rewiring and cleaning the pedal, do you think that would allow me to sew slower? Thanks for any advice!
LikeLike
Good morning Jamie,
Sometimes it take a while to diagnose a problem, but in your instance, I can tell you with 100% certainty that your foot controller has gone bad. Cleaning a controller makes it smoother in operation, but no speed control is an indication that the wire filament in the controller has a break in it.
Replacement the foot controllers pretty inexpensive and they are readily available on Ebay… just make sure it has the proper plug for your machine, or use your cord set to attach to the replacement controller… it’s not hard to do.
I hope this helps and please let me know if I can be of any further assistance.
Have a great day!
Lee
LikeLike
Thank you so much!! I was ready to give it away (very sad), because I really need a slow speed.
LikeLike