
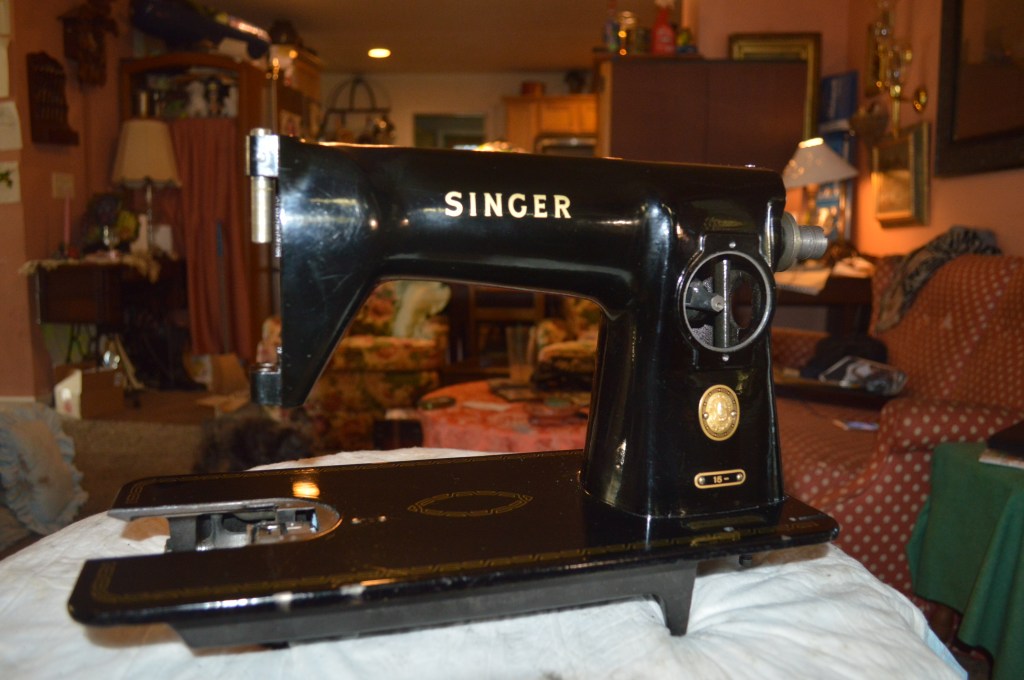
On the bench for restoration is a Singer model 15-75. Many are familiar with the Singer model 15-125, and the 15-75 is identical in every respect except the 15-125 uses a direct gear “potted” motor, and the 15-75 has an external motor and is belt driven. I am a big fan of the Singer 201-2 and the 15-91, both of which have the potted motor. These motors have a stellar reputation and many consider it to be the best motor Singer ever made. On the other hand, an external motor has an advantage in that they can be easily replaced or upgraded, and still demonstrate the true potential of the sewing machine. An interesting fact about the 15-75 is that it is the last model 15 sewing machine produced that could be used as a treadle machine… the end of an era.
The 15-125 and the 15-75 are both restyled model 15’s and the last of a long pedigree of model 15’s Manufactured in many different series numbers, the model 15 was produced between 1890 to 1958. Along with the 15-125, the 15-75 had a production run between 1955 to 1958, and while the 15-75 is by no means a rare machine, it is an uncommon machine.
This machine is a great example of a 15-75. Offered to me by one of our wonderful customers who found it in a local listing, she was gracious enough to purchase and ship it to me at her cost. She thought it deserved a meticulous restoration, and I agree. I hope she reads this blog and feels some satisfaction in the fact that it was restored to the highest degree possible, and will provide years of sewing satisfaction to many generations of sewers in the family of her new owner.
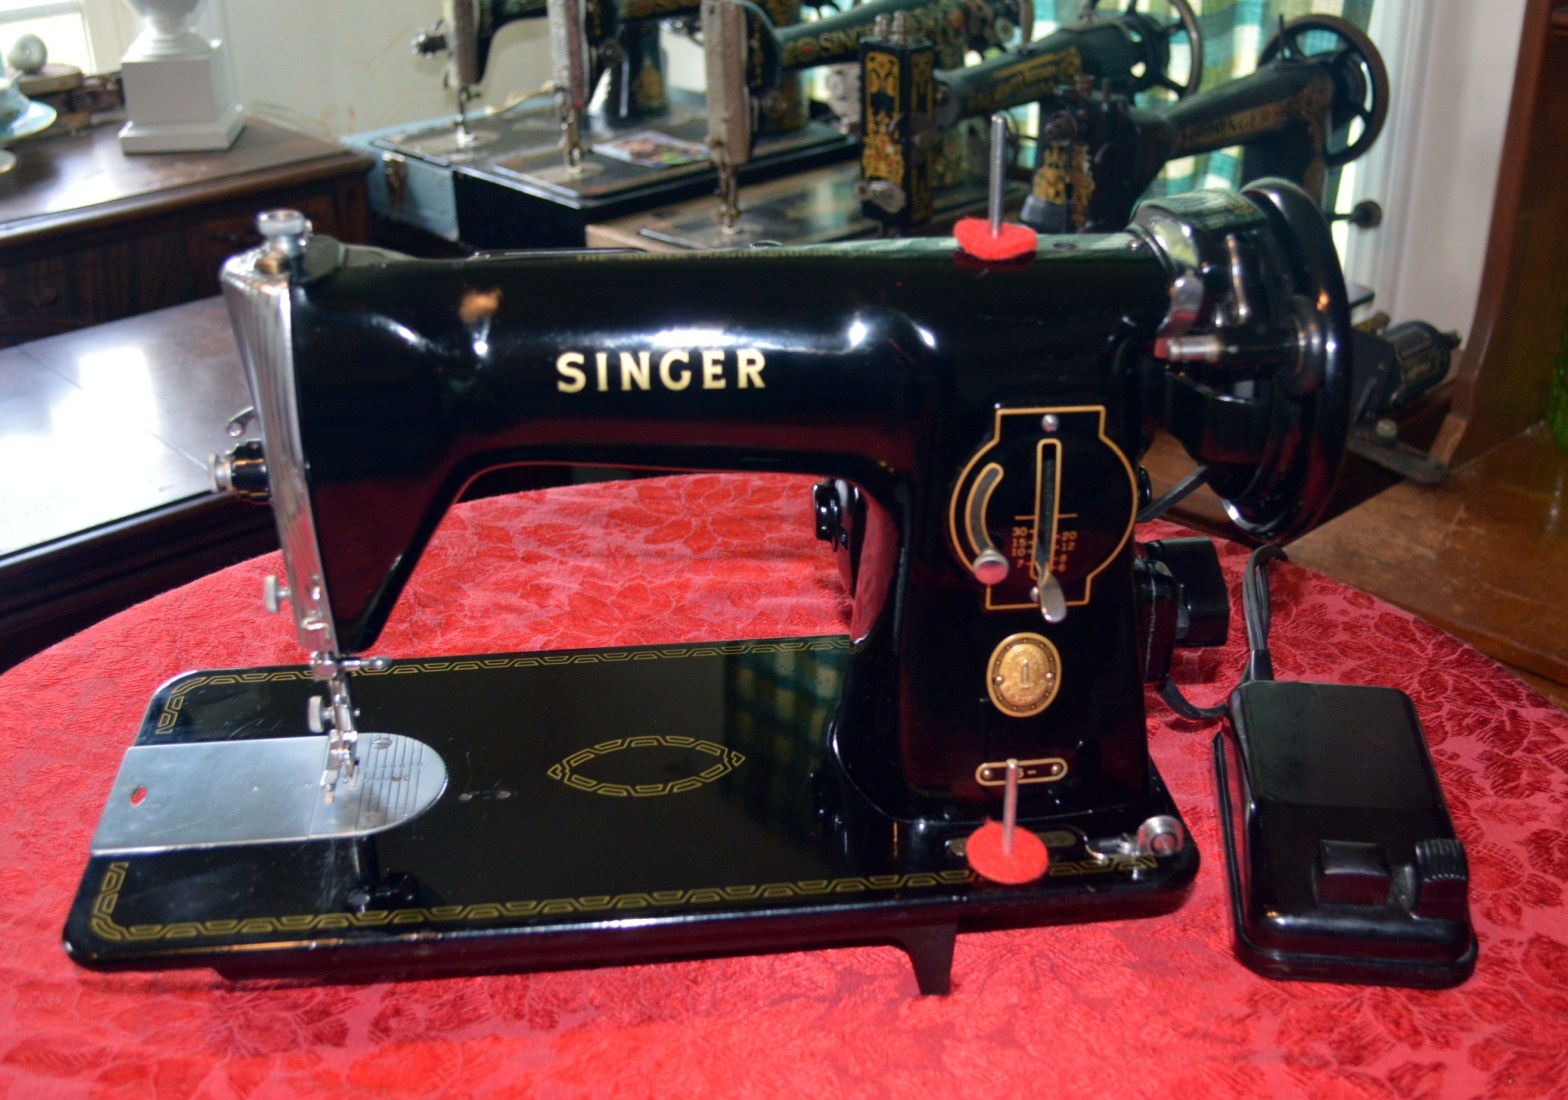
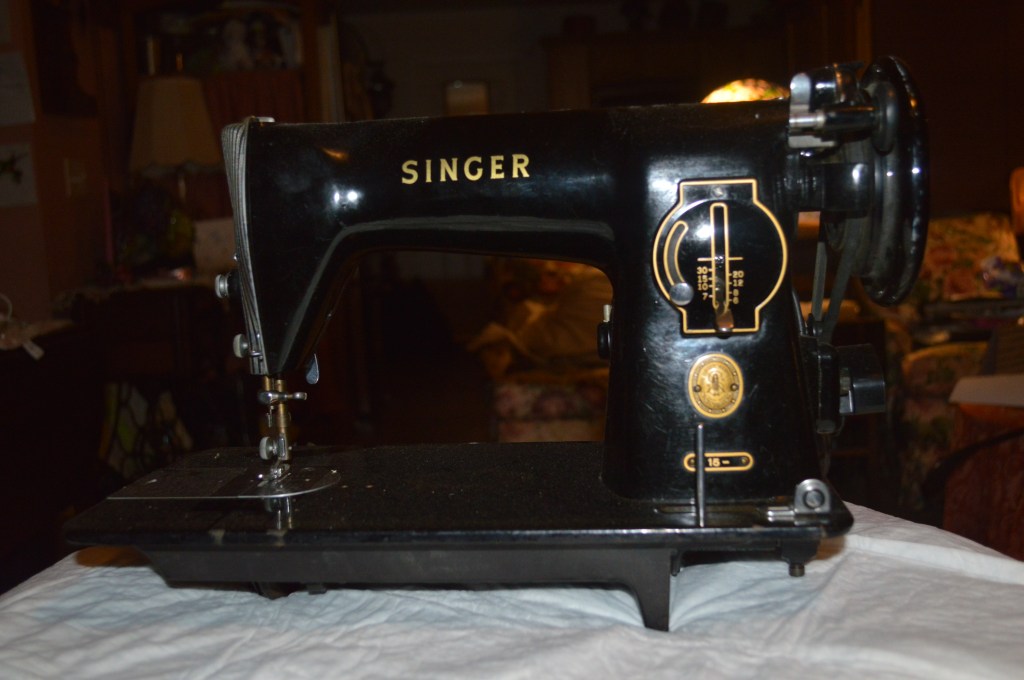
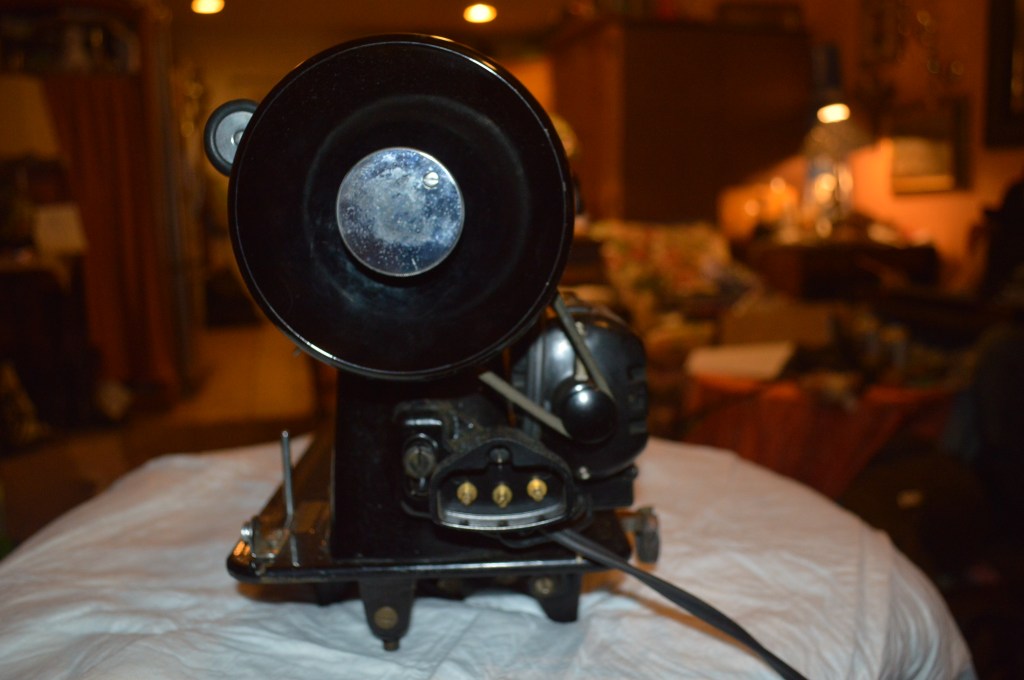
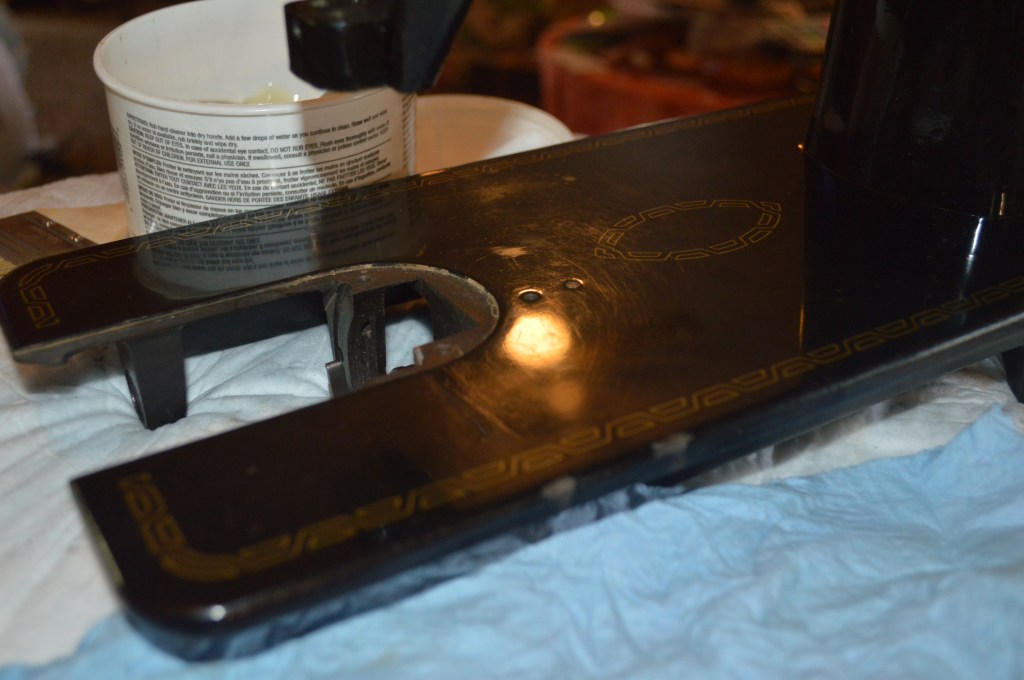
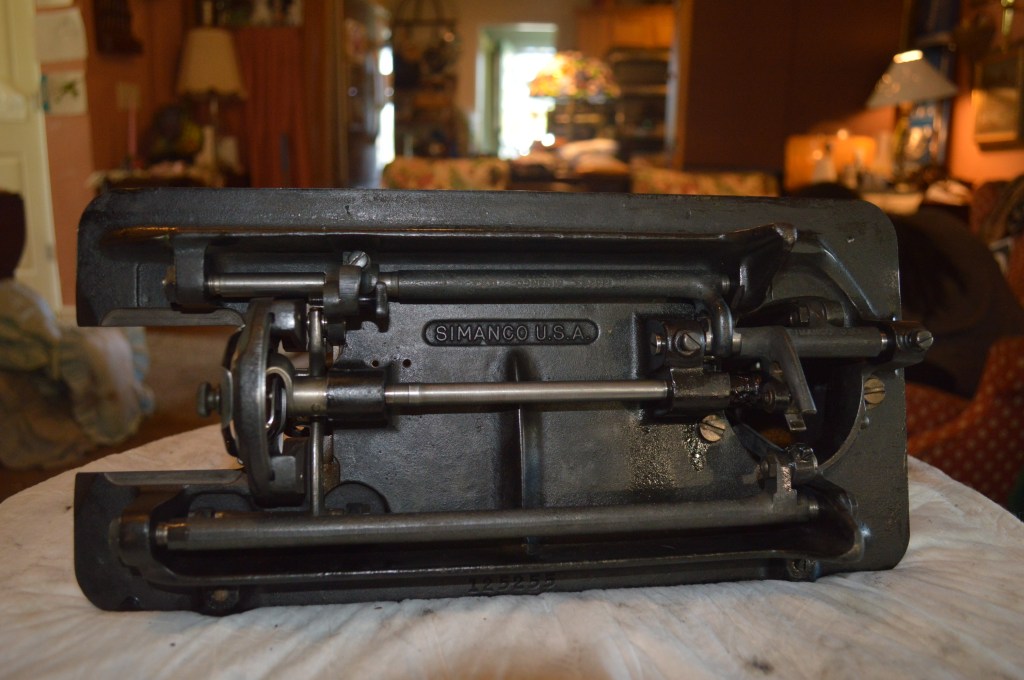
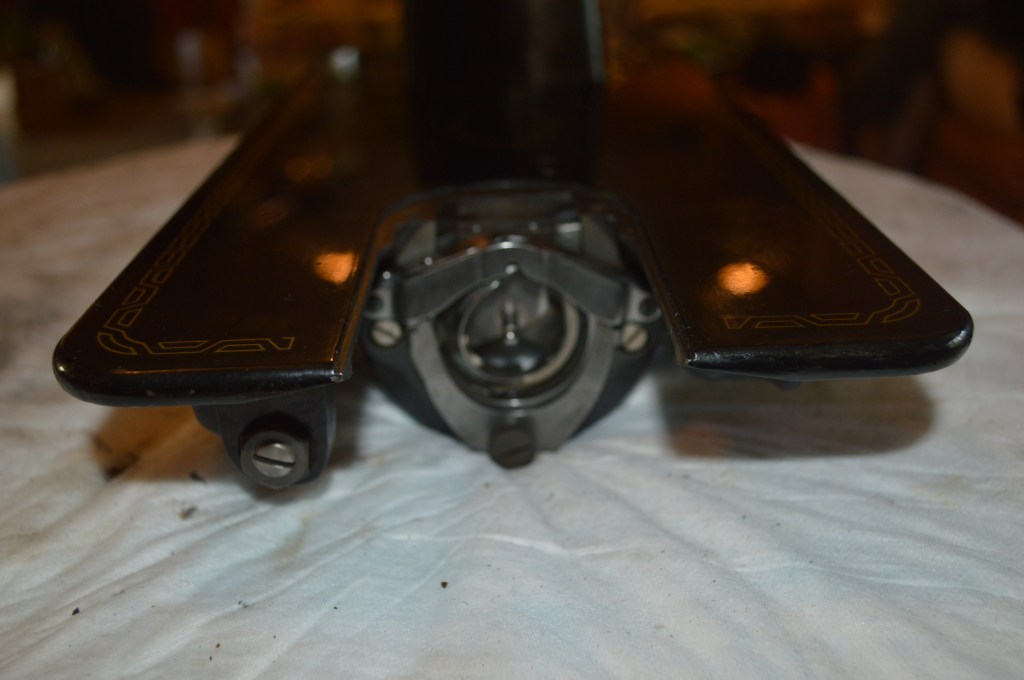
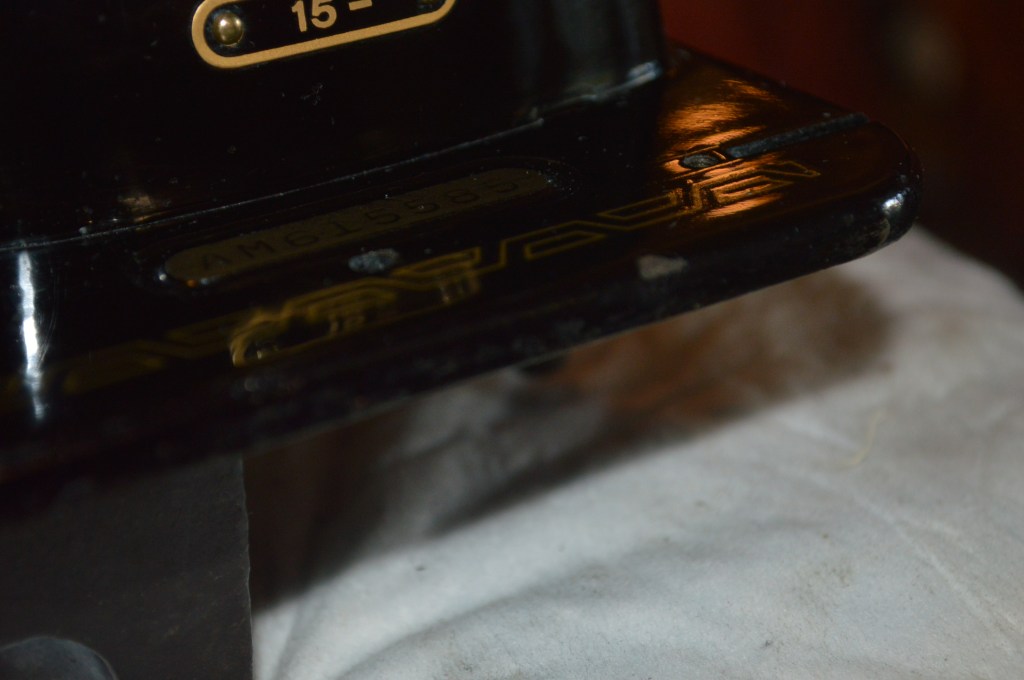
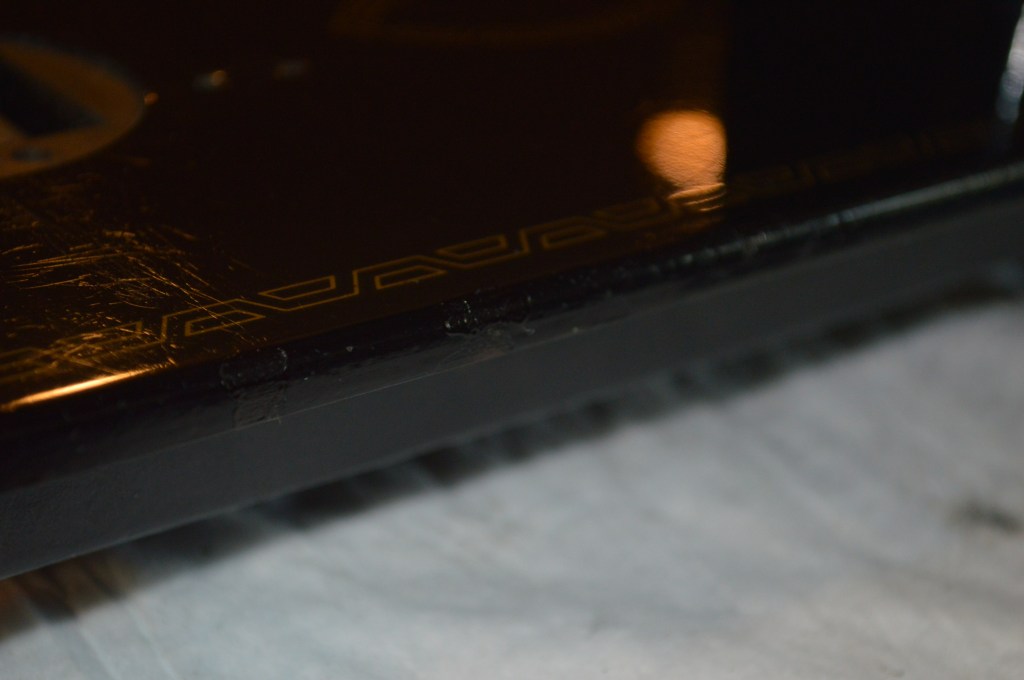
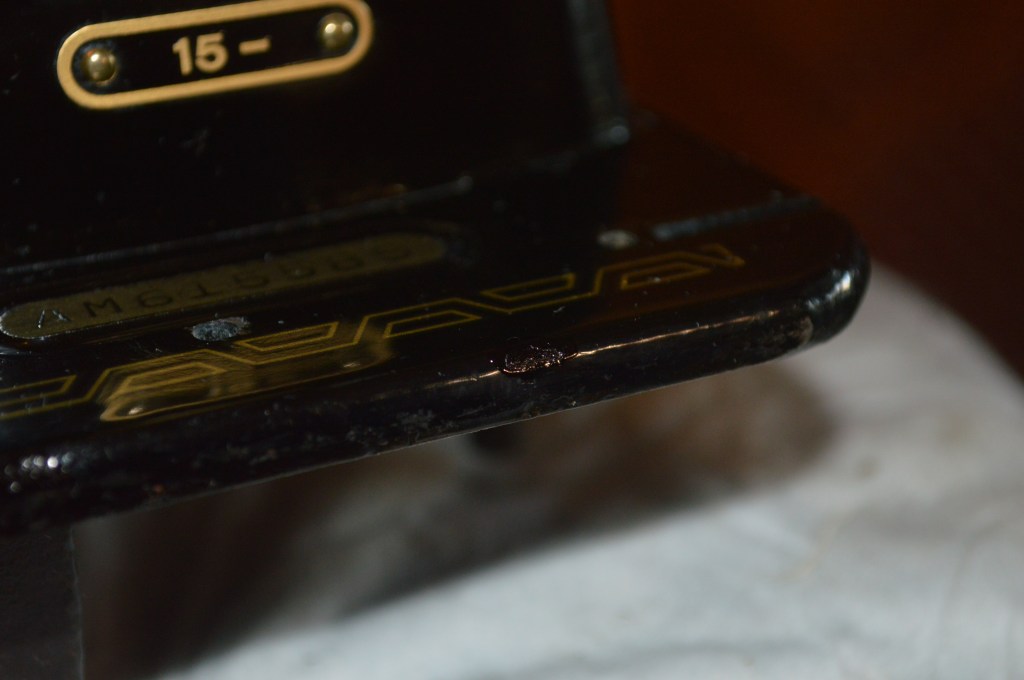
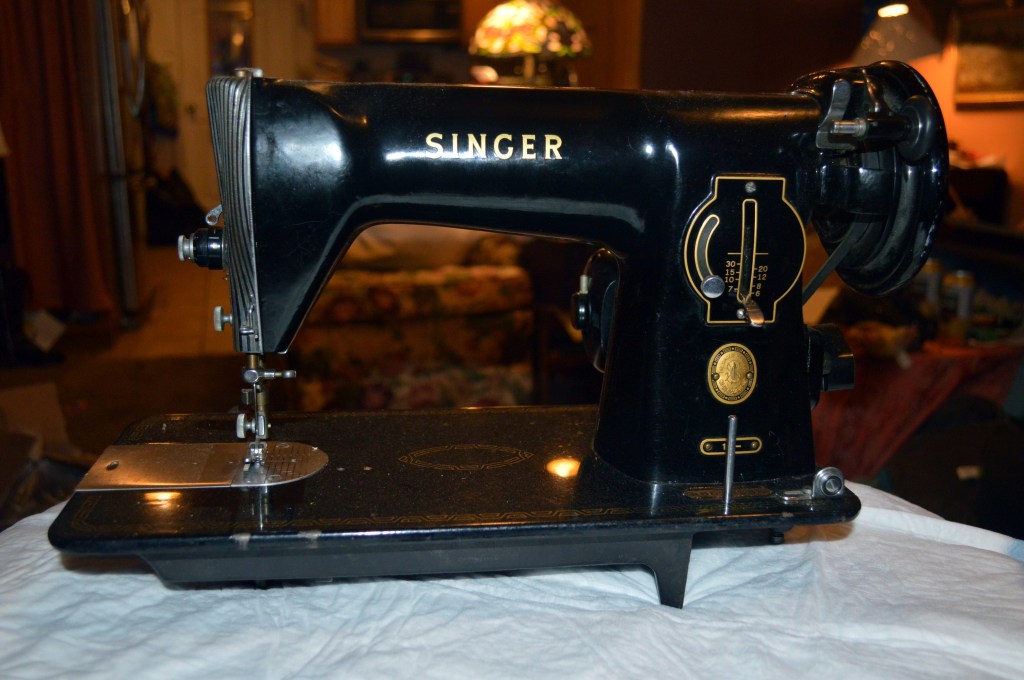
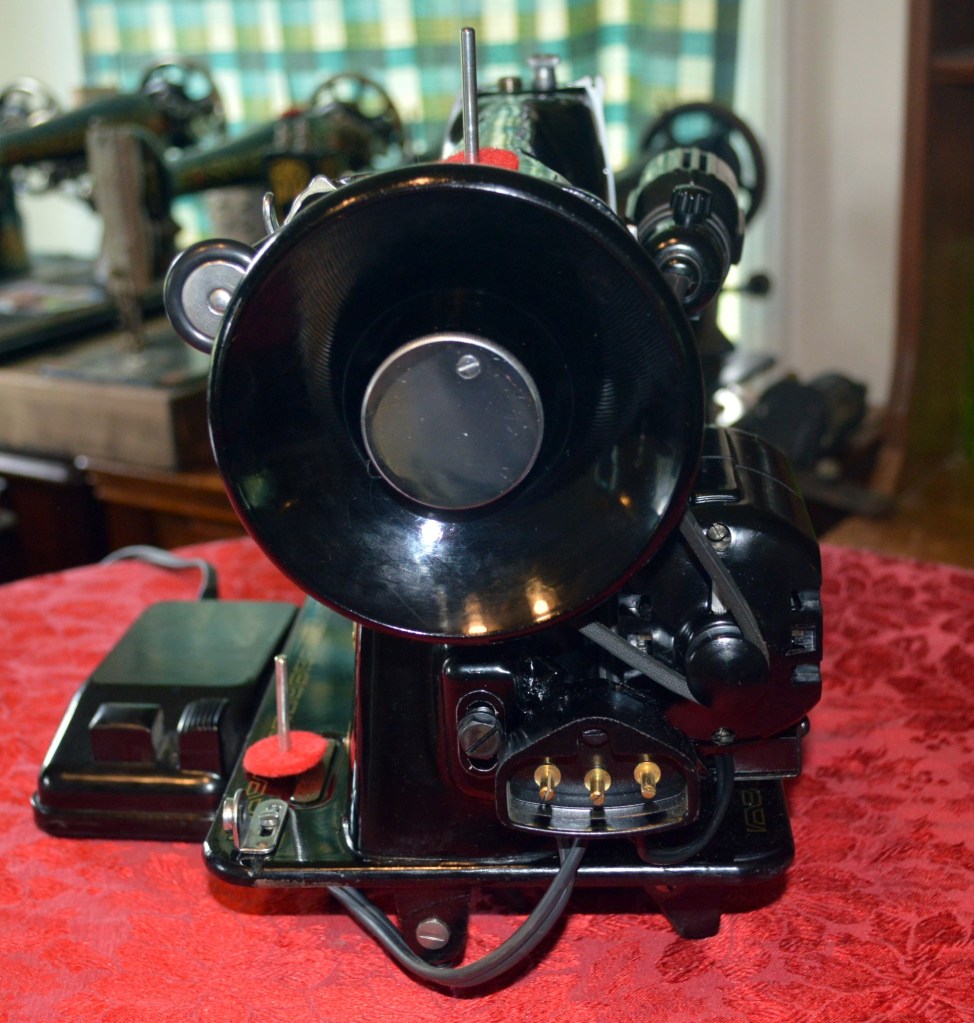
This particular machine is serial number AM615585 and her body is cast iron. This number places her “date of birth” as December 10, 1956. The machine was dirty and stiff. The back story is that she was stored in a cabinet unused for decades. My initial evaluation of the machine revealed that the paint is in very good condition and the decals are excellent. The machine was jammed with thread around the bobbin and behind the balance wheel. The mechanisms showed the typical oil varnish deposits common to machines of this vintage. In short, nothing of particular concern either cosmetically or mechanically, the machine will restore beautifully. After disassembly and cleaning, she will sew beautifully as well… Because she is a beautiful Singer, and the last of her line, I intend to do my best to restore her to as close to “like new” as possible. Here are pictures of the machine before the restoration begins…

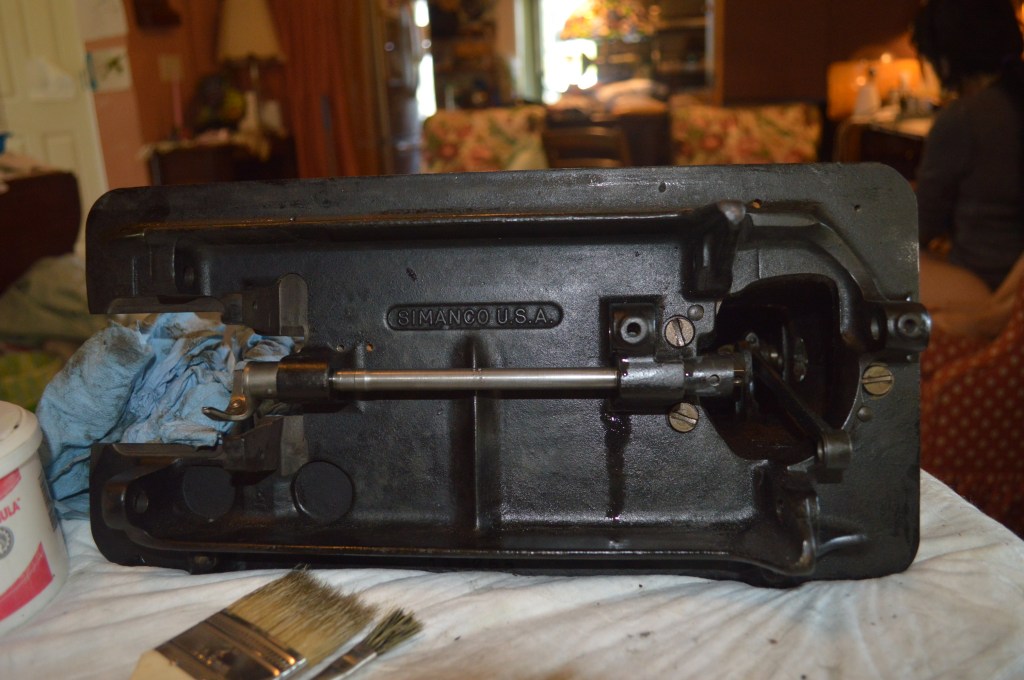
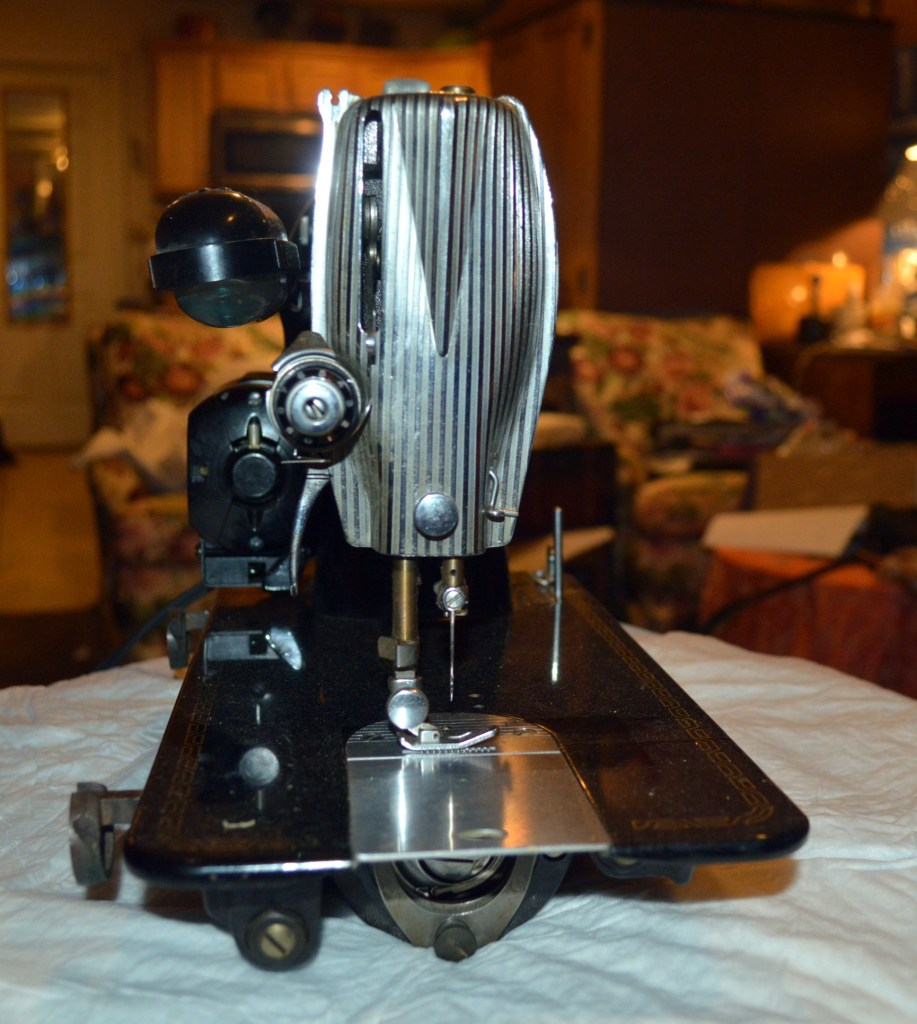
The first step is to disassemble the machine as much as possible to achieve the intended goal. This will include everything except for the main shaft in the sewing arm and the main shaft connecting rod. There is really no point in removing these parts, and disassembly runs the risk of disturbing factory settings that are essential to the smooth performance of the machine.

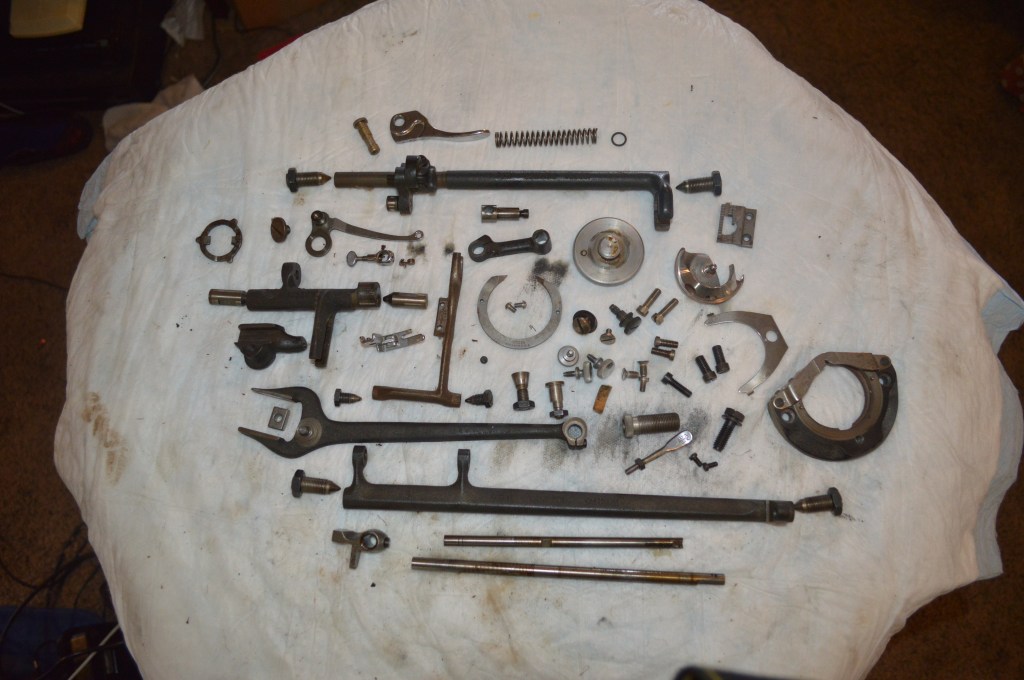
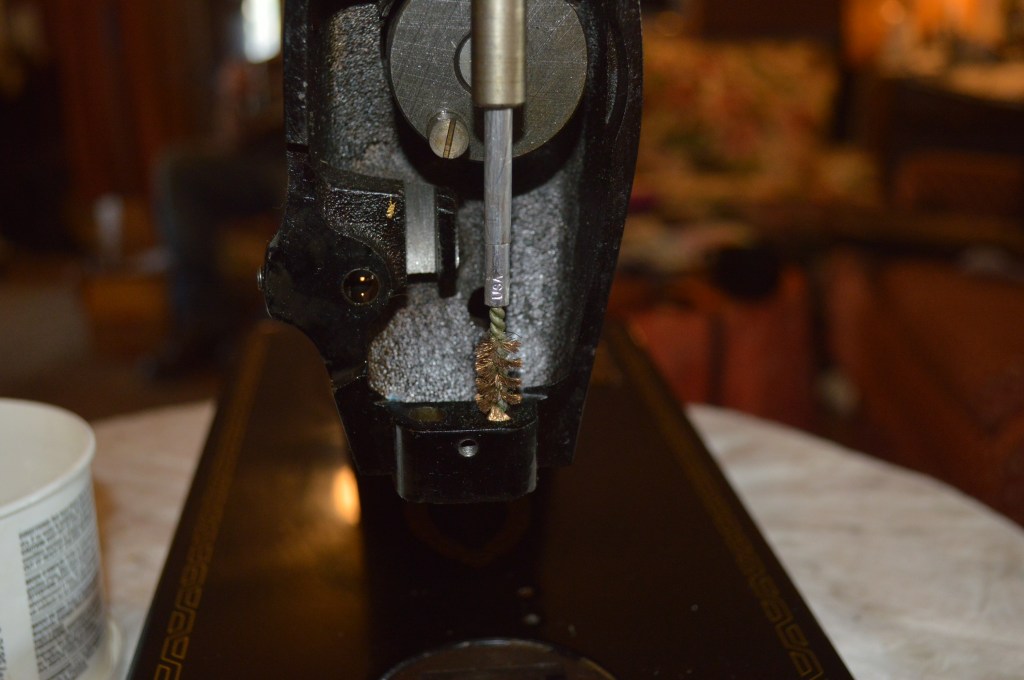
Well, almost all of the parts. In this picture the hook shaft is still in place. I normally remove the hook shaft, but the machine had a different idea. The hook shaft is pinned to the shaft with a solid roll pin and a set screw. Despite all of my attempts to remove the pin, it wouldn’t budge. I thought about some way to persuade the pin to come out, but all of my attempts were in vain. Following my number one rule… do no harm… I decided that the risk of damage outweighed the benefits of removing the shaft, so I’ll work around it.
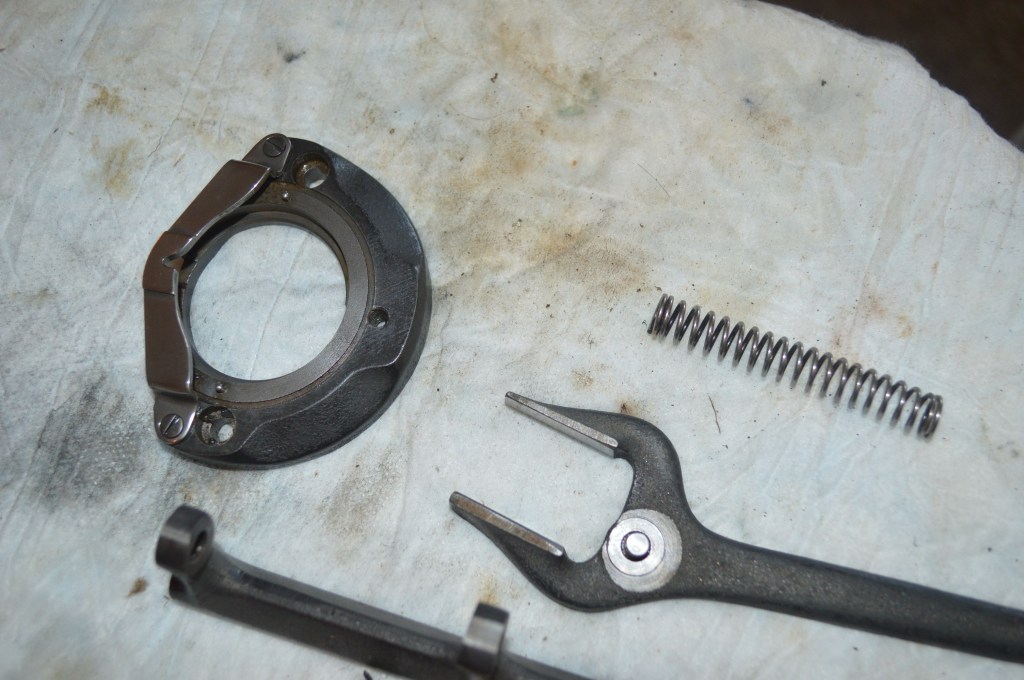
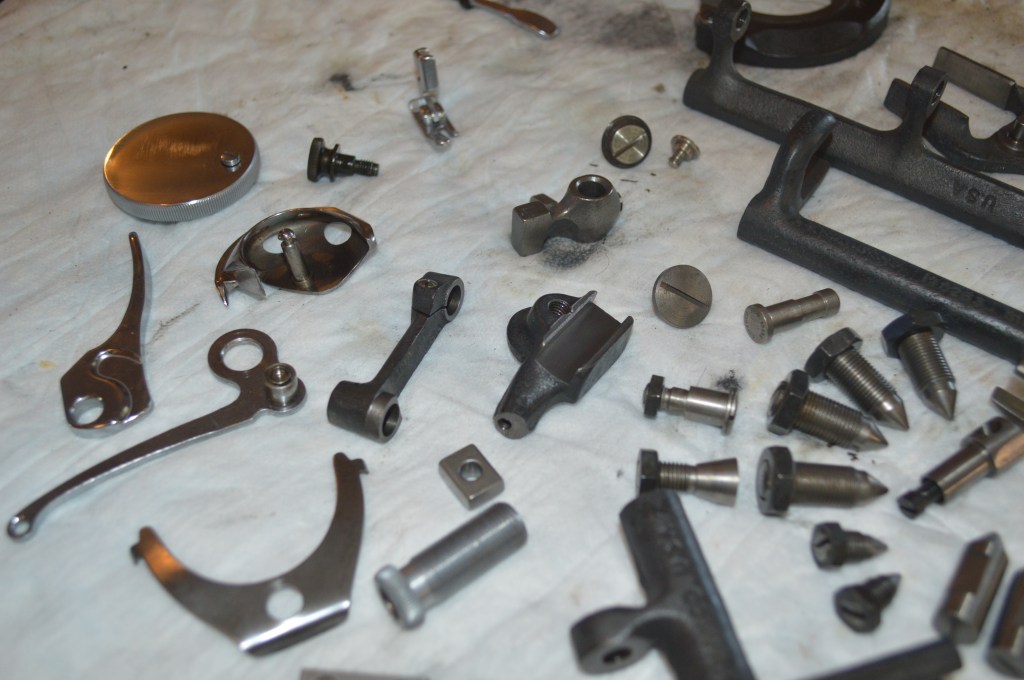
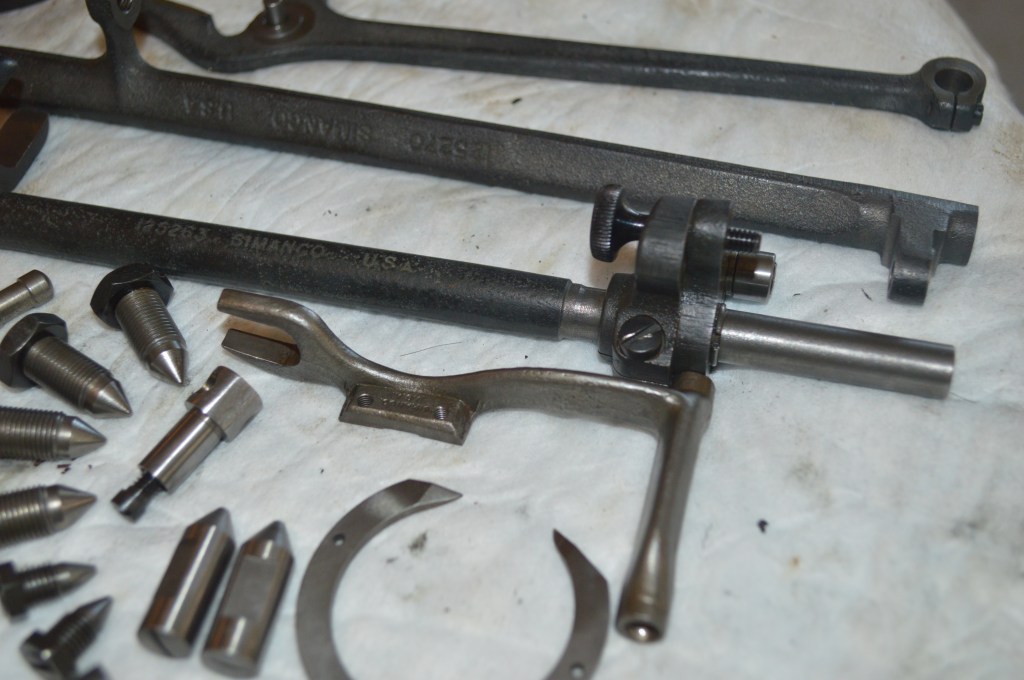
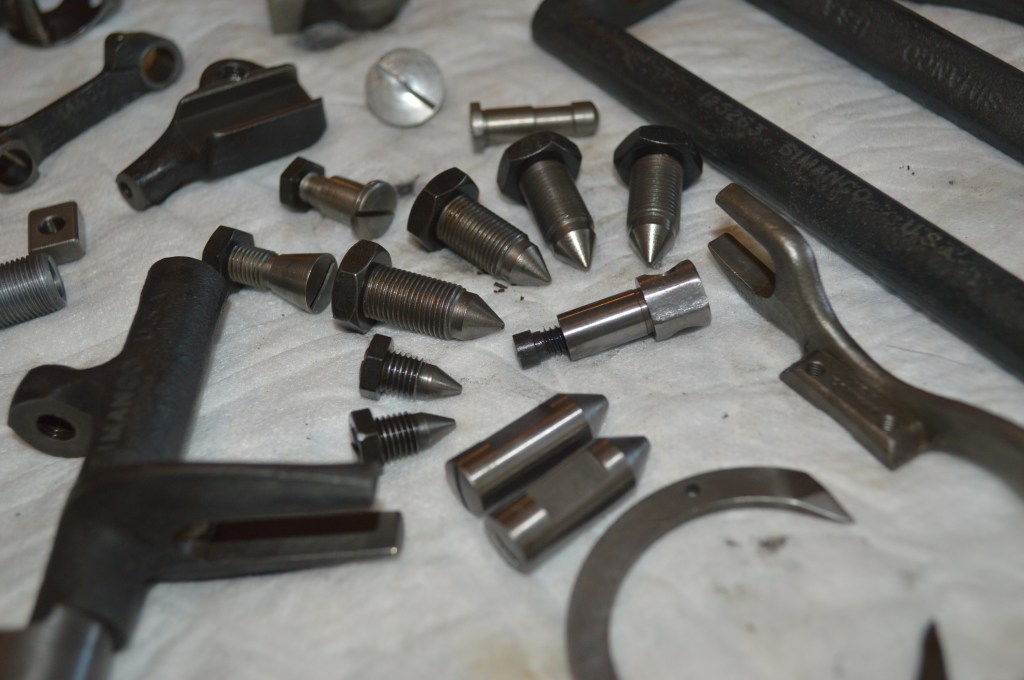
Here are the parts removed and laid out for cleaning…

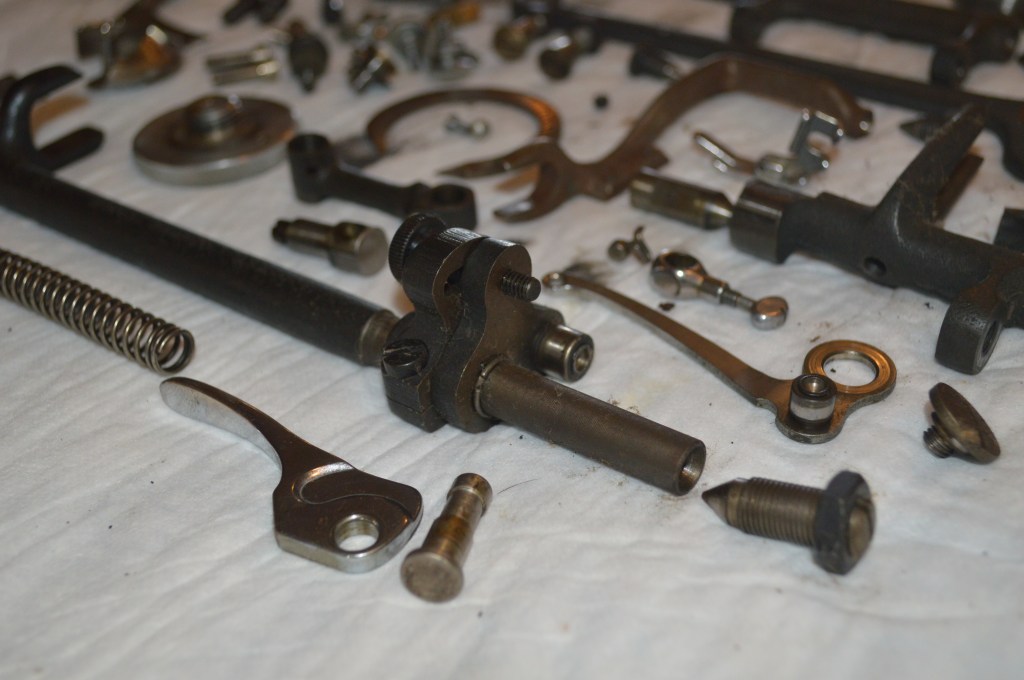
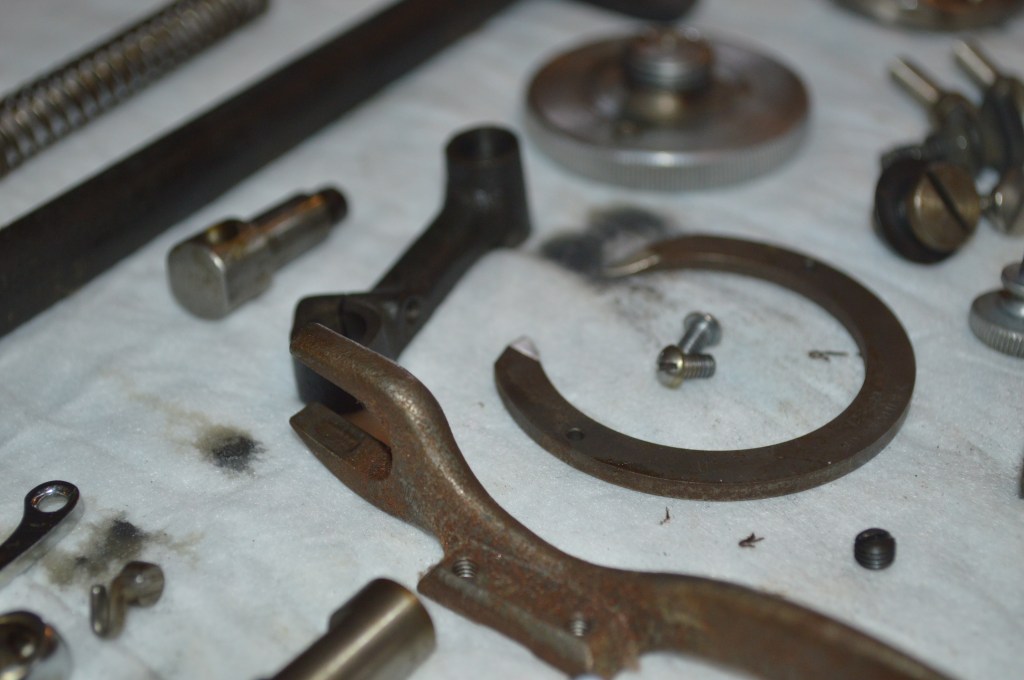
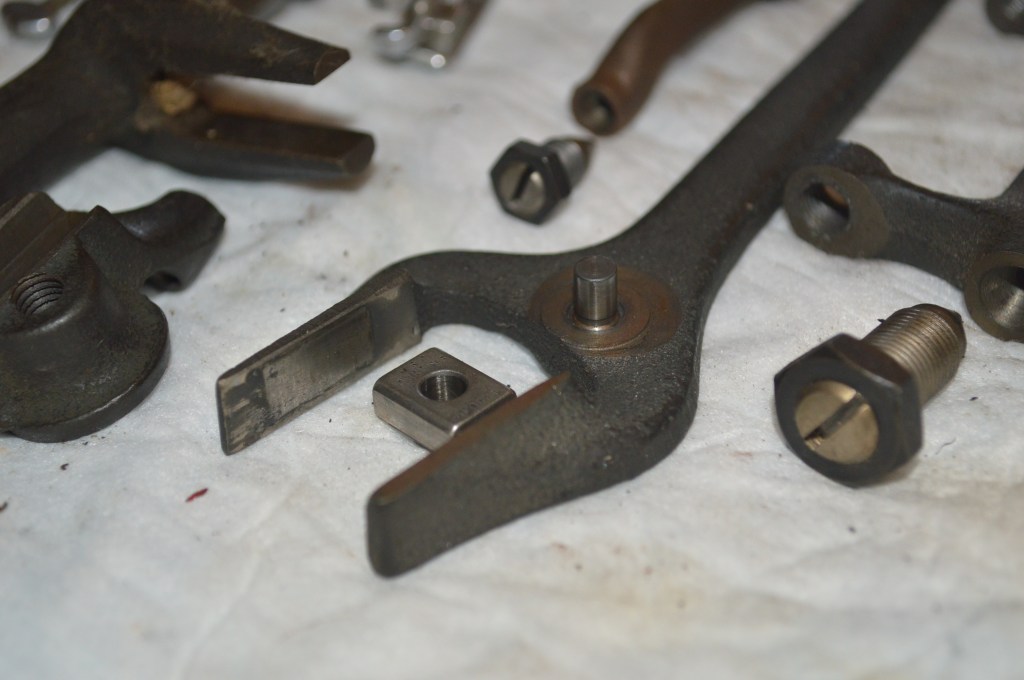
As you can see from the pictures, there is a lot to be gained from cleaning these parts. These all rub or rotate in one way or another, and the oil varnish and dirt inhibit smooth operation. This is where the night and day effect happens… all of the parts removed are cleaned and wire brushed to like new condition. When reassembled, it will be polished steel on polished steel, and the smoothness of the machine will be restored to like she was new.
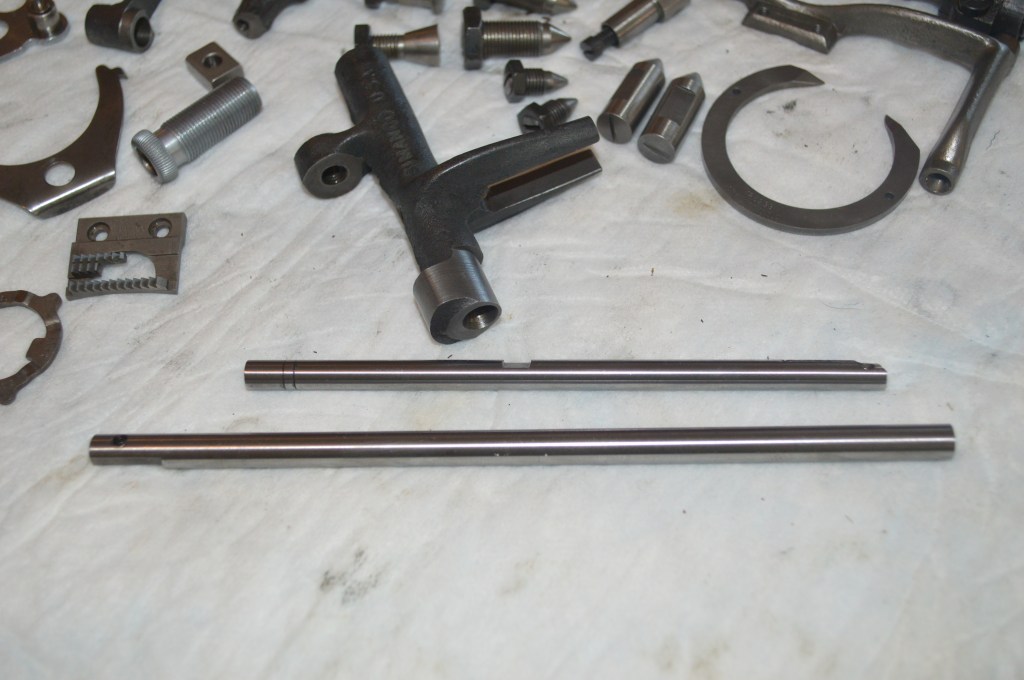
Here are the same parts after cleaning and wire brushing. The needle bar and presser foot bar have been taken a step further and polished smooth as glass.
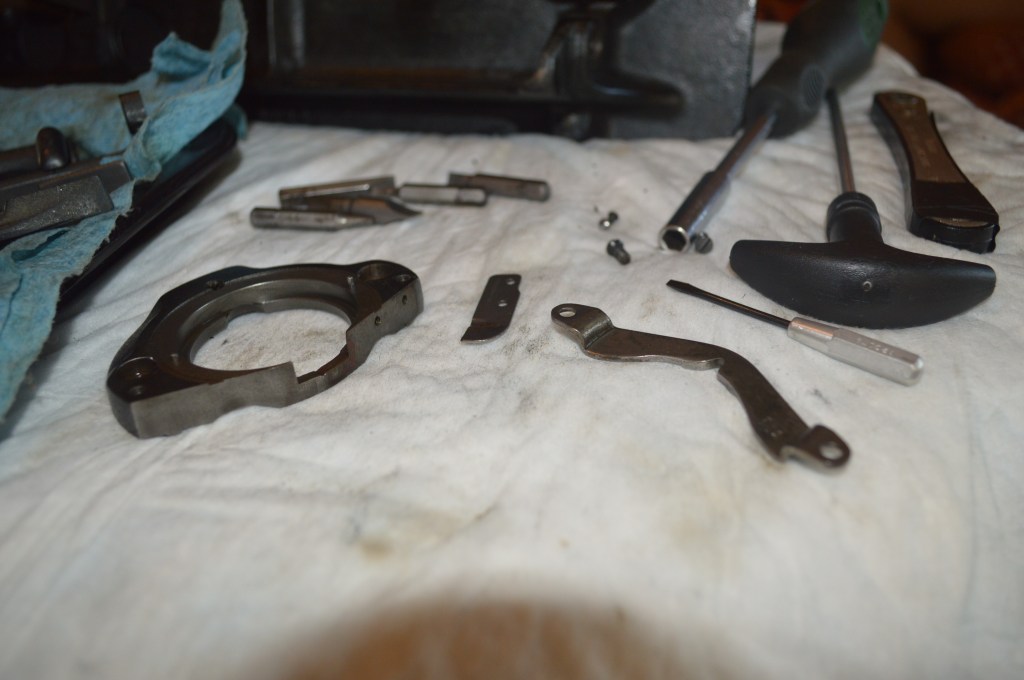
The bushing bores are cleaned with a brass brush to provide a smooth bearing surface for the needle bar and presser foot bar. Similarly, the mating bores for the feed dog and stitch rocker arm assemblies are cleaned at all contact surfaces.
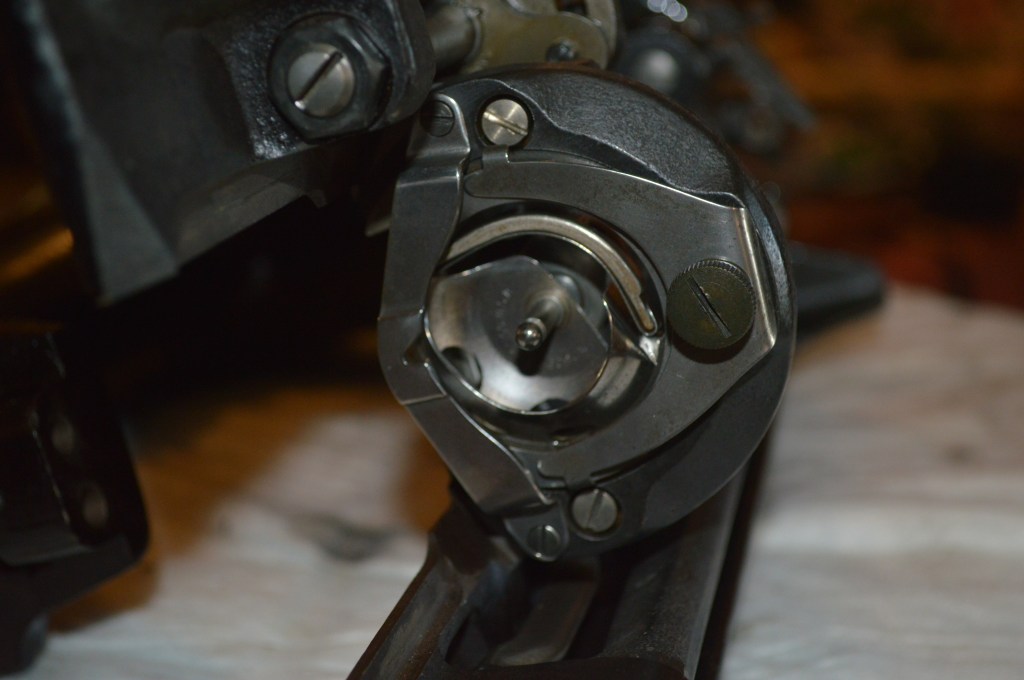
The bottom rocker assemblies and the stitch length fork assembly is reinstalled. These will require adjustment after the machine is fully assembled to adjust the feed dog and stitch length clearances.
Now the restoration turns to the cosmetic restoration. To start, the machine is brushed to remove all loose dirt and dust. Then it is deep cleaned with Gojo. This effectively removes old built up dirt and grime. It is also generally safe for the decals and the paint. One word of caution… Gojo, like any cleaner, is just that… it’s a cleaner. It dissolves oil and grease. When using this or any other cleaner generally recognized as safe (did I say search on YouTube?), be careful. There is a lot of great instructional videos and tutorials on YouTube showing much of what I am doing here. Most of it is great, some of it is WRONG! This particularly applies to motor refurbishing and cleaning. After you watch multiple videos on the same thing, you will see what I mean. Oh… This reminds me to include a tip of the day.
Tip of the day:
Only use sewing machine oil to lubricate a sewing machine. Do not use 3 in 1 oil, WD40, motor oil, or any other lubricant in place of sewing machine oil. I have seen folks recommend them on YouTube but they are wrong and I cannot stress how detrimental their “opinions” are on this topic. Sewing machine oil is not expensive, and your sewing machine requires sewing machine oil for proper lubrication. That’s all I have to say about that.
Back to the topic of cleaning. Only use as much cleaner (GoJo?) as you need, and leave it on the machine only as long as you need to to get it clean. If allowed to sit too long, you run the risk of silvering the decals or washing out the shine on the black japanned finish. Aside from making the finish look much better now that it is clean, the most obvious difference is in the gold decals. Free of dirt and oil, they are a brilliant gold color.

Machine cleaned with GoJo… first step in cosmetic restoration.
The next step is to use a fine grade glaze polish to smooth any paint imperfections and develop a deep luster and shine. For this I use a product called TR3.

Polish is applied and allowed to form a haze 
after buffing the shine deepens
The next step is to apply a second glaze polish. For this step, I am using a product called Meguiar’s mirror glaze. This polish is a finer cut than TR3 and will further polish the already polished finish. Although the first polish gives a great result, the finer polish really brings out the deep rich black finish I am looking for.
The next step is to repair the paint chips on the leading edge of the sewing machine bed.
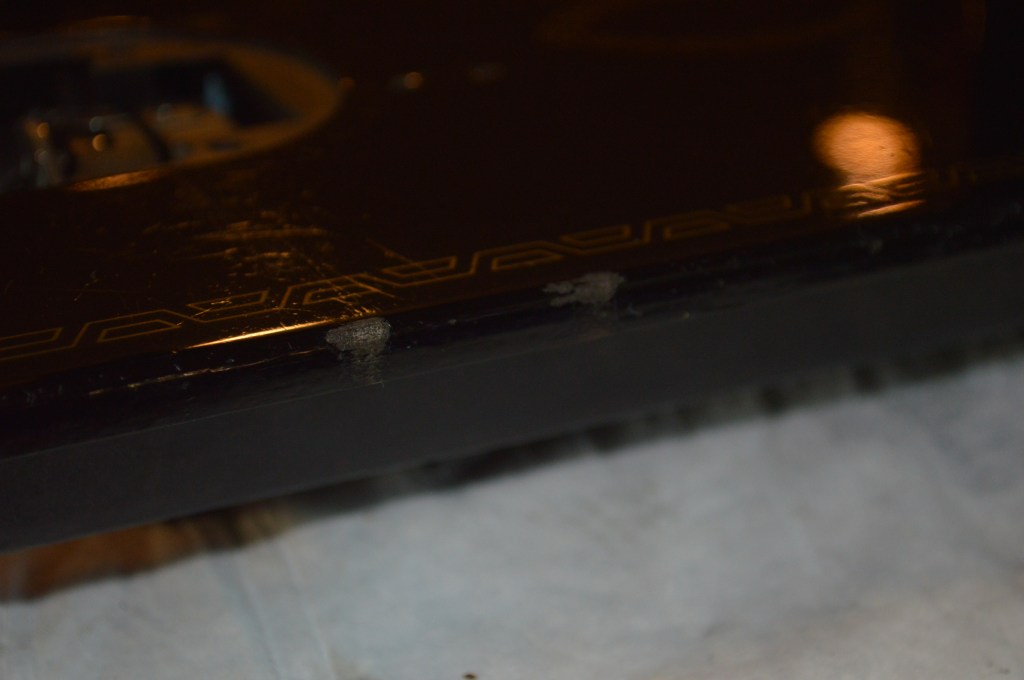
These chips are color matched using a home brew paint mixture consisting of lamp black powder, alcohol, and shellac. It is a very good match for the deep black japanned finish, which also used lamp black (carbon black) and shellac in their paint formula. These repairs are coated with a layer of shellac to protect the paint.
This is as far as the cosmetic restoration will go until the machine is reassembled. To kill the suspense, I’ll tell you that the surface is completely clean, but unprotected. The final step in the paint finish restoration is a coat of sewing machine oil… yep, not wax or automotive sealer. I am choosing this because the finish has an intact coating of shellac. Being a “breathable” oil finish, shellac is nourished with oil, and it is good for re-nourishing the finish now, and (as Singer recommend) for periodic cleaning in the future.
This is a good place to set your expectations for what all of the toil and efforts of this restoration will achieve… the finish will not be perfect. It will not remove all of the scratches in the paint finish. It will smooth out many of the small scratches and make them less noticeable. Lets face it, the finish on any good high quality all metal sewing machine 60+ years old will have some signs of use. After all, it is a sewing machine and it was used! To get a finish like this is an excellent result, and the machine’s finish is in excellent condition. Is it perfect?… No. Is it excellent? Yes.
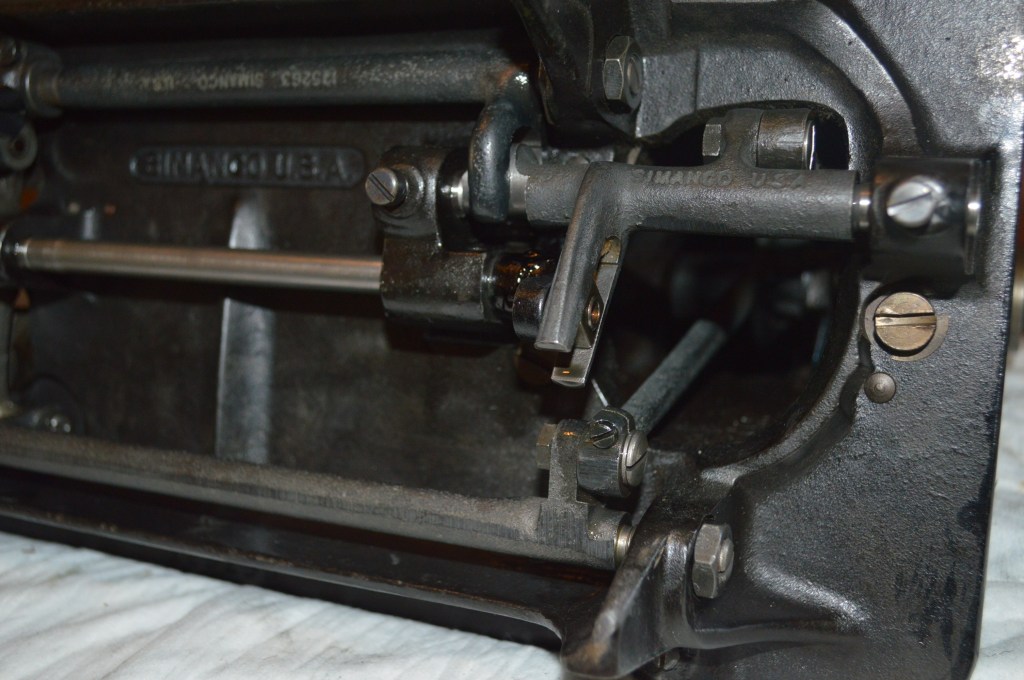
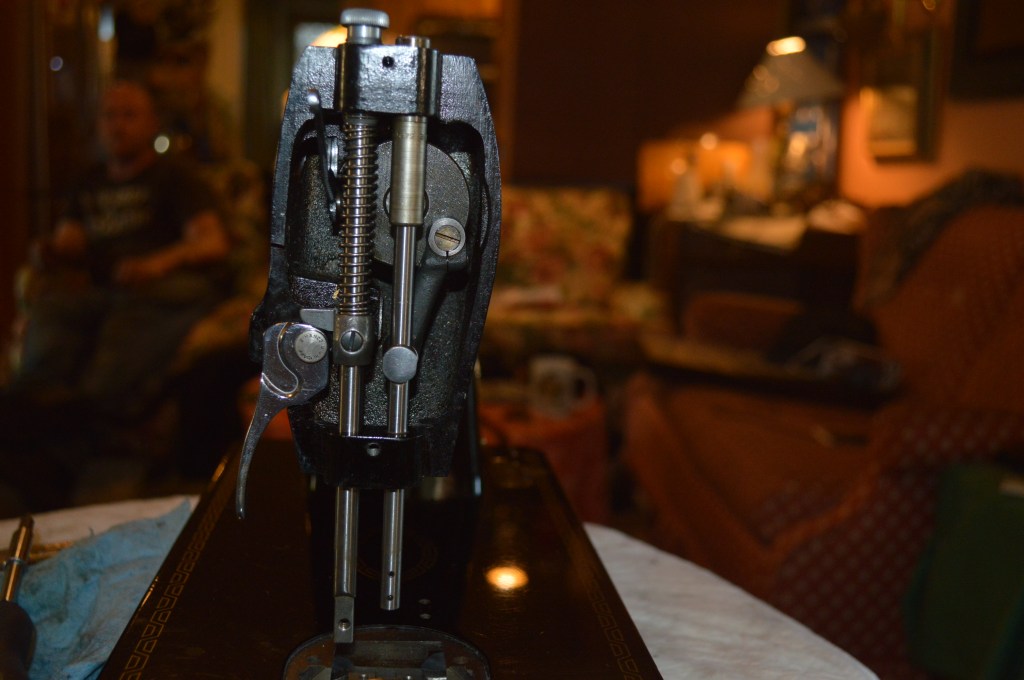
Moving on, the upper assemblies are installed in the sewing machine head. Like the assemblies under the bed, these will be adjusted after the reassembly is complete.
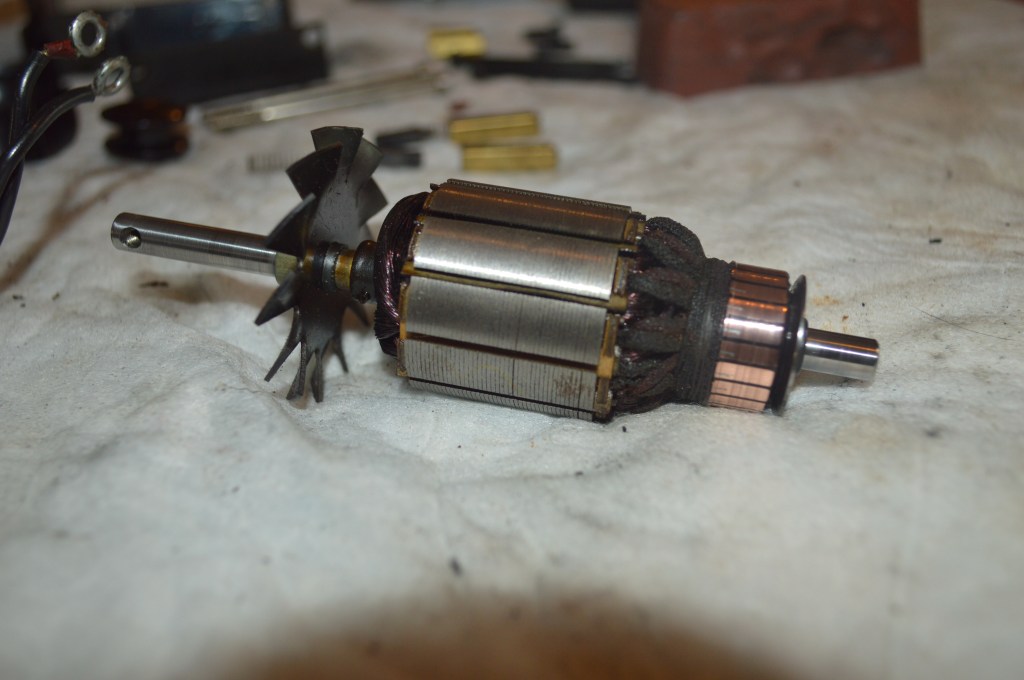
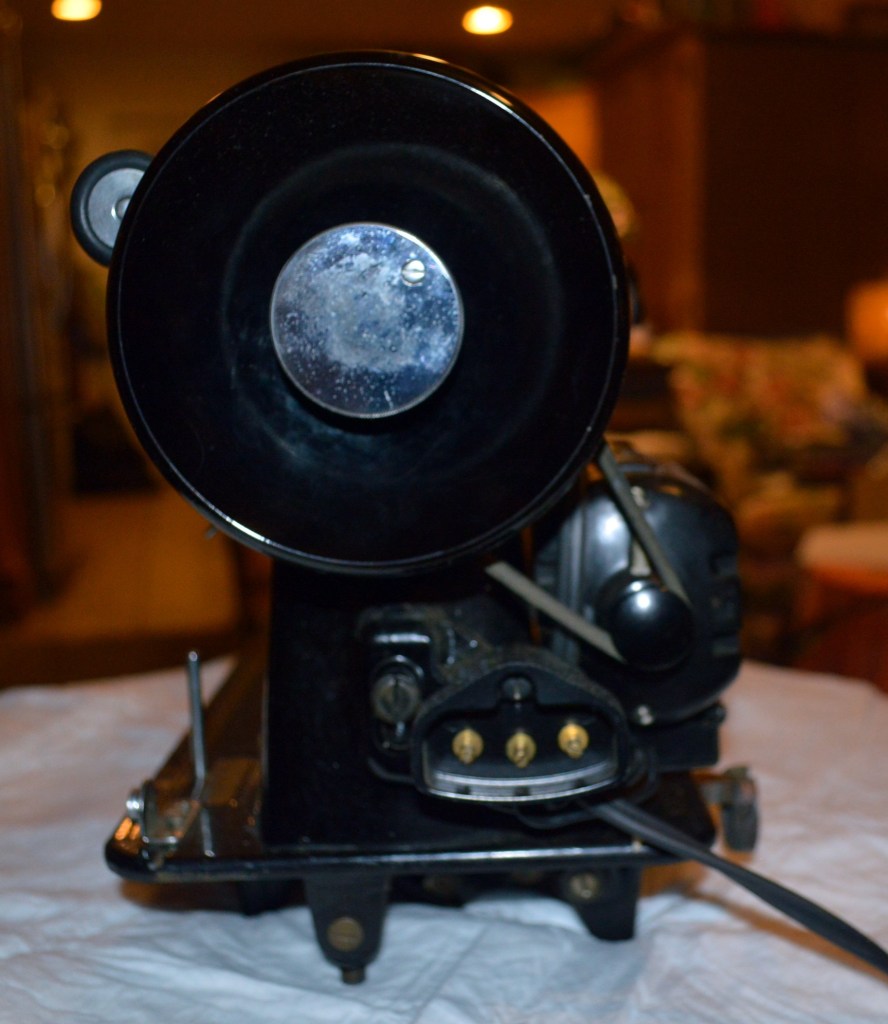
The next step is to disassemble and restore the motor. This motor is a little more complicated to restore because it uses oil wicks for lubrication. These will be removed and replaced with new wicks… easier than it sounds but necessitated for a complete restoration.
After disassembly, the brushes and armature is removed. The commutator is pretty fouled with carbon. This and each end of the shaft is polished.
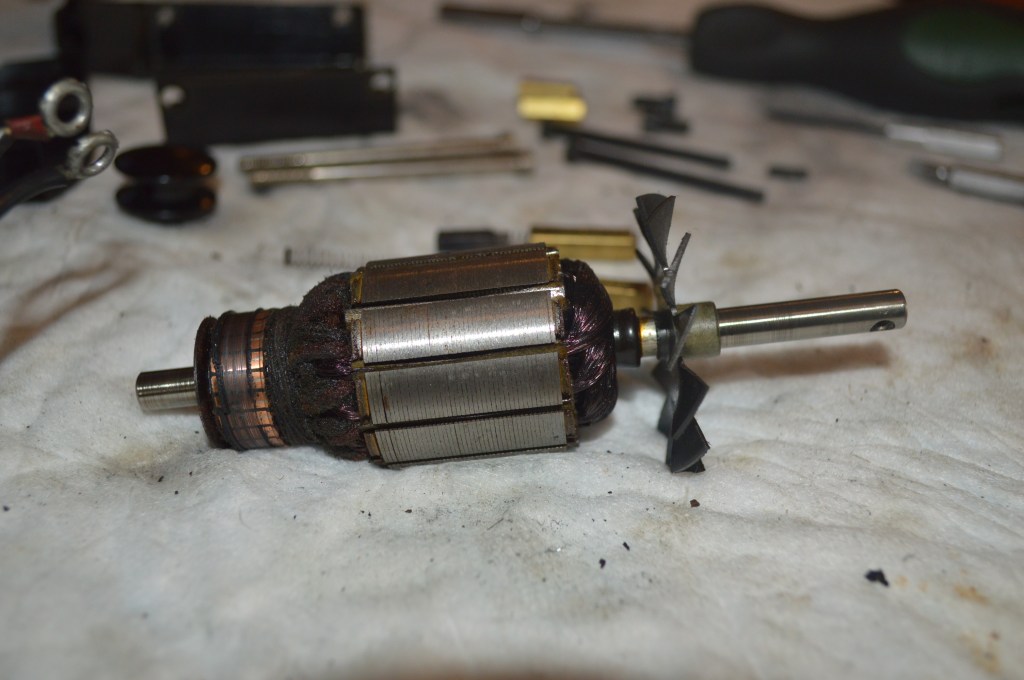
The next picture is after polishing. The smooth surface will reduce friction and minimize wear on the brushes.
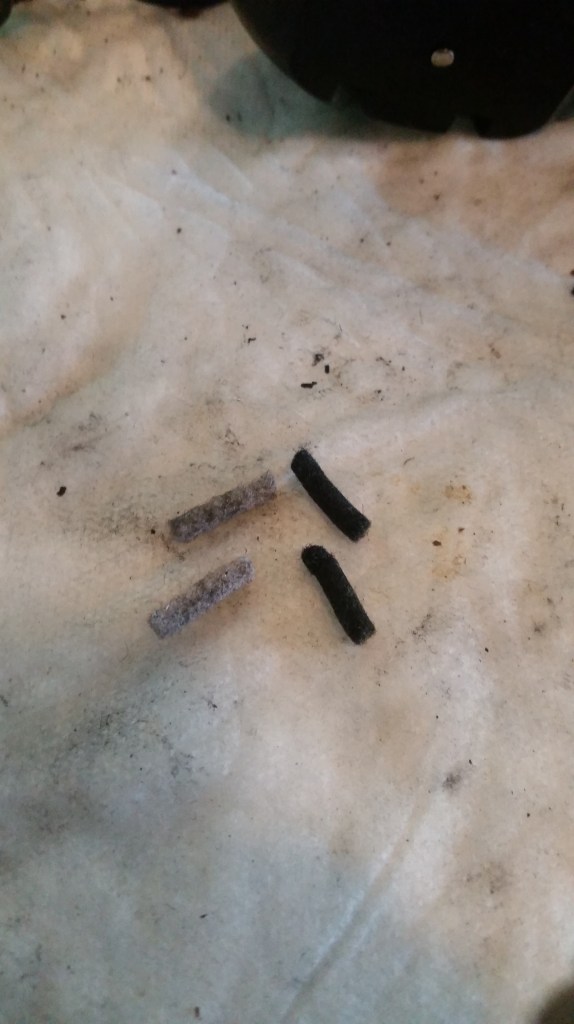
Next is the removal and replacement of the wicks. From the picture you can see that the old wicks are black, it turns out that they are still soft and probably okay, but they are replaced anyway.
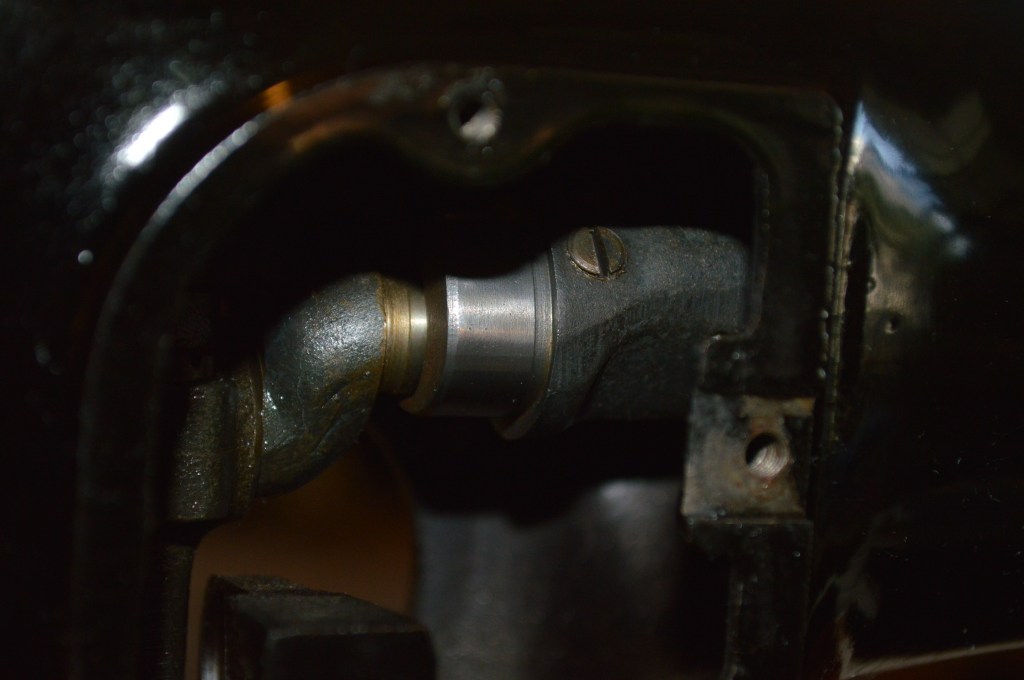
There is one very important aspect of restoring this motor. That is… it is lubricated with oil and not grease! Looking at the motor you see the usual “grease tubes”. But unlike the typical grease wick motor used on so many models of Singer sewing machines, this one is built differently. Here, these tubes hold an oil wick. The difference is shown in the next picture.
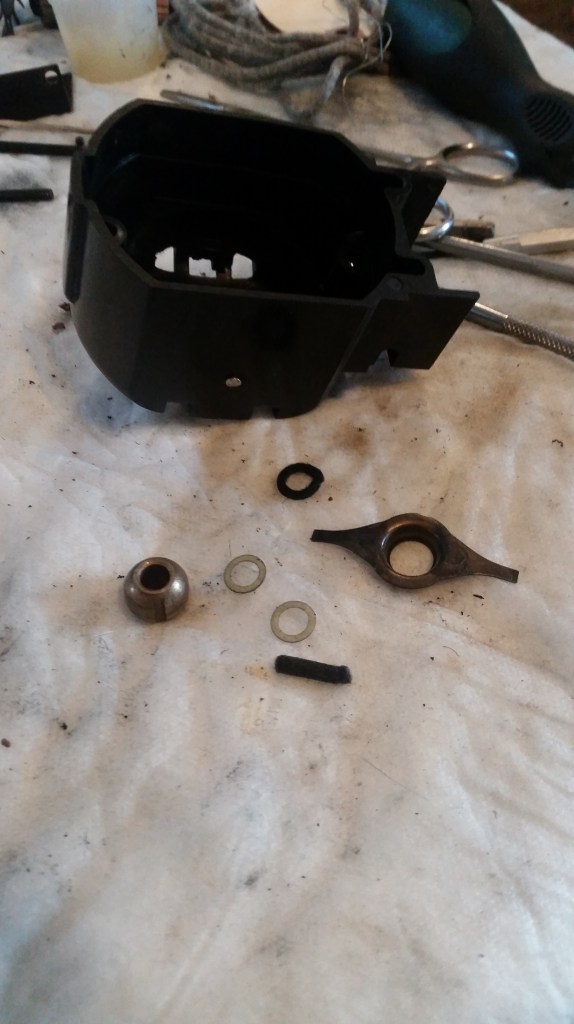
The different is the bronze ball shaped bushing, the felt washer, and the retaining collar. Unlike a grease wick, the oil wick does not contact the shaft. Instead, it fits in a slot in the bushing where it oils the felt and lubricates the motor shaft thru the bushing. A grease wick on the other hand, contacts the shaft. Aside from this, the restoration process is the same.
After the motor is reassembled and run in, it is set aside ready for installation.
Next is the disassembly and cleaning of the tension assembly.
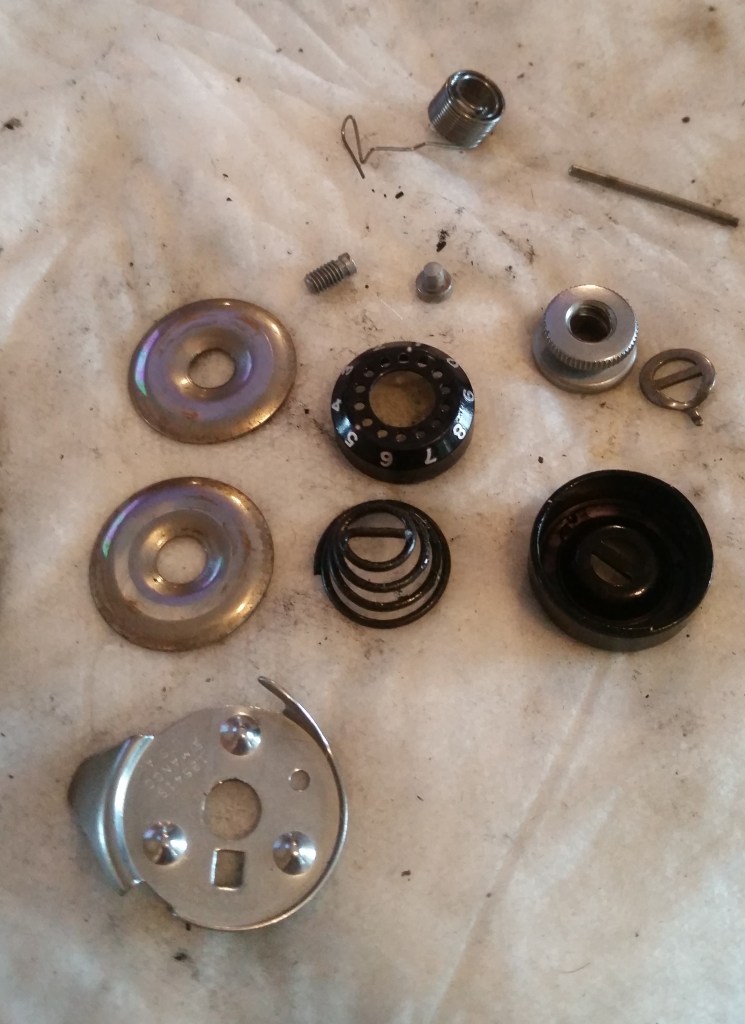
Typical for these assemblies, the tension discs and the tension assembly shaft is polished and cleaned of any grease or oil.
Almost done, the machine is now ready for reassembly and adjusting. The front cover is polished and all of the bits and pieces are reinstalled. The bobbin winder is adjusted, as is the bobbin case thread tension, the upper thread tension, the feed dogs and the stitch length.
The machine is threaded and run to break everything in and seat the assemblies, and now all of the final adjustments are made.
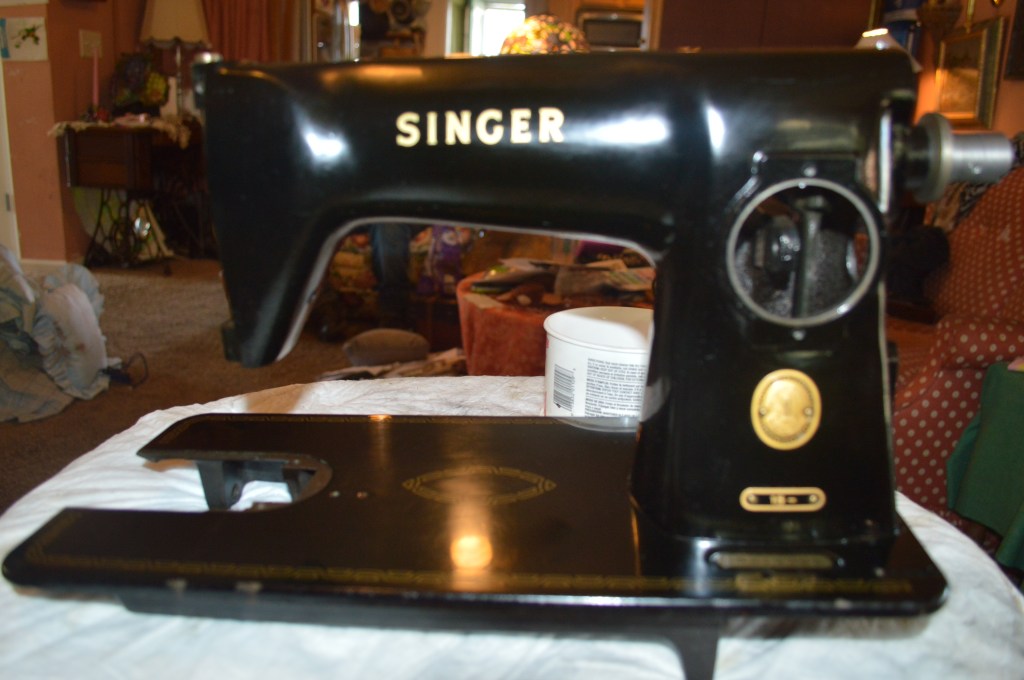
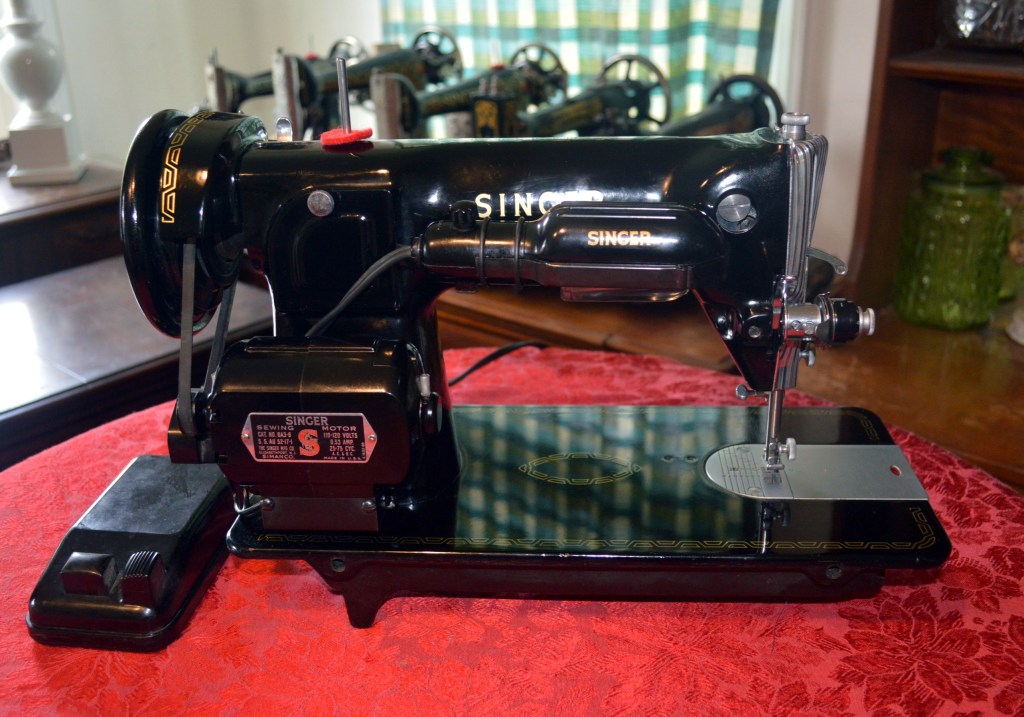
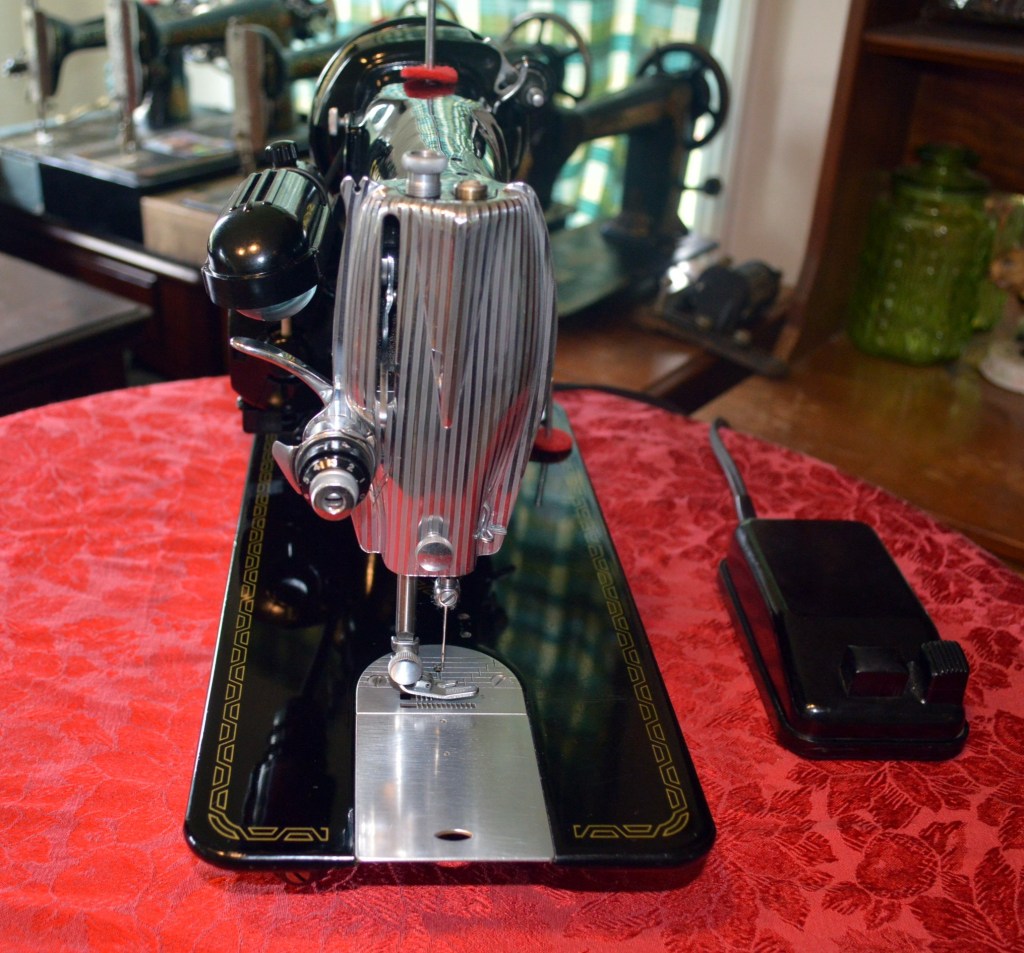
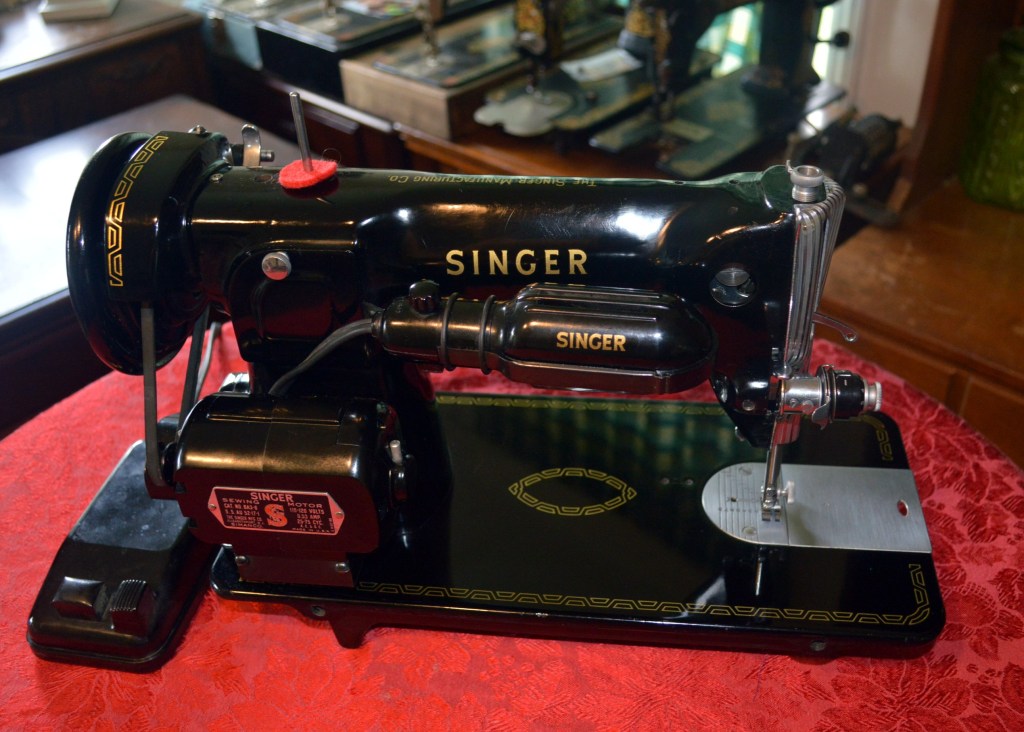
That’s it! How does she sew? Well, it’s a model 15… I could grind off the paint with a wood file, paint her the color of mud with a toothbrush, and carve my initials in the sewing arm and she would still make a great stitch. The real difference is how smooth she sews! Certainly, the beautiful condition of the paint and bright gold decals is a plus. All in all, this restoration resulted in a beautiful and smooth model 15-75 sewing machine… as expected.
So, here is the machine before restoration…
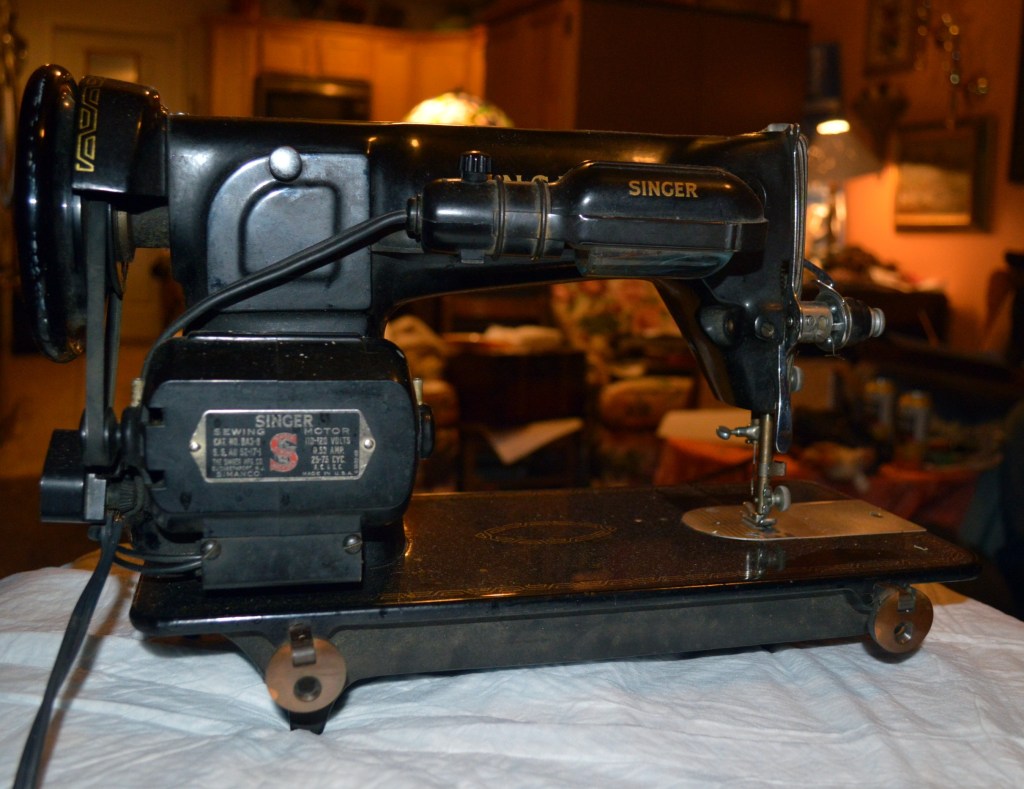
And here she is after the restoration…

If you like what you see please visit our Etsy store at https://www.etsy.com/shop/pungoliving, and see this Singer Model 15-75 and our other restored fine quality vintage sewing machines.
Thanks for reading!

Thank You…. I have the same machine, which I have just started to clean and service. We have very similar backgrounds.. Thanks Again.
LikeLike
You are welcome!
Let me know if I can be of any assistance!
Lee
LikeLike
I just picked up a 15-75 I was wondering if you knew what size belt it needs or where to purchase one?
LikeLike
I’m not exactly sure… they come in 1/8″ increments and it makes a difference.
If you have a belt on the machine you can measure it for a replacement. Belts are easy to find at any online sewing machine parts store.
If you need help mesuring the belt, let me know.
Have a great day!
Lee
LikeLike