
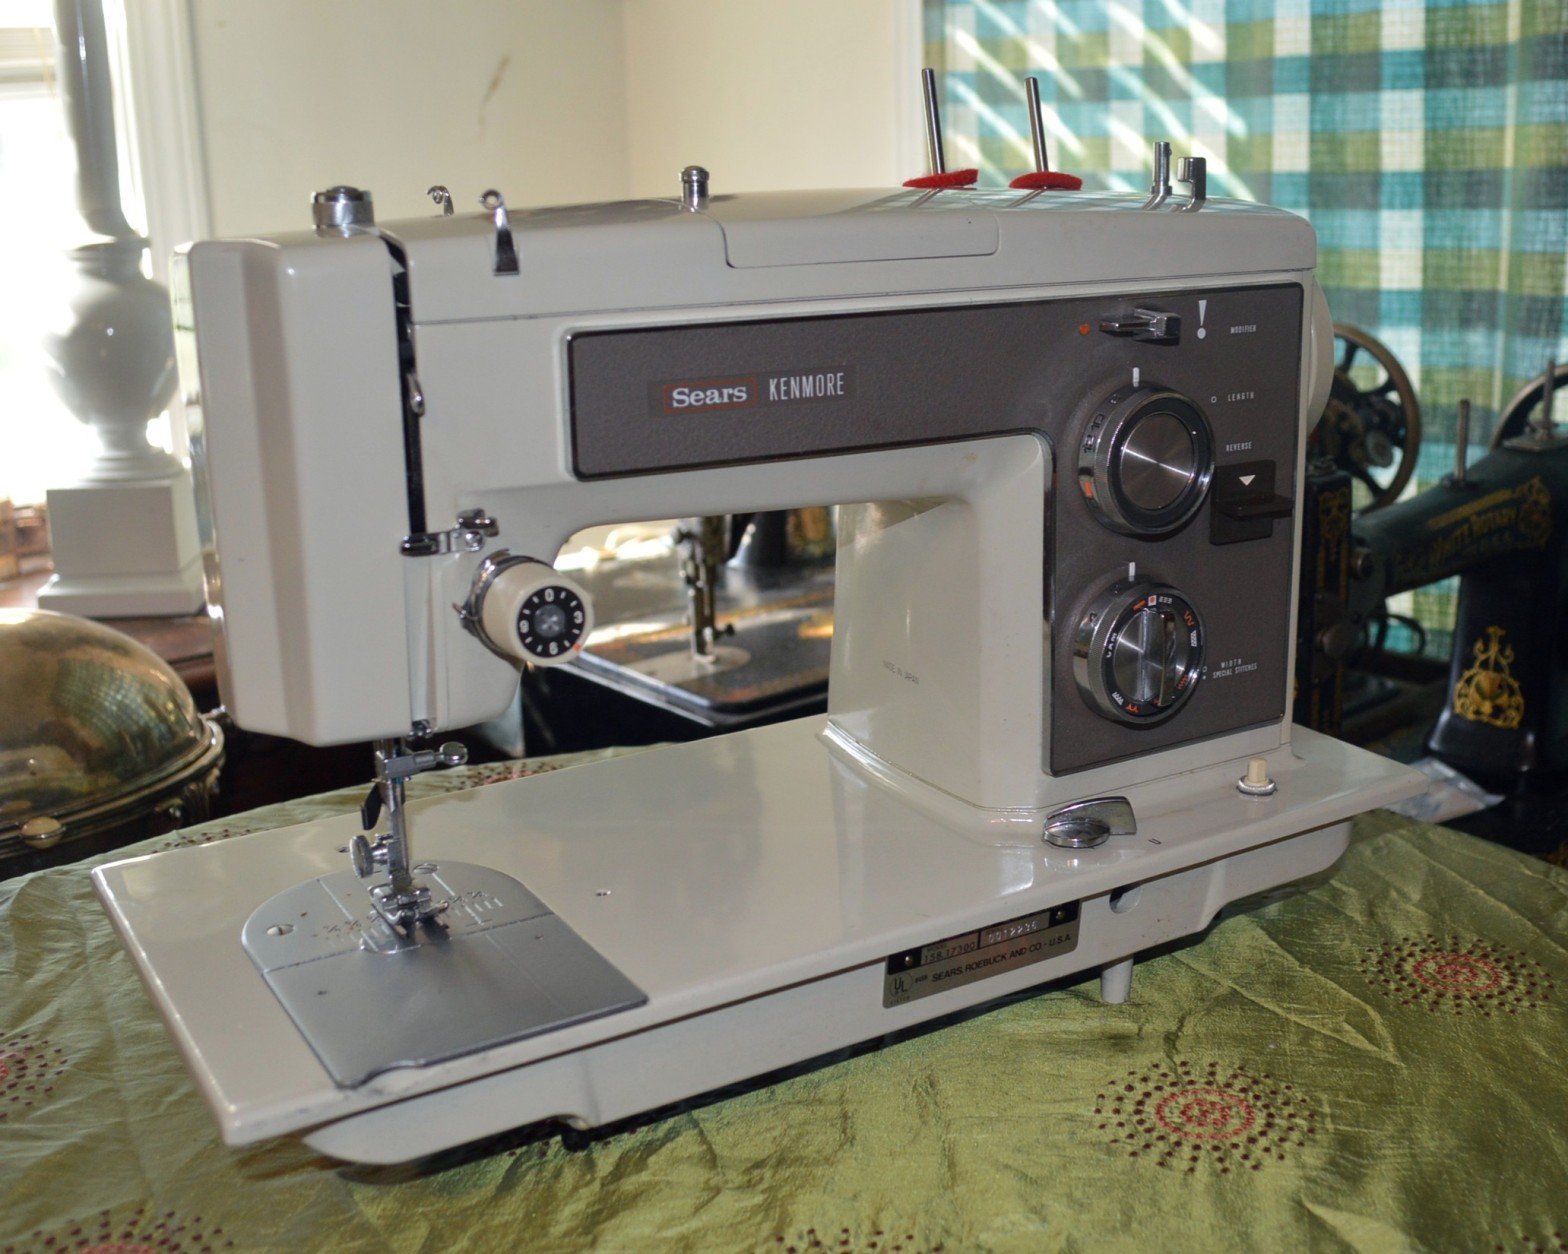
The sewing machine I am restoring now is a Kenmore model 158.1730. Kenmore’s are probably the easiest machines to restore. They are easy to disassemble for cleaning. Most of the Kenmore’s I have come across seldom need disassembly of the drive components, sometimes I do it because it makes it easier to clean, not because it is the only option to restore sewing performance.
To me, this says something about Kenmore’s in general. They are dependable and easy to maintain sewing machines. Kind of like the Honda Civic of sewing machines… They are made with quality materials, and the build quality is very good. Everything fits together well, and the controls are simple to operate. Generally intended for garment construction, all of the stitches you need are built into the machine. The all metal construction assures that it will sew well for a very long time if properly oiled and cleaned. The Kenmore model 158.1730 adds stitch versatility by accepting stitch pattern cams. A common accessory for cam compatible Kenmore’s, just select a cam with the stitch pattern you want, and pop it into the machine’s cam stack.
This Kenmore is no exception. The body of the machine needs a good cleaning, and some of the components need to be cleaned and lubricated. The machine is somewhat stiff, but I expect that this is due to lubrication of the numerous linkages contained in the machine… these are usually the culprit is a Kenmore is acting up.
So, the restoration starts here… This is the machine before restoration.


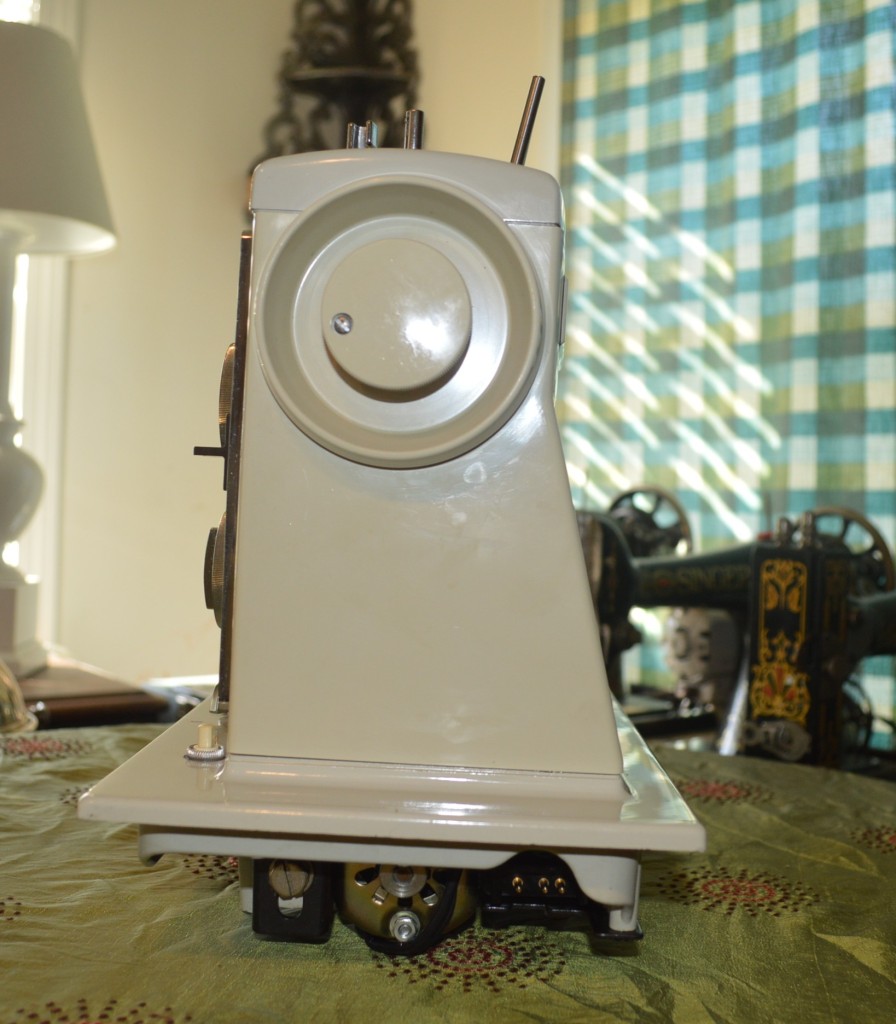
All of the covers are removed, and access to all of the areas I need to reach are accessible.


I have removed the presser foot bar to access the linkages in the head, removed the balance wheel, motor belts, motor, and rear cover. All of the parts I disassembled from the machine are laid out for ultrasonic cleaning…

The presser foot bar is polished after cleaning and set aside…


The motor is disassembled, cleaned, the armature shafts are polished, the commutator is polished, and the brushes are cleaned…

Field coils cleaned 
Shaft bushings cleaned and felts oiled 
Armature shaft and commutator before polishing 
Commutator after polishing
The motor is reassembled and bench tested to ensure it is running as it should… quiet and powerful.
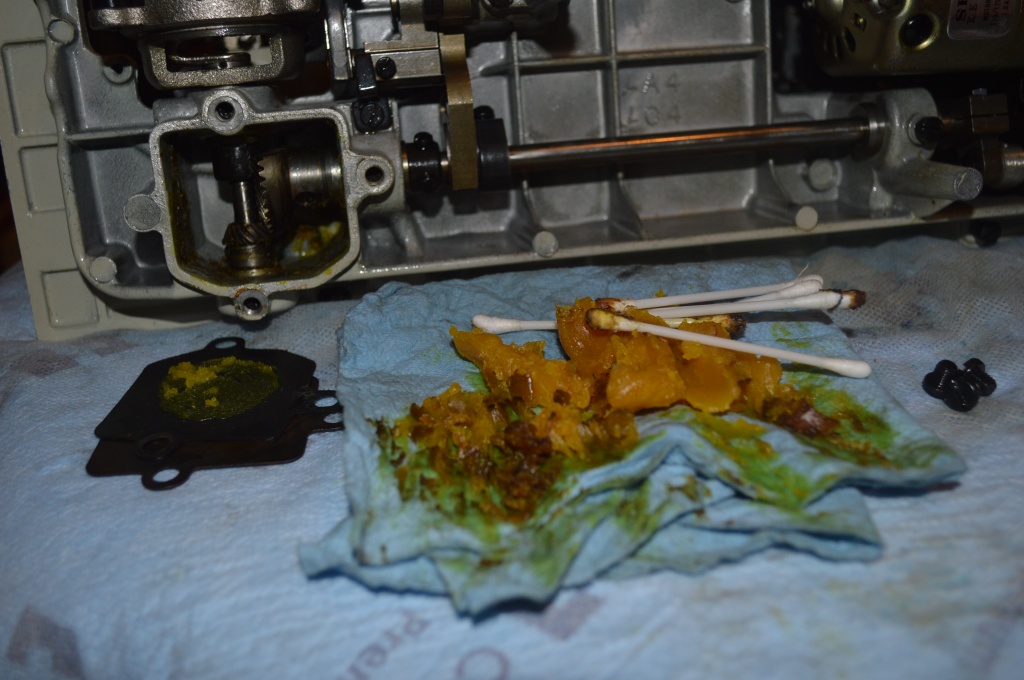
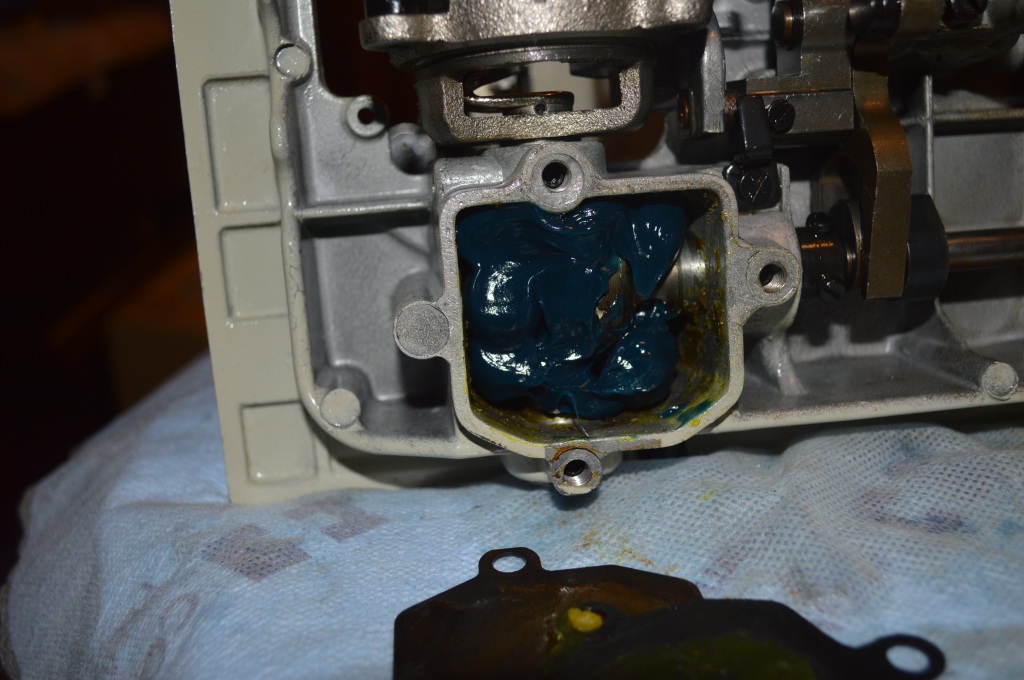
Next, the hook gear case is opened, all old grease removed, cleaned, and repacked with grease…


The tension assembly is disassembled and cleaned… This Kenmore had tension problems that I traced down to corrosion on the tension disc shaft. Polishing the shaft allows the thread to glide thru the assembly with constant tension.


Some of the parts have springs, or covers that can be accessed… and they are rmoved to clean any dirt that has accumulated.

The body of the machine is deep cleaned with attention to detail and all of the mechanisms are oiled. The last step is to reinstall all of the bits and pieces removed, test sew to make adjustments, and make sure all of the built in stitch selections and pattern cams work as they should… That’s it!
So, as is customary, here are the before pictures…


And here are the after pictures…


So how did it turn out?… well, the machine sews flawlessly. This is one aspect of a Kenmore sewing machine that I can say without hesitation. When they are cleaned and recondition to this extent, they all sew great! I find them to be smooth, powerful, very tolerant of tension settings between stitch selections, and they produce a very good stitch. This machine impressed me and is ready to provide many more years of sewing service… Primarily intended for garment construction with the 11 built in stitch selections, but capable of much more using a variety of the 30 additional stitch patterns cams provided with the machine.
If you like what you see please visit our Etsy store at https://www.etsy.com/shop/pungoliving, and see this Kenmore Model 158.1730 and all of our other restored fine quality vintage sewing machines.

Thank you for your information. I am a quilter and sew clothing. I bought a Kenmore sewing machine to take to our lake cabin a few years ago. I just bought another to fix up for the high school drama department. I can’t see buying a new plastic machine. These old machine are so much better. Thank you again!
LikeLike
Hello! I have a 1970 Kenmore 158 that sews like a dream! Fabulous machine! Please tell me what
brand/type of grease you packed into those gears under the machine. Thank you.
LikeLike
Hello Rebecca,
Sorry for the late reply…
You can use any good grade of automotive lubricating grease.
I hope this helps!
Lee
LikeLike
I used Tri Flow clear synthetic grease when I cleaned out the old guno a couple of years ago. I hope that was a good choice! Thank you!!
LikeLike
Hello Rebecca,
Tri-flow synthetic grease is perfect!
LikeLike
Oooops, should have typed “old gunk”!
LikeLike
Thank you!
LikeLike
I used Tri Flow clear synthetic grease when I cleaned out the old gunk a couple of years ago. Was that a good choice? Thank you.
LikeLike
Tri-Flow grease will work just fine!
LikeLike
This is my machine! I bought it circa 2000 because it’s similar to the machine I learned on, which was my mom’s (wish I knew the number). Somehow it has gotten stuck in stretch stitch. It used to have a beautiful, straight and even stitch – I was looking at a halloween costume I made a few years ago and thinking I really need to get this machine back into tip top shape! I picked up a 1430 to use in the mean time but I don’t want to give up on the old girl, I have a bunch of cams for it even if I seldom used them it’s a cool feature to have. Please tell me if you have any tips on getting her out of stretch! I can tell it’s something sticky in the reverse mechanism, the reverse level is really slow to reurn to position but even if I push it back it doesn’t stop the stretch back and forth. I have oiled everything I can see to oil that might help. I actually briefly had it working again, in that it was at least doing normal straight stitch but not as precise as it used to, a little wavy… then I started playing with other settings and it’s back to stretch stitch. I am afraid to disassemble but it may come down to that, although I have read good things about using Marvel Mystery Oil on machines that need brought back to life? Breaks down old oil? Use a mix of Marvel + normal sewing machine oil to get it cleaned out, and then give it a normal oiling since the marvel stuff doesn’t last as well. Any experience/rhoughts?
I did take the cover off where all that grease is and mine is also quite solid and yellow. Will have to change that, although I don’t think that has any part in this problem. Opening that up really made it clear why these machines supposedly last forever.
Our local repair place has a back log of several months, but with a 2nd machine now I could take it in if I need to. But I’m convinced I will eventually get this figured out.
LikeLike
Hello Jodi,
I’m sure I can help you get your machine running properly, especially since it started to work but then didn’t.
Please send me a picture of the top of your machine with the top cover off to pungoliving@gmail.com. I will walk you thru the steps to get it cleaned, lubricated, and working again.
Thanks!
Lee
LikeLike