

I have received several comments from readers on how to rewire their old Vintage Singer sewing machine. The need for this is all too common on the 1950 and earlier vintage machines. While the sewing machine itself is built to last neigh on forever, wires do not. Typically, the wires become brittle and the insulation crumbles and exposes bare wires. I think re-wiring falls into three categories, since the power terminal supplies power to the motor and the light, and the foot controller wires also share the same fate. For this tutorial, I am going to focus on the motor and wiring to the terminal block. Whereas this tutorial can be be generally applied to more than one type and vintage motor, light fixtures fall into several styles. Some are easy to rewire, some are quite difficult. for the purpose of this tutorial, I am only considering the motor.
This is a very complete restoration. I am restoring this for a sewing machine that is undergoing a detailed restoration, so I decided to exerpt the steps here. For this reason, you may not need to follow all of the steps I take. You may simply be interested in replacing the wires… so you may skip steps as suits your needs… or dive deeper. In any case, all of the steps are shown.
I am also going to rely on less words and more pictures captioned to explain the steps. Discussion will be limited to what I consider to be important or relevant to completely describe the steps involved… so here we go.
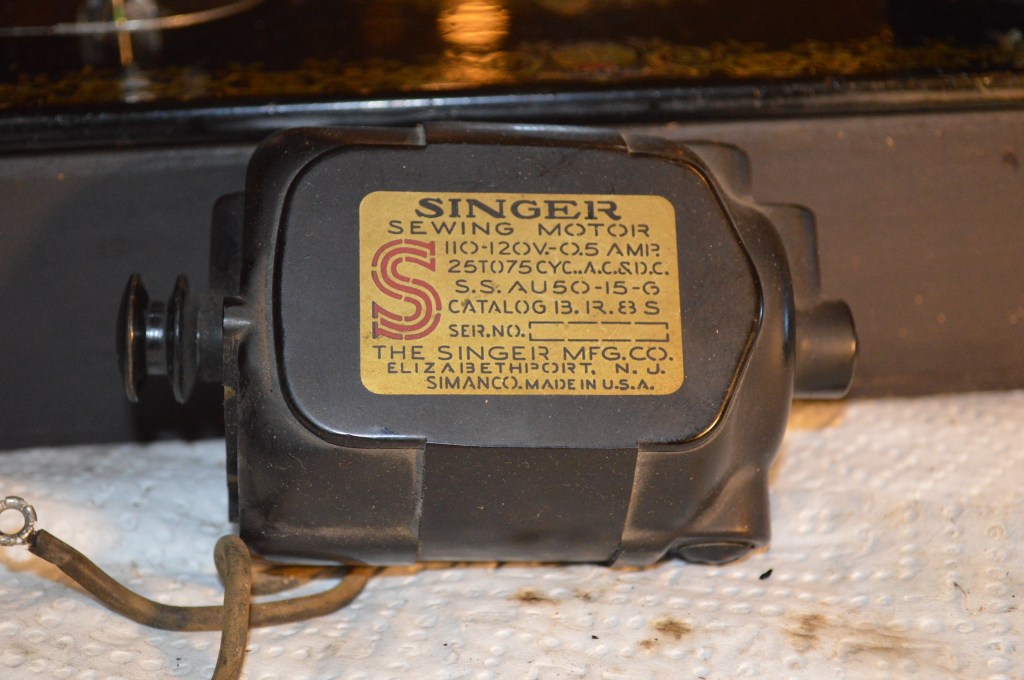
This is a Singer BR8S 0.5 amp sewing machine motor that is fitted to a model 15. It uses grease wicks for lubrication and is a very well built and durable motor.
The first step is disassembly… To make things easier, remove the wire plug terminal and the motor bracket.

Remove the motor pulley. The small screw shown is removed and the pulley pulls off. 
The slotted cap is the brush cap. There are 2 caps and they are opposite of each other. Remove them carefully, they can break. 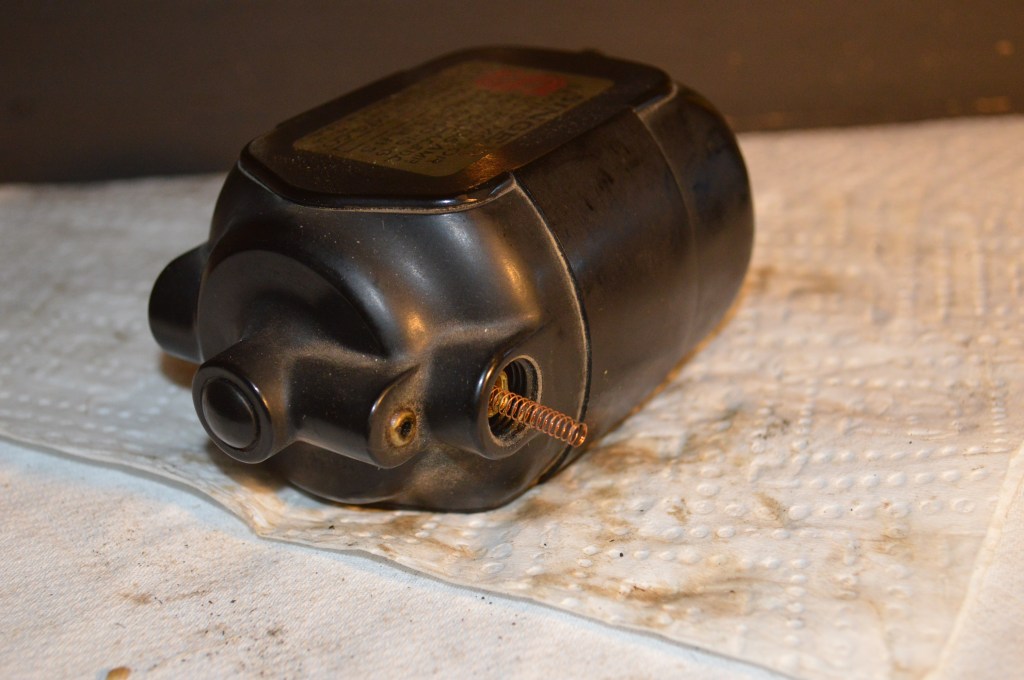
With the cap removed, the brush and spring is revealed. They should slip out easily. If not, don’t fret they can be removed easily when the case is separated. 
These two screws hold the case together. Remove them. 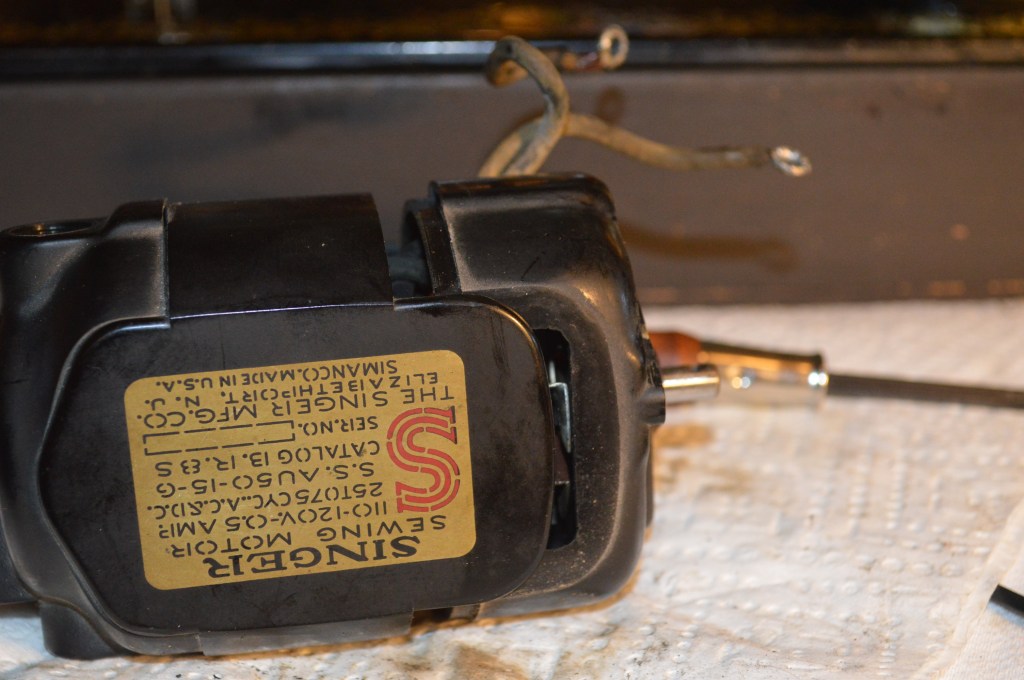
With the screws removed, gently pry the case end cap… pulling straight away. 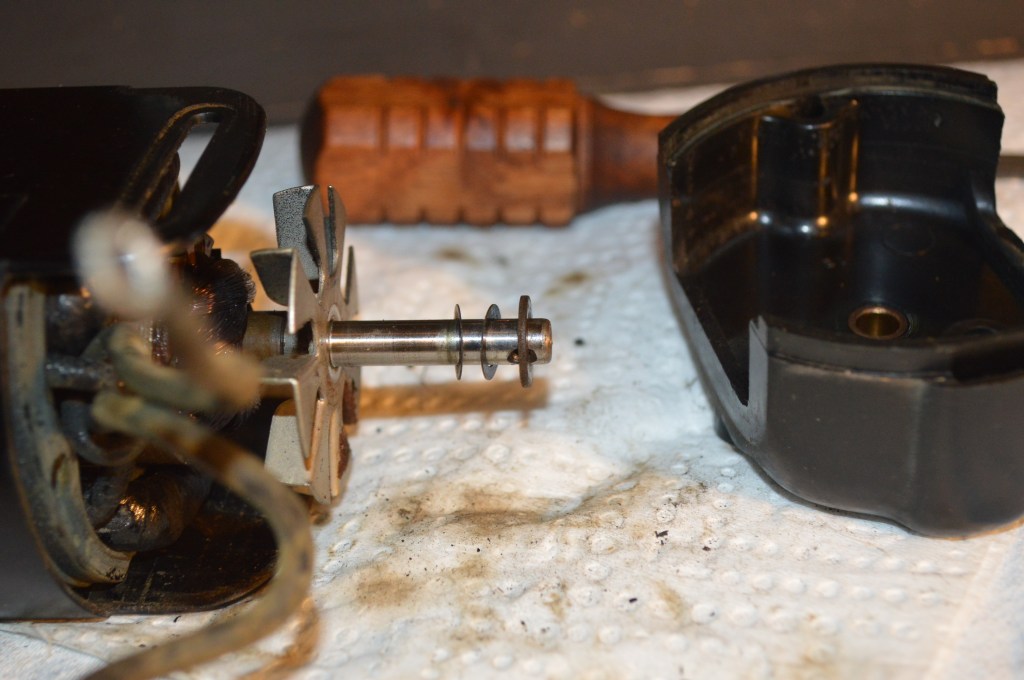
With the end cap removed, the end of the armature shaft is exposed. Note the number and position of the washers. They must be replaced in the same orientation as removed.
Now, I mentioned that the brushes should slip out freely. If they don’t, it means that grease has made it’s way into the brush tubes. This condition will require motor disassembly, and your wire replacement becomes a bit more complicated. No worries, it merely means a few more steps are needed.

Pull the armature shaft straight out 
Note the washer and the carbon buildup on the commutator. 
Gently pry off this end cap. a razor knife along the edges will allow it to pop off 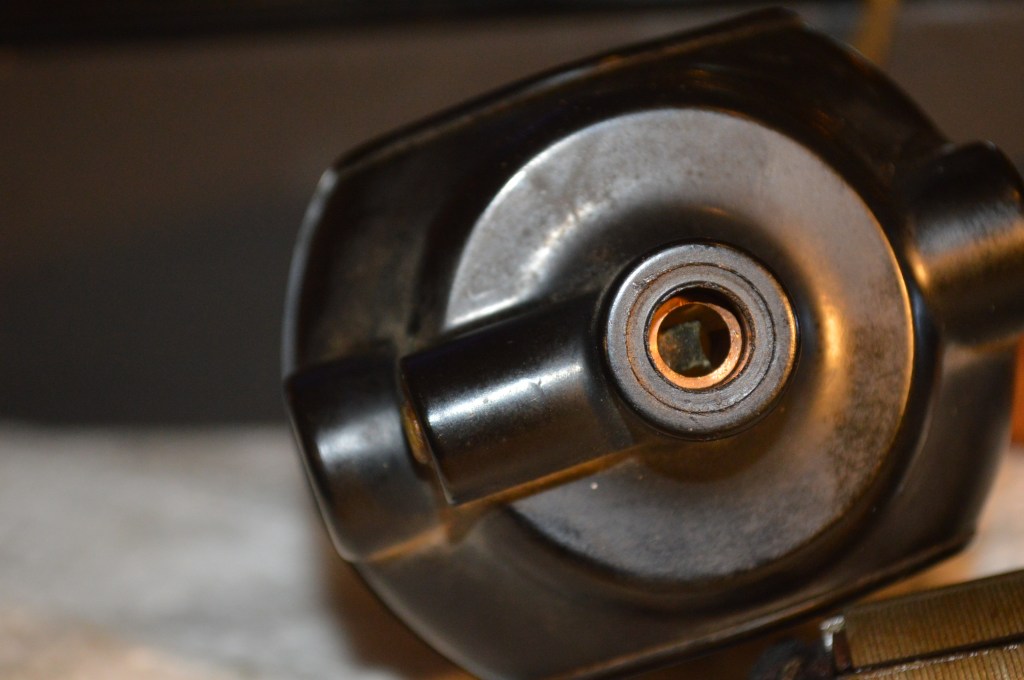
Look closely at this picture. Notice the grease wick inside of the bushing has popped up 
The motor casing can now be separated and the parts laid out for cleaning. Note the orientation of the center casing shroud. It is positional and need to be installed the same for the case to close on reassembly.
Next the commutator and shafts are polished. To polish the commutator I use jewelers rouge and a dremel tool. As a substitute you can chuck the shaft in a drill and use 2500 or 3000 grit wet/dry sandpaper to polish the commutator. To polish the shafts, I use 2500 grit sandpaper wet with a few drops of sewing machine oil and spin the shaft in a drill while running the sandpaper up and down the shaft. It results in a glass smooth finish. Repeat for the other end of the shaft.

Inspect the brushes for wear. They will have a curved face where they contact the commutator and wore to the circumference of the commutator. Because the commutator shaft is polished, they can either be left curved, or flattened with 600 grit sandpaper. These brushes are in great shape, so I will leave them alone. If your brushes were stuck and covered with grease, clean them with alcohol. Now clean the brush tubes with alcohol and a cotton swab.

This brush is in great condition… I’m leaving it as is.
WARNING: Do not get alcohol or any solvent near the thin wound wires… they are the thin wires that form the windings on the armature shaft and field coil windings. They are coated with lacquer to allow them to be wound without shorting on each other. Alcohol and solvents dissolve this coating and it will RUIN your motor… no kidding.
Notice the grease wick I showed in the bushing in the picture captioned above. It was free to pop up into the bushing when the shaft was removed. If your wick pops up, thats very good news indeed. If the wick does not pop up, it must be either removed or freed to move. It must contact the shaft to deliver lubrication. Removing the grease wicks and spring that applies the pressure needed to keep the wick against the shaft is a very tricky maneuver. I would recommend trying to remove it only if necessary and you are prepared to replace the wick… be warned, these are 1/8″ F12-14 felt wicks and are not easy to obtain. Free them instead. To do this, try gently pushing a sewing machine needle or toothpick into the grease port to push the wick down into the bore of the bushing. Now push the wick up by using the side of a needle or toothpick against the wick in the bore. Repeat these steps several times and look for the wick to free itself up sufficiently to pop down into the bore on spring pressure alone. The following picture shows the wicks removed and these springs.

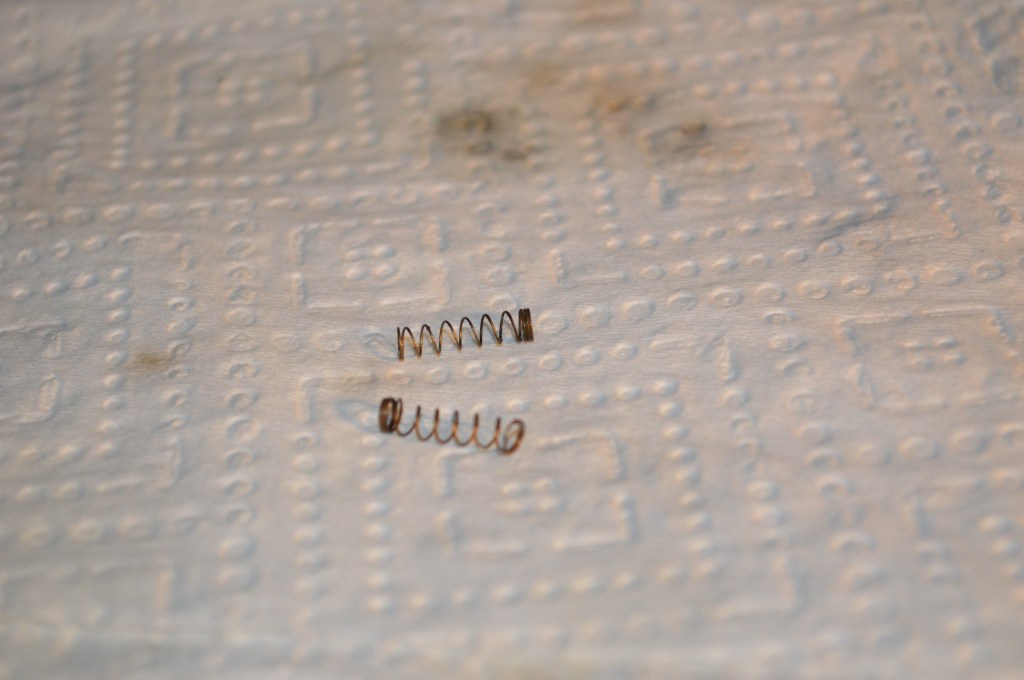
Springs are cleaned of old grease 
These wicks are in good condition. They are cleaned and prepared to be charged with lubricant. 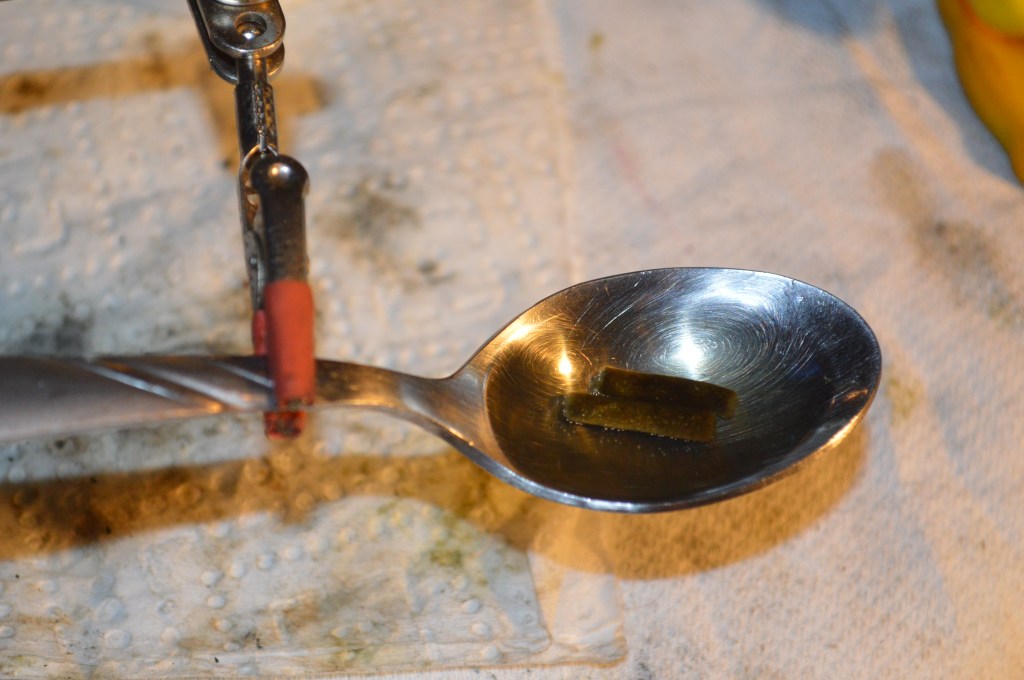
The lubricant is heated to a melted state and it is absorbed into the wick… a few minutes is sufficient
The motor housing is cleaned and the wicks are reinstalled in the motor housing.
Next we will go to the wires. Generally, the only wires that need replacement are the field coil wires… the ones that exit the motor. The brush tube wires are cloth covered and likely in good condition. The brush tube wires on this motor are in good condition. If not, it is a simple matter of de-soldering the wire from the brush holders and replacing the wire.
The wire I am using for the replacement is 18/2 stranded lamp wire. It is available at Home Depot in a 10 ft length package for under 2 bucks. It is the proper gauge without the insulation being too thick. Remember, the motor has limited clearance for the wire in the case, and does not need to be occupied by excess wire insulation. This wire is also a good choice for rewiring the light. For controller wiring, I think a 6 foot extension cord works great. The insulation is thicker and better for overall durability in use. First, the wire will need to be split. Start a cut in the groove between the 2 wires and simply pull it apart… pretend it is taffy and it will peel apart without too much effort.
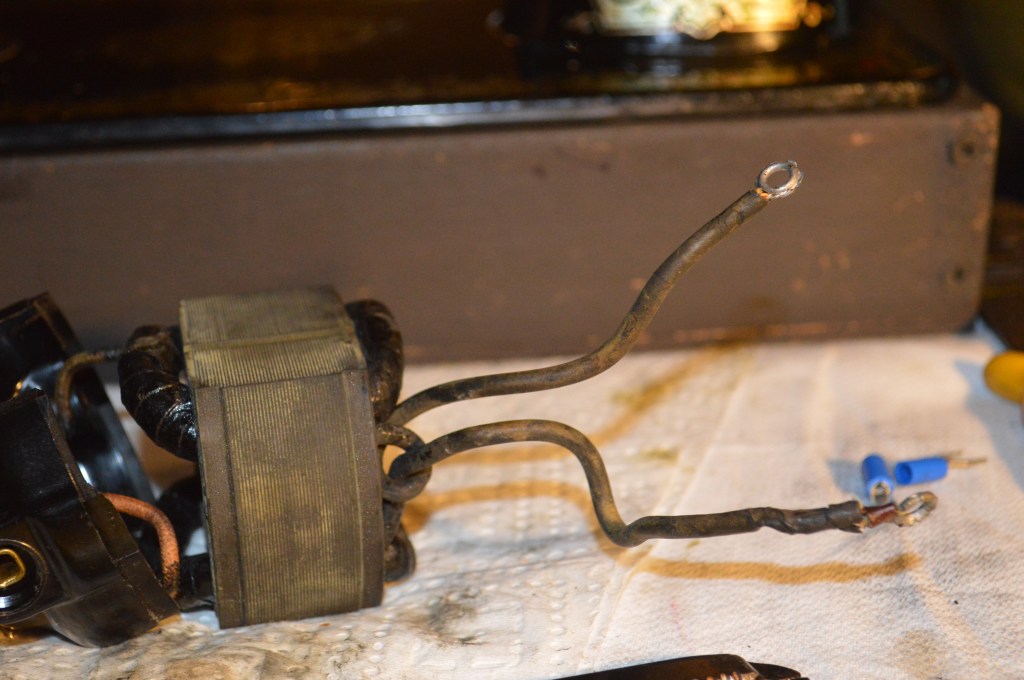
Original wire… I am looking for the best place to cut… Also cut the connectors leaving about 1/2″ of wire. We will reuse these as connectors on the new wires. 
We will need solder sleeves. The smaller the solder joint the better. Instead of trying to twist the wire to make the joint, I take 2 connectors and pull off the plastic sleeves… 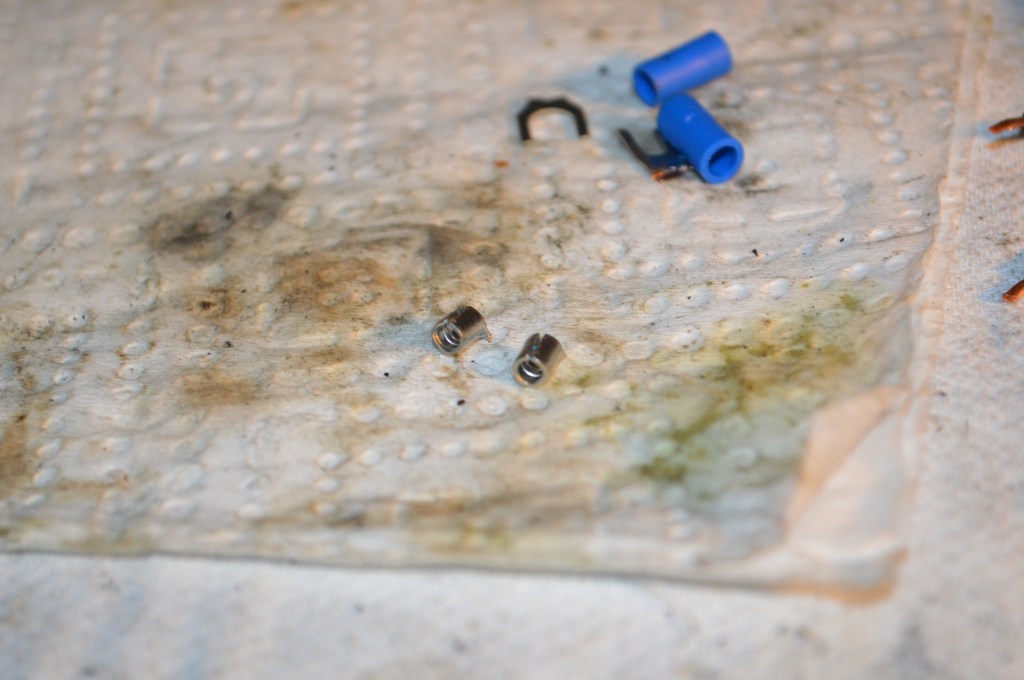
Next, cut the connector away from the crimp sleeve These will allow the wires to be crimped together neatly and provide a very strong solder joint. 
Cut the new wires to length plus 1″. The wires on the motor are cut leaving enough length to strip the field coil wires about 1/4″ and leave room for crimping the sleeves 
Insert the wires into the sleeve and crimp tight enough to hold the wire securely and let the solder flow into the sleeve. 
I like tinning flux… it preps the bare wires to accept the solder and the solder joint forms much faster. A tiny bit on the end of the solder is sufficient. 
After soldering the wires are ready for shrink tubing… don’t try to substitute electrical tape here. You NEED shrink tube 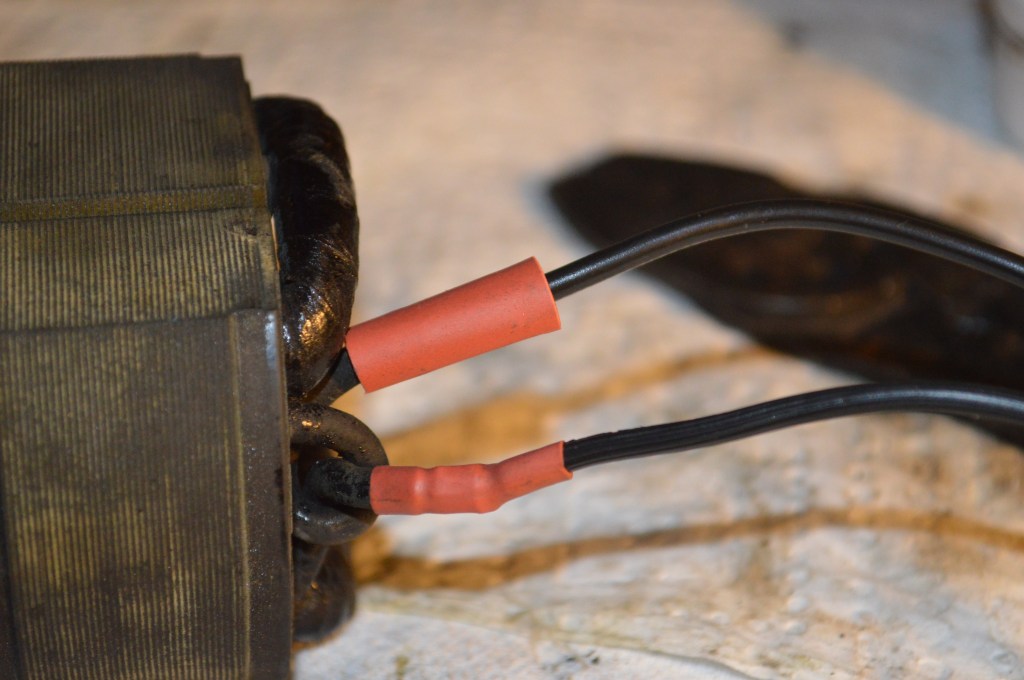
7/32″ diameter shrink tube works great. It is also available at Home Depot. Cut the tube longer than the joint to allow it to shrink and cover the joint and some wire insulation on each side. Here one tube is shrunk. The other tube shows what it looks like before shrinking. You can use a Bic lighter held an inch or two away from the tube… not directly on it. 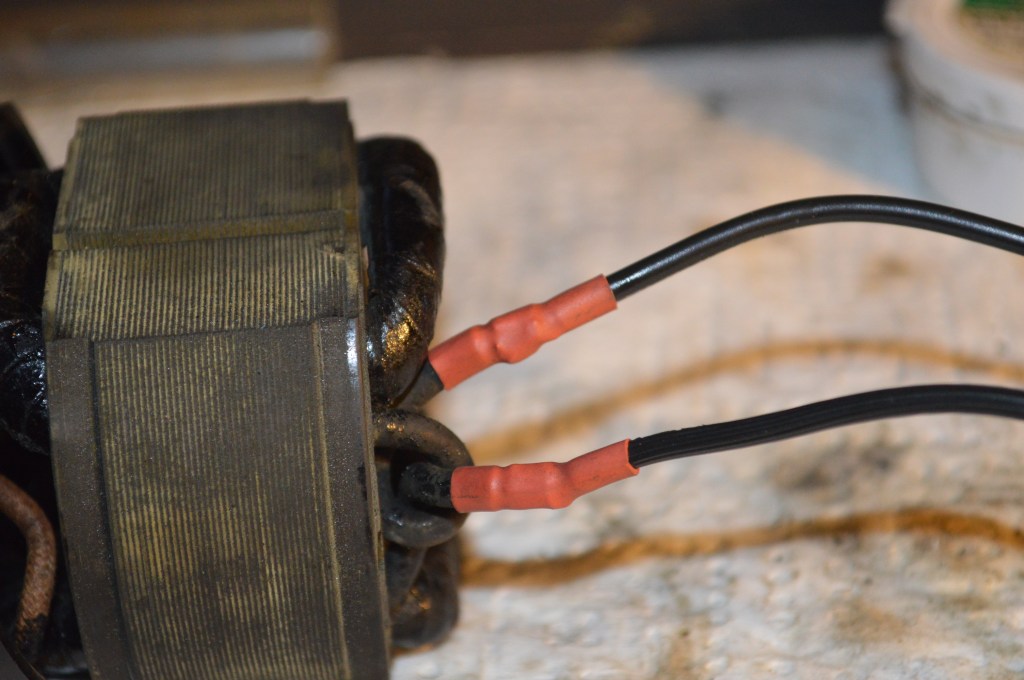
New wires ready for reassembly. 
Reassemble the motor in the reverse order. Don’t forget the washers on the shaft ends. Also, the motor center casing has an orientation. Observe the shape at each end and you will see if it is correct. READ THIS: Now the next step is very important and I will describe it in detail.
The grease wicks should be protruding in the shaft bores. If you push the shaft in without pushing the wick up first, you will cut the wick in half and render it useless. This step takes some dexterity but is simply done… Gently start the shaft into the bushing until it rests against the wick. Use a toothpick to push the wick up into the wick tube. When the wick is flush with the bushing bore, slide the shaft over the wick and seat it in the bore. On the end with the wires, pass the wires thru the grommet hole in the motor casing before inserting the shaft. As you slide the shaft into the bore, you will need to pull the wire to remove the slack. Once the shaft has cleared the wick and the wires are pulled thru the grommet hole, you are home free.
After assembling the motor, make sure it turns without the armature or fan hitting a wire. You will probably notice this before the motor casing closes together completely, but If it does hit, the wires can be cleared with a small screwdriver inserted in one of the vent holes to push the wire out of the way.
Replace the cap on the end of the motor.
Reinstall the brushes so the curvature matches the orientation of the commutator. GENTLY screw the brush caps over the brush spring. Be careful that the spring does not escape and fly across the room. If it does, chances are you will never see it again. The brush caps do not need to be tight… nor should they be. Tighten it about “thumb nail” tight and smile with satisfaction that the motor restoration is done!
Now that the motor is reassembled, the connectors from the old wires are soldered to the ends of the new wire. This is why we saved them when we cut the wire during disassembly.
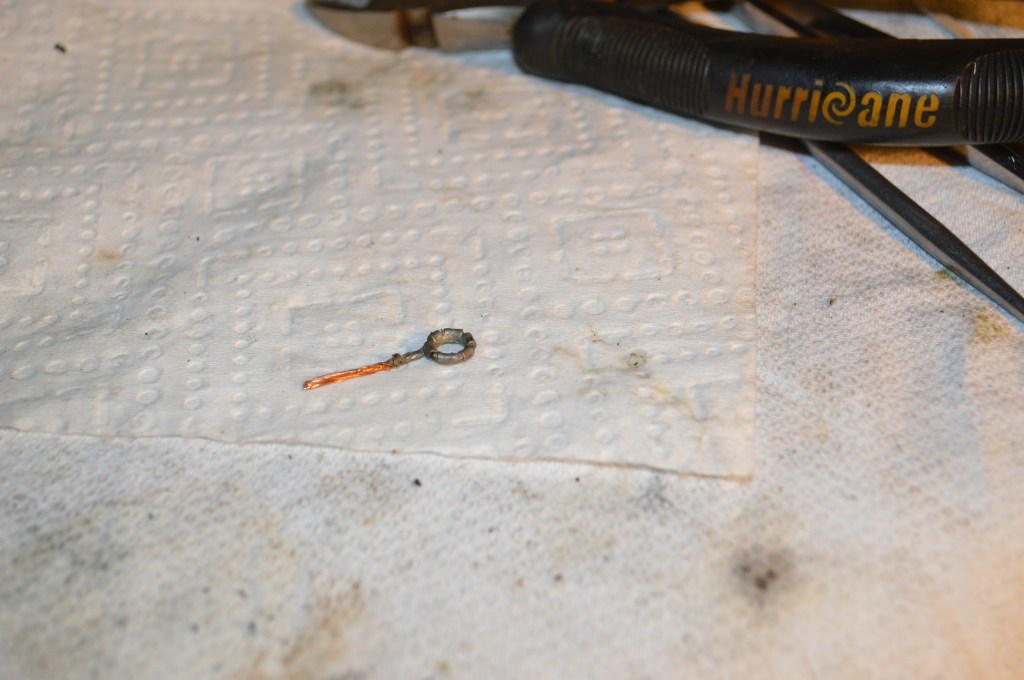
Strip all of the insulation and leave about a 1/4″ or so of wire on the connector. Twist the connector wire to a similarly stripped end of the new motor wire. 
Solder the joint and then stretch shrink tube over the connector and shrink it.
Before the motor is installed, it must be lubricated by filling the grease tube reservoir. The motor lubricant I am using is plain old 100 percent petroleum jelly (not Vaseline) it must be plain petroleum jelly with no other additives. This is generally the economy brand… just look for “100%”. By the way, I am not going to get into a discussion here about it’s suitability as a motor lubricant… the world wide web has much discussion on this topic. Suffice it to say, there is not much demand for grease wick lubricant for these small motors these days and as a substitute, petroleum jelly possesses the necessary melting point to lubricate these motors. Both Singer and White sewing machine literature on the subject recommends it. Inject the lubricant into the grease tubes with a small syringe packed with the lubricant (oral syringes available at any pharmacy work great)
That said and done, reinstall the bracket on the motor and bolt it to the machine… don’t worry about the belt. you will put it on after this is complete and the motor is run in.
Wiring to the terminal block is easy. The back of the plug is numbered 1 thru 3. The new motor wire goes to terminal 2 and 3. The light wire goes to terminal 1 and 3. If you are going to hard wire the controller, the controller wire goes to terminal 1 and 2. I prefer not to hard wire the controller and use a power cord that has 2 wires leading from the plug. In my opinion, it is more convenient to allow the controller and plug to be removed from the machine.

Here I have painted the red shrink tube black…
Before installing the belt, you will need to run the motor to “seat” everything in evenly. Power the machine and run the motor at full speed. You may notice its speed increasing as you run it. I recommend running it until the motor feels warm. Feel free to vary the speed thru this process.
Install and tension the belt and you are ready to go!
I hope you found this tutorial useful, and if you do decide to follow these steps I think you will be pleased with the renewed strength and speed your restored vintage motor will deliver… Also, I don’t think there is a sewing machine motor manufactured today that is close to the quality of these old vintage motors.
I Hope this helps! and please visit our Etsy store at https://www.etsy.com/shop/pungoliving to see our selection of restored fine quality vintage sewing machines.
As always, our tutorials are provided as a free resource to help you learn and maintain your vintage sewing machine. As our site has grown, so has the cost to keep and maintain it. Despite these costs, I will strive to continue posting tutorials and other relevant content for the benefit of the sewing community. If you found the content of this tutorial useful, please consider making a small donation to help me grow the site and help defray my costs… every little bit helps.
Help Support our Site…
Make a one-time donation
Make a monthly donation
Make a yearly donation
Choose an amount
Or enter a custom amount
Your contribution is appreciated.
Your contribution is appreciated.
Your contribution is appreciated.
DonateDonate monthlyDonate yearlyPlease let me know if I can answer any questions or if I can be of any assistance by emailing me at pungoliving@gmail.com.
Thanks for reading!
Lee

Thank you so much for your informative and helpfull posts!
In this particularvpost there is a sentence reading “The motor housing is cleaned and the wicks are reinstalled in the motor housing.”. Now, how exactly am I to replace the whick, als it is way to thick to just push it back into the tube housing.
LikeLike
Hello Jip,
Have you removed the wick? If so, are you using the original wicks?
Reinstalling the wicks is tricky because they must be “snaked” into the grease wick tube… same with the springs.
To reinstall the wick, it is helpful to roll the wick between your fingers to reduce the diameter so it is slightly smaller than the tube. Insert the end of the wick to the edge of the grease wick tube hole in the bearing. Using a thin blade screw driver from the other side to keep the wick from simply pushing through the bearing, use a round tooth pick, a dentil pick, or a sewing machine needle to gently guide the wick from the bottom into the grease wick tube.. Once you get it started, it goes in pretty easily but take your time. It is an iterative process because you are bending a curve in the wick as it enters the tube. Take baby steps as you are inserting it a little bit at a time. When the wick is perpendicular to the bearing bore, gently press the top of the wick flush with the bearing using the screwdriver or toothpick.
I hope this helps! Please let me know your progress… it sounds like you are going for a complete restoration.
Have a great evening,
Lee
LikeLike
Hi Lee, thank you.
One wick is out and broken. (I guess I was a bit too curious.) I have considered a candle wick for replacement, ik but that is too loose. Also considering the grease chord of the kind sailors use to lubricate the shaft of the propellor of their boats.
Now I am trying to fabricate a felt wick myself, using sheeps wool I gathered from fences.
The other wick is still in and blocks replacing the shaft. I do hope that one is not broken.
Yes the motor gets a complete restauration. Hope I will succeed as this is my first sewing machine adventure.
Cudos for your great explanations on how-to-do-things. The pictures are very clear and helpful. Jip.
LikeLike
Hello Jip,
I think you are looking for a substitute that doesn’t exist… I do the same thing sometimes. In this case, I think you need new wicks. The felt wicks used have an “oiling rate”. Too “soft” and it gets too much lubrication too fast, or too “hard” and not enough lubrication and too slow.
I commend you on trying to restore your motor… tell you what. Send me your address to pungoliving@gmail.com (not here where everybody can see it) and I will send you enough of the correct wick to replace your wicks.
I know if you are careful and pay attention to the details, you will succeed.
I hope this helps!
Lee
LikeLike
Hello Lee,
Thank you for taking the time and effort to contribute from your experience and knowledge.
I’m waiting on a Chapman screwdriver kit to attempt to revive a seized 1930s 201-3, so any bit of information is helpful.
You mention that the original wicks were cleaned – care explaining how it was done?
Do these belted motors (mine is a BRK 11) use the same type and thickness of wick as the 201-2’s potted motors?
Thanks!
LikeLike
Hello J!
Grease wicks can be cleaned if the grease has not hardened and caused the wicks to become brittle. The wicks can be soaked in detergent and hot (tap temperature, not boiling) water and gently massaged to loosen and dissolve the old grease. Repeat the process with clean water to remove any detergent, and then dry.
Obviously being felt wicks, they will retain water and need to be thoroughly dried before reusing them. They can be dried in a warm oven (150 to 170 degrees Fahrenheit), or let them dry in the sun for a few days. Regardless of how they are dried, they must be dried thoroughly before recharging them with lubricant.
The Singer potted motor uses a different diameter wick than the BRK motors. The wick diameter in your motor is 1/8 inch.
You mentioned that your 201 is seized. Often times, these machines seize in the shaft bores in the upper arm shaft. The other likely places are in the bobbin hook shaft and in the vertical and horizontal gear shaft bores. I would recommend using a few drops of kerosene at each of the oiling locations (except for the balance wheel oil port). The balance wheel oil port has a felt wick in it that you don’t need to soak with kerosene. To lubricate the balance wheel shaft, place a few drops of kerosene directly to the shaft where it meets the rear shaft bushing (accessible through the rear access. The top oiling port on the connecting rod journal cap also has a felt wick. Again, add the kerosene drops at each edge of the journal caps. The vertical gear shaft bushings have oil ports accessible by removing the rear inspection cover and looking for a port located at the bottom of the top gear shaft bushing. The bottom gear shaft bushing on the vertical gear shaft is lubricated through the hole located on the front of the pillar near the sewing machine bed (just below and to the left of the stitch length lever). The bobbin hook shaft is lubricated by removing the bobbin and putting a drop of kerosene at the hole located in the center of the slotted screw that you will see in the center of the bobbin case. Similarly, apply a drop of kerosene on all of the rotating parts found in the needle bar area. The bottom gear shaft bushings have oil ports located on the top of the bushings on the front where the shafts pass through the bushing bores.
..
Depending on the cause, your machine will free itself one of two ways… either quickly (if it is seized with oil varnish), or hard (if it is caused by rust). The key is to allow time for the kerosene to soak into the bushings. Be firm but not forceful in attempting to turn the sewing mechanism using the balance wheel. Once it begins to turn, it will free itself up through rotating the mechanism repeatedly. If it is free enough to turn under power of the motor, do so for 10 to 15 seconds at a time. If it remains sluggish, add more kerosene. If it begins to turn smoothly, re-lubricate all of the areas with sewing machine oil. Run the machine for a minute or two at full speed and then re-lubricate again with sewing machine oil… don’t be too concerned about adding too much oil… the kerosene and oil necessary will drip and require cleaning with a cloth to remove drips and excess oil.
1930’s vintage 201’s are great machines and well worth the time and effort you will need to spend to bring it back… but it can come back!
Please let me know if I can be of any assistance and have a great night,
Lee
LikeLike
Hi Lee,
I’ll be sure to familiarize myself with all the parts you mentioned and read through the Singer manuals. The machine hasn’t been used in decades and the gears seem to be pretty baked-in together. As you suggested, I won’t forcefully move anything that’s not yet ready to move. With the crumbling wooden base and 82 year old wiring, there’s plenty more fun to be had with this project.
Thank you for all the great information!
LikeLike
Great!
Don’t rush… patience will reward you with a great sewing machine…
Lee
LikeLike