

Kenmores of this vintage are great sewing machines. Often understated, they are very popular among folks that know Kenmore branded for what they are… durable all metal sewing machines with a wealth of features suited for just about any sewing task imaginable. If there is anything I have learned from working on these machines, is that they are well built and well thought out in design. Not particularly flashy, they are neat in appearance and the layout of their controls is practical and efficient. Routine service is made easy by way of “popping off” the top cover (held with spring clips) without the bother of removing screws, and well marked oiling points.
Powerful motors, double belt reduction belt drive, hyper extension presser foot lift, a great variety of utility and stretch stitches, and a very forgiving tension control adjustments are a few things that make these sewing machines a great choice for garment construction. Many of the Kenmore models, like this one, have expanded capabilities with the use of a plethora of pattern cams and unique gear driven attachments for making button holes and even monogramming. These features, and more are what make restoring these machines worthwhile… They are great quality sewing machines that deserve to be preserved and “kept in the stream”.
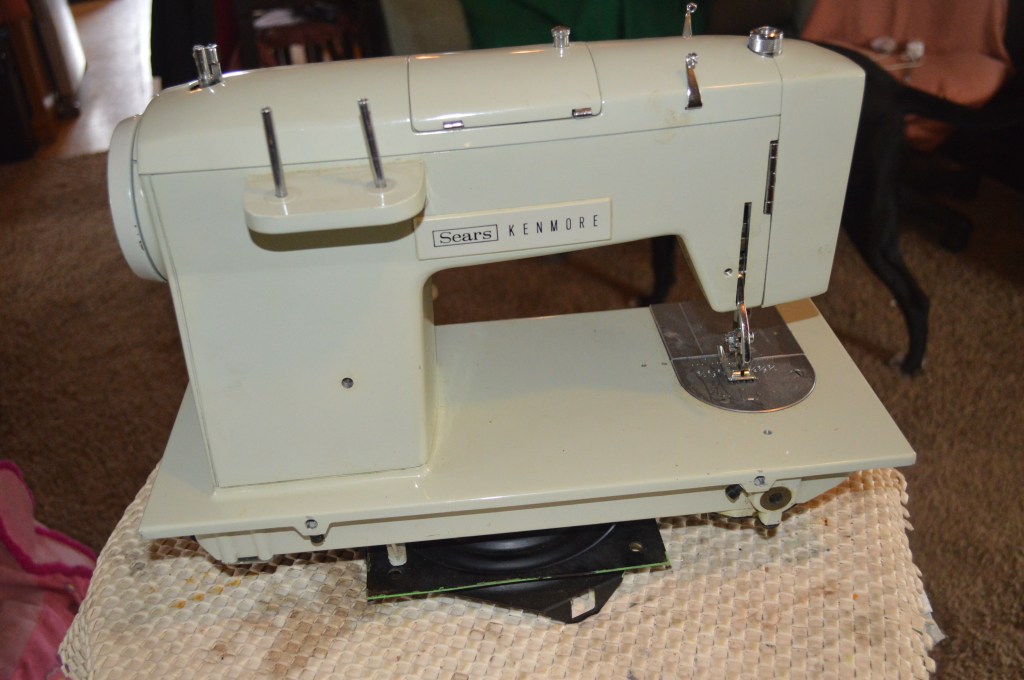
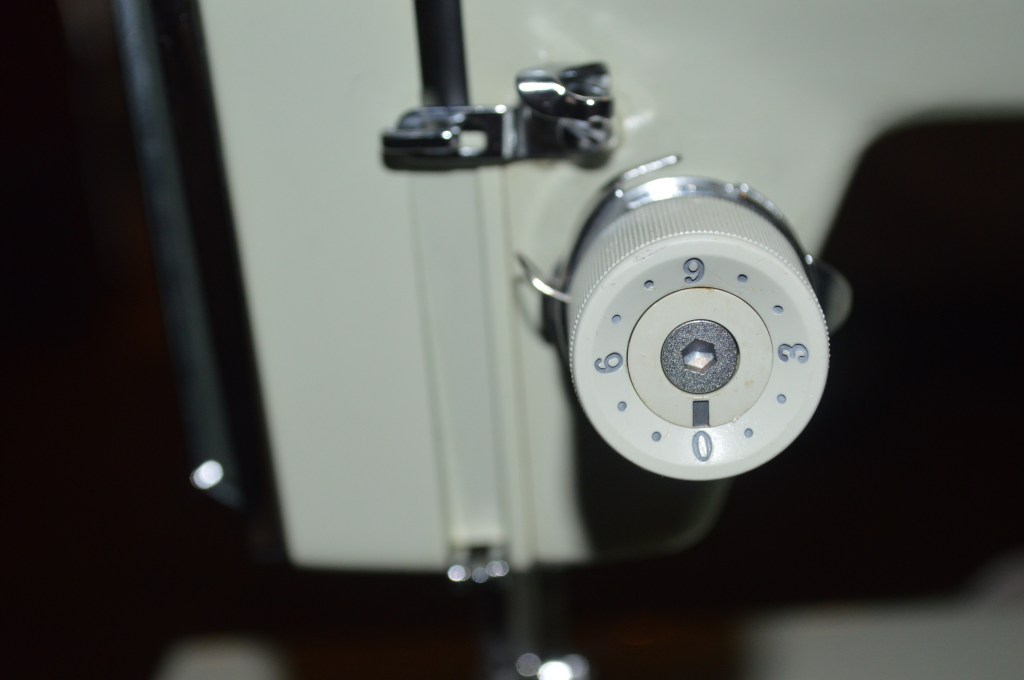
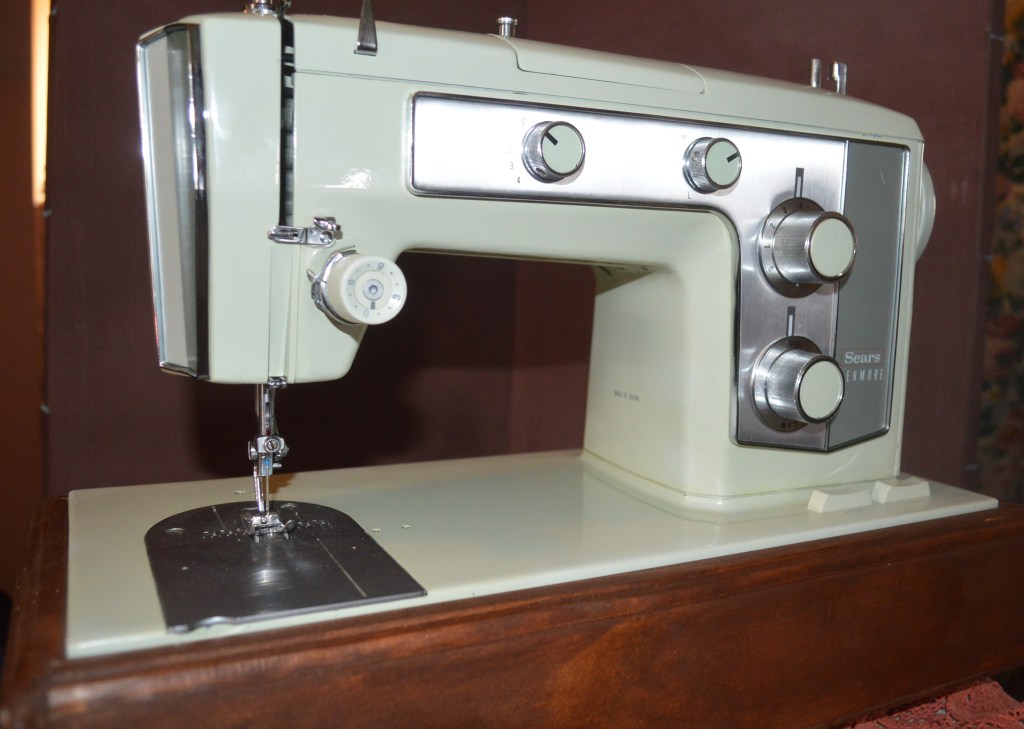
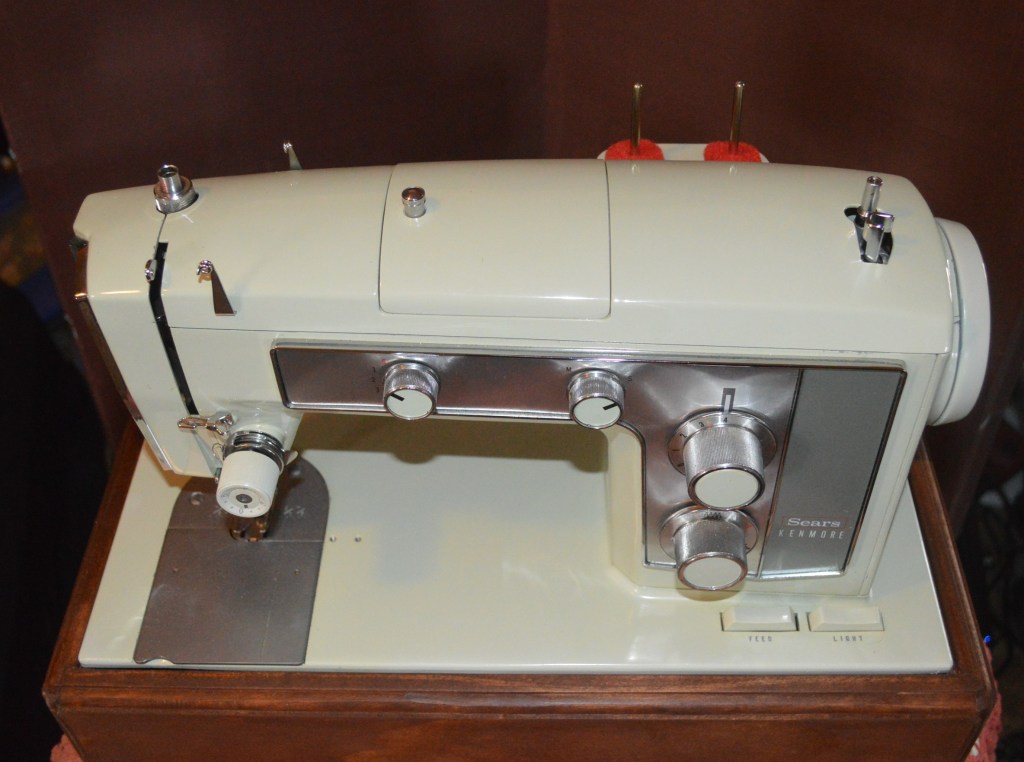
This Kenmore model 158.16012 is a great example of a Kenmore quality sewing machine. Virtually indistinguishable from the model 158.1802 (Kenmores self proclaimed “Kenmore’s Best”), both machines use the same body castings, controls, latch release presser foot clamp, bobbin winder, and super high shank presser feet. Both machines have a 1.2 amp motor and double belt reduction for increased piercing power at the needle. Mechanically, they are very similar. Both use a gear driven oscillating hook and class 15 bobbin. Under the machine, the sewing assembly is identical. The linkages found in the top sewing arm of the machine is a little different, but both have the same cam stack and built in stitches. The selection of built in stitches is scant, and the full range of stitch selection comes from using stitch pattern cams. From a sewing perspective, the most important difference between them is the needle homing position. The 1802 is a left needle homing machine whereas the 1601 is a center needle homing machine. Otherwise, the color of the dial centers is the only difference you will notice… Take a look.
Kenmore Model 158,1601 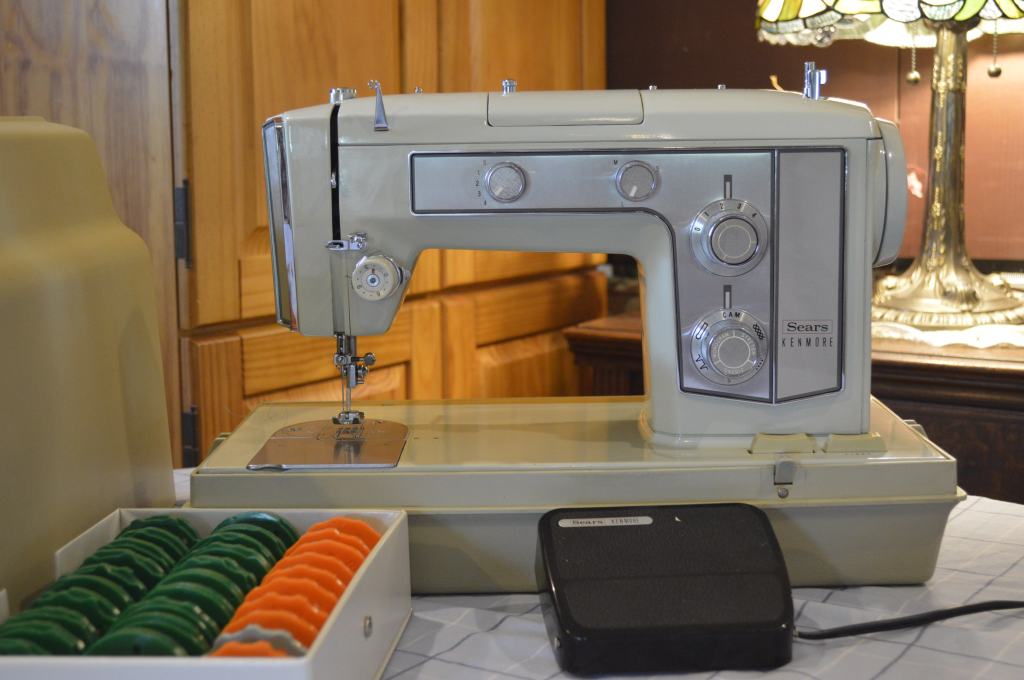
Kenmore Model 158,1802
The 1601 being restored here is typical of most Kenmores. Cosmetically, the paint is in good condition but requires deep cleaning. Mechanically, the emphasis is on removing oil varnish that has coated the inside of the rotating assemblies, replacing the grease in the oscillating hook gear box, restoring the motor, disassembling and cleaning the tension mechanisms, and ensuring all of the linkages responsible for making all of the built in and pattern cam stitches are adjusted and operate smoothly. To achieve this, disassembly of the sewing mechanism in the sewing machine head, the connecting rod, the stitch length fork, the bobbin hook case, and various of the bits and pieces associated with these assemblies is required. Disassembly of the cam stack and linkages in the top of the sewing machine head is not required, except for the connecting rod, the stitch length fork, and the gears, there is everything can be cleaned in place.
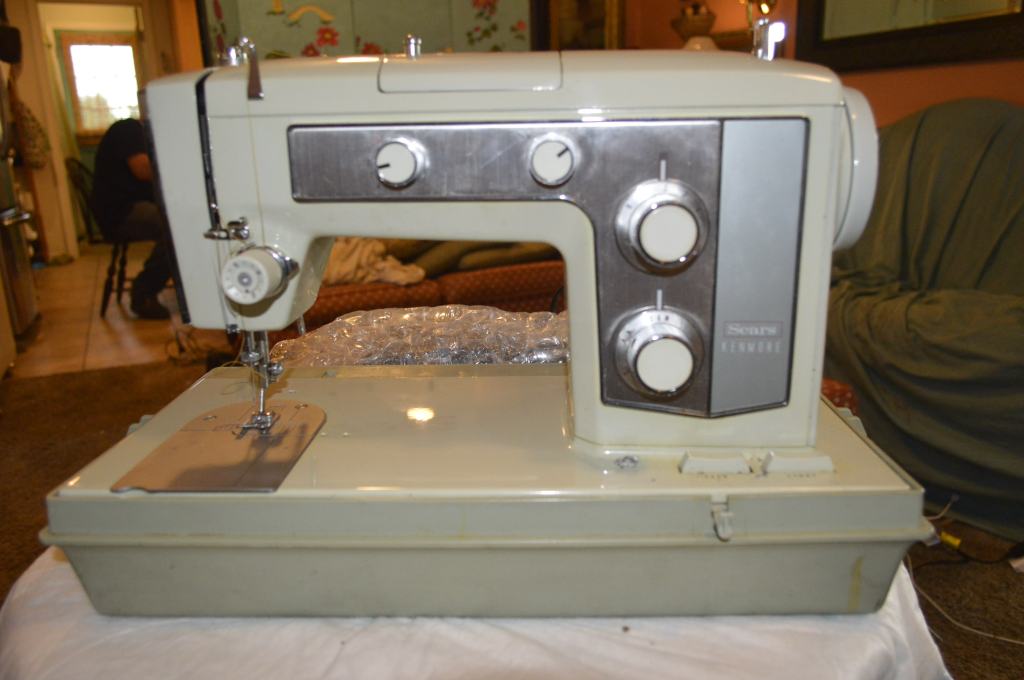
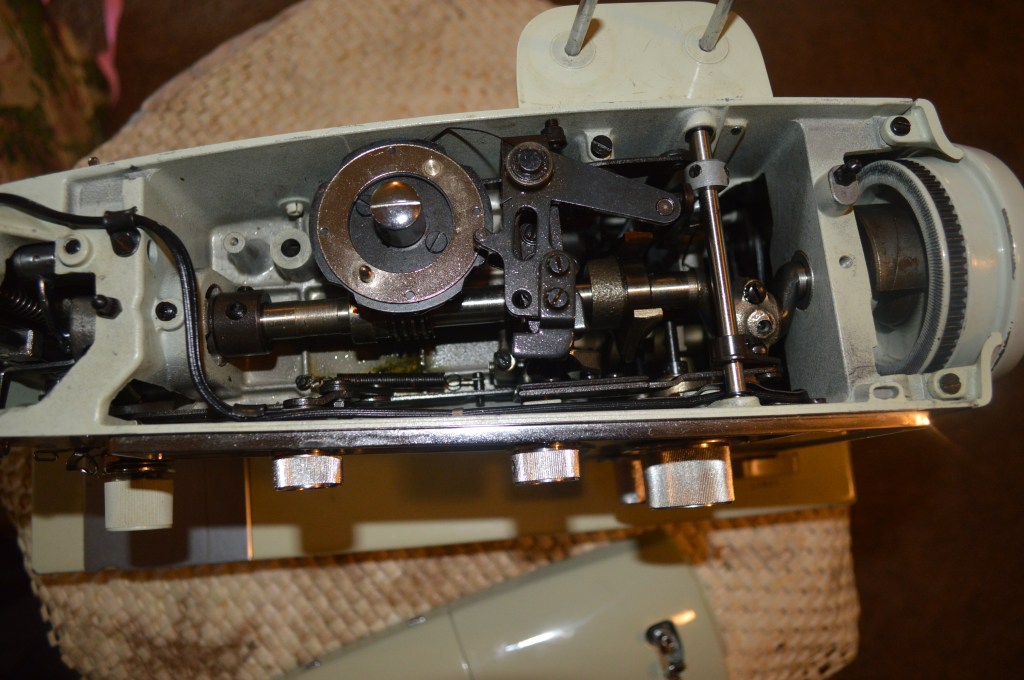
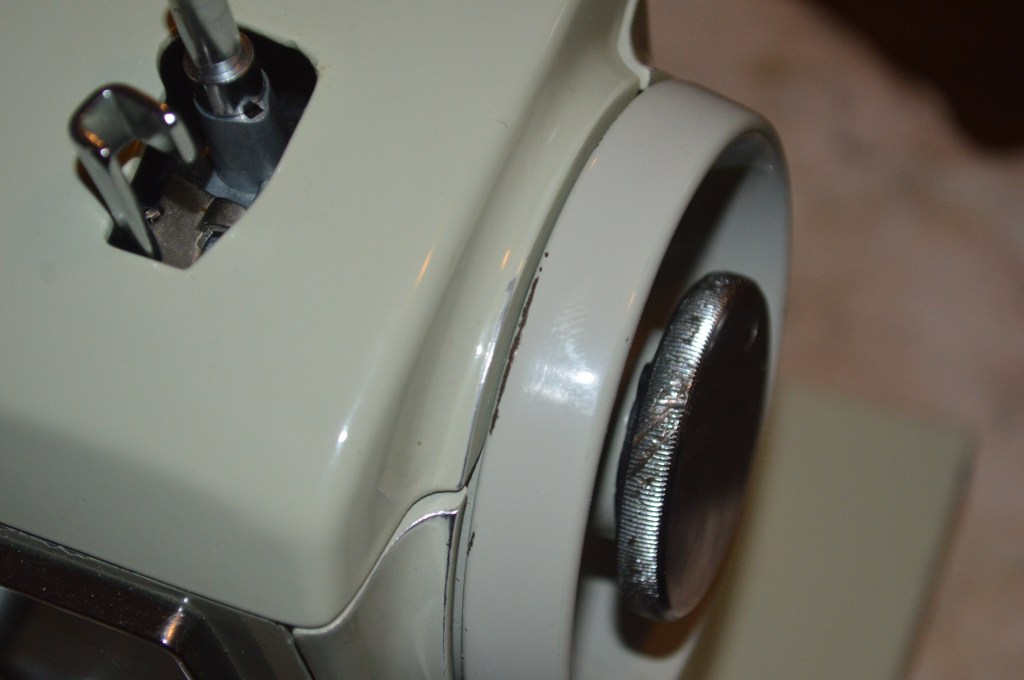
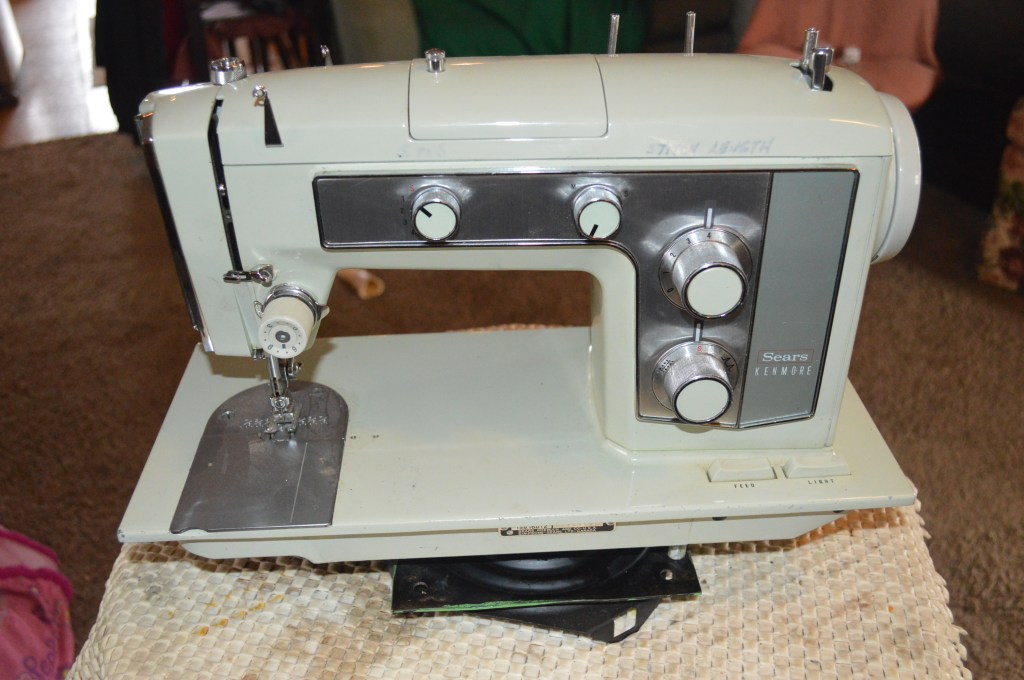
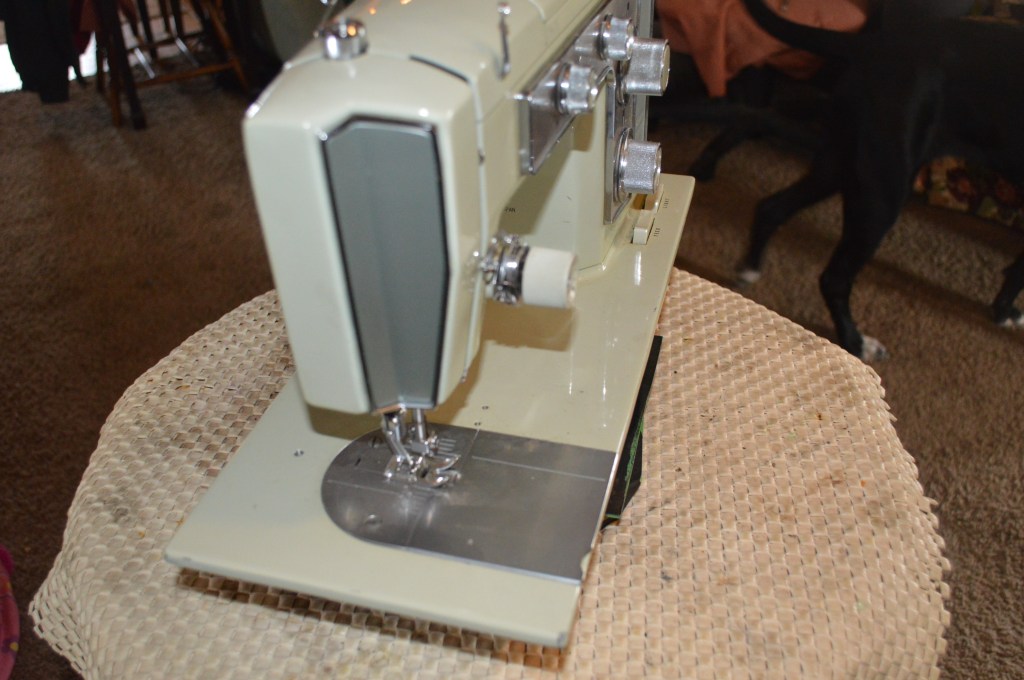
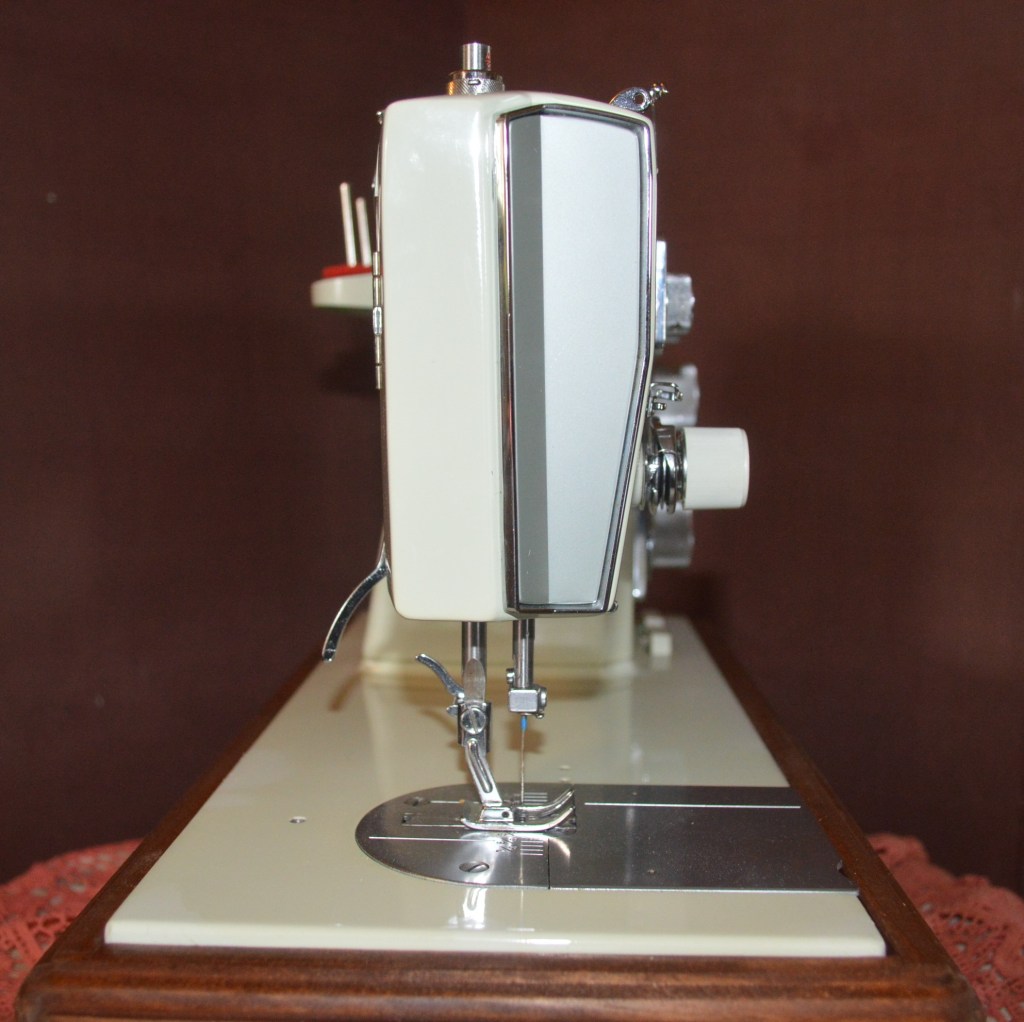
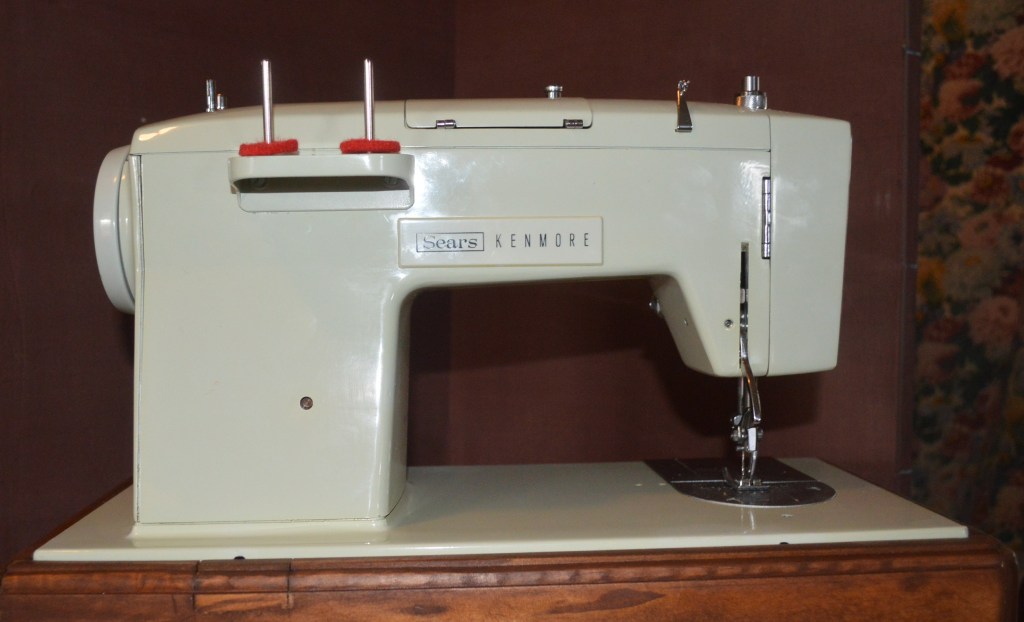
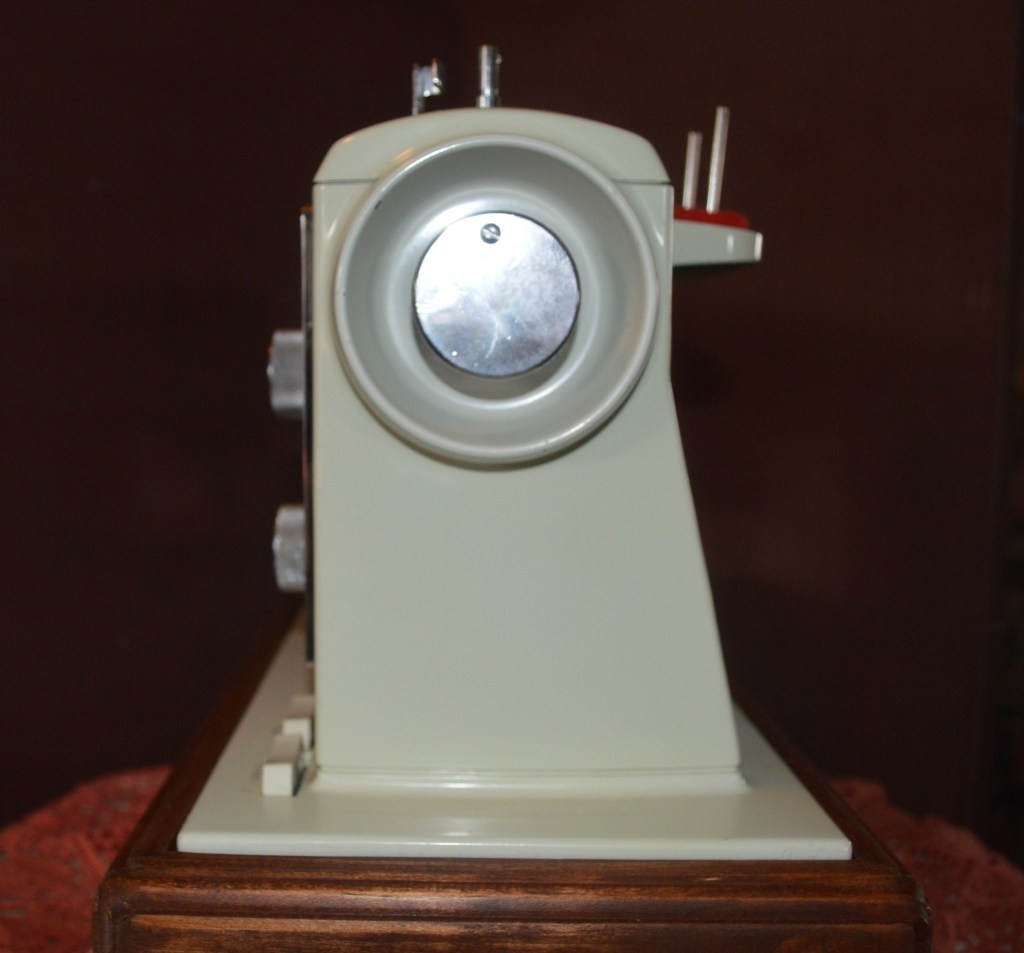
Starting off, here is the machine before restoration…


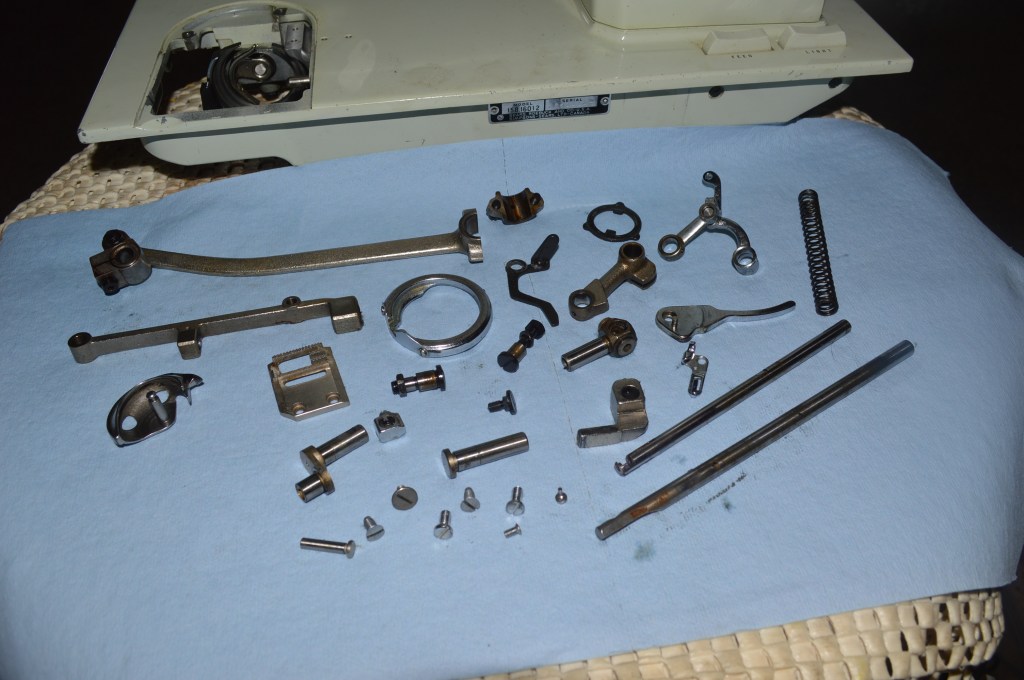
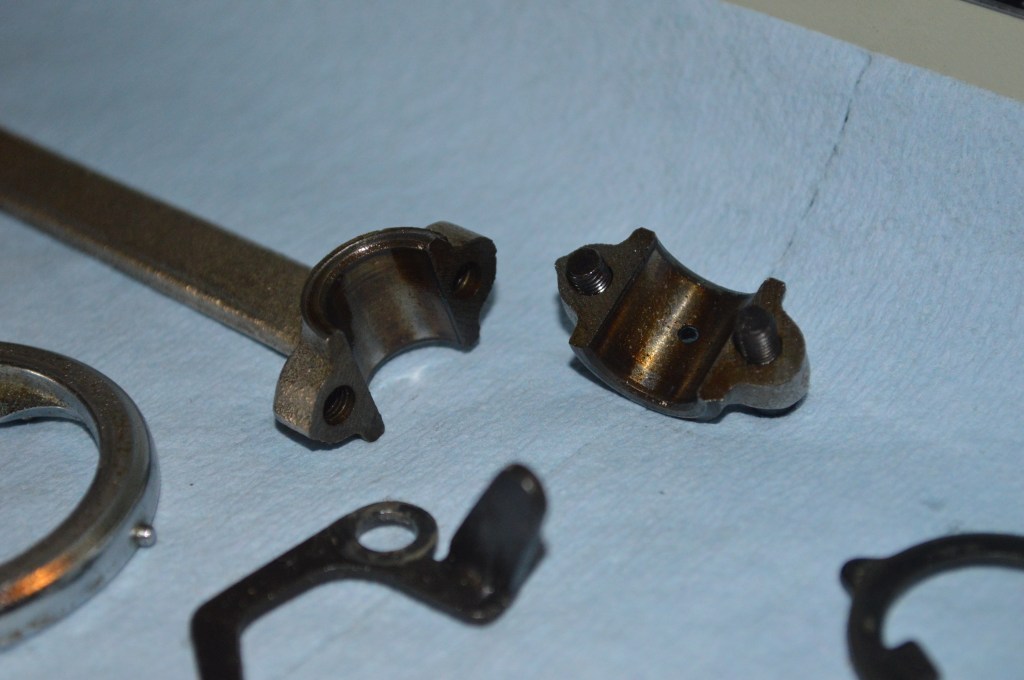
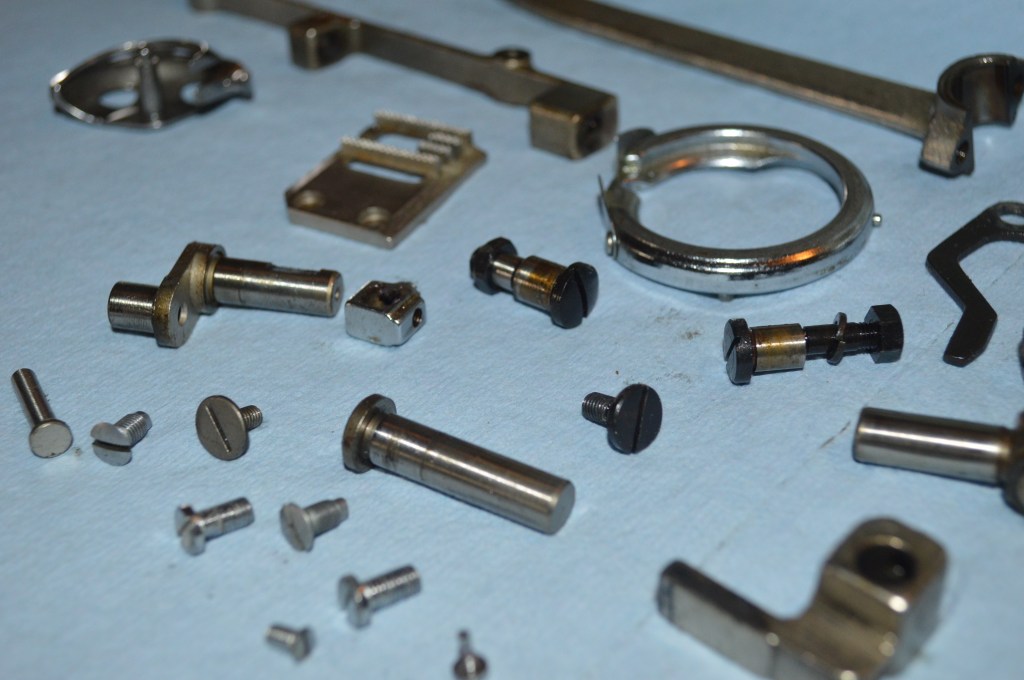
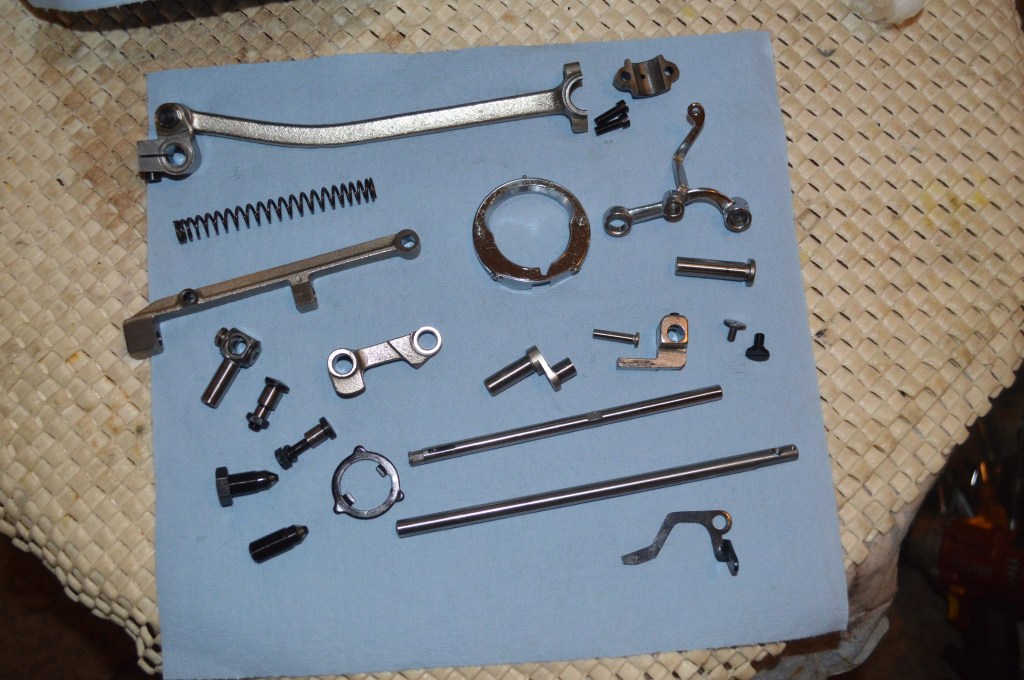
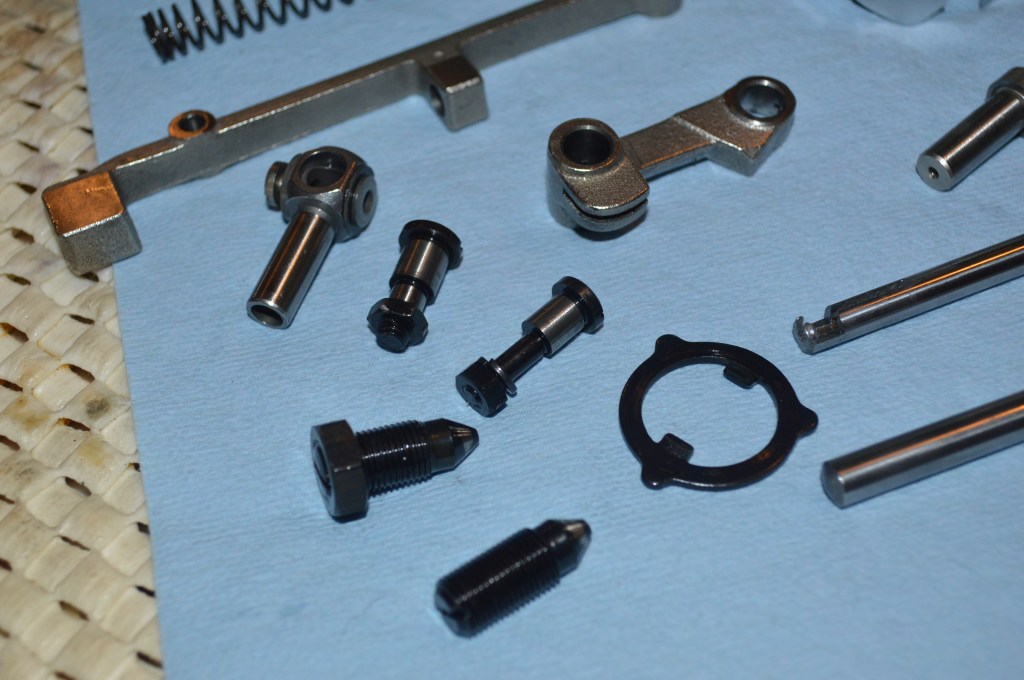
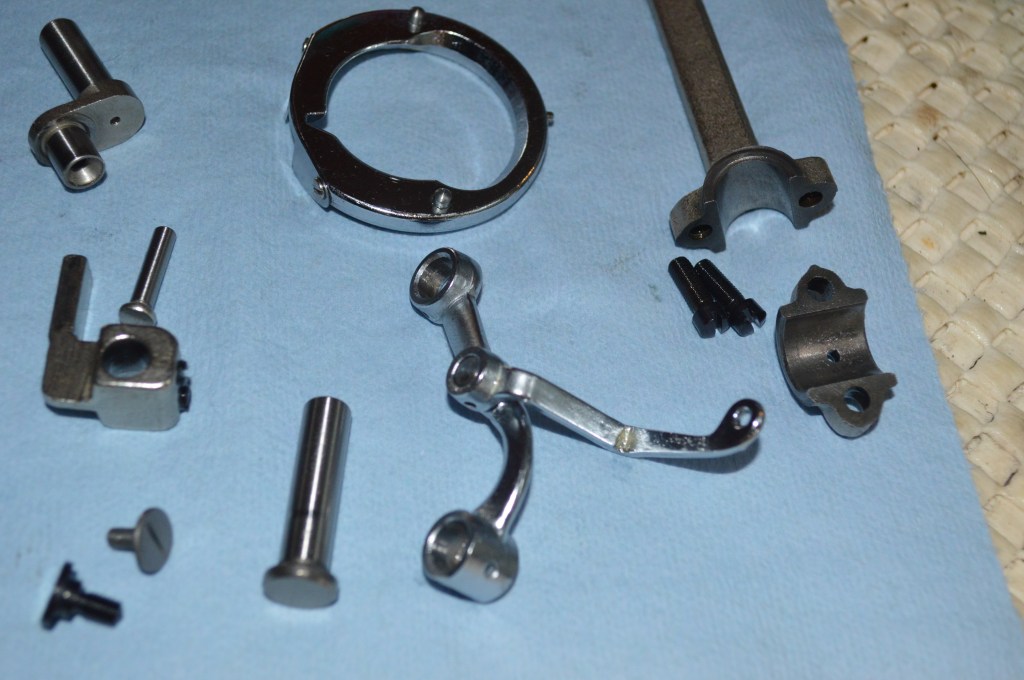
The assemblies removed are laid out for cleaning… In this step, all of the old oil varnish will be removed.
The parts are ultrasonically cleaned and then soaked in oil heated to 250 degrees F to drive off residual moisture. They are then wire brushed to bright steel… the needle bar and presser foot bar are polished glass smooth.

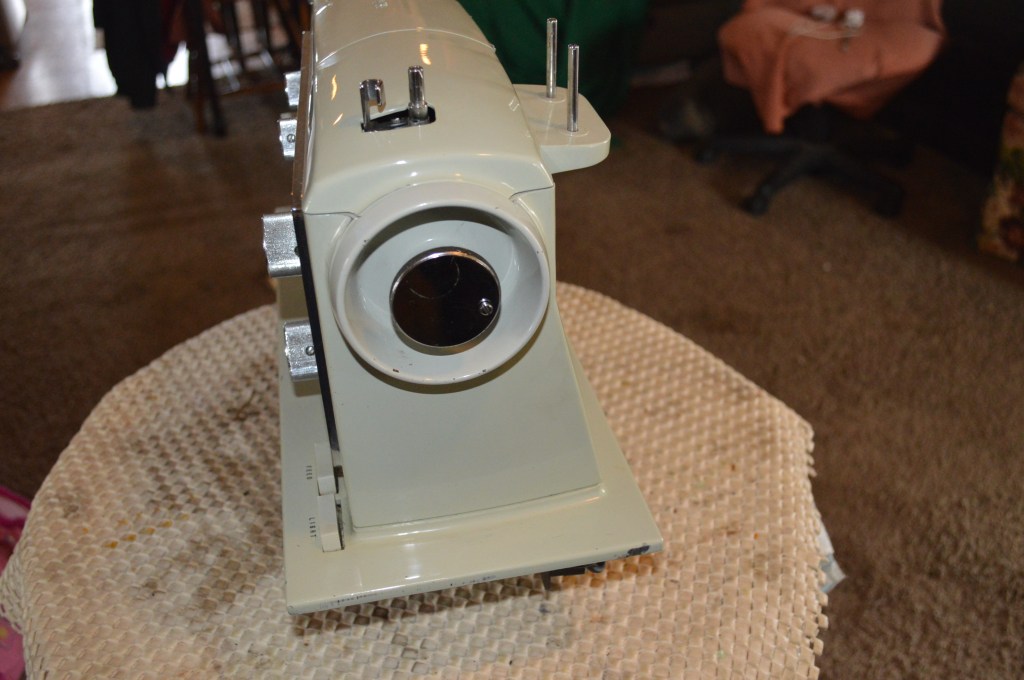
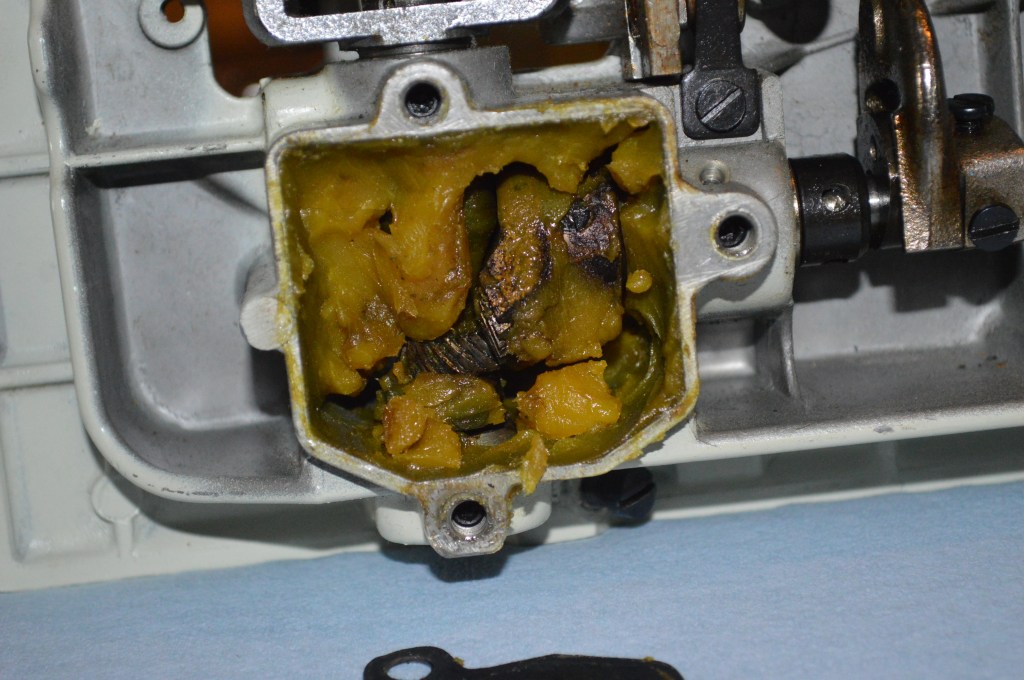
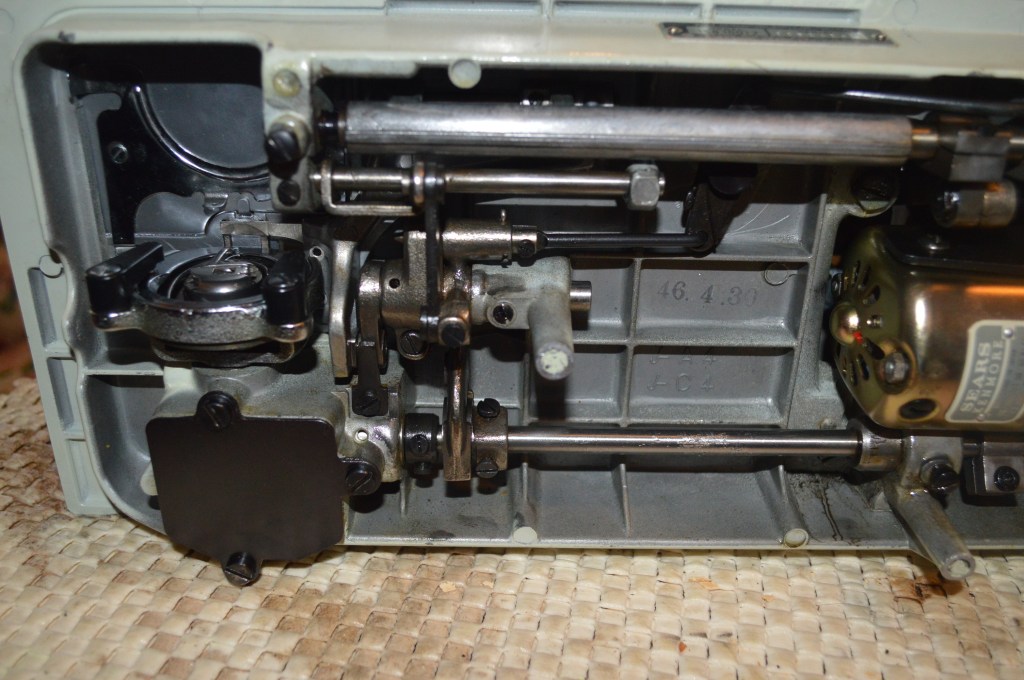
Dirt hides under covers…
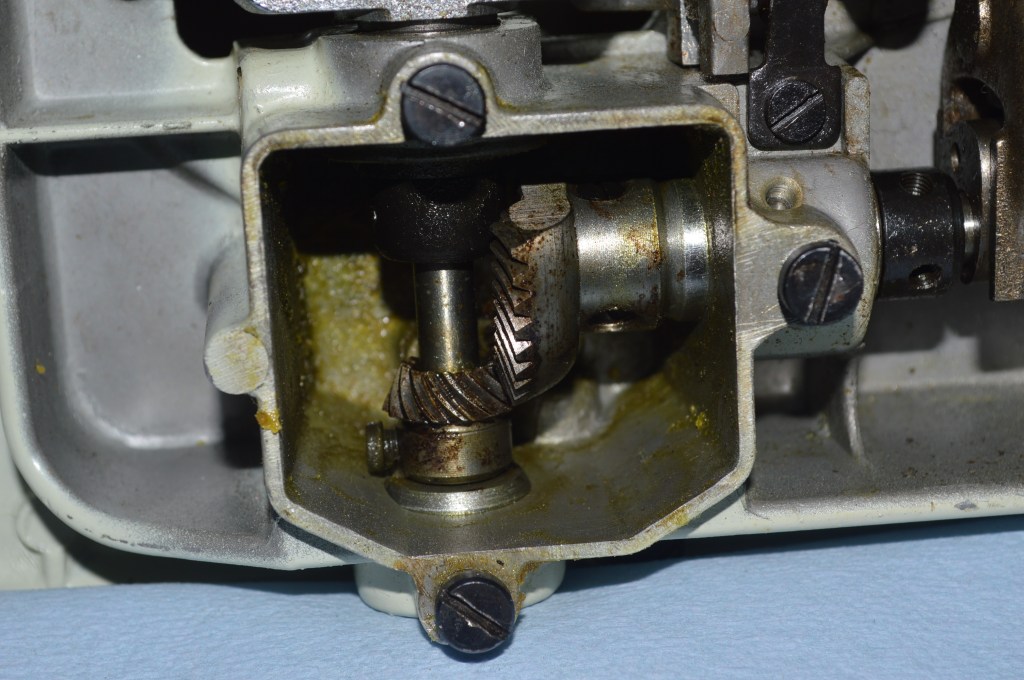
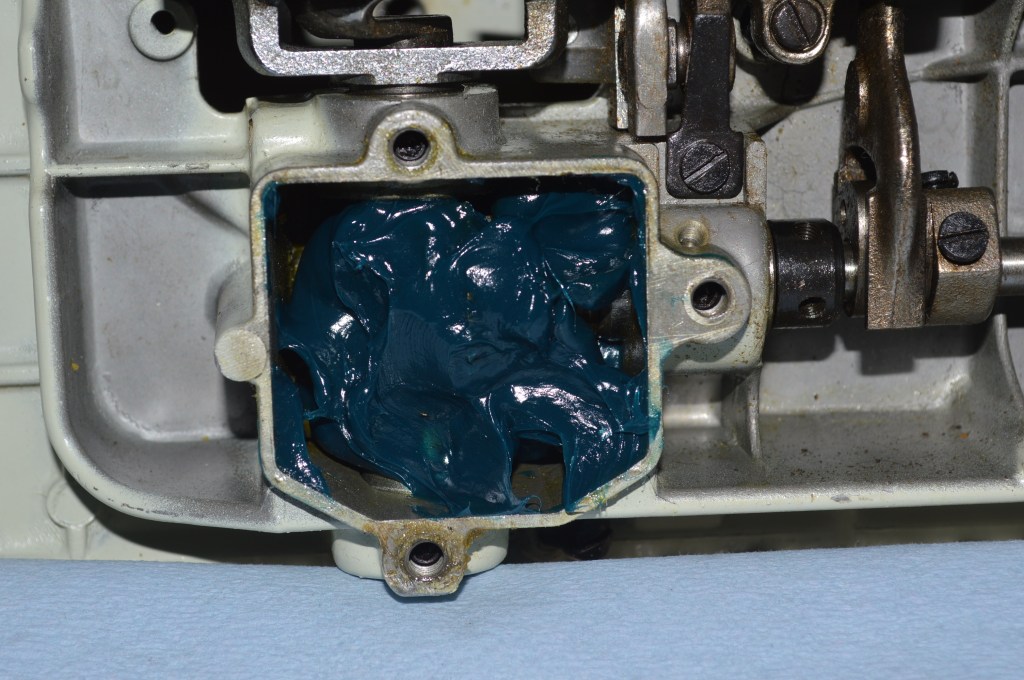
The hook gear gear case is opened and all of the old grease is removed, the gears are cleaned, and the case is packed with new grease. The gear box grease in every vintage Kenmore I have restored needs this service. The old grease ages to the consistency of beeswax and is no longer effective at lubricating the gears.
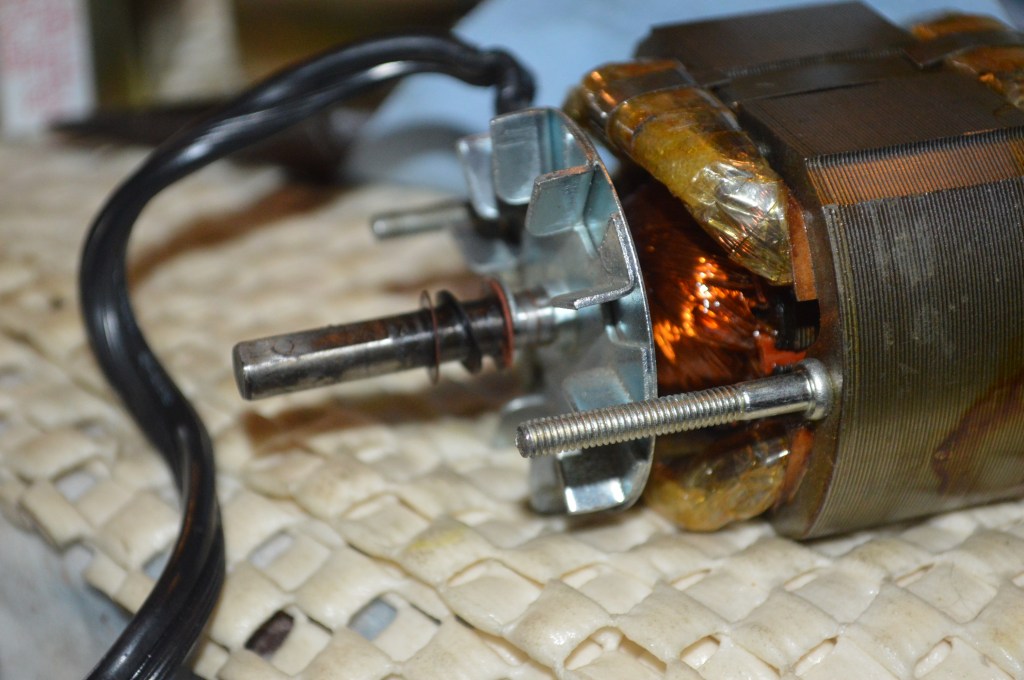
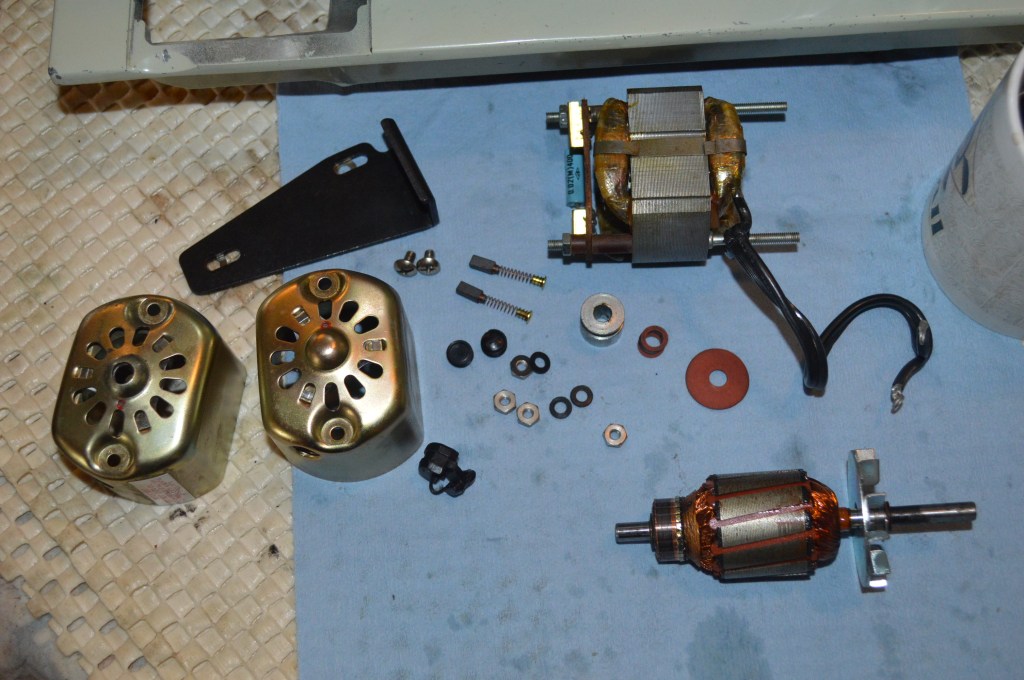
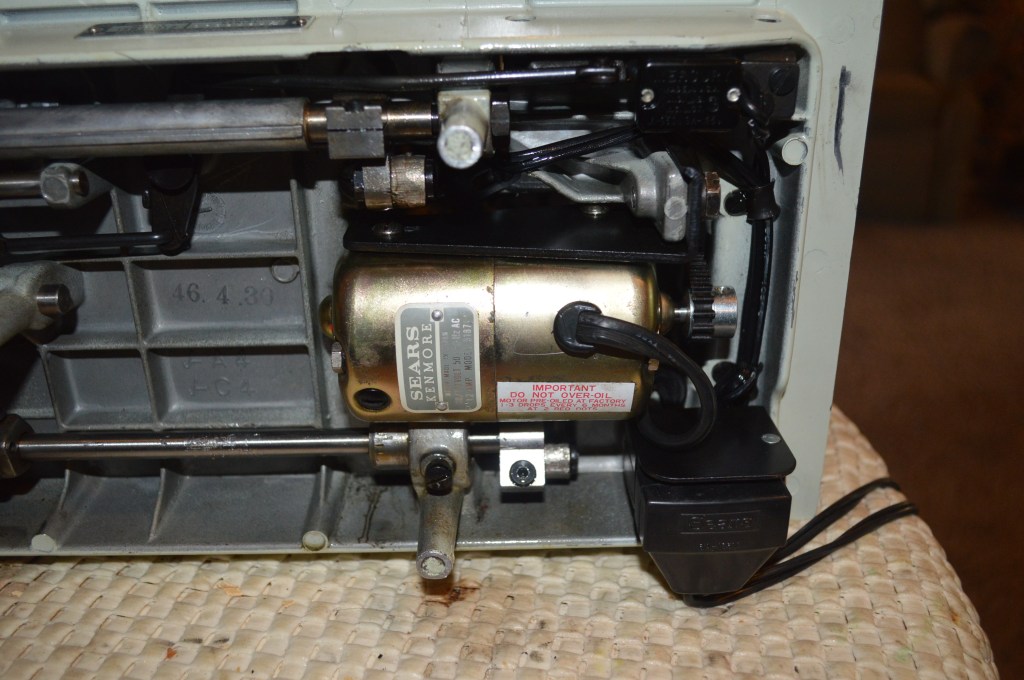
Next the motor is disassembled. The armature shafts and the commutator are polished, and the brushes are reground flat.
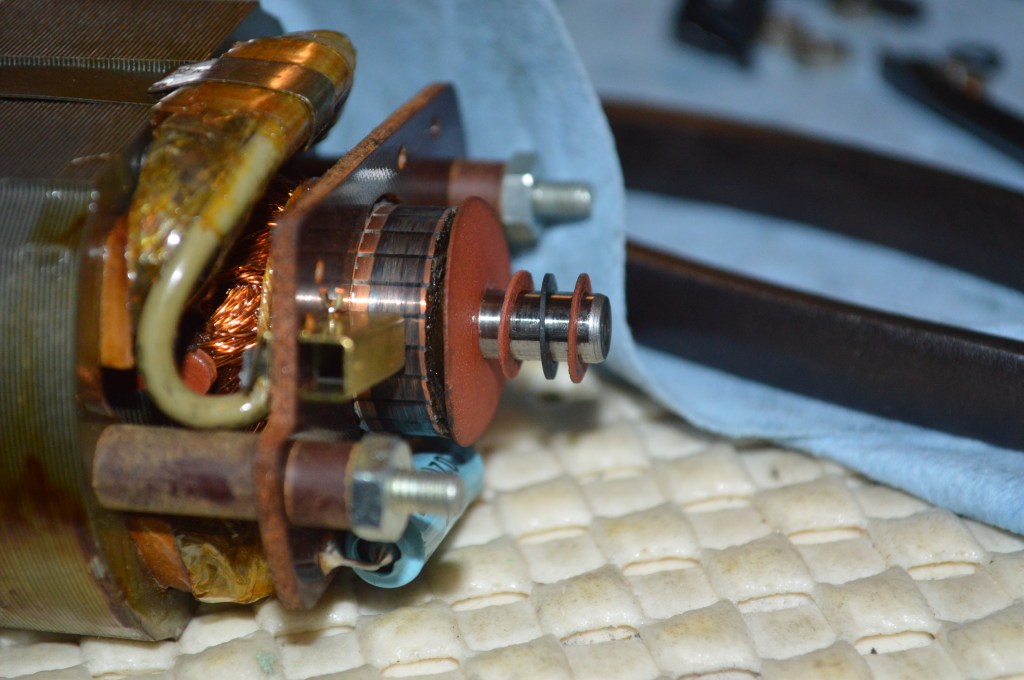
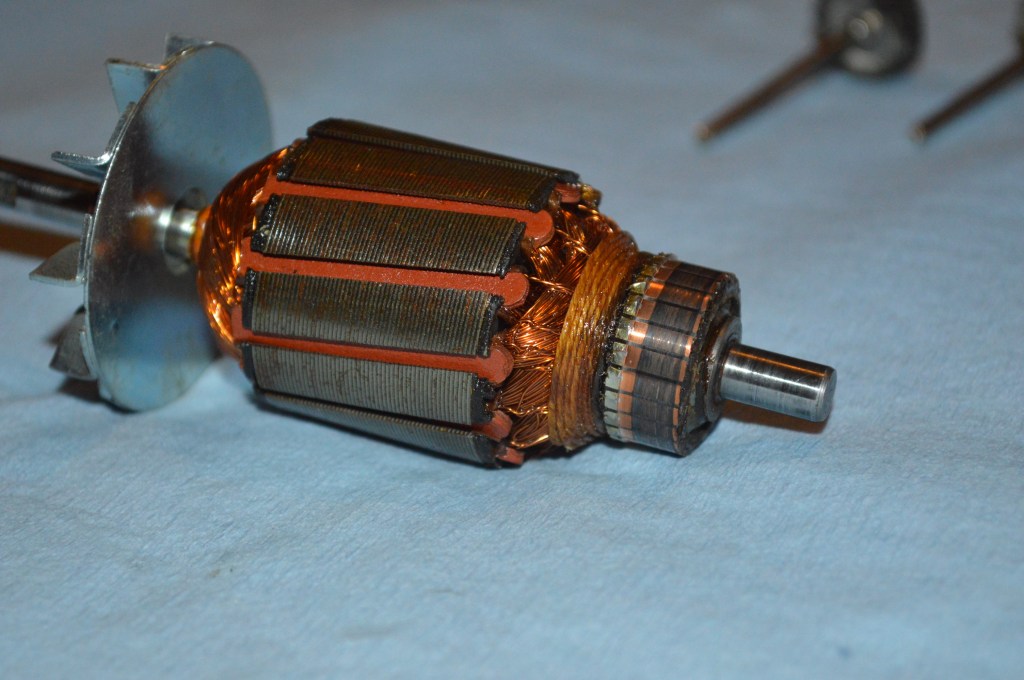
Commutator before polishing 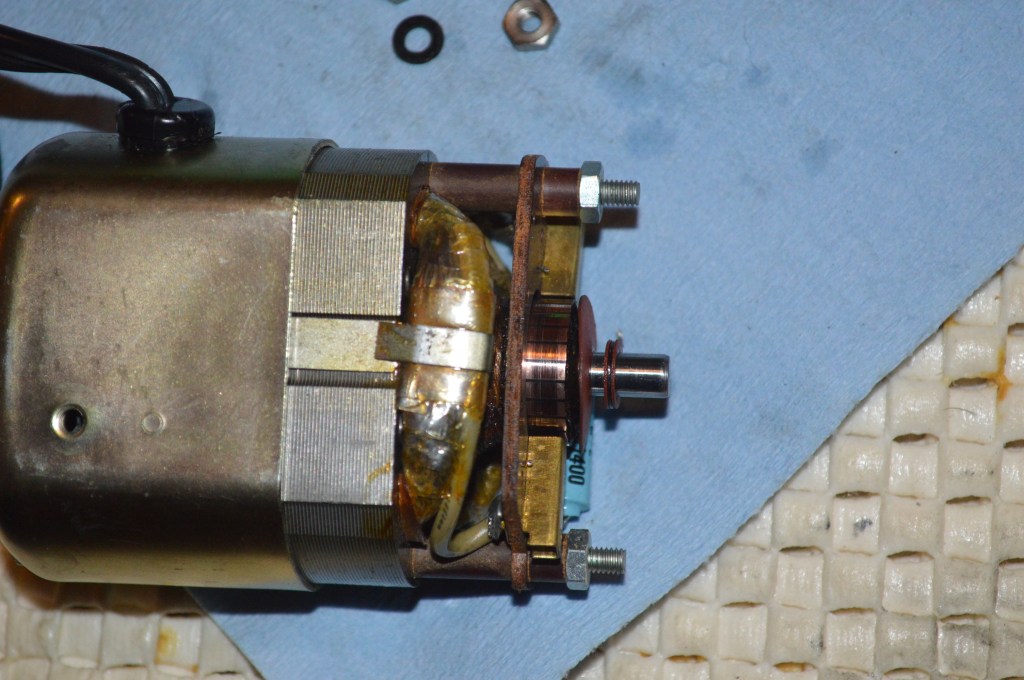
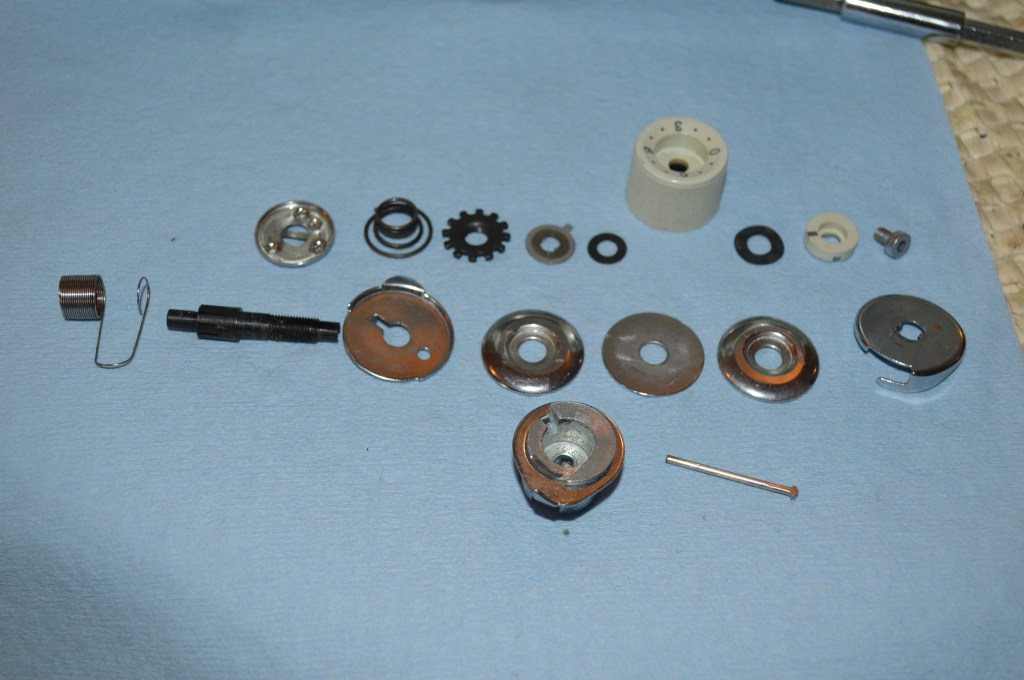
To complete the mechanical restoration, the tension assembly is disassembled and cleaned…

The machine mechanisms are reassembled

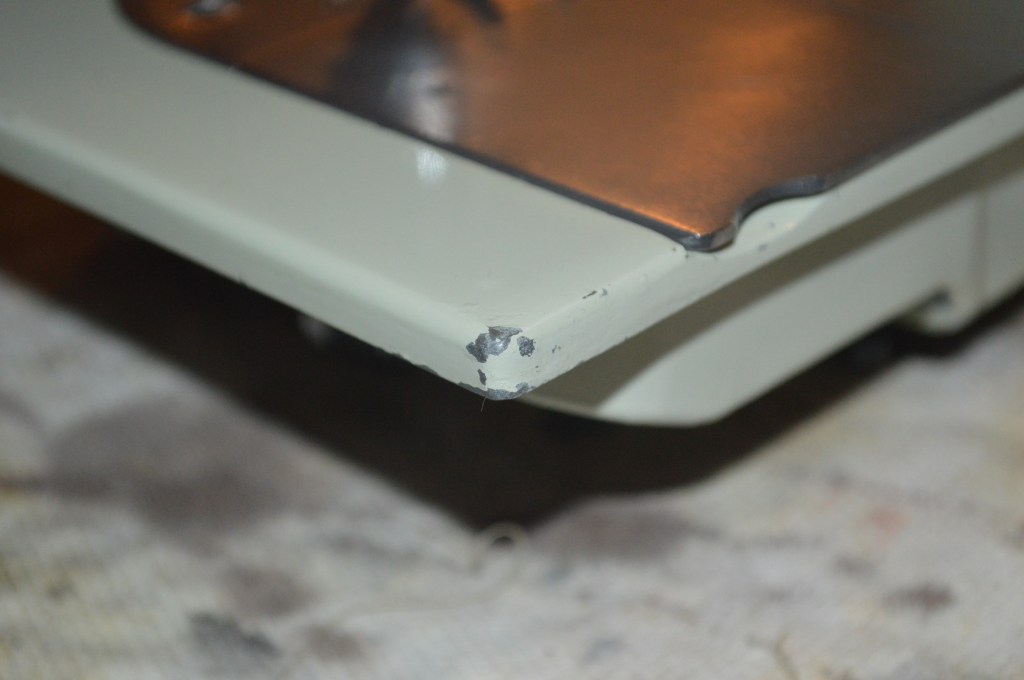
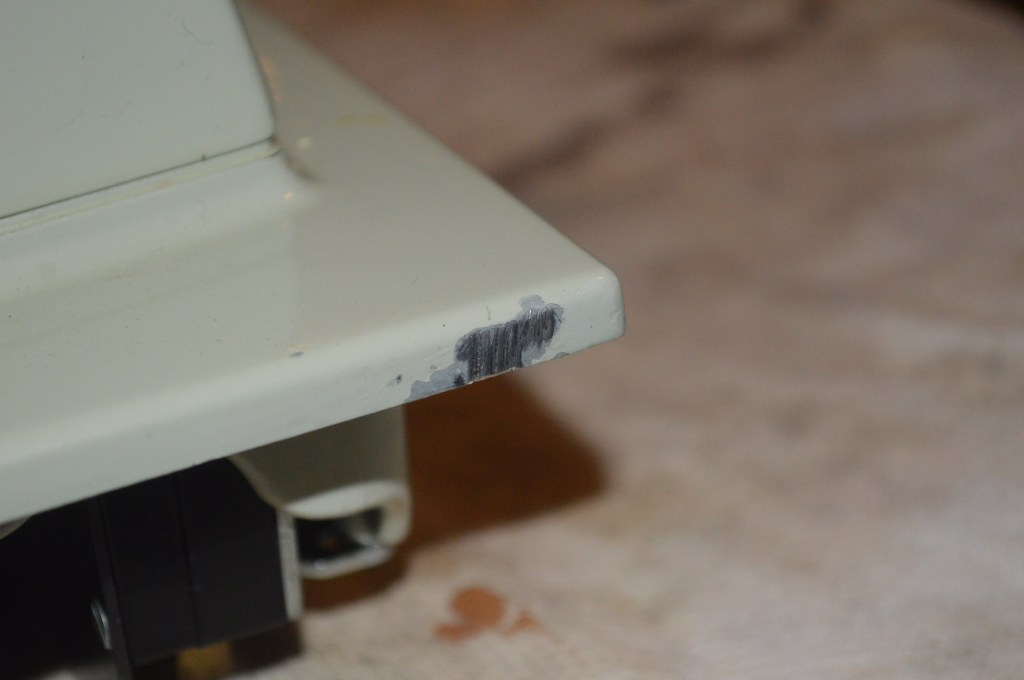
The next step is to do a complete cosmetic deep cleaning of the machine and correcting paint chips with color matched paint. After cleaning, the chips can be repaired. On this 1601, they are minimal, but the result makes the machine look so much better… it’s the details that matter.
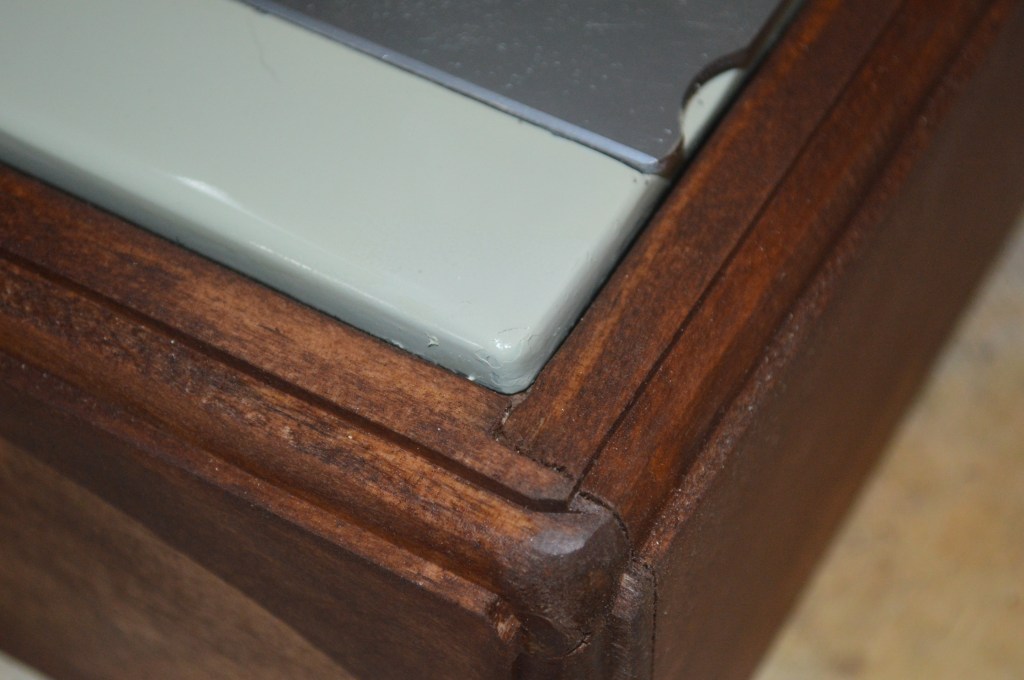
This completes the restoration, and this Kenmore is in tip top condition. It runs smoothly and it looks great. The whole purpose of such a detailed restoration is to return a great high quality all metal vintage sewing machine to as close to “as new” as possible. This restoration is a great example of achieving that goal!
For comparison, here is the machine before restoration…


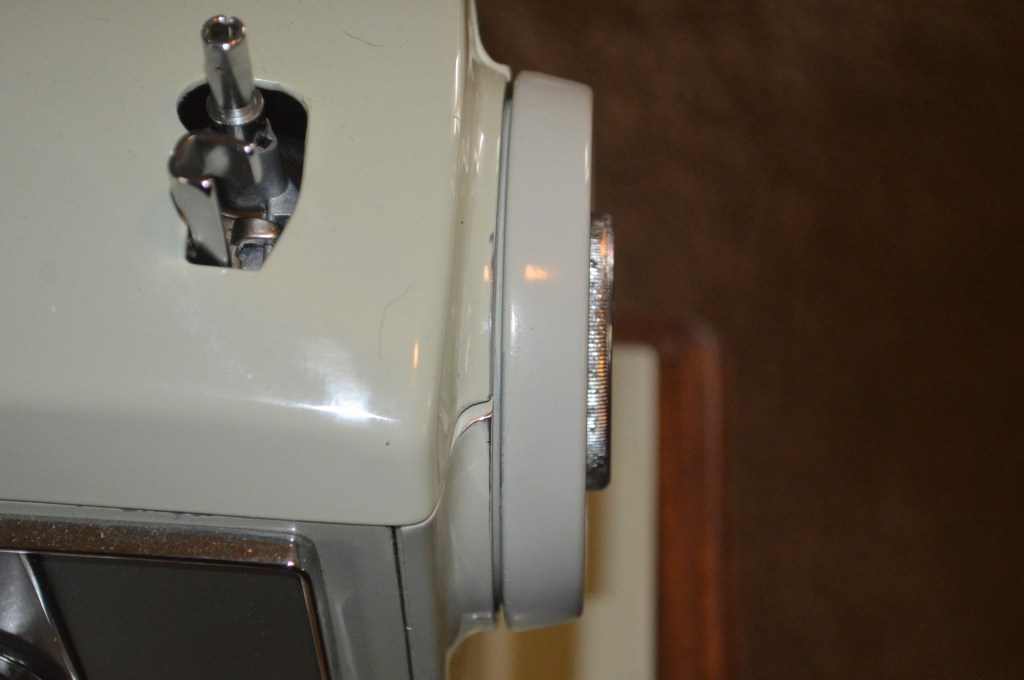
and here is the machine after restoration…

If you like what you see please visit our Etsy store at https://www.etsy.com/shop/pungoliving, and see all of our other restored fine quality vintage sewing machines. If you have any questions, please contact Lee at Pungoliving@gmail.com. If you like what you see please visit our Etsy store at https://www.etsy.com/shop/pungoliving, and see all of our other restored fine quality vintage sewing machines. If you have any questions, please contact Lee at Pungoliving@gmail.com.
Tell me what you think!

Greetings, I have a kenmore sewing machine that needs repair (such as sewing machine belt, tune-up)
LikeLike
Hello JR,
Are you local to the Virginia Beach area? My emphasis is sewing machine mechanical and cosmetic restorations for machines that I can pick up locally. This is much more than servicing or tune-up and the end result goal is a machine that performs like new. What symptoms is your 1602 showing?
Thanks!
Lee
LikeLike
Hello! I have the exact same machine, inherited from my m-i-l. I have a few questions/problems. 1. The top vertical know (stitch width ) 0 1 2 3 4, spins but does not click or connect into any specific number. It’s just free play with the knob. The reverse button does push in. Any clue what to do? 2. Can not get the set screw out of the tension dial area. It looks like it is in there, as no light will pass thru the hole, but nothing can turn it, to remove.
And finally, 3. I have brand “Super Lube” multi purpose synthetic grease. Can it be used to repack the gears? You are my only hope. Thank you. Happy New Year. Linda
LikeLike
Hello Linda,
I like the 1601 and it is almost identical to the 1802… but it is center homing.
Hopefully I can help you diagnose the problem so you can get it sewing properly.
The stitch length dial should turn from 0 to 4 smoothly but stop at 0 and 4… there are no detents in between. If you remove the top cover and look directly at the back of the stitch length dial, you should see a round shaft moving in and out as you rotate the stitch length knob. The end of this shaft presses against the shift length fork and changes it position to get a longer or shorter stitch.
There are two things to look for to determine a cause for no stitch length adjustment…. Turning the stitch dial between 0 and 4, look at the shaft and make sure it is moving in and out in the stitch length assembly. If it is not, the stitch length control is stripped and needs to be replaced.
If the shaft is moving in and out but does not stay in constant contact with the stitch length fork, it is likely that the stitch length fork is frozen in place. If the stitch length fork is frozen, spray the fork assembly with WD40 and wiggle it back and forth with your finger until it loosens up. If it was frozen and then loosened up, make sure the fork stays in contact with the shaft and moves smoothly as you turn the stitch length dial back and forth. If it does, the stitch length problem should be fixed.
The tension assembly is locked in by a set screw. You should see this by opening the nose cover and look at the hole in line with the tension assembly. It is recessed and most likely a hex type set screw. It is metric and a small inexpensive set of hex wrenches can be found at Walmart, an auto parts store, or any hardware store. The set screw just needs to be loosened, it does not need to be removed.
The synthetic grease you have should be fine for replacing the grease in the gear case.
After you try the steps mentioned above please let me know if your problems are solved. If not, I may need a little more information to try and visualize what other steps you can take.
Have a great evening!
Lee
LikeLike
Hey Lee,
“The stitch length dial should turn from 0 to 4 smoothly but stop at 0 and 4… there are no detents in between. If you remove the top cover and look directly at the back of the stitch length dial, you should see a round shaft moving in and out as you rotate the stitch length knob. The end of this shaft presses against the shift length fork and changes it position to get a longer or shorter stitch.
There are two things to look for to determine a cause for no stitch length adjustment…. Turning the stitch dial between 0 and 4, look at the shaft and make sure it is moving in and out in the stitch length assembly. If it is not, the stitch length control is stripped and needs to be replaced.”
—————————————————-
The round shaft does not seem to be moving as I rotate the stitch length knob. So it seems the stitch length control is stripped. Also, front dial only will move 0 to 3, not to 4. Do you by any chance have an exploded view of the inside of the machine? or know of where I could find one? And of course, a source of internal parts, like the stitch length control? Sorry to be so needy. I’ve done restoration on a Singer 66 Redeye 1924, my Spartan, and Singer 99K. And I love them. This one is kicking me where it hurts!
Thank you, Linda
LikeLike
Hello Linda,
I have looked online for an expanded parts diagram. Searspartsdirect.com has some schematics but does not show the stitch length dial assembly (at least in the diagrams I looked at). This is not an aftermarket part and the only option will be finding a part from a machine someone is parting out on Ebay. You may find a service manual online for a small price that will give you more than enough information on machine adjustments. In my experience with most of the vintage machines is that due to the quality of their construction, most of the adjustments are in spec. People do noodle with things so in most instances, the symptom can be traced to an adjustment.
There is one thing I didn’t mention and it may be the culprit… is the dial securely tightened on the input shaft for the stitch length assembly” If you remove the top cover and look at the back of the dial, there is a set screw. Rotate the dial and you will see it. It is close quarters so look carefully. It is possible that the dial is loose on the shaft.
Don’t feel bad about feeling defeat… Kenmore’s by their nature are more complicated than older vintage Singers, but aside from a bunch of bells and whistles, all of the basic assemblies are found. You are not defeated… but a challenge has been placed before you.
I hope this helps!
Lee
LikeLike
Hi again Lee,
Well, I couldn’t sleep well last night, because I was thinking about that sewing machine. I held out till 5 am and decided to look at it again. This is what I found out…..the top cover was already removed, step 1. I had already fiddled with removing the knob and the rod and set screw. So I would replace it and then try it with the rod at different lengths and the set screw at different positions. I also would feel if the rod would rotate all these times. The best adjustment was occasionally a rotated rod shaft, with the set screw as close as possible to the front. Also, the inside “reverse” knob insert is about 1 or 2 mm projecting out from the middle of the knob. Nothing noticable. Repacked the gears and now onto the tension knob. Almost done.
Thanks, Linda
LikeLike
Was the stitch length dial loose on the shaft? If that was the problem you are good to go!
LikeLike
The stitch length set screw was loose. The dial is wasn’t really loose. And, the dial is still limited on its movement. O to 3, but I’ll take it. One more question, please, old oil seems to leave a yellow film, discoloration on the pretty mint green color. Any way of getting it removed? Thank you, Linda
LikeLike
It sounds like you have made progress with the stitch lenght dial. You may be able to adjust further and get the full range of stitches. Oil the mechanism and see if it works loose.
As far as oil staining is concerned, you can try cleaning with GoJo, but my experience is that the staining you describe cannot be reversed. It would be nice if someone had a solution!
LikeLike
Hello, and I just discovered your blog here. What a great resource you have given us, thank you.
My question is about matching paint. You have achieved a truly excellent– i would almost say, an exact– match of color. Do you have a source for exact-match paint, or are you mixing your own?
IF you have a source for paint, are you willing to share it?
Thank you,
J.R.
LikeLike
Hello J.R.
I am willing to share any source or resource I can! That’s the real purpose for my site and I encourage and try to assist anyone I can to help them maintain and keep their vintage sewing machines.
There are several methods I use for paint matching depending on the repair. For vintage black Singers, I mix my own paint using lamp black aneline stain, alcohol, and shellac. This can be sprayed for coverage or applied by brush for detail and chip repair. For decal repairs that are yellow, red, or green, I mix very small quantities by eye. For gold decal repairs, I mix various values of gold… each machine is a little different due to the color aging. These are applied with a fine brush under magnification. This makes it acceptable only for small scale repairs.
For Kenmores and machines of various colors (including some Singers), the paint is an enamel. This makes it relatively easy to match. For these machines, I take a painted part of the machine with the color I need to match, usually the needle barcover or balance wheel, to Home Depot and have them computer match the color. They offer 8 oz. paint samples of latex enamels in various paints for $6. I use a paint by PPG or Behr that is suitable for metal in a semi gloss finish. The color match is very close and about a table spoon of paint thinned down with distilled water and applied with an air brush. This allows for blending into the original paint and leaves a smooth finish. I prepare the surface with 400 grit sandpaper for adhesion before spraying. The repair is protected with a water based polyurethane and then glaze polished to match the gloss of the paint.
I’ve been experimenting with different methods, but this seems to be the best for me.
I hope I have answered your questions but please let me know if I can be of any further assistance.
Have a wonderful day,
Lee
LikeLike
Thank you so much for the rapid and concise reply; I’ll be making a trip to my local store soon, I see. Much obliged, sir.
LikeLike
Hi! This is fabulous! My mother just gave me hers, but I haven’t sewed in ages. Looking for a manual – – any thoughts on where I can get one, online or other? (I’ll check the article again in case you mentioned and I missed?)
LikeLike
Hello Adrienne,
Congratulations! The 1601 is a fine machine and I hope you cherish it as I know your mother did.
Send me an email to pungoliving@gmail.com and I’ll send you the user’s manual.
Have a great evening!
Lee
LikeLiked by 1 person
Hello and thanks for your site! I’m hoping you can help me start troubleshooting. I have my mother’s 1601 machine. It had been working great for a long time, but the last time I tried to use it, the tension was all messed up, the bobbin thread broke twice, and I noticed that the feed dog control will no longer depress. Where should I start to figure this out?
LikeLike
Hello Katherine,
Your 1601 has several seperate problems. Kenmore’s have very forgiving top tension controls and I doubt if the problem is there. The bottom thread breaking is a sure sign that the bobbin tension is too tight.
Often ignored, dirt and gunk can get under the small leaf spring on the bobbin case and cause trouble. I always remove the leaf and clean under it. Even it you don’t disassemble it to clean it, you can loosen the tension by loosening the very small screw on the side of the bobbin. This will loosen the bobbin thread tension. When you put the bobbin in the bobbin case, make sure the thread is coming off of the back of the bobbin when you pass it thru the tension leaf. Loosen the bobbin tension until there is a slight drag to pull the bobbin thread thru the case. Also feel if it is smooth or “catches” as you pull it. This would indicate gunk under the spring. Put the bobbin case in the machine, pick up the thread with the needle, set the top tension control to “4”, and see how it sews. Because 90% of adjusting for a balanced stitch is done by the top tension control, having a proper bobbin tension is important. I will adjust the bobbin tension so it balances with the top control at the number “4” setting. This is all trial and error… the top tension will always feel tighter than the bobbin tension, but either can bee too loose or too tight. The procedure above should get you in the ball park.
The feed dog is stuck because the feed dog mechanism under the machine is frozen with old oil varnish. Vintage machines can be used for years without ever dropping the feed dogs, and the lack of exercise gives ample time for the oil to varnish and gum it up. I see this on practically every Kenmore I restore. The drop dog assembly is fairly complex and buried in the machine. It is not easy to remedy without patience and it can take days of dedicated noodling the mechanism to get to the location of the oil varnish gumming it up. I use concentrated heat from a butane micro torch, but I would not recommend this except as a last resort. The advice I give folks is to loosen it up manually while applying solvent. Repeated exercise over a period of time will work. This is where the patience comes in.
If you would like for me to walk you thru the process and are willing to take the time, I can help you get it working again. The good news is that when it is freed up, it will stay freed up.
Please let me know if any of this helped and if I can be of any further assistance.
lee
LikeLike
Thank you so much for this detailed answer! I will sort out the bobbin and tension first, and worry about the feed dogs later.
LikeLike
I need to replace both belts on my
Ken more 158.16012 sewing machine.
Do you have a video on that process and size and best belts to use? Thank you
LikeLike
Hello Debbie,
I don’t have a video on replacing the belts on a Kenmore, but it is a good topic! You can find the belts at Central Michigan Sewing supply. They are who I get my belts from and are great to work with,
I hope this helps!
Lee
LikeLike