
Introduction
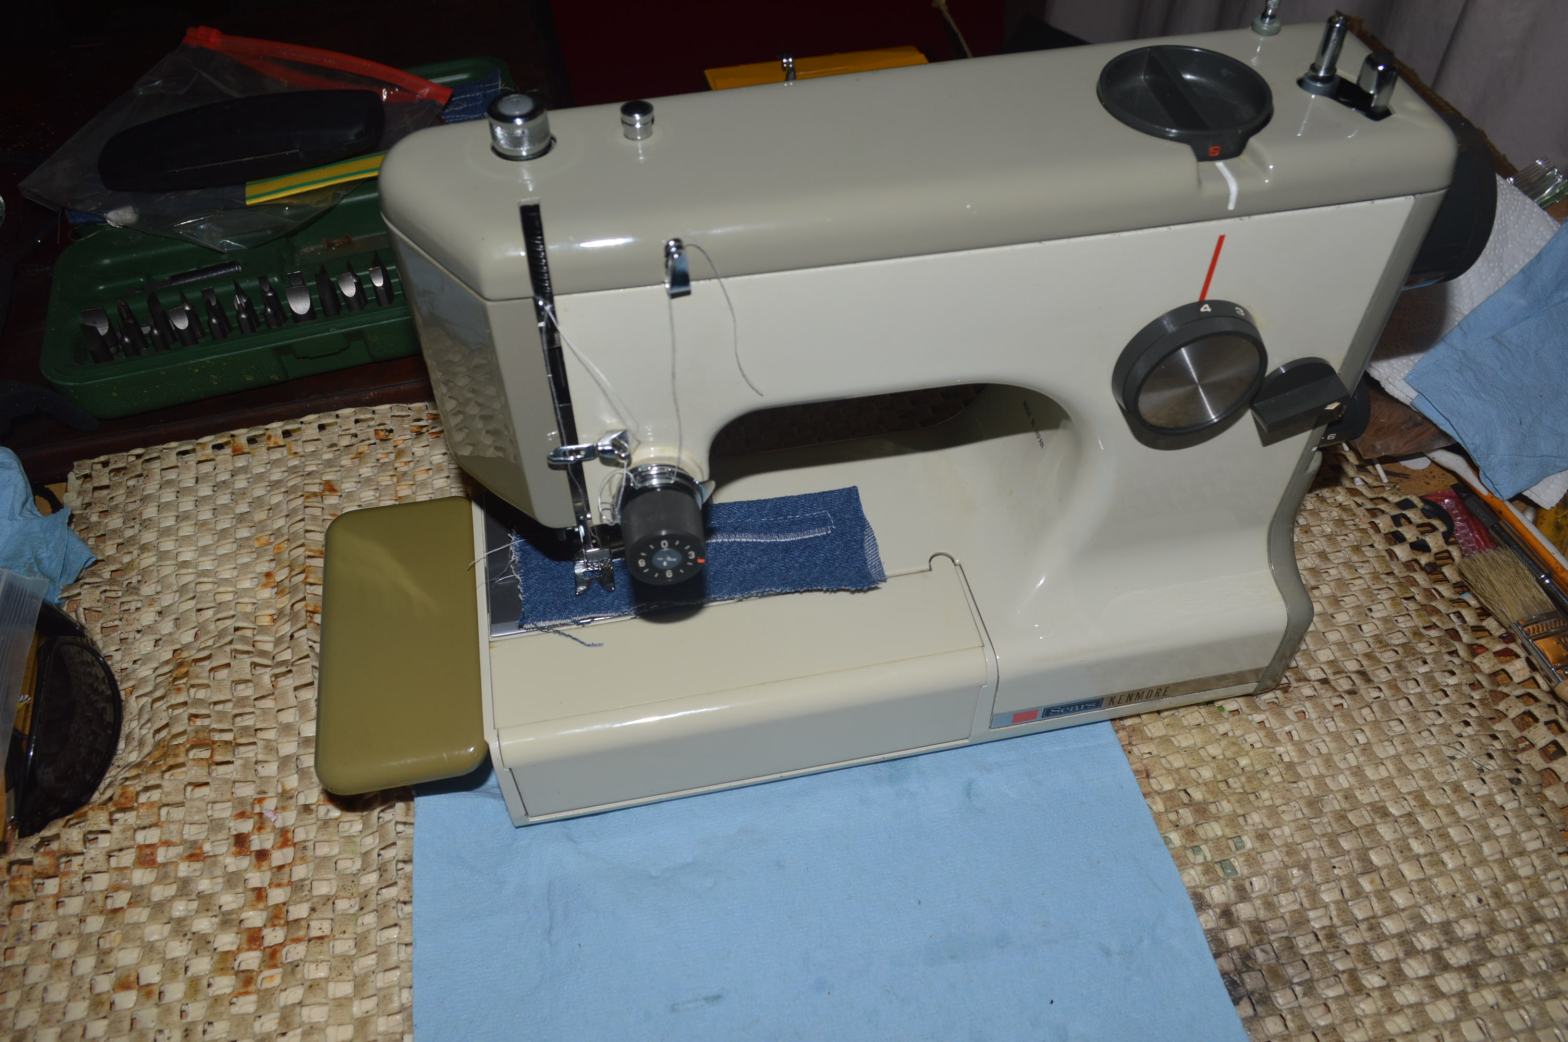
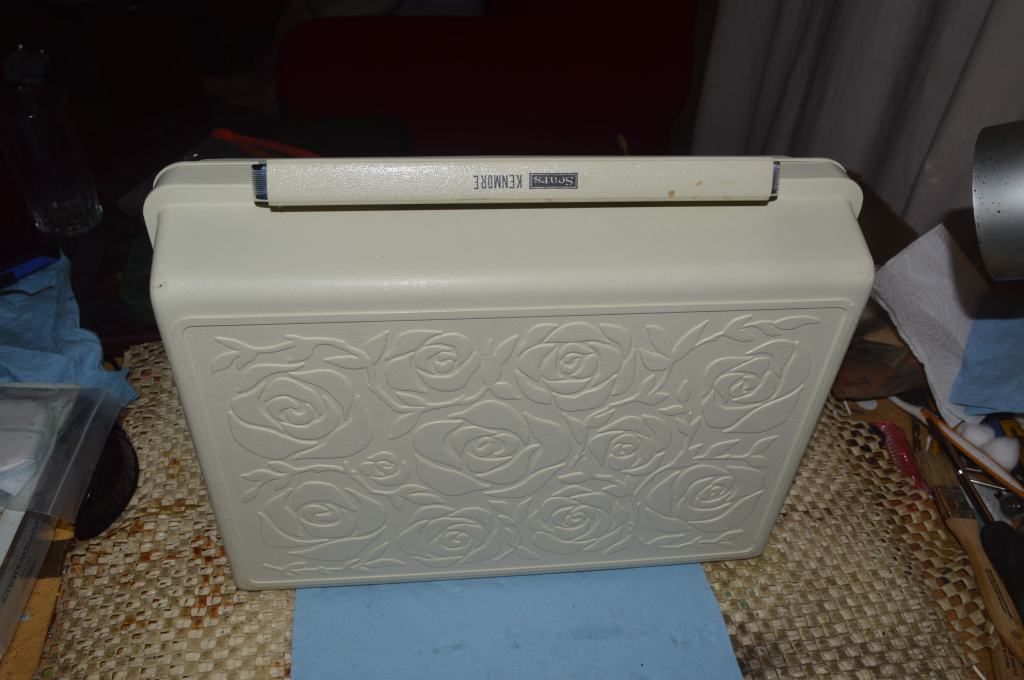
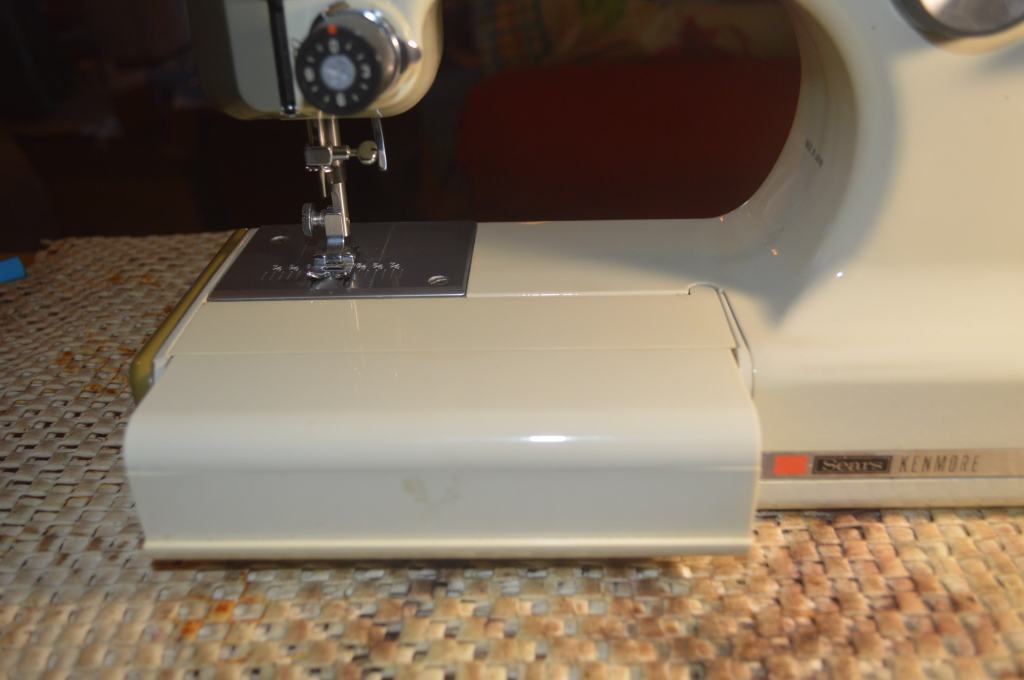
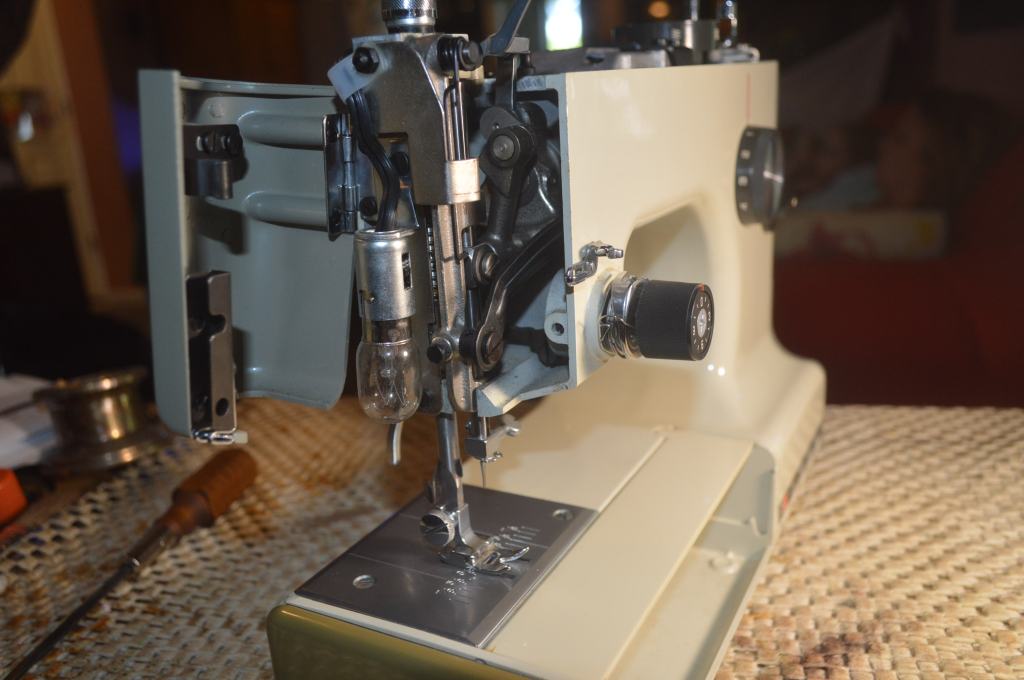
This restoration is for a Kenmore model 158.10302. Produced between 1971 and 1973, it has an all metal sewing mechanism and cam stack. It is an interesting machine and is a portable 3/4 size sewing machine. It’s a nice package. It stores in a convenient carry case, it has a fold out storage compartment for bobbins, needles, presser feet, etc., and it has a small fold out bed extension. The 1030 provides a basic set of functional stitches that include a zigzag, reinforced zigzag, blind hem, and a manual button hole stitch. It is a center homing needle and uses low shank presser feet. The 1.0 amp motor with double belt reduction makes this a very powerful machine. Typical of the majority of Kenmore’s, it uses a class 15 bobbin, standard 15X1 needle and uses an oscillating hook.
This machine is in excellent cosmetic condition. There is nothing to do but clean and wipe it with a cloth. It’s Mechanical condition is another story. Aside from a noticeable lack of oiling, the mechanical mechanisms are clean. I would guess that the machine has seen very little use. Then again, in it’s present condition this machine won’t sew because it is woefully out of adjustment.
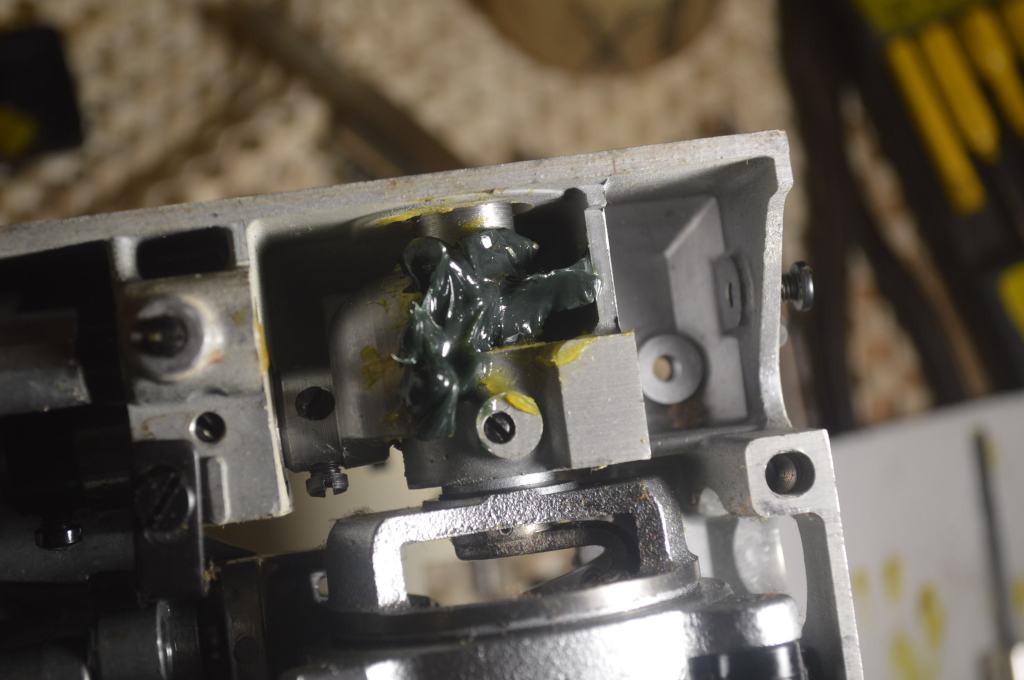
The first thing I noticed is that the needle position was way out of whack. At the maximum zigzag width the needle would strike the presser foot. The machine’s needle bar would not swing back and forth, and changing the stitch selection knob would not produce any change in the stitch pattern. The linkages associated with the cam stack are stuck and non functional. Well into the restoration, I found that the machine had numerous adjustments noodled with that needed to be corrected. To allow the machine to be stowed in it’s case, the machine has a retractable spool pin. The plastic spool pin bushing had broken below the cover and the spool pin would not lock in the raised position. Worse, it would fall out in the retracted position. Fortunately, the spool pin was in the little compartment. There is much do do with this machine but I know that the restoration will turn out beautifully.
Here is the machine before restoration.
The Restoration
To make the machine to sew like new, all of the mechanisms associated with the cam stack need to be cleaned, freed up, and adjusted. The needle bar, presser foot bar, and their associated linkages are removed for cleaning. The tension control is disassembled and cleaned, and the motor is disassembled, cleaned, and the armature is polished. Finding a spool pin bushing as a replacement proved to be impossible so a new bushing must be fabricated. As far as the other sewing mechanisms go, they are surprisingly clean and are cleaned and oiled in place. Lets begin.
Mechanical Restoration
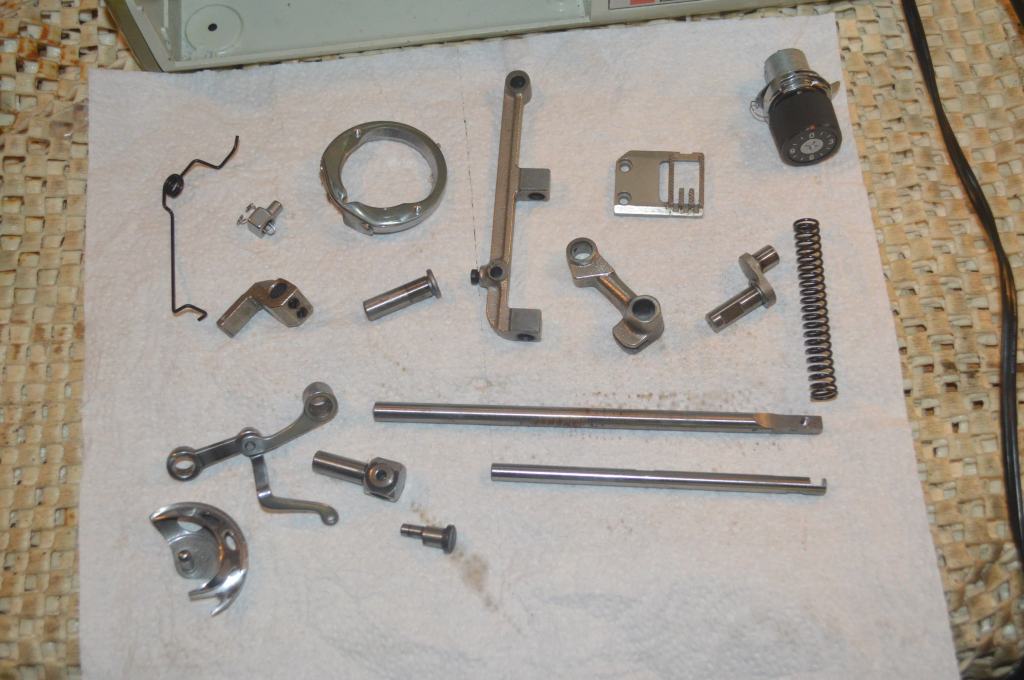
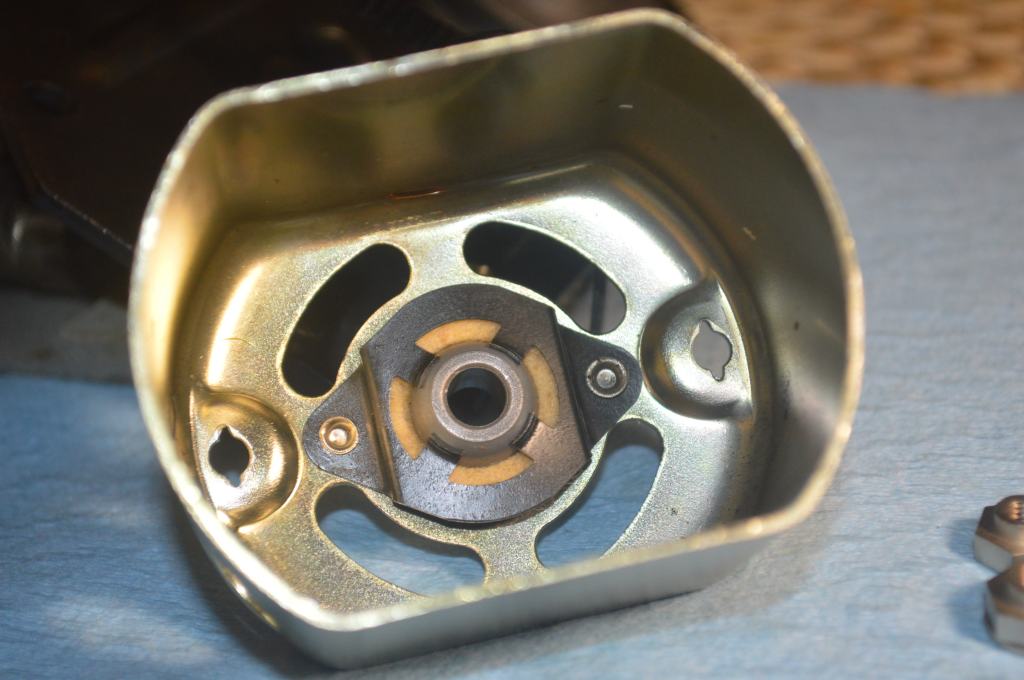
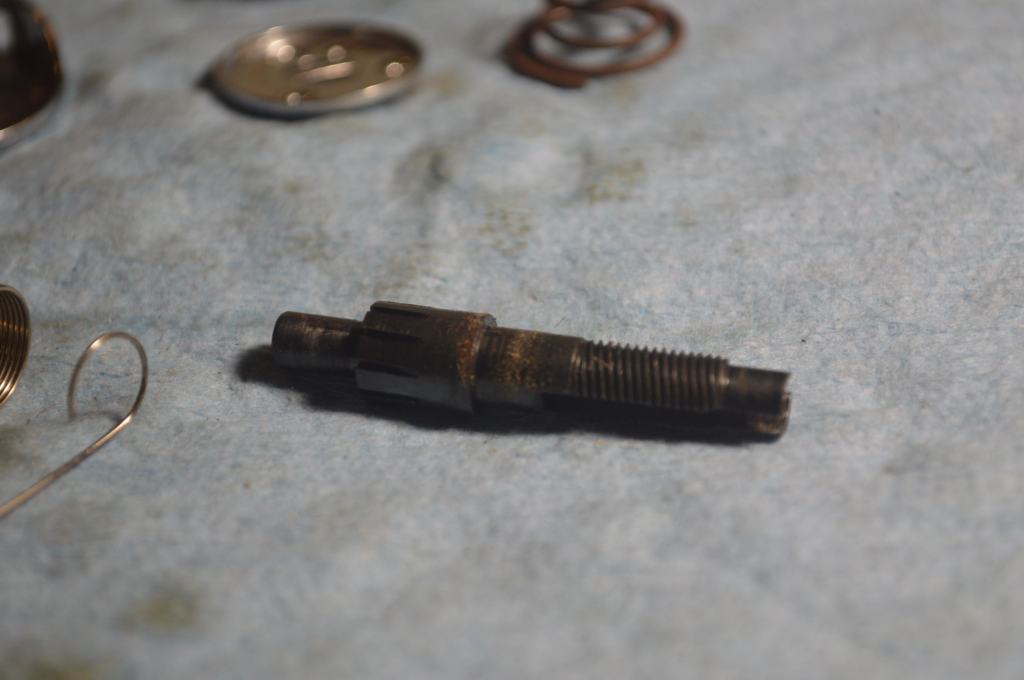
First, the assemblies in the needle bar head, the bobbin race, and the feed dogs are disassembled.

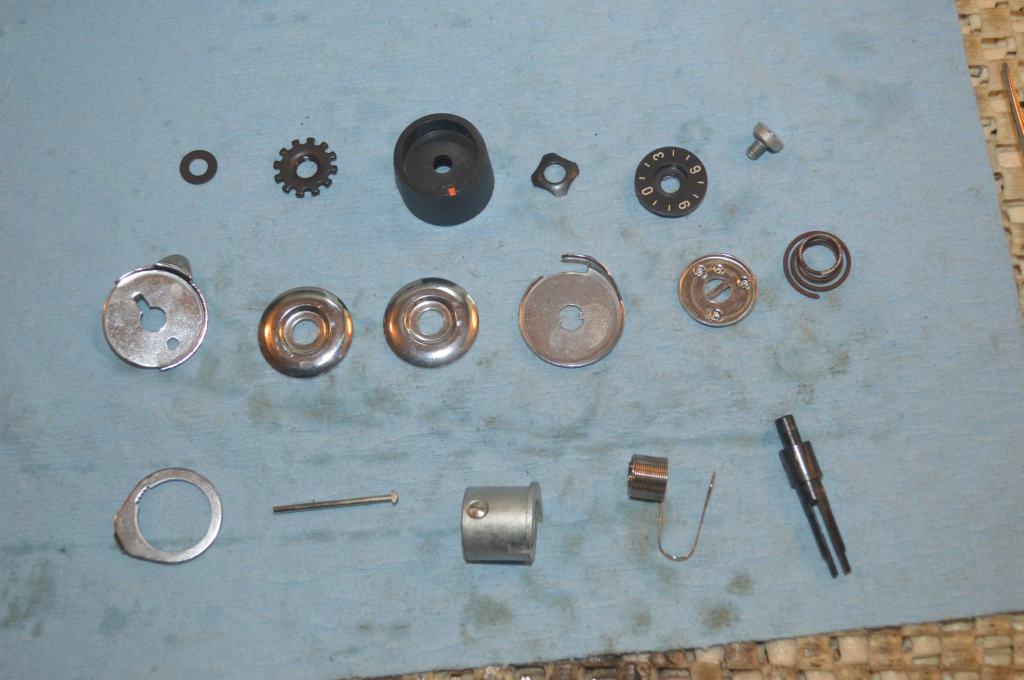
The parts are laid out for cleaning.
After cleaning, the needle bar and presser foot bar are polished and all of the parts are set aside for reassembly
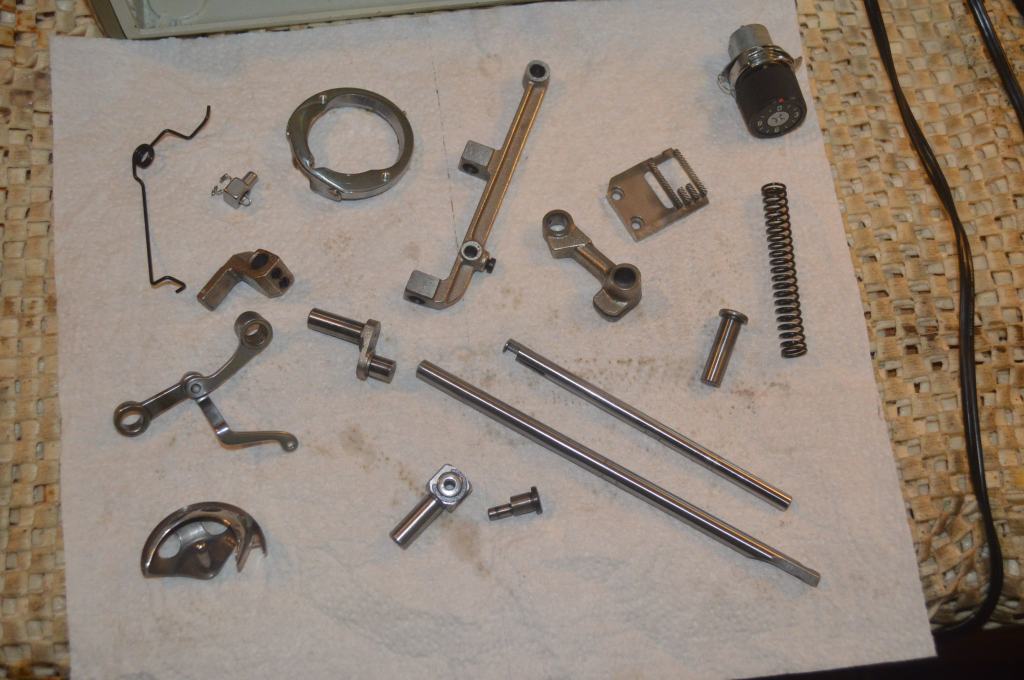
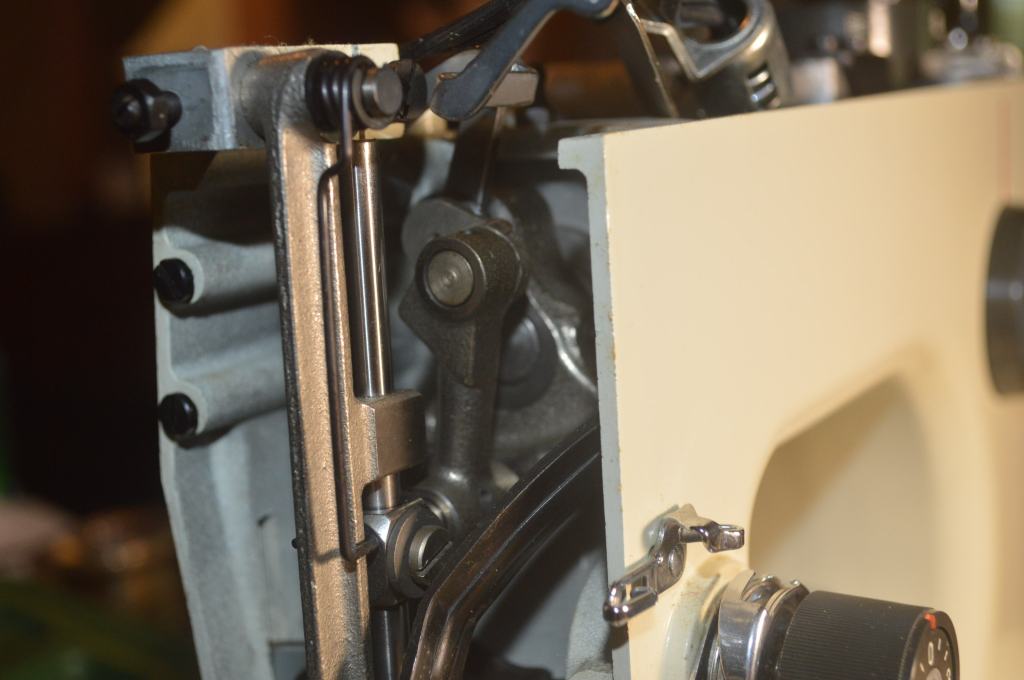
The cam stack linkages, cam stack, and the cam stack follower are cleaned and freed up to operate smoothly. It’s impossible to show in pictures, but there are four points of adjustment to regulate the stitch patterns and all four had been previously disturbed. The mechanism adjustments restored the proper needle position, zigzag width, and smooth operation for all of the built in stitches.
Cam stack and follower
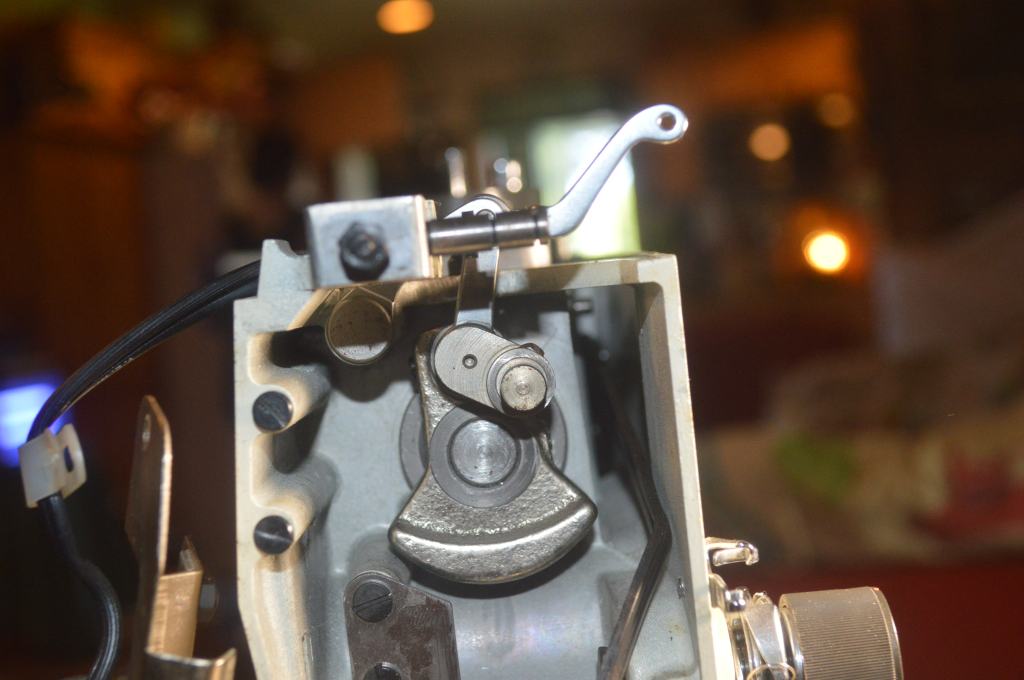
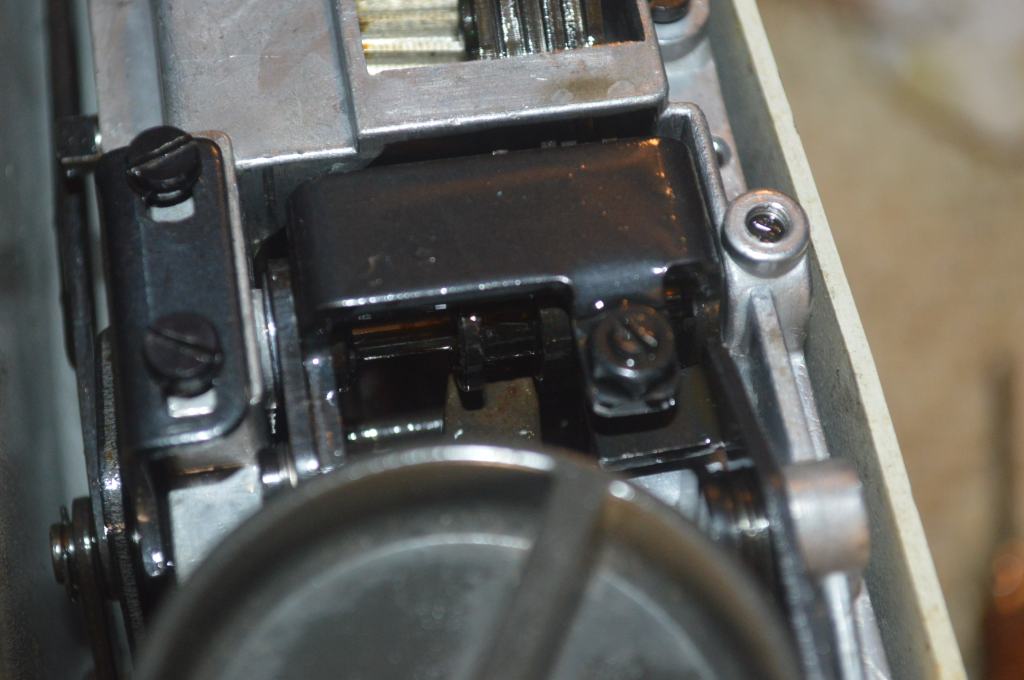
The rear cover is removed to access the motor.
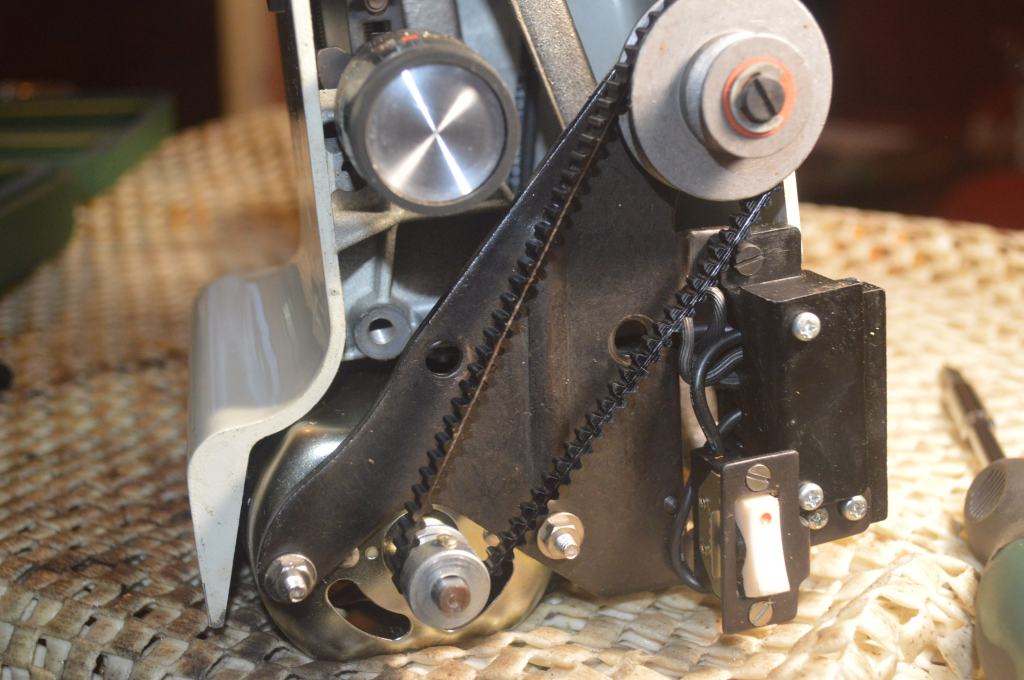
The bobbin winder is removed and cleaned.
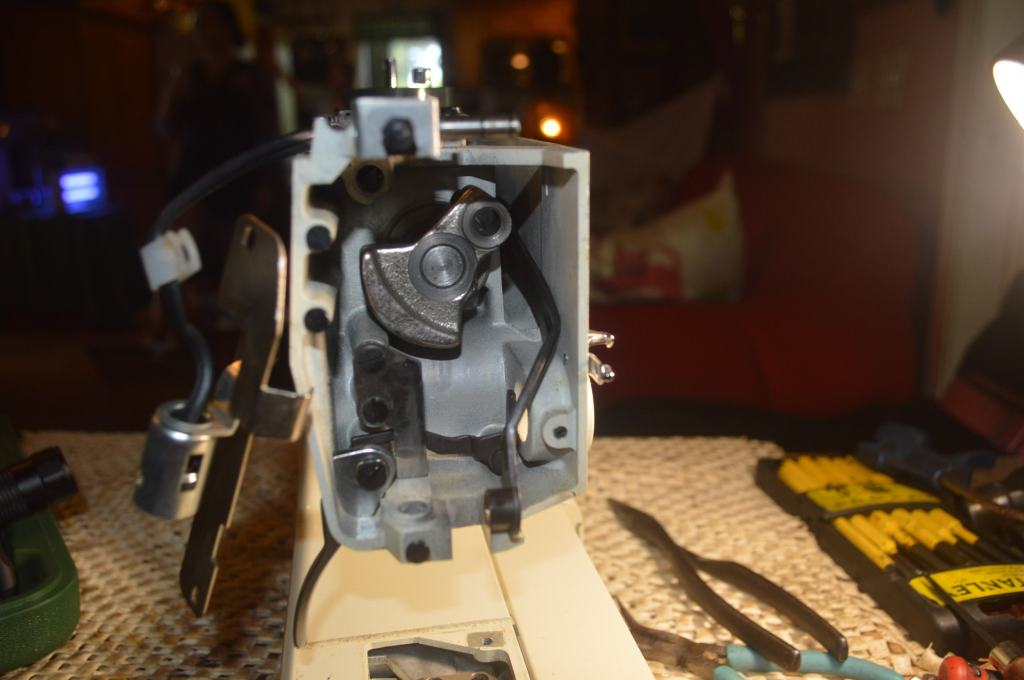
The bottom cover is removed and the mechanisms are cleaned. The feed dog height and drop feed dog mechanism were out of adjustment and were adjusted for proper feed dog height and feed dog drop.
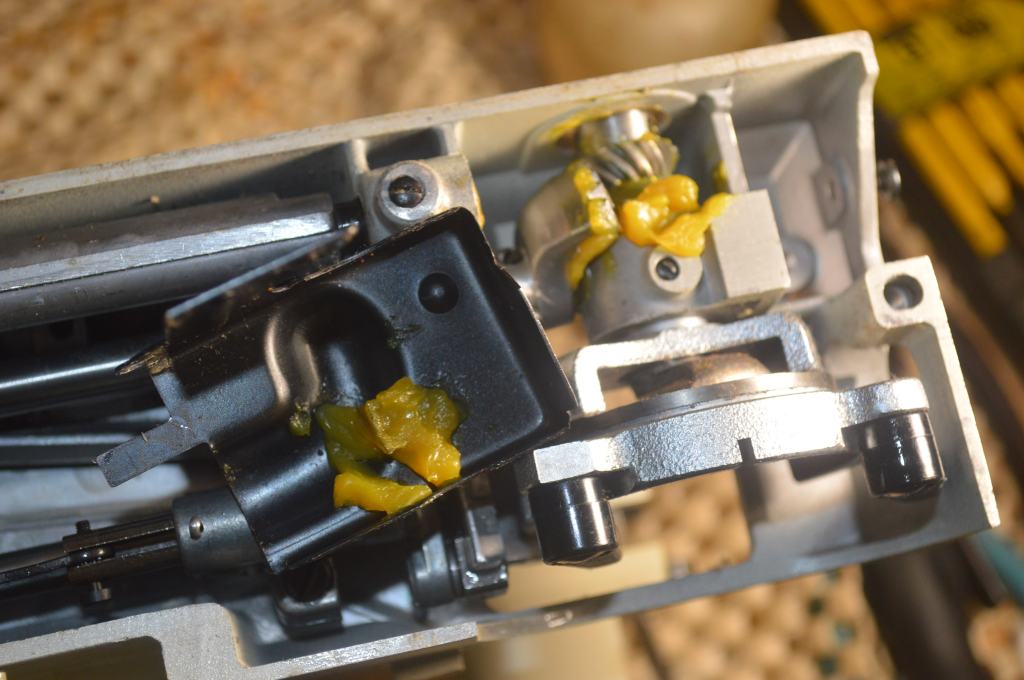
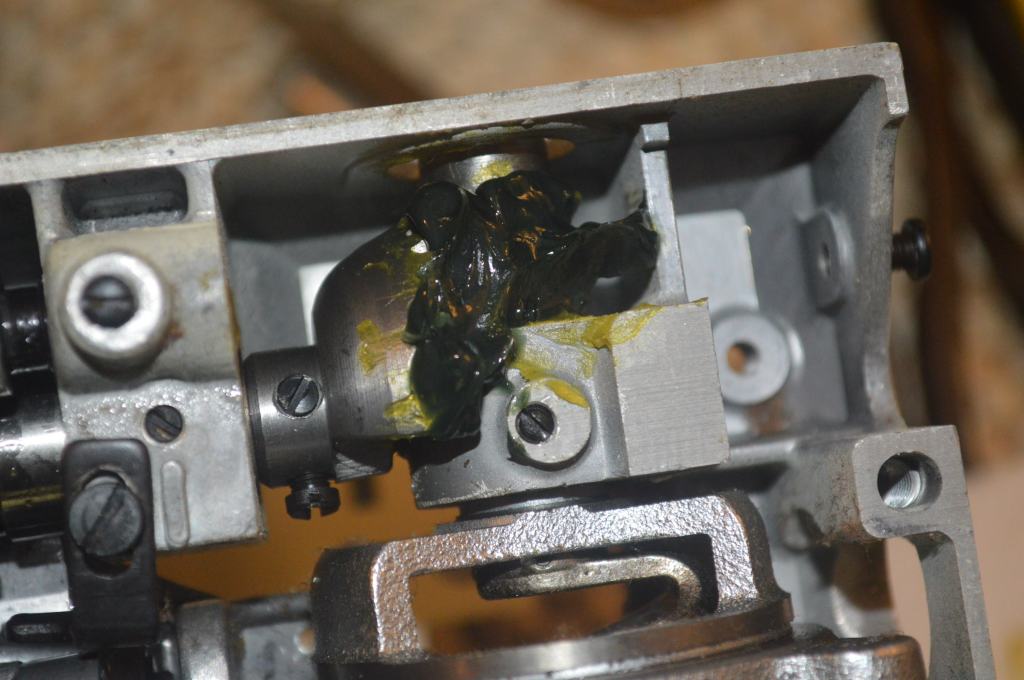
The old grease in the oscillating gear case is removed and replaced with new grease.
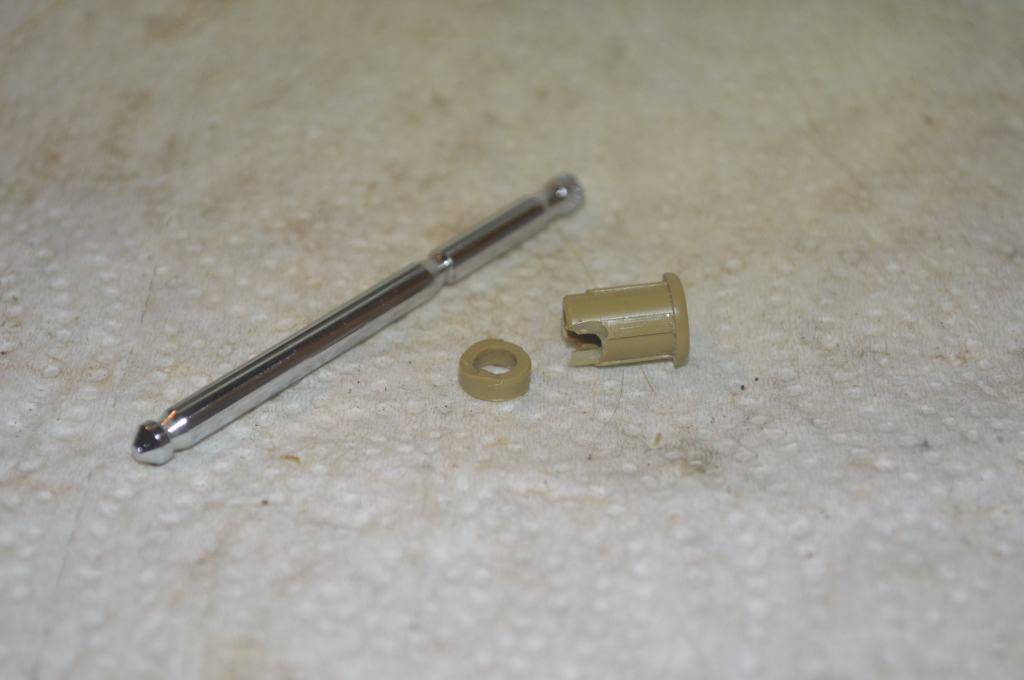
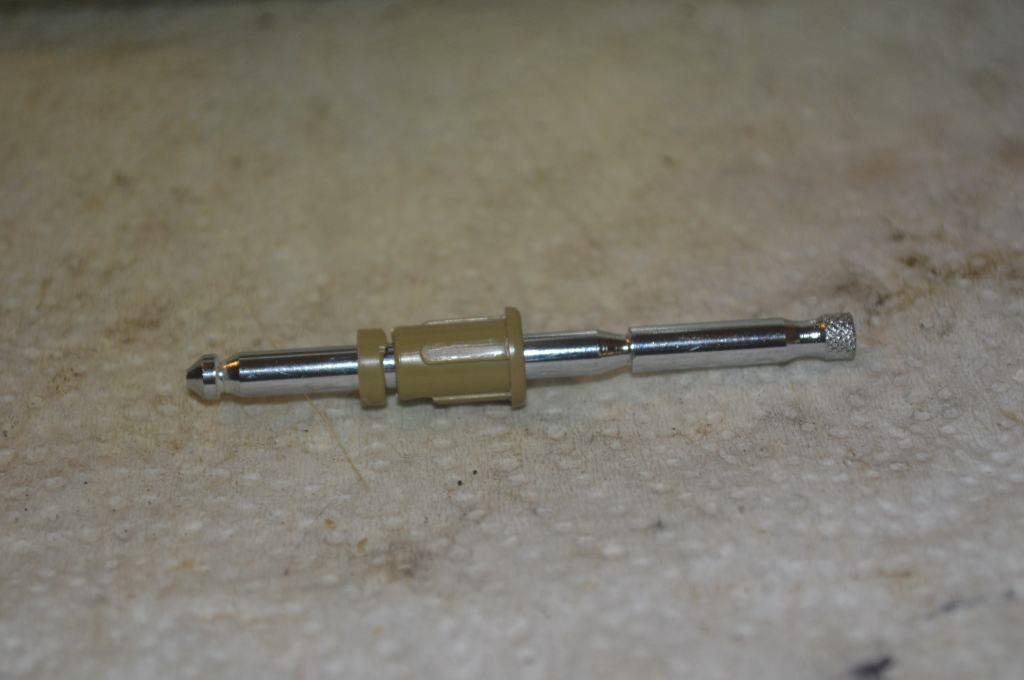
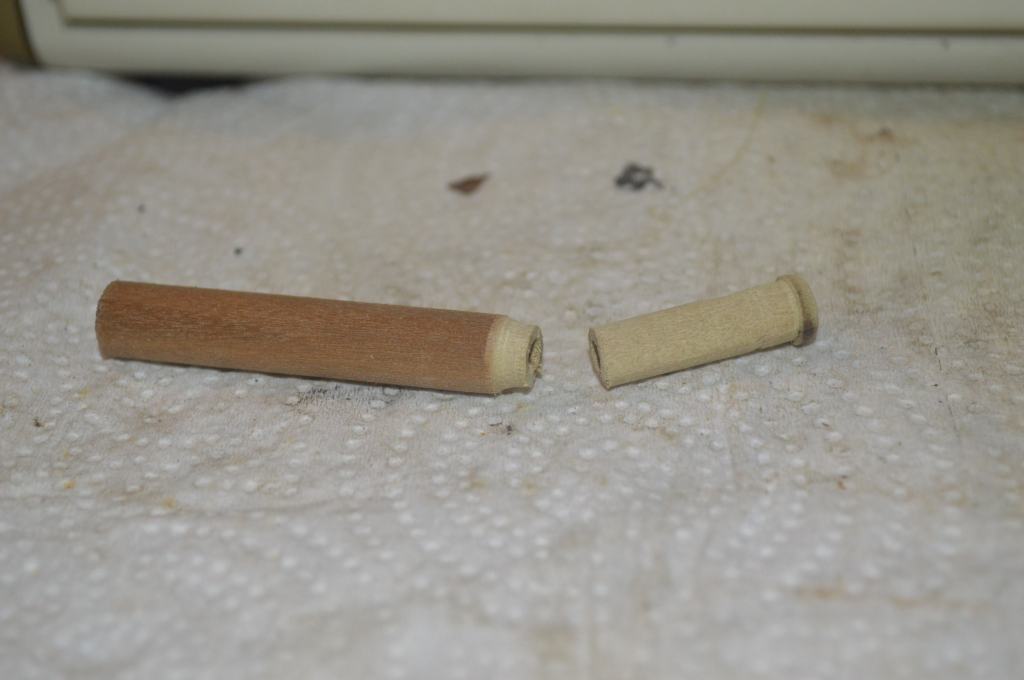
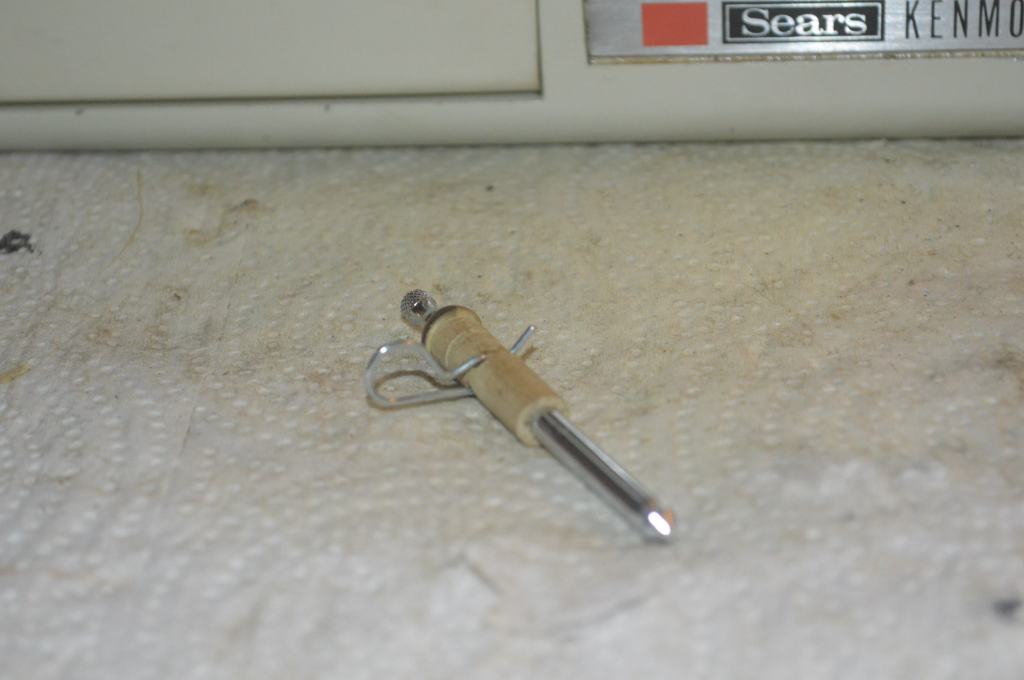
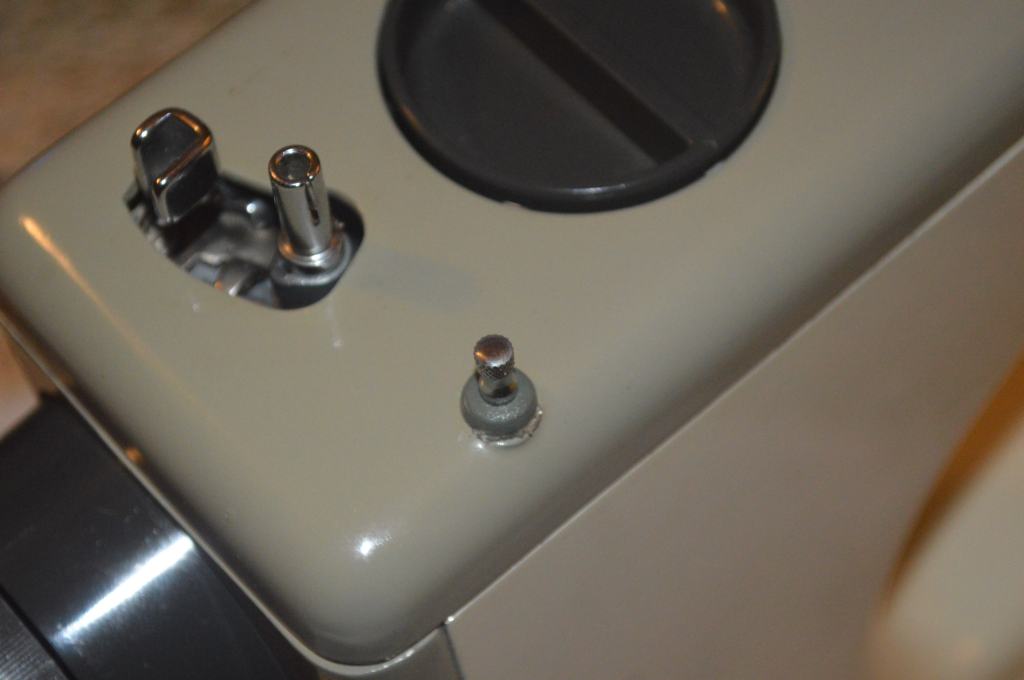
The spool pin bushing is fabricated. For this I used a hardwood dowel and turned down in a lathe to match the original. A gage drill bit the same diameter as he spool pin was used to drill through the center of the dowel. Two slots allow the spring clip to engage and disengage the notches in the spool pin smoothly. It is painted to closely match the original color.
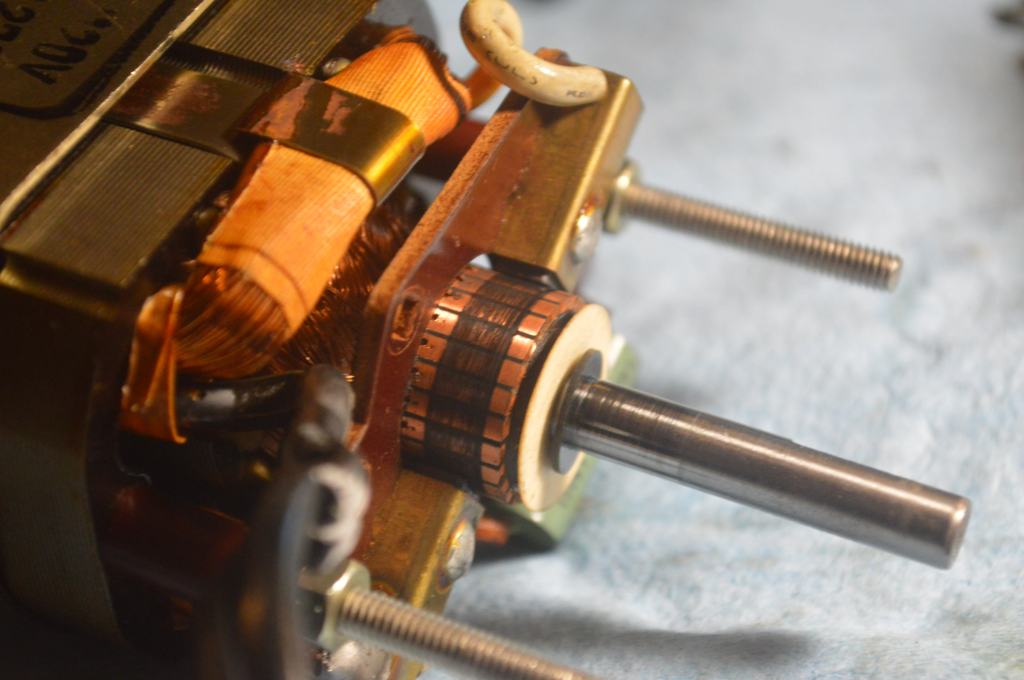
The motor is disassembled and cleaned and the armature is polished. If you look in the motor cap, you will notice that the oil felt is white. This suggests that the motor was not used much and it was not lubricated regularly… it looks new… dry of oil but new.
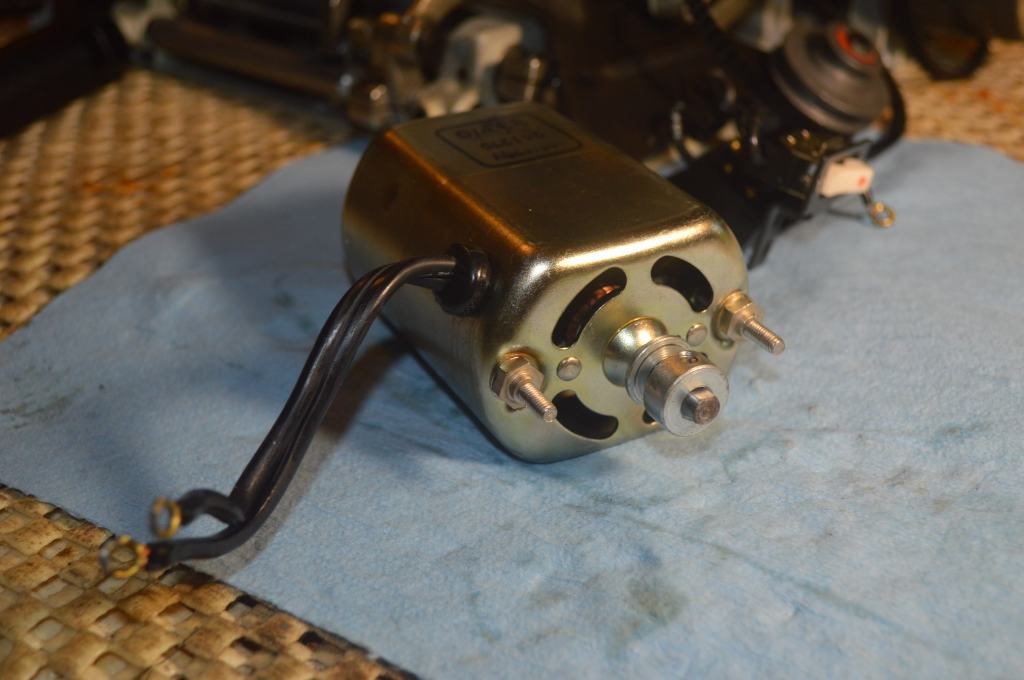

The motor is reassembled and run in to ensure it runs strong, and as I suspected, it does.
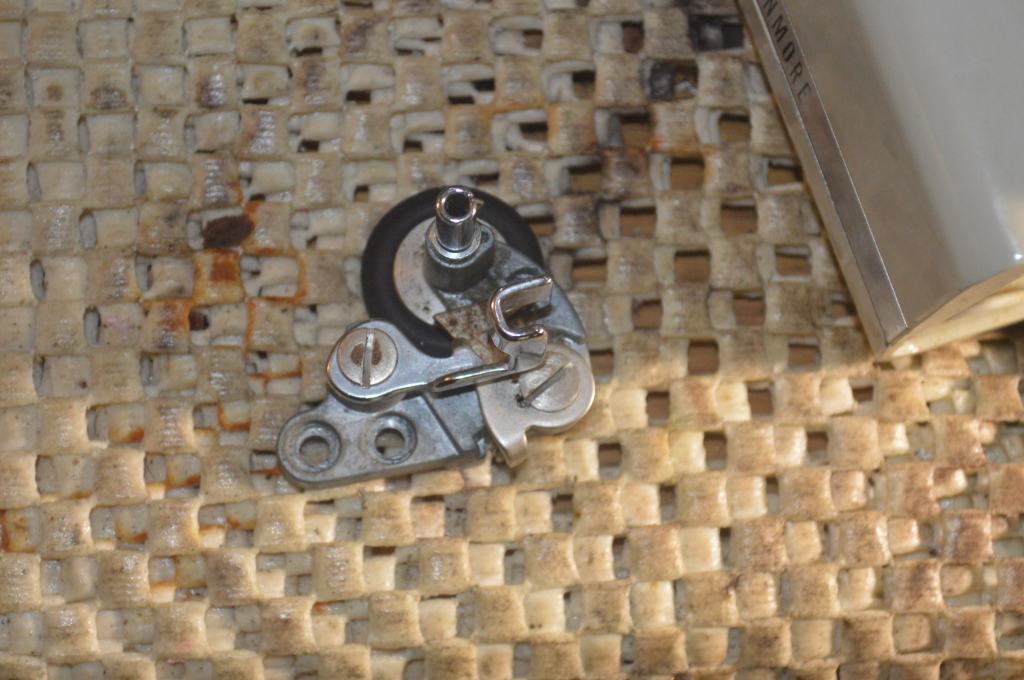
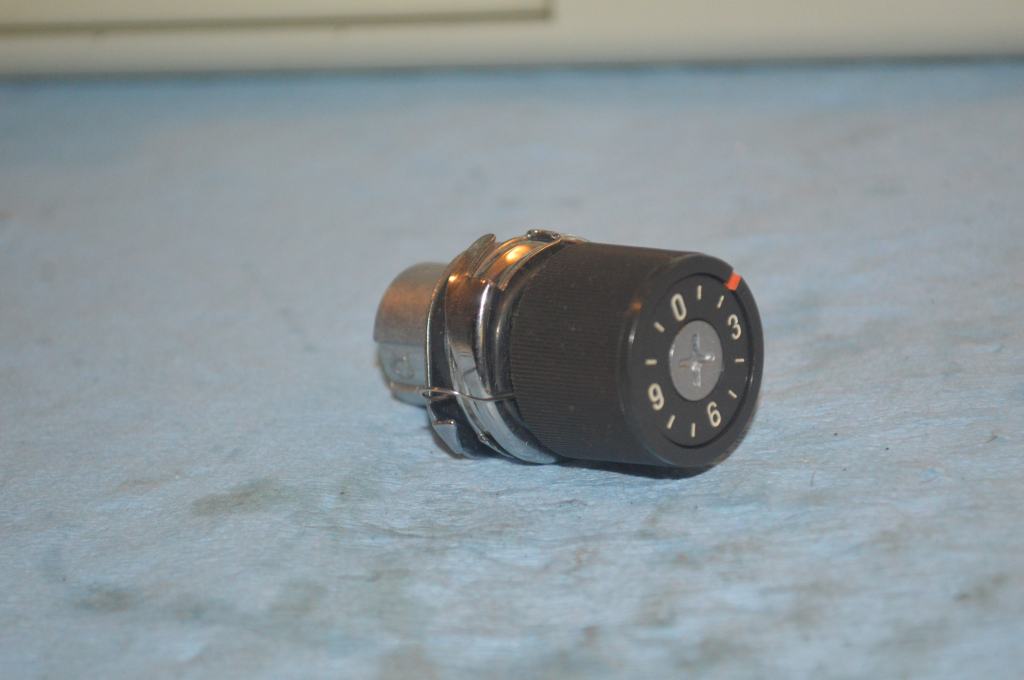
The top tension mechanism is disassembled and cleaned.
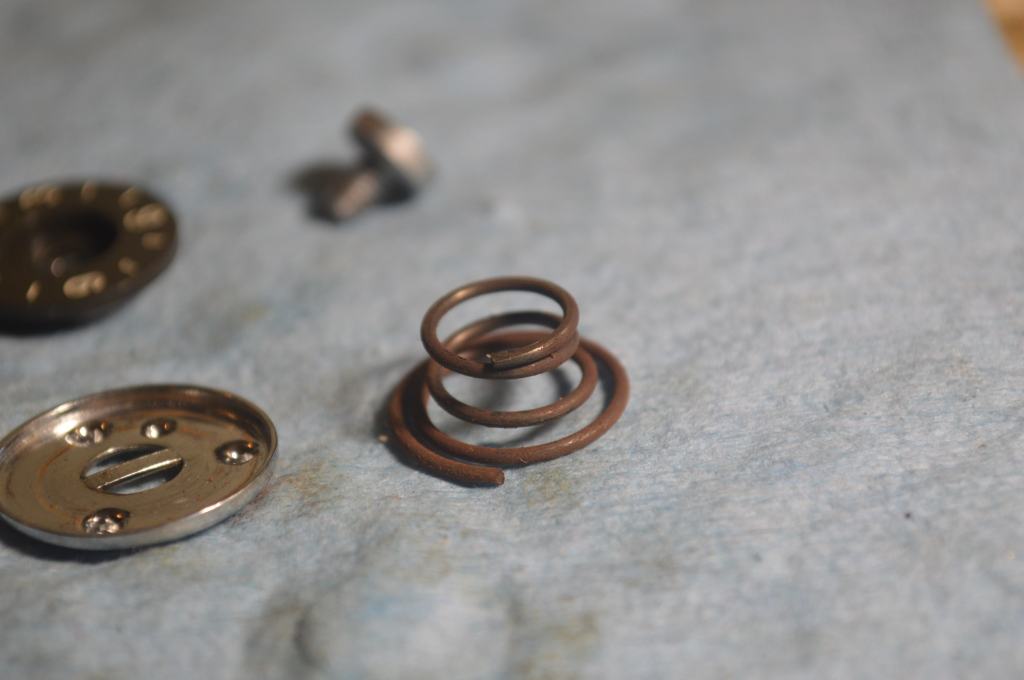
If you look closely at the tension assembly shaft and the beehive spring you will notice rust… this is likely caused by using water and detergent to clean the machine and water dripped into the tension assembly. Rust on the bee hive spring is no big deal, but rust on the shaft is. The thread must pass smoothly between the tension discs and around the shaft for even and consistent thread tension. The rust is removed from the spring and the shaft is polished smooth before reassembly.
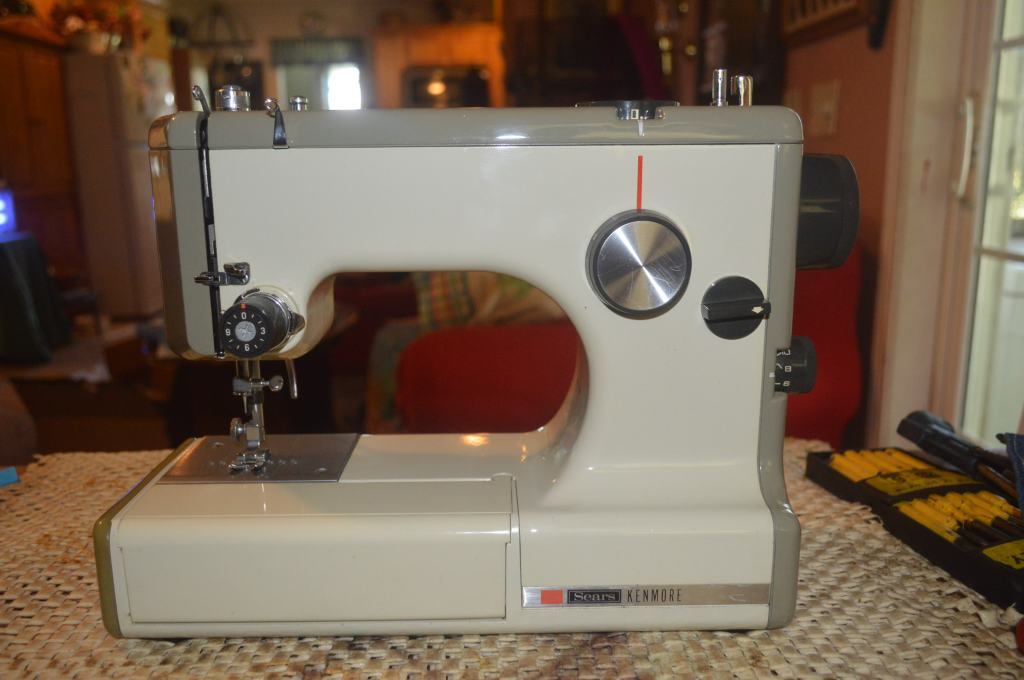
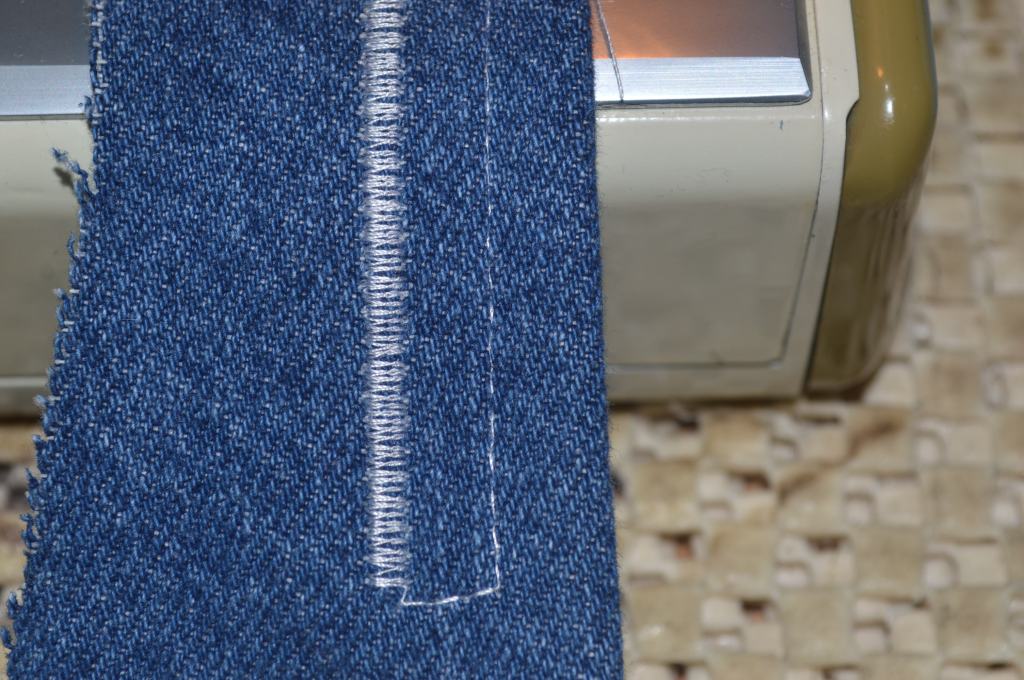
The machine is reassembled and all final adjustment are made. At the end of the restoration, the machine runs great! The fabric feeds straight both forward and reverse, the bobbin winder winds a tight full bobbin, the machine has plenty of power, and the stitch looks great!
The final result is gratifying. Just because a machine is small or portable doesn’t mean it can’t sew a good stitch. This machine certainly does and it will be a great companion to take to sewing class or on the road where one might encounter an “emergency” garment repair.
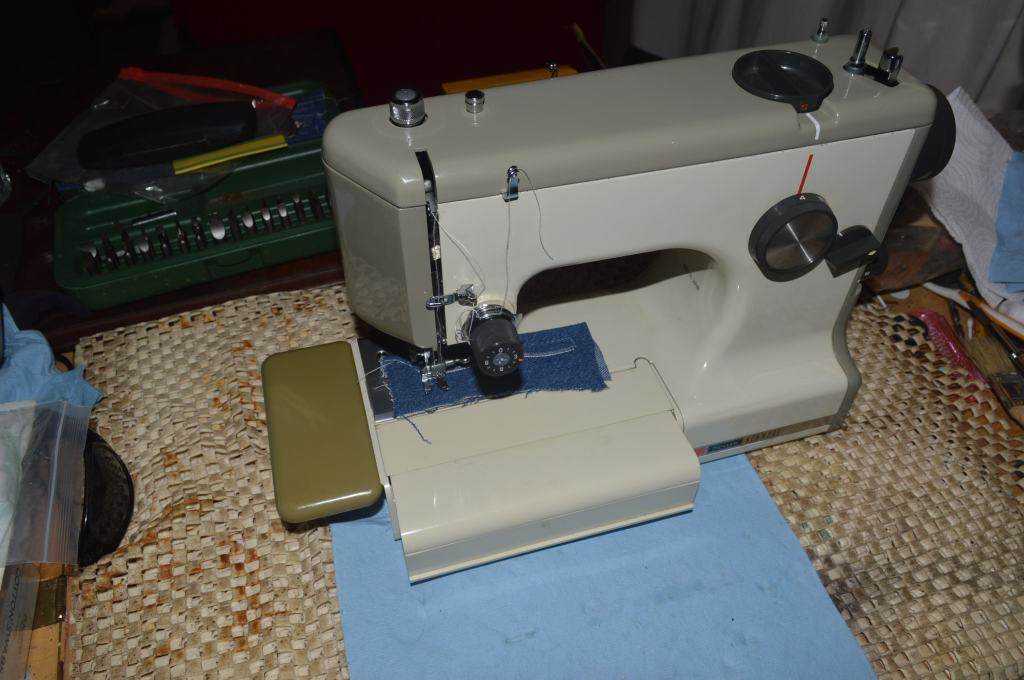
Here’s the machine after restoration.

That’s it! The restoration of this Kenmore model 158.10302 is complete and it’s come a long way. It runs and sews great. I hope you enjoyed the restoration process as much as I and I look forward to the next!
If you have any questions or comments please contact me at pungoliving@gmail.com and let me know!
Thanks for reading!
Lee

Love, Love, LOVE those “Mini-Kennies” or “Keatherweights” as I’ve noted some people call them. I have two 1040’s, one in working condition and one not; so I did a little cannibalization and brought one of them up to snuff. (Of course it wasn’t too bad to begin with.) It runs very quietly and smoothly and is wonderful for knits because it sings with twin-needles. For some reason, my darling old 14001 doesn’t like twin needles, and my modern Brother VQ3000 electronic dude is designed to use them but even if set properly for their use, he HATES them! So my little 1040 comes in handy as I love making knit clothing – very comfy. I have several other Kenmore models that are waiting for a bit of rehab, so I’ll be testing them out with twin needles too; it will be interesting to see the results. I swear, different machines have different personalities!
By the way, those little spool pin bushings are a b***h to find. I’ve been on the lookout for one and I’m determined to find it eventually. I think Kenmore made 2 little mistakes with the 3/4 size series; the spool pin bushings and the bobbin winder. They should have made the little bushings out of metal or supplied extras, and the bobbin winder assembly is OK except for the piece of metal that serves as it’s base. The metal is too soft and subject to breaking. DON’T ask me how I know this! ; – }
Best wishes to you both and stay healthy.
LikeLike
All of the 158 series all metal Kenmore’s (pre 1976 at least!) are really good sewing machines. I’m not as familiar with the 148 series because there are just too many to become accustomed with. They were made by different factories in Japan, but the 148 series has some nice looking and heavy machines.
I’ve never used a twin needle but my Wife often uses 2 threads in one needle for variety and the Kenmore’s seem to handle the thread just fine. Mostly she uses a 1400 but she also uses her 1755.
I don’t know where to find the spool pin bushings. My guess that a vintage part would be brittle enough to break removing it. The next option would be to replace the top cover. Parts for the 1040 machine are not as readily available. I opted to make the bushing from a hardwood dowel and that was a challenge in itself! If you find a source for the bushing, please let me know so we can share the info with others that undoubtedly have the same problem.
I will say that the 3/4 size Kenmore’s pack a lot of power in a small package. They are not feature rich but they have enough basic stitches to make or repair a garment, and the stitch quality is pretty good too… it would make a nice piecing machine.
Thanks for your comment and please let me know if I can be of any assistance to you.
Have a blessed day!
Lee
LikeLike
I have a similar model I am restoring and I can’t get the bobbin winder mechanism to press up against the fly wheel. Any thoughts? It worked once and never again.
LikeLike
Hello Bobbi,
It could be the rubber bobbin wheel is worn. It could also be a slight misalignment in the bobbin winder mechanism and the top cover of the machine. The assembly is secured with two screw bolts. It doesn’t look like it, but you can loosen these bolts and move the assembly slightly towards the balance wheel.
Try this and see if it works and let me know.
Thanks!
Lee
LikeLike
We have a Kenmore 158.1030 1, and are trying to figure out how to loosen the transfer pulley shaft/bolt so that we can replace the belts, and adjust the belt tension. The shaft/bolt is very tight, and we are wondering if it is left or right handed thread.
LikeLike
Hello Stephen,
These screws tighten clockwise and loosen counterclockwise. They can be very tight and strip the heads if the screwdriver is not a proper fit. Hollow ground screwdrivers should be used. An easy way to loosen stubborn screws is to use impact while loosening. Simply try to loosen the screw while rapping on the end of a screwdriver with a hammer. Do not hit it hard… light tapping is sufficient.
I hope this solves your problem and let me know if I can be of any further assistance.
Have a great day!
Lee
LikeLike
Please tell us how to remove the gear box cover on the 1030.–The one that covers the gears that run the bobbin.
I just bought a 1030 and it was bone dry. It got a good cleaning, oiling and I greased the gears on top, but can’t figure out how to get the lower gear box cover off to clean and re-grease the bobbin gears. Thank you!
LikeLike
Hello Lee,
I just got a 1030, and have cleaned, oiled and greased the gears on the top. However, I can’t see how to remove the gear box cover on the bottom–the one that covers the bobbin gears. I’d like to clean and re-grease them.
I’m looking forward to using this cute Kennie. Thank you; hope to hear from you soon.
LikeLike
Hello Eileen,
The 1030 has a plastic bottom tray that you remove. Once it is removed, you will see the gear case has a metal pan on the bottom, Remove this pan, and the gears are exposed.
I hope this answers your question, but if not. please let me know!
Have a great night,
Lee
LikeLike
Thank you for your reply. Two more questions about the 1030: I got the plastic bottom tray off and can see the gear case. I can’t get the gear cover (pan) off. There are 2 screws; one on top the other on the bottom–the top screw comes out easily. The bottom one I can’t reach with my offset or straight screw driver. I’m assuming both screws need to come off to remove the cover but how?
Another problem is the clutch knob is stuck tight.. I removed the screw from the clutch knob. I’m trying to hold the handwheel still while turning the clutch knob toward me (counter-clockwise). It won’t budge. What can I do? I can’t wind the bobbin with the knob in the stuck position.
Thank you for any help you can give! I appreciate it so much.
LikeLike
Hello Eileen,
I didn’t see the second screw… Perhaps if you sent me a picture to pungoliving@gmail.com I can see it better.
The clutch know can be removed much easier if you out something under the needle bar and bring the needle bar down to jam it. This will lock the sewing mechanism and allow you to get more force on the stop motion knob… Sometimes the get unusually tight!
I hope this helps,
Lee
LikeLiked by 1 person
Good news–I was able to get the bobbin gear case off, cleaned the gears and greased them, Then my son was able to get the clutch knob free with a turn of his wrist–and I had been trying for 2 days!
Now my dilemma is the bobbin winder isn’t winding. The rubber ring makes contact with the “teeth” on the wheel but does not turn. The sides of the ring appear flat to me. How can I attach a picture here or where you can see it? Please let me know if the ring is the problem. Is the ring something I can replace myself or do I need to take it into the shop?
Thank you for all your help.
LikeLike
Good morning Eileen,
The bobbin winder tire is readily available at any online sewing machine parts store. You can send pictures to pungoliving@gmail.com.
It is an easy fix and you will be sewing with the machine soon!
Lee
LikeLike
I just obtained a 1040 and I have two problems. I cannot get my bobbin winder to spin (I have disassembled, and the vertical pin doesn’t want to turn inside the cast pieced). I also cannot get the feed dogs to drop. Any tips?
LikeLike
Hello Marie,
The bobbin winder is frozen and if it is oiled it can be forced to turn. There is not much concern in damaging anything as the assembly is robust. You will notice a small notch where the winder shaft enters the body of the winder. This is where you oil it. Let the oil soak in and then coax it to turn. Once it begins to turn, it will free up quickly. After it is turning freely, put it back on the machine and engage it to wind a bobbin. The machine will turn it quickly and it will be good as new.
The feed dog drop can be affected by more than one thing. The machine uses a cone shaped rod that engages the rocker arm shaft. Where it engages, the rocker arm shaft is split so one side is free to move independent of the other. The usual cause of the sticking is either the joint where the two sides separate, of the rod is stuck and not disengaging. In either case, WD40 or penetrating oil is needed.
Once oiled, make sure the rod is retracted and then work the two sides in opposite directions to free them until they are free to move on their own (no help from you). This can take some time because the joint is in a tight place.
There are times where the cause of the sticking (likely old oil varnish) is difficult to get to and patience is key. It may take several days for it to free up and take multiple applications of penetrating oil. Heat would help, but unfortunately it is difficult to localize enough heat in the spot that needs it without heating the surrounding area.
If you are patient and take your time to exercise it (even over several days) it will loosen up.
Please let me know if this is successful and if I can be of any further assistance.
Have a wonderful day!
Lee
LikeLike